Basement Media Room Reveal
I’m excited to share our finished basement media room with you today! It’s a cozy living space, where we hang out, watch TV, lounge, and occasionally entertain. This space has continually evolved over the years, since we moved in… and the current iteration finally feels finished. Click through for the complete tour, sources, and some fun before & after images!
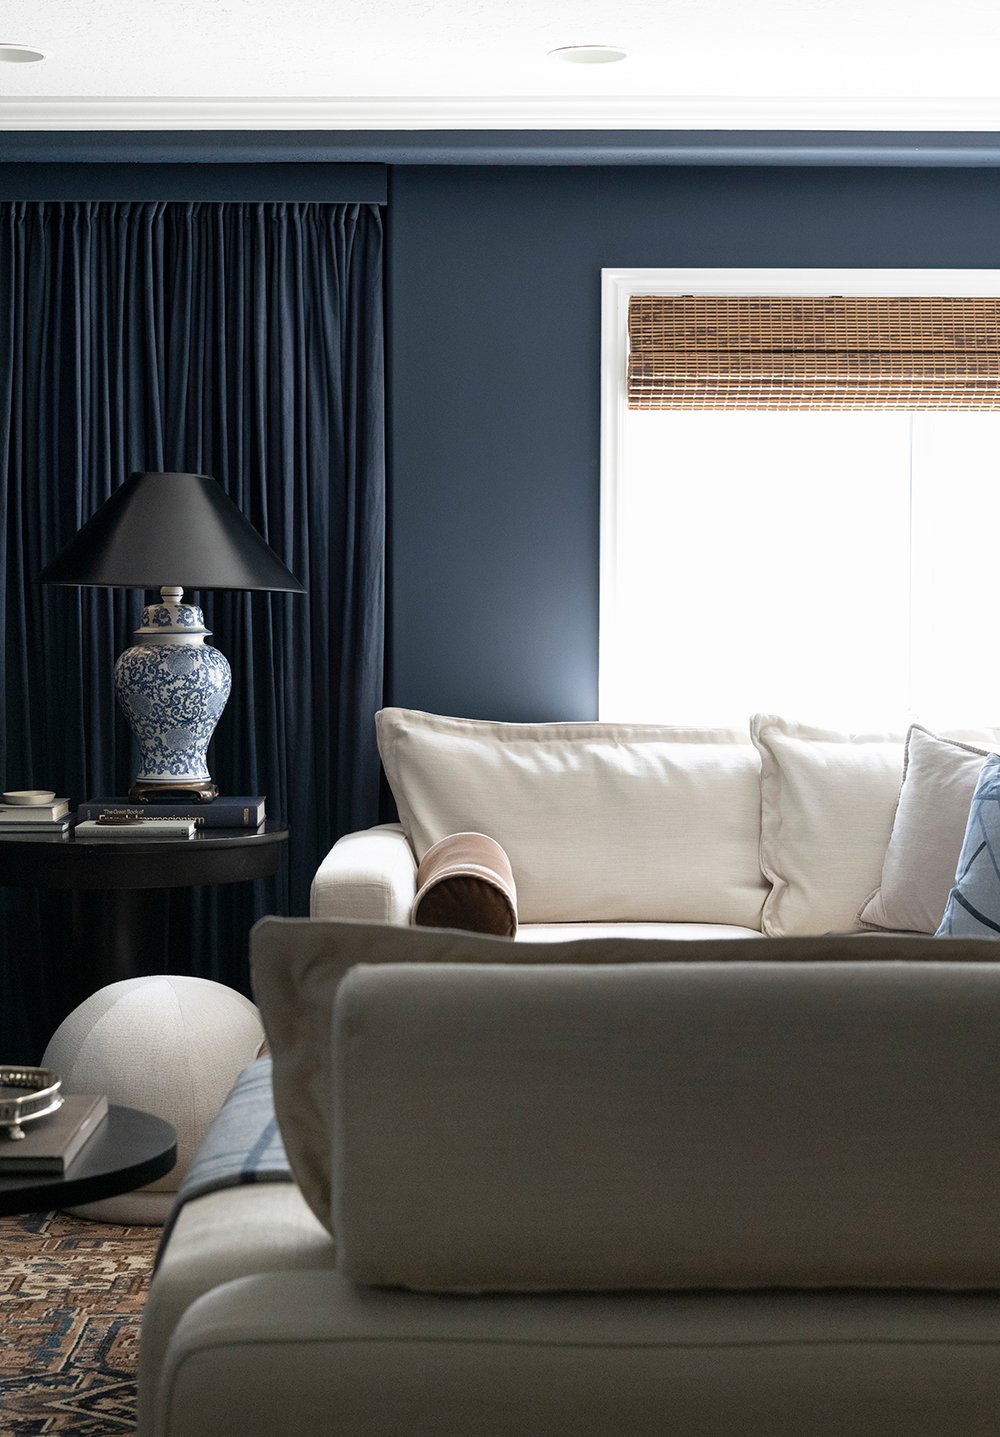
We began making adjustments to this space six months after moving in. In an effort to improve the aesthetic and make the room more functional, we decided “phase one” of the basement & media room makeover would include paint and cosmetic changes. I dyed custom drapery panels, moved furniture, styled the space, and installed art. It was a quick, but effective makeover. Rugs have come and gone (my effort to cover the carpet), eclectic vintage finds often end up down here, and we’ve enjoyed many movie nights in this space that has constantly been in flux. However, it was time to make some permanent and lasting upgrades. Most recently, I shared our newly renovated basement bar, which is open concept to this space. The other half of that renovation is this media room… which is really just a cozy living room that has a home theater vibe.
Before & After
During that makeover in 2019, I wrote…
“Eventually, we’d like to demo the walls and change the layout… but until then- I want to create a cozy space that is more representative of our aesthetic, because who knows when we’ll be able to fully renovate down here.”
Having lived with “phase one” for over four years, it honestly grew on us. Why move walls and spend a ton of money, if things were working well and functioning better than expected? I also really still loved the aesthetic and changes we had previously made- the moody paint, the art, and the soft monochromatic drapery panels. I wasn’t ready to part with it- so we decided to replace the flooring, doors, tweak the floor plan, and make those temporary adjustments feel more permanent.


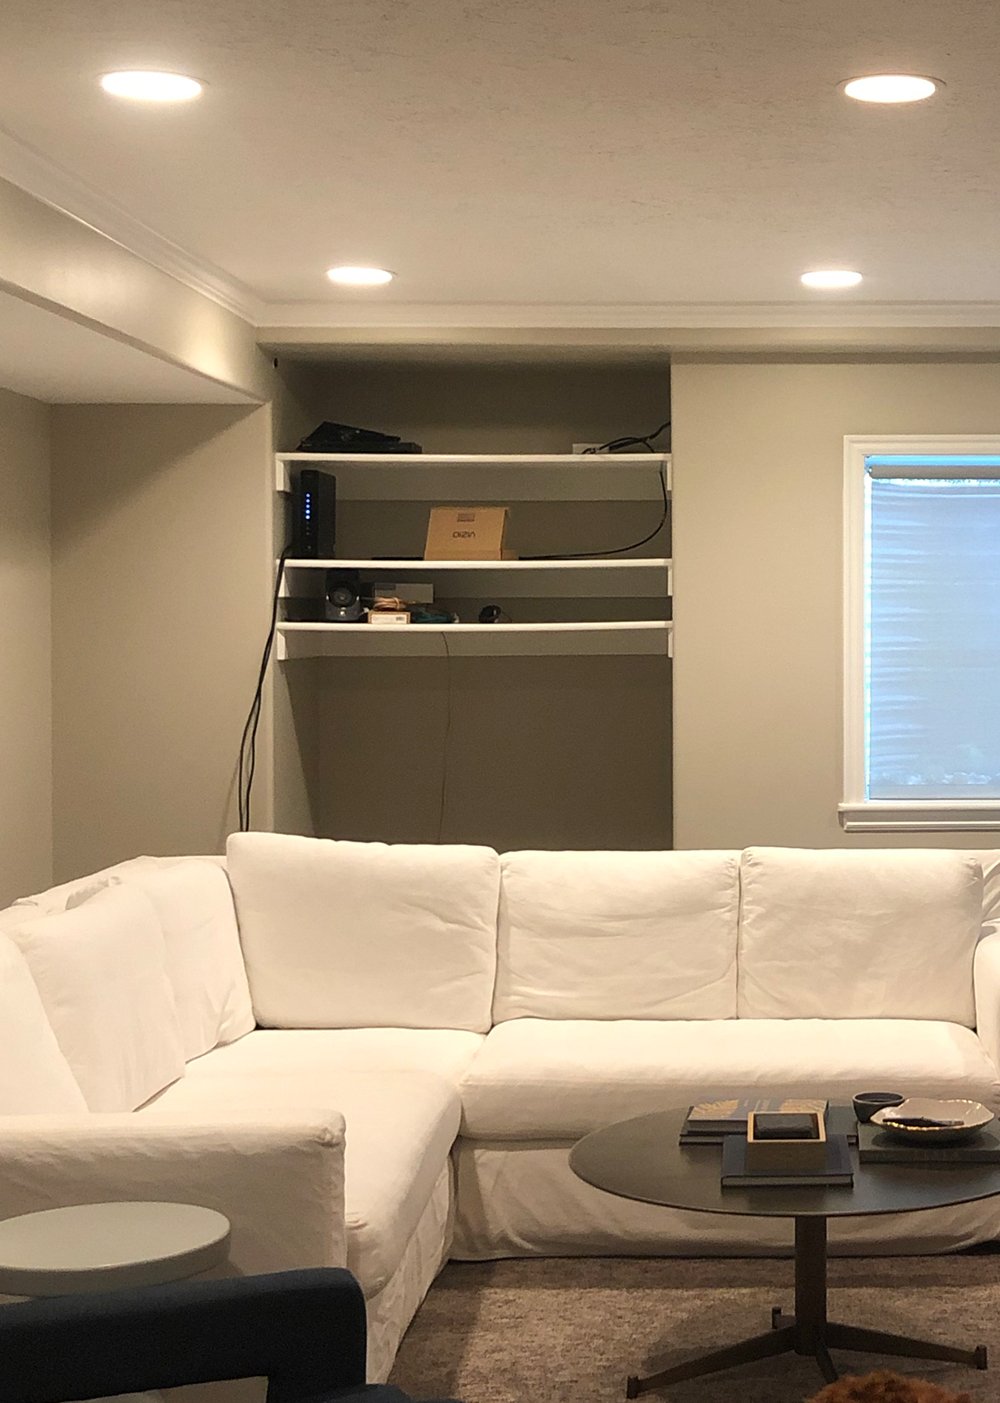
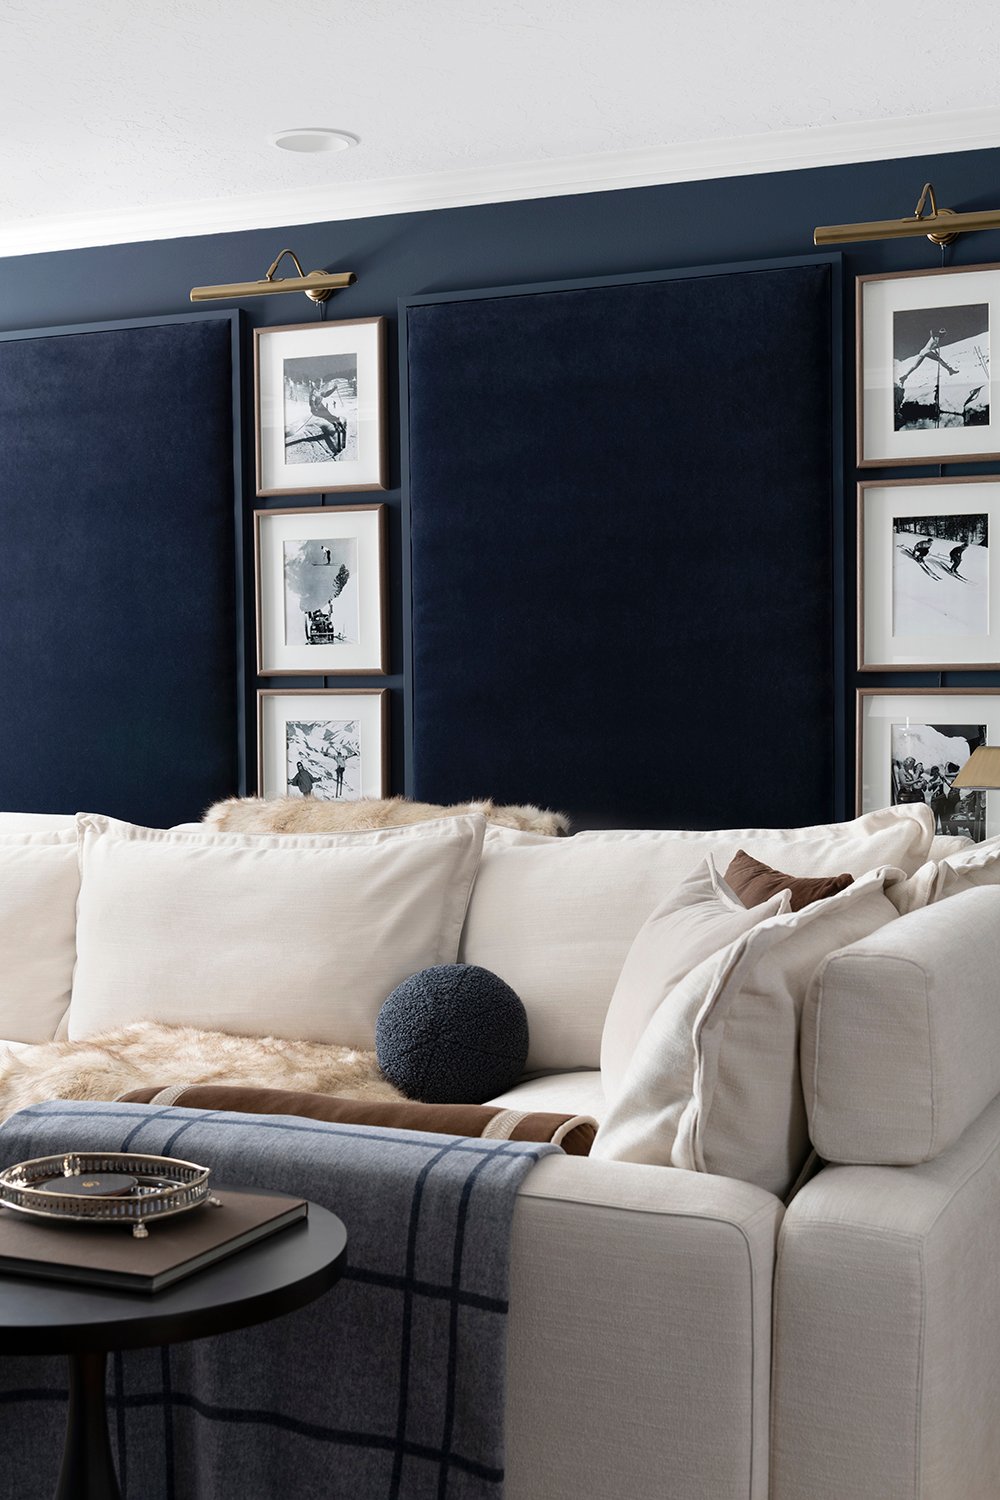
Some of you who are familiar with this space or have been following our renovation journey might remember where this room started. Greige walls, gray carpet, and little personality was the general aesthetic upon moving in. It felt like a blank (and boring) canvas in comparison to how it looks today…

Goals & Floor Plan
We knew the basement kitchen would eat the majority of our budget for this overall living space. The media room also seemed to withstand the test of time and our needs, so little was to be done. My main goals for that side of the room felt pretty feasible…
- Replace the carpet with a basement-friendly hardwood type of flooring (and find a vintage rug).
- Replace the existing doors and hardware.
- Replace the sofa and find an option that better fits the updated floor plan.
- Add casters to the credenza (for easy moving and access to the closet behind it).
- Hem the drapery panels after the updated flooring is installed.
- Touch up the existing paint and extend it to make the kitchen area feel cohesive.
- Install a fireplace or additional heat source.
- Swap lighting, replace bulbs, and relocate sconces (electrical work).
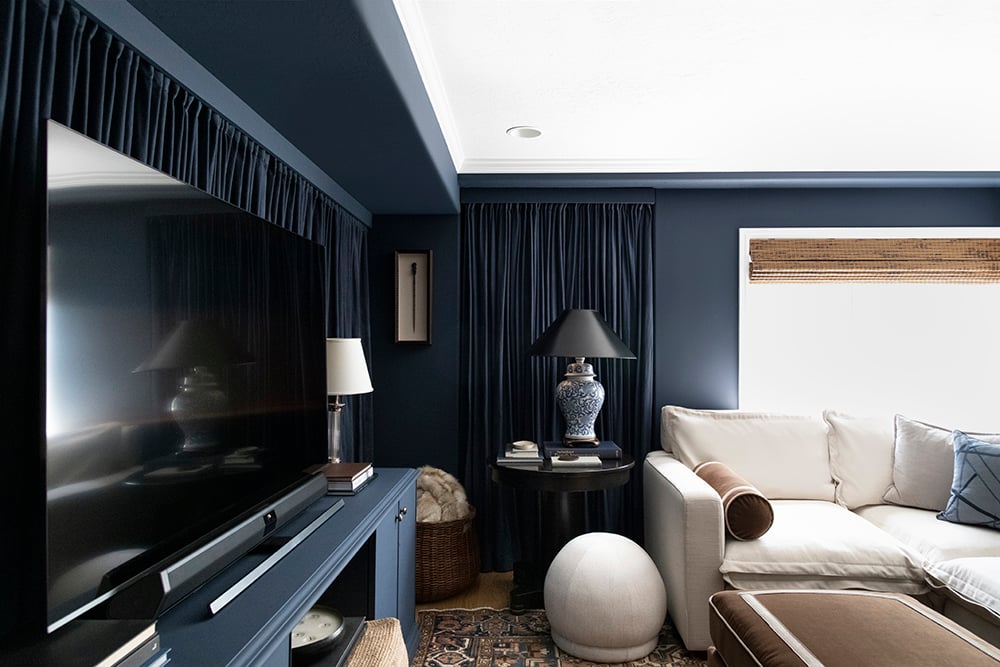
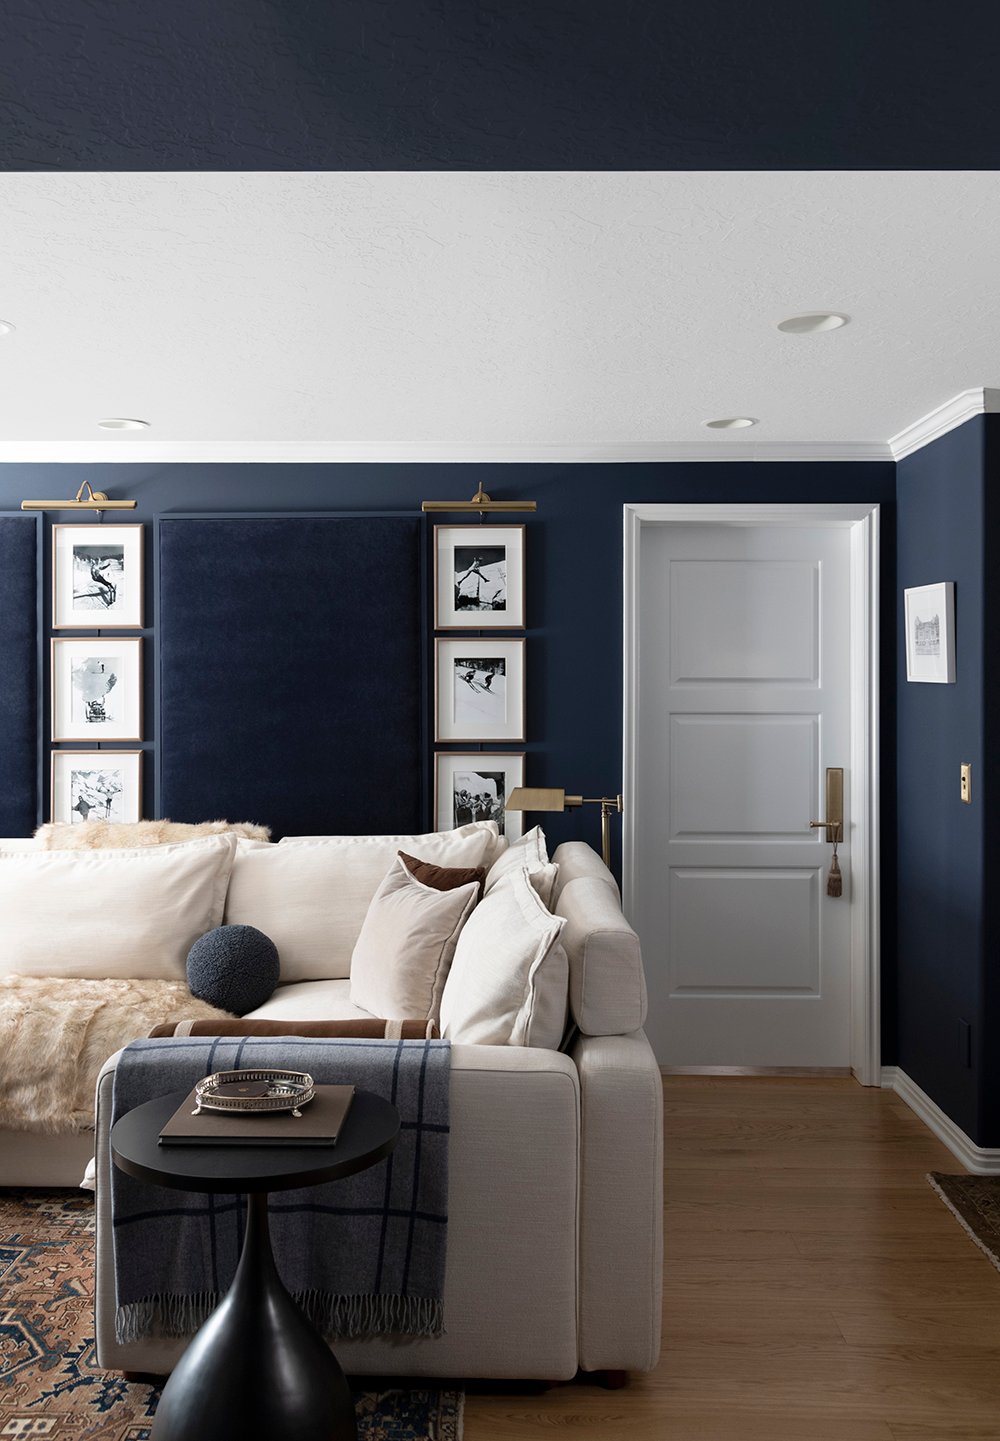
The media room is open concept to our basement bar, so I wanted these spaces to feel cohesive and function well together as a unit. Below, you can see the small wall that divides the two spaces.
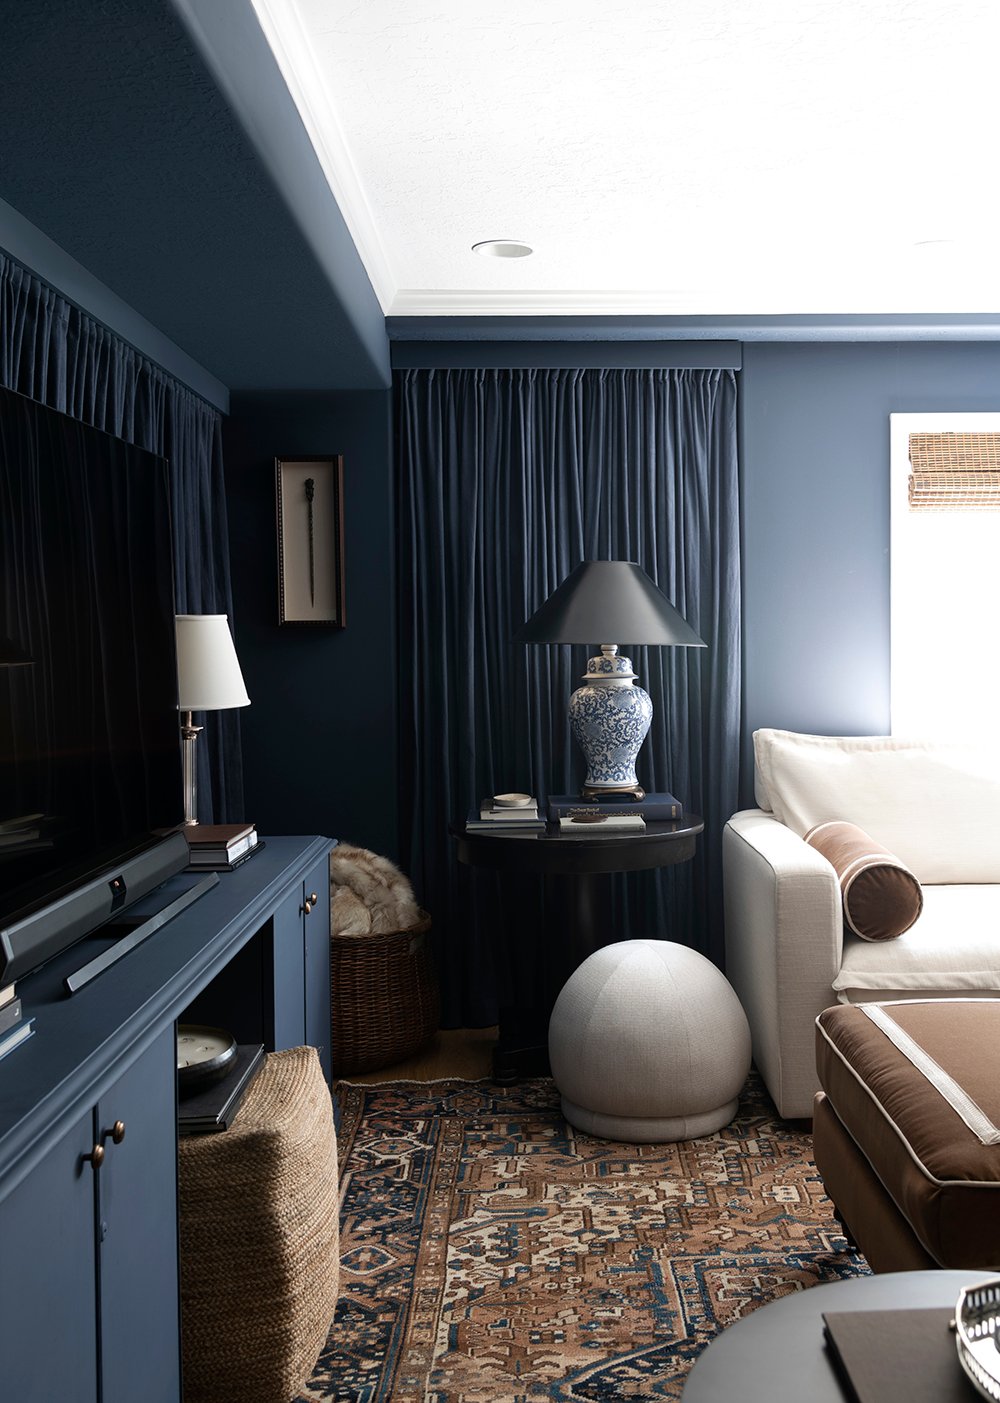
Seating
Seating had always been an issue in this space. We moved our beloved Pottery Barn sectional from our previous home into this room and it just didn’t fit very well. We needed something more substantial with a different shape to accommodate this space. Emmett was very vocal in requesting a comfortable recliner, which obviously wasn’t ideal for my aesthetic or the floor plan. I landed on a Homebody sectional that perfectly fits our space… and it reclines (though you’d never know it).
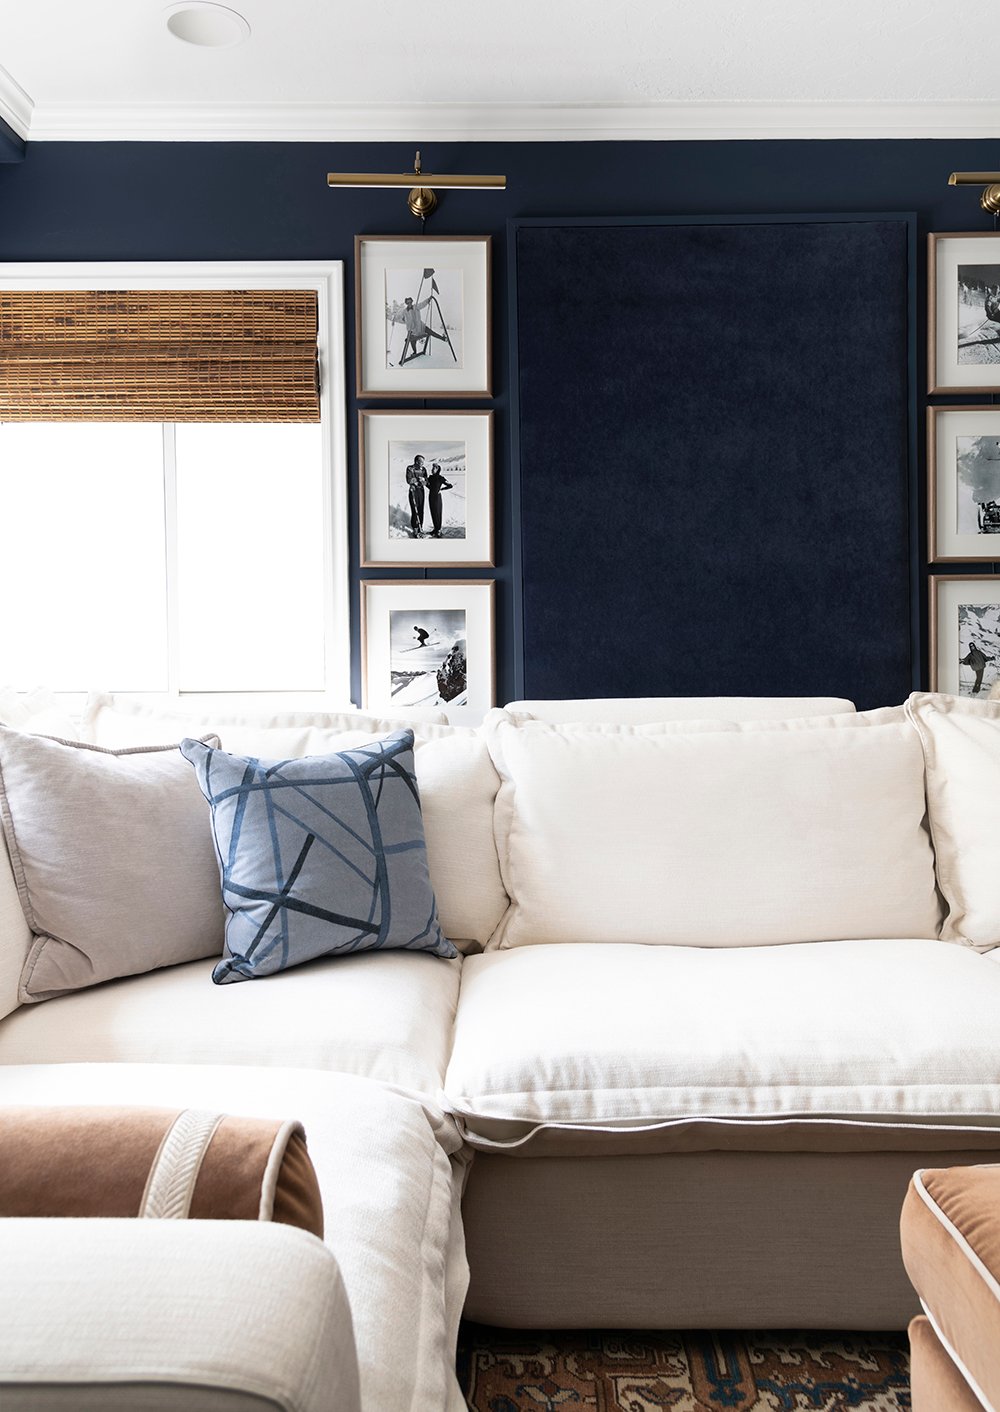
I promise to work on a proper review with a dedicated blog post for our sectional because it’s honestly really cool and we love it! Not only does it recline, but it can be adjusted, has phone chargers inside, is upholstered with performance fabric that is holding up well to our dogs, and it’s customizable. In the meantime, if you want the specifics… we ordered the six piece U-shaped sectional in the linen and coconut fabric.
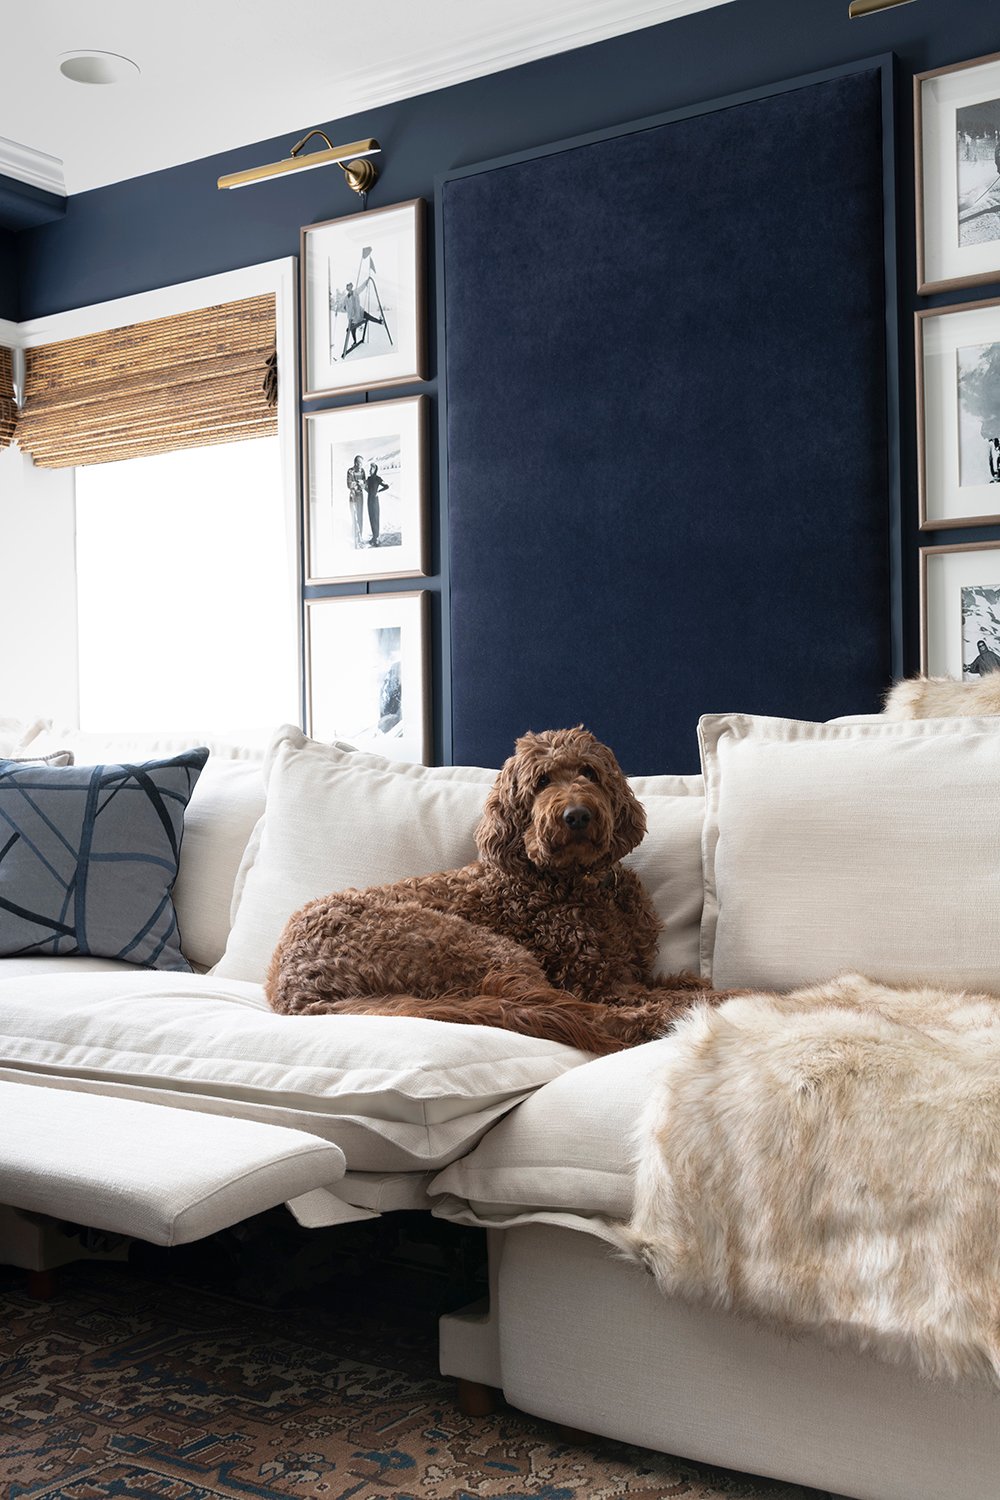
This sofa complements our floor plan and the elongated shape of the room much better, while offering far more seating than our previous option. This is the only seating in the room (aside from the bar stools), and I think it adds to the cozy aesthetic. One giant sectional you can sink and snuggle into, that takes up the majority of the space. There are no bad seats for watching TV and everyone is comfortable.
Our family was here visiting last month- we had an impromptu movie night and all seven of us (four adults and three kids) were able to fit comfortably on the sofa… including our dogs. That is something we’ve never been able to do, and it felt really special- to be enjoying that moment together, not worrying about people having to sit on the floor. I’m glad we were able to find a seating arrangement that worked well with our odd-shaped room instead of having to move walls and rethink the space entirely.
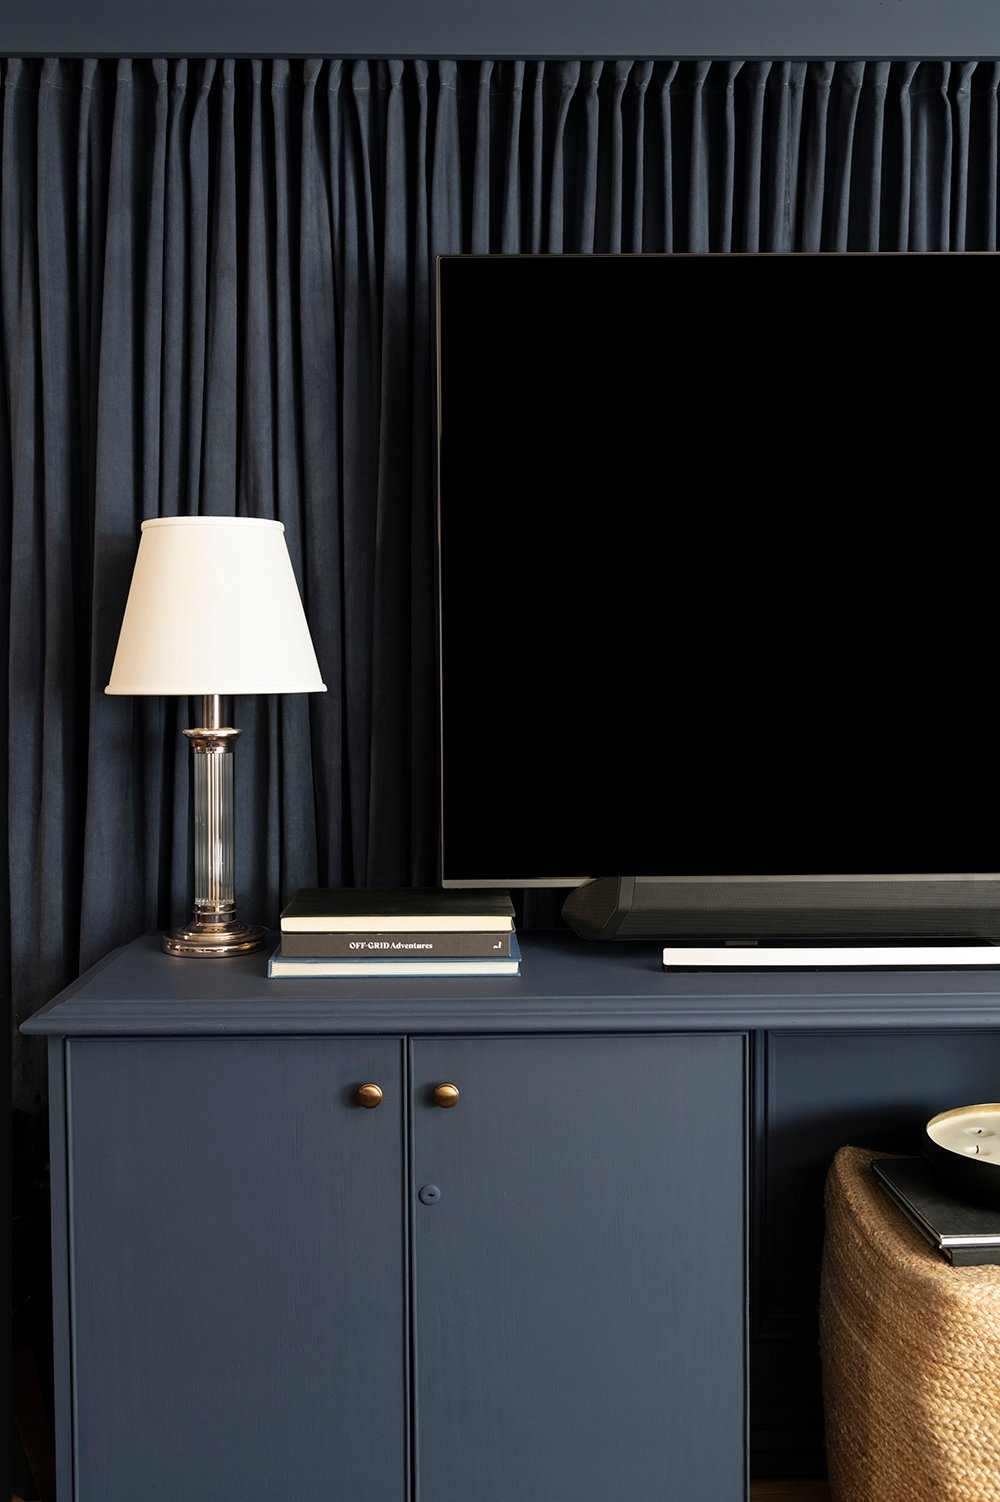
TV Wall & Tech
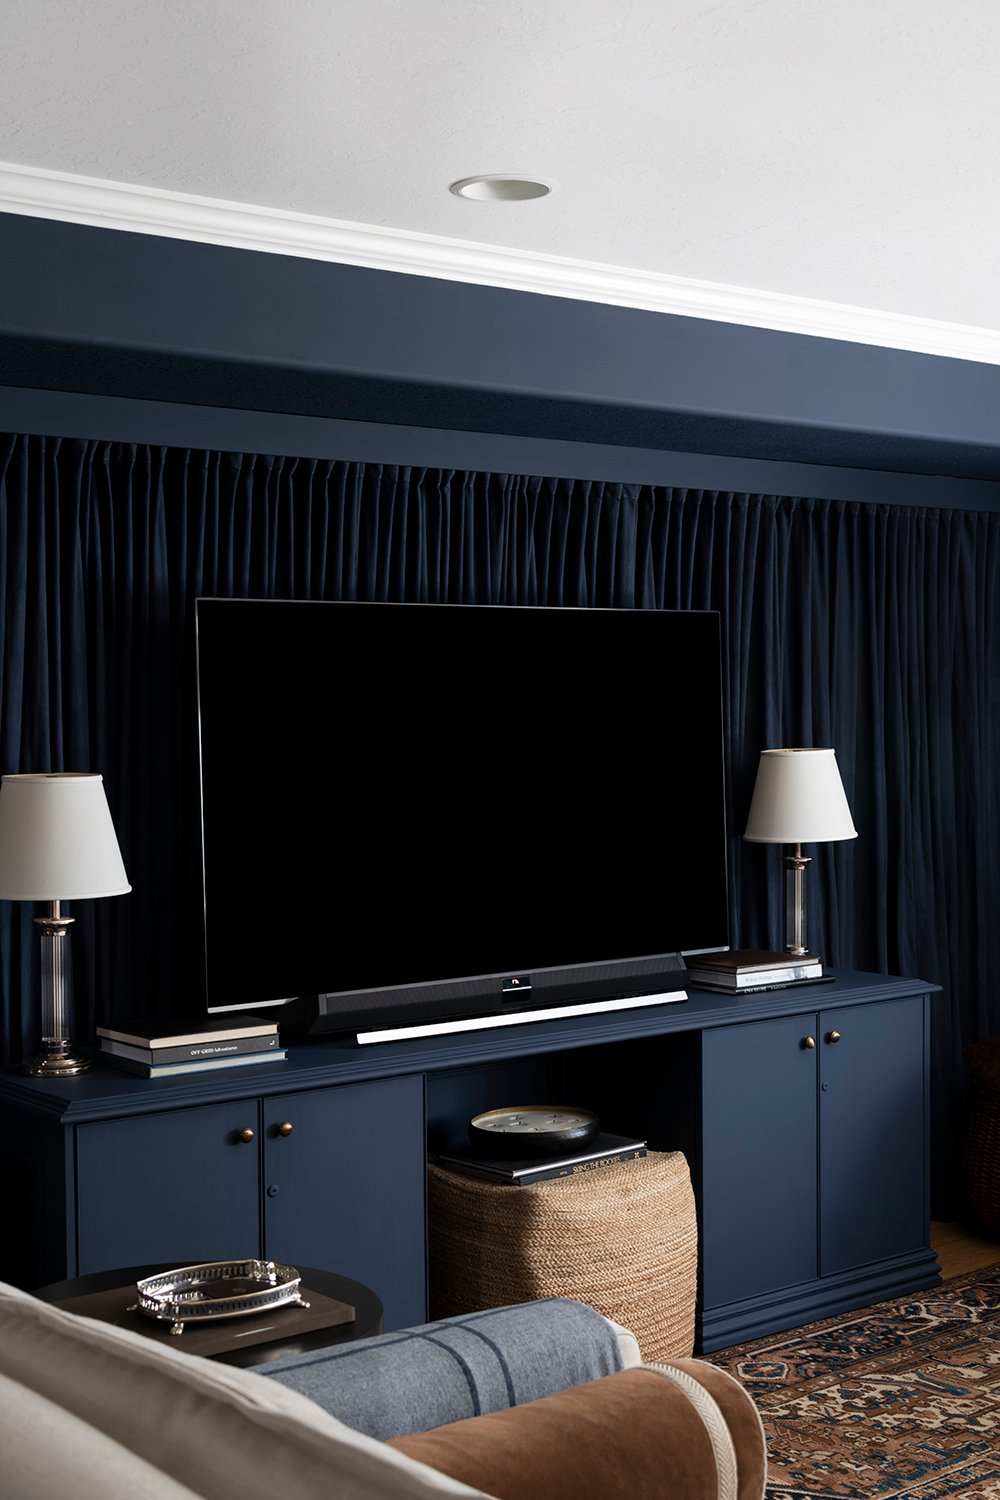
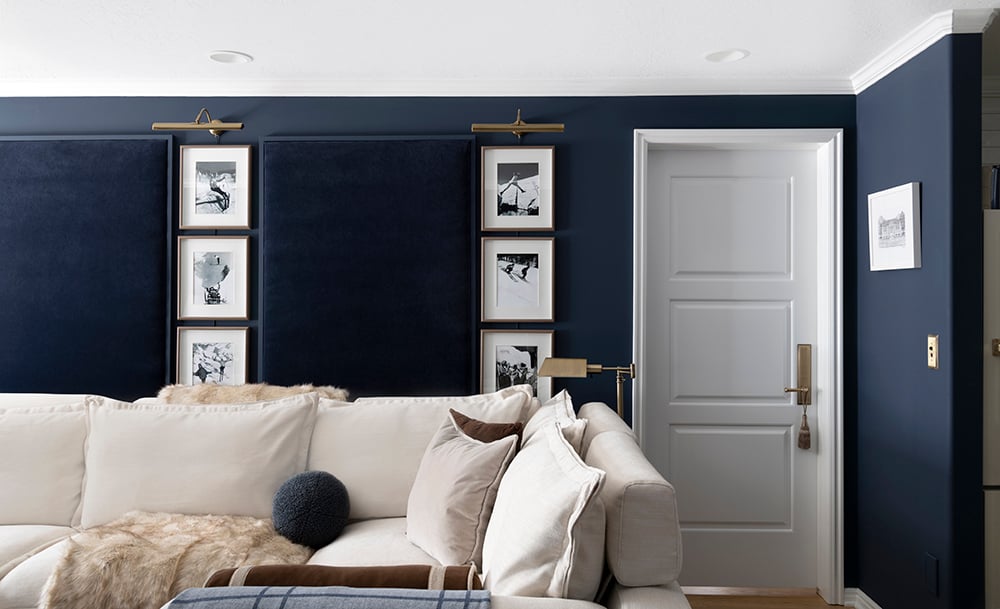
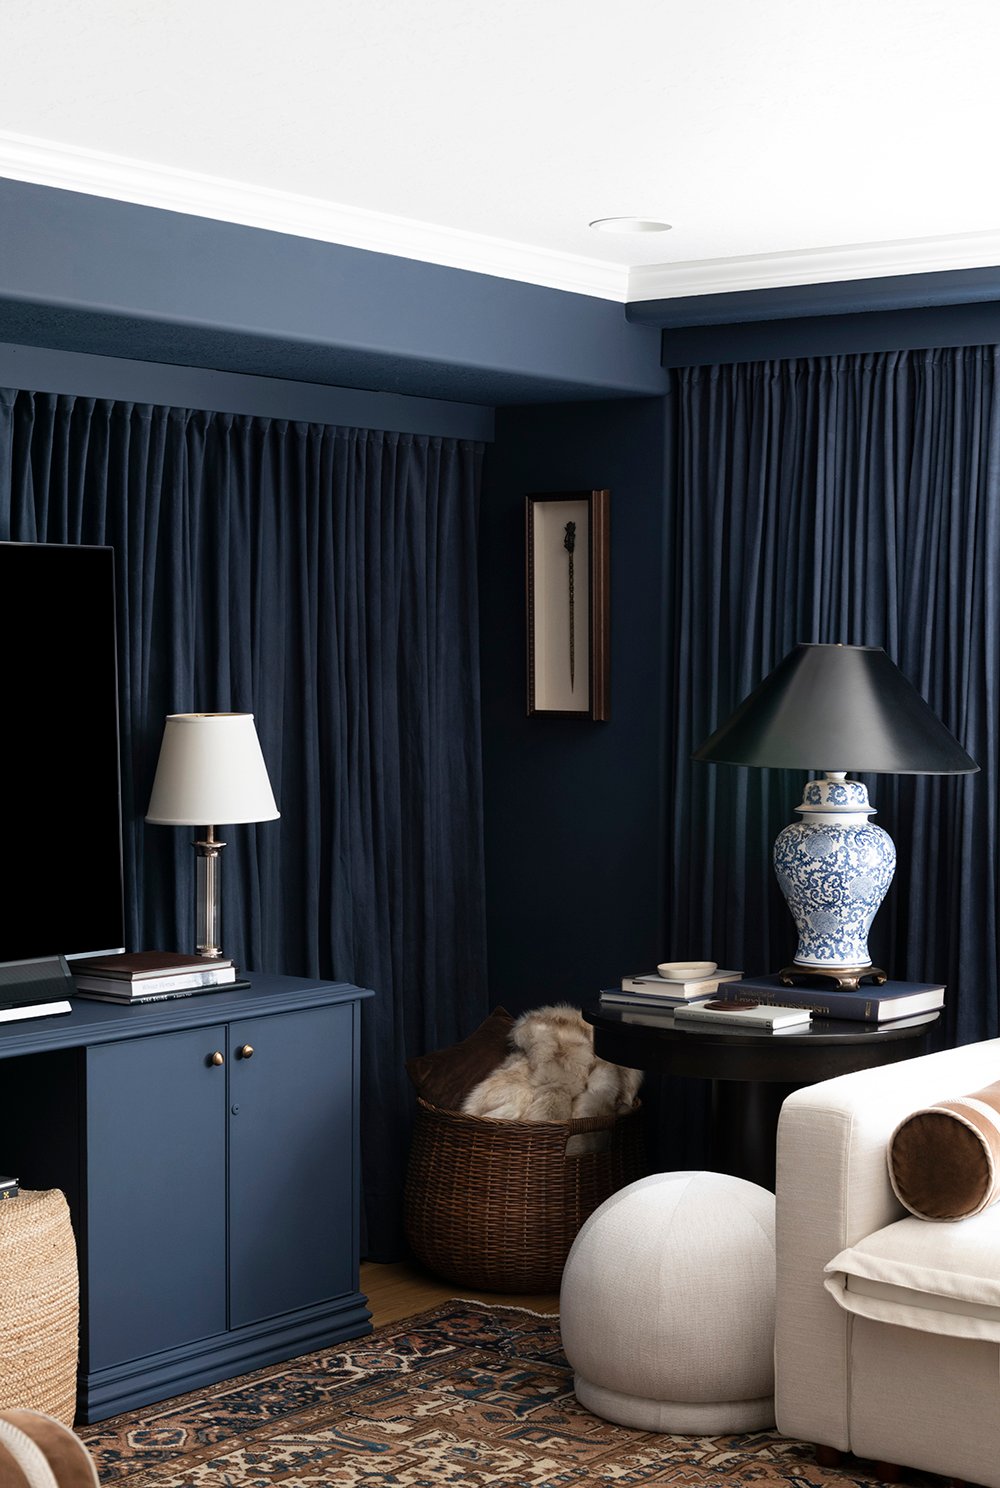
Emmett asked if we should hunt for a new credenza, knowing this was supposed to be a temporary solution… but again- it felt like something that has worked well for us and I still like the look of it! I pulled this thing out of a dumpster at his work almost five years ago and painted it to match the space for a monochromatic look.
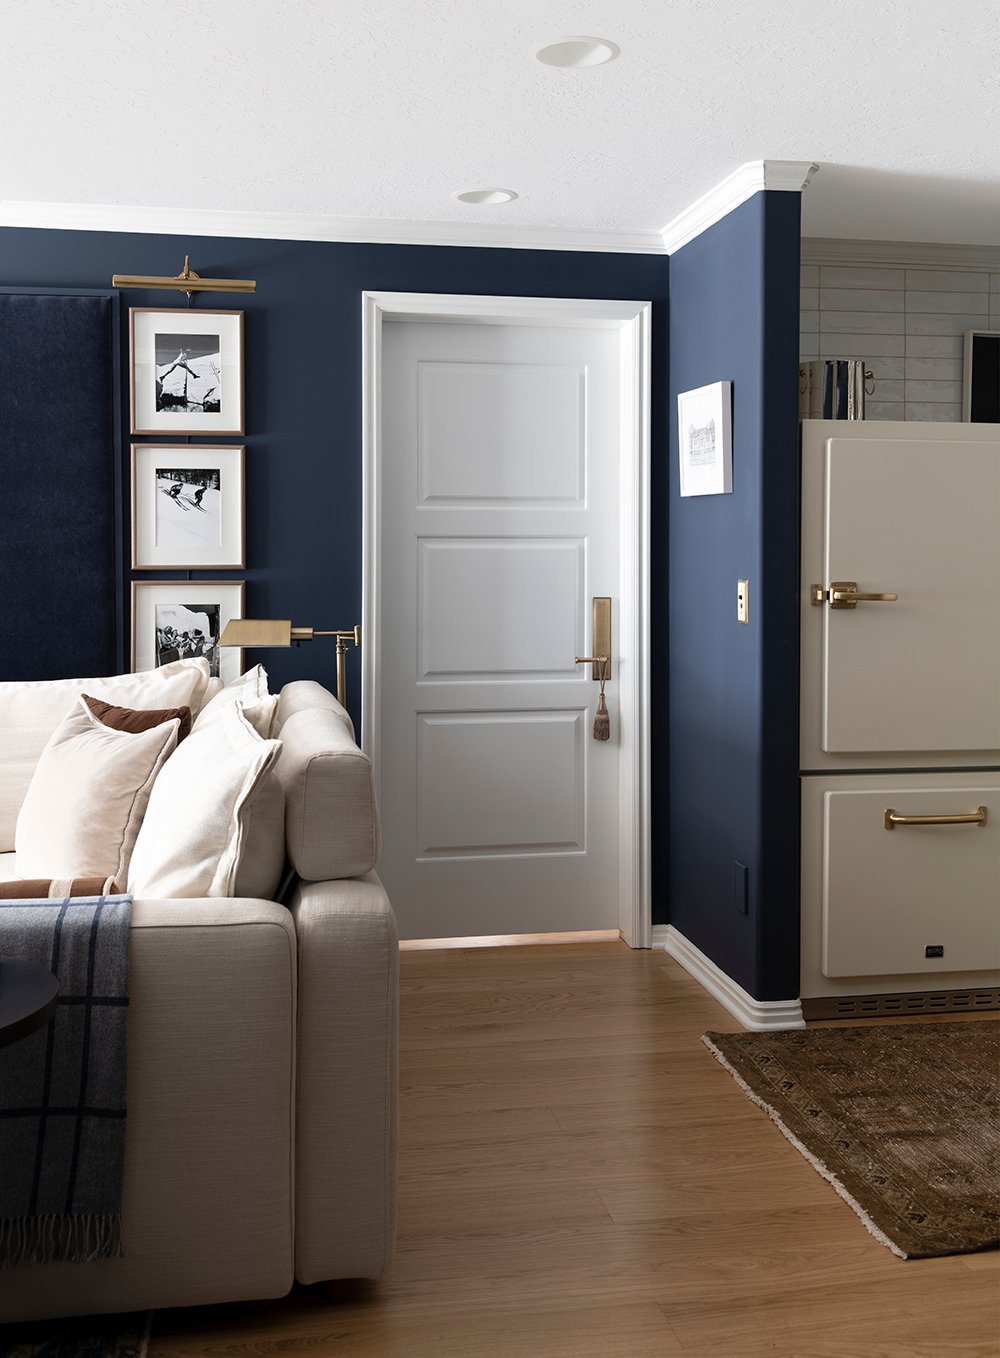
We did add hidden casters to our dumpster credenza though. Why? Behind the TV curtains are French doors that lead to our utility closet. We obviously need to be able to access our water softener, hot water heaters, and whole house humidifier. Having lived with this in front of the doors for years at this point… it’s a pain to move. Now, we simply roll it left, easily slide the curtains (they’re on an easy track), and access the doors for quick maintenance. A small and easy price to pay for optimizing our floor plan! It has been working well.
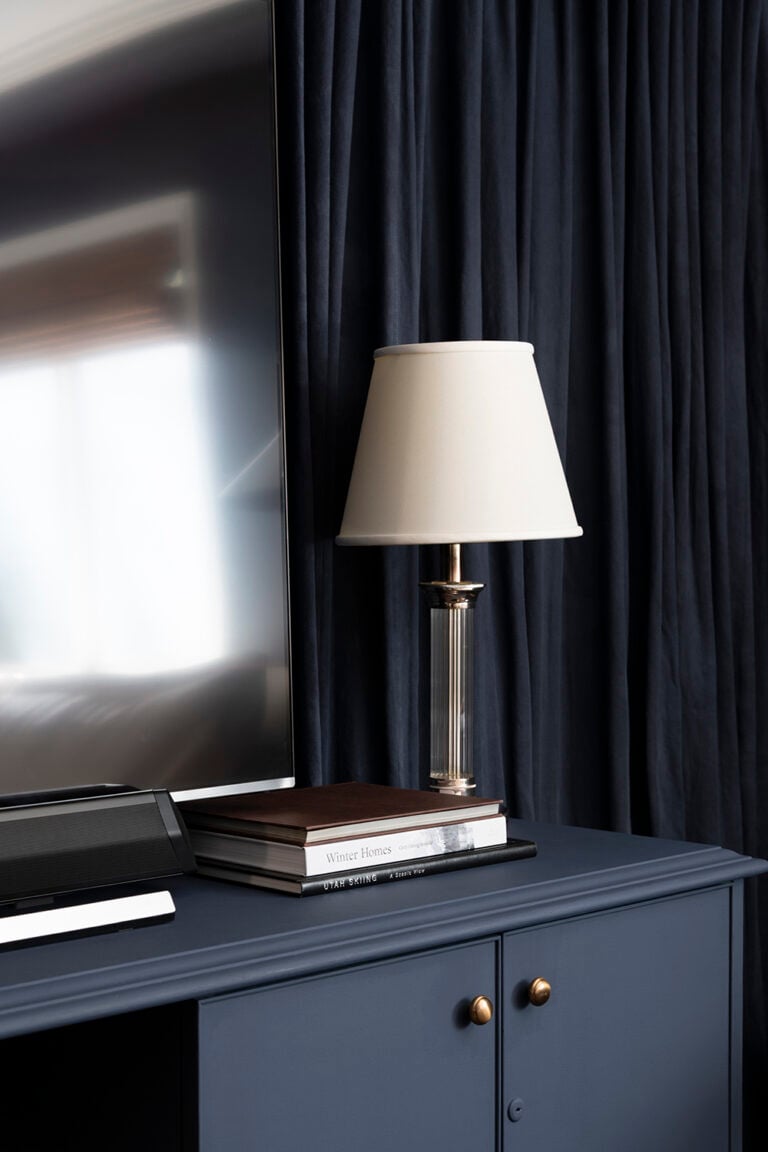
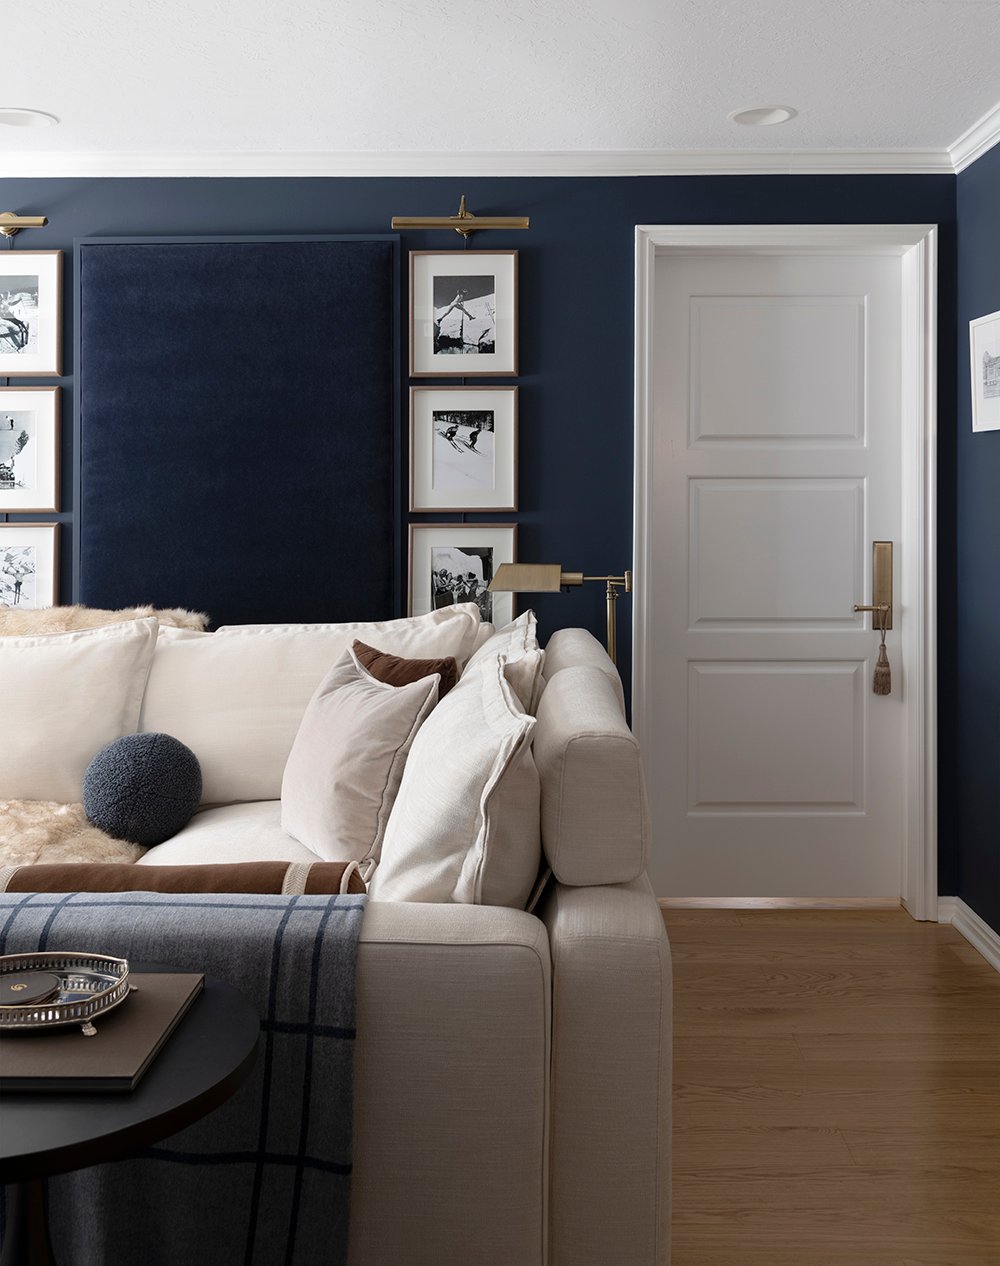
Most of our cords and media live on shelves behind the adjacent curtain. One thing we did agree that needed an update was some of our tech. For a proper home theater experience, we splurged on this surround sound system– which is cleverly hidden (making my designer heart very happy). Our oversized TV is only a few years old, so that stayed… but we did add smart plugs throughout the basement, which is ideal for turning on the lamps and gallery lights throughout the space. It’s also awesome for dimming the lights during a movie without having to get up or move about.

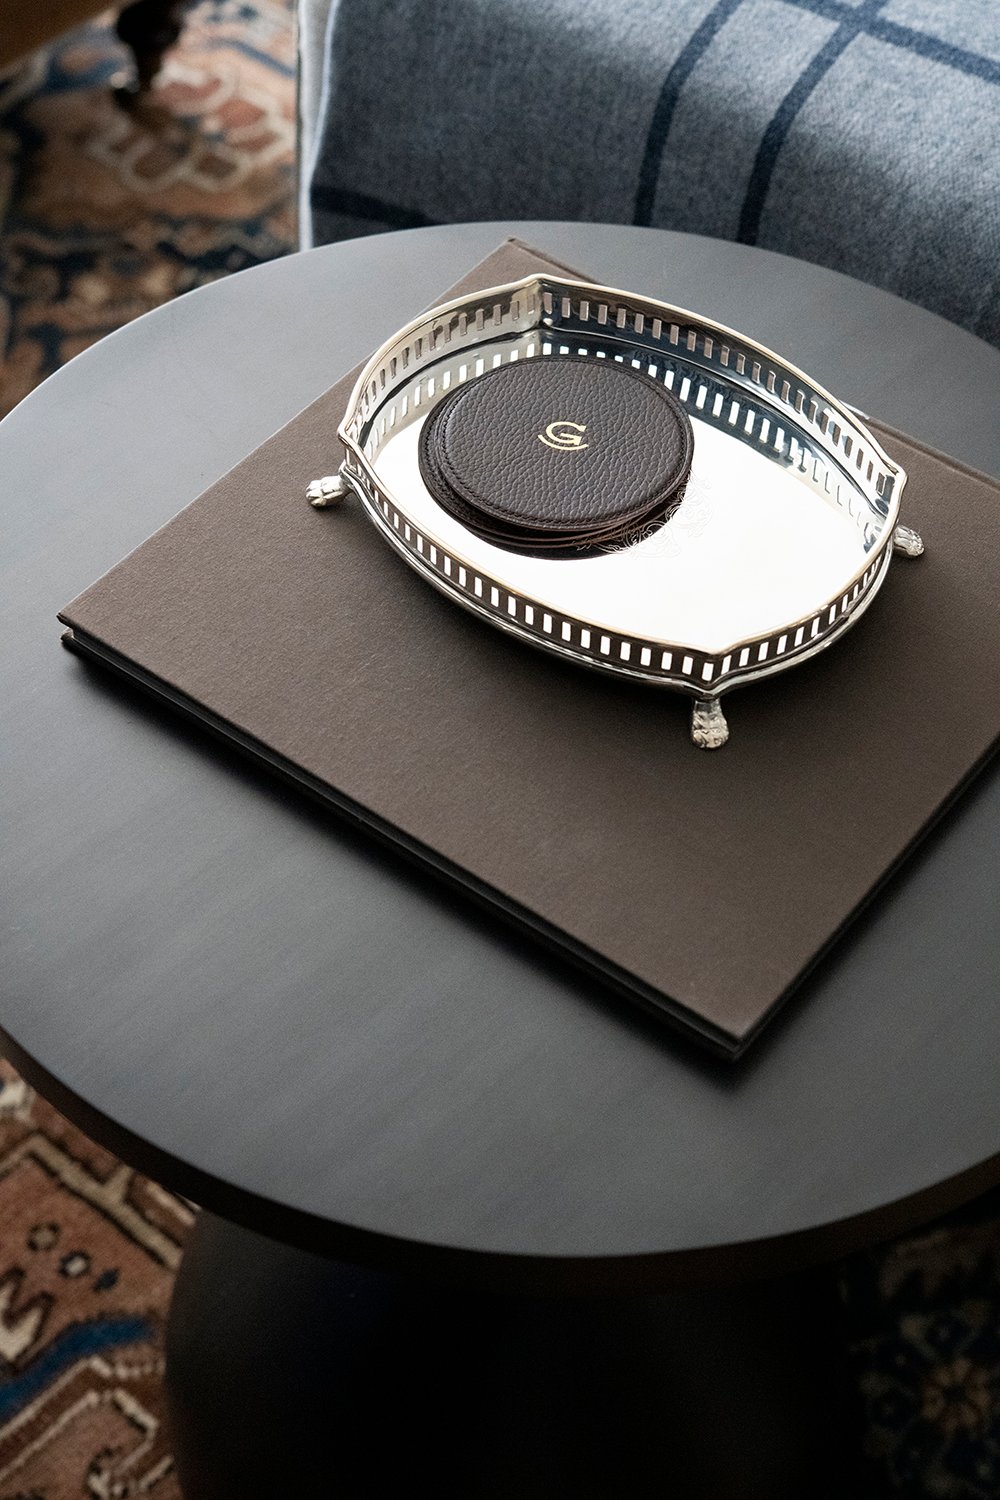
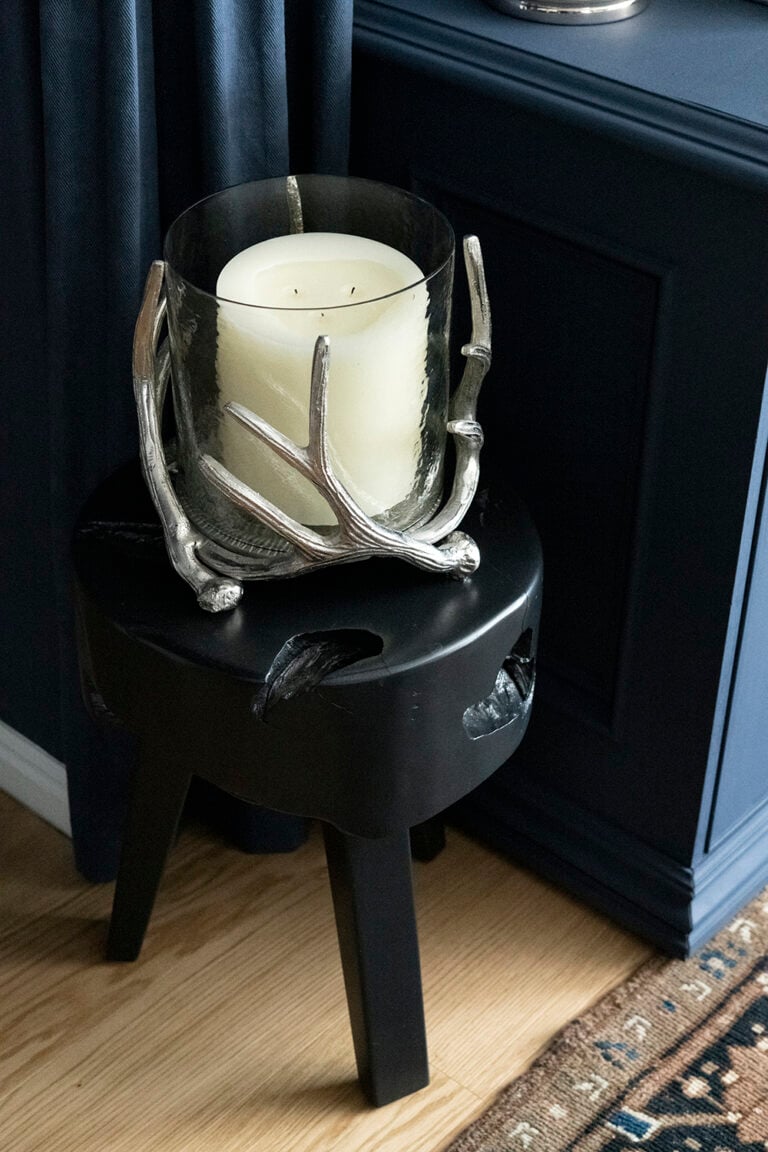
I kept the styling pretty simple and eclectic… books that feel fun and representative of our personality (skiing, outdoor adventures, art, horses, etc), candles, and plenty of coasters and trays for snacks & drinks.
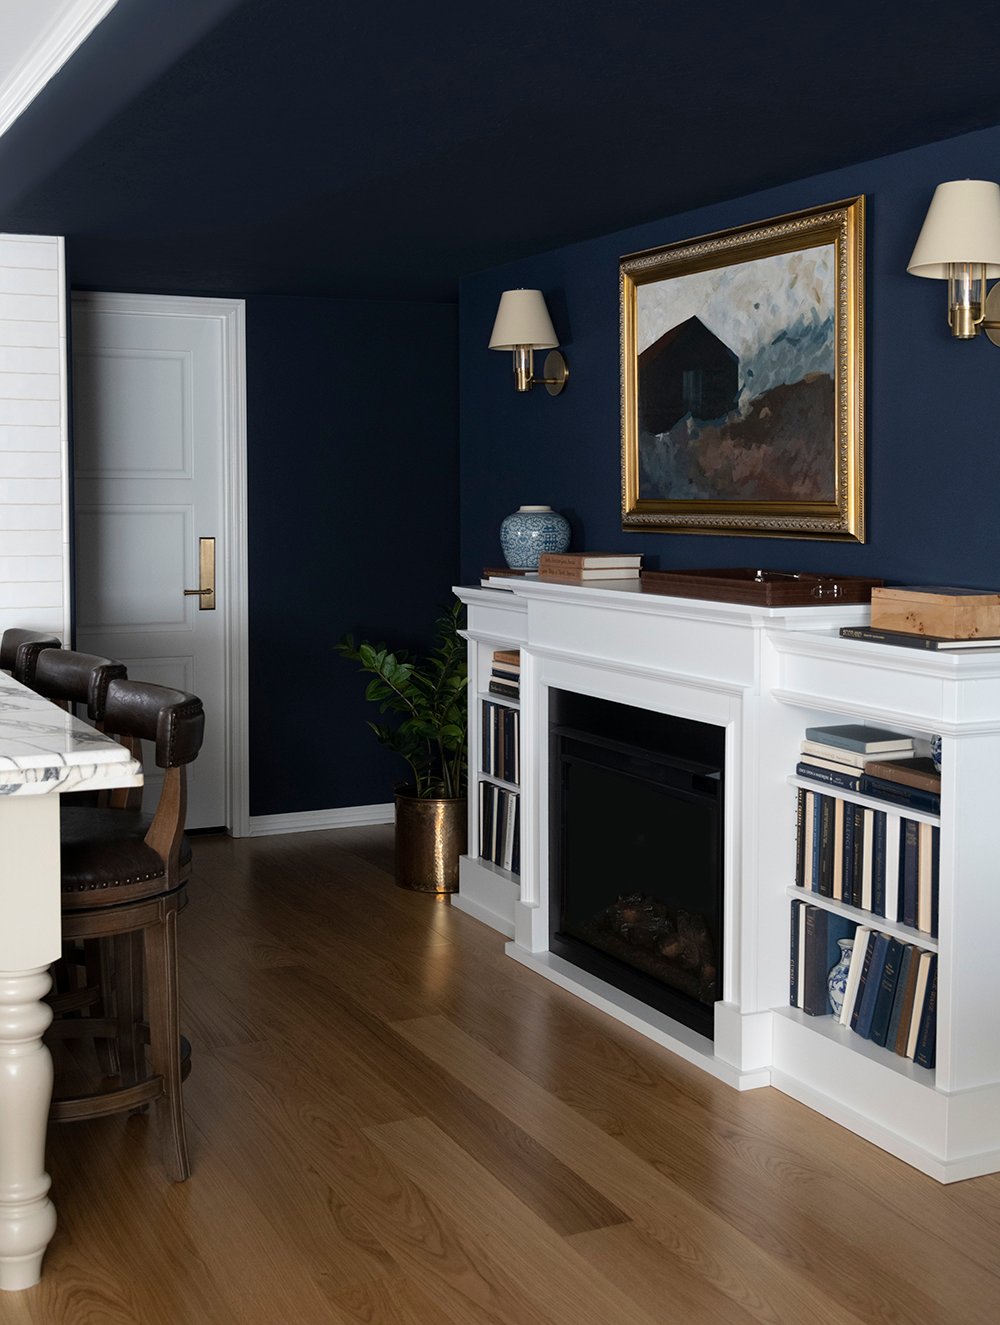
Fireplace & Millwork
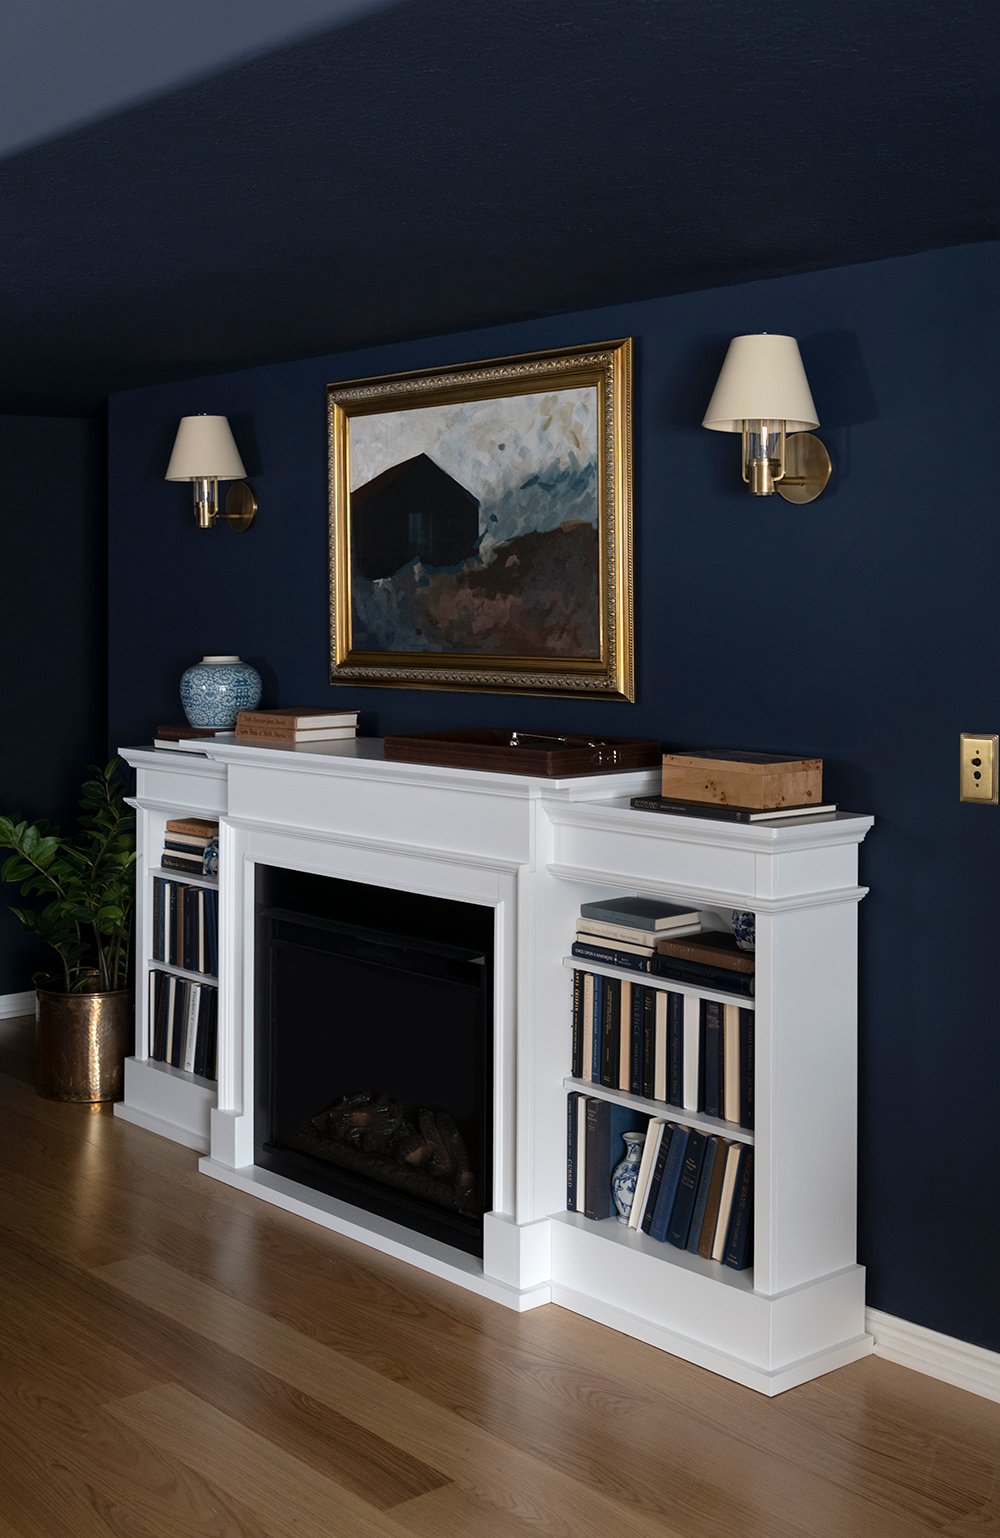
Being a cool basement, we wanted to add a heat source of some sort. We didn’t need anything too intense, as it’s never frigid down here… we were thinking an output equivalent to a nice space heater. I found this electric fireplace built-in from Amazon and I’m also going to share a dedicated review on it this fall. It’s really amazing! It puts out a lot of heat, looks surprisingly good, and was the easiest to install.
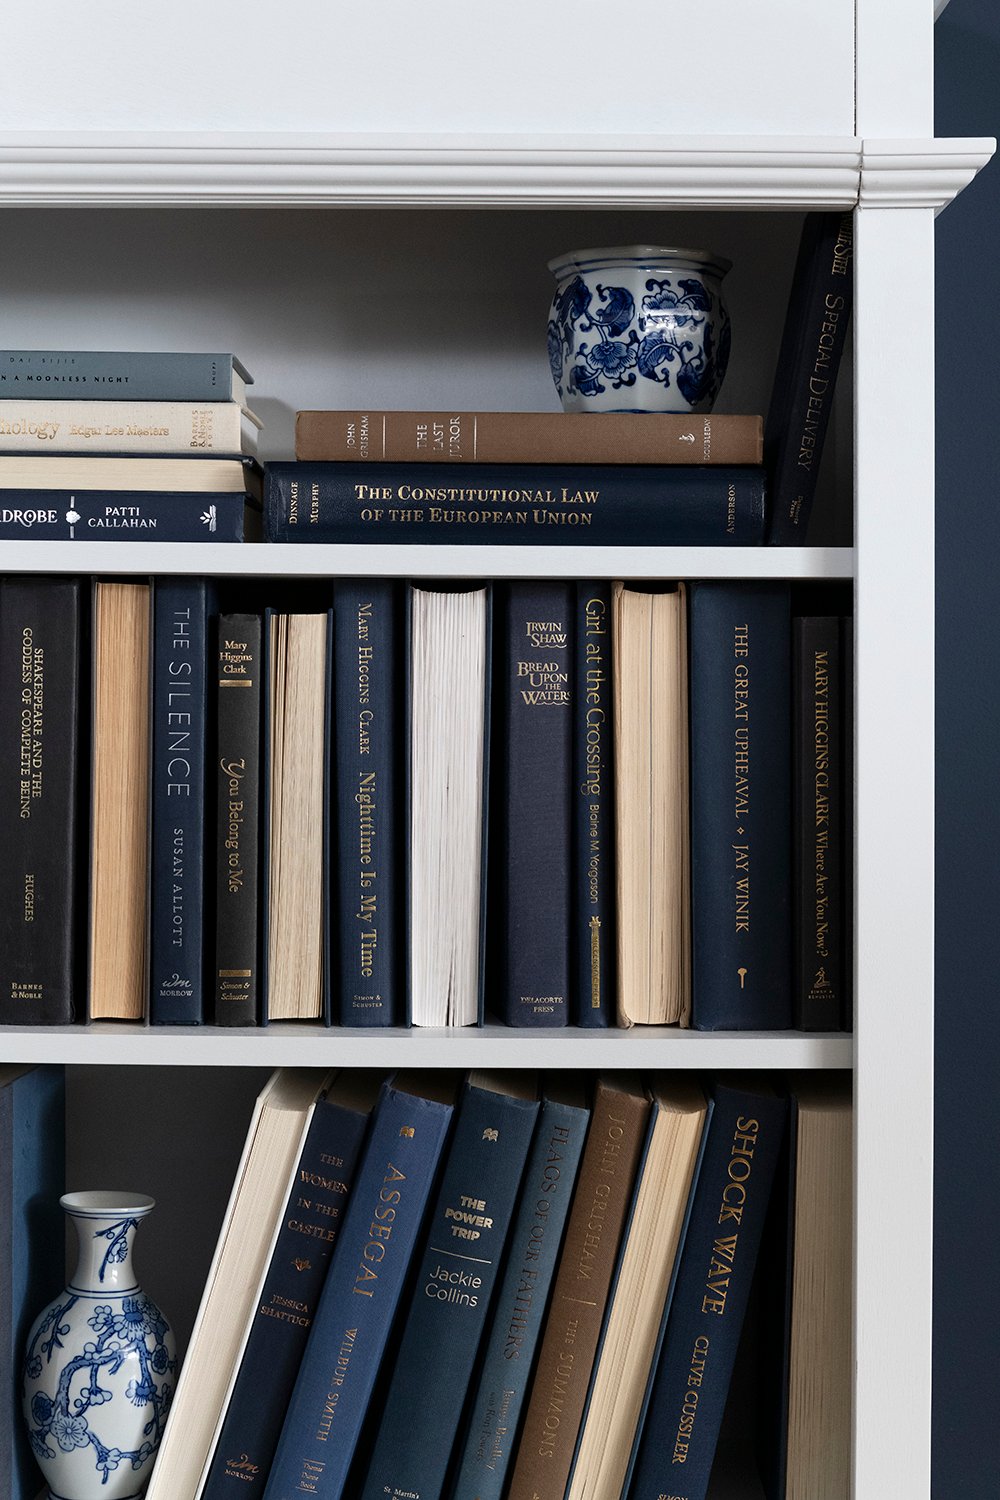
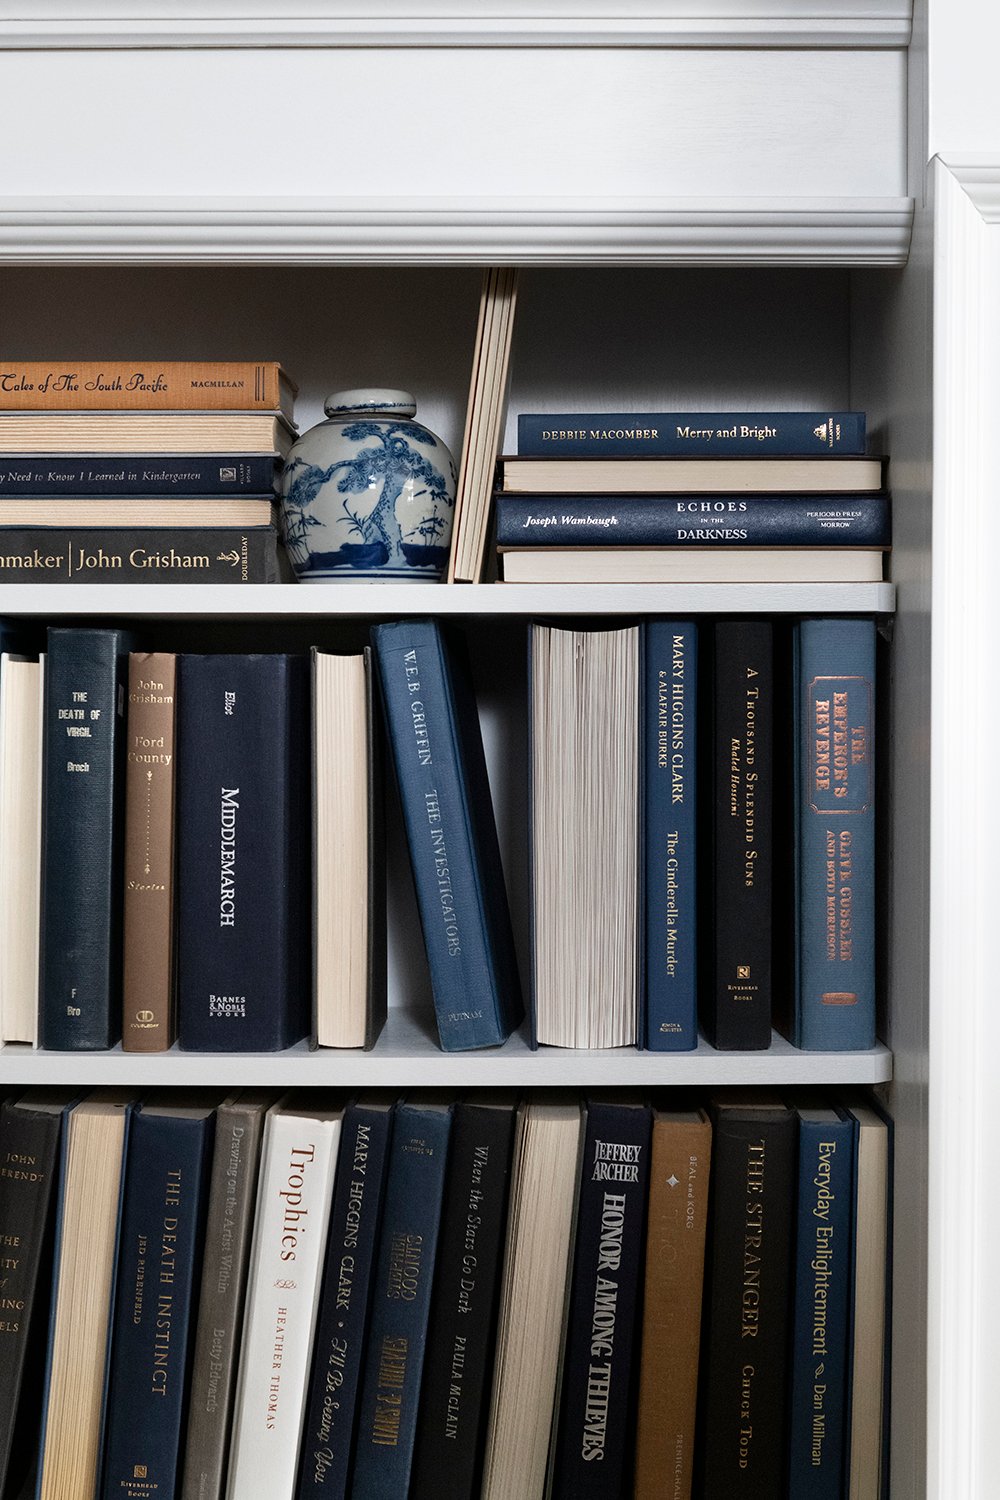
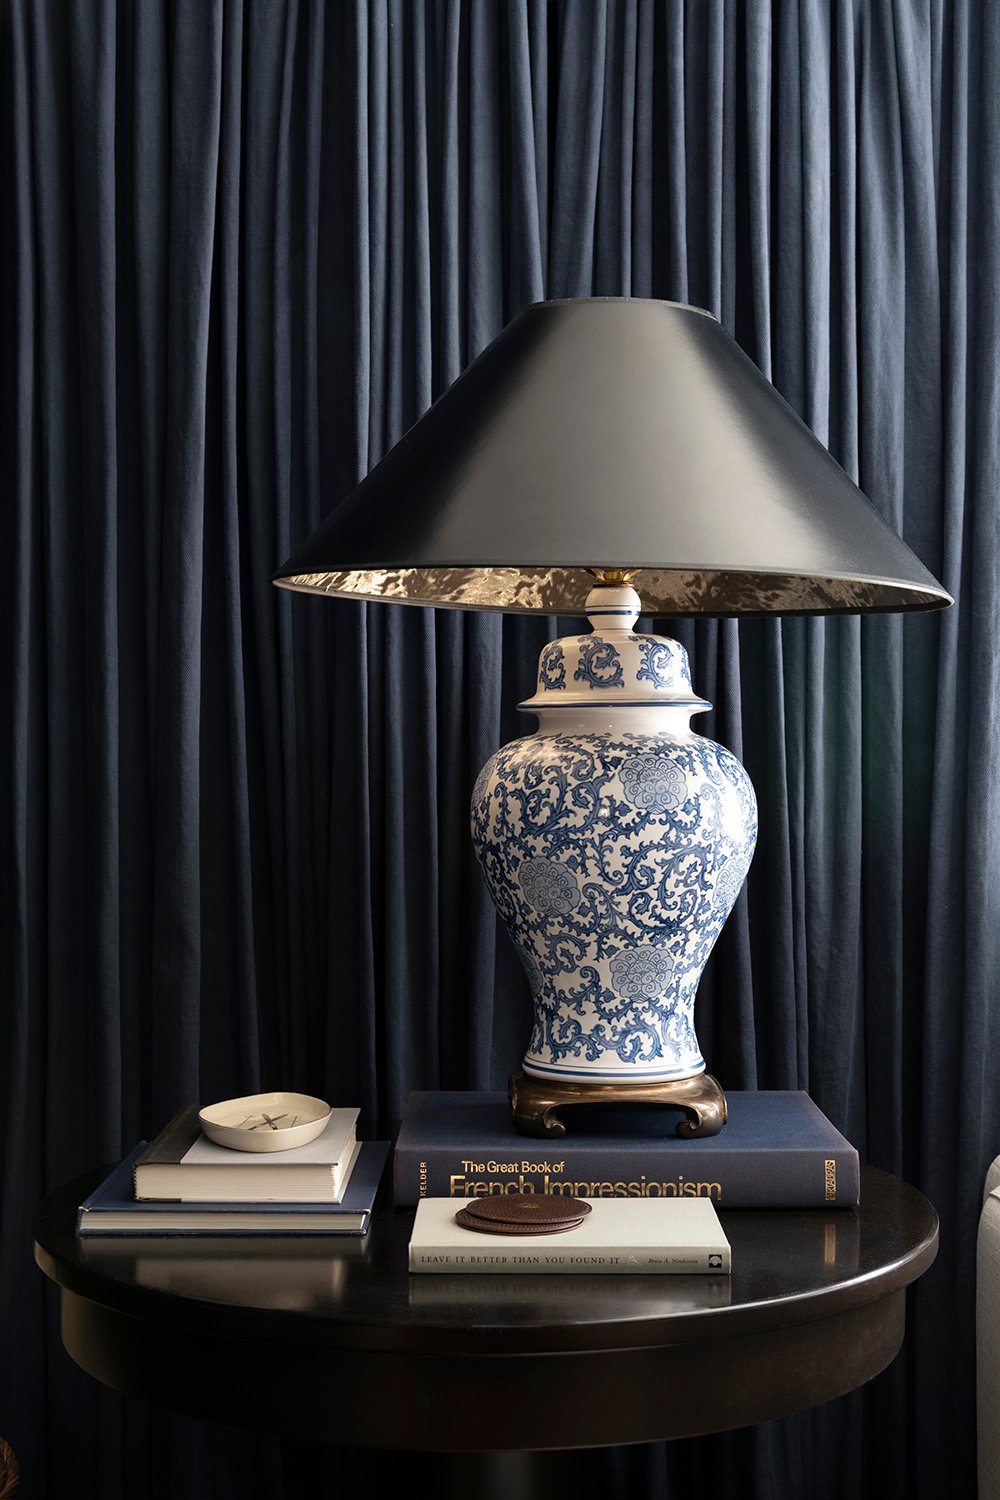
You know how much I love shelf styling with books… true to my aesthetic, I filled up the built-in shelves flanking the fireplace pretty quickly. I also inserted some blue & white ceramics for a pop of pattern. The art was a meaningful DIY… if you missed that project, check out how to turn inexpensive framed art into custom artwork. I really enjoyed creating this one.
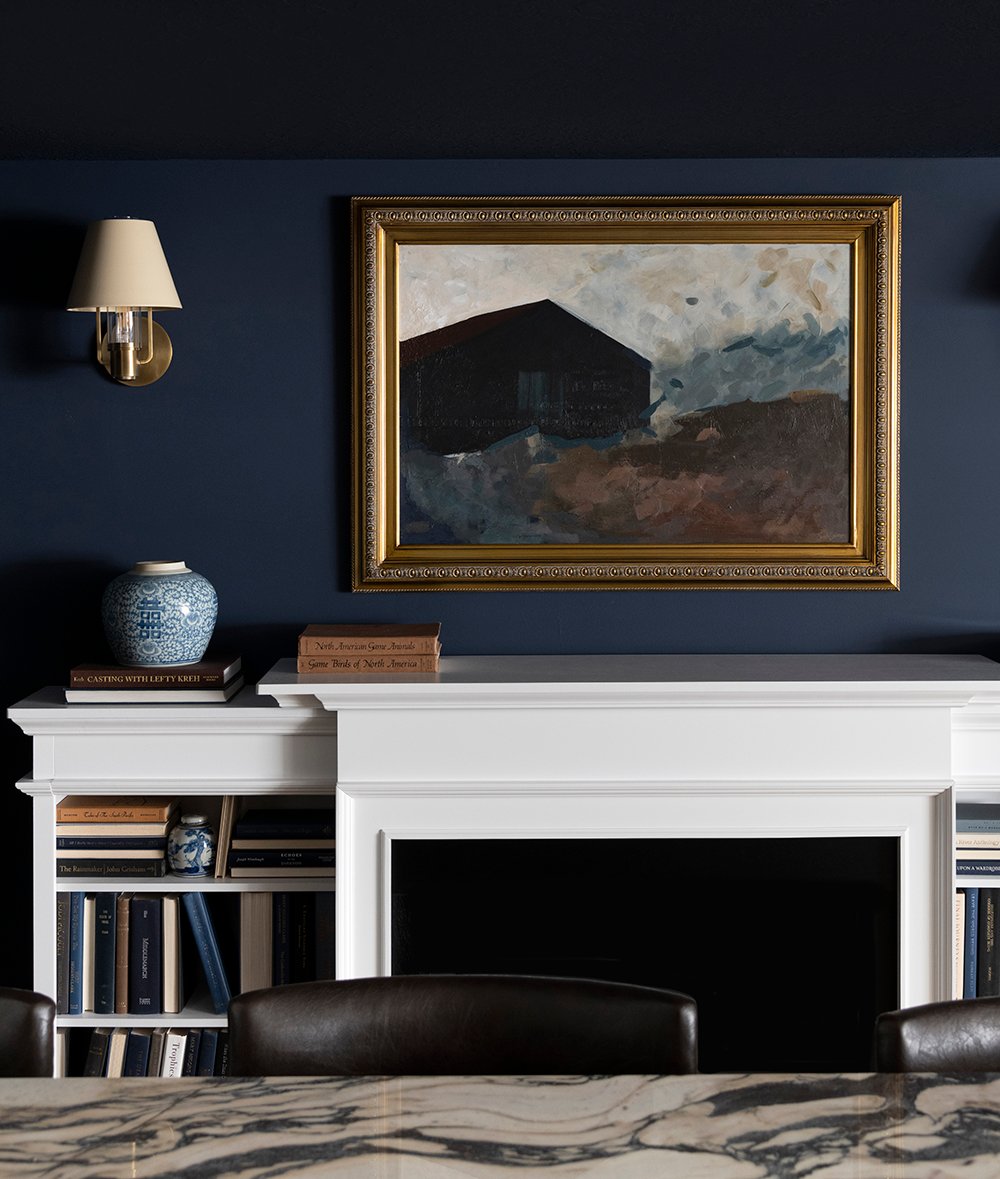
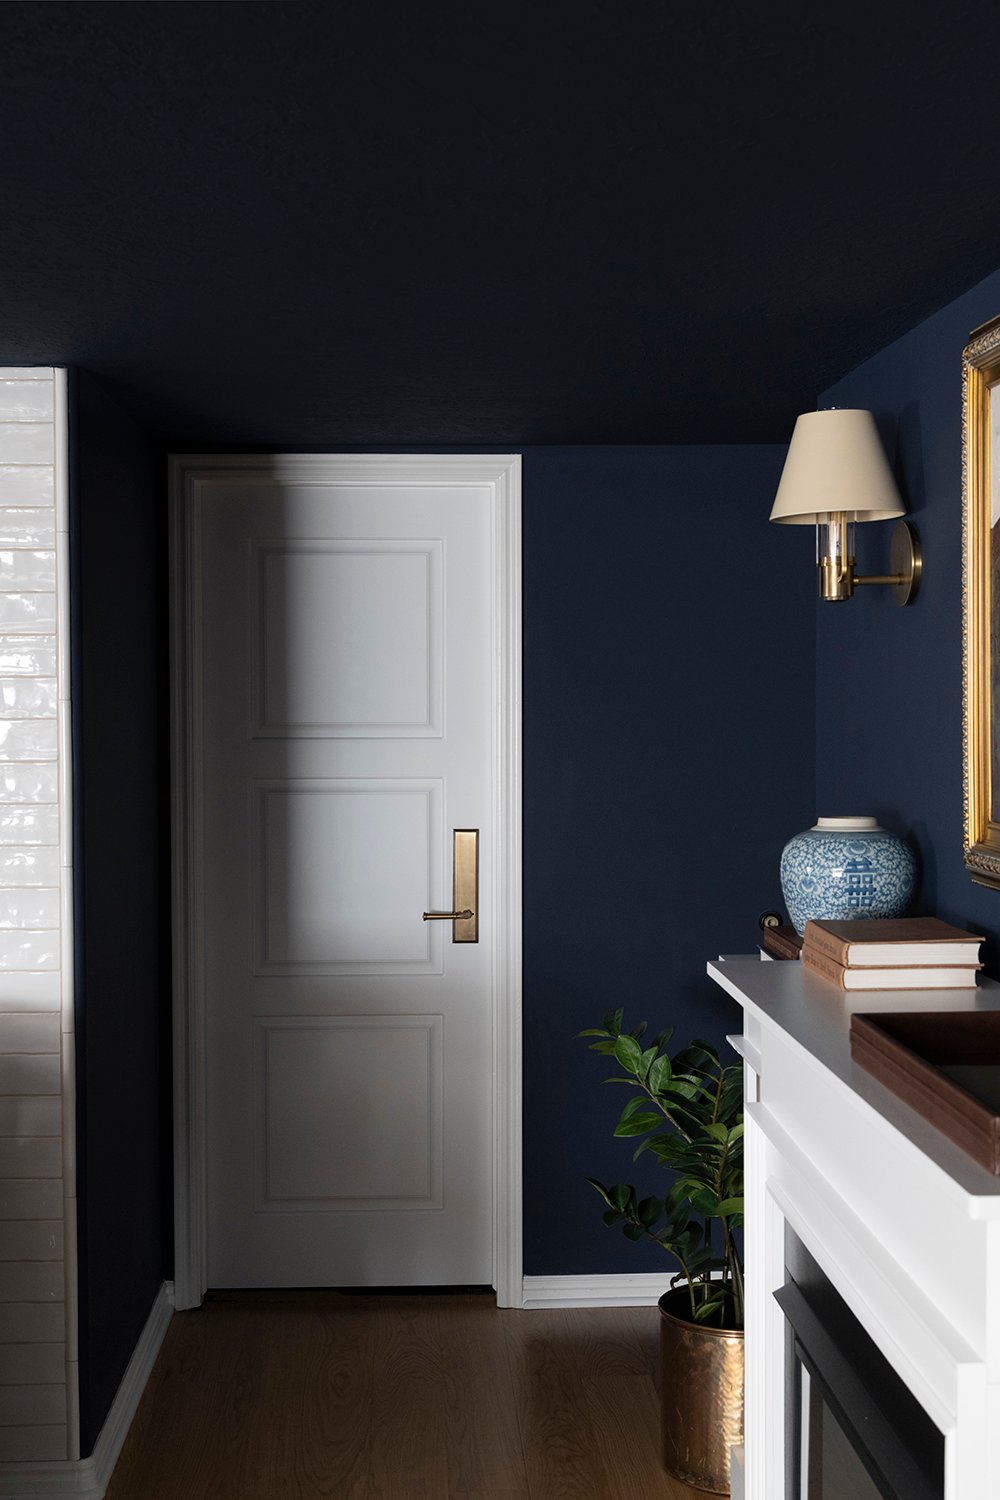
Replacing the interior doors and hardware also made a huge difference throughout the basement. The dated 90’s doors had to go, and I love seeing that beautiful Grandeur hardware sprinkled throughout our home.
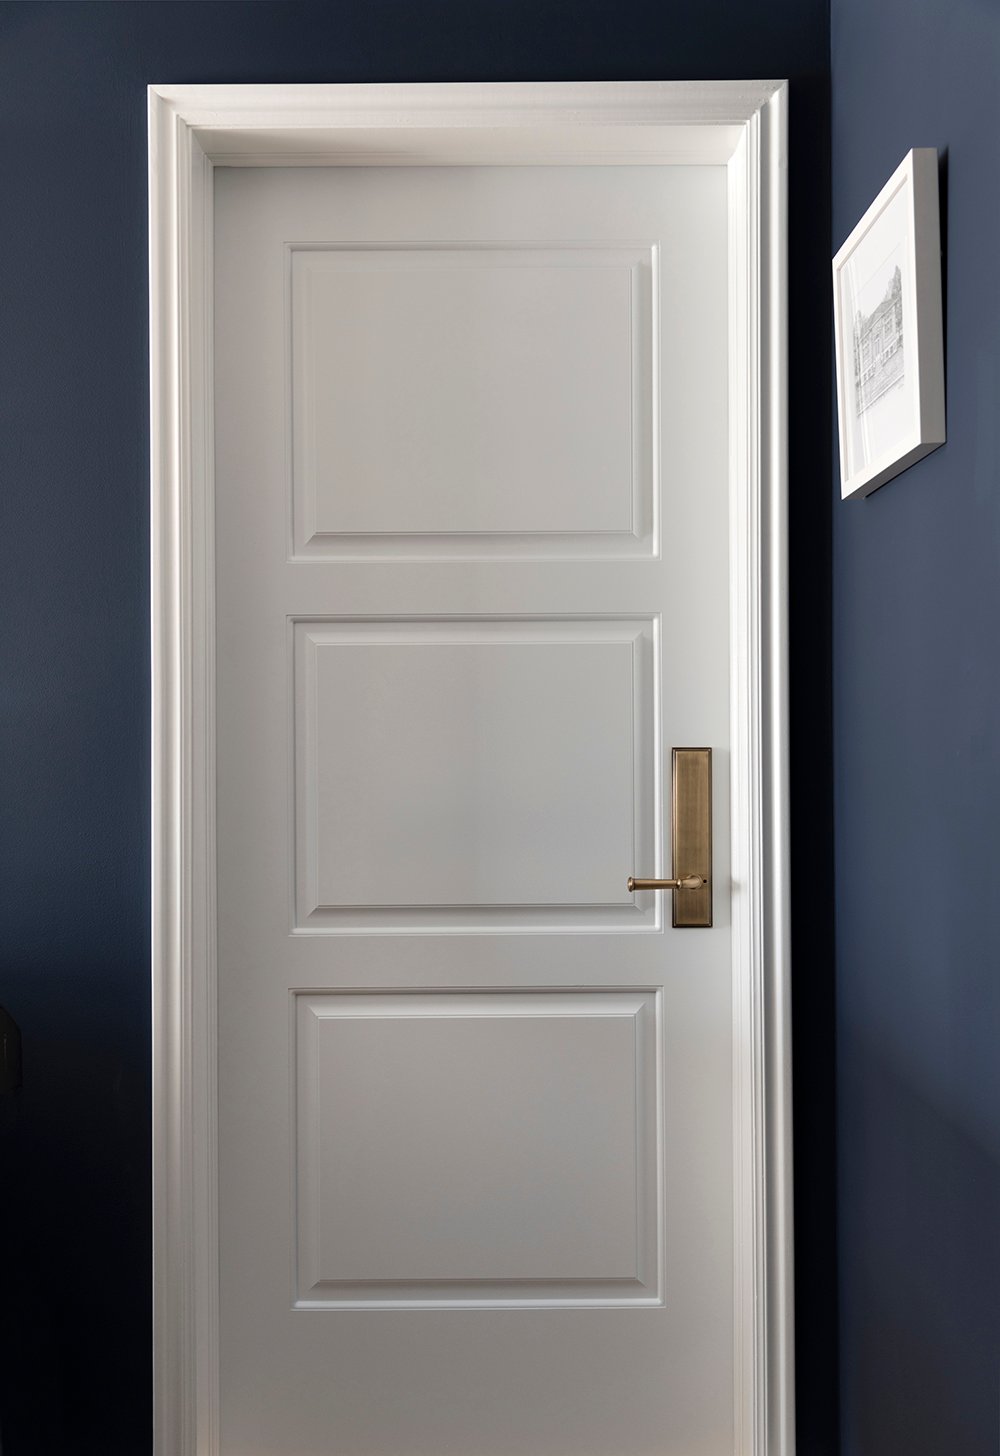
Luckily, we were able to leave the existing crown moulding, casing, and baseboards throughout the space. Having installed new flooring, we did replace the quarter round though. The space suddenly feels so clean, crisp, and new with the updated flooring, millwork, and doors.
Get the Look: Sources
Click directly on each item below to be redirected.

Please let me know if you’re curious about a source I might have missed. I’m always happy to share! I tried to link everything that was applicable. If it’s not linked… it’s most likely vintage.
FAQ
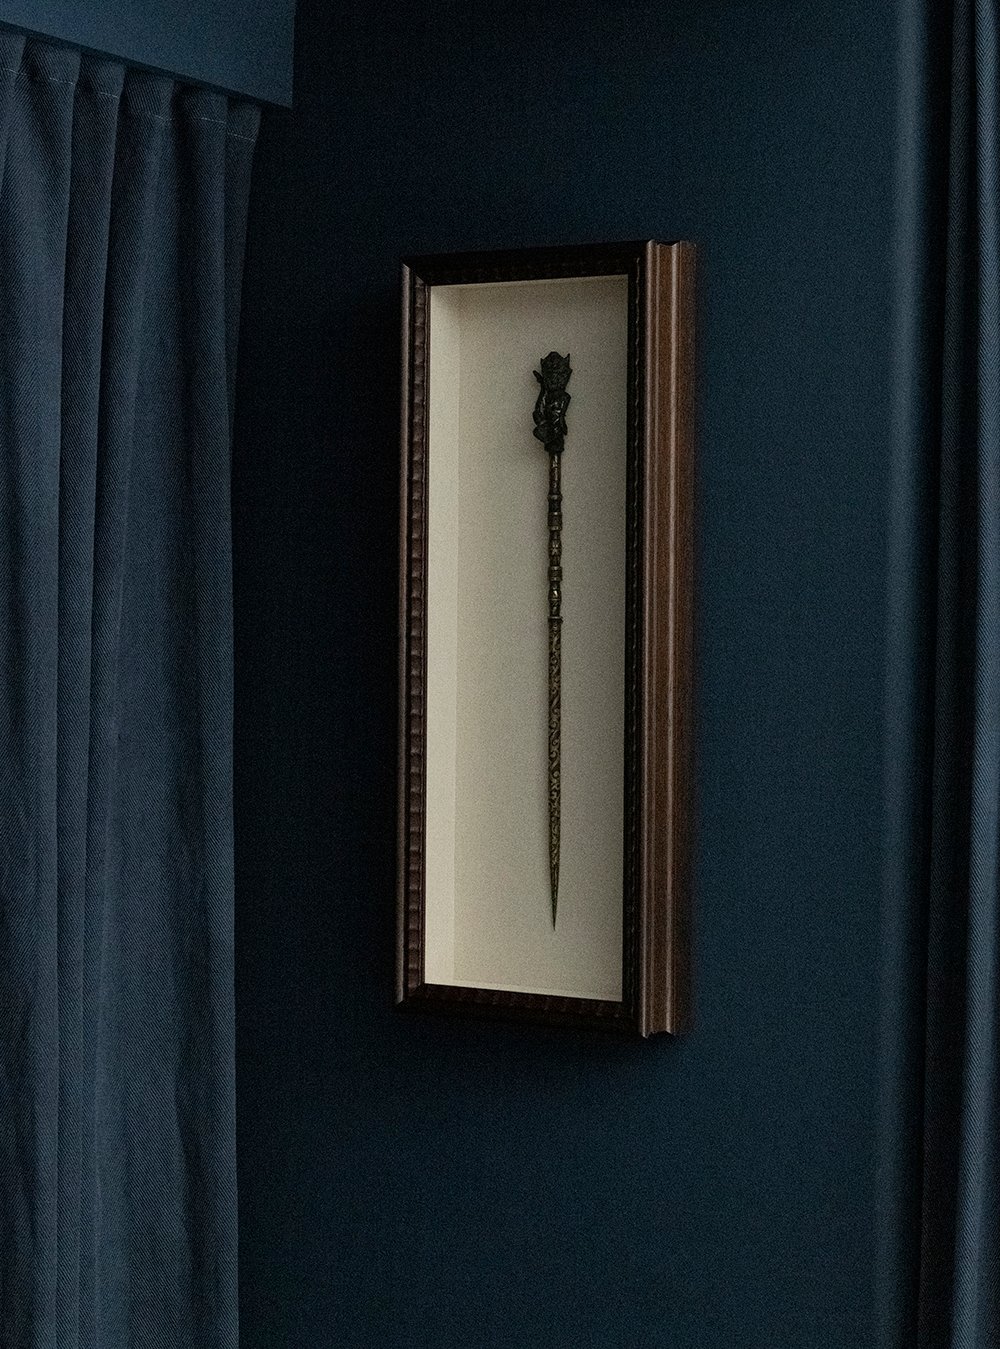
Remember my post on Custom Framing Tips? That’s Emmett’s antique tattoo needle he found at an antique shop in Chiang Mai. Didn’t it turn out so cool?
Of course! It’s a hardwood veneer rated for basements… it’s called All Aboard from Stuga. I have an installation tutorial post coming in the next week or two, along with an FAQ specific to this product.
Honestly, no. Ha! Still exciting though! There is a hallway and closet to the right of the fireplace that we’ll be expanding into a sauna later this year. It’s across from our home gym and once that demo is complete, we’d love to address the lower basement ceiling (currently painted navy). We were thinking of installing planks or board & batten over the lowest portion to conceal the texture and make it look more architecturally updated. We’re also in the process of continuing the flooring installation throughout the entire basement- including the basement bedroom and gym.
Yes! That will also have a dedicated blog post coming soon. You might have also noticed the matching bolster cushions? I thought those were a nice cohesive touch!
Related
Looking for more basement posts or tutorials throughout this renovation I’ve previously shared? I’ll link some favorites for you below…
- Basement Renovation Design Plan
- How to Turn Inexpensive Framed Art Into Custom Artwork
- Keywords to Use When Searching for Large Vintage Rugs
- Where to Find Vintage Ski Prints & Winter Artwork
- Basement Bar Reveal
- How to Dye Curtains
- Initial Media Room Makeover
- Look for Less : Our Basement Media Room
- Basement Media Room Movie Night
- How to Replace an Interior Door
- Basement Bedroom
- Basement Bathroom
I hope you enjoyed the tour! I’m looking forward to hearing your thoughts in the comment section below. Please let me know if you have questions about anything! I’m also happy to cover additional blog posts, if you’d like to dive deeper on any of these topics or projects. Hope you have a great day, friends. Thanks for reading!
Obsessed! Love the first iteration and this one too! Love the ottoman and matching pillows!
Would love to know a rug source !!!
This one was a lucky find from Kasra Rugs: https://www.kasrarugs.com
Thank you so much, Abby! I’m excited to share more on the ottoman and bolsters in a separate post soon!
Good morning! So much to adore about this sumptuous and inviting space! Of course, I’m scouring every image for additional peaks at the glorious new rug. Deep, perfectly grounding palette, plus a powerful punch of pattern… offering compelling counterpoint to the countertop marble’s drama. 10/10. The new sectional, too, deserves high marks. It’s giving lounge-worthy but not disheveled, a fine line for sectionals. I’m still a skosh skeptical about recliners, but Crosby is really selling it. I’ll eagerly await your full review because our current movie-viewing situation needs a serious upgrade. Speaking of improvements, the fireplace wall is pure wizardry! You created welcoming warmth and charm out of thin air. Such vision. (The sauna plan has me 🤯!) Naturally, the overall styling is impeccable- blue and white notes, plush fur throws, expertly-mixed metals, that bananas Alice Lane pouf! I can’t imagine a more cozy cocoon of a basement. Perhaps my favorite aspect of your design sensibility though is always the authenticity. No need to replace the dumpster credenza, move walls, or make other changes just for the sake of change. You also make a strong case for living in a space before finalizing plans. So smart. Beautifully done, Gibsons! As the kids say, no notes. I’ve got cake decorating on my agenda today, so send steady hand vibes, please. (Piping is not my forte.) Cheers to a lovely spring Wednesday!💜
Hi Peggi! Thank you! You made my day. I knew you’d appreciate the vintage rug. That was such a lucky find! I was hoping the sofa would look comfortable (because it is comfy) WITHOUT looking messy. It does take some fluffing, but I don’t mind. Excited to share more about it in a separate post. I’m also thrilled to hear your thoughts on the fireplace wall. That thing has been the best surprise. It works really well. Here’s to hoping we can fit a sauna into the closet, ha. We’ll see how it plays out. I snagged the Alice Lane pouf at their warehouse sale a few weeks ago for 70% off, so that was a happy accident. I also appreciate your commentary on design sensibility- I’m really happy we kept most everything and worked with the existing layout. Great point on living in a space before renovating, too! I hope cake decorating is going fabulously- that sounds like my kind of day! xo
What a beautiful morning for a basement reveal! Good morning Sarah! I didn’t think this space could be topped, but somehow you made sensible changes that took it to the next level. The flooring swap was a practical, beautiful investment that just elevates the entire vibe. The oversized vintage rug looks incredible and anchors the room beautifully. Lush, cozy, and charming. Your layout swap was genius, and the new sectional fits the space so much better- I love that you’re now able to comfortably seat more guests, without sacrificing aesthetically- and you know I’m incredibly excited for your review of this one! The ottoman and matching pillows are the icing on the cake for me. The rich velvet color with contrast trim is stunning, and is an entire vibe on its own. I’m in awe of your ability to effortlessly bring a color upwards with furniture and decor- it looks collected, versus being matchy. Adding the fireplace to what would be blank space (in anyone else’s home), was not only smart, but a gorgeous and cozy addition. Your diy art looks incredible above it, and the sconces are both simple and unique. I’m noticing that you brought pops of silver into the living space that tie in well with the hardware you chose for the kitchen- such a timeless, elegant detail. Overall both spaces compliment each other so well, and flow cohesively. I can’t decide which view is my favorite: the one looking at the basement door with the fireplace in view on the right, or the one where the pony wall separating the living space and kitchen is in view. I couldn’t tell you what it is about those two views specifically, but damn you’re good Sarah Gibson! All in all, stunning!! I hope these new renovations have brought more useful enjoyment to your space. Have a happy hump day! Xoxo
Hi Lauren! Thank you so much! The vintage rug is definitely one of my favorite finds. Despite the weird layout, I think we were able to make it work. I’m feeling good about the current floor plan! I’ve got plans to work on the sofa review in a week or two, having lived with it for a few months now. You know I love mixing metals, and I’m excited you spied the additional of polished nickel and silver elements. I think the doors made a huge difference, so I love hearing that you appreciate those two specific views- thank you, thank you! Day made. We can’t wait to enjoy this space- send me all your good TV and movie recs, please! Have a great day! xox
Good Morning!
Wow Sarah! That sectional looks amazing and it reclines 🥳 my gosh it’s pretty and super functional 😍 Fantastic! I love the pic of Crosby totally into his comfort zone, the sofa is definitely pup approved 😝 The flooring is gorgeous and the vintage rug you found is perfection. The fireplace is lovely and definitely adds coziness especially frosty nights in winter will be wonderful. I appreciate our electric fireplace as it provides the perfect amount of heat without getting too hot. I loved our gas fireplace in our last house but we couldn’t leave it on too long as it heated the room quickly and our upstairs got cold as a result. Electric fireplaces have definitely come a long way and the one you chose is beautiful. And of course styled to perfection. The art, sconces, decor and books really create a gorgeous stage for the unit and complement it so well. I’m glad you kept the same wall color and that credenza is fabulous so why replace what works.
The basement is such a cozy vibe providing function, comfort and it’s stunning. So glad to hear it’s been family tested and it worked out wonderfully! Cheers to many more family movie nights and fun times ahead 🥂 I’m still in awe of the kitchen/ bar, and you’re adding a sauna too! That’s awesome, I hear infrared saunas are so good for your health, that will definitely add another major element to unwind after a busy day. Yay! Well done and enjoy. Woohoo! Happiest of Wednesdays 😎
Thank you, Colleen! The sectional was definitely an amazing find- we’ve been enjoying it. You know our dogs rule the house, haha! This is our first experience having an electric fireplace and I have to say- I’m pleasantly surprised. It puts off quite a bit of heat. They certainly have come a long way, indeed! I’m impressed. I’m excited for more family movie nights ahead! That’s exactly why we want to install a sauna… the health benefits. With everything going on with me, I’ve wanted one for awhile. Fingers crossed we can make it fit! Hope you’re having a wonderful week! xo
What a wonderful, elegant and luxe space!
Thank you so much, Mizé!
When I saw that you posted the reveal I had to jump on & see it. So cozy and inviting! You have made it so beautiful and enjoyable. It is understandable that you and Emmett would spend evenings there.
Love the vintage rug. Great colors and goes so well with the room. I was surprised at where your fireplace was located. I thought you replaced the credenza. Very clever use of space and location.
The antique tattoo needle is an awesome travel find. Your large basket worked out great for blankets. You have curated yours & Emmett’s interests together so well. I wish I had that talent.
I am very interested in your new sofa. My husband loves a recliner chair but I cannot stand them. Luckily I found a large (extra wide) chair with ottoman that he lives in. Now that I see this couch and the possibilities, I can see it in our living room for tv watching.
A spa/sauna room will be amazing! The health benefits will be too. Wish we had basements in Texas. Enjoyed the reveal and seeing all the hard work you both have done. I am off to a hair appointment. Have a great rest of your week.
Thank you, Danna! You’re so sweet. It was definitely a tricky floor plan, but I’m really happy with where we landed… and having a heat source has been so nice! The new sofa has been amazing. I’ll definitely share a blog post review for it, and if I ever see it go on sale- I’ll be sure to share. They usually email me. That’s exactly why we want a sauna- health benefits, and living in snowy Utah, it sounds like the best way to warm up after a ski day. We’re still sketching what it could look like and how it fits. Fingers crossed! Hope you’re having a great spring season! xo
It’s so beautiful! Words I never thought I’d say about a basement – ha! Truly, tho, you have such a terrific design eye. It’s a welcoming, cozy space with major function to boot. I imagine it’s a tough space to leave, which is what we’re all trying to achieve in designing a space, I think. Thank you for sharing!
Thanks so much, Danielle! Ha, I love to hear that, and appreciate it. You made my day. Hope you’re having a good week!
What a beautiful reveal! I love how you made the layout work and kept a lot of the first wave of updates. I am glad to know there is such a beautiful reclining sofa option out there – filing that away for my own future media room. Love the ottoman, bolster pillows, rug, navy color, inside of the black lampshade…the list goes on! What a great space to hang out.
Thanks, Brittany! Emmett was not budging on the recliner request, oof. I’m glad we were able to find a good compromise, ha! Thanks again for reading and for your sweet comment! Hope you’re having a good week.
It’s beautiful and so cozy! I love it and I’m inspired to give our basement an overhaul…maybe once I finish painting our kitchen cabinets. HA! You two are so productive. I’m proud of you and happy for you to have this space to enjoy.
Thanks, Christiane! Can’t wait for you to see it in person soon! Have you been following along with Dan’s basement renovation of our old Ohio house? It has been making me SO happy! They’re doing a fantastic job. Love to see that house being loved. Hope you’re having a great week!
How good is this reveal!?! And amazing that you could keep the same layout with that awesome couch. We have a dark tv den room and it’s the most cozy hangout room. I know the painting wasn’t this go-around of work, but you’ve got to mention the paint color or noobs like me will just ask: what color are the walls?
Thank you so much, Julie! I’m really glad we were able to keep the existing layout. I love a dark cozy TV hangout! The wall color is Naval by Sherwin-Williams… such a pretty navy! Have a great weekend!
This space turned out beautifully! Always love seeing how you can update a room without full demo/renovation.
I love this design and am so impressed with the before and after. I may have missed it in the article however what color walls did you go with?
Thank you so much, Kyrie! The walls are Naval by Sherwin-Williams
What color paint did you use?
It’s Naval by Sherwin-Williams!