Our Kitchen Reveal
 Thanks for being here for my “Posts from the Past” week! All five posts I’ll be sharing this week are ones I’m really proud of… from room reveals to DIY projects, I hope you still love these old projects as much as I do. It has been fun taking a trip down memory lane. Some of you were here for these posts, and some may be new to you. First up- our previous kitchen reveal, which I initially posted in June 2018. Enjoy, and have a great week!
I can’t even begin to tell you how excited I am to FINALLY reveal the kitchen! We started this project back in December and it has been a long time coming. We literally just finished the final details last week, so that goes to show just how long renovations actually take if you’re tackling it yourself. Emmett and I both worked on the space after business hours and it has really been a labor of love. Click through for a ton of photos! I have SO much to share and I can’t wait to chat about our latest finished project with you…
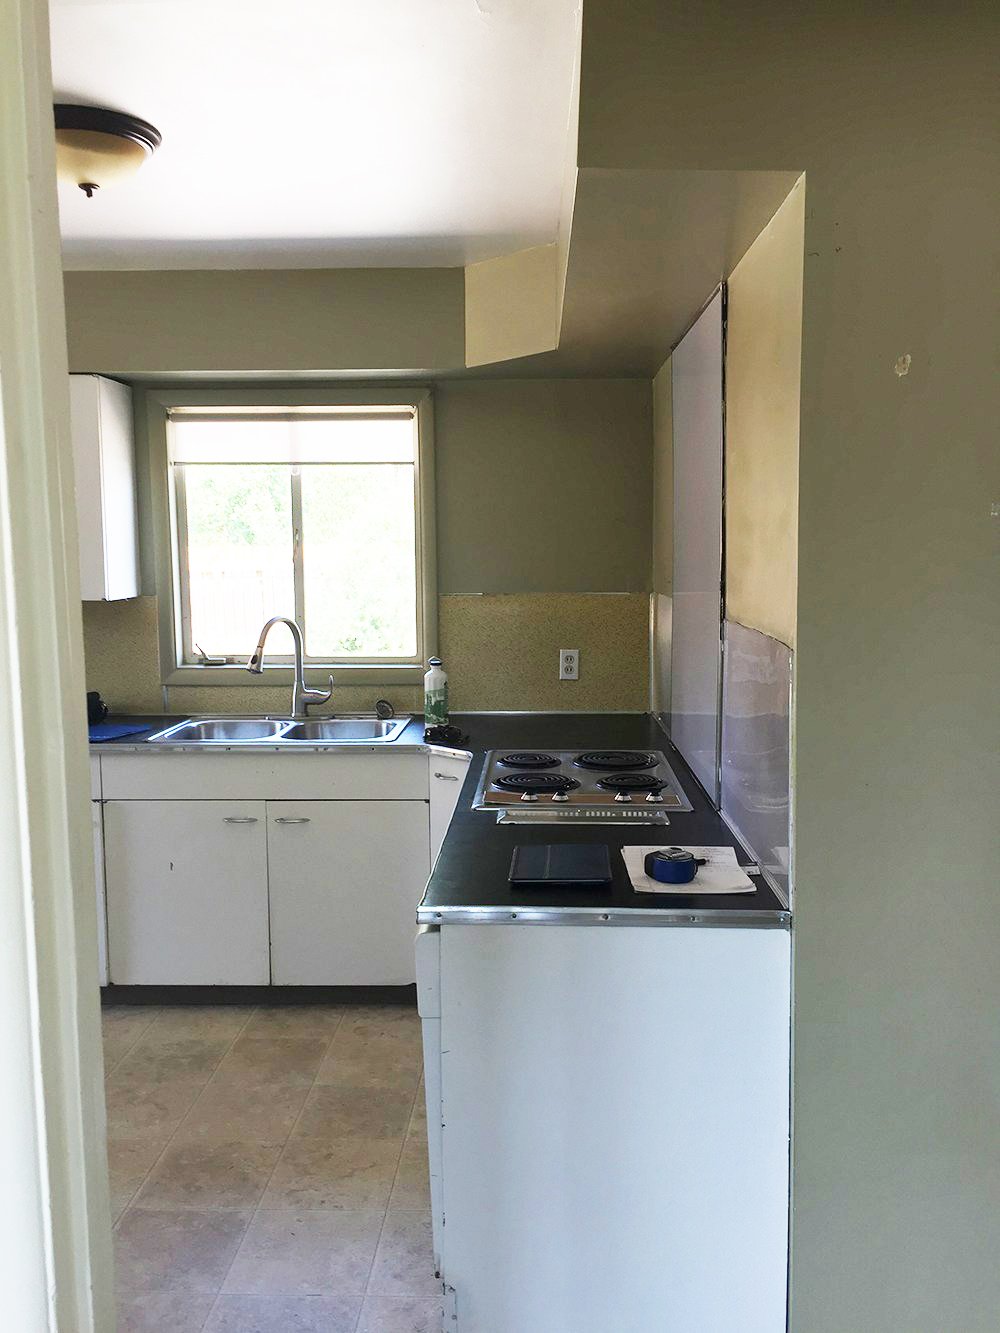
Let’s start with a before image, shall we? Just to remind you how this space used to look before we ripped it down to the studs and started over… yucky green paint, original metal cabinetry that was rusting, an ugly “cosmetic” bulkhead, duct taped countertops, linoleum flooring with rotten subfloor underneath, the list goes on and on. You can check out all of the before images in this post.
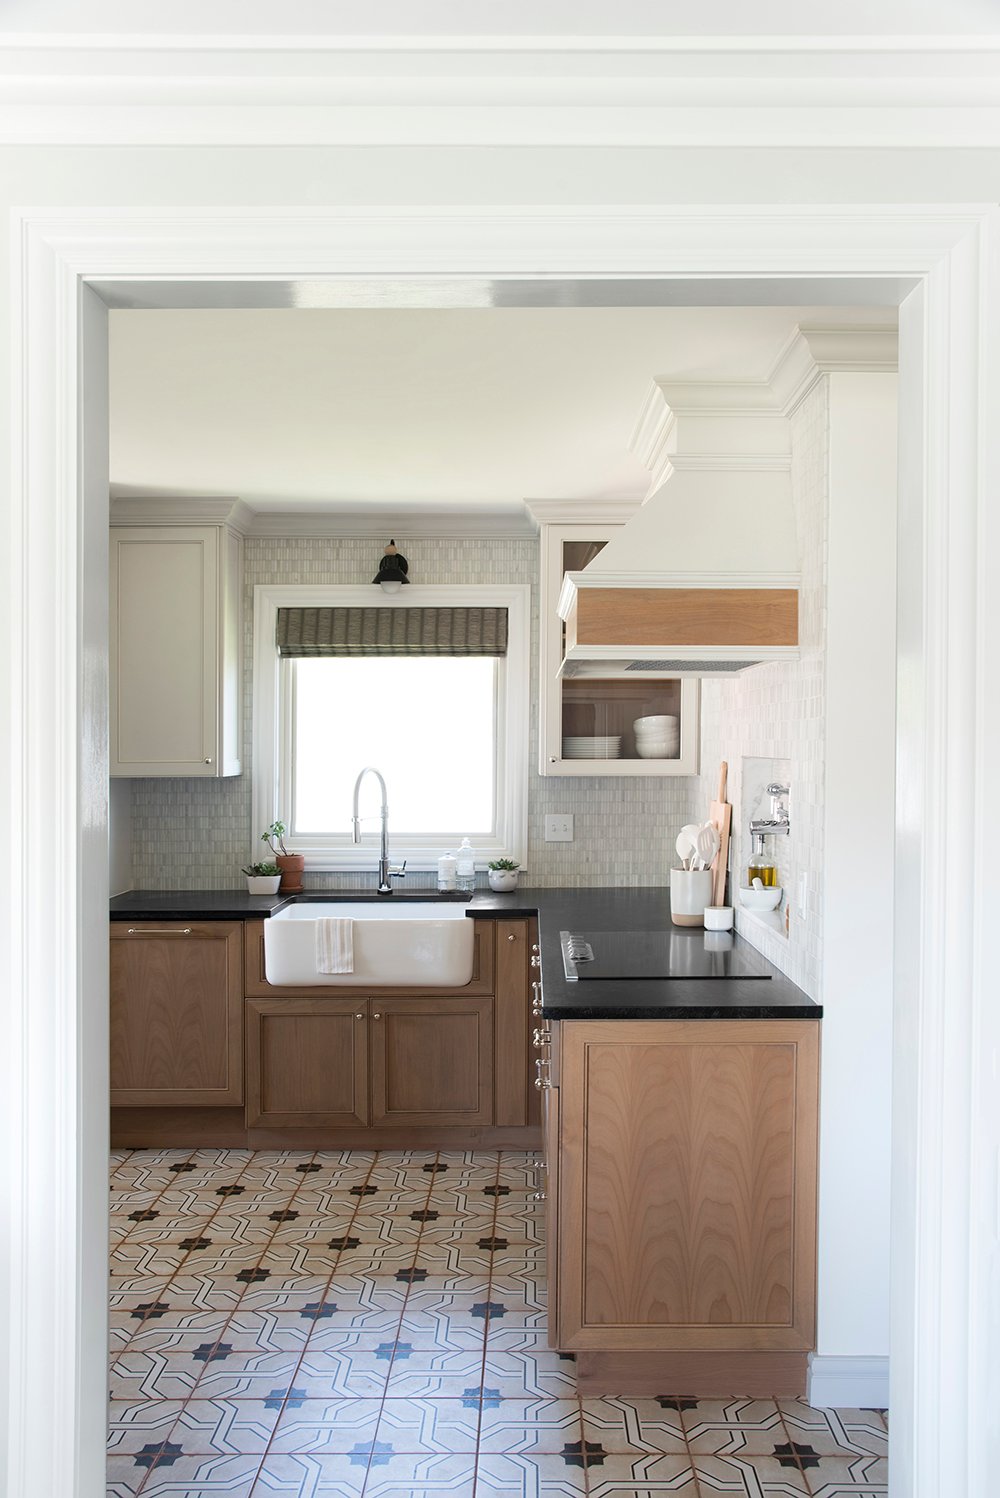 Here’s what it looks like today! A world of difference, right? This view is looking into the space from our living room and it doesn’t even look like the same kitchen. I’m also convinced that photos don’t do it justice.
Our previous kitchen looked like this. While it would’ve been easy to opt for white shaker style cabinetry and hand glazed subway tile once again (BTW: I still think that’s a classic look even though it’s “trendy” right now), I’m thrilled that our current kitchen feels original and is representative of our style and personalities. Emmett and I really poured our heart and soul into this space and I hope you enjoy seeing it finished as much as we do. We’ve also pinched our pennies and saved for this project since moving in, so this is pretty special moment to see it totally finished.
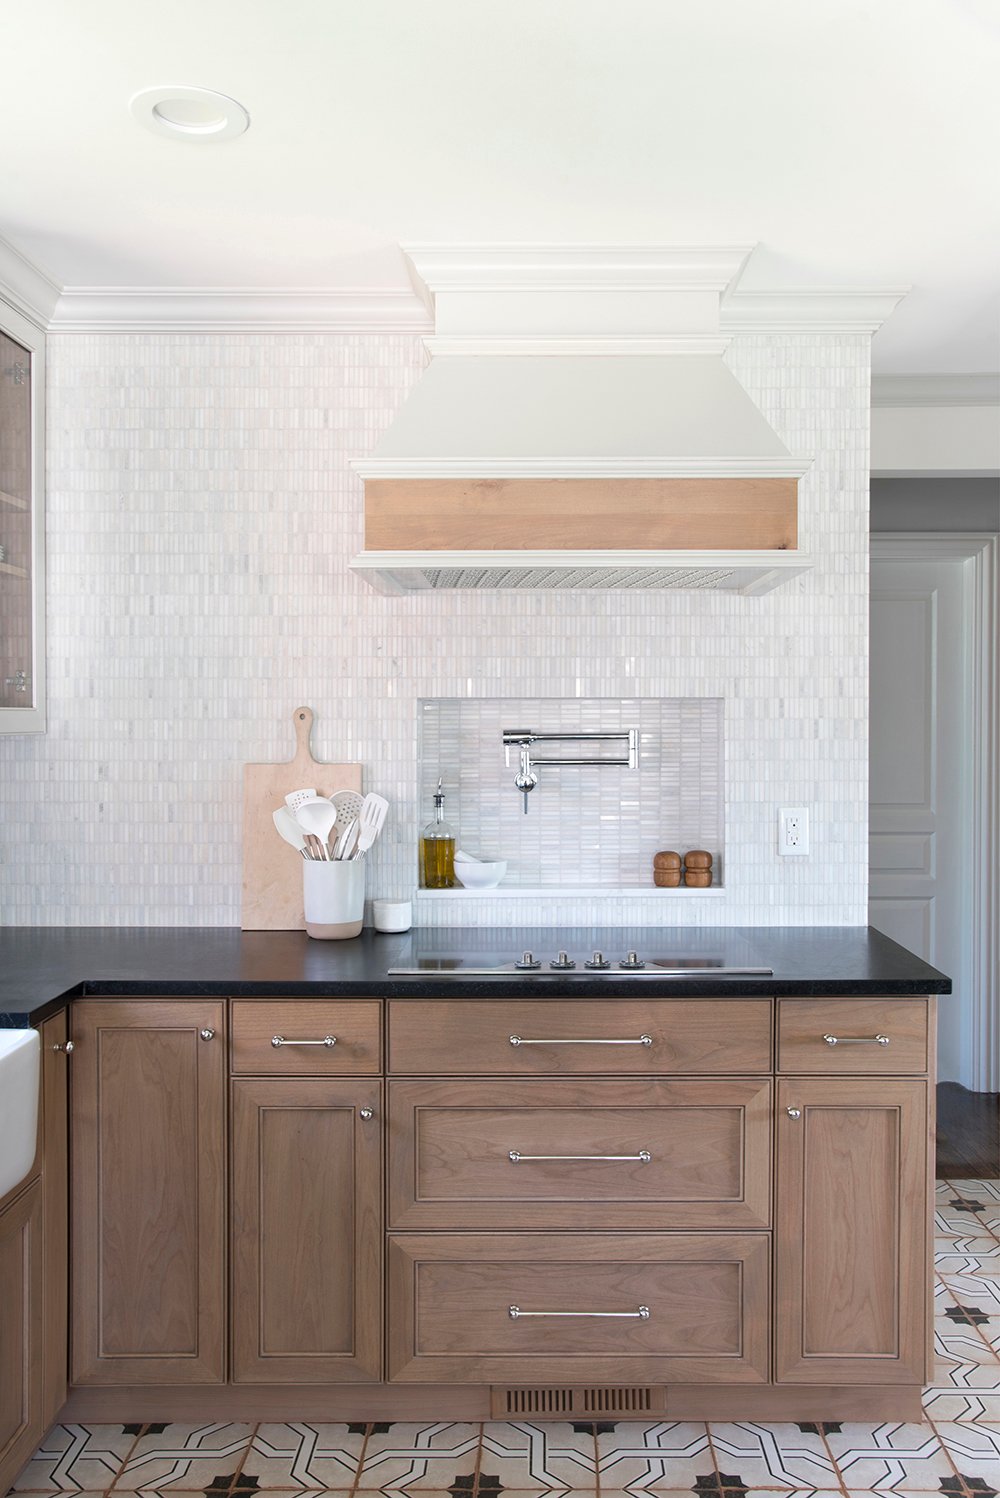
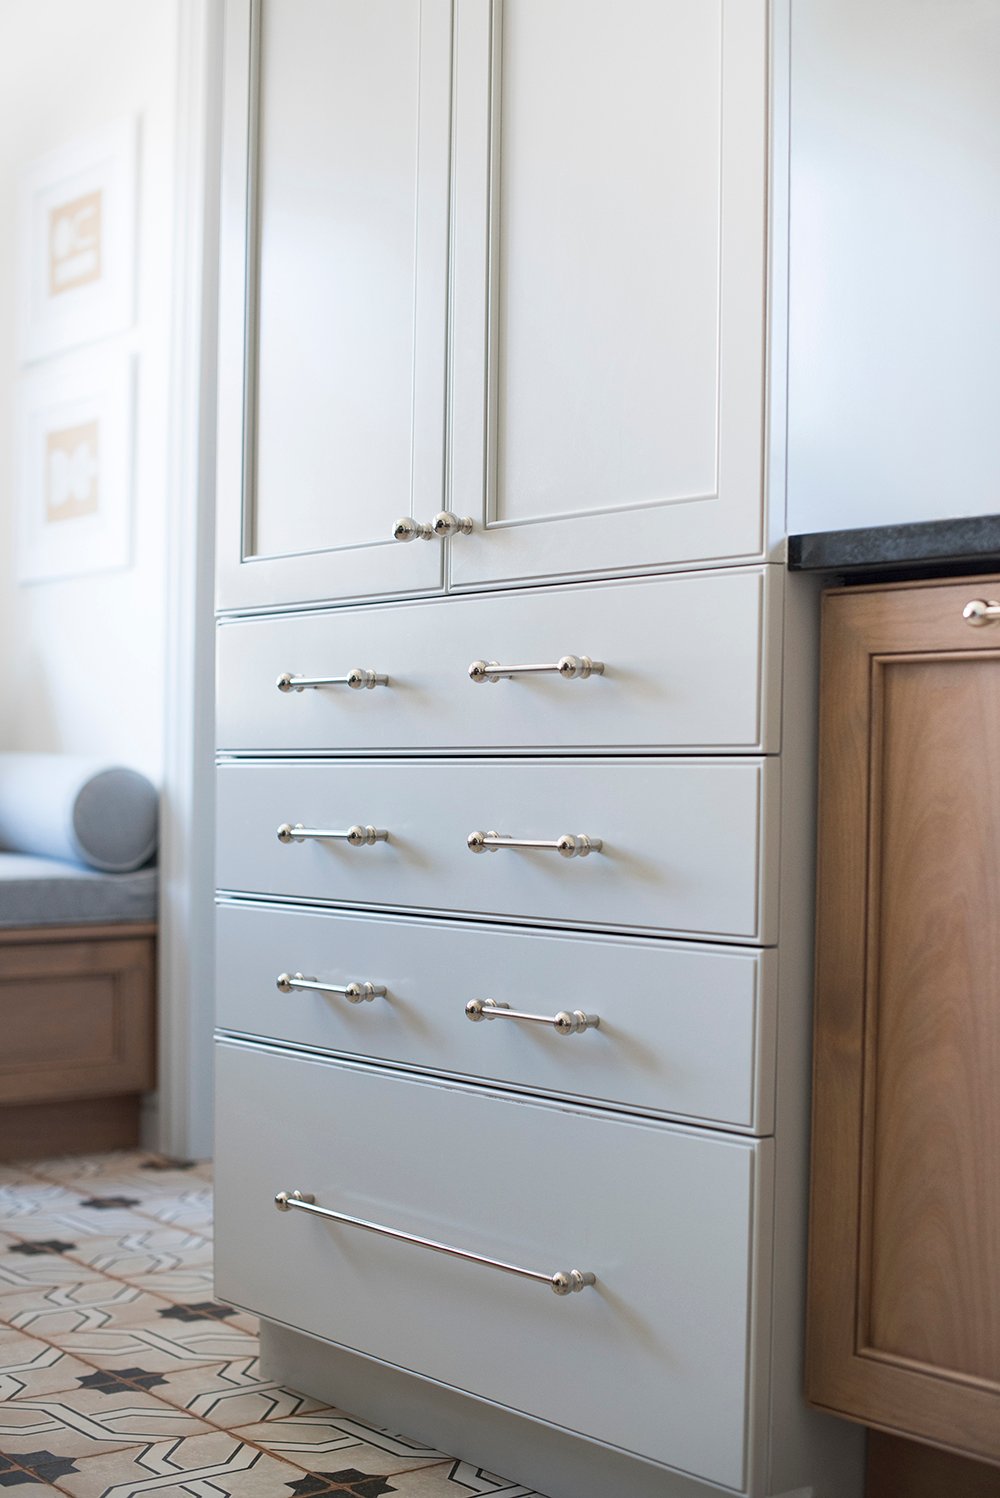
 First, let’s chat about the cabinetry because I’m very proud of it! I sketched my vision for the cabinetry and had it custom made at Emmett’s work (he does accounting for a custom cabinetry / millwork shop). We went through multiple samples, stain colors, Sherwin-Williams paint colors, and I tweaked it until it was absolutely perfect. I landed on a custom color somewhere between Sherwin-Williams First Star SW 7646 and Big Chill SW 7648 for the perfect color on the upper cabinets. Even the toe kick vent covers are custom stained to blend seamlessly with the design. I’m a details person, so I try to think about every little thing- even the ugly parts, like exhaust panels.
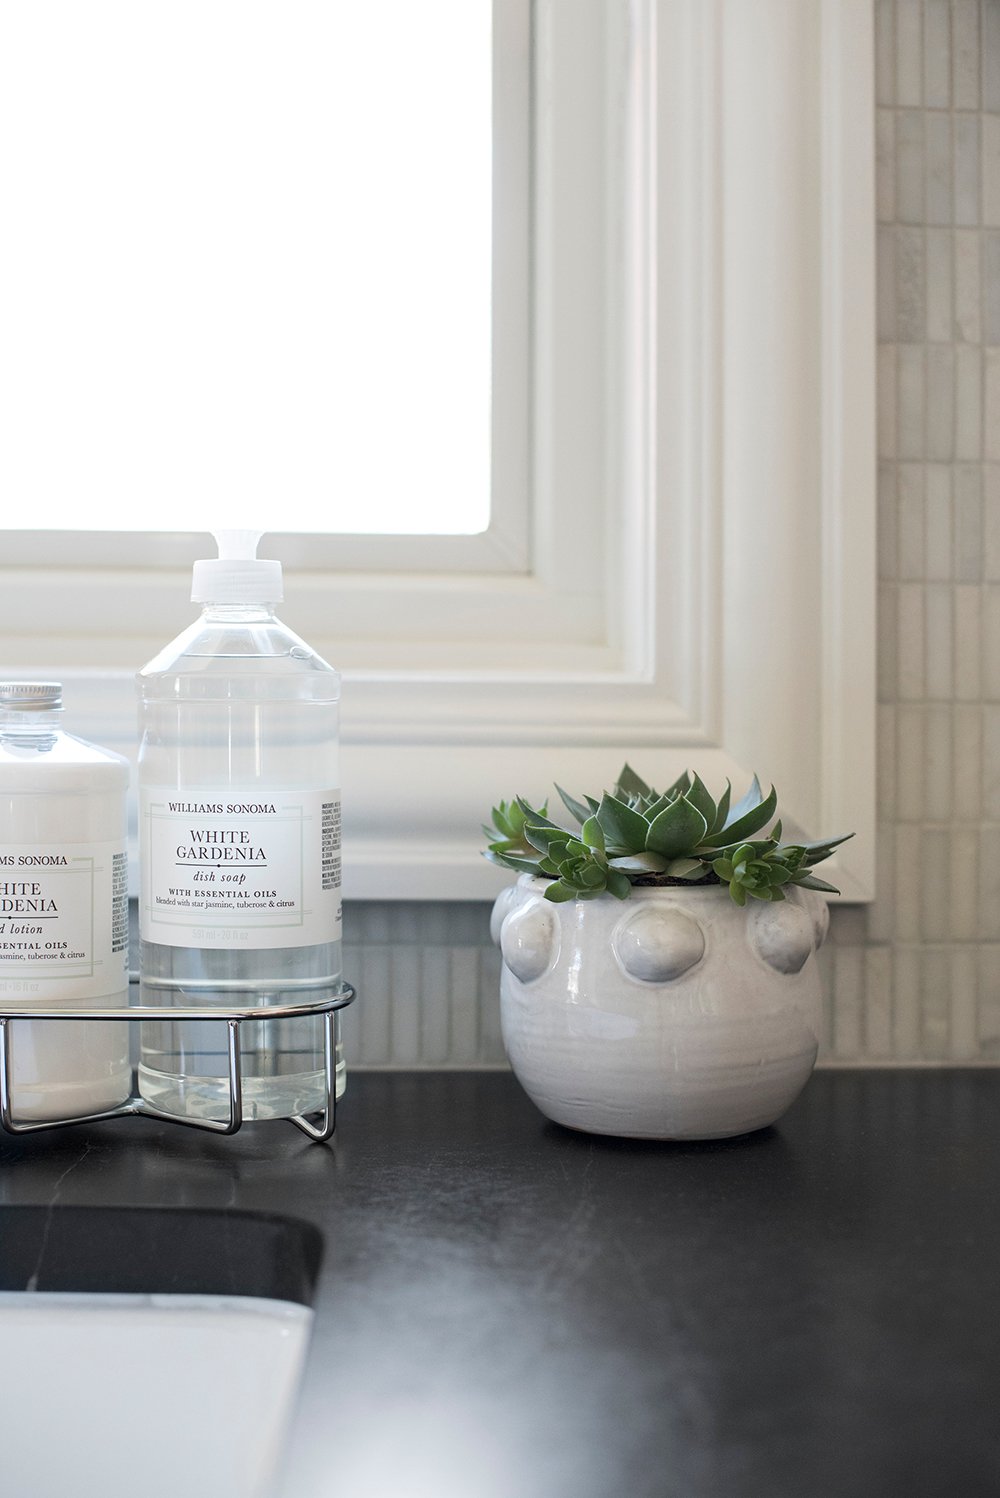
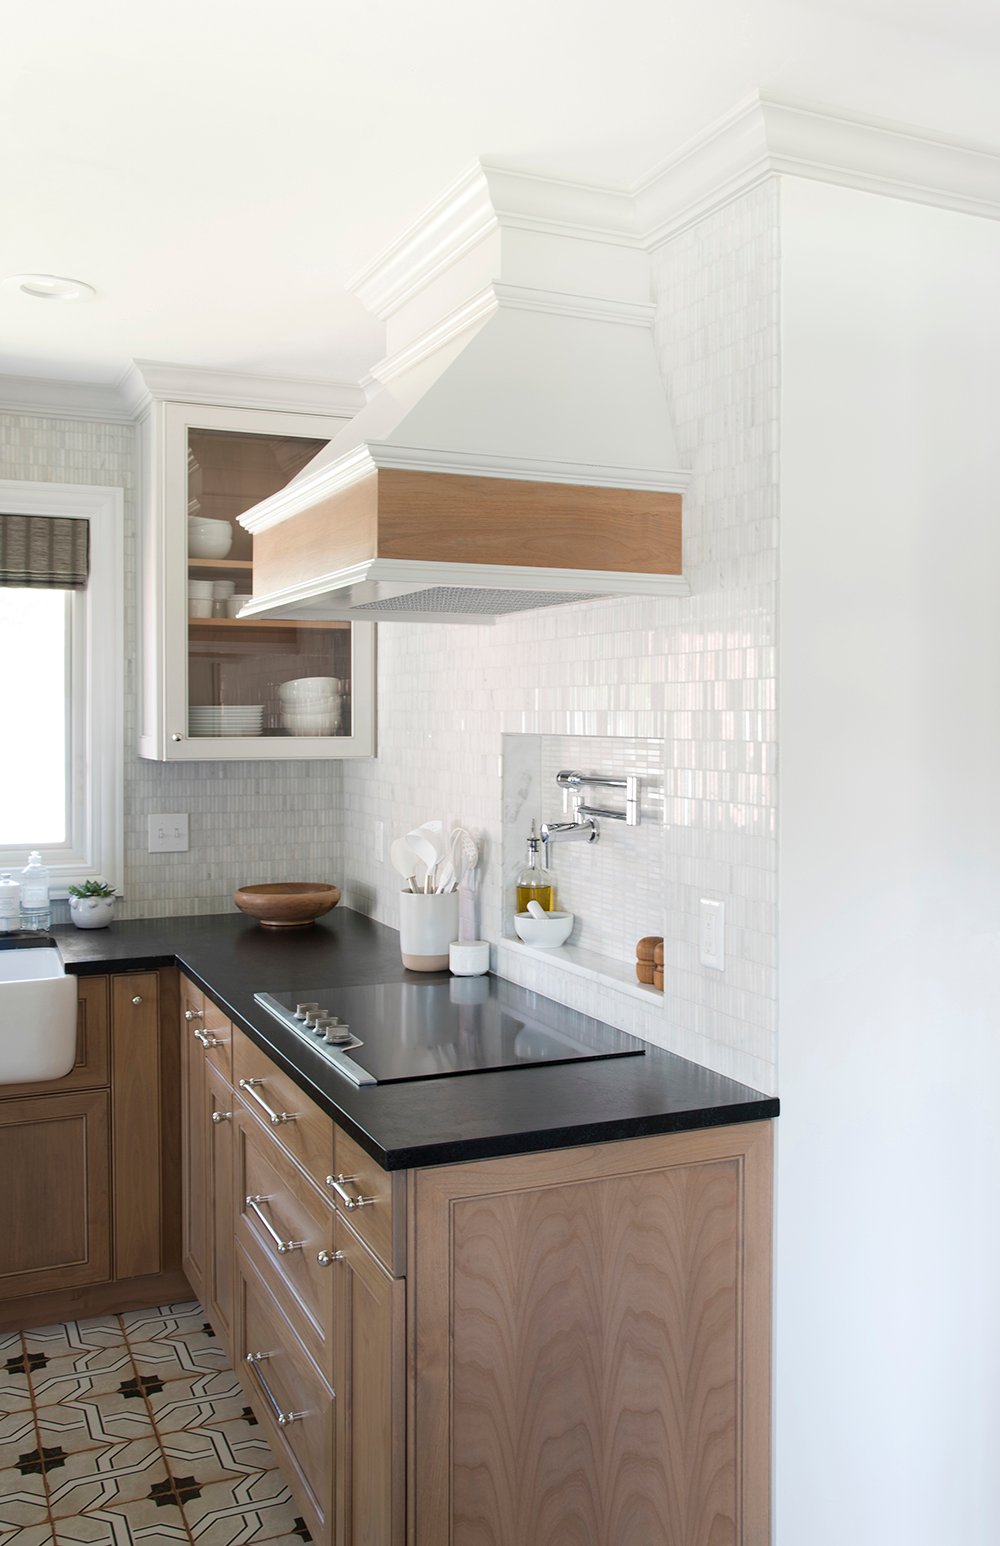 As always, I like to take the backsplash tile all the way to the ceiling, if possible. I saved on the floor tile and splurged on the backsplash. I’m happy to report I think the decision paid off because that marble is absolutely gorgeous! It’s difficult to capture just how beautiful it is in photographs, but take my word for it…. it’s textural and sophisticated all at the same time.
I pulled out my paint deck and color matched the warmer tones in the backsplash to select a wall color. I opted for Sherwin-Williams Alabaster 7008. It’s soft, creamy, and inviting, while complimenting the cool gray upper cabinetry color to perfection. I also feel like it ties the wall tile and floor tile together nicely.
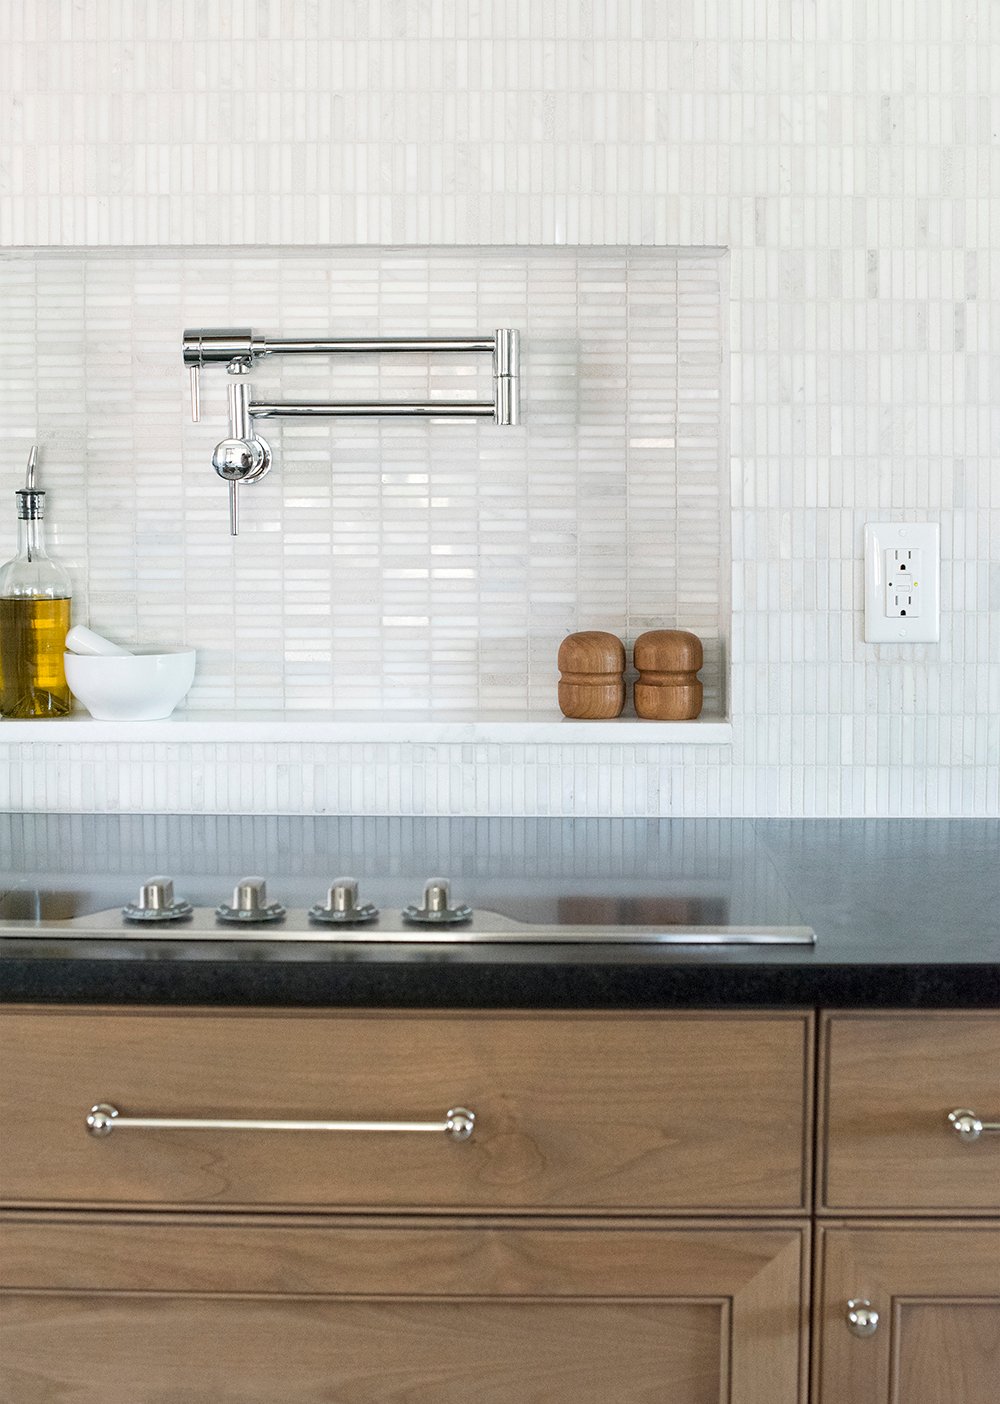
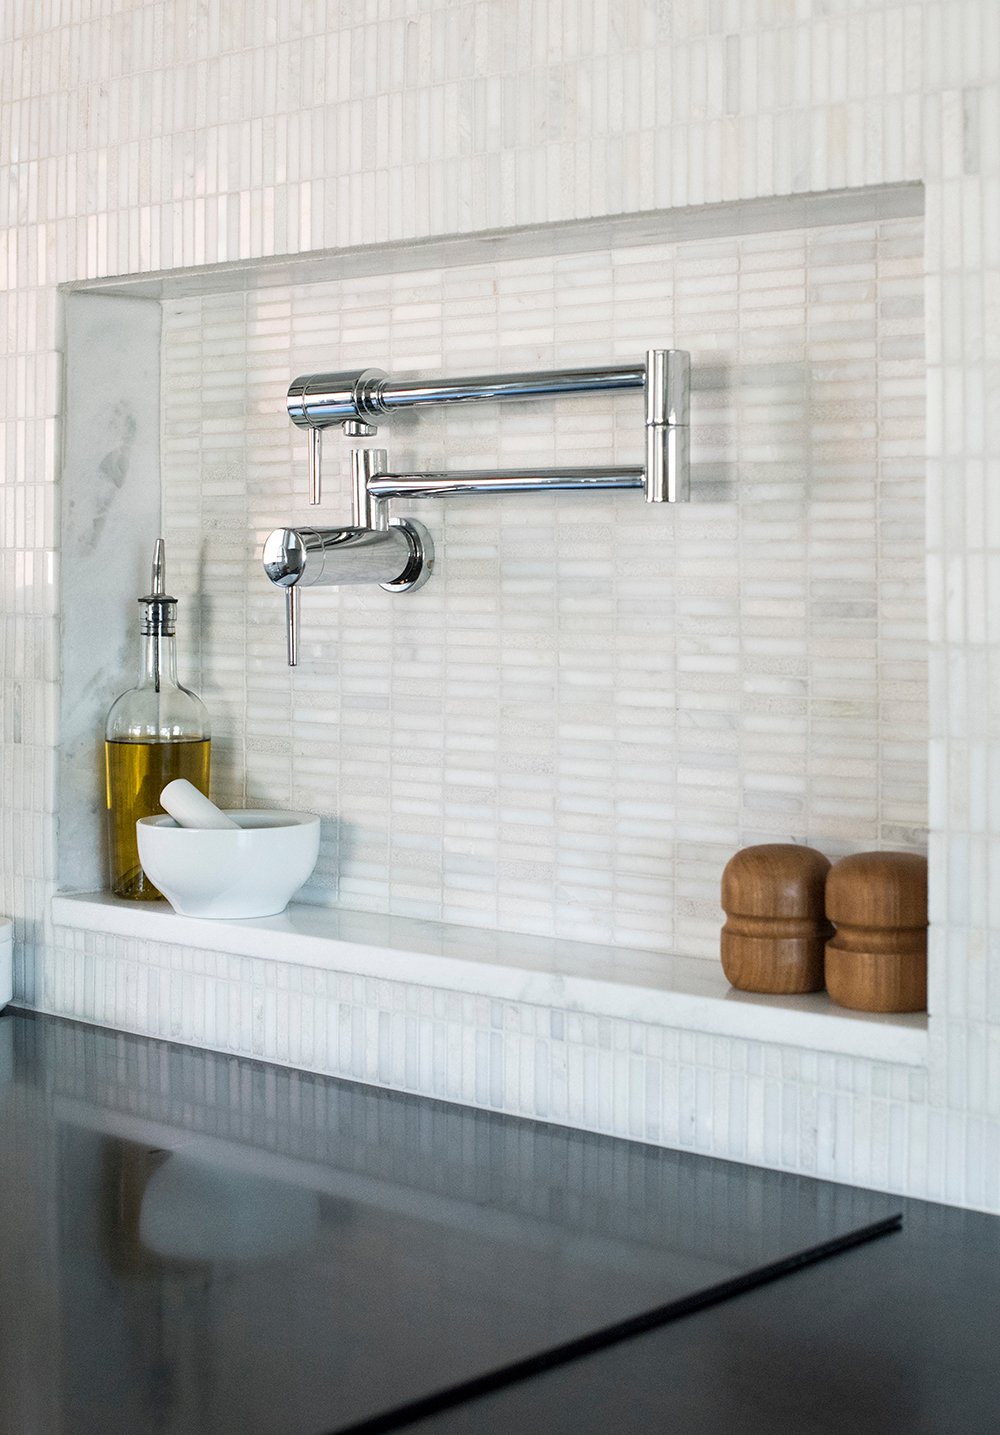 I designed a recessed niche to fit perfectly under the range hood, behind the cooktop. This is convenient for salt, pepper, oils, and other cooking items. It gives us a place to sit things of that nature without taking up precious counter space. I had Emmett trim out the sides of the niche with marble slab remnants and the finished look is absolutely stunning! It turned out even better than I had hoped, and I wondered why kitchen niches aren’t a common thing? I think about the convenience of our shower niche and believe it is equally as functional in a cooking environment.
 Speaking of cooking, we opted for an induction cooktop this time around. I really wanted gas, but Emmett talked me into this option and I’m SO happy he did. It’s easy to clean, boils water in an instant, cooks evenly, and is much safer. Do any of you use induction for cooking? I’m pleasantly surprised and am wondering how I ever survived without it? I’d make this decision over and over again- solid choice!
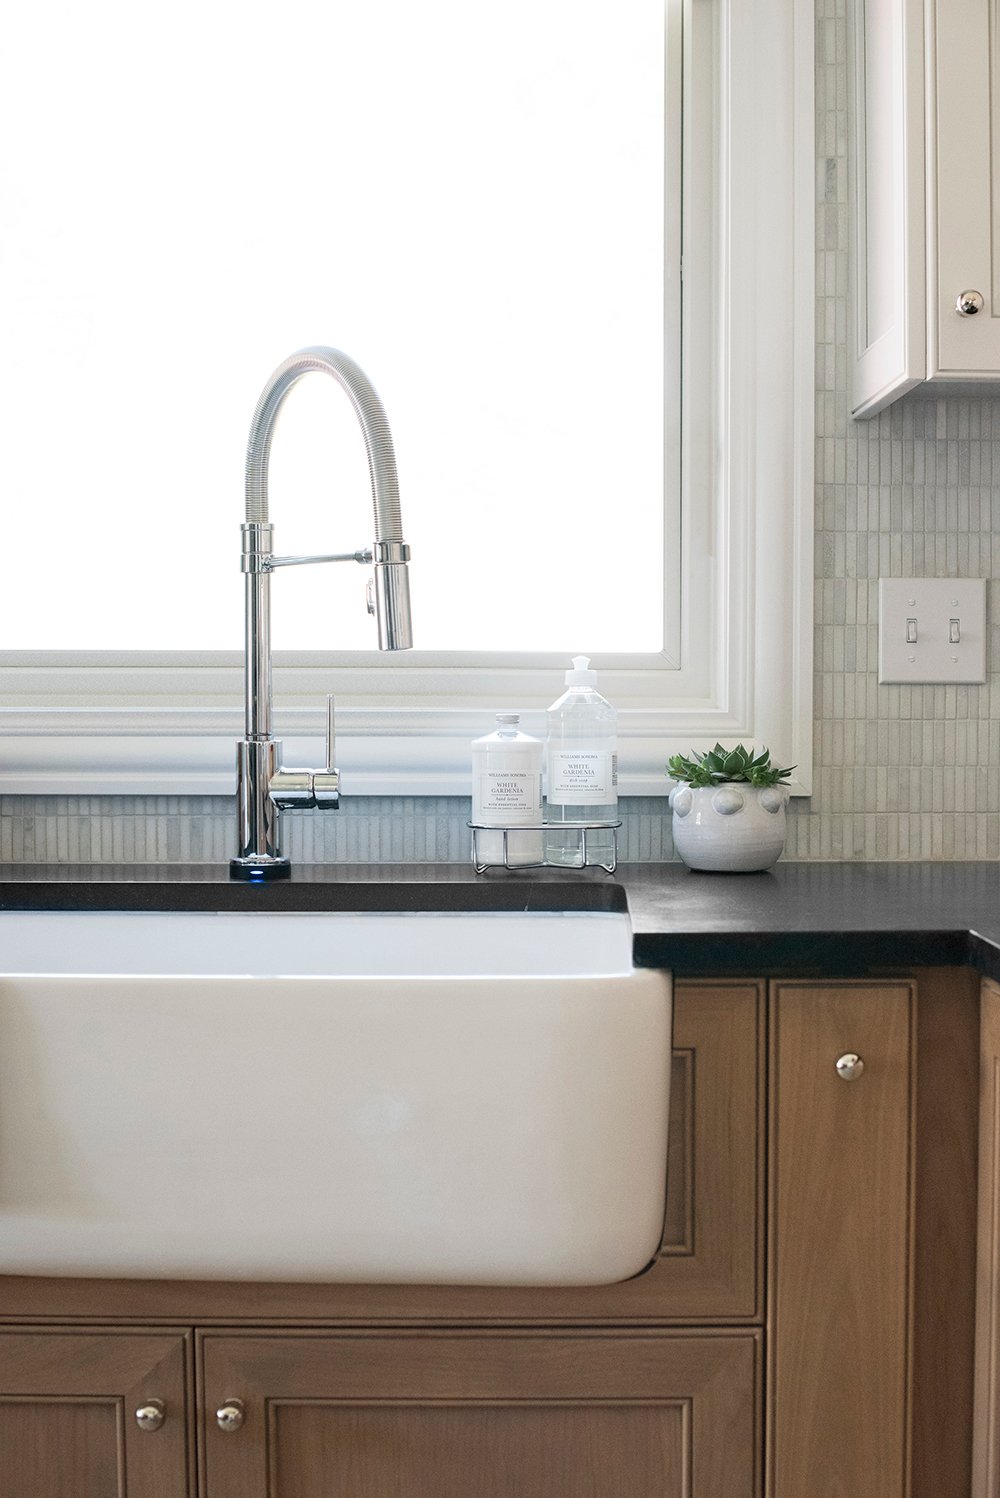
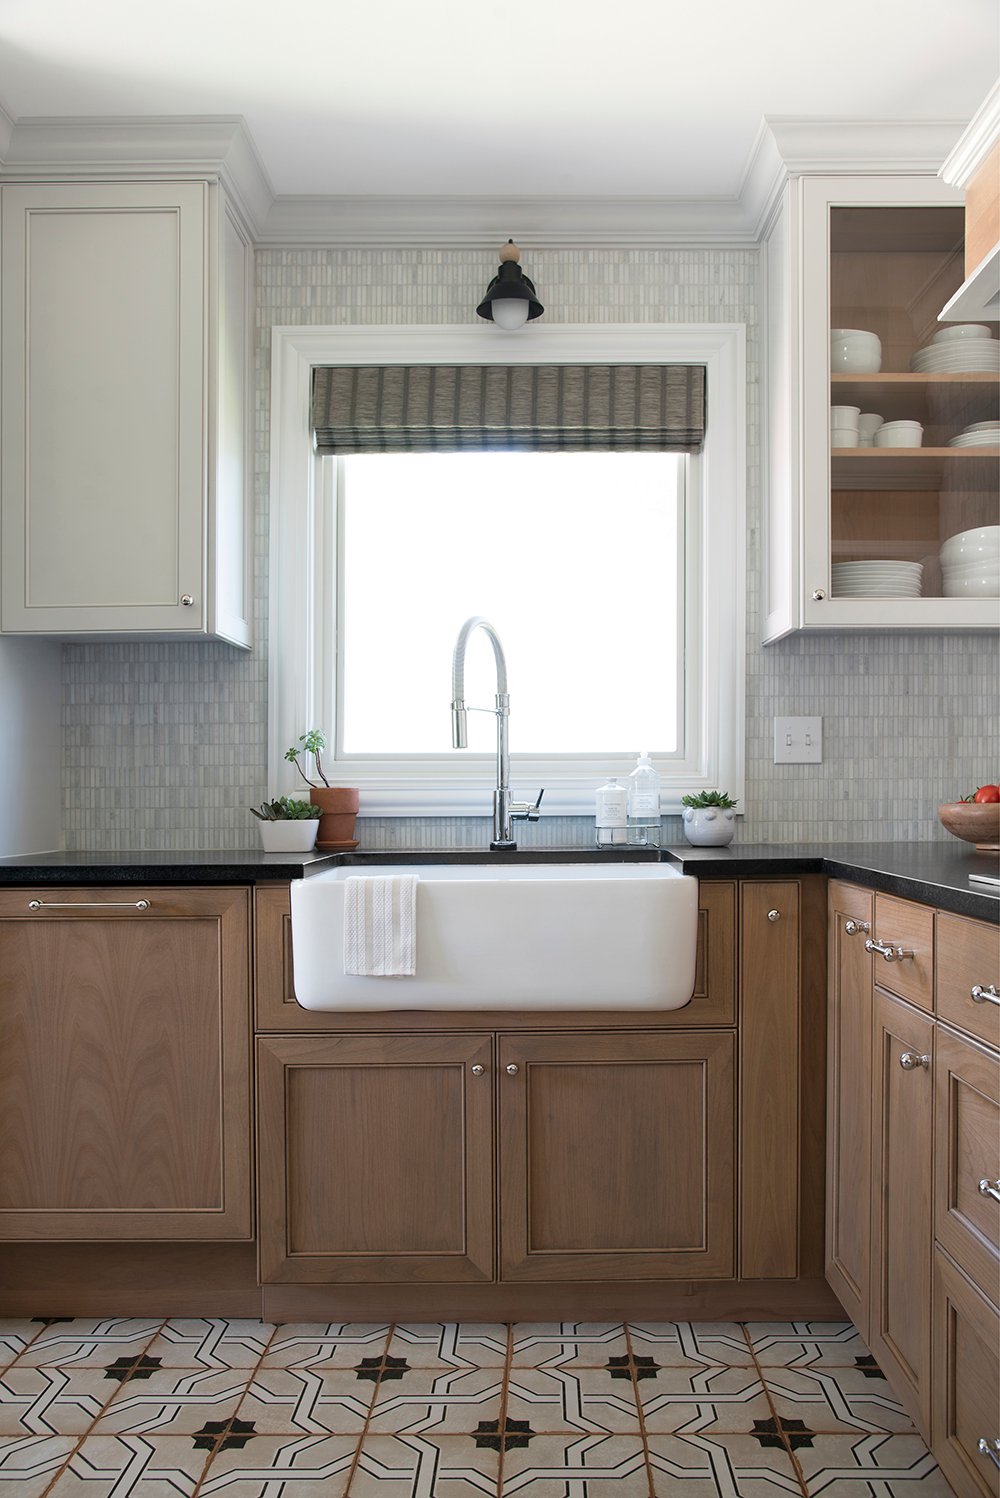 On the sink wall, we kept the window (and sink) in the same location, but the replacement is obviously a vast improvement from the existing vignette. It’s really nice to do dishes and look out into our beautiful backyard. Speaking of the sink, I’m all about a classic, apron front farm sink. I don’t consider it a “trend”, but rather a timeless staple that isn’t going anywhere anytime soon. I love the way the white fireclay ties in the window trim, which I intentionally painted Sherwin-Williams Extra White 7006, rather than making it match the custom gray trim in the rest of the space. I think it adds depth and creates a nice, bright focal point. I just shared the DIY for the sconce above the window in this post.
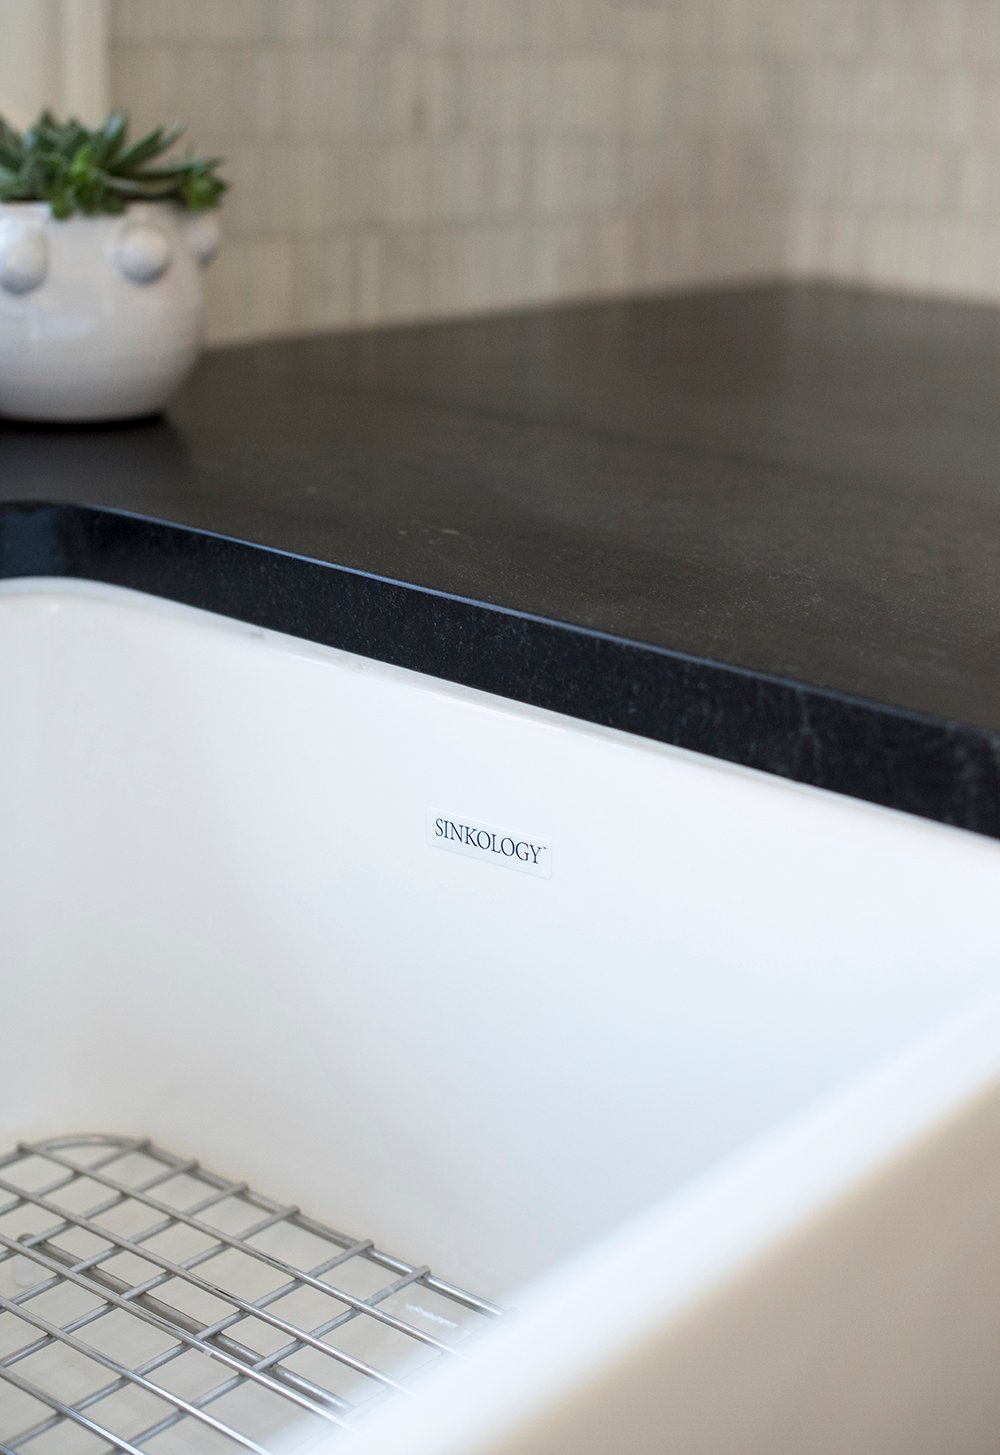 I granted Emmett’s request and also ordered the stainless grid that fits into the bottom of the sink. I wasn’t sure how I would like it, but it’s actually very nice. We ended up scratching the bottom of our previous fireclay sink (of a different brand) and this makes me feel better about protecting it. I’m also into the industrial aesthetic.
 The soapstone countertops might be another one of my favorite things about the kitchen. When I shared our laundry room reveal, they were a popular topic and I can’t wait to devote an entire post to the countertops! They’re rich black, have a nice velvety touch, and include all of the charm and charisma natural stone offers.
 See the beautiful veining in the soapstone? I fell in love with this material during my quarry visit to select marble for our fireplace…. the moment I laid eyes upon the Alberene soapstone, I knew I had to have it for our kitchen. It’s safe to say, I’m not disappointed with that decision.
 Also on the sink wall, we have a ginormous pantry to the left side of the dishwasher. It’s coming in super handy for all of our food storage. Check out how I selected that stunning pantry hardware in this post. Would you guys be interested in a pantry organization post? I figured you might want to peek inside eventually?
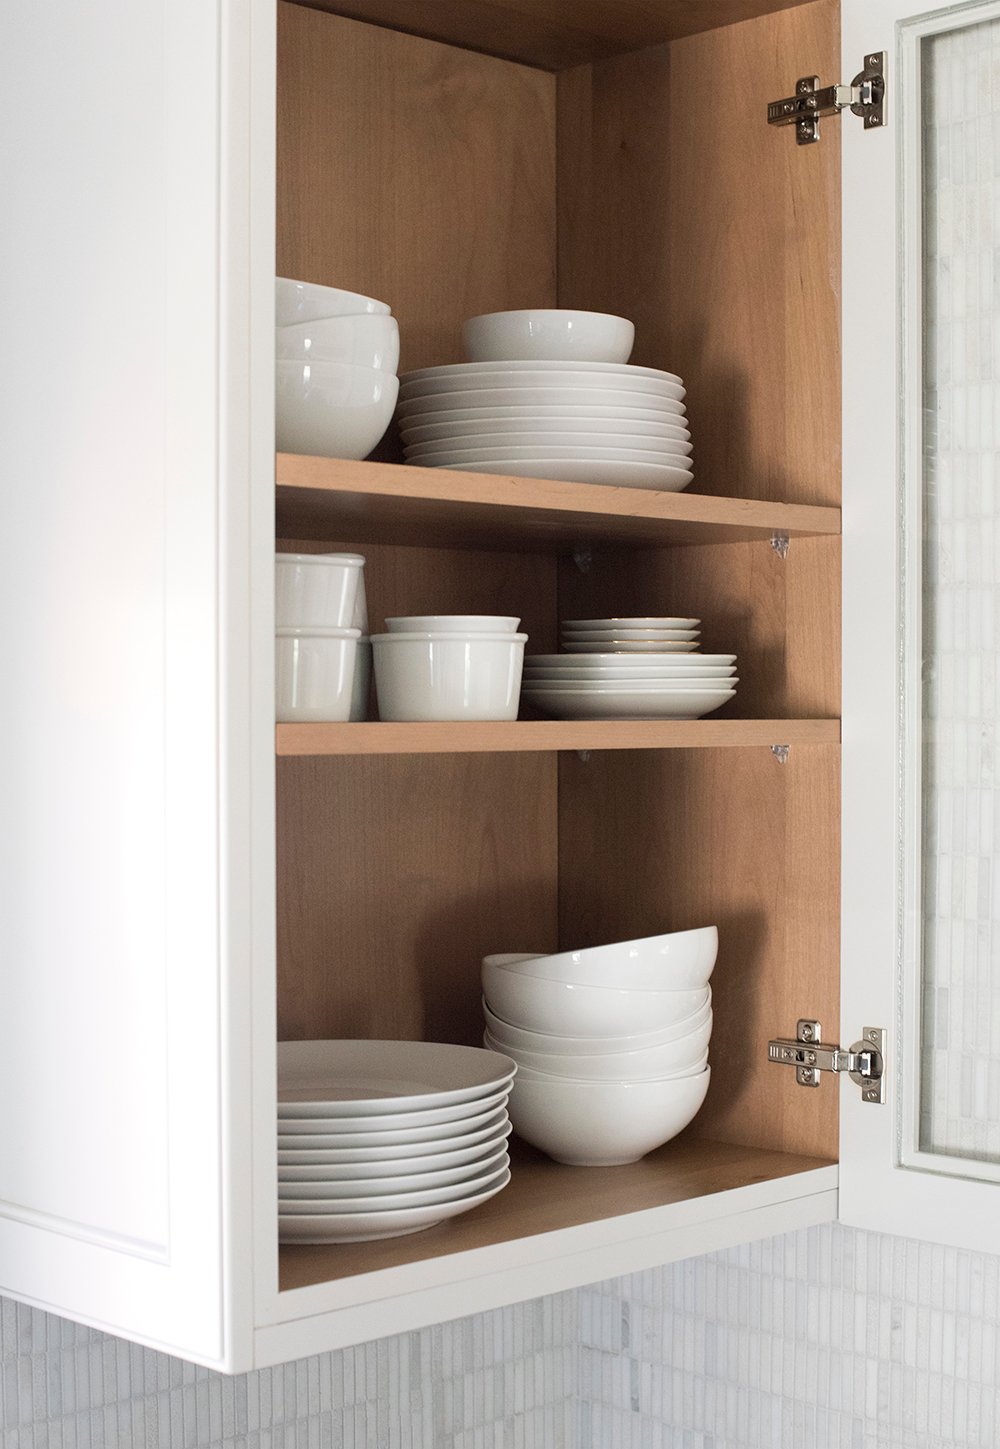
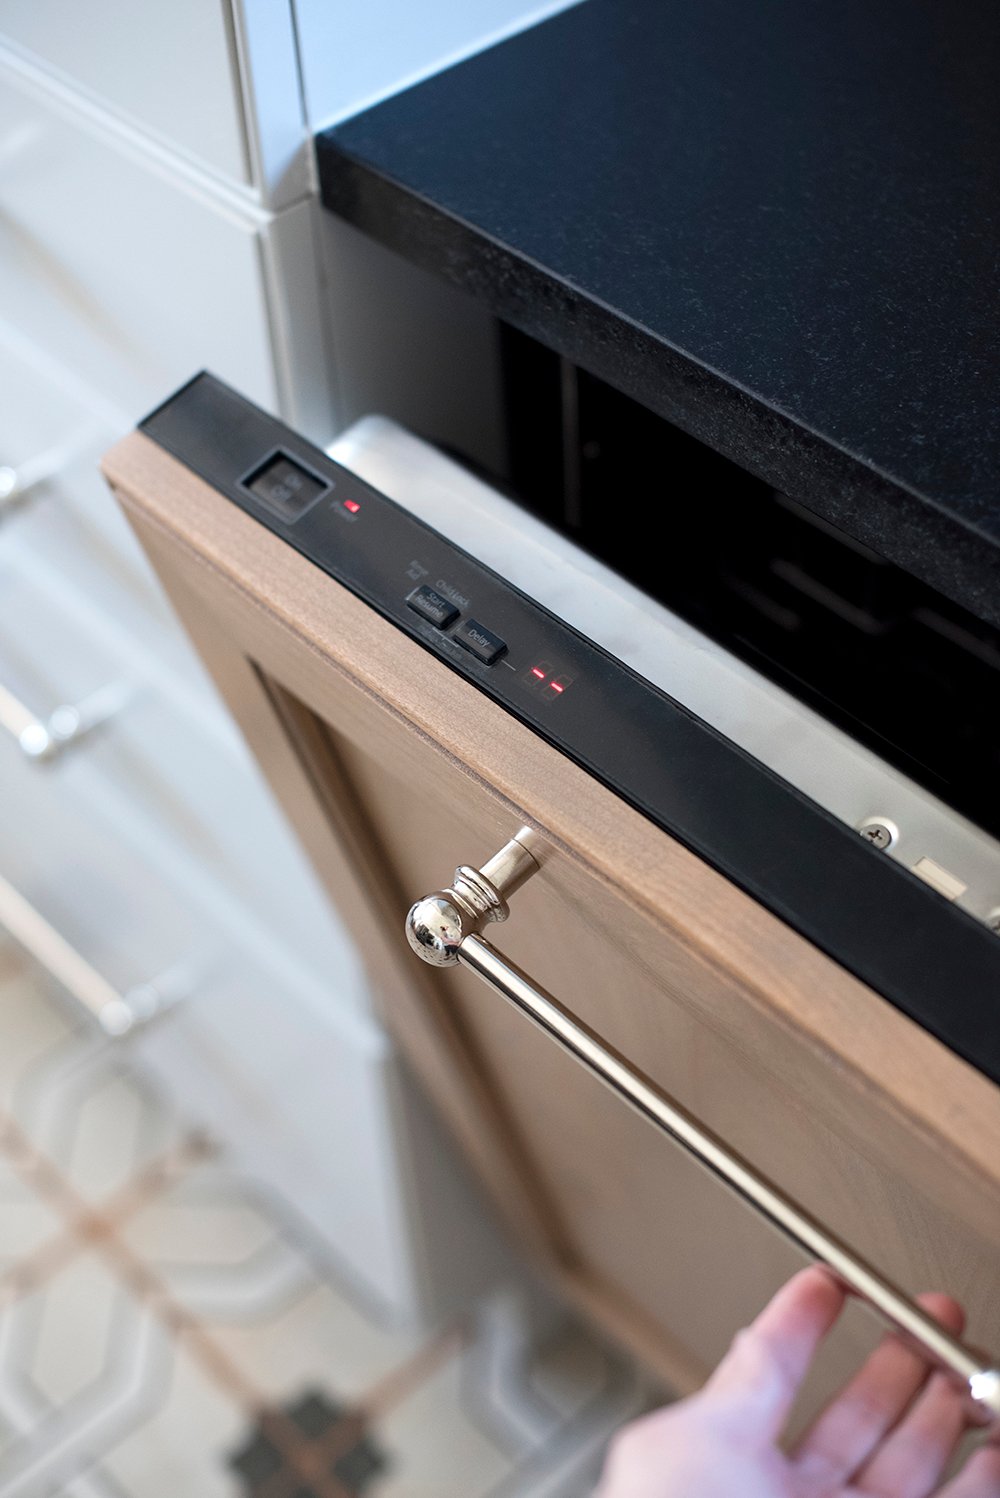
If you’re curious about the dishwasher, it’s integrated into the cabinetry- this is also referred to as “panel ready”. We had a cabinetry panel made to disguise it, so it blends with our lower cabinetry. Surprise!! There’s a dishwasher in there…
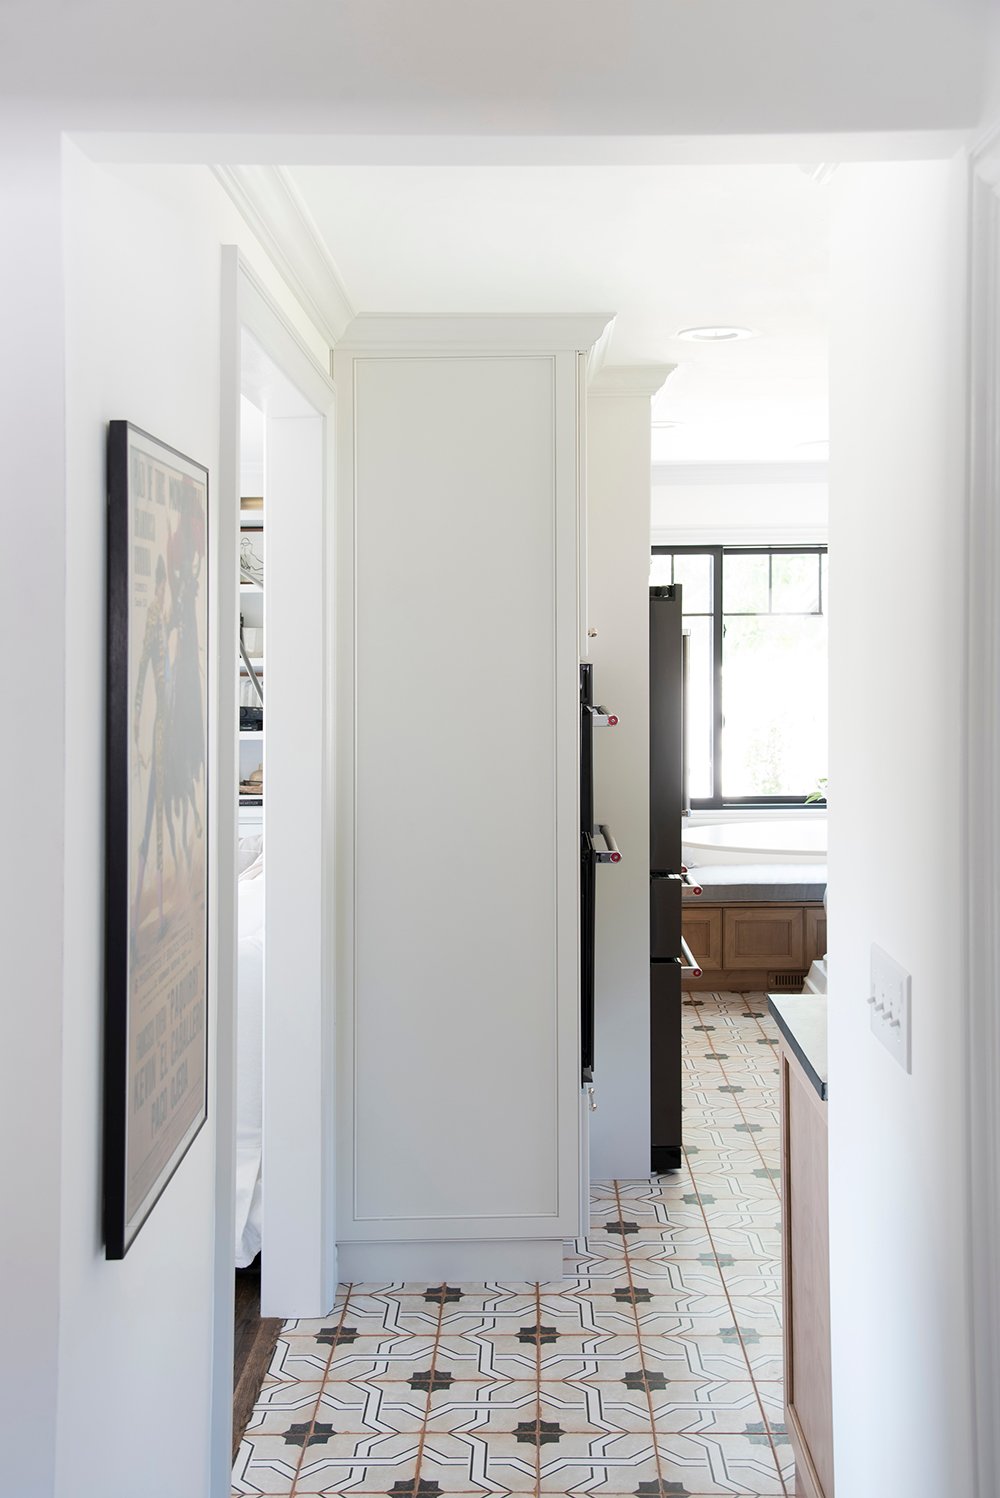
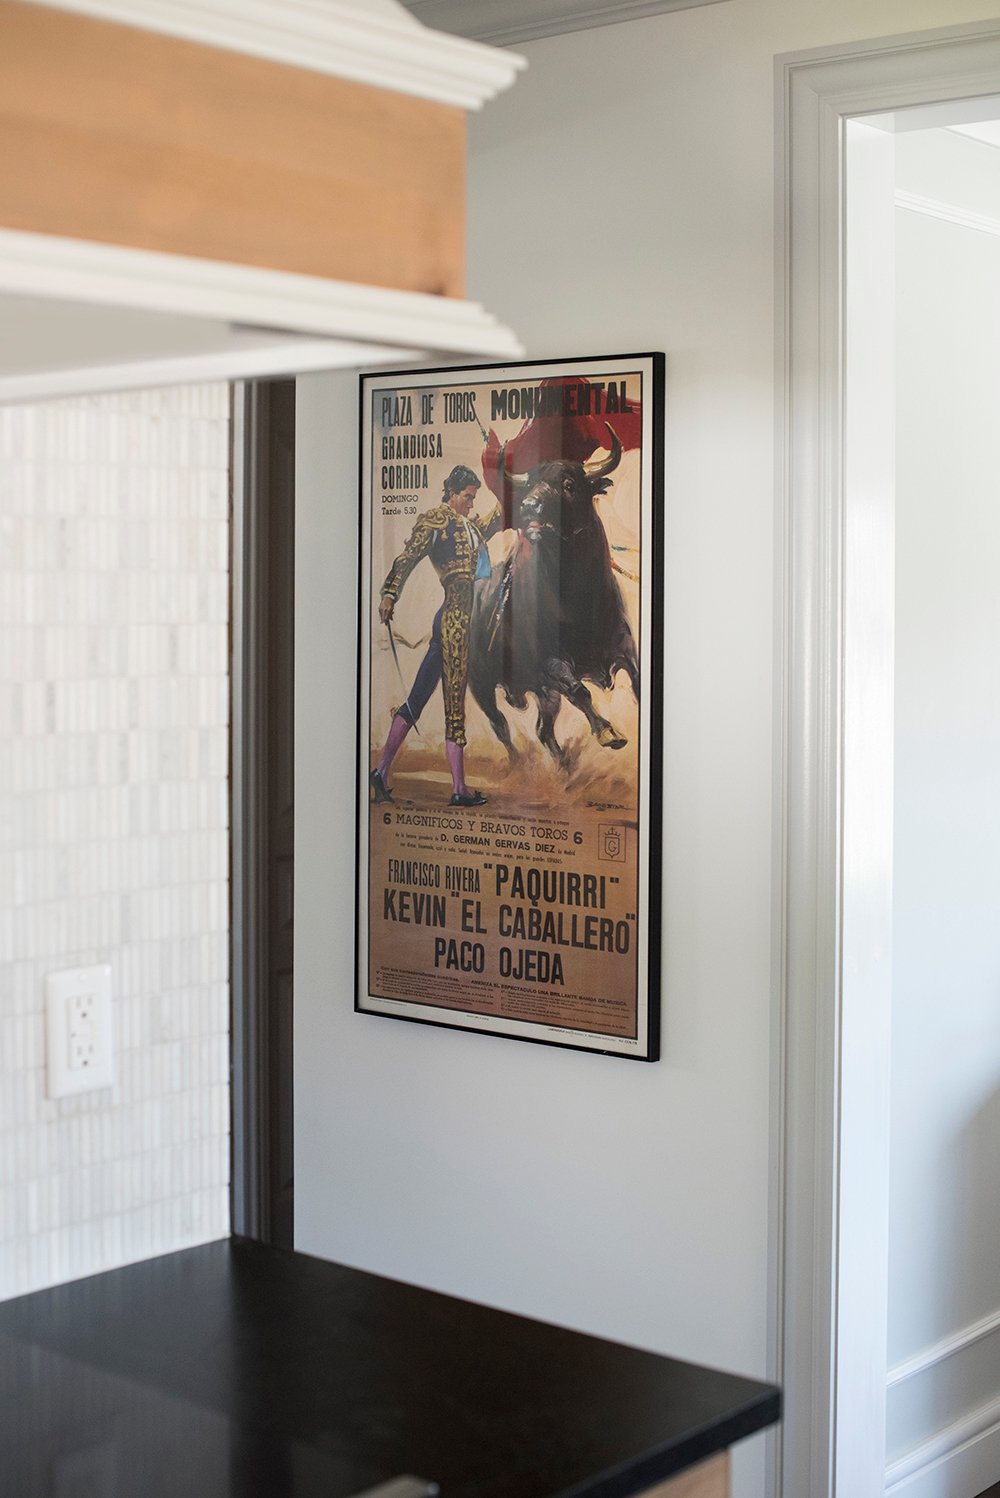
 Let’s step back (literally) and I’ll show you a view looking into the kitchen from the hall (which we’ve already started renovating). We widened the doorway and it feels so much more spacious. To the left is the living room and obviously the kitchen / breakfast nook is straight ahead. Read more about the matador art and its meaning to me in this post.
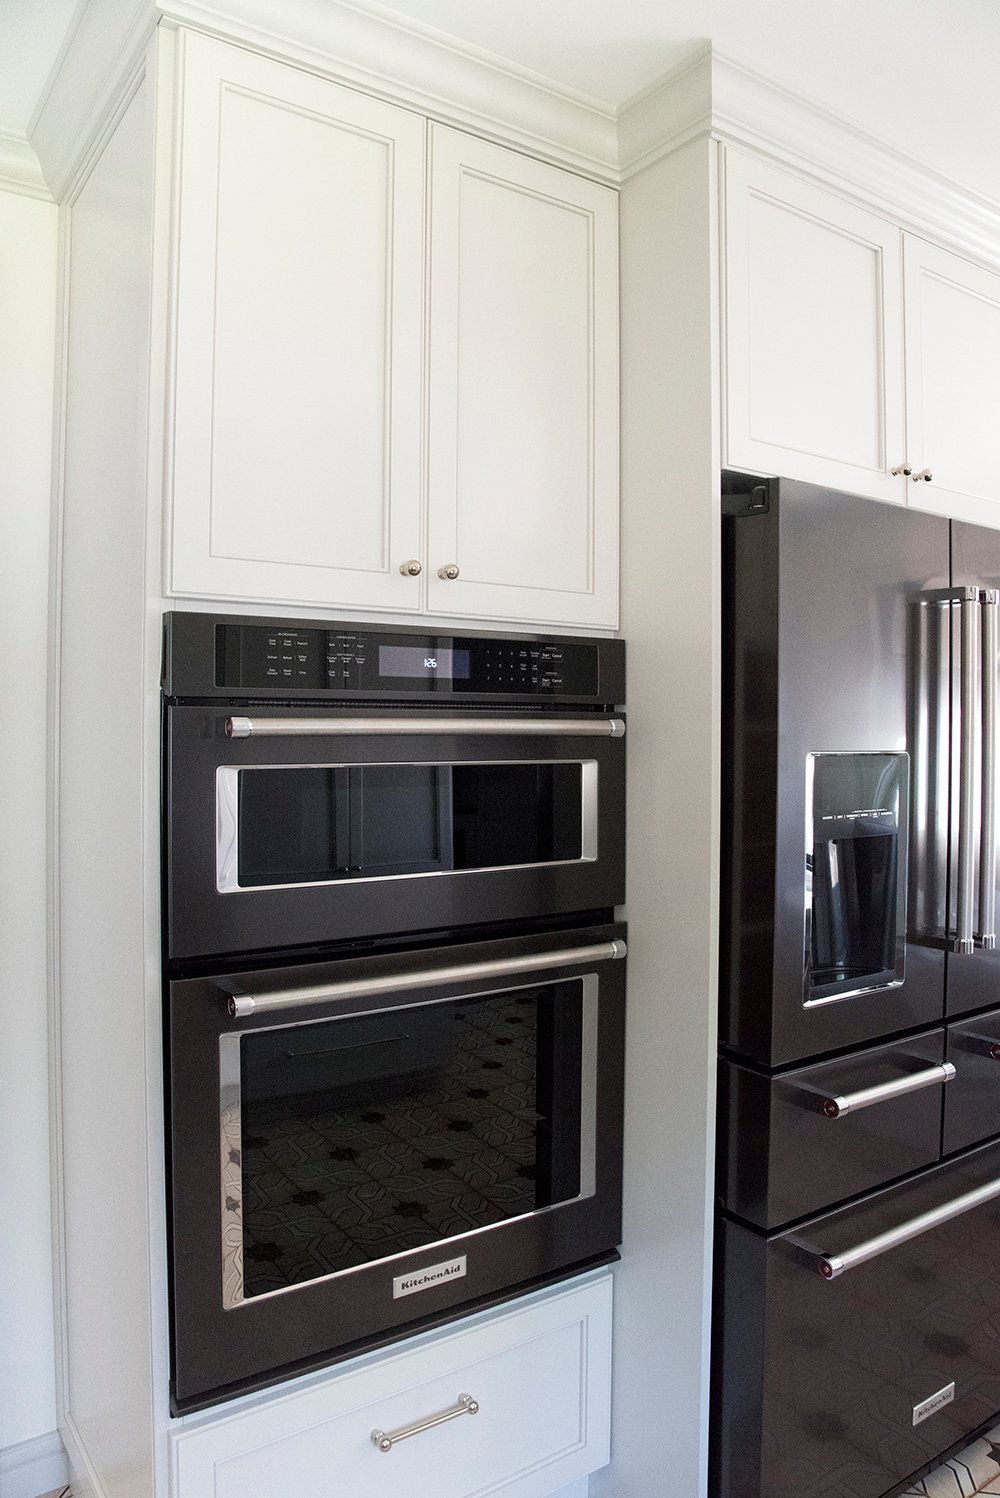
 In regards to appliances, I scored everything on Black Friday and saved quite a bit of money! Emmett is pretty particular when it comes to refrigerators, so he picked this one out and we both love it. It’s very convenient, super smart, and I love the way it looks. It adds a nice industrial vibe to the space and ties in the deep black countertops. I know water dispensers on the front of a fridge is not for everyone, but we use it SO often, it really comes in handy and is the best fit for our family.
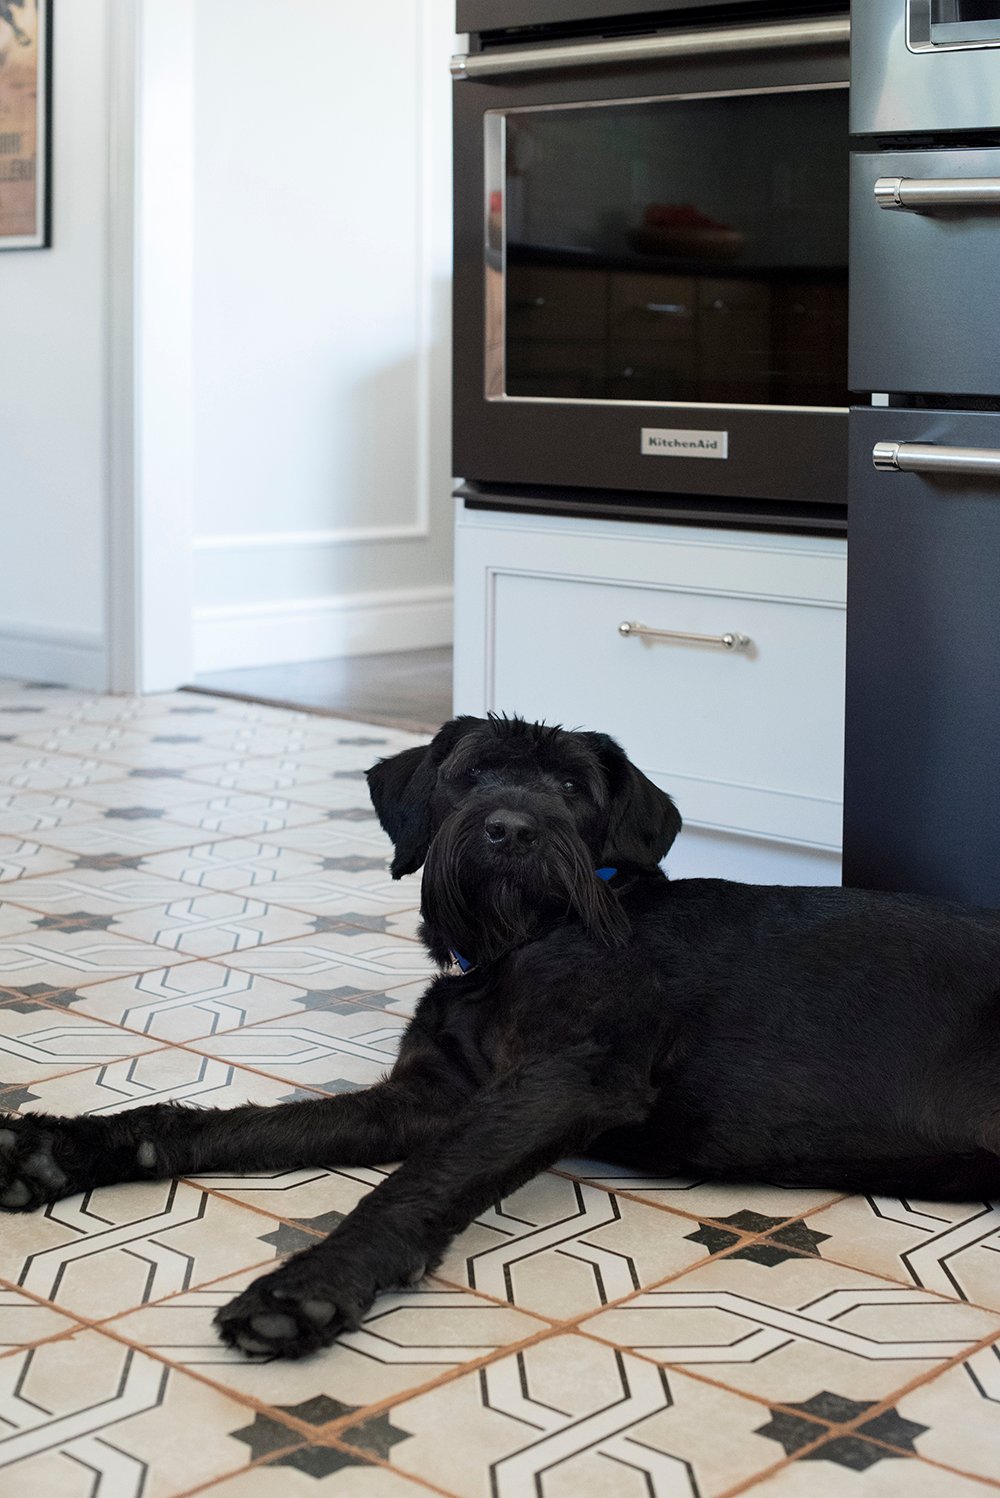
 I’m also in love with the black stainless finish! It doesn’t fingerprint as easily as regular stainless and I feel like it’s a modernized version or new take on industrial design. Are you guys into it? It’s funny because readers have messaged saying I designed the color palette around my dogs. Ha! Maybe that was a subconscious decision? Either way, Finn’s new favorite spot is in front of the toe kick registers on the cool tile floor.
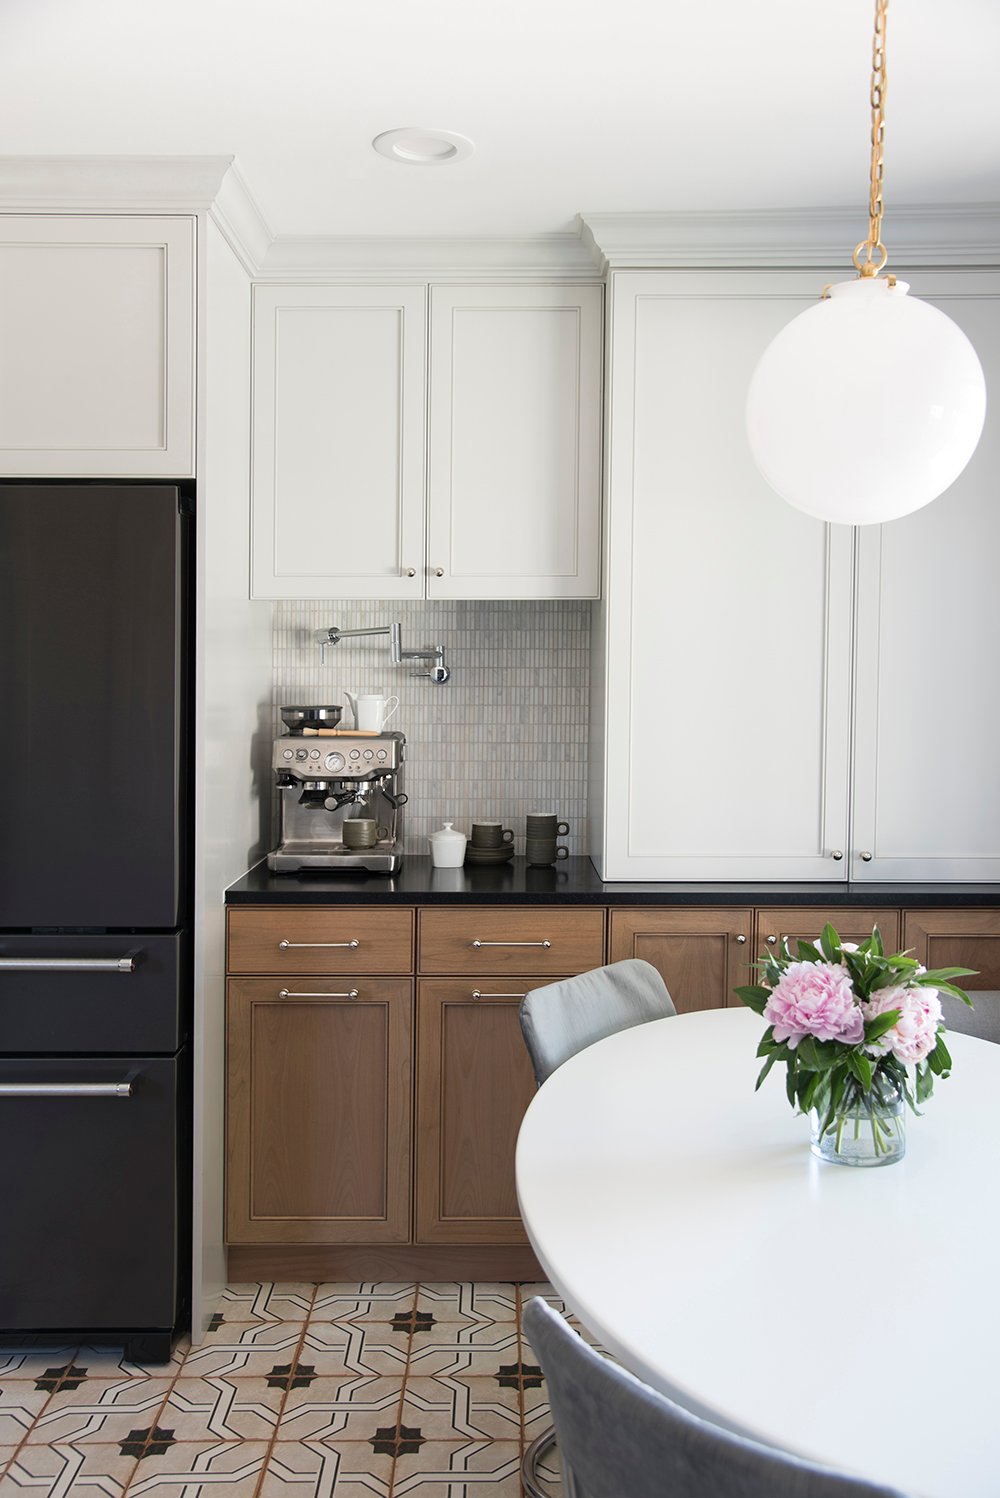
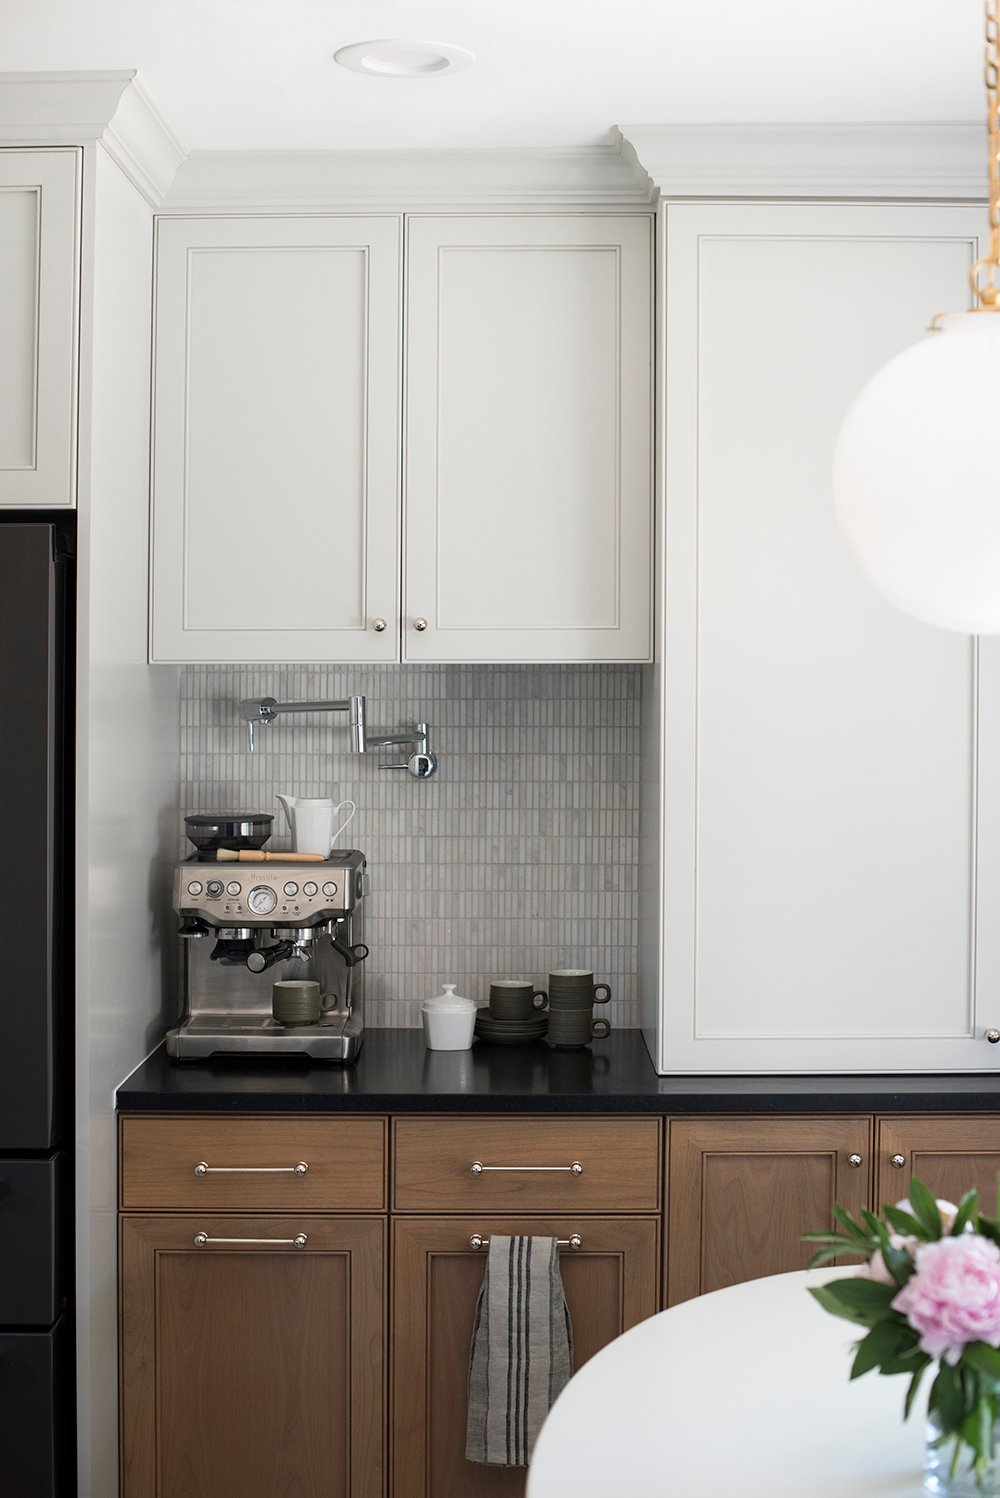
 Moving to the other side of the kitchen and appliances, you’ll find the coffee / espresso bar. I pretty much use this area twice a day and run on caffeine. I’m trying to learn how to be a barista and impress house guests… so far I’m just average and have yet to master espresso art with frothed milk. Someday, someday.
 Beneath the coffee station in the lower cabinetry are two custom slide out trash bins- for trash and recycling. They come in super handy and I love that there isn’t an ugly trash can sitting on the floor taking up additional, valuable space.
I feel like I also have to mention the pot filler! This was my brightest idea because I HATE carrying water to and from the espresso maker. Anyone else with me? I think it’s a really practical place for a pot filler. This one matches our smart faucet and I couldn’t be happier about the pair!
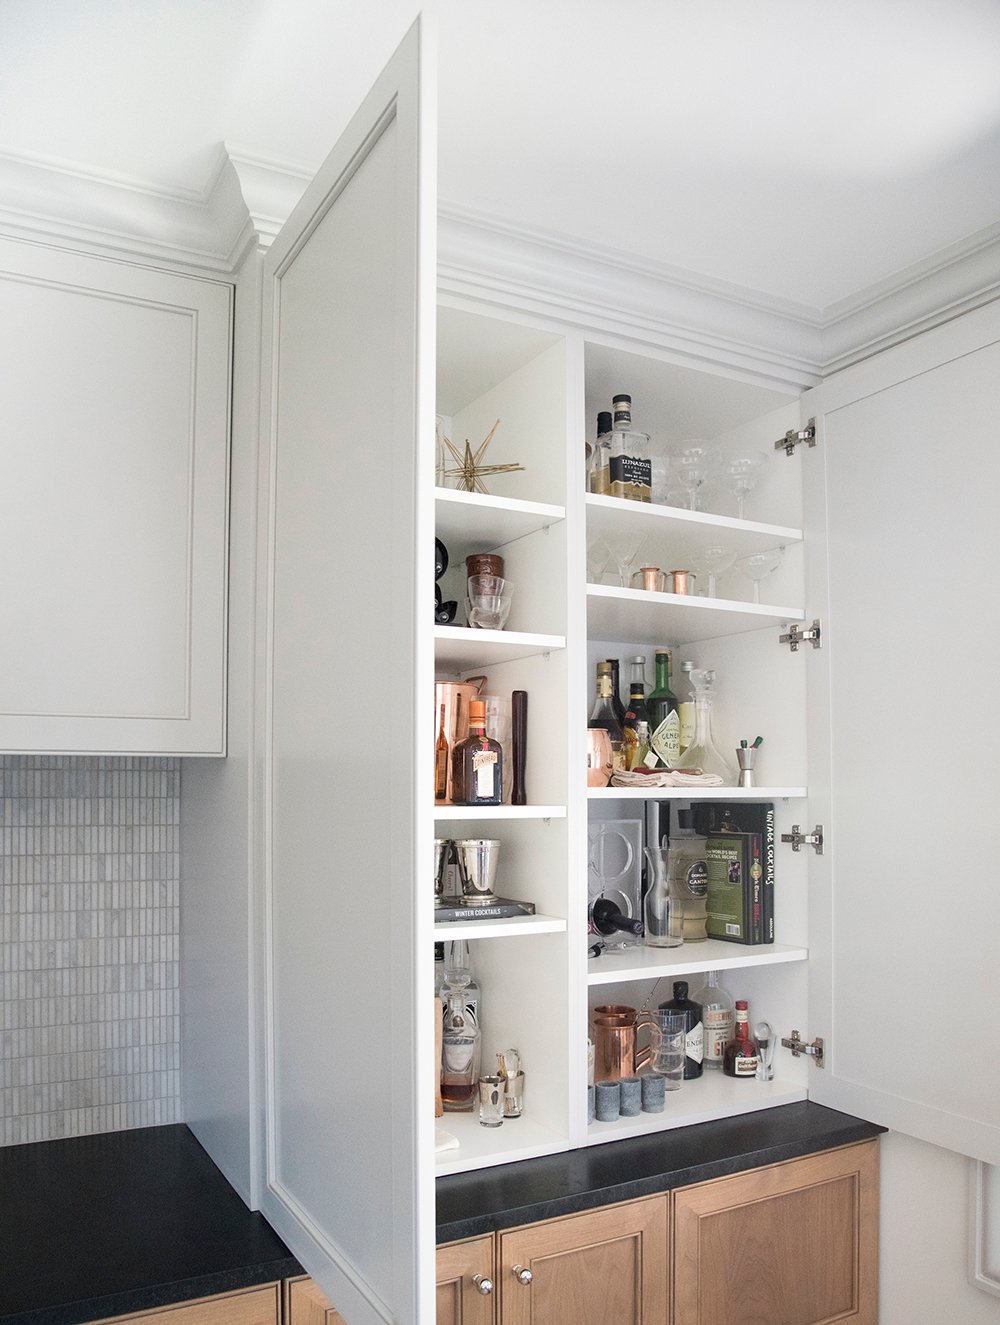
 To the right of this area, I’m sure you’re wondering what’s in the gigantic cabinets that span from countertop to ceiling? That’s our bar cabinet, which I’m sure will come in handy when entertaining!
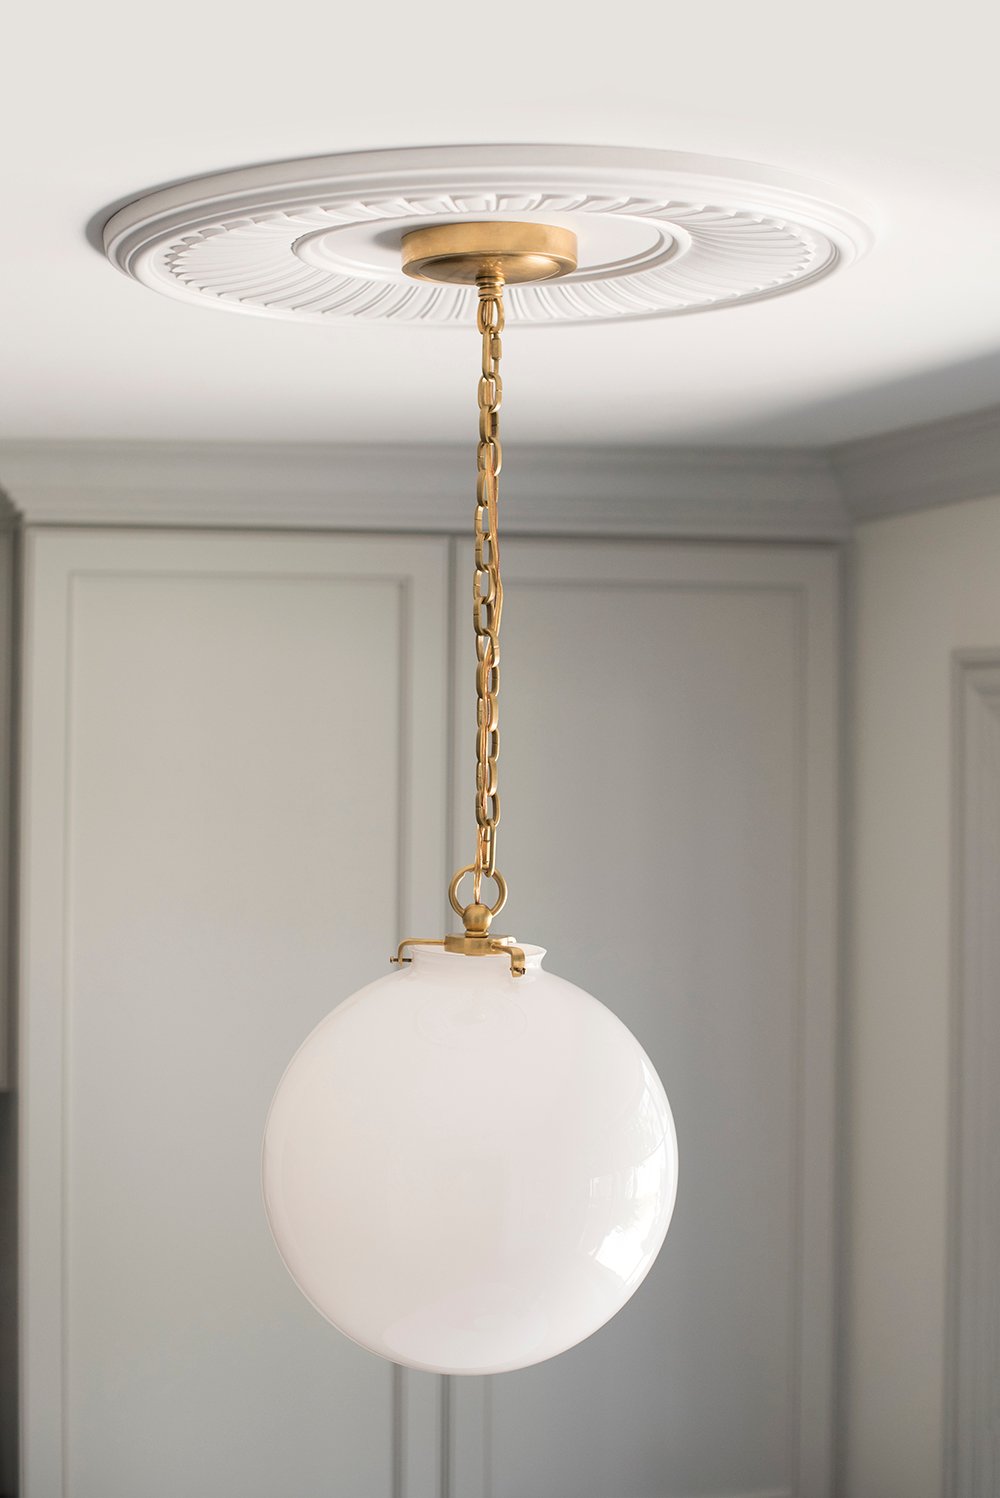
 I’m going to make you wait until tomorrow for the breakfast nook reveal, because this post is already realllllly long, but I can tell you… I had to switch up the light fixture from the original design plan. It was a bit of a debacle and I was heartbroken at first, but I’m very excited about the replacement– dare I say it’s even better than the original option?
 If anyone is curious about sources, I’ll link everything in the roundup below! Please let me know if I missed anything…

01: ceiling medallion // 02: soapstone countertops // 03: faucet // 04: wall paint: alabaster SW 7008 // 05: pendant light // 06: sink // 07: sink grid // 08: cabinetry paint: custom mix from Sherwin-Williams, but it’s somewhere between… first star SW 7646 and big chill SW 7648 // 09: floor tile // 10: sconce // 11: backsplash tile // 12: canister // 13: vintage poster art // 14: dish towels // 15: spice jar // 16: tea towel // 17: soap set // 18: ceiling paint: ceiling bright white SW 7007 // 19: espresso maker // 20: pot filler // 21: refrigerator // 22: oven & microwave wall unit // 23: induction cooktop // 24: cutting boards // 25: white planter // 26: cabinetry pulls // 27: cabinetry knobs
There is LOTS of kitchen related content coming, so stay tuned for that. Look for a soapstone Q&A, patterned floor tile roundup (basically the contenders I didn’t use), the breakfast nook reveal tomorrow, and much more! I also wanted to ask… are you guys interested in the budget and what we paid for everything? I can work on a post for that as well, or just shoot me a message and I’ll be sure to answer.
Regardless, I’d love to hear your feedback in the comment section below. This project has been ongoing for half a year and you guys have been a big part of it. Thank you SO much for all of the support and encouragement along the way! It means more than you know. Hop over to Instagram tomorrow for a live tour after the breakfast nook reveal at 8pm MT. xox
*This post is sponsored by Sherwin-Williams®. All content, ideas, and words are my own. Thank you for supporting the brands that allow us to create unique content while featuring products we actually use & enjoy!