How to Train Readymade Curtains for a Custom Look
There is this common misconception that good looking drapery has to be custom, which typically costs quite a bit of money. Having both high-end (more expensive) custom drapery panels and readymade options throughout my home, I’m here to tell you, as a designer, that some of the budget-friendly options can definitely take on a custom feel. By training the fabric, you can turn something affordable and accessible into something that looks tailored and elevated. This is one of those designer tricks that makes a bigger difference than people expect. Once you know how to do it, you’ll never skip it again! Click through for my best tips for making your window treatment budget go further, and save my simple 3-step process for training readymade curtains for a custom designer look… minus the high price tag.

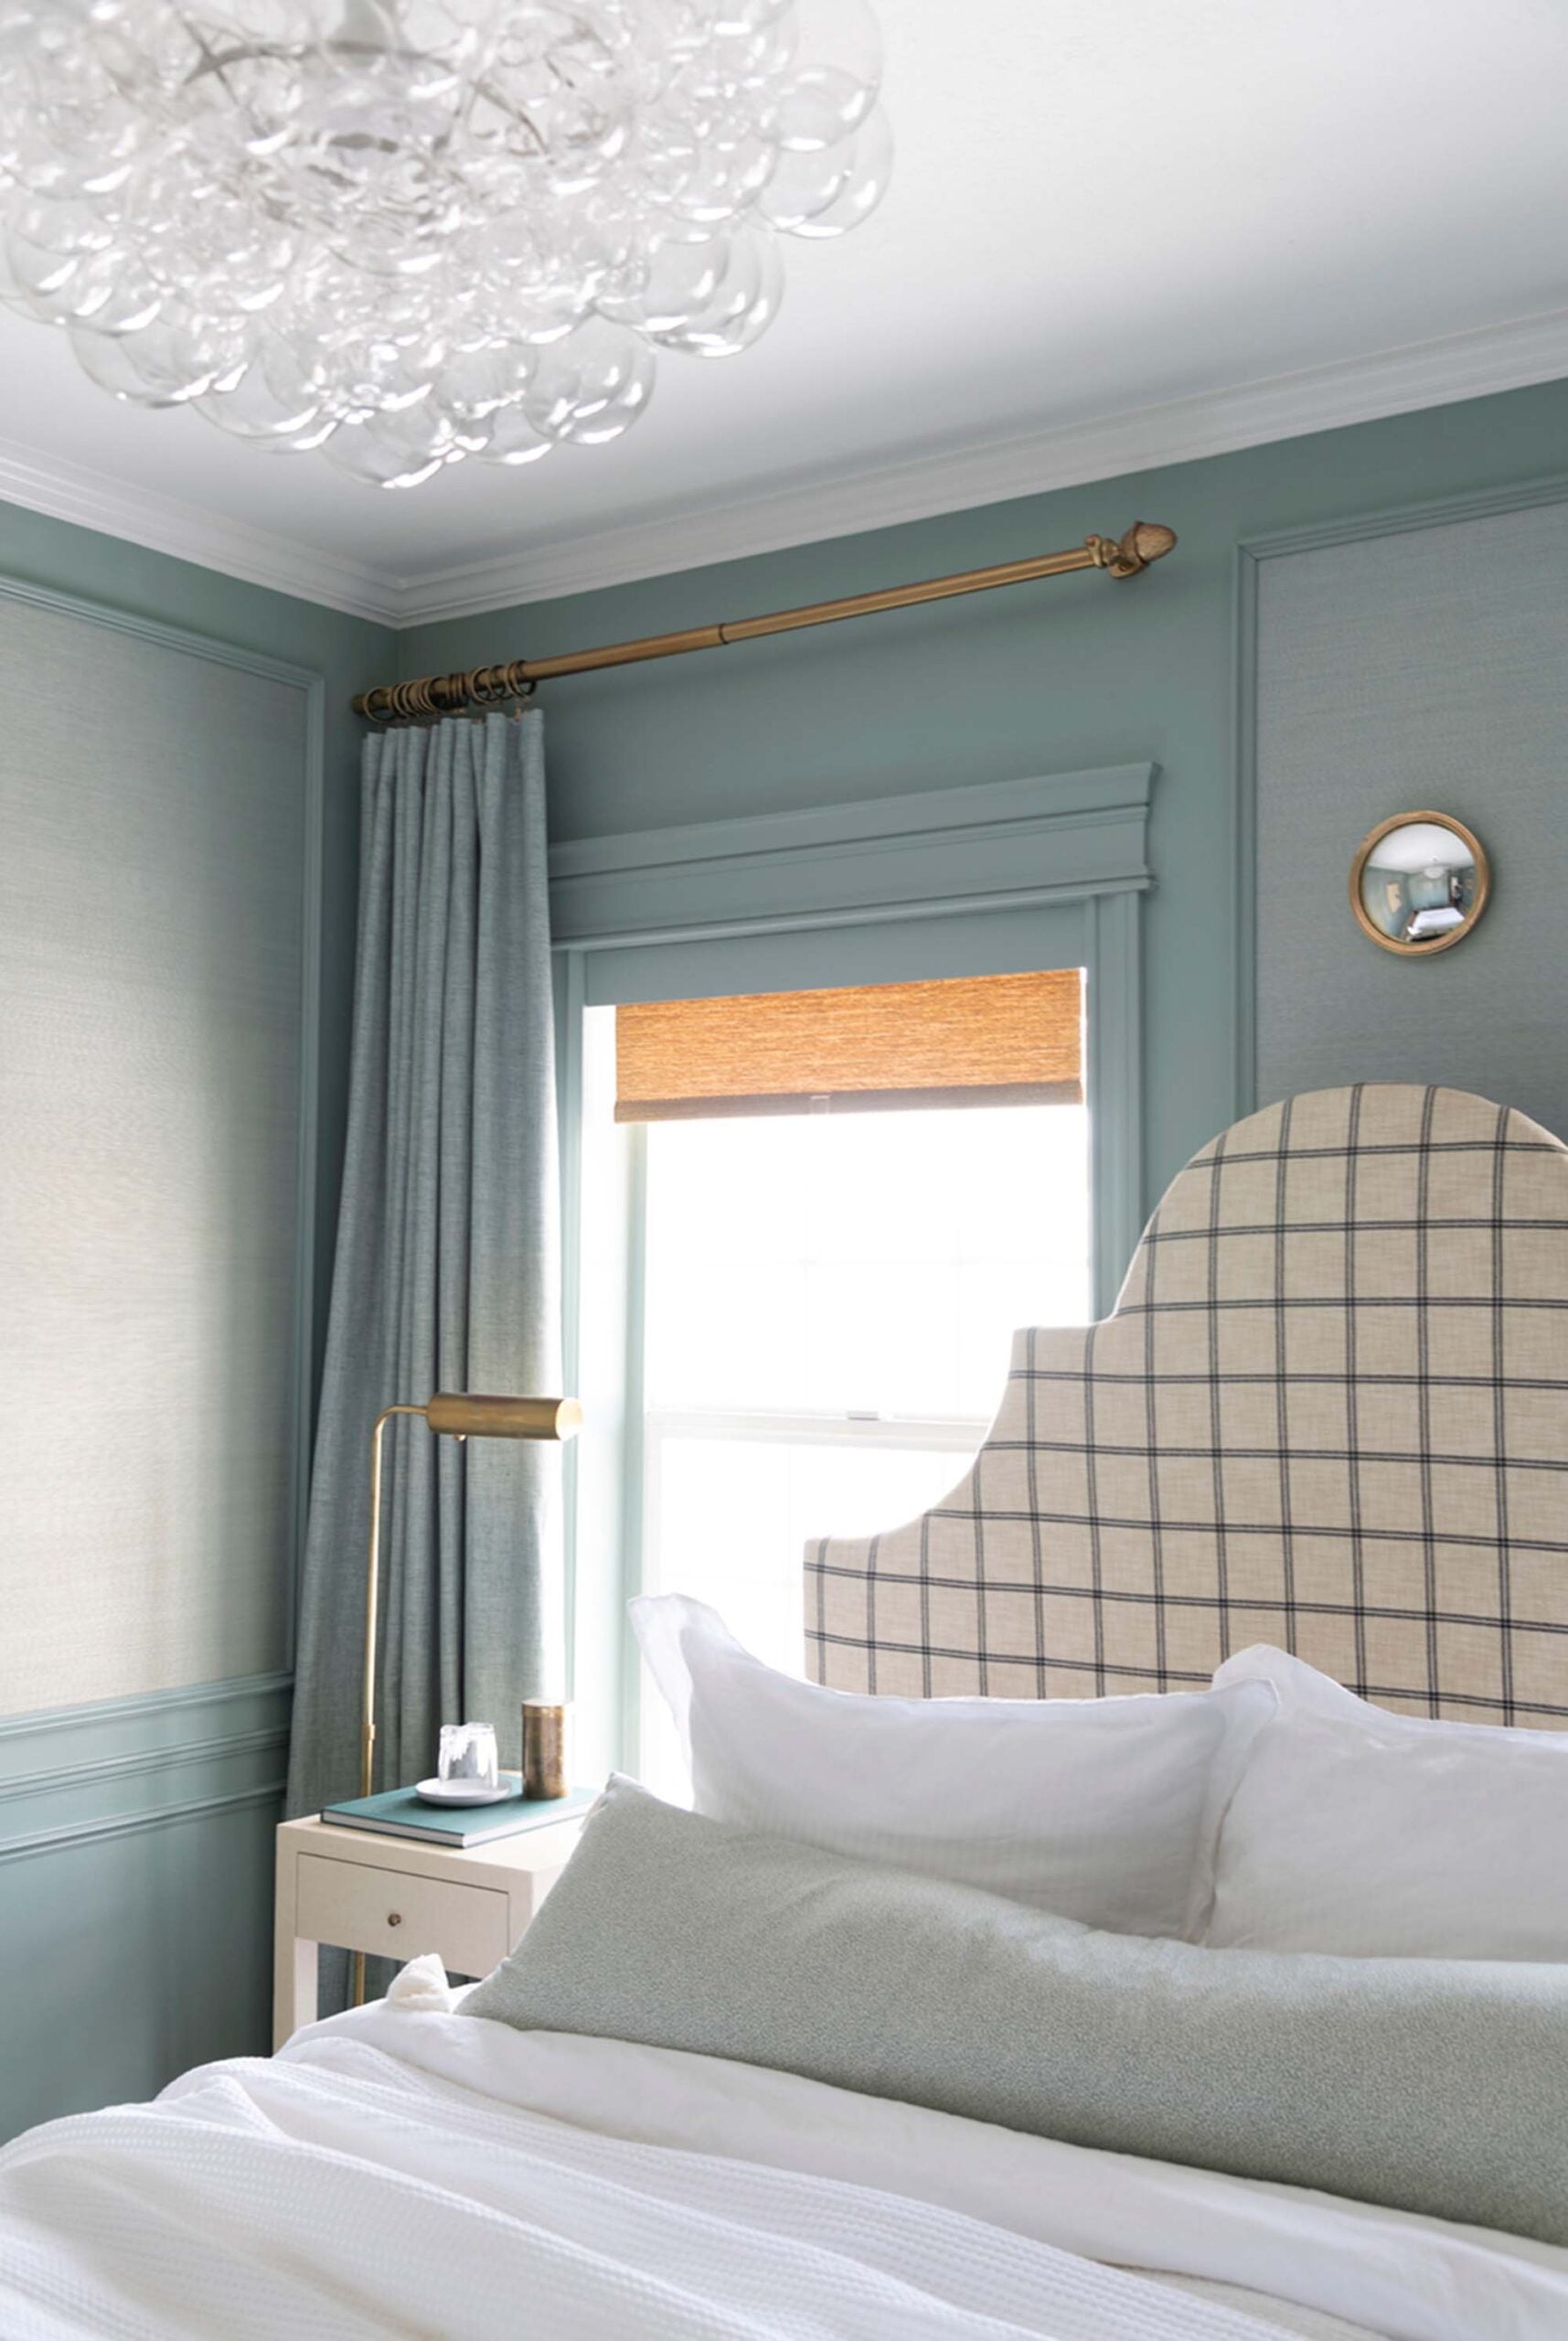
Since all of my curtains have been trained and I don’t have a new drapery project to photograph from start to finish right now (coming soon though… our nursery makeover and design plans for baby Gibson), I’m mixing & matching descriptive images throughout this post to give you a better visual. Most recently, I trained curtains from Amazon for our basement home gym reveal. If you’re looking for more options to get this project started, reference the best budget curtains that look custom.
What It Means to “Train” Curtains

So, what exactly is curtain training? Training curtains is manipulating a panel, so the fabric falls in the direction you’d like, creating an even, custom, tailored look. When buying readymade curtains, you still need to customize your selection to best fit your window and room. While you’re not buying custom, they still require customization to look their best. Curtains (or any fabric) will hold their shape and position if you train them. By doing this, you’re encouraging the fabric to hold gentle pleats so the panels hang consistently every time they’re opened or closed. This is a standard practice with custom drapery, and it works beautifully with readymade panels too. Here’s how to do it…
What You’ll Need
What do I mean by requires customization? You can buy curtains from wherever… but they’re going to require a little work on your part. Here are my top readymade window treatments from Amazon. When buying readymade, I always end up doing some key things for that functional designer look:
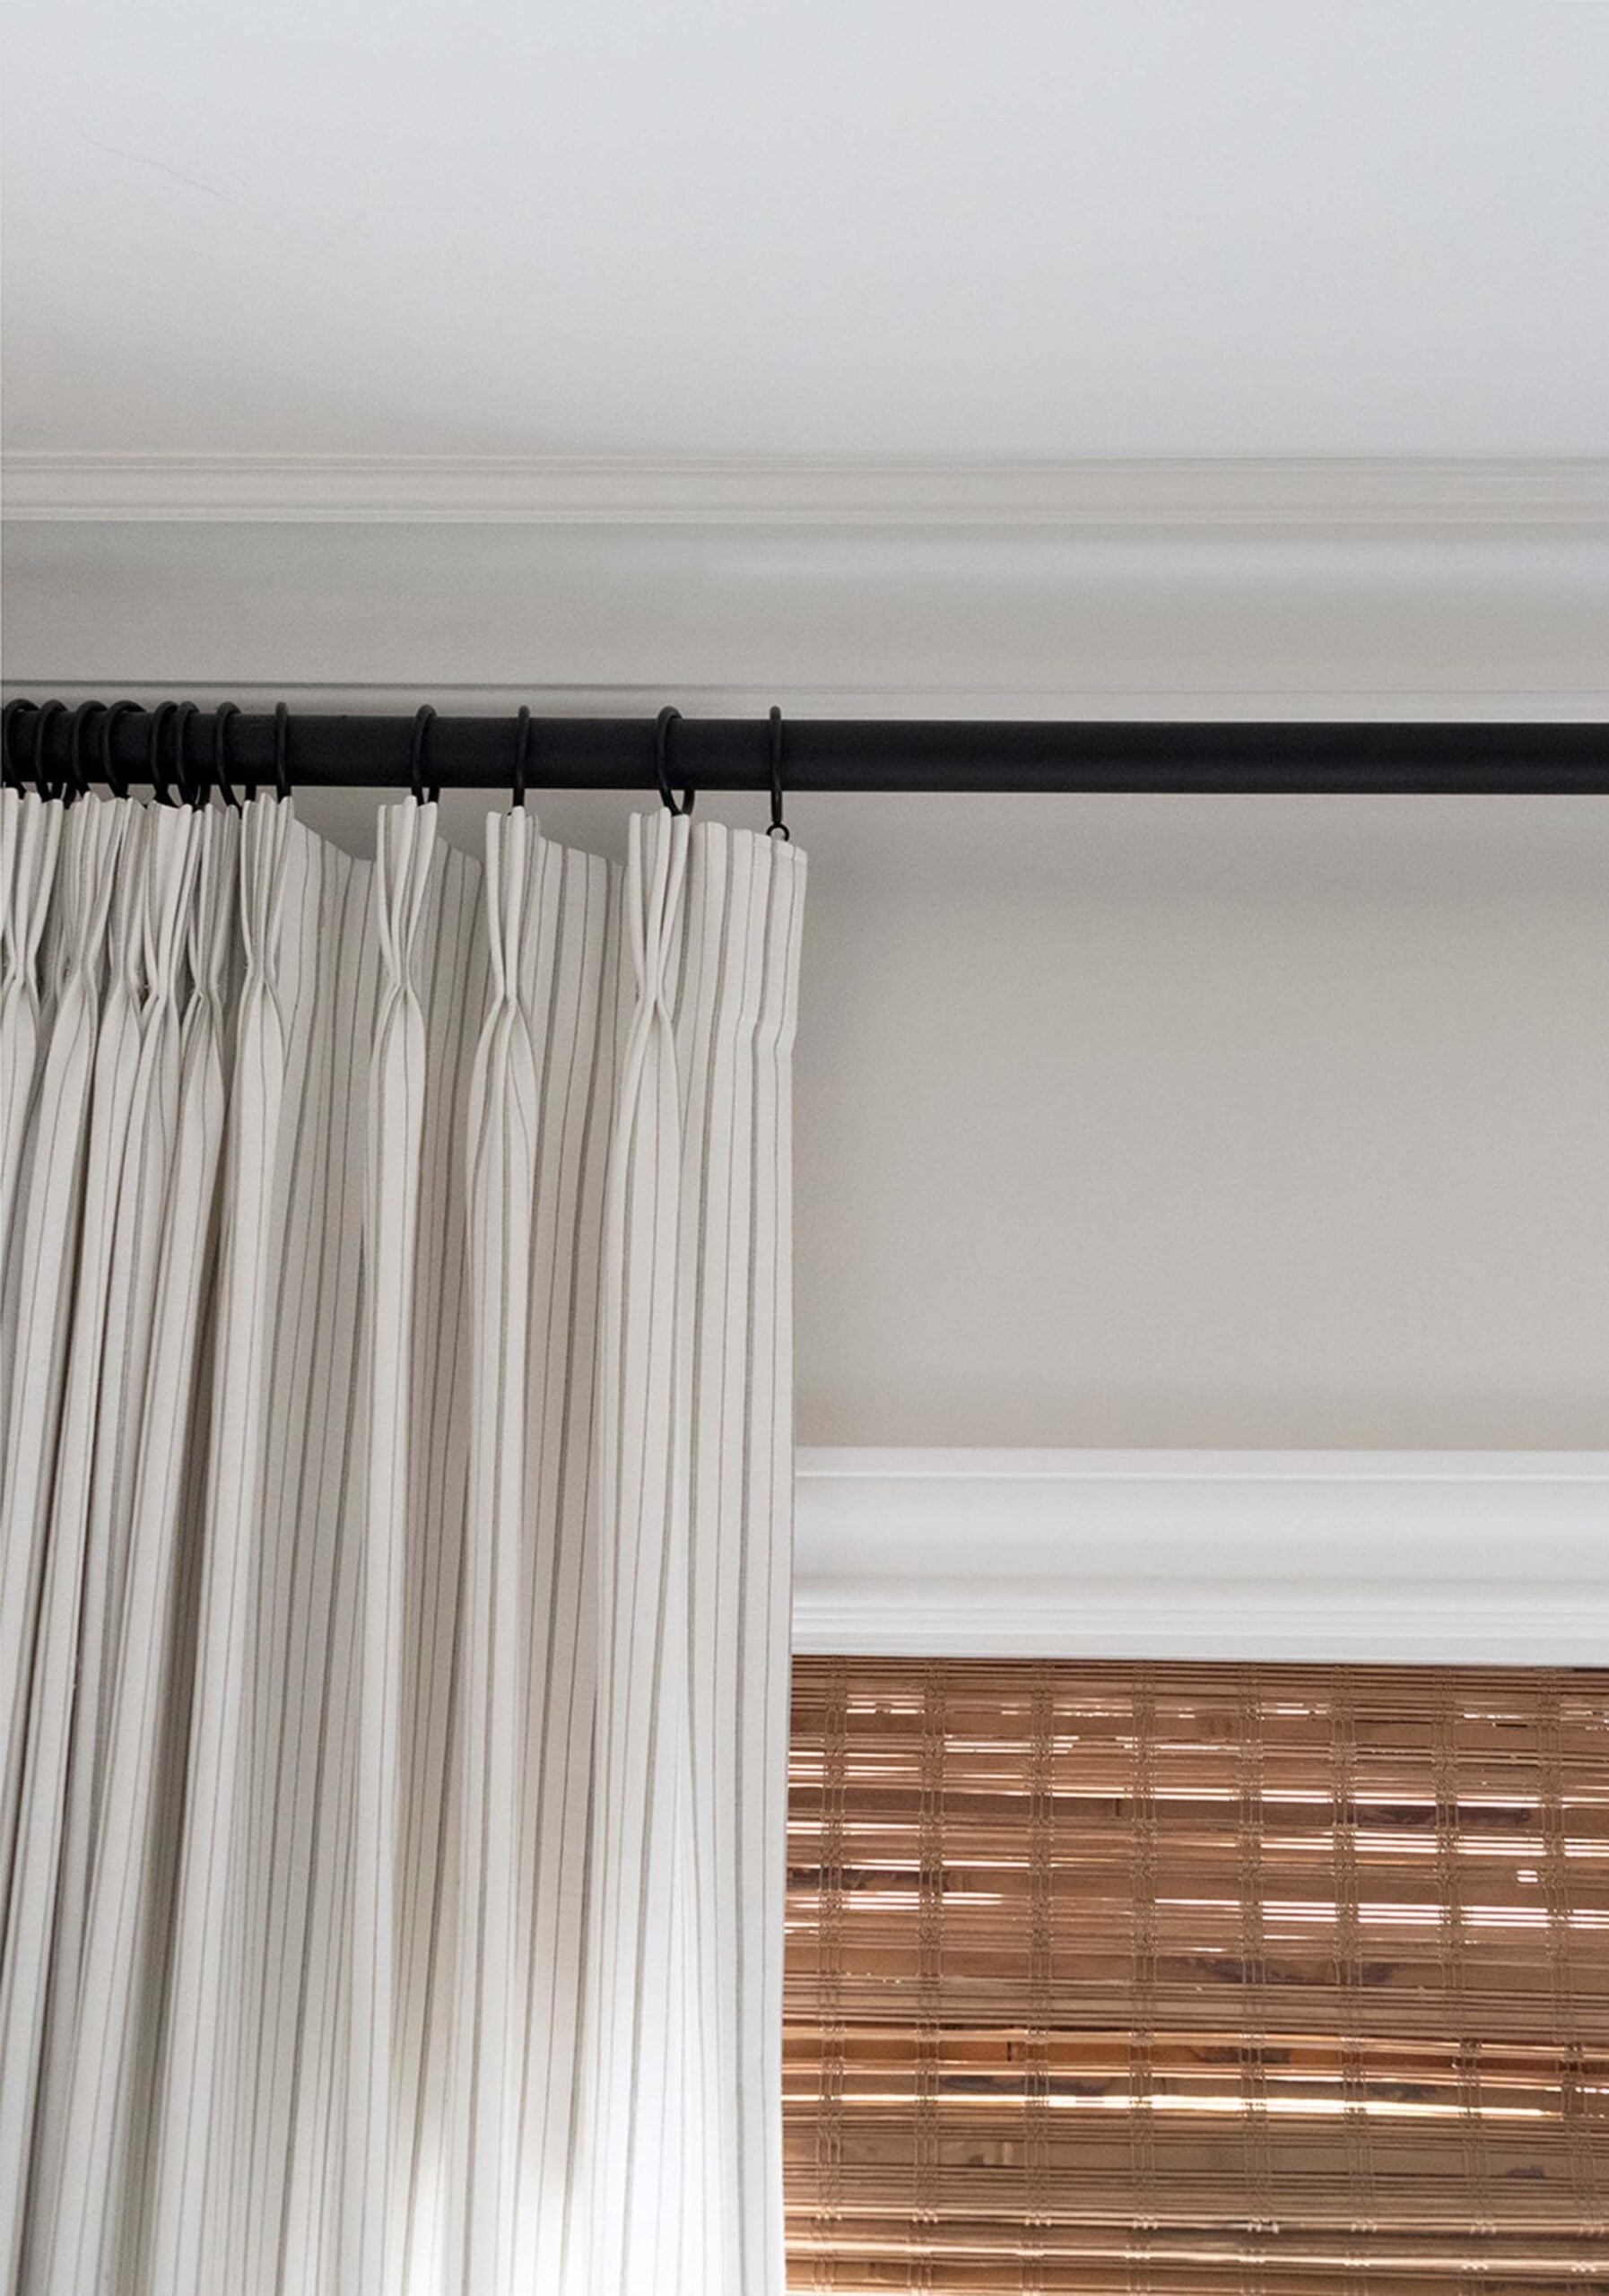
- Invest in classic or hidden hardware (a rod, nice finials, a ceiling track, quality rings, etc)
- Add curtain hooks, pleats, or clips (for a tailored look)
- Steam & iron (I never skip this step)
- Hem your curtains (even if you don’t sew- use fusing tape, which only requires an iron)
- Add clips & ties to train your curtains (keep scrolling for my detailed process)
Step-by-Step: How to Train Readymade Curtains
How do we curtain train? My exact process requires the following: ironing or steaming (sometimes both), spraying the curtain with water (you can also use ironing starch), clipping or tying them, then training them into position. Sometimes it can take a few days, but it’s easy and requires minimal effort. Here is my simple 3-step process…
Step 1: Measure & Pleat or Clip
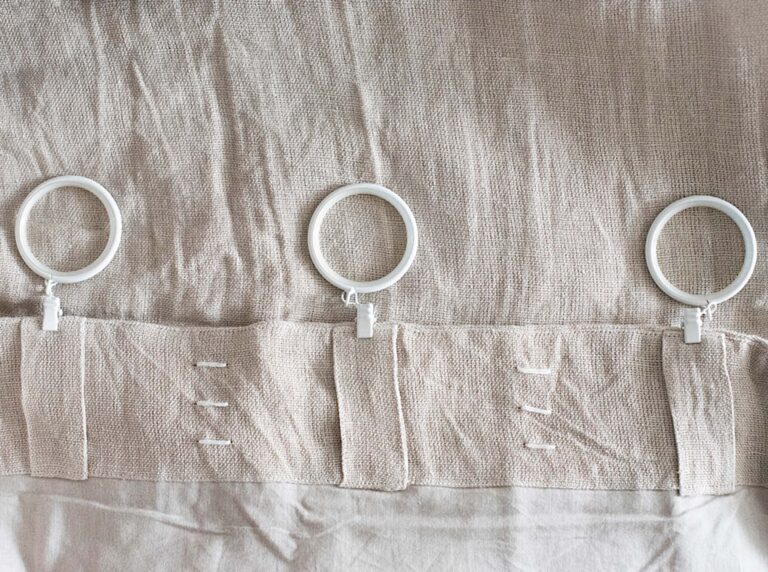
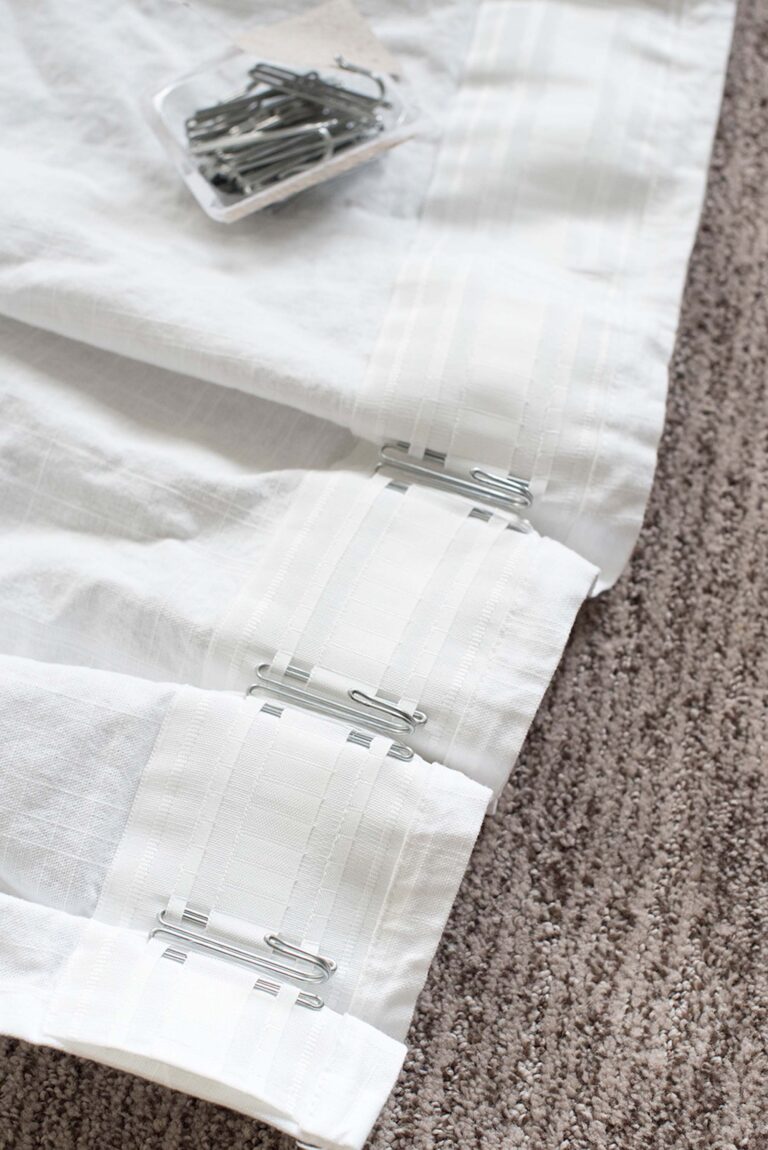
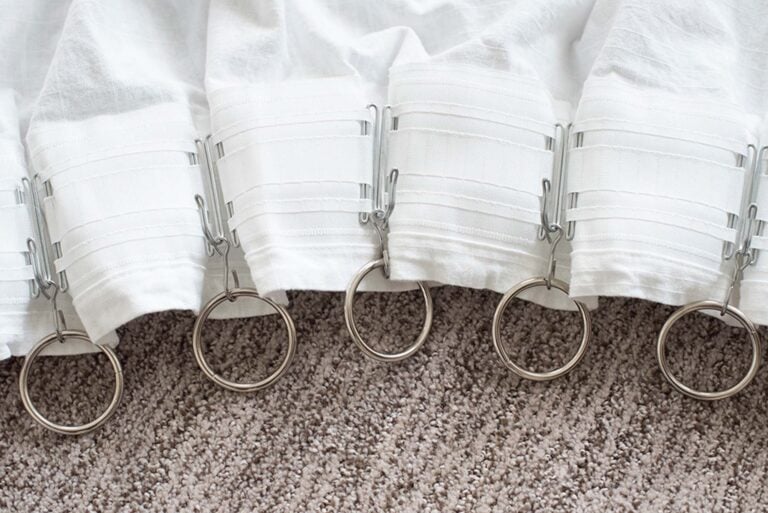
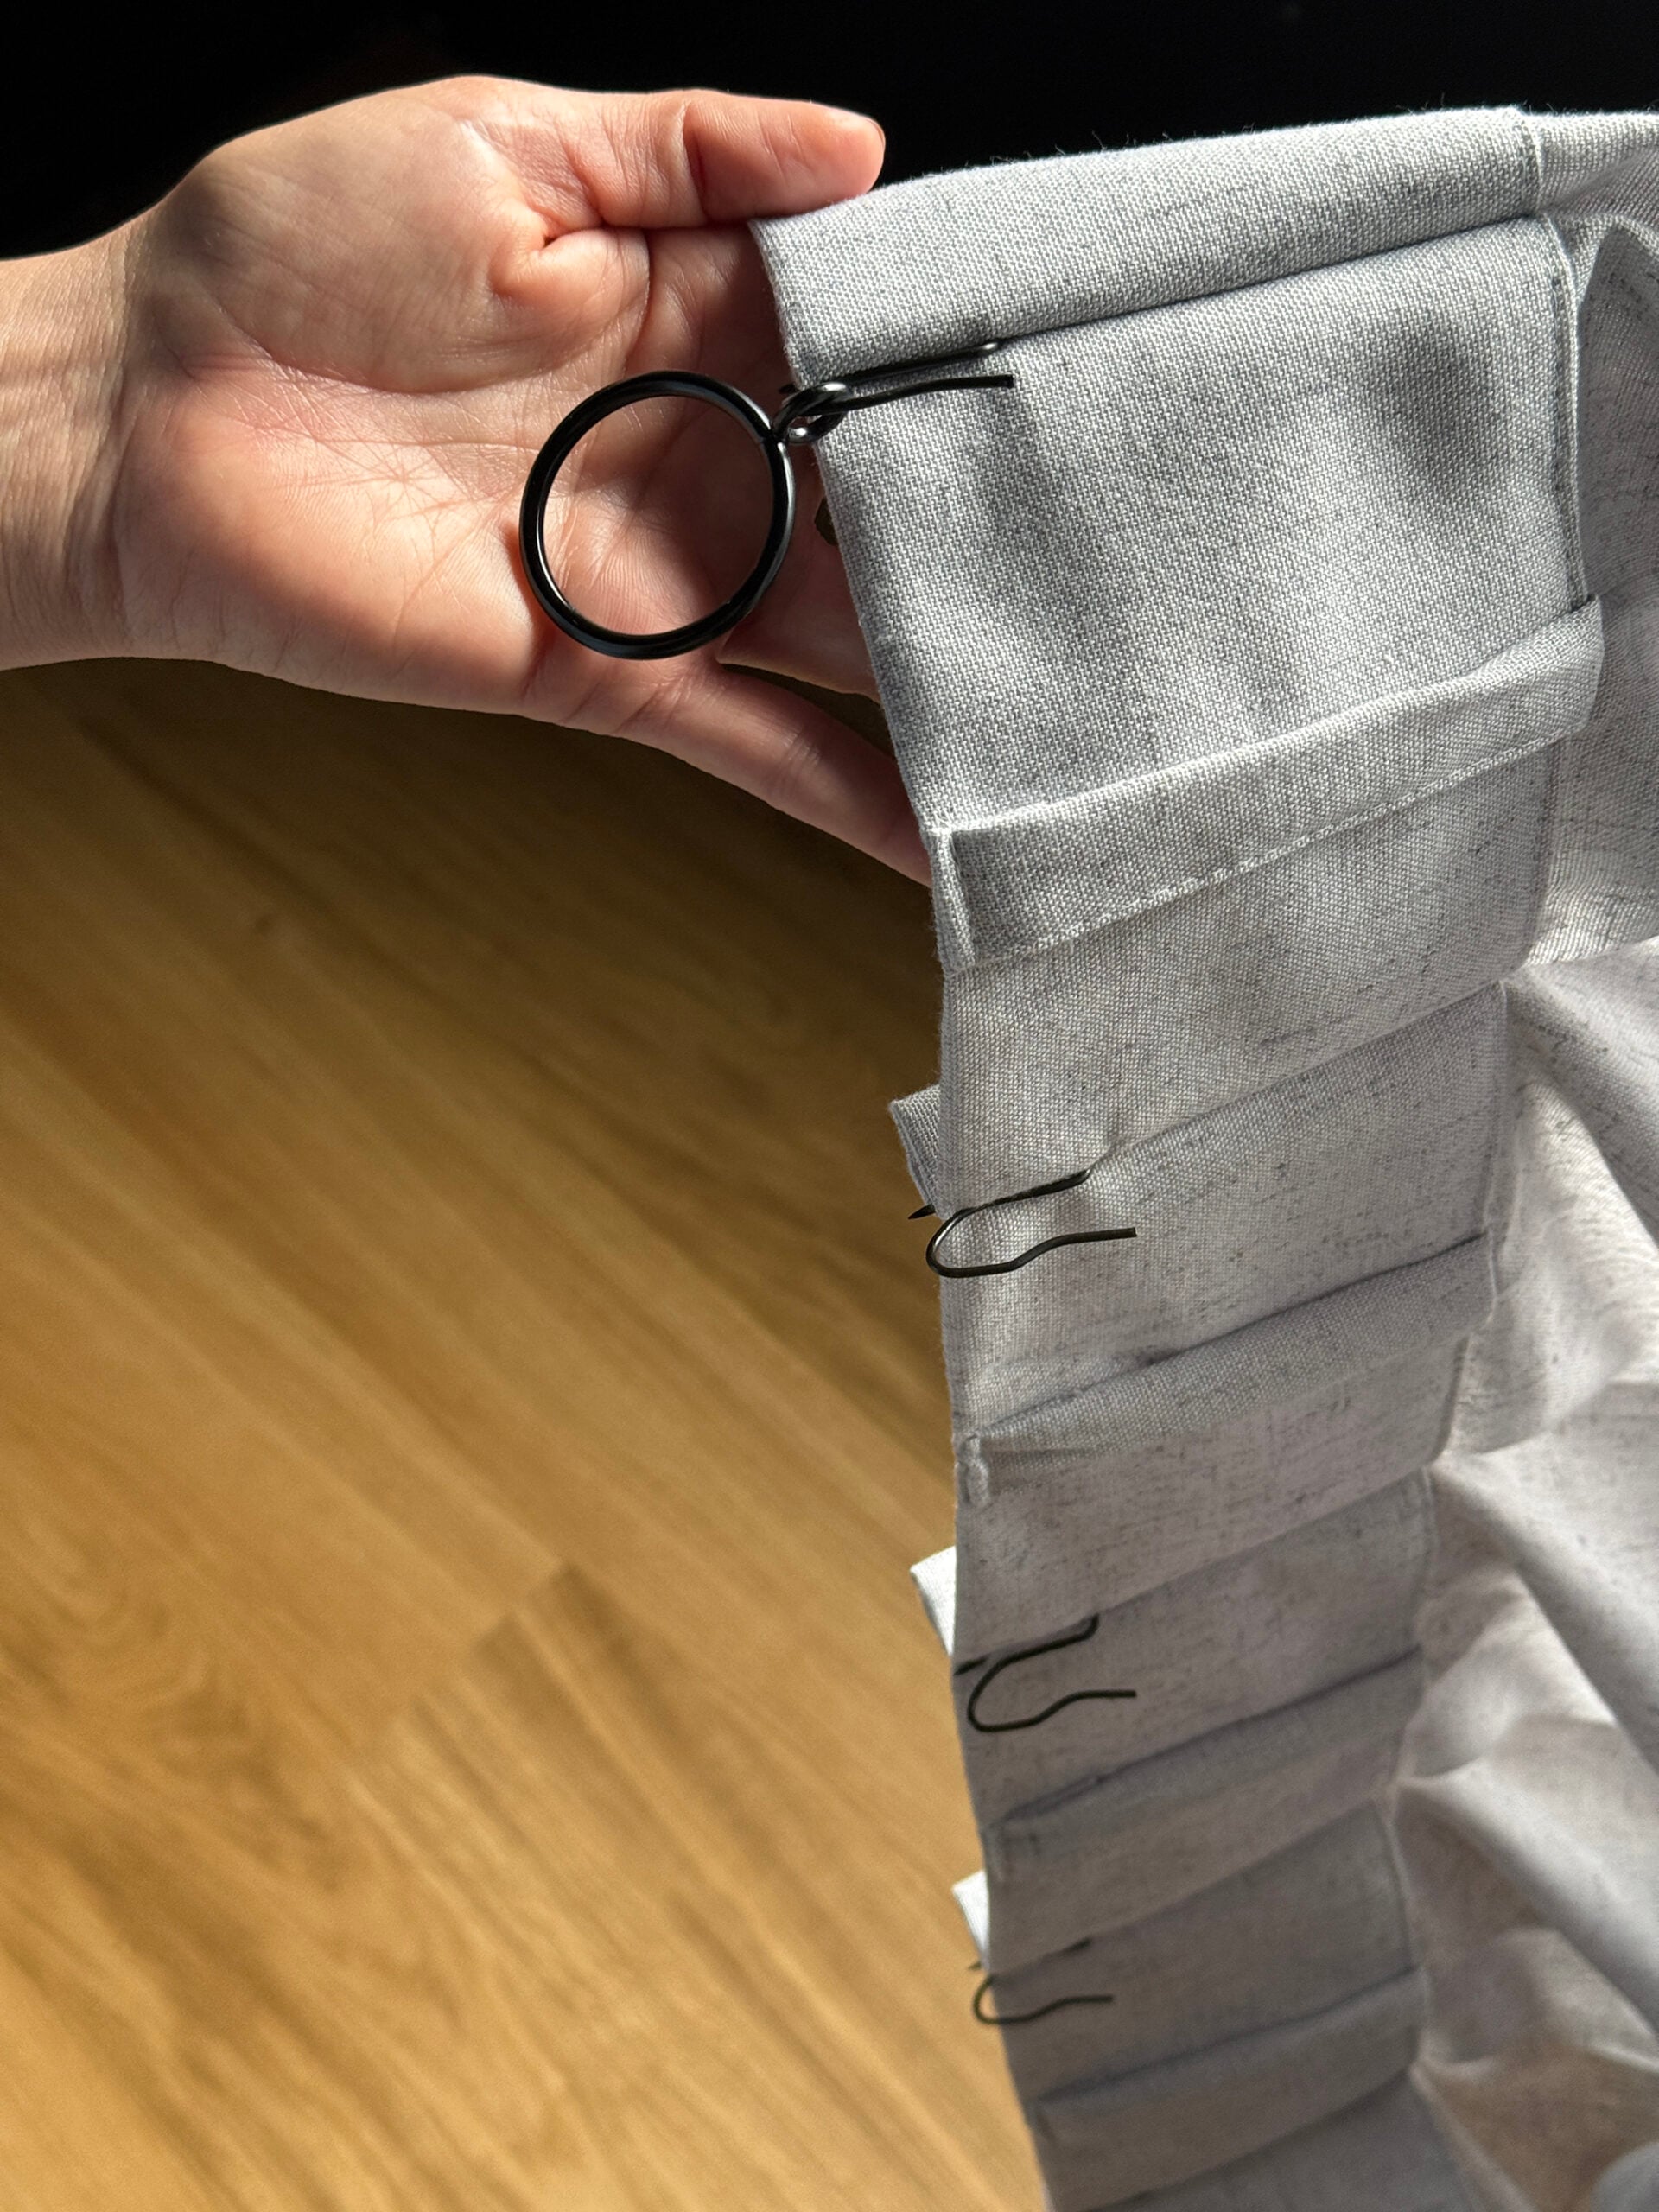
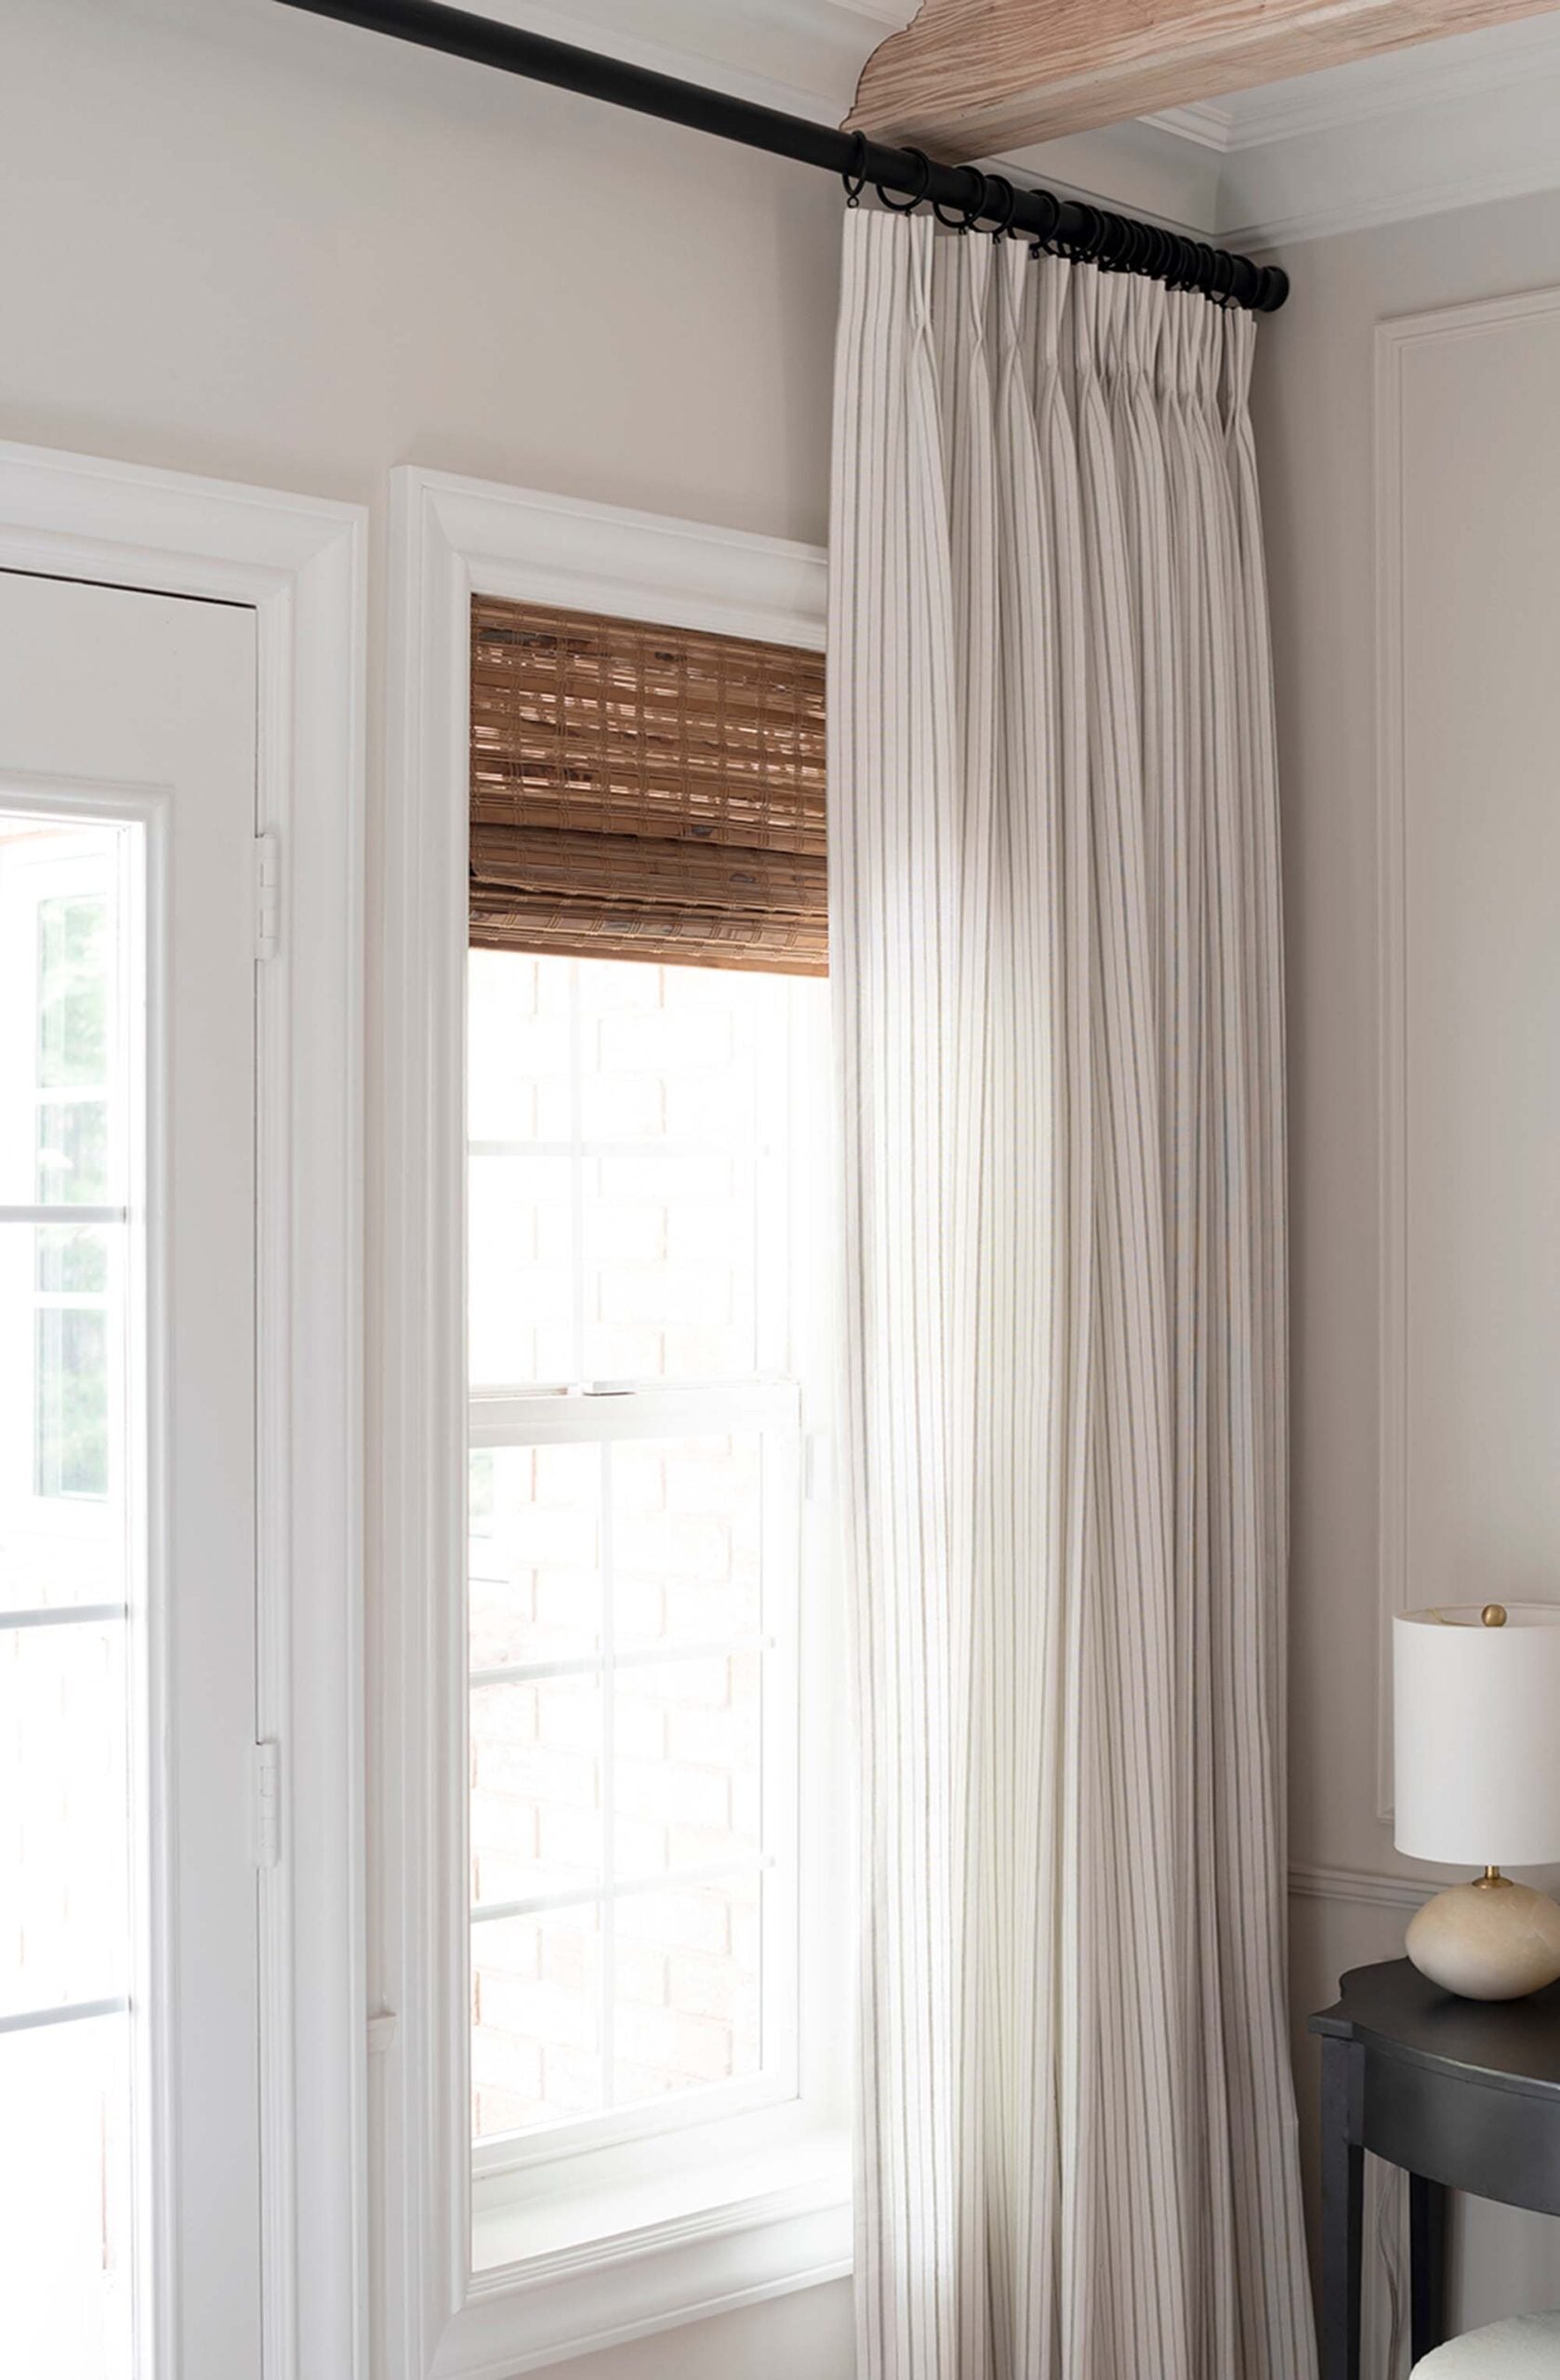
Once you’ve found a good readymade panel to install alongside your hardware, the first step is to pleat & clip the panels. You can either use rings with curtain clips or pleating hooks for a tailored look.
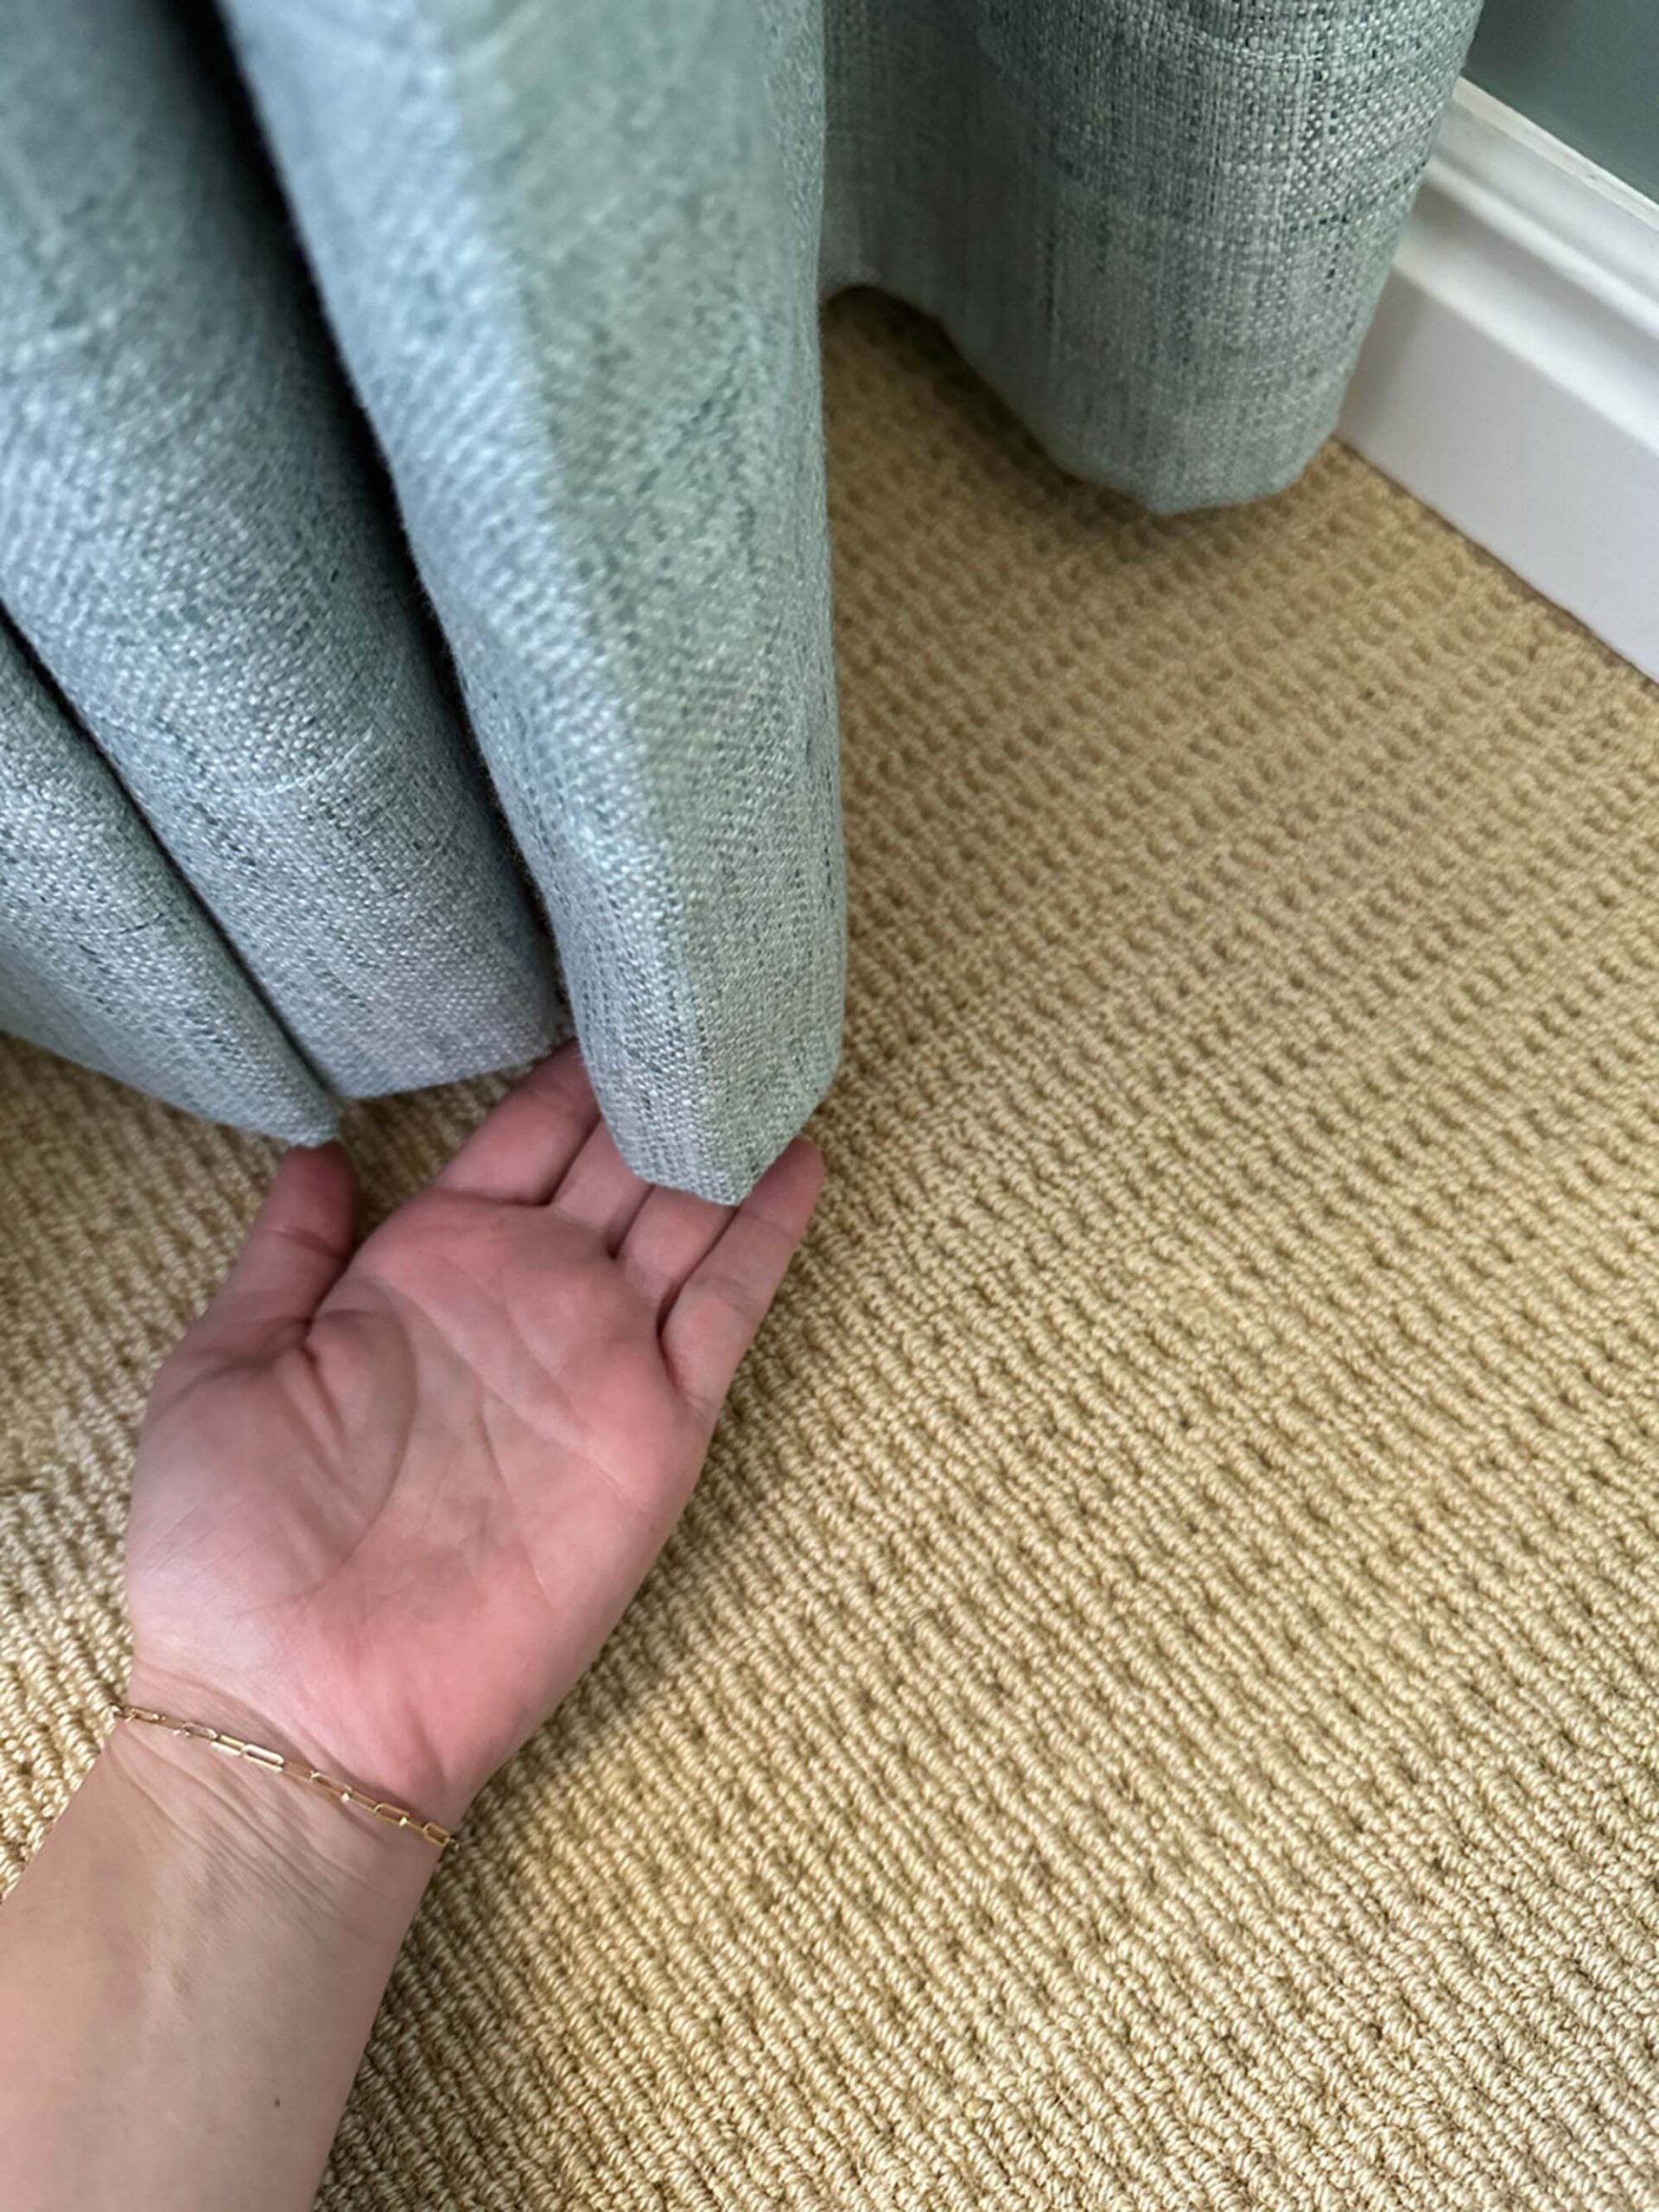
Next, temporarily hang them up and measure carefully. What should you measure? We’re looking at the length because the next step is hemming. Your curtains should barely kiss the floor. I’m not a fan of puddling, so I prefer my curtains to float 1/4-1/2″ above the floor. Keep in mind, some materials will stretch as they hang, so make sure you account for that. The goal is to hem your curtains once, so measure twice, account for stretch, and proceed with confidence! You should be able to slide your hand between the floor and the curtain, if you’re eyeballing it.
Step 2: Hem, Iron & Hang
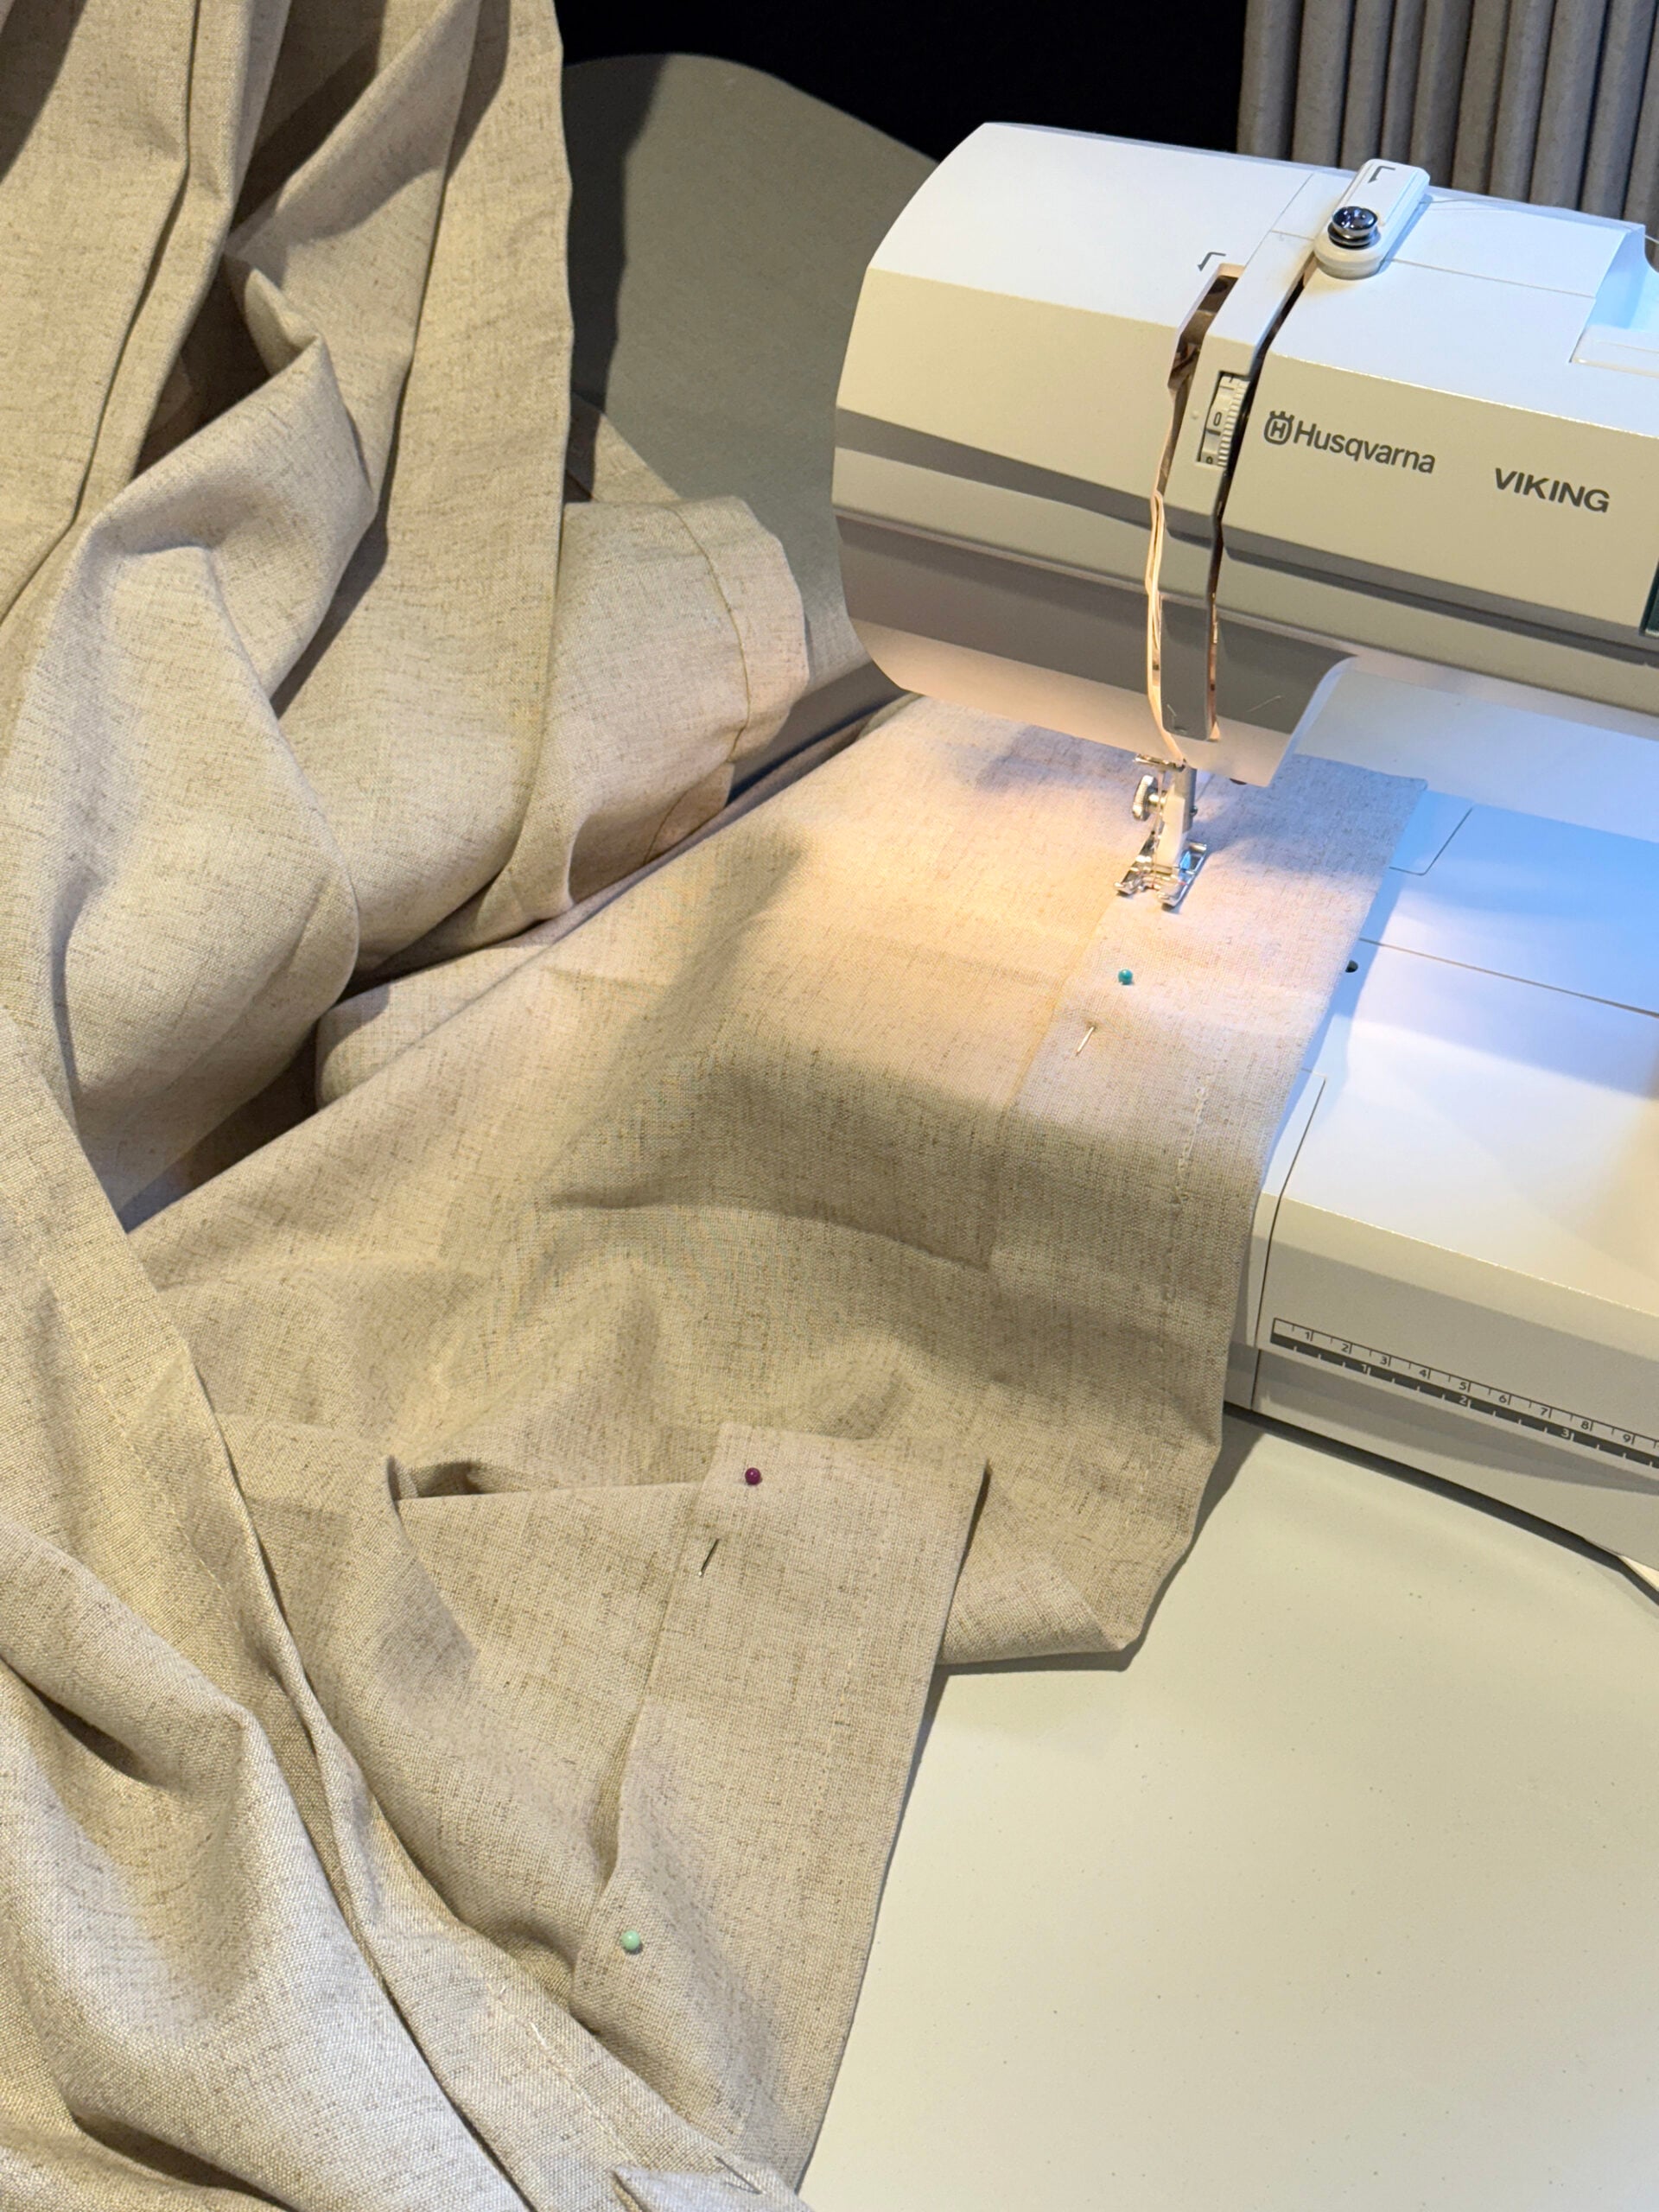
If you don’t sew, it’s ok- there is an additional way to hem your curtains and it only requires an iron. Buy yourself a pack of fusing tape. Fold the curtains into their hemmed position, sandwiching the fusing tape in the center of the fold, then iron to bond and set the hem… it’s easy! Once your curtains have been hemmed, iron them while they’re down and easy to maneuver, then install and hang them.
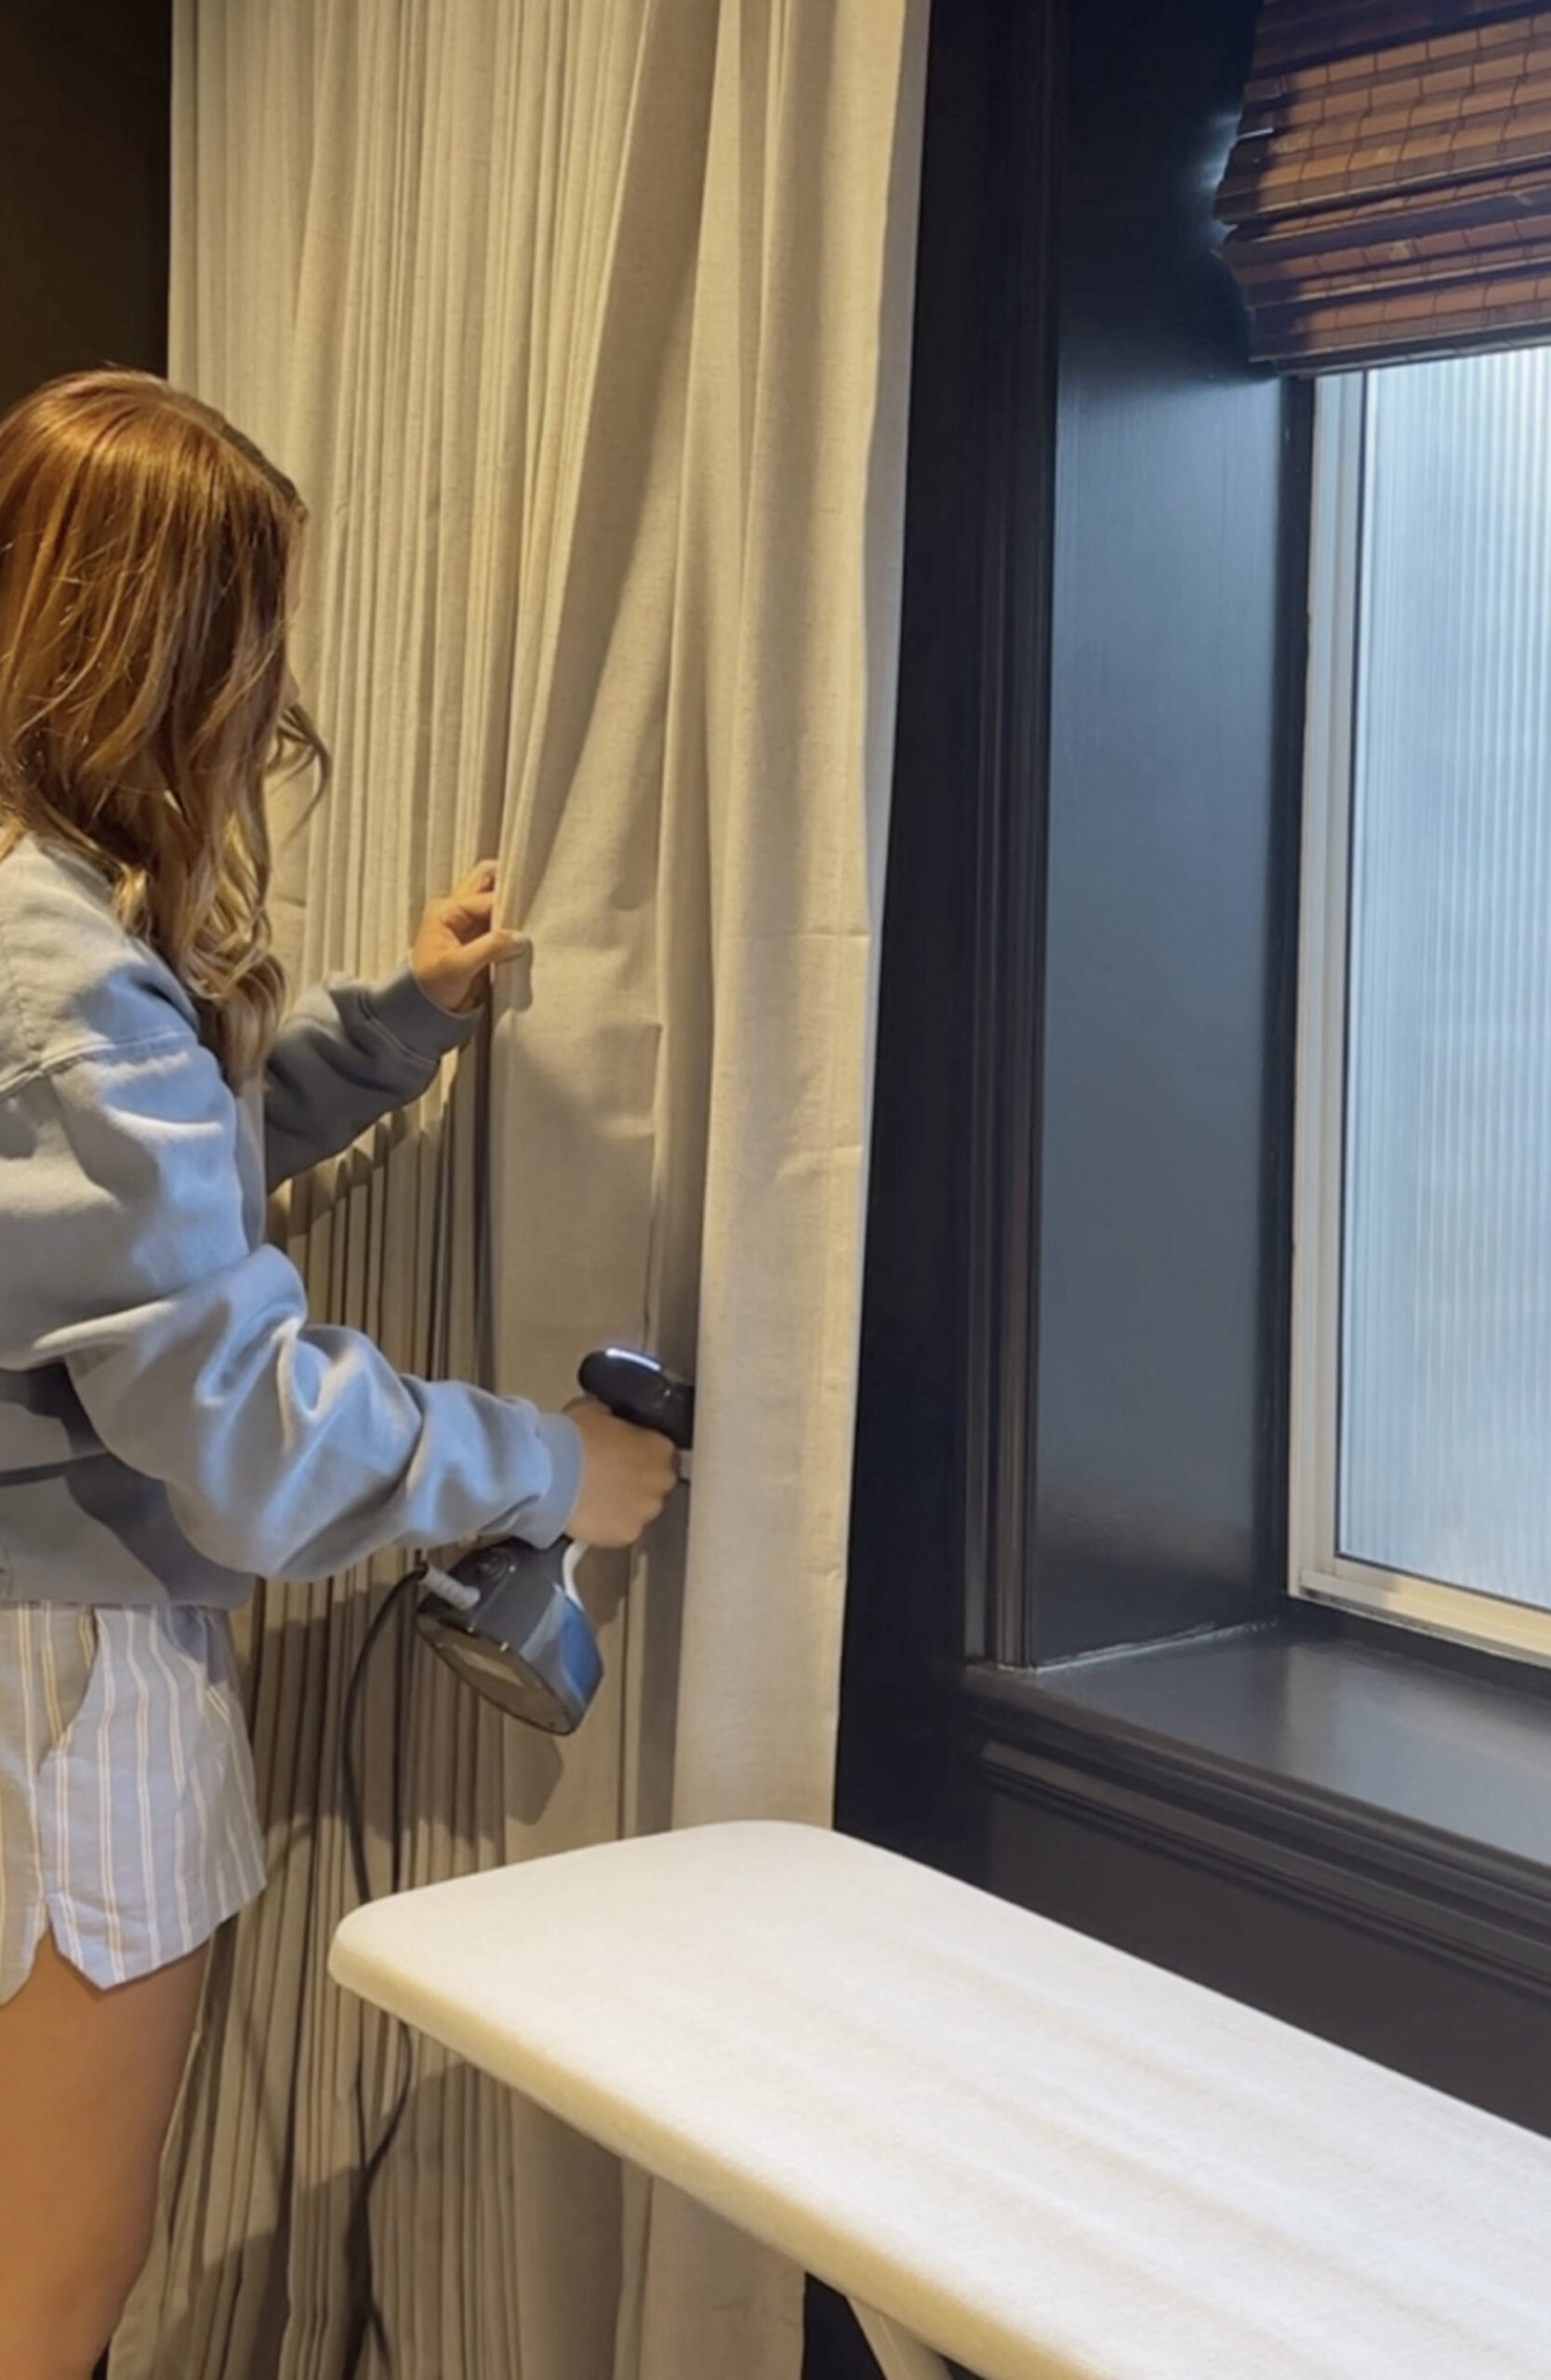
Step 3: Steam & Train
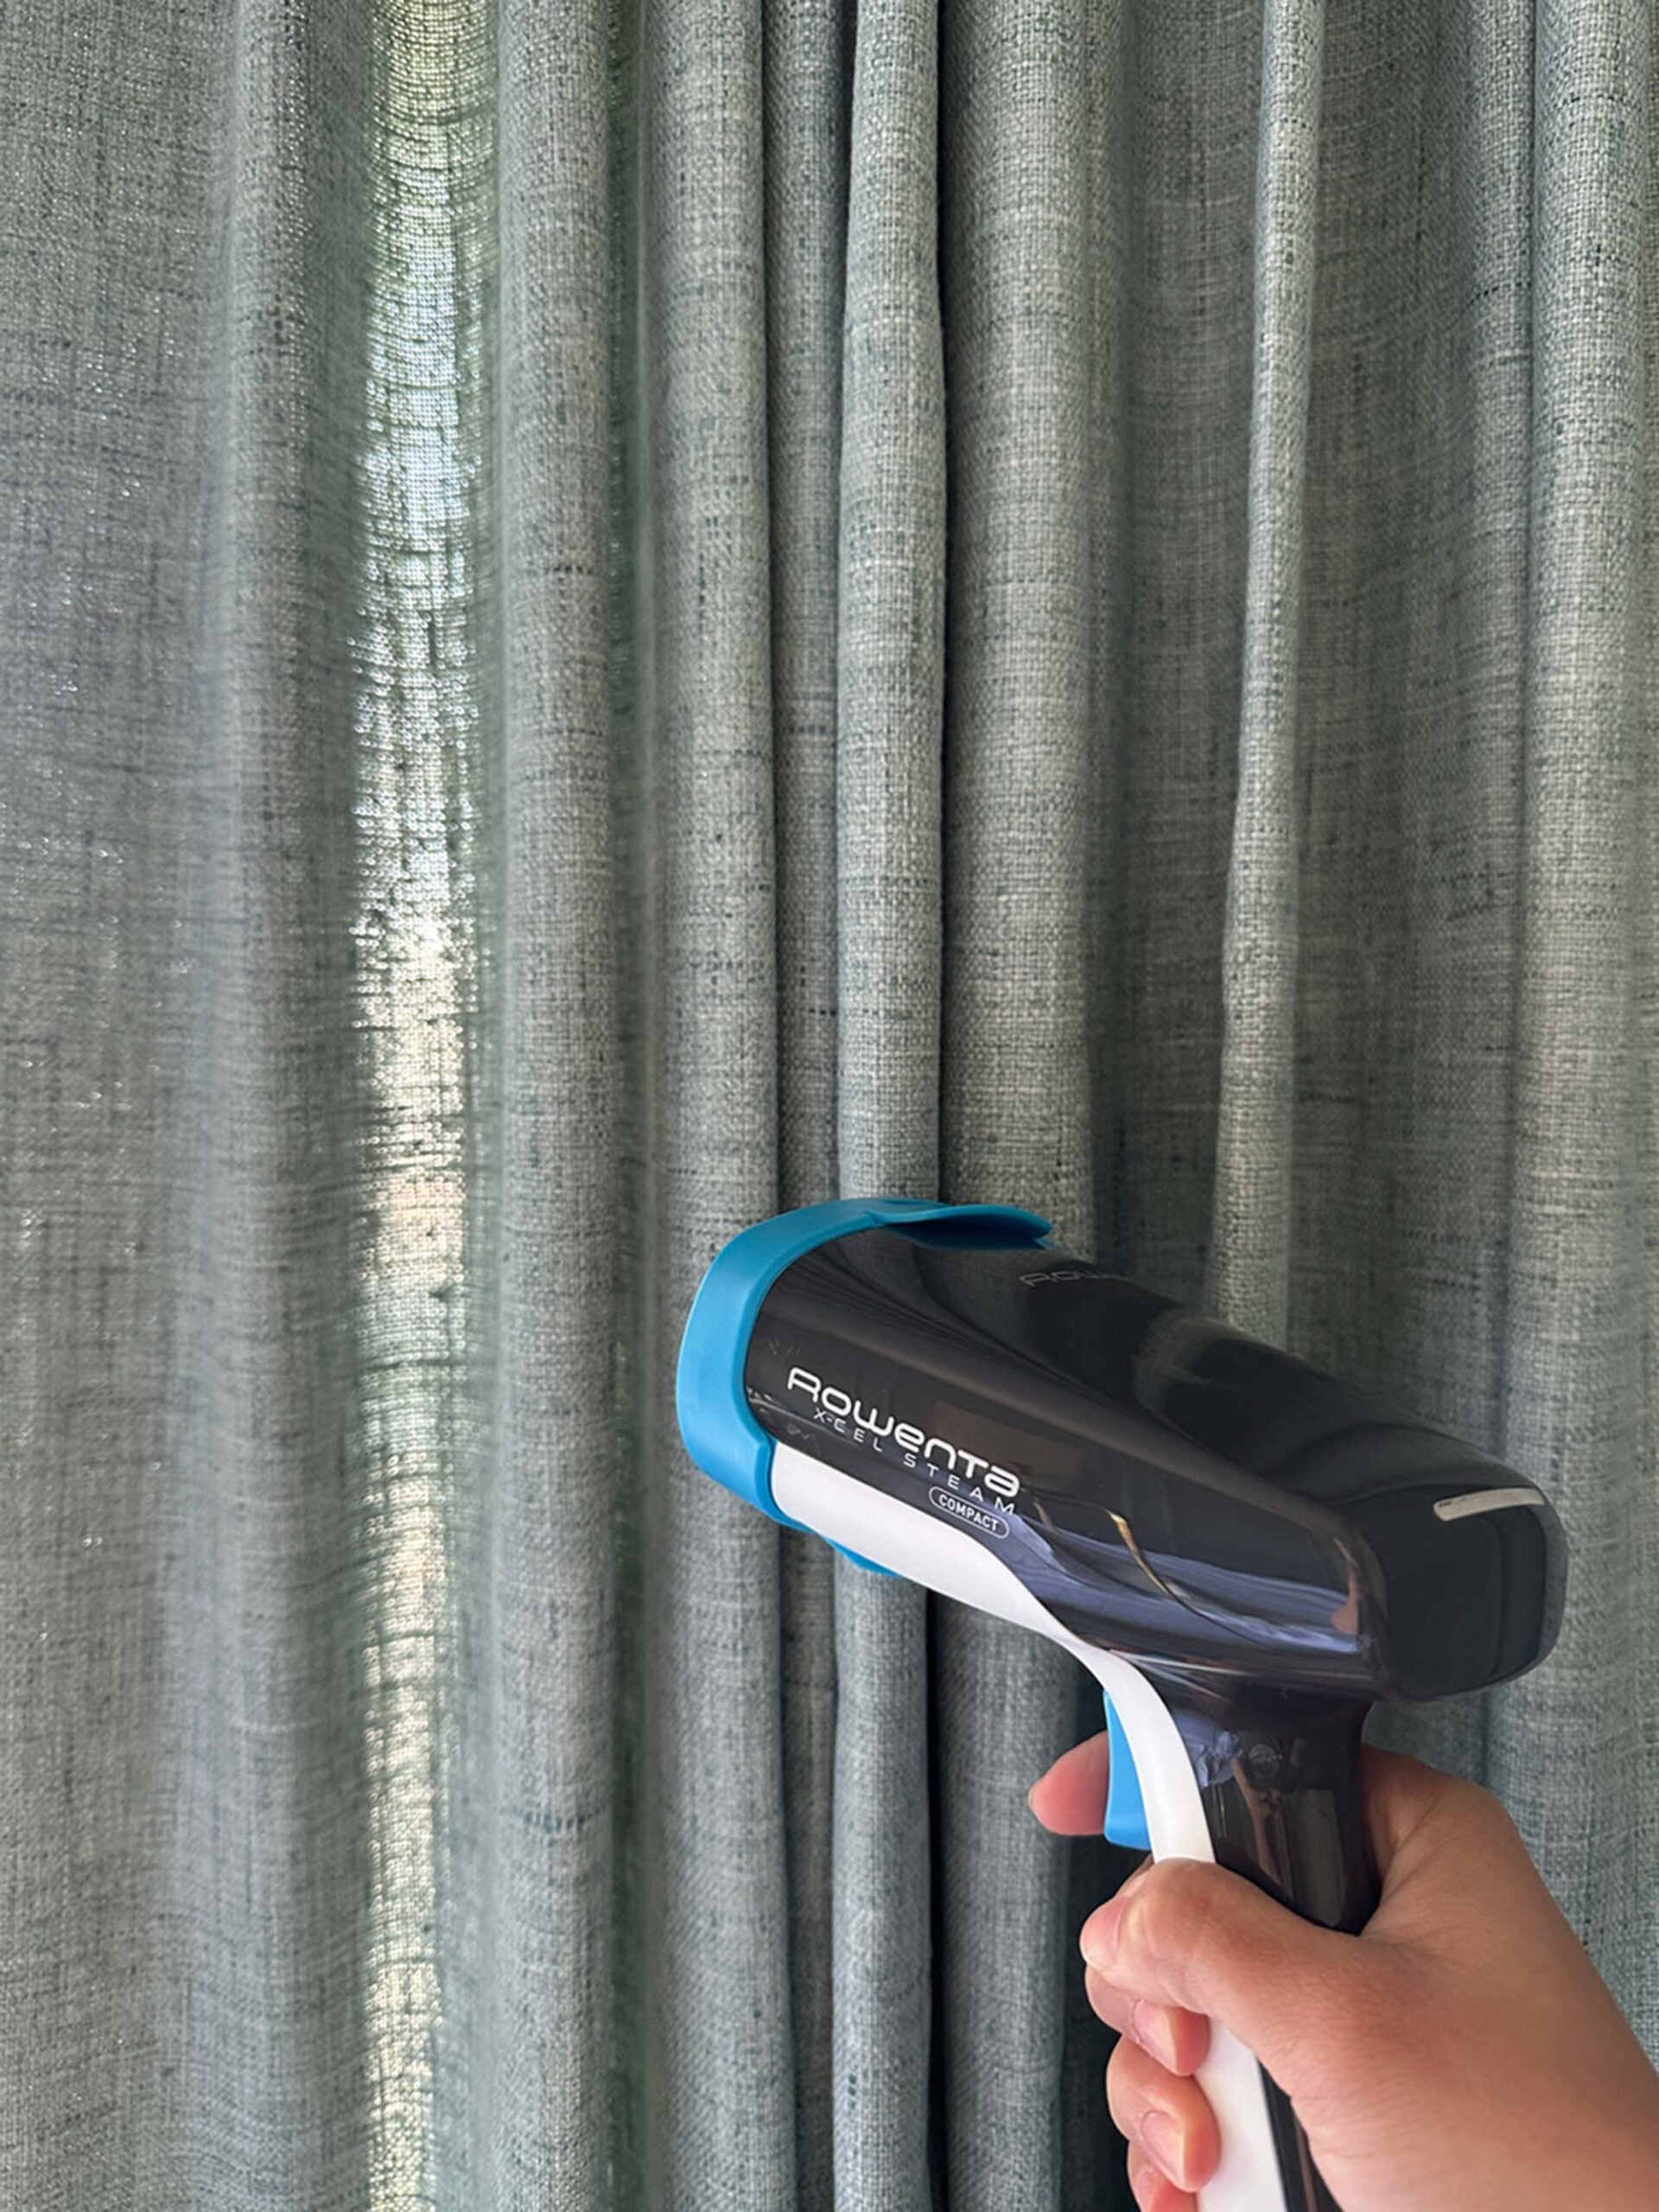
Once they’re installed, bring out your steamer. Typically, they’ll get some wrinkles or indentations during the installation process and you’ll want them to look perfect prior to training. Steaming will also help them settle and stretch as they hang. I steam from top to bottom while the curtains are hanging so gravity can help relax the fabric. If you’re using an iron, keep the heat appropriate for the material and work carefully.
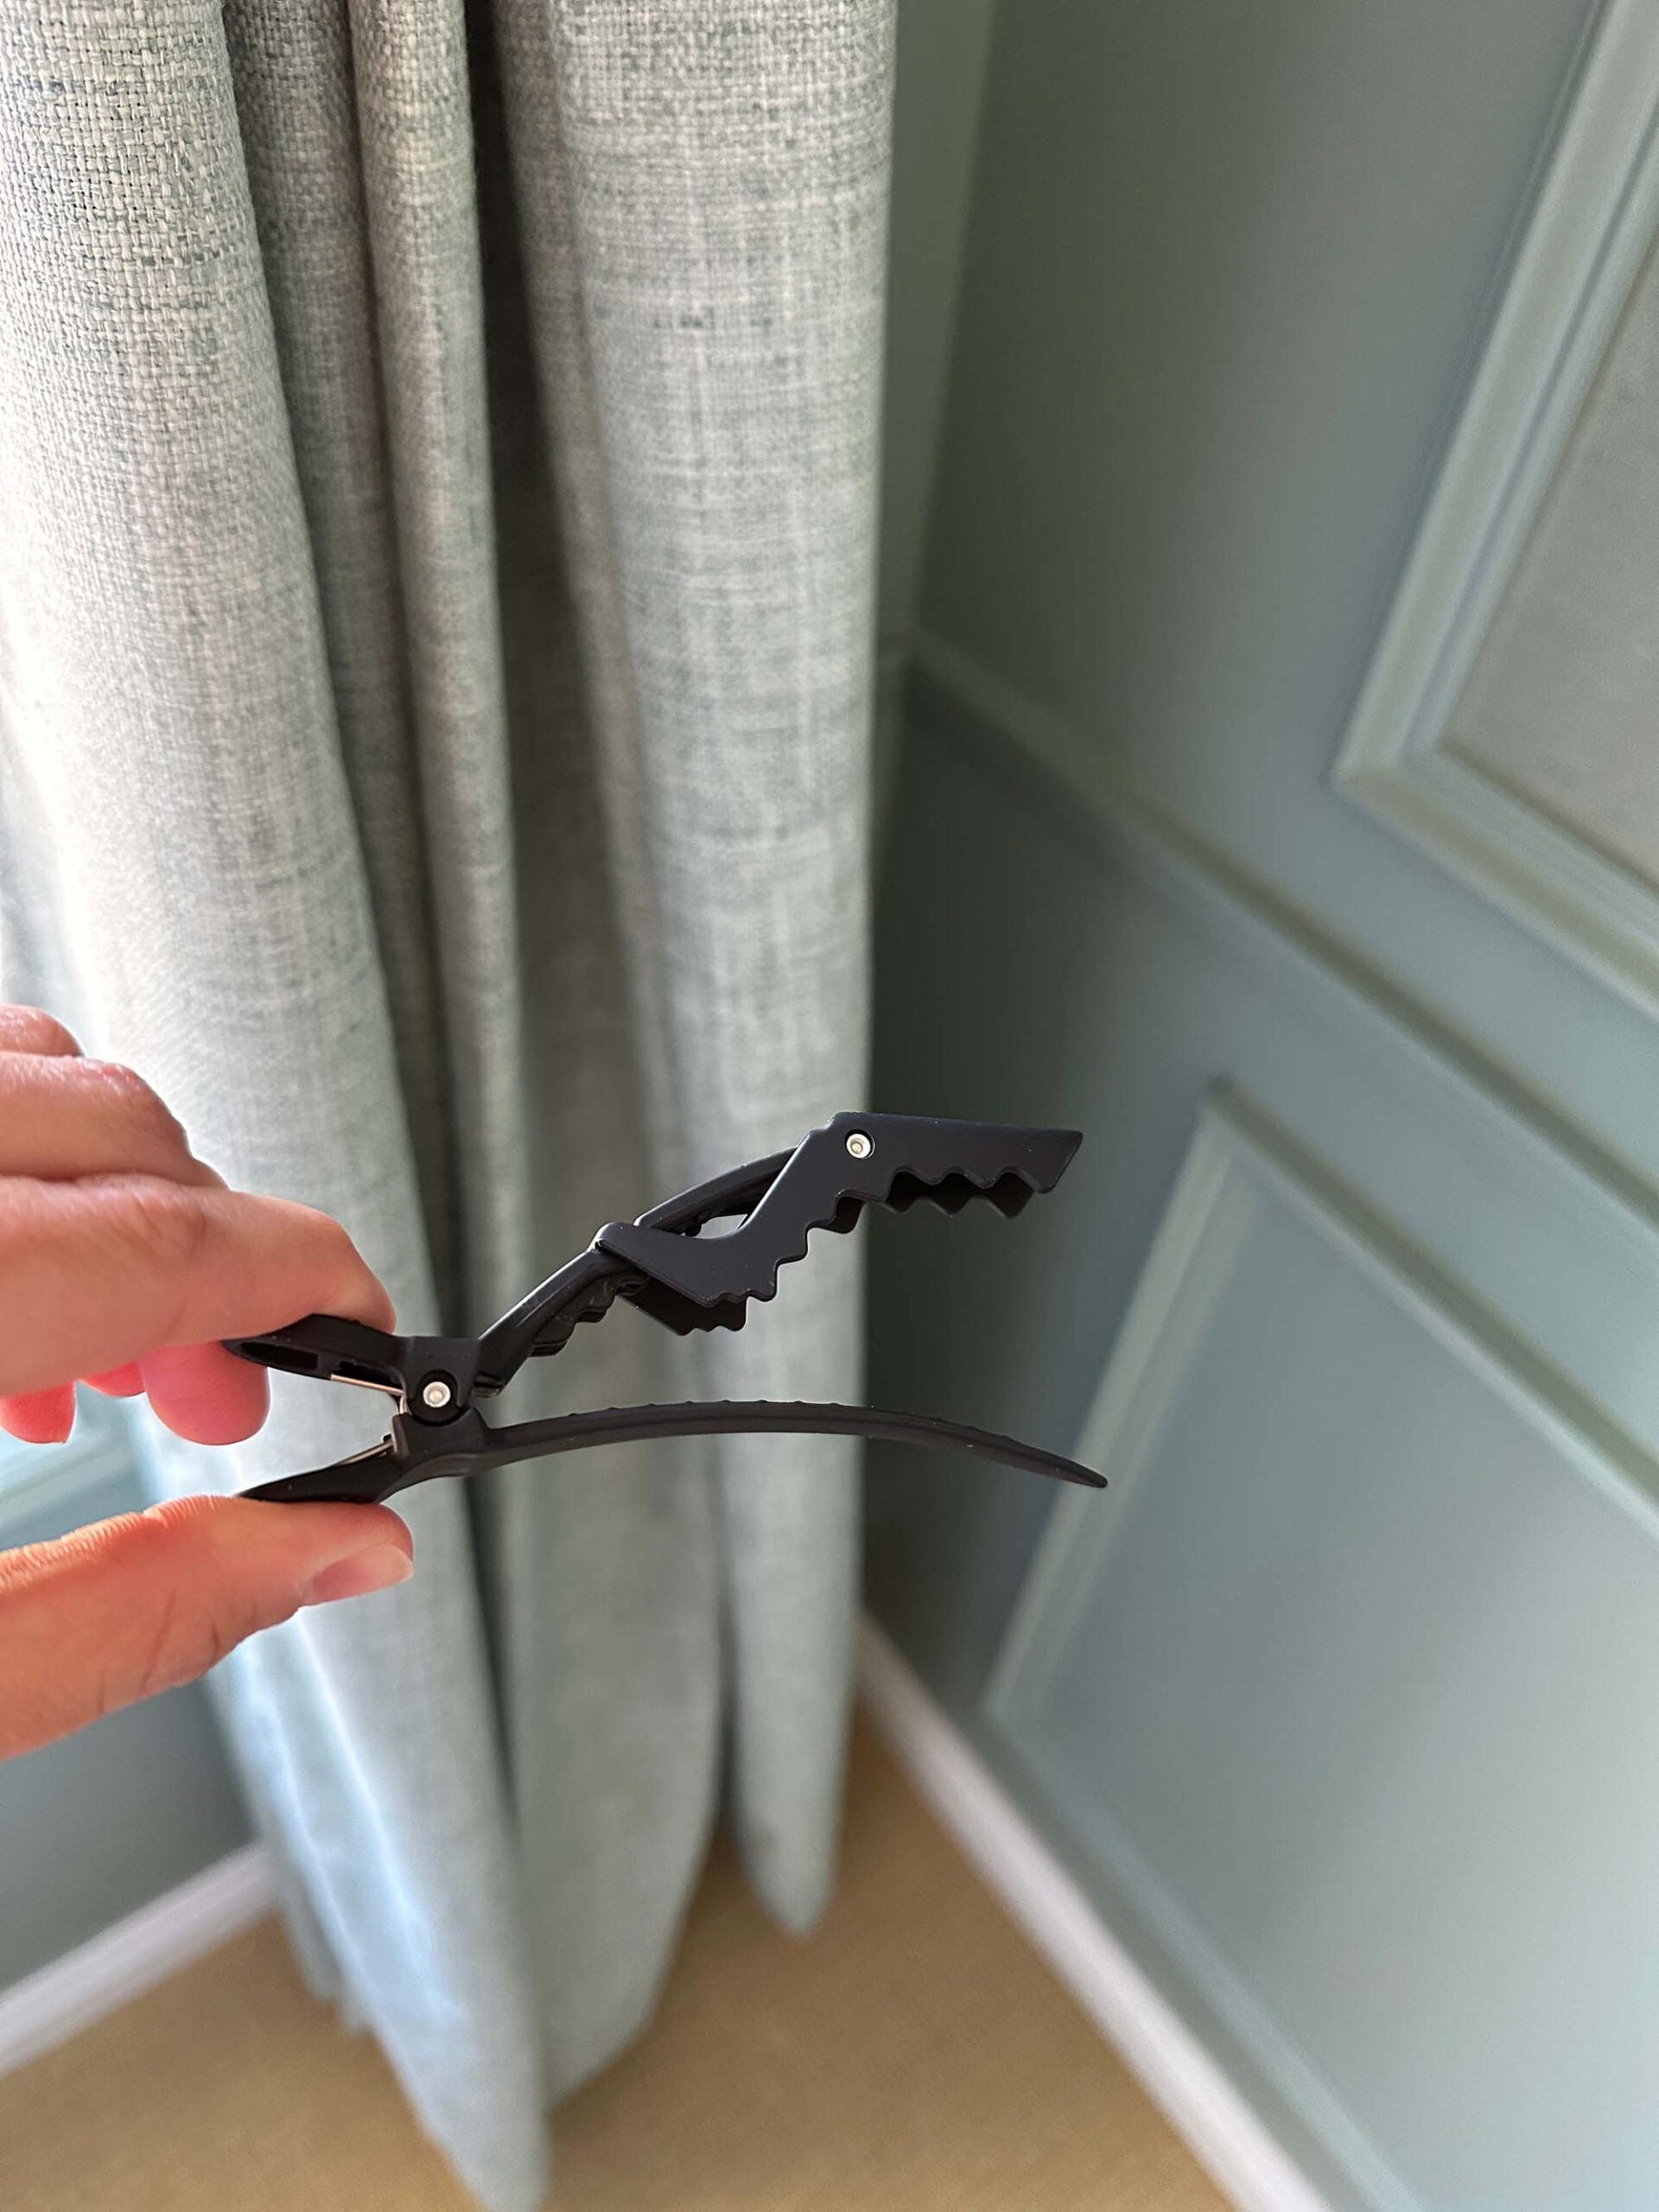
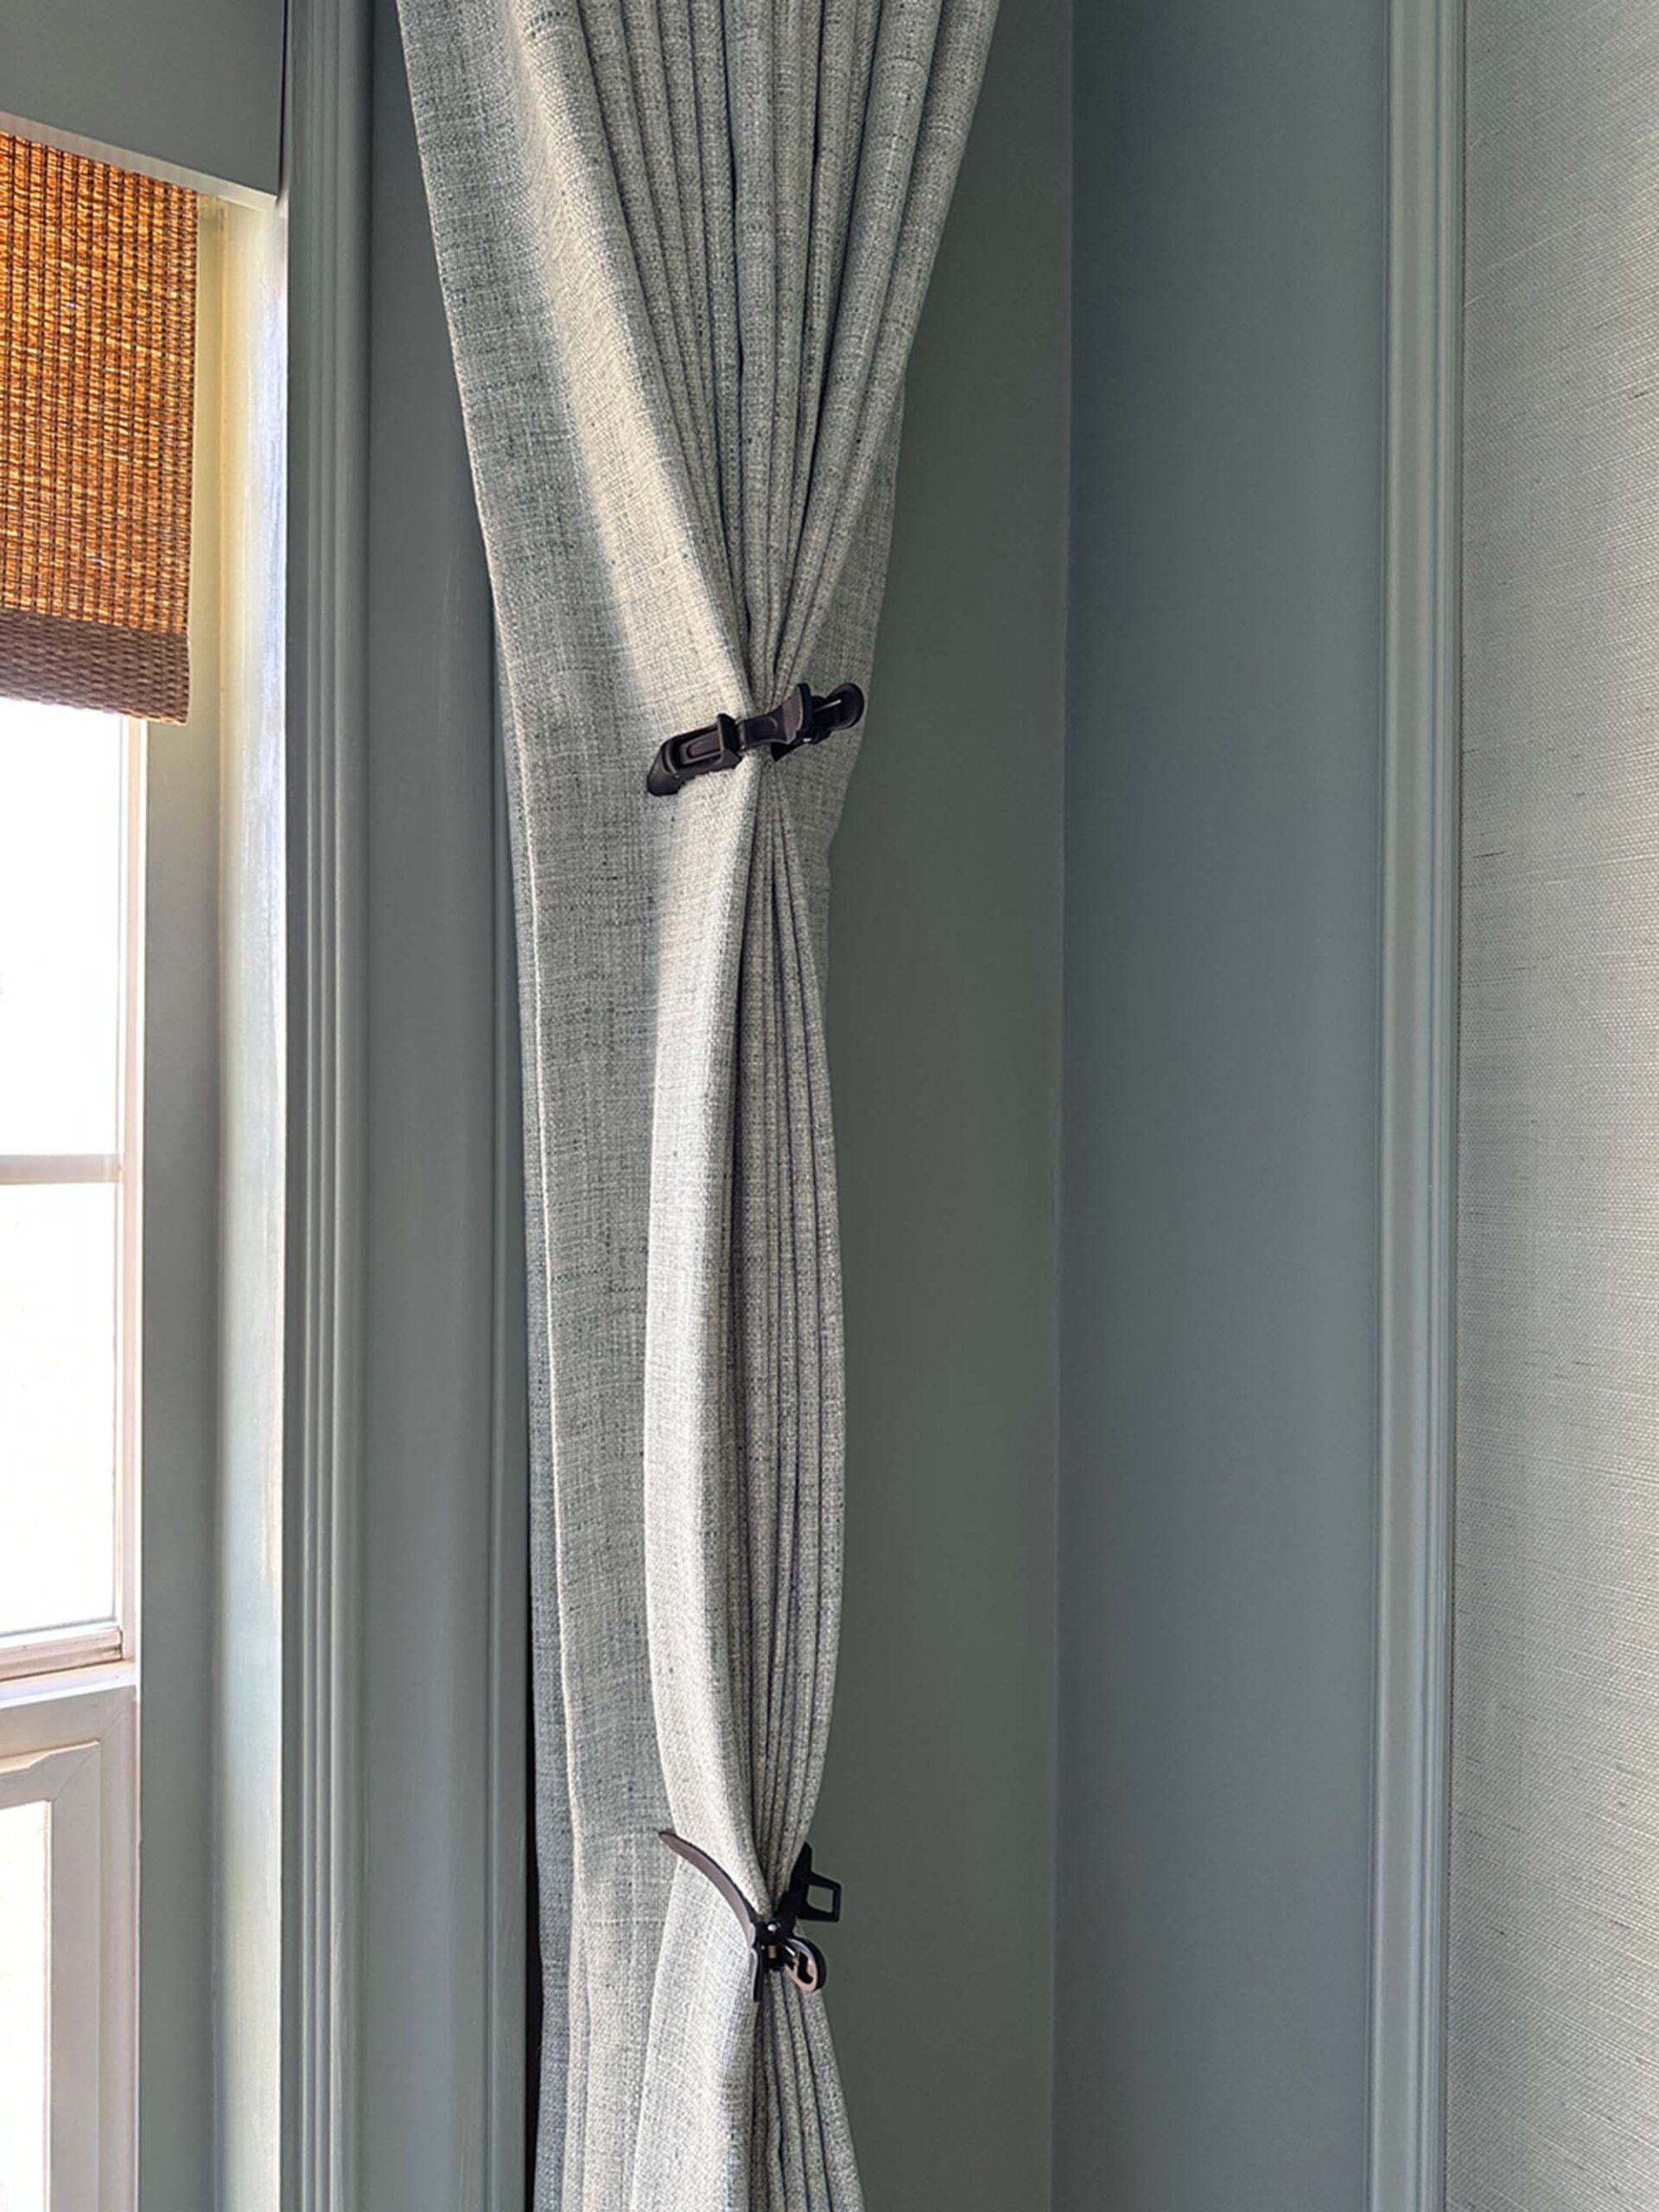
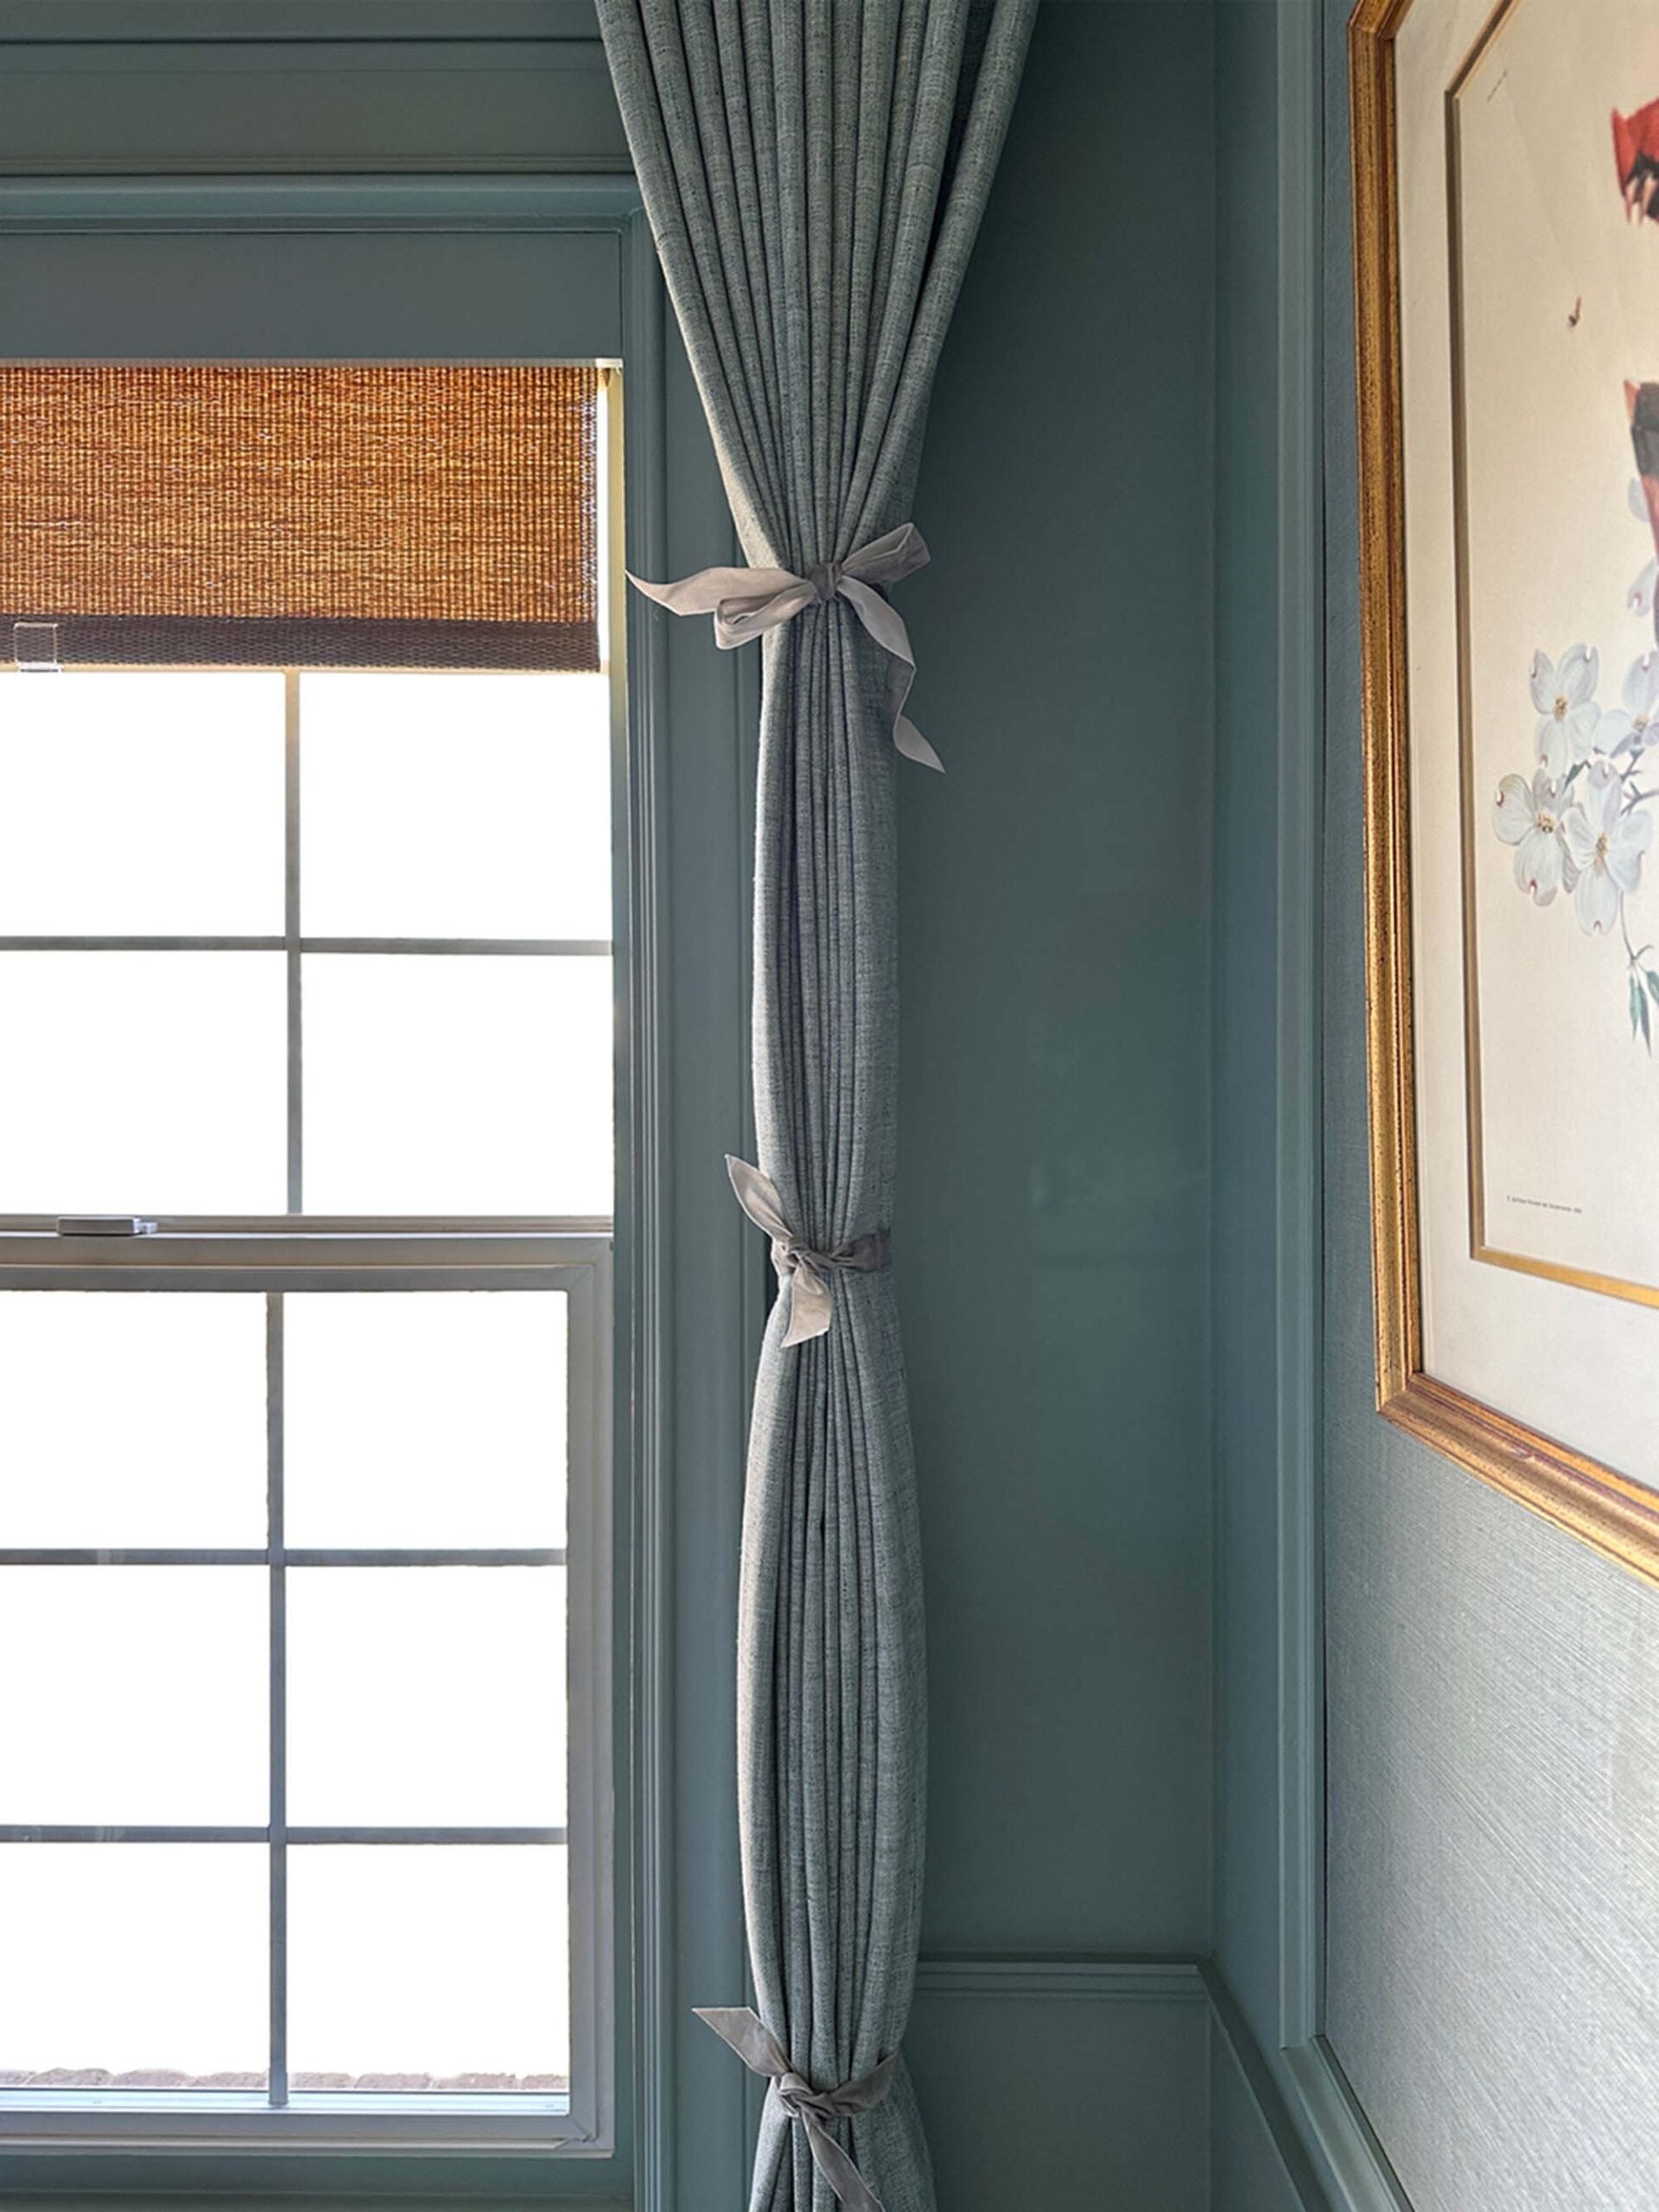
Now for the training… I like to use hair clips to hold the pleats temporarily while I’m working and manipulating the fabric- they’re easier to adjust. Working from side-to-side and top-to-bottom, evenly fold & pleat the curtains by hand. Make sure they’re consistent because this is how they’ll hang once they’re trained.
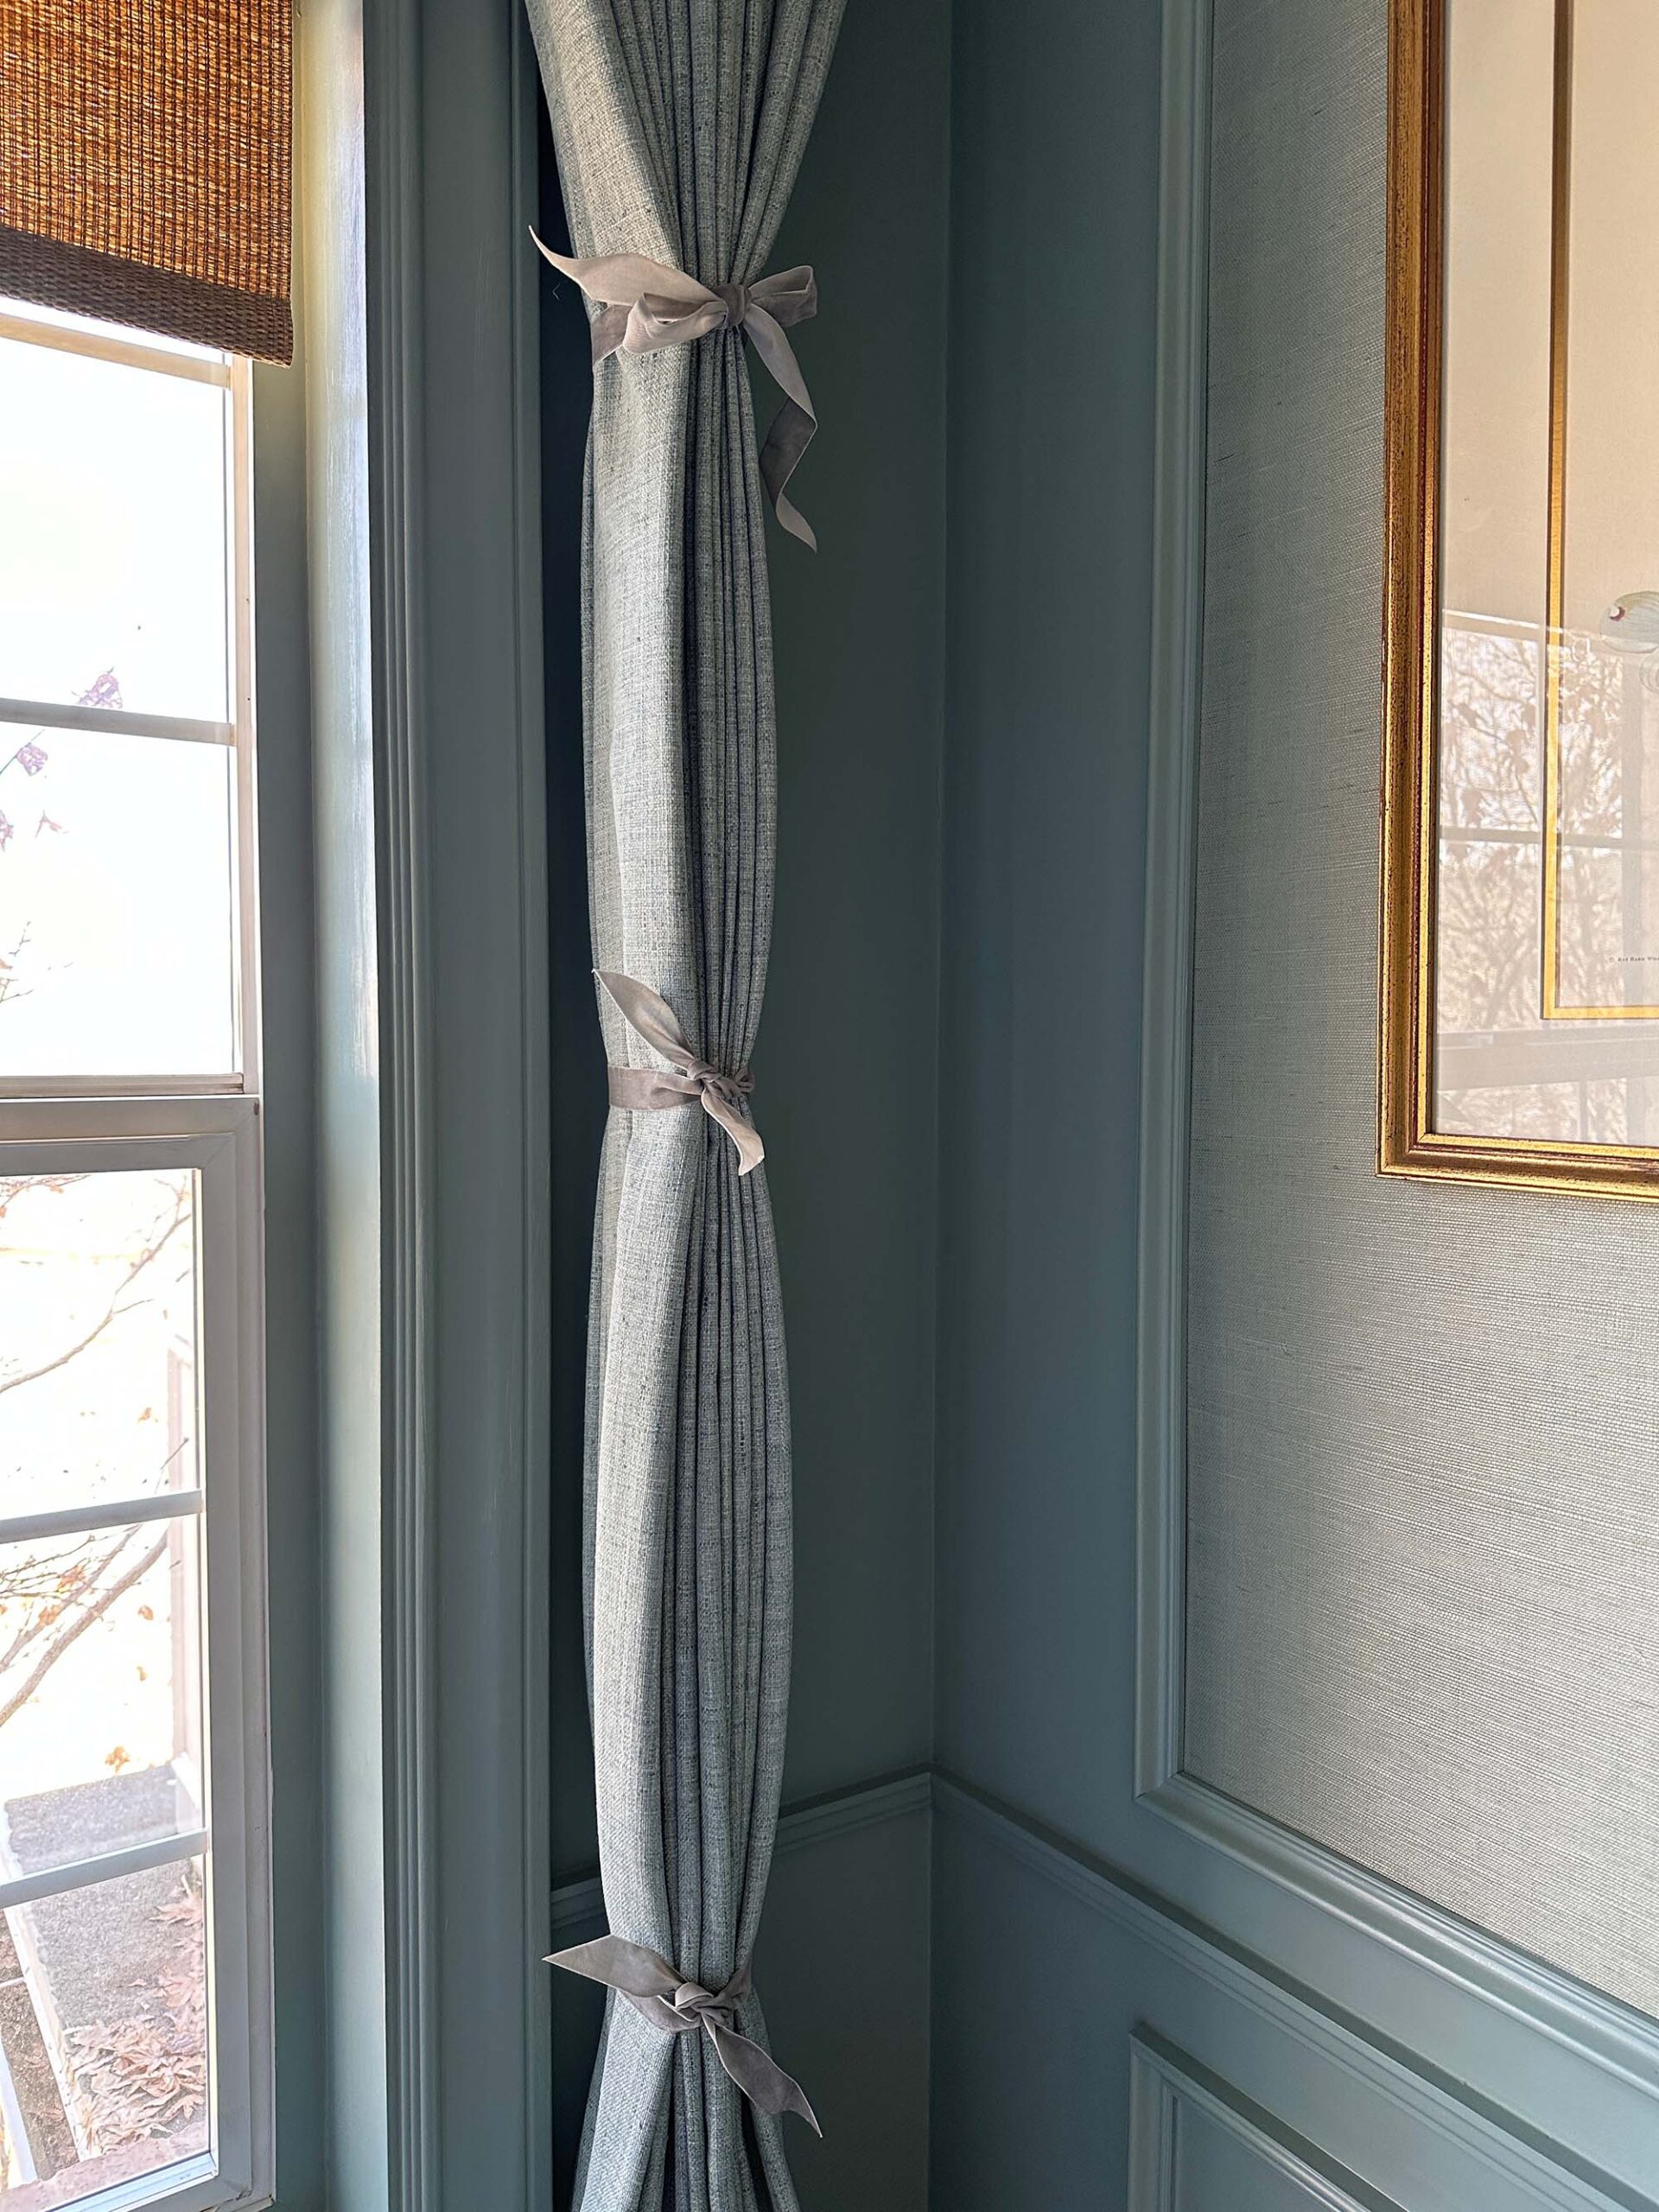
Once you have them fixed as you’d like, use ribbon or string to tie them into place. Tie them 3-4 times from top to bottom, give them a spritz of linen spray, starch, or water. Leave the curtains tied for at least 48 hours. Longer is fine, especially for heavier fabrics like linen blends or velvet. This resting period allows the material to develop what designers call “memory,” so it naturally returns to those folds once untied. Undo them and voilà, perfect drapery panels!
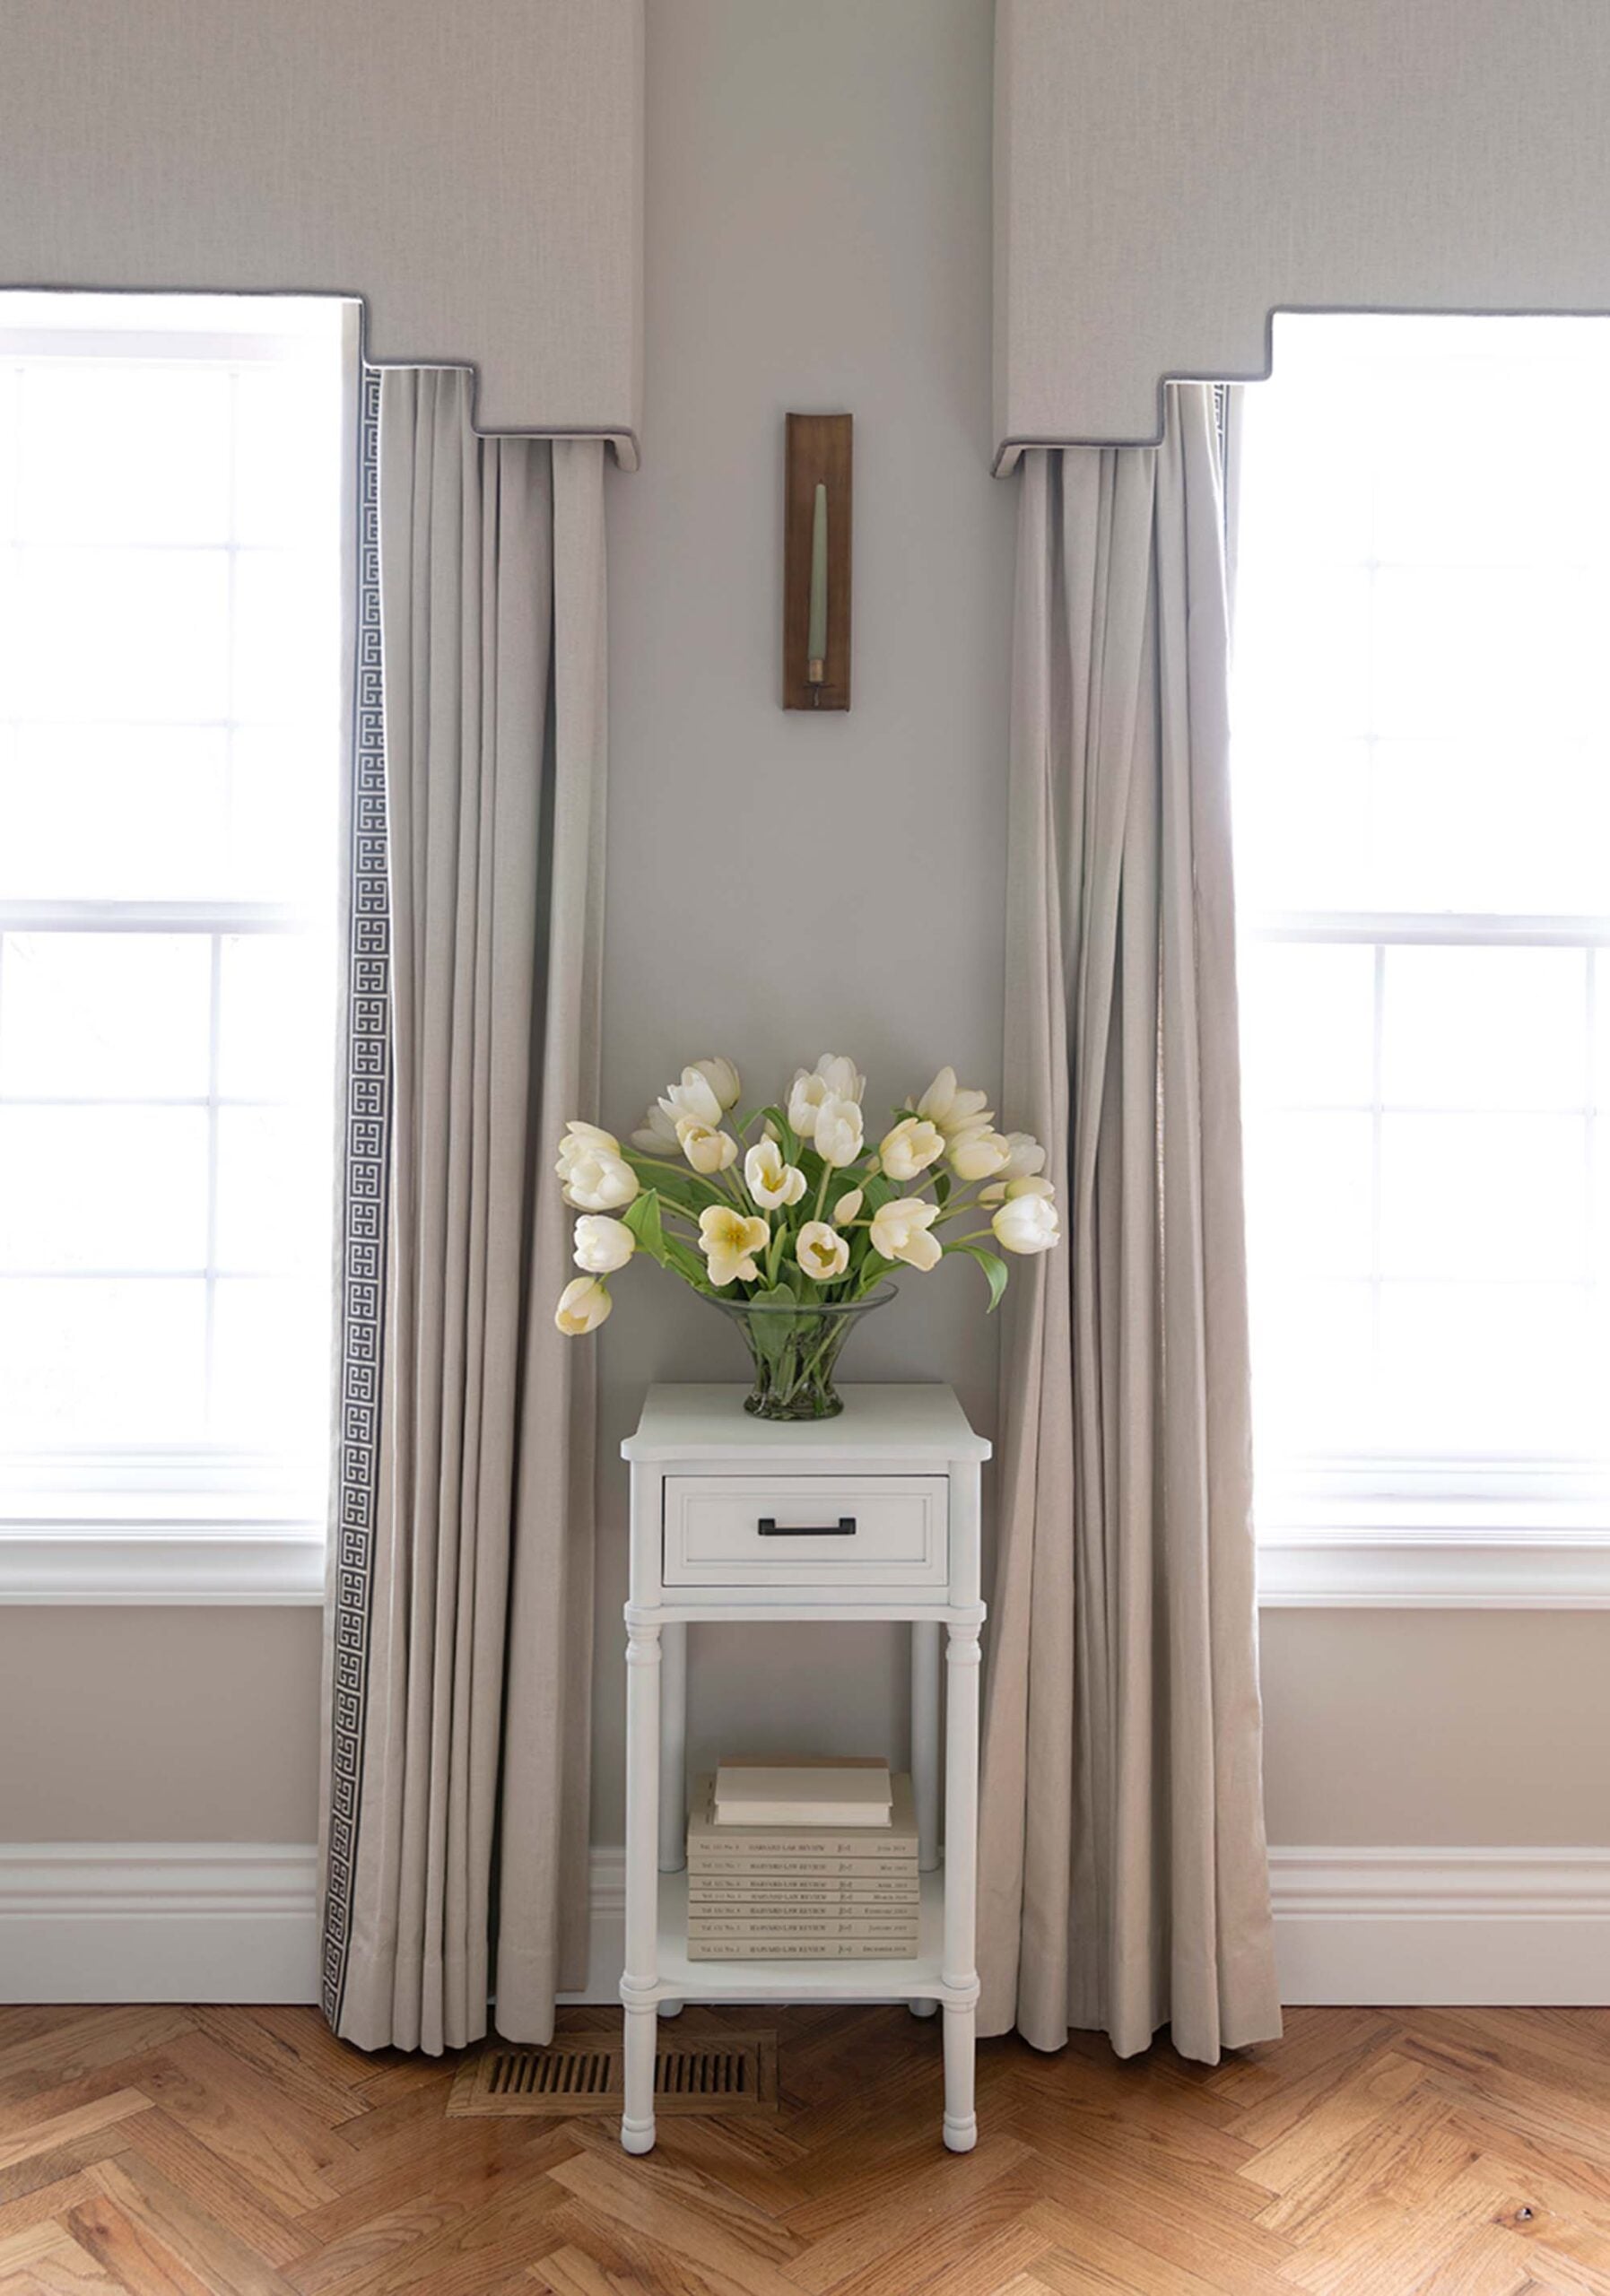
Why Trained Curtains Look Better
Untrained curtains tend to shift every time they’re touched, which creates uneven folds, making them look messy. Trained curtains fall back into place effortlessly. The room feels tailored, more intentional, and finished. It’s a subtle upgrade that elevates the entire space.
Questions?
Most curtains need about two days to hold their shape. Heavier fabrics may benefit from a few extra days.
Not all, but most benefit from it. Linen, cotton, and heavier blends see the biggest improvement.
Steaming is gentler and easier while the curtains are hanging, but ironing works if you’re careful.
It is DIY! You can learn how to make a custom upholstered bed here.
Related Posts
If you’re looking for more posts on window treatments, I’ll link some of my favorites for you below…
- Affordable Window Treatments For a Custom Designer Look
- 12 Designer Tips to Make Your Ceiling Look Taller
- How to Hang Artwork in Front of Curtains
- The Best Budget Curtains That Look Custom
- 40 Designer Approved Roman Shades to Fit Any Budget
I’ll also link some of my favorite readymade panels for you in a slider at the bottom of the post. Please let me know if you have any questions about my process or window treatments in general. I’m always happy to help! You really don’t have to spend an arm and a leg on custom window treatments for a designer look if it’s not in your budget. It definitely requires some effort to get there though!
If you’re investing time in choosing the right fabric, hardware, and placement, this final step is what brings everything together. Once you’ve done it once, you’ll start noticing trained curtains everywhere, and untrained ones will be impossible to unsee. I hope this post was helpful.

Sarah, thank you! I feel so validated. My husband thought I was nuts when I did this with new drapes several years ago. And the drapes are still hanging beautifully.
I love hearing that, Marti! It really does make a world of difference… validation indeed!
Good morning! First of all, thanks for thinking I’m fastidious enough to own a steamer. Ha. As I’ve leaned into my laziness over the years, I’ve all but abandoned even the use of my iron. Since one seems vital to this process, do you recommend the one you’re using? Even though the procedure seems simple, I know arranging those pleats evenly along the full length would be tricky. Your tip about using hair clips is genius! Once they’re trained, do the drapes require occasional touch-ups? (Other than post-laundering) Also, do you recommend training all window treatments? I’m wondering about more casual linen panels (like in your bedroom) or café curtains. As someone who’s unlikely to ever purchase custom drapery, I really appreciate your ready-made recommendations! One element that I’m not sure you’ve covered before is choosing rods and finials. Am I overthinking it? (probably) Should they blend with the millwork? Match other hardware in the room? Contrast with the drapes? Make a statement? This might be why I have no drapes in my home-too many decisions. If I hang around here long enough, you might convert me though. All of your window treatments are so beautiful and effortless. Thanks for another informative and helpful post! I’ve got birthday cake and drywall patching on my agenda. Lol. Have a super Wednesday, Sarah! 💜
Hi Peggi! I can’t believe you don’t have a steamer? I use my steamer wayyy more than my iron! I love the Rowenta one I have- it’s older, but has done a great job and still works years later. Pleating the full length of the panel gets tricky, but the clips make it so much easier. You just can’t leave the clips there or they’ll make creases. Once you’ve got them pleated nicely, swap the clips for ties and let them hang like that for a few days! You don’t have to train all window treatments- it just depends on the look you’re going for and what material you’re using. I let me linen curtains in our bedroom do their own thing. They have a casual wrinkled look about them and I’m cool with it- so I didn’t train those. If I had time to train our cafe curtains in the camper (and it weren’t just for camping), I totally would… if they were inside, for sure! Maybe I’ll work on a hardware post that compiles some good tracks, rods, finials, etc. Great idea! It’s really a personal preference and what aesthetic you’re going for when it comes to hardware. I’m trying to convert you to install some drapery ;) Happy cake baking and drywall patching!! That sounds like a super productive day. xo
Good morning! All of your window treatments are envious, and I strive to have such beautiful wi dow coverings. Alas, many of ours are simply lackluster. I have trained a few sets of drapes and our two upstairs shower curtains- but your hair clip trick is a genius maneuver and I’ll be keeping that in my back pocket! It’s funny, the only time I use my iron is for the curtains- but I far prefer my steamer. Have you seen the steamer that’s a steamer and iron in one? I may need to upgrade, ha! Peggi- if you don’t use your iron, a steamer is the perfect lazy woman’s tool. (I loathe ironing and it has rendered my iron useless). I recommend the Conair brand steamers. Have used many of theirs and they are fantastic, and dare I say, faster! A question about using pleating hooks: do you need to account more in your measurements to ensure they still look full? I’ve yet to try them. Wonderful tips on this sunny morning, and I’ll be crossing my fingers your weather reports are wrong. Have a lovely day!
Thank you, Lauren! The hair clips are so handy because you can easily move them (unlike the ties). The only problem is… don’t leave them because they leave bad creases. They’re perfect for getting them set though. The steamer iron is so cool! My iron is OLD. I’m pretty sure my grandma gave it to me back when I graduated high school and was leaving for college, haha! Maybe I’m due for an upgrade. Another weird trick I’ve tried on the curtains- using a hair straightener…. it kind of worked, but just so so. You’ll definitely need to take pleating into account for your measurements because it changes the width. Today it’s is warm, cloudy, and windy here, and I’m hoping the snow report for tmrw is wrong. Ha! Have a great day!! xo
We all love a quick and easy project but sometimes taking extra time results in a more polished outcome. Training the pleats makes such a big difference! Love the hair clip idea to temporarily hold the pleats as you work your way down the panels.
I would recommend ironing or steaming before measuring for hems – doesn’t have to be as thorough as a final ironing before hanging & training – but wrinkles and folds can make a big difference in the length. It’s difficult enough to estimate how much drapery panels might stretch because of the weight of the fabric without having to add in how much length might be added when wrinkles and folds relax. And if you can let the drapery panels hang for a day or two before measuring then most of the stretching and relaxing will have happened before you measure for the hems.
Most definitely, Cheryl! I typically account for the stretch by pulling the curtain taut and pinning (prior to hemming), so I don’t have to iron twice. I also try to consider the weight and type of material, because some will definitely lengthen over time. Those are great tips though if you’re trying to be super precise- especially letting them hang for a week or two to account for the lengthening! Thank you for taking the time to share. Hope you’re having a great day!
Forgot to mention that if the drapery panels are machine washable it’s best to wash them before hemming – I made that mistake once (and as someone that sews a lot, I knew better). I usually hang them when they are almost dry and then measure for hemming at least a day later when they’re totally dry. If they aren’t terribly formal then rehanging and steaming for pleat training is sufficient but more formal panels may need ironing as well.
Luckily the panels that I didn’t wash first were mostly hidden behind a couch so the spring cleaning shrinkage wasn’t very noticeable.