Wood Detail Sconce DIY
 Hit rewind and travel back to February, when I was selecting lighting for our kitchen renovation… I fell deep, deep in love with this sconce by Allied Maker, but couldn’t justify spending THAT much money. It was wayyyy out of our budget, but trust me- I wanted to. I’m serious when I say I was obsessed. I had dreams about that stupid light fixture. I looked for other alternatives and tried to push it out of my head, but I couldn’t envision anything else in our kitchen above the sink. I was literally feeling remorse that I couldn’t afford the light of my dreams. It was at that point when I finally decided I should try to make my own version and DIY it. Click through to see my interpretation of a modern black sconce with a geometric wood detail. I’m pretty happy with how it turned out- especially for the price! You will not even believe how much money I saved…
 Here it is looking pretty great in the kitchen. I can’t wait to show you more of that space in a couple weeks! If you’re also into the look and want to try this easy DIY that cost UNDER $70, here’s what you’ll need:
S U P P L I E S + T O O L S
- this sconce
- stain
- wood filler
- round 2″ wood ball
- sand paper
- wood glue
- drill press (you can use a power drill as an alternative)
- band saw (you can use any type of saw, but a band saw is most precise)
- clamps or vice grip
I’ll start by saying- if you’re not super confident in your woodworking skills, the round wood spheres are REALLY cheap, just buy a few of them in case you mess up. We only used one, but Emmett is pretty good at this sort of thing. I kept thinking, “I should’ve bought a back up”.
Step 1 // Drill a centering hole in a scrap piece of wood. We began by making a circular cut that would hold the sphere steady, making it easier to cut and drill, as well as find the center. This step is optional, but it makes things a lot easier because you have a nice, secure template and work setup.
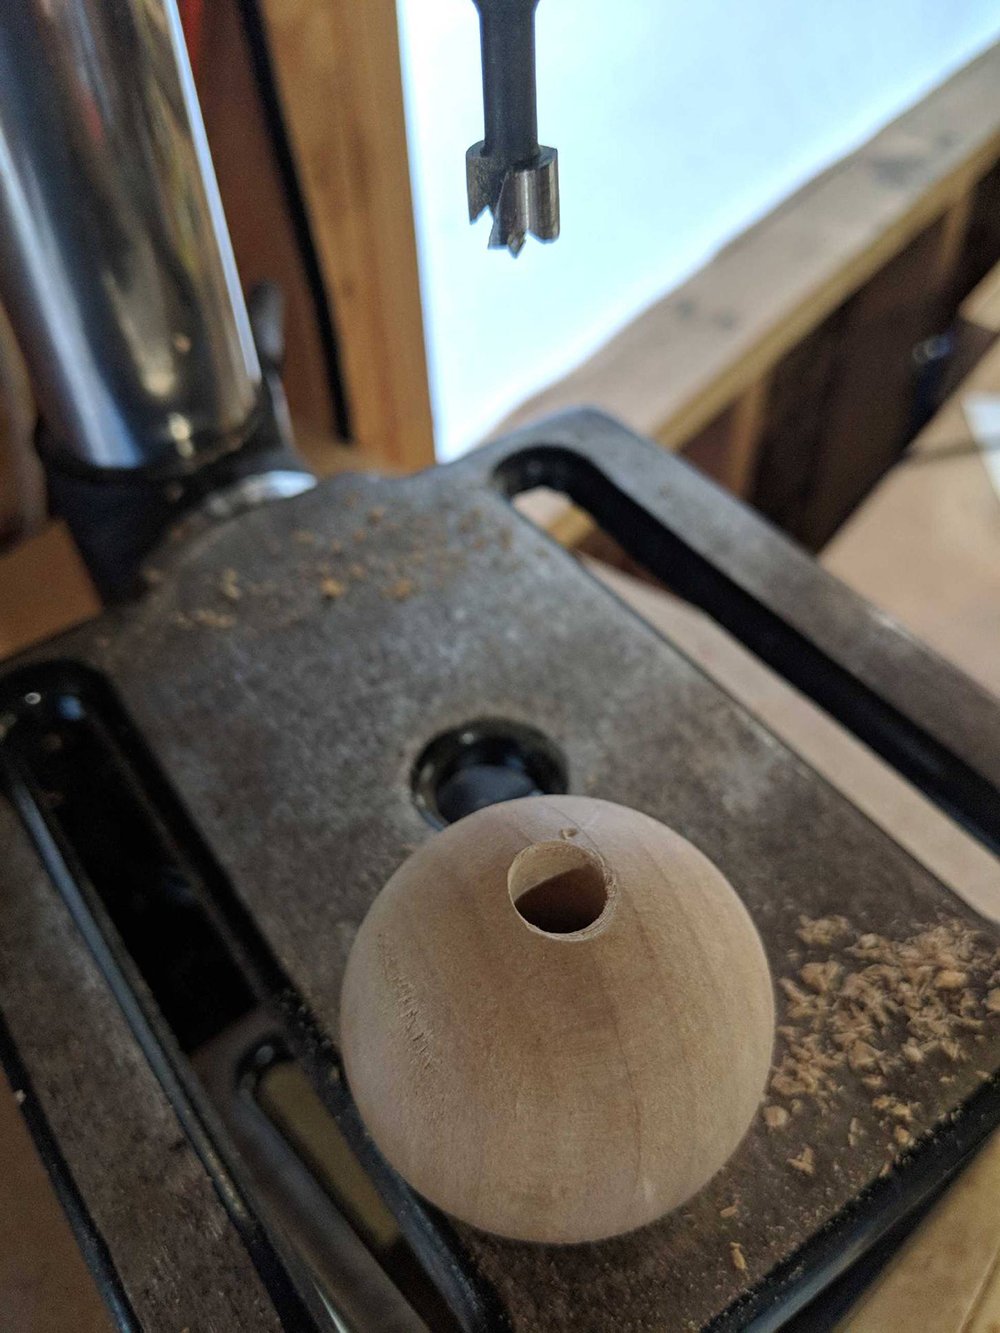
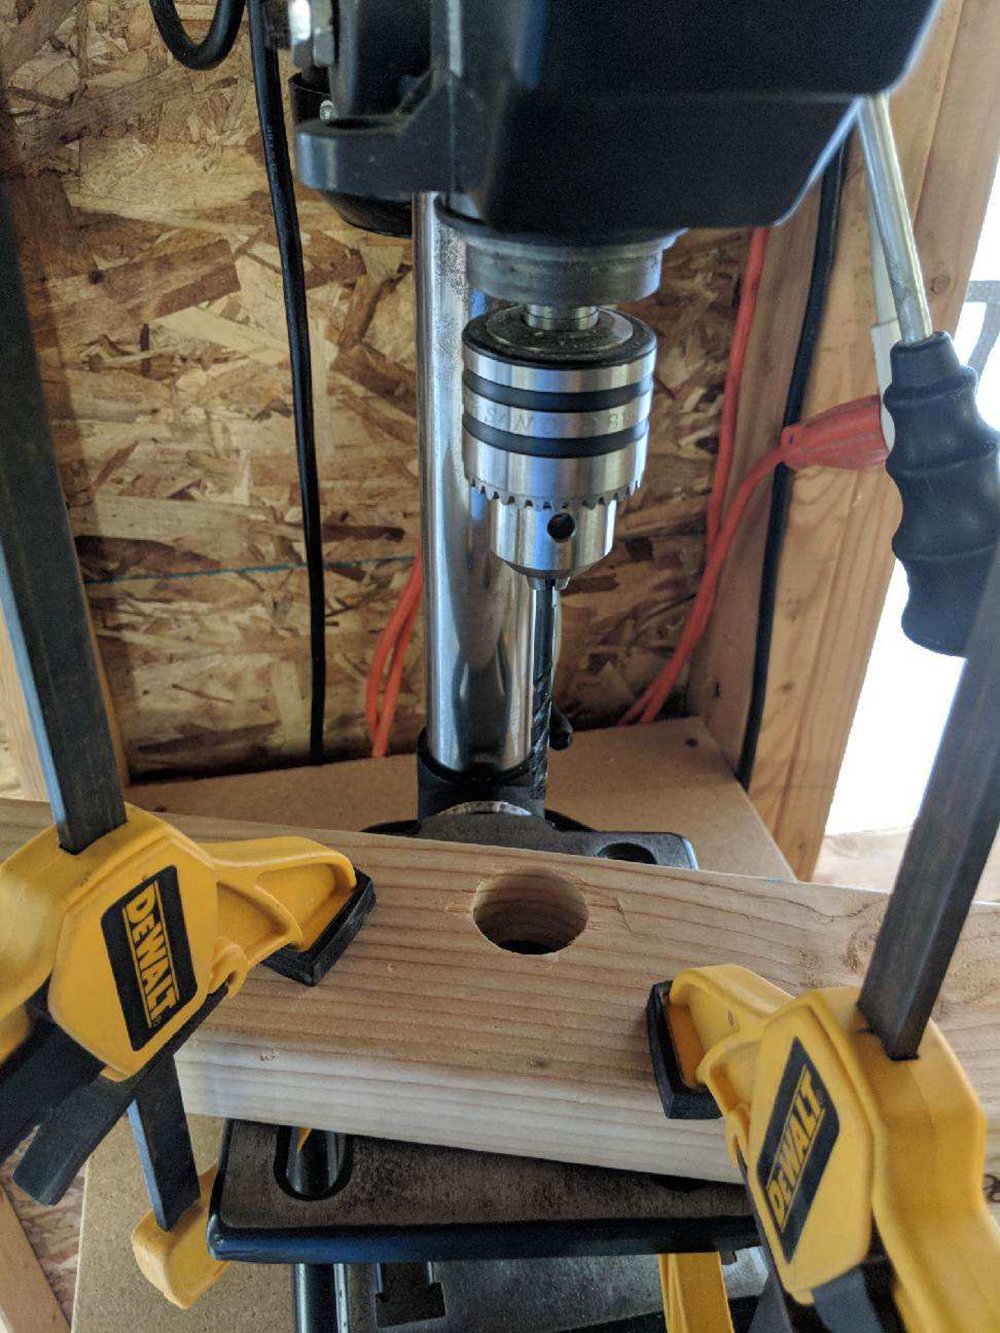 Step 2 // Drill a center hole. Next, sit the sphere into the template (like an easter egg) and drill a hole all the way through the sphere, as shown below.
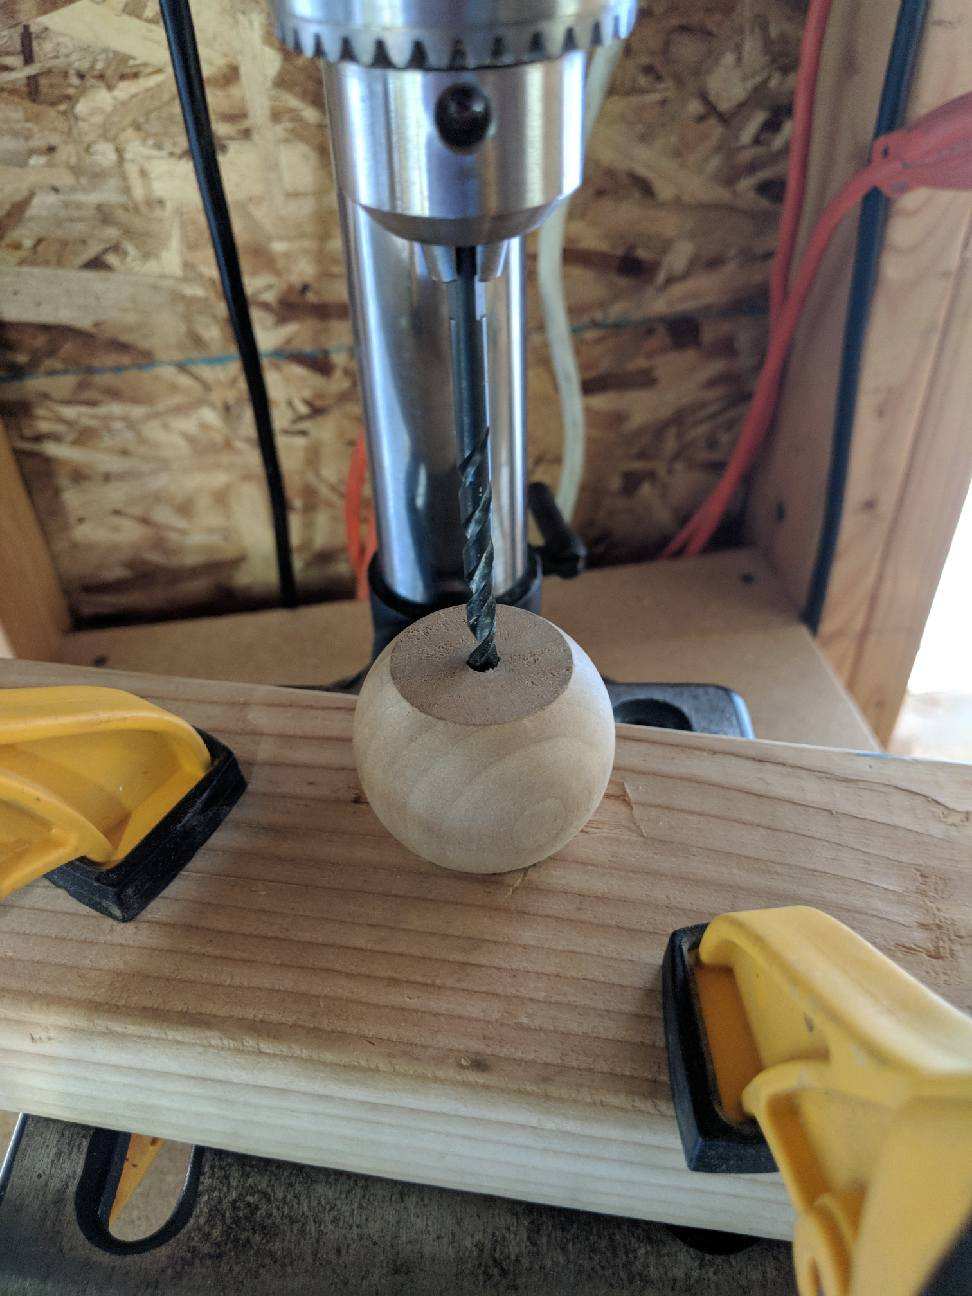
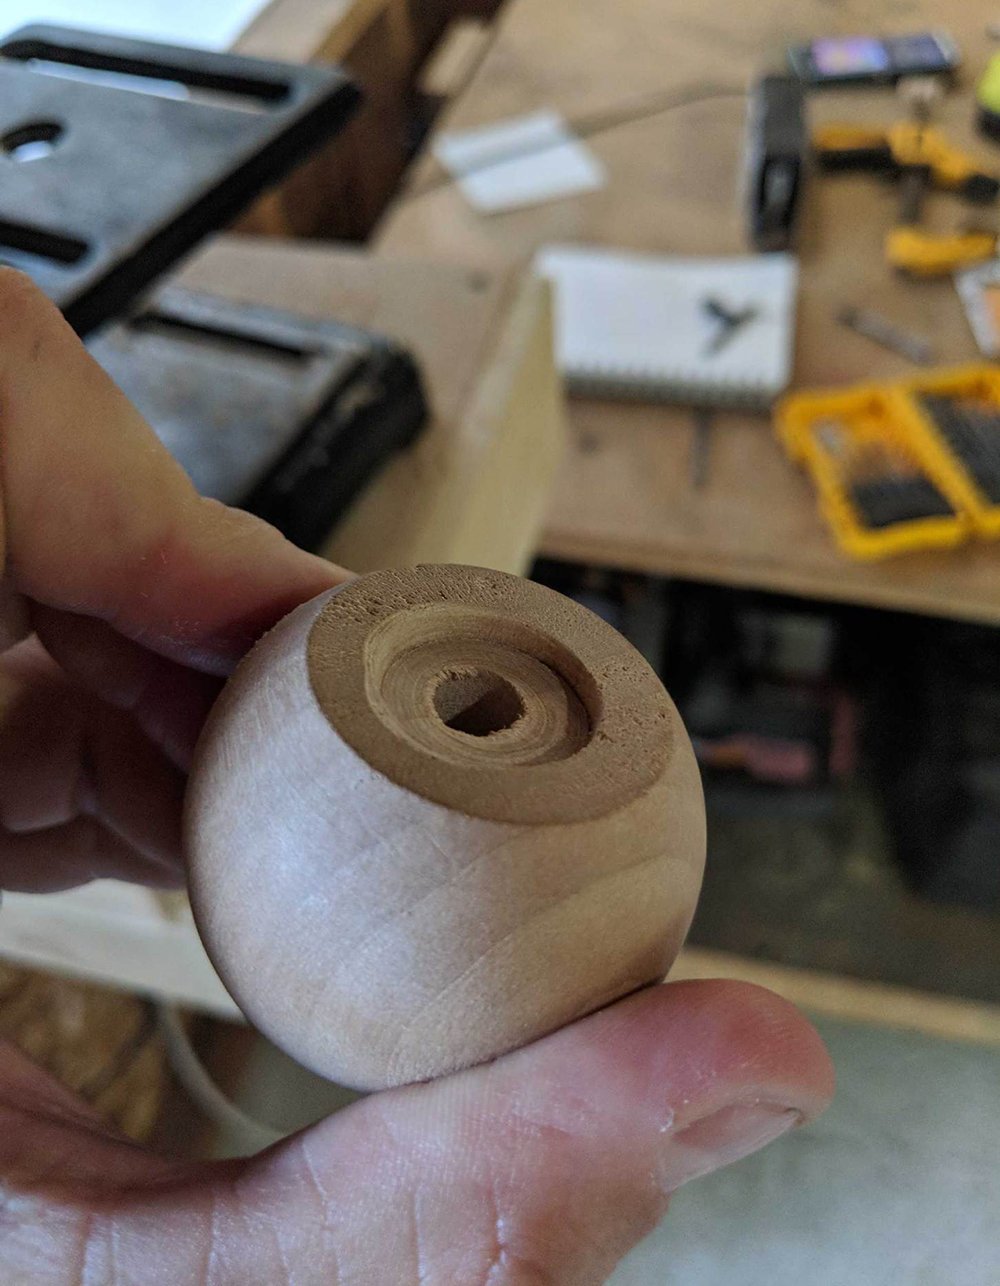
 Step 3 // Drill a recessed counter sink. Switch drill bits to counter sink indentations in the shape. Basically, this indented section will wrap around the profile of the sconce, just like the image below…
 Step 4 // Cut the sphere in half. Using a band saw (or the saw of your preference), slice the sphere in half.
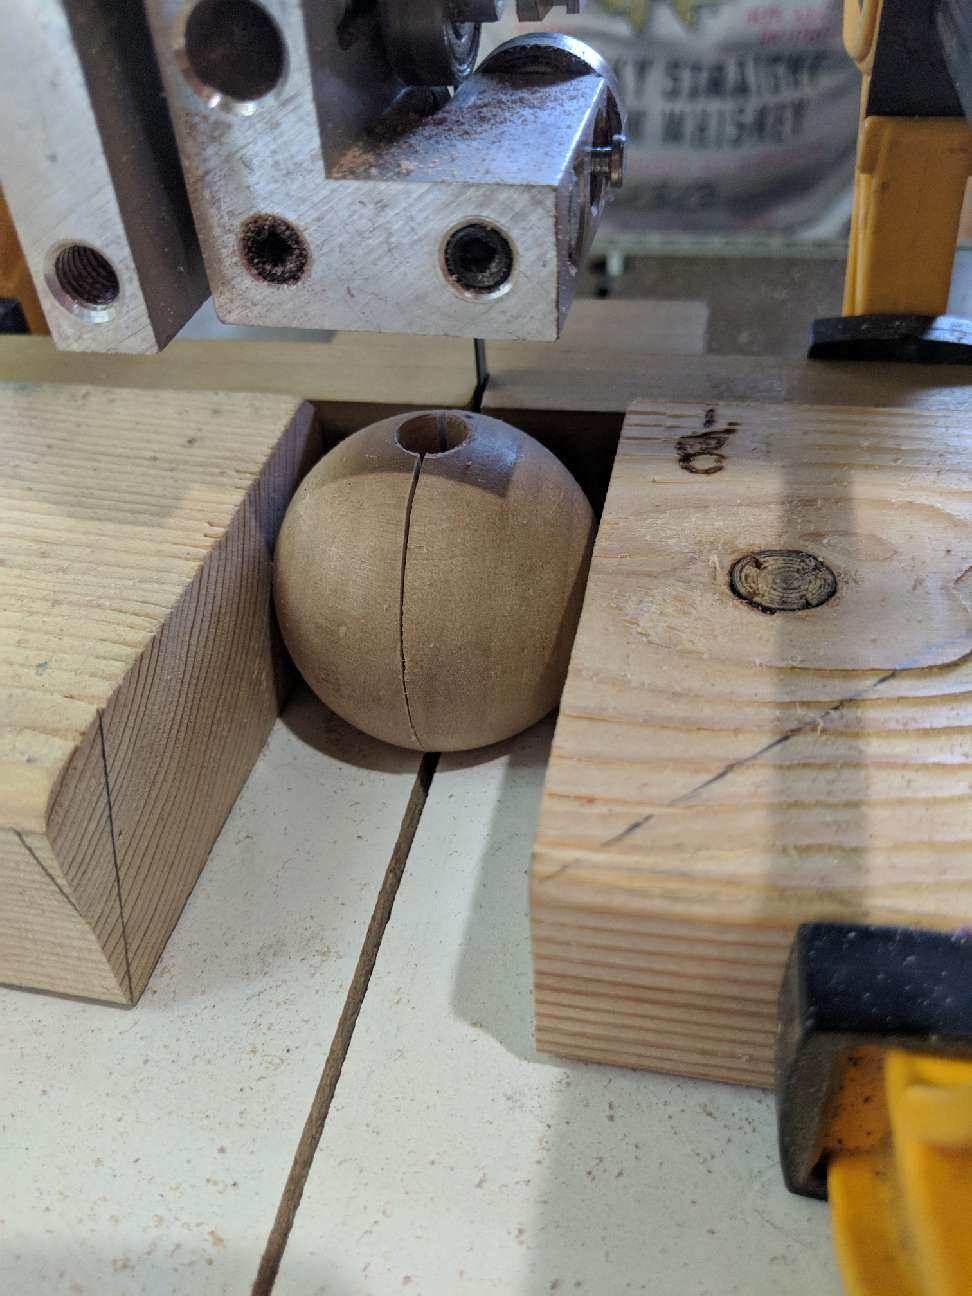
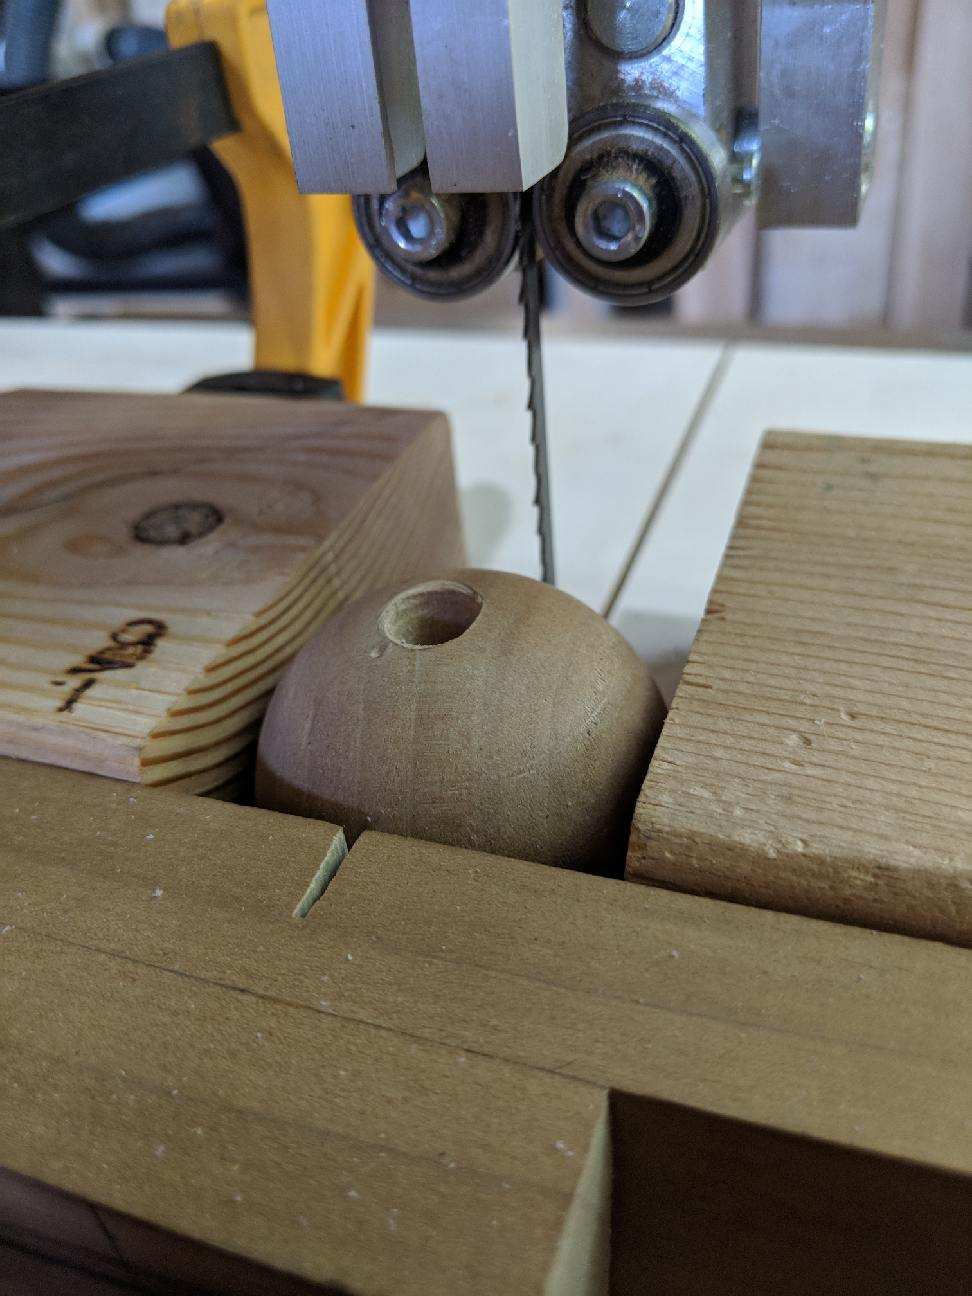 This is what the process should look like as you’re carefully cutting the circle through the center…
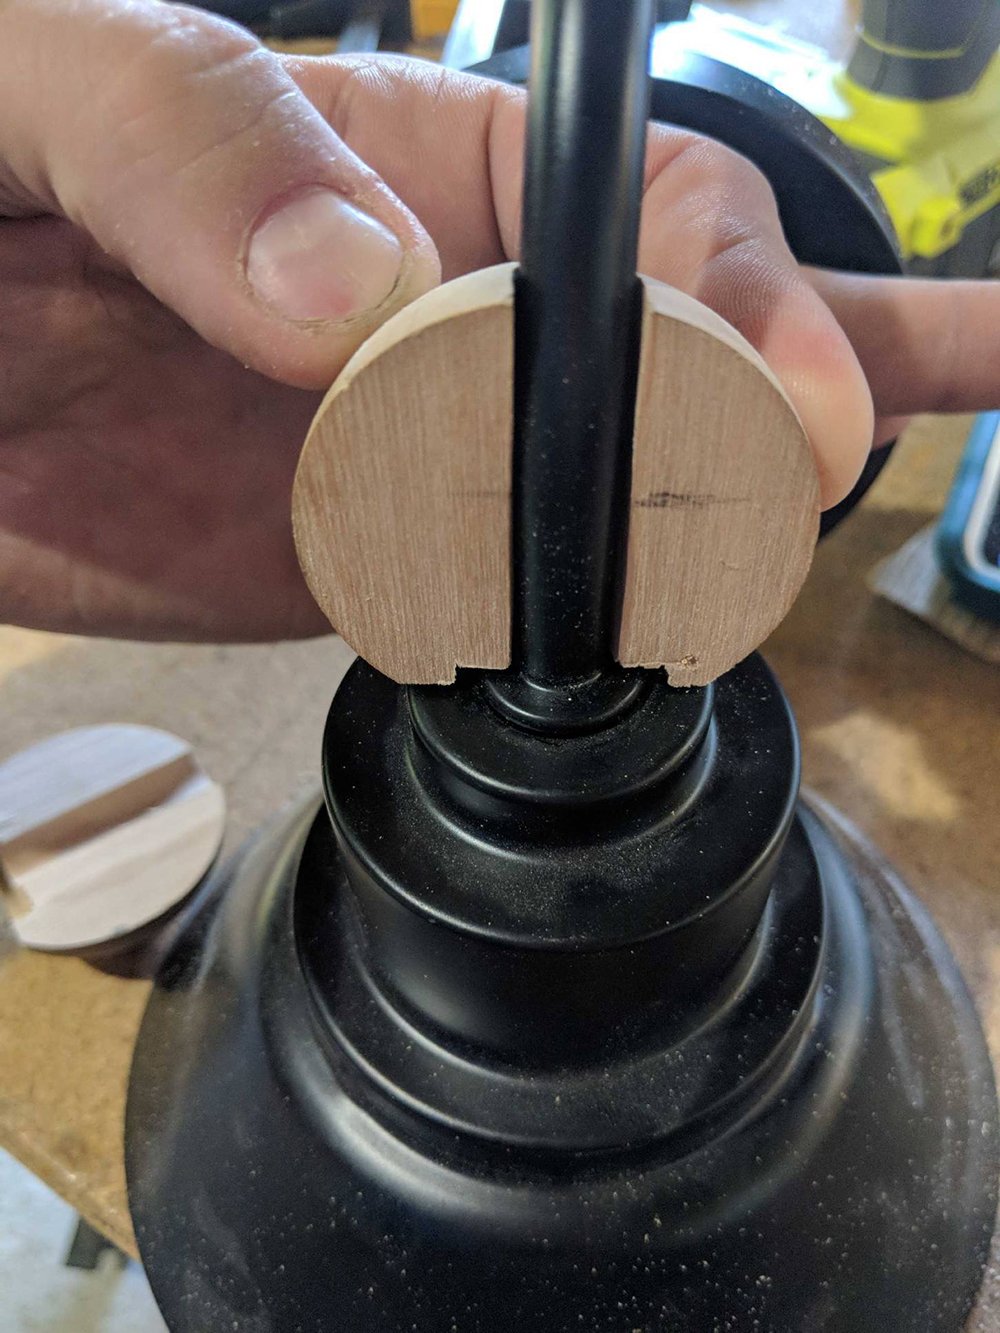
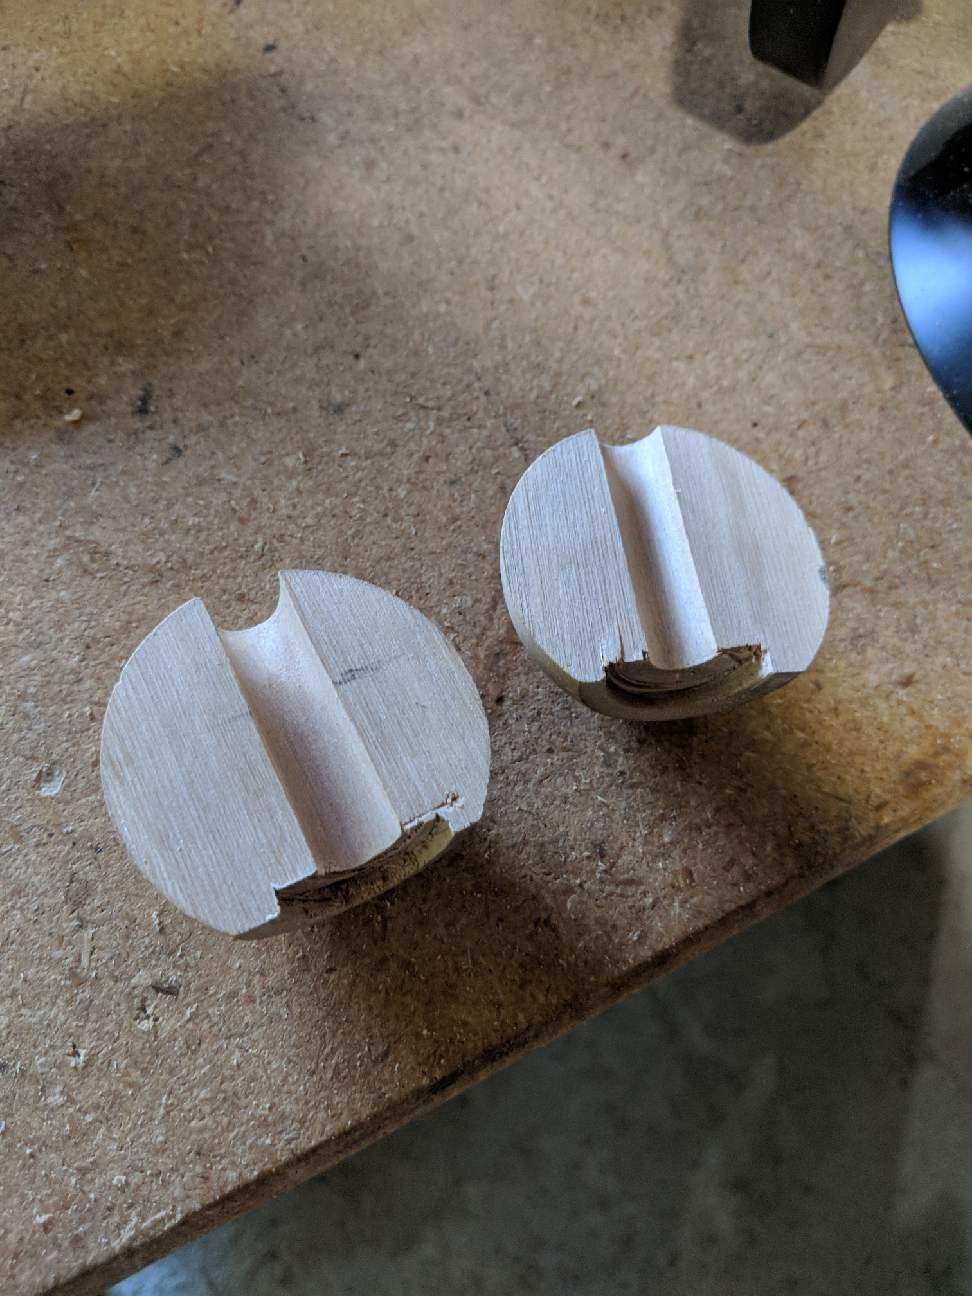 Test each half to make sure it fits around the sconce shaft. It should look something like this…
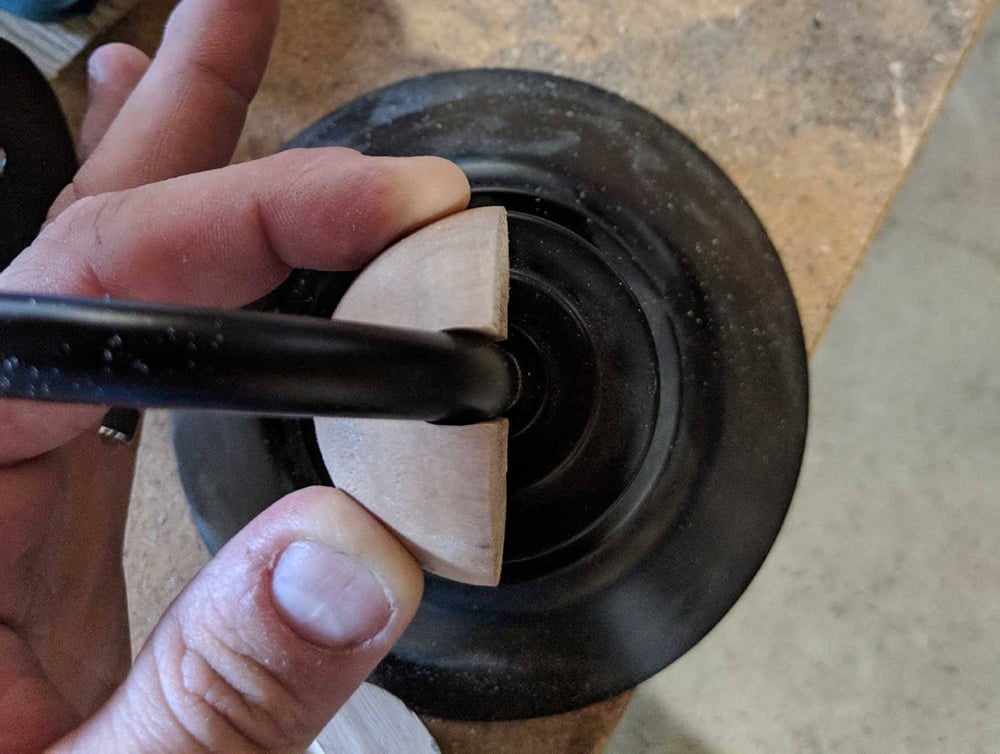
 Here’s a view from the top- it fits nicely around the gooseneck…
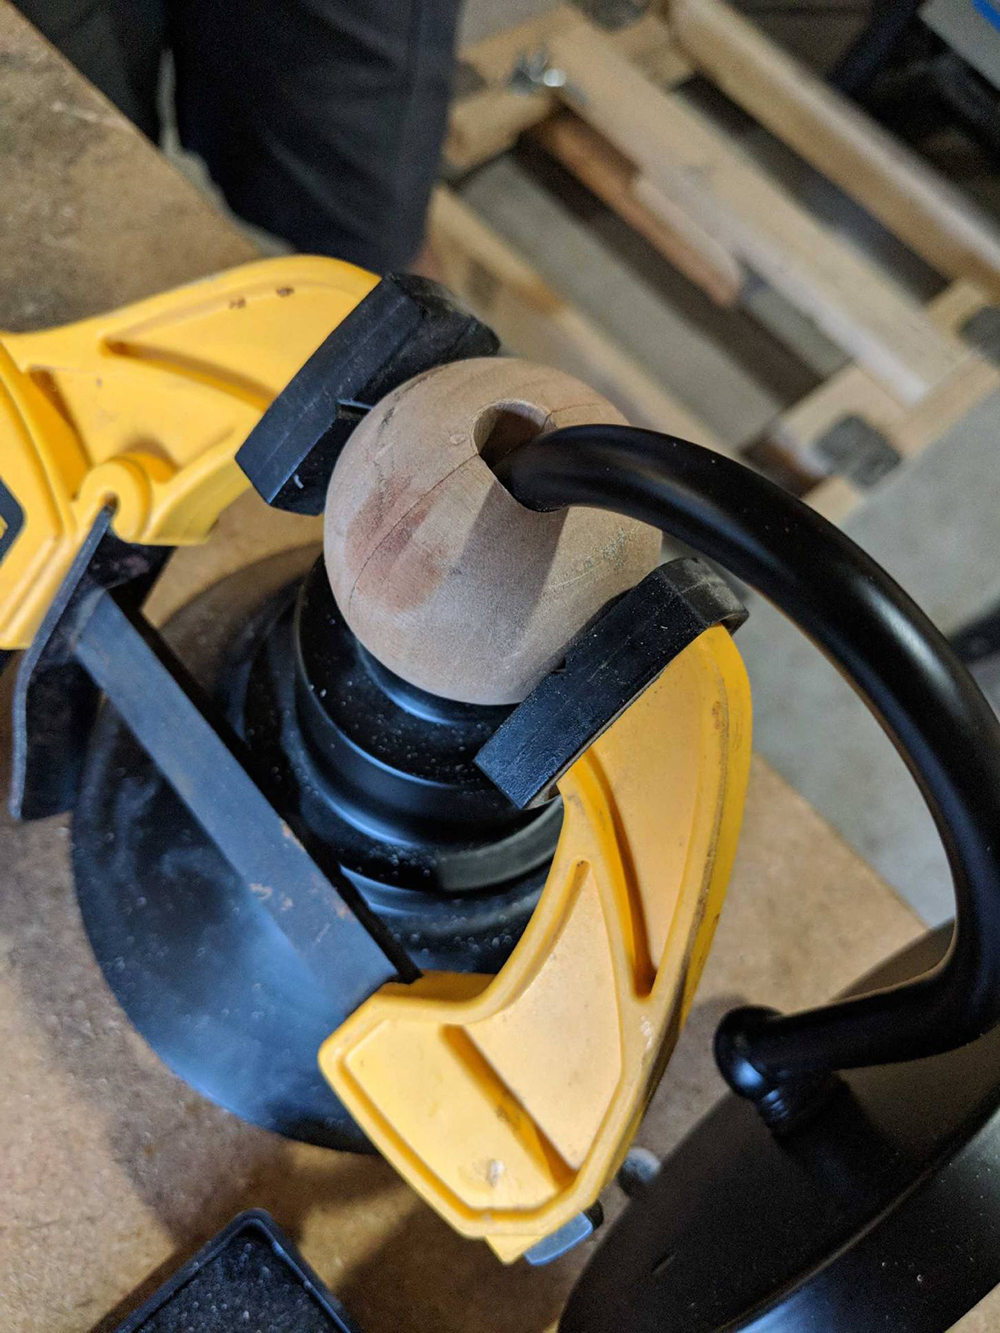
 Step 5 // Secure the halves back together. Dab a little wood glue on each side of the sphere and piece it back together around the sconce.
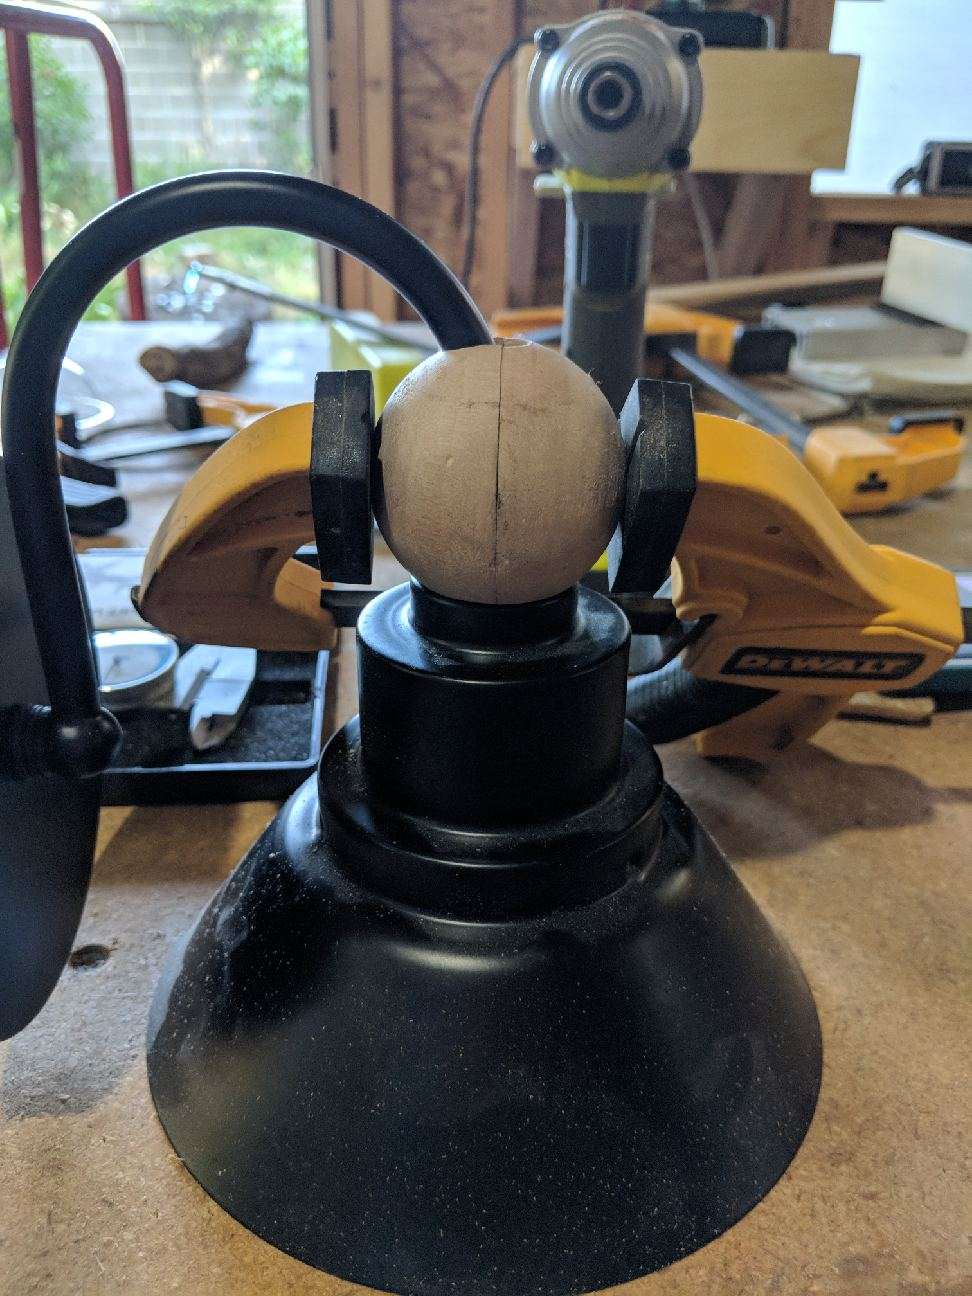 Allow it to sit under pressure in vice grips or clamps for 30 minutes, or until the glue is completely dry.
 Step 6 // Putty and stain. Once the glue is dry and the sphere is totally secure around the sconce, fill the remaining portion of the hole and seam with with wood filler or putty. Once the filler has set up, give it a light sanding, and stain the piece whatever color you’d like.
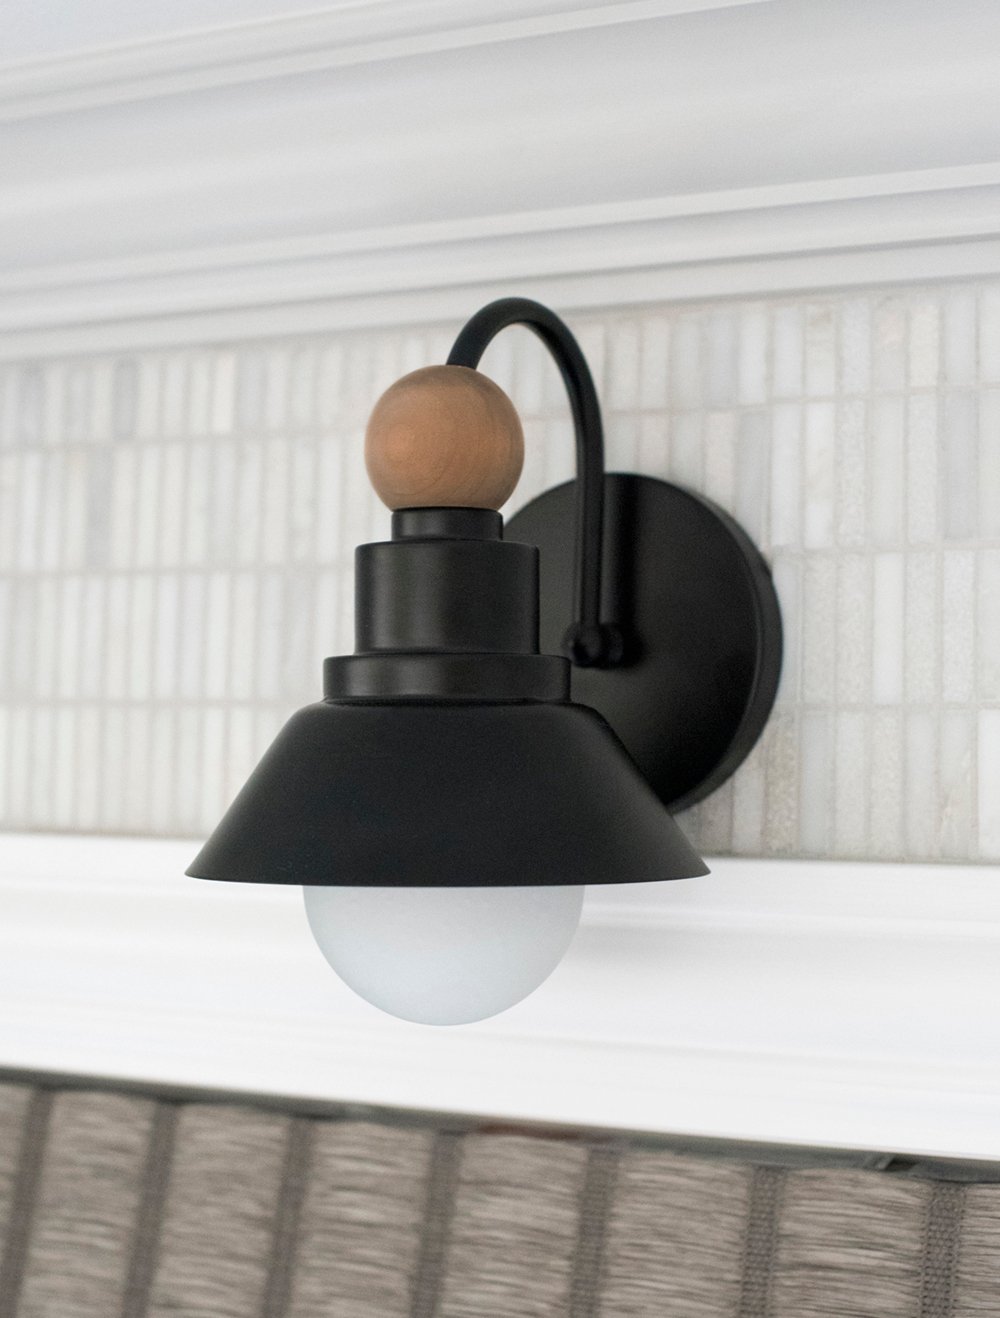
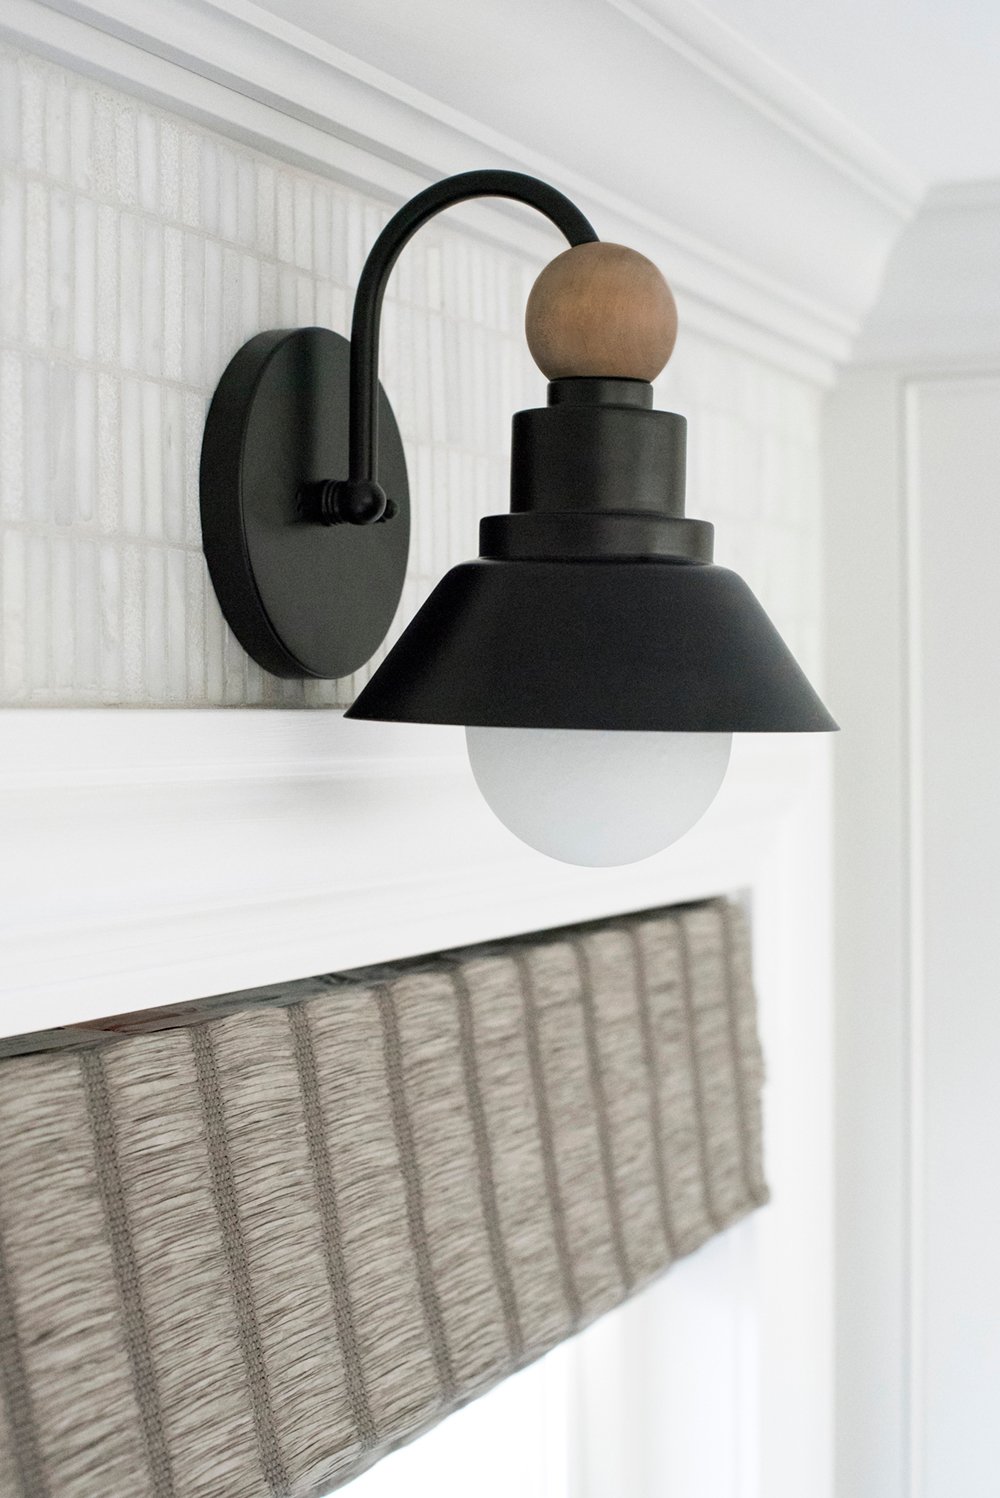
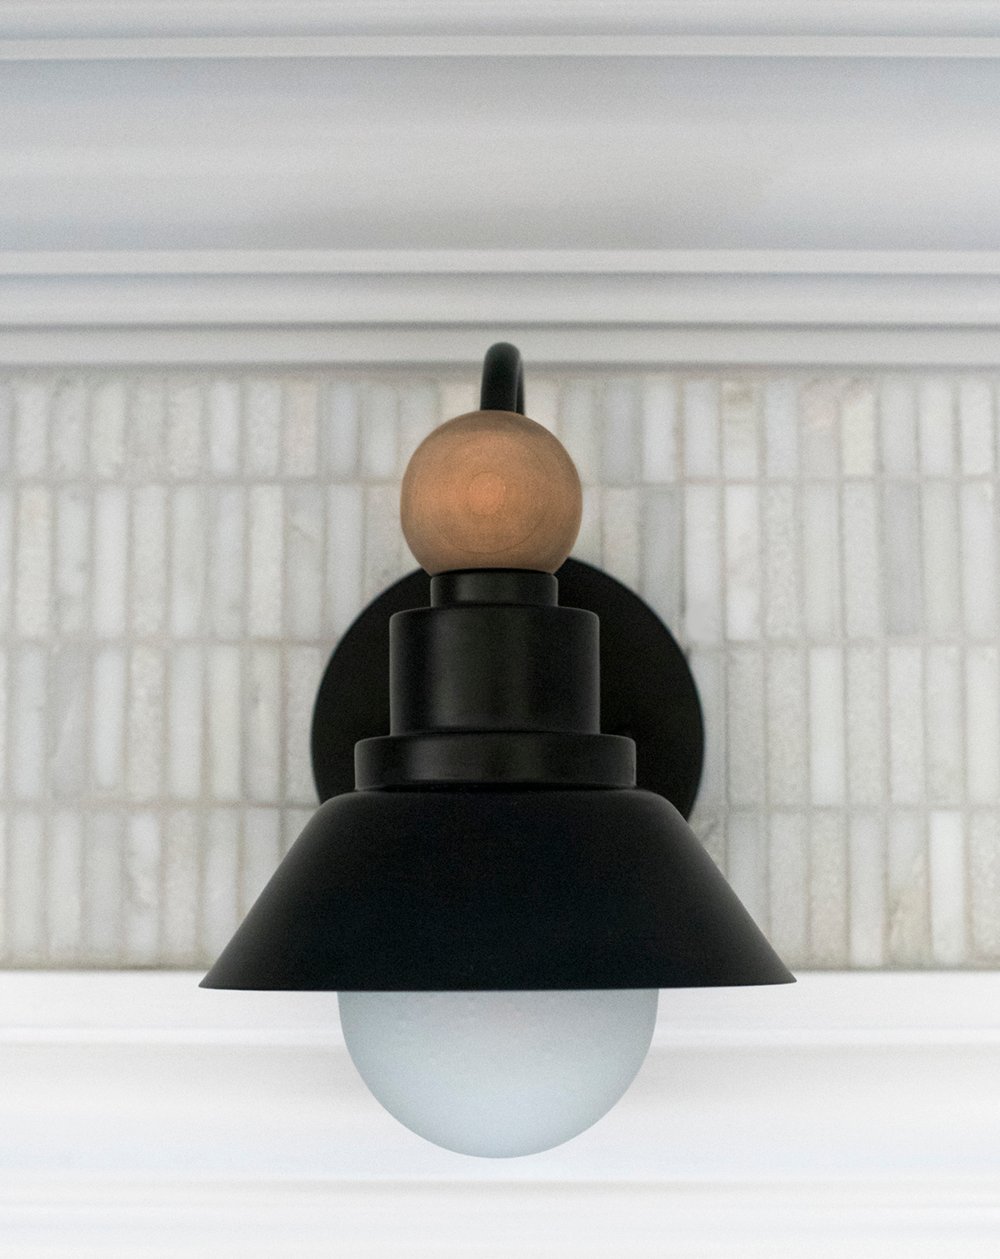
 That’s really all there is to it! You could even get creative and use a different shape. Here’s what the final result looks like:
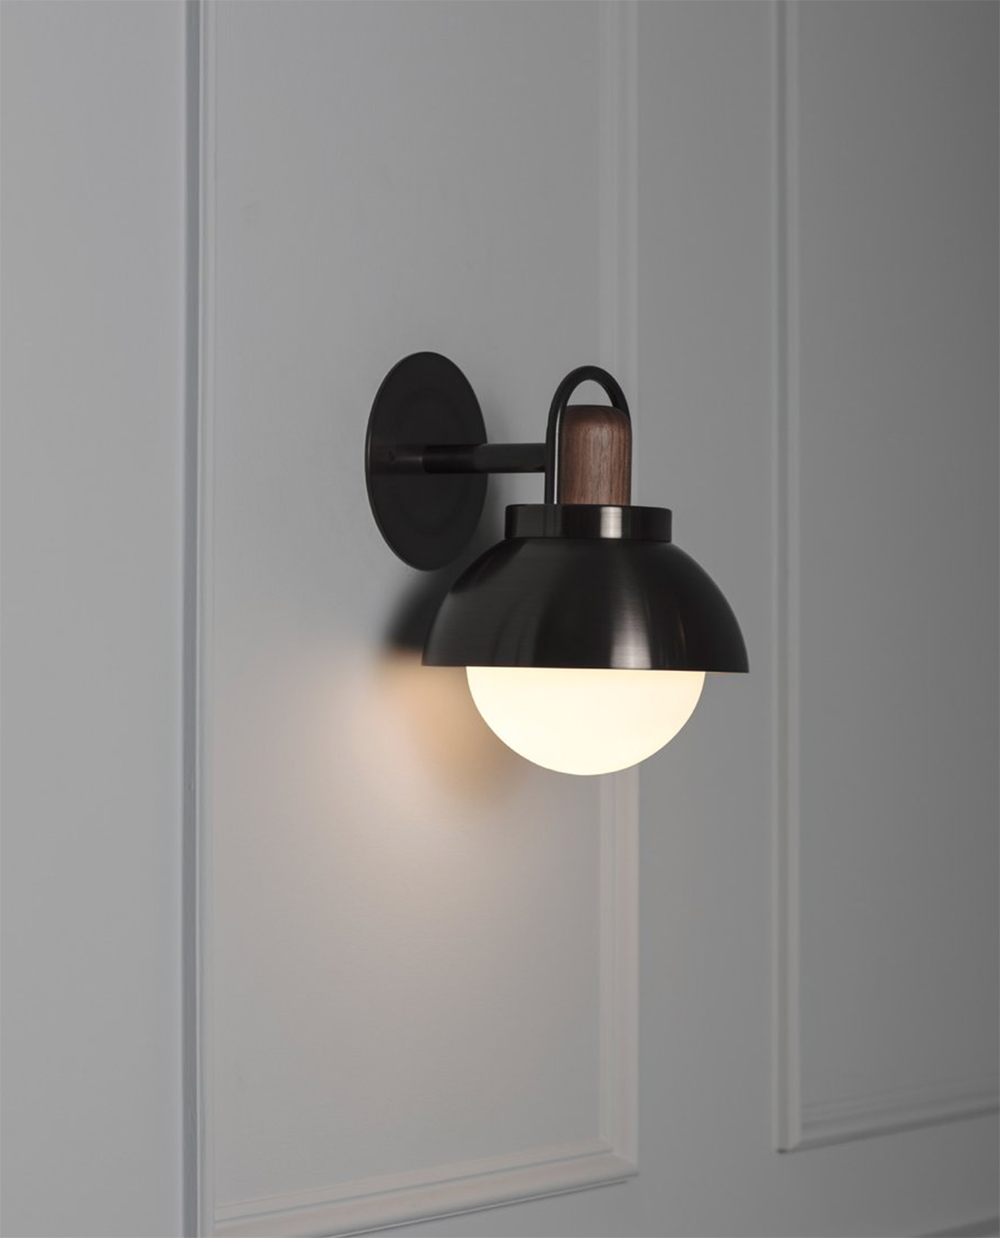
 And for a fun reference, this is the sconce I fell head over heels for… how do you think it compares to my DIY? I saved a total of $1,180. THAT IS CRAZY!!
 Does mine look equally as breathtaking? Ehhh….not quite, but for the dollars I saved, I’m totally fine with it. I’d love to hear your thoughts. As always, leave any questions about the project in the comments below and I’ll be sure to answer!
SaveSave
Job well done! The original inspiration sconce is absolutely and utterly gorgeous – but a true reminder of the ‘good golly’ prices of high-end lighting. Also a possible example of everyone’s different thought processes and decision-making criteria when choosing where to spend their budget?
Thank you so much, Sally! If I’m being totally honest, if I made more money and had the budget to cover that gorgeous light fixture- I totally would’ve went for it. It looks high end and the enamel is stunning… it’s really a piece of art! Maybe I’ll keep crossing my fingers one of my clients has the budget for it? haha!! xo
Obsession is the mother of invention! Nice work. (Holy cat, lighting can be $$$!)
It really is, Peggi! Thank you. Lighting can definitely get pricey, but it’s one of the places I’m actually willing to spend money. However, that tiny sconce was way out of our budget, so I tried to improvise.
I actually quite like yours! That’s awesome that you found a way to DIY it since you couldn’t get it out of your head. I can’t wait to get the source on your shades, though…
Thanks so much, Michelle! The roman shade is from blindsgalore – I’ll link all of the specifics in the kitchen reveal (coming in a couple weeks)! xox
Wow Sarah!! That came out great! The price for that original is ridiculous and I think I might like yours better!!
Thank you!! I still LOVE the original, but I just couldn’t spend that :( I’ll live with my cheap version. Haha! xo
To be completely honest I like your DIY sconce way more than the inspiration for a couple of reasons. Firstly, that sconce was nice but so not worth $1180 and secondly creativity is far more valuable and unique than an overpriced mass produced product. You have great taste and are quite skilled at design and super bonus you have a handy husband to assist. Thanks for sharing the DIY details on your very pretty sconce!
That is the best compliment, Colleen! I absolutely love your points. I’m definitely lucky to have a handy husband. Although, the DIY was a lot easier than I expected, so I think I would’ve been fine on my own for this one. We did run to our friend’s house to borrow the band saw and drill press, that made it much easier because we don’t have those tools. xox
If you had shown me both without the price i would have thought yours was the pricier version. I DO like it better. Well done Sarah!
Really?!! That makes me so happy!! I’m still smitten with the original, if I’m being transparent… but- I think for the budget, this worked out well and I’m happy with the outcome. xo
Hey Sarah…
What a clever idea. I like your DIY sconce better, than the inspiration sconce. Love the wood with the black and white! Lucky you, you have a hubby with mad skills, a drill press and table saw.
Thank you, Terri! Best compliment ever :) Yes- I’m very lucky to have a handy husband. We actually don’t own the drill press or saw, but we have best friends who have a workshop they let us use when needed. In that regards, we’re VERY lucky! xo
I like the DIY better. Actually I don’t see what you saw in the original one. Glad you found a solution!
Thanks so much Alison! xo
I DO believe that I like your DIY light much better than the ridiculously priced sconce, truly! Very impressive.