Our Backyard Reveal
 I’ll start by saying this backyard project has been a work in progress and a long time coming! As you probably know, we’ve been busting it in the backyard for just over a month. I’m excited to finally share the fruits of our labor, the successes, and even the failures along the way. Click through for the entire backyard reveal (plus a ‘Get the Look’)! This week I’ll share a different yard related project every day, so keep checking back… especially if you’re interested in any of the DIY tutorials.
Believe it or not, we started planning this project in April. If you missed the plans or the terrible before photos, check out that post here. I’m not going to lie… it’s been a long two months of doing nothing but yard work. It’s been challenging, laborious, and has tested our strength- both physically and mentally. We’ve mixed over 10,000 pounds of concrete and have put in over 300+ hours to get our yard to this point. Initially when planning the project, we had decided to hire out the work. We still have so much to do inside the house, it seemed like paying someone else to help with the yard was our best bet. After four meetings with different contractors, we then decided to tackle the yard ourselves. Why? Mostly because of the lead-time and budget (the highest quote was $35,000!)… and one contractor told me my design plan was stupid and he’d have to ‘check with my husband’. Ha! I sent that one packing pretty quickly. Long story short- this project was all us. In the end, I’m happy we took that route and am so proud of the space we’ve created. Let’s dive right in, shall we?
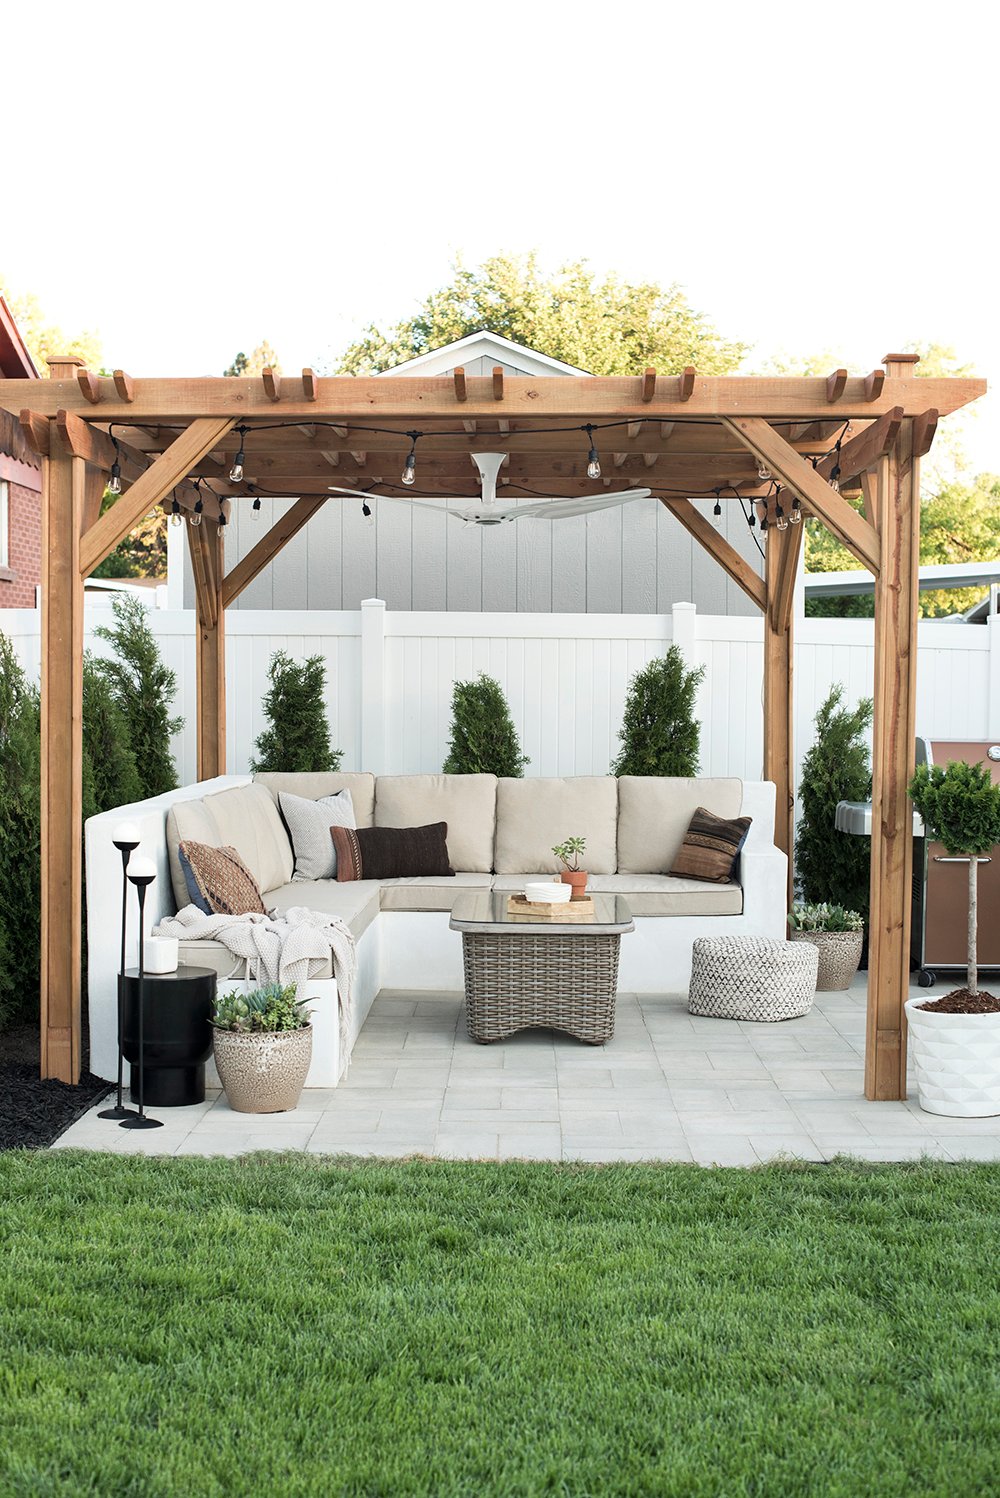
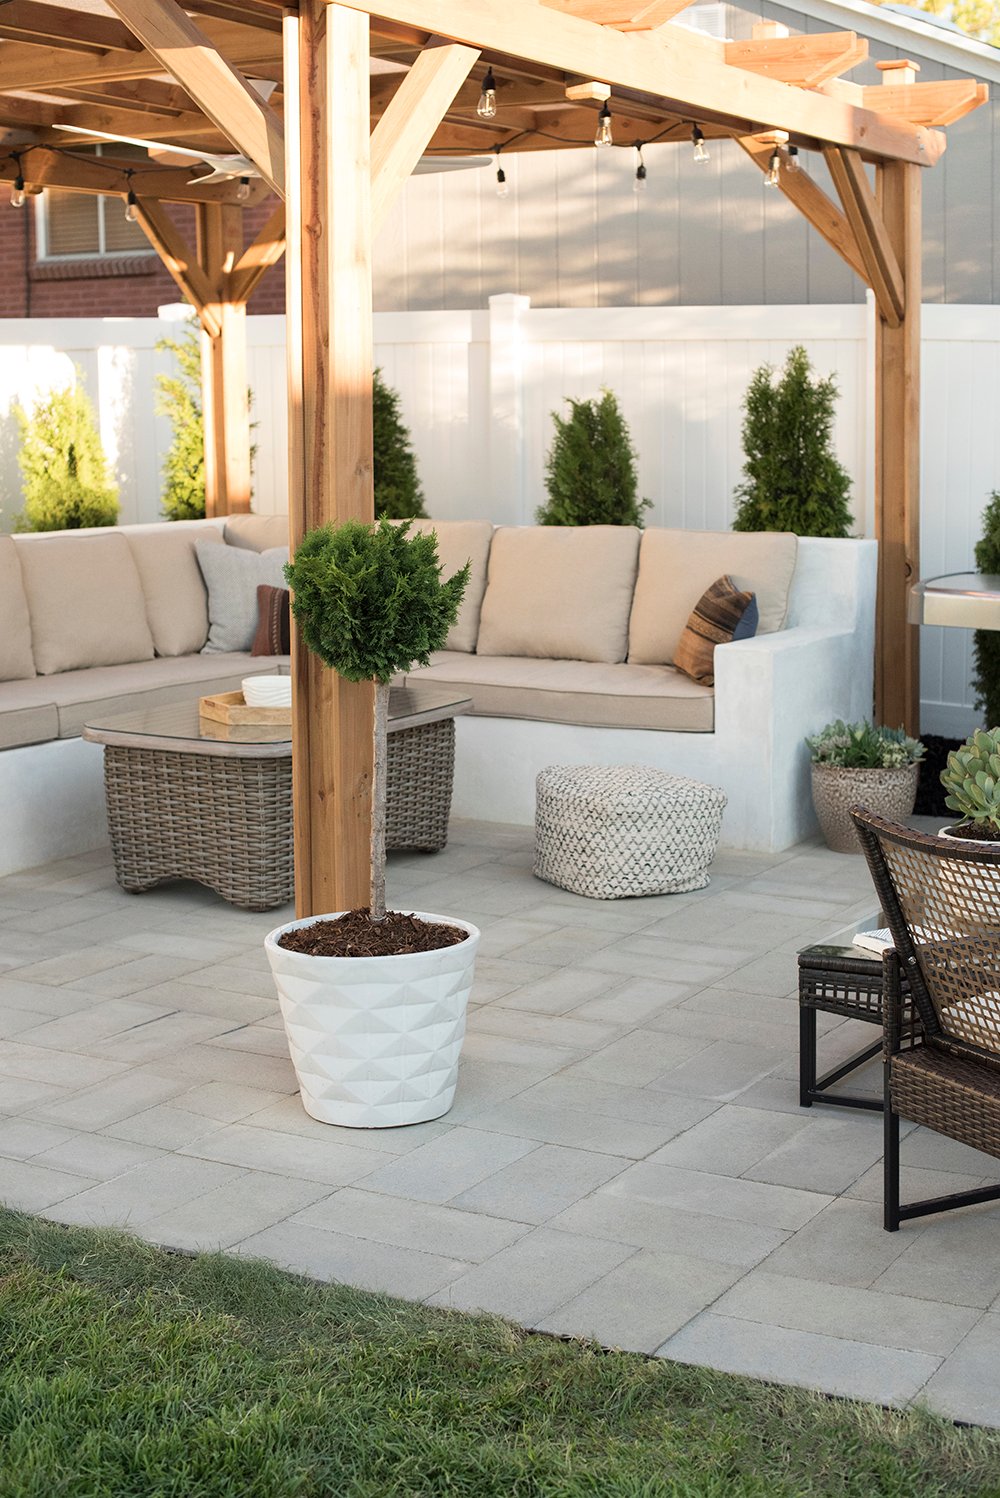
We started the project with a TON of demo and installed a new privacy fence (click for that post and tutorial). I knew I wanted a pergola or some sort of shade, but it was actually Emmett’s idea to place it in the far corner of our yard. After the pergola was up, we added a paver patio and custom seating. Next came landscaping and sod, and now the space looks like this!
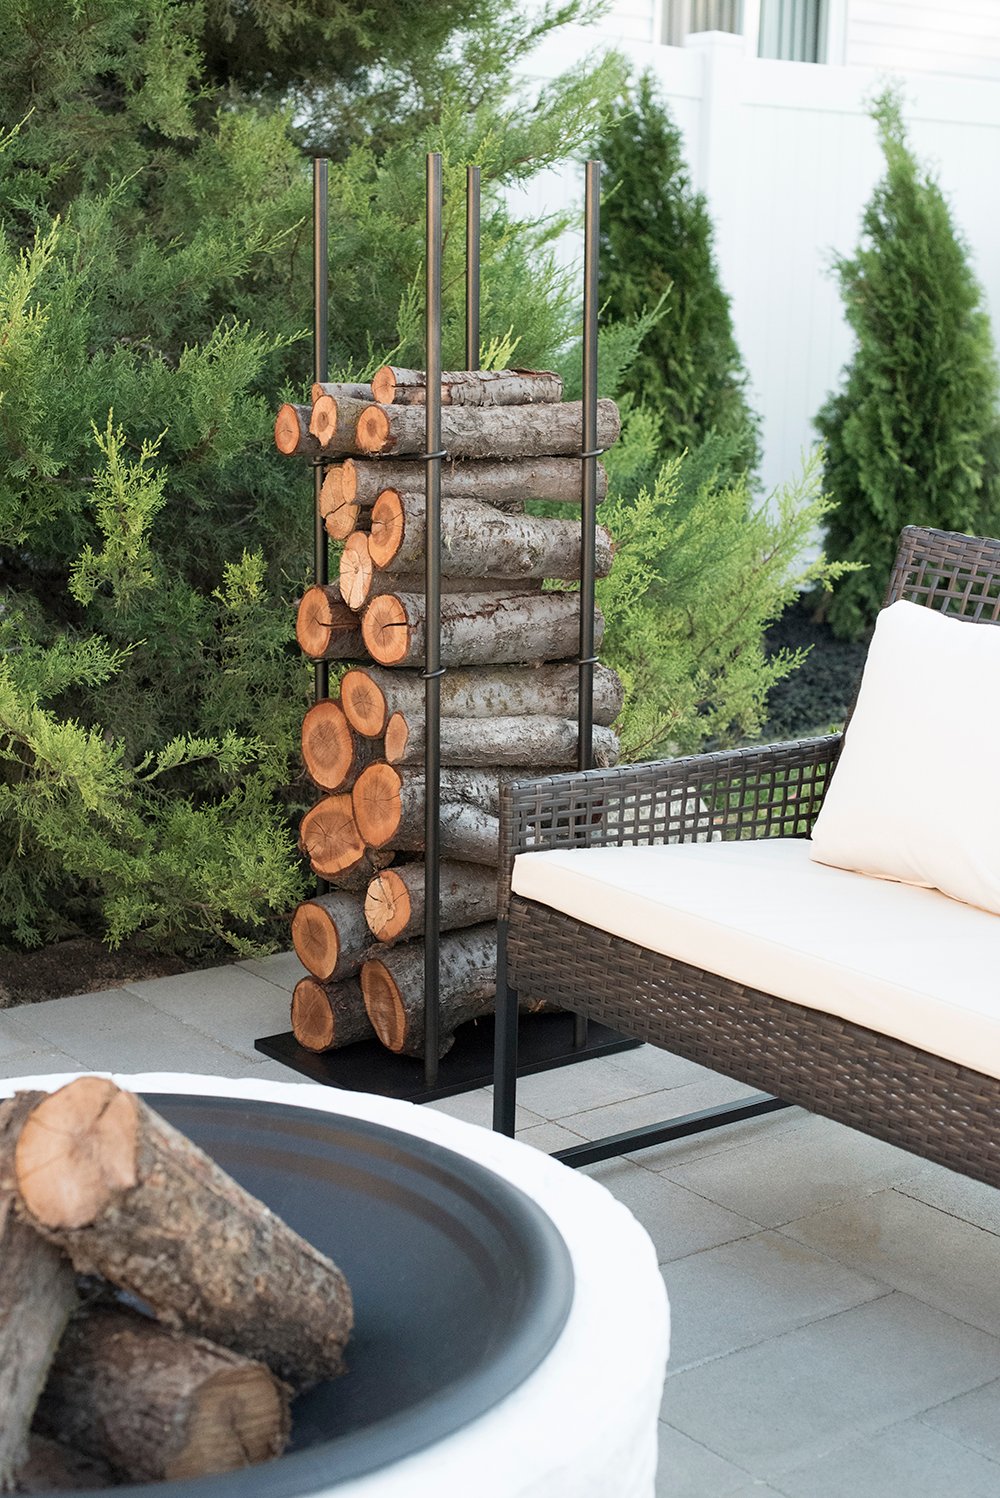
We now have a place for grilling, entertaining, lounging, and even a spot for a cozy fire.
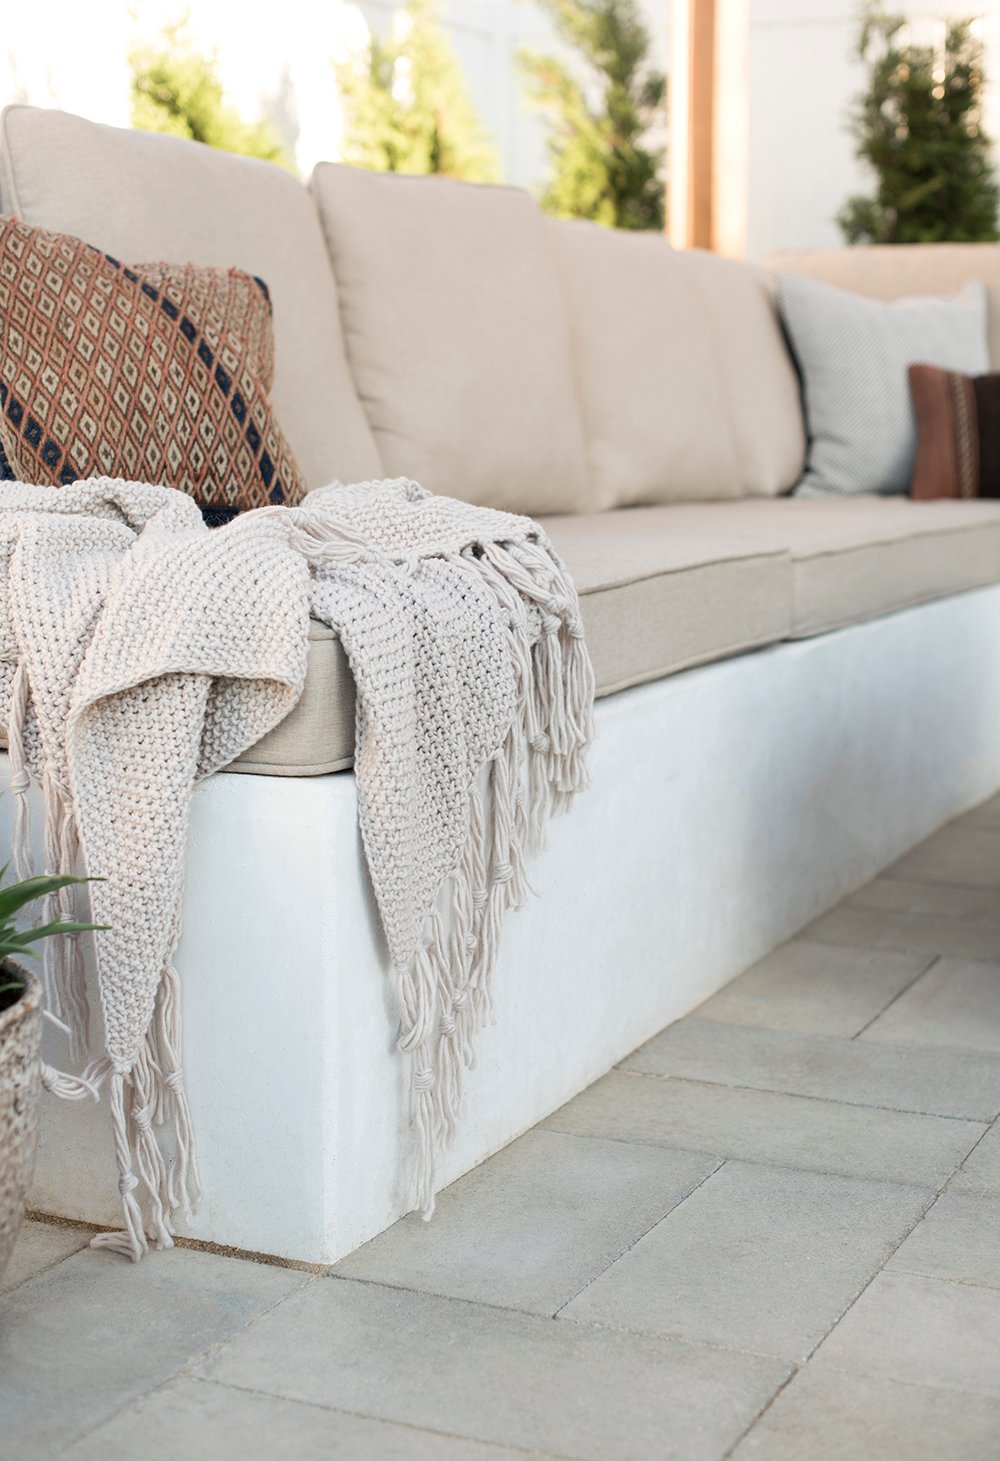
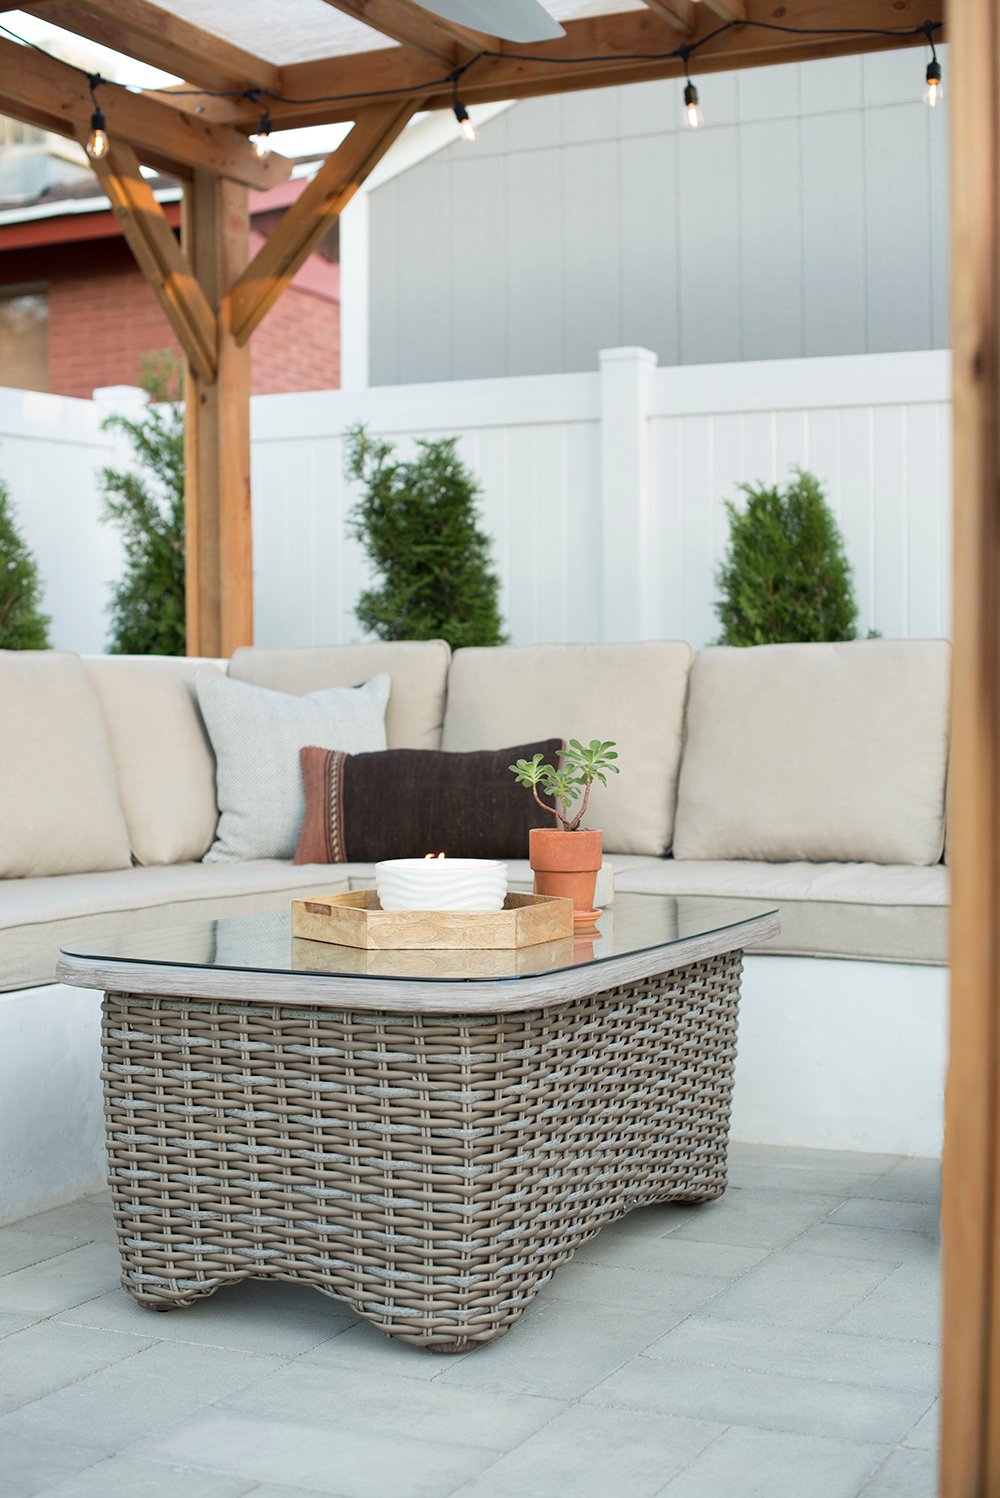
 My favorite part? Definitely the seating. It’s one thing to have a place to sit and hang outside, it’s a totally different ballgame to be comfortable. We weren’t really planning our ‘first official barbecue’ quite yet, but friends showed up and we made it happen! We sat outside for hours and everyone complimented how surprisingly comfortable the outdoor sofa is. That’s a big win in my book.
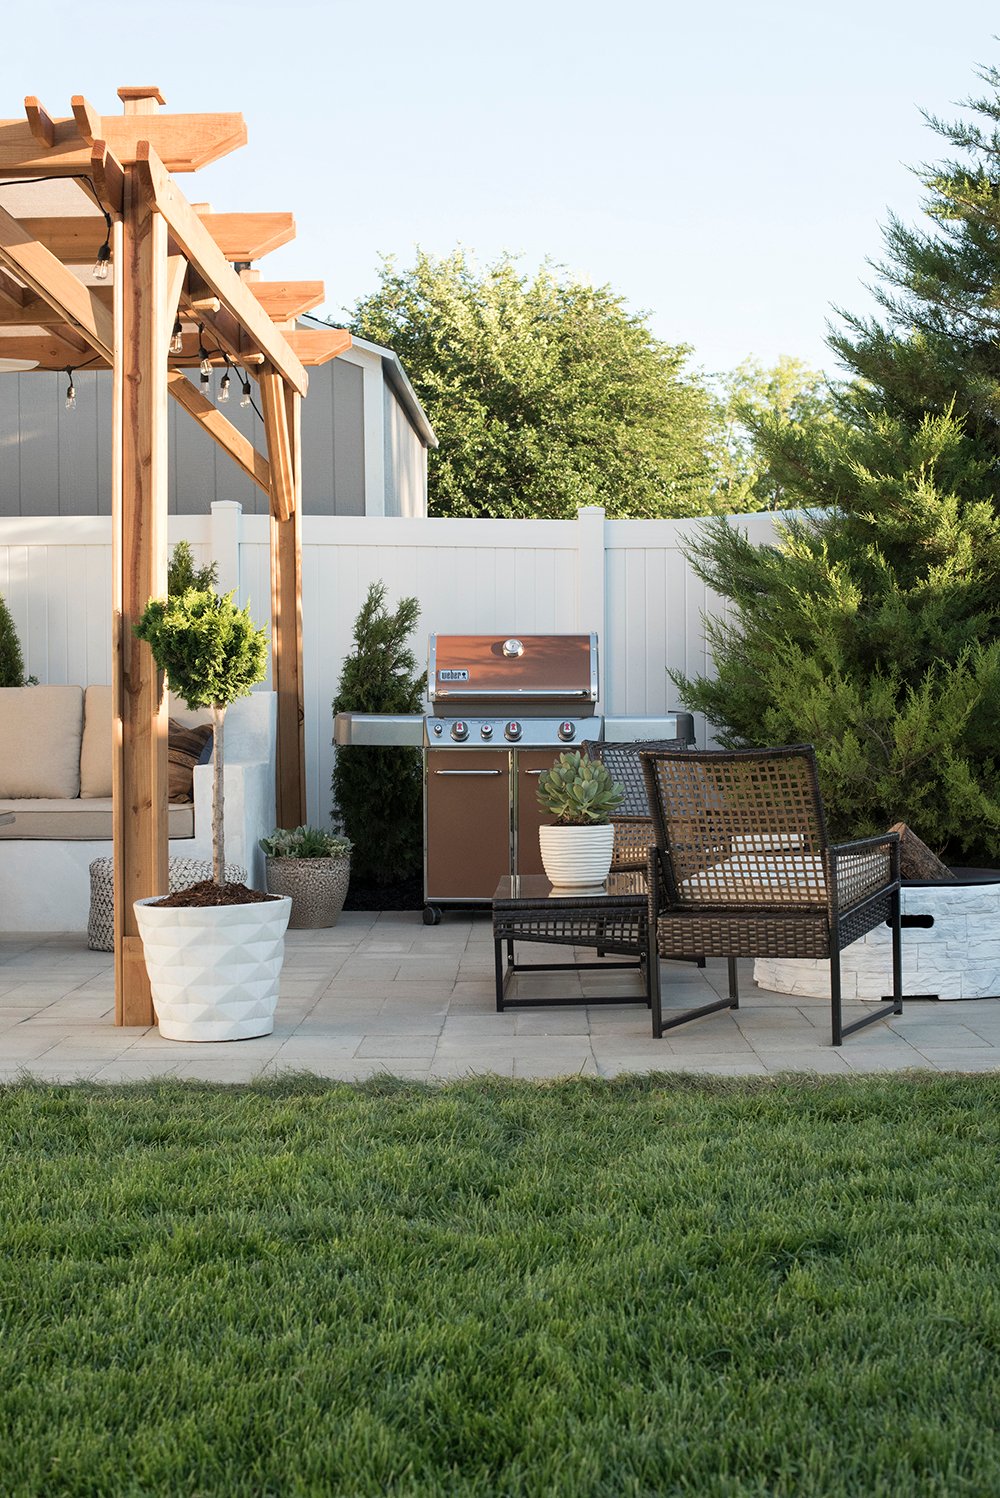
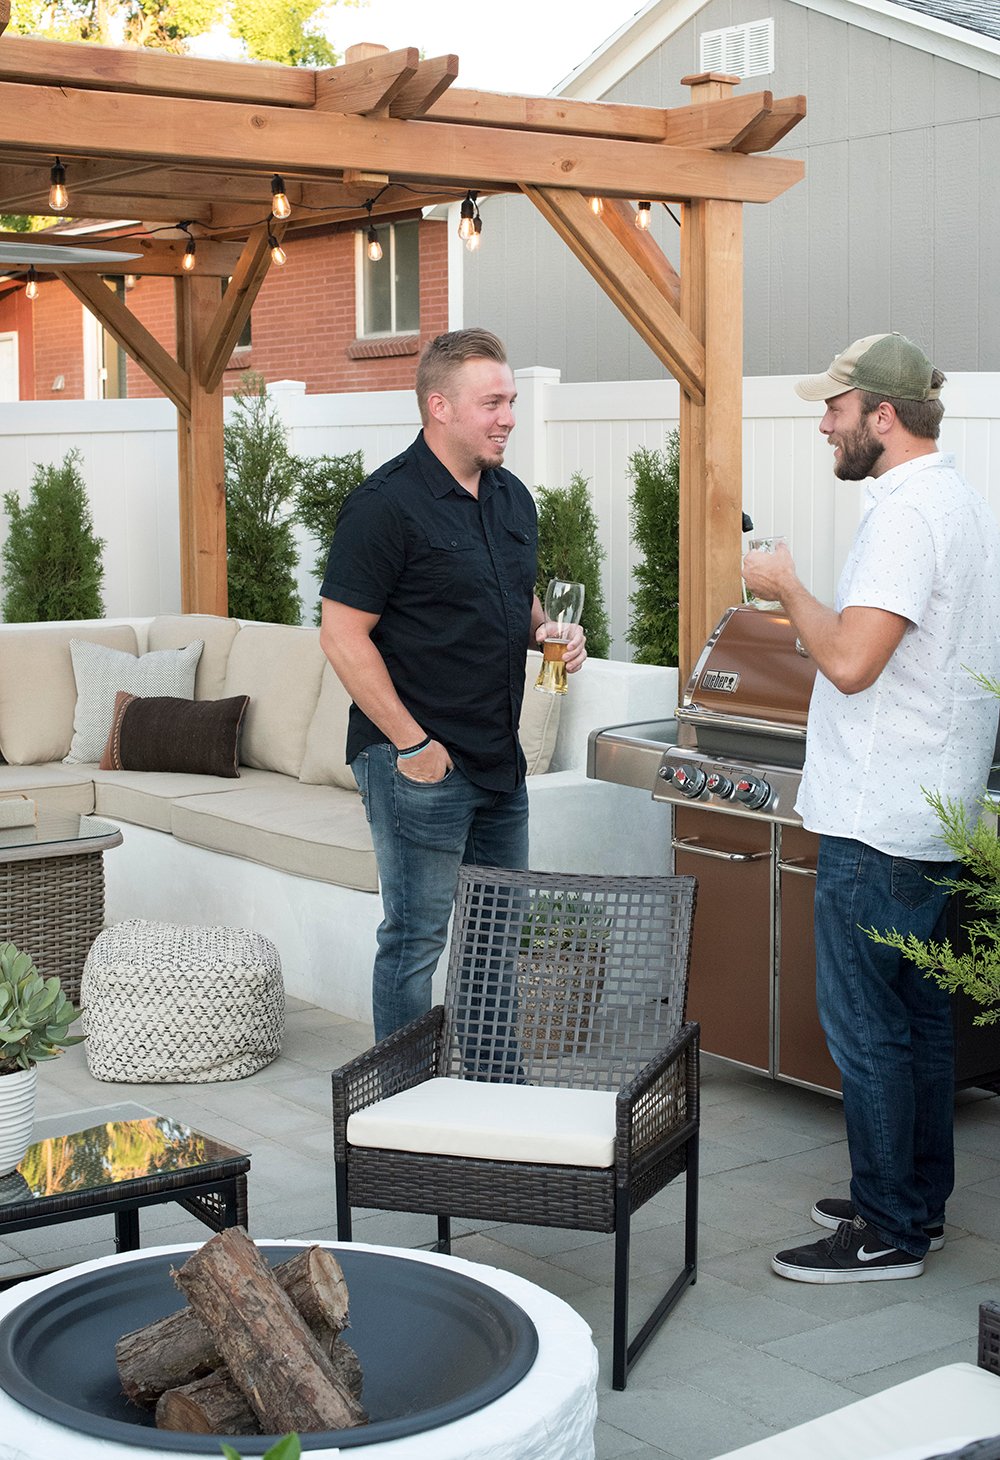
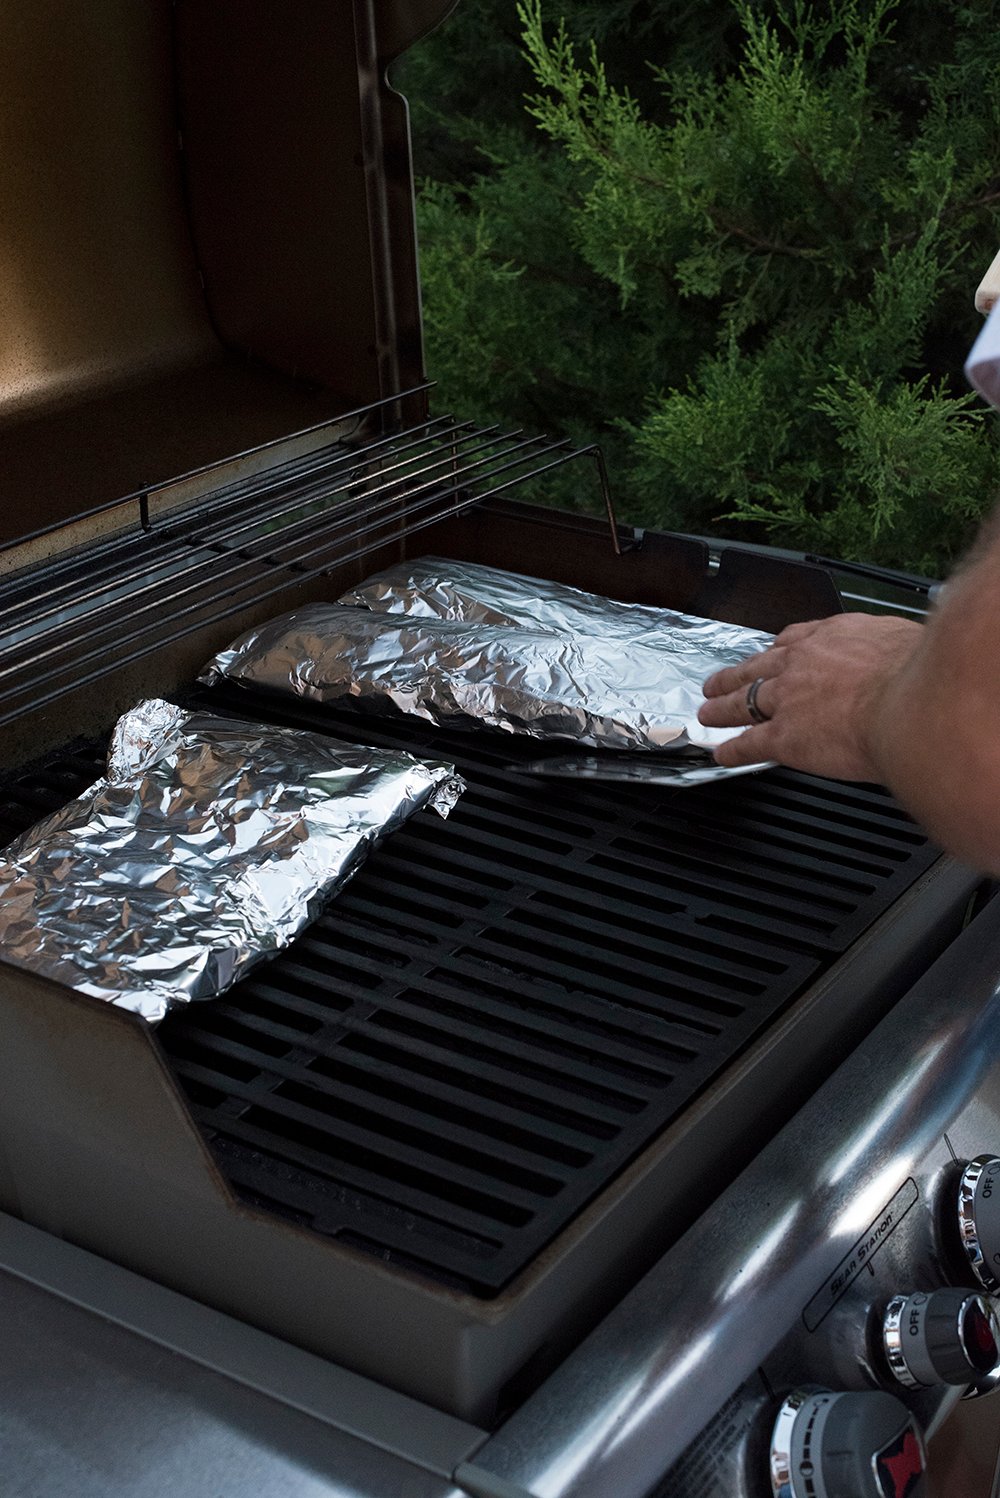
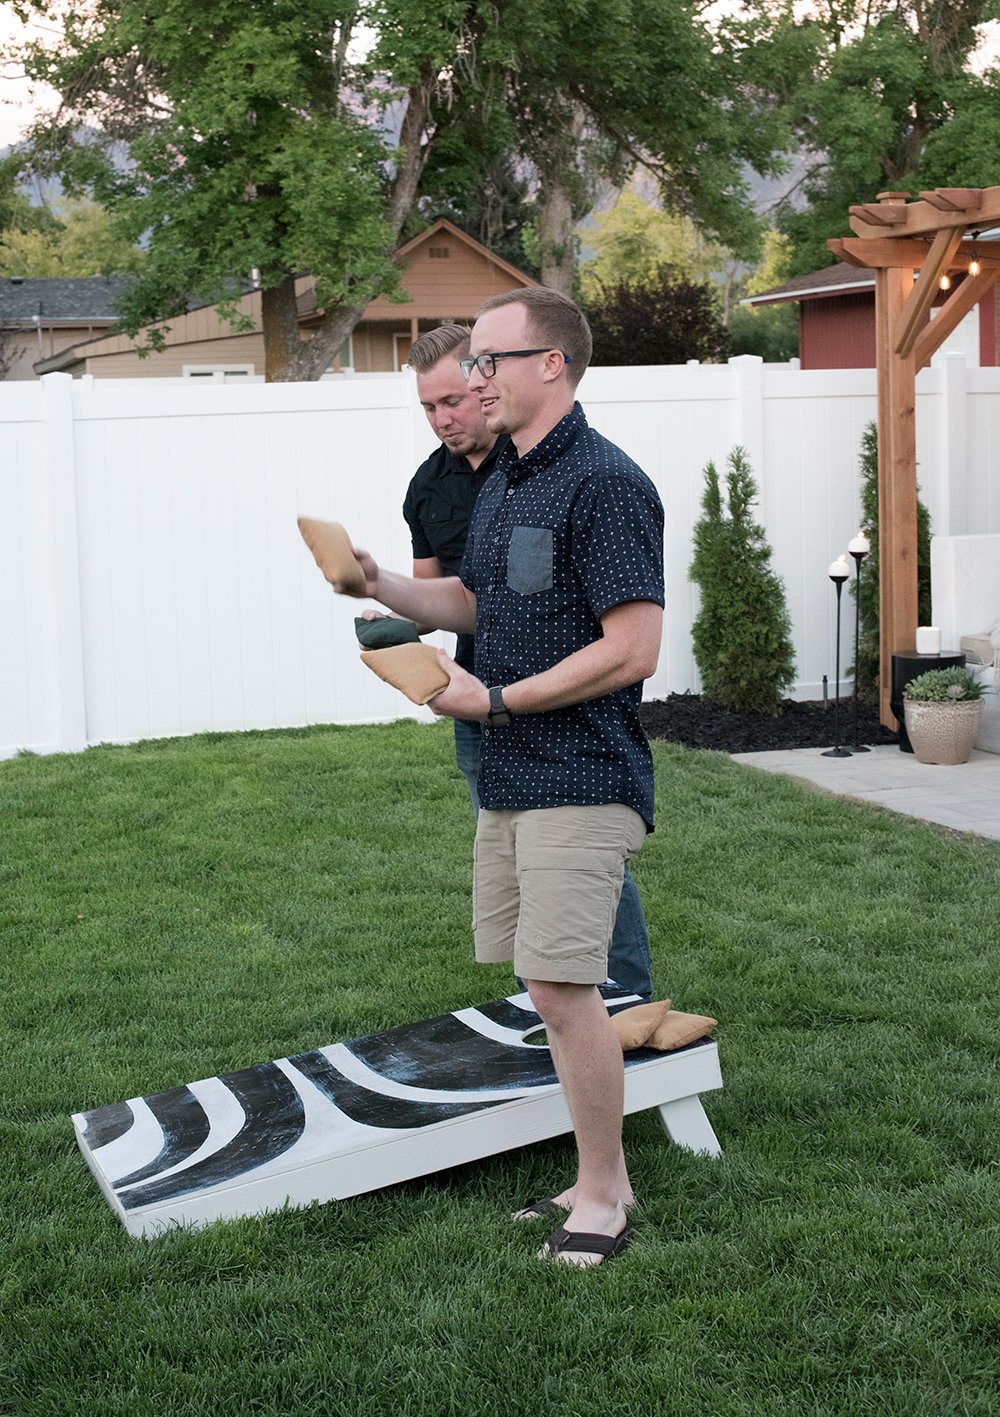
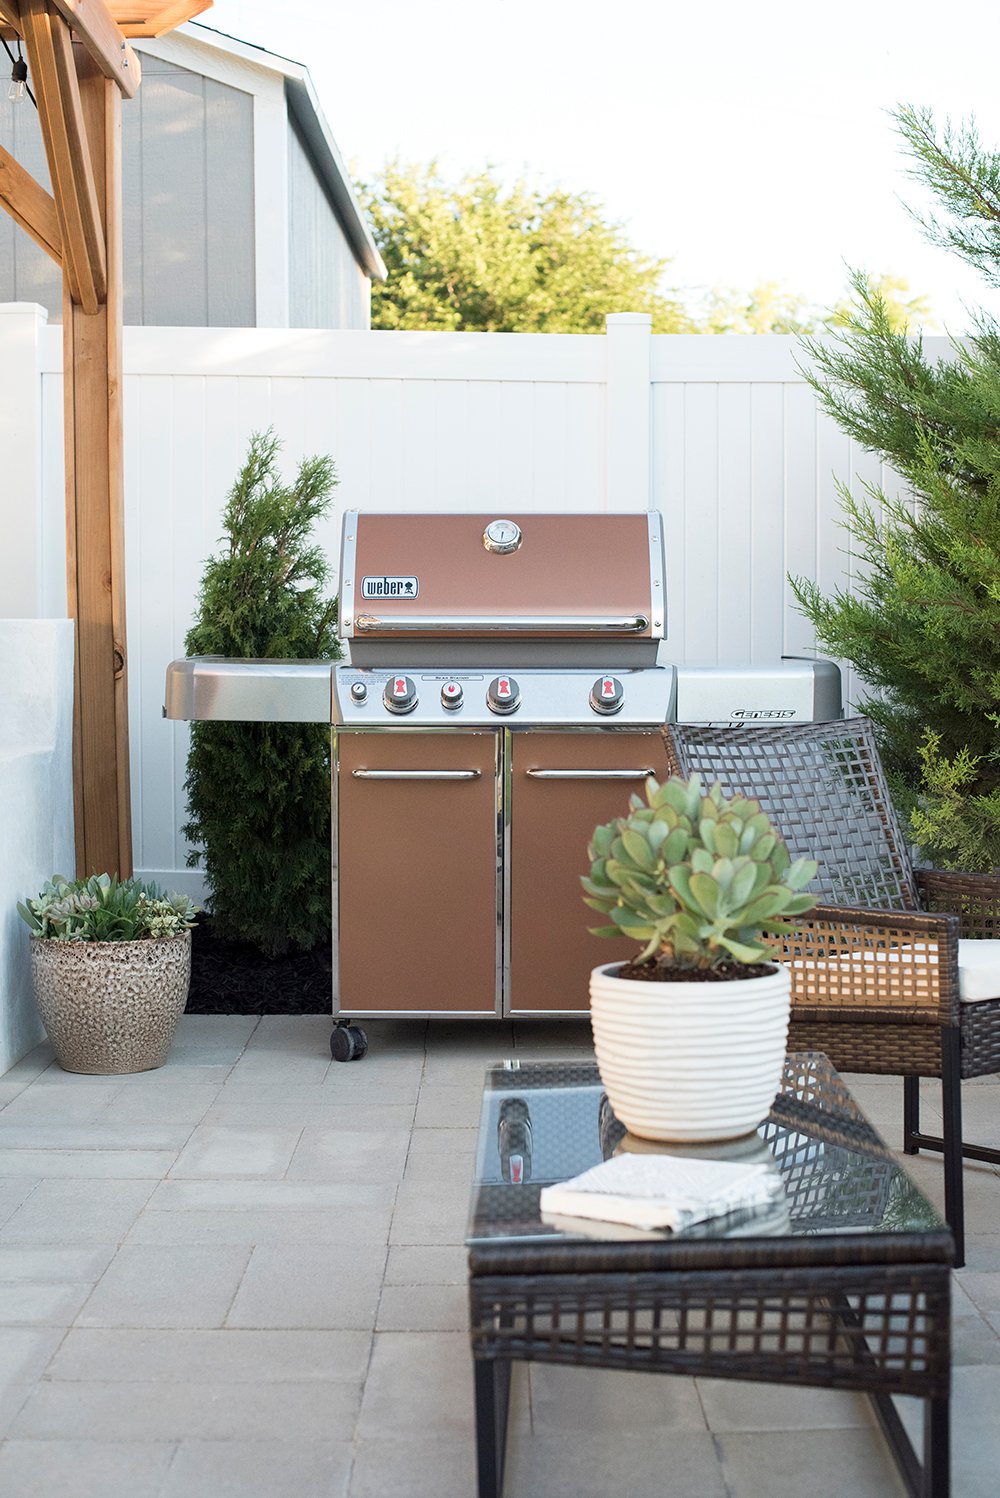
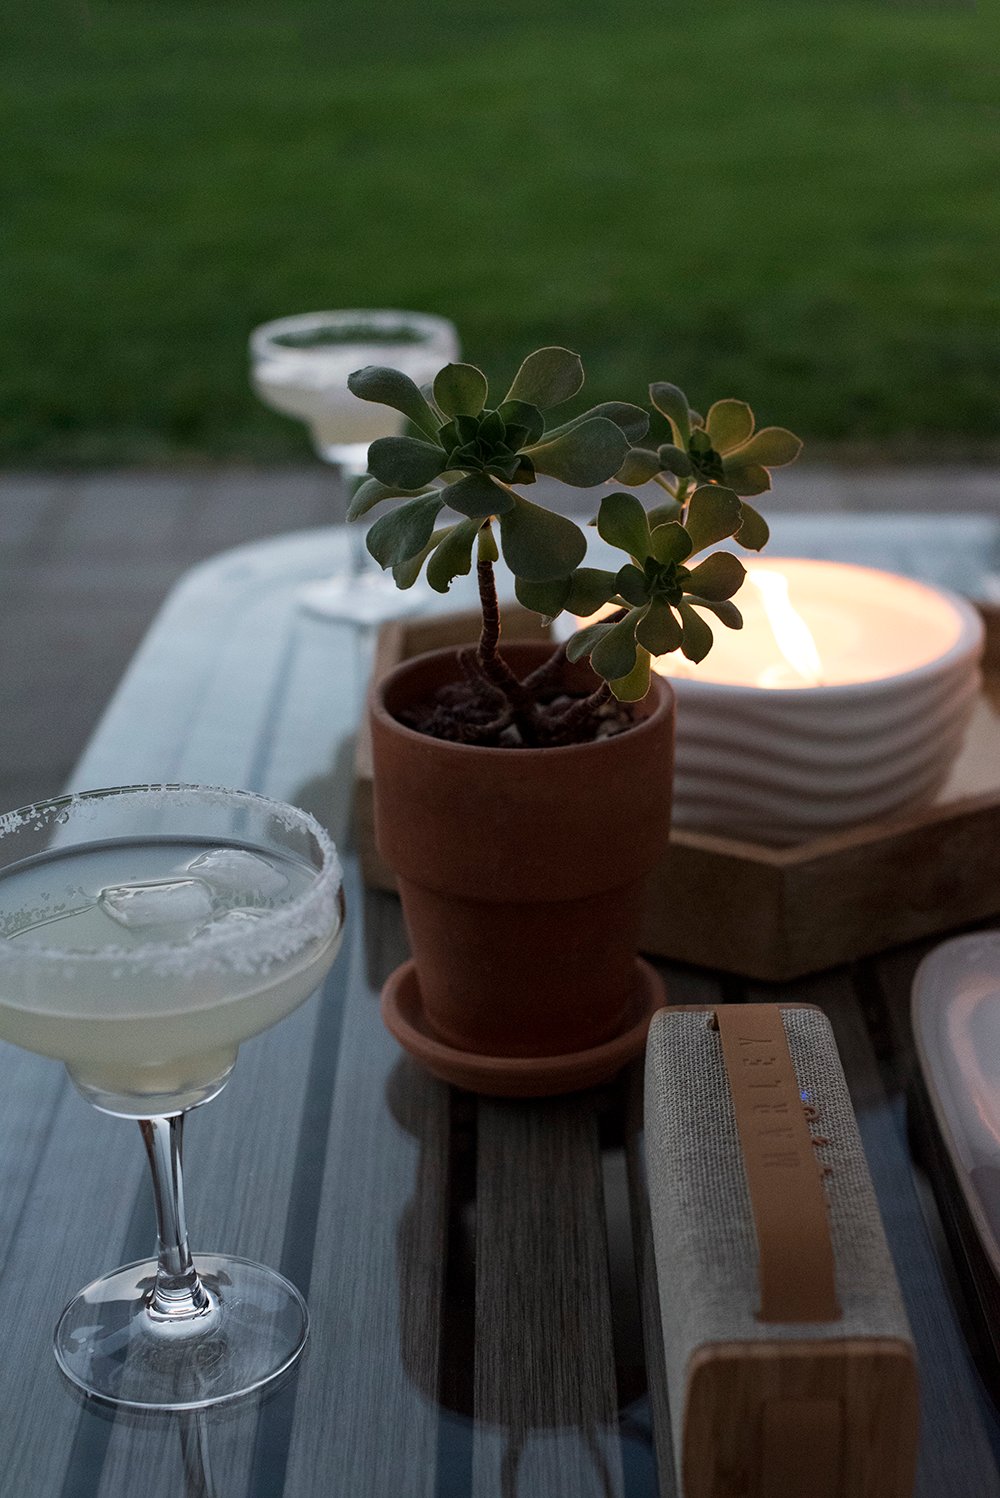
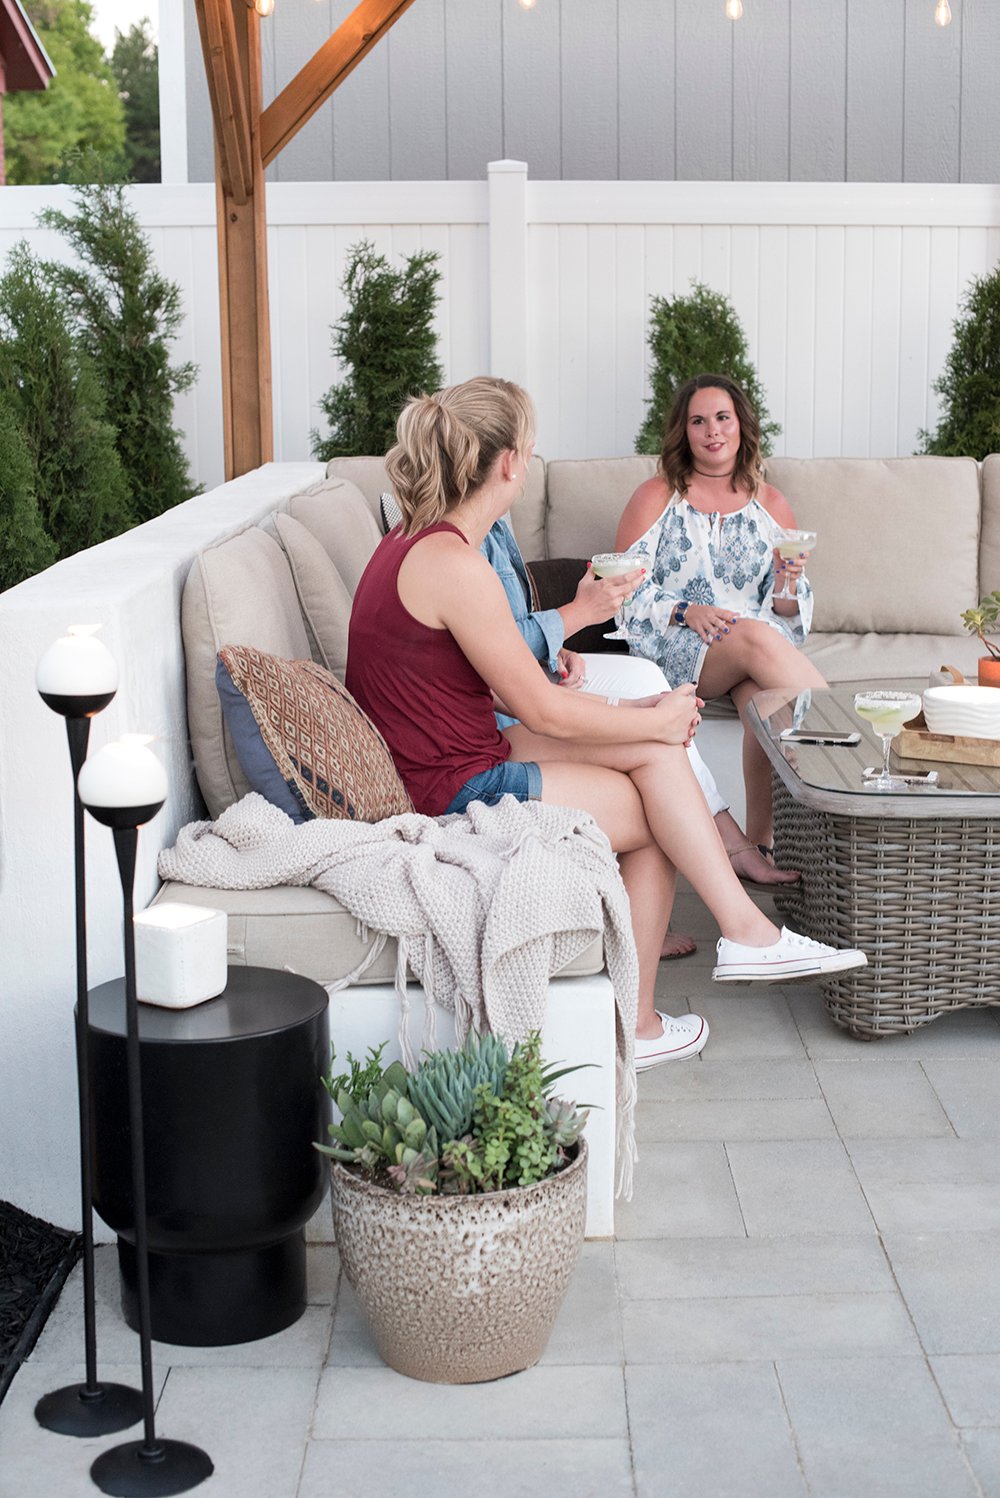 I made a big batch of margaritas, brought out some cold beer, and Emmett tossed his favorite ribs and vegetables on the grill. While the food was cooking, friends played cornhole and caught up. We also had house guests visiting from the midwest, so this ended up being perfect timing for a little get together. New friends meeting old friends! It was really the best impromptu barbecue, and it helps to depict how we actually use the space. Everything about this post is realistic and honest…. styled exactly the same as it still is today.
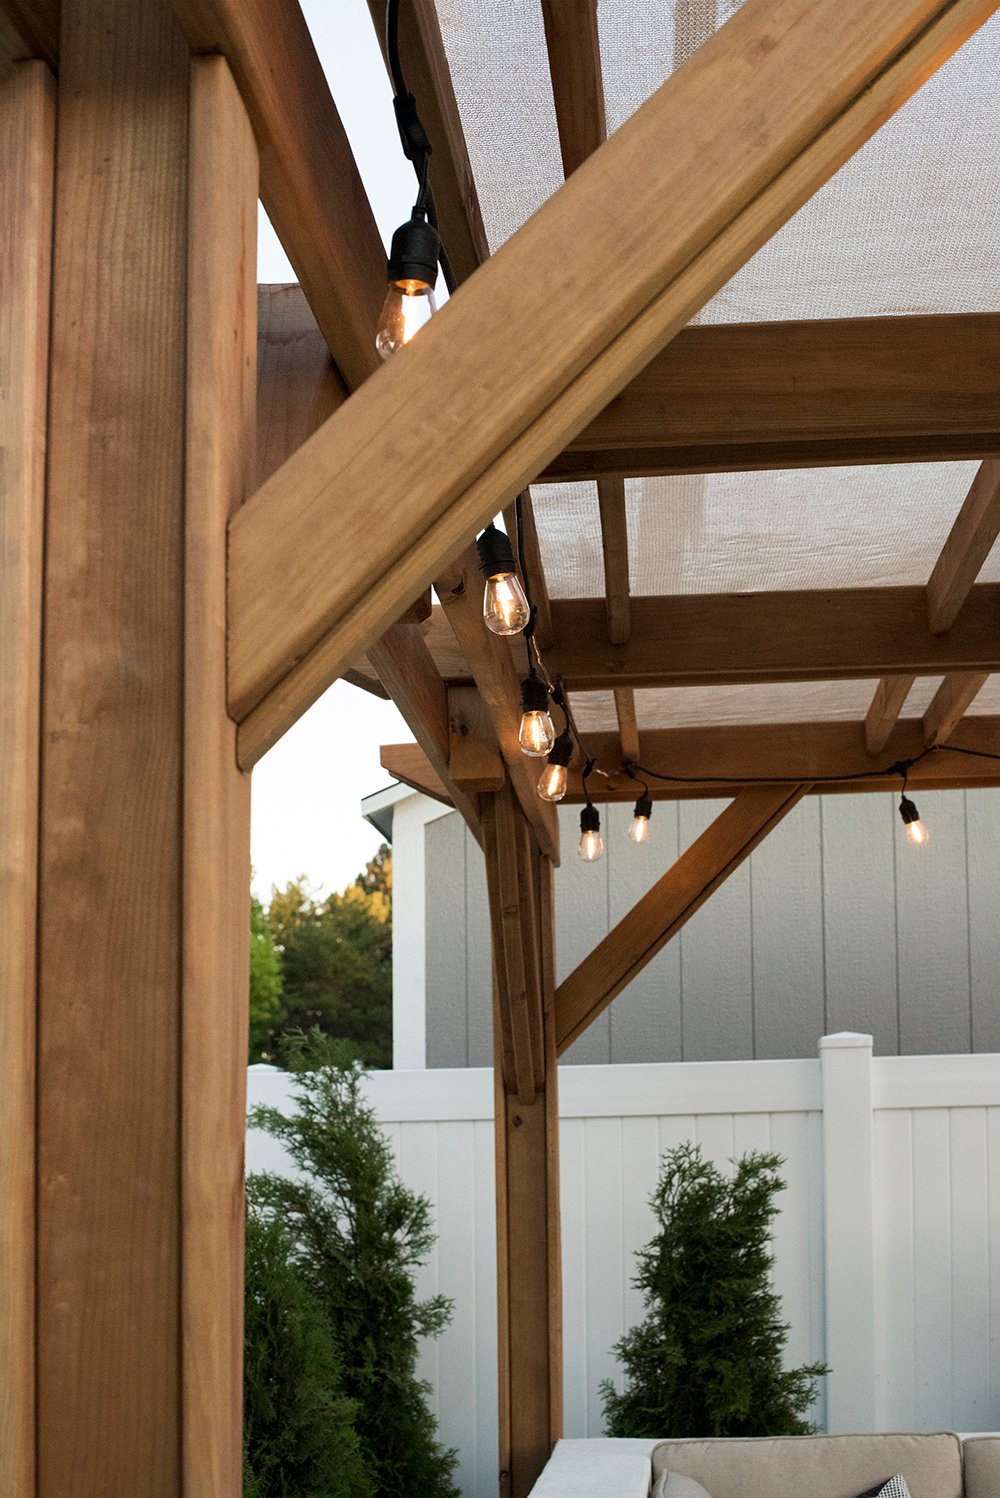
 I mentioned shade at the beginning of this post, and a lot of people have asked on Instagram how we shaded the pergola. We have hot and sunny summers here in Utah, so having a place to retreat from direct sun is super important. We bought tan shade fabric and affixed it to the top of the pergola with these clips. Not only does it provide shade, but it’s designed to block harmful UV rays, wind, and cools the temperature underneath by 15 degrees. In the winter, we’ll remove it, wash it, and reinstall next spring.
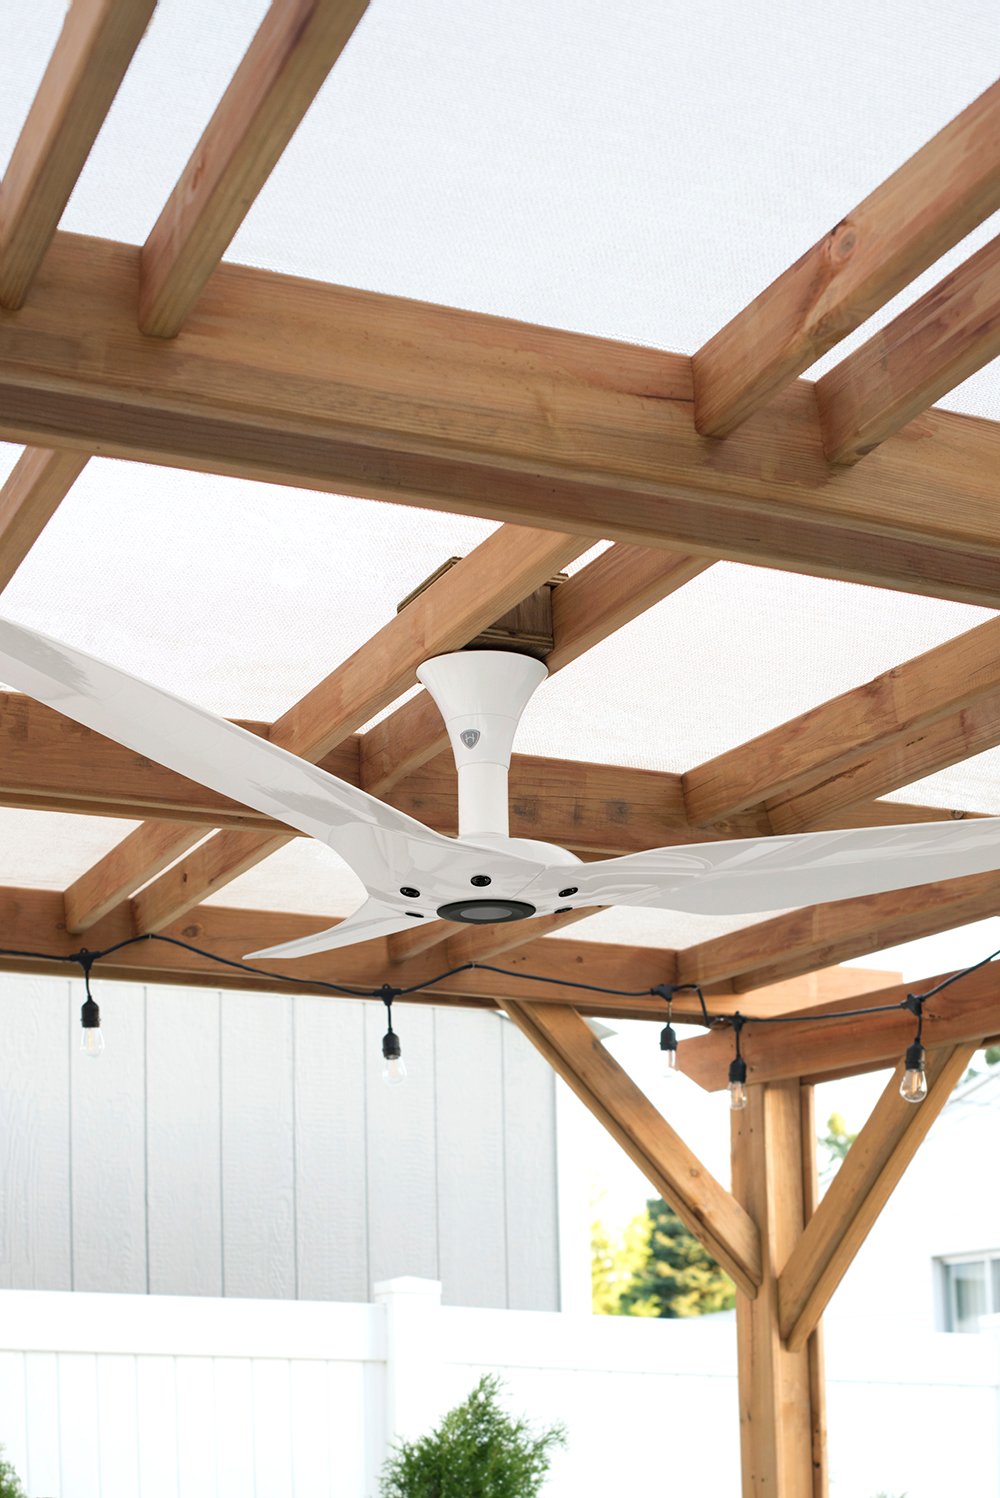
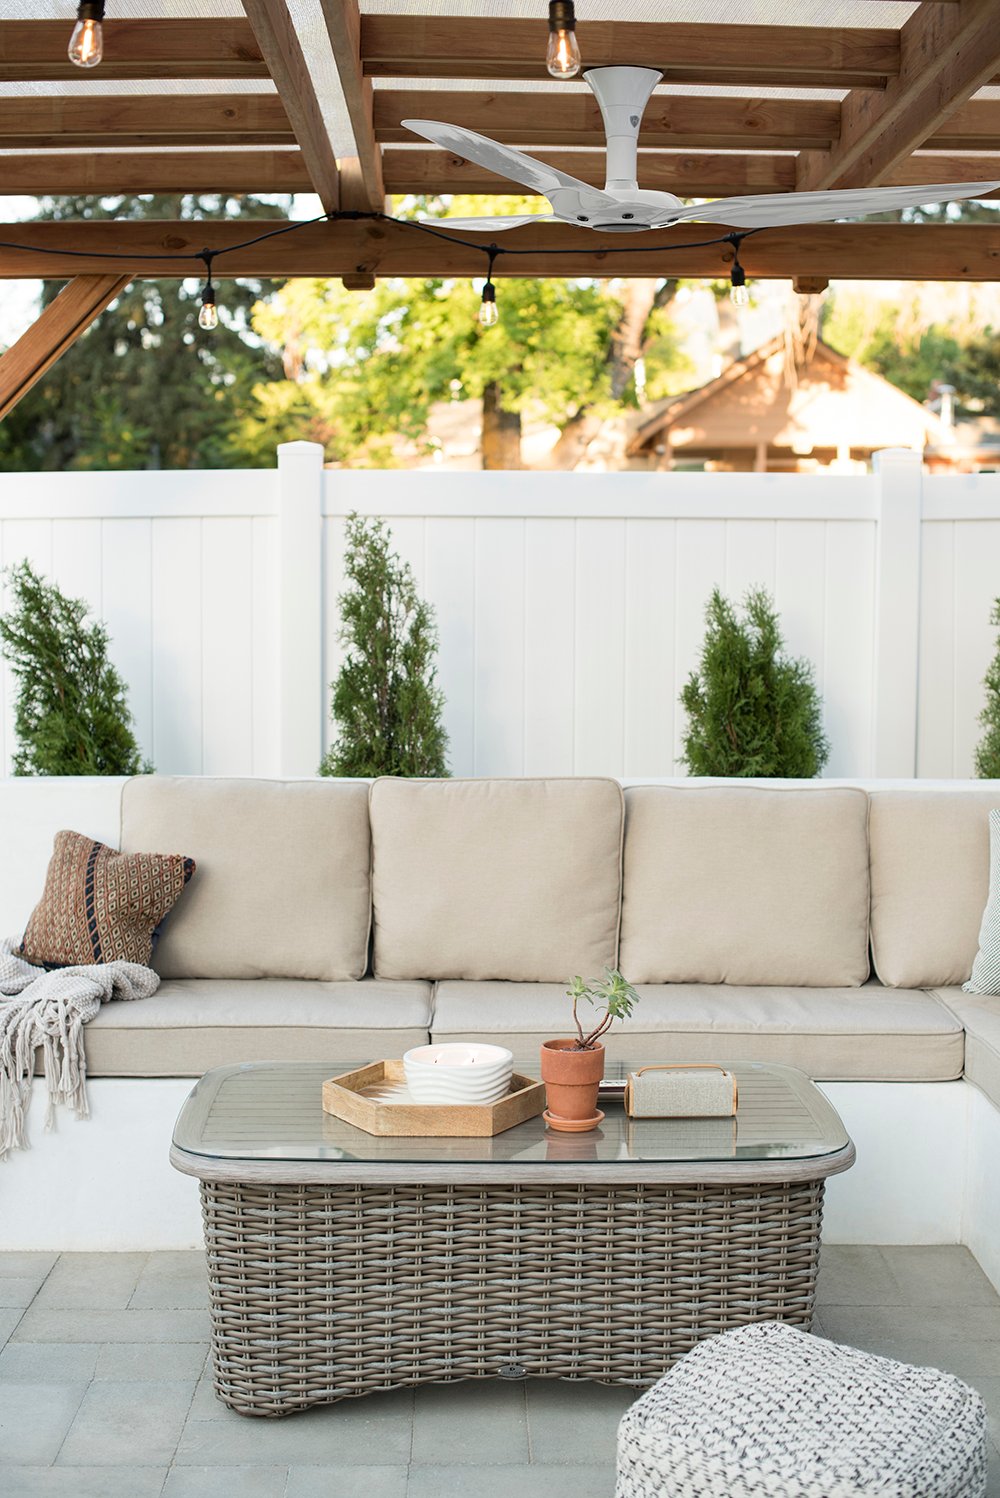
In addition to the shade fabric, we installed a Haiku overhead fan. You might be wondering why and how we landed on this. I’m devoting an entire post devoted just to the fan, because yes- we ran electrical to the pergola. To give you brief reasoning… this fan is wet rated (it can get rained on, live in 100% humidity, and take thunderstorms like a champ), low profile, looks amazing, and most importantly- cools the space so quickly. You wouldn’t believe the amount of air this baby produces. It really makes you more comfortable sitting outside in the dead of summer, enjoying this space before the sun goes down.
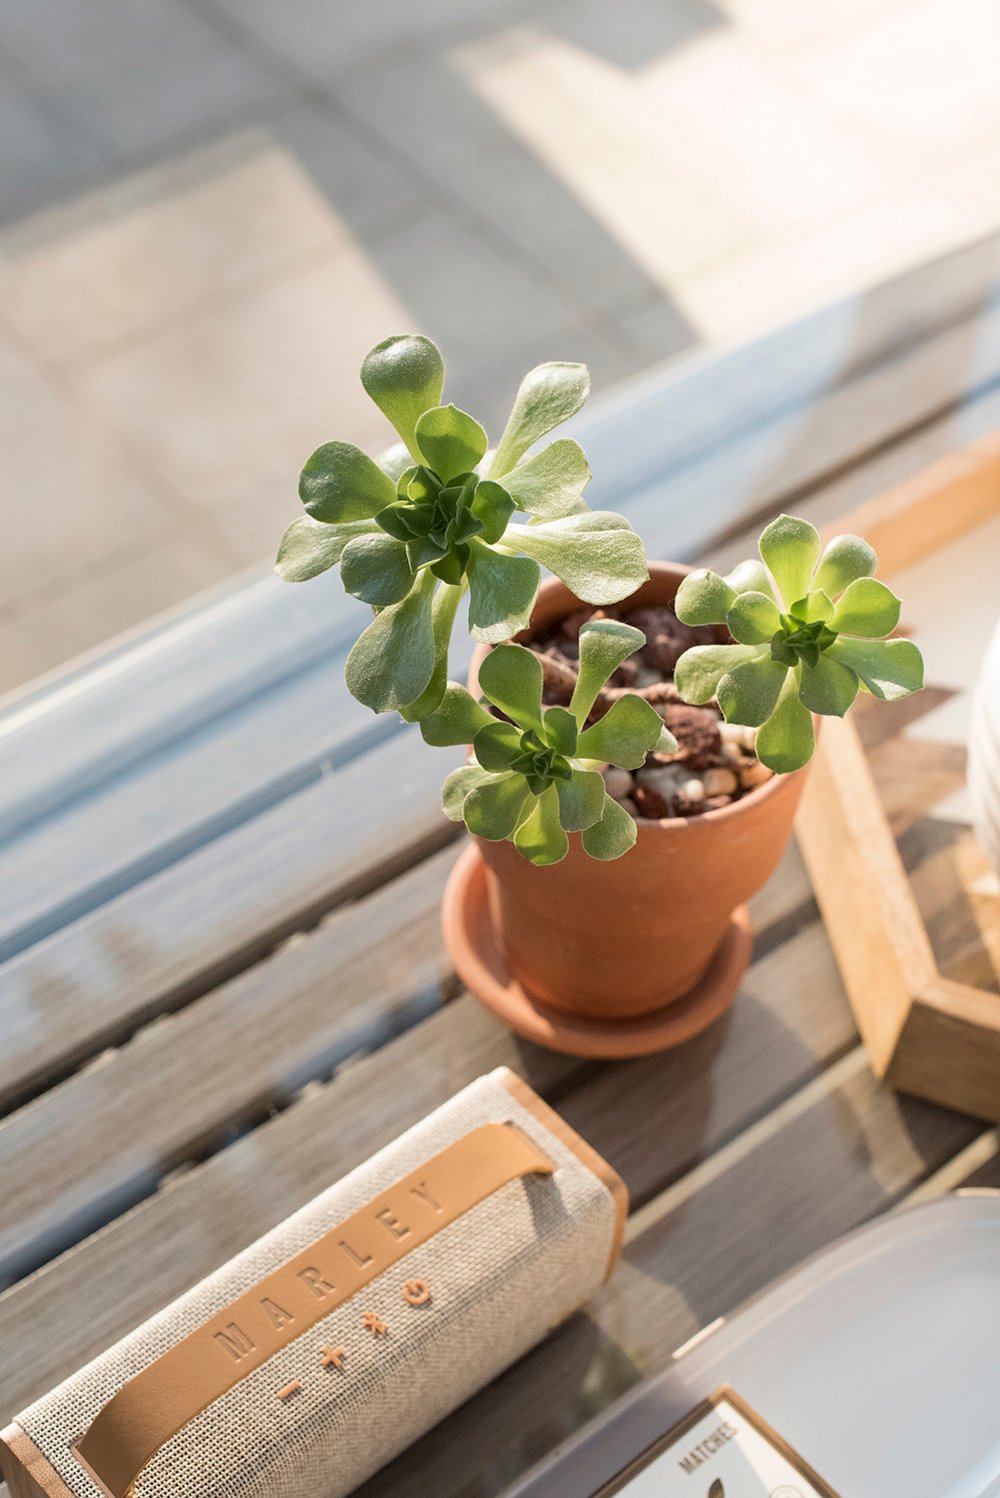
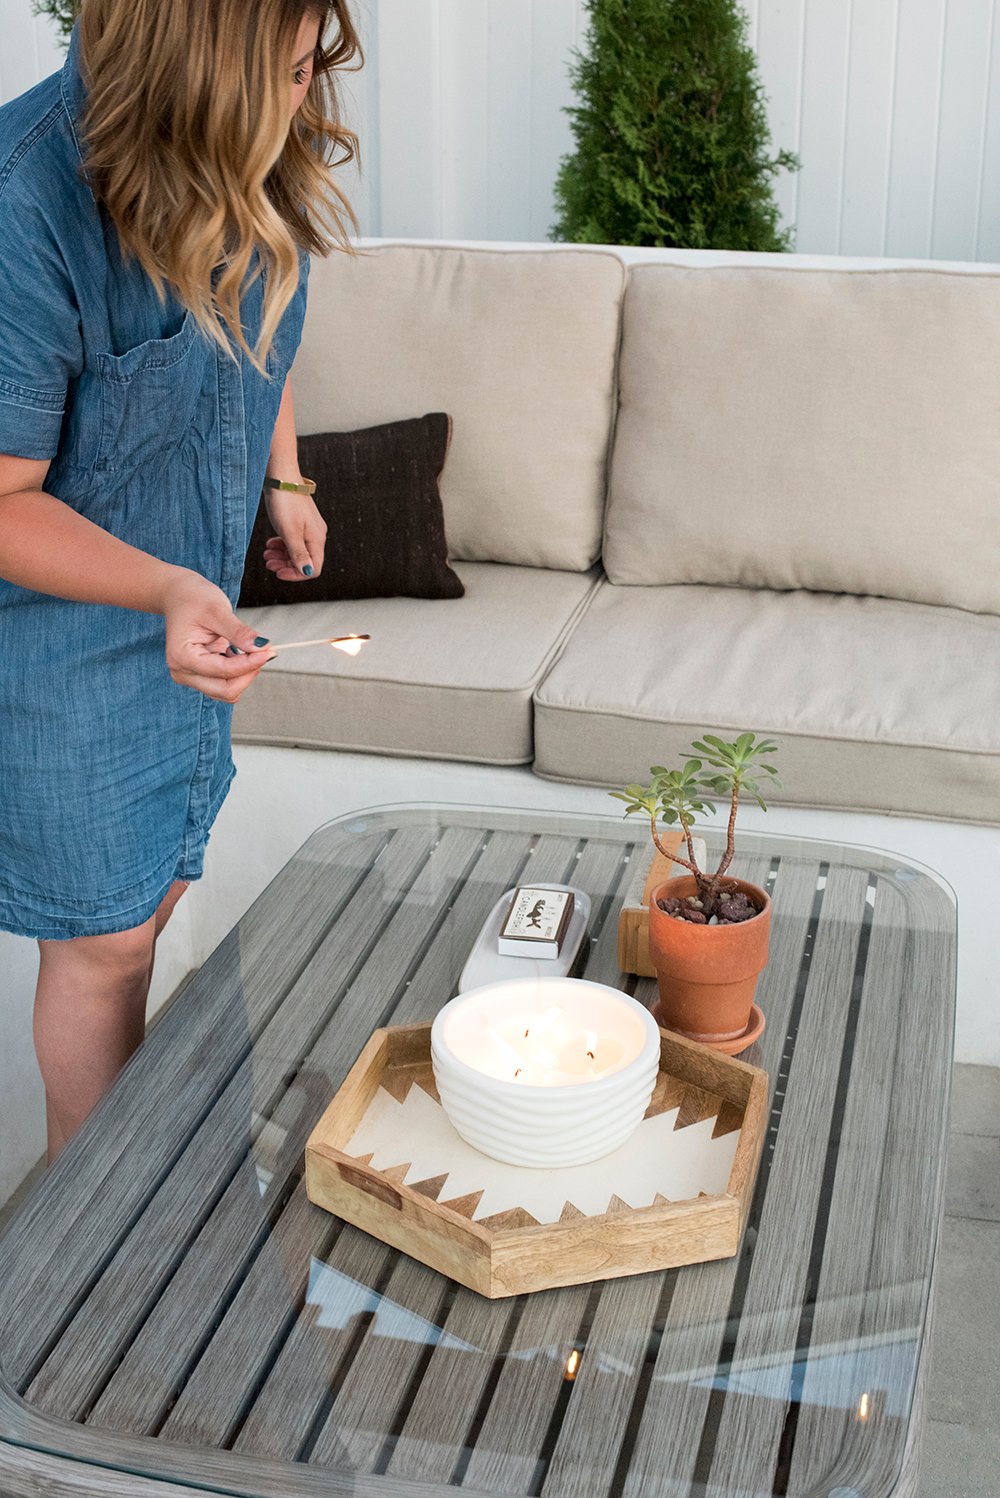
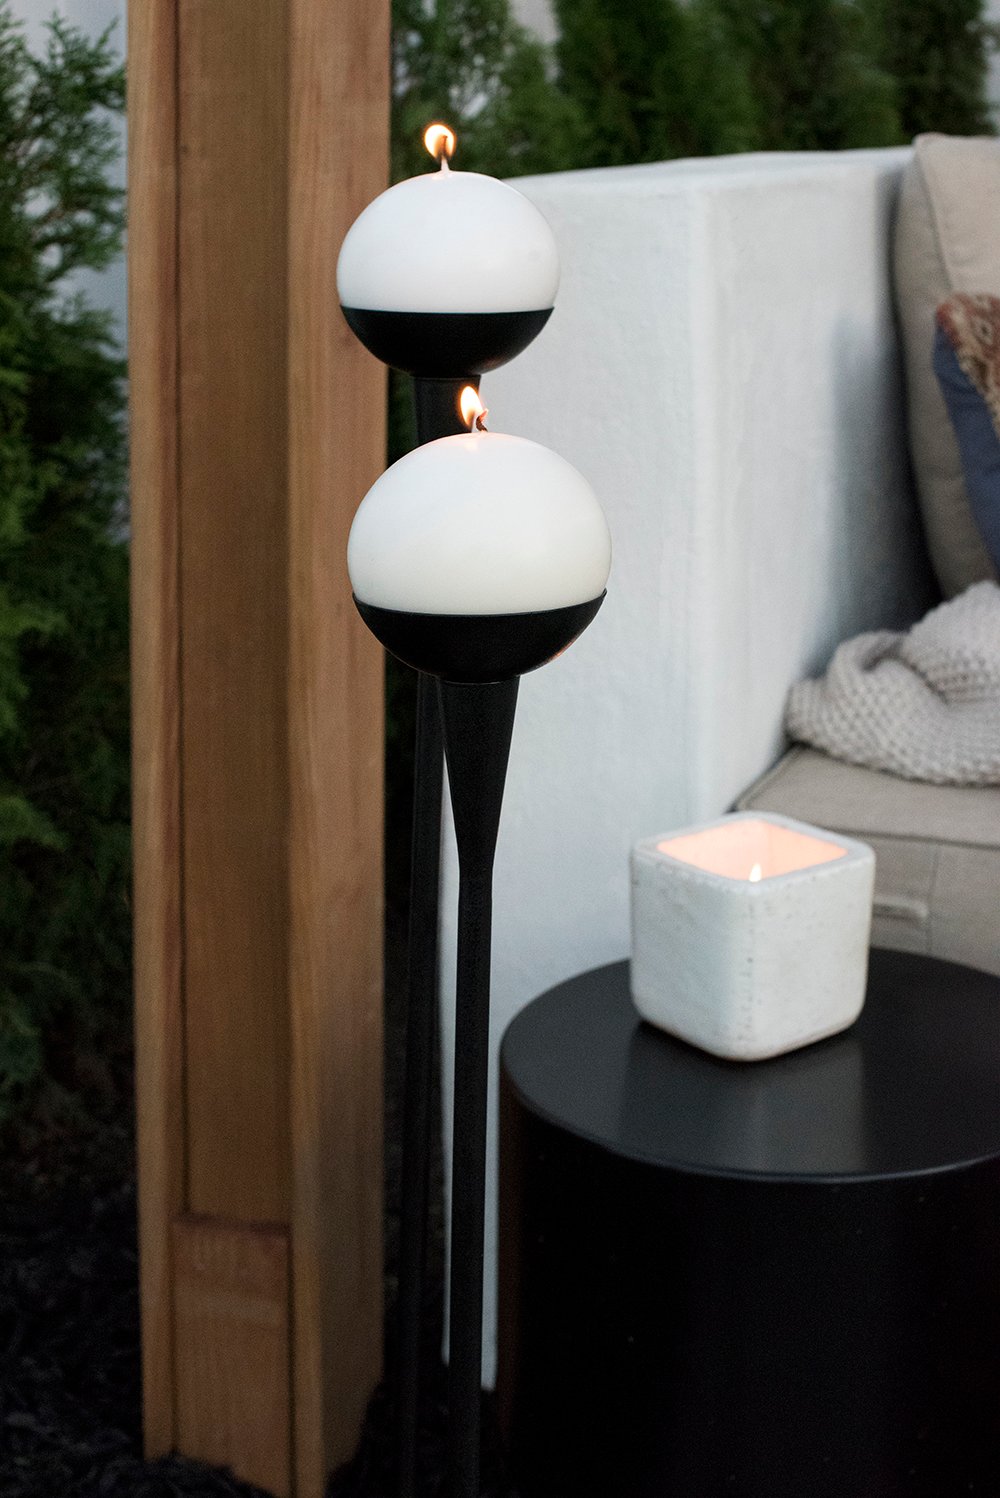
 Back to our little barbecue.. I brought out some music, and once the sun set, lit a few citronella candles to keep the bugs away.
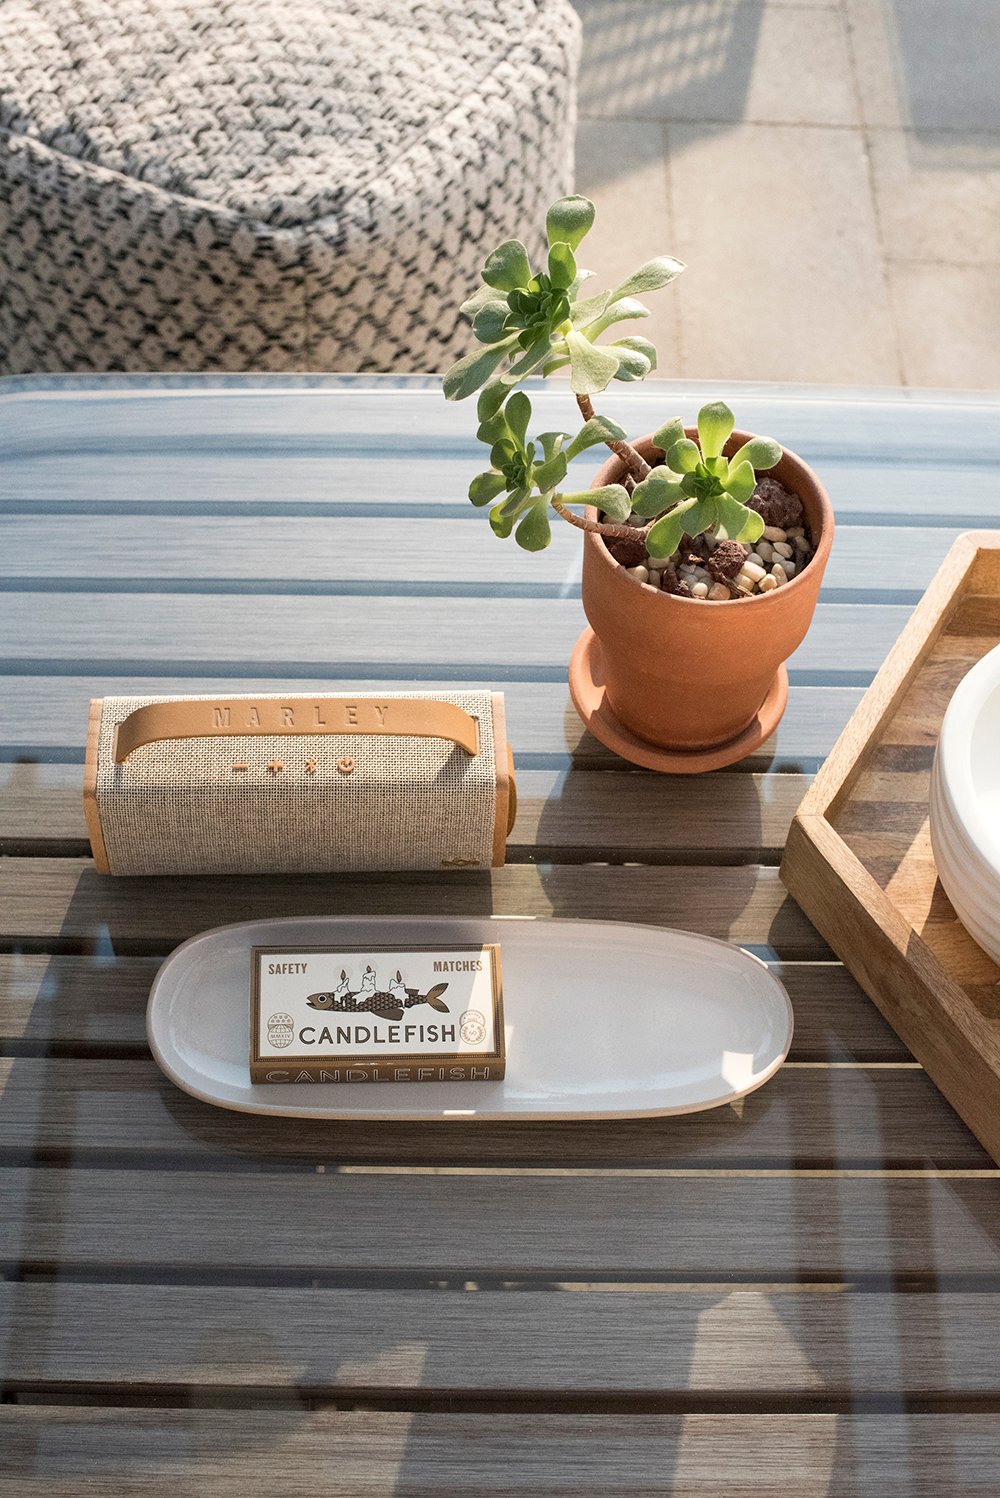 This bluetooth speaker is perfect for entertaining in this space. I love the organic aesthetic and my ‘tech-iest’ friend commented how amazing it sounded. The little handle makes it easy to carry around if you’re moving from one spot to another.
 Believe it or not, Utah went a few months without rain and the day I put out all the furniture and cushions, it rained four(!) days in a row. I’m talking torrential downpour and thunderstorms. I felt like I couldn’t win. I was certain all of that hard work was ruined. Luckily, everything held up perfectly. I’m looking into some furniture covers just to be safe, but everything is outdoor rated, weather and fade resistant.
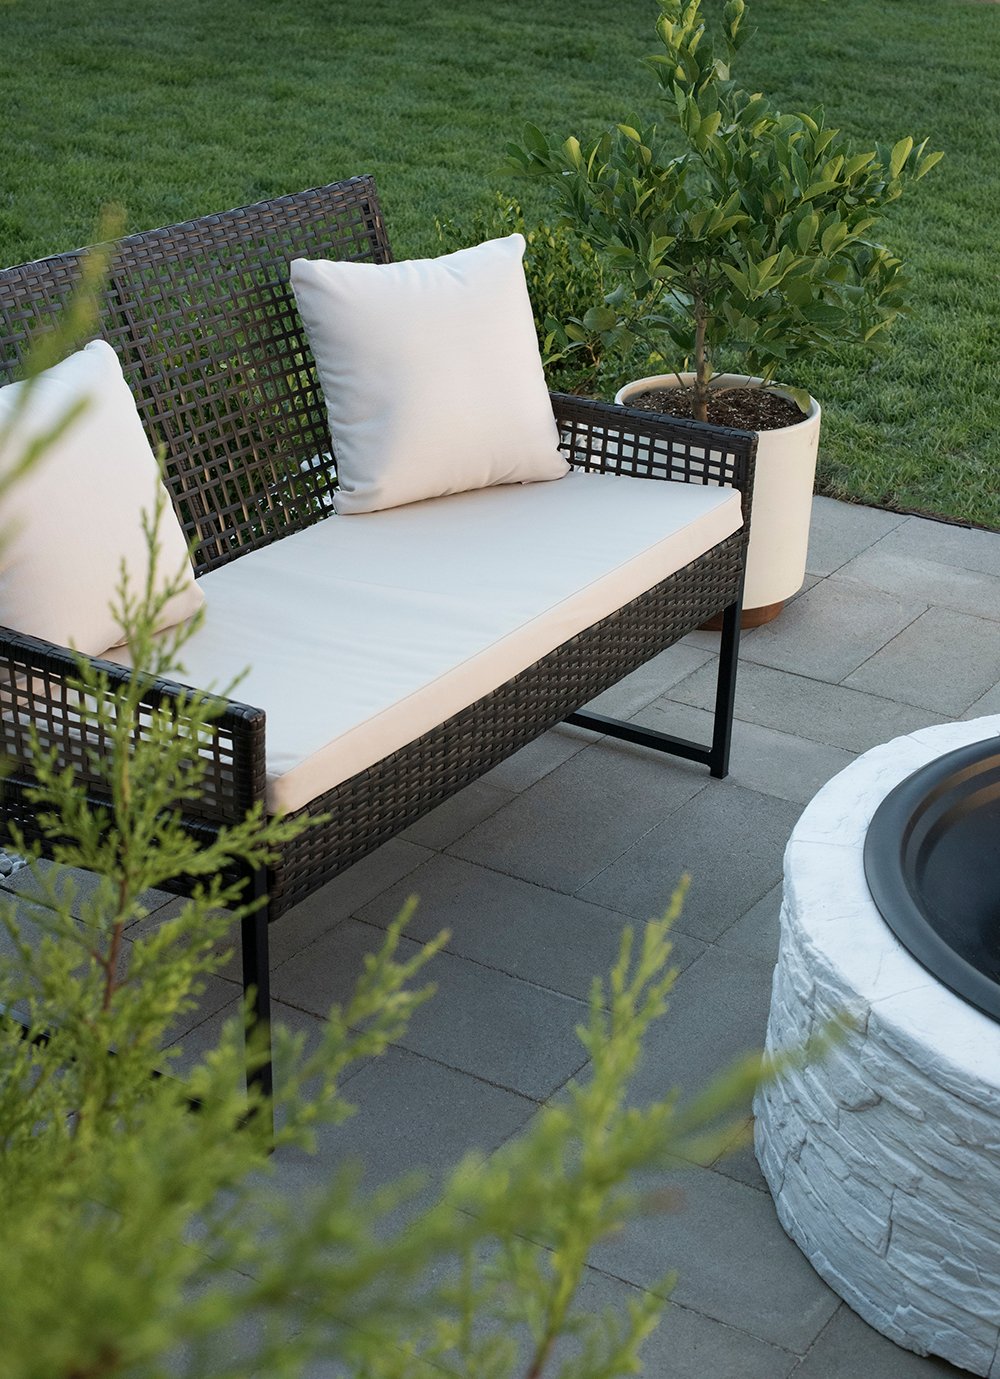
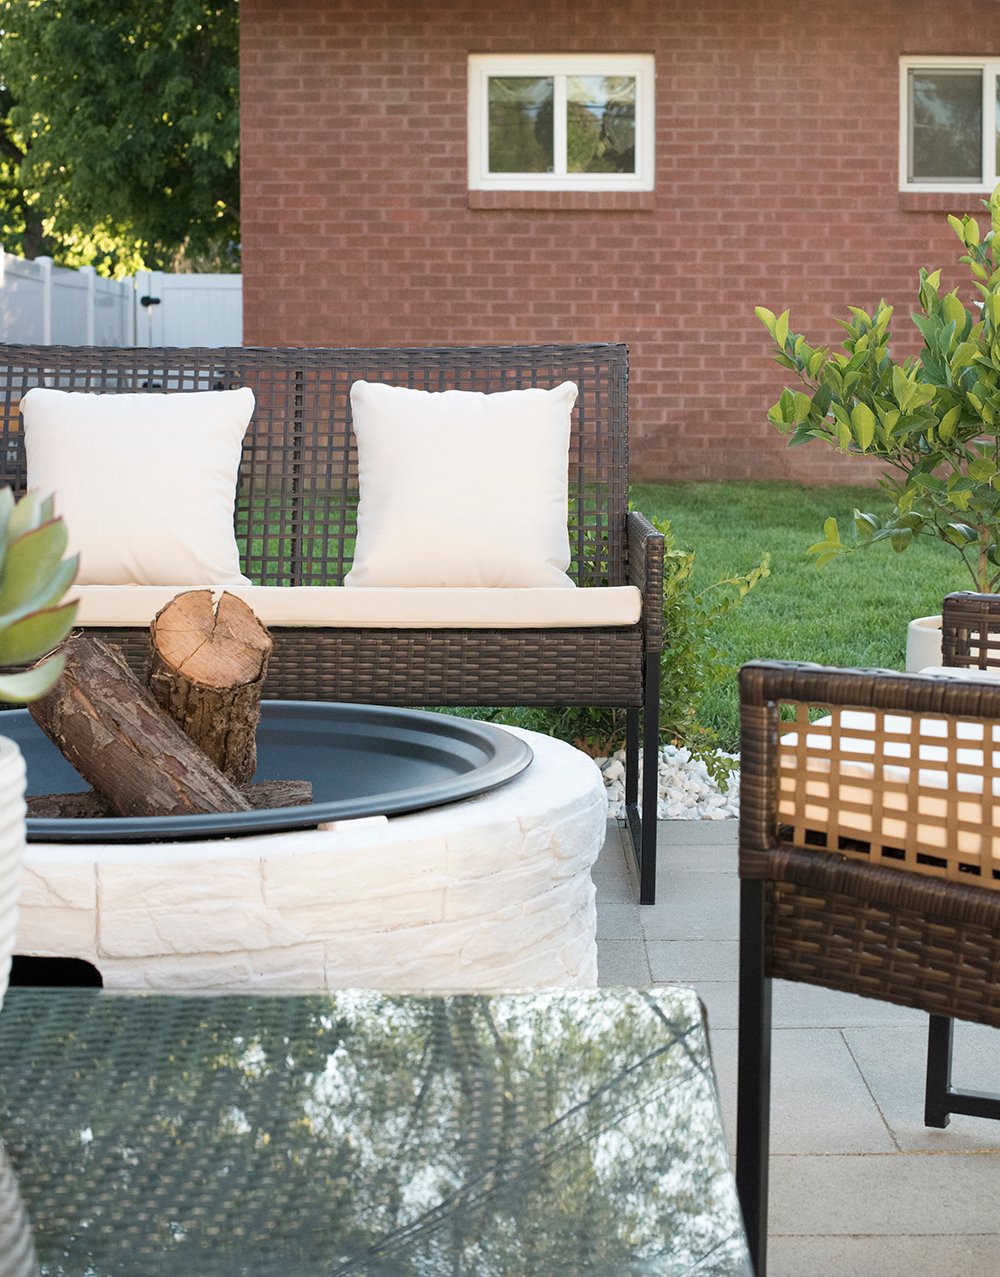
On the opposing side of the paver patio, we also have freestanding seating around a fire pit. I loved this patio set and it’s actually really affordable, as well as comfortable.

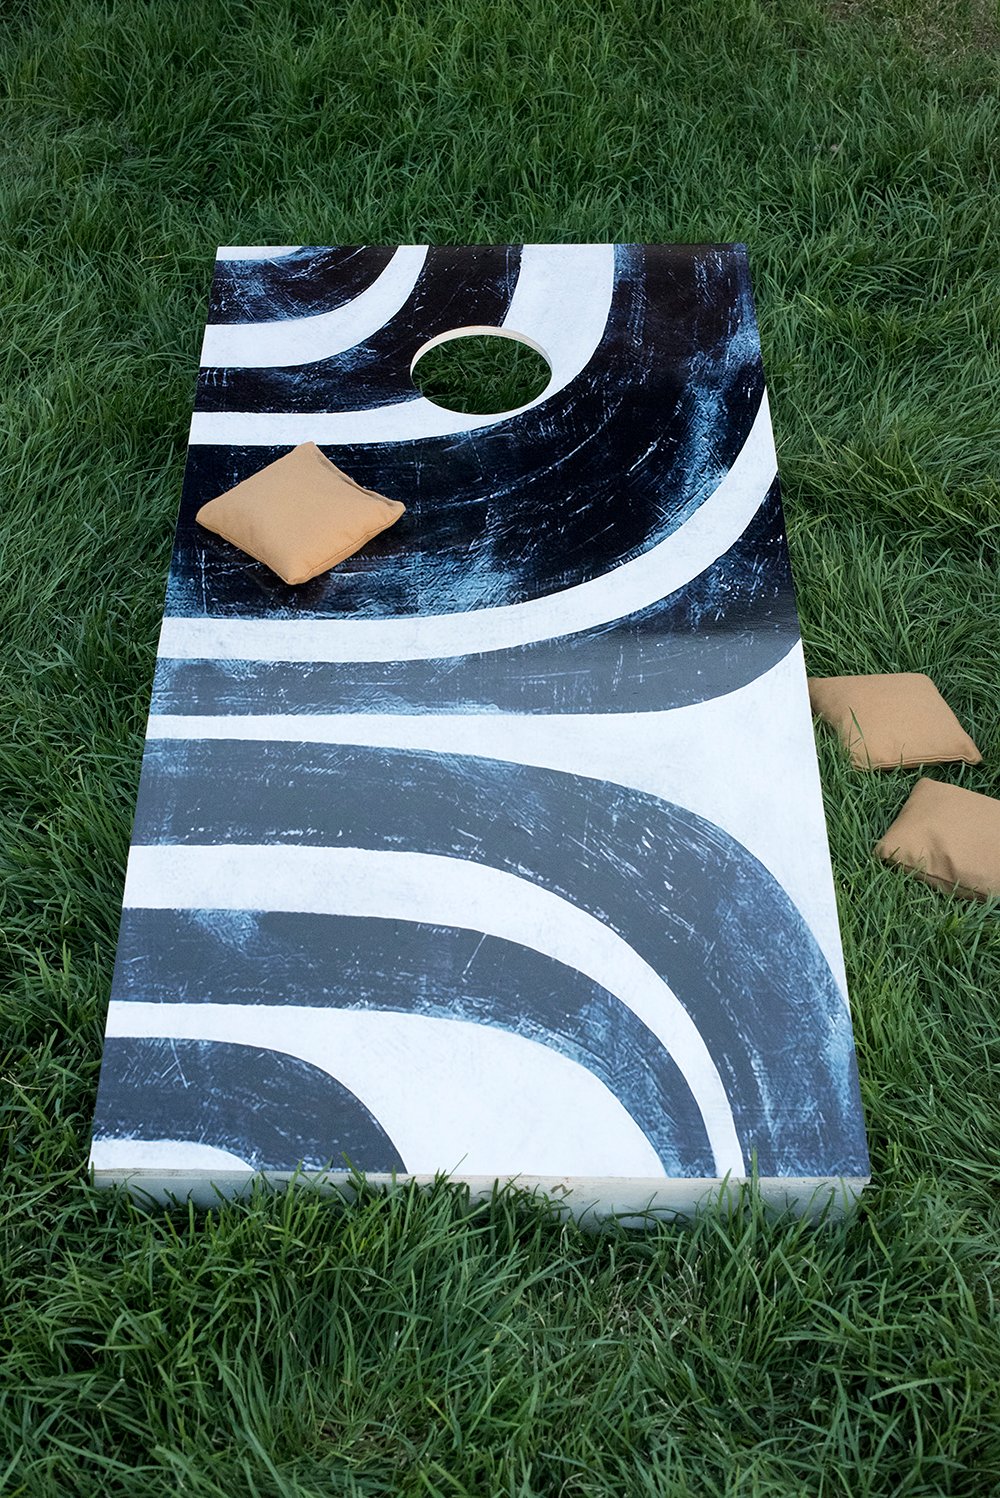
 As I was shooting photos and the food continued to cook, friends kept socializing and playing yard games. I can’t wait to share this cornhole set DIY with you later in the week… I think of it as art for your yard entertainment. I’m not into the ones that look like they came straight from a fraternity. Ha!
 As it started to get darker out and the appetizers were disappearing, everyone transitioned onto the patio for dinner. Eventually we’ll finish the outdoor dining area, but it won’t be connected to the pergola or paver patio. We’re thinking a separate courtyard after the add-on, about 20-30 feet away from this vignette. It’s close proximity to the kitchen would be more functional. In the meantime, everyone was content just hanging out on the lounge furniture to eat.
 Friends brought their dog to play with ours, and they tried their best to behave and not beg. I might’ve given them a couple samples to snap these photos. Ha!
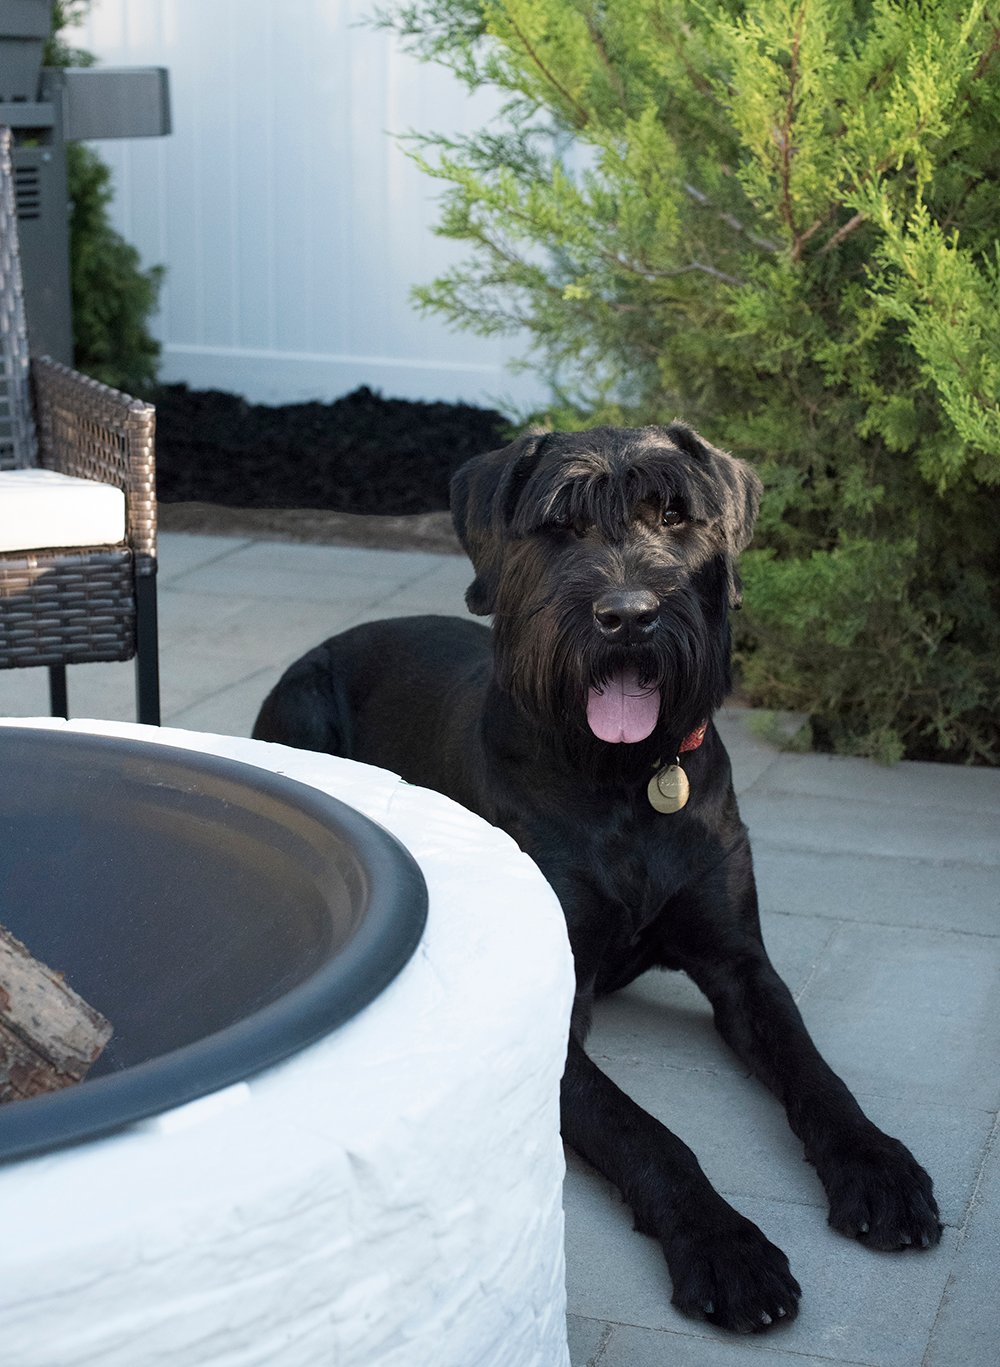 Remember Roxy from this post, in her beautiful kitchen? I think the four legged family members also approve of the patio, pergola, and backyard makeover.

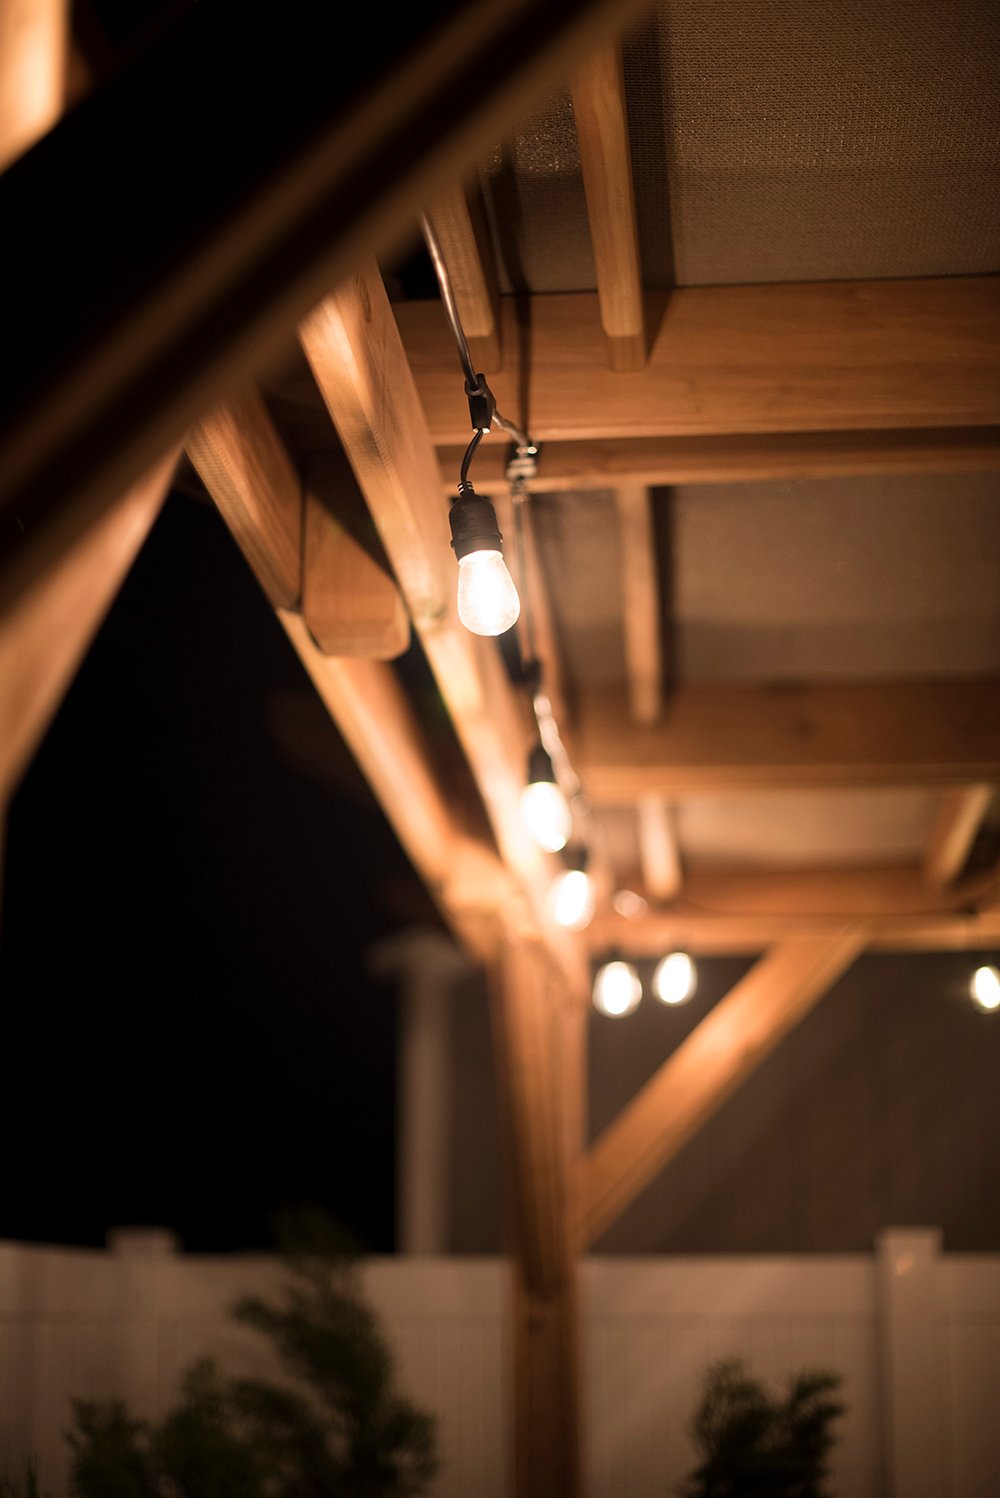
 I probably turned the twinkle lights on a little prematurely, but I’m excited to finally have a spot for them! If that doesn’t scream summer night, then I don’t know what will. These are also weather rated, industrial, and heavy duty. Living in a place like Utah, it’s important to find items that can withstand the harsh weather.
 As the evening wound down, I took a couple photos after dark to show you how this space really changes. It surpassed my wildest dreams. Candles and lights glowing, a little fire rolling, drinks in hand, and lots of laughter. That’s really the best way to describe this space and the memories we’ll make here once the sun goes down.
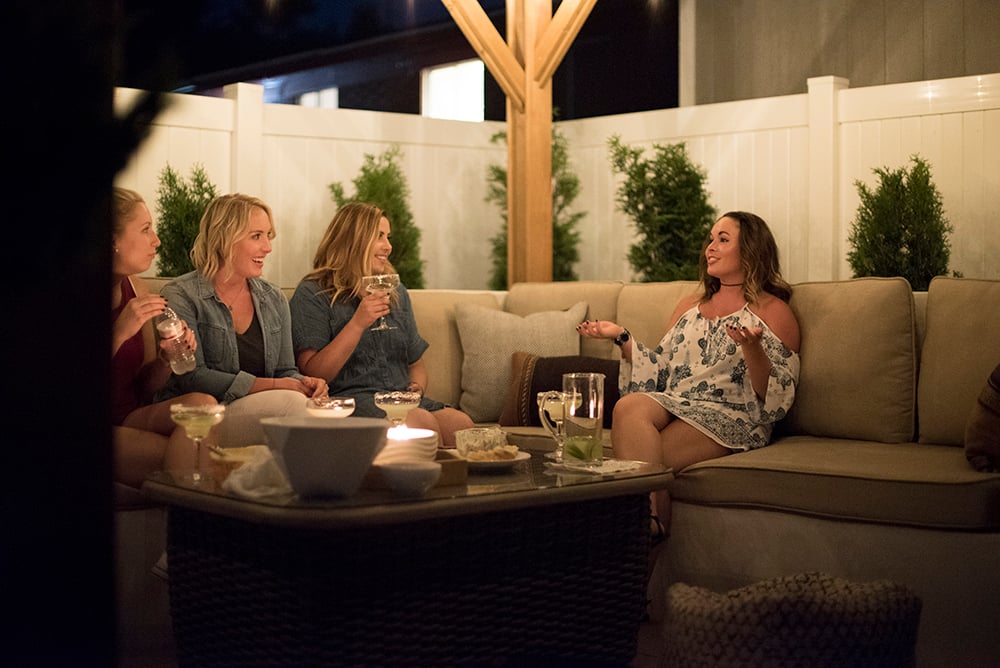 Emmett snuck this shot of my gal pals and I sharing a laugh. Looking back on these images made all the hard work and sweat for this backyard worth it. To see the people I love enjoying each other’s company in a beautiful space made my
 night… probably my summer. We didn’t get to entertain or enjoy our last backyard at the Ohio house. This really makes me glad we tackled the yard sooner rather than later.
 The guys caught up around the fire pit under the stars and we called it a night. Our first time entertaining in our backyard was a success and Emmett and I exchanged giant smiles as everyone was leaving. We’re so happy with how everything turned out.
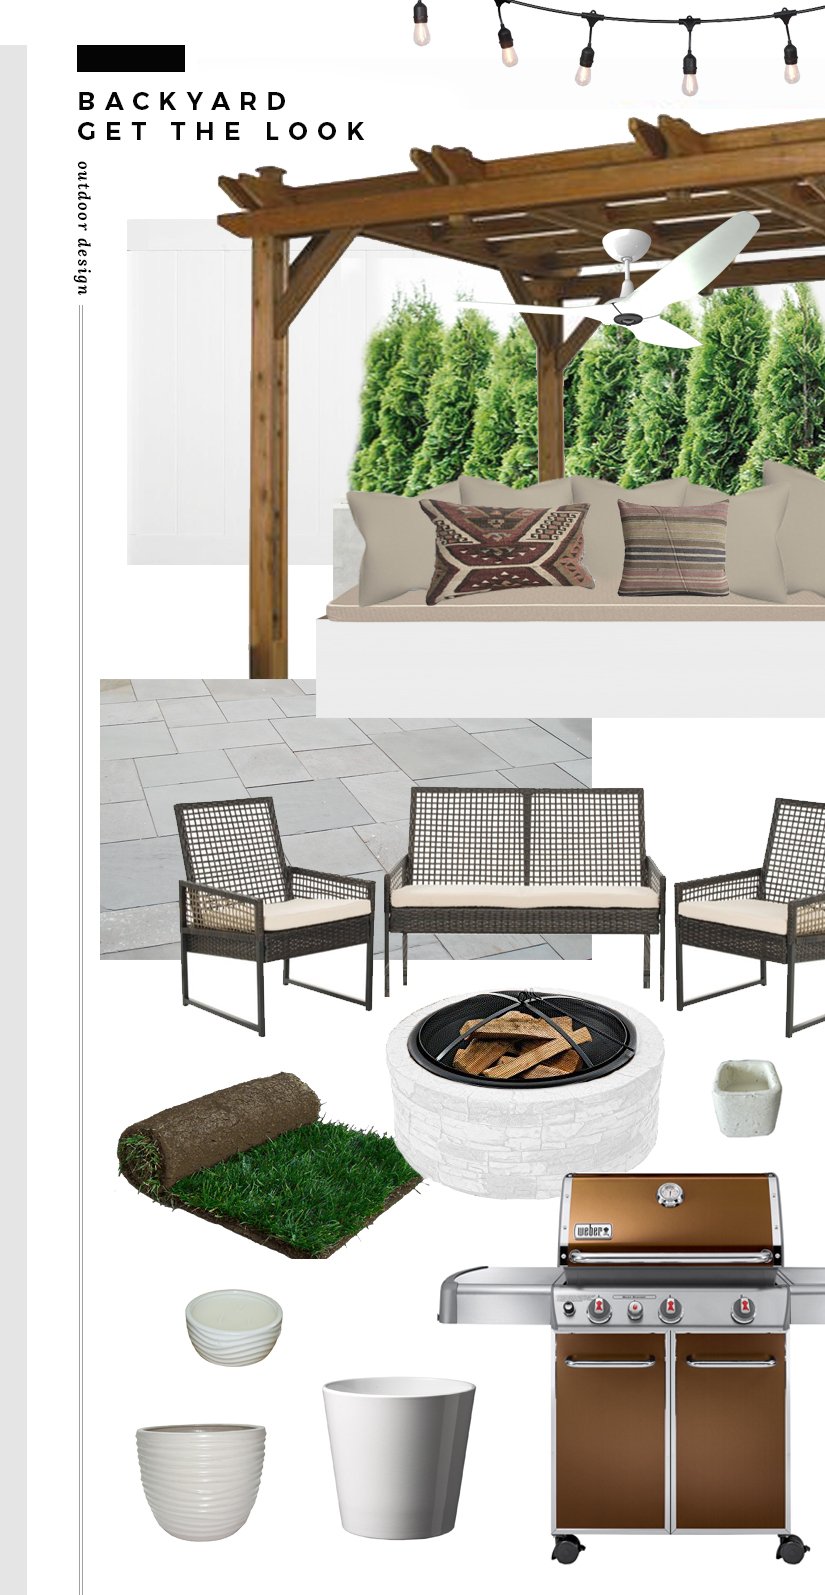
 If you’re wondering about the sources, I’m linking everything below… mostly everything is from Lowes! Hover over the image and click the items to be directed to the link.
 So… here’s what you have to look forward to in regards to backyard content! I’ll be sharing these throughout the remainder of the week into the following:
- Paver Patio DIY
- Custom Outdoor Seating DIY
- Cornhole Board DIY (with downloadable patterns)
- My Favorite Pitcher Margarita Recipe (best enjoyed in the backyard)
- Our Landscaping Design Plan
- Why You Need an Outdoor Fan
- The Backyard Budget
Please let me know your thoughts. I’d love to hear feedback! I know a lot of you have been following along on Insta stories and have been so encouraging. I really appreciate all the love, support, suggestions, and compliments!
*This post is brought to you in collaboration with Lowes. All content, ideas, and words are my own. Thank you for supporting the sponsors that allow us to create unique content while featuring products we truly use and enjoy! I also have to thank my friends for being super cool and allowing me to take their photo for the blog.
Sarah, your yard is just stunning! When can we come over?! Your hard work is so evident.
Thanks so much, Kim!! Anytime ;) … we love everything you guys do. xo
Absolutely PERFECT!! I love every detail and already showed my husband the built-in seating…we are going to recreate it in our yard!
Thank you, Courtney! I’m posting the seating DIY on Wednesday. Please share photos… I’d love to see how yours turns out!! xo
WOW! This is absolutely beautiful! It looks both inviting and classy. I love how everything is pulled together. Your hard work clearly shows. And way to write off that sexist contractor – gross!
I can’t wait to read the upcoming DIY projects you listed.
Thanks so much, Robyn! I hate sexist contractors… it happens way too often, sadly. Thank you for following along!! xo
Looks wonderful Sarah. I laughed so hard on your IG story today with Finn peeing on your newly planted cedar.
Hahah!! Those crazy dogs. Thanks so much, Holly!! Hope your week is off to a great start. xo
Looks amazing! This is so inspiring as so many times I hear inflated prices from contractors and think “I’ll just do it myself”. I am curious if you will share a budget breakdown, specifically about your hard scapes – the paver patio, pergola, and bench. Thank you in advance!
Thank you! I’ll definitely get the budgets together and share those as well. We had a running tally for the entire backyard, but I’ll try to break it down by project. xo
Goodness gracious, it looks SO GOOD! I can’t wait to see more about the custom seating. Very impressive!
Thank you, Alex!! That’s getting posted on Wednesday. xox
I would literally put every last thing in my own yard! I looove it. Oh, and that contractor?! Seriously?! 😡
Thanks, Lauren!! Yes… super disappointed in meeting that obnoxious guy. Ha! Hope you and your babe are doing well!xo
So impressive! Both in looks and the fact that you guys did it yourself. A big raspberry to that sexist contractor!
Thank you, Cyndi! …and yes- what a jerk!
Sarah! It’s stunning! I can’t stop scrolling through the pictures. You and Emmett did an amazing job and I’m so happy you get to enjoy it now :-) Tell me about those pillows. I think I remember you mentioning on your IG they were under $9 (not sure if that’s right)? Where can I find them? Can’t wait for all of your upcoming posts!
Thanks so much, Dana! Oh yeah… I totally spaced on the pillows. They have a bunch for $9 in this Etsy shop: http://www.awin1.com/cread.php?awinmid=6220&awinaffid=258335&clickref=&p=https%3A%2F%2Fwww.etsy.com%2Fshop%2FZDkilimspillow%3Fref%3Dl2-shopheader-name
Its absolutely gorgeous and you should be so proud of what you’ve accomplished. You’ve taken a small, run down house and turned it into something really classy! Amazing!
Thank you, Linda! We still have a long way to go, but making progress feels good! xo
Looks amazing Sarah! I can’t wait to come see all you’ve done :)
Yes, please!!! Book a flight ;) Thank you and miss you!! xo
Absolutely stunning!!! Easy for me to say, but it was definitely work all of your hard work! You’ve done such beautiful work with your space.
Thank you so much! xo
Sarah, you should feel SO proud. The space is a dream! I can’t wait for the other posts you have planned.
Thank you, Lillian!! I really appreciate it :) xoxo
Beautiful! Beautiful! Looking forward to all of the details on the pergola and seating. You and Emmett rock!
Thank you, thank you!! :) You made my night with this comment. Ha! xo
We shared a cornhole DIY this spring. Adding a custom design to the top definitely elevates the look beyond frat-house! Robin used a mix of stain and paint to make this color blocked version: http://andthenwetried.com/2017/04/one-room-challenge-week-4-cornhole-diy/
Yours turned out great, Michelle! I actually just posted my DIY for cornhole sets today: https://roomfortuesday.com/diy-cornhole-set-with-free-pattern-downloads/
so so so so so so beautiful! sorry i’m commenting up a storm today! I’m catching up on everything in your back yard! this is so gorgeous! I can’t say it enough! Rhett and I love being outdoors so this space is right up our alley! You took your vision and really transformed this space! Hello outdoor living!! A+ work you guys! Cheers!
Thank you, Allison!! I really appreciate it. It was a long two months of physical labor, but we’re finally enjoying it. Everything was well worth it. Good luck with your new home! xo
Is the wood holder from Lowes as well! love that style!
Hey Allison, I was curious about the wood storage tower too. I found it….I think!! https://www.crateandbarrel.com/frame-log-holder/s223049?storeid=860&localedetail=US&a=1552&campaignid=880315824&adgroupid=42649983725&targetid=pla-323323282683&gclid=EAIaIQobChMIl-O_yeWO1wIVCVuGCh2jTg-_EAQYASABEgLPCPD_BwE
Sorry Cara and Allison… I totally missed your comments. That’s it! The one Cara linked is the one we have. Sorry about that! xx
Perfection as always! You guys are busting with talent!
Thank you so much, Beth! Hope you’re doing well :)
i’m so inspired and can’t wait to do more with our back yard based on your inspiration! AMAZING!
Thank you so much, Georgia! I really appreciate it :) xoxo
Hi! Love the pergola! What Type of stain did you use for it and color?
Thank you! We didn’t have to paint it or stain it (super easy!!).. it came like that. It was a kit from Lowes. You can find all of the resources at the bottom of this post (just hover over the roundup) and click on the pergola- it will direct you to the exact product we purchased.
Hi there! Beautiful space! Just wondering if you can share where you got the free standing tall skinny black candle holders at the end of your custom couch? Thank you!
Thanks so much, Ericka! They were a lucky vintage find. I’m sorry! xo
Oh my goodness -what a beautiful makeover! And your blog is so honest -I had given up plans of doing anything with our big backyard because of all the quotes that we got from landscapers (all 15 k plus for very basic patio and firepit) -learning from you the actual time , effort and money it took you plus the detailed steps makes me believe I can do something like this. For our Seattle weather, I don’t think I can do anything before mid March next year but will keep visiting your blog and reading up till then. Am so glad that Lowe’s website pointed me to your blog. Thanks for sharing all your experiences!
Thank you so much, Jaya! We had the same story… lots of high contractor quotes. So happy you found me through Lowes- happy to have you here. Have a great weekend! xox
Hi Sarah. I’m new to your site and really love your style!! Can you tell me where you got the knitted beige throw from?
Thank you so much! So happy to have you here. The knitted throw can be found here: http://bit.ly/2DDQA6O Sadly, the beige color is sold out, but the gray is still available. xox
I love this – it’s beautiful! Did you consider any kind of retractable shade? If so, did you have any resources on how that may be installed?
Thanks!
Thanks, Sarah! Actually yes- we did consider a retractable shade and we kind of ran out of time last summer, since we finished the space near the end of the season. This spring we have plans to make some adjustments, and that’s on the list! I’ll be sure to do a post about it when the time comes. xo
Beautiful work! How did you get the fire pit white? When I click on the link, it takes me to a brown/natural stone color. I love the look of the white instead!
I spray painted it white! Just make sure you get a high-heat / heat-resistant paint :)
Beautiful space! Thank you for the inspiration! Do you happen to have a source for the black pedestal candle holders?
Thank you, Sarah! The pedestal candle holders are vintage. I found them at a mid century shop in Ohio! They’re really cool… I wish I had a link I could give you for a replication, but I can’t find them anywhere. Sorry! xox
I absolutely LOVE what you have done! Wondering where you got the serving tray for the coffee table? You guys did an amazing job!
Thank you, Trisha!! That tray came from Target about 4 years ago… Nate Berkus brand, I believe.
This is amazing! Love the couch! Wish our deck could handle that weight load and we could diy one ourselves. Wow! Wow!
It is VERY heavy. I unloaded every single cinder block and bag of cement from the palettes, and let’s just say- I had jello arms for days. haha! Thanks so much for the love, Mary! xox
Hey Sarah,
LOVE your outdoor space. My husband and I are updating our patio look and I am trying to put together some ideas. Did you do anything extra to your firepit finish? The one in the lowes link looks more gray/tan vs your white-ish look. Thanks so much!
Thank you so much, Seleste! Great question- I did… I painted the fire pit white, with high heat resistant spray paint (also from Lowes). Your timing couldn’t be more perfect because tomorrow morning I’m sharing what our backyard CURRENTLY looks like. I also have an outdoor DIY planned for Tuesday, so check back for both of those :) xo
Hello,
Beautiful backyard. Where did you get your log holder?
Thanks! You can find it here: http://bit.ly/2ID2ekW
Beautiful backyard! Did you build your pergola yourself or where did you buy it from? It’s exactly the style I’m looking for.
Thank you Lindsay! The pergola is linked in this post, as well as on this page: https://roomfortuesday.com/shop-my-house/ … it was a kit that you build yourself.
Love it all, another fantastic execution! Thanks for the inspo !! Off topic BUT do your friends know what breed of dog Roxy is? I ask because I have rescue dog that looks just like her & I have always wondered what he is!
P.s. thanks a zillion for the detailed budget breakdown very helpful for those of us planning similar backyard Reno’s…so we can keep on budget/plan in stages!
Thank you Lori! Roxy is a treeing walker coonhound. She is also a rescue and my friends just found out her breed! It was so exciting!! The DNA tests they previously did weren’t super accurate, but they finally got to the bottom of it.
May I ask you what are the evergreen trees that you planted behind the pergola? I have recently moved to Denver and am looking for evergreens that don’t grow past 8- 10’ and don’t need much sun. I love the look you created here. Many thanks,
Frances
Absolutely! They’re emerald arborvitae trees :)
Did you paint the fire pit? I don’t see a white one at Lowe’s.
We did! I just grabbed a couple cans of high-heat spray paint at Lowe’s.
Hi Sarah,
Loved your backyard idea – we are trying to do something similar. Where did you get the woven coffee table?
Thanks so much, Sonali! The woven coffee table is Gloster brand, but unfortunately it’s no longer being made. I’m sorry!
This is gorgeous., Are you in a back split that doesn’t have a walkout? Did you put your space away from your house? I am dealing with trying to find a spot for my cement patio and gazebo, I am in a back split with no walk out and I was thinking of putting it against the retaining wall instead of the house. My backyard is not large. Any suggestions?
Thank you, Cindy! I’m not sure I understand what you mean with back split? We’ve actually since moved, but this home was just a single level, and we did put the pergola in the back corner of our yard (away from the house). There was an exterior door that allowed us to access the backyard, so that was convenient. I’m not sure if that’s helpful? Sorry!
Hey Sarah, your backyard is completely impressive! It seems words are very less to express the beauty of your backyard. Everything has caught me and convinced me to see. Such a great talent, keep it up!
Thank you so much!
Hey! I’m looking at installing my pergola soon and wondering what type of wood you used and what stain is this? It’s gs perfect combo! :)
Hi Victoria! The pergola came in a kit (we just had to assemble), so this is the color it came. It’s linked in the post!
Hi Sarah! I have been so inspired by the work you and Emmet did on the backyard renovation…with custom seating and pergola. Do you by chance have instructions on how you created the pergola? (Forgive me if I missed it posted somewhere!)
Thank you so much, Brandon! We actually purchased the pergola from Lowe’s, and it’s a kit. It comes with instructions on assembly and is really pretty easy! I hope that helps.