Guest Bathroom Reveal
 I’m incredibly excited to share the very first room reveal in our new house. As most of you know, Emmett and I moved in December from this house to our current home. We had to address the guest bathroom first because of plumbing issues that needed attention ASAP, but I was fully on board to kick off the renovation with a BIG project- such as a bath. It’s probably the most difficult room we’ve ever tackled and I hope our friends and family will be very happy when they visit and use the space. I really wanted it to feel like a spa-like retreat or luxurious hotel bath. Meet the newly remodeled guest bathroom! Emmett and I have been working extremely hard on this space since January and I’m excited to finally share the finished project with you. It turned out even better than I had hoped!
*This post is sponsored by Lowe’s. All content, ideas, and words are my own. Thank you for supporting the brands that allow us to create unique content while featuring products we actually use & enjoy!
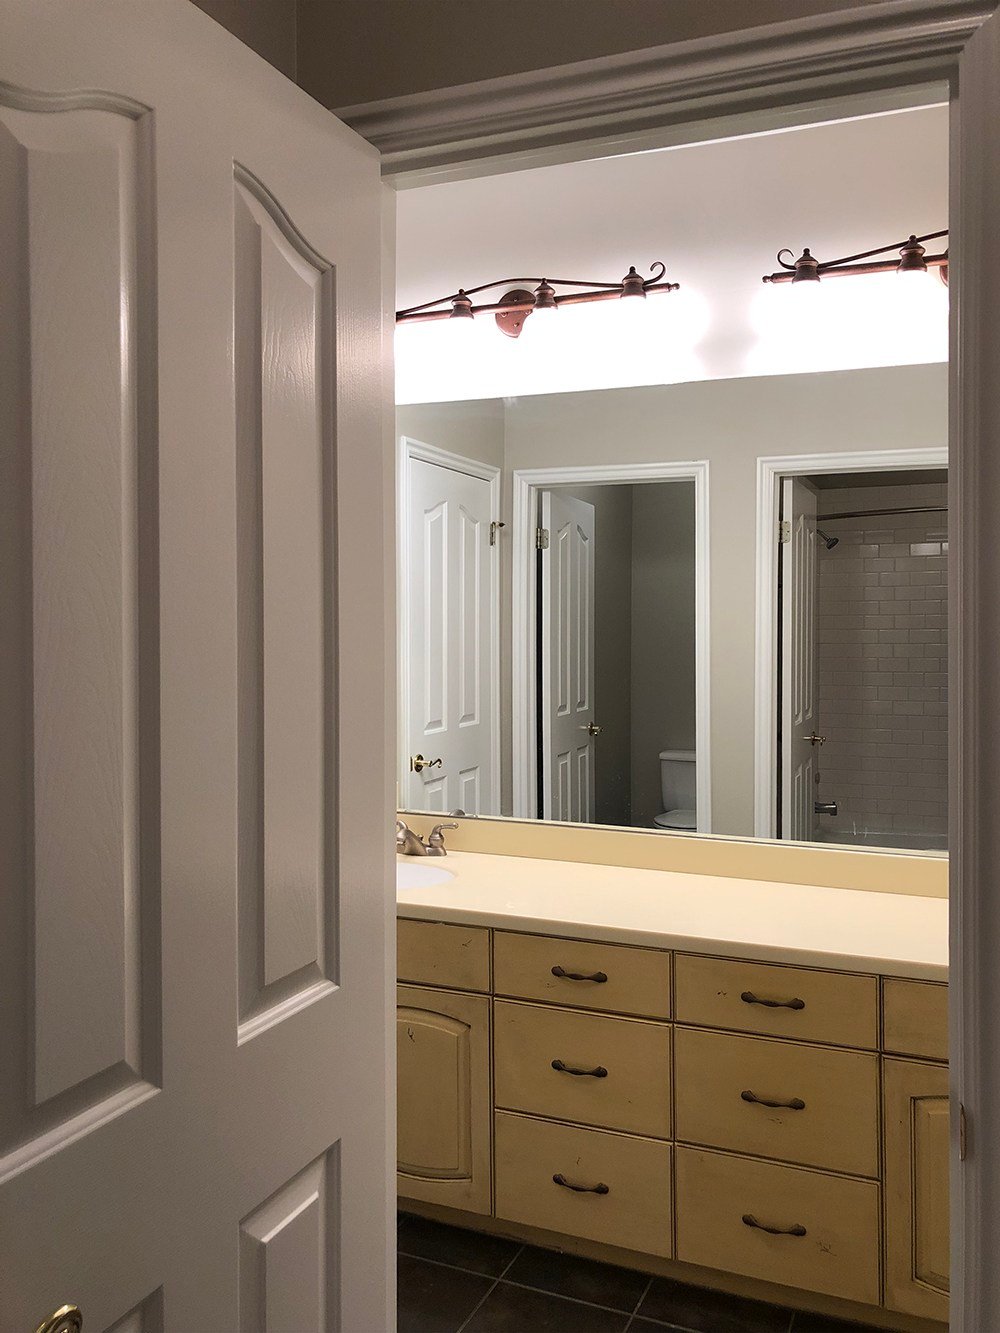 As a reminder, pictured above- this is where we started…remember the “bananity”? Check out all of the before images in this post. This bathroom used to be separated into three smaller rooms (toilet, shower, and sink). Now it feels spacious and so much more functional. There is certainly nothing builder grade about this room anymore. This is what it currently looks like… hardly recognizable, right?
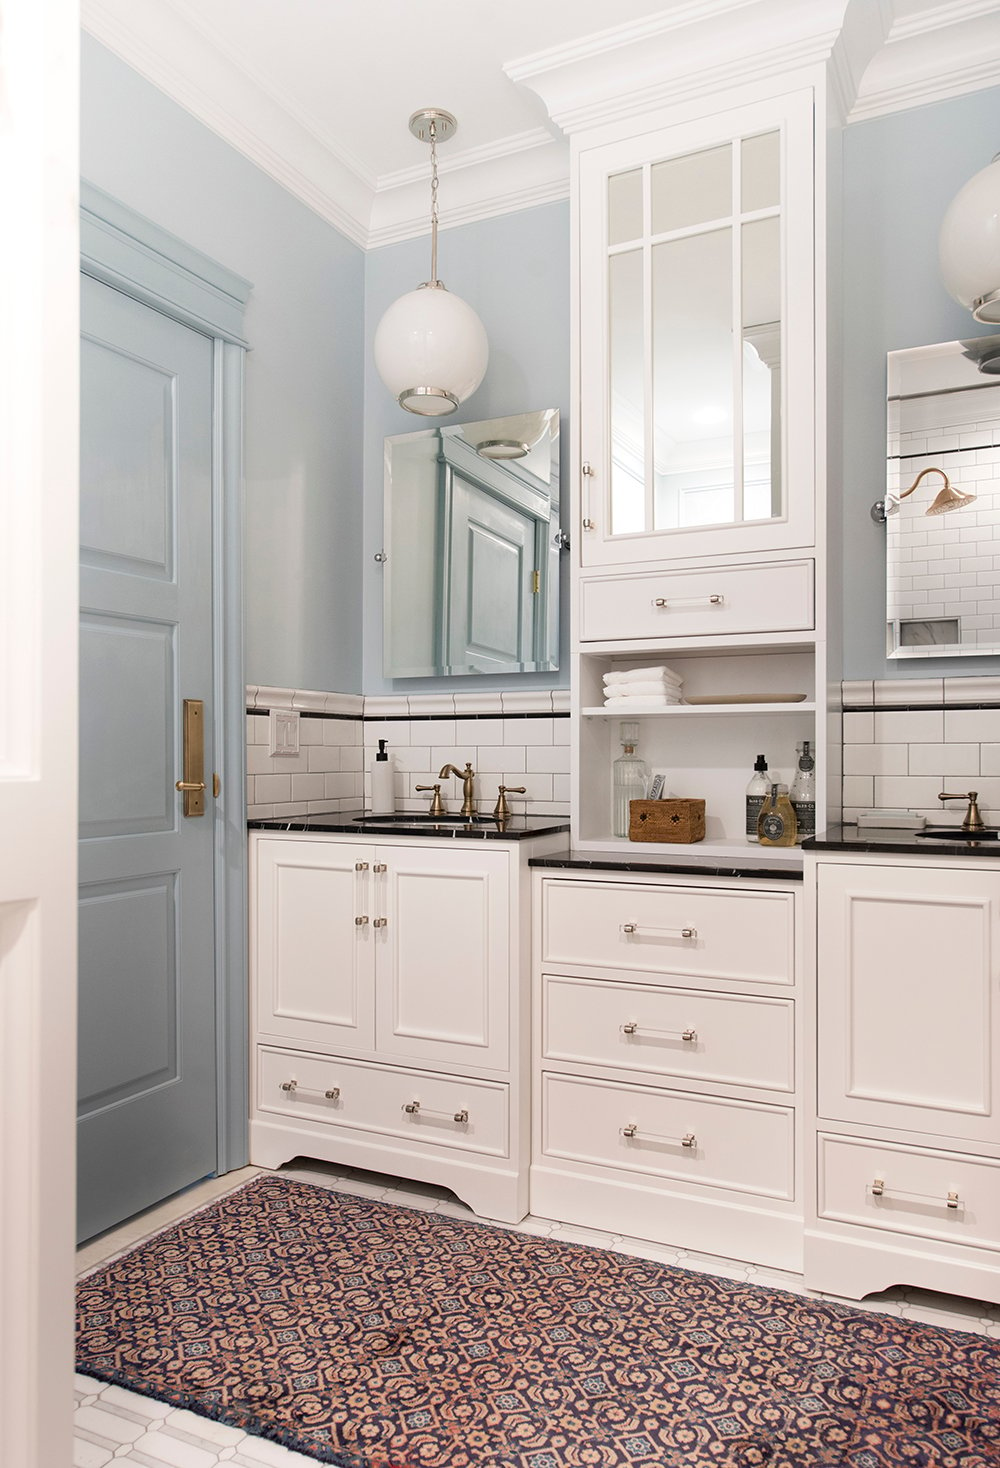 We demoed walls, three different ceiling heights, and basically took this room down to the studs. We still have three designated spaces for the toilet, shower, and sink (plus a vanity table), but it feels more intentional and open… like I can actually breathe in the space.
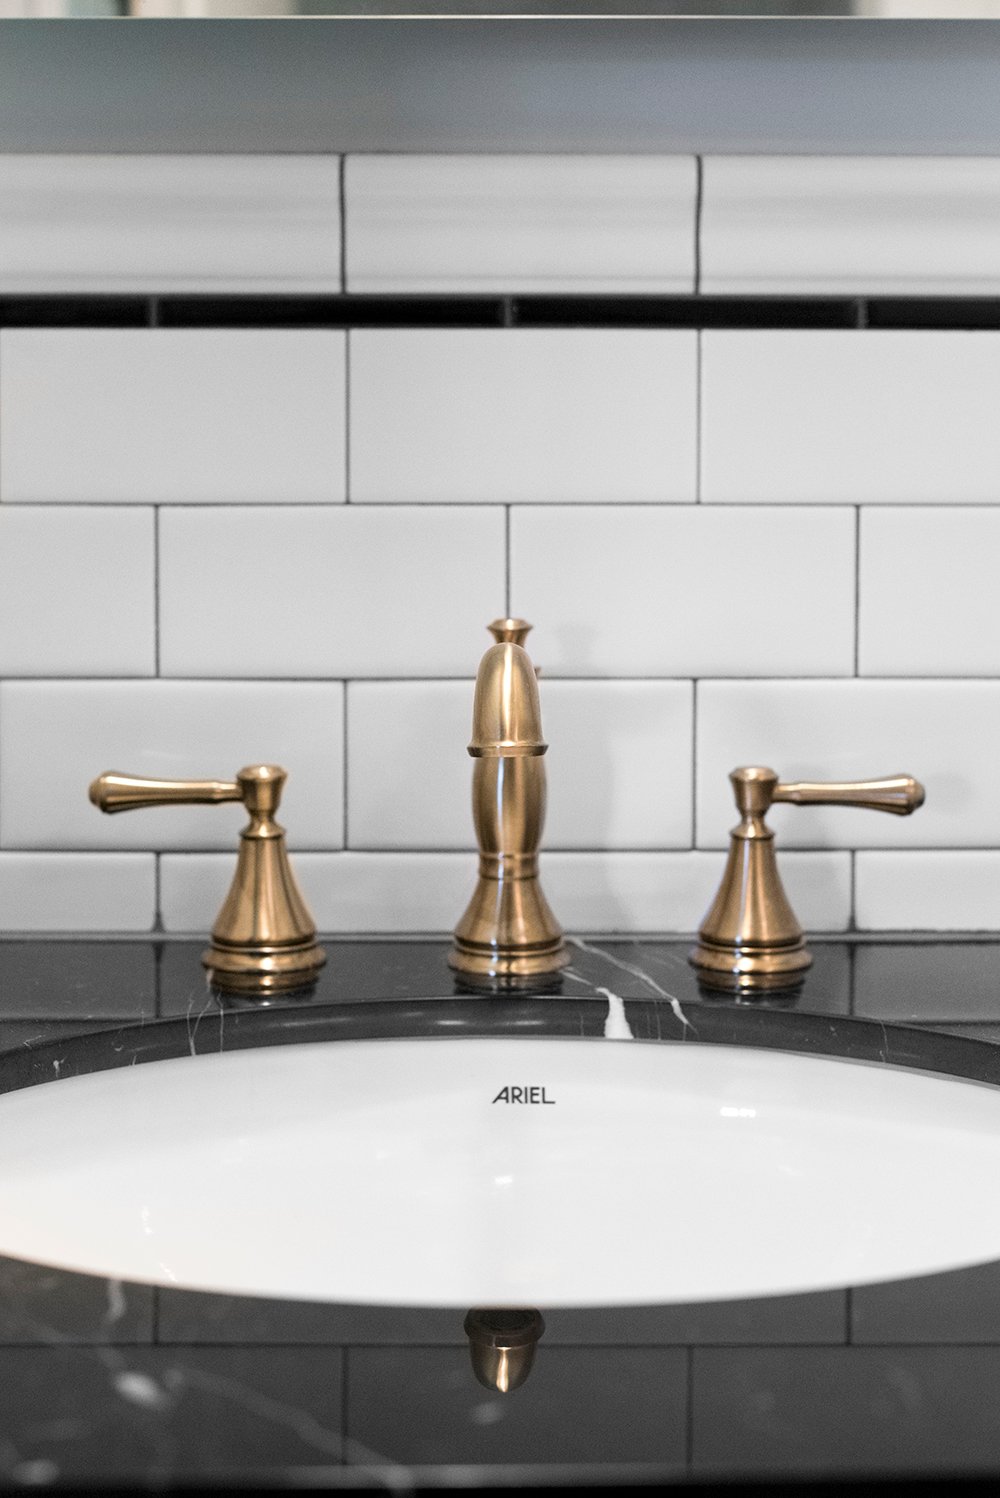
 Although this bathroom looks high-end (at least I hope it does!), we saved a lot of money and actually came in under budget for the project. If you’re wondering how… we tackled all of the labor ourselves and took the DIY route, per usual. We also customized readymade fixtures (like the gorgeous Ariel double sink vanity), stuck to budget-friendly light fixtures (remember this DIY?), and mixed high and low priced pieces. Every single fixture (plumbing, lighting, hardware, etc) and building material (tile, grout, etc) came from Lowe’s! It’s all very accessible.
 We also got thrifty to create some custom features- I sewed the shower curtain, Emmett crafted that gorgeous burl vanity table, and I scored black marble remnants for the countertop. In case you missed my tips to customize a readymade bathroom vanity- check that out here. I’m going to walk you through each space in the bath. First up… the shower!
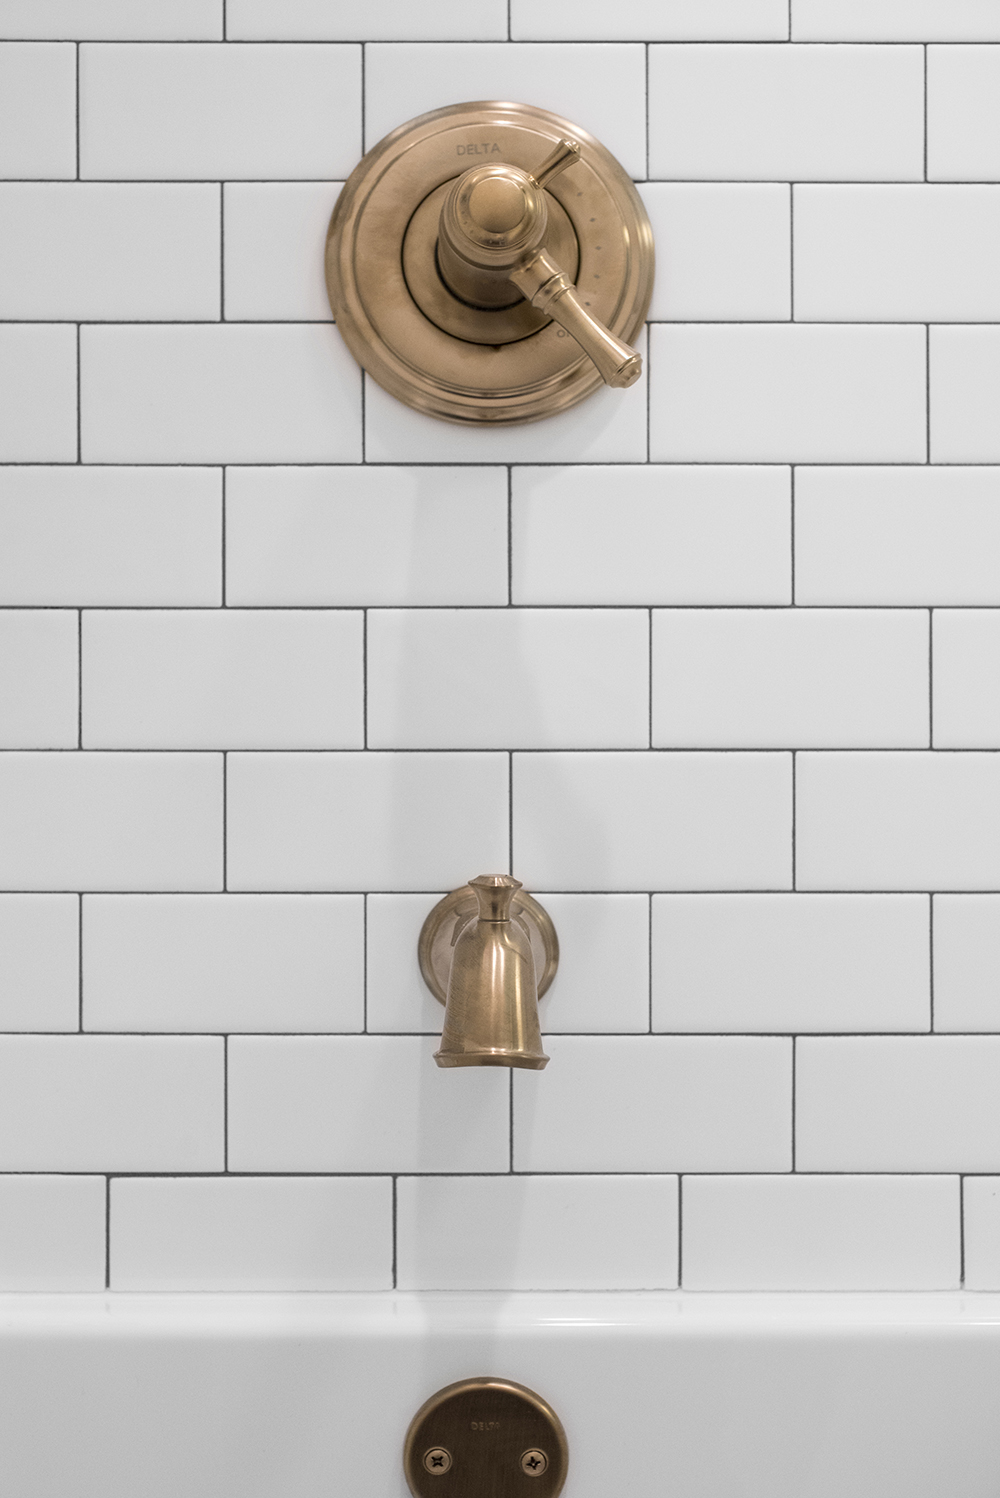
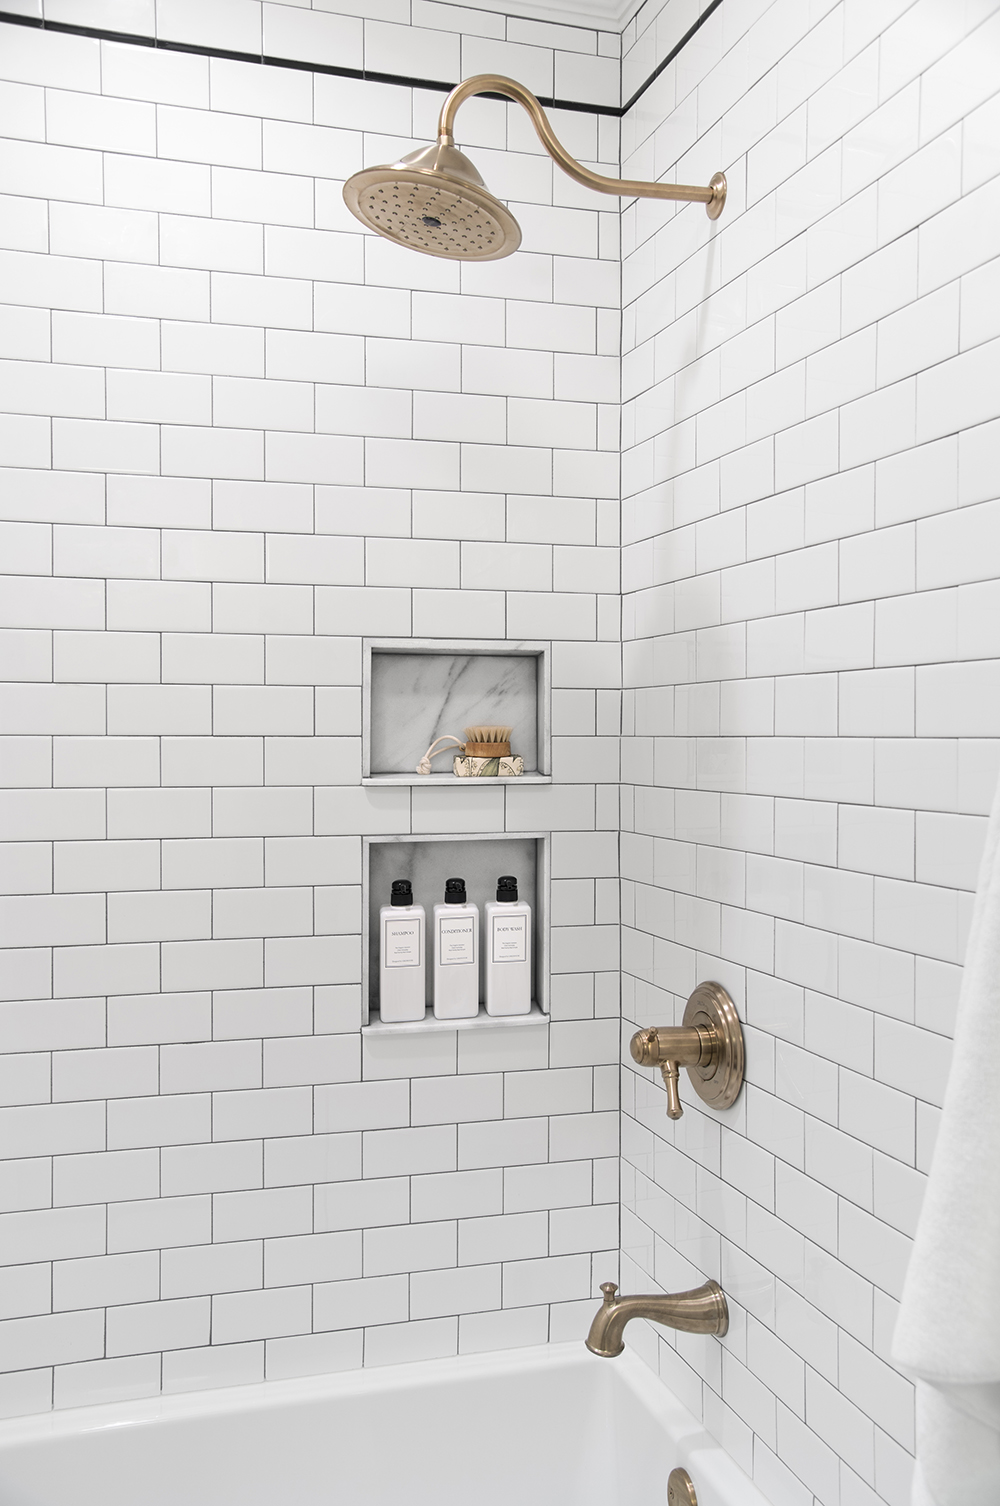
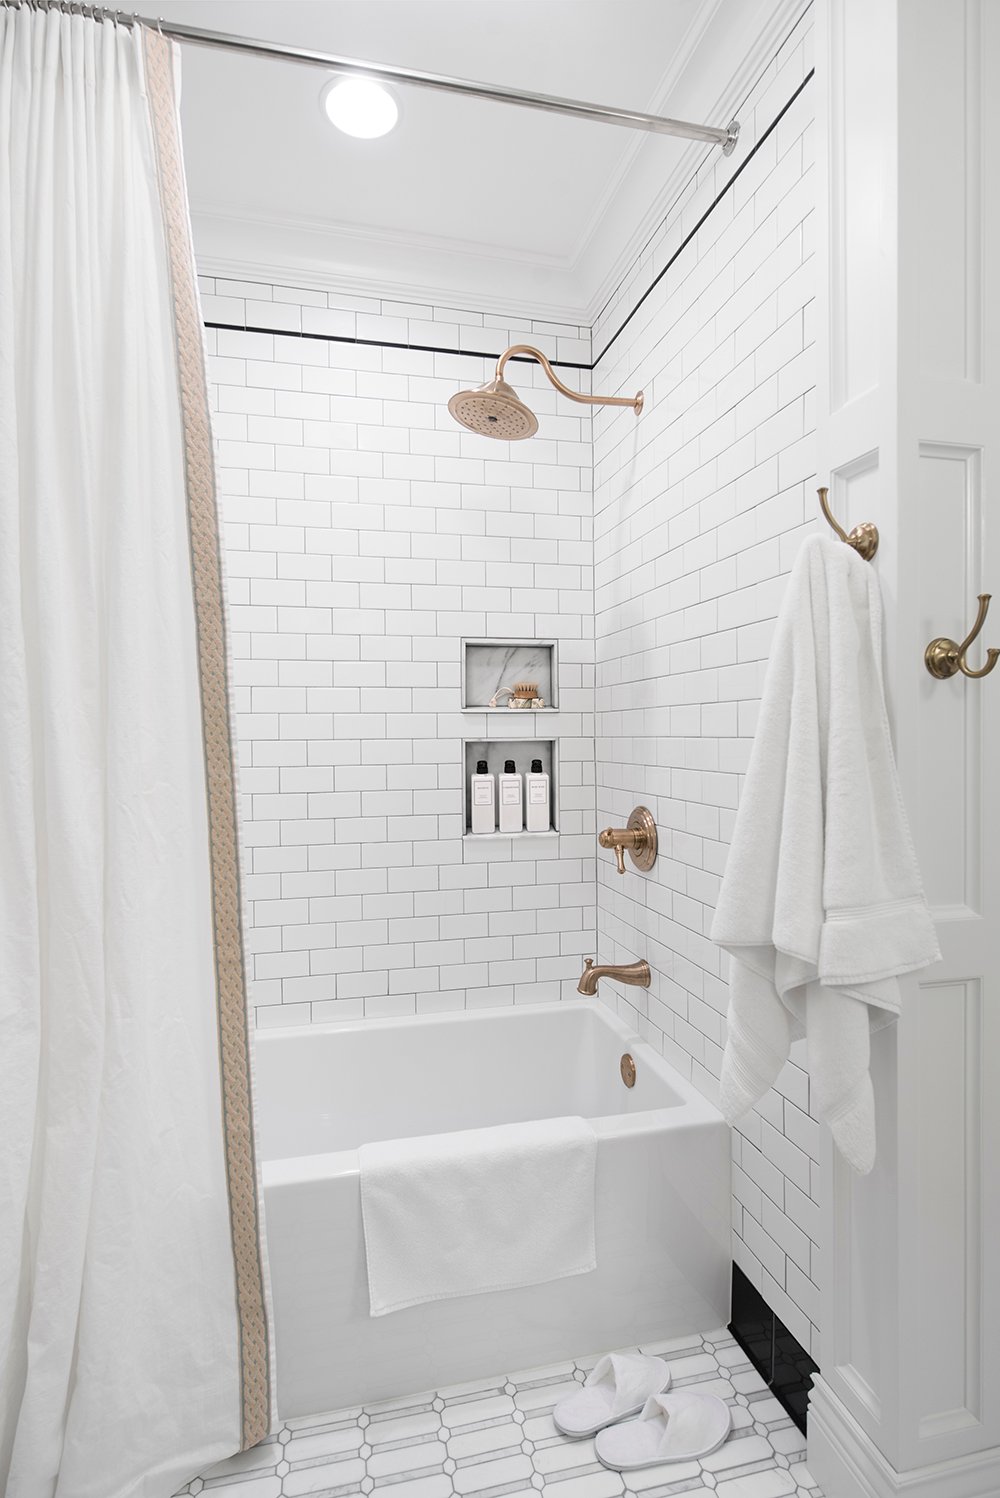 In keeping with the “classic hotel bath vibe”, I wanted it to read simple and sophisticated in the bath and shower area. Classic black, white, and marble tile surround the alcove bathtub. I stuck with the Delta Cassidy brass shower trim and I have to say- that gooseneck shower head has me smitten! I share details on all of the plumbing fixtures in this post, plus tips for making cohesive selections.
 I have no idea why I hadn’t heard of these until now, but Lowe’s sells a recessed Broan can light that is also an exhaust! My mind was blown when Emmett brought that home. It’s a total game changer! We put one above the shower and one above the toilet. They look so much nicer than an ugly exhaust vent… plus they’re great for additional light. This bathroom doesn’t have any windows or skylights, so having multiple light sources was key. The best part? It’s incredibly quiet… you can barely hear that it’s running.
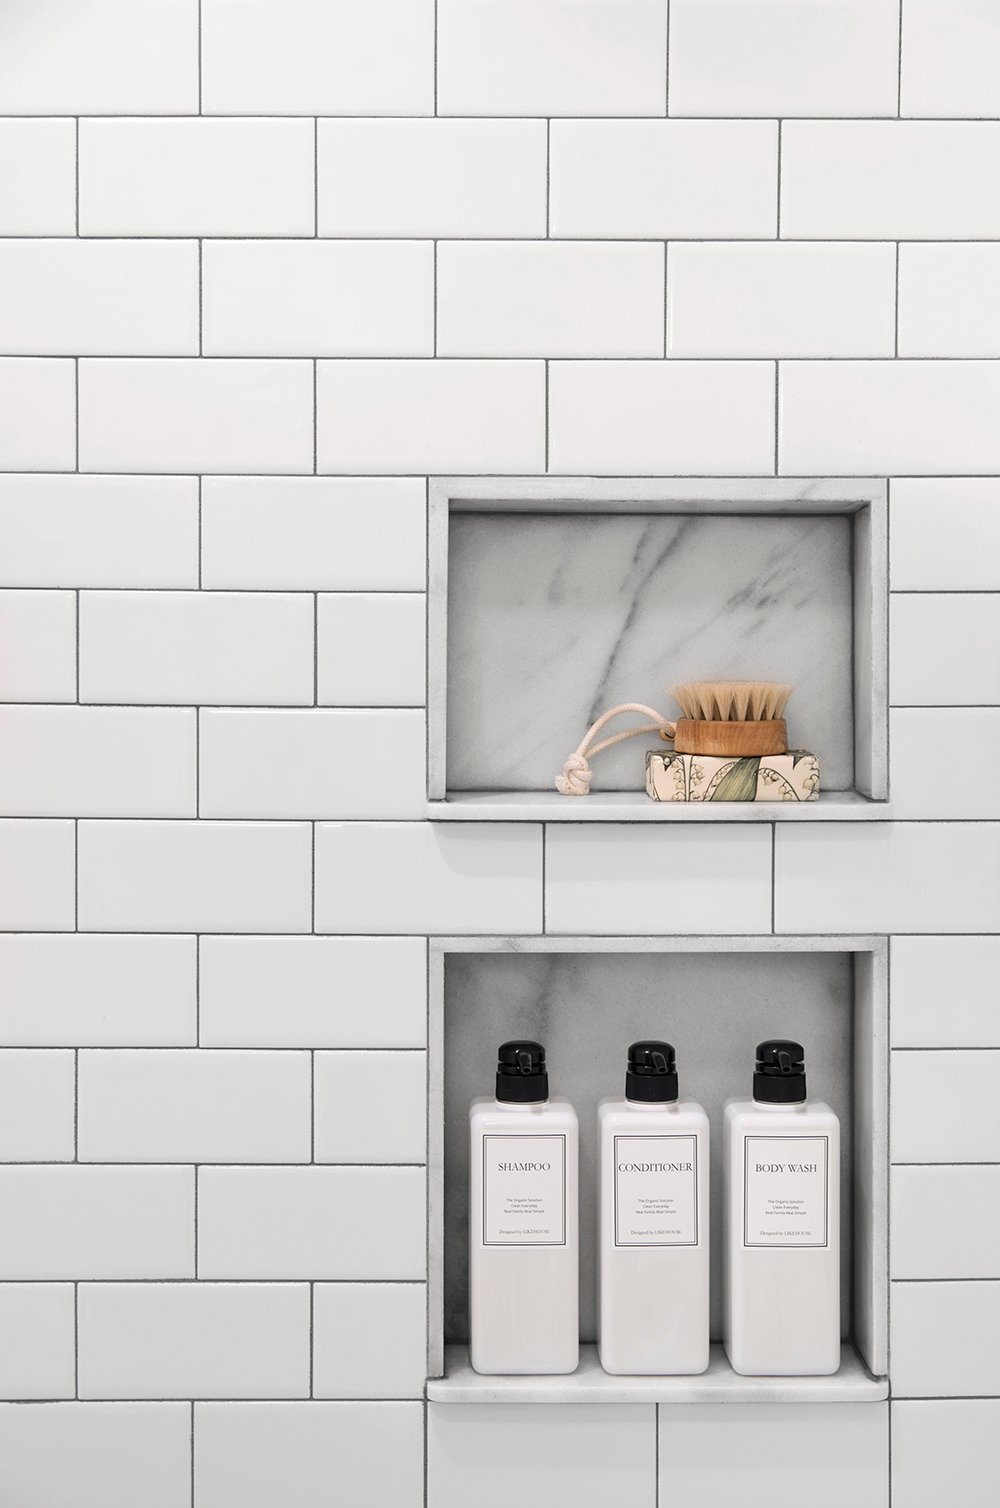
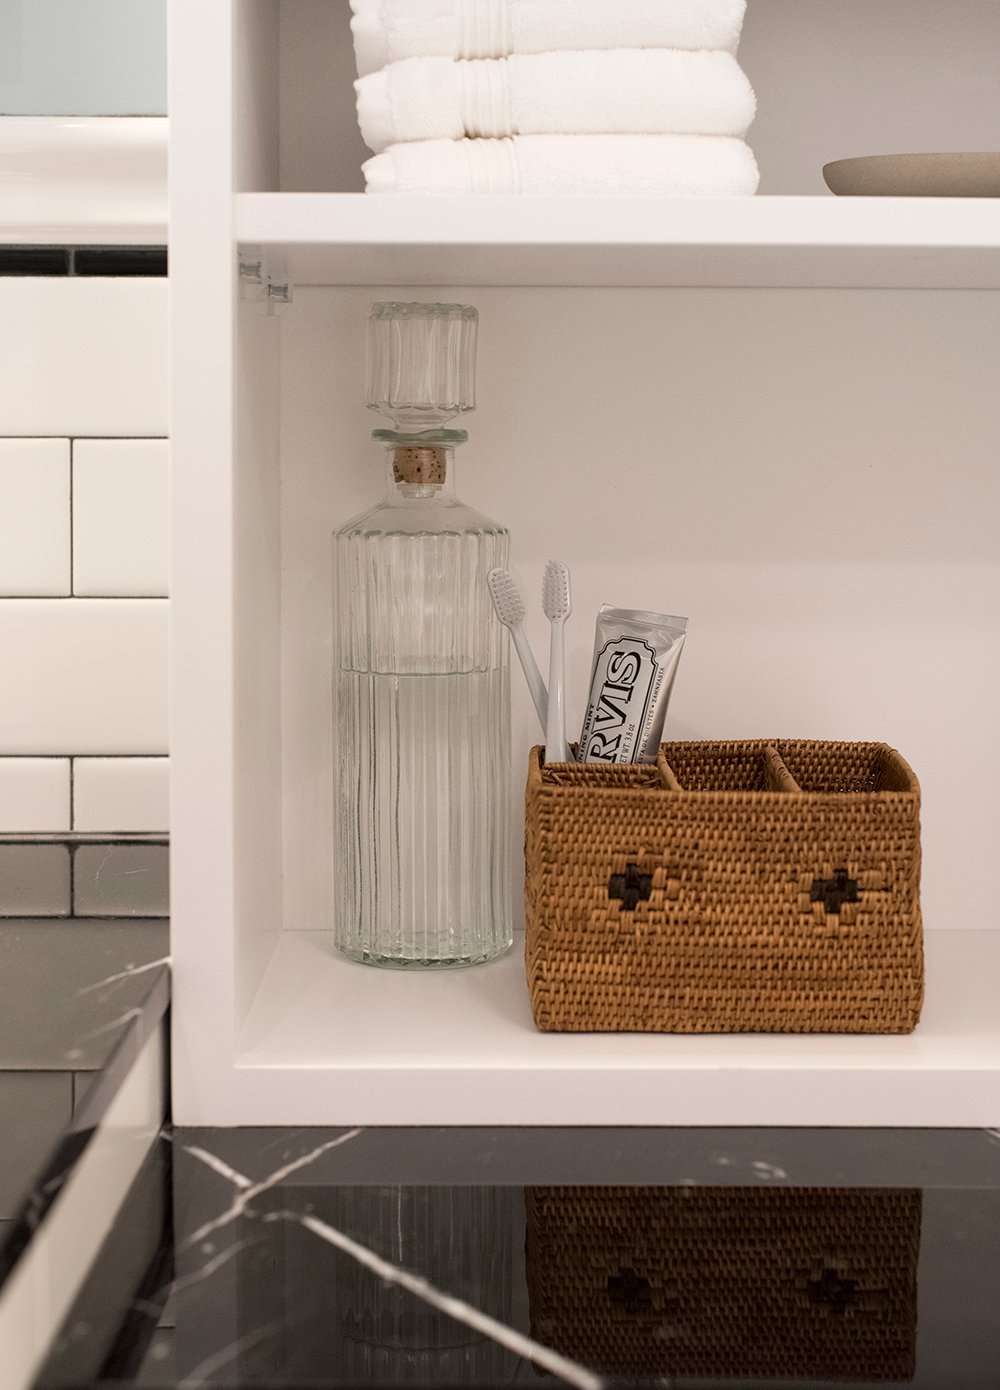
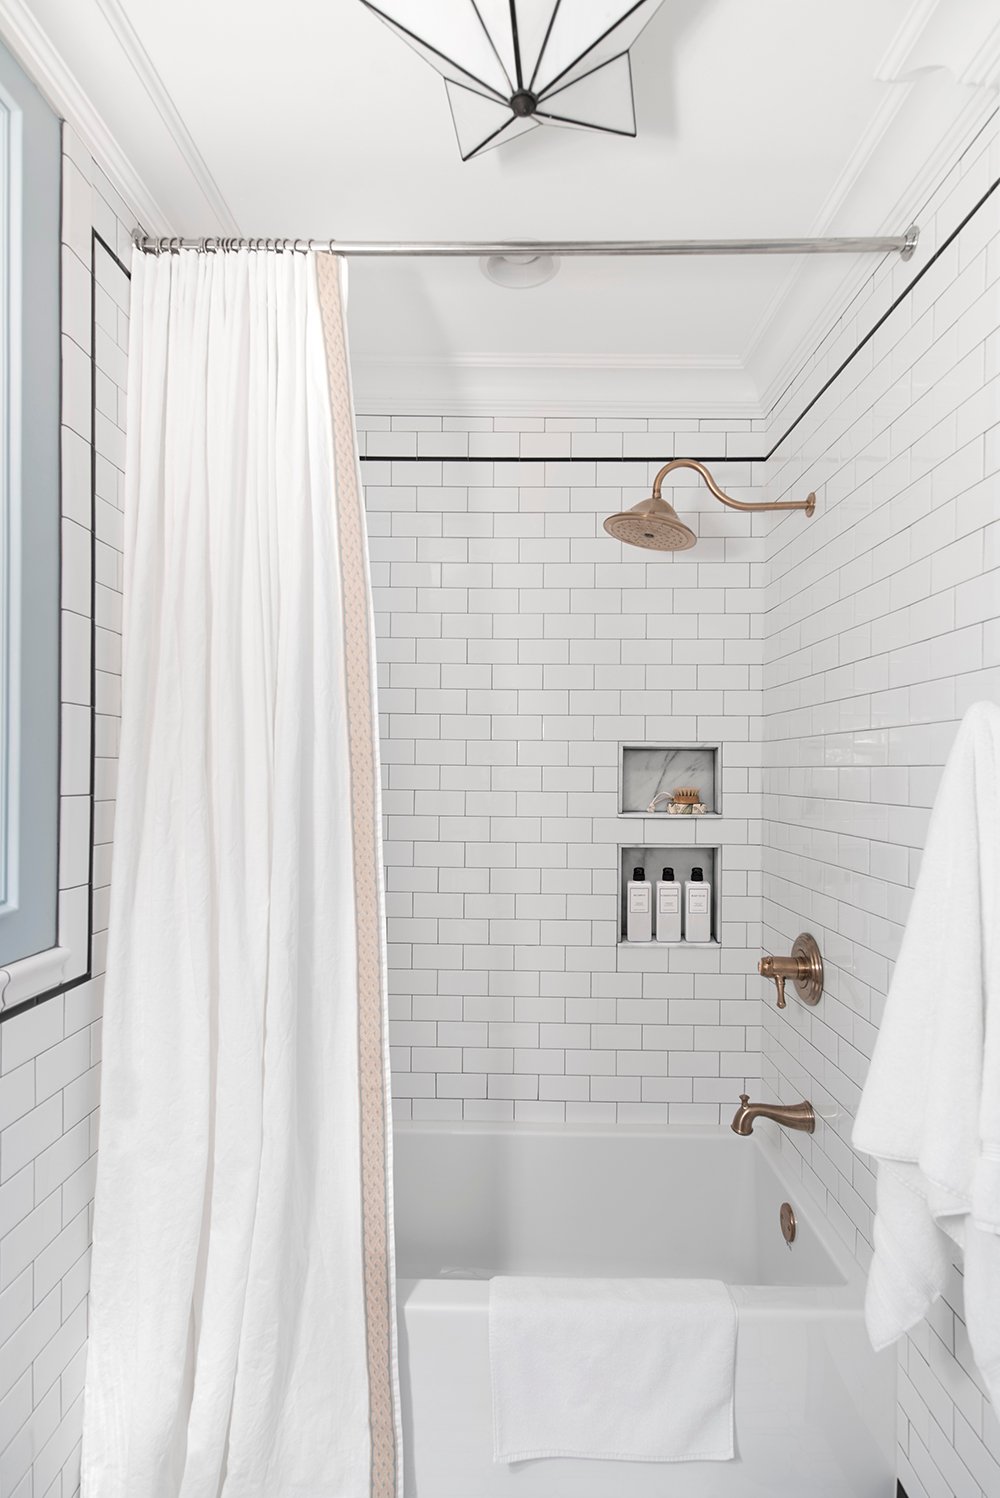 As for the shower niche, I opted for carrara marble to tie in the mosaic floor tile. I think for a guest bath, simplicity works well. I filled the toiletry containers with my favorite relaxing shampoo, conditioner, and body wash. Here’s to hoping our house guests will appreciate them as much as I do!
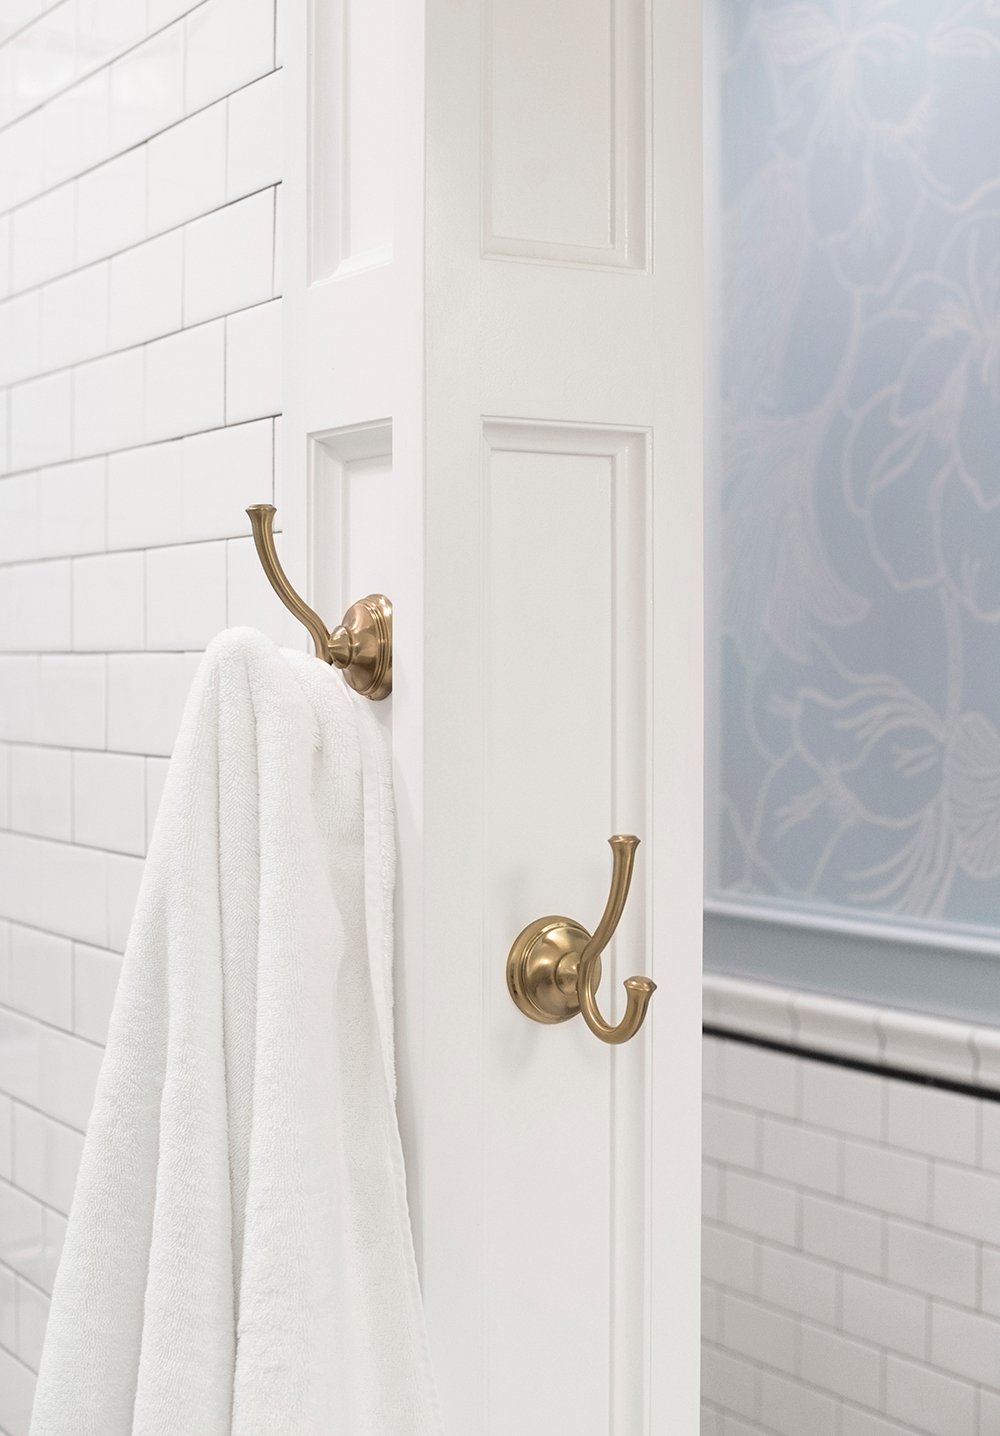
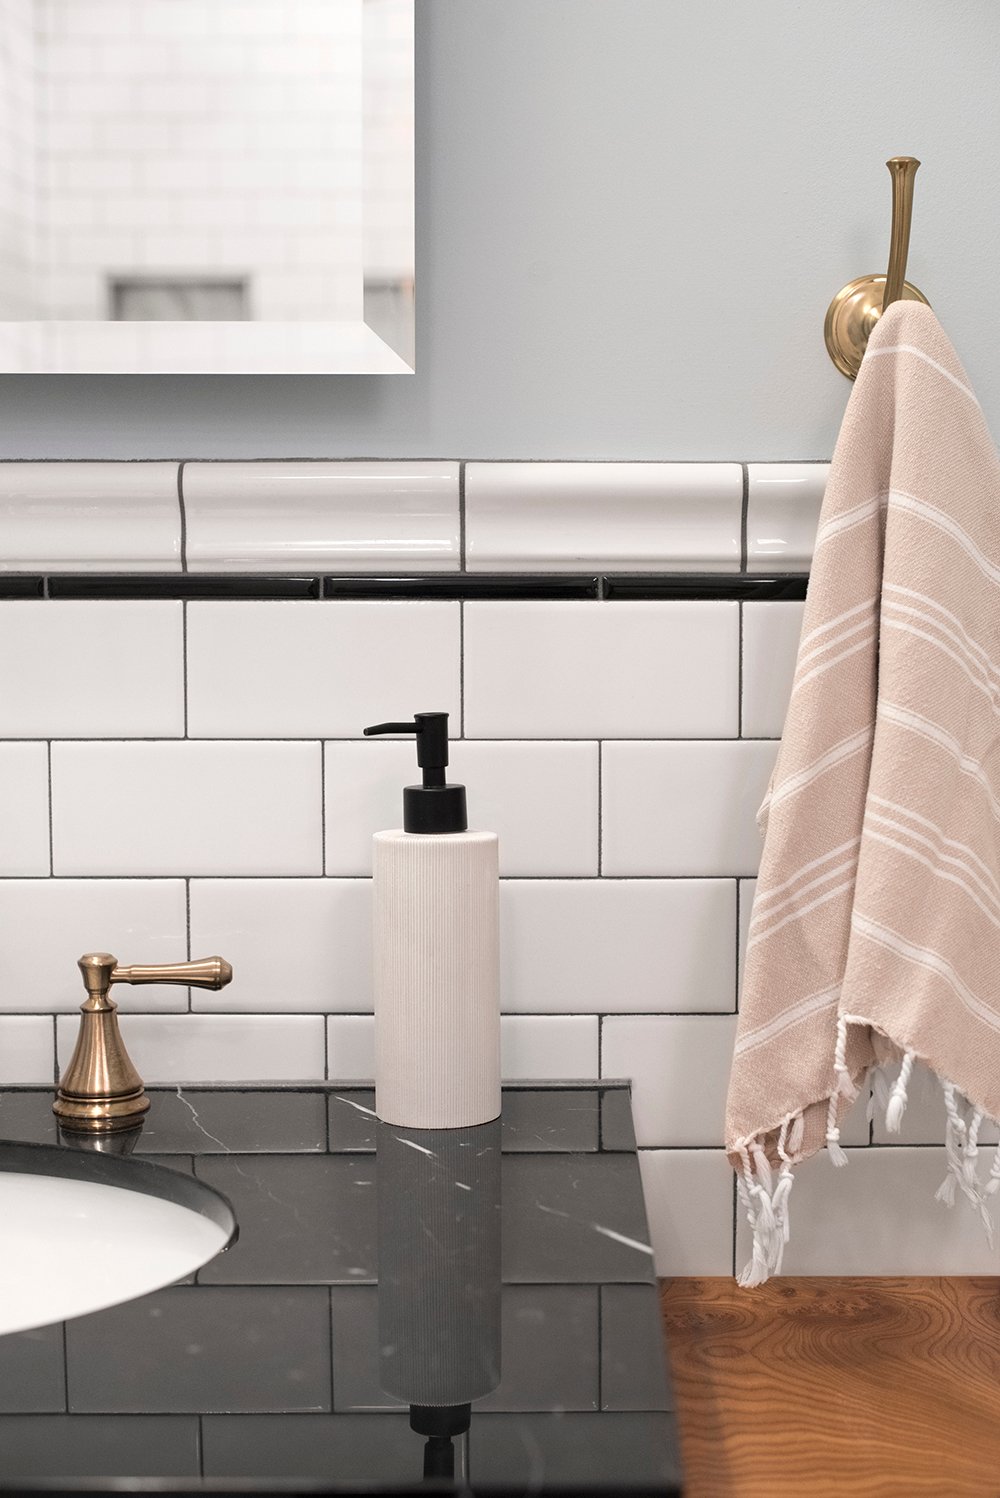
 I didn’t really have a plan as to where the champagne bronze towel hooks would live or how they’d fit into the design… I just knew they’d come in handy and towel hanging space is absolutely necessary. Emmett is most proud of the column he built to bridge the gap between the shower and toilet area- I think the hooks fit perfectly on the inner panels and emphasize the beautiful architectural feature he created. They’re also within ideal reaching distance from the shower. Their scale and finish is really great! I’d definitely use these again elsewhere in the house, so don’t be surprised when they show up in another room.
 This shower took me two weeks to tile and I’ll say this… my iPhone can no longer be unlocked via fingerprint (because it basically rubbed off during the process, haha!), but it was well worth it!
 Let’s move into the space to the right of the shower- the water closet or toilet area. I never thought I’d fall in love with a toilet, but it happened with this Kohler memoirs elongated toilet. On it’s own, it’s beautiful. The skirted and easy-to-clean flange, the bright white color, and the timeless shape is very pretty… but I wanted to spice it up a bit. I swapped the toilet seat for a black number and switched the lever to match the rest of my plumbing fixtures. Va-va-voom! It feels perfectly vintage, yet modern- don’t you think?
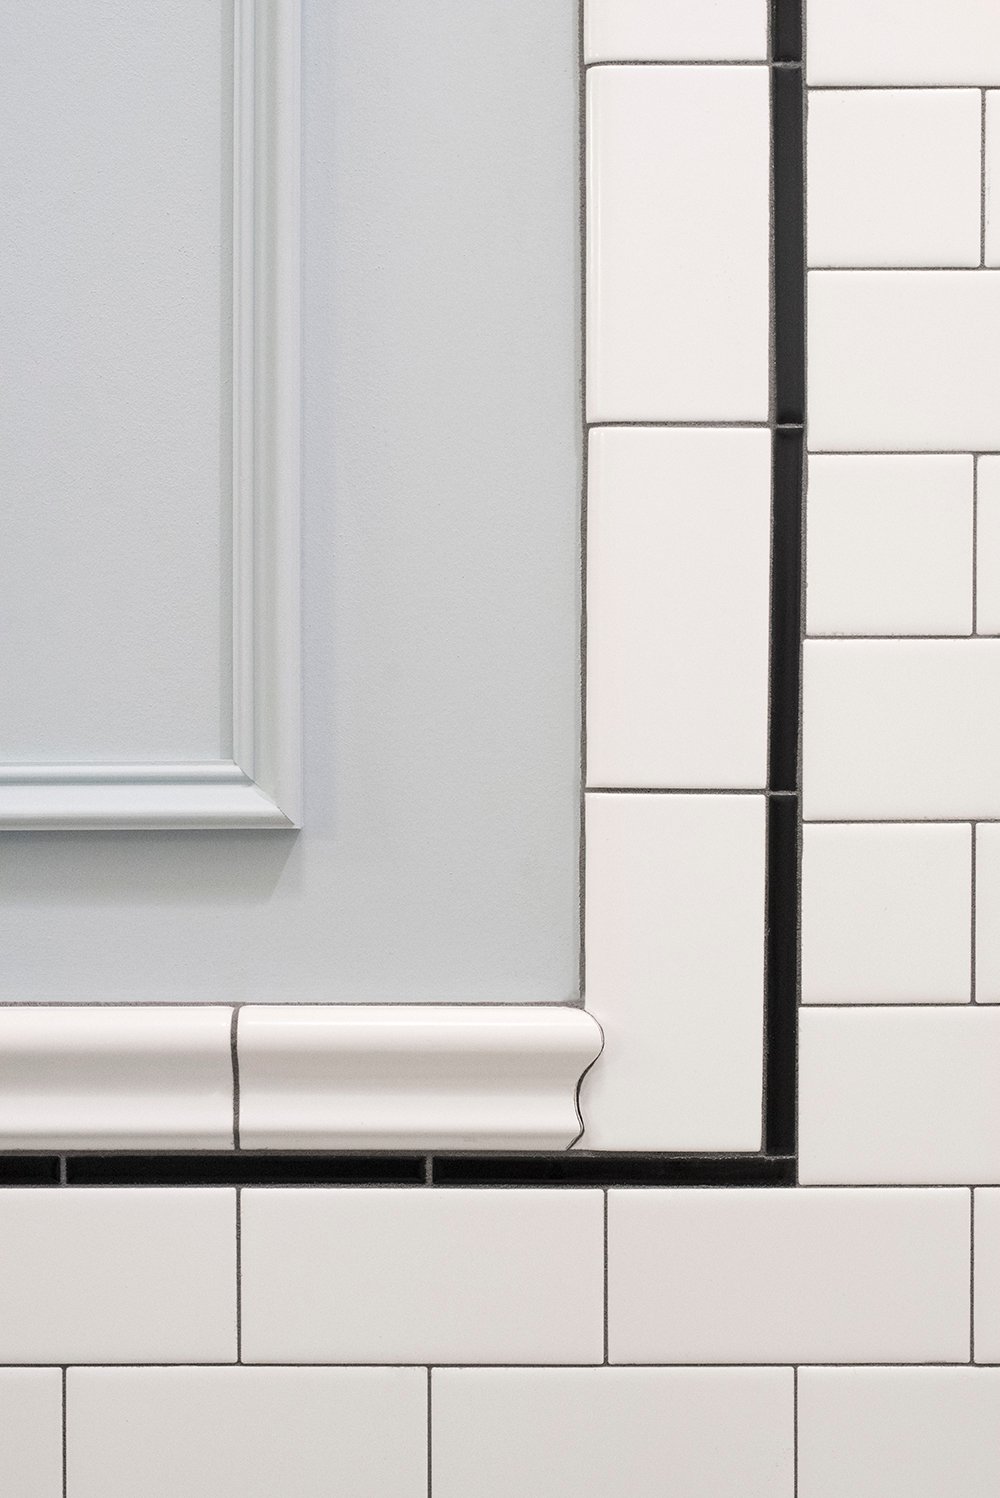
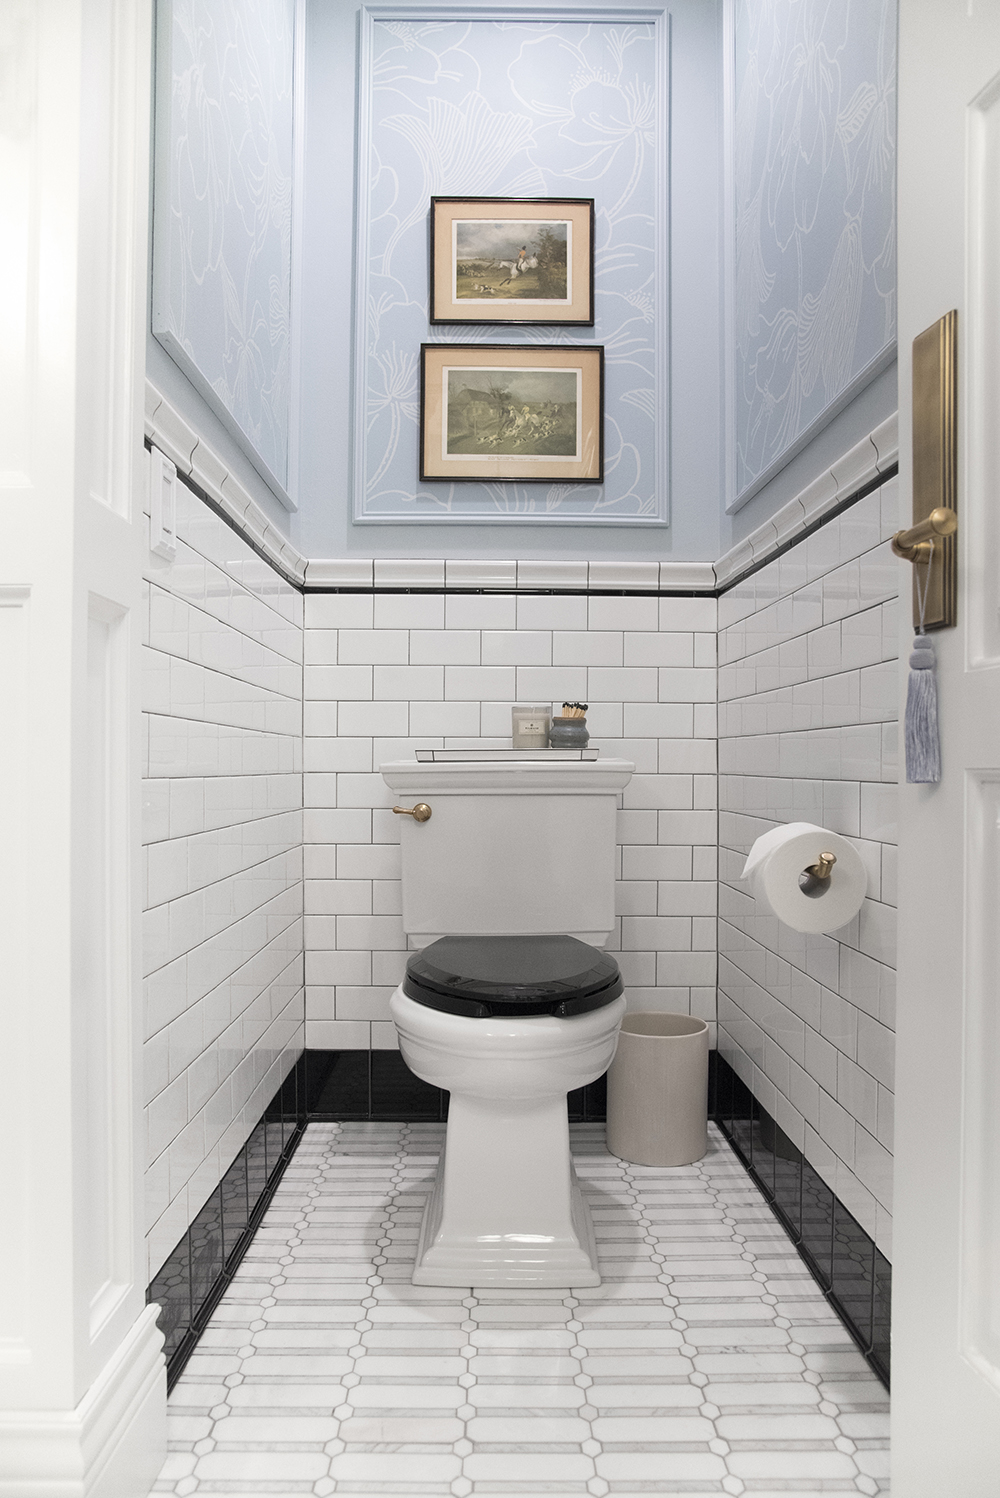 The toilet paper holder is also from the Delta cassidy collection. This is another area I spent countless hours tiling, but I’d say the payoff was worth the labor. Not only will this area be a breeze to clean, but I know I’ll love it for years to come.
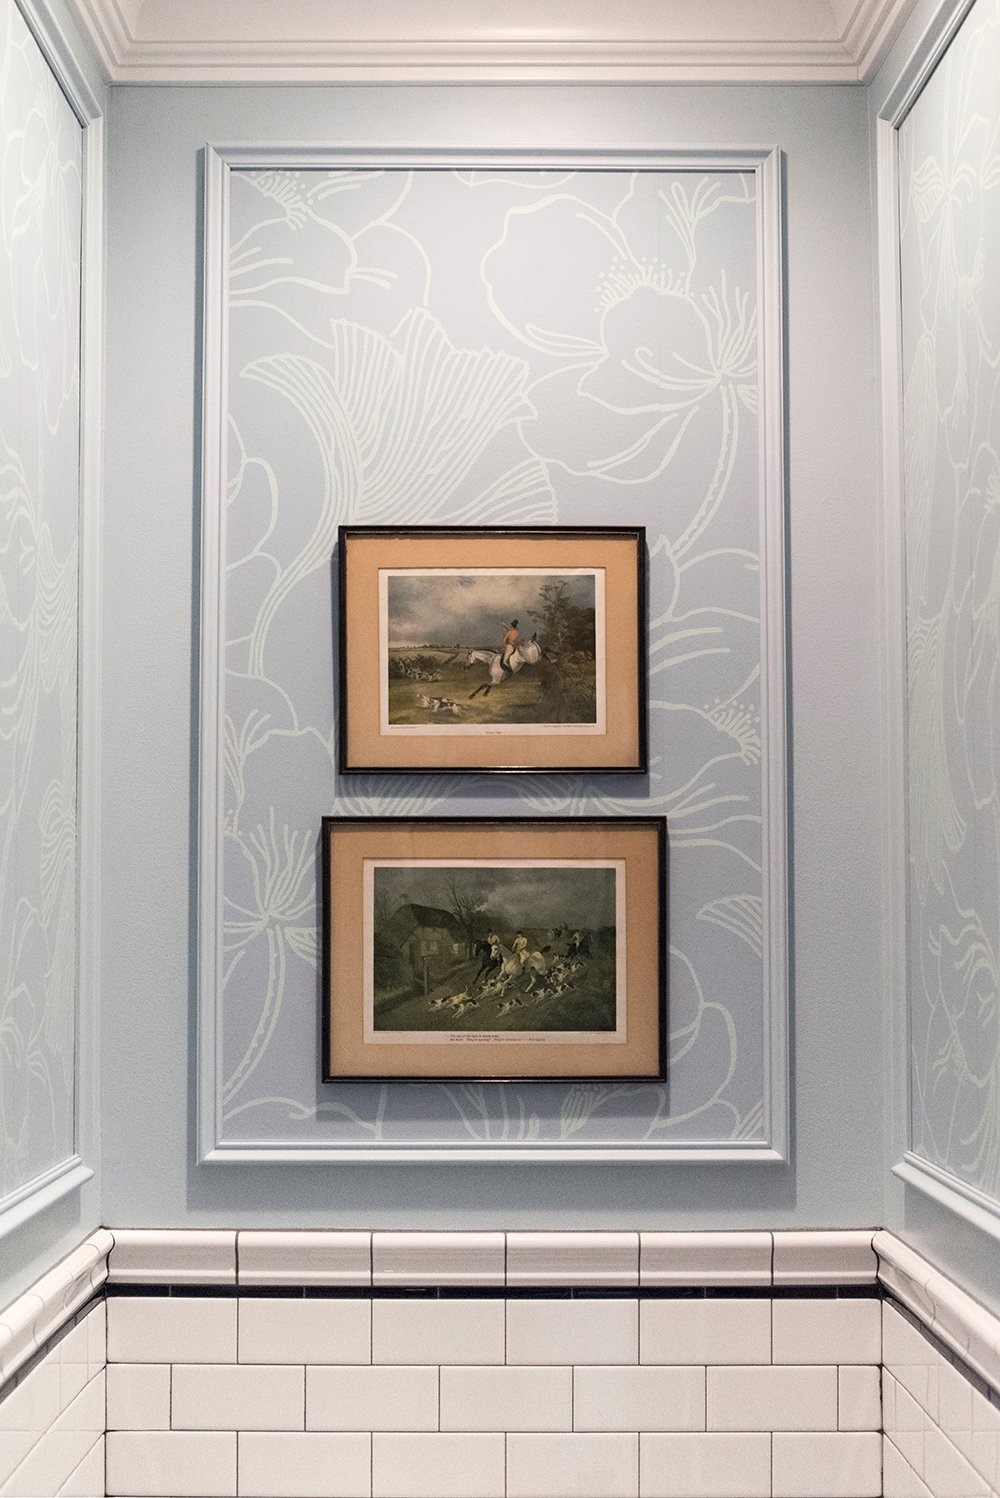
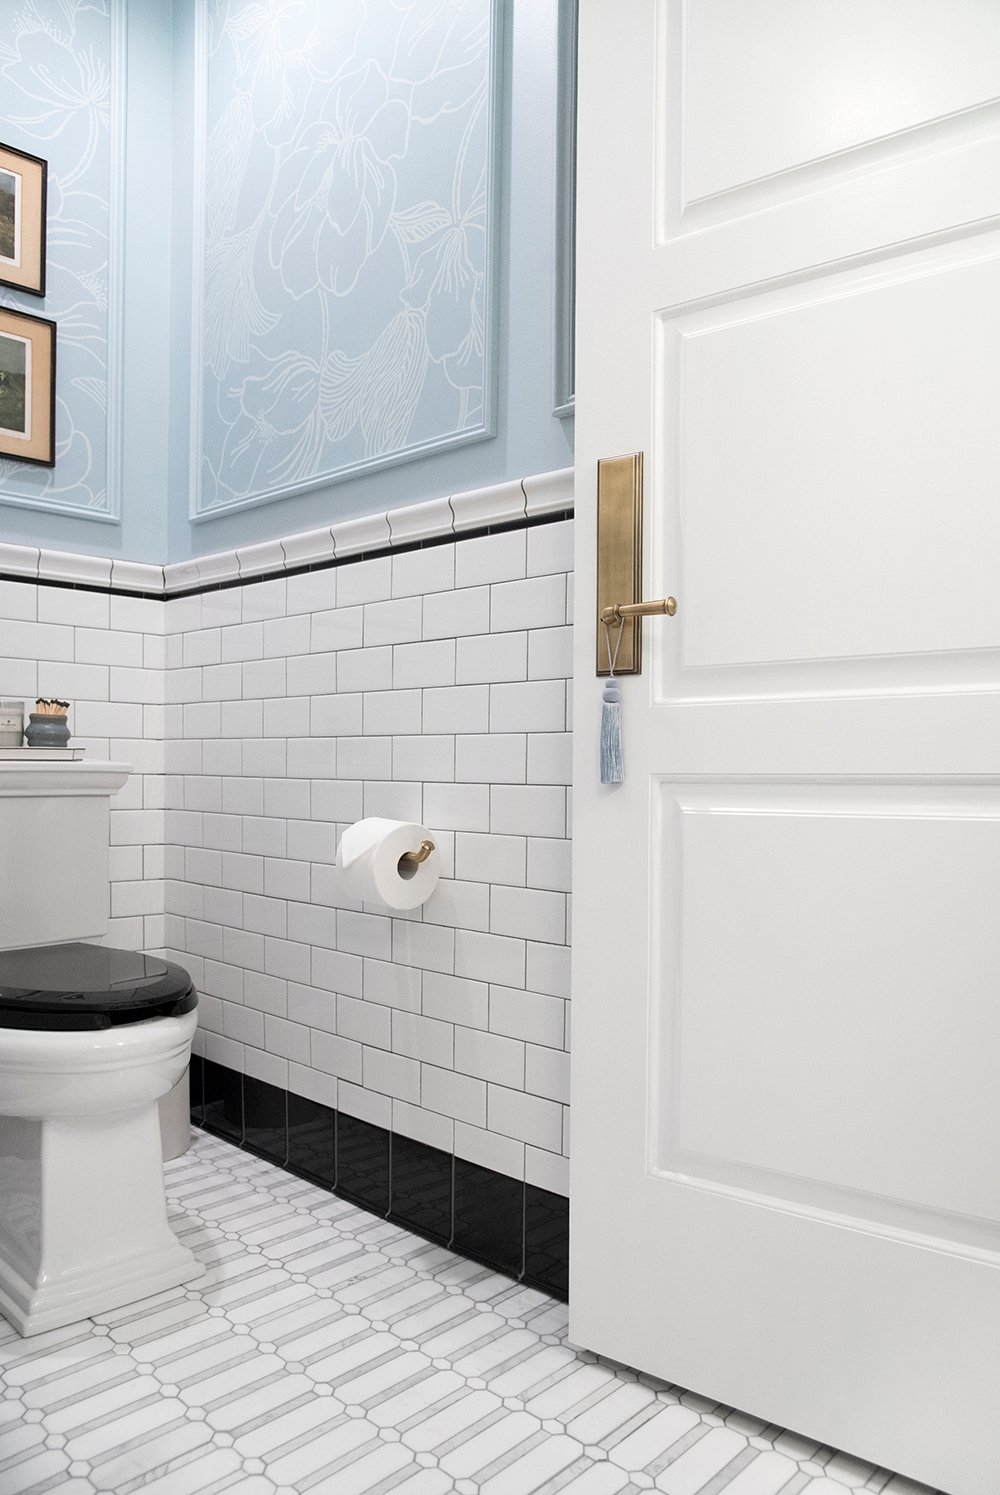 I wanted a little pop of surprising pattern to live within the three panels surrounding the toilet. I wallpapered a monochromatic floral print and layered vintage artwork on top of it. Do you guys remember me telling you about sweet Margo? If not, read this Instagram post… this artwork also came from her and you know I have a thing for horses. The english prints add the traditional aspect I’ve been craving. I also love the unexpected element the wallpaper adds to the water closet.
 Of course you knew you’d see matches and candles in the space… my go-to styling move! It’s super functional (and necessary) in a bathroom- especially if you’re going for that spa-like scent.
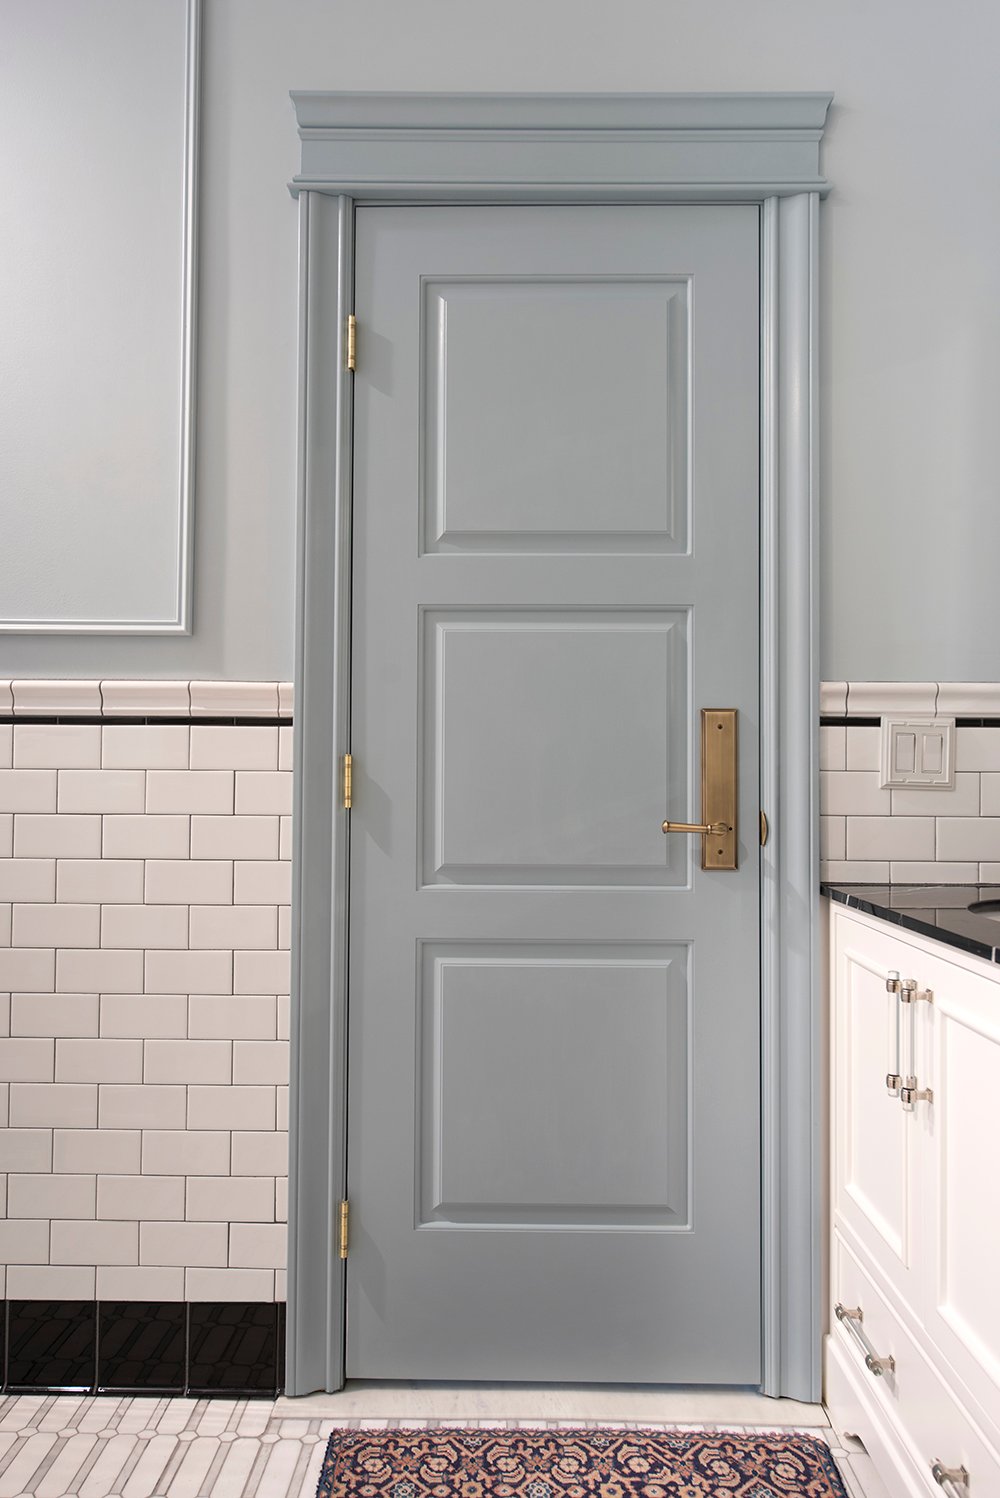
 Working our way around the space, you’ll see the backside of the door which swings in toward the toilet area. For every single home we’ve renovated, I’ve always special ordered interior doors from Lowe’s. It’s the best way to get exactly what you want, the price point is great, and you don’t have to worry about retrofitting anything. This is the interior door style we’ll be using throughout our entire house and I’m pretty excited about it. I love the balanced three panel aesthetic. You can modify any shape or profile in their millwork ordering department.
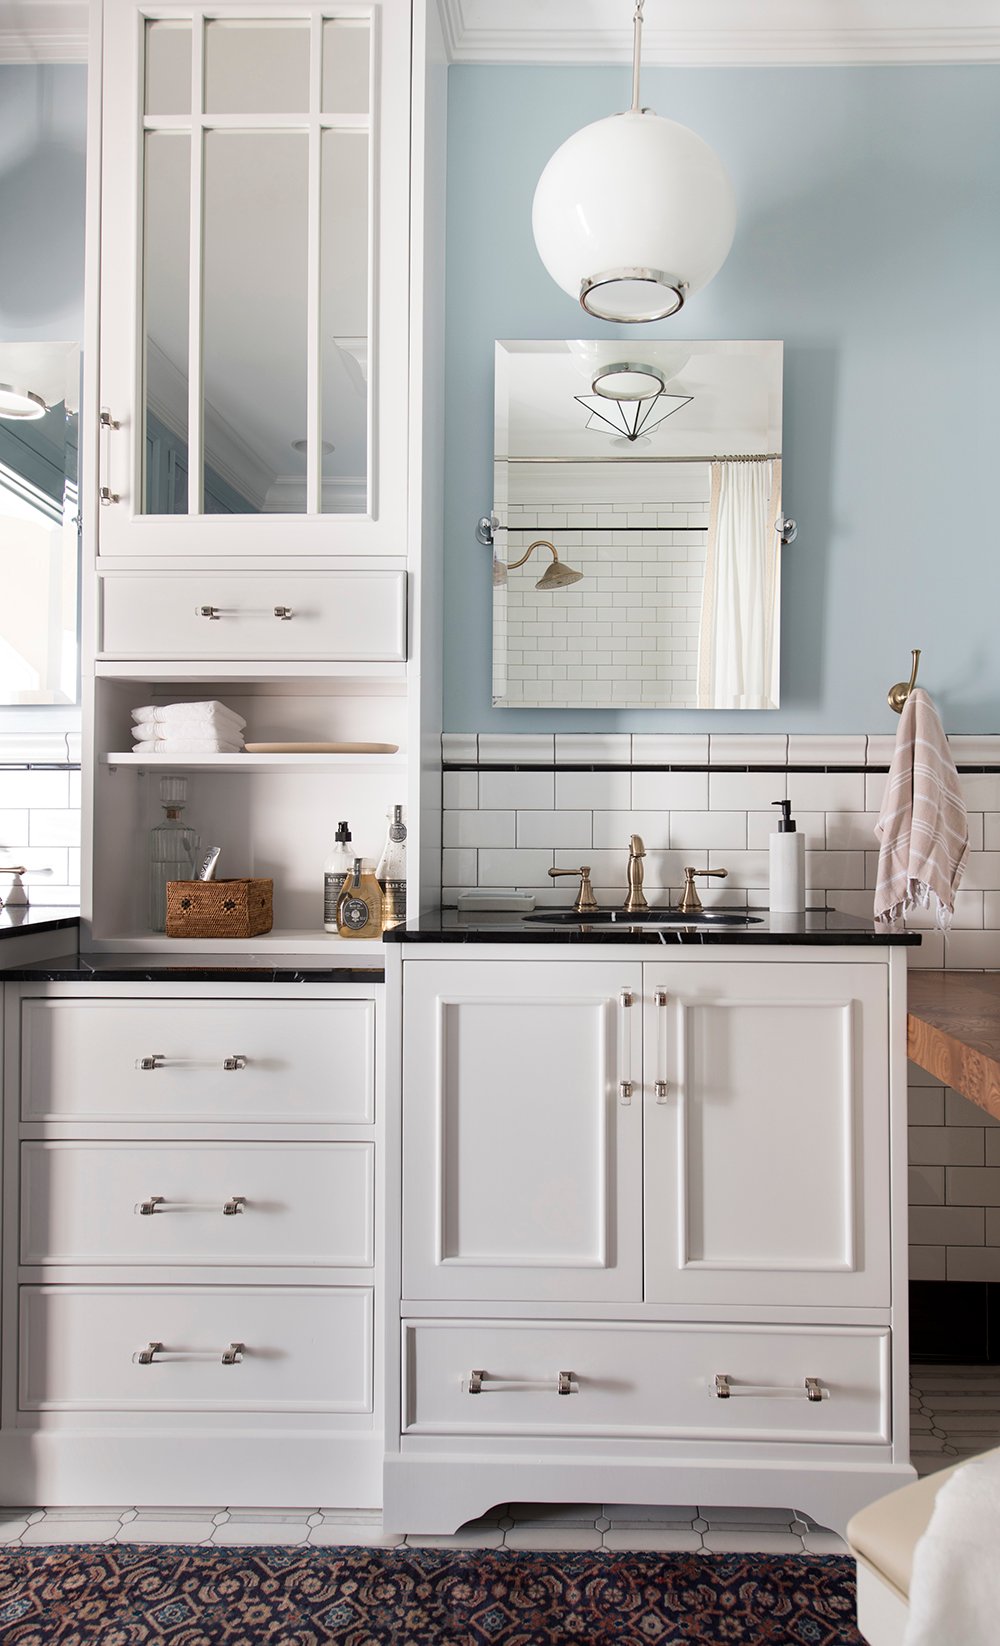
 The vanity turned out SO amazing. I love how dramatic the storage tower looks connected to the ceiling and crown moulding. I also think swapping the Amerock hardware and mixing metals was the perfect solution to add depth and interest.
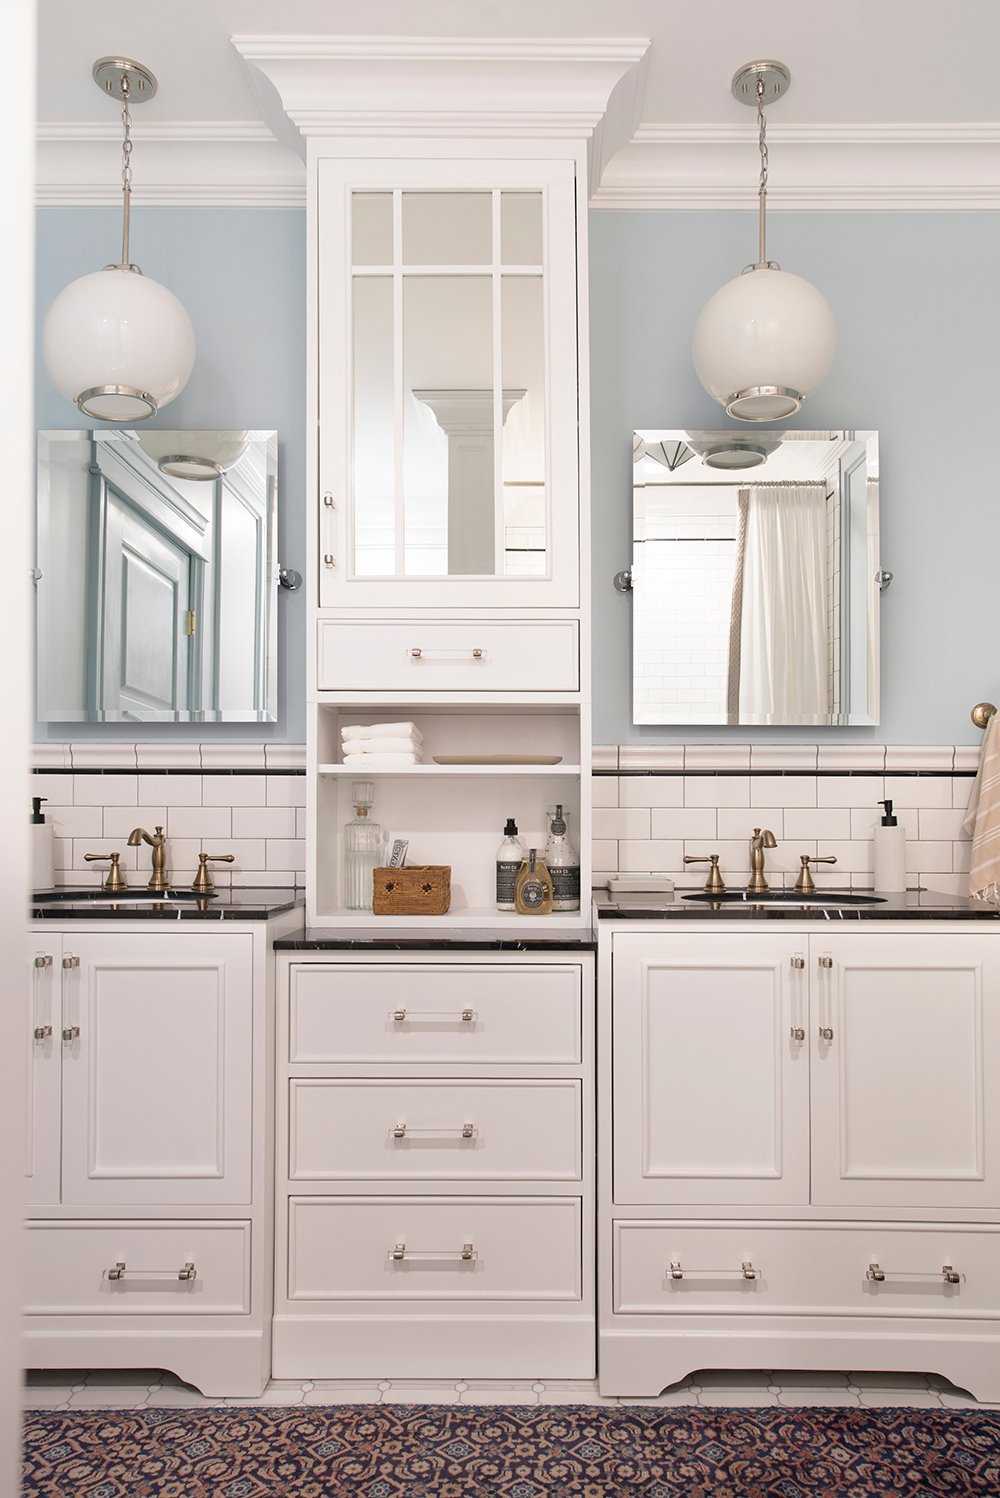 If you remember, we added the lower portion of the vanity tower to increase the height. I wanted a section to slide tall toiletries into- like fancy decanted mouthwash and tall bubble bath bottles (who have I turned into?!).
 One thing is for sure- there is certainly no lack of storage in this space. Visitors will have plenty of room to tuck away their toiletries and cosmetics. I’m working on a post to share soon… how I “stocked the guest bath”. Let’s just say, I went all out- spa slippers, plush towels, a hair dryer, toiletries, and all of the other hotel things I love. They’ll never want to leave! It’s crazy to think this is the first time Emmett and I have lived in a home with more than one bathroom. It’s going to be wonderful to not share a bath with friends and family when they come into town.
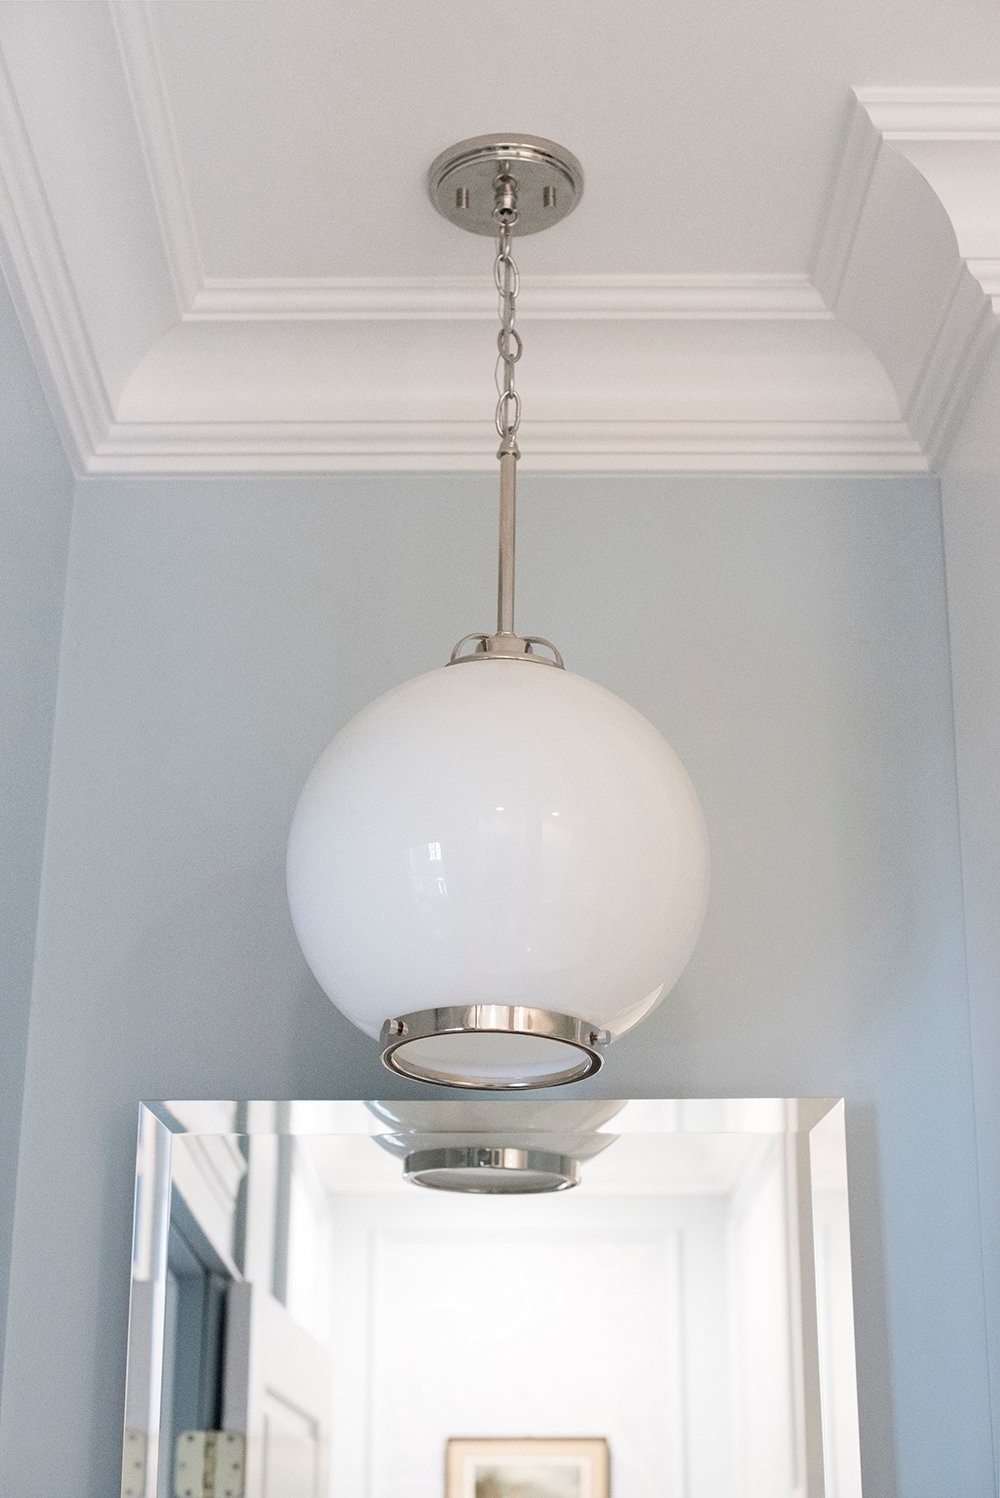
 As I previously mentioned, this bathroom doesn’t have any windows or natural light, BUT with the door open, light from our giant front balcony window floods into the space. Maybe someday I’d like to add a skylight (if possible), but for now- I tried to adequately light the space from multiple sources… recessed lights, pendant lights, a semi-flush mount, and a sconce. It’s really very charming in the evening when you can choose just how bright to light the environment. It can get really bright, but also very soft and romantic.
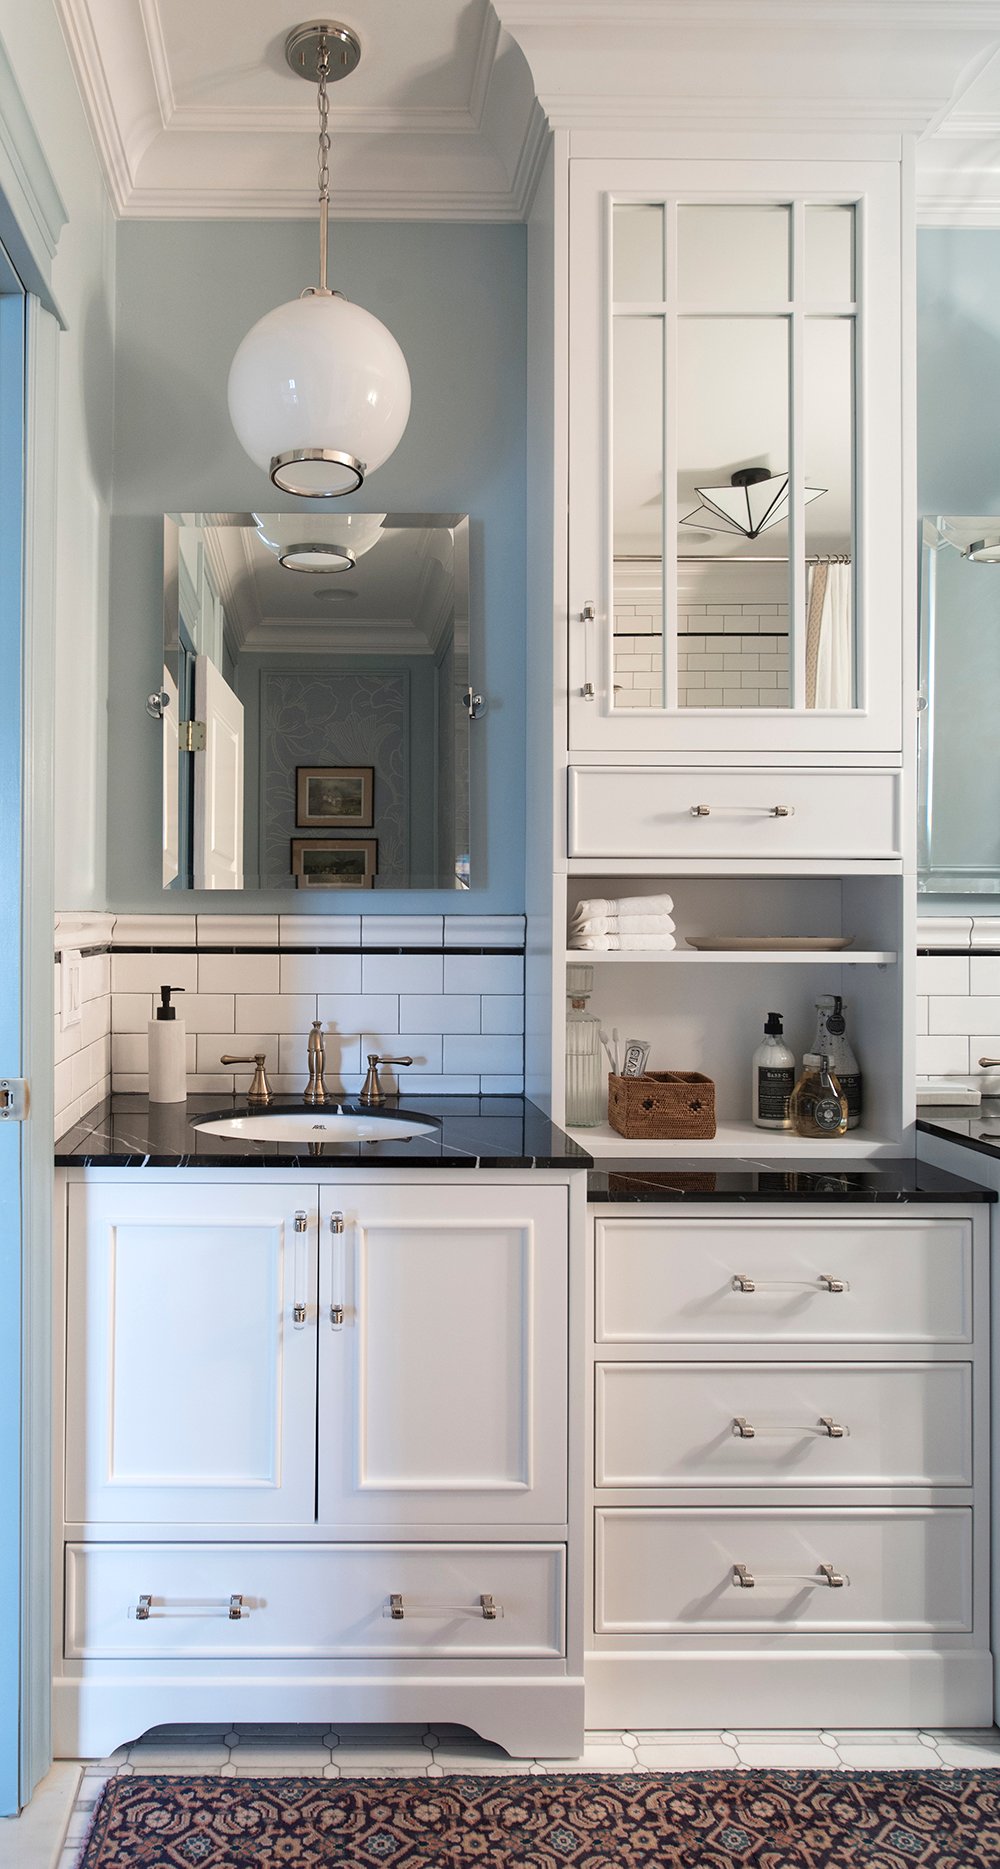 I do have to take a minute to give those pendant lights a shout out of their own. They were $95 each and are amazing! The scale is fantastic and they look so much more expensive than they actually are. They’re my favorite light fixture in the space.
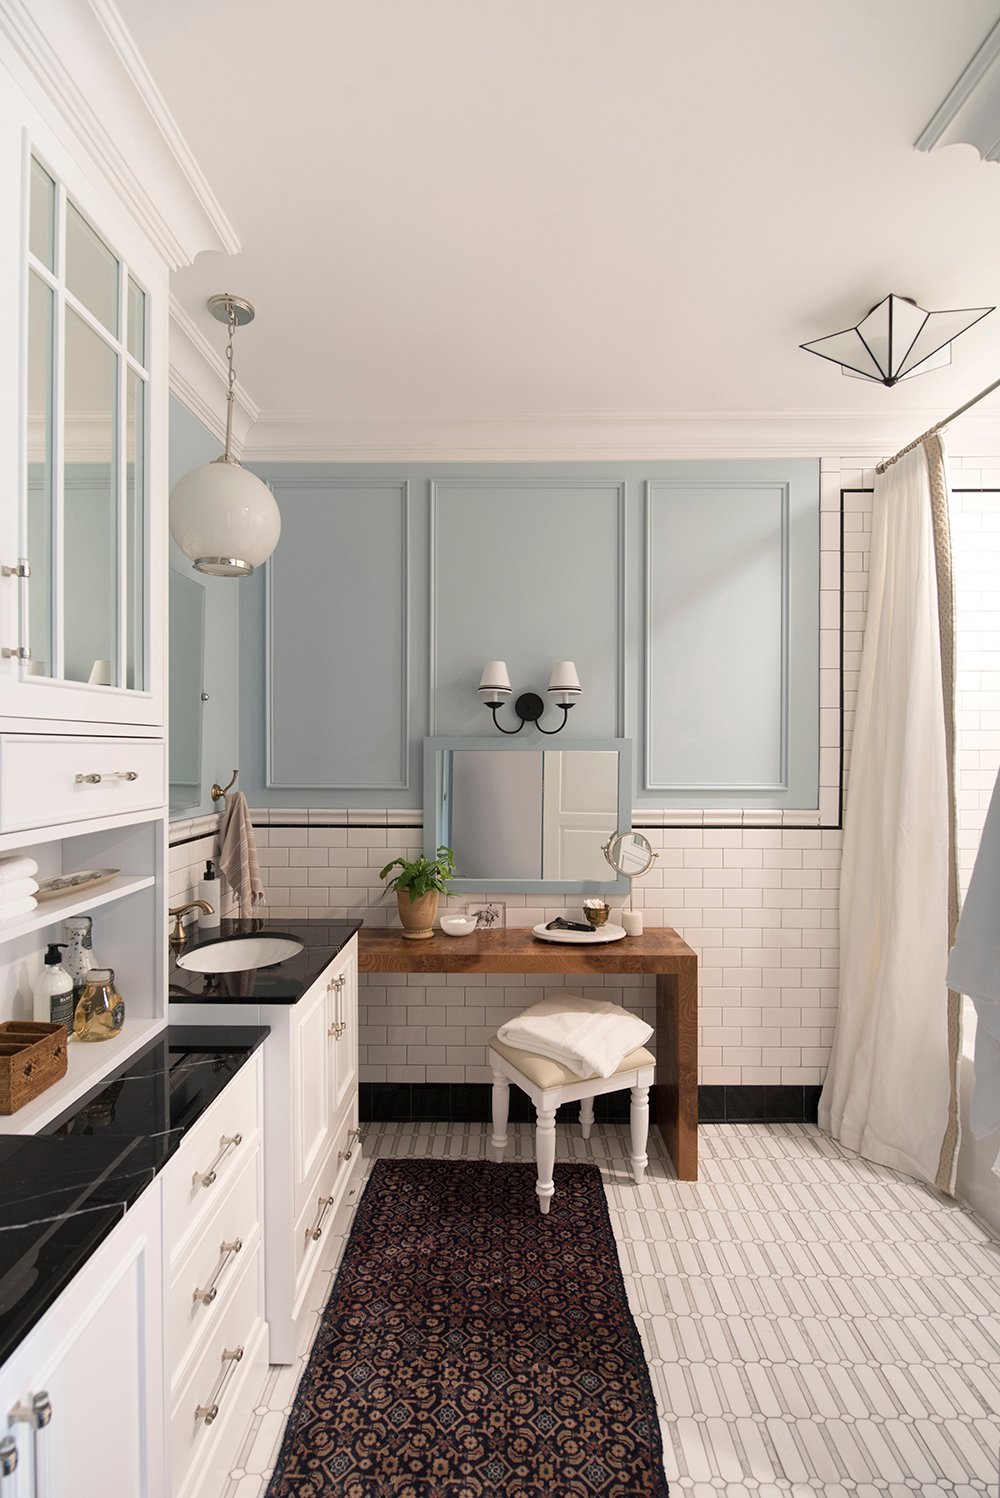
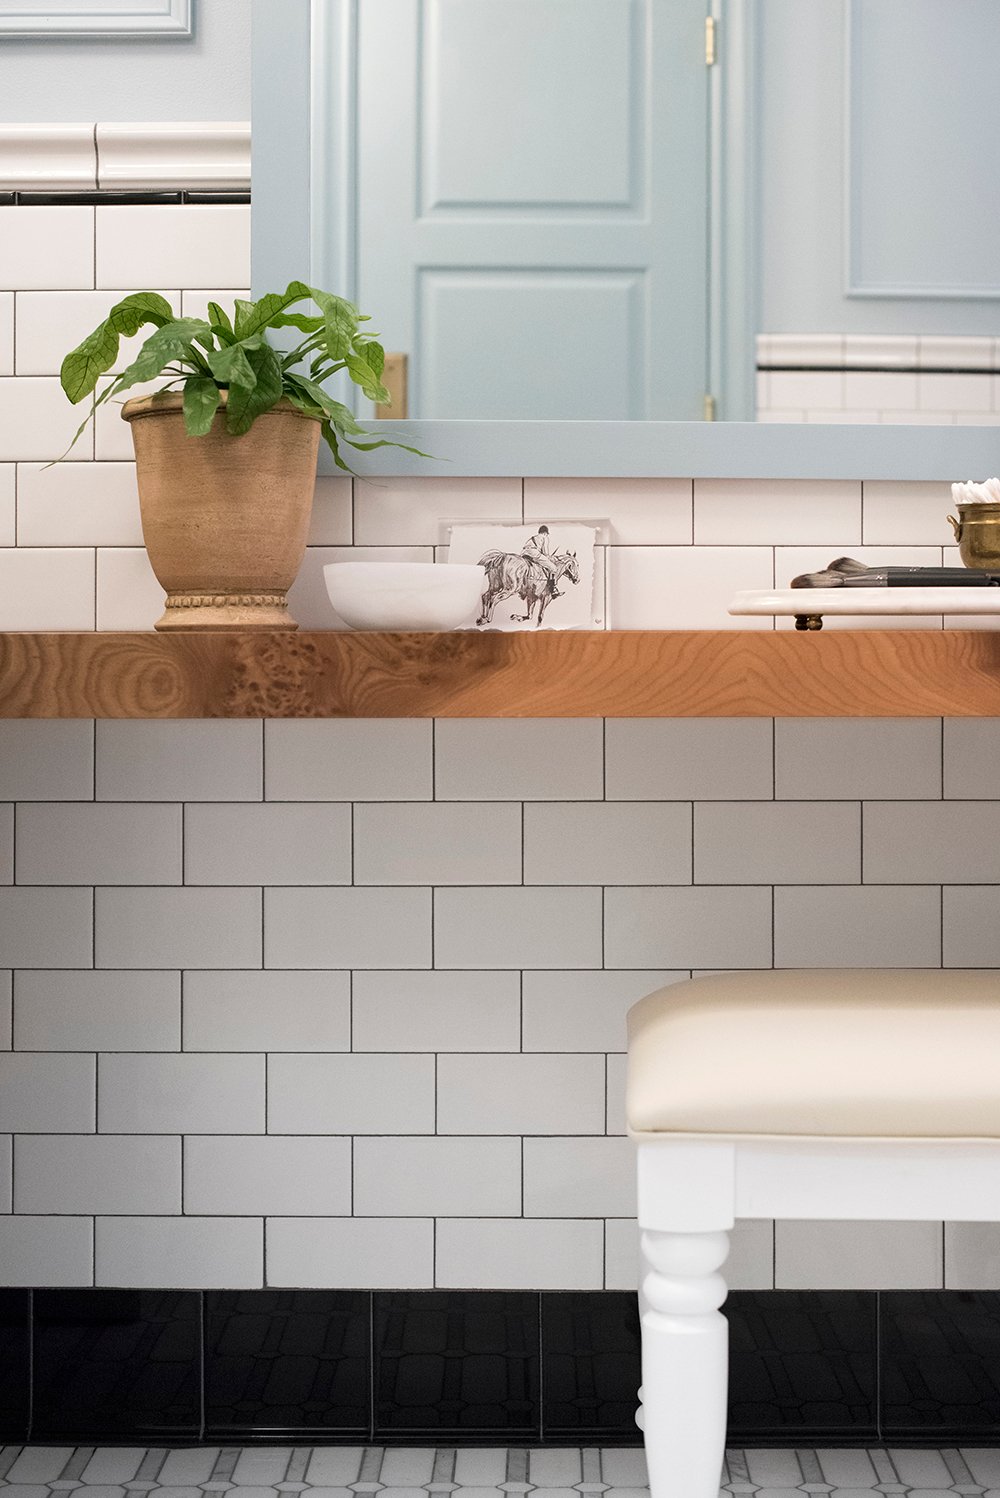
 Now, for a very beautiful vignette which resulted as a solution to a problem… the burl wood vanity table. Emmett wanted to build another tower or add onto the vanity to make it fit perfectly from wall-to-wall. That sounded like trying too hard and was definitely going to be difficult. This bathroom is huge and the thought of a gigantic spanning vanity also sounded kind of weird and grand to me (in a bad way). I had another idea- a vanity table. I love that it perfectly fills the negative space and provides functional seating.
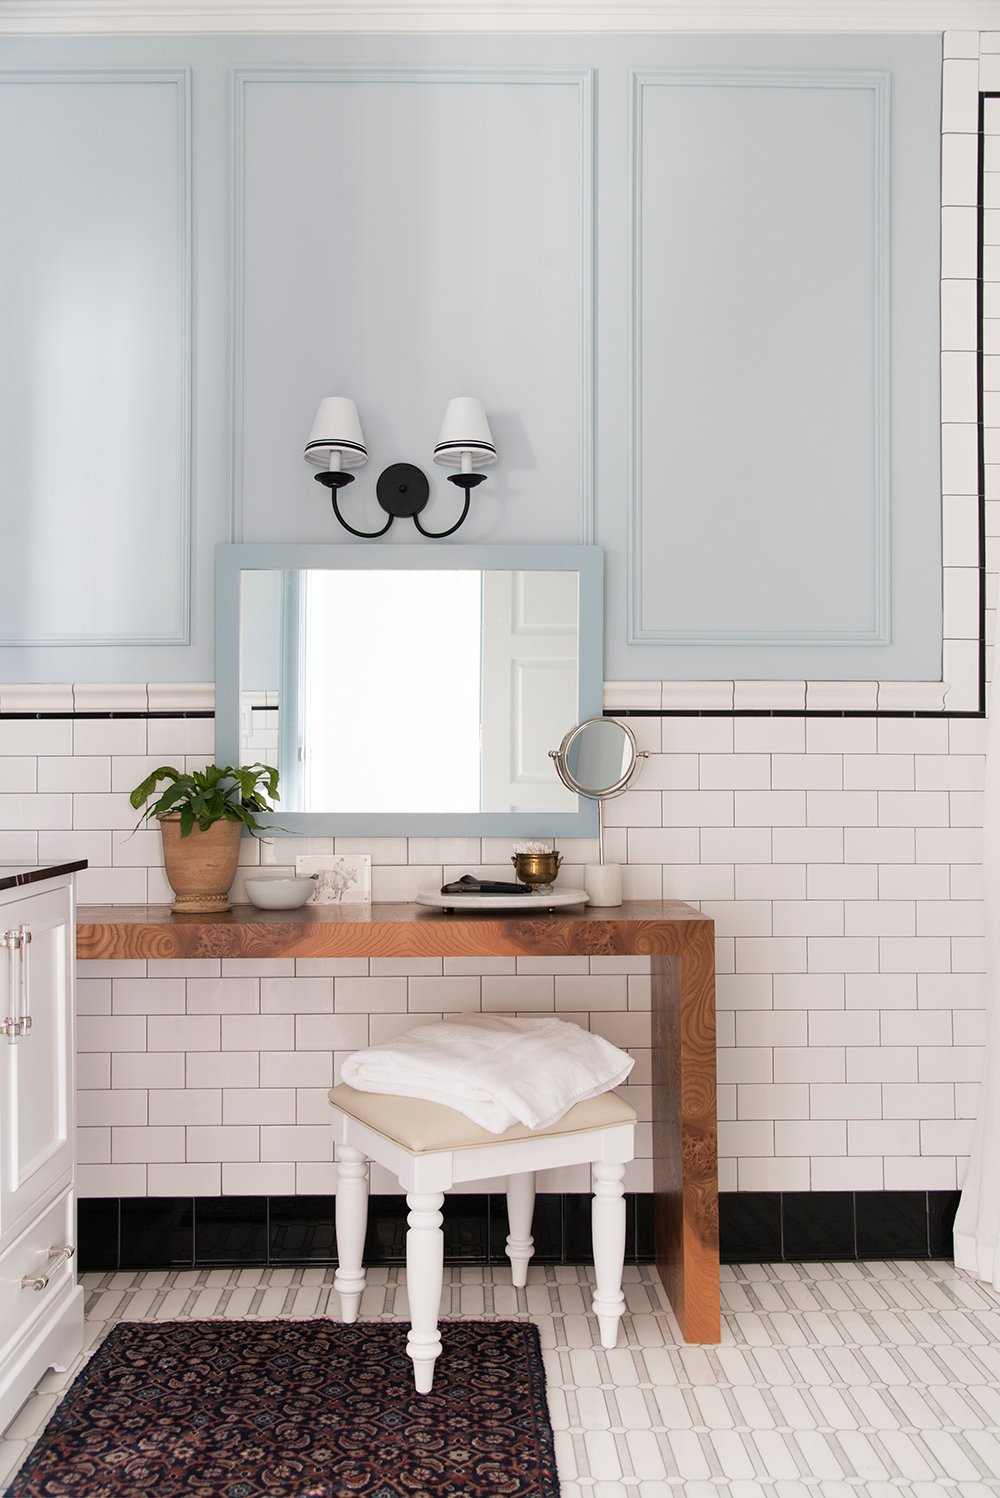 It’s a few inches lower than the sink vanity and will give guests another functional surface. I’ll take any chance I can to use burl or warm wood in a space. It’s such a nice, organic contrast to the tile. I’m just so impressed with how far Emmett’s craftsmanship has come… he grain matched that thing- it’s really unbelieveable in person.
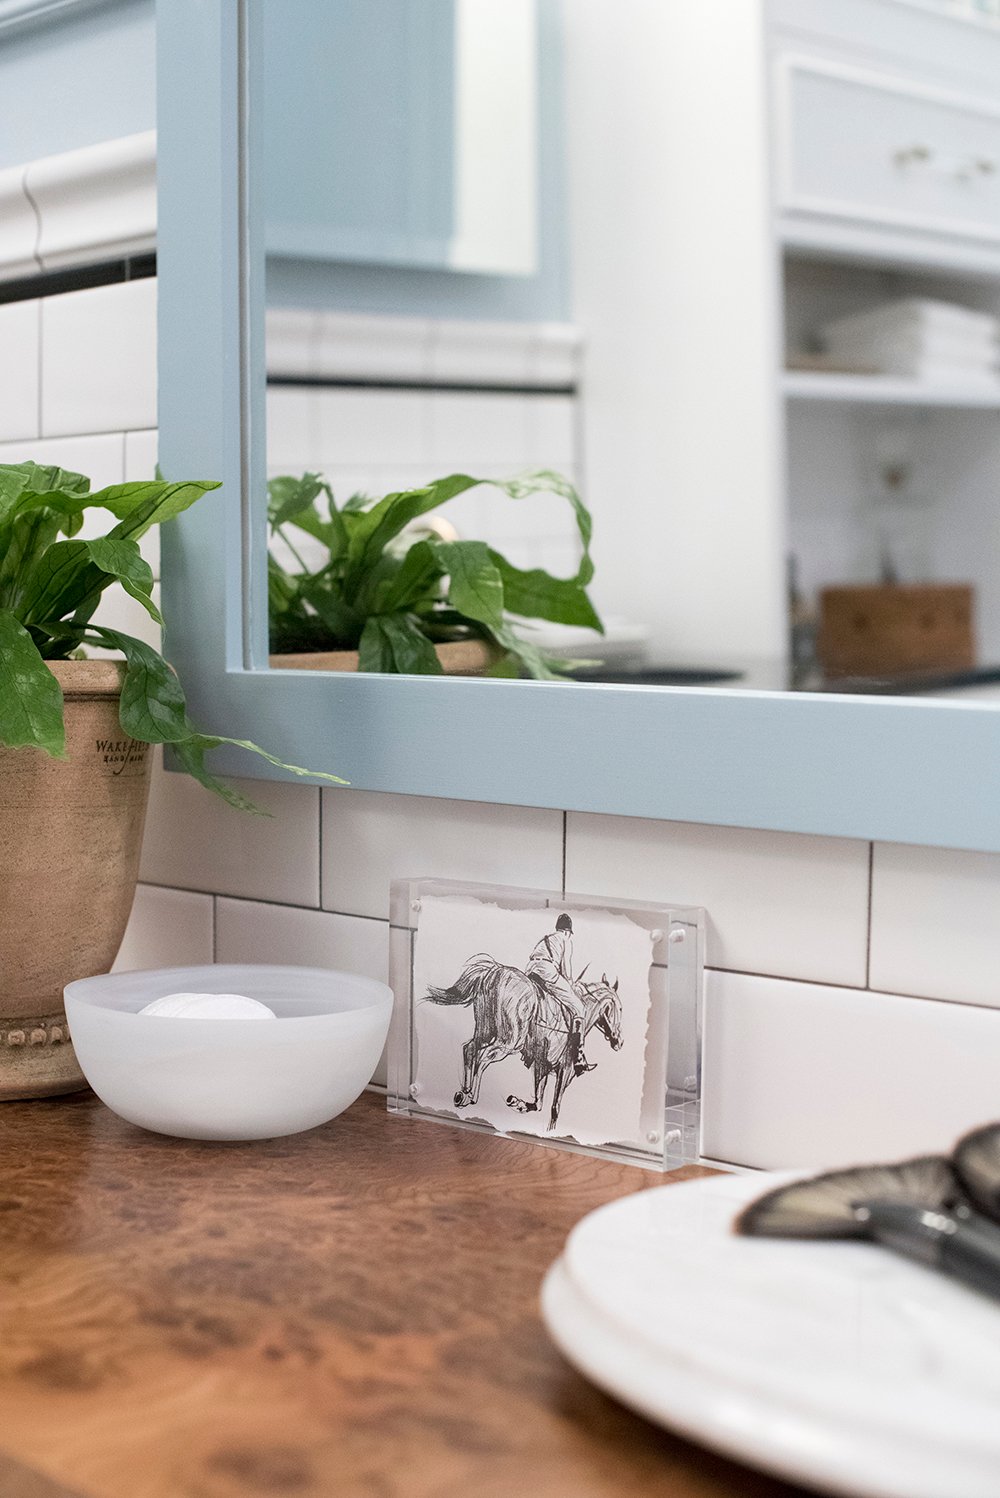
 The sink vanity actually came with two basic mirrors, but I ended up buying polished nickel options instead (they just felt more formal with the bevel). Long story short- I painted one that came with the vanity the same color as the door and installed that above the burl vanity table. I’m digging the layered look and this will be the perfect spot to put on makeup or get ready.
 That’s another great way to save money… use what you already have! This mirror ended up being a great fit for this vignette and only took an hour of my time to paint.
 I’m going to link fixtures and materials below, but please let me know if I missed anything you’re curious about…
 01: progress lighting nickel globe pendant // 02: ariel stafford double sink vanity // 03: quoizel frameless wall mirror // 04: delta cassidy widespread faucet // 05: amerock glacio polished nickel hardware // 06: allen+roth semi flush mount light // 07: delta cassidy towel hook // 08: project source fixed shower rod // 09: american olean chair rail // 10: american olean black pencil liner tile // 11: american clean 3×6 subway tile // 12: american olean bullnose tile // 13: american clean black base tile // 14: elida ceramica geo marble mosaic floor tile // 15: delta cassidy shower trim // 16: maax rubix alcove bathtub // 17: three panel interior door // 18: delta cassidy toilet paper holder // 19: home styles makeup vanity stool // 20: livex lighting mendham sconce + shade DIY // 21: kohler memoirs elongated toilet // 22: delta cassidy toilet lever // 23: kohler black slow-close toilet seat // 24: broan white bathroom fan and light // 25: anatolia marble floor and wall tile (for shower niche) // 26: mapei premix grout (silver for floor tile & pearl gray for wall tile)
For all other sources and paint colors, you can always refer to the SHOP MY HOUSE tab. I’ve created a new one for our current home, and you can still shop the resources in our previous home. It’s basically the ultimate linked source guide.
 I have to give a GIANT thank you to our friends Emily & Brant (whose house you’ll be seeing on the blog very soon!). They are basically the only reason we were able to meet our deadline and helped us tile and work for two days straight. You know you have true friends when they dead lift a toilet through your hall into the bathroom. They only live a block away, but I told them to come use the guest bath anytime they want. Haha! I also have to thank Lowe’s for being an incredible partner- without them, my vision probably wouldn’t be a reality right now. They truly are a wonderful company to work with, filled with amazing people.
If you missed any guest bathroom projects, find them here:
- Guest Bathroom Design Plan & Before Images
- How to Install Mosaic Floor Tile + My Favorite Marble Mosaics
- Ways to Customize a Readymade Vanity
- How to Choose Cohesive Bathroom Plumbing Fixtures
- Double Sconce Easy Shade Upgrade
- How to Make Subway Tile Look Classic, Not Basic
- A Day In the Life Of : Renovating
If you made it through that entire post, thank you!! I appreciate every single one of you for reading and sending your encouragement. I have SO many more bathroom related things on the calendar to share with you. Tomorrow- please come back for a vintage rug giveaway… I want to properly say thank you and am giving away two rugs I got for the space but didn’t use. As always, I LOVE hearing your feedback in the comment section below. I’d love to hear what you think! xo