Laundry Room : One Room Challenge – Week 5
 We’re one week away from the big reveal and it’s crunch time in the One Room Challenge! We’ve made A LOT of progress in a short period of time, but we still have lots left to do. Click through for the very last progress update before the laundry room is entirely finished.
In case you missed any of the previous weeks, don’t worry! Catch up here: Week 1 (before images and the design plan) // Week 2 (demo, subfloor, plumbing, electrical, designing the dog crate) // Week 3 (drywall, floor tile, rug selection) // Week 4 (cabinetry, backsplash tile, countertop, custom upholstery)
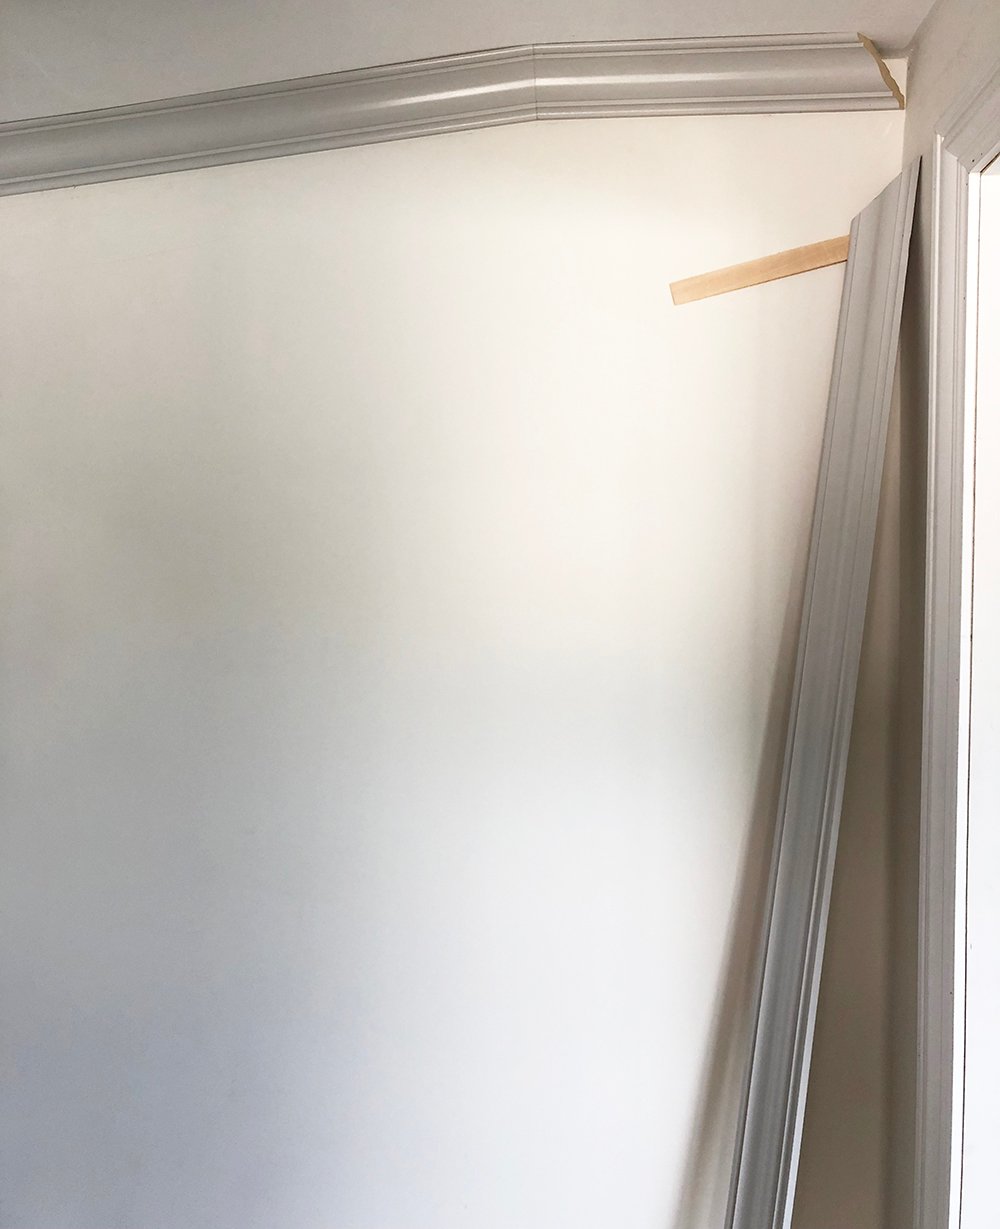
Week #5 is all about the details. Emmett is still in the process of installing the millwork (find my opinionated thoughts on that in this post), which is proving to be very challenging due to the shape of the room and the slant of the ceiling. It’s seriously crazy!
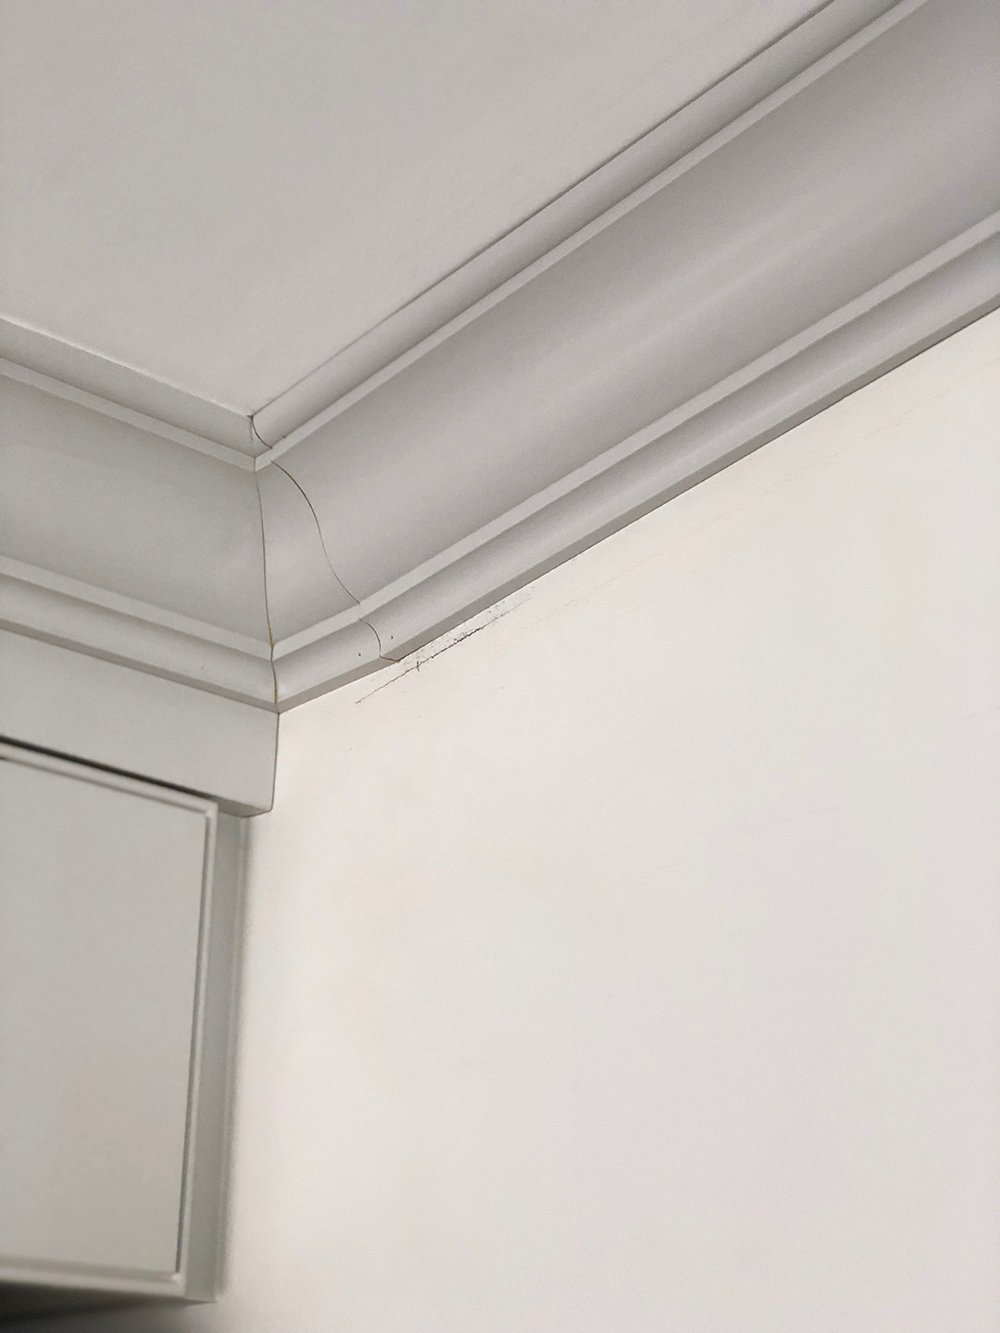 The crown moulding has to terminate in weird ways and we took a ton of time to brainstorm how it could even work. He’s killing it though and amazing me as usual! It looks fantastic and I’ve been filling nail holes and painting my heart out on the portions he has completed.
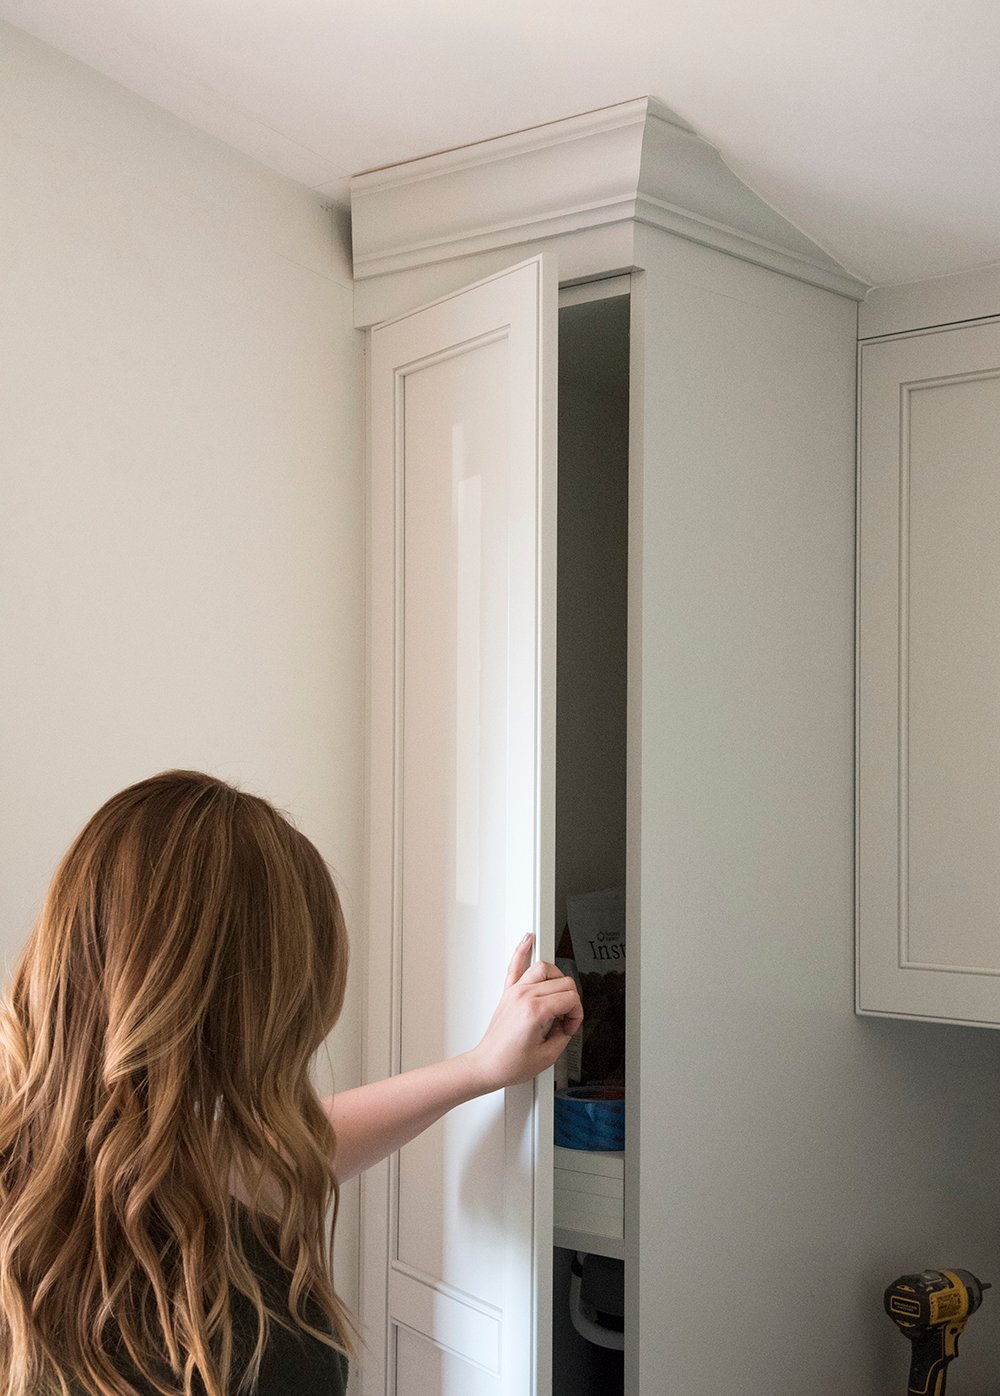
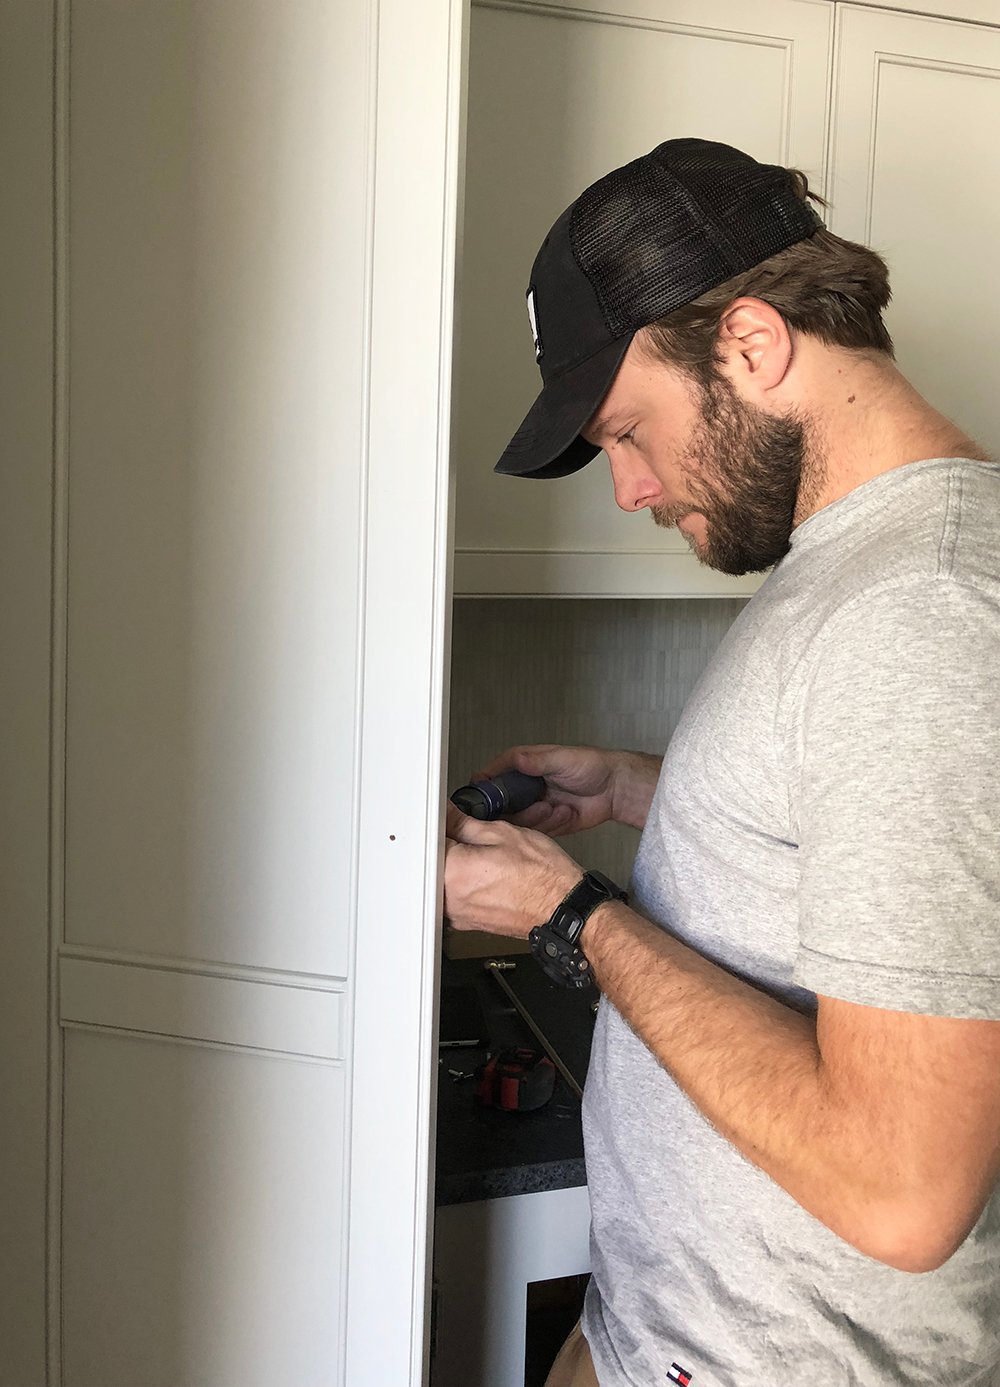
 In addition to the millwork, the cabinetry is also finished being installed… all of the little filler pieces have been added and things are looking nice and custom, just as I envisioned.
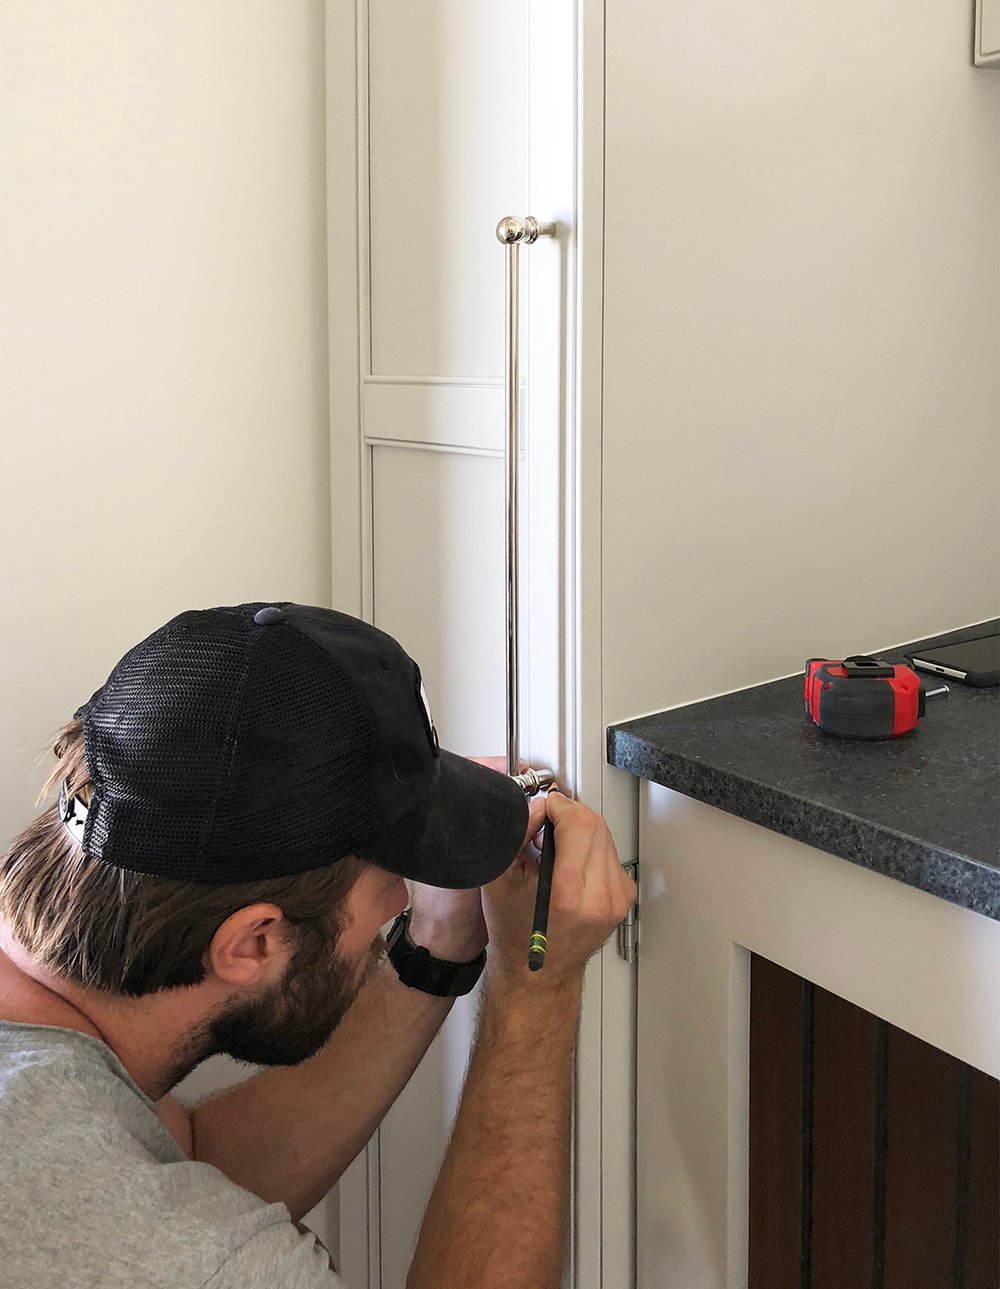
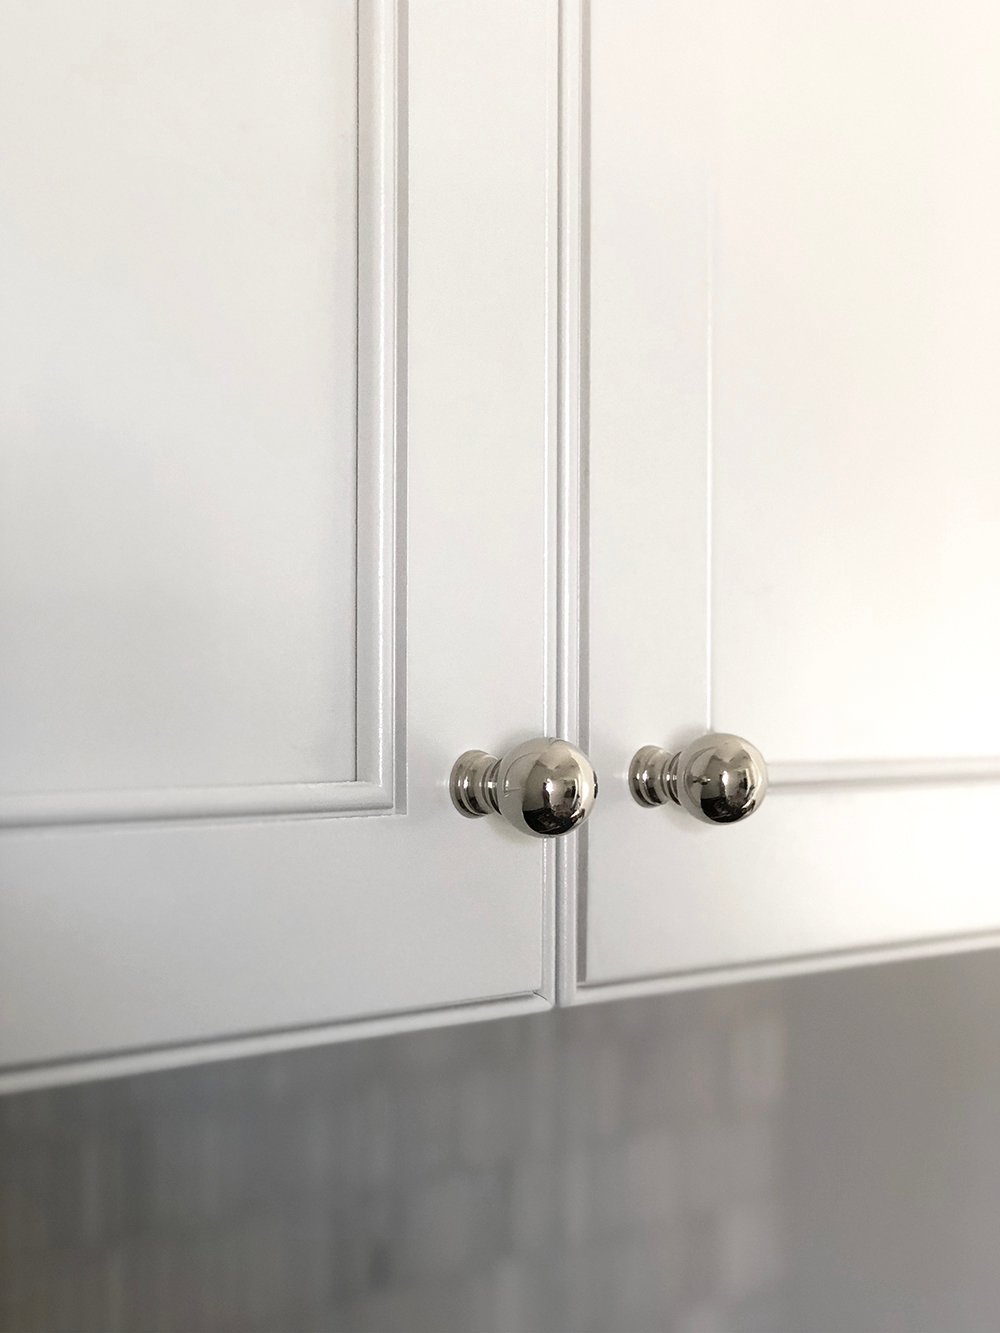
 The gorgeous hardware from Pepe & Carols is installed and I’m losing my marbles over it- it’s even better than I imagined! I love that they were able to customize the length for us, so we could get an extra long pull for our floor-to-ceiling cabinet.
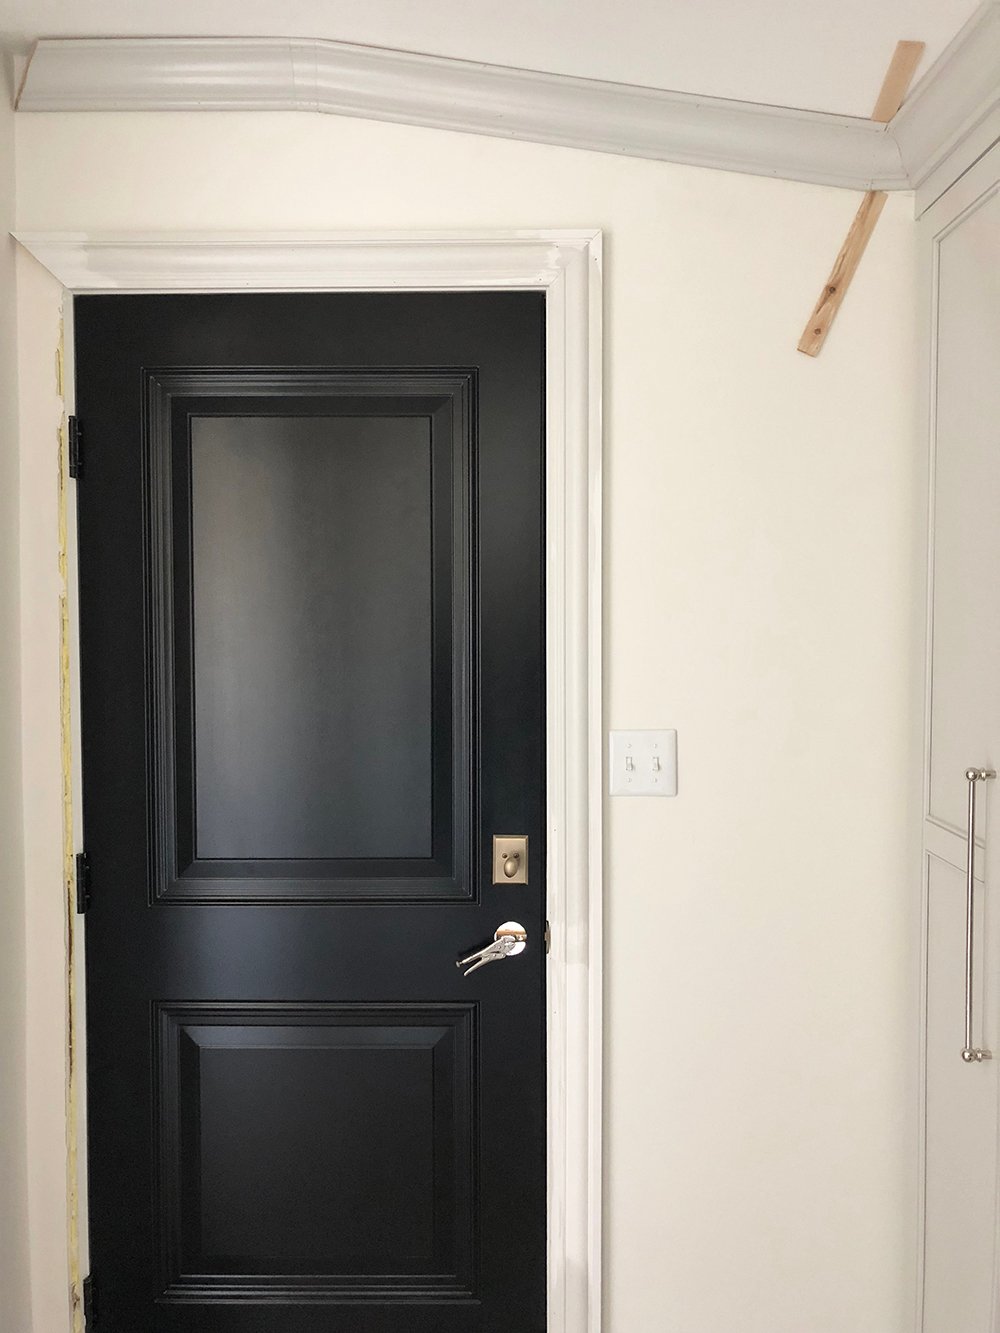
 The back door has been painted and we’re waiting on one last piece of beautiful hardware to arrive. Until then- we’re using vice grips to open and close the door, ha! Notice that I’m mixing antique brass and polished nickel hardware in the space? I’m totally fine with mixing metals… in fact, I think it adds depth and prefer to mix it up!
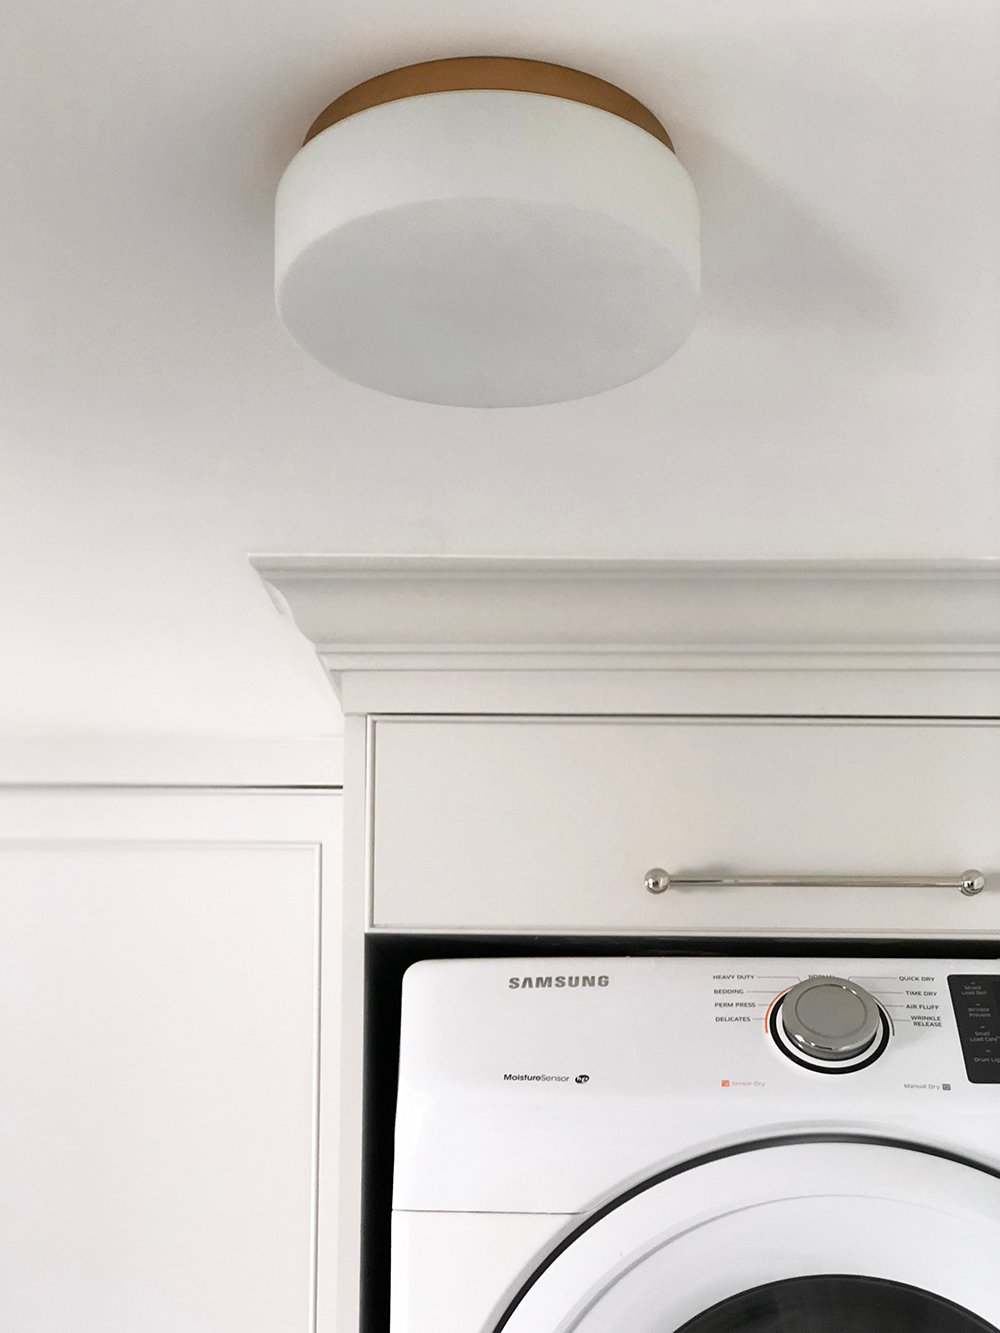
 The light fixtures are also installed. These flush mounts were SO inexpensive, and I personally think they look pretty high end (DIY win). There are two of them in the room. Of course I used my hack to turn them antique brass. More on that DIY here! It’s seriously my best kept secret, that is obviously no longer a secret.
 You might remember my ugly pet food storage containers from Instagram (if not- the DIY is highlighted on my story)… those are finished and look a million times better.
 If you’re wondering about paint colors in the space, I selected Sherwin-Williams “Alabaster” for the walls, and the cabinetry and millwork is a custom color I had Sherwin-Williams mix for me… it’s sort of in-between their popular gray colors “First Star” and “Big Chill”.
 So- maybe you’re thinking, “What’s left on the to-do list?” Sort of a lot…
- One more coat of paint for the walls (SW Alabaster)
- One more coat of paint for the trim (SW custom mix… between Big Chill & First Star)
- Tile the crawlspace access door
- Seal the backsplash
- Install the new exterior sconce / porch light
- Install hooks
- Install artwork
- Install gallery light
- Build custom dog feeders
- Wax the soapstone countertop
- Wipe and organize shelving / cabinetry
- Finish installing door hardware
- Style and shoot the space
Here’s to hoping we can cross everything off our the list this week and coming weekend, because ready or not- the reveal will be in one week! Come back Wednesday for the final space (so exciting!!). In the meantime, check out the other guest designer spaces in the challenge… click the logo below:
![]()
This is looking so nice, Sarah! I hear you about the crown mouldings but they are going to look so fab. Love those personalized bins! :)
Thanks so much, Tee!!
OMG! Where to start. I love the profile of your cabinets they looking bleeping amazing. I’m currently redoing my kitchen and it’s taking will power not to scratch my whole plan and go with a similar style.
I love the moody colours they are a perfect mix withought being too dark! Hope you don’t mind but I’m totally using this as inspiration for my mudroom/pantry makeover.
Last up is the sleeted Wall trim! We have the same thing and I’m really struggling to get it done. So happy to see it looking amazing in your space. Wishing you all the best, can’t wait to see the reveal!
Thank you, Jessica! So excited to hear you’re loving the cabinetry design. I sketched the profile out months ago for our kitchen renovation and had all of the cabinetry custom made… my husband works for a local cabinetry manufacturer. Absolutely, feel free to use it for inspiration :)
Okay, first, the room is looking amazing! Second, I love the decals on the dog food bins, but I have a logistical question (really just sheer curiosity). I have dogs and use a similar bin, so I know how heavy it can get. Are you guys just stacking them full of food and pulling them both out everyday? Are you adding a shelf between? So curious how this will work in your everyday life!
Thanks so much, Alex! I haven’t quite decided on the food storage bins yet… I have a couple options. The photo is a little deceiving in the way I shot it- the bottom big is double the size of the top one, so the smaller bin wouldn’t be so heavy. Option #1… install a sliding shelf on the bottom, so I can put them out (rather than lifting them out of the cabinet). Then I would just lift the smaller one off of the larger one (that’s easy though). OR Option #2- Add another shelf for the smaller bin, so they each have their own section. The shelfs are all adjustable and we can add or remove as many as we like. I’m thinking Option #1 makes the most sense for how we use the space. Does that help to answer the question? xox
Ahh, got it. Love the slider option! Thanks for indulging my nosiness. :) Can’t wait to see the final reveal!
Sure thing!! I think the slider shelf is probably the best option. I think I might go ahead and order that today, haha! Here’s to hoping it’s here in time for the reveal.
I love the hardware that you chose. So lovely.
Thanks, Jacqui!!
OhEmGee! Love this room to the moon and back. Can’t choose a favorite, but will spend time swooning over your hardware this week. #justsayin ~~ Susie from The Chelsea Project
Hahaha!! Thank you, Susie! You always have the sweetest comments. Thanks for stopping by to check it out! xox
Gorgeous! Where is the flush mount fixture from?!
Thanks, Ciara! The flush mounts were a DIY… you could find them here: https://roomfortuesday.com/a-trick-for-switching-light-fixture-finishes/
I am loving the hardware you chose, it has a nice weighted look with a bit of heft perfect for the laundry room. Love that you are also making it a pet friendly space too. Rooms that pull double duty’s are my favs.
Thank you, Jen! Our house is pretty small, so we definitely need the rooms to pull double duty and be super functional! xox
I’ve been loving watching the progress of this space. It’s looking so darn good! All the best as you head into the final week!
Thank you so much, Jordana! xox
The color choices, the cabinet fronts, and the impressive molding work are amazing!!!!!
Thank you, thank you, thank!! xo
Wow! I would have given up on having crown molding with those crazy angles! Great job!! It’s looking so good!
Thanks, Emy! That’s all my husband… I can’t take credit for the millwork installation. ha! xo
That long pull is so dreamy! As is the paint color, and the cabinets, and well, everything. Keep it up!!!
This is all looking amazing! I can’t wait to see this space finished – I know I’m going to love it already!
Thanks so much, Lindi! xo
Wow, this is looking really clean and beautiful! This looks like a room I’d love in my house. I’d lose my mind with all of those angles, though.
I am so glad to hear that I am not the only one that likes to mix metals, I think it really give a space depth! That hardware is amazing!! And that cabinetry is gorgeous. I can’t wait to see the final reveal!!
You guys are doing a fantastic job! Can’t wait to see the reveal. I love the hardware and the mixed metals!
Thank you, Jude!
Wow – we love the new cabinet hardware too! Stunning for sure. Your cabinets are beautiful too – can’t wait for the reveal!
Thanks so much!!
This is gorgeous! I can’t wait for the final reveal!
Thanks, Ruthie!
The cabinetry and moulding looks amazing!
Thank you, Jessica!
Sarah I seriously love this project. Following along has been so fun and I cannot wait to see the finial reveal today!
I love how this space is coming together! That crown moulding would seriously kill me though, I have a hard time with perfectly straight walls lol! Can’t wait to see the reveal!
Thanks, Casey!