A Trick for Switching Light Fixture Finishes
 With the One Room Challenge in full swing and a kitchen renovation wrapping up, I’ve been in saving mode lately. Home renovation projects require a lot of time and money, which sometimes means getting creative with the budget to achieve a designer look for less. I forgot all about a light fixture hack I tried years ago (in our Ohio home) until recently. When choosing inexpensive light fixtures for our laundry room, it all came back to me and I thought it was definitely worth sharing! Click through to learn my trick for switching the finish of a light fixture…
First of all, if you’re wondering WHY you might want to change the finish of a light fixture… it’s because the high-end finishes (like antique brass or dark bronze) are often more expensive. It’s also easy to find cheap light fixtures that have a decent shape, but the finish is usually terrible. The latter is what I was dealing with this time around.
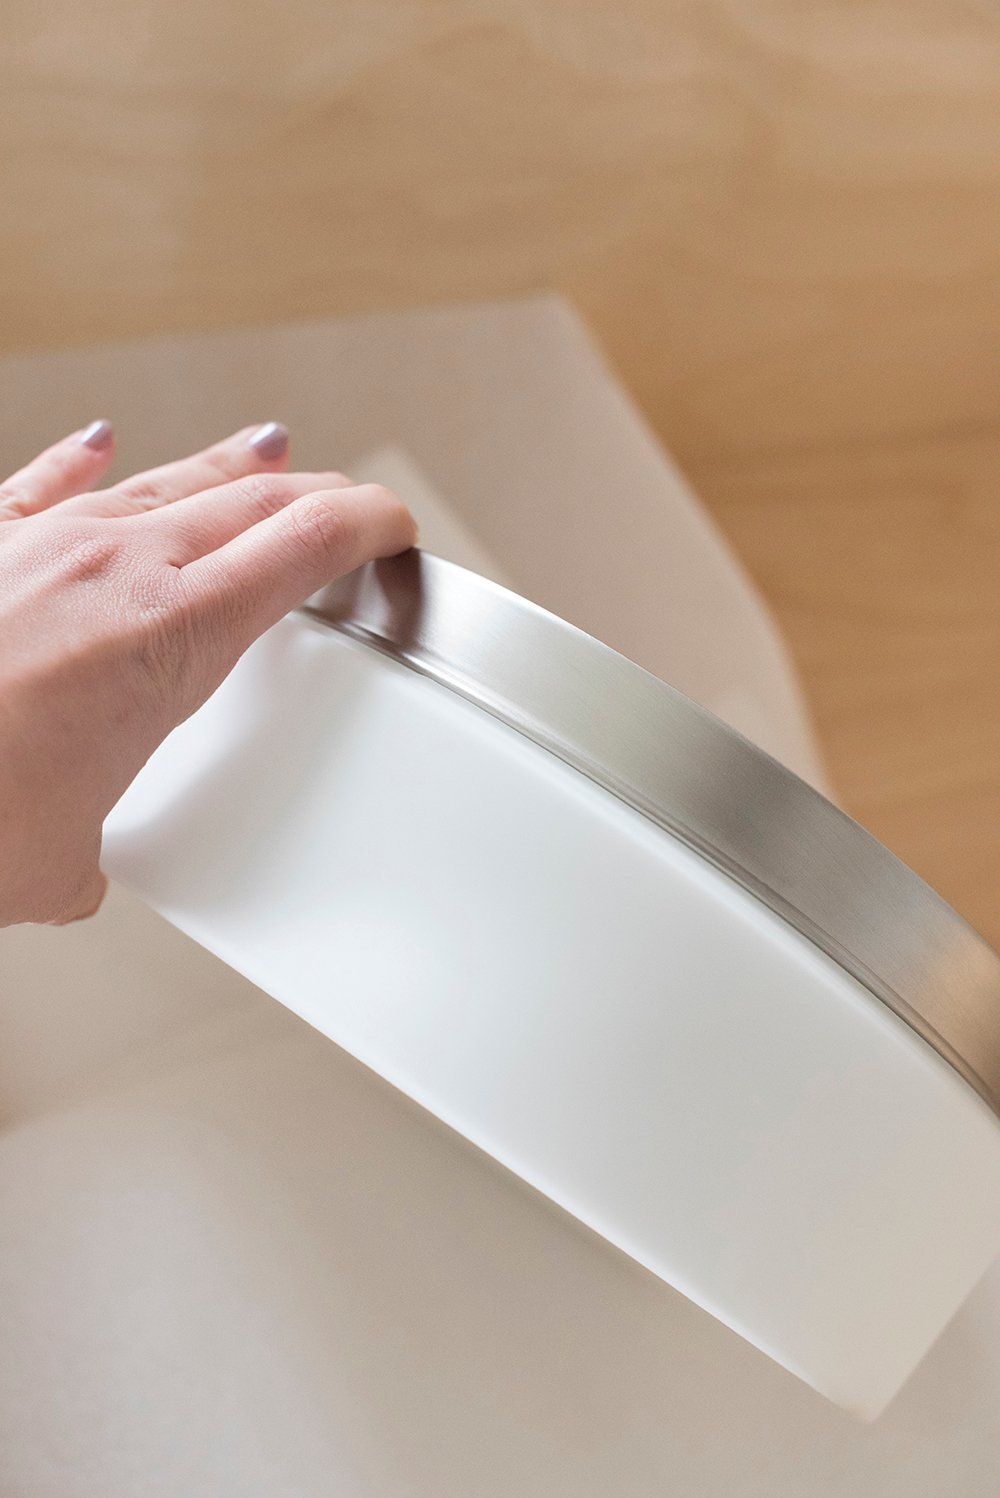 I found a couple flush mounts that were the perfect size and simple shape for the laundry room, but I really wanted an antique brass finish. Of course, the fixture only came in silver colors, but I bought two anyway, knowing I could easily change them to fit my design plan (and budget). If you’re thinking, “why don’t you just spray paint it?”… I’ll tell you. I’m not really into the spray painted metal look, I feel like it often turns out cheap-looking and the metal loses it’s metallic finish or luster. It’s also a headache to spray something and a LOT more prep.
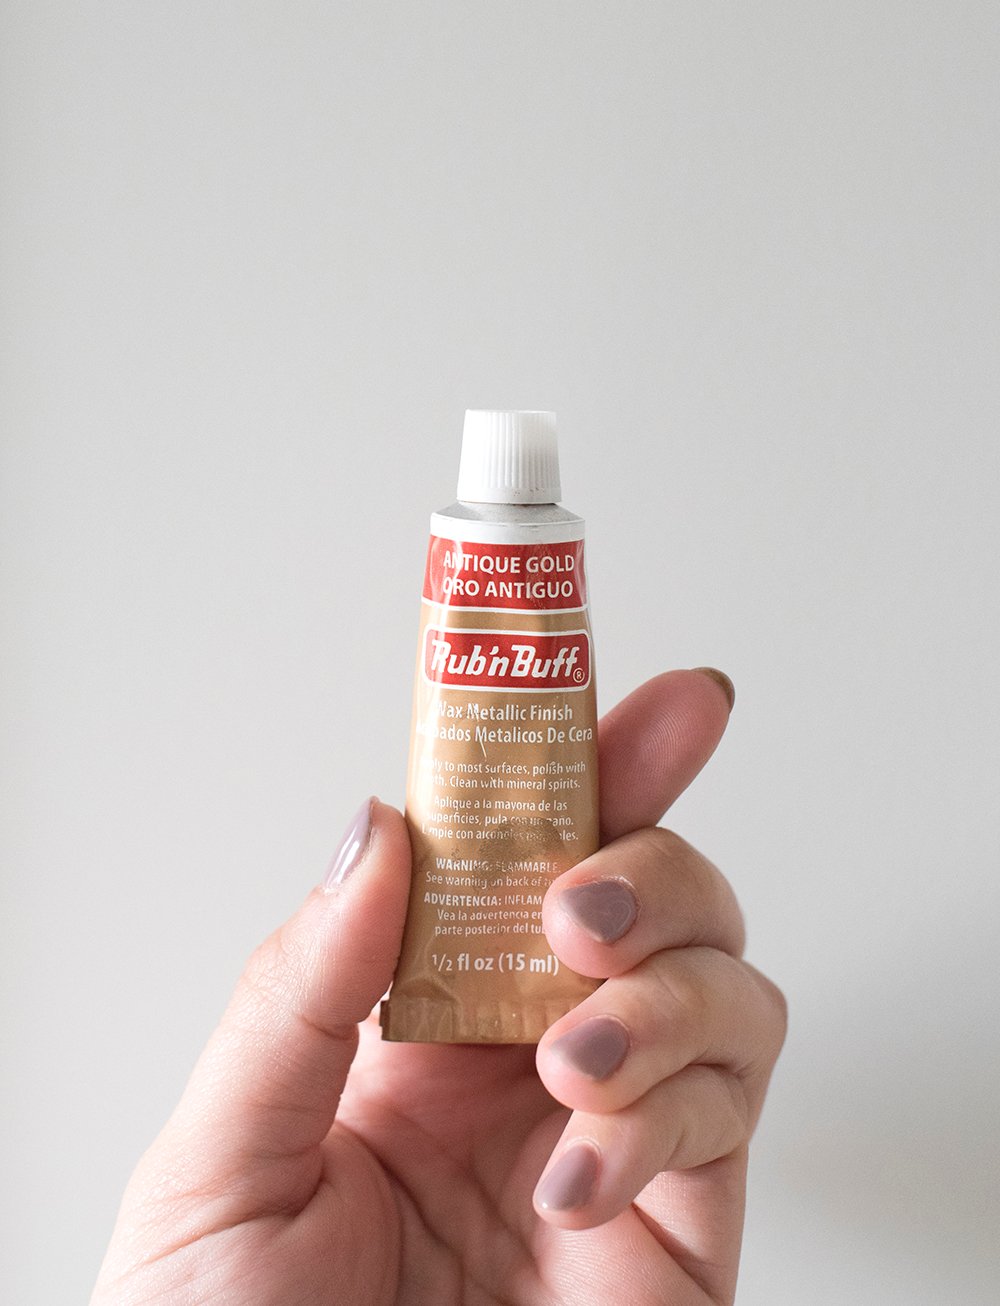 Instead, I pulled out my Rub ‘N Buff. Yes, it’s a stupid name, but it actually works well. Basically it’s finely ground metallic powder mixed with wax and pigment that covers an existing finish while looking like metal (because that’s what it’s actually composed of).
For $8 and five minutes of your time, you can swap the finish of any metal light fixture. It also comes in a lots of different colors, but this time I was obviously shooting for an antique brass aesthetic.
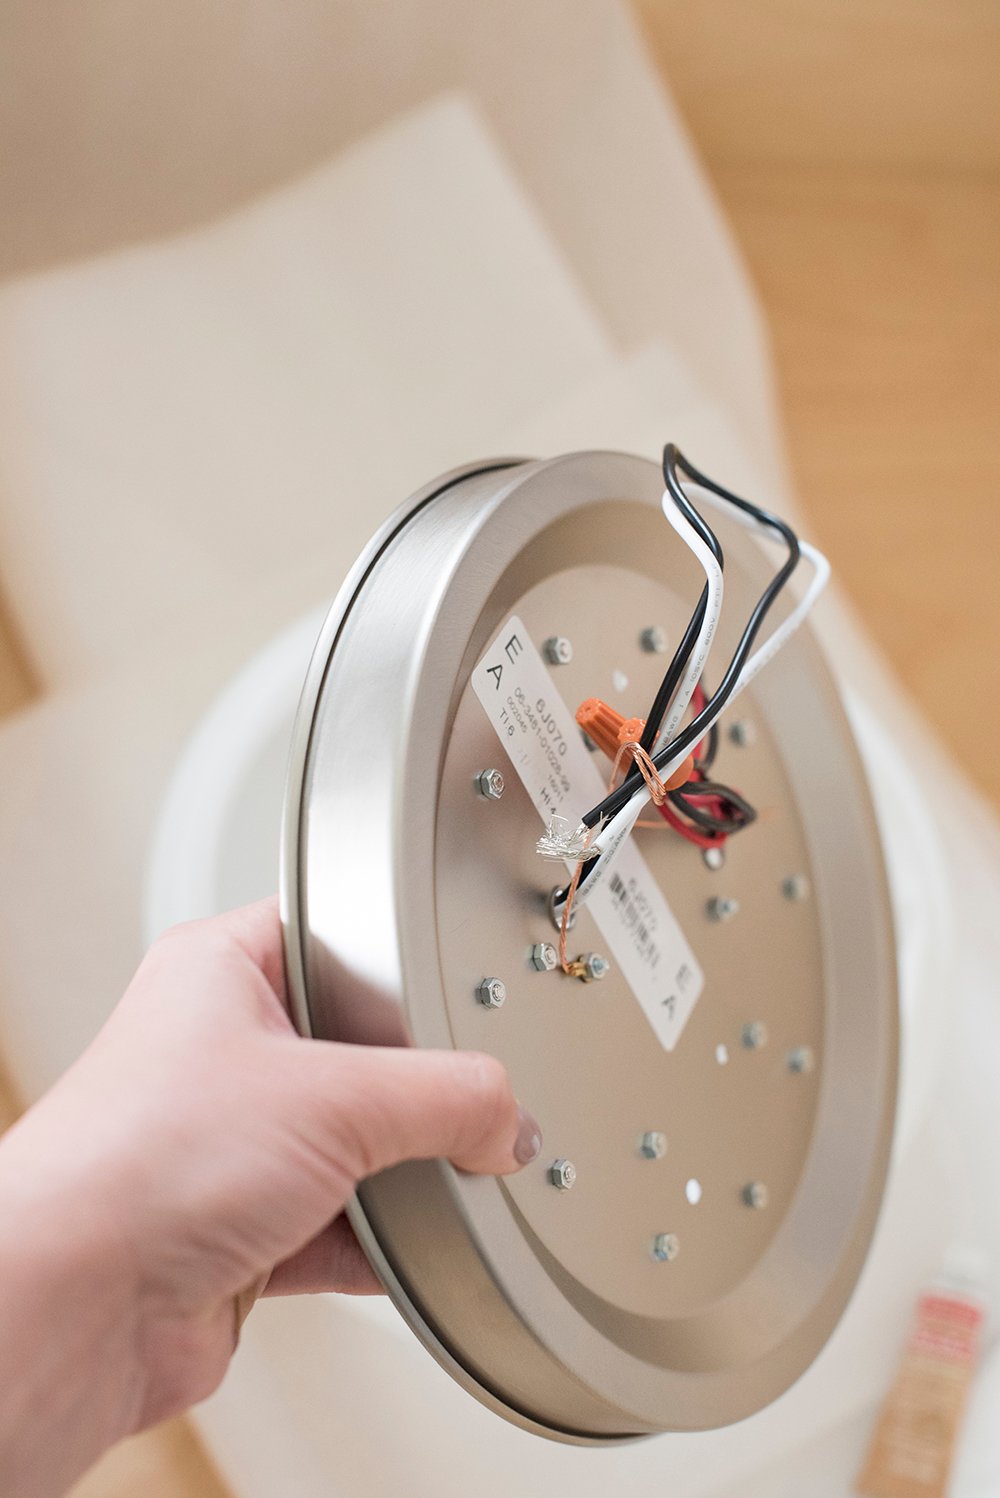 To start, I wiped the light fixture clean and made sure it was totally dry before applying the product. I then disassembled the light fixture, that way I wouldn’t accidentally get any on the white shade.
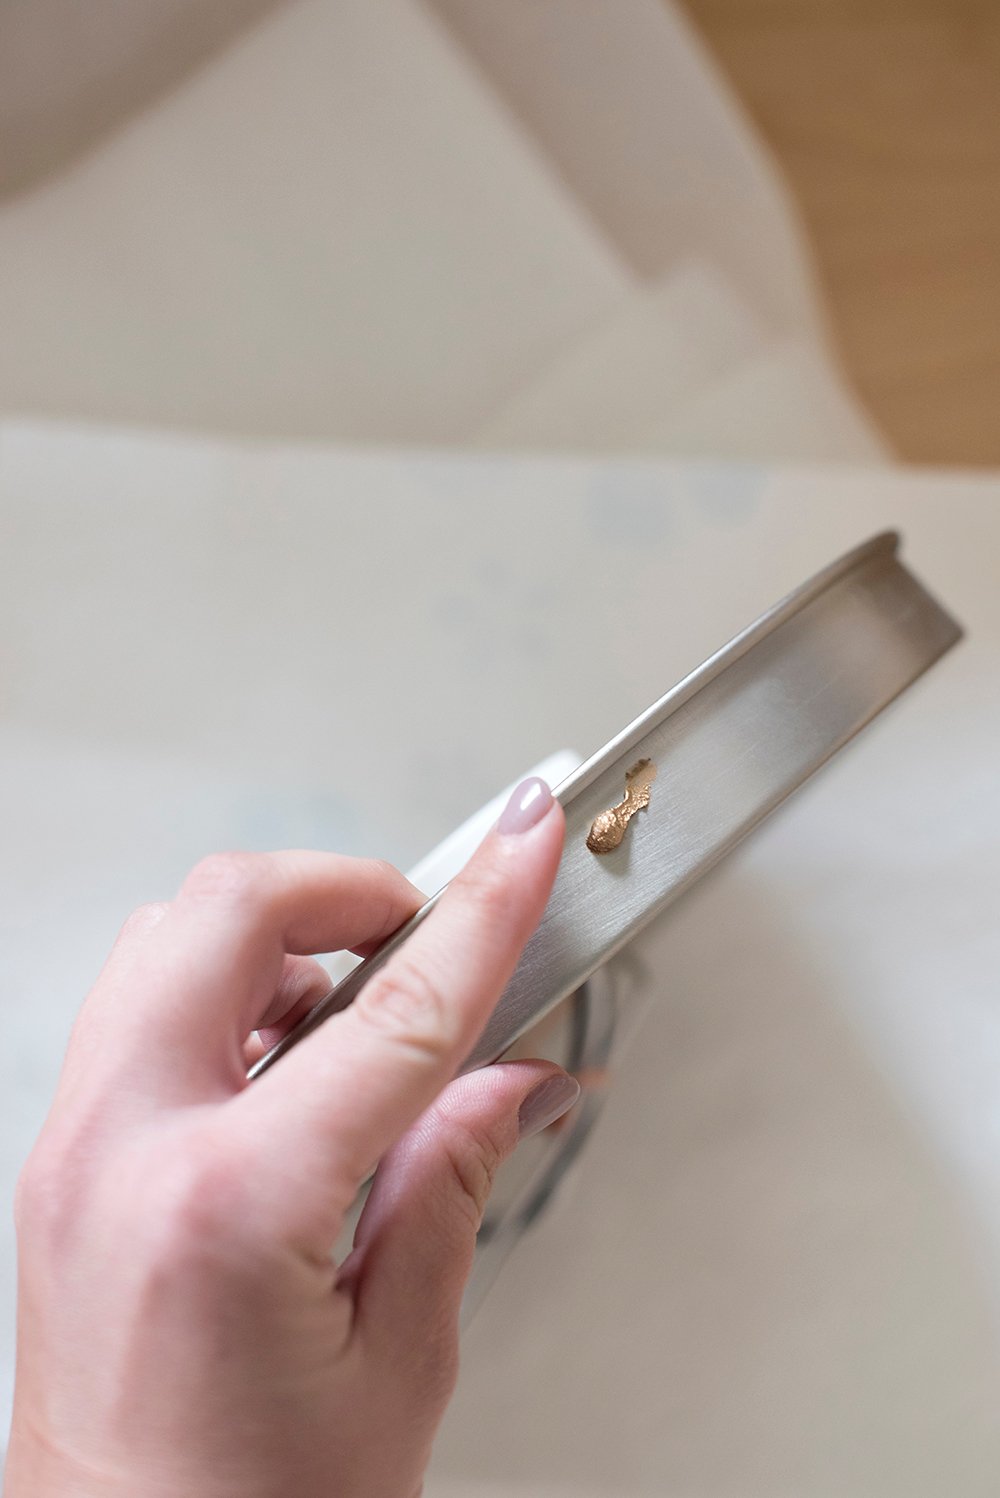 I then used my finger (although you can also use a soft cloth) to apply the paste. I feel like I have better control with my finger, but then again- I also apply makeup using my fingers. Ha! Idk.
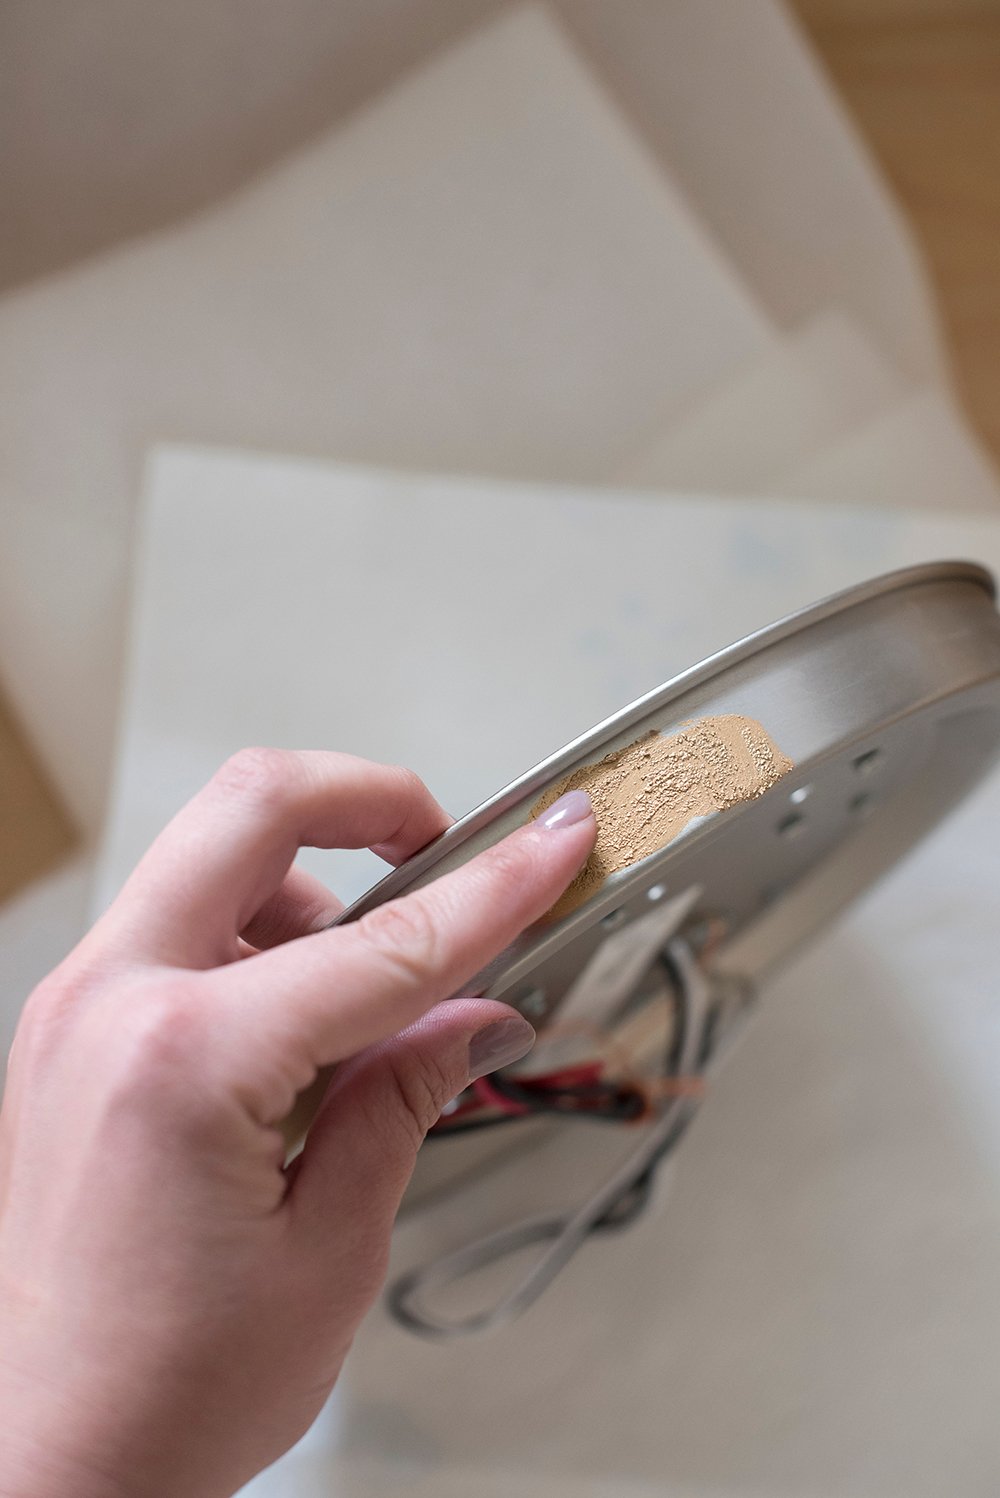 I did use a Q-Tip to get into the tight spots where the rolled edge meets the side. A little bit goes a LONG way. After it was totally covered, I allowed the fixture to sit for about an hour before buffing it into a shine or luster.
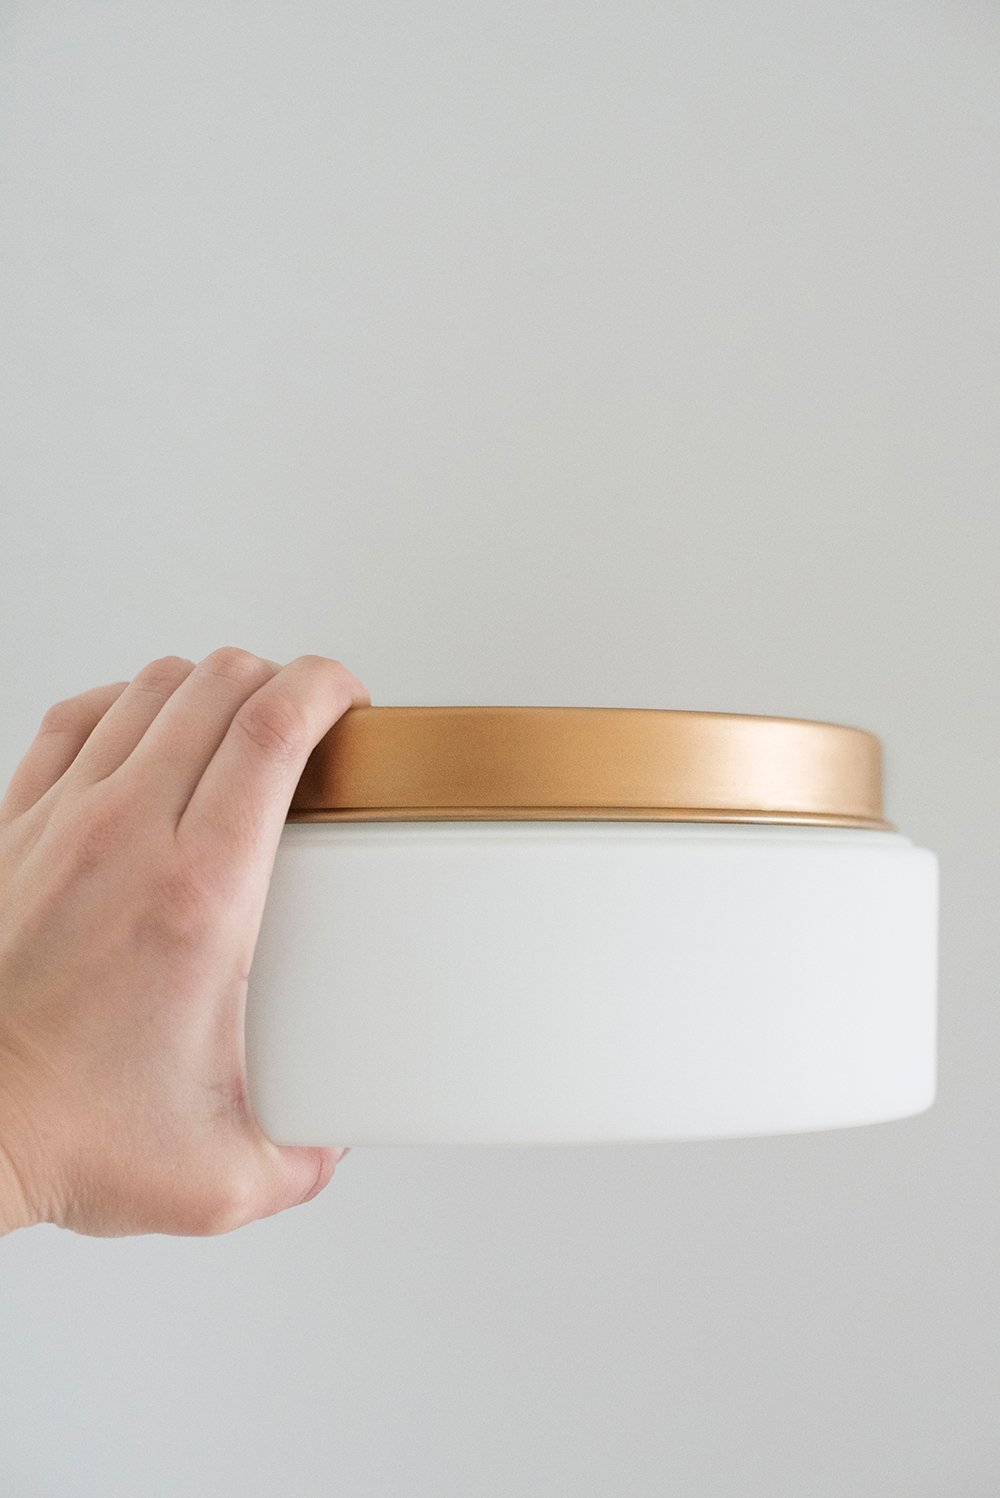
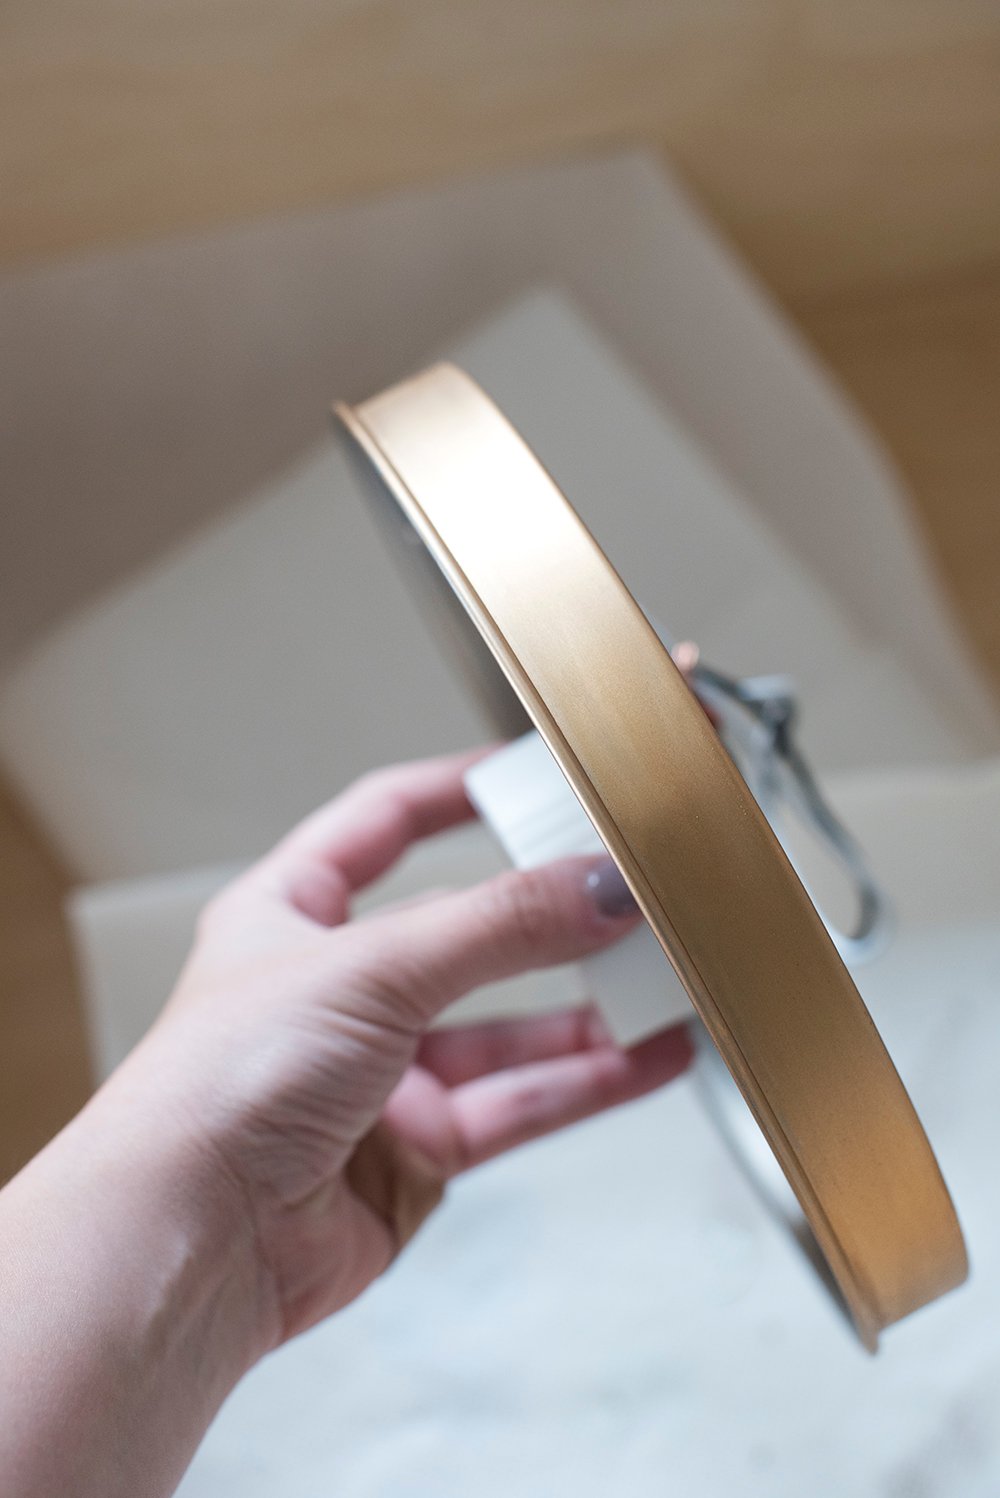 That’s it! There’s really nothing to it. The result is a brass fixture that still looks and feels like metal… rather than metal covered in paint. You can also layer it up to add texture or increase the depth.
 The laundry room lights aren’t installed yet because the ceiling still needs to be repaired, primed, and painted, but you can see how it turned out above and below.
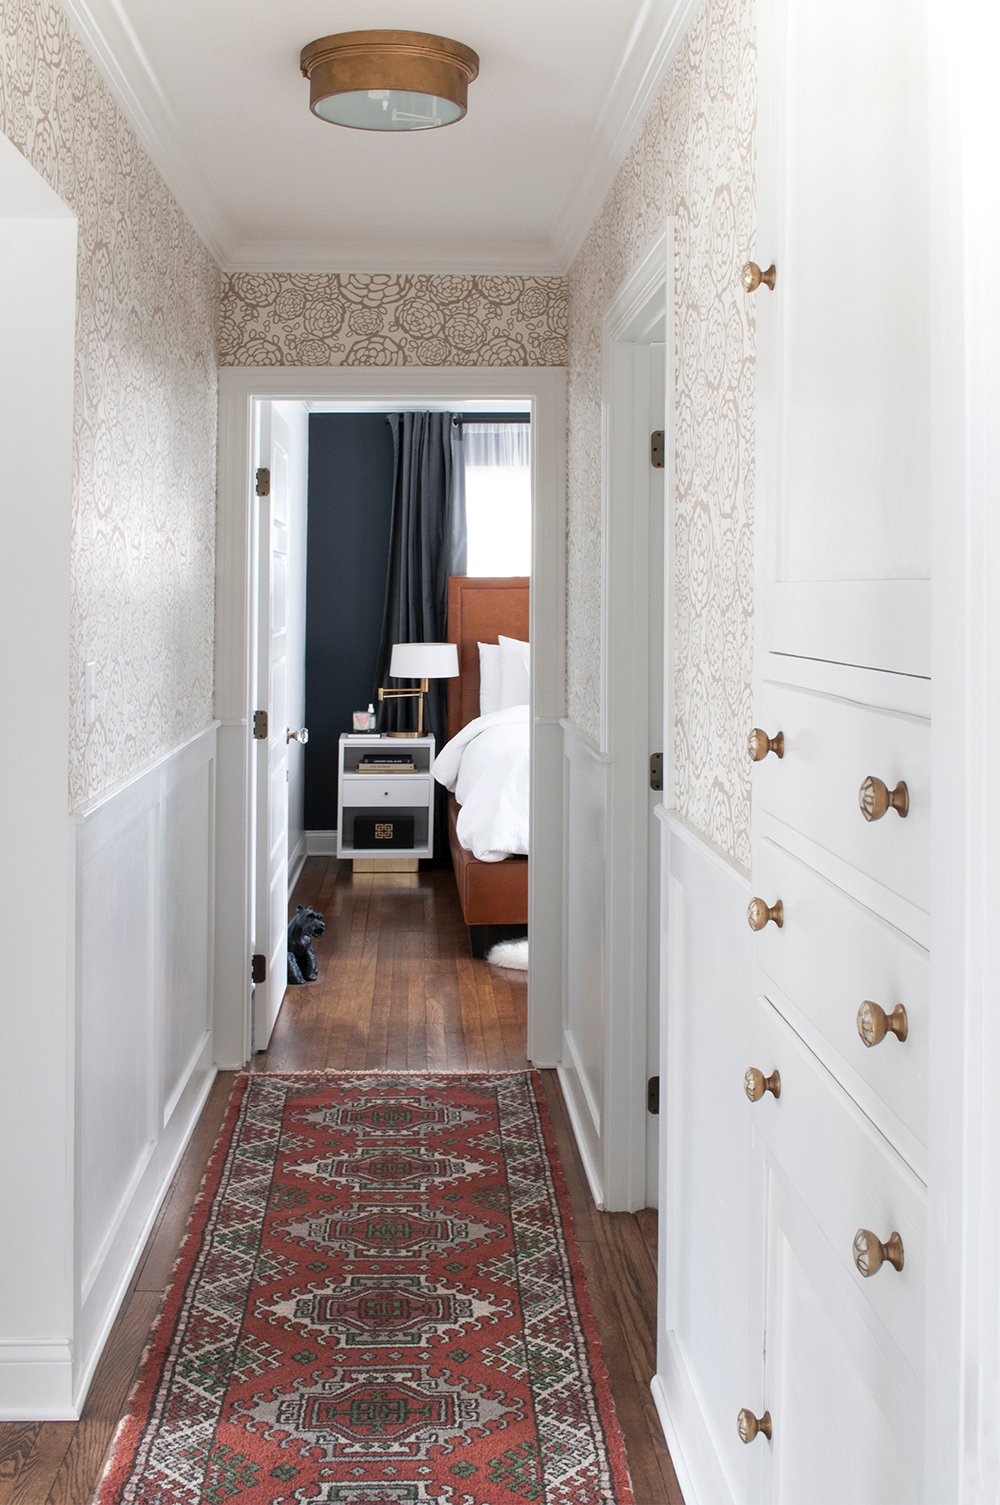
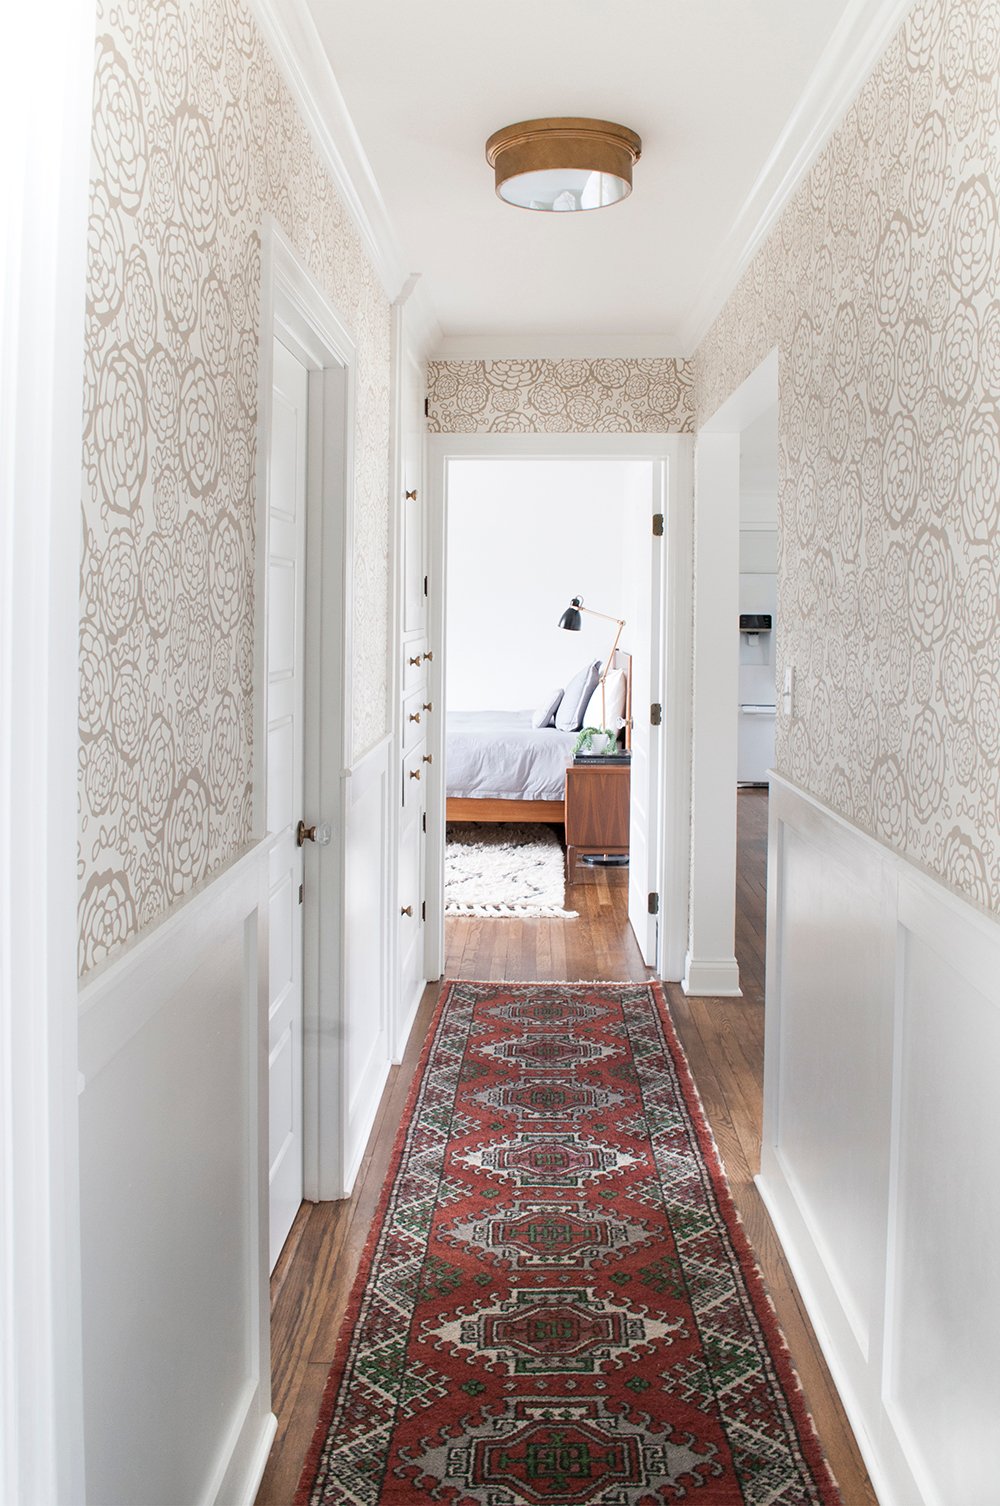
 You can also get a feel for how I transformed an inexpensive fixture in my old hallway using the same method. As I mentioned previously, depending on how you apply the product, you can achieve different looks. I went for more texture on the hallway light and applied multiple layers.
I still get SO many questions about that light fixture and where it was from. It looked really close to this designer fixture, but the truth was- I bought it at Home Depot for under $50. I actually first discovered Rub ‘N Buff on my friend Kristin’s blog.
 Have you guys ever used it? I can’t believe I forgot about it. It’s really a handy thing to have around. I’ve only used it on light fixtures, but I’m sure it would work for other small metal surfaces as well. This post is not sponsored or anything, I just wanted to share a hack that could save you guys some money. I’m a definitely a fan- especially for the ease and cost!
Wow! Beautiful! Would you recommend only using rub n buff for things/fixtures that aren’t touched often (i.e. a light fixture and not, say, a switch plate)? Or do you think I could get away with it? :)
I’ve honestly never tried it on anything other than light fixtures. I’d maybe test it out on something small or inexpensive to see how it holds up? I’d be interested to know!! xo
The transformation of the light fixture with Rub N Buff is “brilliant”! So much better, cleaner look than the metallic spray finish technique.
It definitely is my preference… it just looks more metallic!
I love Rub N Buff! Both of your fixtures look fantastic. Thanks for reminding me about this stuff! I’m currently looking for affordable light fixtures for our nursery project and this just opened up a bunch more possibilities!
I can’t believe I also forgot about it. Ha! It definitely opens up more possibilities for budget fixtures. Good luck with the nursery! xo
Do you recommend buffing with a soft cloth?
I just used a Bounty paper towel, but a soft cloth would probably work better!
OMG this is so helpful! I wish I knew about this sooner. Of course I literally just spray painted a sconce. Wasn’t my first choice but another thing I tried didn’t work great. Definitely giving the Rub N Buff a try.
Yay!! So glad you liked the post, Melissa. Let me know what you think once you give it a go! xo
Thank you so much for this post! This is exactly what I wanted to do to the silver mid-century modern light fixture we have in our dining room. I was planning on spray painting it bronze but now I’m totally going to do this!
-Felicia
http://www.casalibrablog.com
Definitely go this route instead of spray paint- I think you’ll be happier! Good luck Felicia! :)
The reviews for the light fixture itself are pretty dismal! Have you had any issues with yours?
They’re not installed yet. I do have a slightly different model, as the one I have has now been discontinued. They’ve been in storage for a bit. I can say the linked fixture for my hallway worked perfectly and I had zero issues with it!
WOW!
Great post Sarah!
Thanks girlfriend!! xox
Do you think this product can be used on swing-arm sconces? I purchased brass ones off amazon a couple of months ago but the design of the bedroom has taken a bit of a turn since then and now I’m thinking dark bronze or black would look better… thoughts?
I’d test it in a small area first, but it should be ok! My only concern is the wear and tear of the swing arm movement, or how often you’re touching it.
That’s an AMAZING tip!! Wow…so beautiful!
Thank you, Jen!!
This is quite possibly the best tip I’ve seen in a while. I have an old, ugly light fixture that I can’t replace since we’re renovating that room eventually…didn’t seem worth it to buy an interim fixture. This may do the trick though!
Definitely give it a try and let me know how it works! Thanks, Kristin! xo
I have a bad “habit” of buying vintage paintings on ebay and a few years back I got an oil painting that arrived with a really harsh gold color frame. It didn’t even work well with the painting, and worse yet, it didn’t work with my room. So I turned to pewter rub ‘n buff and changed that gaudy gold into sleek silvery pewter. Voila!
I think that’s a FUN habit. Haha!! Rub ‘n Buff is pretty amazing- using it on a frame is another good idea. Thanks, Becky! xox
Hi Sarah,
Do you think this technique could be used on door hinges? We’re looking at purchasing door knobs similar to yours from Nostalgic Hardware in antique brass. That said, the knobs are pretty expensive and I’d like to be able to use the hinges that come with the new doors, if possible. Any thoughts? Thanks!
I definitely think it could be used on hinges! It’s worth a shot anyway… if it doesn’t hold up, you could always swap them out later.
The light linked appears to be different than the light you’ve used in your laundry room. Where is the light in your laundry room from?
The one that I have was the older version of the same light (I had it tucked away in storage and sort of forgot about it)- they just updated it because the one I have was discontinued. Sorry!
Hey Sarah! Love this post! Hope you are still replying to comments from this post. What are your thoughts on integrated led lights? I know they’re suppose to last long but inevitably everything breaks at some point. Would you rather choose a light fixture that has replaceable bulbs or an integrated led light? Hope you can shed some light on this.
Hi Tina, thank you! I don’t have a problem with integrated LED lights- they’re eco friendly, have lots of color options, and typically they last for a very long time. Even once they burn out, I’m sure replacements are an option from the manufacturer? I typically focus more on how a light fixture looks from an aesthetic perspective and if it had an integrated LED bulb and I liked the fixture, that wouldn’t stop me from purchasing it. I hope that helps? xox
Hi, Sarah!
You inspired me to change the color of the canopy and downrod of a couple amazing rock crystal pendants I got at the Restoration Hardware outlet. I’ve tried using my finger, a piece of soft microfiber cloth, and a sponge brush, but I cannot come close to achieving a texture which buffs smooth (or gives the piece any coverage). I’ve accepted the fact that I’m going to have to spray paint these parts in a similar color prior to attempting again to get the Rub n Buff on and looking good. I cannot figure out what I’m doing wrong. I don’t use too much, and have tried both going with the “grain” of the brushed chrome surface and just going across in a straight line. Help! 🙏🏻
Hi Julia! Hmm… this is tricky, because I’ve never had that happen before. Was the fixture clean before you applied the Rub n Buff? Is the Rub N Buff old or expired? If you layer it on too heavy, it can look more textured or aged. I’ve found that you kind of have to get it right on the first rub because layering doesn’t work well for the smooth look. I wish I had an answer or could be more helpful. I’m sorry!
Do you know if a black finish on metal sconces can be changed to bronze?
It can!