How to Paint a Dresser Like a Pro
If you’ve ever wanted to paint an old dresser like a pro, but don’t own a paint sprayer- this post is for you. I recently refinished a vintage dresser using nothing more than a brush, foam roller, and my favorite self leveling paint. The finish looks sprayed and is so smooth… not a brush stroke in sight. It’s streak-free, durable, and looks completely custom. This method contains no complicated steps, just good prep and the right technique. Let me walk you through exactly how I did it- and be sure to save this for your next thrifted furniture project…

I grabbed this dresser from Facebook Marketplace for the nursery. I wanted something with character and a classic shape. This vintage Ethan Allen dresser fit the space and the budget. If you missed our news, or the latest in the nursery renovation, be sure to catch up here…
The Before
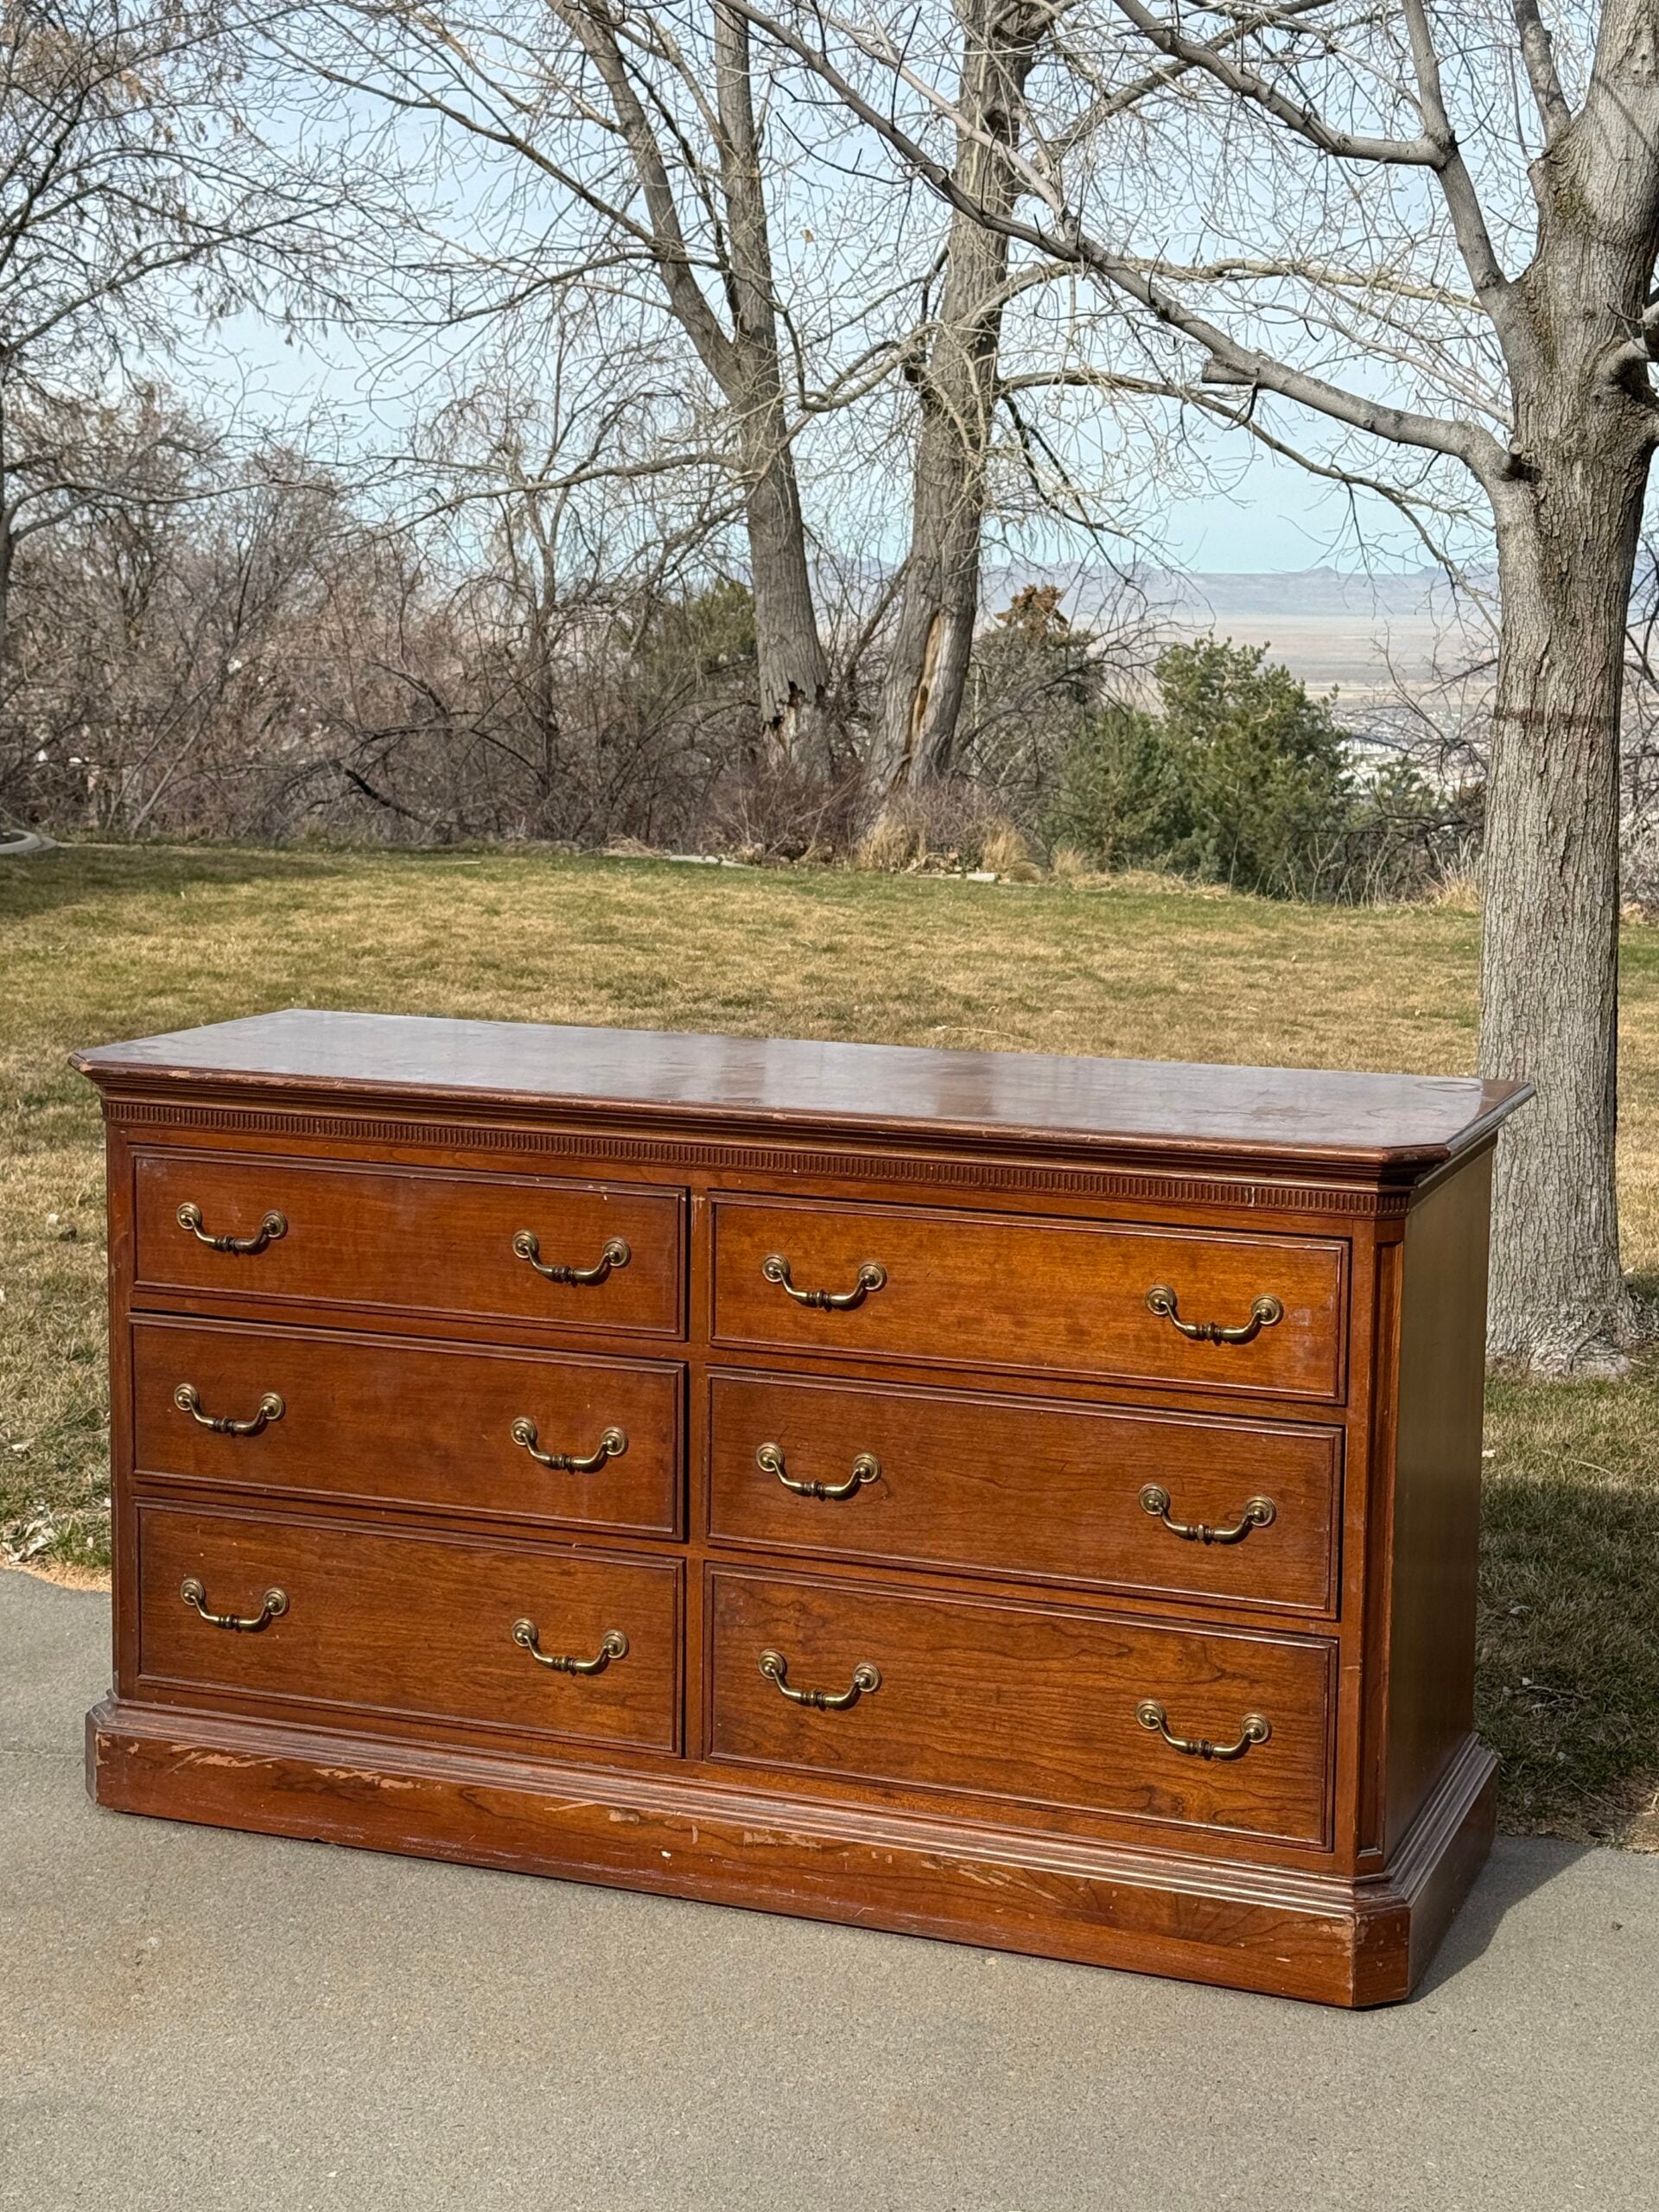
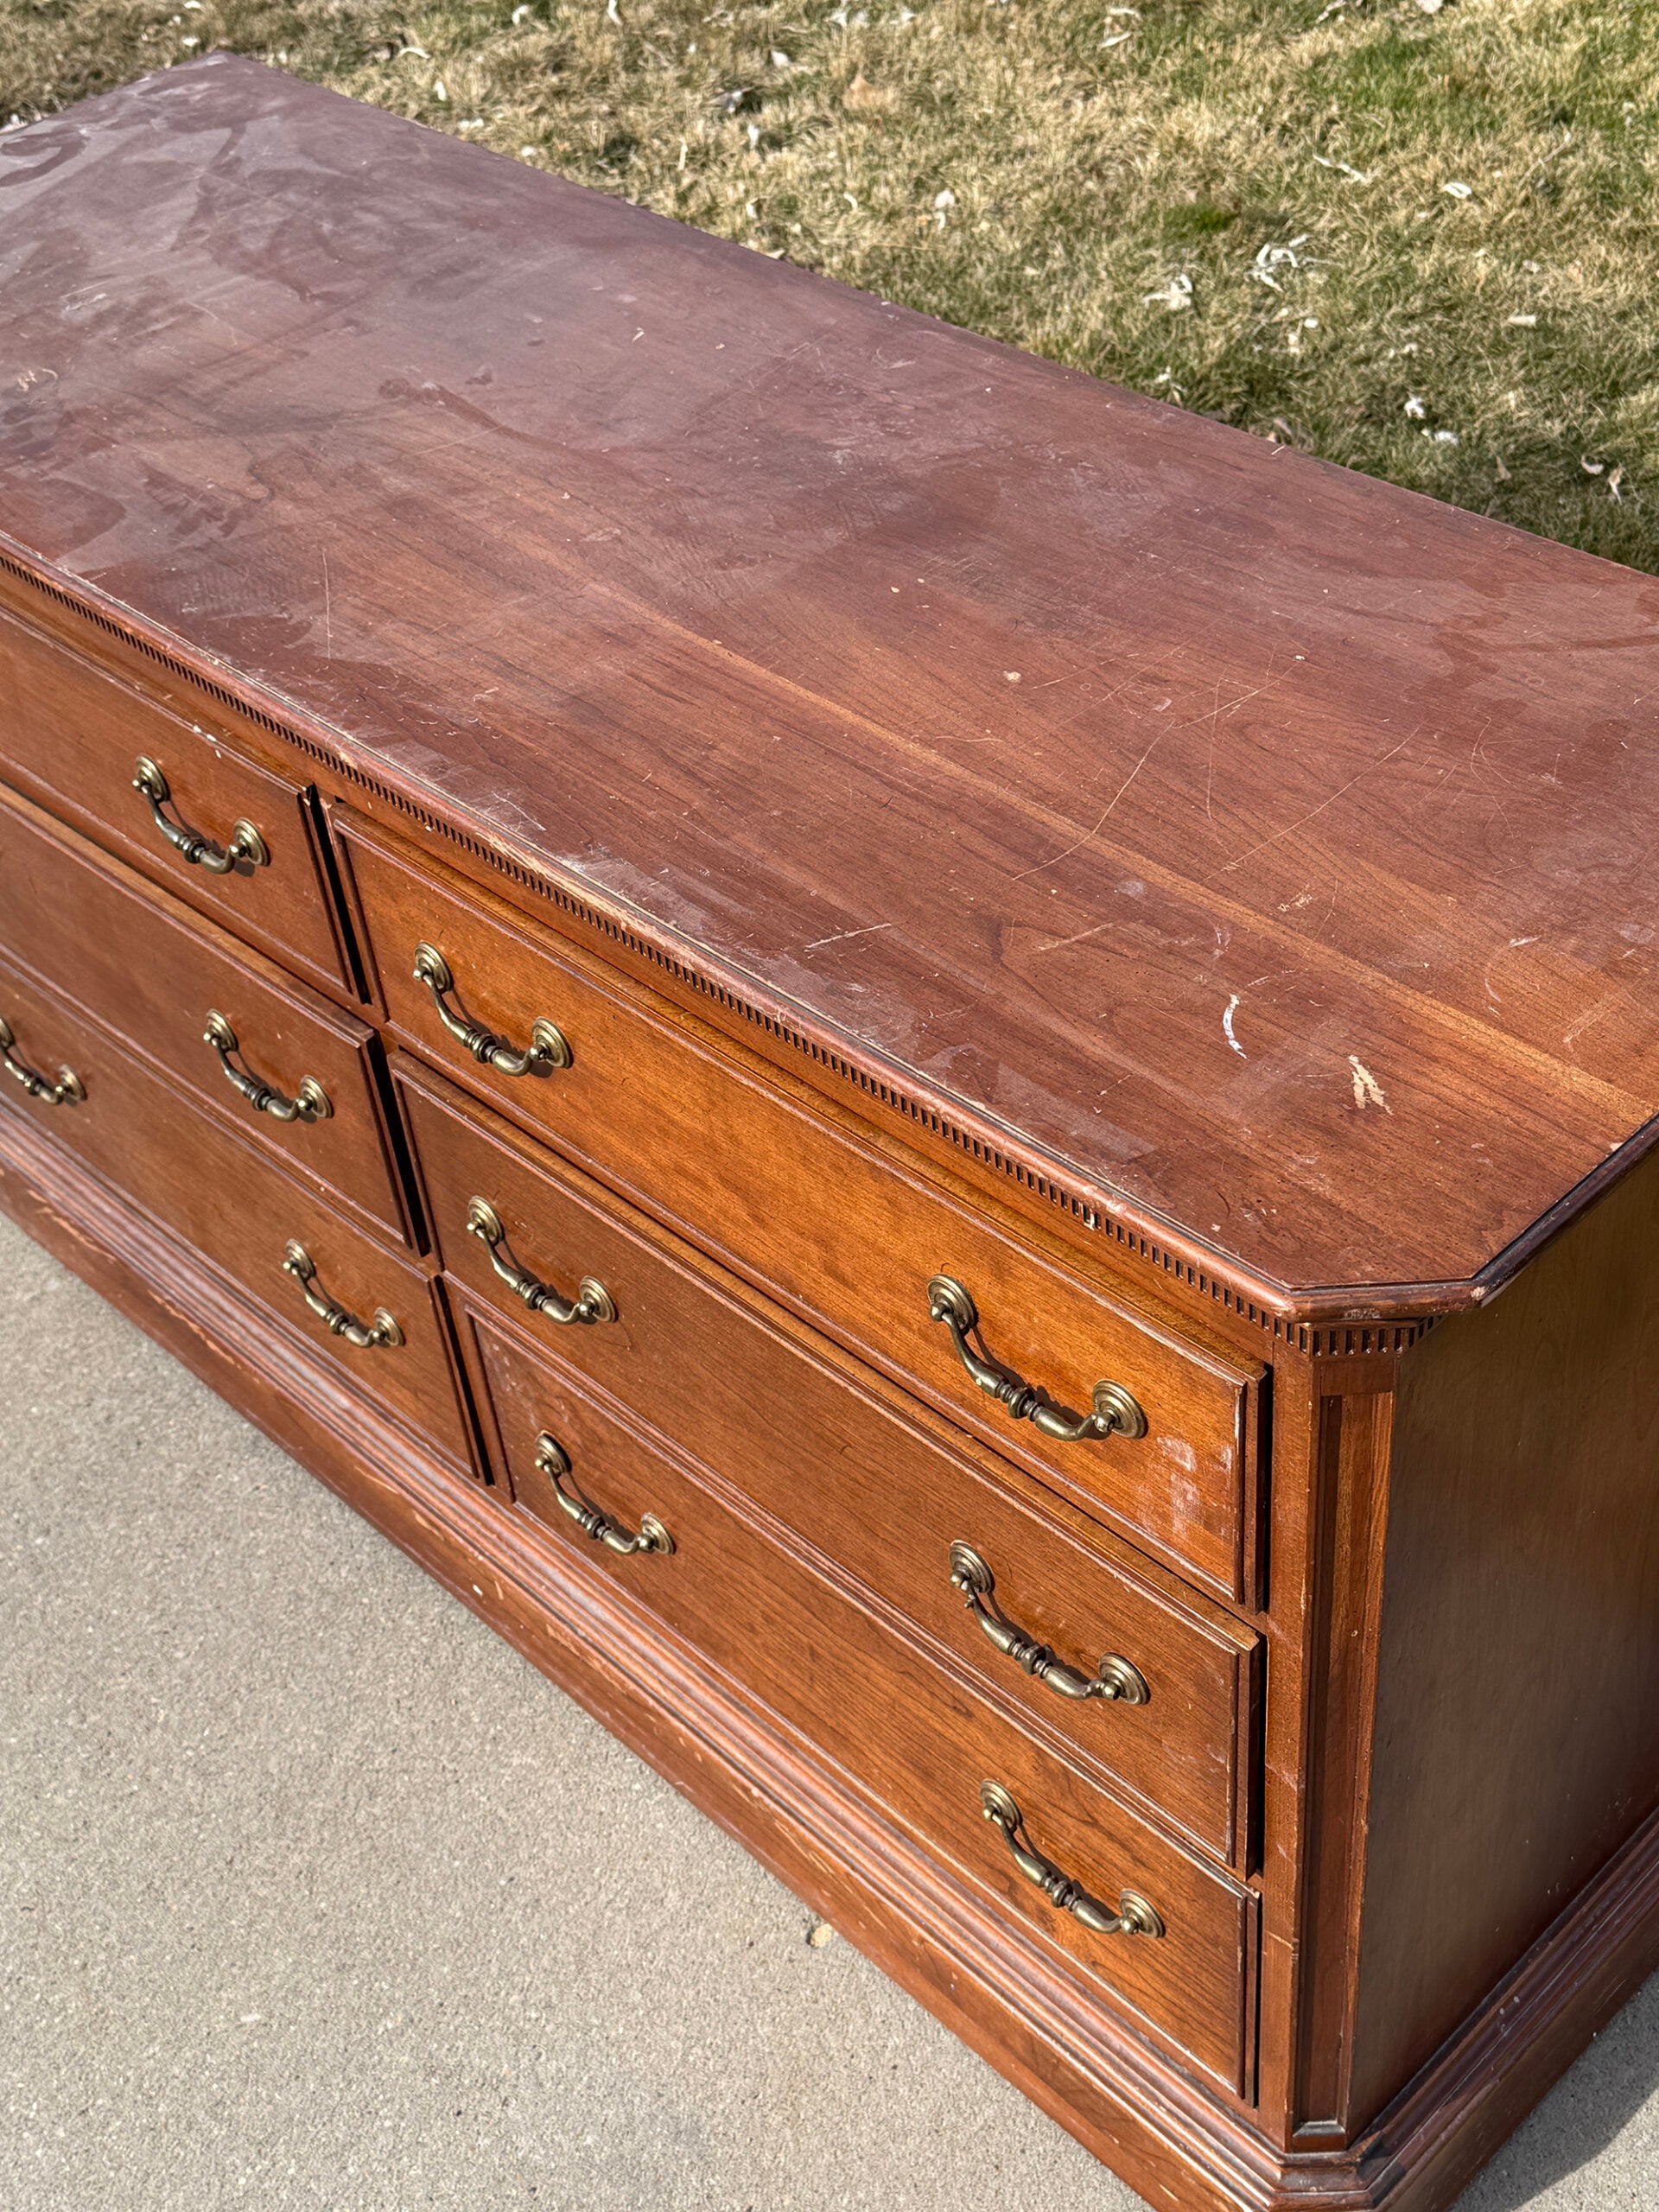
This vintage dresser had a beautiful silhouette and solid wood construction, but the finish looked rough. From scuffs and scratches to nail polish stains, the wood finish had seen better days, and the hardware needed attention. Whenever I find a piece like this, I focus on the bones first. If the shape and craftsmanship look good, it’s worth saving! This one had so much potential… it just needed a fresh start.
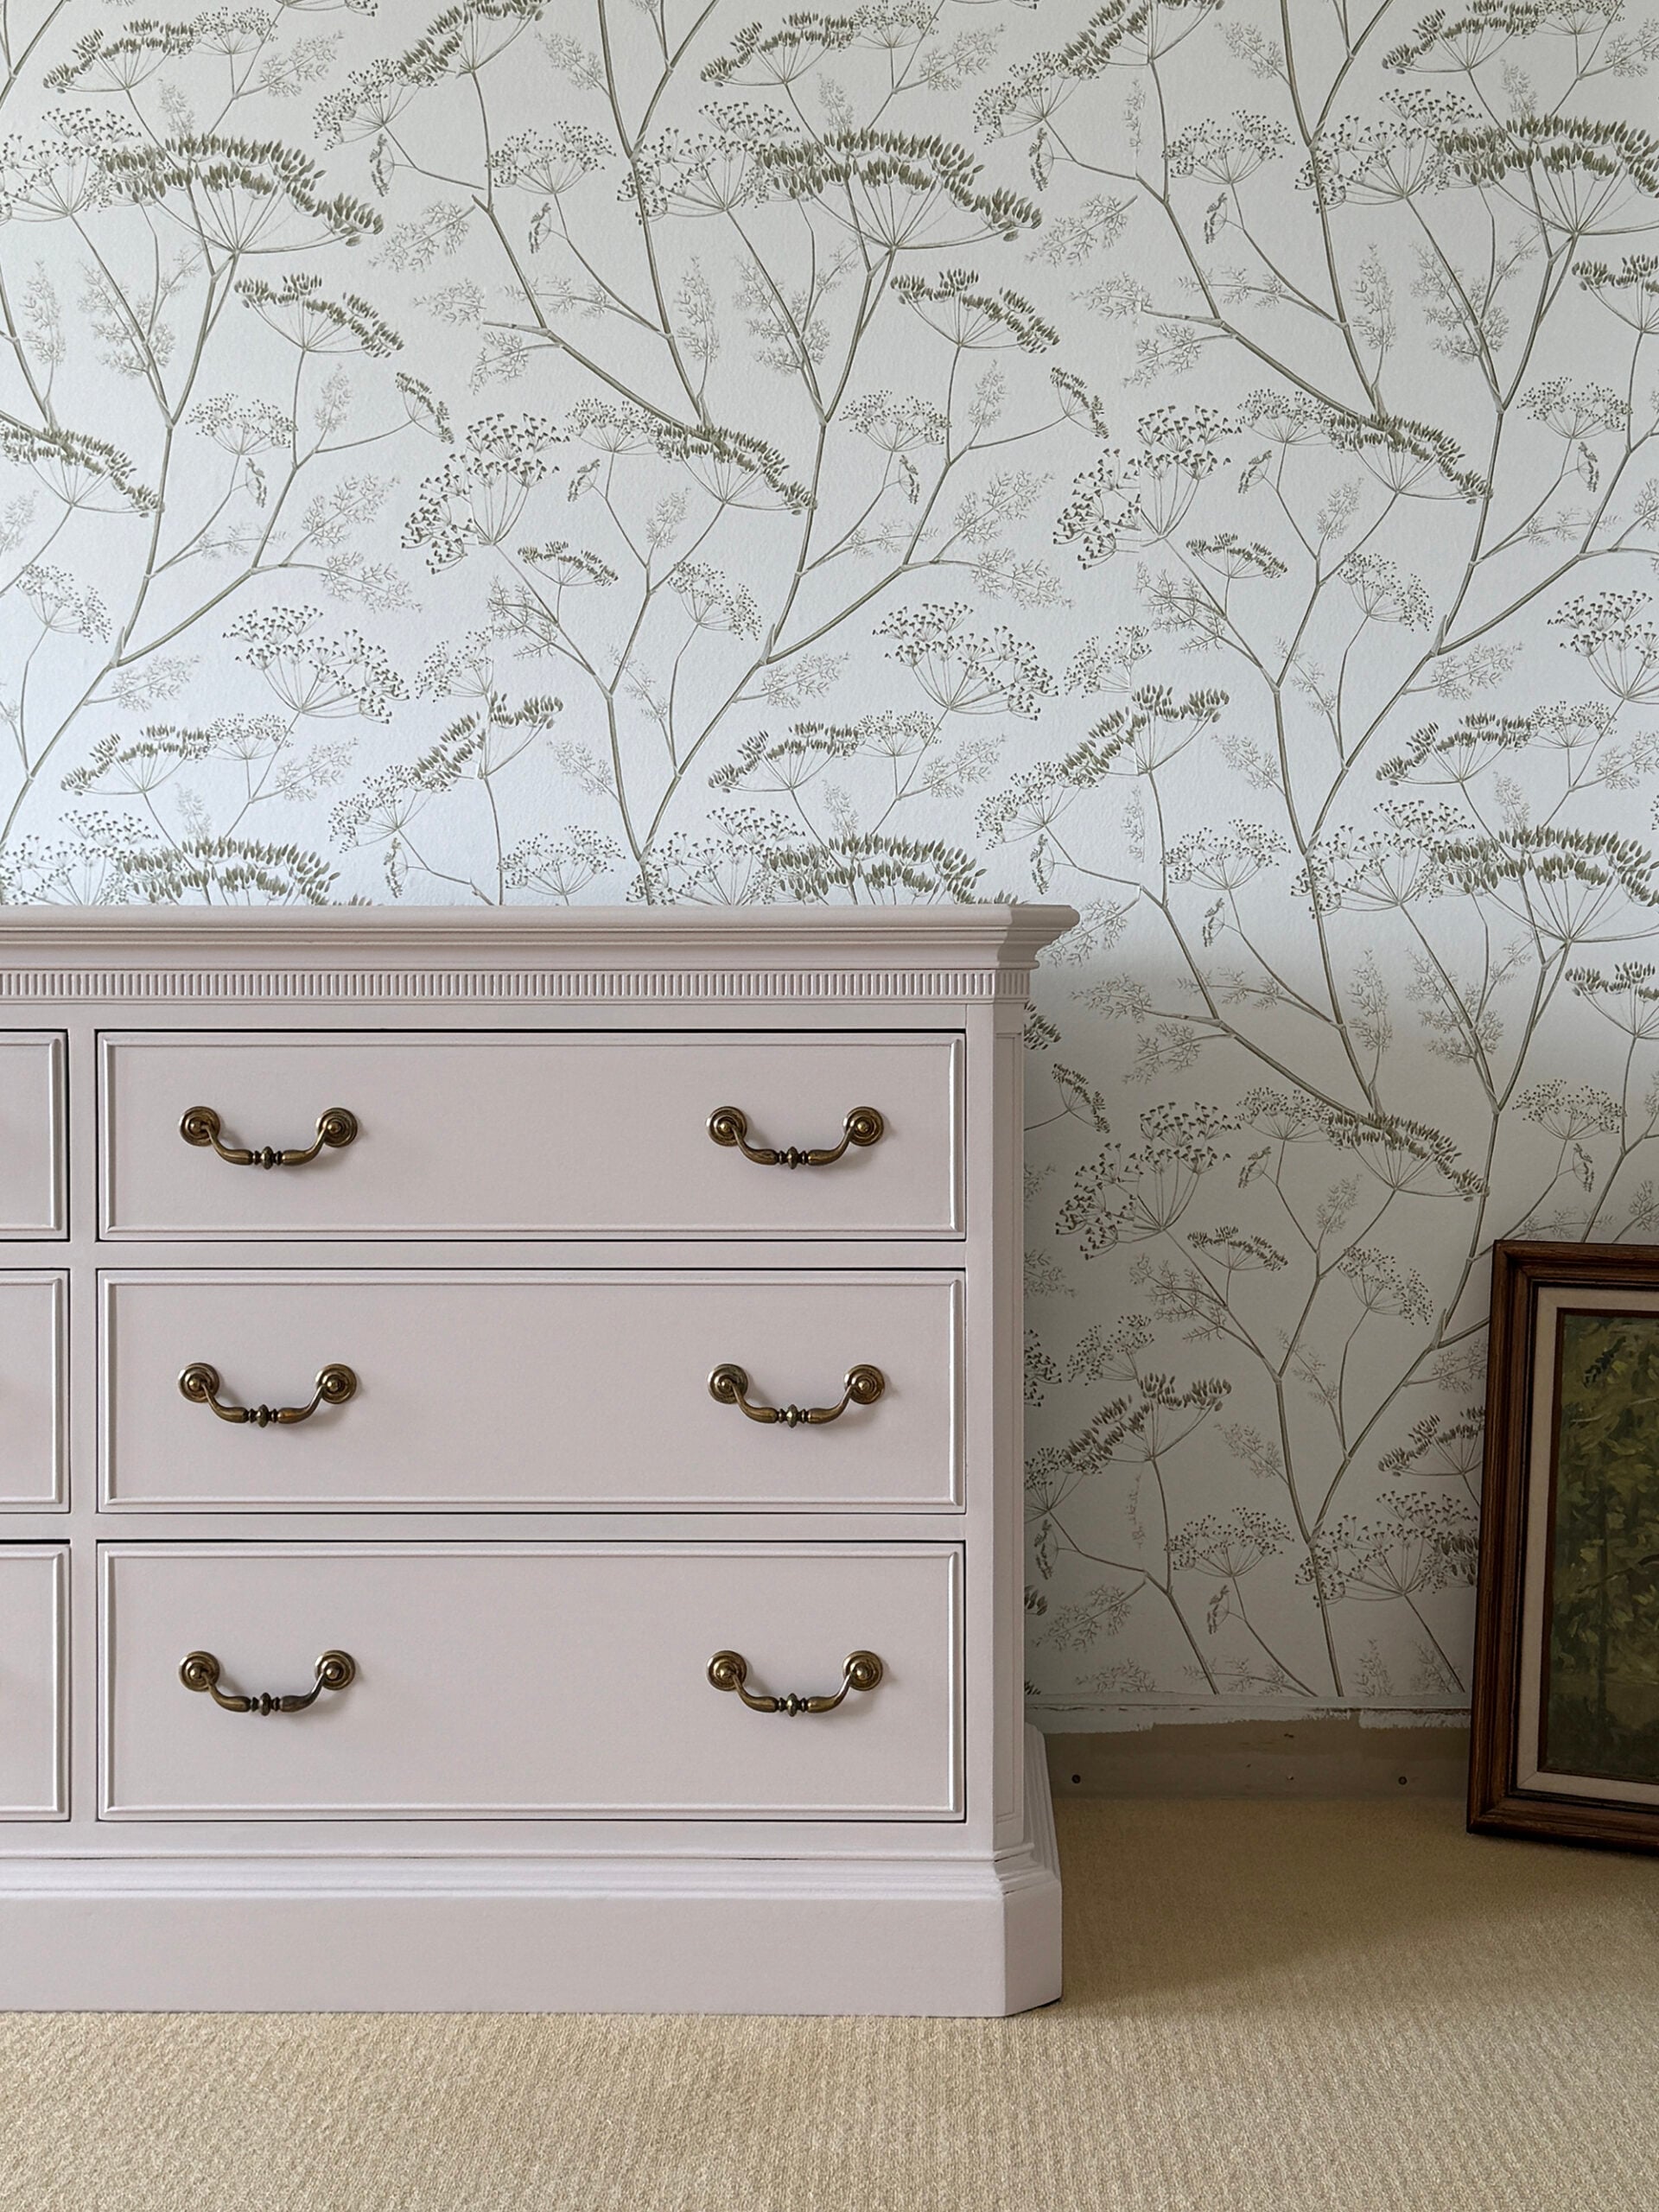
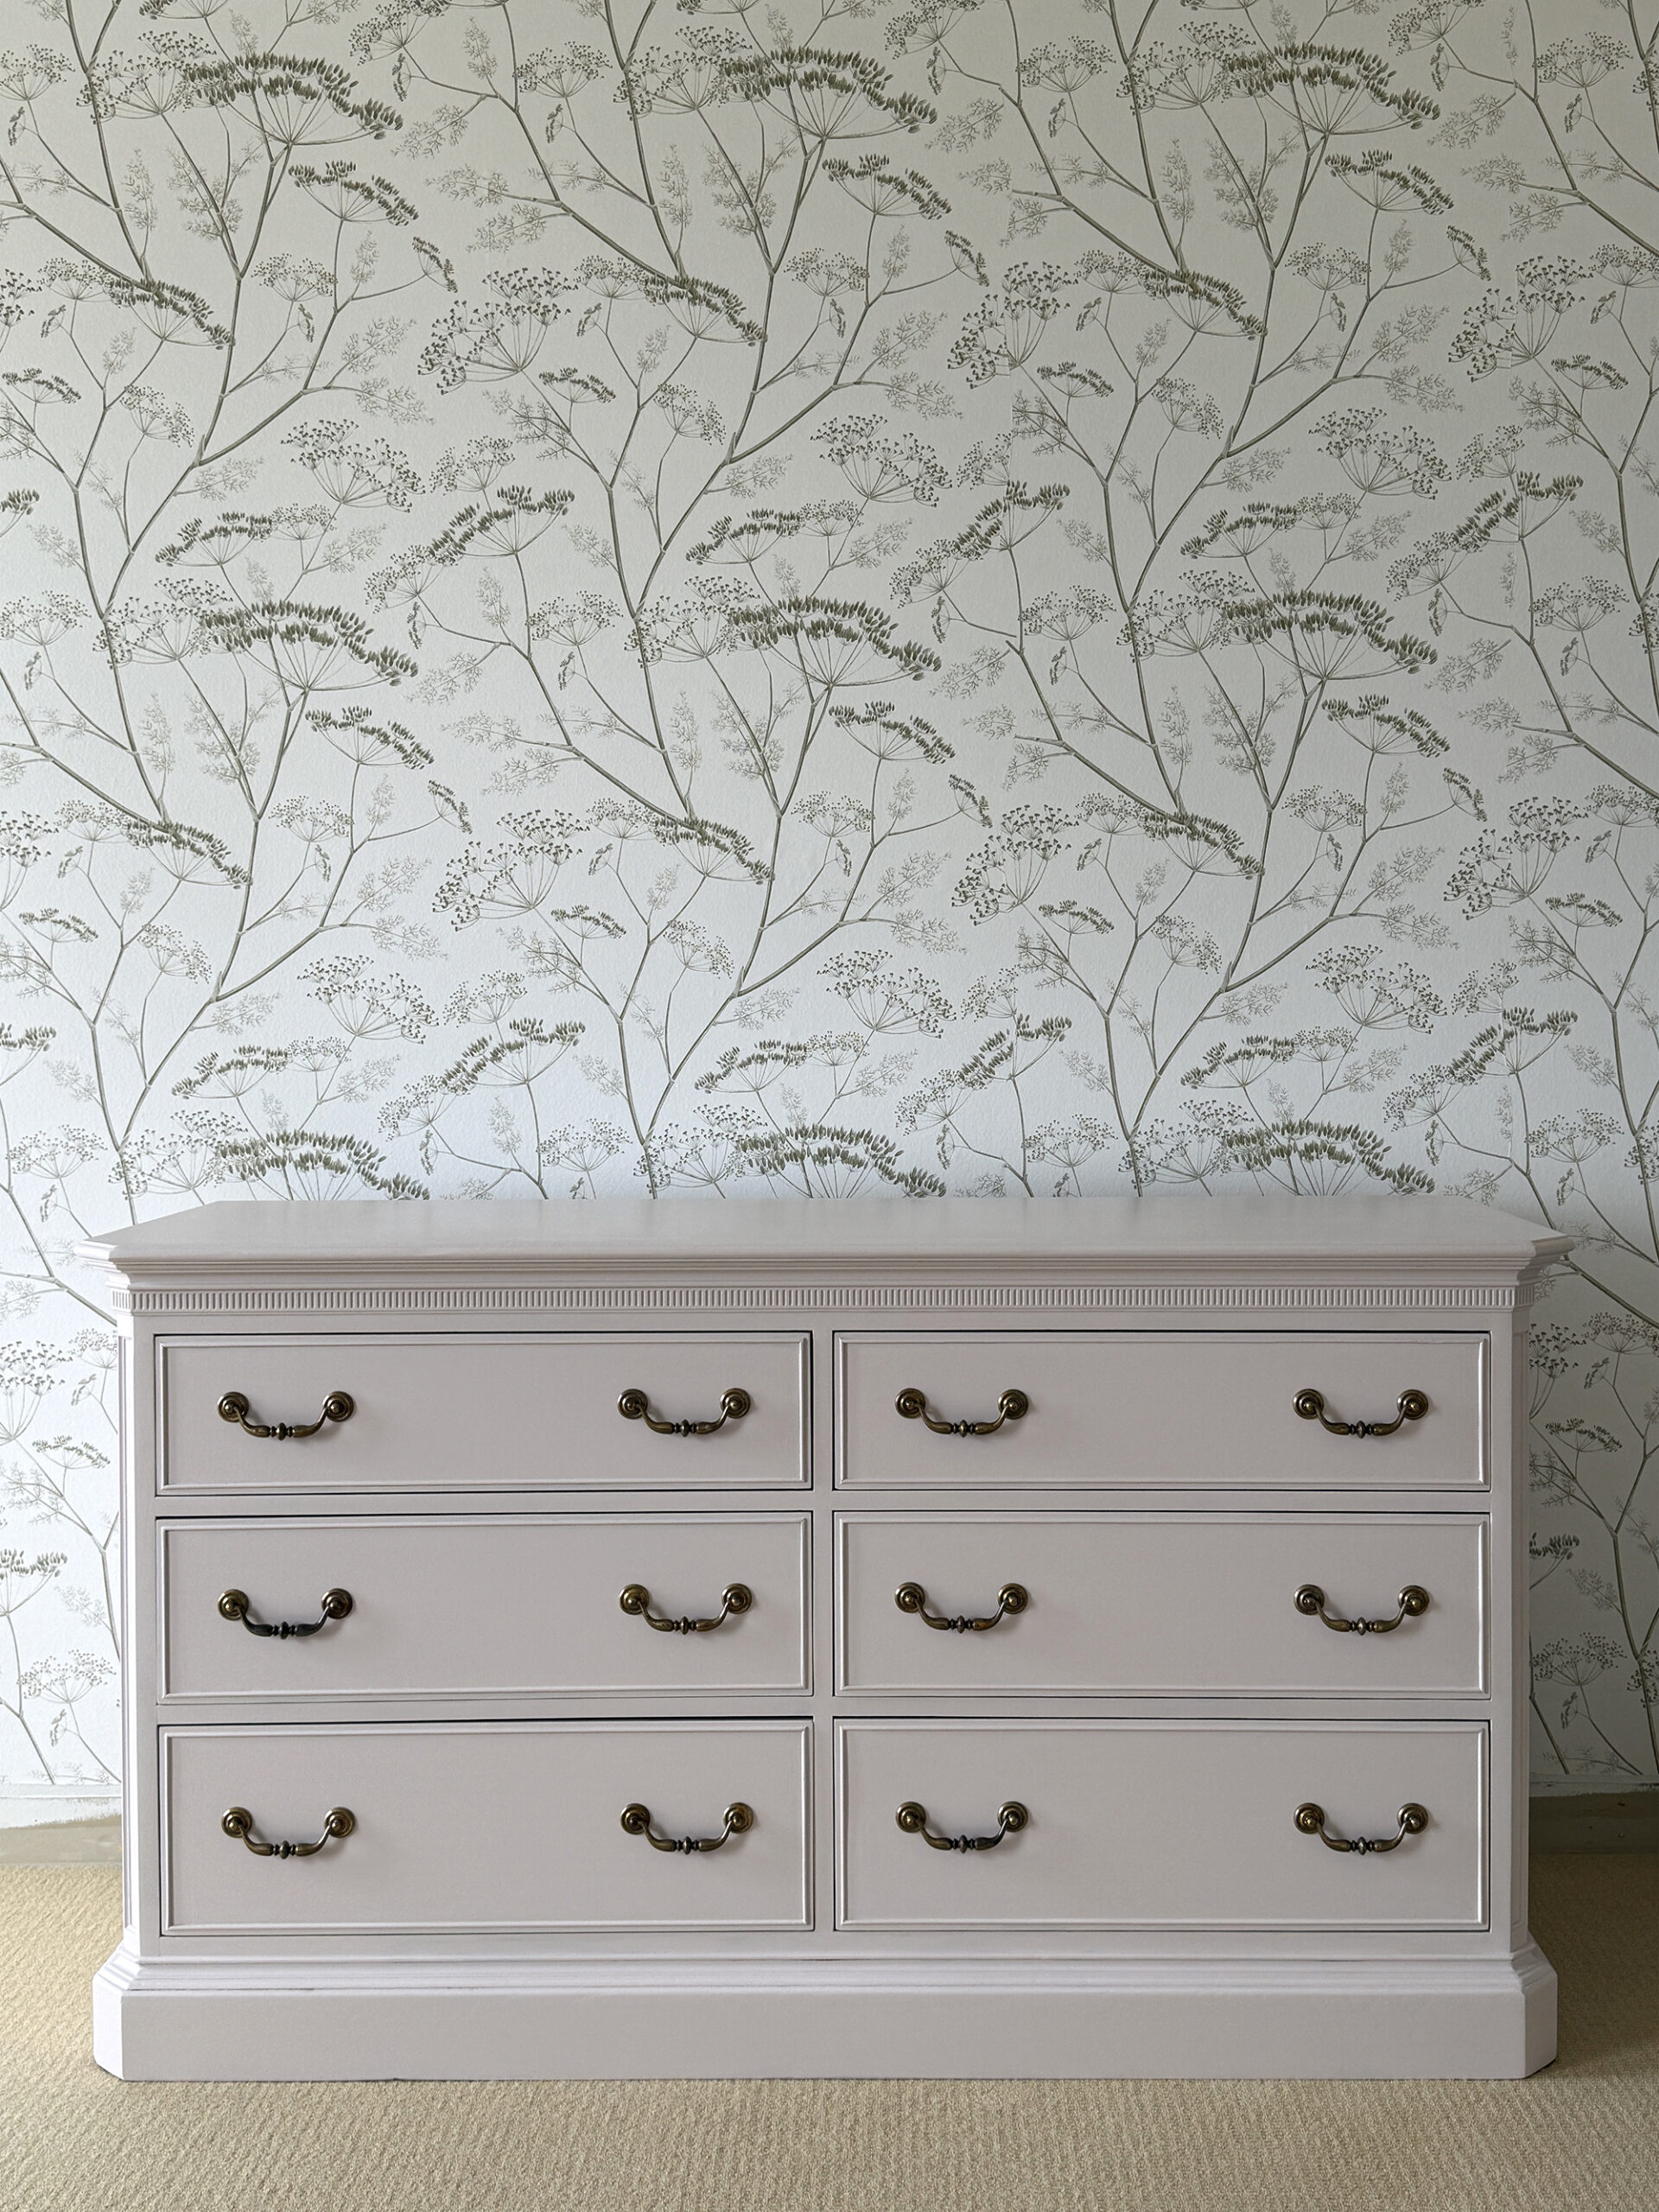
The After
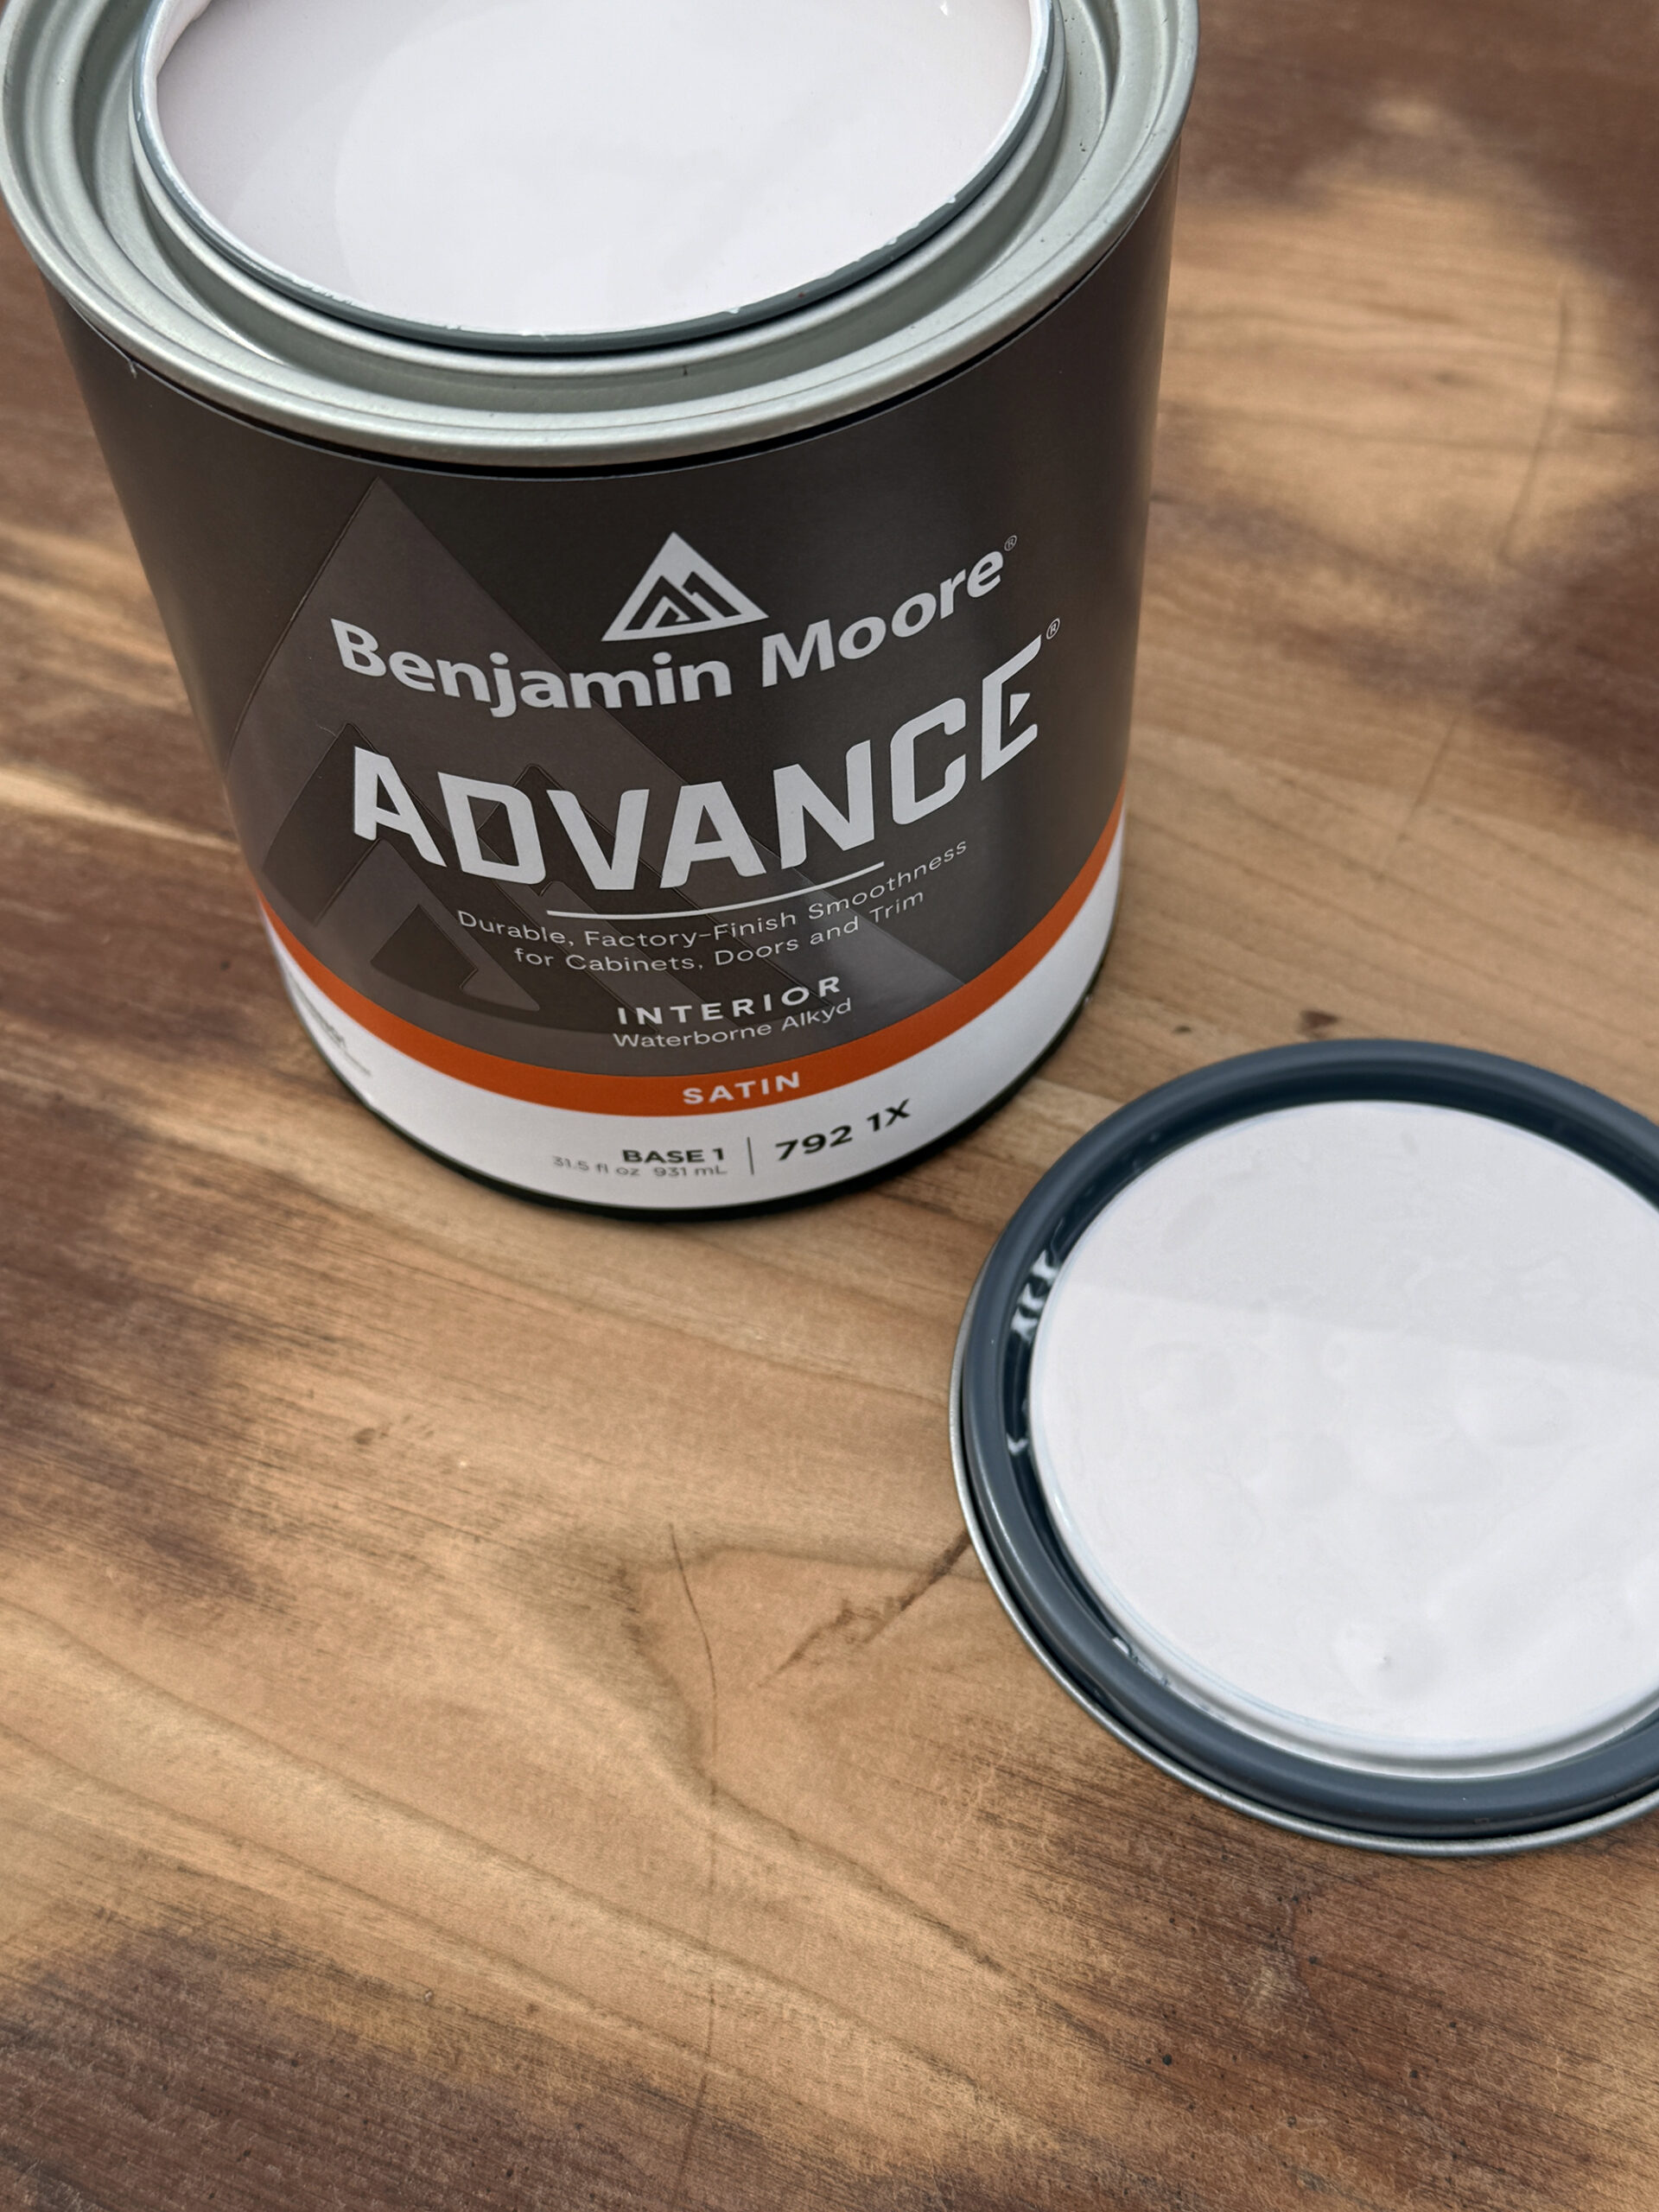
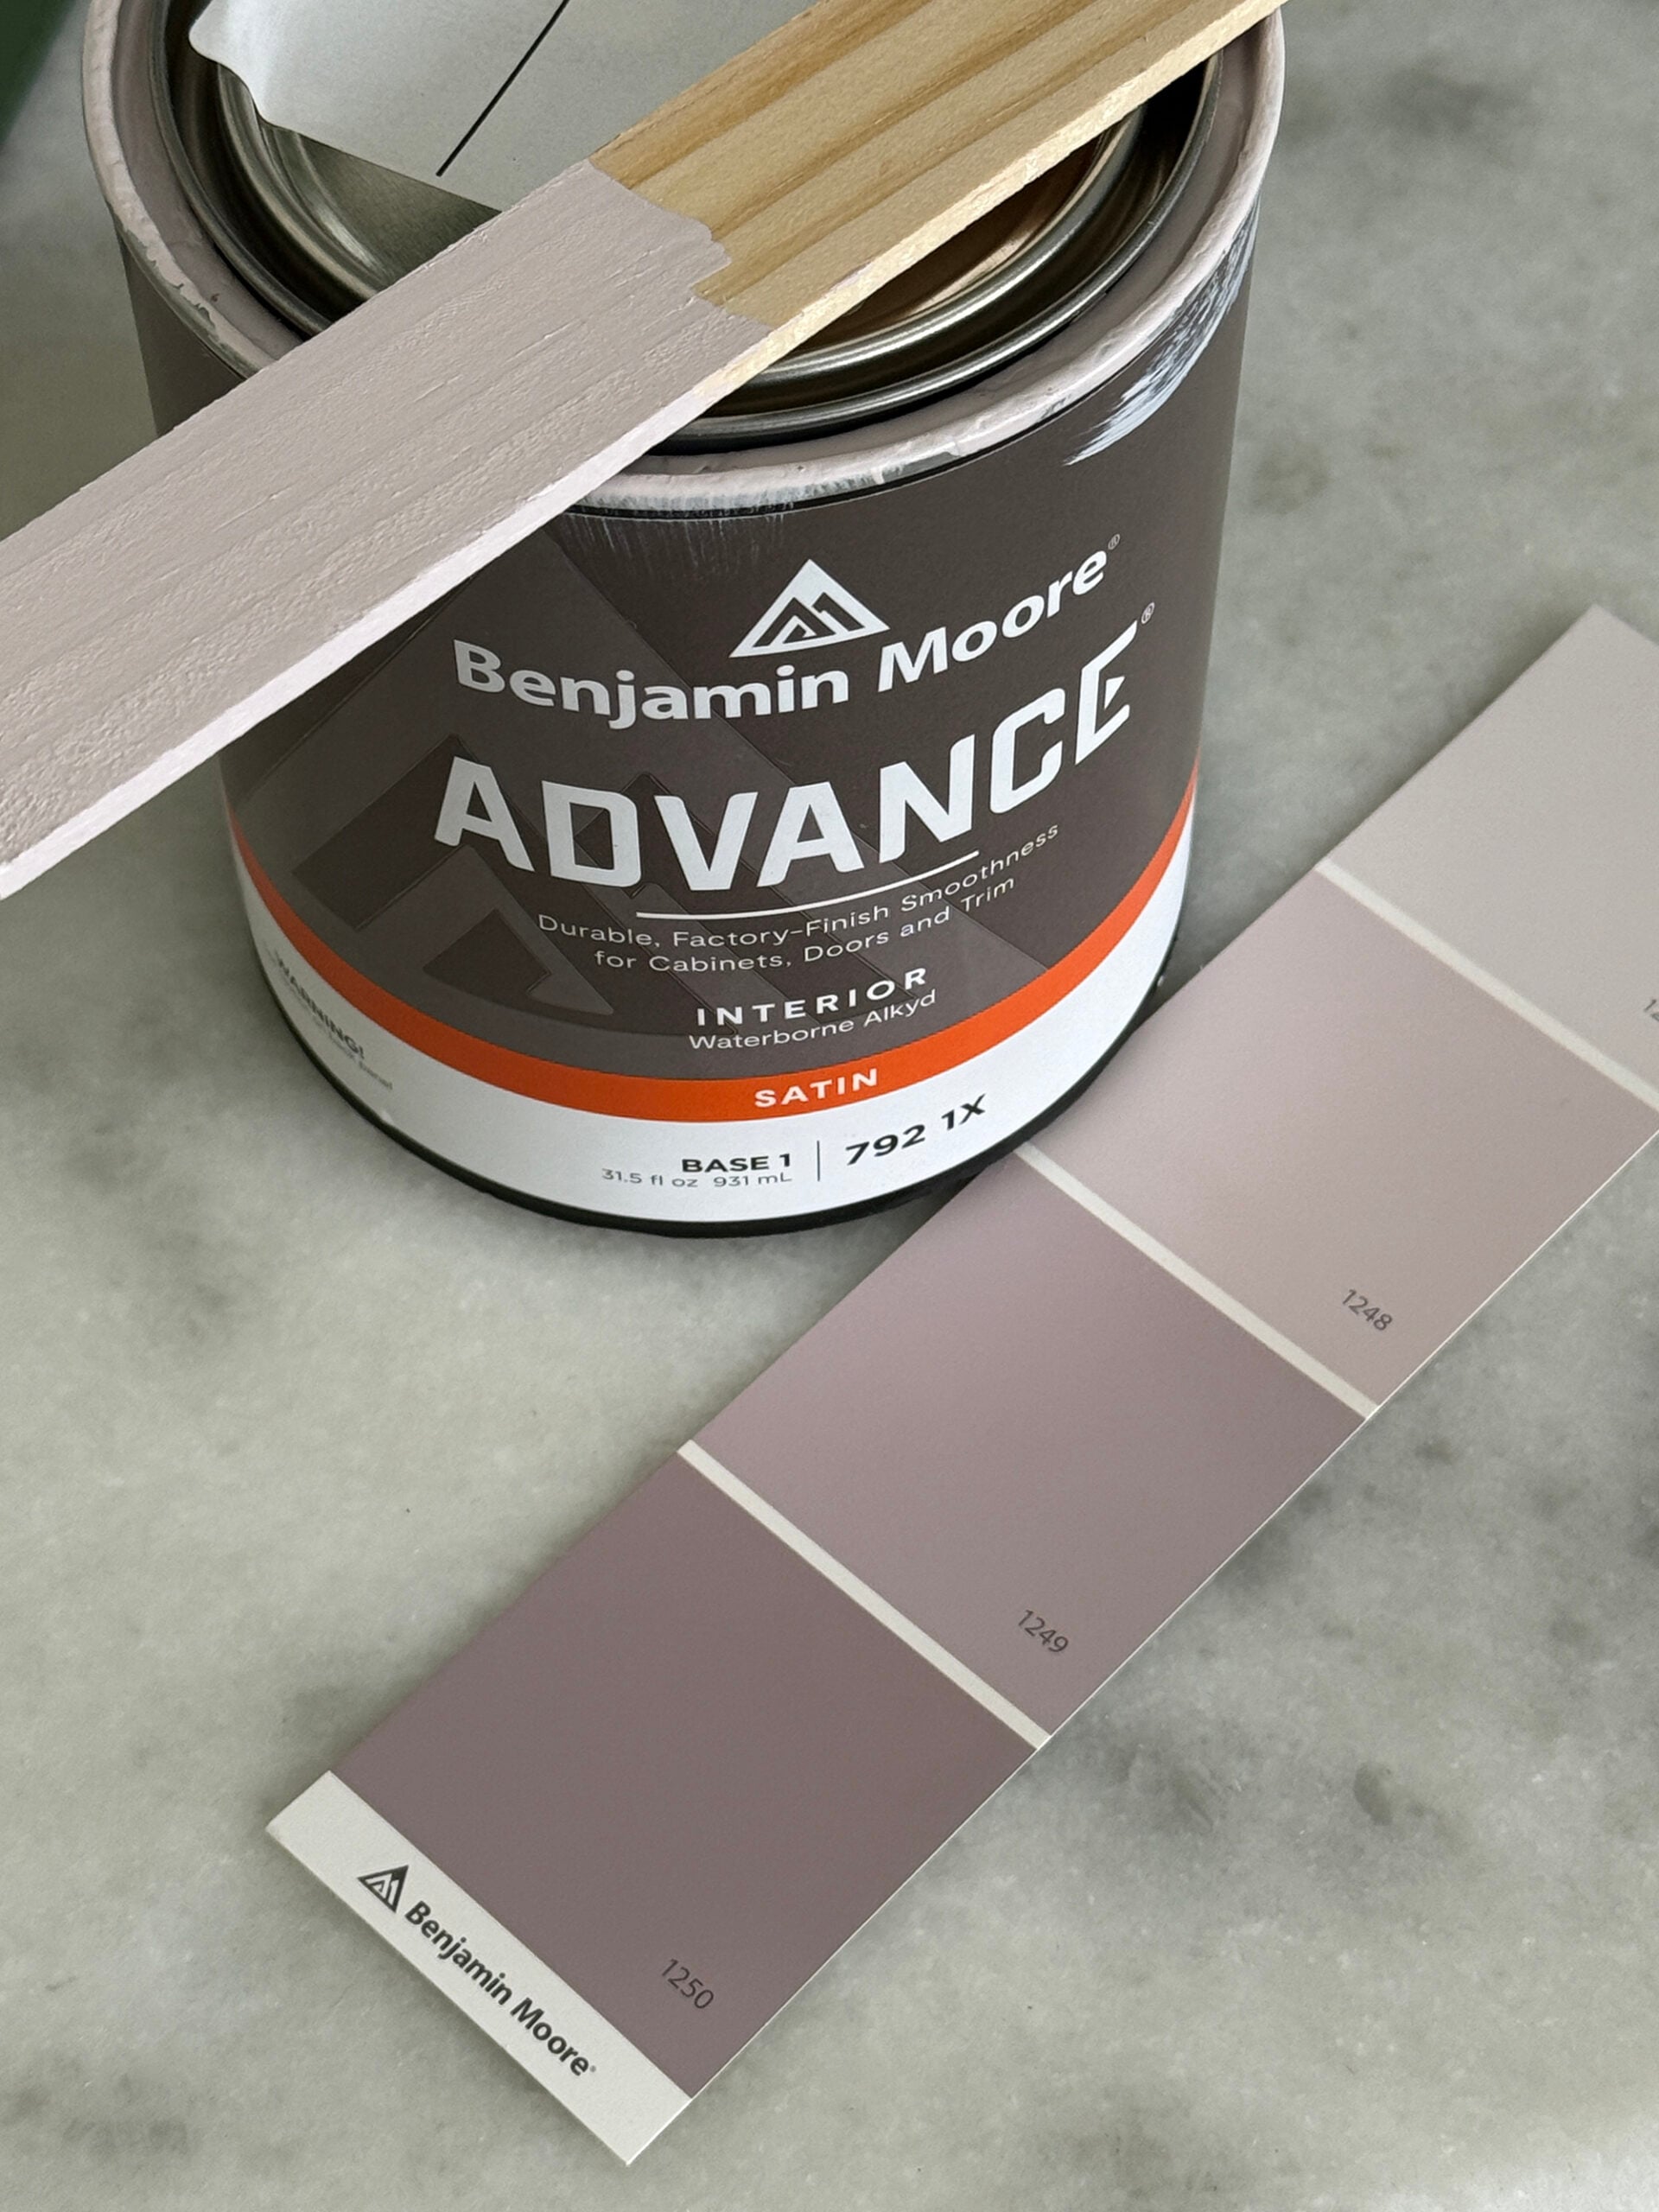
I painted the dresser in Benjamin Moore Advance in satin, in the color Organdy. It’s a soft, dusty neutral that works in almost any space. Not too gray. Not too creamy. It felt like the perfect muted lilac blush hue for the nursery. The finish leveled out beautifully and cured to a hard, durable surface that can actually handle everyday use. Here’s exactly how to paint a dresser like a pro… my tried and true process.
Tools and Materials I Used
You really don’t need much to paint an old piece of furniture. I’m guessing you already have most of these items to get started… no paint sprayer required!
- Benjamin Moore Advance paint (I used the color Organdy, in satin)
- High quality angled brush or smaller brushes for details
- High density foam roller (I like the 4″ size)
- Sanding blocks
- Clean cloth or towel for dust removal
- Screwdriver for hardware removal
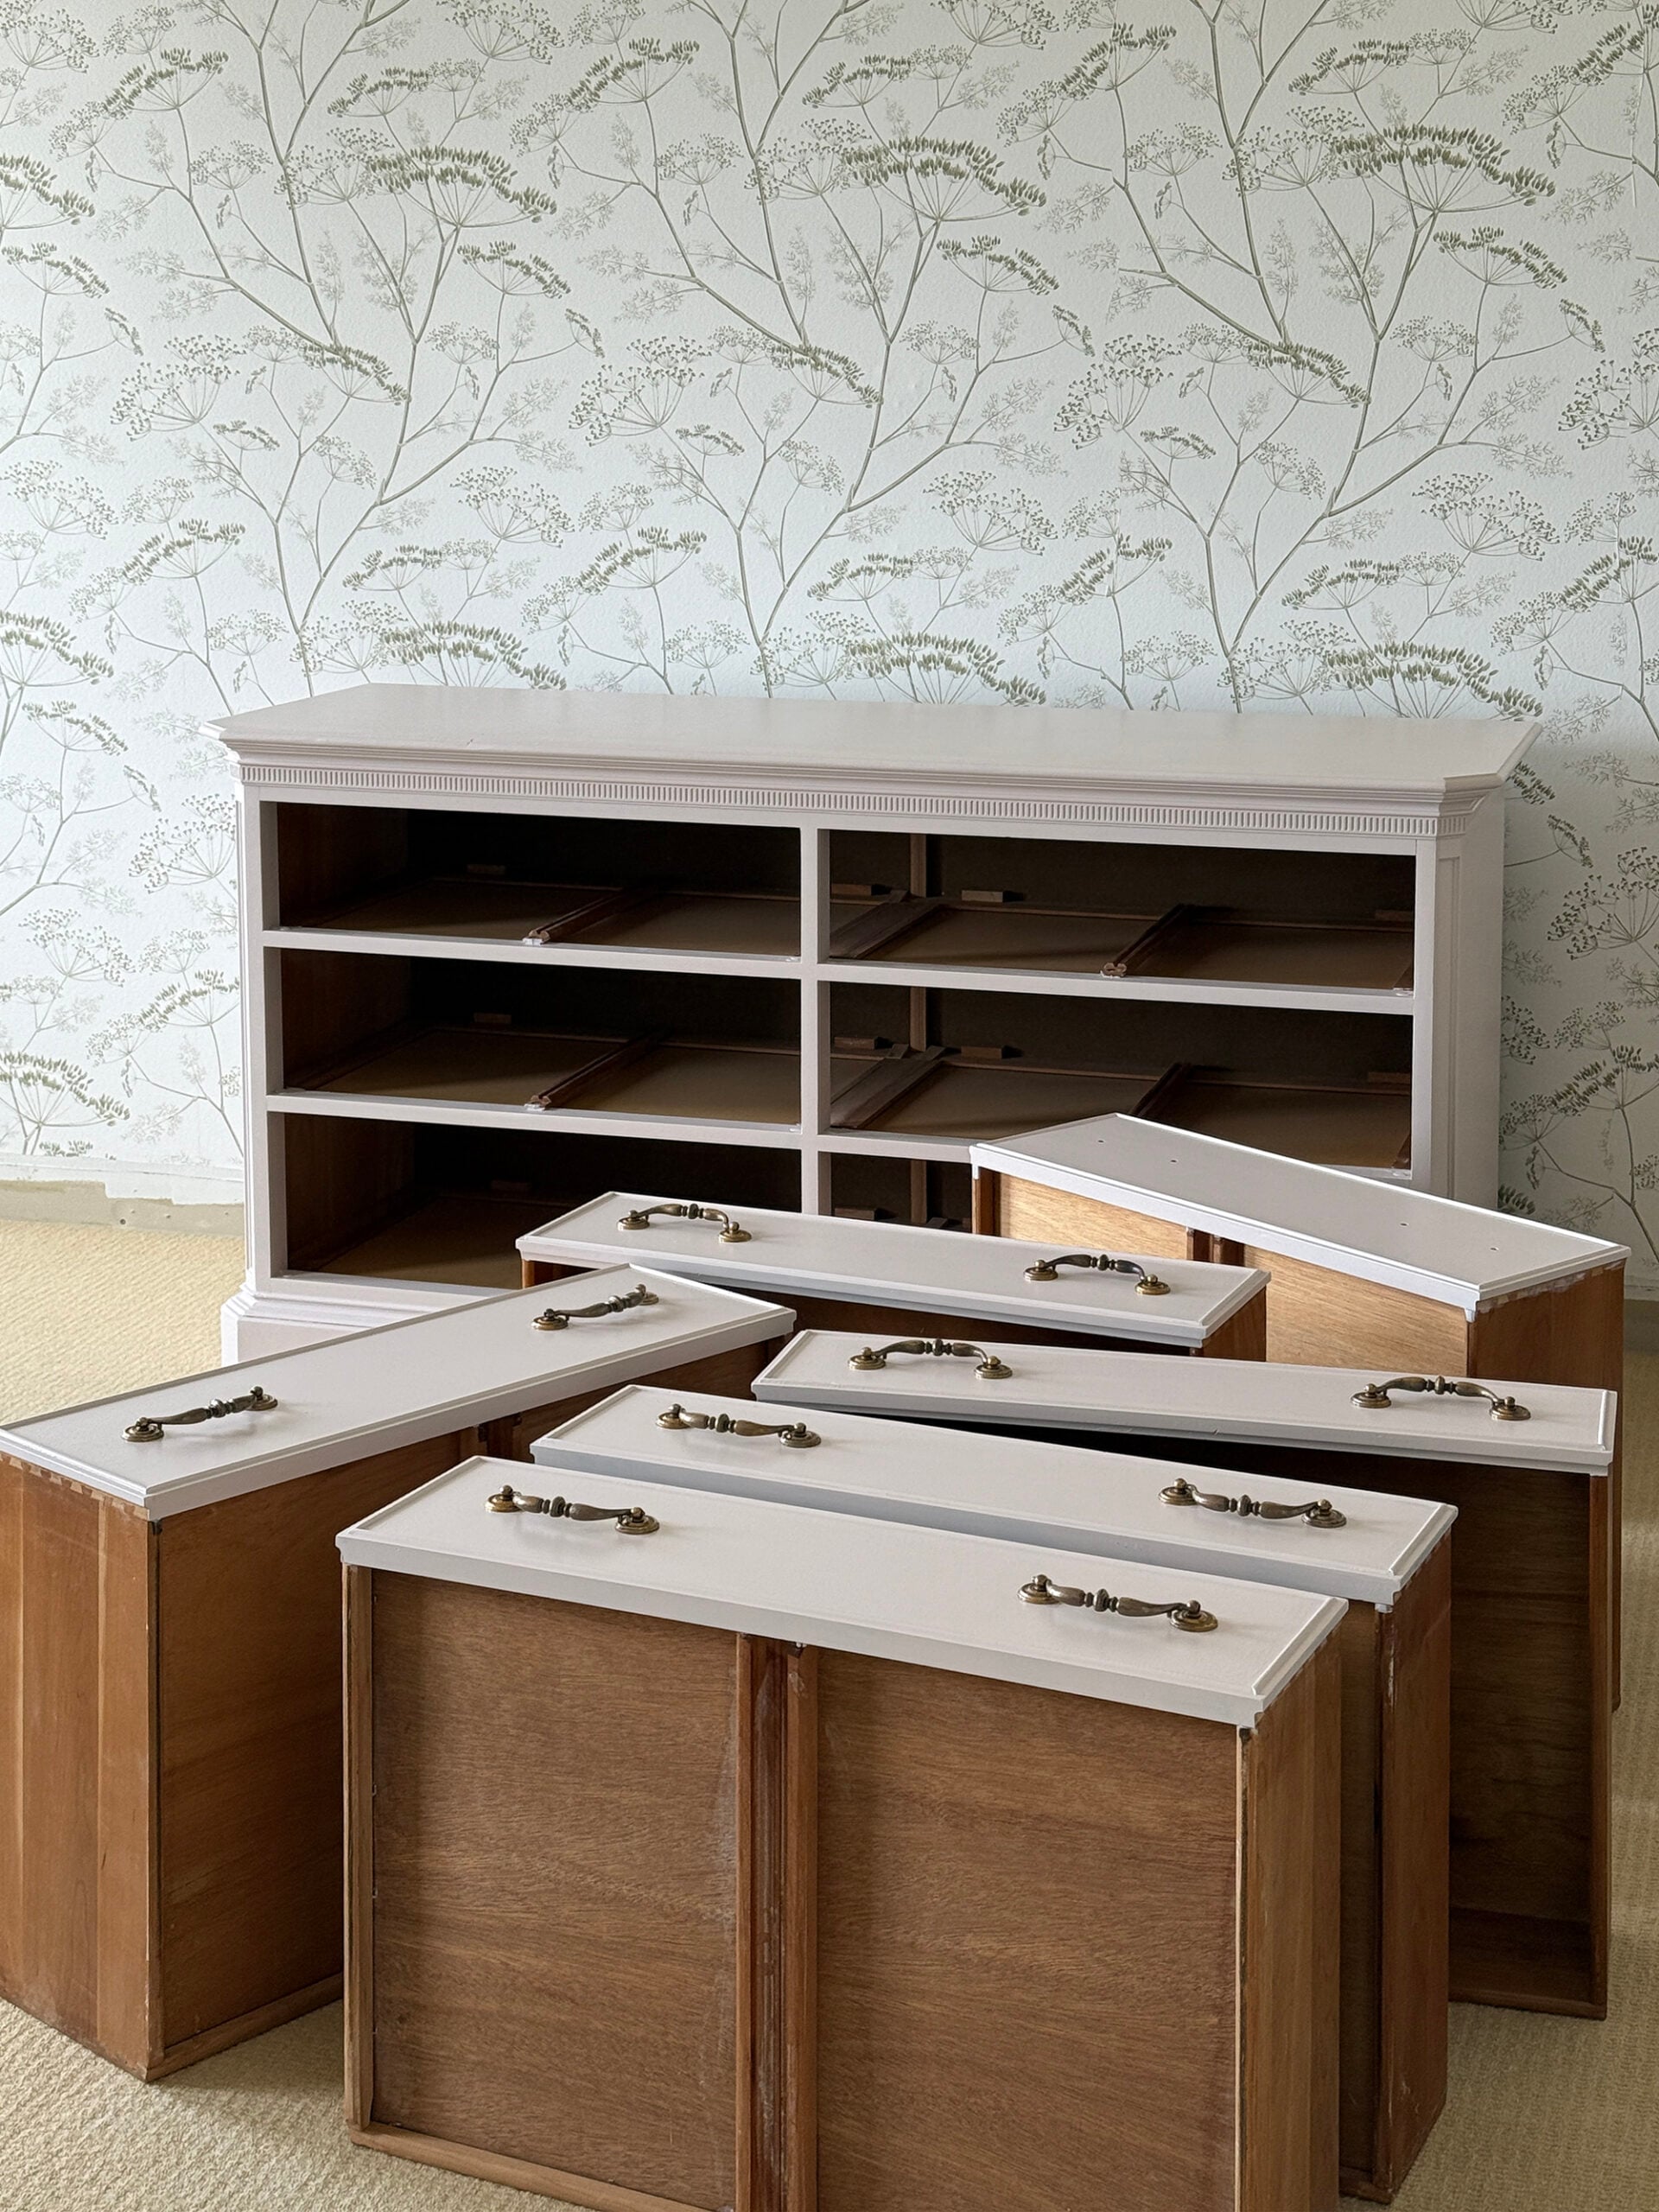
Step 1: Remove the Hardware and Sand
Prep is boring, but necessary for these projects (unfortunately). I started by removing all the hardware. This gives you a clean surface to work and keeps paint off your pulls. I always store screws in a small labeled bag or cup so nothing gets lost.
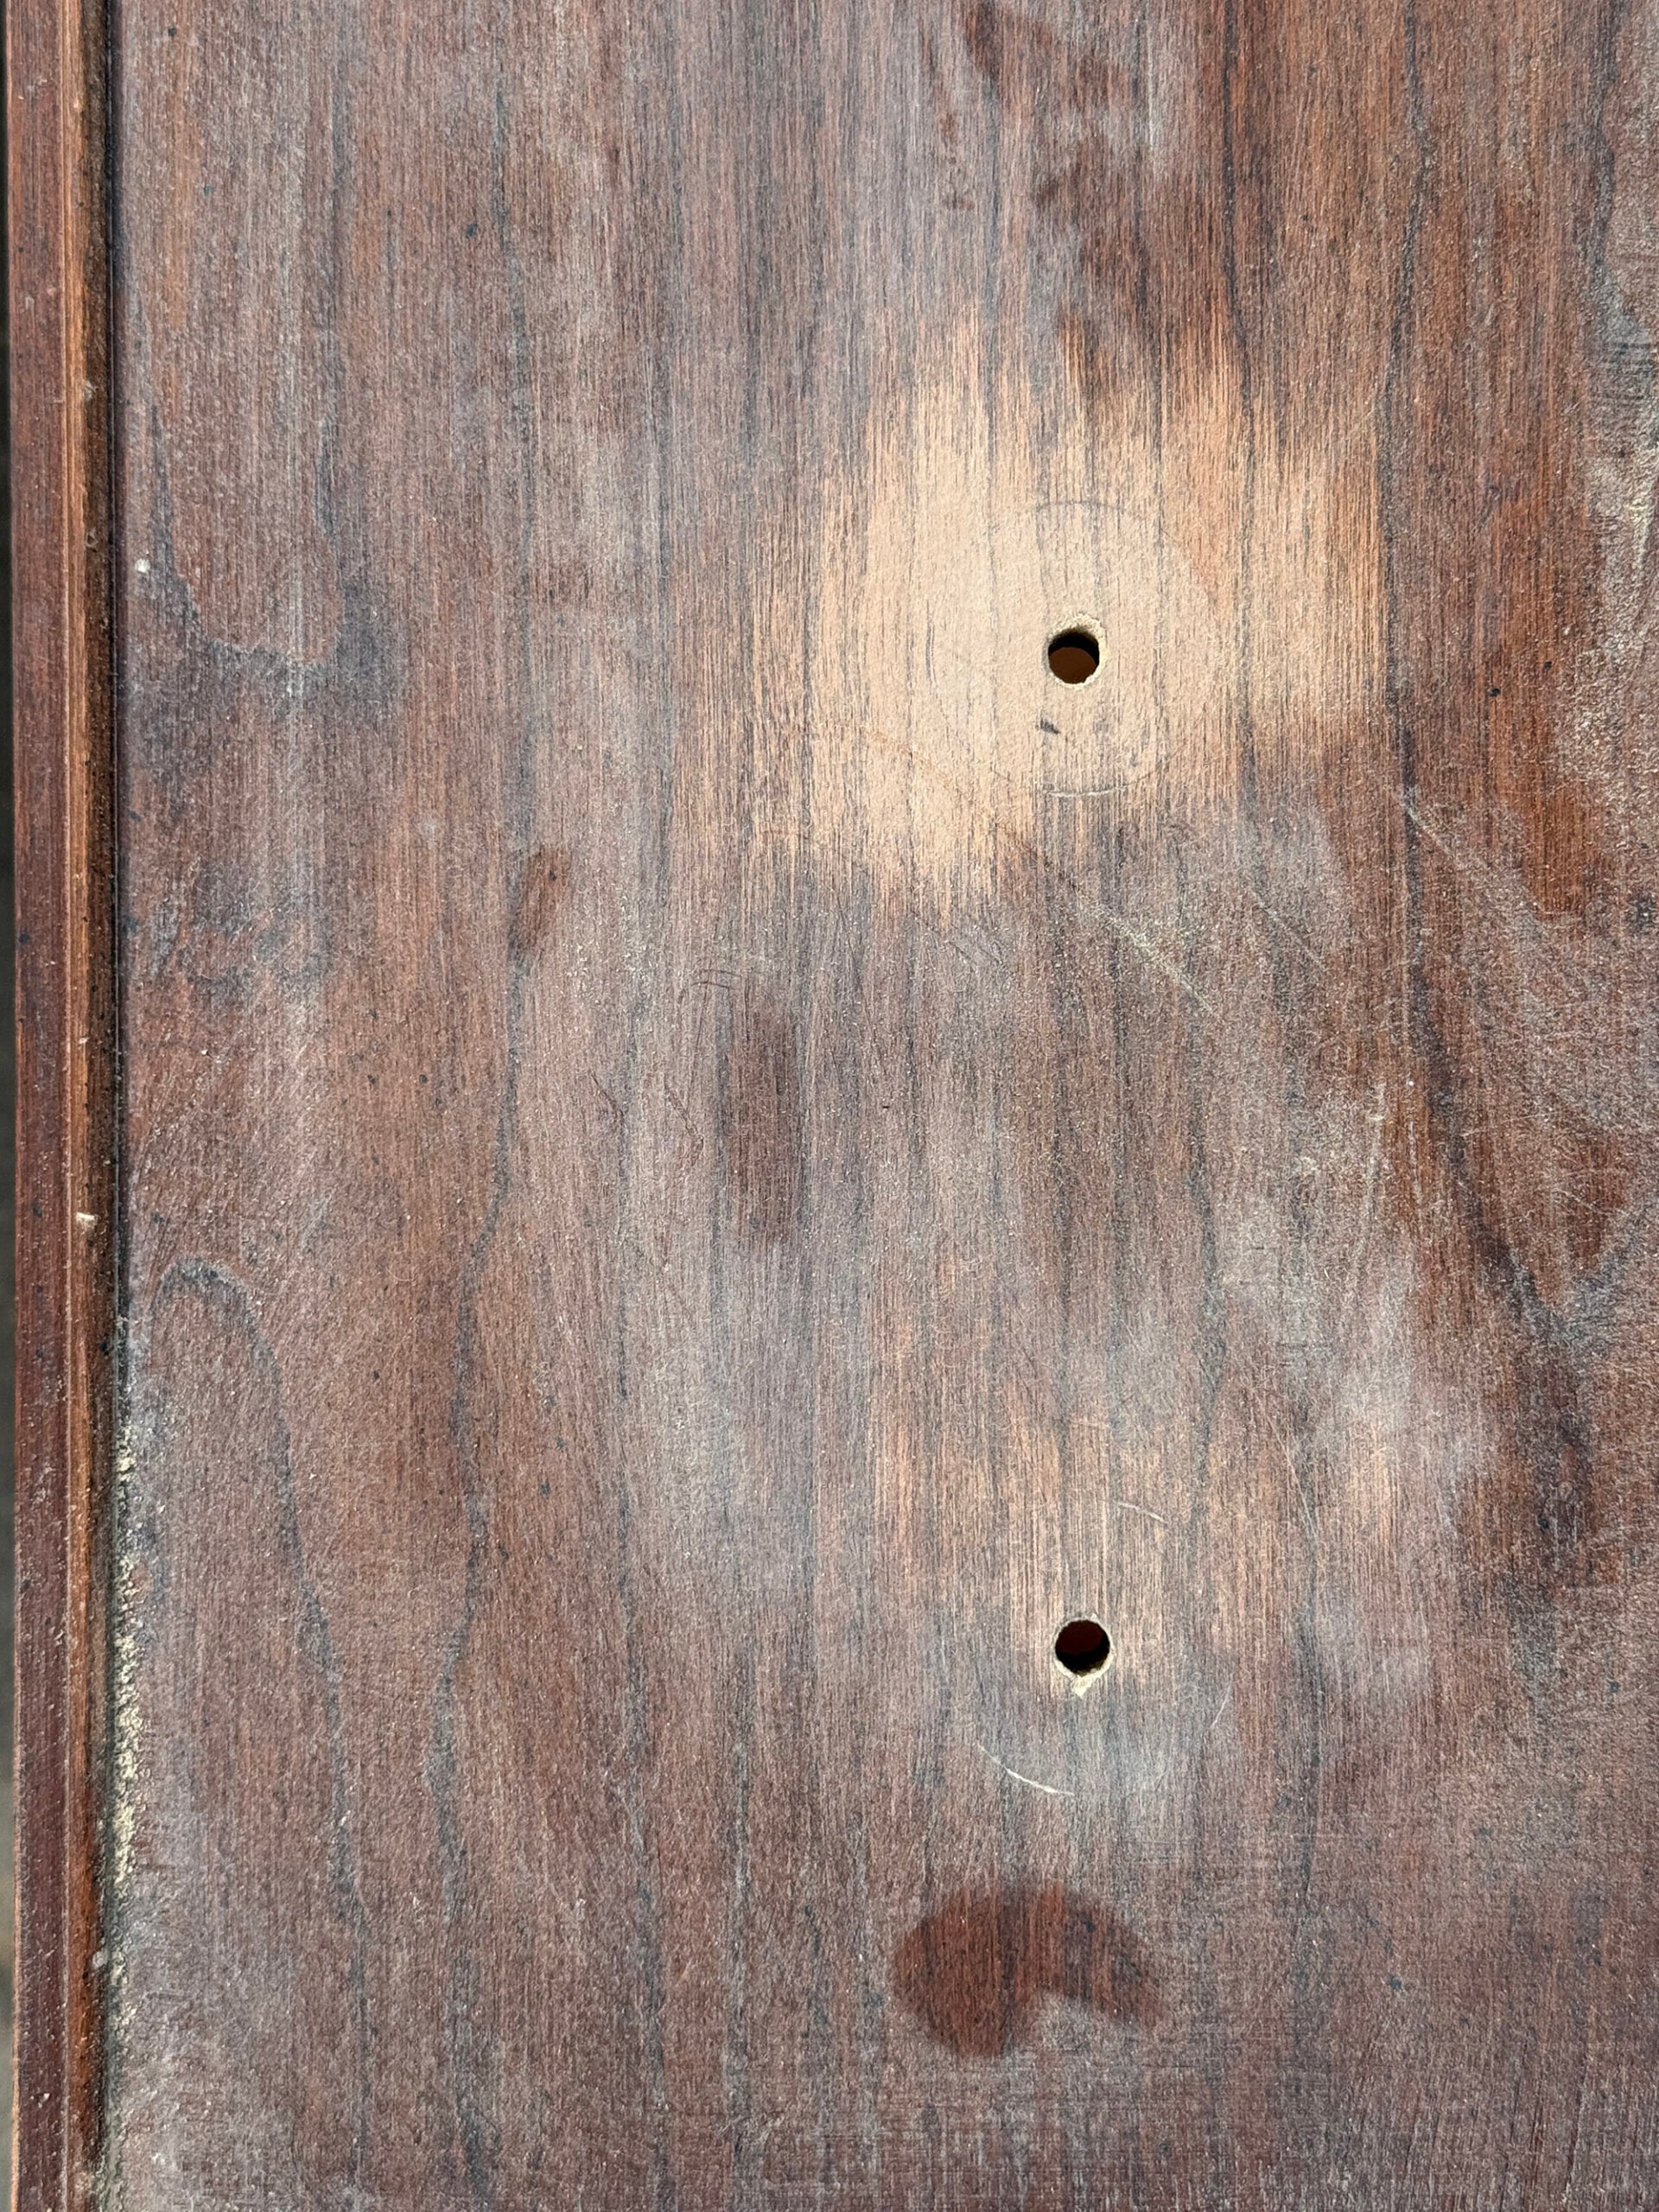
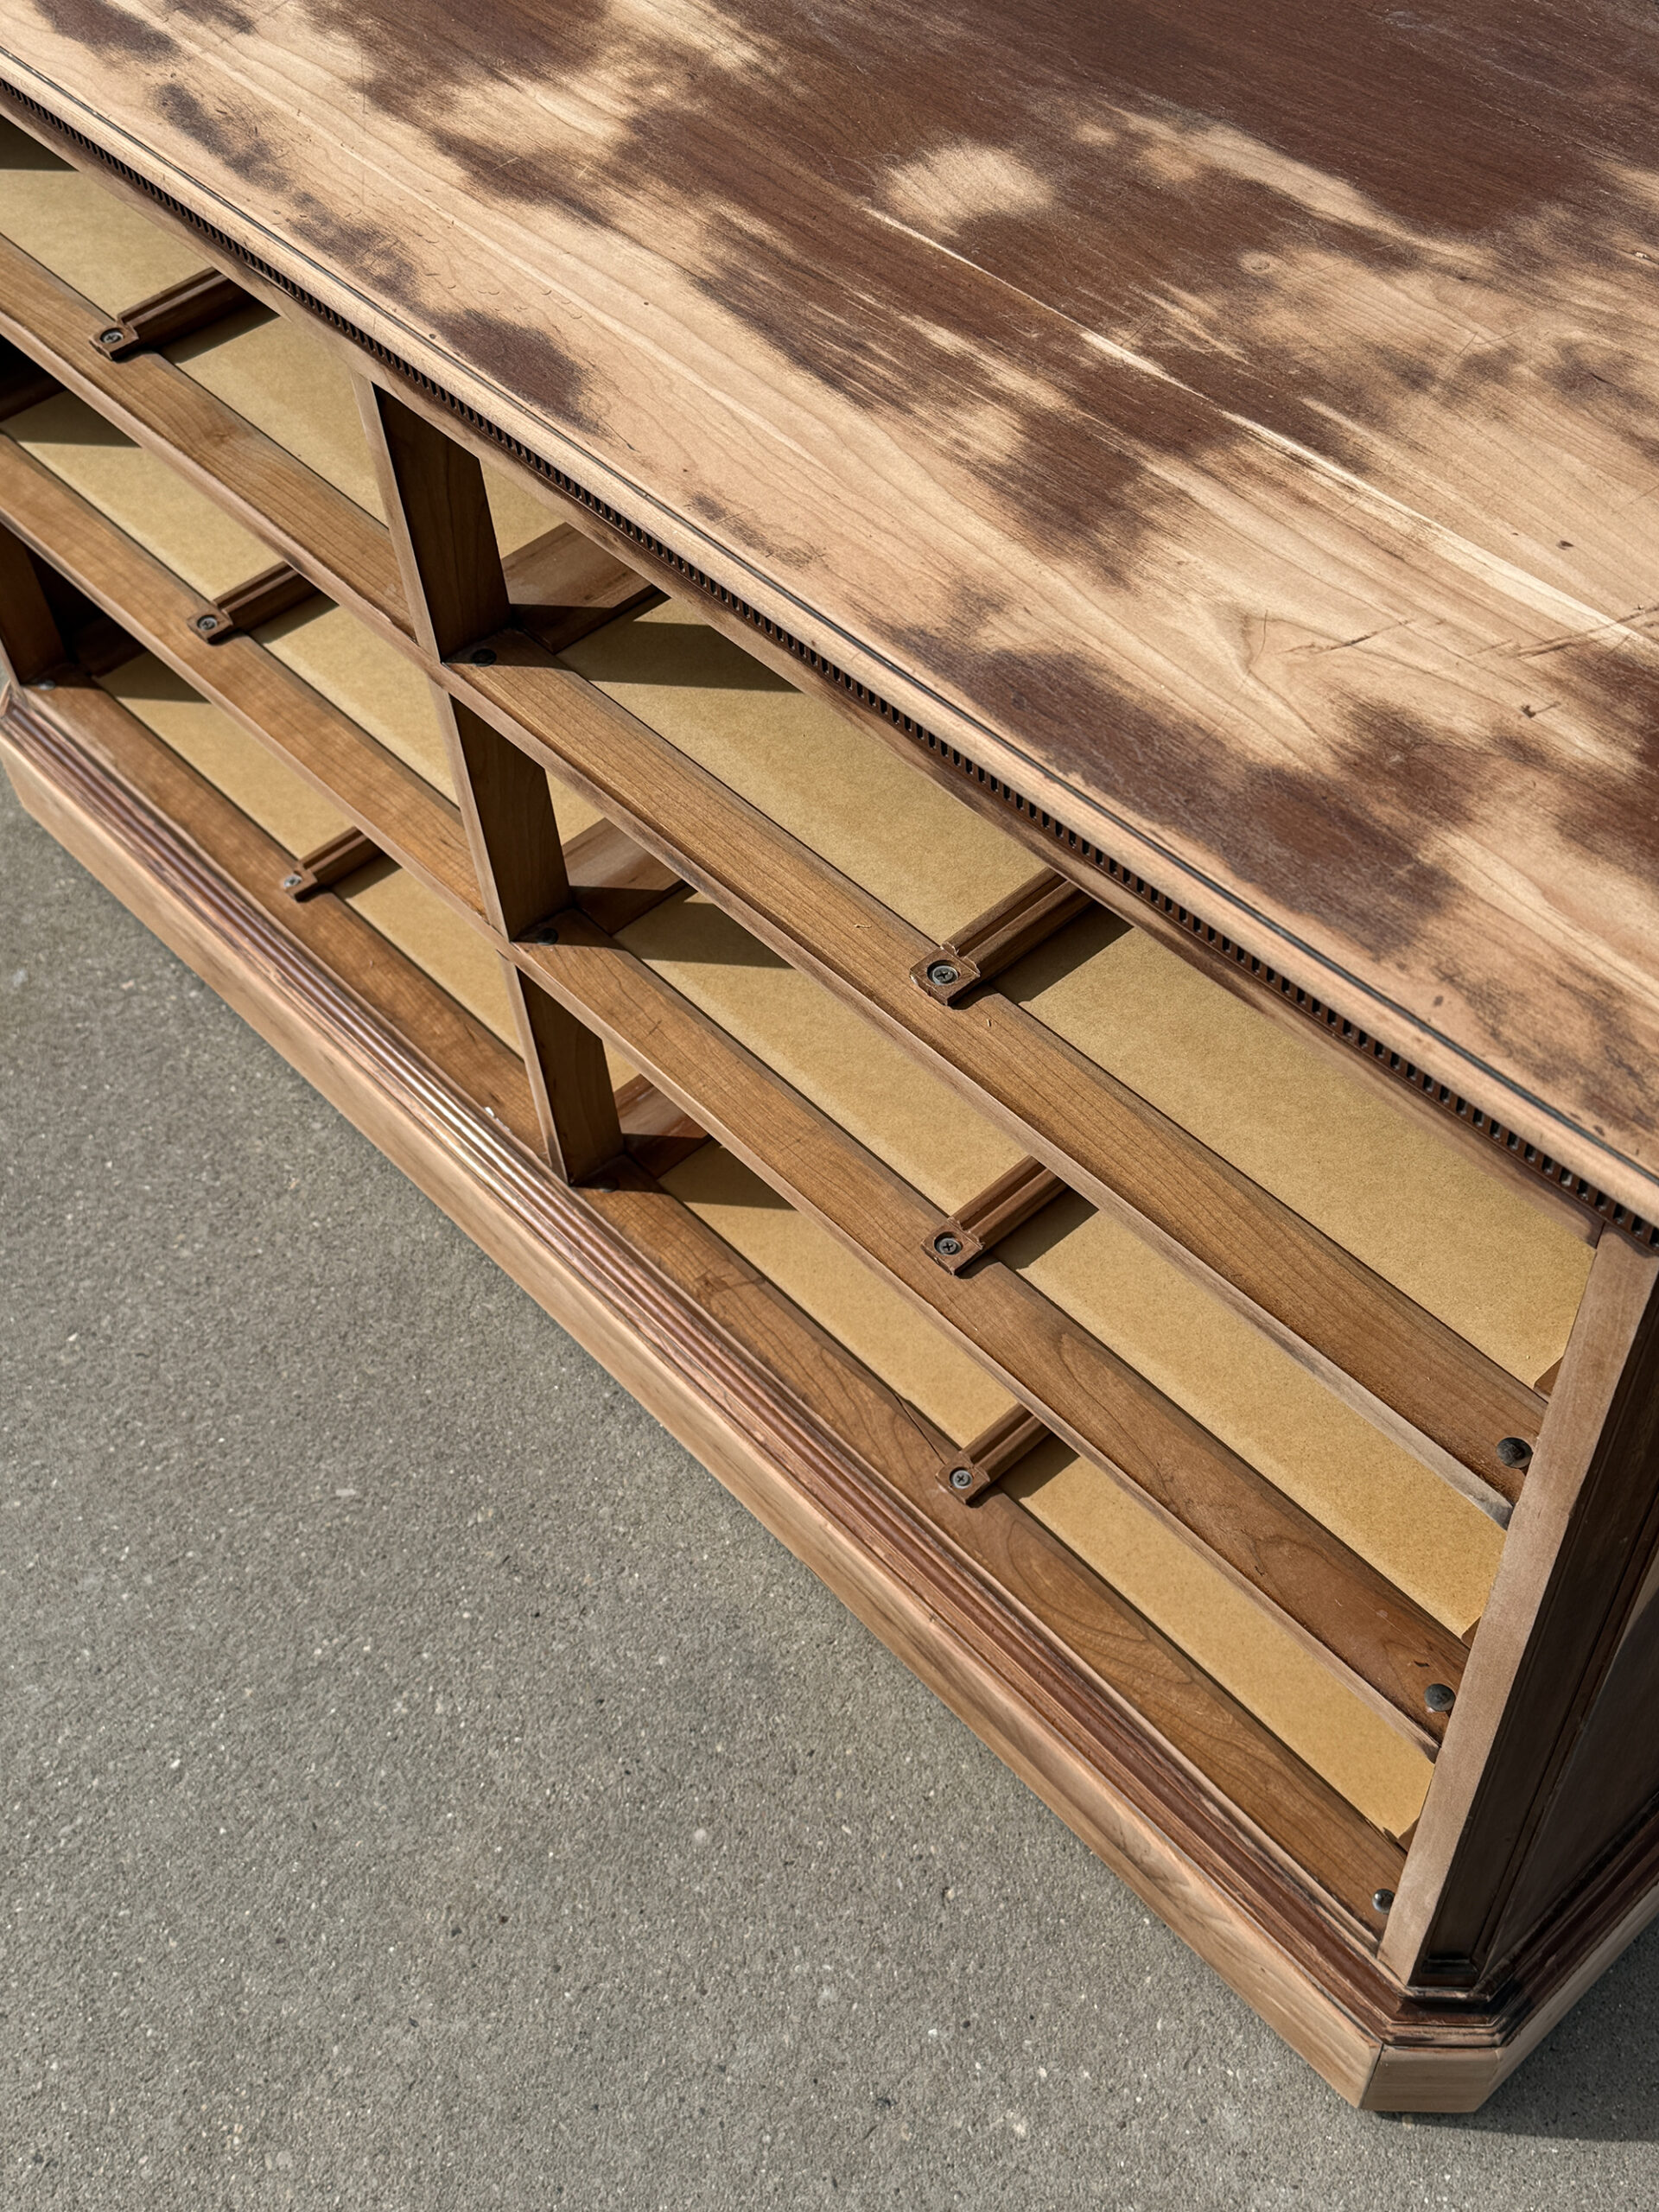
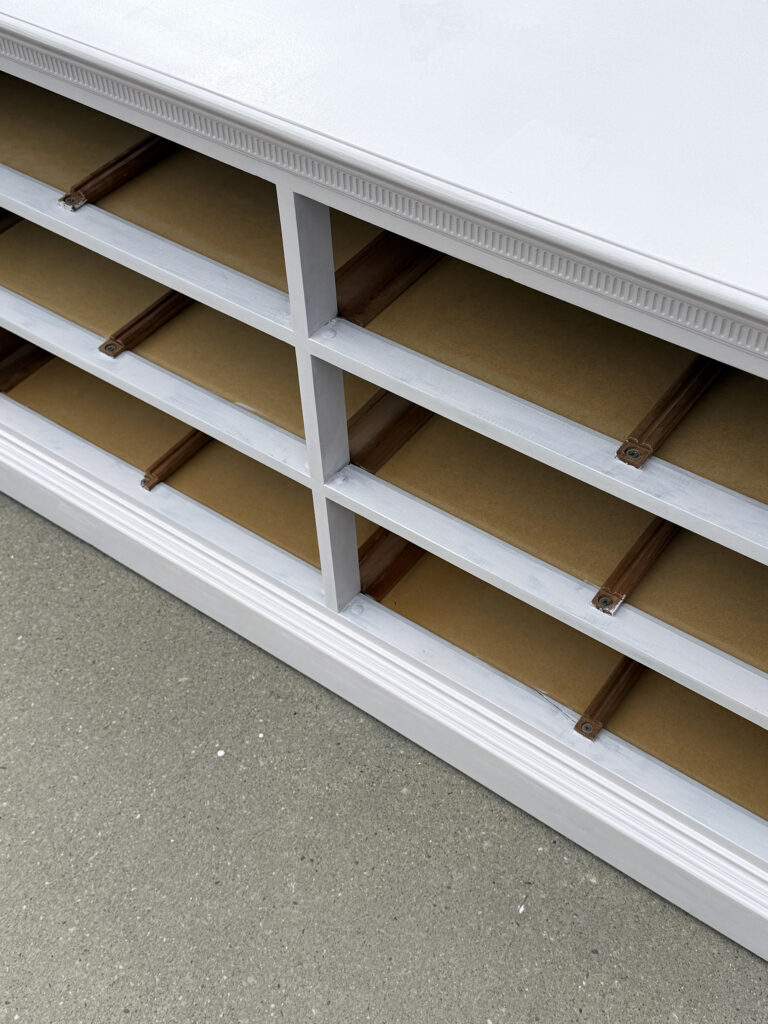
Next, I sanded the entire dresser to scuff and smooth the existing finish. You do not need to strip it to bare wood unless the finish is damaged… in my case, the scuffs and scratches went deep, so my sanding took quite a while. The goal is typically to create enough grip for the paint to adhere properly. After sanding, wipe everything down thoroughly to remove dust. A clean surface is critical if you want a professional finish.
Step 2: Choose the Right Paint
If you want to paint a dresser like a pro, your paint choice matters. I used Benjamin Moore Advance in satin, in the color Organdy. Advance is a self leveling alkyd paint, which means it smooths itself out as it dries. That’s how you get that sprayed look without actually spraying. It also cures to a harder finish than standard latex paint (similar to enamel), which makes it ideal for furniture or cabinetry. Satin or semi gloss is my preferred sheen for dressers. It gives a subtle glow and added durability without feeling slick.
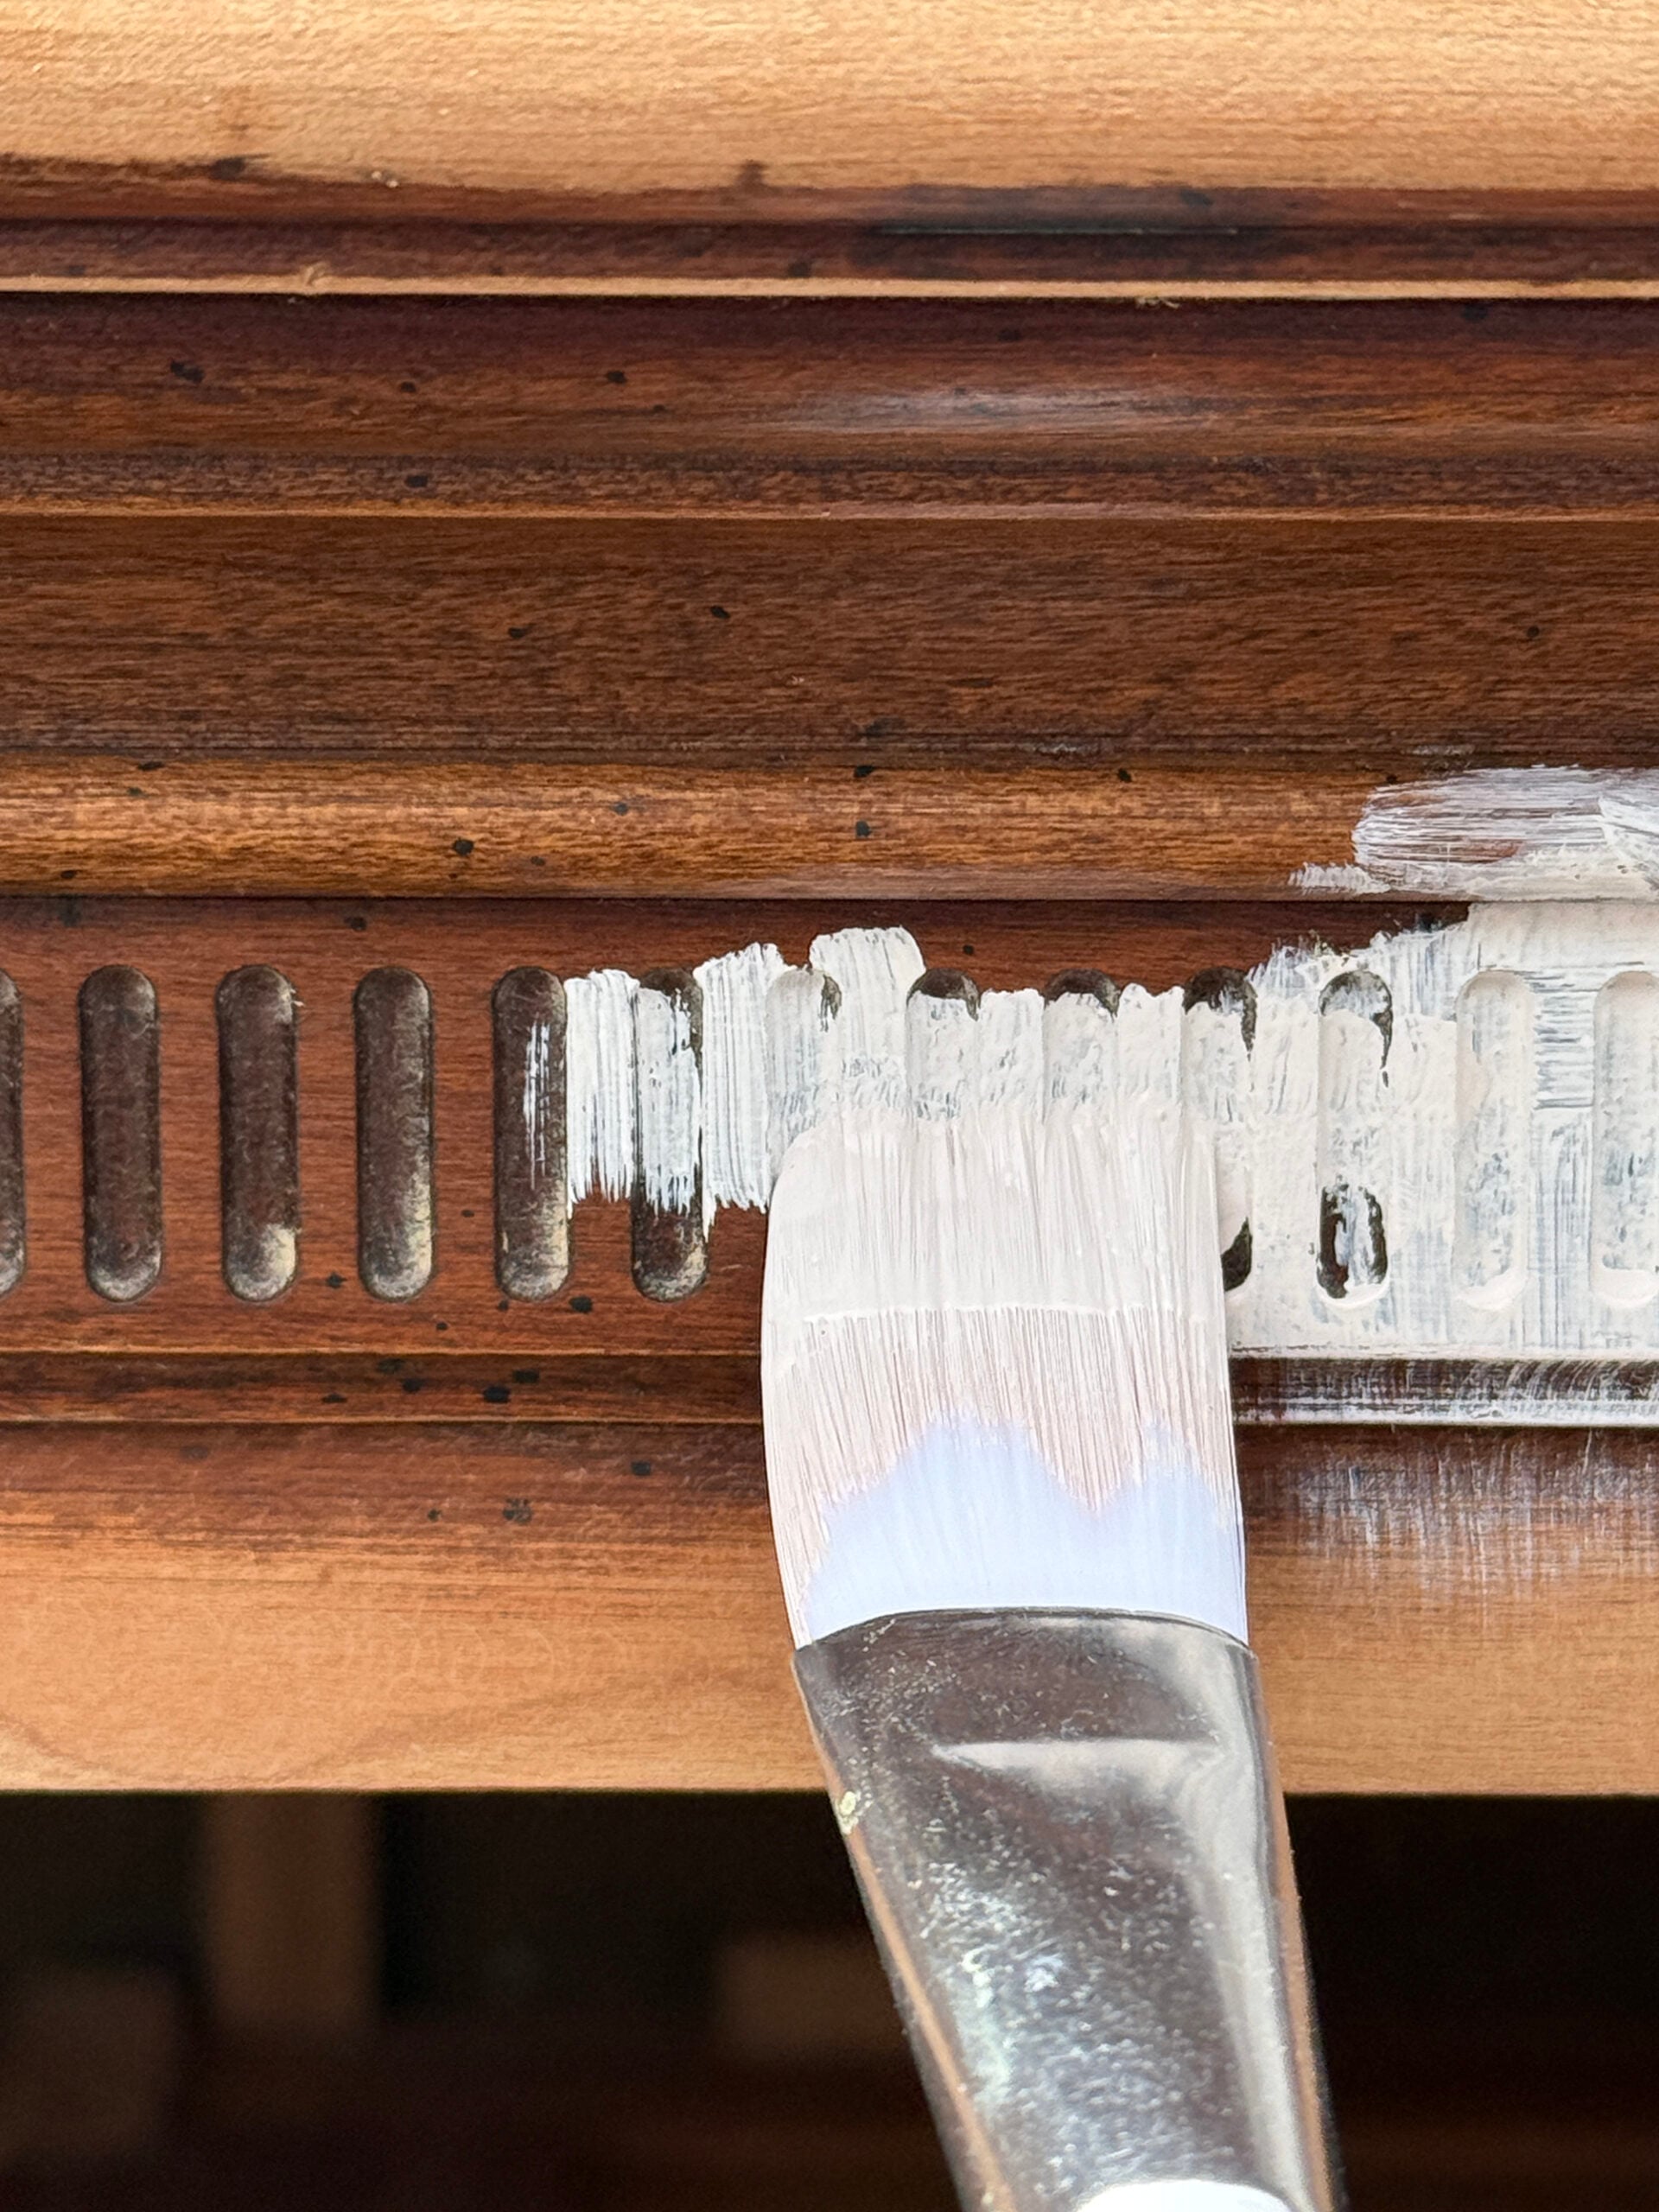
Step 3: Brush the Details First
I always start with a high quality brush for the detailed areas, corners, and edges. Work in manageable sections and avoid overworking the paint. Advance has a longer open time, so it will level out as it dries. The key is to apply it evenly and then leave it alone. The tiny fluted details (pictured below) took me quite a while and required a smaller art brush.
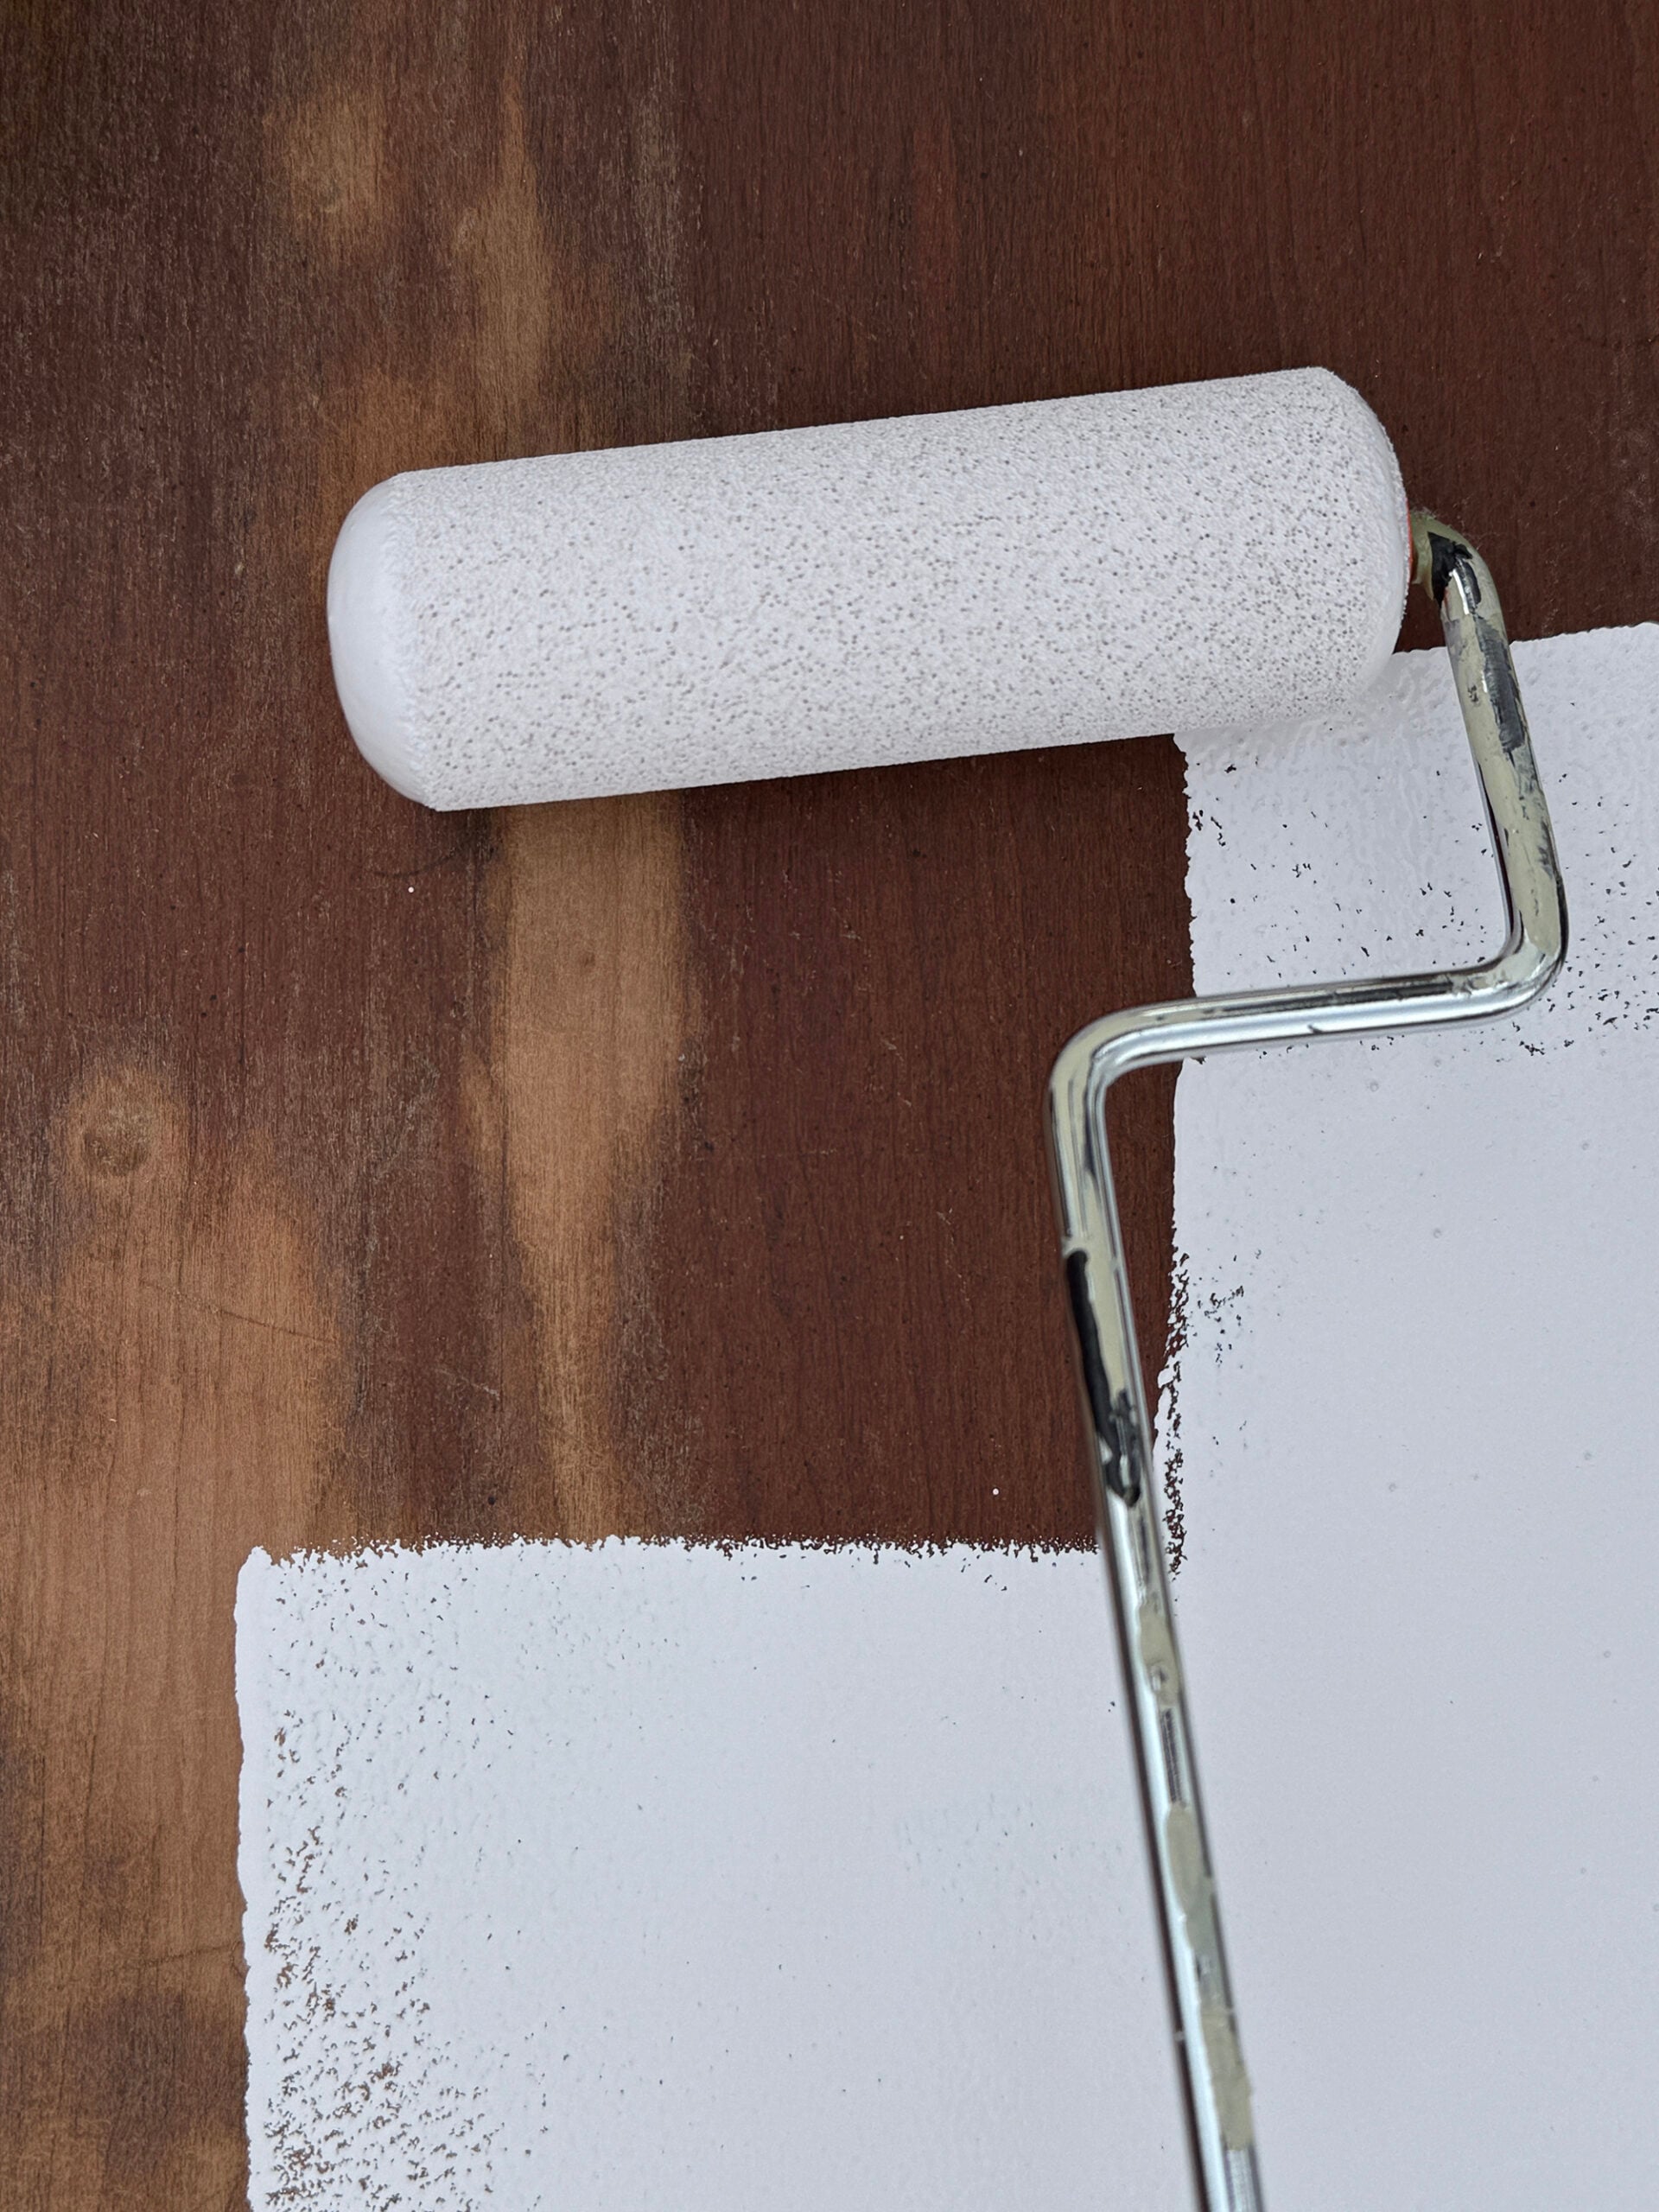
Step 4: Roll the Flat Surfaces
After brushing the details, I used a high density foam roller on the larger, flat surfaces. This step makes all the difference. A foam roller lays the paint down thin and smooth. Roll lightly and evenly, then resist the urge to go back over areas once they’ve started to set. Two thin coats will always look better and perform better than one thick coat.
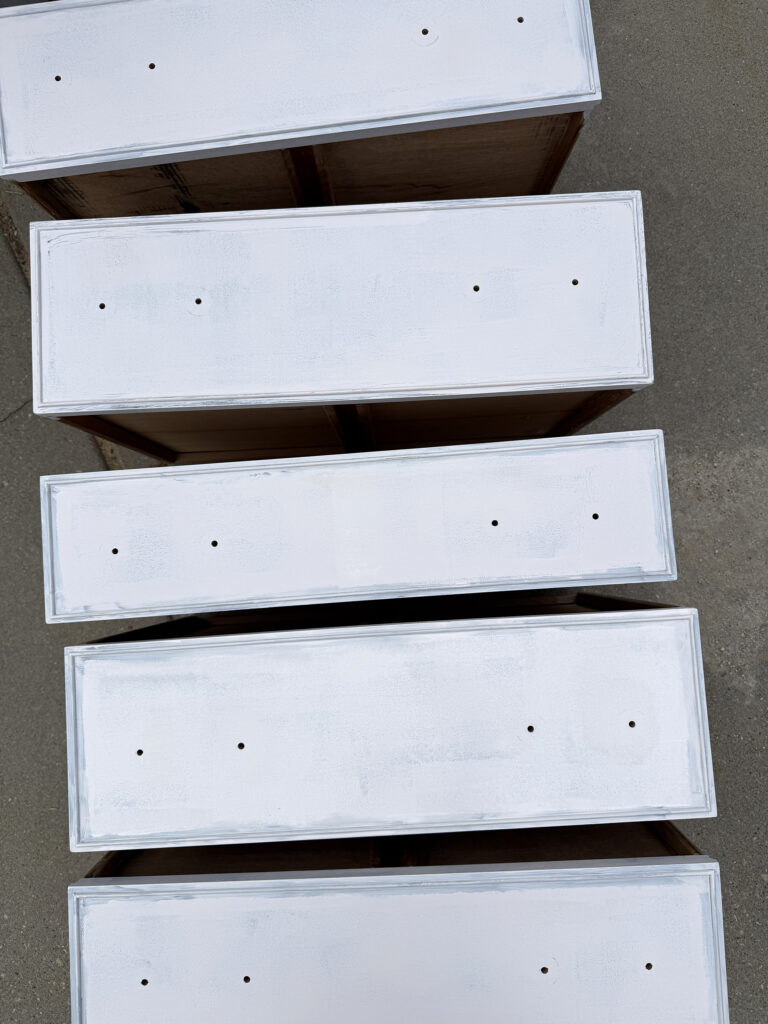
Step 5: Repeat More Coats, Then Let it Cure
Dry and cured are not the same thing. Benjamin Moore Advance takes longer to fully cure, but that extended cure time is what gives you that durable finish. Work in thin layers, allowing it dry between each layer. The first layer will look splotchy (my first coat pictured below)… that’s normal. I applied three coats, total. Then, I let the dresser sit undisturbed before reinstalling the hardware. That’s the cure time… and it’s important not to skip that step!
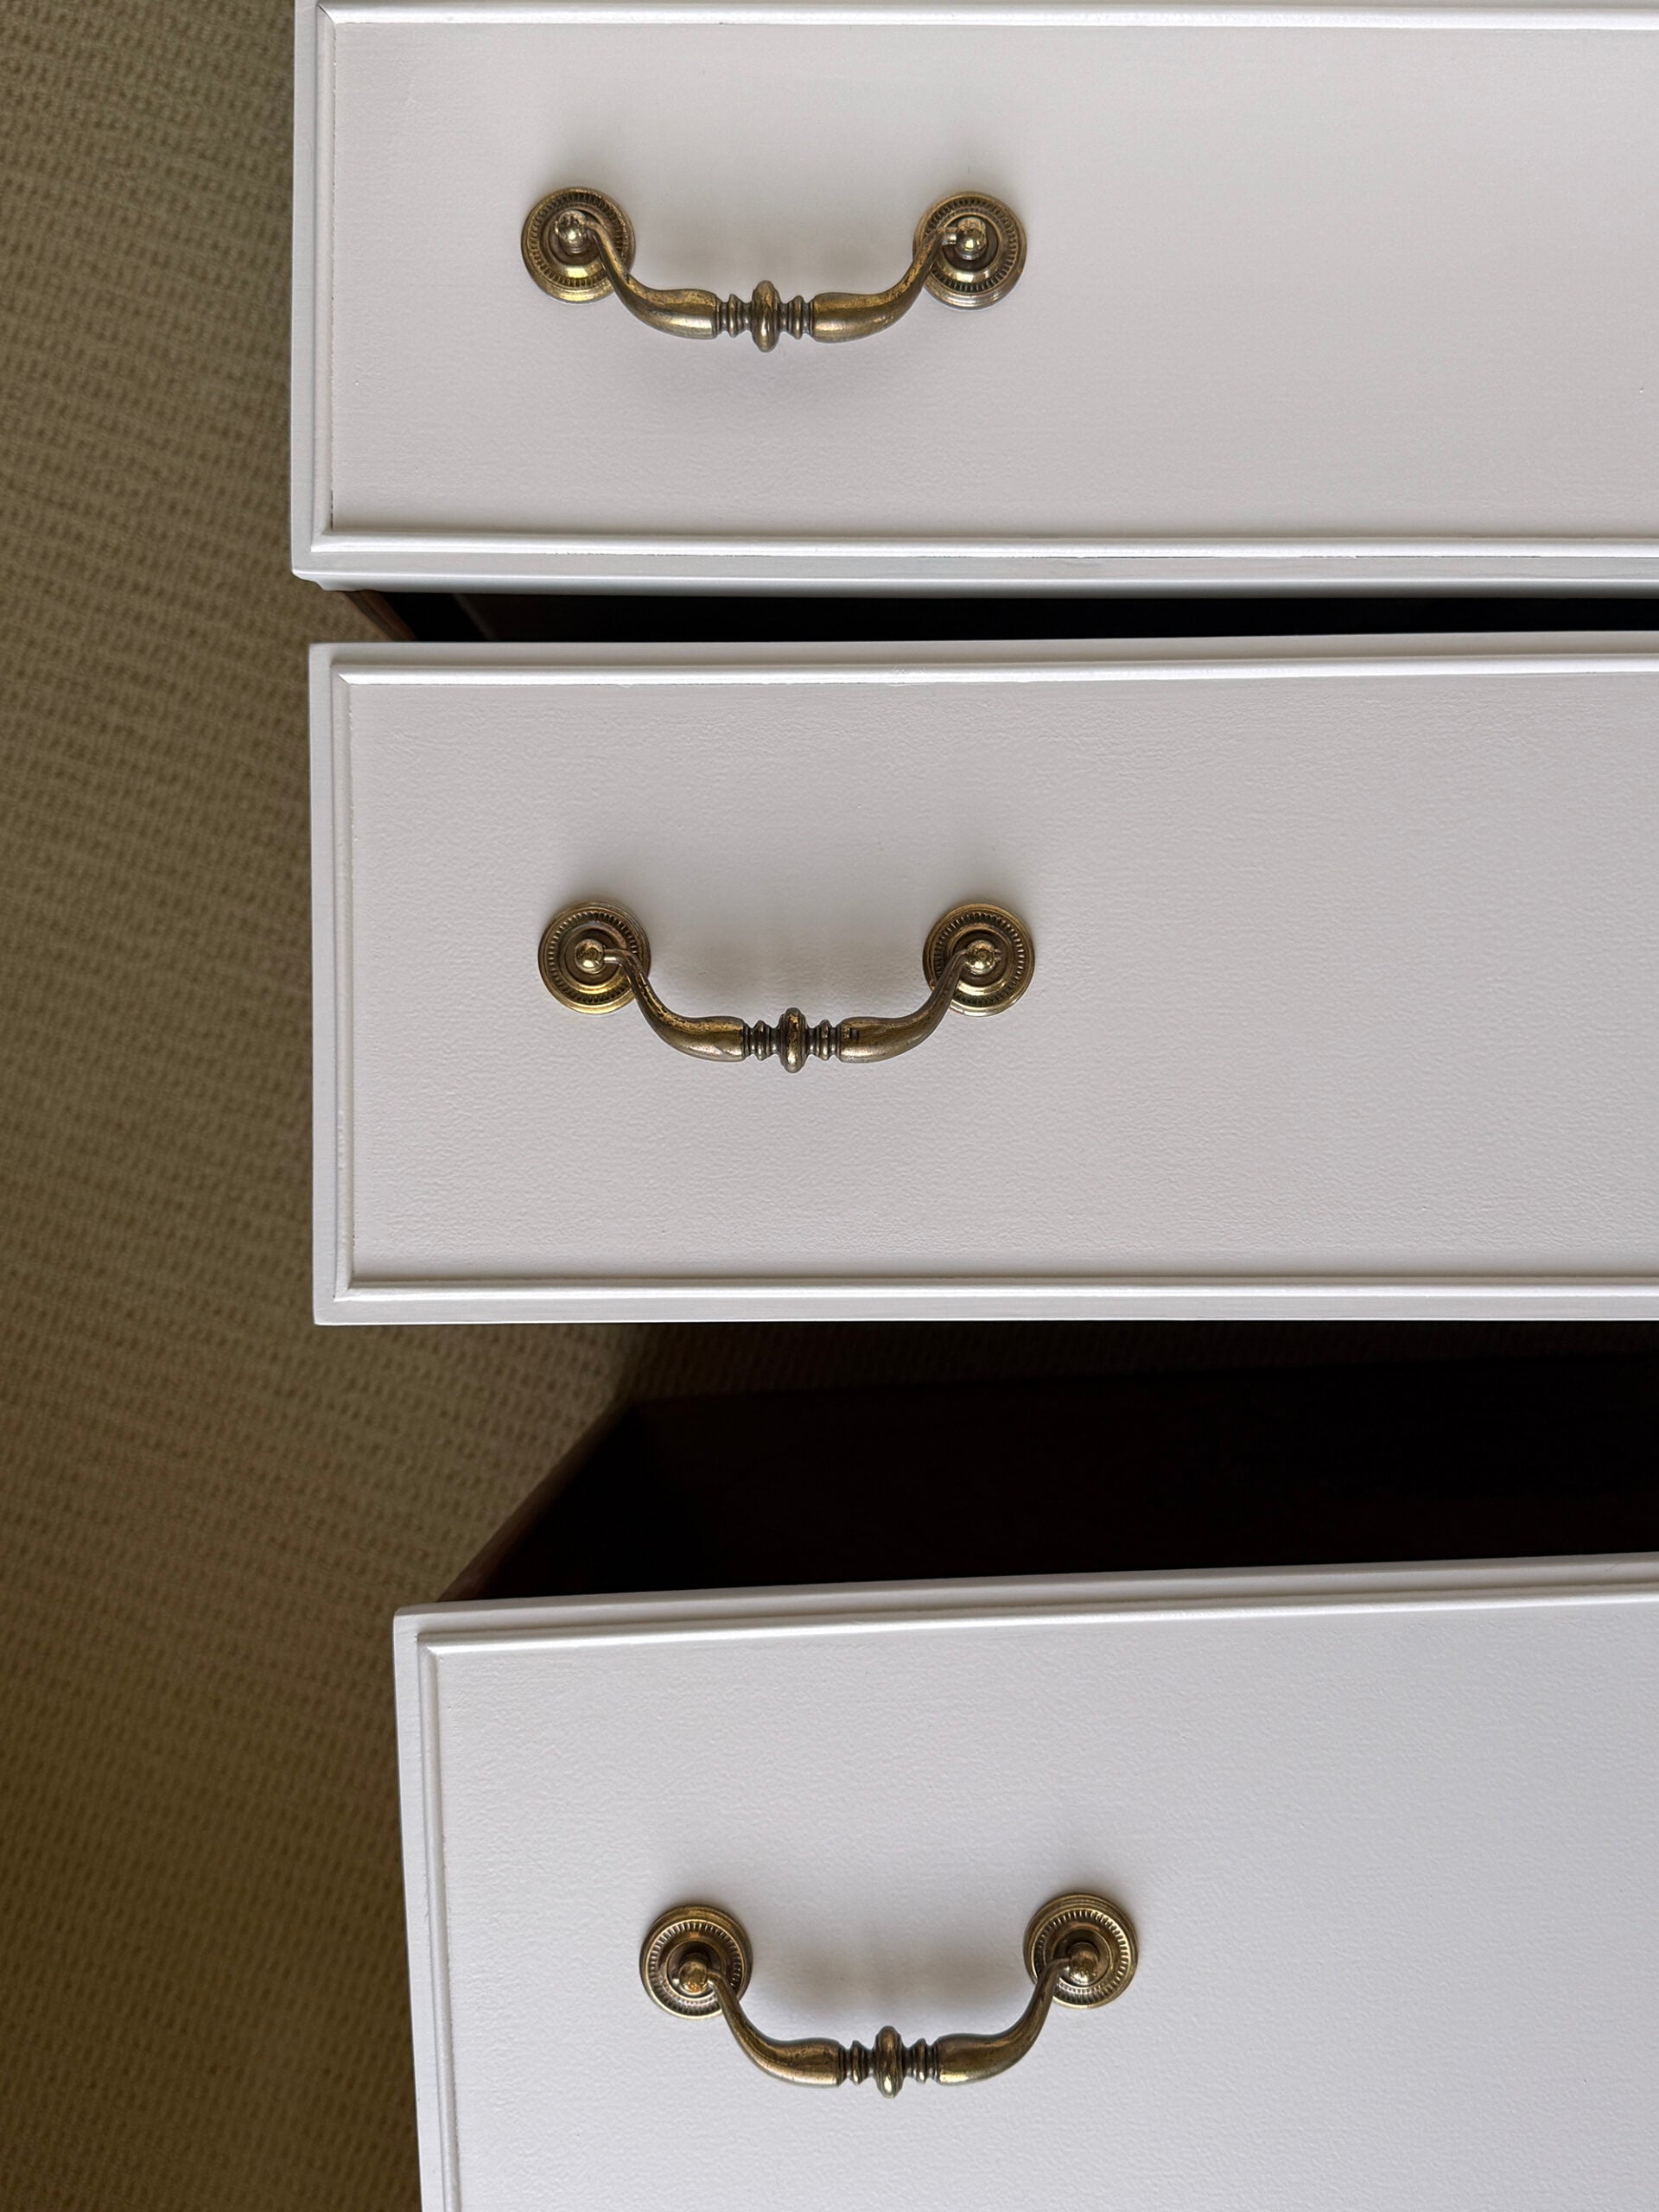
Step 6: Reinstall the Hardware
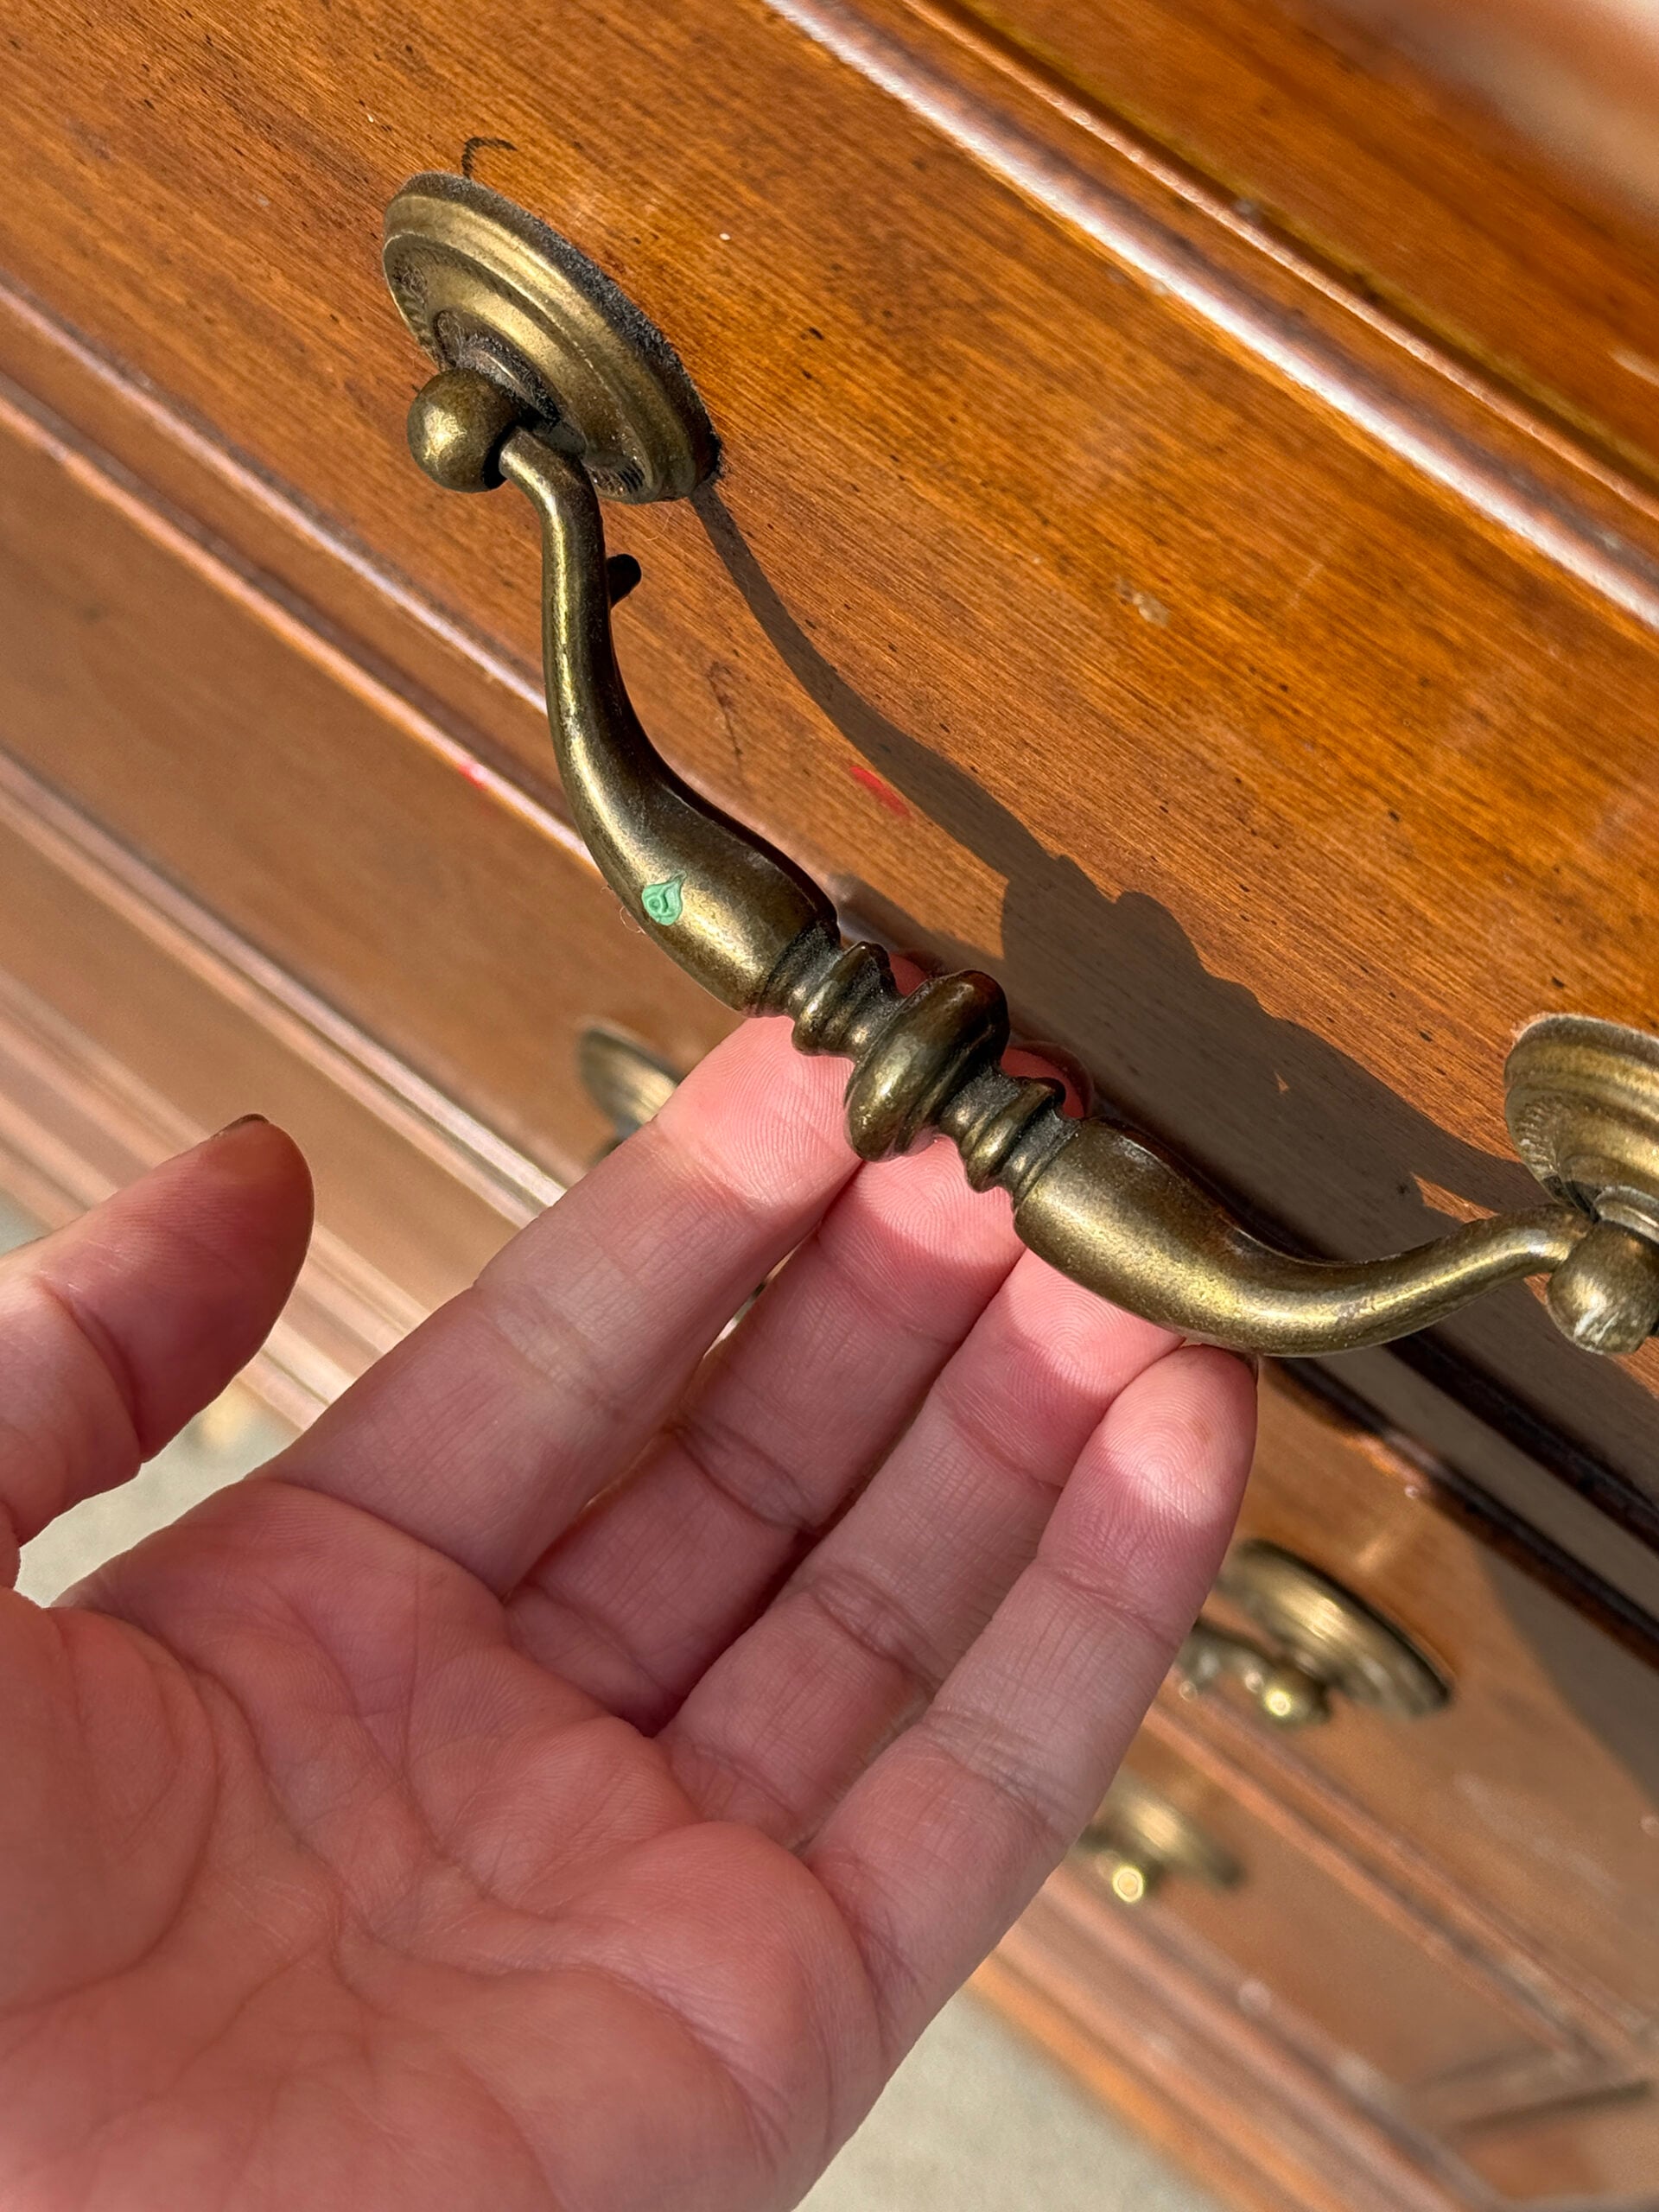
Before putting the hardware back on, I cleaned each piece thoroughly. I soaked the hardware in soapy water and polished it the best I could… though I do love the patina. Reinstalling the hardware is always my favorite part. It instantly pulls the entire look together and makes the piece feel finished. I loved the original hardware, so no need to replace it this time around- that’s always an option though.

This piece turned out so beautiful! You can’t even tell it was super banged up, and the soft lilac color is perfect for the nursery. I saved money refinishing it myself… and I didn’t even pull out our paint sprayer. Sometimes it’s just not worth the hassle. I’d rather just use a brush and roller.
Questions?
Satin or semi gloss is my go to for dressers. It strikes the right balance between durability and softness without looking too slick or shiny. Check out my designer guide for choosing the best paint sheen or finish.
If the existing finish is in good condition and you’re using a high quality paint, like Benjamin Moore Advance, you can often skip primer after a proper sanding. If you’re covering dark wood, stains, or knots, primer is a smart extra step. I’m kind of lazy when it comes to this sort of thing, so I typically skip primer and haven’t had any issues. Emmett, on the other hand, prefers to prime.
The paint may feel dry within a day, but it takes longer to fully cure. I recommend giving it several days (I shoot for a week) before heavy use, so the finish can harden properly.
Related Posts
Looking for more paint projects or furniture makeovers? I’m going to link some of my favorites for you below!
- How to Paint a Door
- My Top Paint Color Picks for Dark Kitchen Cabinets
- How to Smooth a Textured Ceiling
- How Paint Color Percentages Work and When To Use Them
- Small Coffee Table Makeover
- The Top Black Paint Colors Designers Always Use
- How to Reupholster Antique Chairs (Step-by-Step Tutorial)
- Patio Chair Makeover
- 24 of My Favorite Neutral (Non-White) Paint Colors
- Favorite Benjamin Moore Paint Swatches

Painting a dresser with a professional finish doesn’t require expensive or fancy tools. It just takes some patience, good prep, and the right paint. If you have a vintage piece sitting in your garage waiting for a second chance, this is your sign. A little sanding, a beautiful color, and a free weekend can completely transform it. There’s something so satisfying about taking a tired piece and turning it into something that feels custom and intentional. This one looks right at home in the nursery, and honestly- it gave me the boost I needed over the weekend. The space has been dragging while we wait on cabinets, and finishing the dresser or changing table felt like a step in the right direction!
Wow Sarah! I adore the color. It’s the perfect muted lilac, and a subtle contrast against the green and the wallpaper. What a lucky FBMP find. The silhouette is perfect, the details… chef’s kiss. Love the end result! I appreciate these tips; I have 2 nightstands and a dresser for Brooke that I need to repaint. They were a vintage market find that had been refinished to a beautiful muddy sage. Over time imperfections in the paint job have become more apparent, and I knew I’d eventually need to correct it; you’re right on time!! Both kids rooms are getting their glow up while the kids are on a spring break trip with the grandparents. It’s going to be a wild week for Jeff and I, but we have a solid plan and paint has been purchased. I’m hoping as part of the prep I’ll be able to tackle Brooke’s furniture. Fingers crossed for me! Thanks for posting this- I feel more confident after reading and ready to tackle the task! Did you use a specific bristle of paint brush? The nursery is coming along beautifully!!
It’s gorgeous and goes so well with the wallpaper! Can’t wait to see more of the nursery. And for its resident to be in it!
The color is really beautiful and painting the dresser really makes the fluted moulding pop-it’s my favorite part!
Hi! Thanks for this post, I’m planning to paint my son’s dresser and was looking for tips! Curious how you have noticed the paint hold up over time? I’m thinking if I would need to use some sort of sealer afterwards since a dresser is high use and prone to scratches etc. (but would rather avoid the extra work lol).