Small Coffee Table Makeover
 Over the summer, I spontaneously snagged a really beautiful coffee table on Facebook Marketplace. At the time, I didn’t have plans for it, but I really liked the shape & details. Fast forward to now, that little table has seen a LOT of change and found a home in the guest bedroom that I’ll be sharing with you soon. It perfectly fit in the window nook, in front of the sofa. Click through for a wild makeover, a new favorite product for bleaching wood, and for some DIY drama, ha!
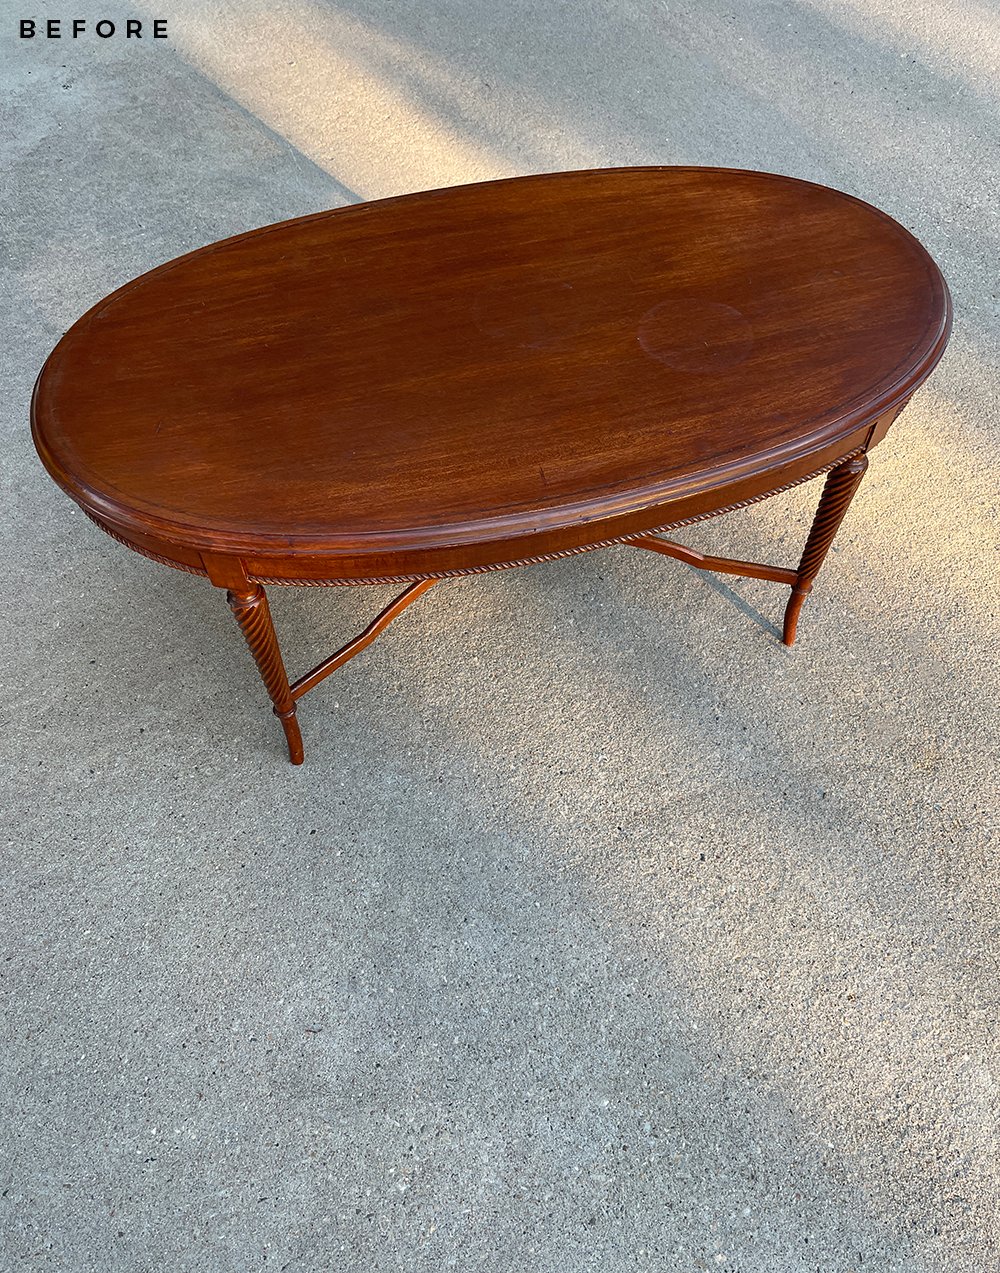
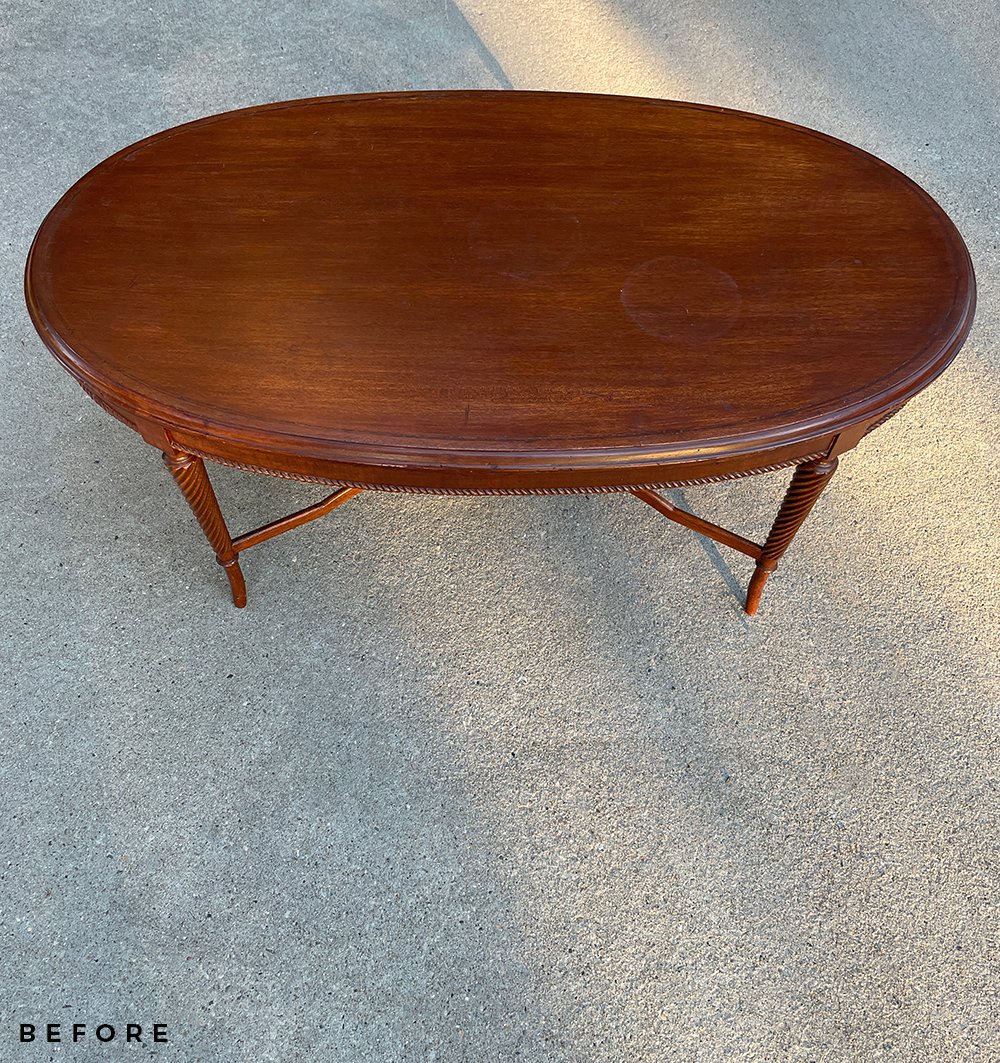 This is what the table looked like the day I bought it home (above and below)… really pretty, but it has some water damage, and was more red than I would have preferred. We cleaned it, took it downstairs to my prop closet, and agreed we’d tackle it at a later date. Anyone else do this far too often? Yeah, me too.
 About a month after I grabbed the table, one of my favorite brand partners reached out to see if I wanted to work together on a furniture DIY. I’m thinking to myself that the stars have aligned and the timing couldn’t be perfect to bring that table out of storage after having just put it downstairs. I agreed to test a new stain product and Emmett got to work stripping the cherry coffee table…
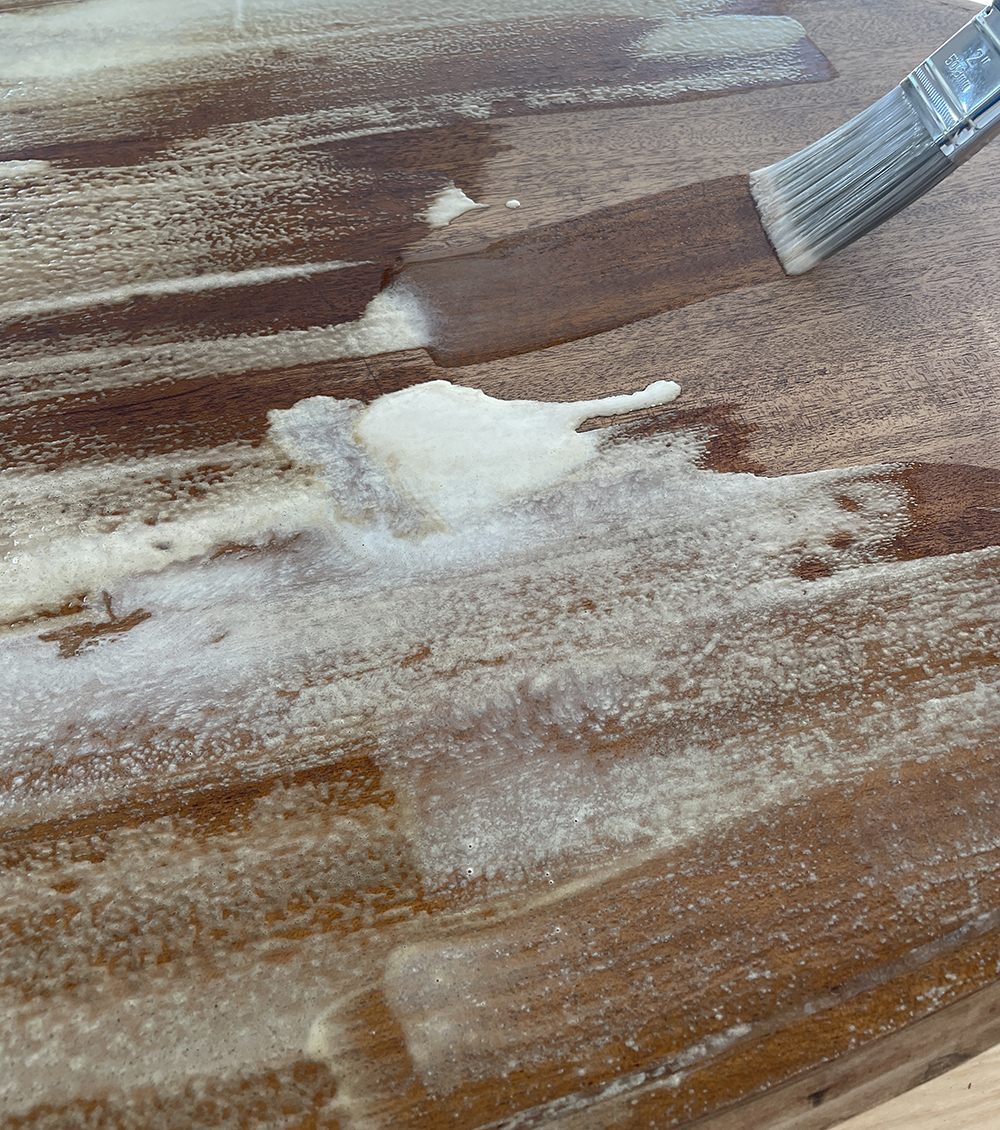
 We used this multipurpose paint, stain, & epoxy remover. It required a couple coats, but did a fantastic job- and helped saved us a ton of time from sanding those intricate braided, twisted, and carved details.
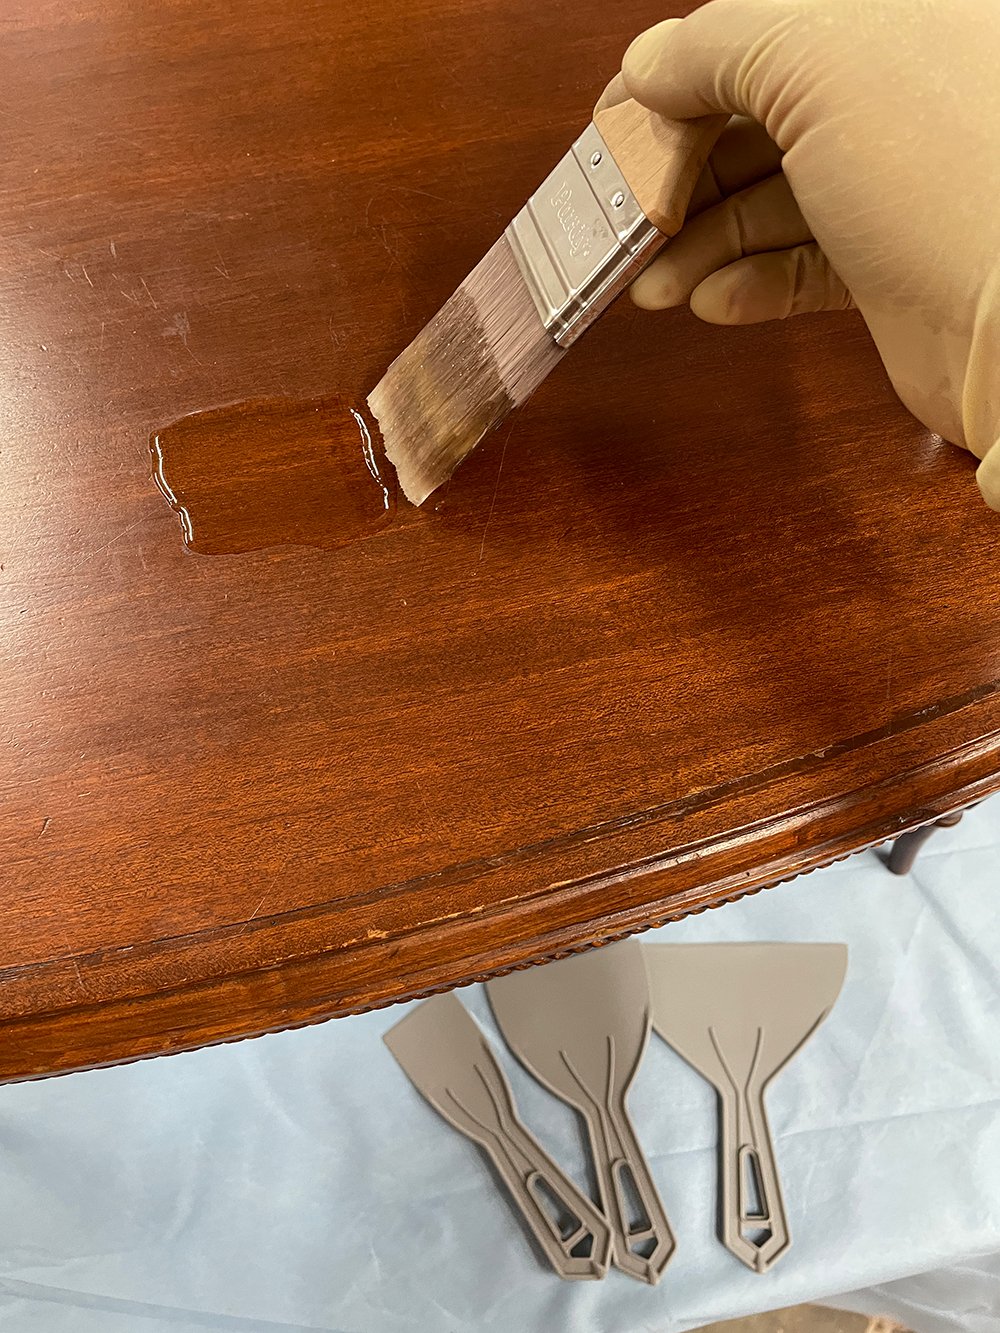
It gums up like the photo above and below- then you scrape (or towel) it off and repeat. It’s messy, but such a time saver. Well worth it, in my opinion.
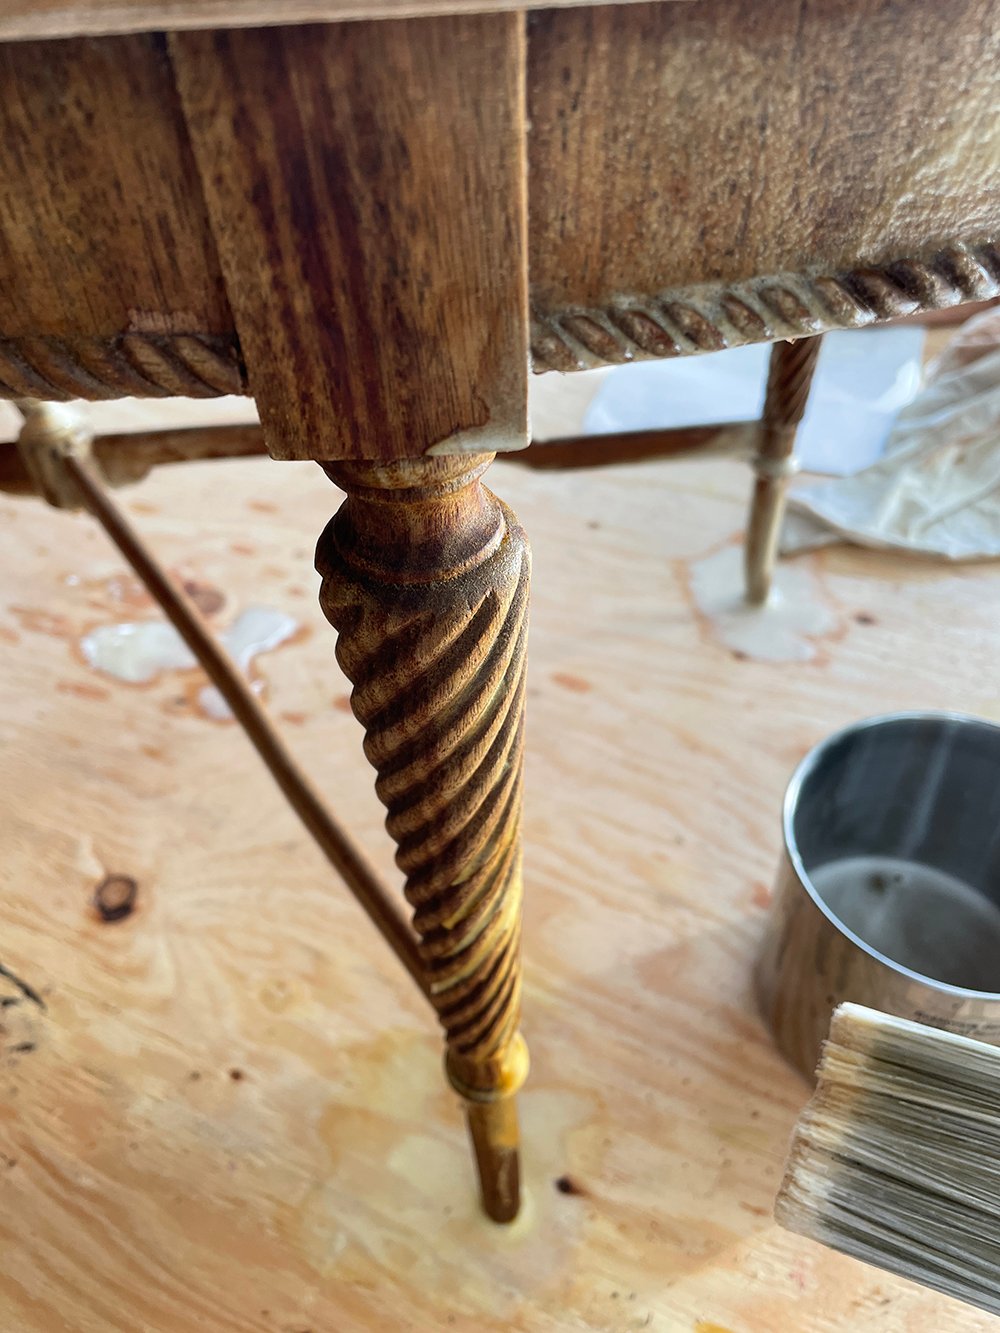
 Once the stain was lifted, we were left with raw cherry wood… which still has a strong red undertone- where it gets the name “cherry”. Emmett decided to grab some wood bleach from the shop at his work and give it a go… especially since we were using a lighter stain color.
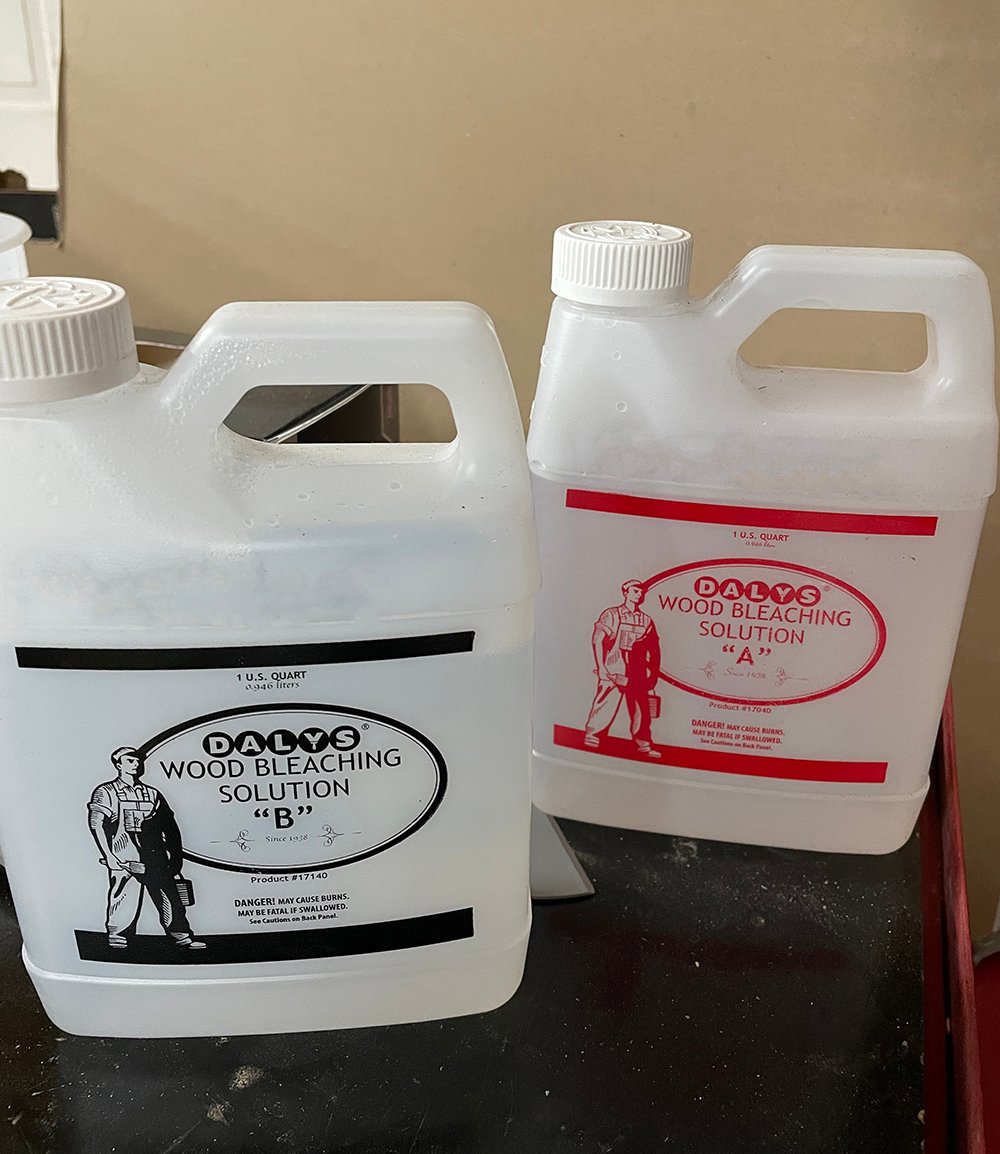 We will definitely be using this stuff again! If you’re trying to lighten wood or remove warm or cool undertones- this stuff works wonders.
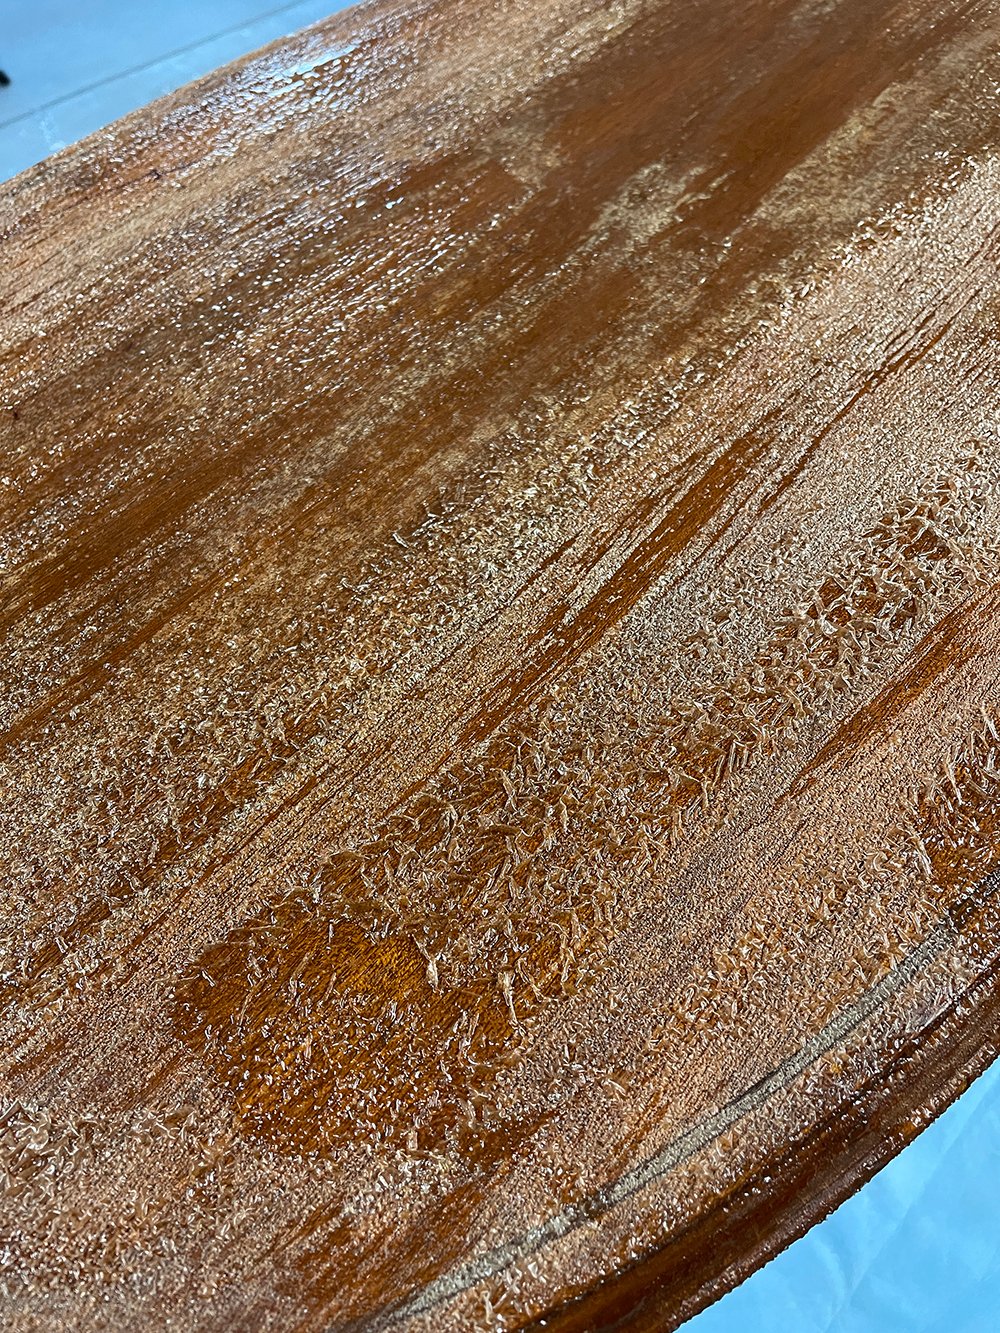
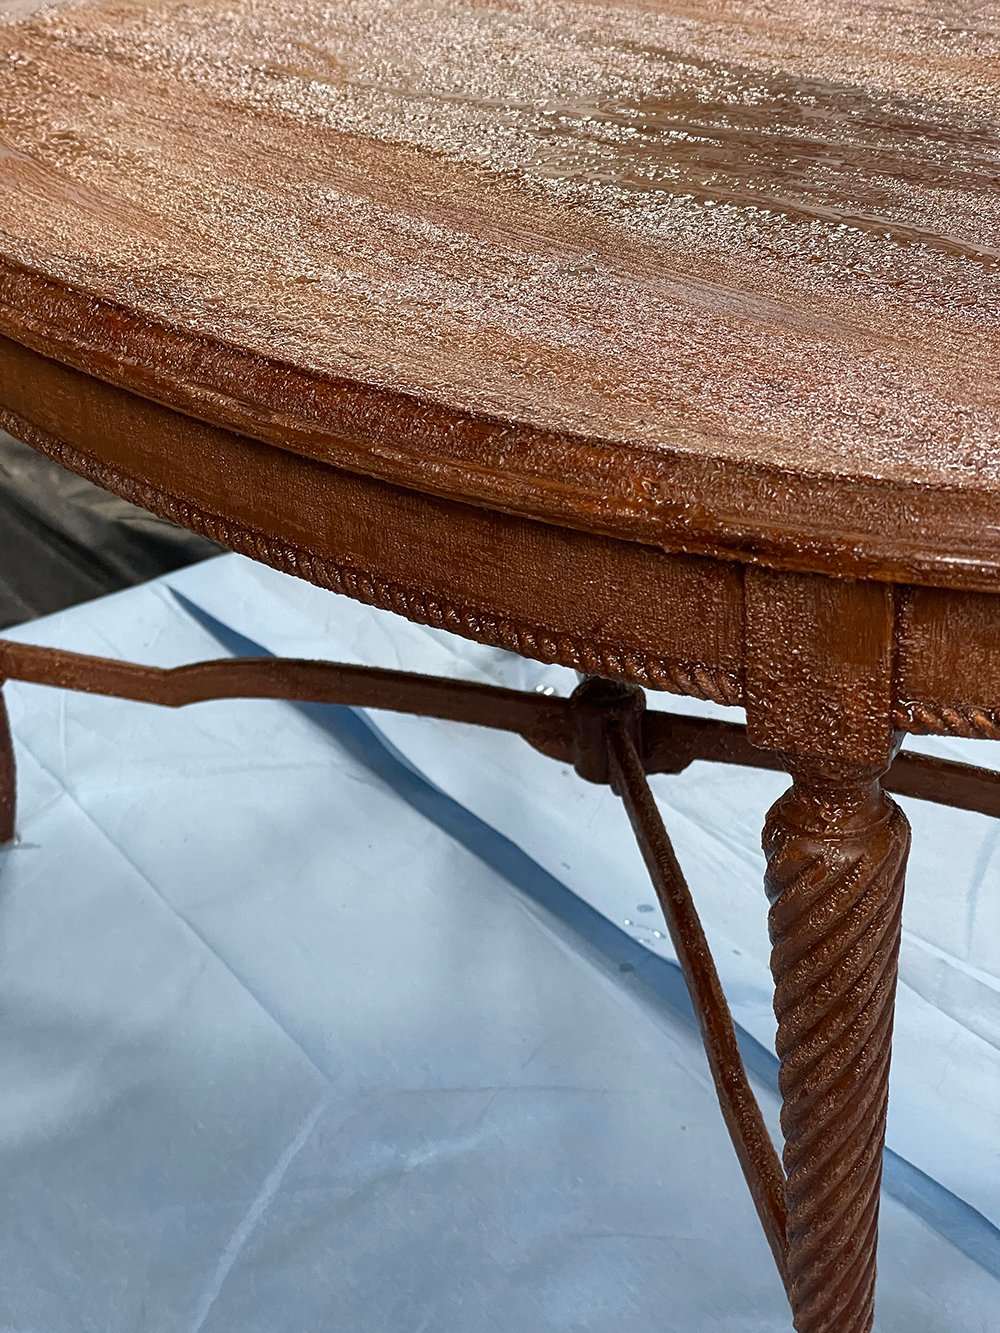
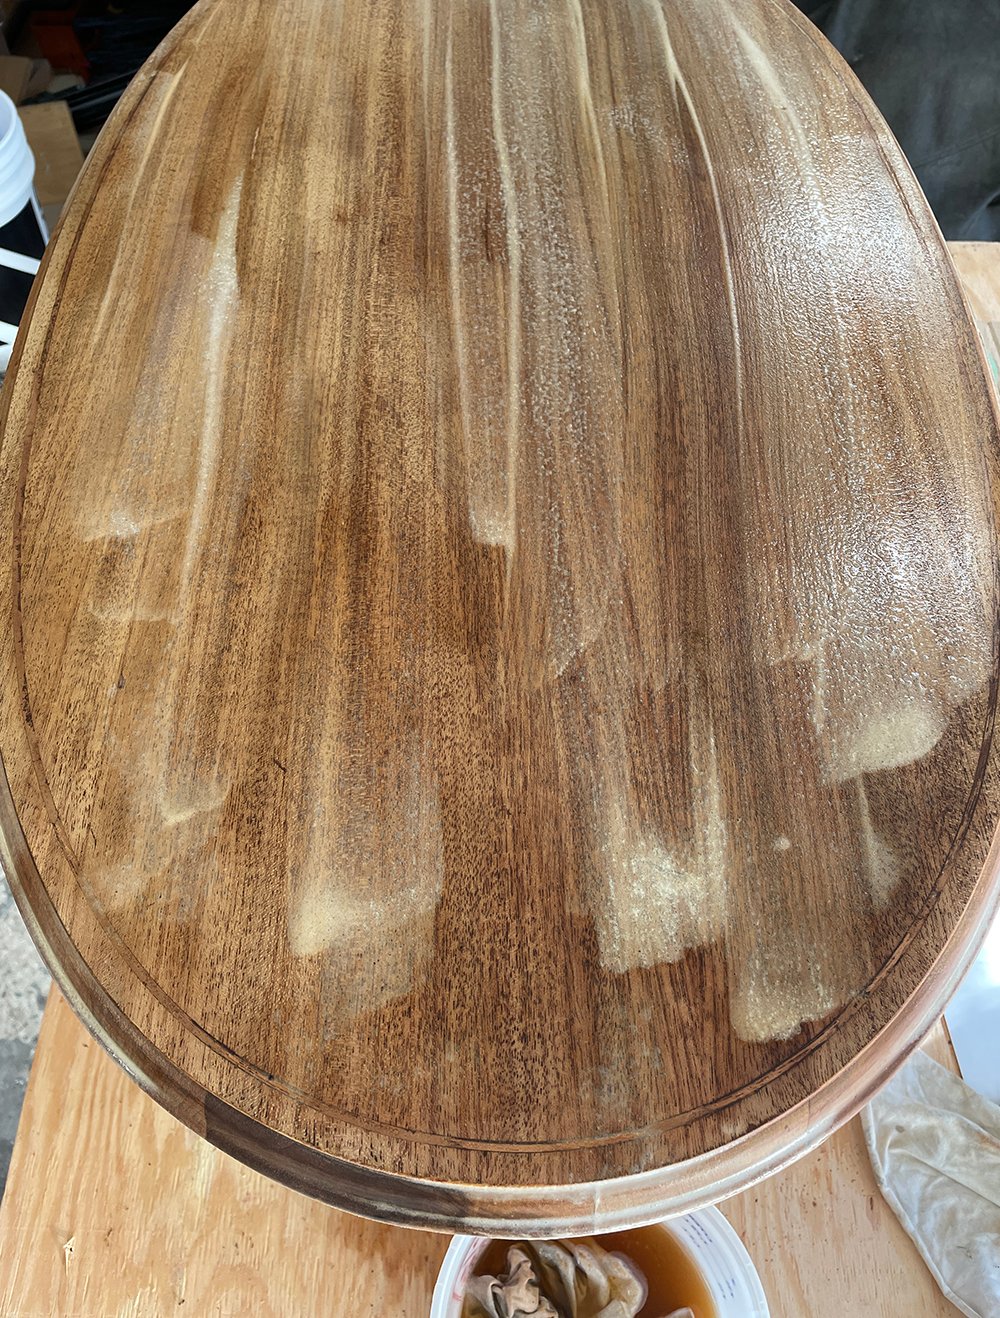
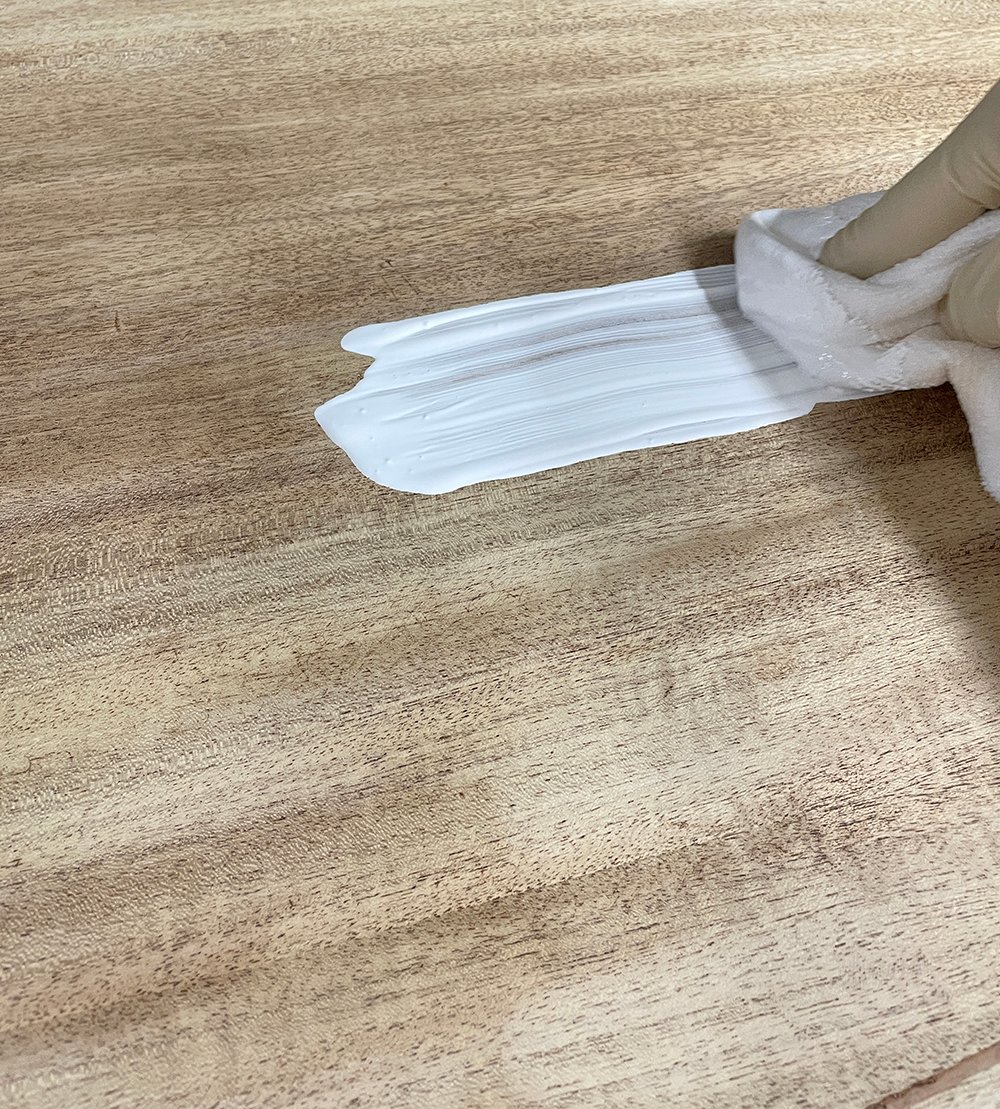
 It goes on pretty thick, like the above photo, and it lifts color from the wood. This was especially helpful for our cherry table. Here’s a closer look…
 You can see how much cooler in tone the table looked after the first pass… pretty incredible. I wish we would have discovered this product sooner!
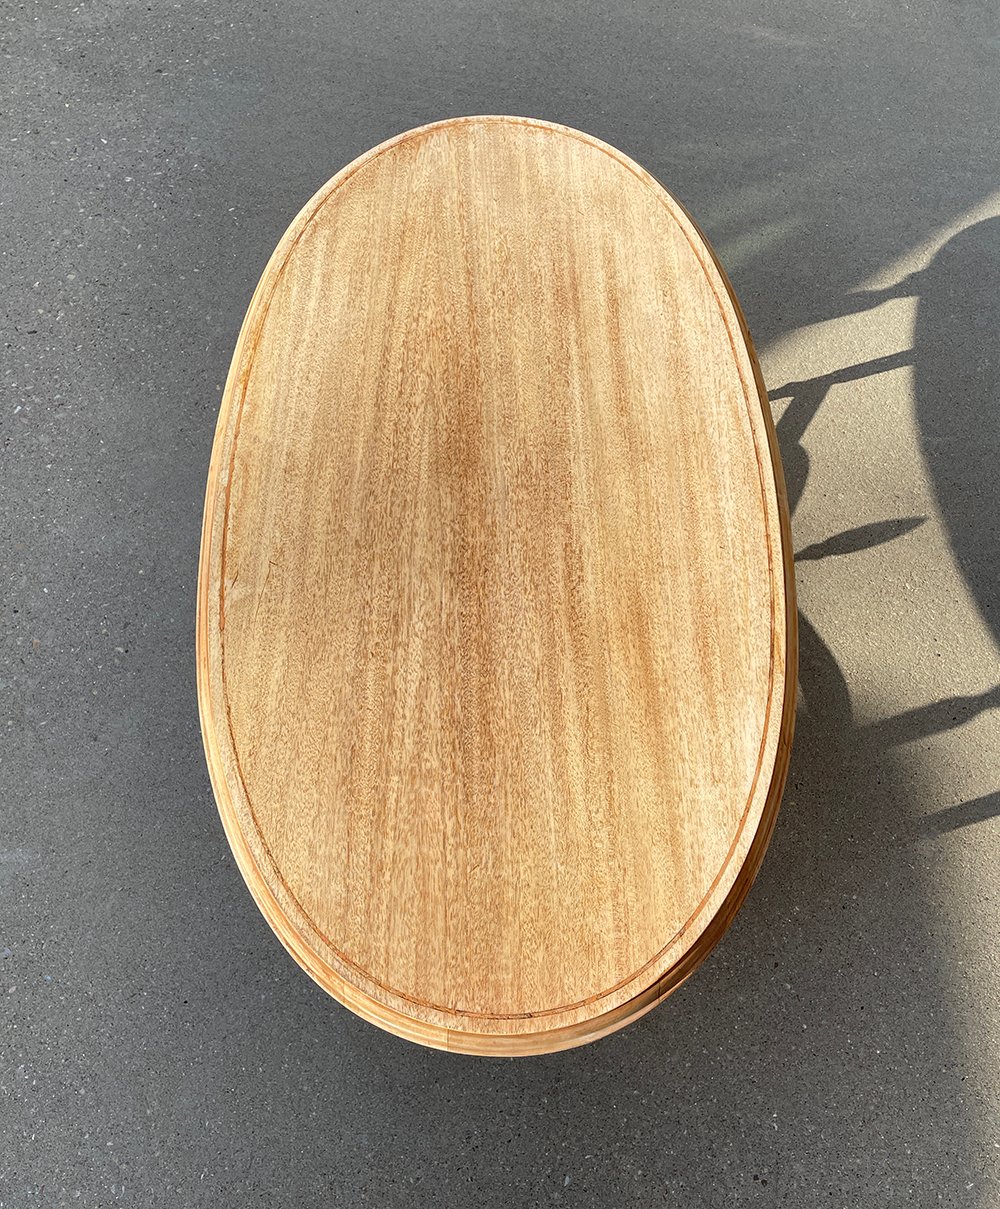
 Once Emmett was finished bleaching the table, we were left with a blonde beauty. At this point, it was looking pristine and set for stain…
 Given we were working with a brand partner on this project, the color was decided- which was a white stain. I’ve used white stain in the past… remember our pedestal makeover? It turned out really lovely and I was fully on board to commit to a similar color again. Emmett got going and stained the tabletop white, albeit a little premature because I hadn’t been given the formal “go ahead” just yet. I bet you know where this is headed- here’s where the DIY drama comes in.
The brand changed the product color, our table had already been finished in white, and it turned out the new project deadline interfered with our trip to Indonesia. We tabled the table and decided to figure it out after vacation (as one does after copious hours have already been spent on said table). We honestly just laughed about it… totally my fault for trying to knock things out quickly before our trip. I finally decided (months after this fiasco) I wanted the table to live in the guest room I’ve been working on, so Emmett repeated the stripping & sanding process to start all over. He was a better sport than I would have been, bless him.
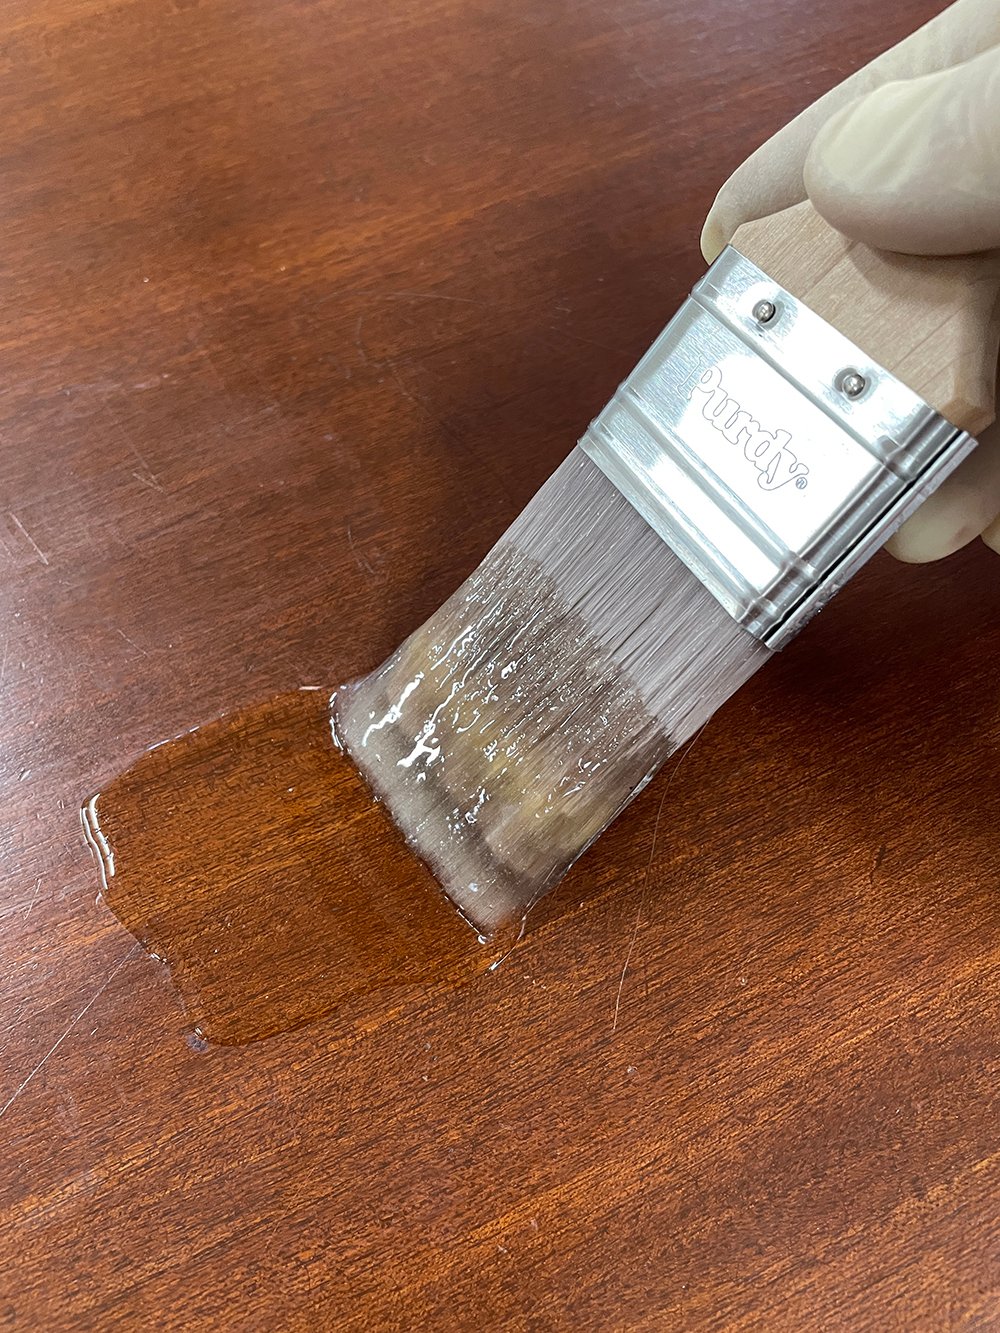
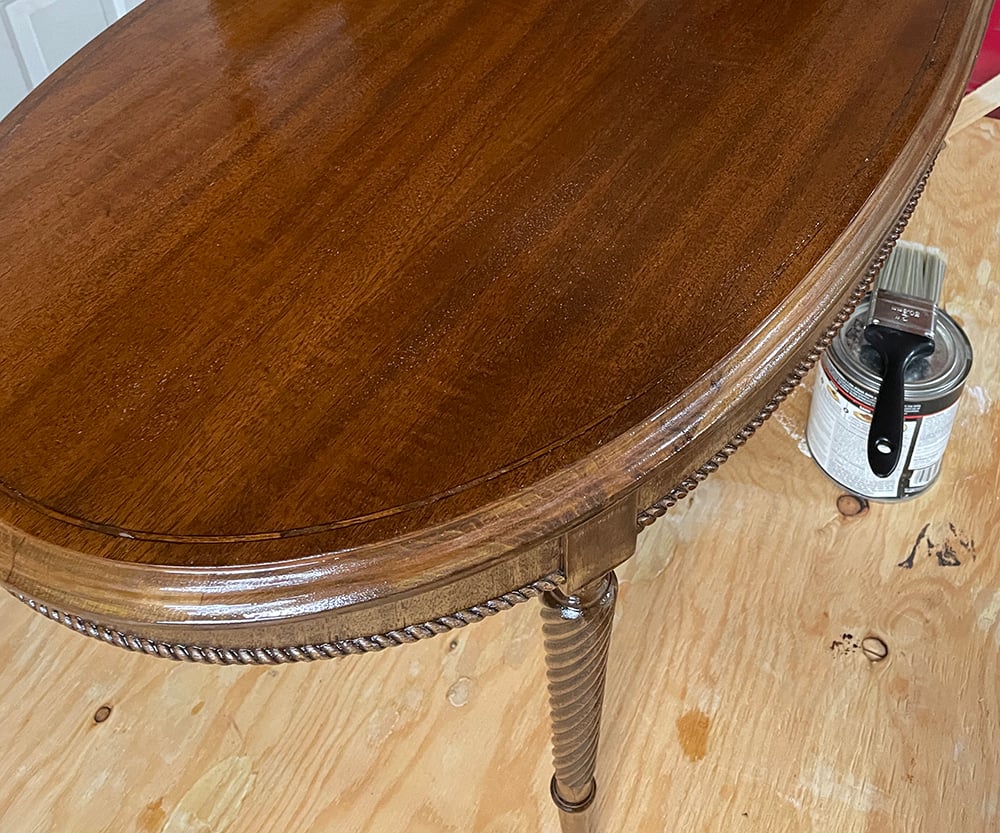
 I’ll spare you the same process photos over again, but being able to choose my optimal stain color for this space- I landed on a warm walnut finish. We used our favorite gel stain again! Here it is drying…
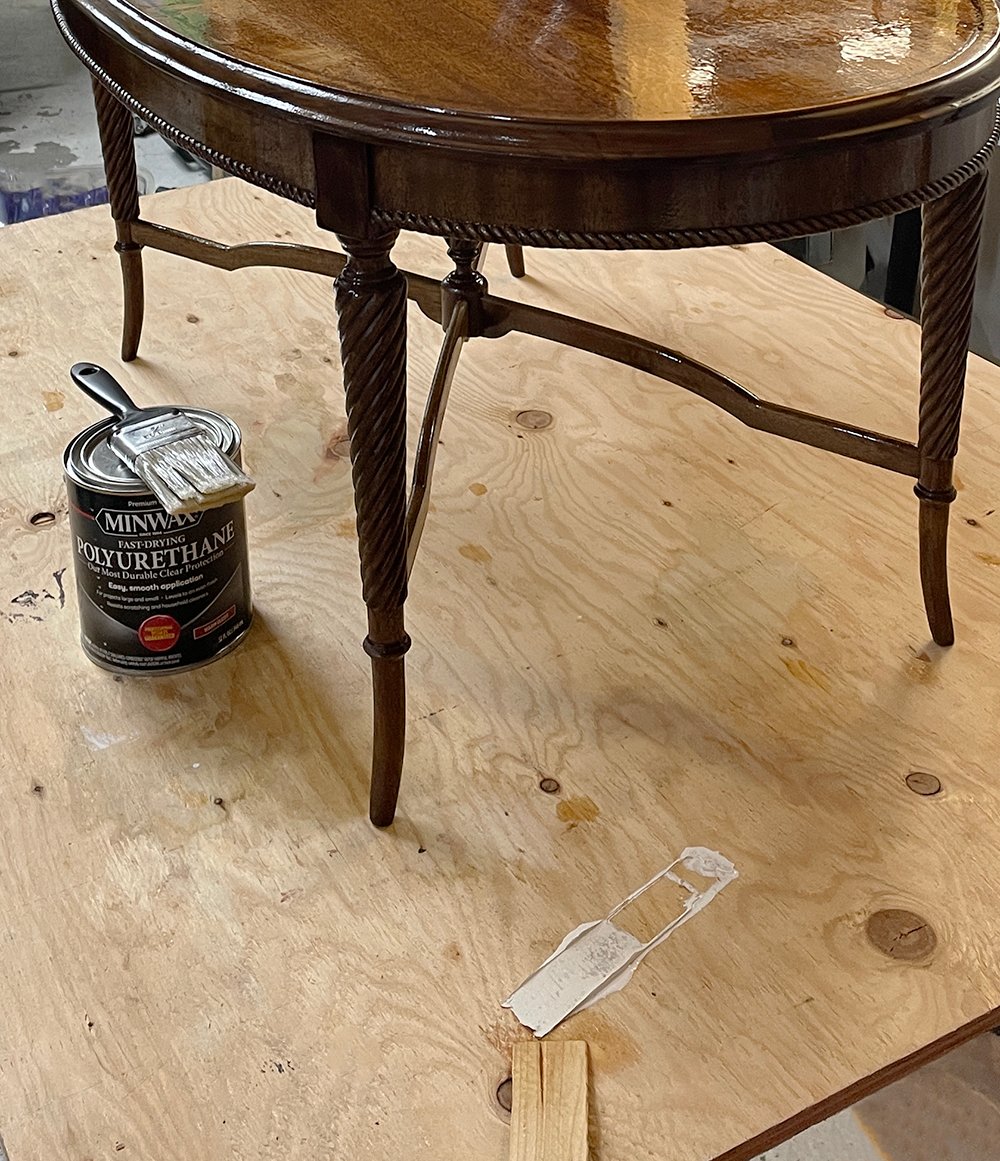
 Emmett followed the stain with a quick-dry poly to give it a nice gloss and durability- especially since it’s living in a guest room that is frequently used.
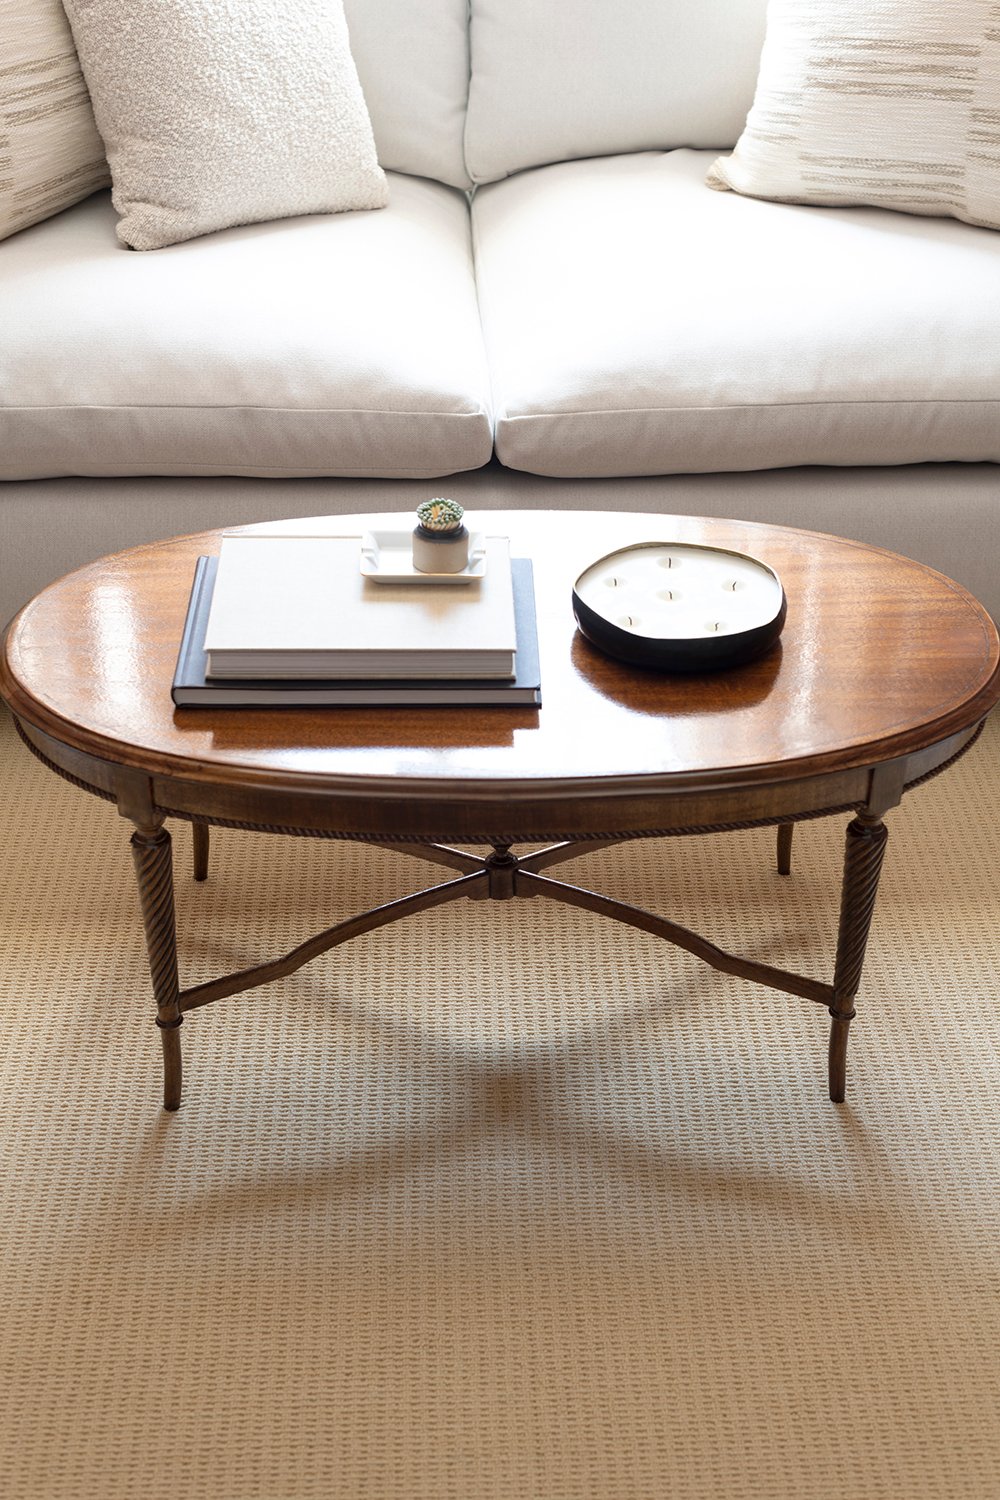
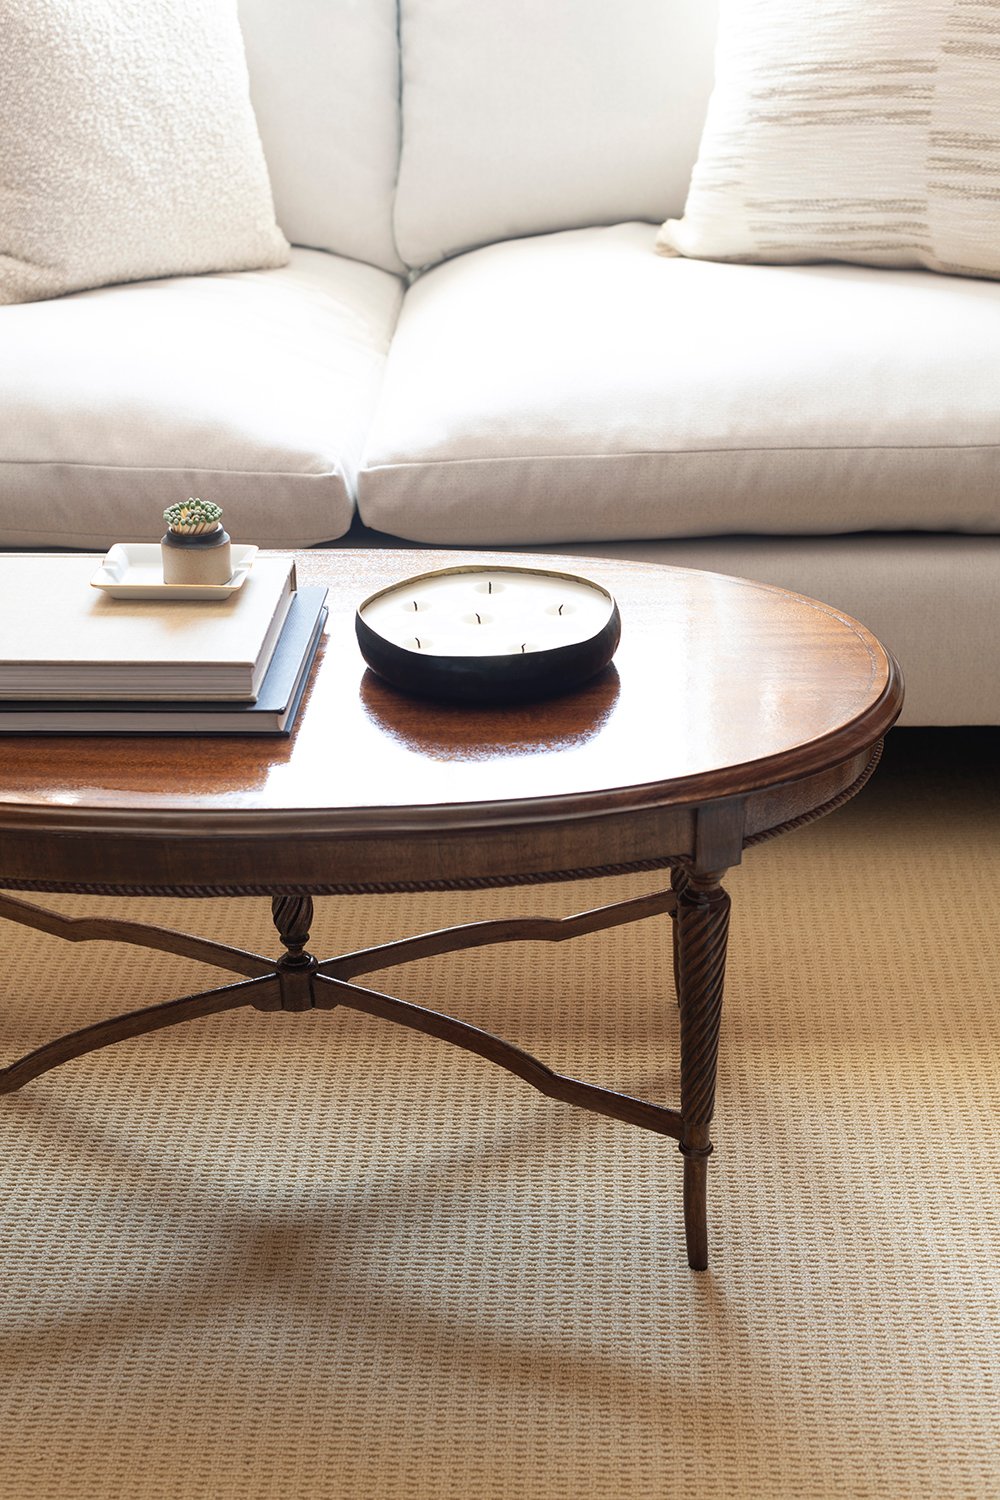
 Ready to see the finished table? I wanted to give you a good look, but only close-ups so I don’t give away the entire room. I’m still waiting on my artwork and haven’t properly styled it yet.
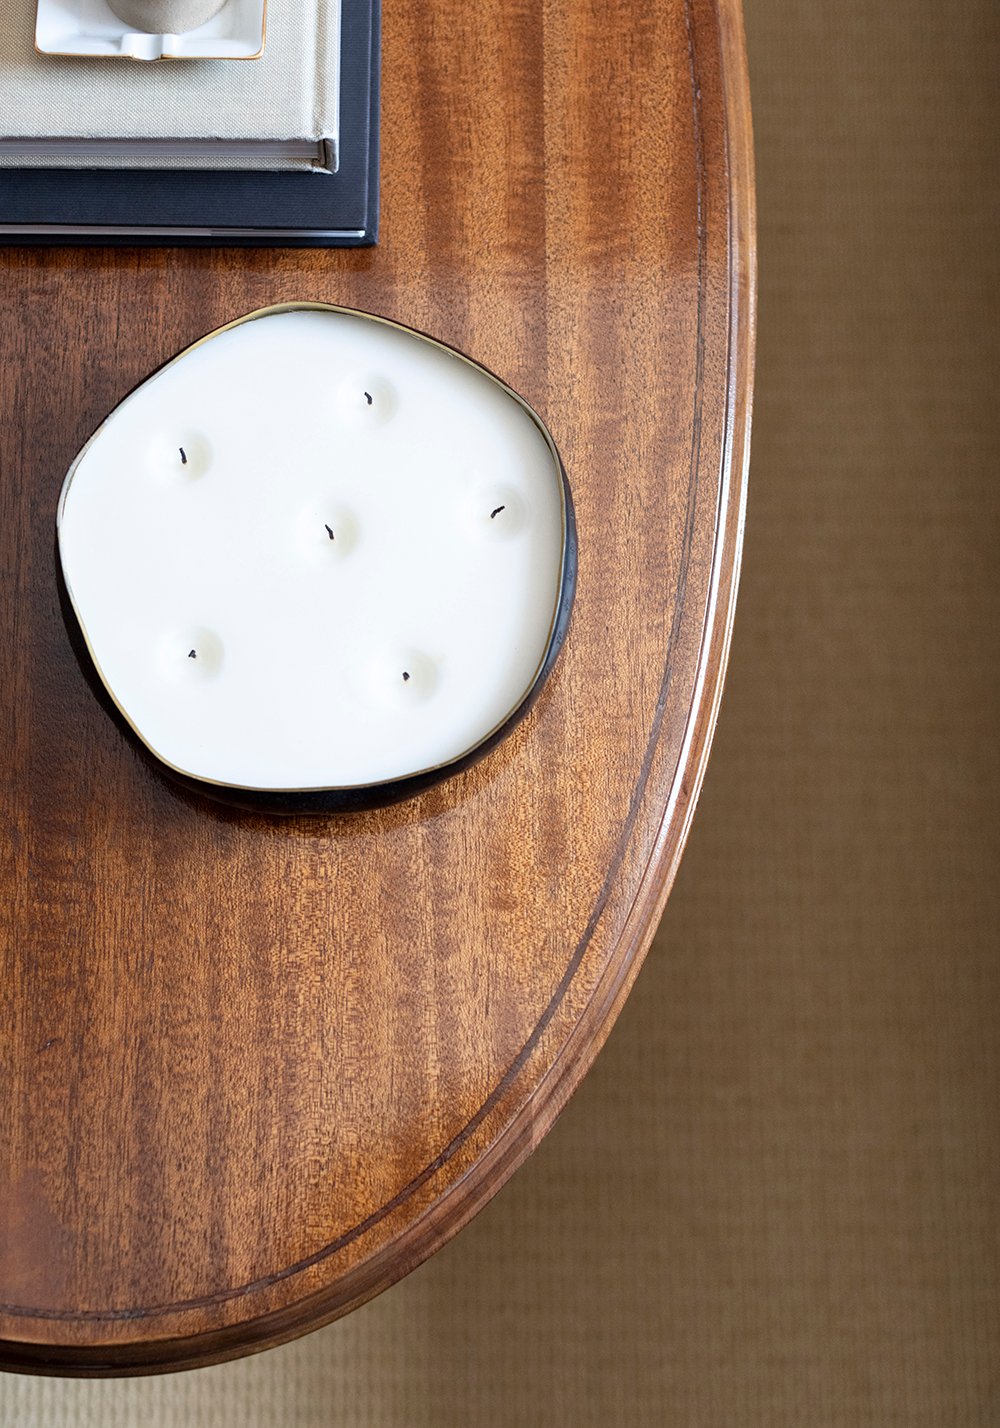 Isn’t the color so lovely and rich? It’s warm, has a deep walnut tone, and doesn’t feel overly red like it used to. I think it pairs perfectly with our guest space… like it was meant to be here all along!
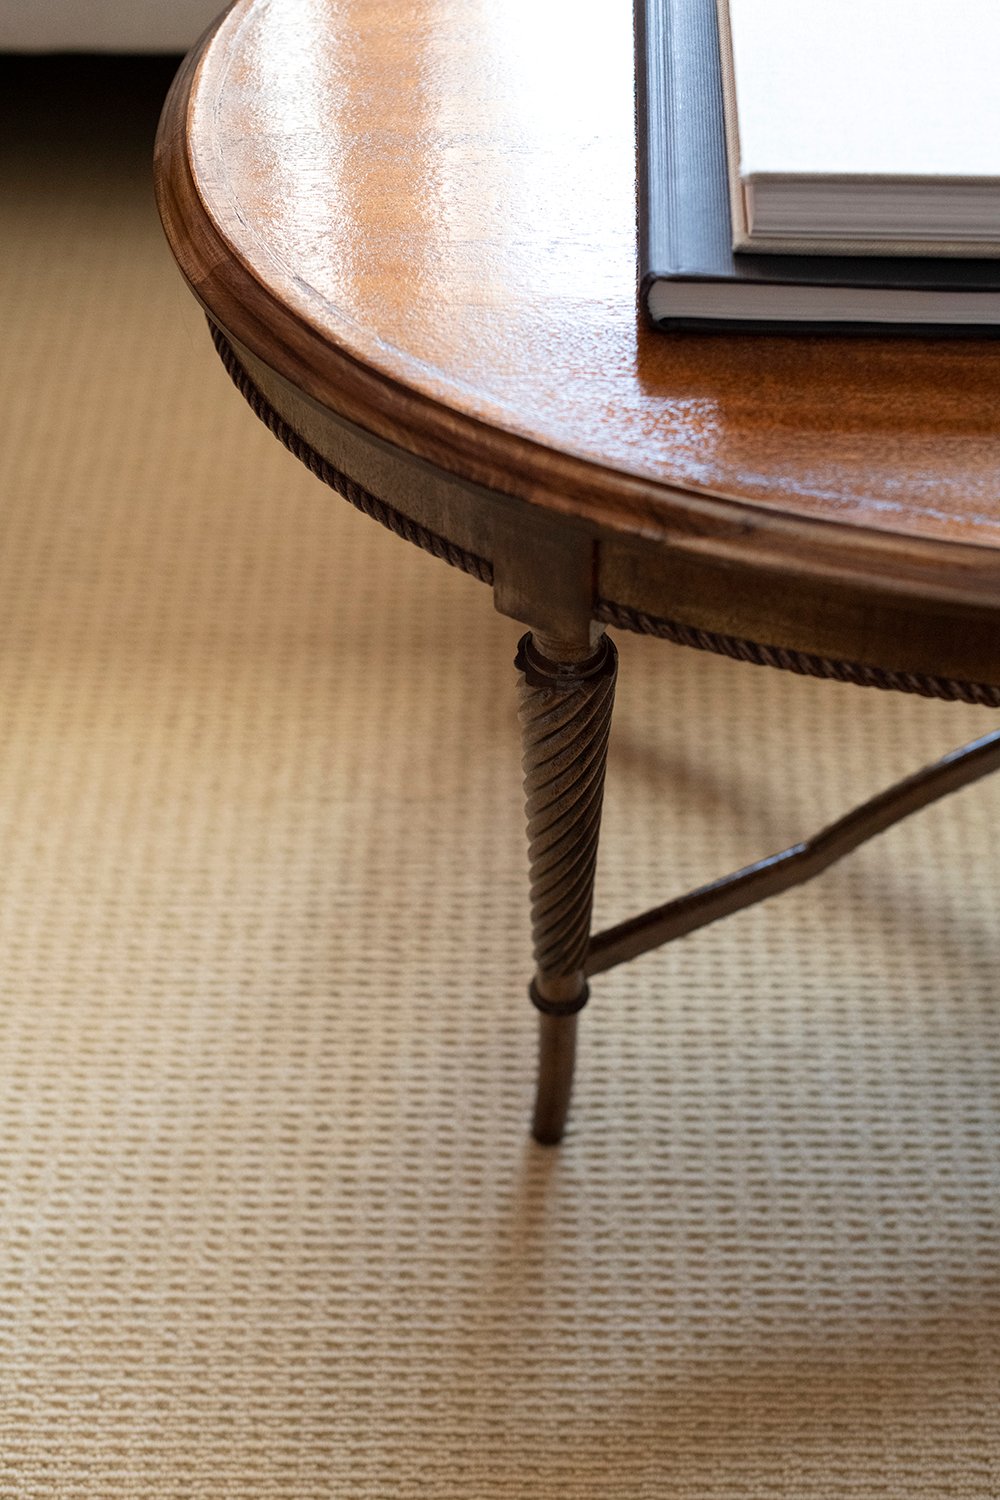
 The lower stretcher and those intricate details are so beautiful in person. Emmett really did a fantastic job bringing this little table back to life. The finish is pristine!
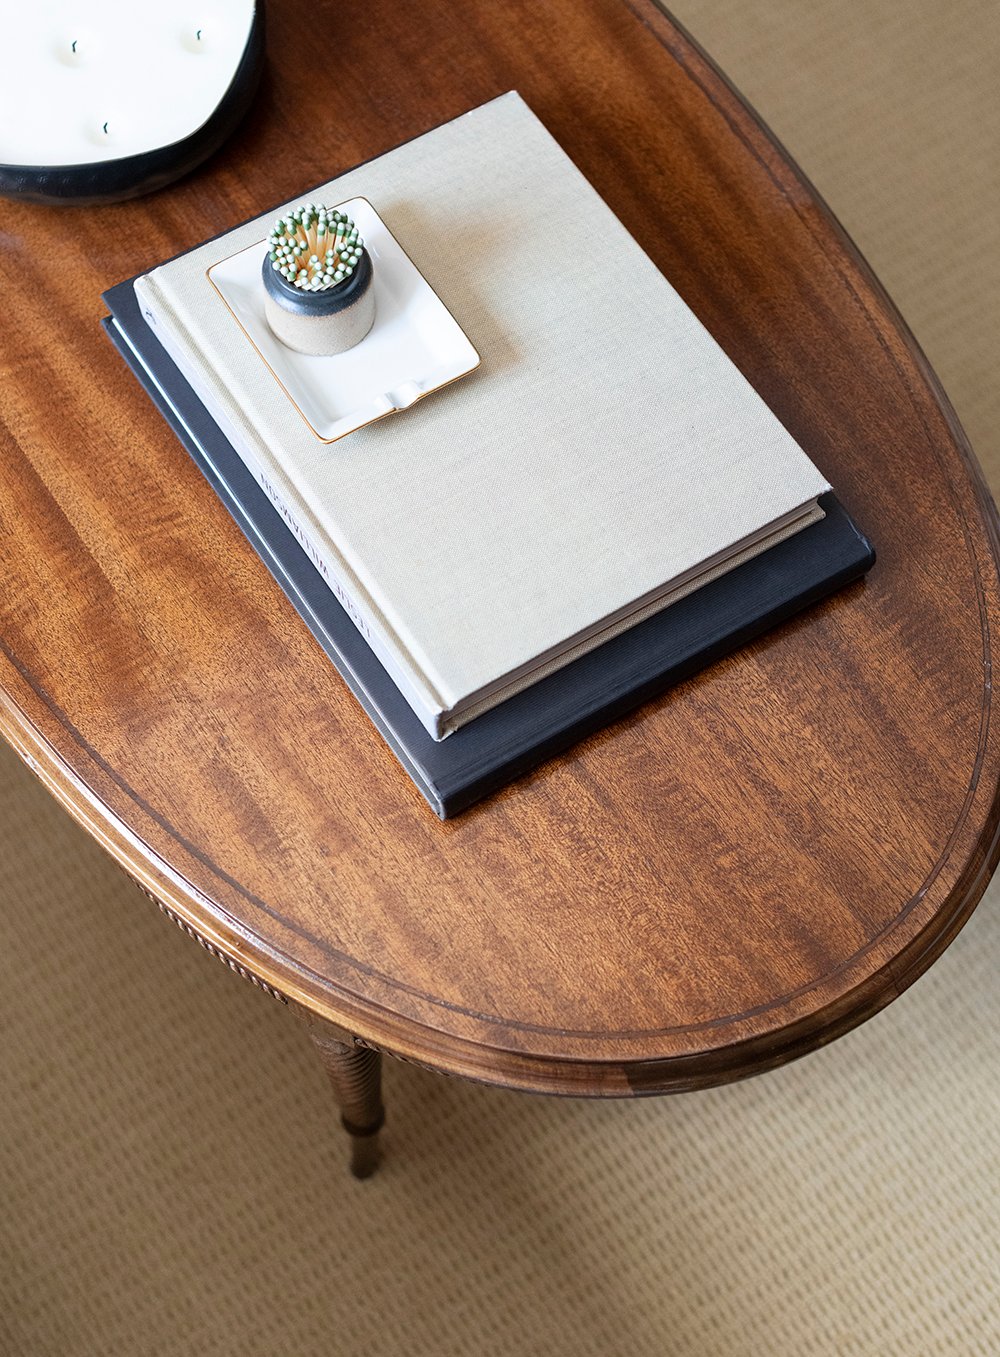 Probably an unpopular opinion because they are said to be “difficult” to style, but I just love an oval coffee table. We have one in our formal living room as well and I think they’re so versatile. They save space, balance corners and hard edges within a room, are family friendly (no pokey edges), and have a gorgeous feminine look to them.
 Hopefully you enjoyed this makeover post… it has been a long time coming! Now that our family has stayed in the space and used it in a “finished” sense, I can definitely say the table worked out really well. I’m happy we were able to pull everything together before they arrived. Have you scored anything great on Facebook Marketplace lately? We’re due for a new roundup post soon!
Good morning! DIY drama (insert theatrical music…) Ha! But also, oof, what a lot of work! I can certainly see why you snatched up that little cutie though. I love all the delicate twisty details. The final color is SUCH an improvement. I’ve often lamented finding a nice thrifty piece with that less-than-desirable cherry finish. Good to know that a remedy actually exists…if I only had Emmett’s patience and skill! As for the table’s installation, I can just picture it working beautifully in that guest room nook! So functional. Anxiously, but patiently, anticipating that reveal! (Waiting for art from the framers seems to take forever, in my experience.) I wholeheartedly agree with you on oval coffee tables. The shape seems more common in the vintage examples I admire. I think of it as so versatile, but now I’m curious why it’s considered difficult to style? I’ve been coveting a dramatic pink marble one on FBMP that I absolutely do not need. Maybe I’ll surprise myself for Valentine’s Day. LOL. Happy to hear that you had such fun with your fam; I bet your house seems suddenly quiet! Now you’ve got three seconds of rest before your next adventure. (Banff?) I so admire your gusto for life! Cheers to a wonderful Wednesday, Sarah!💜
DIY drama, indeed… and so much extra work. Oof. Lesson learned! I love the way this little table turned out though- worth the headache, for sure. I can’t believe we had never bleached wood before now. I wish we would have discovered this product sooner because it’s so handy and easy to do. I’m super excited to share the guest room reveal tomorrow. I just put the finishing touches on the post and scheduled it. I’m eager to hear your thoughts on the paint. It was a tricky one to photograph and is a bit of a chameleon color. I love an oval table! They can be difficult to style because of their shape. Most designers and stylists think in grids & odd numbers for coffee table styling (book stacks, trays, etc), and the oval shape can prove tricky to work in odd numbers because of the shape… sometimes two stacks fit better than three, the shape is more elongated, etc. A dramatic pink marble coffee table?! I need to see this! I do feel like you need it (instigator over her, ha)! Happy Valentine’s Day to you?! Our house is definitely quiet after sending our family home. Having 5 extra people in our house for the week definitely made it feel fun (and loud). I’m in catch up mode (obviously given my late response to comments) after having them here, finishing & shooting the guest space, and now we’re gearing up to catch our flight (Banff) in a couple days. Sometimes I wonder why I pack my calendar so full. Lol! It’s still proving to be a good health distraction these days, so I’m rolling with it. Hope you have a great day, friend! xox
Good tease with the most adorable table and couch! Can’t wait to see the rest of the room. Lucky guests! When you showed a picture of this table on IG I was giddy with excitement and a little envious your find! The legs and shape are my favorite. Wow, it turned out so nice! Emmett did a great job…twice. Never heard that oval tables were hard to style. Our coffee table is the same shape and I agree with it being best for walking around a sofa or with little ones.
Look forward to a FB Marketplace post. Hope your week is going well.
I can’t wait to share it with you tomorrow, Danna! I just finished writing the blog post and it’s all set to go live tomorrow morning. Can’t wait to hear what you think! The table was really meant for that little nook- I’m really happy with how it turned out. I love an oval table because they’re so practical and add a nice soft shape to a space… definitely easy to walk around and are family friendly. They’re notoriously difficult to style because of their shape. Most designers and stylists think in grids & odd numbers for coffee table styling, and the oval shape can prove tricky to work in odd numbers because of the shape… sometimes two stacks fit better than three, the shape is more elongated, etc. It’s a fun challenge!
What an adorable little FBMP score! The shape, stretcher, and detailing is top notch. I’m definitely with you- if I had gone to all that trouble just to do it over again, I’d have been pretty fussy about it. Sounds like Emmett has a ton of patience. He did a fantastic job re-finishing this piece, and I’m drooling over the rich toned stain. I have no doubt it looks perfect in the little nook, and I can already imagine the vignette. I can’t wait to see the entire room pulled together. Was the bleaching process long and involved? I’ve wanted to try bleaching my red oak bedroom furniture- it was never our first choice of furniture but we’ve lived with it so long we’ve grown to love it, and functionally speaking, it’s perfect for us. I’ve long thought a little tlc, bleach, and a new stain would dramatically change the look and feel to something more updated and modern. Either way, I saved the product you recommended. I’d love to give it a go! You’re bringing all the reminders this morning of the refinishing projects I have on deck, and now I’m itching to start one. Your table turned out lovely. Thank you for sharing the process with us! Have a joyous Wednesday!
Isn’t it cute?! I can’t remember what I paid for it, but it was less than $40… definitely a score. I’m excited to share it styled and looking charming in the guest room reveal tomorrow. The color swap wasn’t ideal, but we just had to laugh it off. Oof. Note to self- don’t get ahead on projects, even after contracts have been signed. I wasn’t trying to burn any bridges, so we made it work. Hah! The bleaching process wasn’t bad at all… you apply it just like stain and wait. It’s like magic. I can’t believe we hadn’t tried it before this project, but we both agree we’ll do it again in the future. Easy! You could definitely use it on your red oak bedroom furniture. That would be an awesome update! We used that specific product because Emmett grabbed it from his work (the cabinetry shop). Obviously those are GIANT containers, but I wonder if you could find a smaller (non industrial) quantity? It worked super well.
What a gorgeous coffee table Sarah! A total score 😍 Oval coffee tables are hard to find, even if purchasing new, you struck a gem for sure. Speaking of gems that husband of yours is the “BEST” way to go Emmett 🥳 He has incredible patience and skill for these projects and am totally amazed he refinished it not once but twice 😳 I seriously would have been annoyed about the color change. Haha! I’m not sure what the first finish looked like but the second one is just stunning. What a beautiful add to the guest bedroom, it’s obviously a great size to have a sofa and space for a coffee table. Very convenient for guests indeed. I bet it was tough for them to leave that lovely space as you’ve got the most amazing home, not to mention the most comfy of guest bedrooms. I bet they felt like they were staying in a swanky hotel ☺️ Lucky family!
I forgot to mention on Monday how wonderful you inherited an antique easel. What a lovely keepsake and treasure. I can’t wait to see where it will end up. I’m sure you will find the perfect spot 🥰
I ordered some vanilla from Heilala and am anxious to try it. I ordered 2 bottles and qualified for a free package of vanilla sugar. Yay! I’m using a ton of vanilla these days as I making yogurt nonstop. And I’m excited to taste the sugar too! 😋
Have a super terrific day and the makeover on the coffee table is spectacular 🤩
Thank you so much, Colleen! I definitely found a gem… in the table and Emmett. We were both pretty annoyed about the color change, but what can we do. We just had to laugh it off. It was a lot of work on his part, but he didn’t complain. Bless him. Ha! I learned a valuable lesson not to jump ahead. My planning brain makes that difficult. The white stain honestly didn’t do the table justice. I can’t wait to show you the final styled space in the guest room reveal tomorrow- I think it was meant to live in that room with that pretty walnut color. It looks perfect! The easel I inherited is currently living in the basement, but it’s BIG- so I need to find some large scale art for it. I have no idea where it will live, but it’s definitely special. Did your vanilla and vanilla sugar arrive? I can’t wait to hear what you think about it. It’s almost time for me to order more- we go through it pretty quickly with all that baking I’ve been doing. You inspired me to add a splash to my vegan cashew yogurt (which is not my favorite) and it has significantly helped! Here’s to hoping I can have dairy again soon. I get my food sensitivity results back next week, so my fingers are crossed.
Sarah, what a lovely coffee table! A total rating Even if you get a new oval coffee table, you have undoubtedly found a treasure. Speaking of diamonds, your hubby is the “BEST” choice, Emmett. I’m completely shocked he refinished it twice since I would have been irritated by the color shift. He has amazing patience and skill for these projects. Haha! I don’t know how the first finish looked, but the second one is really gorgeous. What a lovely addition to the guest bedroom, and what a nice size for a sofa and a coffee table. Really convenient for visitors. They must have found it difficult to leave it.
Thank you so much! Emmett really is the best, ha. He was a good sport about refinishing. We’re usually on the same page and were both a bit annoyed, but made it work. We both agreed the second stain color was much better for the table anyway. It ended up working out, despite the extra hours he spent. Whew!
I am looking for a lovely wood coffee similar to this one but just can’t seem to find one. Love the legs and the bead work on this! Job well done!
Thanks so much, Bea! Not quite the same, but very cute!! Check out this one: https://rstyle.me/+Uo3B6kxqmJPbJ67roBtRtw