Guest Bathroom Renovation Recap
 As promised, with each room Emmett and I renovate, we kick things off via video and wrap them up in the same way. Click through to watch our guest bathroom renovation recap… where we share our final thoughts, challenges we encountered, the timeline, the budget (a highly requested topic), and a couple things we’d do differently, as well as notable moments from the renovation. This is a fun post!
RECAP
Let’s dive right into the video recap. Be sure to watch until the very end because Emmett accidentally spills the beans on our next big project. Haha! Oops. Oh well- we’re all friends here… no secrets.
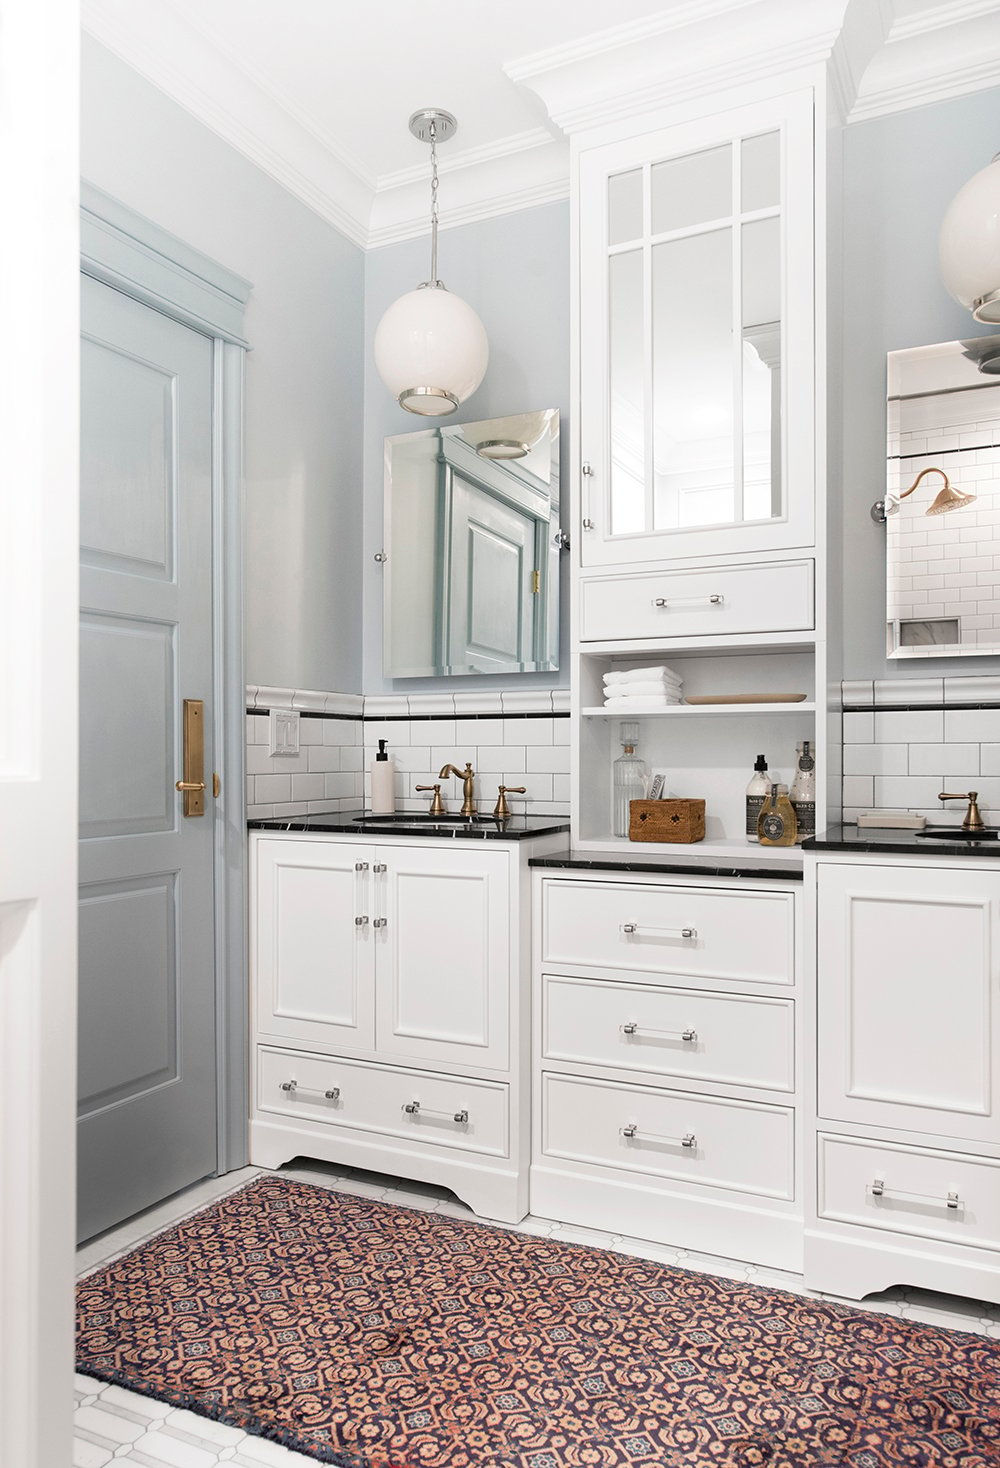
The name of this renovation was TILE. So much tile. I’m really pleased with how the space turned out though and all that tiling was well worth it in the end. I actually got a manicure last week, which is something I hardly ever do, but my hands were begging for it. I’m happy to say, I can now unlock my phone via fingerprint again. Anyway, moving onto the timeline…
TIMELINE
This renovation took place over the course of 8 weeks. It was pretty fast given the size of the room and amount of work we had to do. There toward the end, I honestly didn’t think we’d make our deadline. We pulled a LOT of late (1 – 2am) nights. Here’s how the timeline looked:
- weeks 1 & 2 // demo
- weeks 3 & 4 // framing, plumbing, electrical rough-in
- weeks 5, 6, & 7 // drywall, cement board, priming, waterproofing, tile, and millwork
- week 8 // finishing work- install light fixtures, paint, grout, install plumbing fixtures, install door, style & photograph

BUDGET
My goal on the blog has always been 100% honesty & transparency… so if that means sharing the numbers and cost for each project, so be it! It’s important to know just how far your dollar will go and what it will get you when renovating. For our budget, keep in mind our guest bathroom is BIG. It’s literally the size of one of our old bedrooms and spans 11 feet across- that obviously meant ordering more material. The size of your space definitely influences the cost. I’m breaking down our estimated bathroom budget below. I also tried to link everything!
- toilet lever // $34
- toilet // $449
- toilet seat // $105
- bathroom vanity // $2,834
- vanity hardware (13) // $263
- bathroom mirrors (2) // $600
- shower trim // $518
- vanity ottoman // $86
- pendant lights (2) // $140
- semi flush mount // $100
- exhaust can lights (2) // $240
- paint // $140
- shower niche marble materials // $20
- toilet paper holder // $45
- marble remnant slab + fabrication // $800
- bathtub // $707
- shower rod // $7
- towel hooks (3) // $75
- widespread faucets (2) // $868
- subway tile (19) // $1,273
- base tile (60) // $165
- black pencil liner (140) // $135
- bullnose subway tile (35) // $26
- chair rail tile (140) // $270
- floor tile (94) // $1,784
- wallpaper (1 roll) // $285
- millwork // $750
- building materials / plumbing materials / electrical materials // $1,500
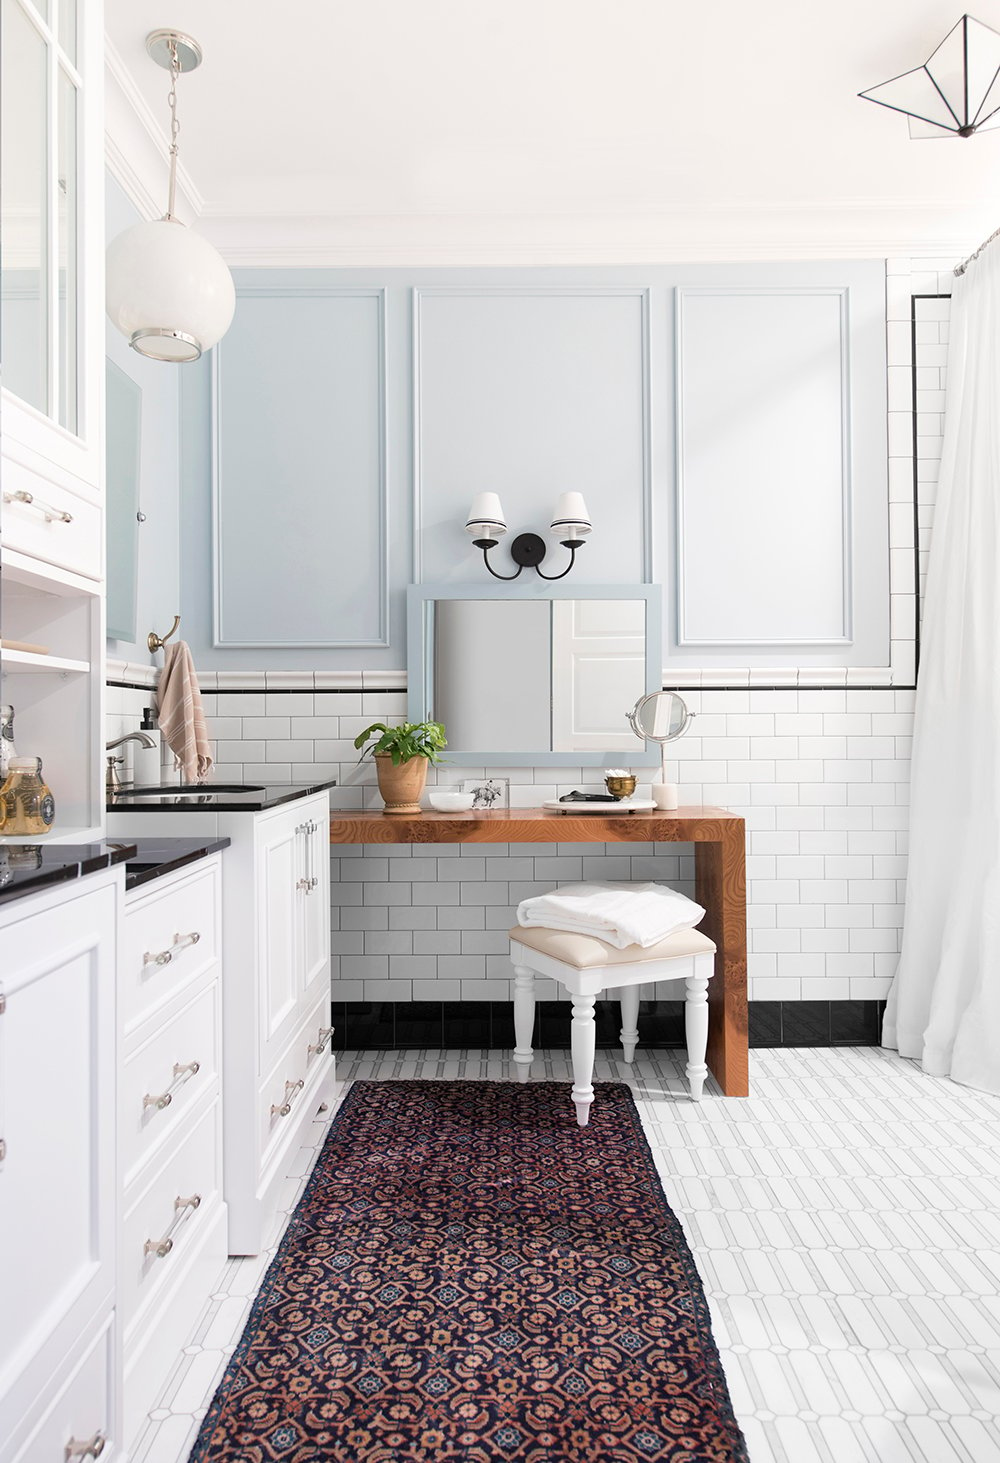
- burl vanity table (we made it) // $750
- vanity sconce // $90 (with DIY shades)
- interior door // $300
- door hardware // $283
- accessories + linens // $650
TOTAL = $15,292
I think that’s an amazing price for the quality, aesthetic, and all of the material that went into the space. Emmett and I are both really thrilled with how things turned out and we’re guessing we saved at least $15k doing the labor ourselves. If you plan to hire a contractor for a similar project, you should budget for at least $30k.
Lots of bloggers are FINALLY starting to share budgets and begin the important discussion in regards to money. Thanks to HGTV and other home improvement shows, lots of people have a very skewed reality of what home projects actually cost. To compare another bathroom budget, check out my friends Chris & Julia’s budget breakdown of their master bath. They hired the labor out, so that can give you an idea of how much a contractor would cost.
RESOURCES
In case you missed anything or didn’t get to follow as closely as you would’ve liked, you can find every single guest bathroom related blog post linked below! For all other resources, visit the “shop my house” page.
- Our Guest Bathroom Design Plan & Before Images
- Guest Bathroom Reveal
- How to Choose Cohesive Bathroom Plumbing Fixtures
- How to Install Mosaic Floor Tile + Marble Mosaics
- Ways to Upgrade Your Toilet + A Roundup of Favorites
- Stocking a Guest Bathroom for Visitors
- How to Make Subway Tile Look Classic, Not Basic
- Selecting Interior Doors & Hardware Style
- Extra Long Shower Curtain DIY
- Choosing a Vintage Rug for the Bathroom
- A Day in the Life Of : Renovating
- Double Sconce Easy Shade Upgrade
- Ways to Customize a Readymade Bathroom Vanity
- How to Plan and Design a Shower Niche
Whew!! There is A LOT of good stuff crammed into that list. I’ll wrap things up by saying THANK YOU for following along, cheering us on, and for offering your encouragement during this project. Renovating is always a rewarding challenge and we couldn’t have done it without you. I’d love to answer any questions or comments below!
So appreciate your transparency – it really does help me be realistic in my plans and dreams!
So happy this post was helpful Danielle! In my opinion, it’s always better to be educated than disappointed when it comes to the renovation budget :) xox
You two are the cutest. I appreciate the $$ discussion though some may find it awkward. Media just so rarely represents reality…Maybe that’s not its purpose. Deep thoughts for a Monday.😁 Also interesting to know that even new houses aren’t square! Now I don’t feel so bad about my old wonky walls. Hope you’re having an amazing time with the fam; can’t wait to see the chairs you and g-ma are recovering! Dining room?
Ha, thanks Peggi! I agree with you- media isn’t realistic most times. Yes- as it turns out, apparently new homes have wonky walls too? Argh. The chairs are for a basement game table :)
Thank you for keeping it real! Your space turned out gorgeous and you both must be so proud of all your hard work. Not only did you save a heck of a lot doing that yourself, it’s incredible that you stuck to your timeline and got everything done (and photographed and shared on the blog) just in time for your visitors.
Thanks for sharing!
I so enjoy these renovation recap posts! Your guest bath is absolutely gorgeous. A quick question about your timeline: you’ve mentioned that you both have full-time jobs, did all of the work on this space happen during the evenings and weekends? We’re planning our kitchen renovation currently and are trying to work out a realistic timeline. Thanks so much!
Thanks Elizabeth! Your timeline would definitely depend on how quickly you work and how many hands you have helping. There are a lot of factors! We still finished later than expected- even with added “padding” to our timeline and recruiting the help from two friends for a weekend. We renovated our kitchen last year in the same way and it took us nearly 5 months. Of course a portion of that was waiting on permits, cabinetry production, etc… but that’s part of it. Hope this helps :)
Your bathroom looks amazing! You and Emmett are clearly a kick ass team when it comes to design and renovation. I also LOVE your blog’s transparency. So many home blogs that are published always hide costs. Thank you for creating such helpful and realistic content!!! xo
Thank you so much Marni!! We really love what we do, and my goal has always been 100% honesty, so I’m happy that shows :) xox
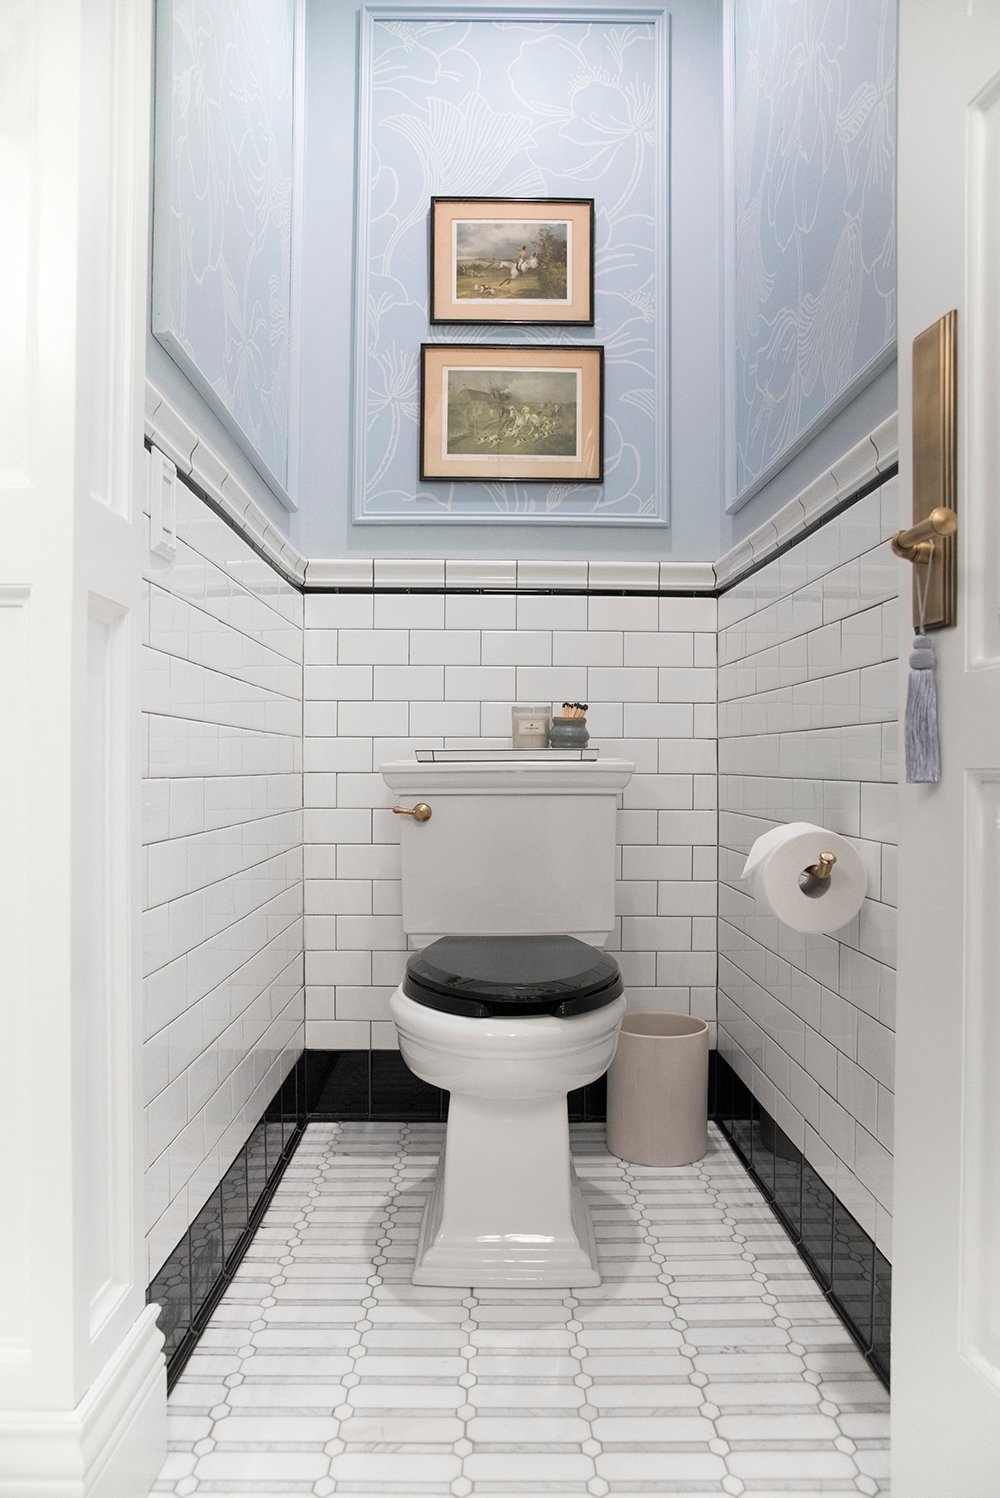
Apologies if you answered this question elsewhere – can you talk about the decision not to use the wallpaper in all of the millwork “niches” around the room and only using it in the area with the toilet?
No problem, Kelly! I wanted the water closet to have a fun little surprise subtle pattern, so I kept the wallpaper contained and balanced in the 3 panels surrounding the toilet. There is already SO much good going on in that bathroom (detailed tile work, burl wood, patterned floor, vintage rug, mixed metals, etc)… I didn’t want the wallpaper pattern to compete. Sometimes too much of a good thing can be a bad thing. I like that it’s just a nice unexpected element in the toilet niche and allows the other beautiful items in the space to shine. Hope this helps to answer your question :)
I love the polished nickel faucets. I am considering that finish for my upcoming bathroom renovation because it looks warmer than chrome. What cleaner/wax do you use for maintenance?
Me too! I like the warmer, more traditional look. It’s pretty much maintenance free! I’ve toured the Delta headquarters and they design their finishes to be long lasting. You can just use a regular cleaner.
Beautiful! How does this compare to your last bathroom remodel?
Thanks Emily! This renovation was on a much larger scale. We had more square footage to cover so it took significantly longer. I’d say the styles are still pretty similar though! This one probably skews a bit more traditional.
Can you link a source for the transition piece you did for the floor tile?
I just grabbed an inexpensive marble threshold from Floor & Decor!
Hi! Do you mind sharing the grout color you used?!
There are a lot of possibilities – With a grout that includes portand cement (usually sanded) white or splotchy grout may be from efflorescence, usually due to moisture content of grout. If it’s unsanded grout I’m not sure what’s happening in your particular situation.
Your crown molding is gorgeous and is very similar to the cove look we need to replace. Honestly, the whole thing is the perfect style for our 1924 apartment with 9′ ceilings, although your bathroom is about double the size of ours! I saw in your list that the millwork is from Metrie – do you know which item the cove/crown was? I am struggling with figuring out the best size for all of our moldings. Many thanks
Absolutely! I have all of the millwork linked in this post, Beth :) Hopefully it’s helpful!
I love the style of this bathroom. I noticed that the vanity is sold with a white top and yours is black. Were you able to substitute at the same cost, and if so, what vanity top did you use? Thanks and well done
Thank you, Jennifer! Check out this post for more on that topic: https://roomfortuesday.com/ways-to-customize-a-readymade-bathroom-vanity/