Basement Bedroom Reveal
 Last month I shared my design ideas and plans for our basement bedroom. Click here for the before images (if you missed them) and my initial thoughts on giving this room a quick, budget-friendly makeover. I’m excited to give you the full tour of the finished space today! Click through to check it out- I’ve also linked all of the sources for you. For being a fast makeover, I’m really happy with how this room came together…
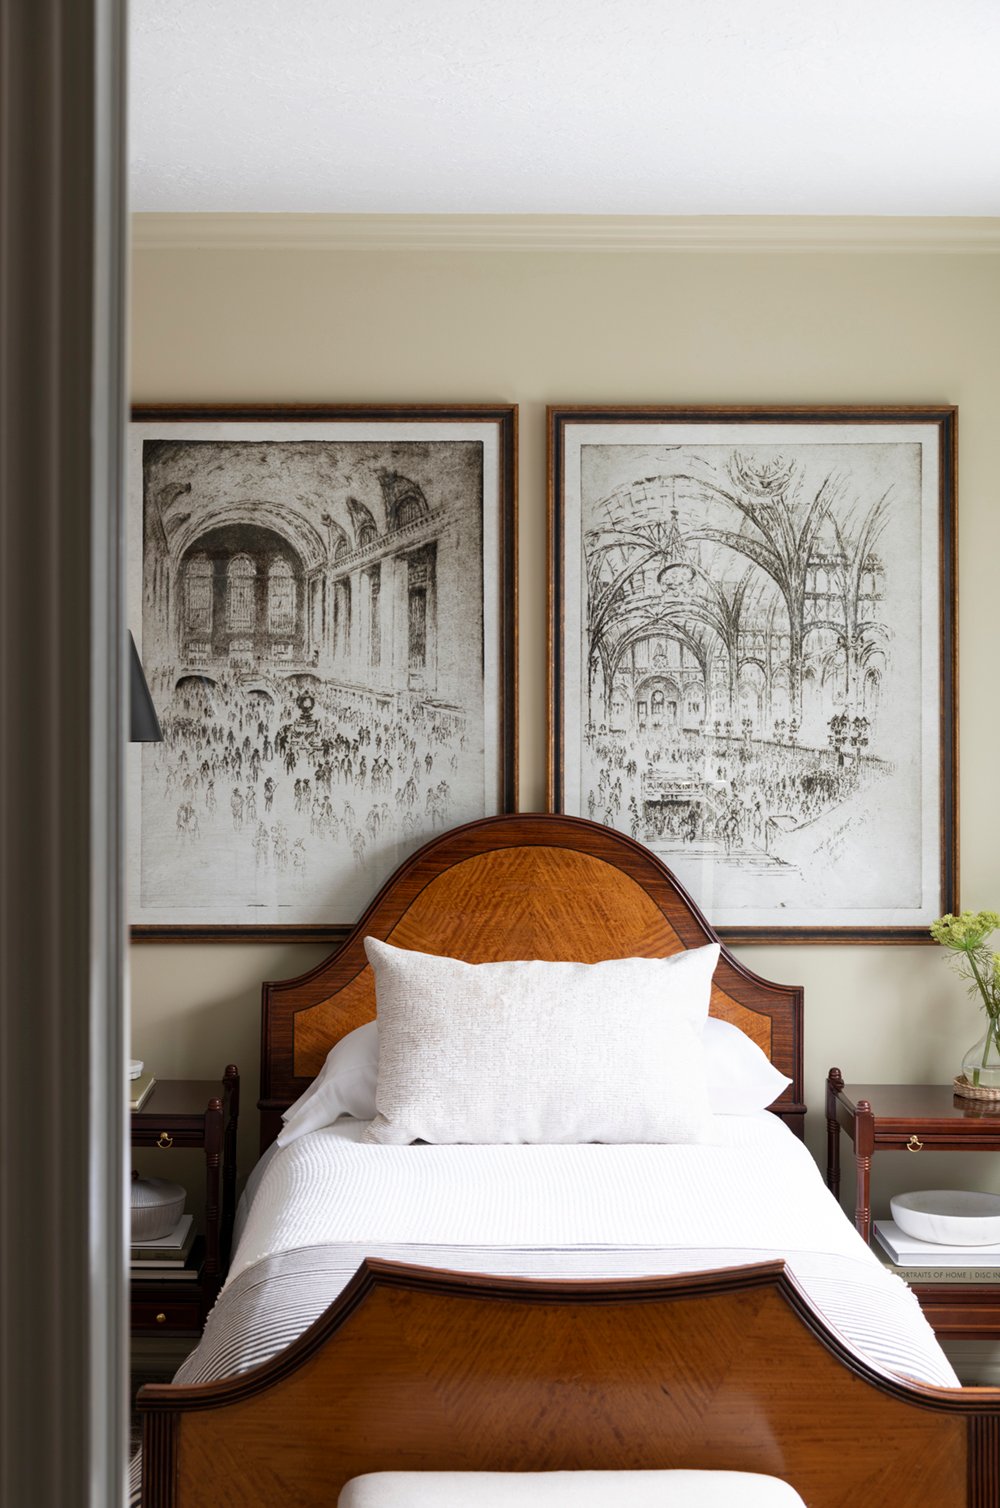
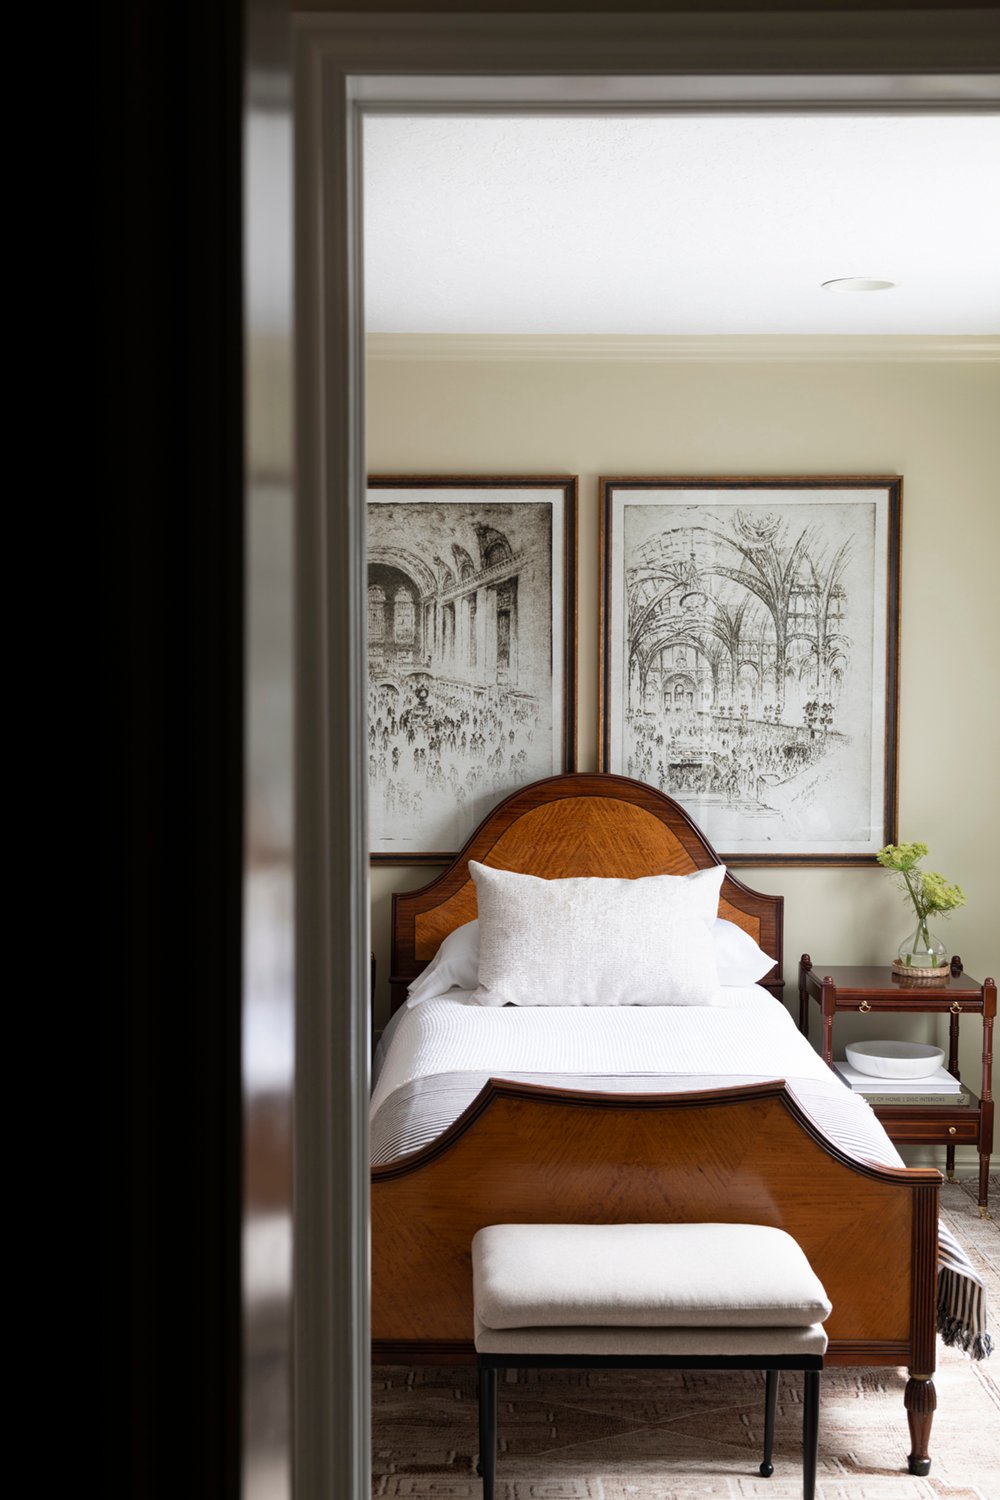
First, a quick reminder of where this room started. Those corner shelves and closet doors had to go! Aside from that and a fresh coat of paint, the only other big change I made in here was replacing the window treatments. Otherwise, this room mostly required thoughtful design & layering, adding some light fixtures, and installing art. Easy!
 Rather than replacing our closet doors- a costly and labor intensive endeavor we’ve tackled time and time again, I decided to install a wall-to-wall ceiling track with heavy drapery panels. Why? Being a basement bedroom, I knew this space could seriously benefit from soft texture and visual warmth. It’s a cold space, so panels made the most sense while remaining cost effective.
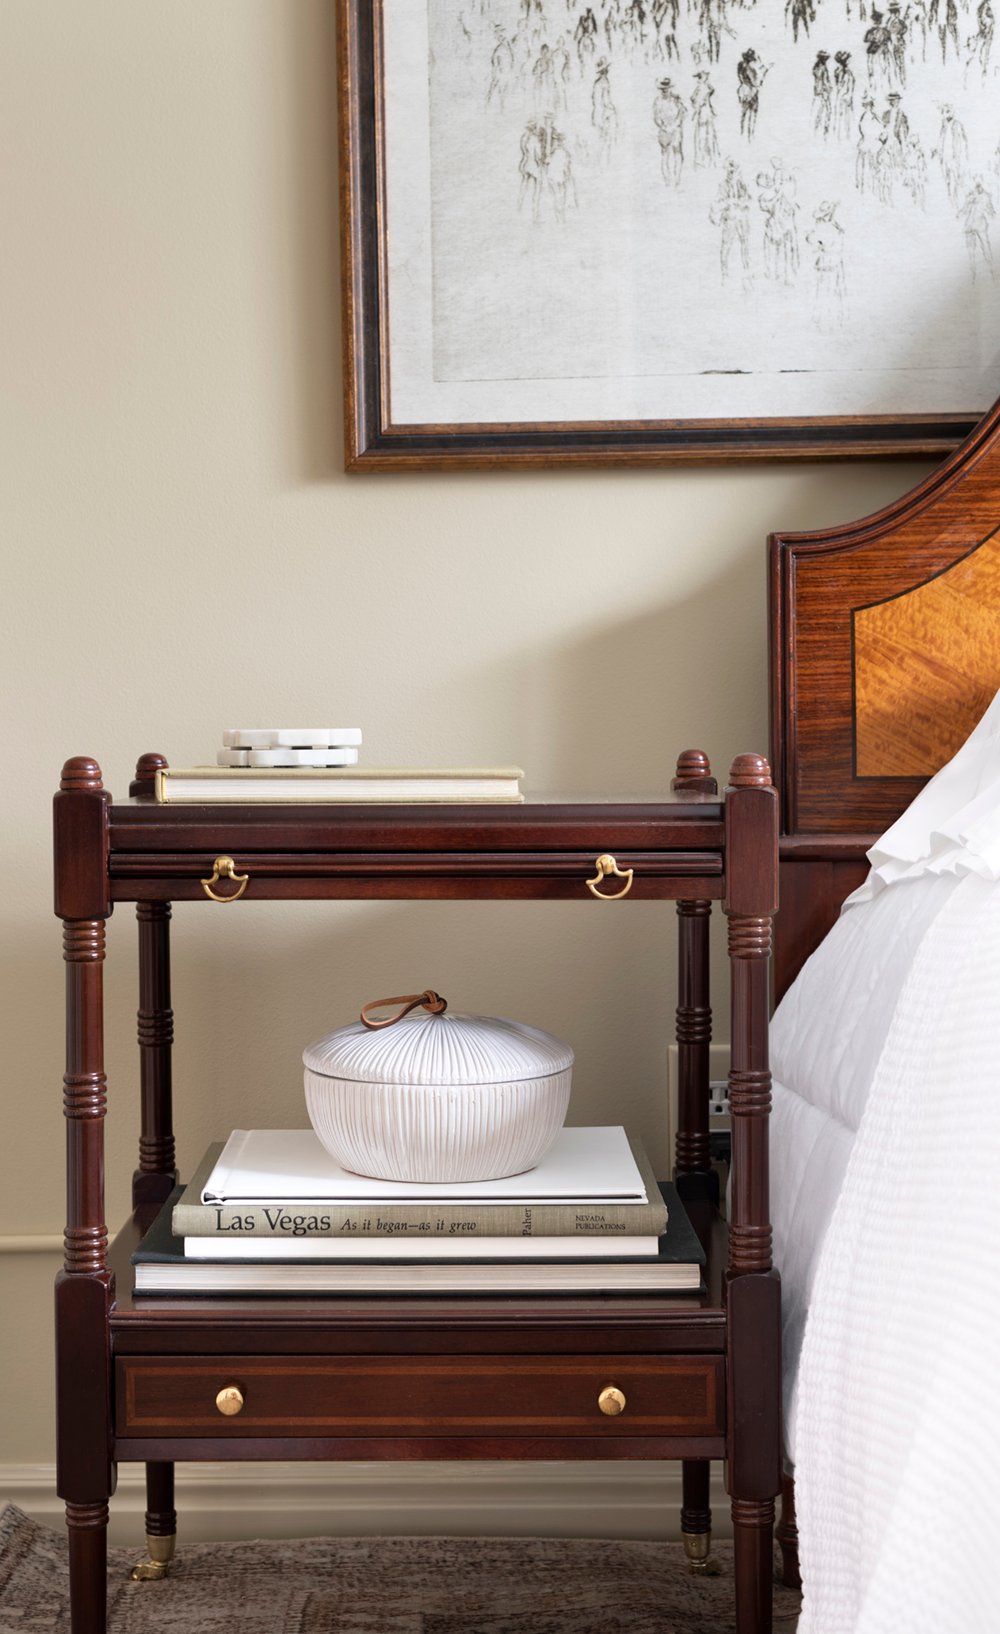
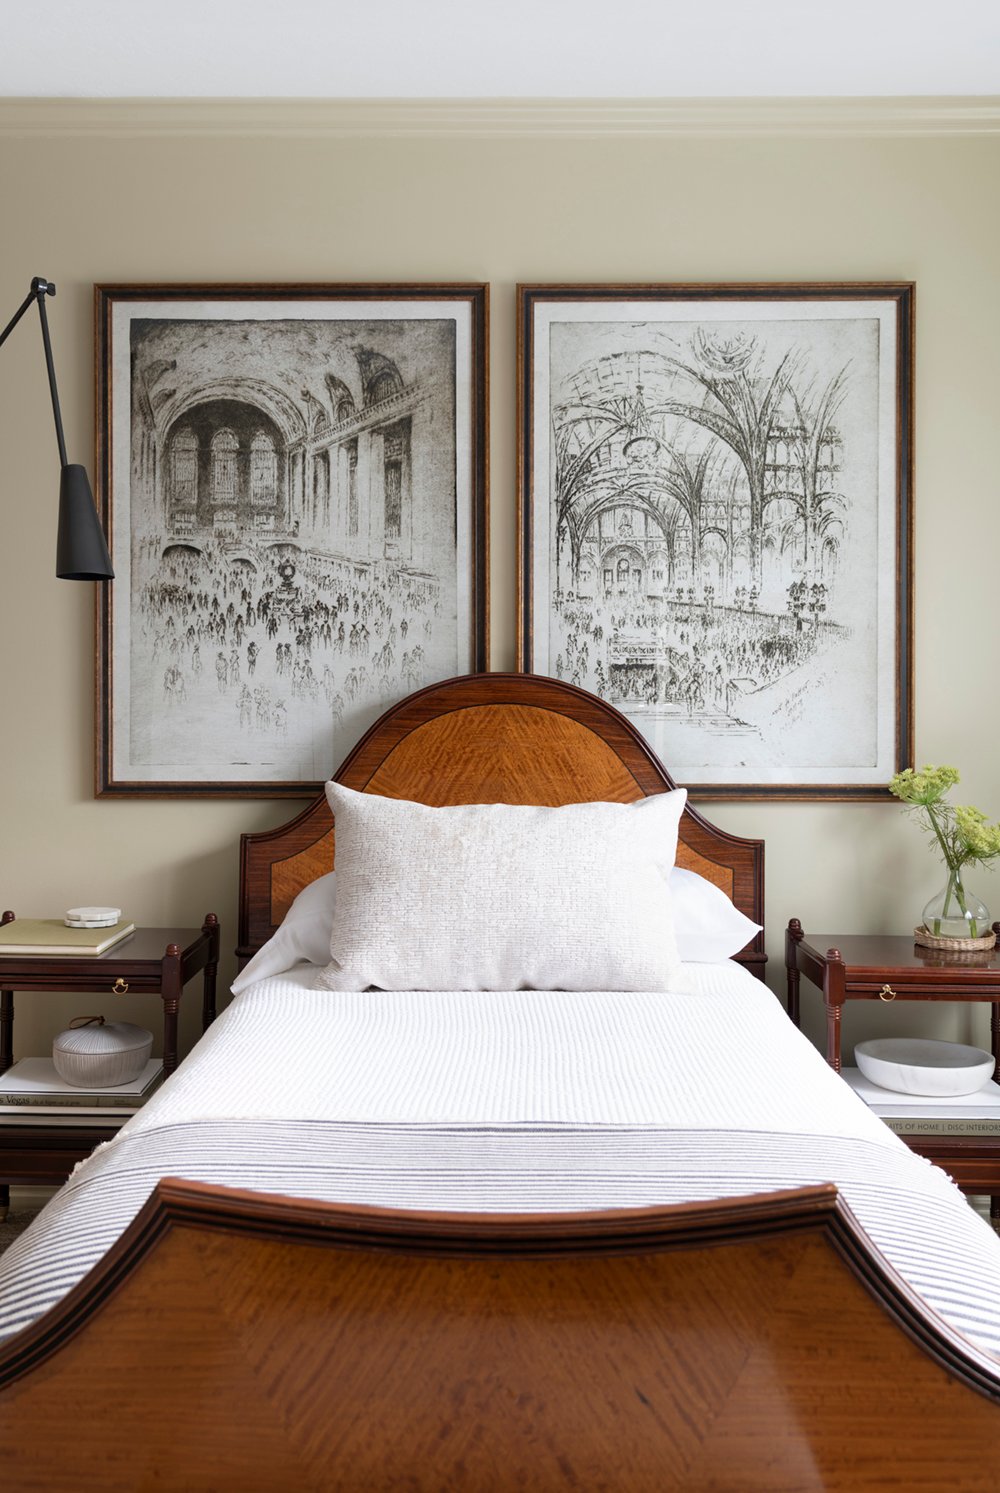
 As I previously mentioned, the furniture stayed. I thrifted the bed right after moving in and the nightstands shortly after. Since this is a smaller bedroom (and we have multiple guest rooms), a longer twin size bed totally works in here.
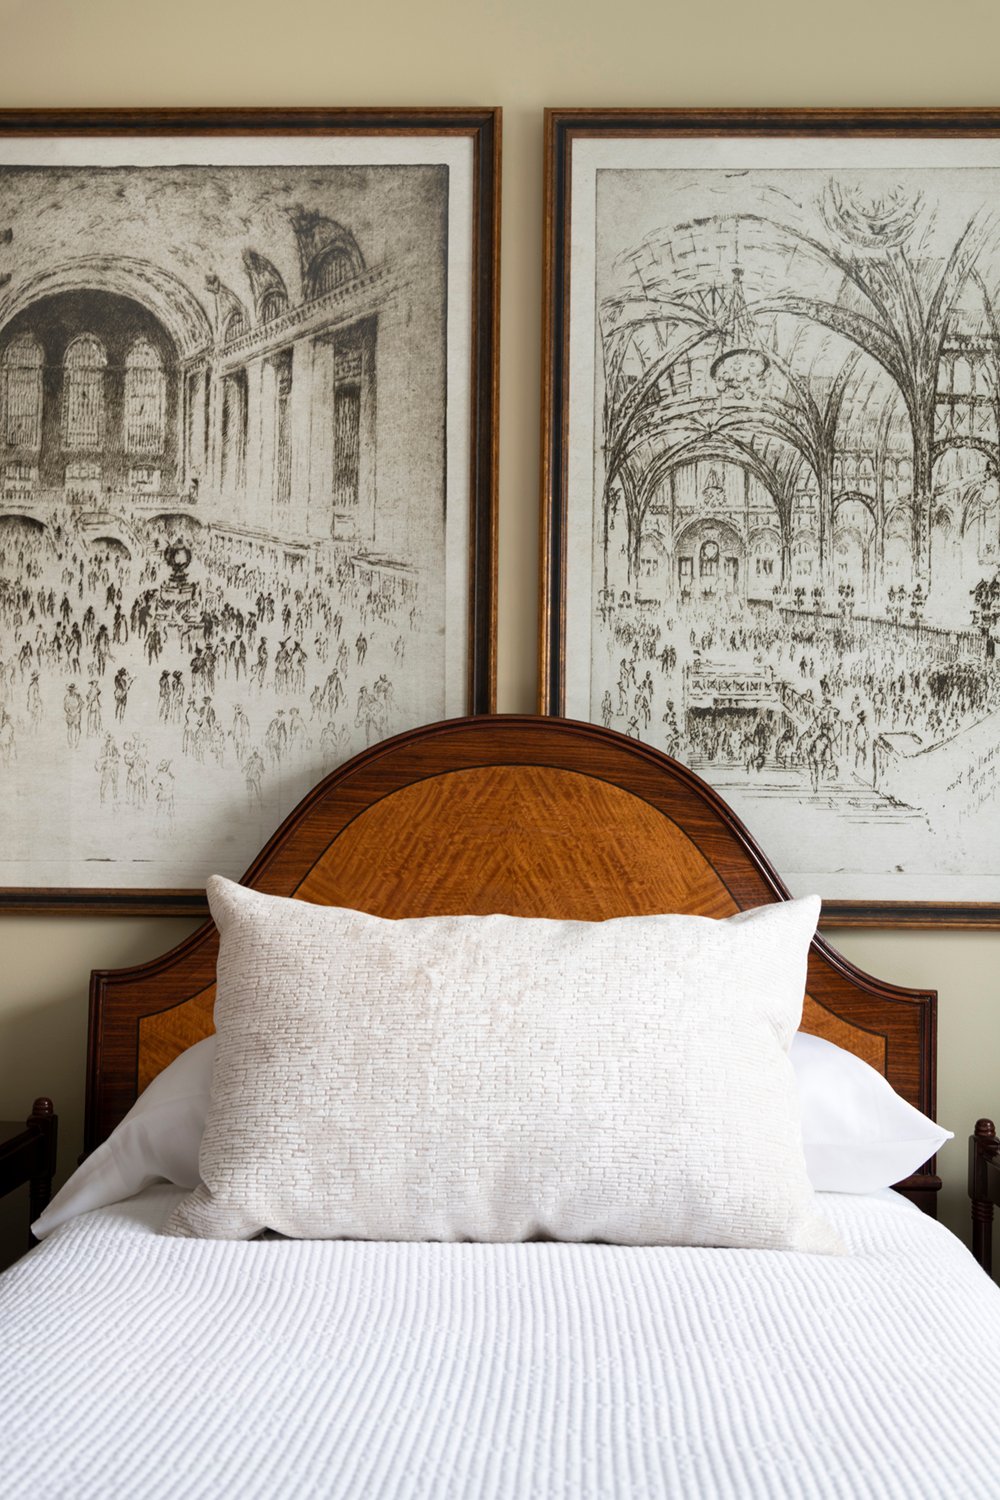
 Usually, I’m all about furniture projects and updating stain colors- but for some reason, I’ve never minded this cherry combo… I never intended to refinish these pieces. I thrifted the bed and nightstands separately, but they feel like they were meant to be paired together. They add the right amount of warmth to an otherwise cold basement bedroom. I do think cherry is making a comeback, by the way.
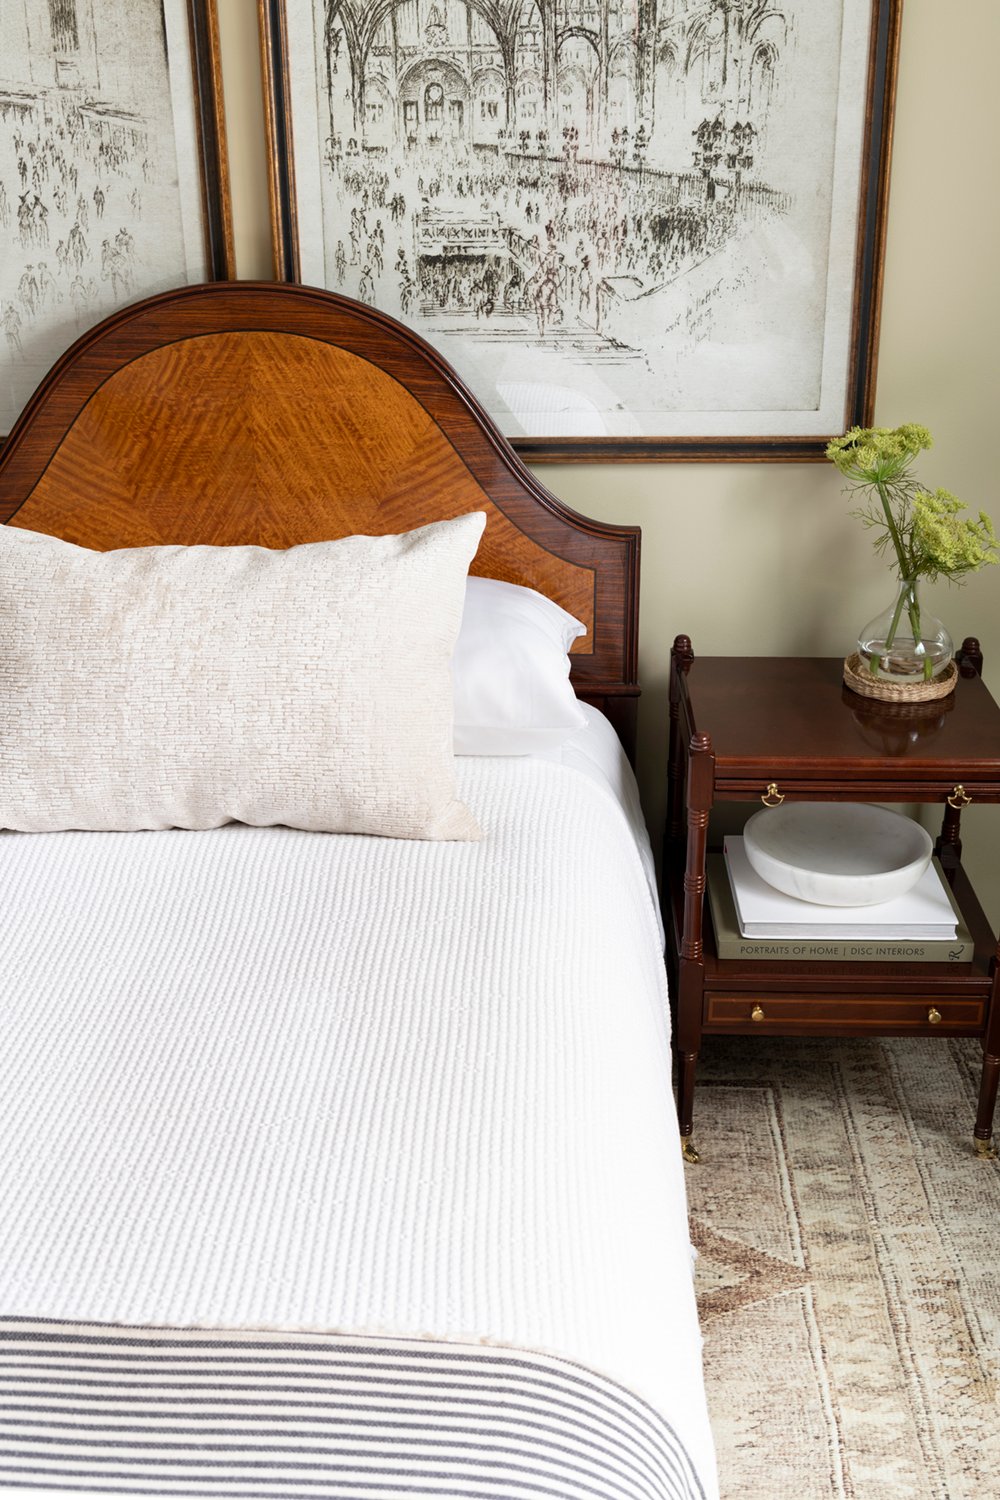 Since the bed is on the smaller side and this room runs cooler (in terms of physical temperature), I layered luxe bedding to keep our future guests extra warm & cozy. I will say- this is one of our most comfortable beds in the house. My brother always requests this room when he visits because he prefers dark, cold, and private- he stays up later than the rest of us and worries about waking us. This secluded room is actually ideal for that. It has also made a great space for napping kids in the past.
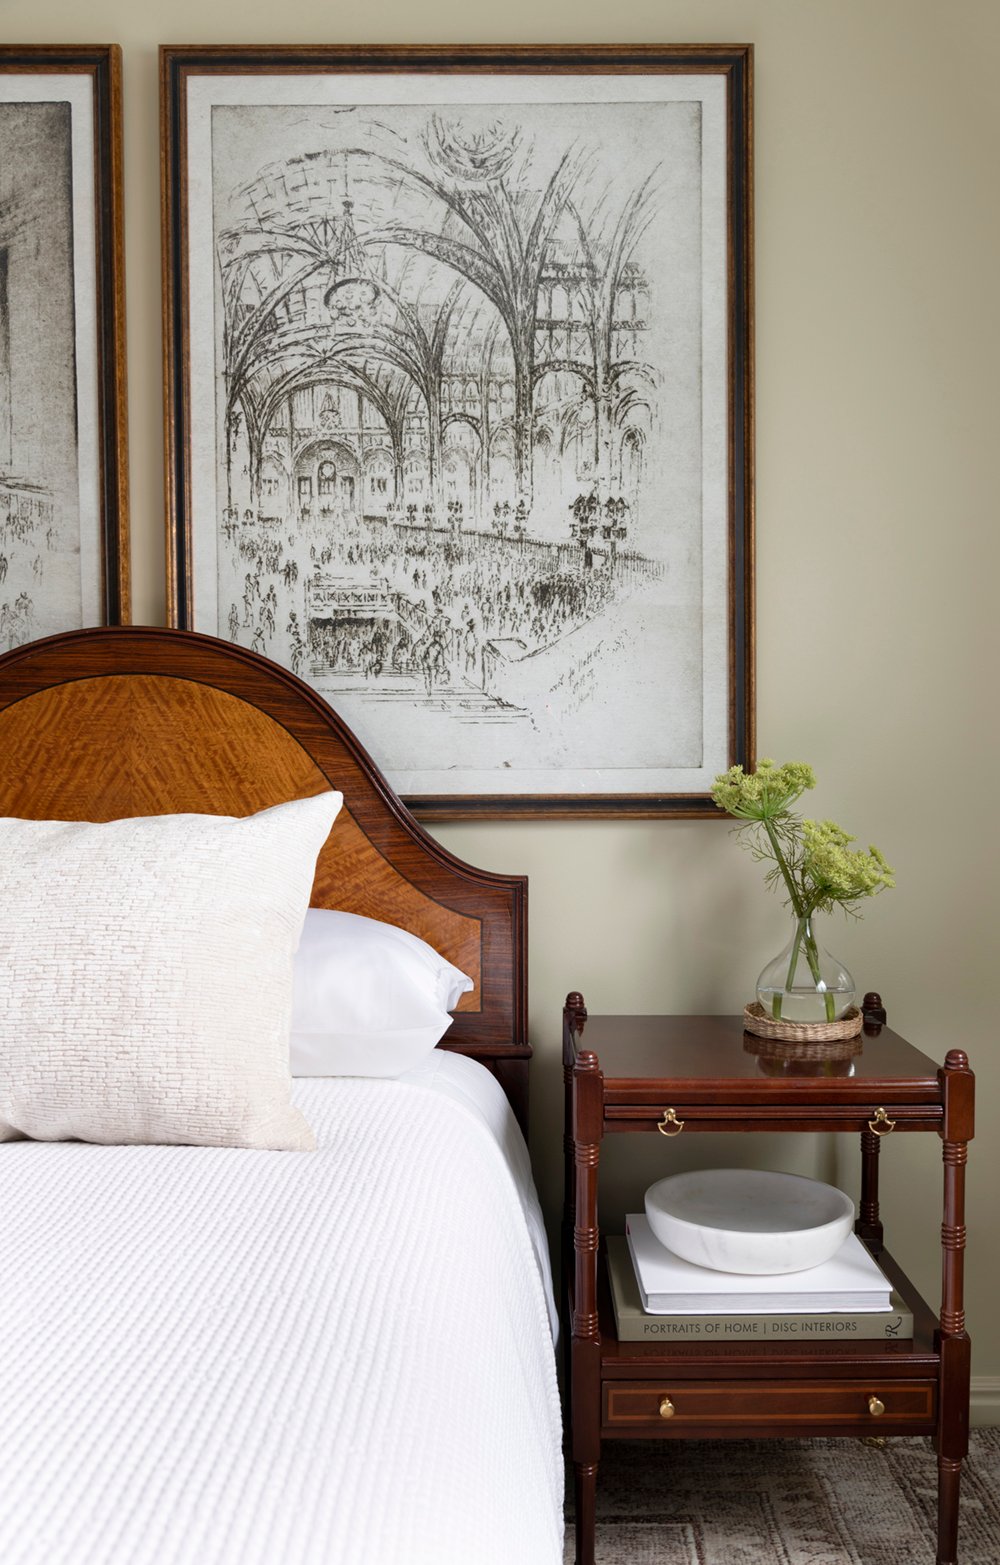
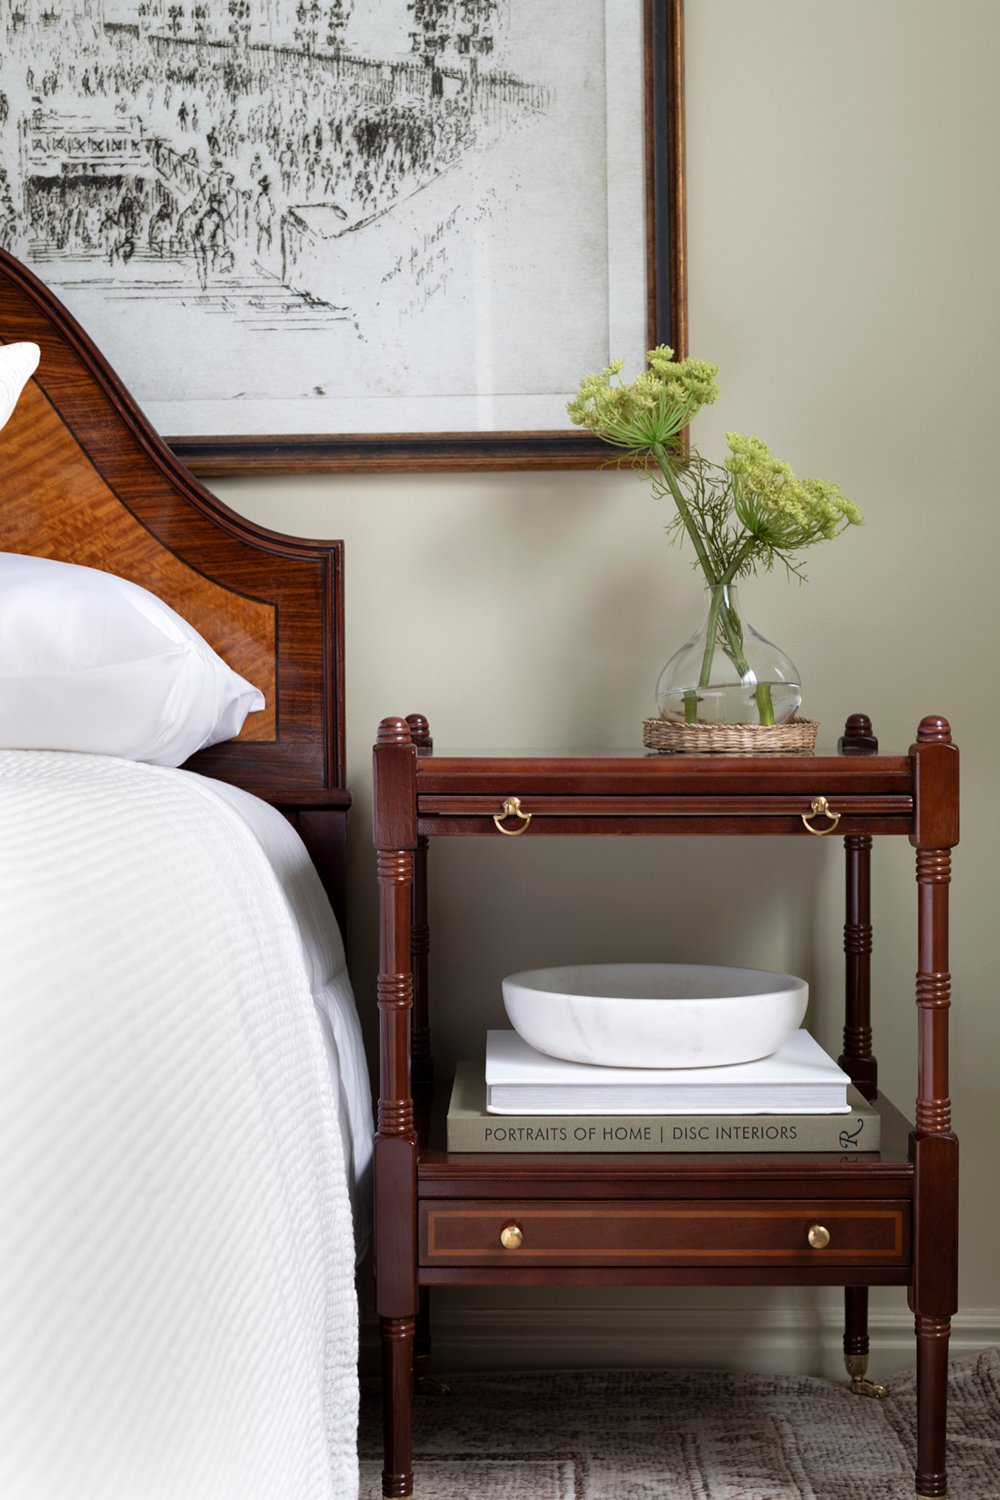 I think the biggest difference is making this room feel apart of our home was honestly taking the time to style it. I had previously thrown mismatched pieces into this room, creating a quick and makeshift space for visitors in a pinch. This time around, I wanted to put thought, intention, and effort into it. Little touches like books, trays, bowls, and florals helped to make it feel more interesting & inviting.
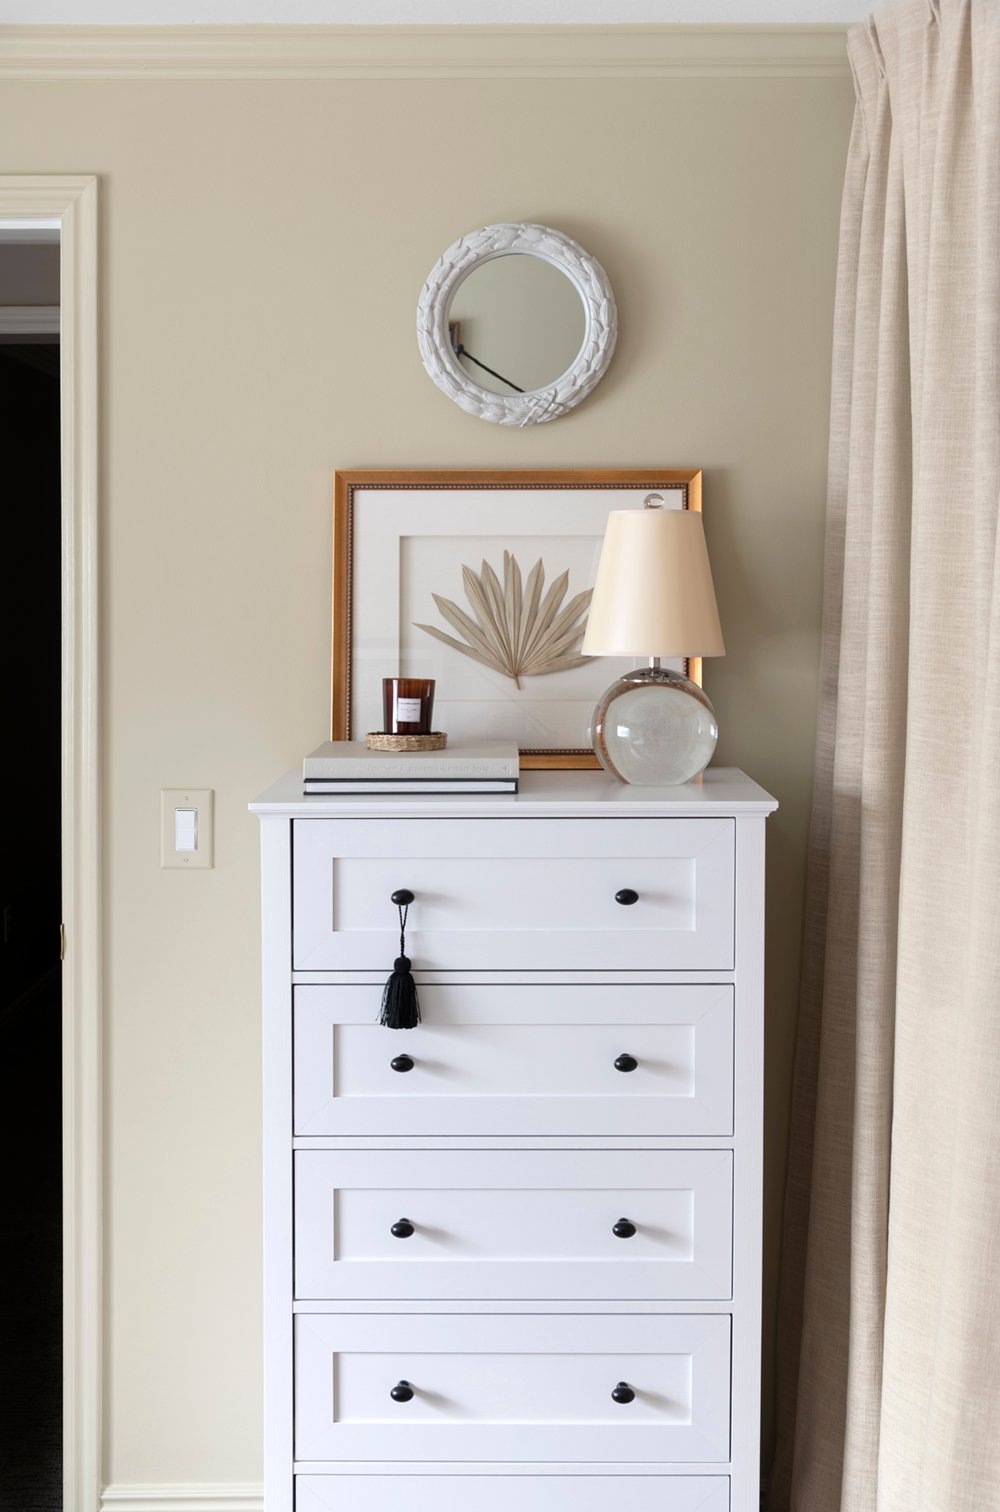 I also wanted to add additional storage for guests. This five drawer dresser was very affordable- assembly was a bit of a pain, but I managed. I swapped the hardware for a designer look (and added a tassel), but this empty dresser will be great for visitors.
 I’m the type of traveler who appreciates unpacking and getting organized once reaching my destination. I know our friends & family who stay here will put this empty dresser to good use. It also helps to fill negative space and makes the bedroom feel more balanced. Of course, it was fun to have another surface to style as well…
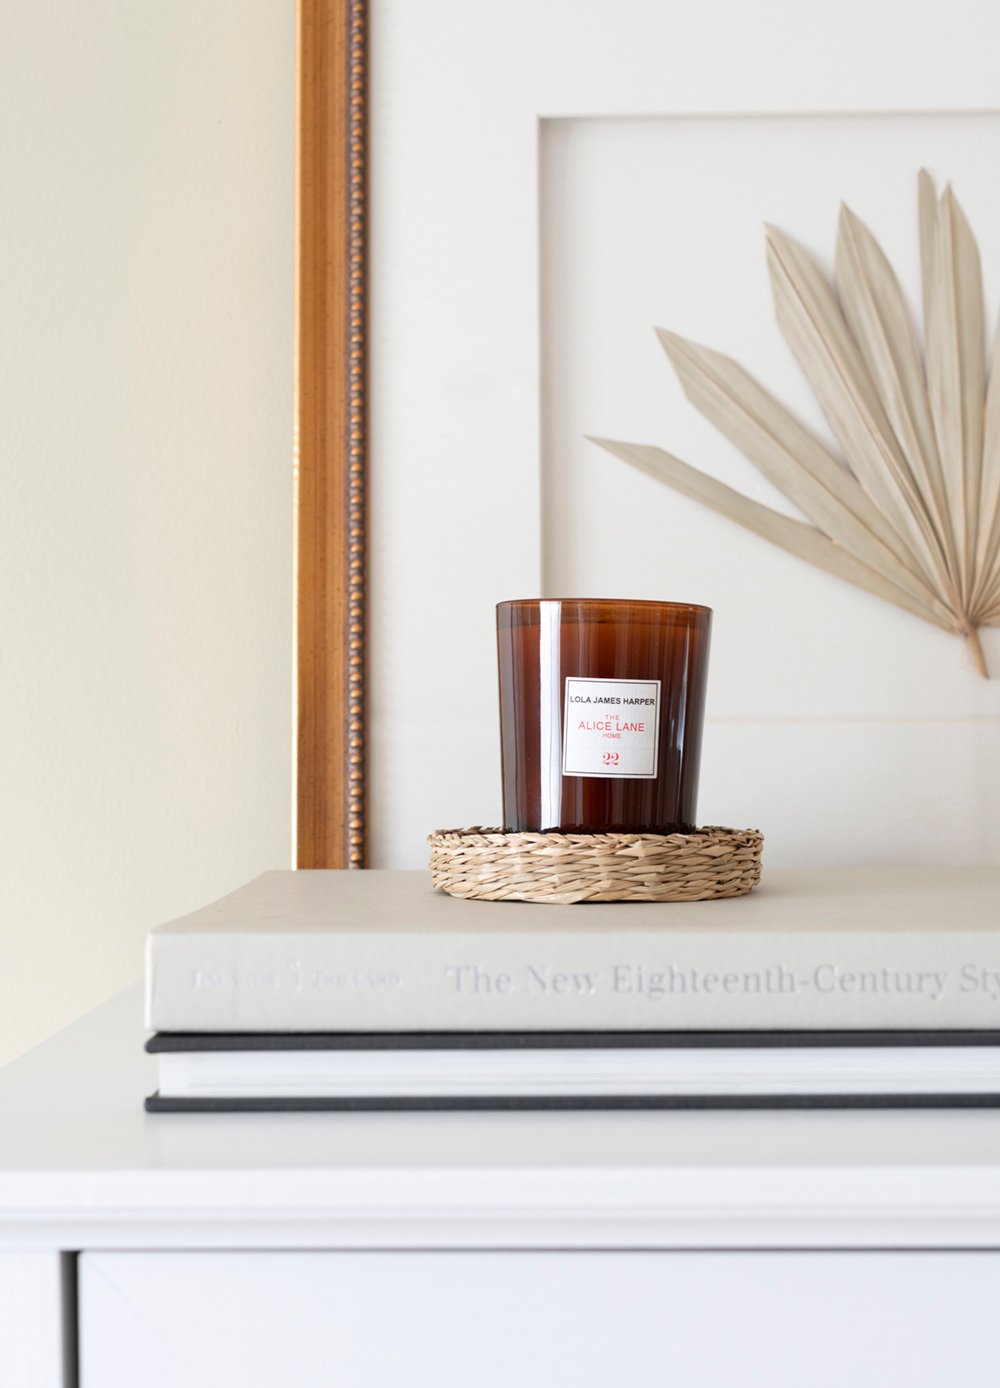
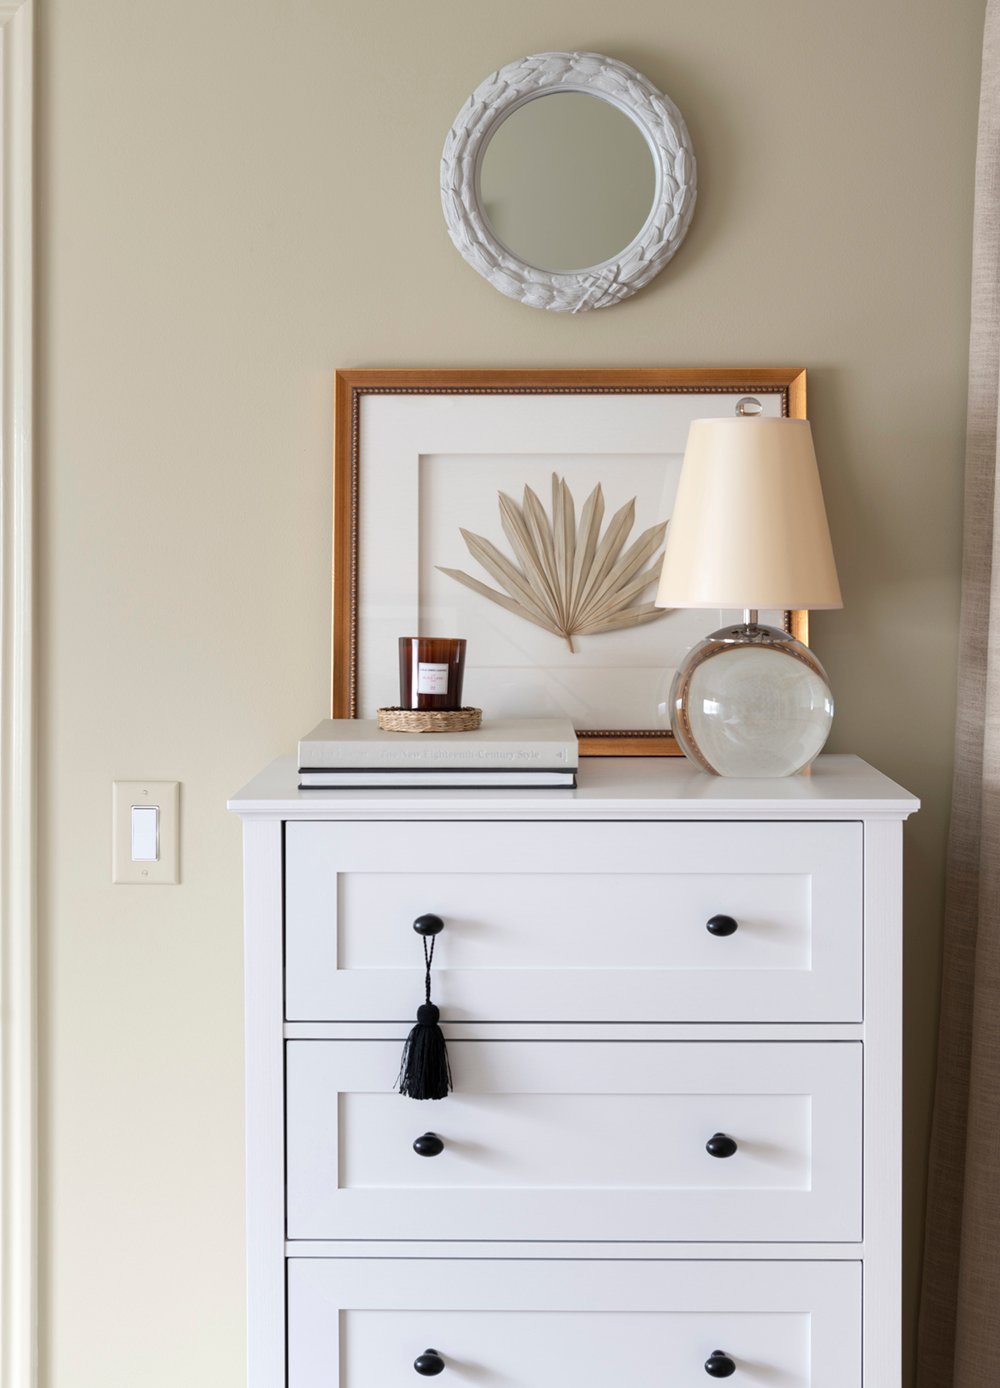
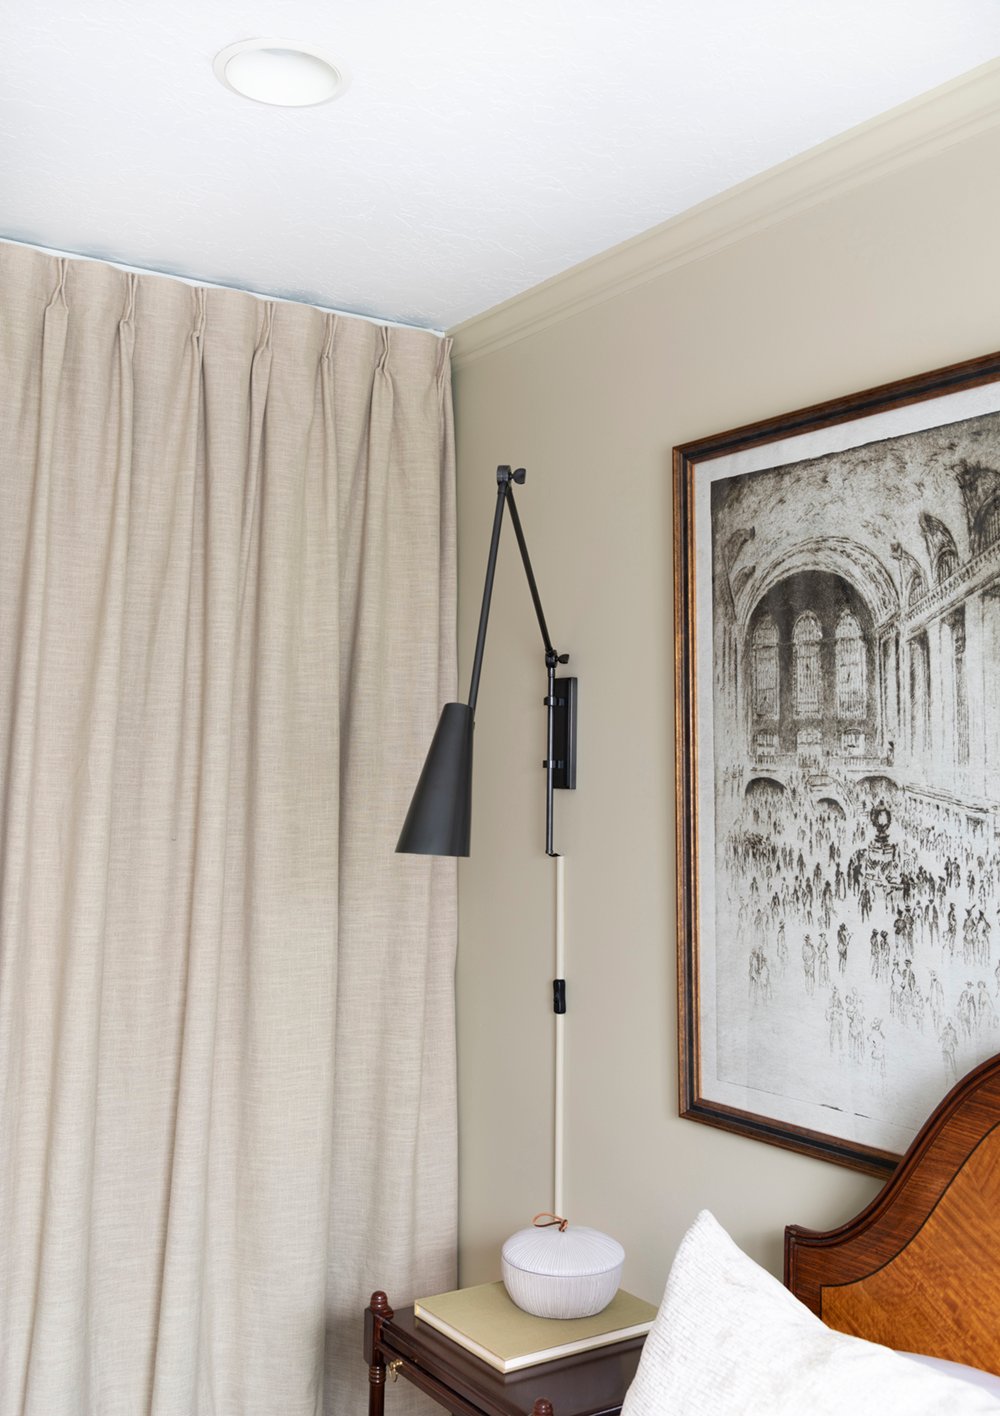
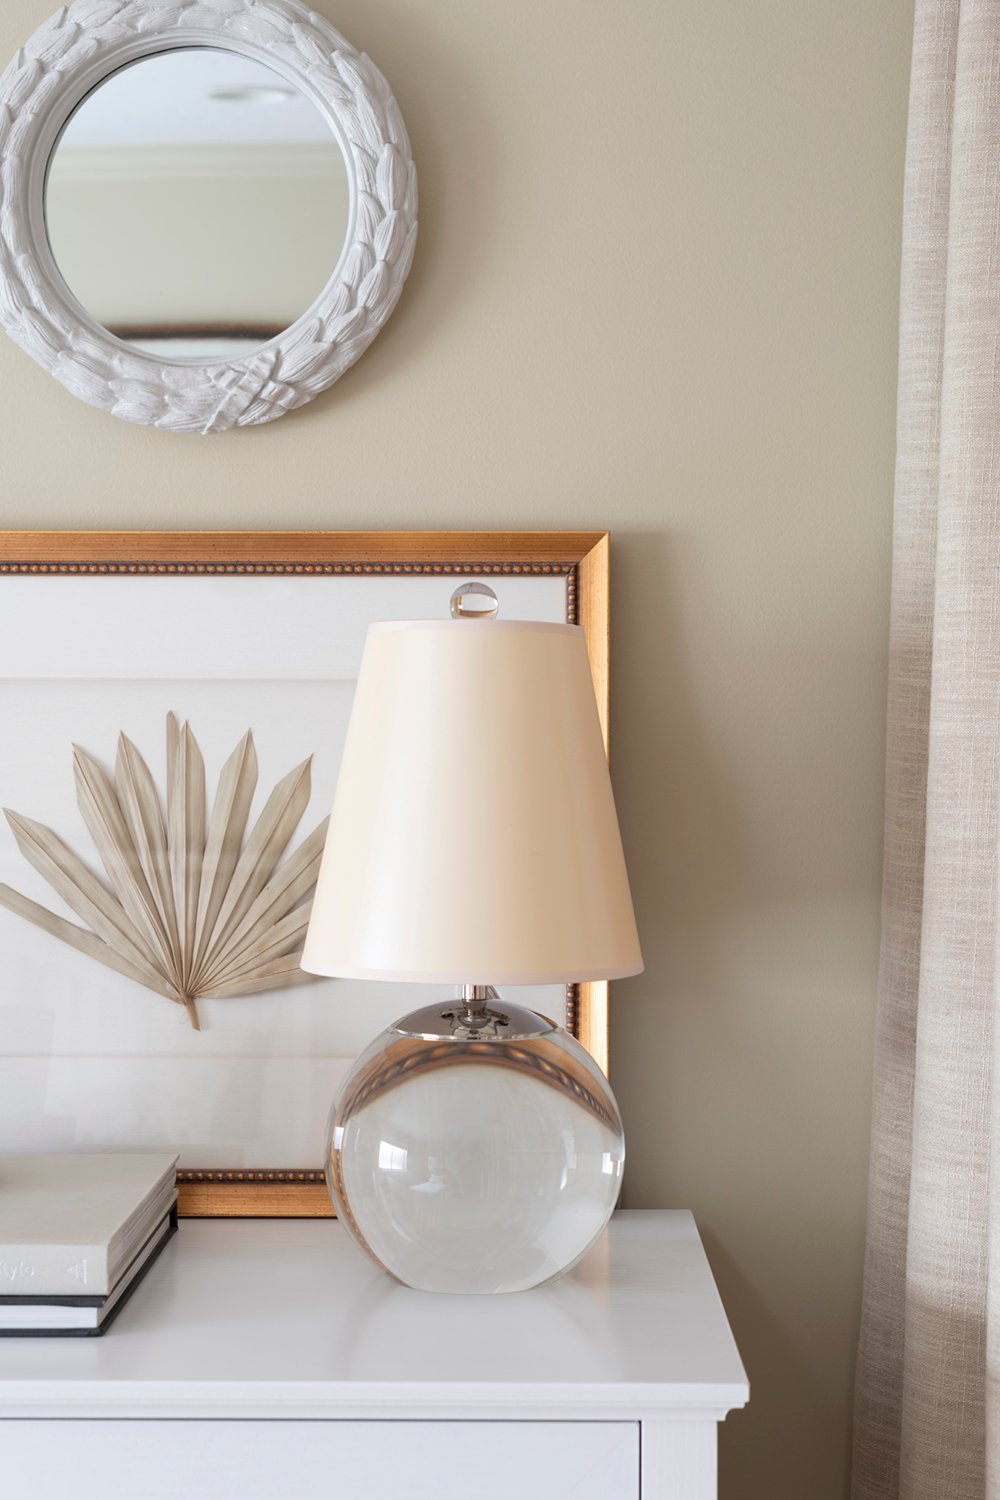
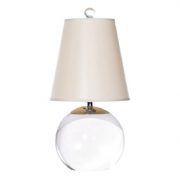
Illuminating this dark corner was a must, so adding a crystal lamp felt like the right move. Warm, ambient light sources are crucial- especially when designing spaces within a basement. Next to some leaning artwork from the shop, a couple of good books, and a vintage mirror (anyone remember it from our old laundry room?)– this corner shaped up to be one of my favorites.
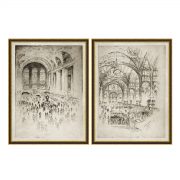
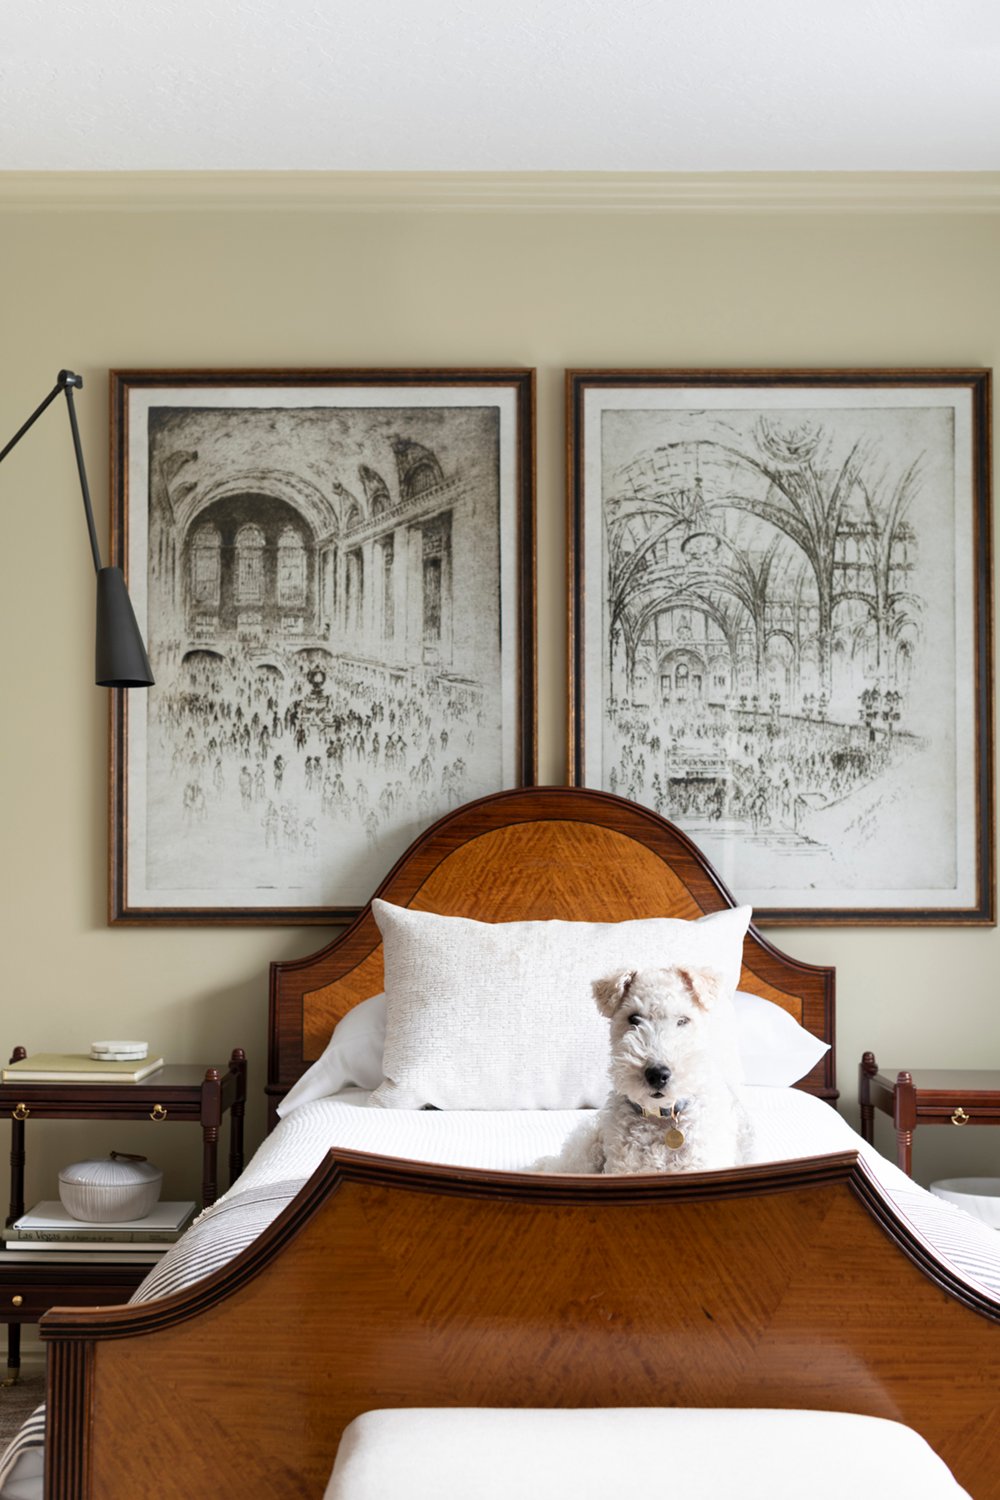 One of the most impactful moments in this space ended up being the artwork. I just added this oversized Central Station pair to the Tuesday Made shop (I’ve received lots of questions about them)! The frames are absolutely stunning, as are the charcoal works. Their large scale is exactly what this bedroom needed. For a space that doesn’t have much millwork, has lower ceilings, and isn’t overly interesting (architecturally)– artwork provided the best opportunity to make a beautiful impact.
 The next thing I wanted to chat about or give you a closer look at is the drapery panels. I just used an Ikea ceiling mount track and ordered some heavy (custom sized) panels from Amazon. For being a budget drapery find, I’m really impressed! These perfectly conceal the closet wall, while adding warmth & texture… mission accomplished. They are double pinch pleat panels which add an elevated or designerly look. I did have to hem and steam them, but for the price- I’d definitely recommend these.
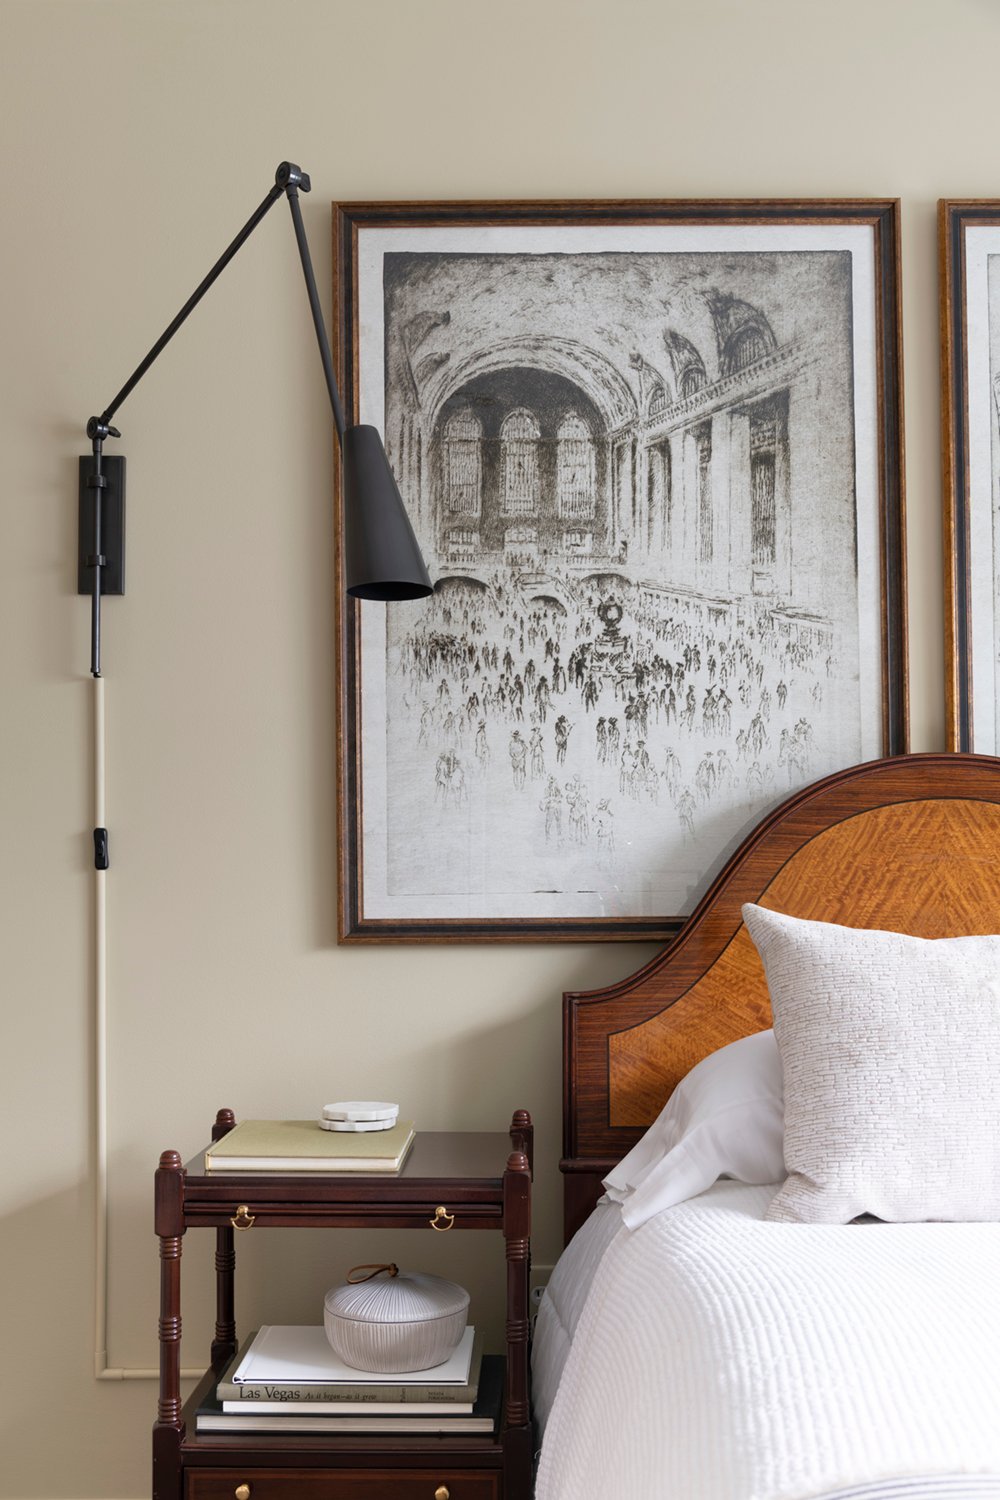
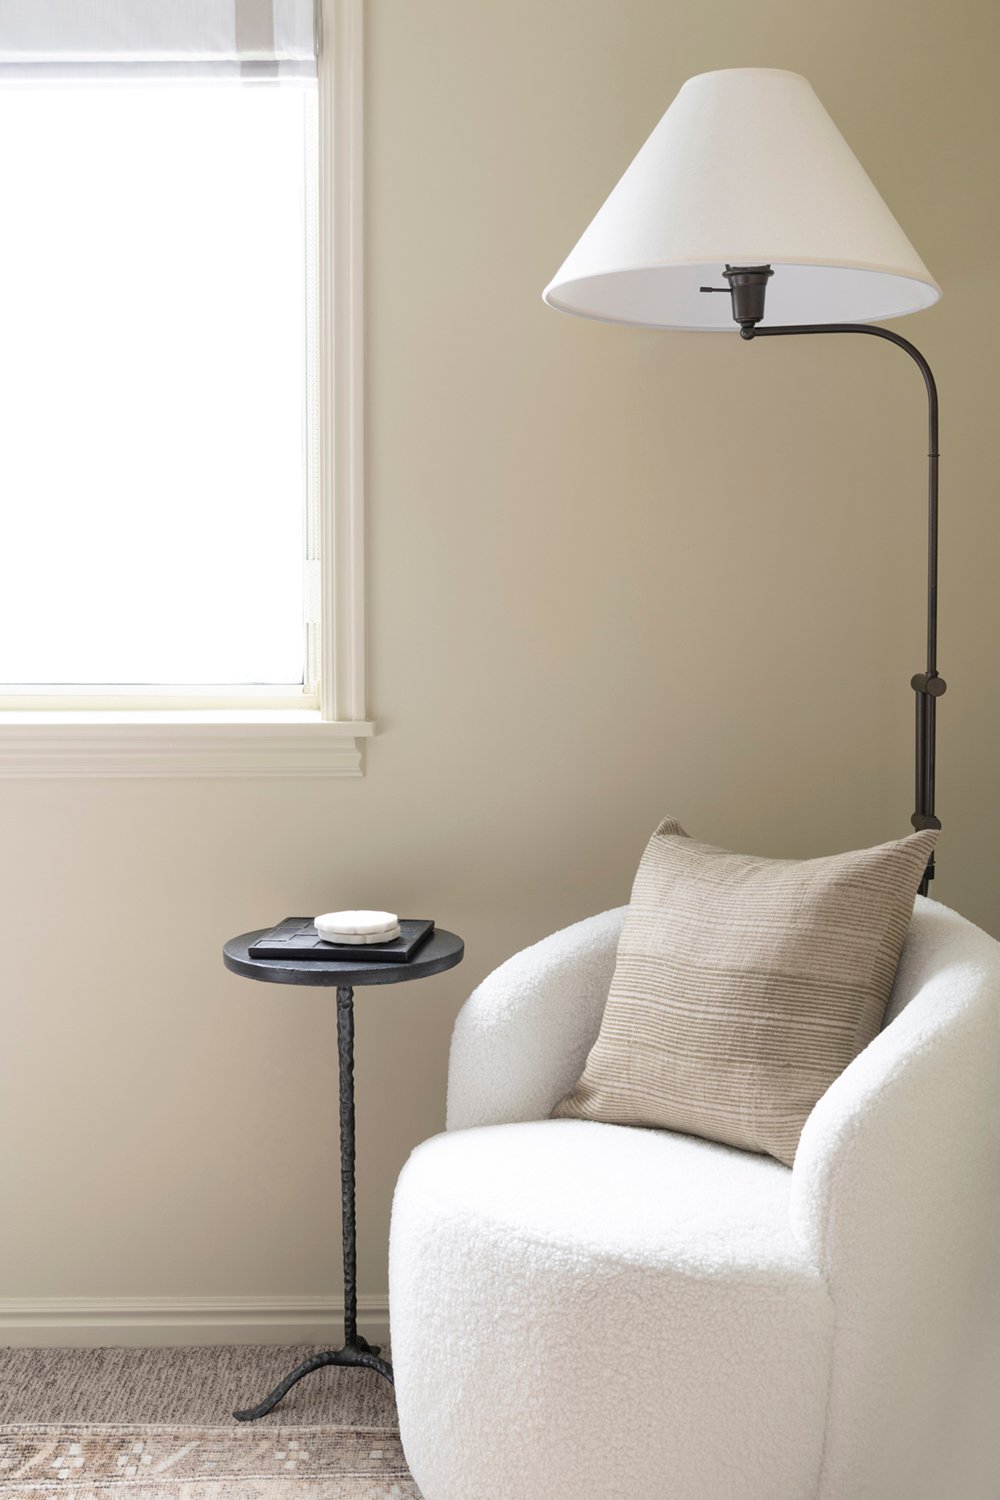
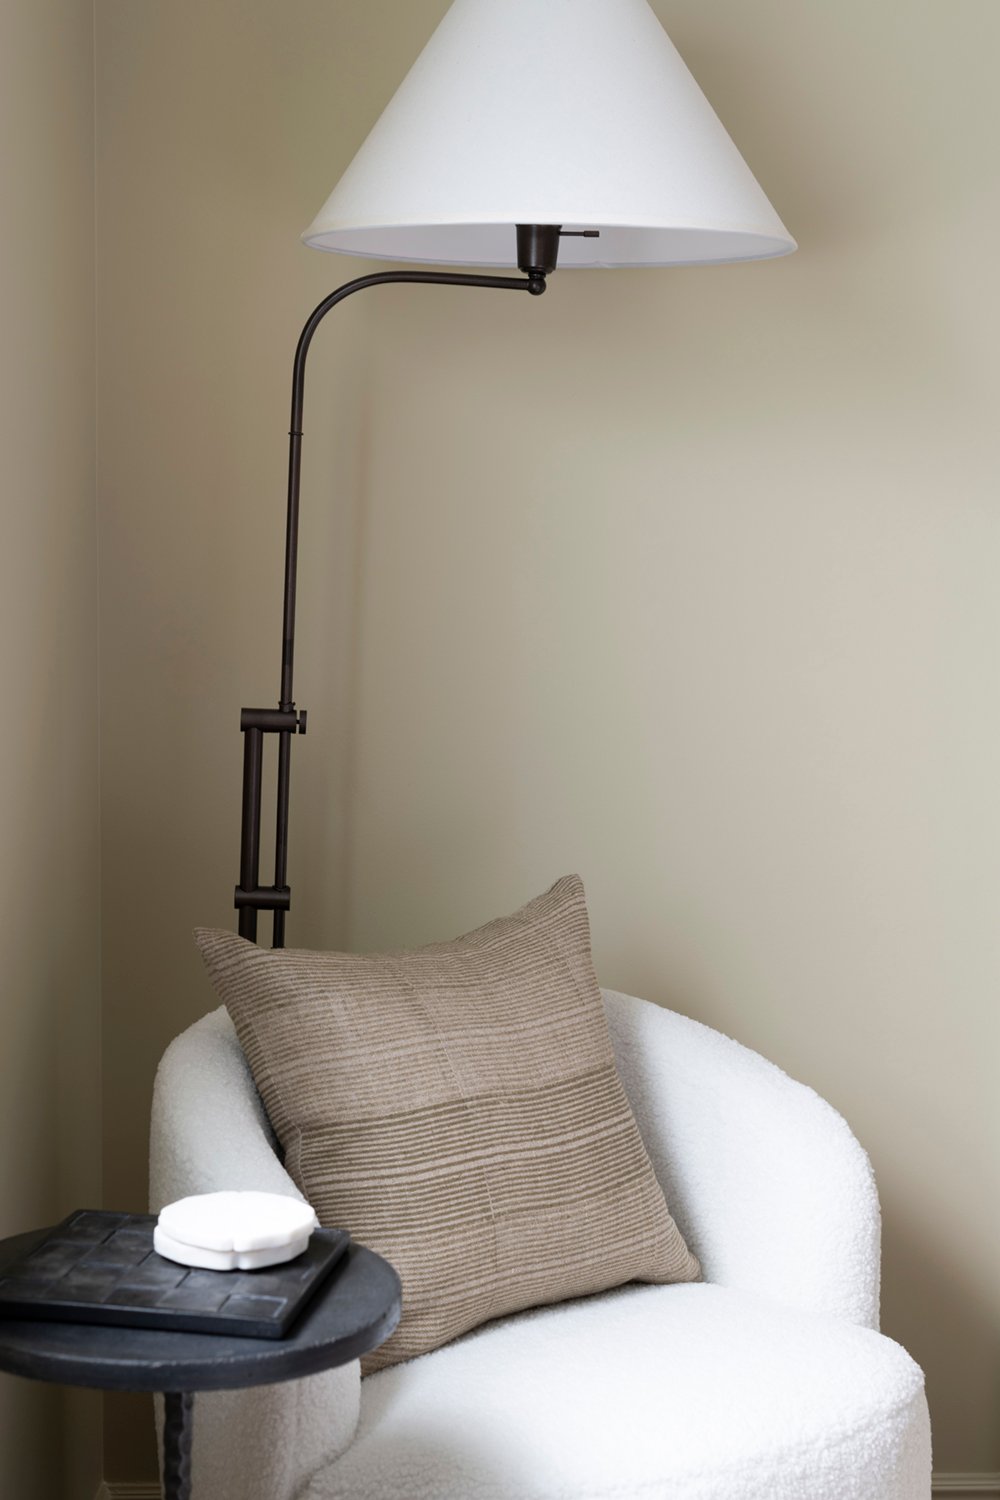
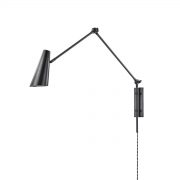
 The sconce was another intentional design decision… this room is already very symmetrical, so a sculptural (asymmetric) touch was a welcomed addition. The modern shape is the perfect juxtaposition to the classical artwork and traditional furniture. I love that it breaks the grid.
 Being a plug-in fixture, it made for easy and quick installation. I used my tried & true cord hiding hack, as well! The wall switch provides easy access for house guests. You can barely even see the cord or the plug-in behind the nightstand, pictured above!
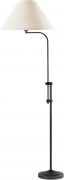
 The third light fixture in the room is a floor lamp I had previously purchased and painted for my home office- but never used. I’ve been waiting for the perfect place for this lamp and it finally found a home in the basement bedroom. All corners of this bedroom have a warm glow and illumination during the evening hours. I’ll have to share some nighttime images because it’s quite cozy!
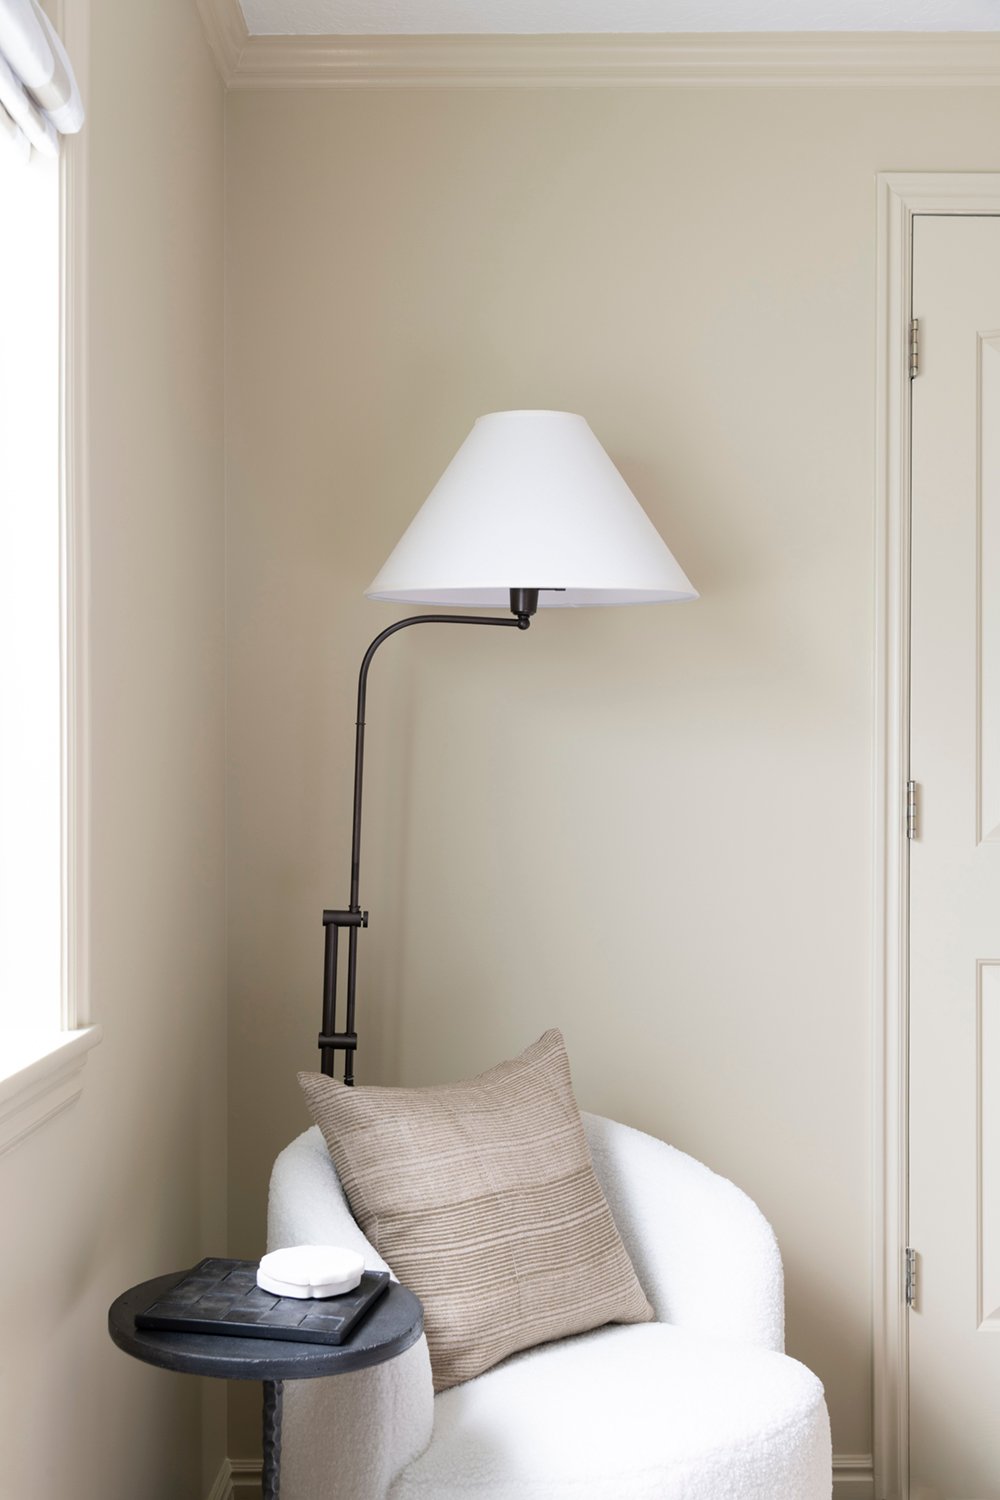 Luckily, I had room for a small swivel chair for a seating moment in this space… it’s actually pretty comfortable and doubles as another spot to drop a bag or belongings. If you missed my reeded glass window tutorial, the egress window in this room got a mini makeover that drastically improved the overall aesthetic.
Shop the sources by clicking the numbered links below the collage… not all are clickable.

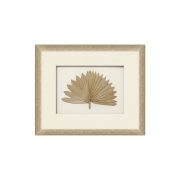
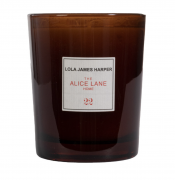
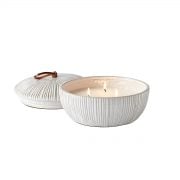
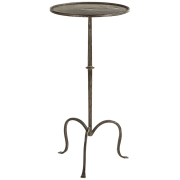
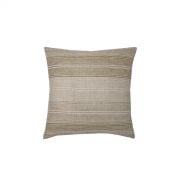
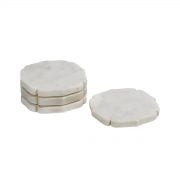
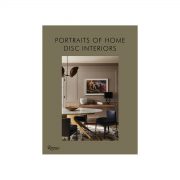
01: drapery panels // 02: paint color: richmond gray by benjamin moore // 03: central station studies // 04: lorne sconce // 05: pillow top ottoman // 06: area rug // 07: roman shade // 08: floor lamp (painted bronze) // 09: palm frond art // 10: alice lane candle // 11: penny lamp // 12: marble bowl // 13: pistachio striped pillow // 14: swivel chair // 15: queen anne’s lace bud vase // 16: marble coasters // 17: ribbed lidded candle // 18: hand forged martini table (similar) // 19: portraits of home book // 20: 5-drawer dresser
Please let me know if you have any sources questions- I’m happy to share! I tried to use existing items to renovate this space on a tight budget- and many things are vintage. I think for being a lower budget space, it still has a designer look. What do you think? I’m all about mixing high, low, and vintage!
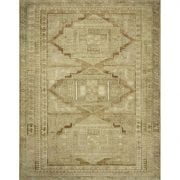
 Eventually, we’ll replace the carpet throughout the entire basement, so this bedroom will end up with LVP flooring… but we’ll do it all at once at a later date. For now, the carpet is in good shape (though not my aesthetic preference) and the super soft area rug seems to help.
 I’ve really been enjoying these faster paced projects, and with Emmett’s surgery coming up next week- I think it’s safe to say you can expect more of these from me since I’ll be solo renovating for the next six months. Sure, they’re not as fun for me as large scale renovations (like a kitchen, bath, or laundry room), but I do think there is something to be said about attainable spaces that bring instant gratification and feelings of accomplishment. What’s on your home to-do list this year? I’m already brainstorming what I could tackle next.
 I hope you enjoyed this bedroom! I’d love to hear your thoughts in the comment section below. For being an afterthought basement bedroom, I’m really glad I took the time to improve this space. It feels a million times better and now I won’t be tempted to use it for storage. Overall, I’m pleased with how things came together and I hope our friends & family will visit and put it to good use soon!


Oh my god. I’ve really been loving these “small” (i’m sure it was still a lot of work) projets. What an impact this oversized art has ! What a lovely color on the wall ! And the drapery wall is a great idea, i’ll keep it mind. Bravo !
I’m going to start looking for a bed for the future shared bedroom of my children, it has inspired me to look first for what I can find second hand ans then plan ahead…
I’m looking out for your next project and Best of Luck to your husband !
Thank you so much, Marie! I’m thrilled to hear that. The art is my favorite, too. It works really well with my antique furniture. Fingers crossed you’re able to score some cool secondhand pieces. I’ve got a new Facebook Marketplace Finds post coming on Friday- definitely check those out to help hone your algorithm! Thanks for the well wishes and for reading. Have a great day :)
Good morning! Hurrah for room reveals! And what a stunner! So many thoughtful, beautiful elements. The incredible bed and nightstands make such a statement! They really speak to each other. While I wouldn’t generally call myself a fan of a cherry finish, I can’t imagine anything else looking quite so perfect. (I definitely think all cherry wood is not the same!) Next, the oversized artwork is blowing my mind. When I first saw a peek at the placement tucked behind the headboard, I gasped. Genius. The way the arches and columns in the prints echo the shape of the headboard and leggy side tables? Phenomenal. I’m also 100% in love with the lighting. I’m dying for a modern, articulating sconce for our bedroom makeover, and this look confirms it. Big, bold, asymmetrical. Sweet! While the color palette is tight and neutral, the number and variety of subtle patterns and textures feels rich and inviting. (Texture…still a component that I forget.🤔) You’ve really created such an intentional and welcoming space. Bravo! I know the meaty, messy, blow-the-house-up renovations are exiting, but I adore this scale of makeover. The work to impact ratio is impressive. Even though I’m still in drywall dust purgatory, you’ve replenished my renovation motivation! Thanks a million! And I can’t wait to see what you tackle next! (after April, of course.🤪) Happy Job Well Done Wednesday, Sarah! 💜
Thank you, Peggi! The bed and nightstands were definitely lucky marketplace finds. I didn’t intend to put them together initially, but they felt meant to be. I really like the warmth they add! I totally agree with you about not all cherry furniture being created equal. Some cherry can look really cheap or orange. The artwork really made the room. When those arrived at the shop, I knew I had to install them in here! I knew I wanted the asymmetric sconce, and the other two lamps I already owned just ended up working well together in here, so it felt like a happy accident (and budget saver). Drywall dust purgatory is the worst part of any project… I hope you’re finished and can get to the fun part soon! It’s always worth it :) You’ve got this! I’ll definitely be starting something new after the craziness of April comes to a close. Ha! Have an amazing day! xo
This room is going to serve as my own jump off point for Aaron’s room! Being on the smaller side as well, there are a few tricks you’ve included here that will serve me. I’m particularly captivated by the drapery panels instead of closet doors- what an amazing way to add warmth to an otherwise cold space. Reviews of the drapery panels said the drapes are heavy. Did you select a particular ceiling track based on weight load? Or are all ceiling tracks made equally? If I were to utilize this in a child’s space, should I be concerned about the ceiling track being pulled off the ceiling? (I’m thinking I may need a curtain draw stick thingy). I adore the way the nightstands marry so well with the bed. It’s like they were made for each other. Your ability to pair secondhand furniture is always so inspiring! Of course the art steals the show. I never considered going larger with fewer pieces, and after seeing it, that’s a no brainer! How stupendous are those charcoals?! In love! Your lighting plan works well- I’m especially drawn to the asymmetrical look of the sconce. This is a fantastic example of how to floor plan a smaller space, and check off the necessity boxes while still making room for wants- hello sweet little swivel chair! The dresser is actually one I saved awhile ago for Aaron’s room. Are you happy with the quality? Can the drawers hold an adequate amount? It’s so difficult to tell from the manufacturer photos if this would serve my own needs. I’m definitely in the market for a tall versus wide dresser. I’m still just awe inspired by these quick makeovers you’re tackling, and how simple tweaks can create such amazing impact. It’s safe to say I’m fully on board with these short but impactful renovations. Of course the larger scale reno’s are so much fun, but I’m loving these smaller ones lately. Thank you for sharing these Sarah, you’ve offered me so much to consider in planning out Aaron’s small room, and I’m thankful for your expertise and example of how to do it elegantly. I hope you have a fantastic Wednesday!
Yay!! Love hearing that, Lauren! The drapery panels are definitely heavy because they’re lined for blackout. We just used the simple Ikea track and it’s supporting them with no problem- just make sure you use plenty of screws and anchors. I wouldn’t be worried about it come down (even if pulled on by kids). It’s very secure. Thanks so much for your kind words- this was definitely a fun and easy space! The art is my new favorite. I love the simplicity and scale. The dresser is awesome for the price. Honestly, I don’t have anything in it (since it’s for guests), but I wouldn’t stuff it full of heavy items. Full of clothing would be fine, but I could see the drawers warping with a ton of weight. It’s heavy for what it is and the price is great, but it’s definitely not solid wood. Hope you have a good Wednesday, too!! We’re buried in snow (14″), so I’m dreaming of sunshine over here. xo
That bed is so stunning! I’m going to have to look several more times. This is so timeless yet modern, elegant and cozy! This is Beautiful.
Thanks so much, Michele… definitely a lucky antique find! Thanks for reading and for checking out the basement bedroom. Hope you’re having a good day!
Oooh I just love this!! I’m so excited to see well designed/styled spaces with 8′ ceilings and not a lot of architectural details. Our house is a 1500 square foot ranch (vaguely mid century) and just doesn’t call for a lot of detailed millwork. So this kind of room is so inspiring to me, because it’s relatable and achievable!! Definitely looking forward to your projects the next few months, but I hope Emmett is ok and heals quickly!
Thank you so much, Amanda! I find these kind of spaces and renovations inspiring too, Amanda. We’re so used to seeing over the top architecture these days because it’s trending, but sometimes simple design can provide the best inspiration for a variety of aesthetics or homes… sometimes it’s just more applicable. Thanks for the well wishes! I’ll pass them along to Emmett :) We’re anxious for his surgery next week. Hope you’re having a great week!
I love the Grand Central station prints. I followed the link on the Tuesday Made shop, but I could not find the artist. Can you help me figuring this out?
Thanks!
Thank you so much, Julie! We work with an art gallery and custom framer for many of the prints & paintings in our shop (including these), and often times the artist’s name is not given- sadly I don’t have the information for these works.
Beautiful Sarah! This bedroom is a perfect example in “The art of Decorating” a combination of perfect scale, gorgeous furniture, great colors and texture, stunning artwork and tremendous creativity makes this budget friendly bedroom so amazing 😍
Honestly, I love dark woods and yes even cherry, even if it’s been taboo for a while, I’m here for a comeback. The vintage furniture really sets the stage for an amazing space. The white budget friendly dresser is so cute and your artful styling always creates the most beautiful decorating moments. The sweet chair corner nook is also terrific and your lighting is always perfect! You need to write a coffee table design book Sarah, you must have so much content by now. All your homes are so beautiful, while each one is quite different they are all classics and excellent examples of great design. As if you need another project on you plate but “just a thought” 😉 for the future. How cool would it be to sell a Room for Tuesday design book at your Tuesday Made shop? It would be a huge undertaking but I think it would be fabulous 🥂
We are awaiting visitors today as our friends from Toronto are arriving this evening. I even baked, haha! I’m doing some last minute cleaning and then I’m ready for a week of entertaining 🍾 Should be lots of Easter fun!
Also, sending all the good healing vibes possible 🌈☘️❤️ For Emmetts surgery/recovery and for you getting medical issues resolved. Surely the doctors will figure it out soon 😳
And Bravo on another stunning space Sarah! So incredibly lovely 😊 and your talent is limitless ❤️ Cheers to another amazing reveal.
Thank you so much, Colleen! I’m with you on dark woods- I think they’re timeless and have a nice traditional feel. I definitely lucked out with the vintage furniture. Funny you mention a book, that’s been on my dream list / life goal for years now. Maybe someday I’ll figure out how to do it or make the time. I think that would be so fun! I love styling and photographing, and you’re right- I’ve built up quite a few images over the years. Enjoy your Toronto visitors this week- how fun! What did you bake?! I wish I could jet down to Florida to see you and get some much needed sunshine, ha. We have 14″ of snow on our lawn right now. Have an amazing day and a super time with your friends this week :) xo
I love the bed! The side tables do feel like they belong. The artwork is the perfect touch. The arches of the art and the colors of the frame make it all feel cohesive.
Thanks so much, Christiane! Can’t wait for you to see it in person later this month :)
Stunning! I love these quick guest bedroom make overs, it really shows the power of paint and styling!
Thanks so much, Mattie! I’m so glad to hear that.
It’s exquisite! Warm, guest-friendly & each piece stands on its own but completes the ‘you are welcomed here’ vibe.
Thank you so much, Diane! I love hearing that it feels inviting and welcoming :)
Hi Sarah! I love your room and want to order drapery like yours. I’m wondering how wide to order though. I know the general rule of thumb is 1.5-2x the width of the window, do you follow that for these particular panels? Thank you so much.
Thanks, Shelley! I followed that same rule for these panels, so that should give you a similar look. Hope that helps!
Beautiful room and I appreciate you listing the sources. However, I didn’t see a source for that cutie pie at the foot of the bed who so nicely coordinates with the room!
Ha, thank you Elaine! Always coordinating with the dogs in our house :)