DIY Faux Reeded Glass Window for Added Privacy
When trying to brainstorm a solution for our ugly original egress window in the basement bedroom, I’ll admit- I felt stumped. It wasn’t until I was standing in the kitchen, admiring our cabinetry, when inspiration struck. As I was looking at our reeded glass cabinets, I wondered if I could replicate that look with the existing basement window. There had to be a product! I tried a couple and found one that I really liked and it worked well. There is something about reeded glass that instantly elevates a space. It feels timeless and architectural, yet works in almost any home. This is definitely worthy of a blog post because it’s very affordable, was a breeze to install, and gives a designer look for less. Click through for a quick and easy window tutorial that is great for adding privacy to a space or blocking out and unsightly view… and for a look at my basement bedroom!

If you are craving privacy without sacrificing light, or simply want to add character to a window that feels a little too plain, this faux reeded glass window DIY is still one of my favorite tricks. It’s a great solution if it’s not in your budget to replace a window altogether. In my case, it also works well for egress windows and our building codes. It’s a non adhesive window cling that can easily be removed, therefore it doesn’t violate any basement escape regulations. To see more of our basement bedroom you can find details on the blog including 20 ideas for making a basement bedroom feel cozy on a budget.
Why Faux Reeded Glass Is My Top Choice
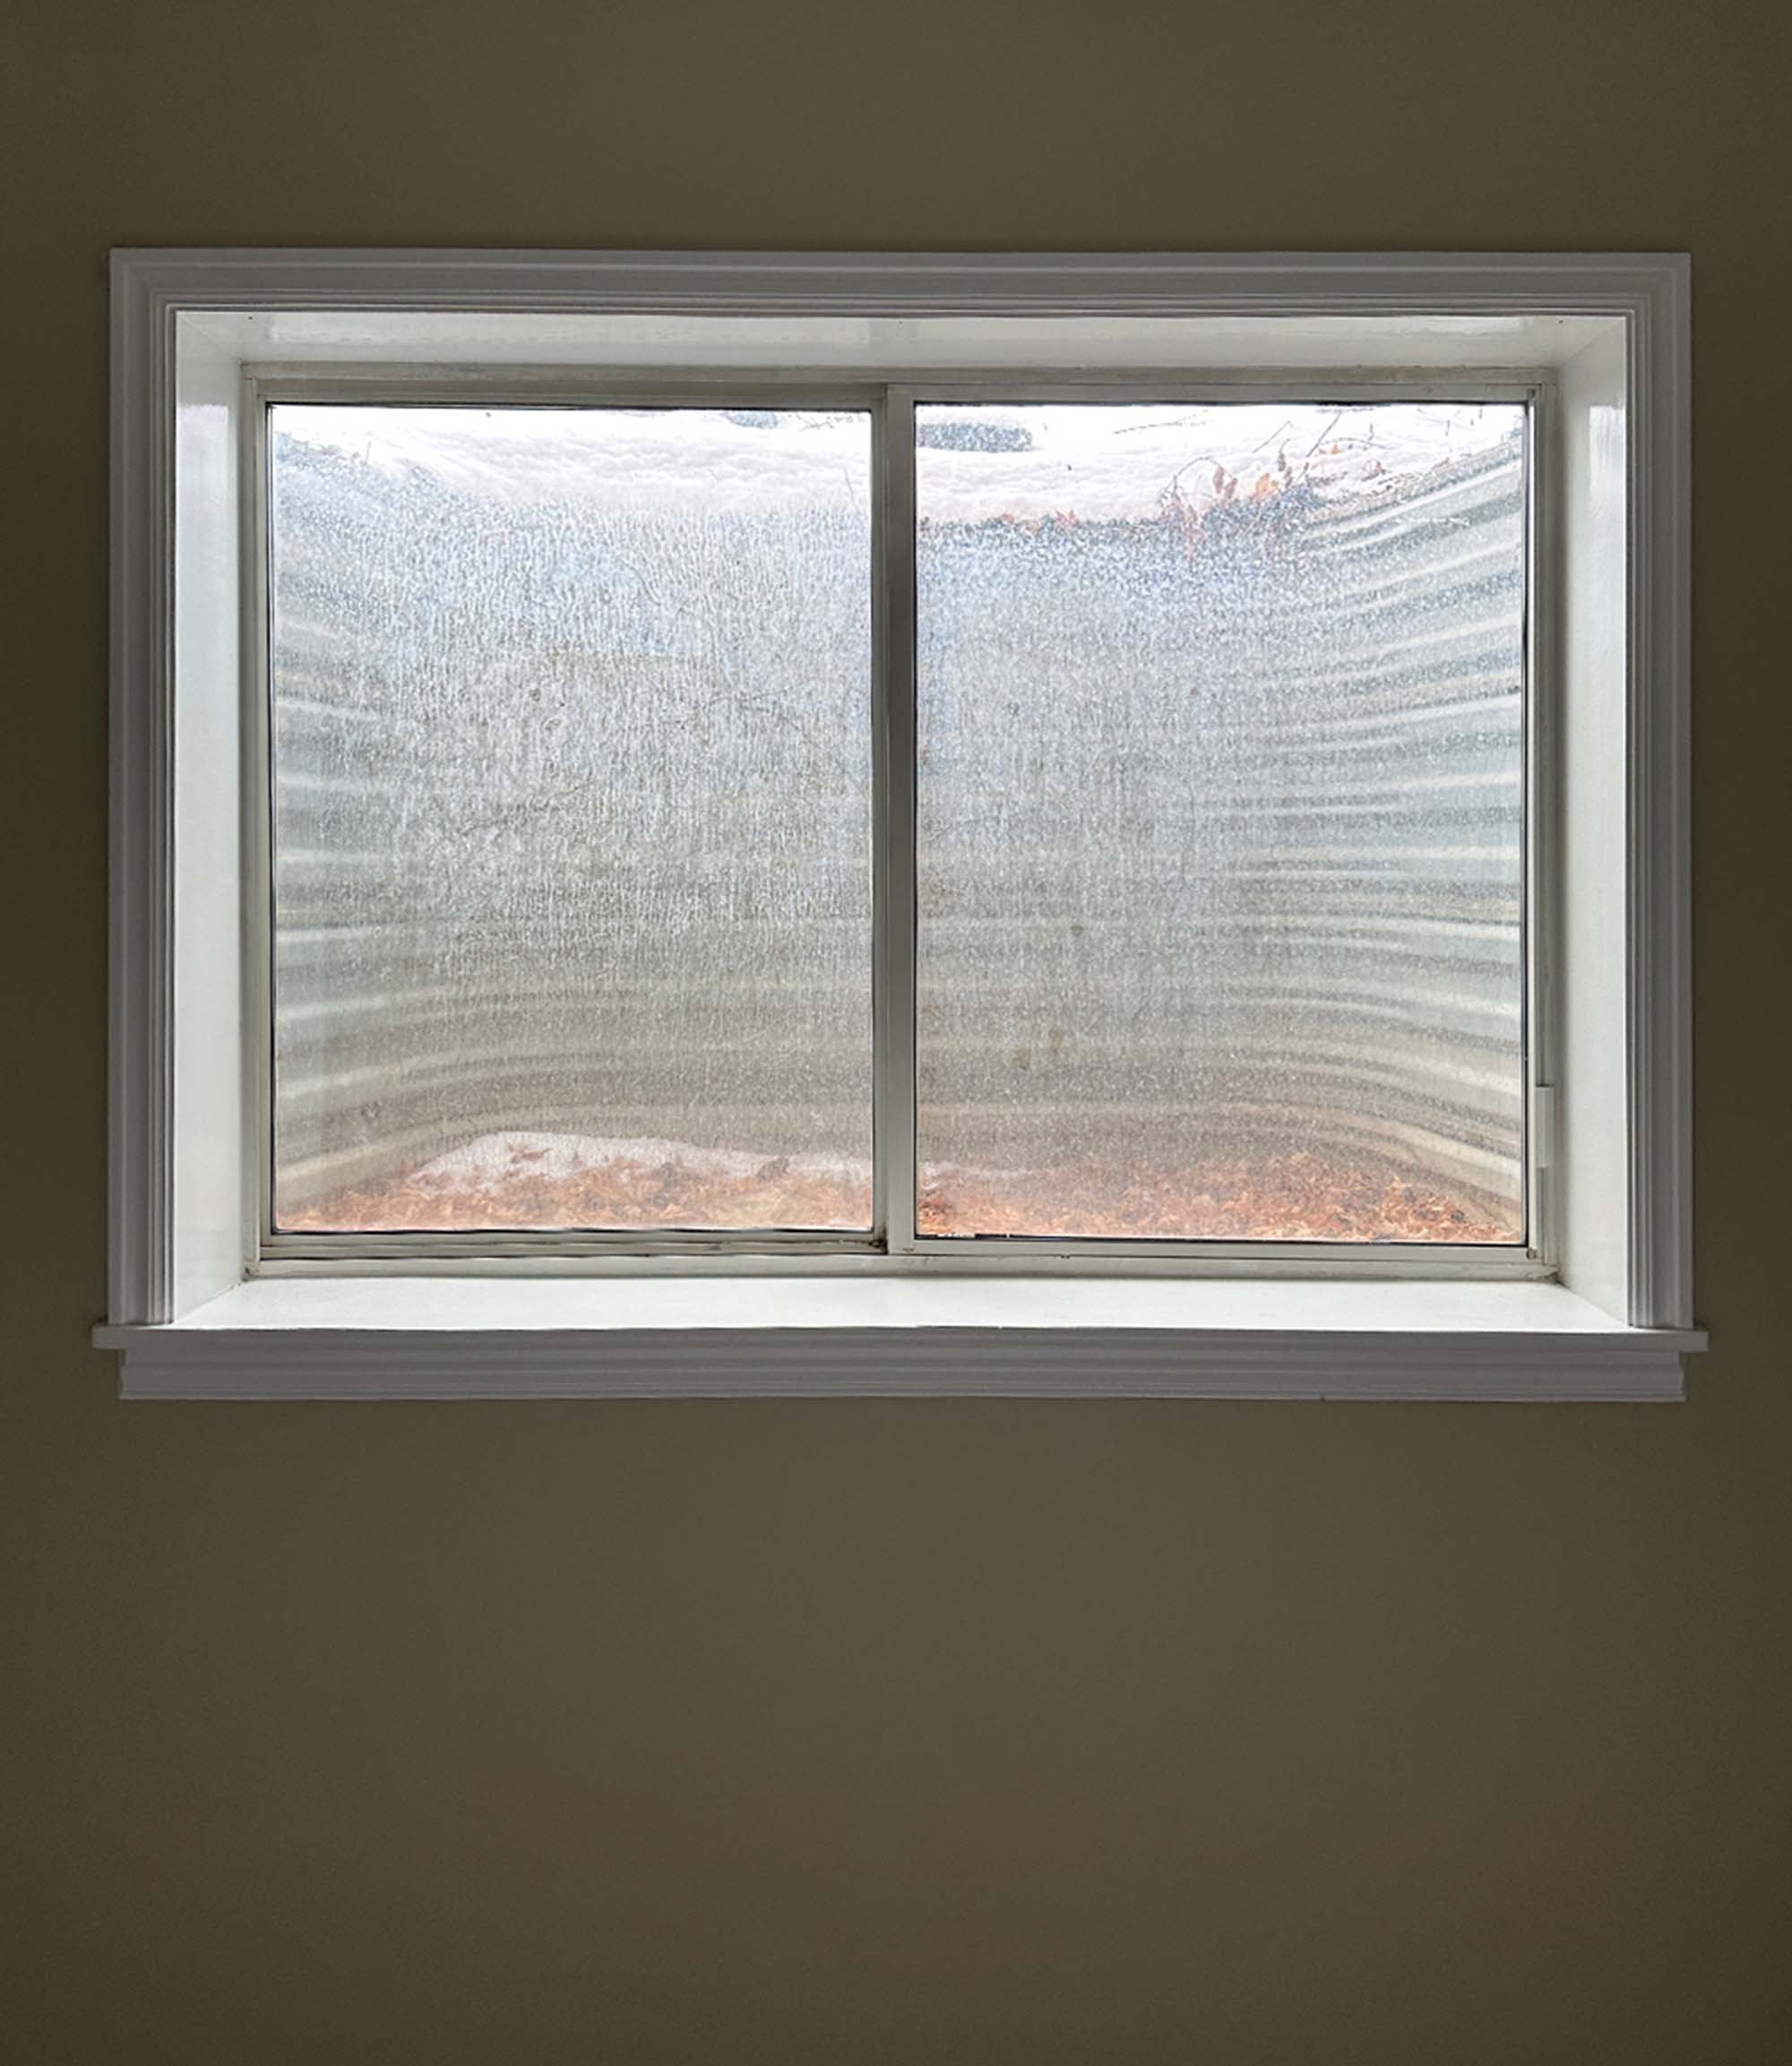
Our basement windows have seen better days, but they’re in great shape and are still functional. They’re not the most efficient since they’re original to the 90’s, but they do the job. While they’re quite dirty on the exterior and layered with calcium deposits (thanks to our hard irrigation water), my main goal was to diffuse the view while still allowing natural light to flow in. I don’t love the look of our window wells. They’re metal, are constantly dirty thanks to our location and climate, and they’re just not aesthetically pleasing. I think reeded glass is a classic choice. While it trends in and out of popularity, its roots are traditional and architectural, which makes it feel right at home in both old and new houses.
Here’s why I opted for a reeded glass window film… it offers the same benefits as real reeded glass, without the cost of totally replacing our basement windows. You get privacy while still allowing natural light to pour in. This is also a renter friendly option, if you’re unable to replace your windows. I have used this approach in multiple spaces over the years, and it continues to hold up both visually and practically.
Where This DIY Works Best
This easy faux reeded glass window DIY is especially helpful in spaces where you need privacy and softness, while still allowing natural light. I could see this being helpful in: bathrooms, powder rooms, front doors or sidelights, laundry rooms, pantry doors, or home offices.
Tools and Materials
Reeded glass, privacy glass, or faux reeded glass window clings help to filter natural light while disguising what’s behind the window. This project is simple, budget friendly, and does not require specialized tools. Here’s what you need to get started…
- Reeded Glass Window Cling Roll
- Scissors
- Xacto Blade
- Window Cleaner
- Soapy Water or Basic Cleaning Spray
- Metal Ruler
- Measuring Tape
- Squeegee
- Towels
- My Affordable Custom Roman Shade
How to Install Faux Reeded Glass Window Film
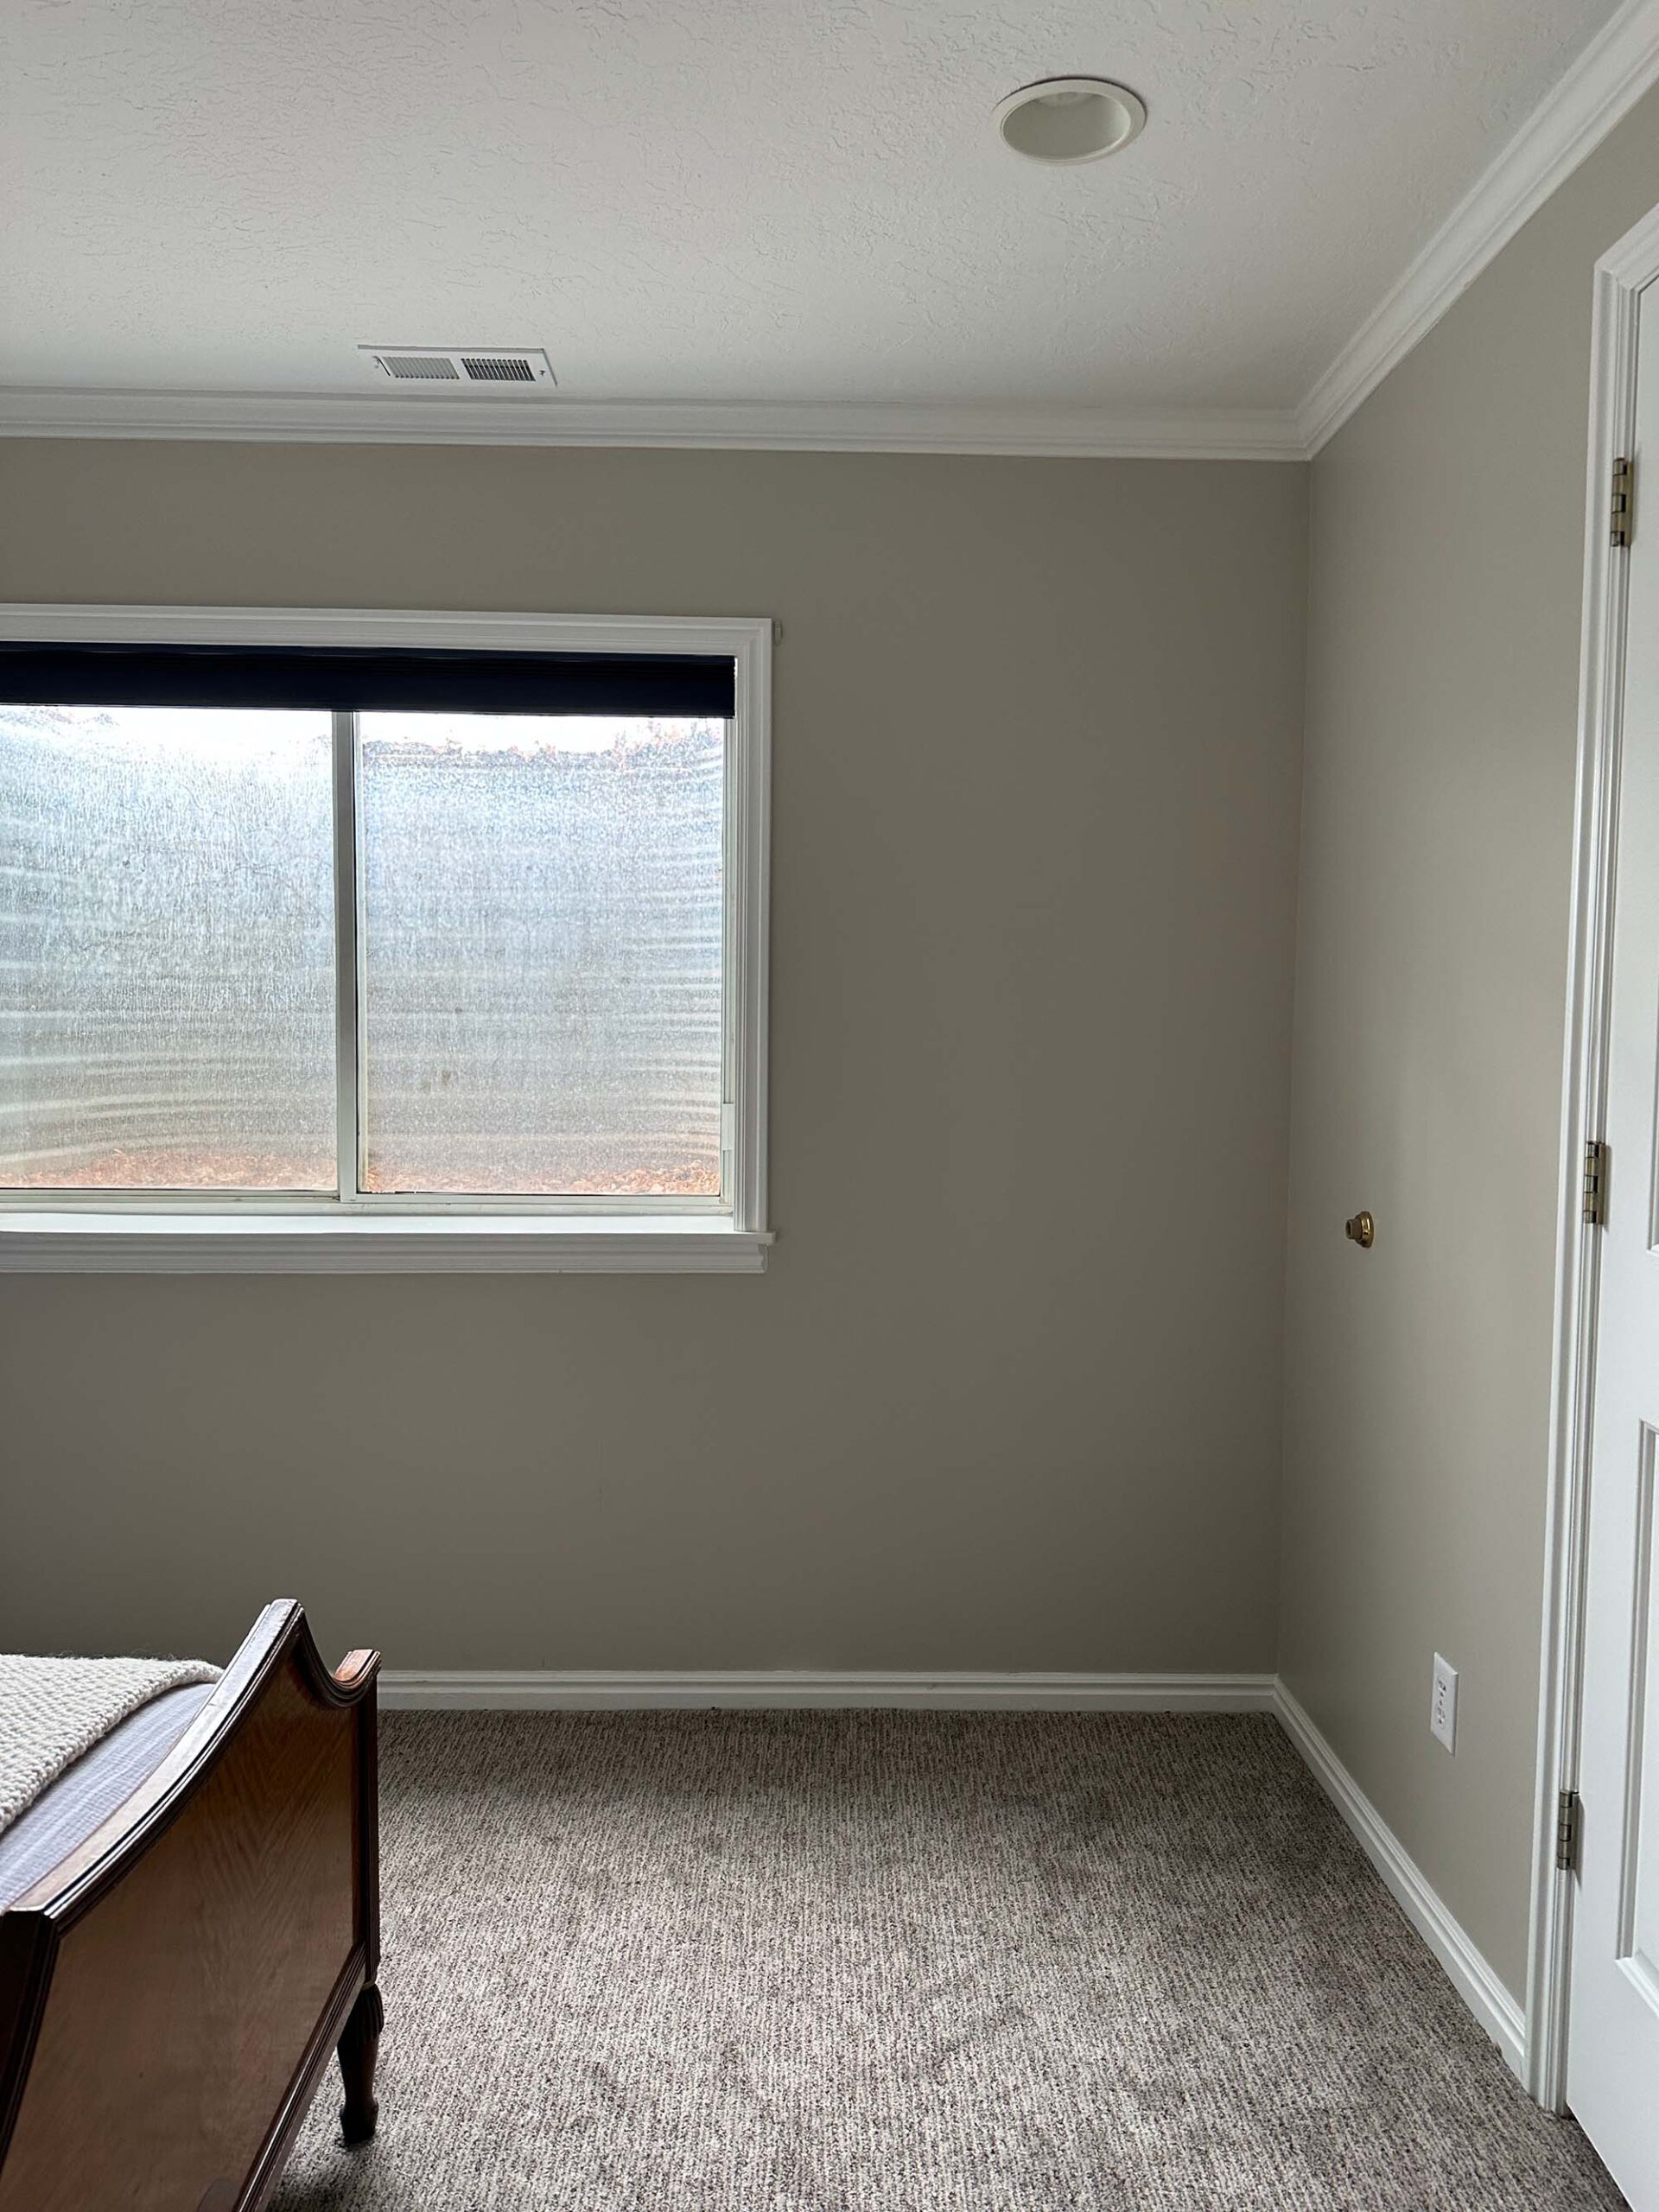
The above image shows where I started… the window well is obvious and ugly. I think I’ve mentioned this before, but my first job in high school was installing vinyl graphics and vehicle wraps, so this process is something I’m really comfortable and familiar with. The reviews for the window cling are meh, but I’m convinced it’s because people weren’t prepared or informed for the installation. The instructions make it seem way more complex than it actually is. I promise it’s easy! Let’s get started…
Step 1: Clean the Glass

First, you’ll need to clean the window really thoroughly. I just used Windex and made a couple passes, making sure to get the edges really good. Any dust or residue will show through once the film is applied.
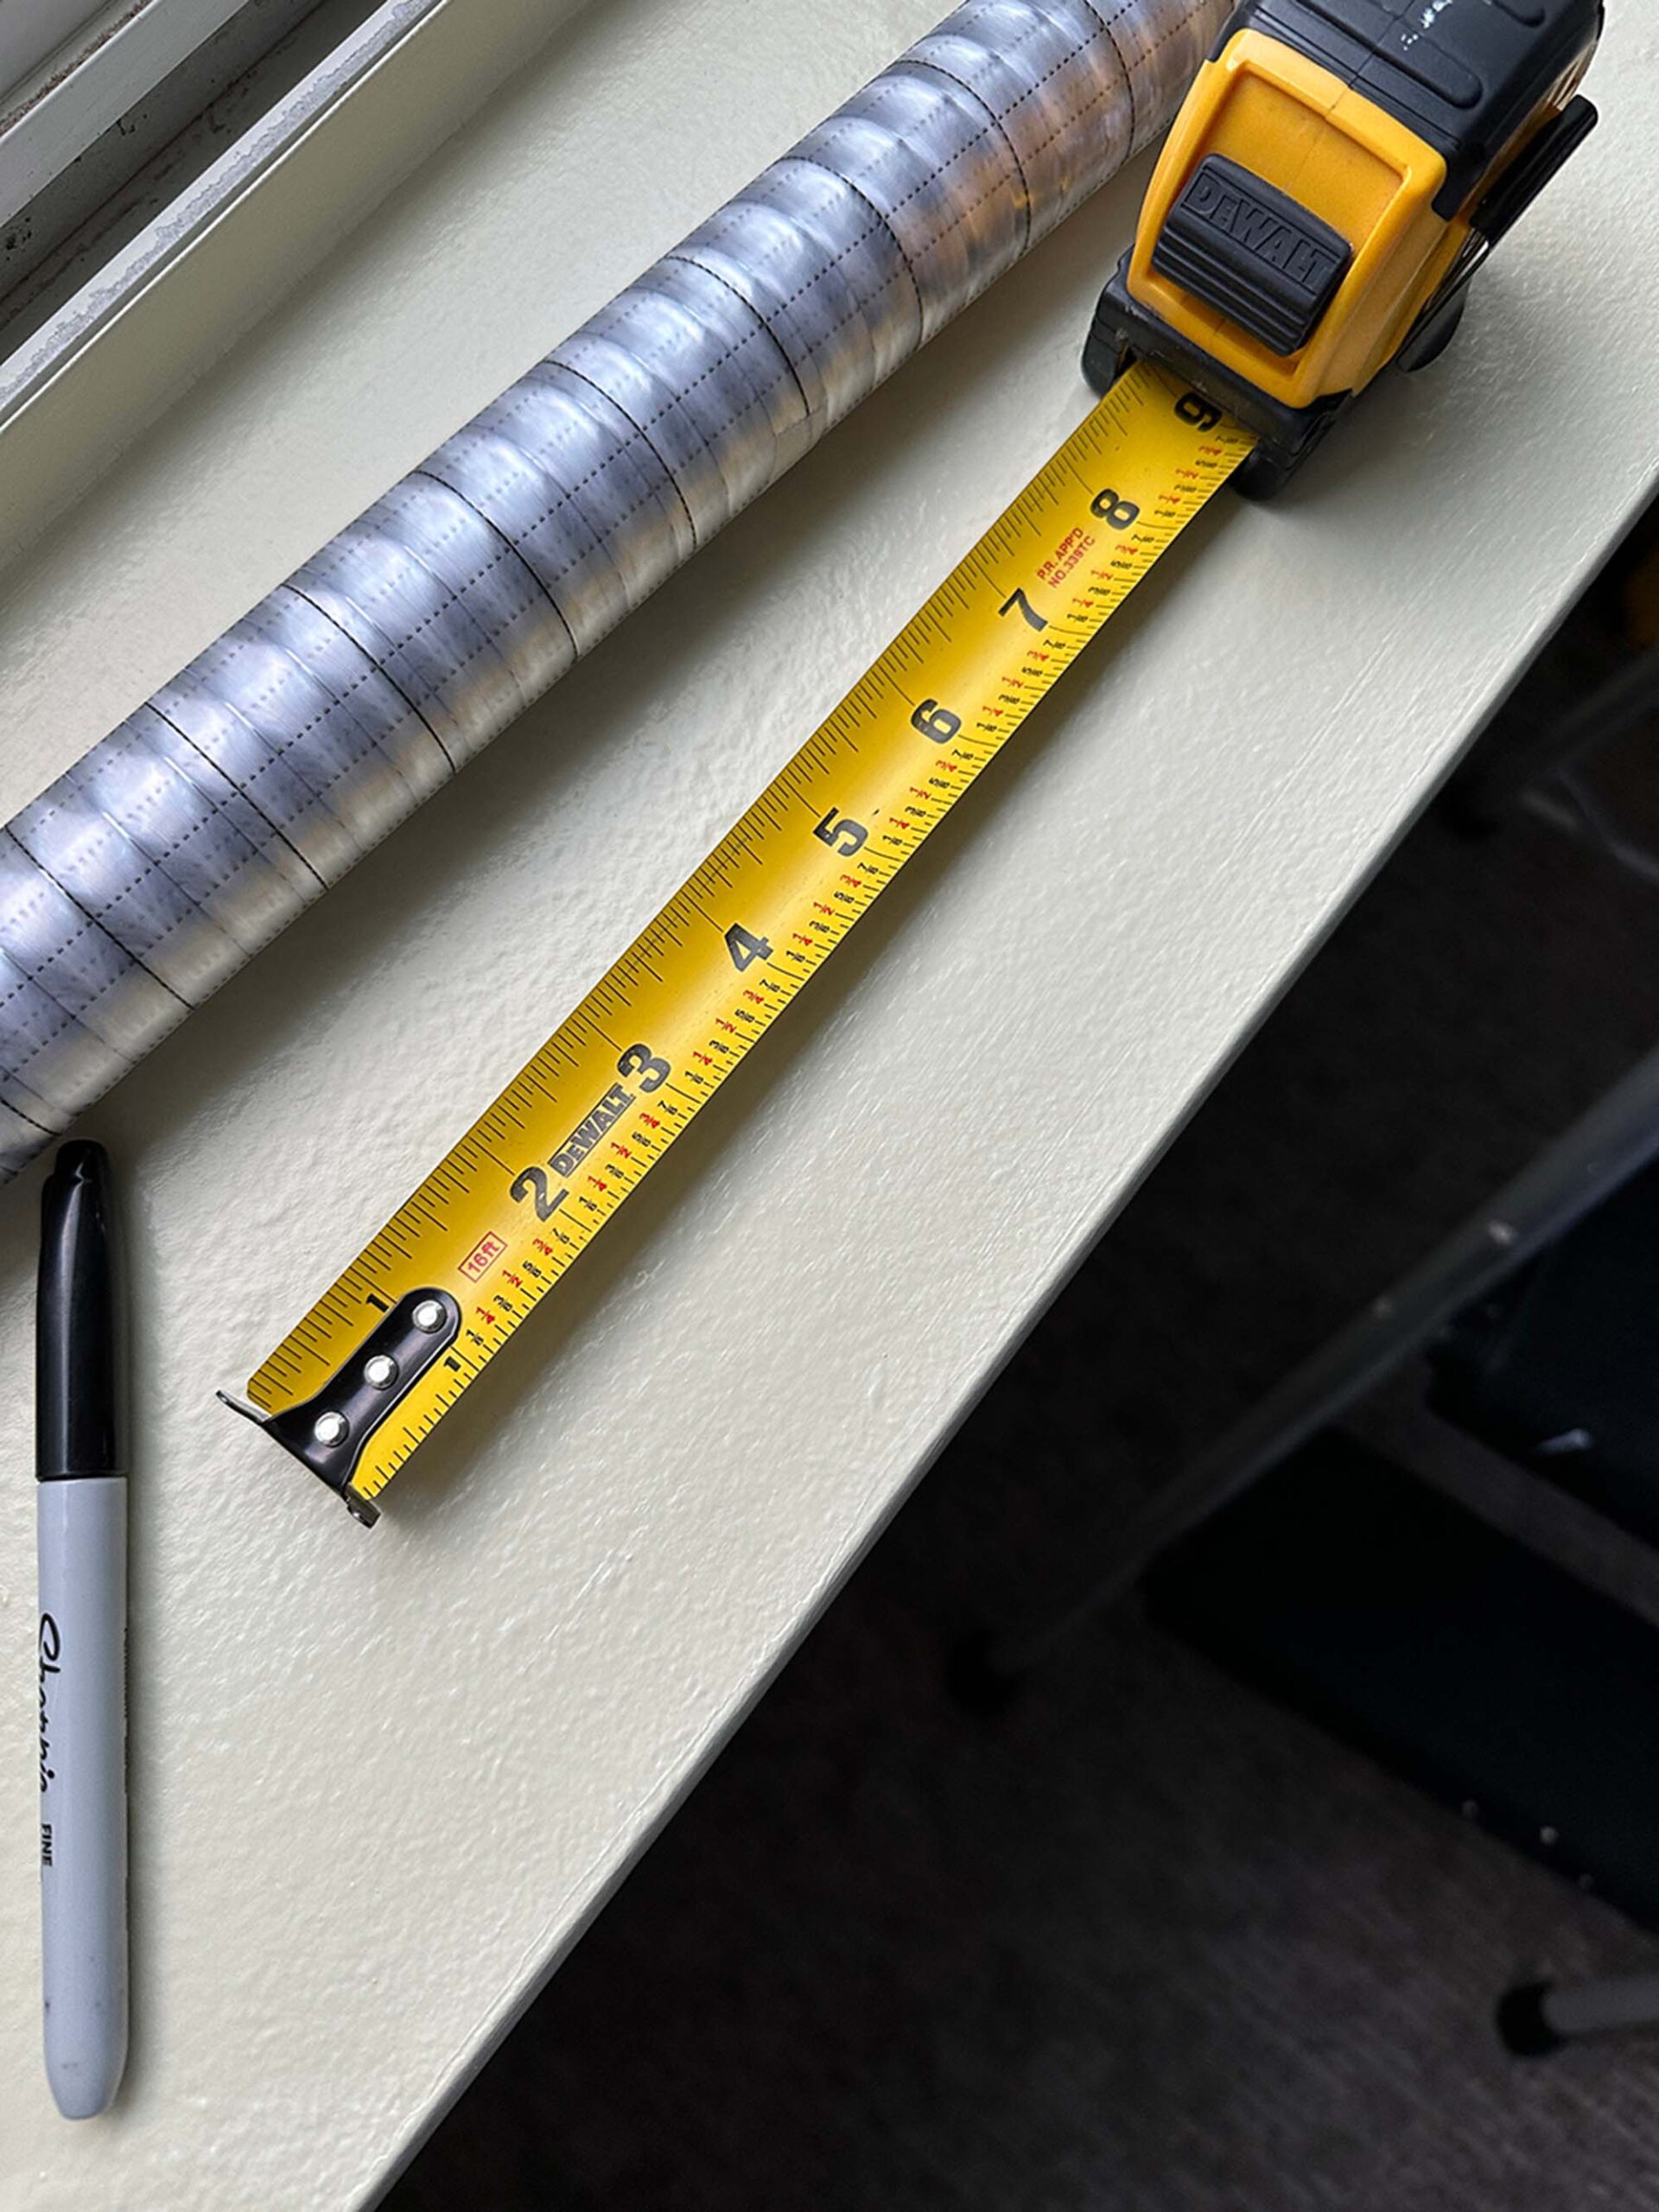
Step 2: Measure, Cut, and Prep
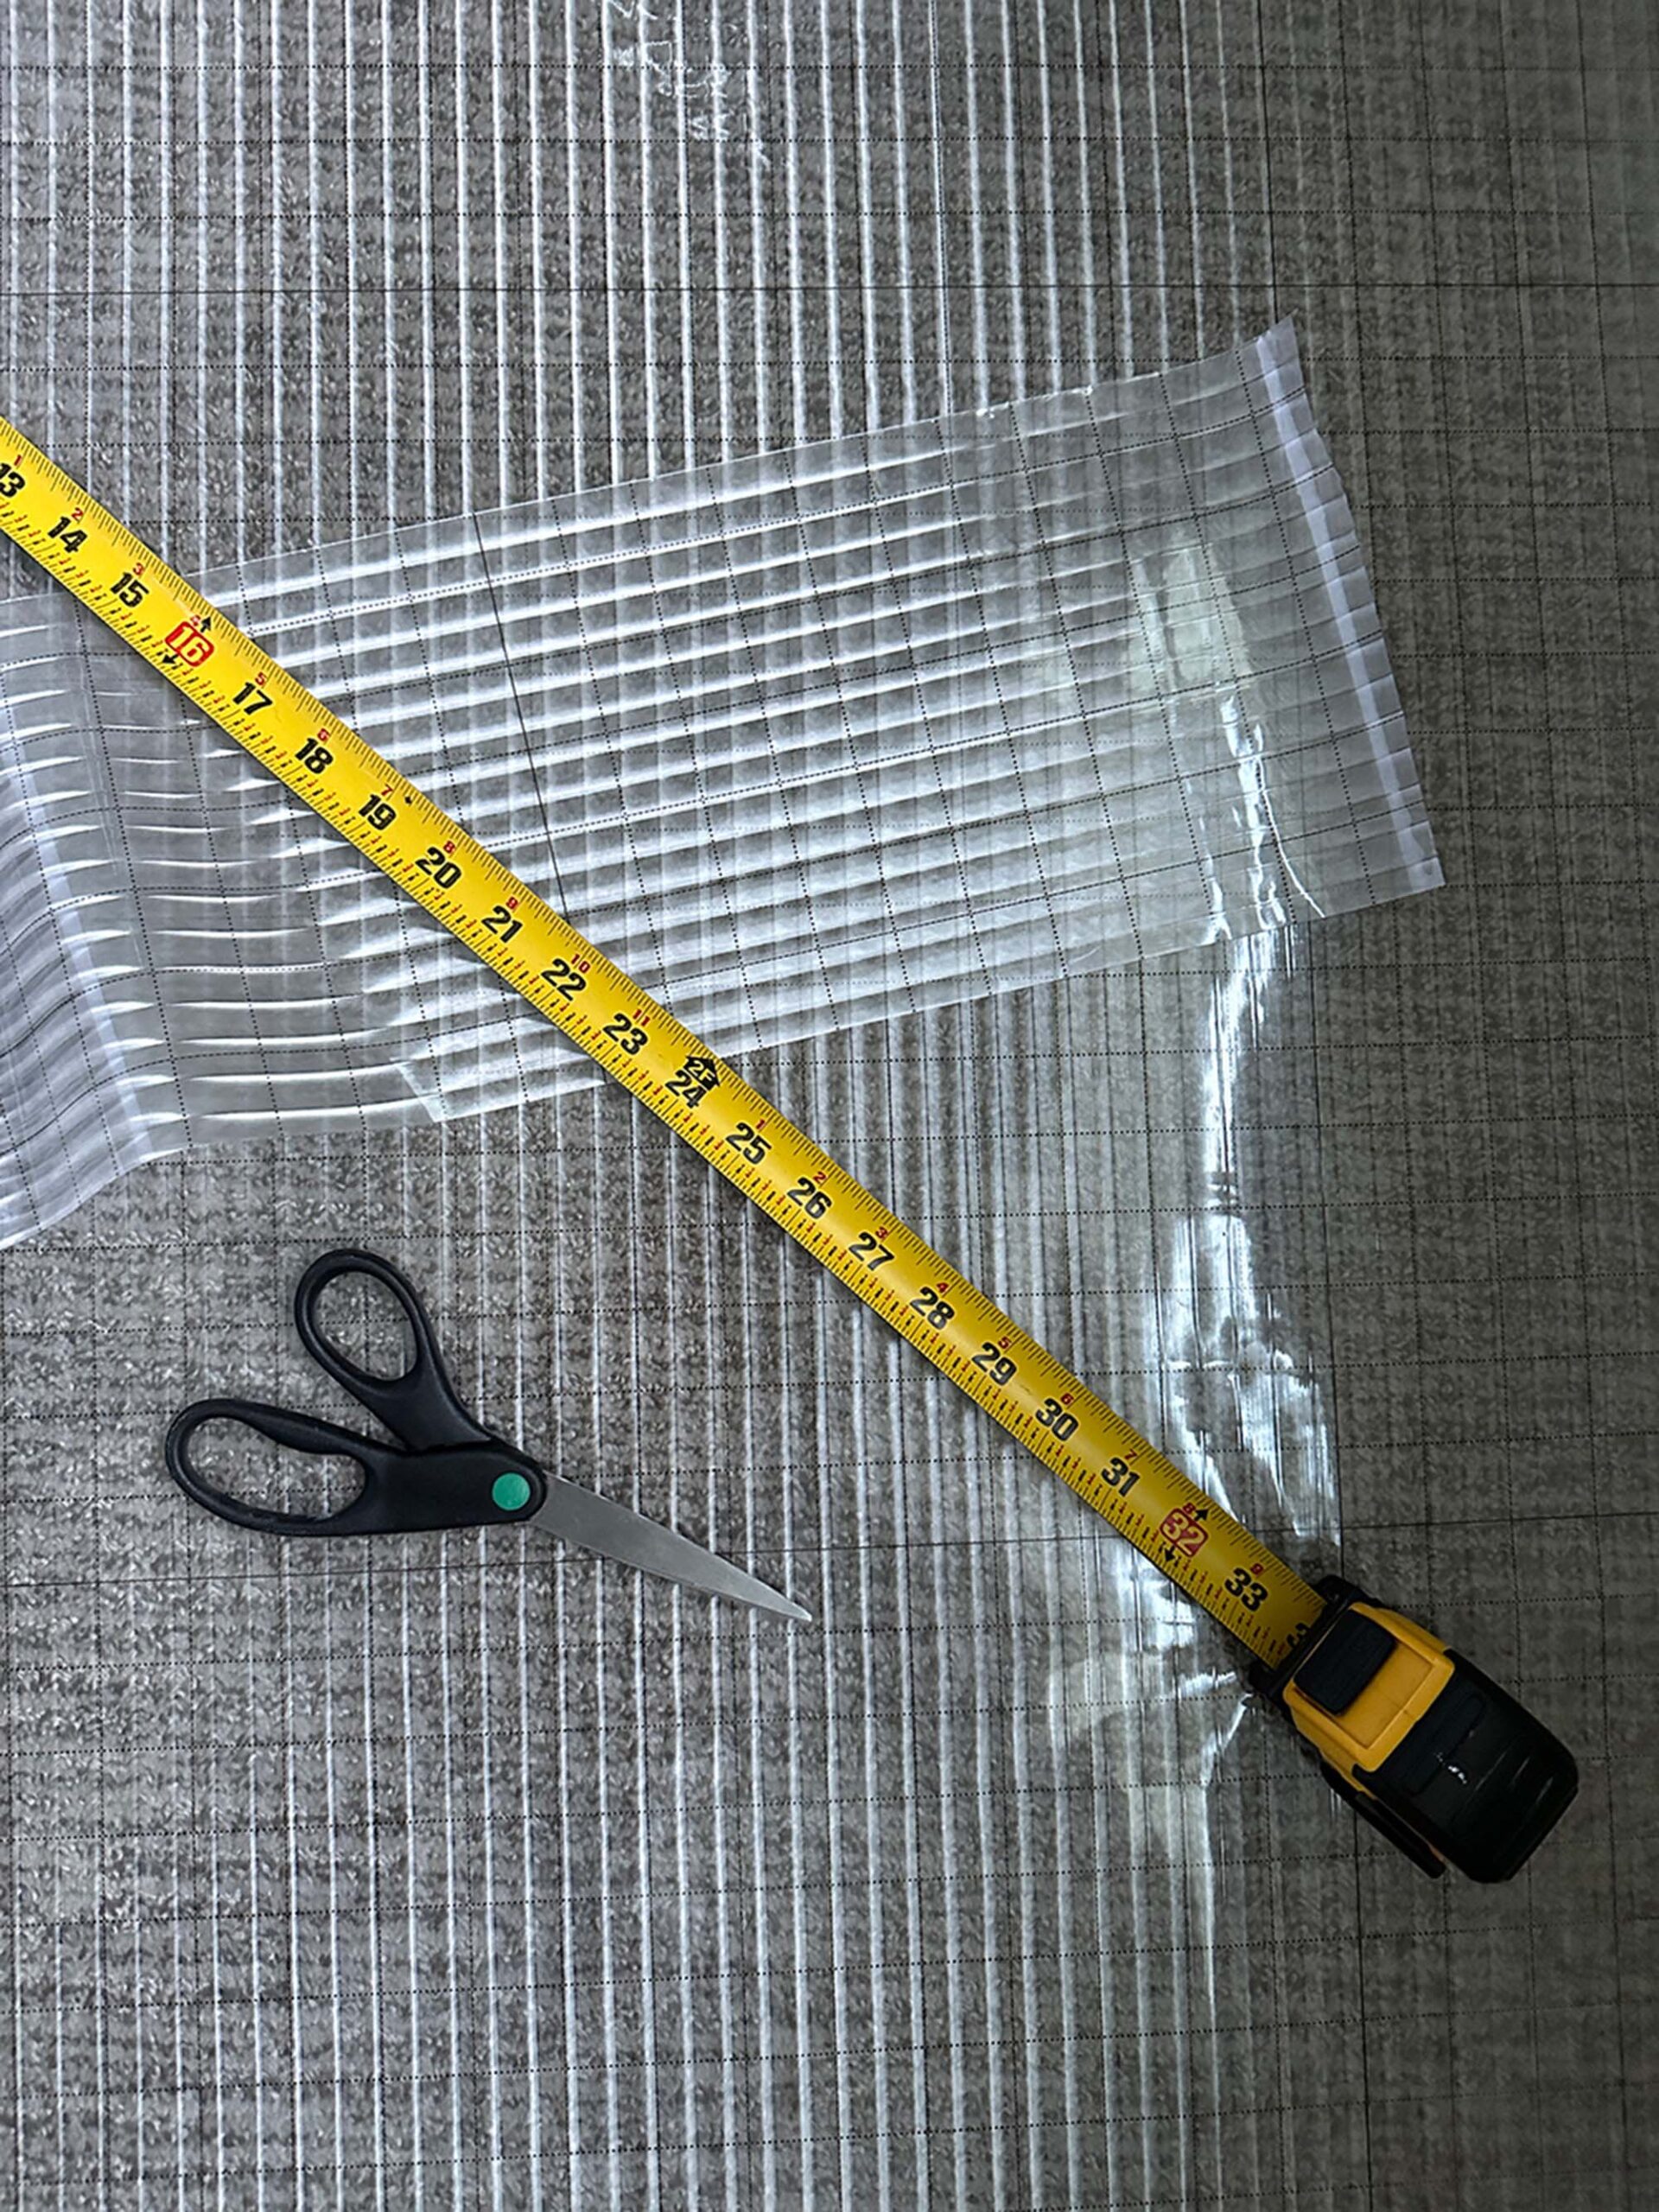
Next, you’ll measure your windows and cut the material to size, PLUS one extra inch lengthwise and widthwise. For example: my window was 27″ x 37″, so I cut the material to 28″ x 38″. This gives you flexibility for a clean edge later.
Once your material has been cut to size, spray the window with soapy water or a basic all-purpose cleaning spray. Make sure the window is totally drenched with solution. This makes it easier to install and allows you to reposition the film as needed until it’s perfectly aligned.
Step 3: Remove the Backing from the Product
Next, peel the backing off the material 25% downward, lining up the factory edge in one corner. Like this… don’t worry about bubbles yet.
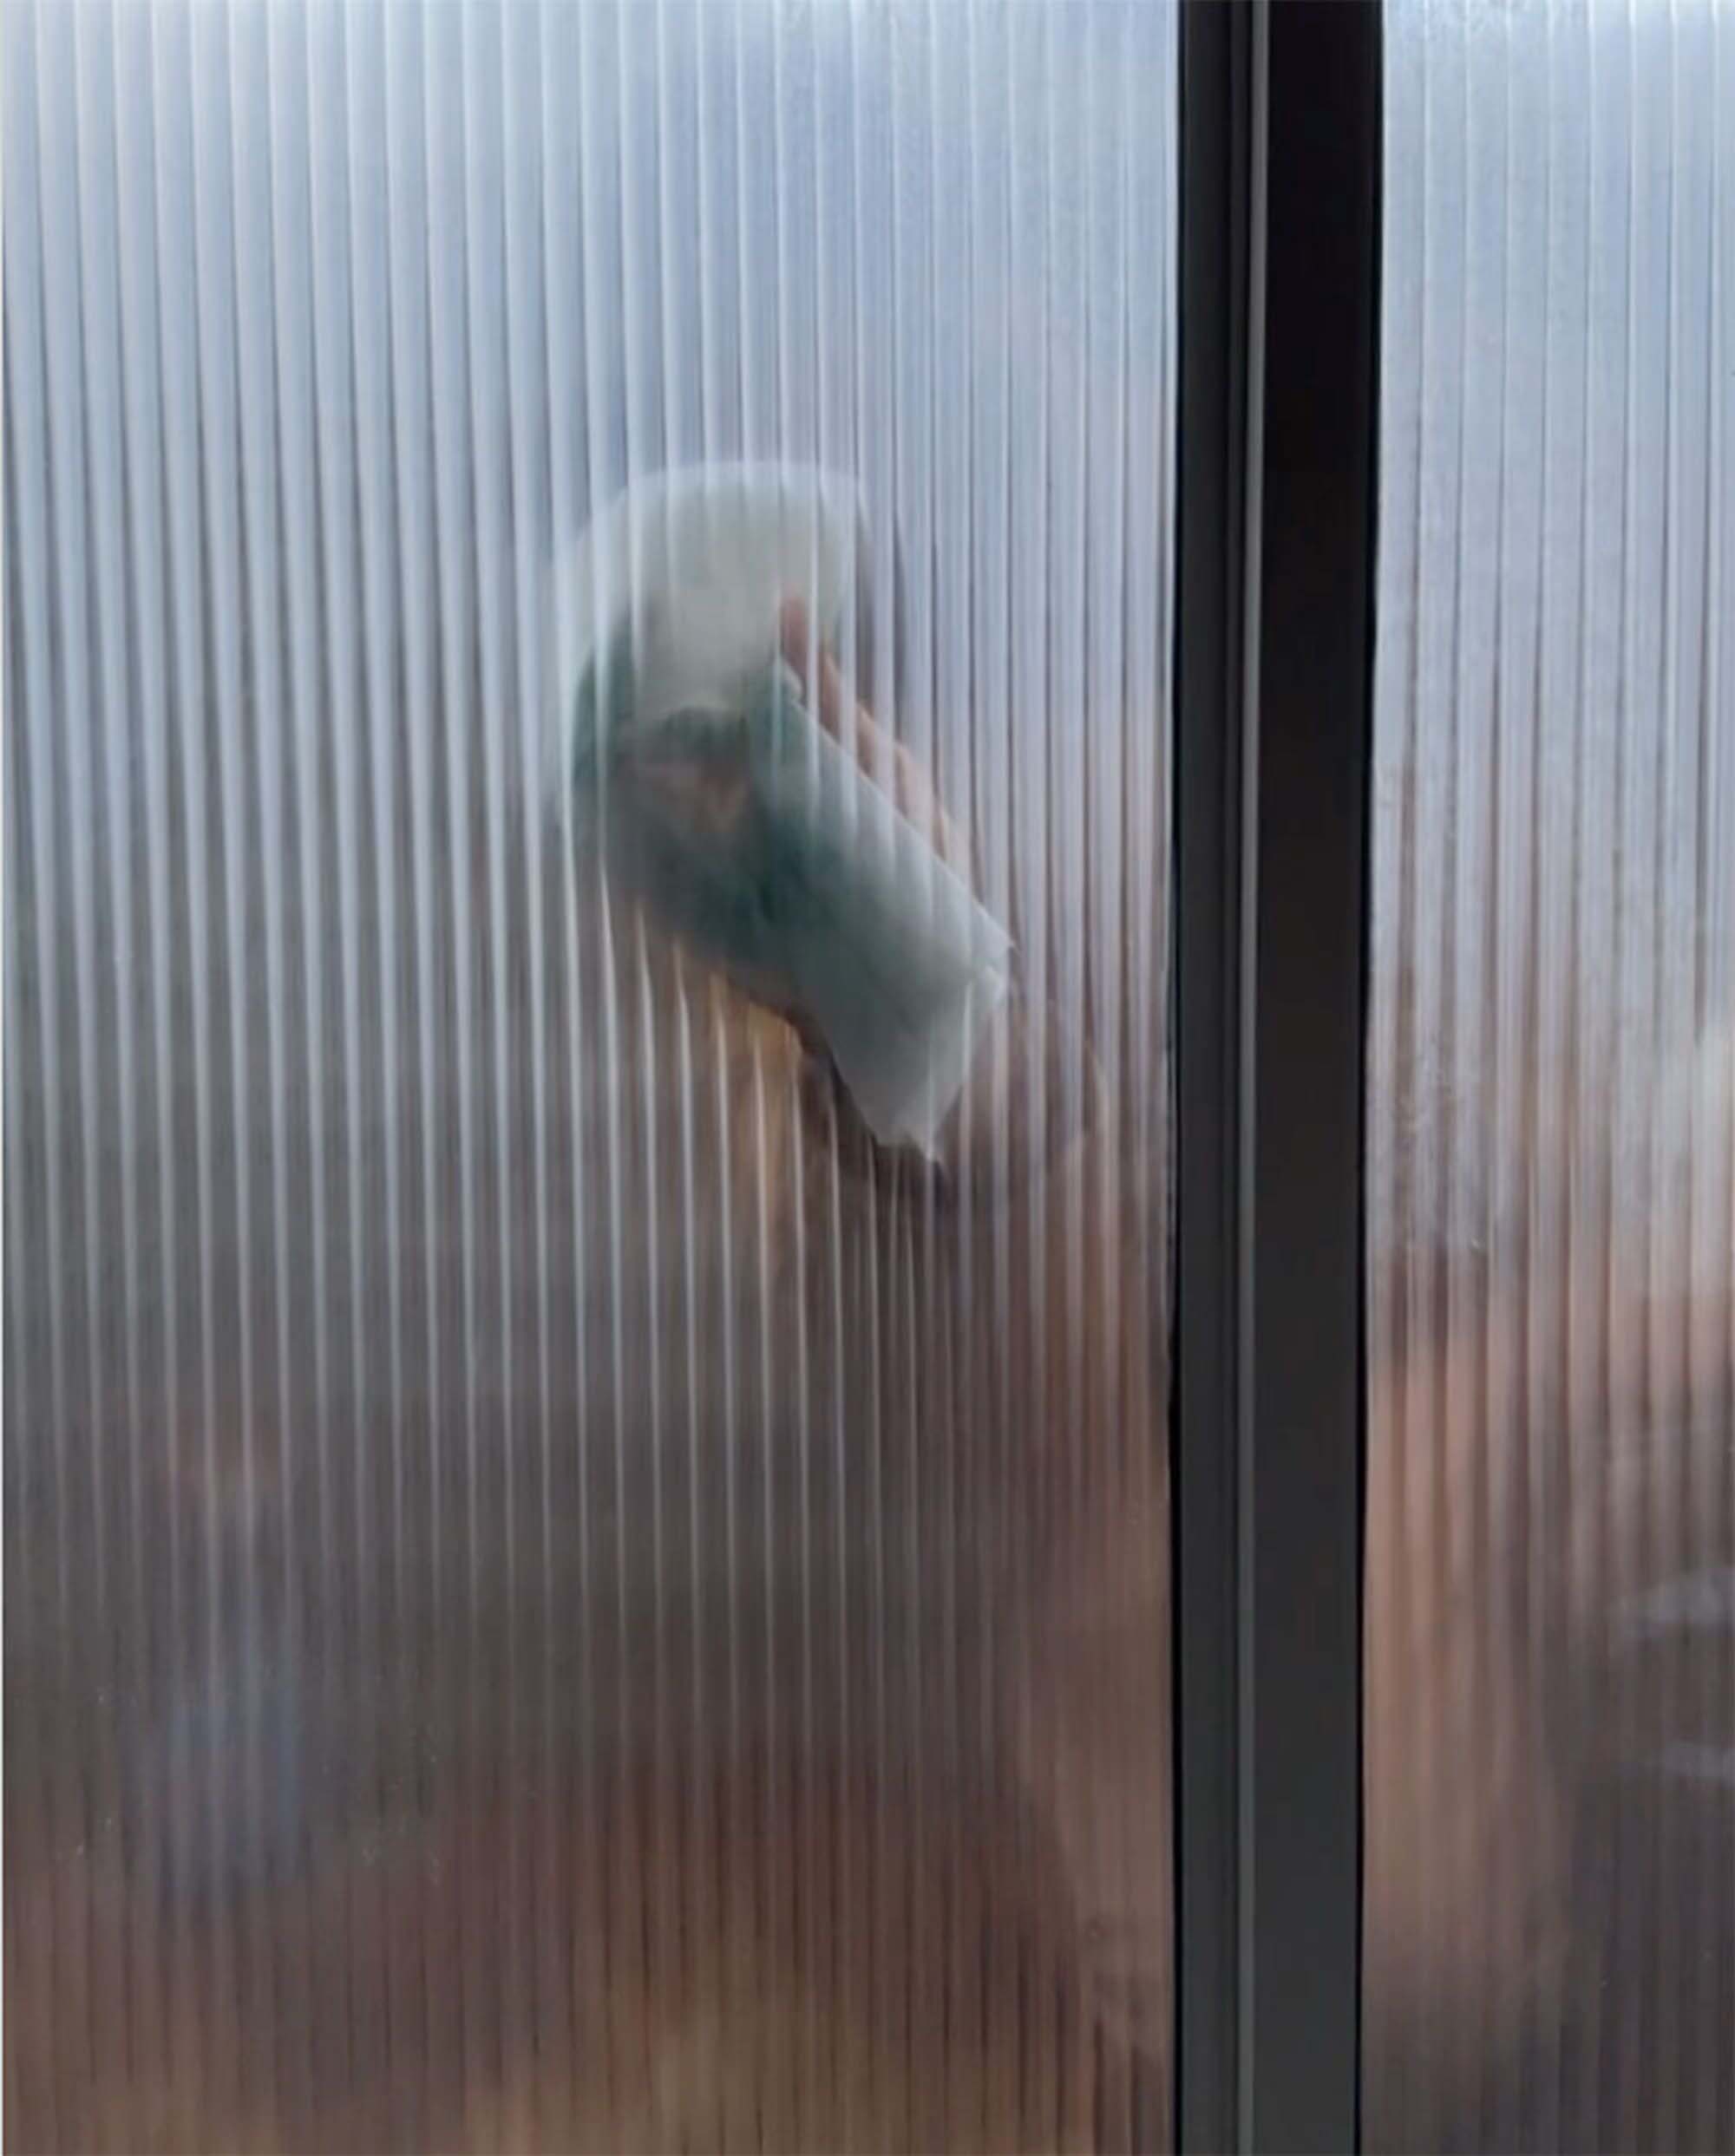
Step 4: Squeegee from Top to Bottom
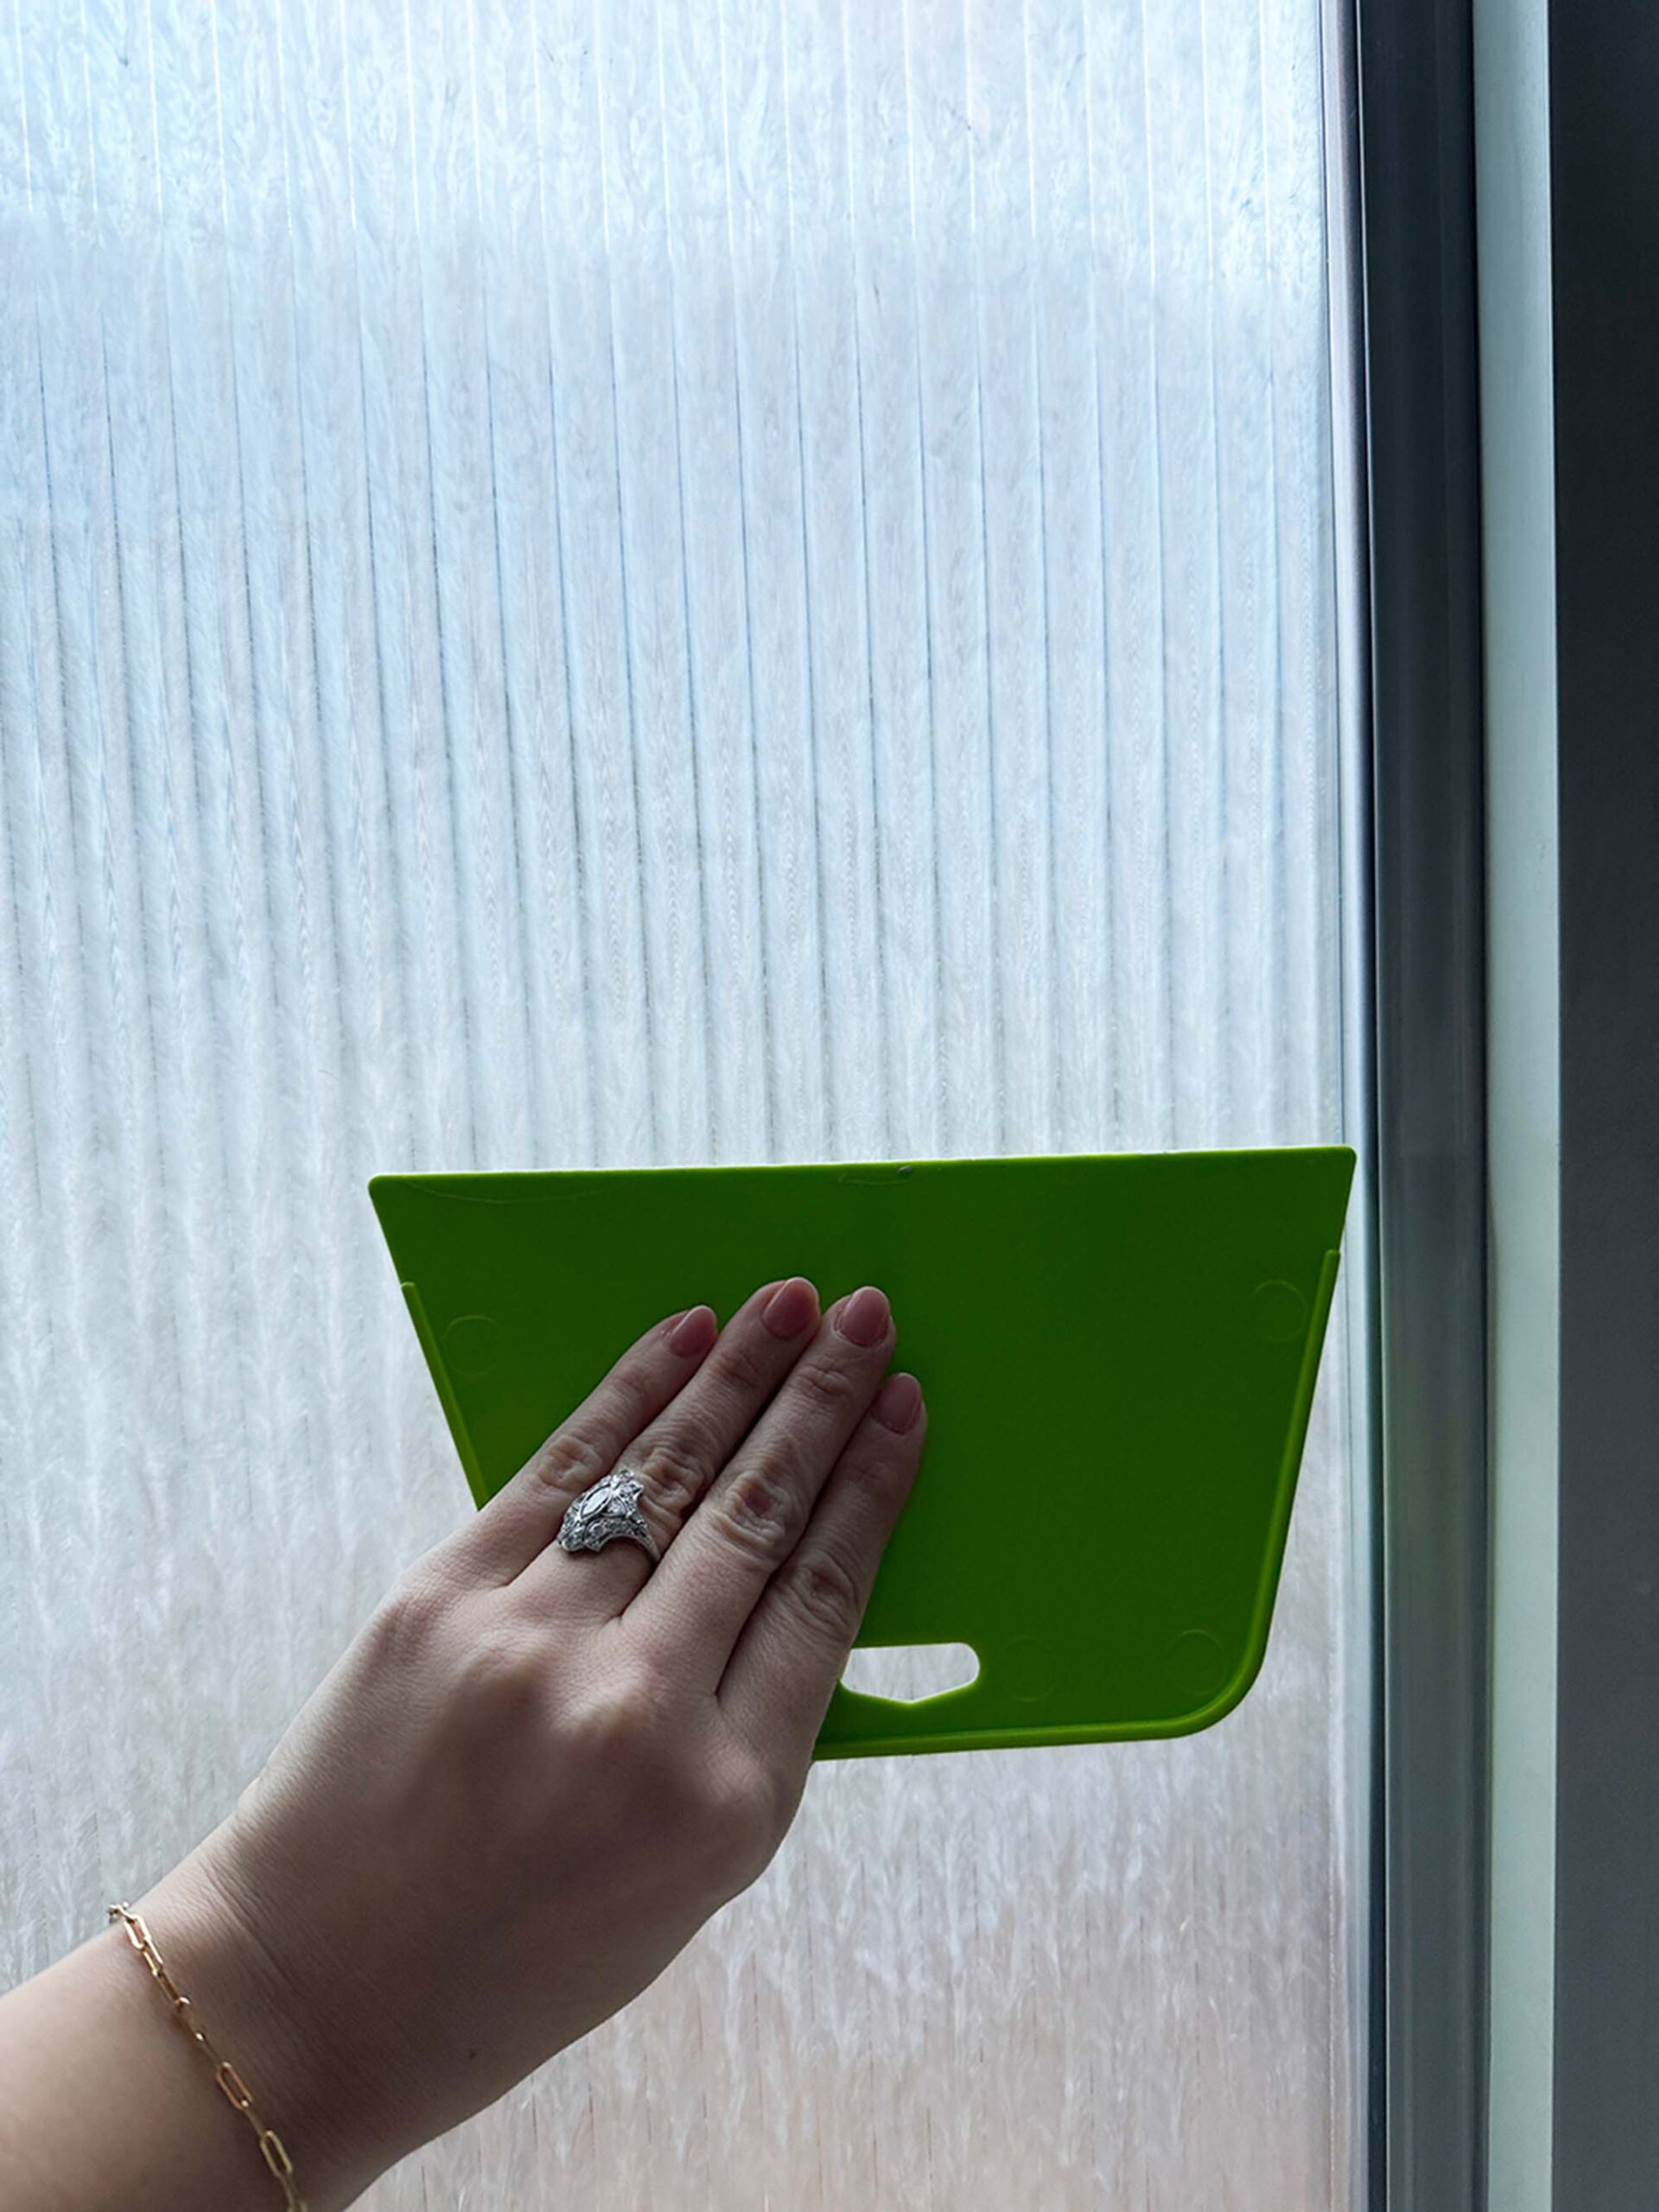
Once it’s aligned, use the squeegee from top to bottom, pressing the solution out of the edges, until no bubbles remain. Make sure it’s super smooth and flat…
Step 5: Cut the Excess
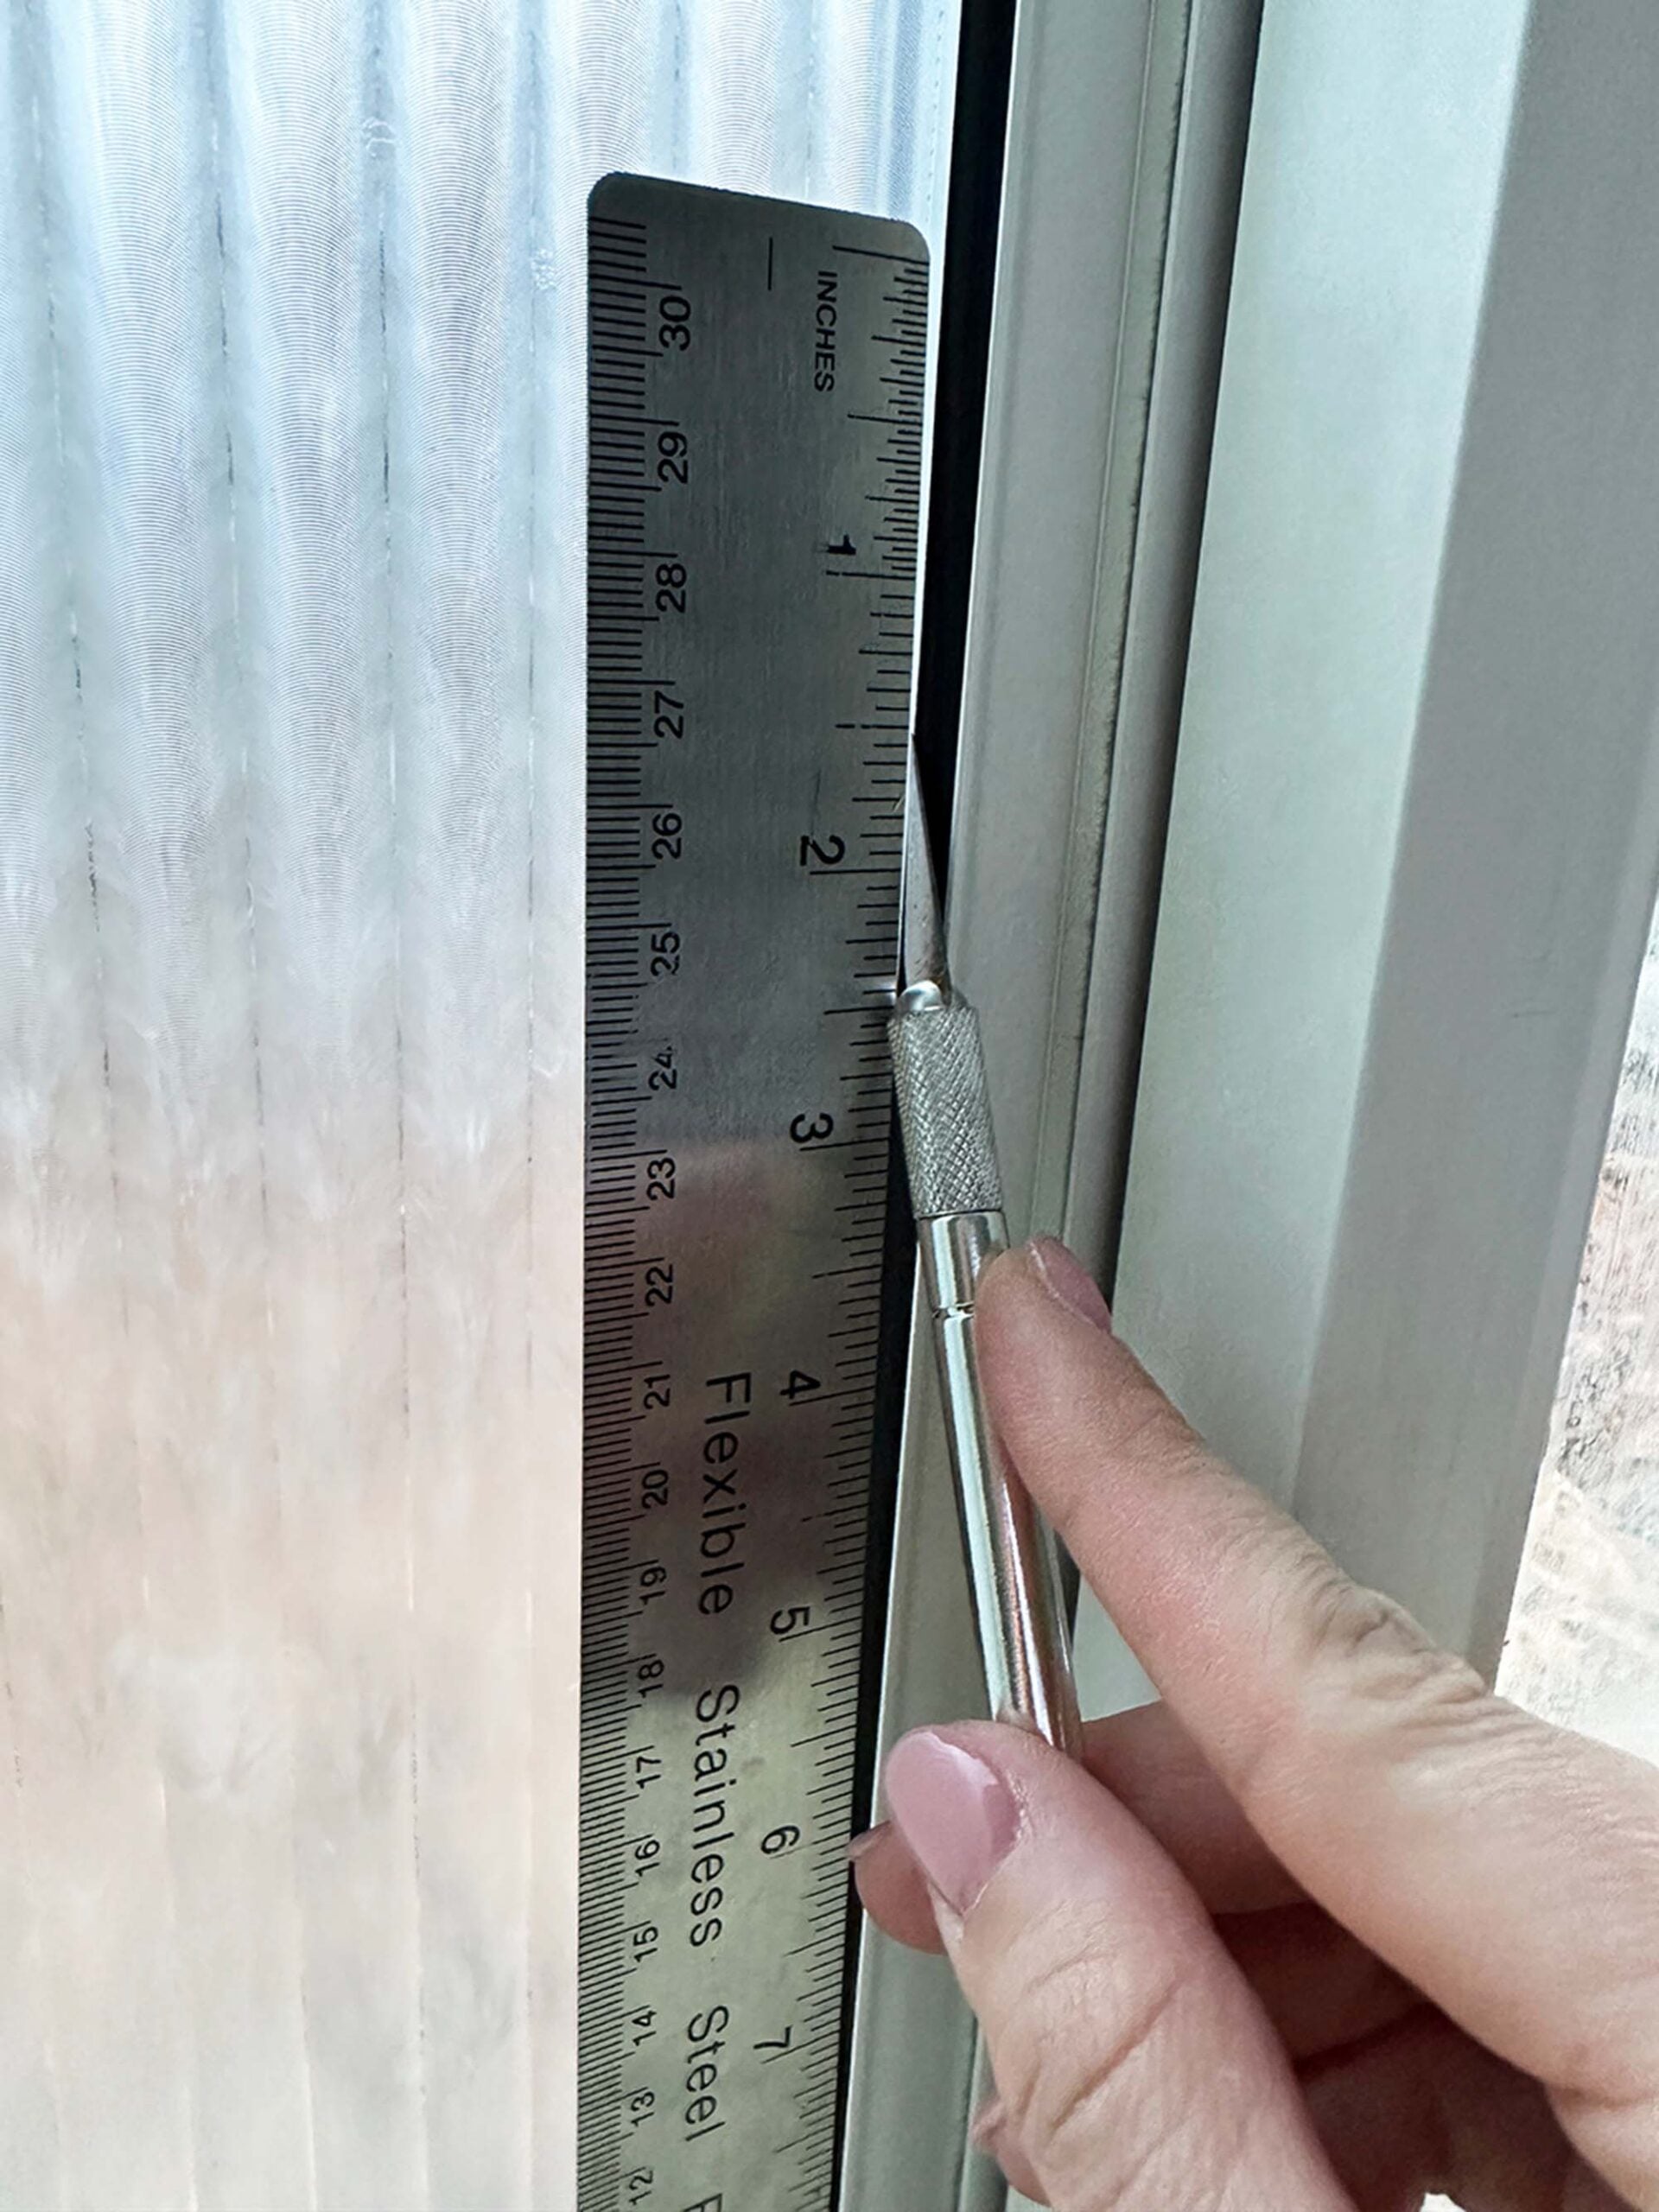
The last step is to trim the excess material away from the edges with your Xacto knife. You should only need to trim two edges since you aligned the material in one corner. Use the metal ruler, dragging it as you cut. This makes it easy to achieve a super clean, straight line in one fell swoop!
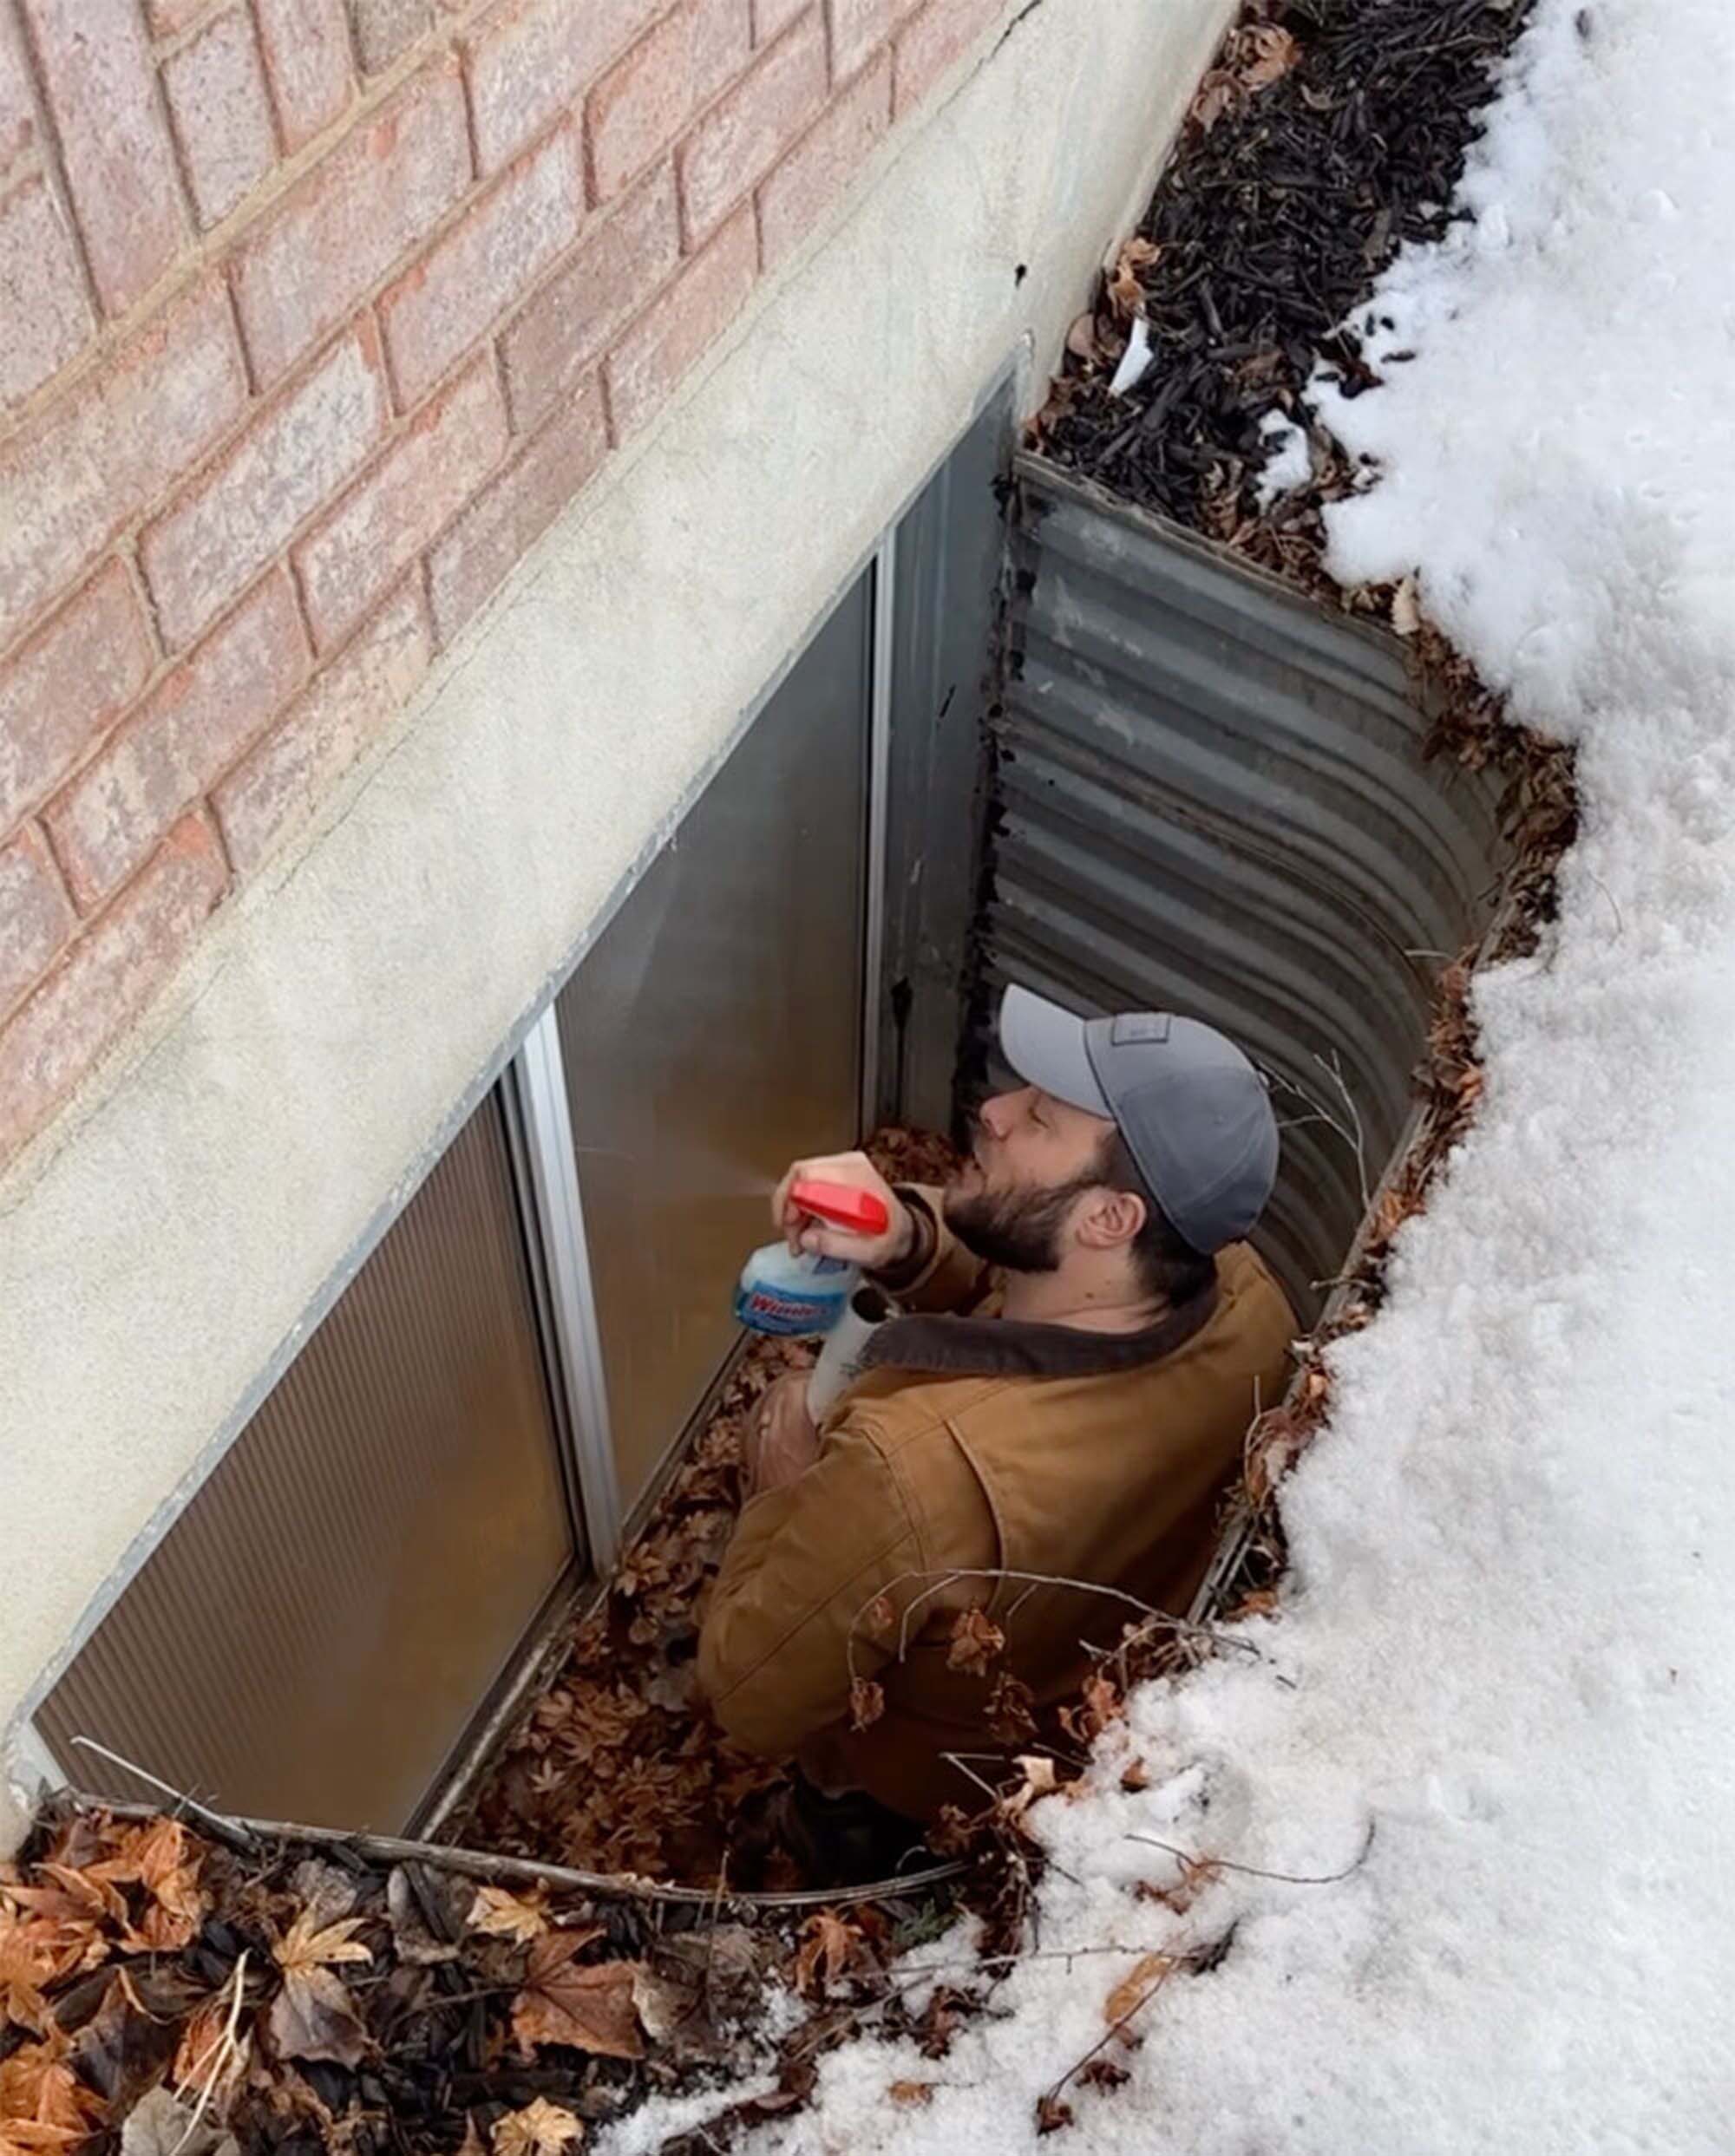
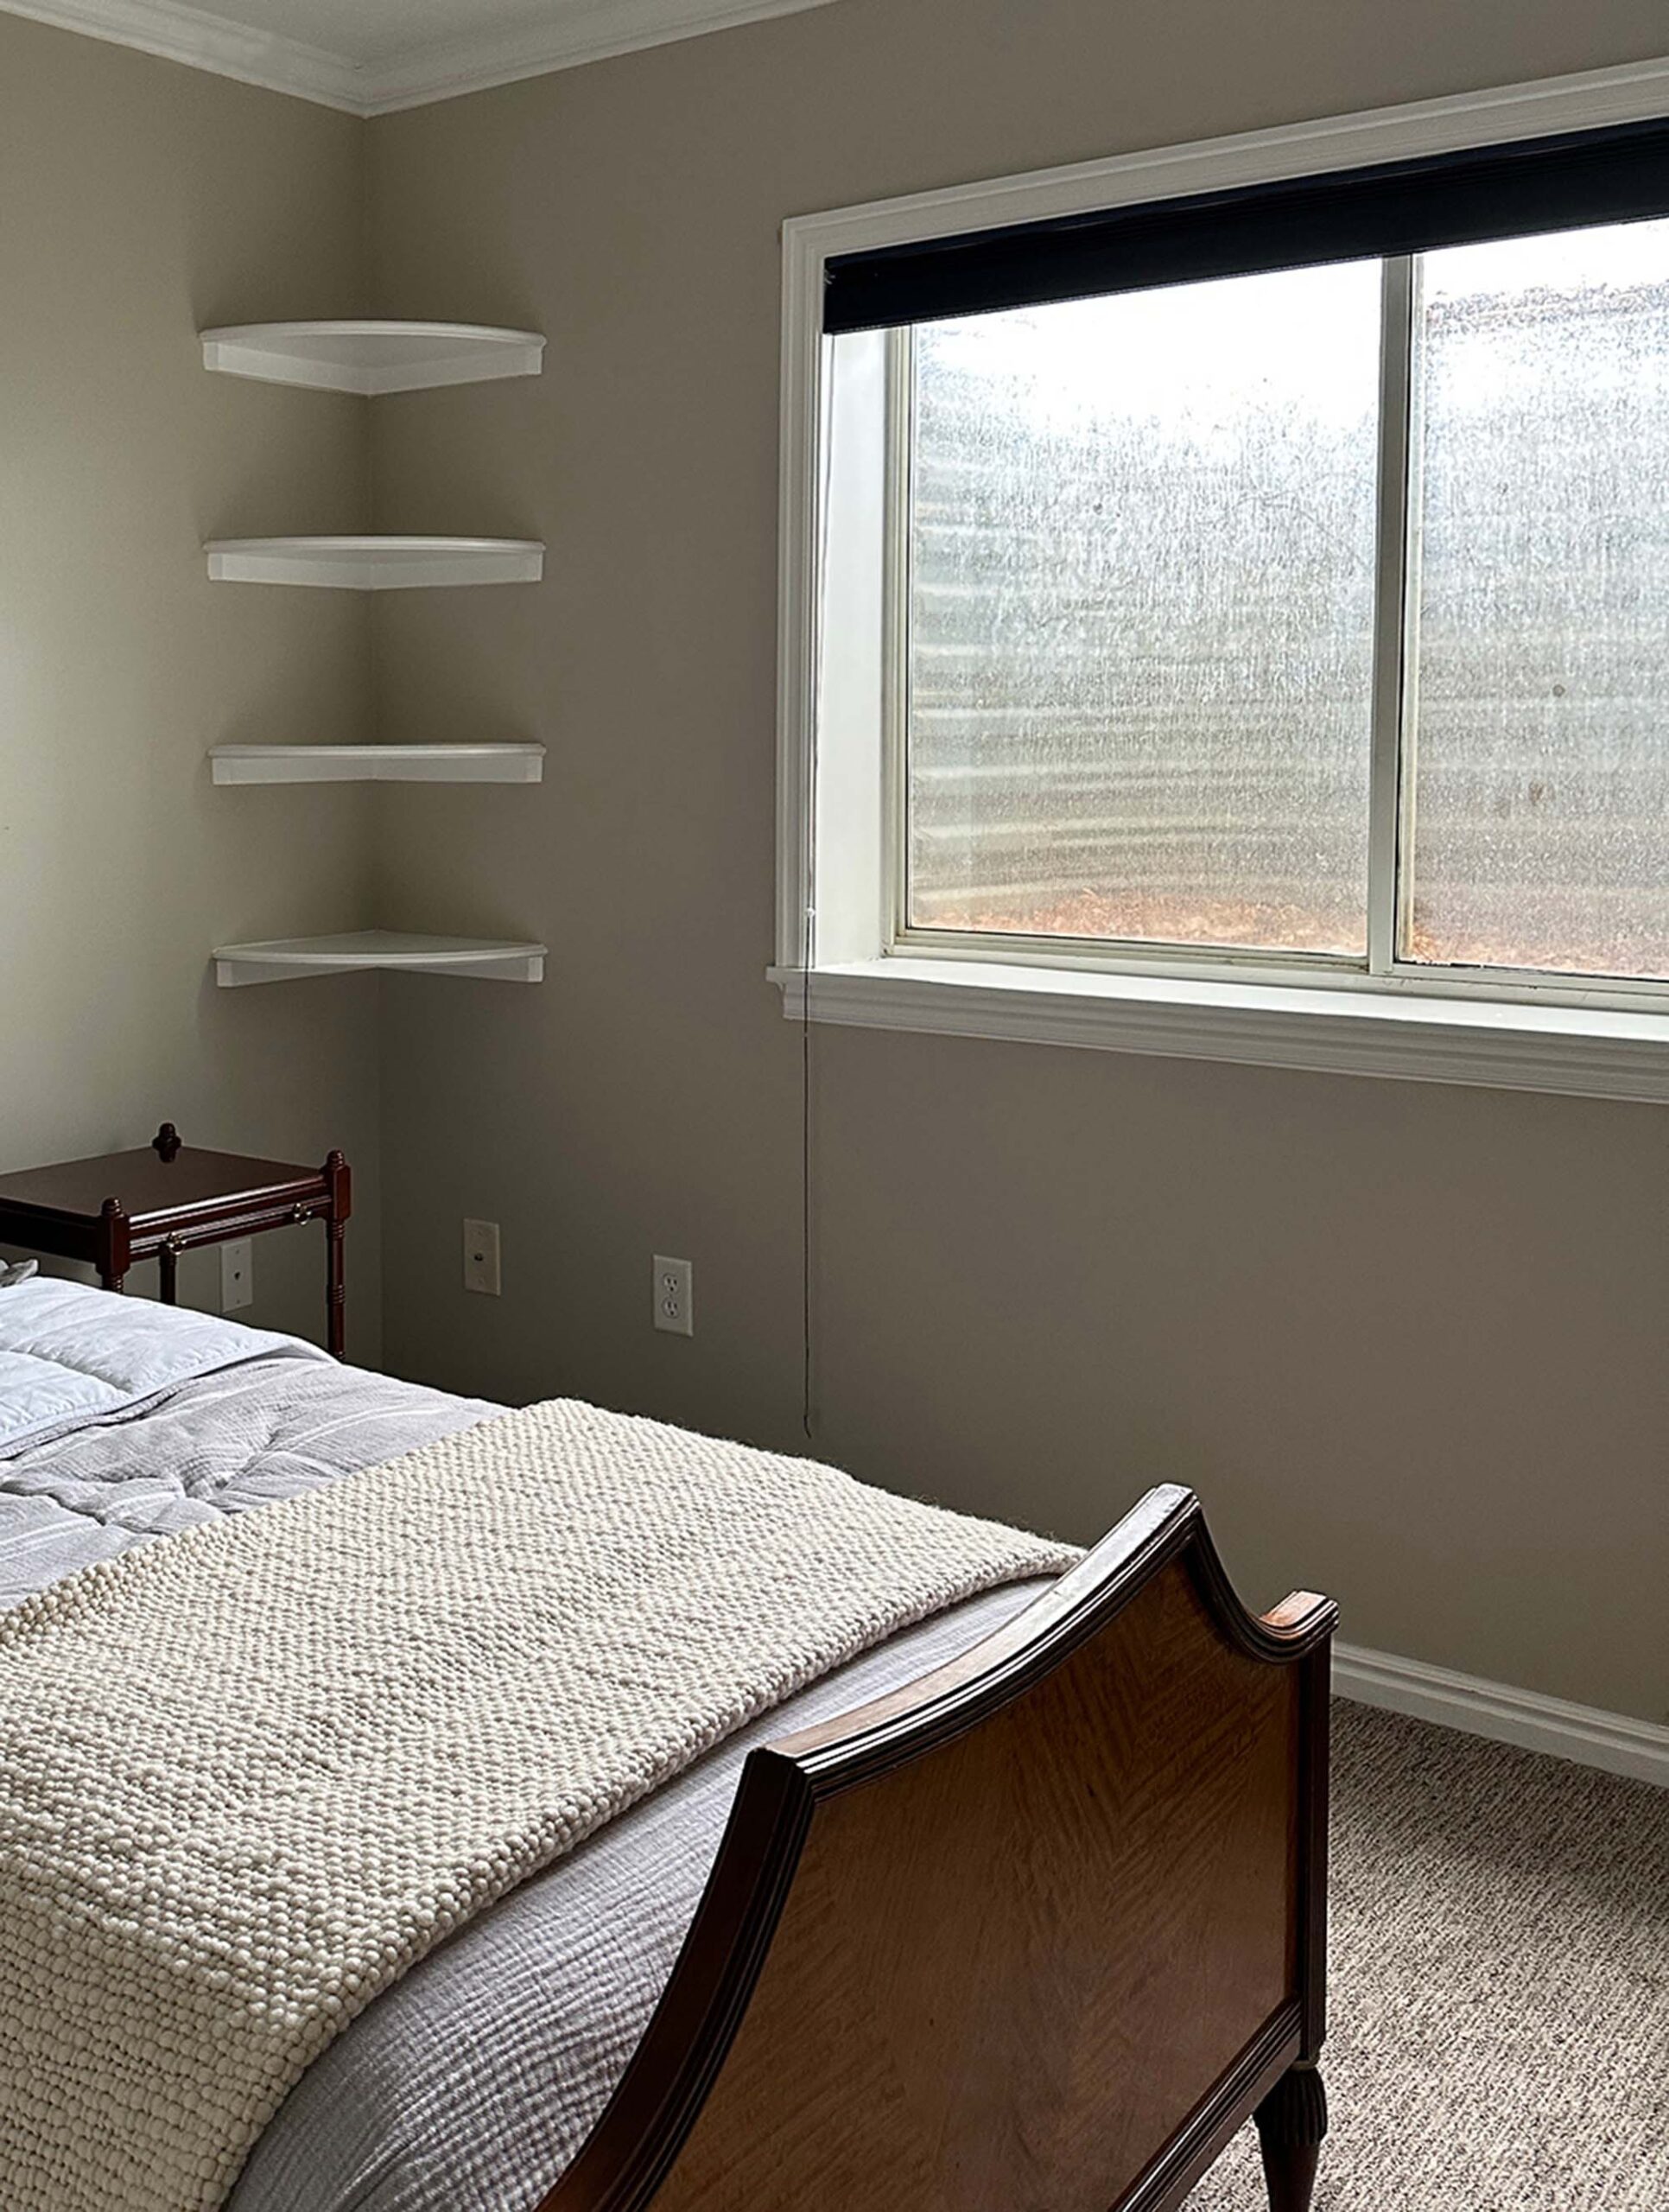
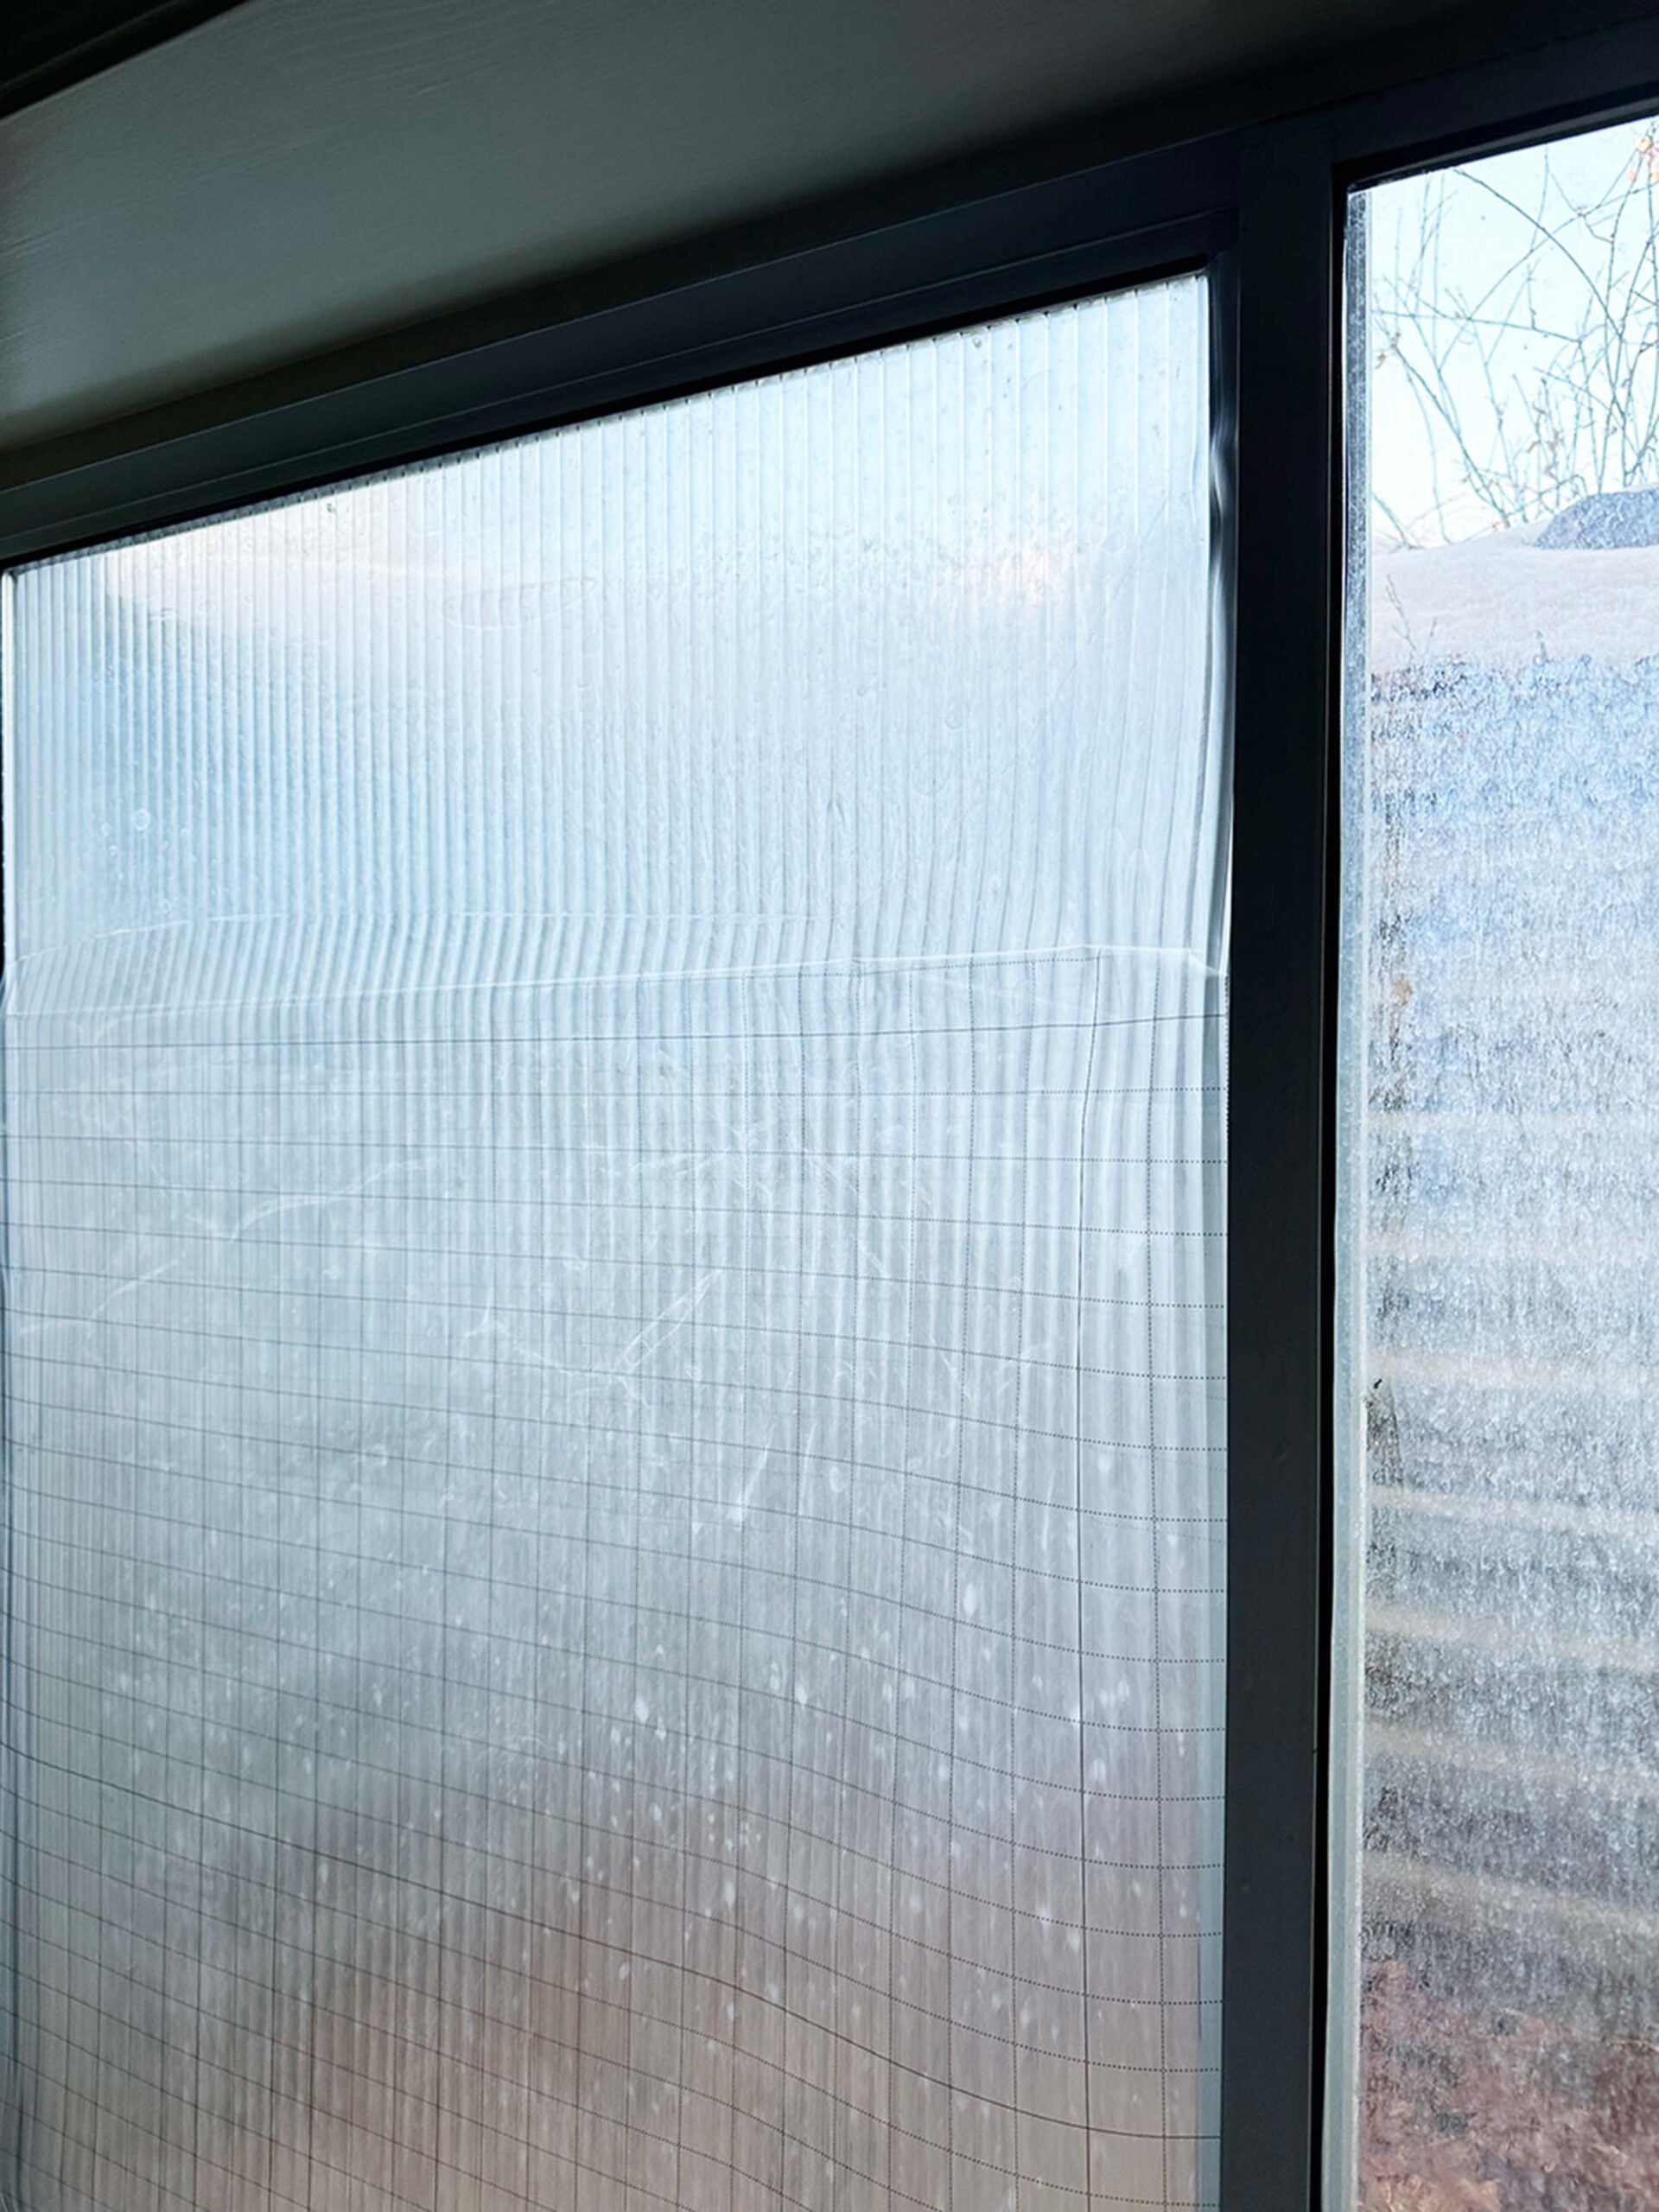
I then sent Emmett outside into the window well for a much needed exterior window cleaning! He waded through the snow and scrubbed the exterior of the window… bless him. I’m so glad I didn’t have to crawl down there- knowing my luck, I would have gotten stuck. Here’s a look from the exterior and interior (pictured above).
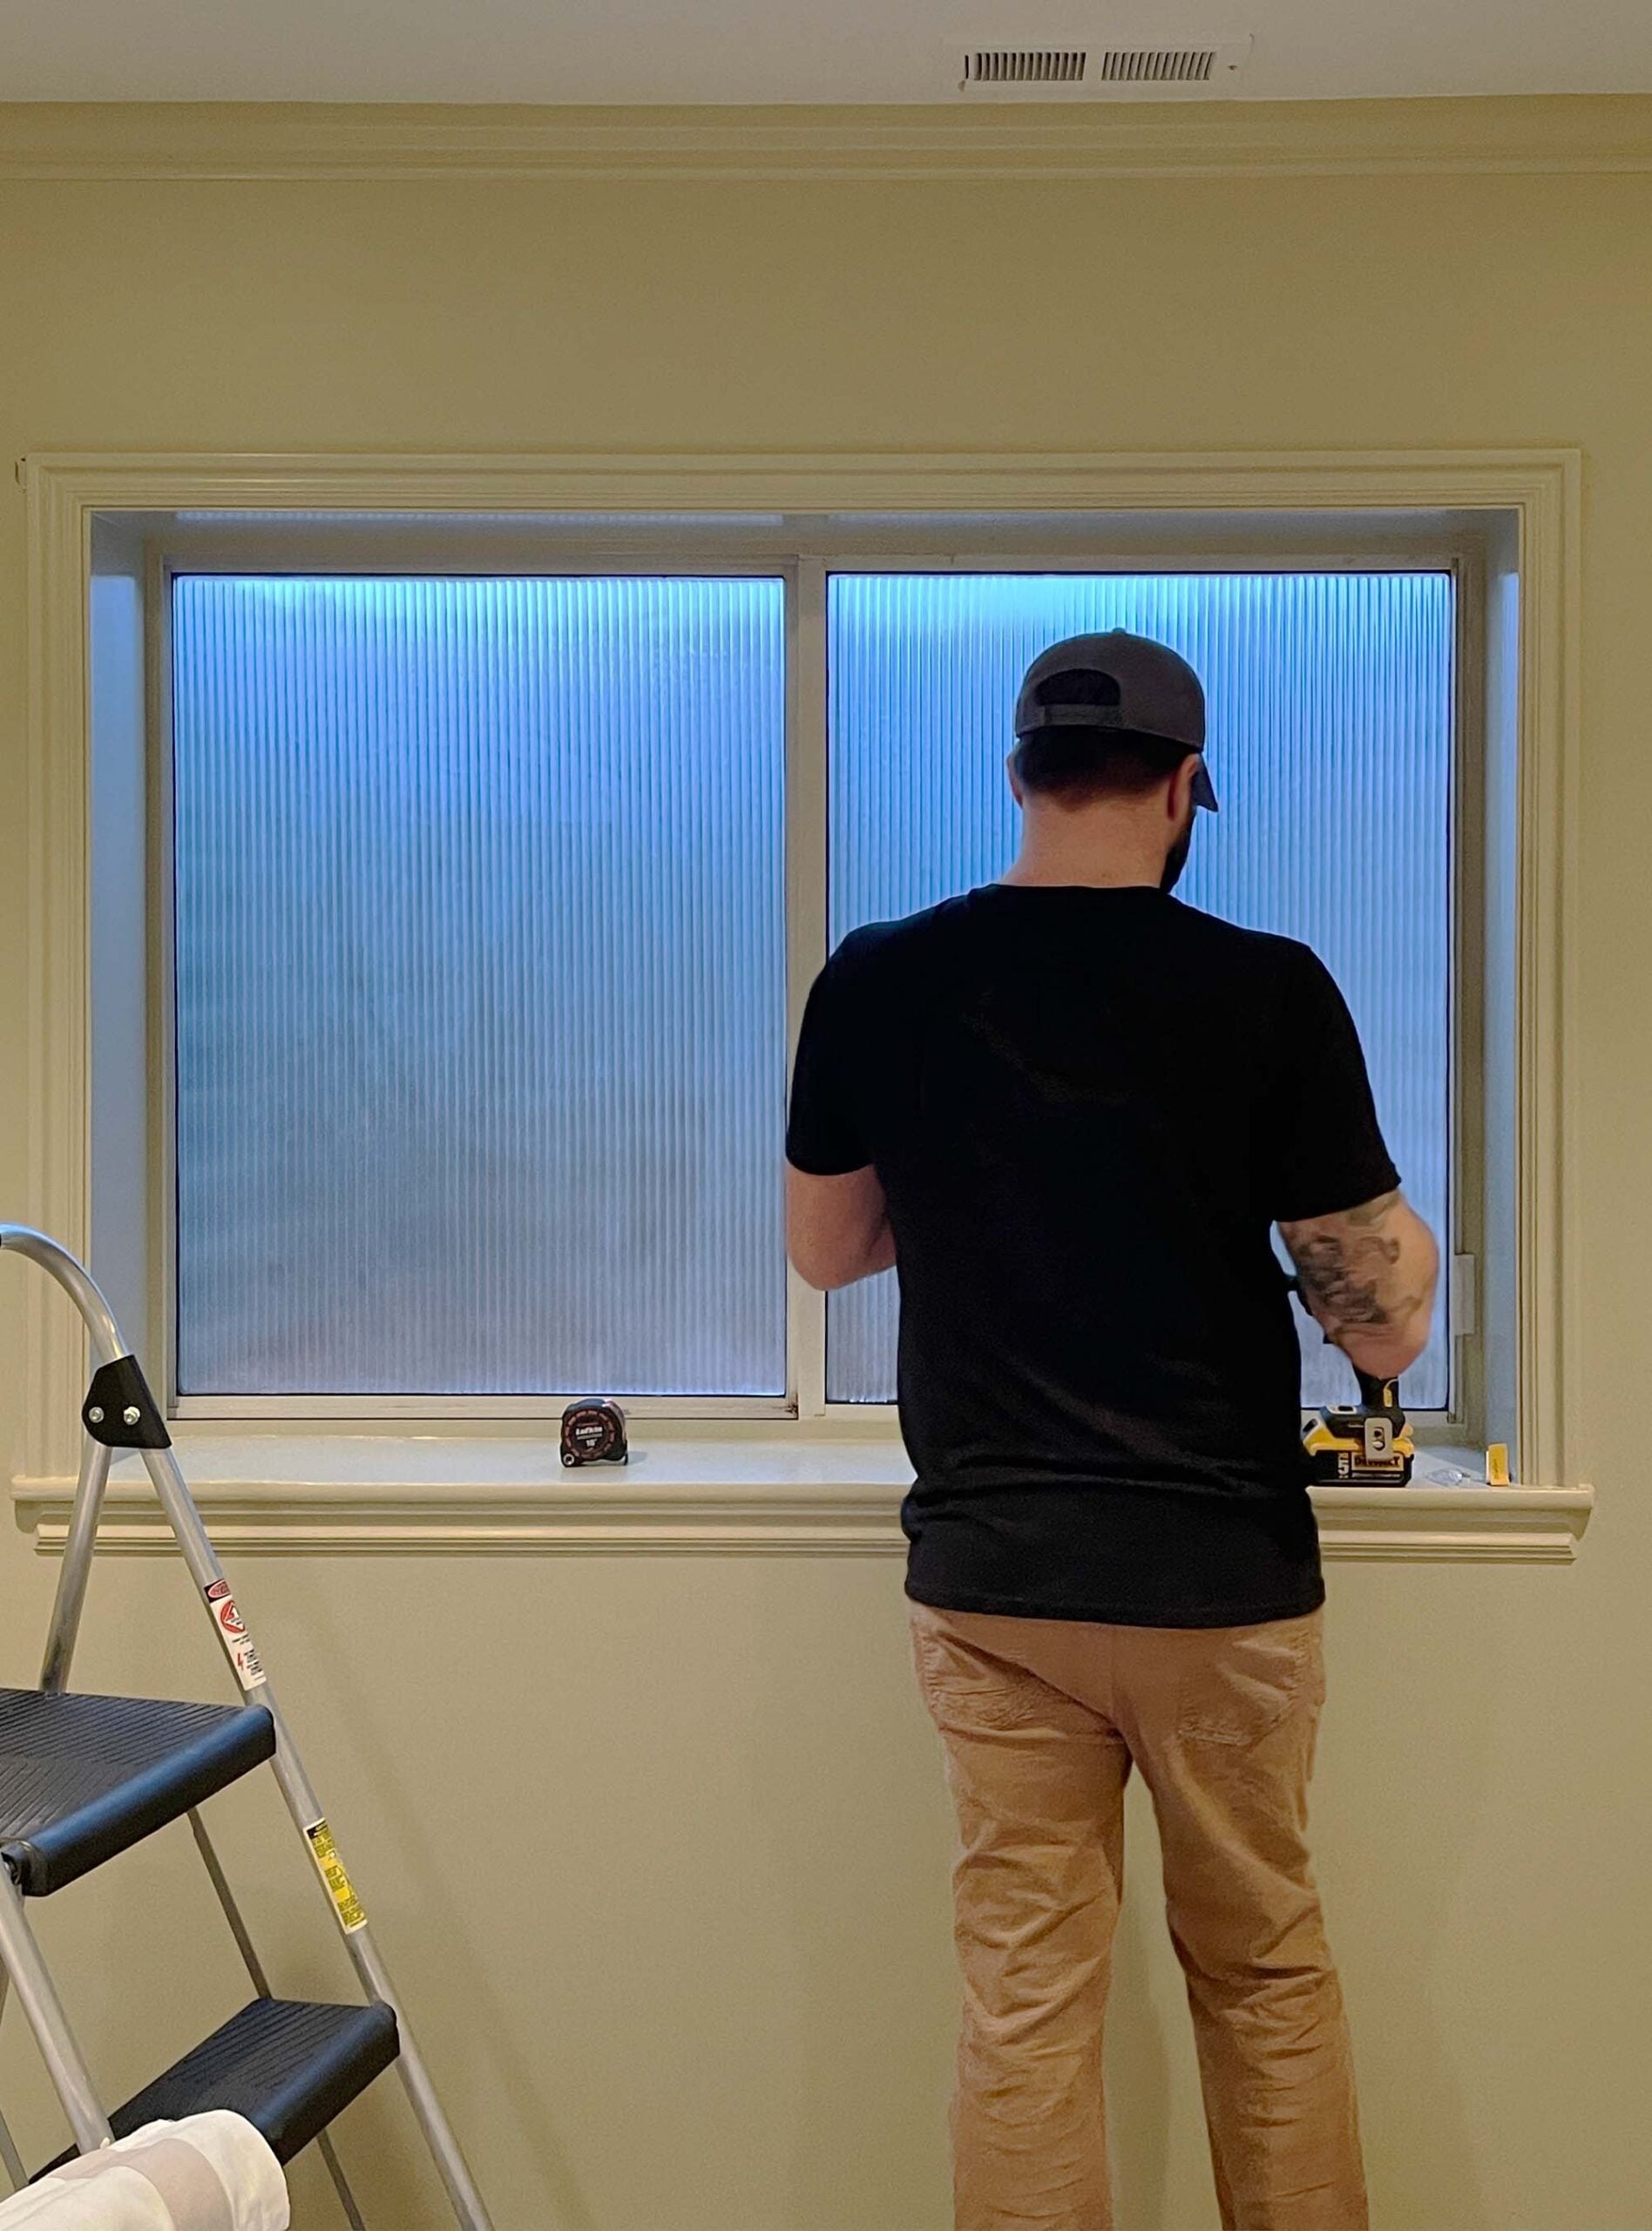
The End Result
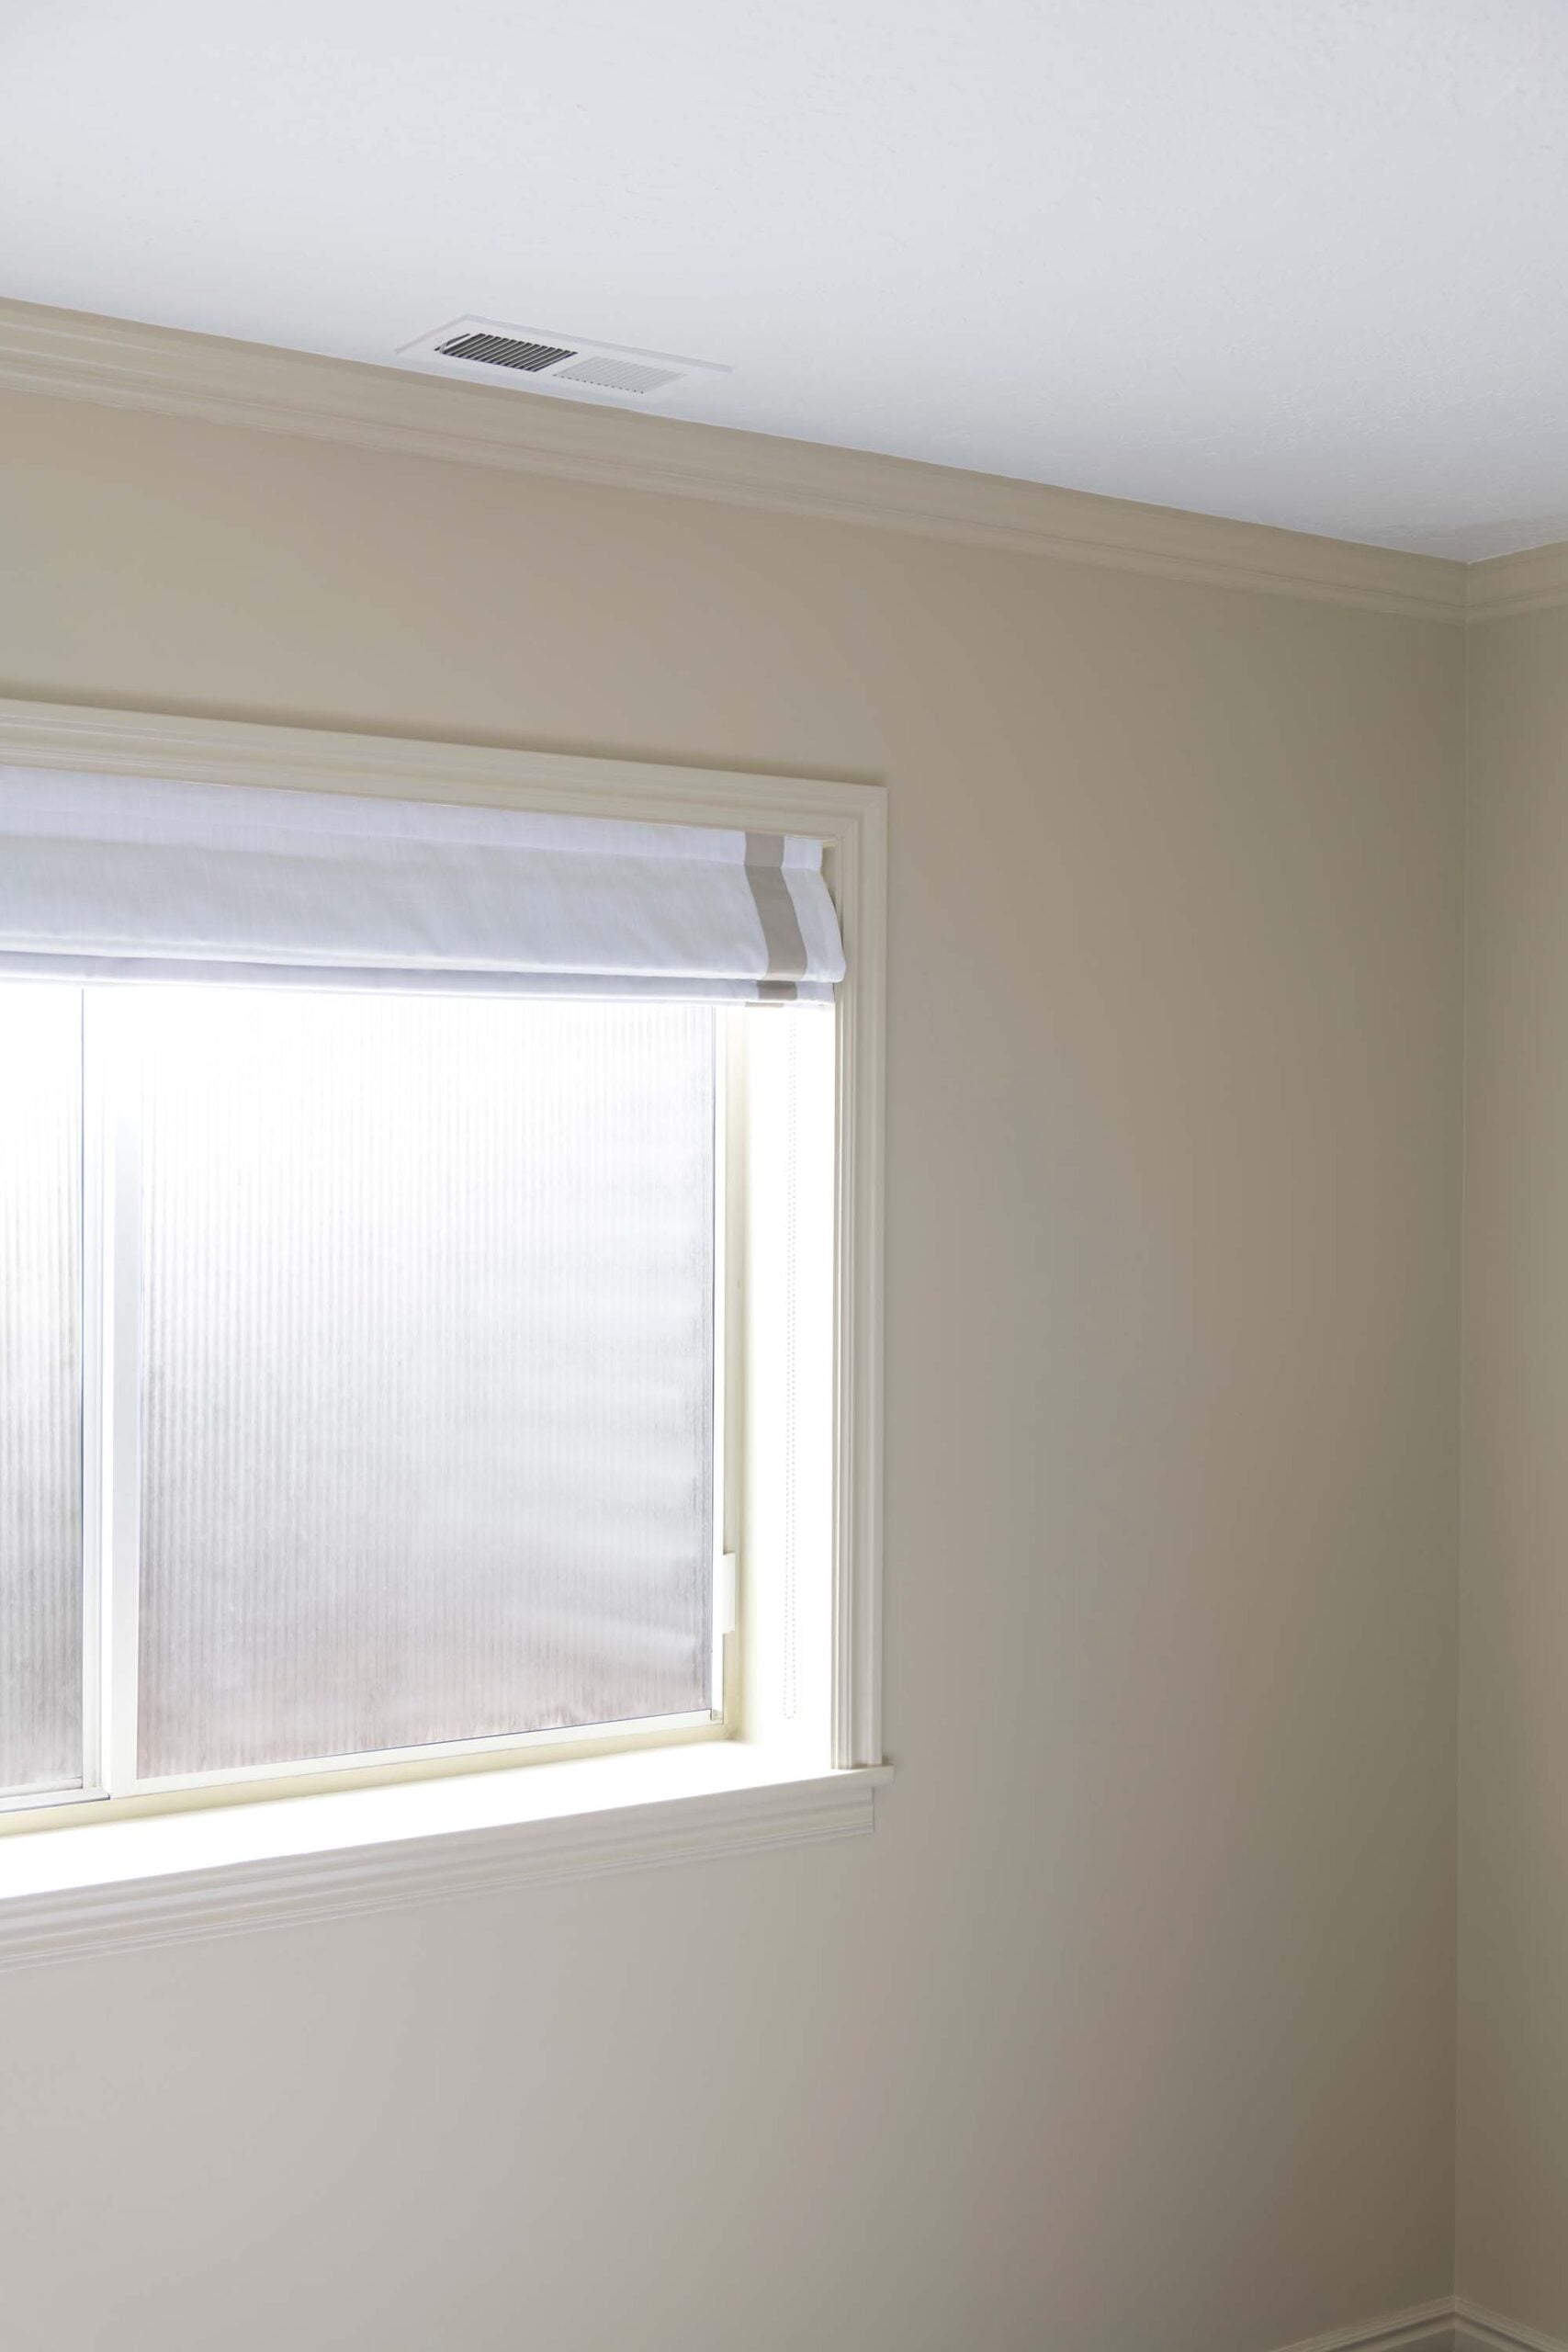
Last, Emmett installed my affordable (and custom!) roman shade before we called it quits. I’m really pleased with how this budget friendly window transformation turned out… and it still allows the natural light to flood into the room while remaining within our building regulations and budget. I’m calling it an affordable and aesthetic win! Stylistically, it has proven to be one of those easy upgrades that continues to feel relevant as trends shift.
Questions?
Definitely! Check out our basement bedroom here… I shared the complete tour, before images, and linked everything in the space.
Absolutely. It works well on glass doors and sidelights.
In my experience, yes. When applied correctly, the film stays in place and remains easy to clean. Most window films are removable, which makes it ideal for evolving spaces (or renters).
A soft cloth and window cleaner are all you need. I’d avoid abrasive tools.
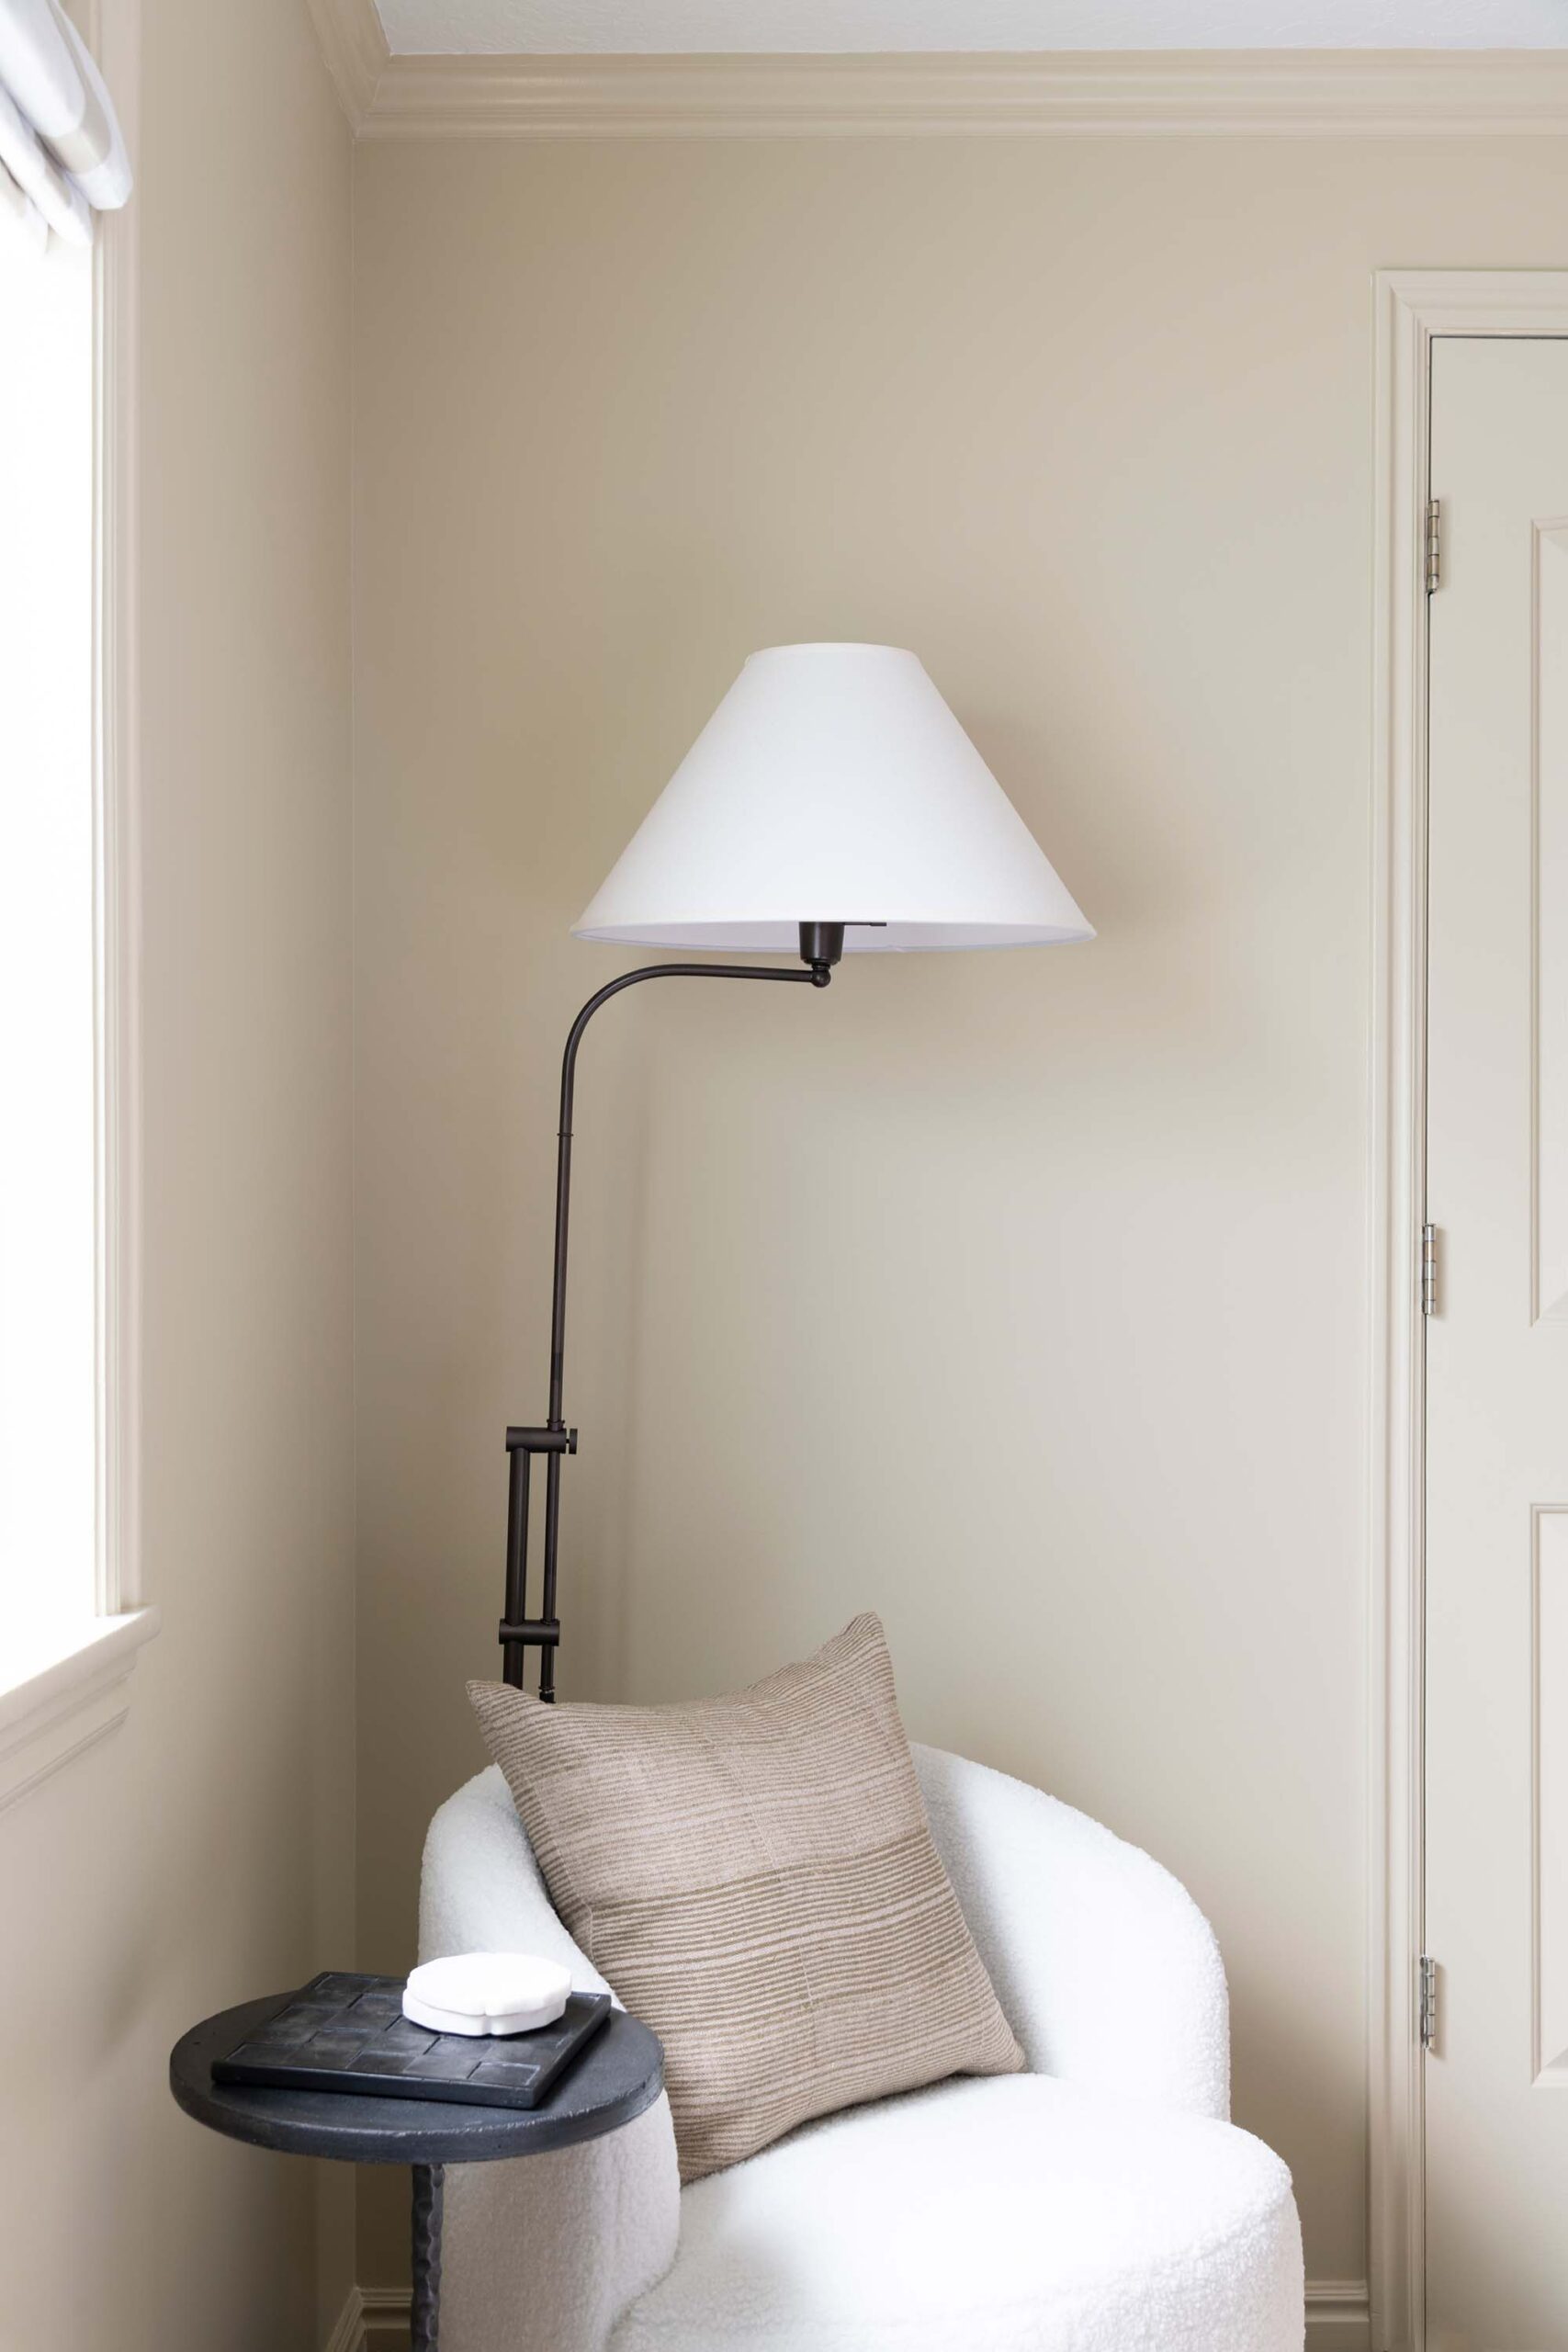
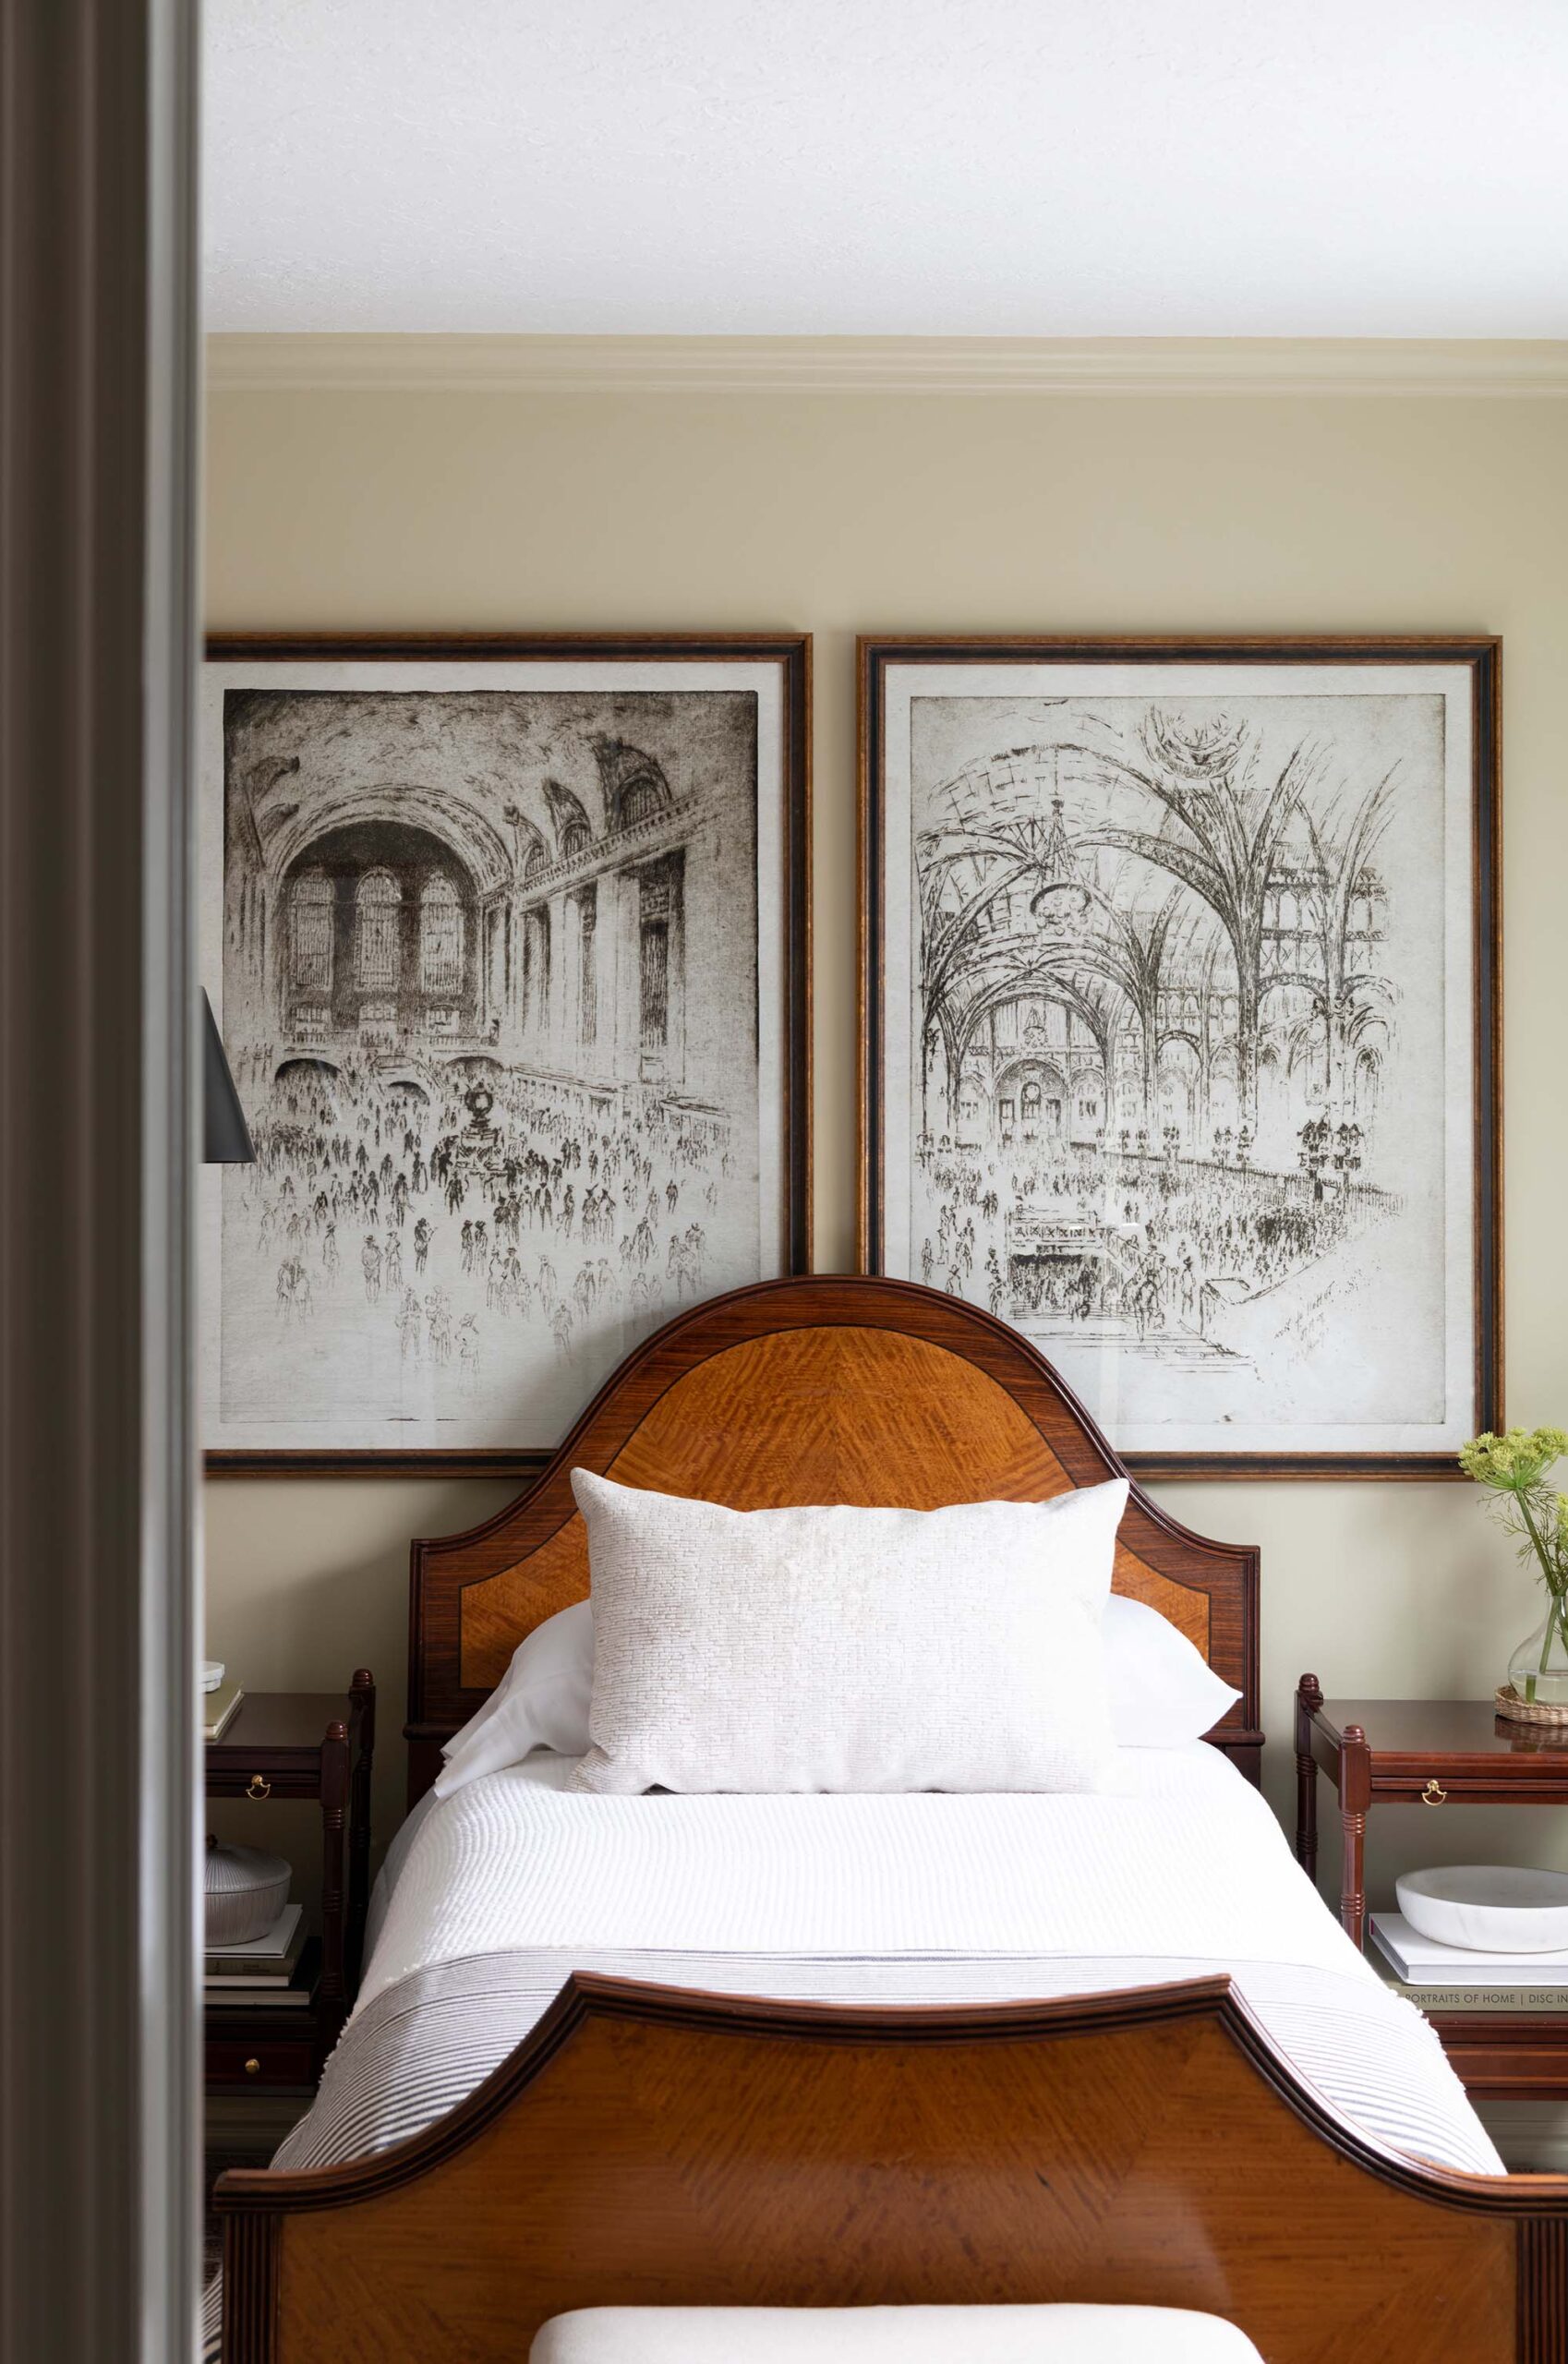
Happy to share… it’s from my shop! You can find the central station studies, here. They come with the custom frames and are the perfect oversized works.
Related Posts
Are you looking for more cost effective inspiration to spruce up your home? I’ve got some reader favorites for you.
- The Best Budget Curtains That Look Custom
- Affordable Window Treatments For a Custom Designer Look
- 40 Designer Approved Roman Shades to Fit Any Budget
- 5 Ways to Score Quality, High-End Furniture On a Budget
- 10 Budget-Friendly Ways to Instantly Refresh Your Kitchen
- How to Install Hardwood Flooring in a Basement
- How to Make a Custom Upholstered Bed
- Best Affordable Bedding for a Designer-Looking Bed
- How to Close & Remove a Window Well and Egress Window
- How to Choose the Right Wall Trim and Baseboard Style for Your Home
This faux reeded glass window DIY adds character without shouting, privacy without heaviness, and charm without the price tag of custom glass. If you are looking for a timeless upgrade that feels thoughtful and intentional, this is one worth revisiting. I hope this post was helpful! I’ll link my tools for you below. I know many of you messaged saying you’ve been wanting to attempt this quick project, so hopefully these instructions and my experience will come in handy. Let me know if you have any questions in the comment section. Have a great day, friends!

Good morning! Such an easy, elegant, and inexpensive solution! Even though they may not be the prettiest window wells, you can’t be sad about all that light in a basement. I’ve often wished we had a few egress windows in ours. (but not enough to justify the expense!) As for the privacy film, I used a similar product on our large, front windows. I installed simple sheers inside for aesthetics, but these north-facing rooms need all the light they can get. The product I used is lightly adhesive and has a different pattern, but what a simple fix! Highly recommend. I love the look of your ribbon-trimmed shade, too! So classy. Did I tell you I ordered two bamboo blinds for my bedroom project? I chose them from your Amazon storefront; they’ve got thousands of stellar reviews and are custom sized?! We’re still a few weeks away from delivery, but I’m excited. Now to obsess over lumbar pillows, sconces and a new piece of art! Ha. Seriously, what’s more fun than bedroom design? Happiest of Wednesdays to you, Sarah!💜
Thank you, Peggi! My thoughts exactly… I’m happy to have windows and natural light! For such a simple, quick, and cost effective treatment- I’m really happy I decided to give this a try and pleased with how it turned out. It definitely helps to disguise our metal window wells. The ribbon trimmed shade was another inexpensive Amazon find (less than $100 and custom size & color!). I’m so excited to hear you ordered those bamboo blinds for your bedroom- thanks for using my link, BTW. I can’t wait to see how it’s coming together! I hope you have a happy Wednesday, too. I’m off to the Tuesday Made shop on this rainy day.
Good morning! I’ll start by saying I love the way this turned out- it’s such a cost effective way to beautify a not so gorgeous but oh so necessary bit of functionality. I have seen reeded film used before and loved that it really looks like reeded glass. This is a solution I’ve been contemplating for my own home. In our primary bathroom the tub is installed directly under a large window, overlooking my neighbor’s kitchen window. I didn’t realize until last summer how much my neighbors would be able to see in the evening hours. 😳 Immediately I thought of this solution. The windows in the bedroom area also overlook neighbors’ homes, and I’m considering installing on all of them for a cohesive look, as they’re among the only windows in the house that lack grids, and a notable view. Are the rolls of this pretty sizeable? Did you have to order more than one roll to cover the entire window? Again, the results speak for themselves; such a simple solution, but such an elevated look. Thank you for sharing these tips- I’m definitely going to put them to good use!
Thanks, Lauren! The rolls are really large- I actually ordered two, thinking I’d need one sheet for each pane of glass and only ended up using the one roll (despite measuring)… they definitely send more than the listing describes. I only used the one roll for both windows (two pieces cut to size). It took me all of 10 minutes to install and was super easy. I like that it helps to disguise the metal egress window well, and I can always easily remove it, if needed. As for the seam- it should be really easy to hide the seam thanks to the linear reeded pattern, and spraying the window beforehand makes it easy to shift the panel or film, so you can perfectly align it before using the squeegee to press it down. Definitely easier than a sticky or adhesive decal type product. Hope that helps!
While I’m thinking about it: do you have any tips for if there is a seam? I doubt I’ll be able to install this without one. Thanks again Sarah!
Curious – How did you cut a 28 x 38 piece when the stuff you linked to is only 17.7″ wide?
When I ordered it a few weeks ago, there were a couple size options. My roll was listed as 35″ x 78″ (same brand, same product). I’m wondering if the larger size sold out and was removed? Not exactly sure!
I just installed this on a bathroom window, and wished I had read your tutorial first. A SHARP! knife is necessary (don’t ask how I know, lol). That was my first go, and luckily only wasted $5 on the mediocre install. I will be doing this again, and next time I will follow your steps. It really does transform the room and doesn’t look flat on the window, looks like real reeded glass.
I’m been thinking of doing the same thing for a bathroom window! You’ve convinced me!