The Shed Reveal
 I’m excited to share our shed reveal with you today! We started this project eight weeks ago, and over the course of two months, this exterior structure took shape quickly. Emmett and I played around with the idea of moving our existing shed to our side yard. It lived in the fenced section of our backyard and took up precious green space. It made so much more sense to have shed storage in a portion of our yard we didn’t really utilize. After brainstorming our needs and really thinking it through, we decided to build a new shed altogether. Our existing shed was over 20 years old and wouldn’t be easy to move, so I created a quick design plan and Emmett started prepping for the foundation- a concrete slab the new shed would rest upon. Here we are a couple months later, and I have to say- it looks pretty charming for a storage shed! Click through for a peek into our exterior paint process, the reveal tour, and source links!
*This post is sponsored by Purdy. All content, ideas, and words are my own. Thank you for supporting the brands that allow us to create unique content while featuring products we actually use & enjoy!
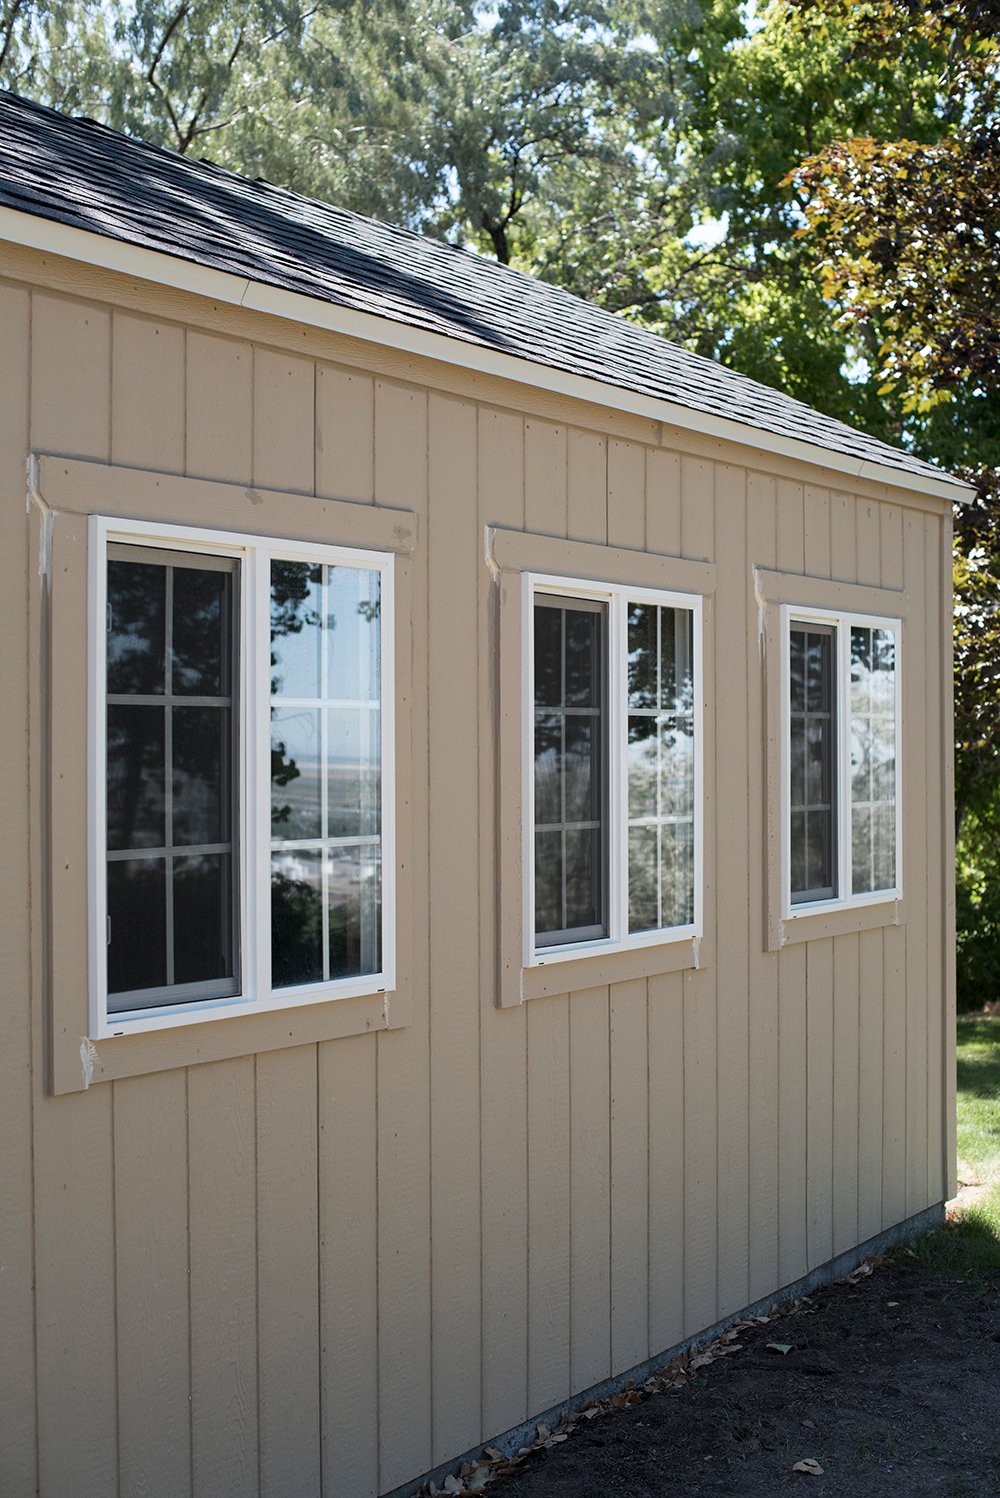
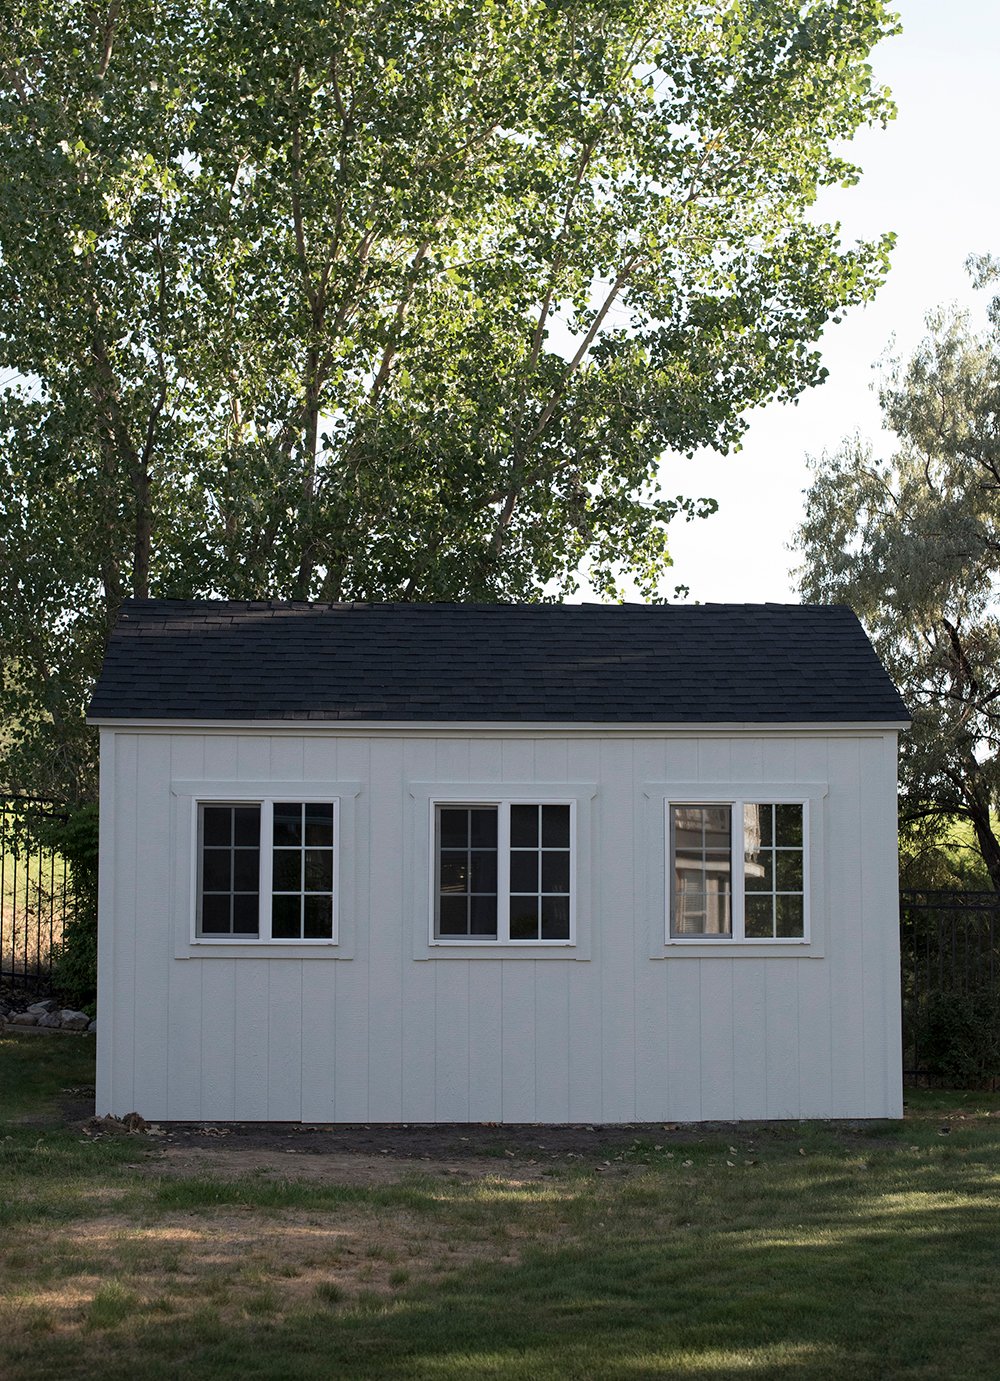
 Before I dive in, many of you requested a shed supply building list and more on that process. For the sake of keeping the reveal post to a reasonable length, I’m going to share the structural details and supply list next week… so check back for that! I just didn’t want to leave you hanging. Today it’s all about the exciting cosmetic stuff (paint, landscaping, and fixtures)! Ready to see how it shaped up? This is how things looked prepped and ready for paint…
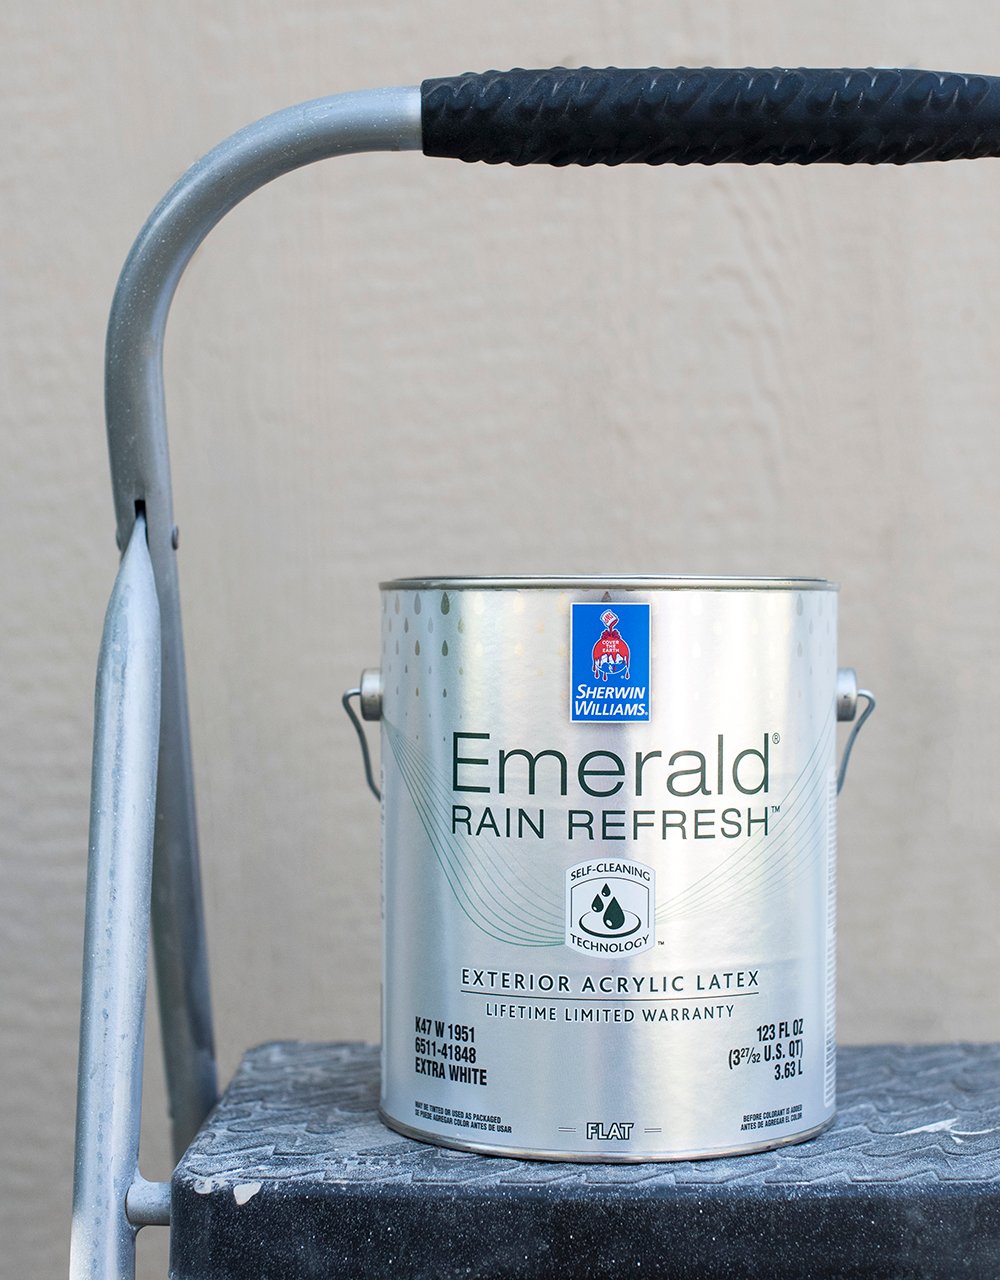
 We’re big on researching, planning, and grabbing the right tools for the job, and this shed was no exception. Our goal was to make sure the shed will withstand the test of time, in terms of durability and aesthetic. In terms of selecting an exterior paint, we opted for Sherwin-Williams Rain Refresh. It’s a new product that is super durable with self-cleaning technology. I’m not sure how our home exterior will change in the years to come, but we’ll definitely be updating it at some point. I figured SW Nuance (a cool, creamy white hue) was a safe bet… and it matches our bedroom balcony painted brick. Rain Refresh is formulated so dirt washes away upon contact with rain or water for a clean look with minimal maintenance. This new coating also offers excellent UV and weather protection, so it checked all of our boxes for the shed exterior.
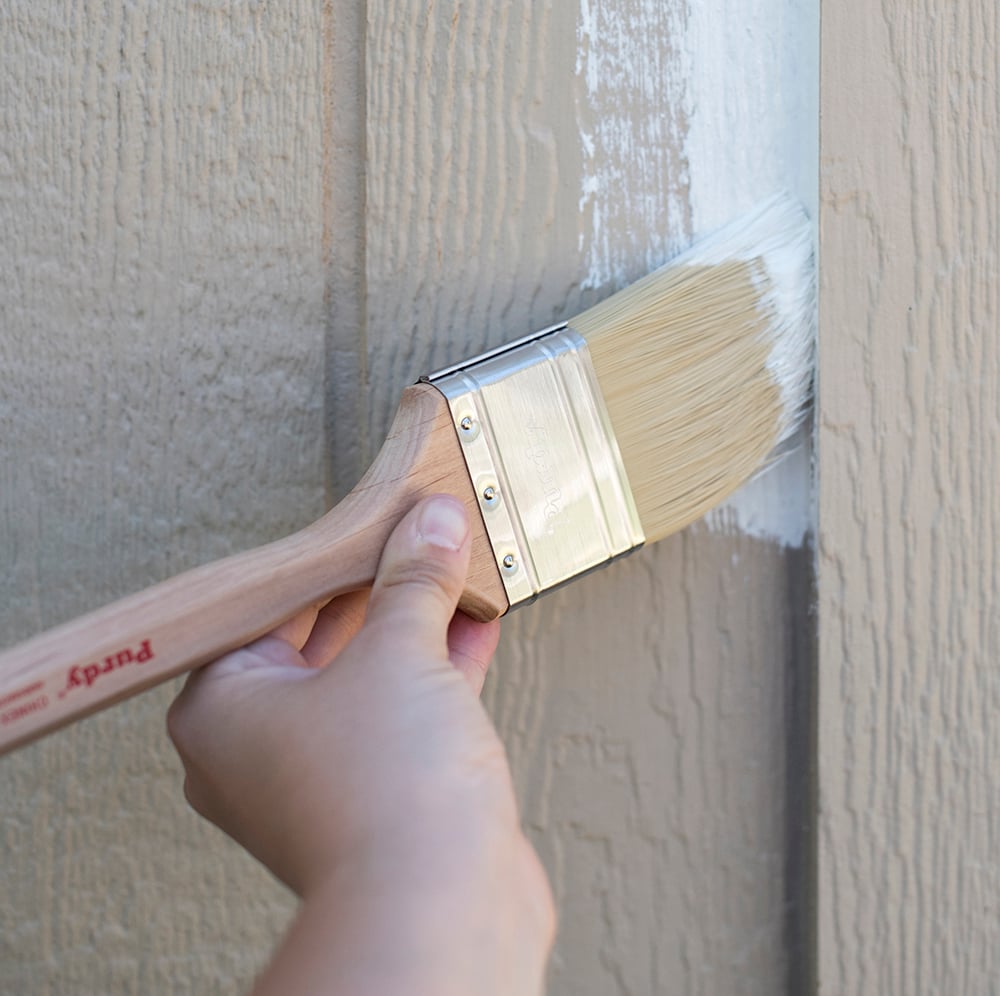
 After choosing the paint, it was time to select the correct tools for application. I landed on Purdy’s Chinex® Elite™ Brush due to the rough textural siding of the shed.
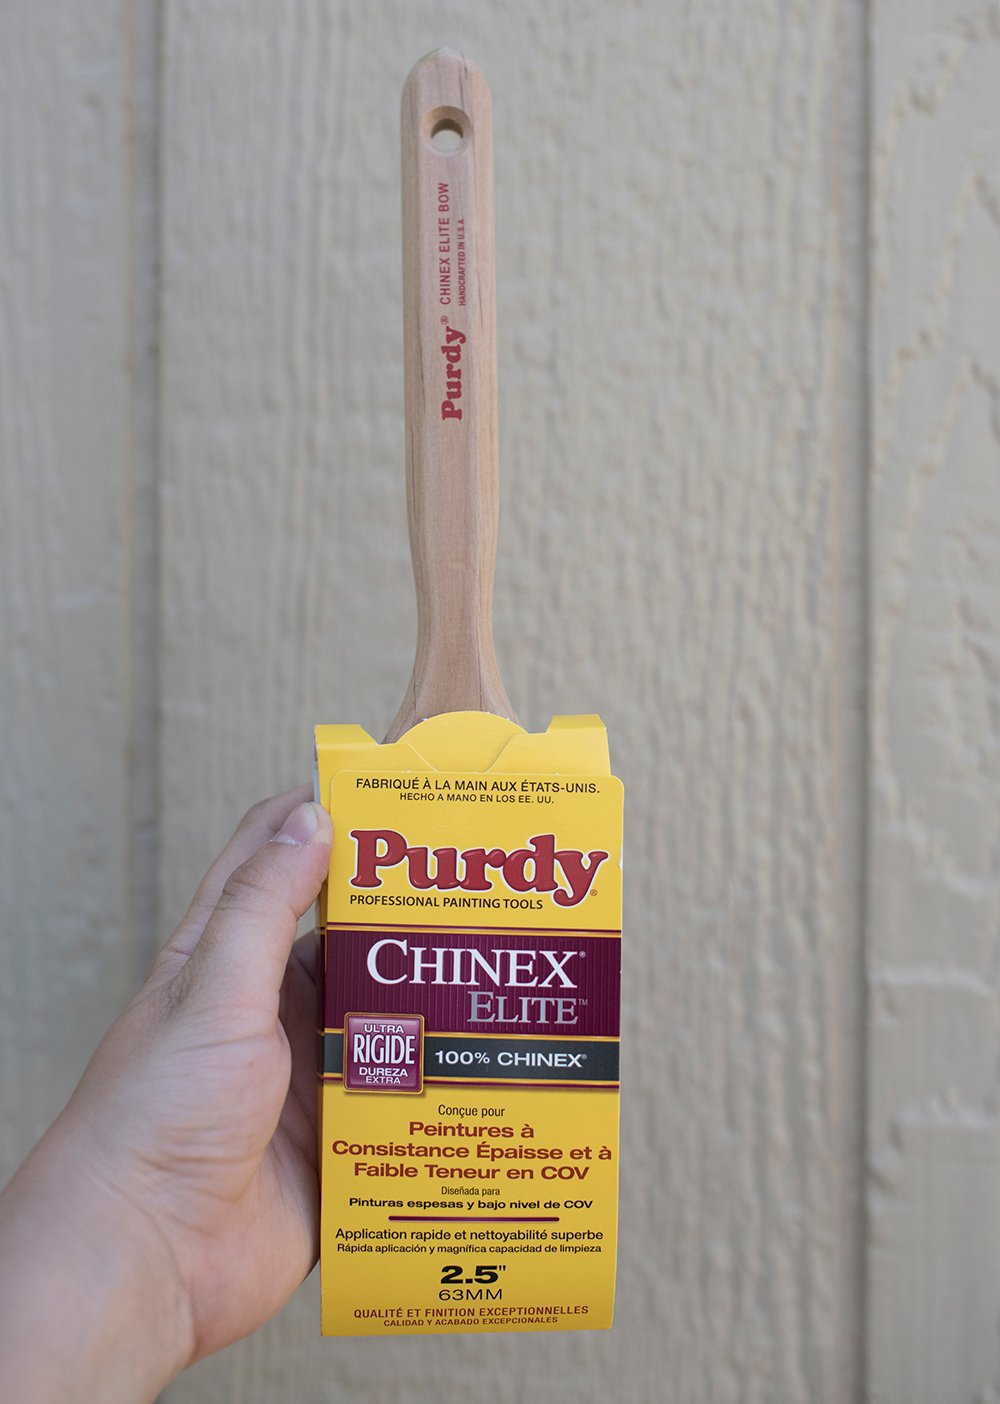 This paintbrush has pre-flagged bristles (split bristles that allows them to pick up more paint) for better coverage, quick application, and durability against rough surfaces. This one works great with heavy-bodied, low-VOC paints- like the exterior Rain Refresh paint we landed on.
 Emmett and I are good at different things and luckily enjoy opposing tasks, when it comes to painting. I always trim projects out, while he rolls. For the roller, I went with Purdy’s Lambskin Roller. It’s made of 100% lambswool, and is designed to pick up, hold, and release a great amount of paint or stain, which was key for this project.
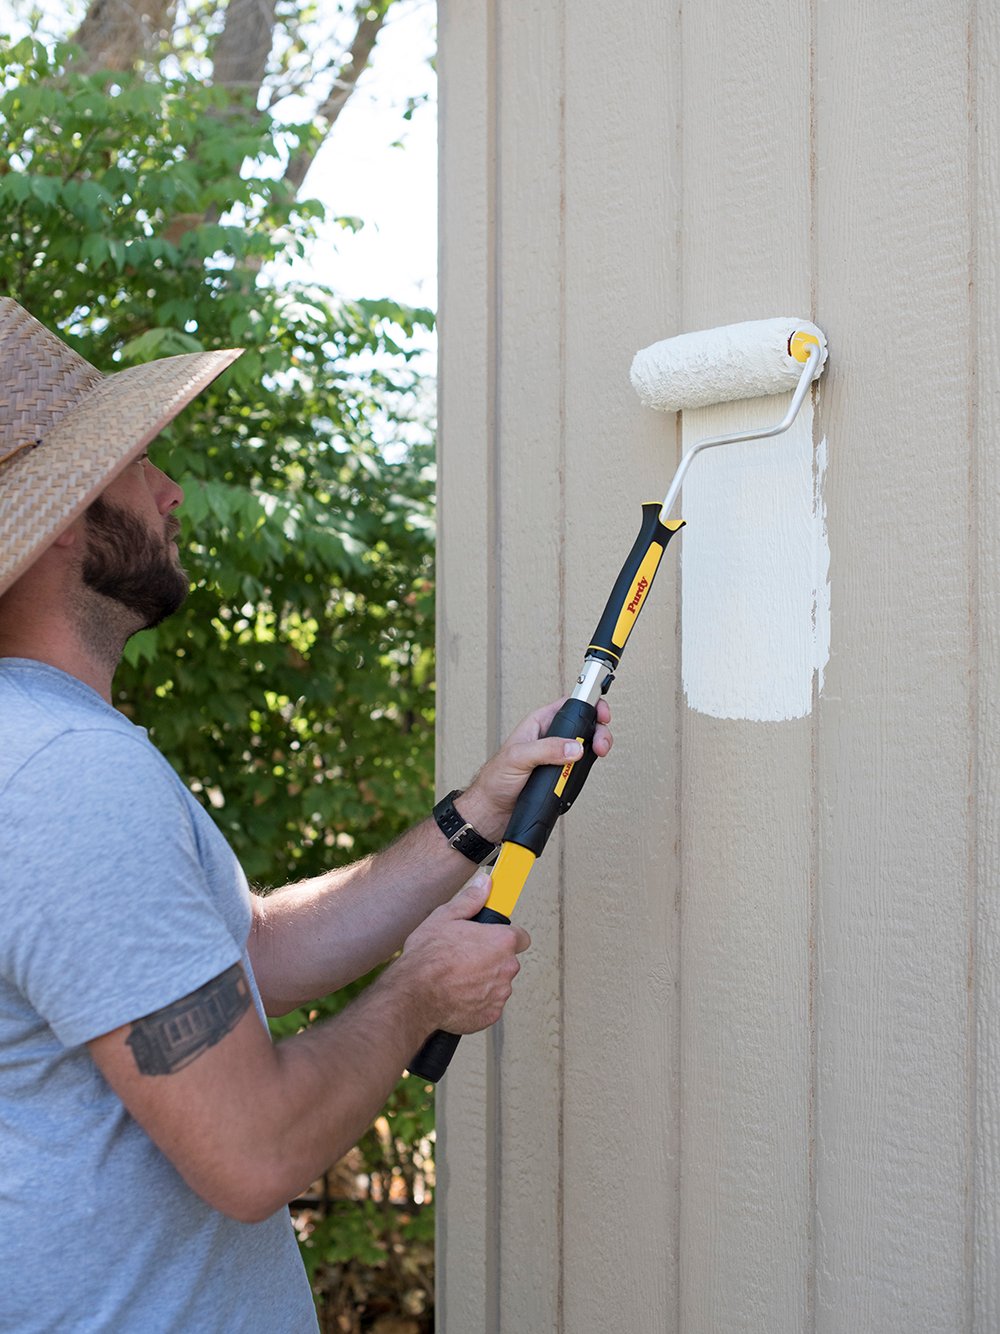 These roller covers are also abrasion-resistant for a longer life, so we were able to use the same roller for two coats of paint on the rough textured shed siding. It has a 1/2″ nap, so it’s perfect for painting decks, siding, and rough surfaces like textural exterior projects and masonry.
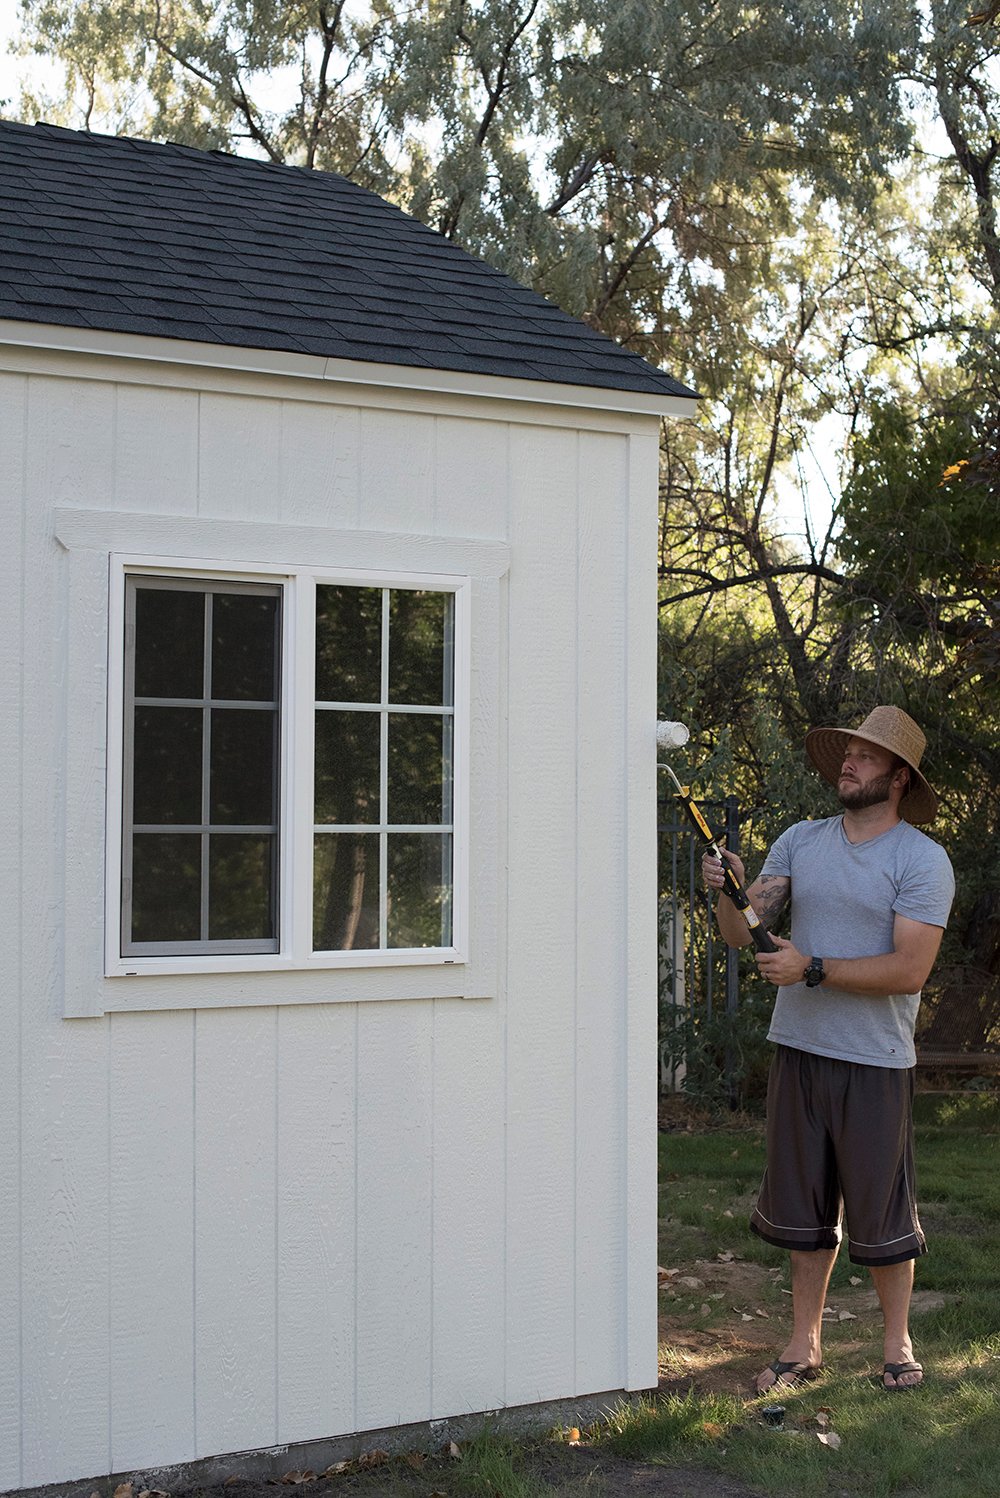
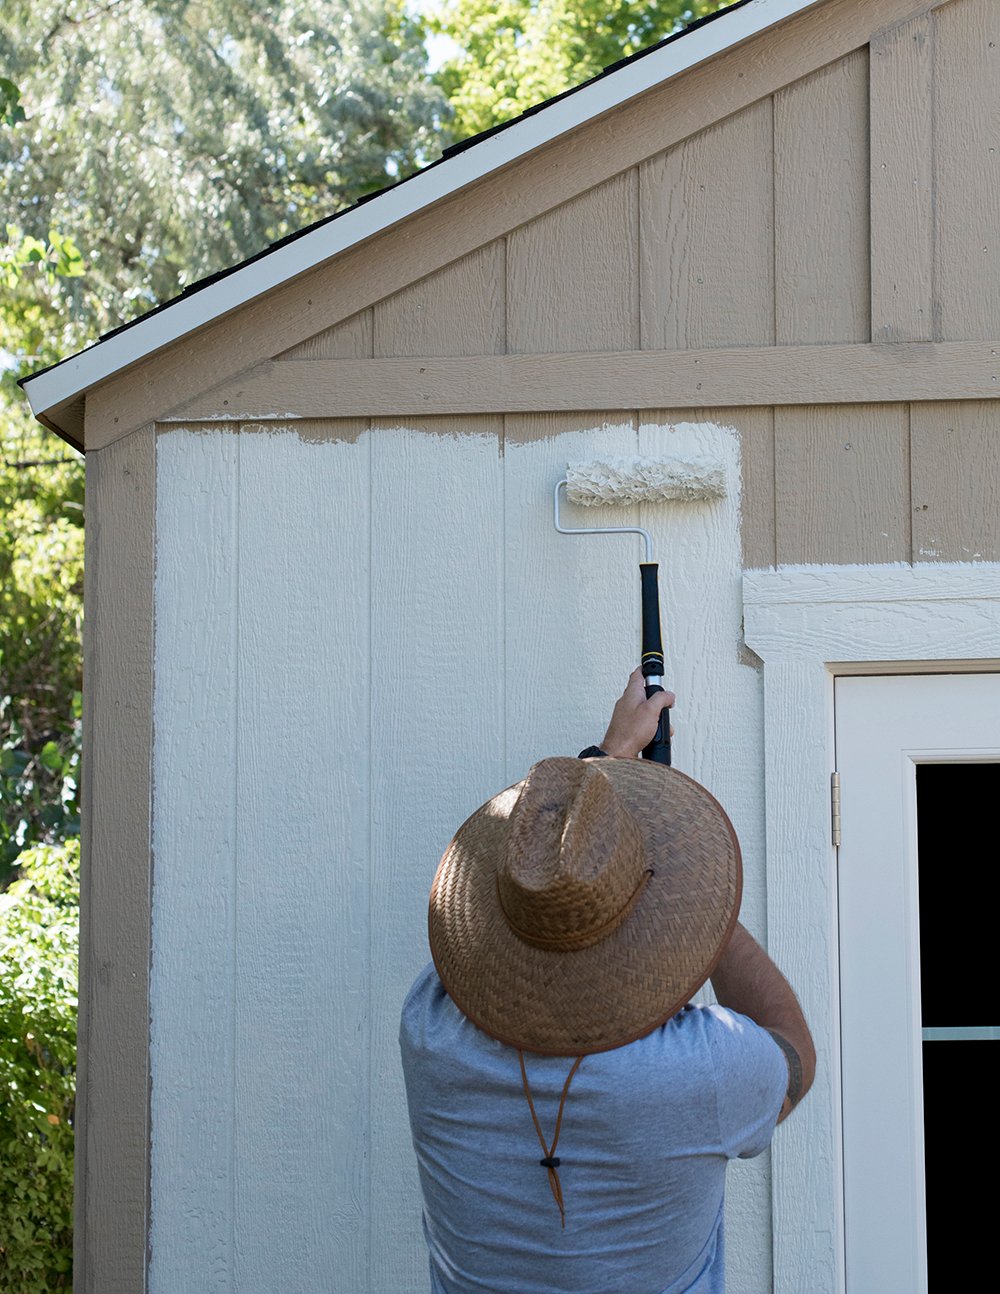 Emmett also used our Revolution™ 9″ Frame to make the job easier. We tackled this project on a HOT Utah day and wanted to finish it quickly and easily. This roller frame is our favorite because it’s super lightweight and can be connected to any standard threaded pole. Both of us painted simultaneously and we finished two coats on the entire shed in four hours. I feel like that’s pretty impressive… and totally tolerable (even in the summer season). This is what it looked like after one coat…
 The second coat went very quickly, but I’m glad we decided to do it (we were on the fence because it looked pretty good after one). We had extra paint and figured additional coverage couldn’t be a bad thing. We ended up using 2 gallons for the entire project.
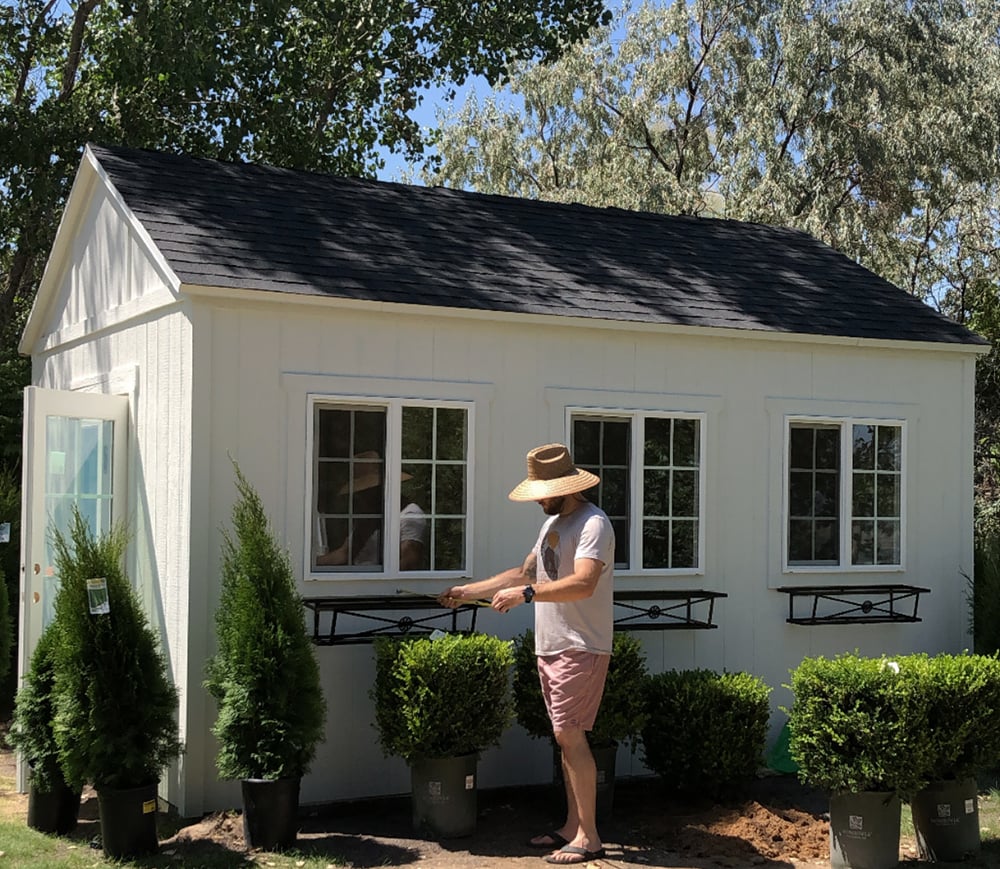
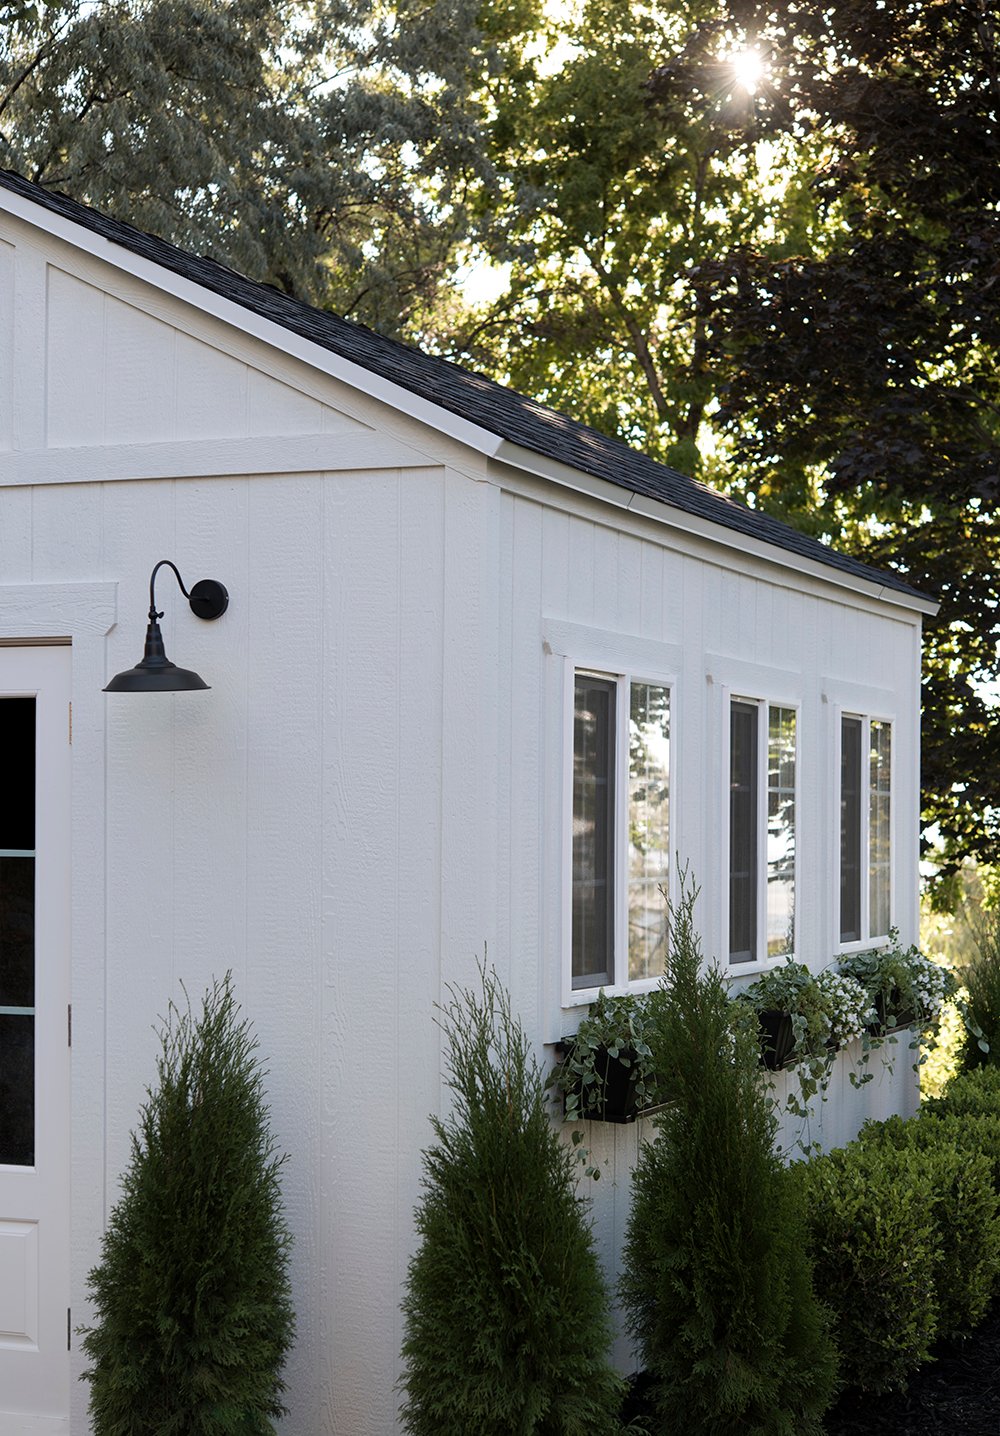
 A couple days after we painted, Emmett landscaped and I worked on planting our window flower boxes. Emmett is really awesome at landscaping and enjoys these type of projects, so I turned him loose to tackle that portion of the shed.
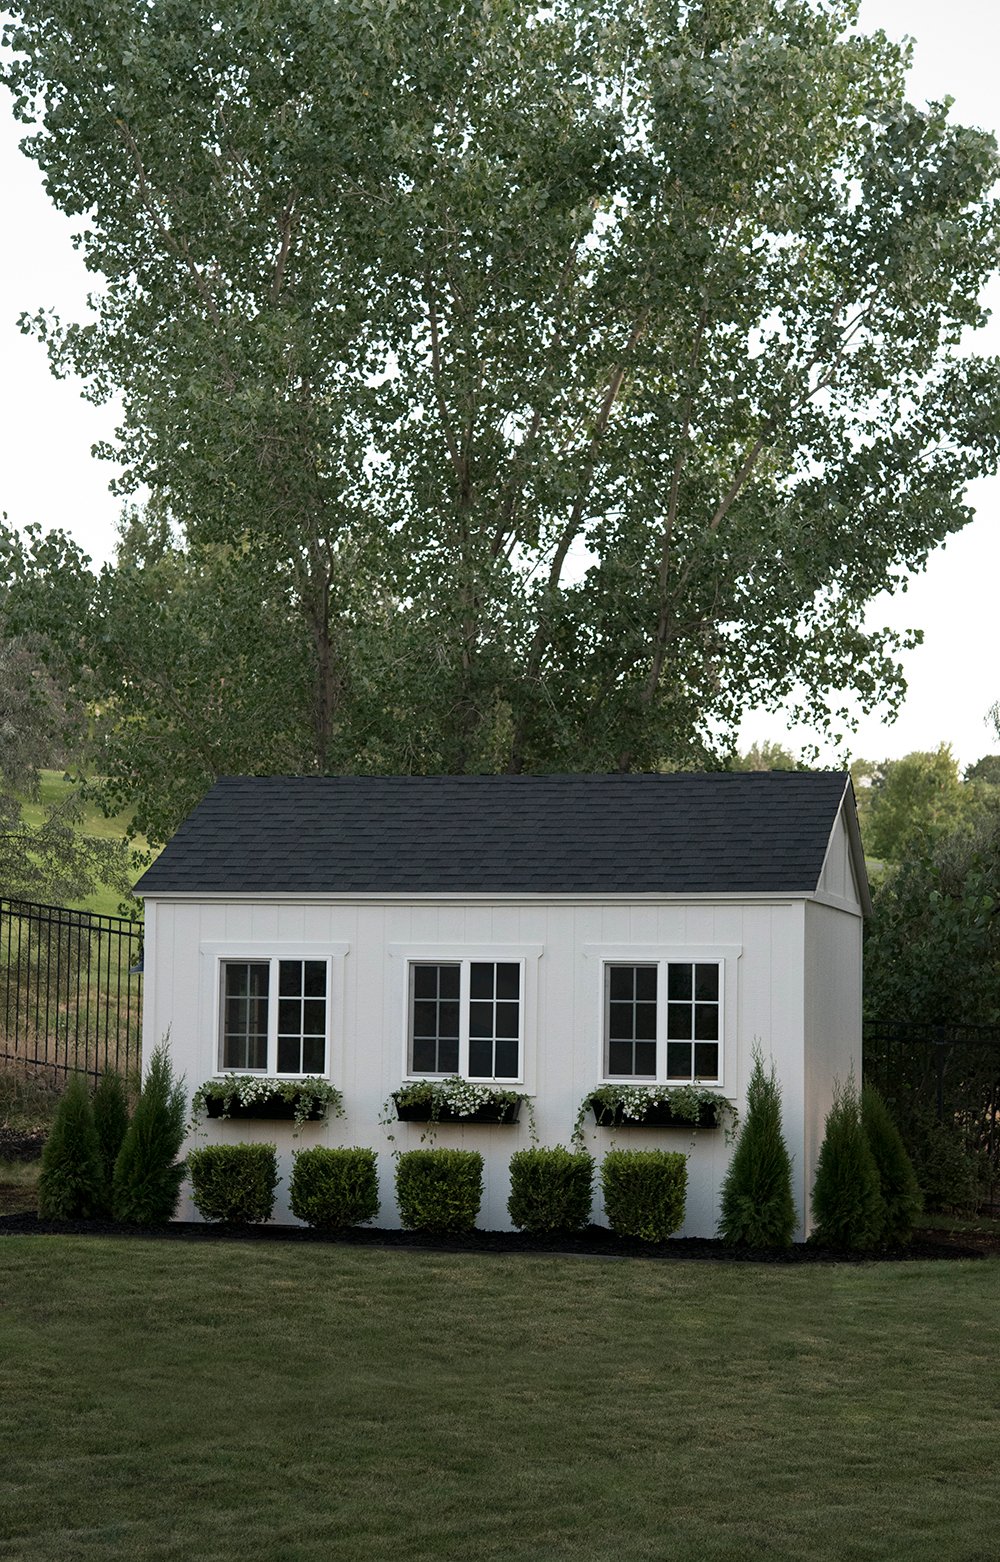
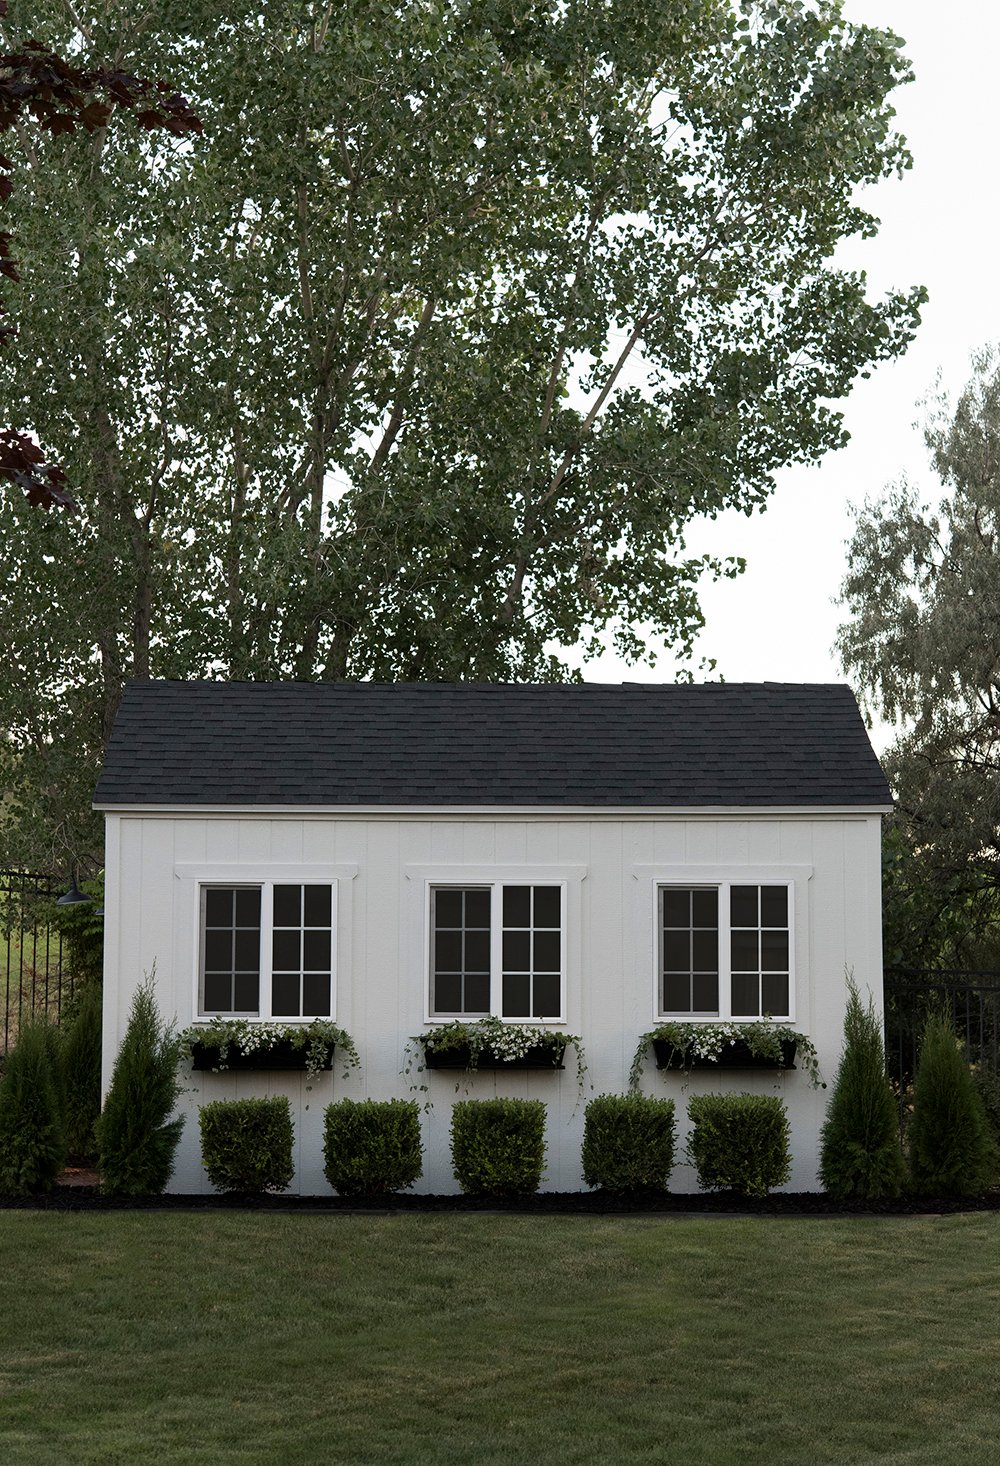
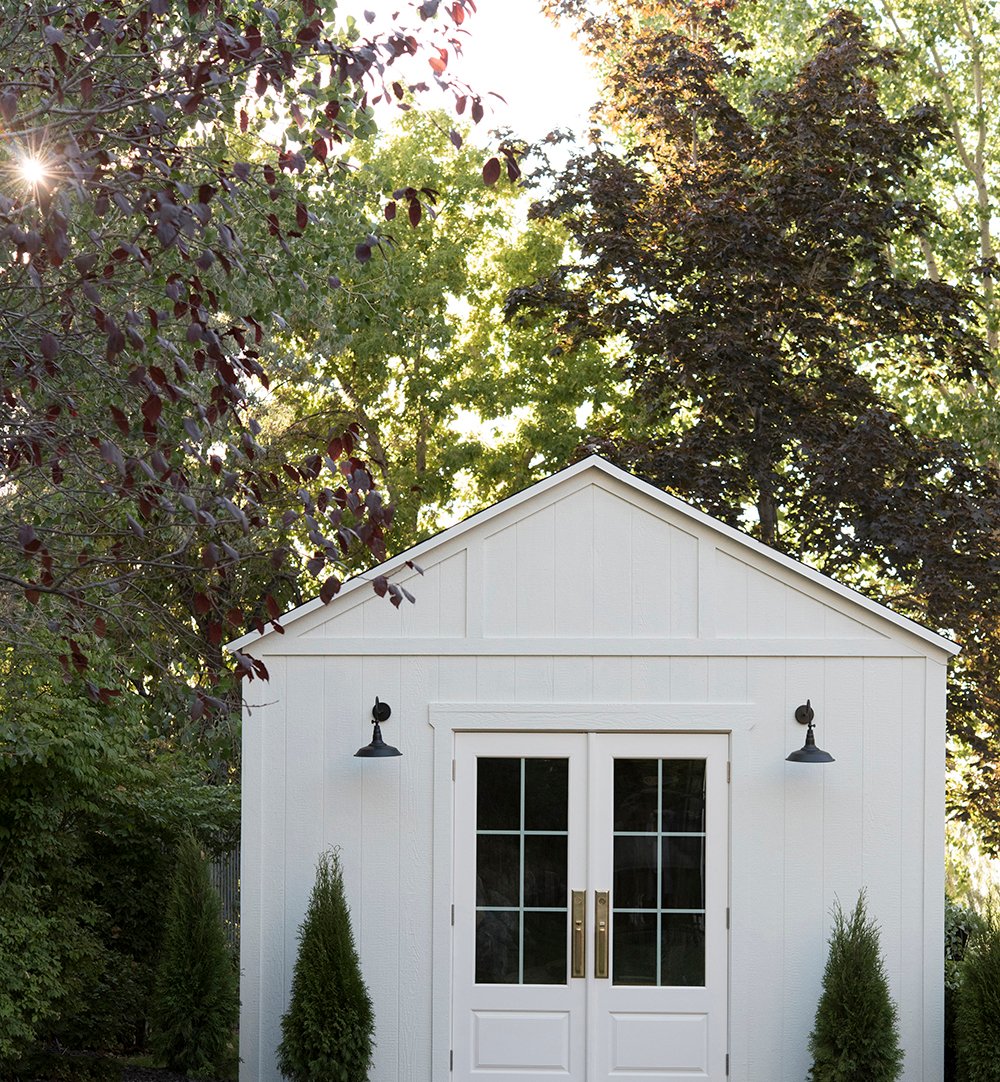
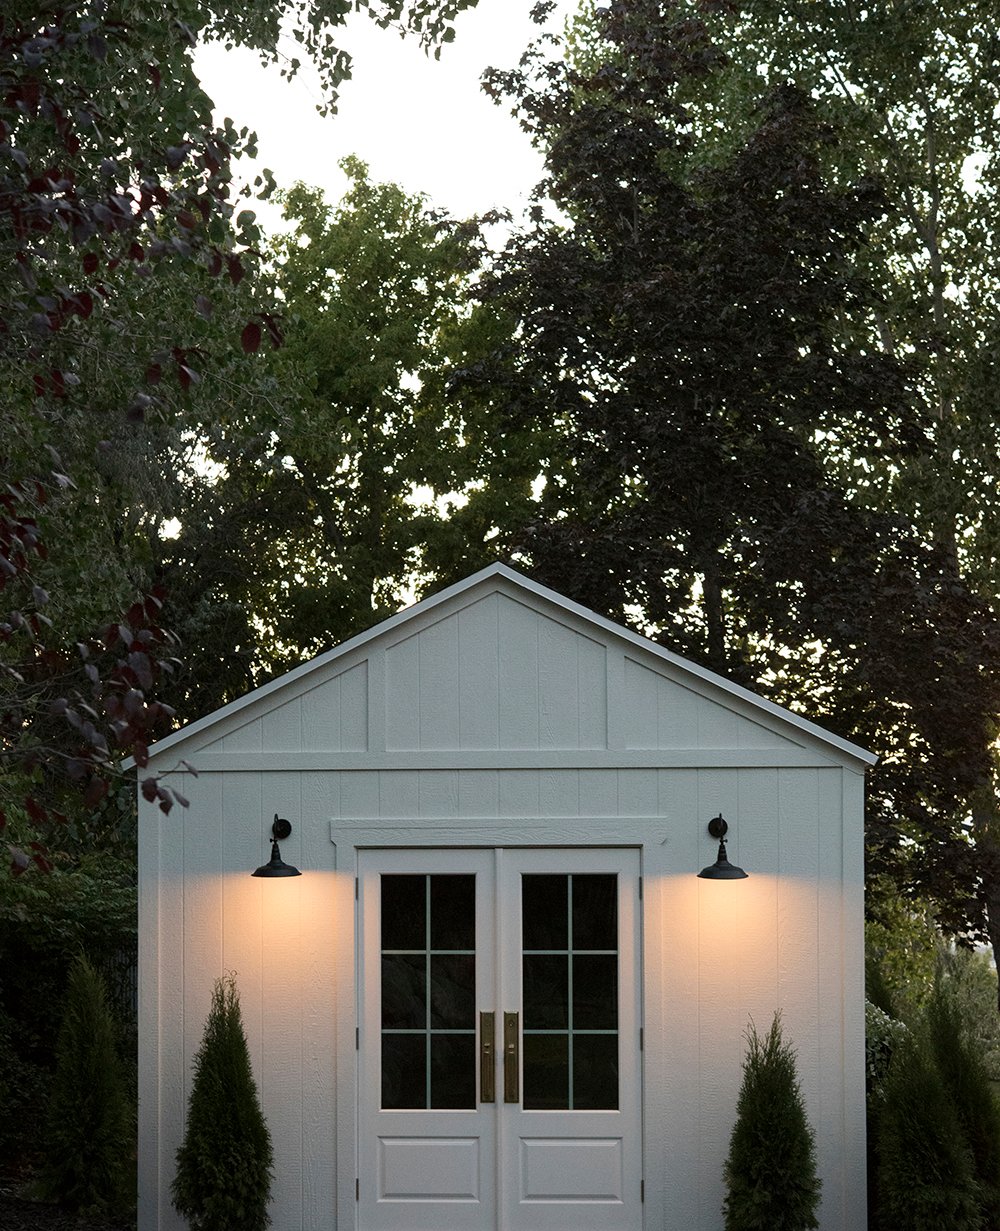
 Ready to see how it turned out?! For a storage shed, the exterior is so charming. We have plenty of room for our tools, lawn care equipment, snow blower, even room to store some of our patio furniture this winter. It’s perfect!
 It was a game changer removing our existing shed, too. We have SO much space in the fenced portion of our backyard now. I feel like this is a much better use of space and seems to make better sense for our property layout.
 It feels like it belongs in our yard and is apart of the space. I worried that it would feel like an afterthought or like it was floating in the middle of our side yard. I didn’t want it to look unintentional, and I think the landscaping really helped with that. All of our plants came from the garden center at Lowe’s.
 I’ve had many requests to link the window planter boxes, and I actually ended up painting those with Krylon Rust Protector Galvanizing Primer, followed by a coat of their Rust Protector Paint.
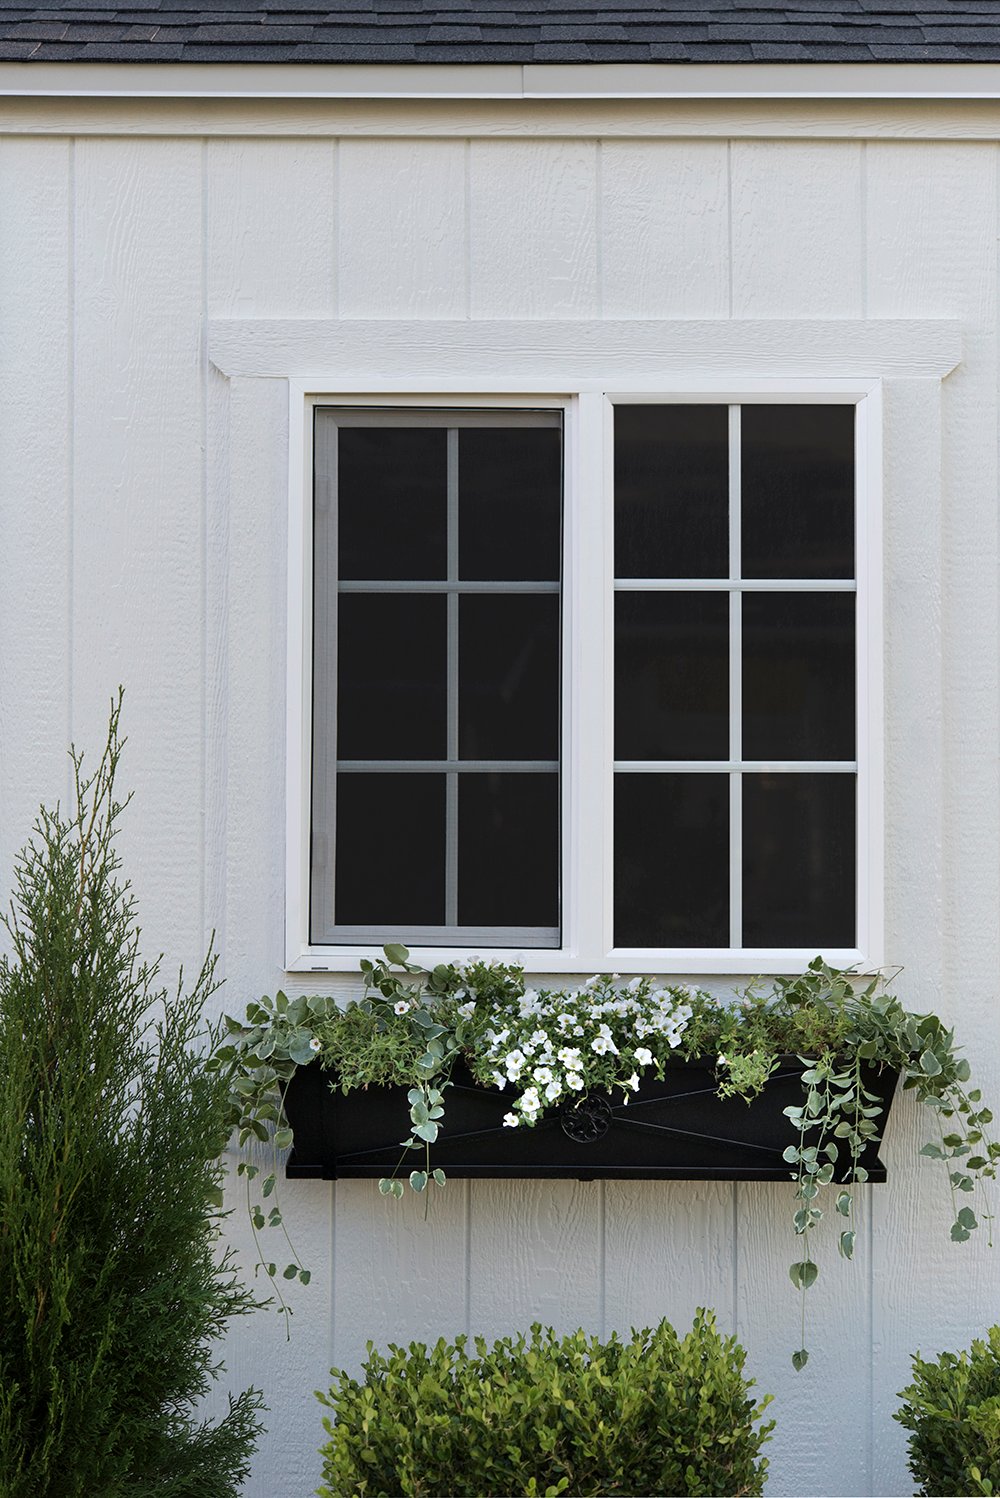 I wanted them to look tonal, so the frame is gloss and the box itself is flat. The shape of the window planters feel really classic to me… they just needed a quick color adjustment to align with my overall vision.
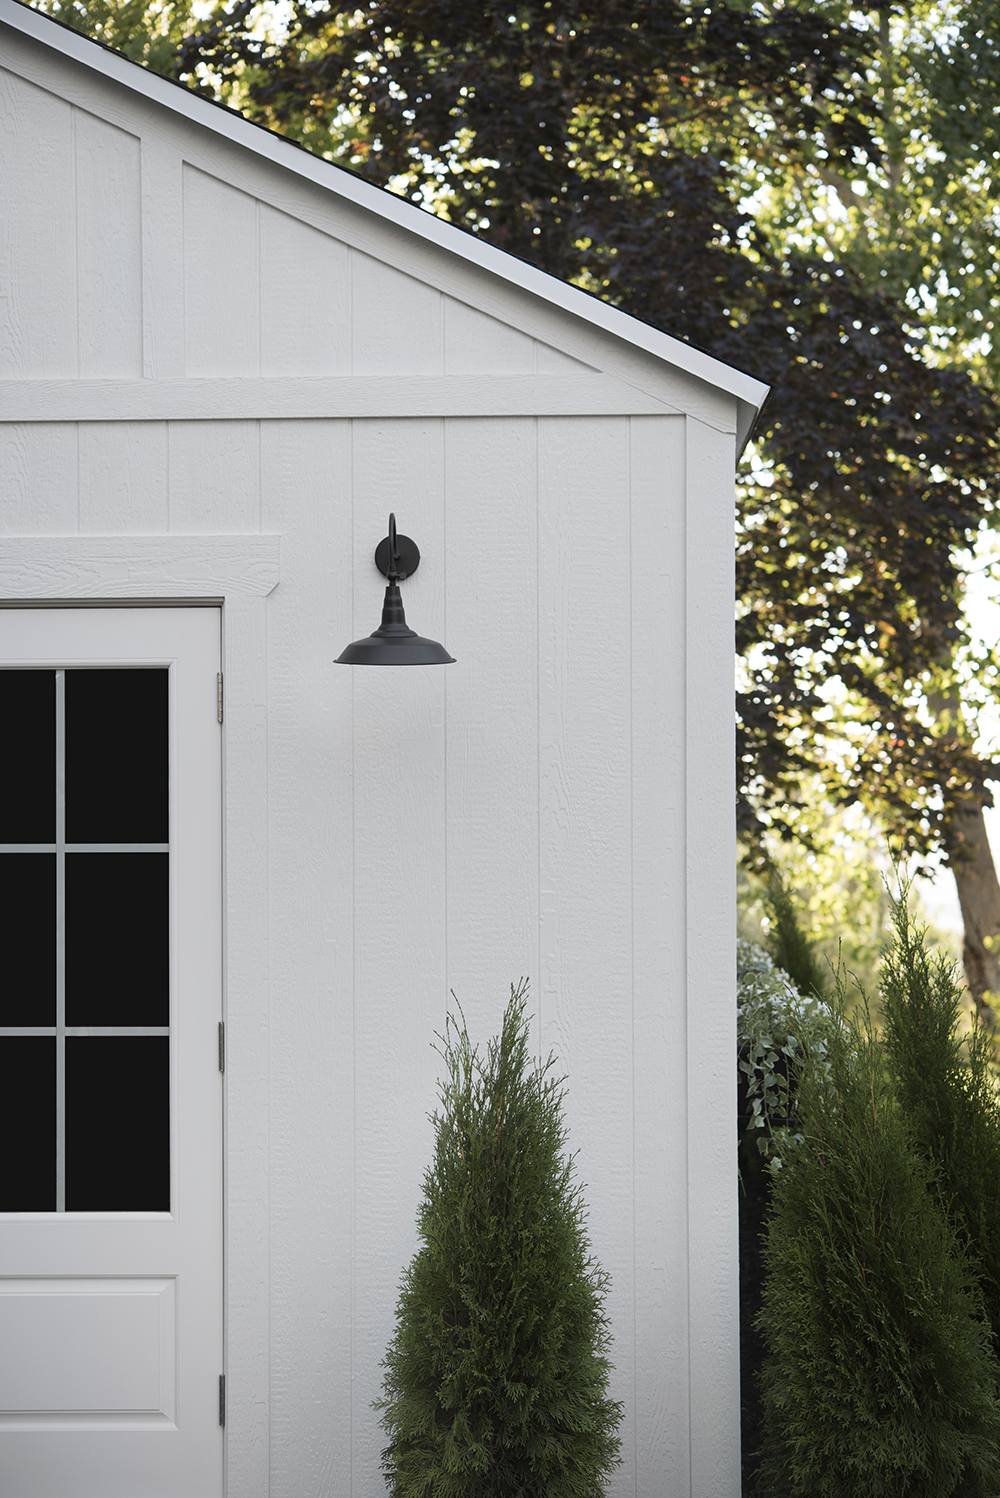
 Another concern I had was the shed exterior aesthetic looking “farmhouse” due to the simple shape, basic materials, and black & white palette. Our home is a colonial and I wanted to make sure it still felt cohesive with our exterior. Adding french doors in place of a typical shed “barn looking” door was an intentional move on my part… as well as the luxe brass hardware.
 The french doors are in the same family as the ones found in our formal living room, which lead to the backyard. The hardware matches exactly and I think having those cohesive elements was a good design move. That Emtek Melrose entry hardware, in the stunning french antique finish, will forever be my favorite. It’s classic, modern, and seems to fit any aesthetic.
 Another dilemma Emmett and I had to work through was the decision to run electrical to the shed. Eventually, we decided it wasn’t a worthwhile investment for our property. This is a storage shed. Our plan for this structure has always been less glamorous than the she-sheds or studio sheds you see floating around Pinterest. It’s a storage shed for our tools and lawn equipment. It is what it is, and running electrical would’ve been a big expense that also added a ton of time to our project.
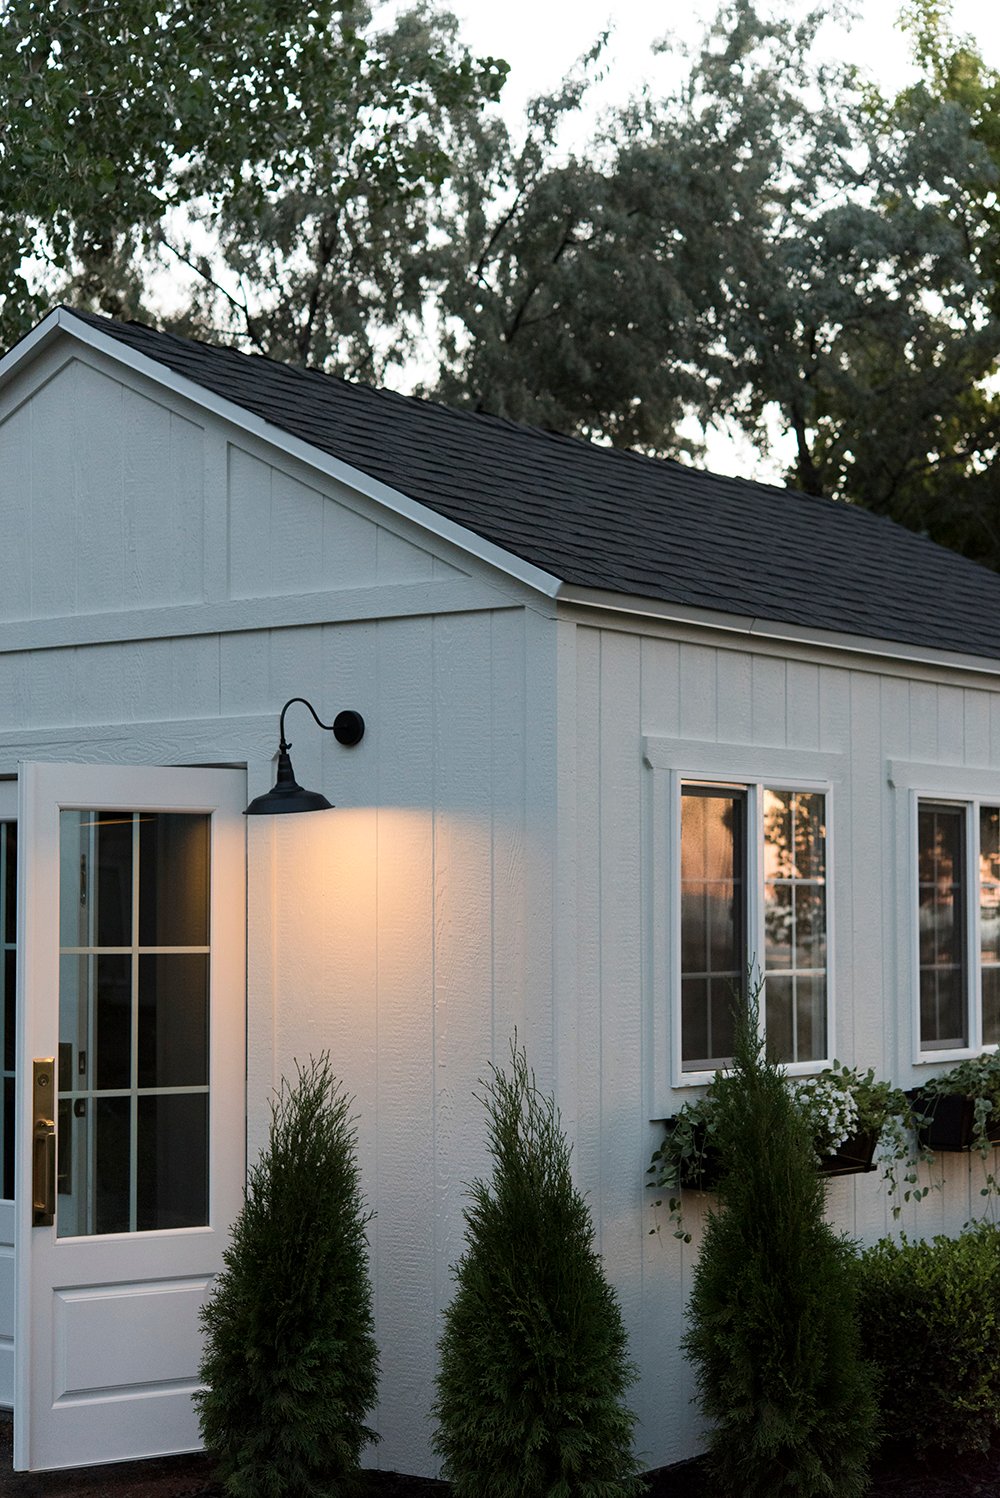
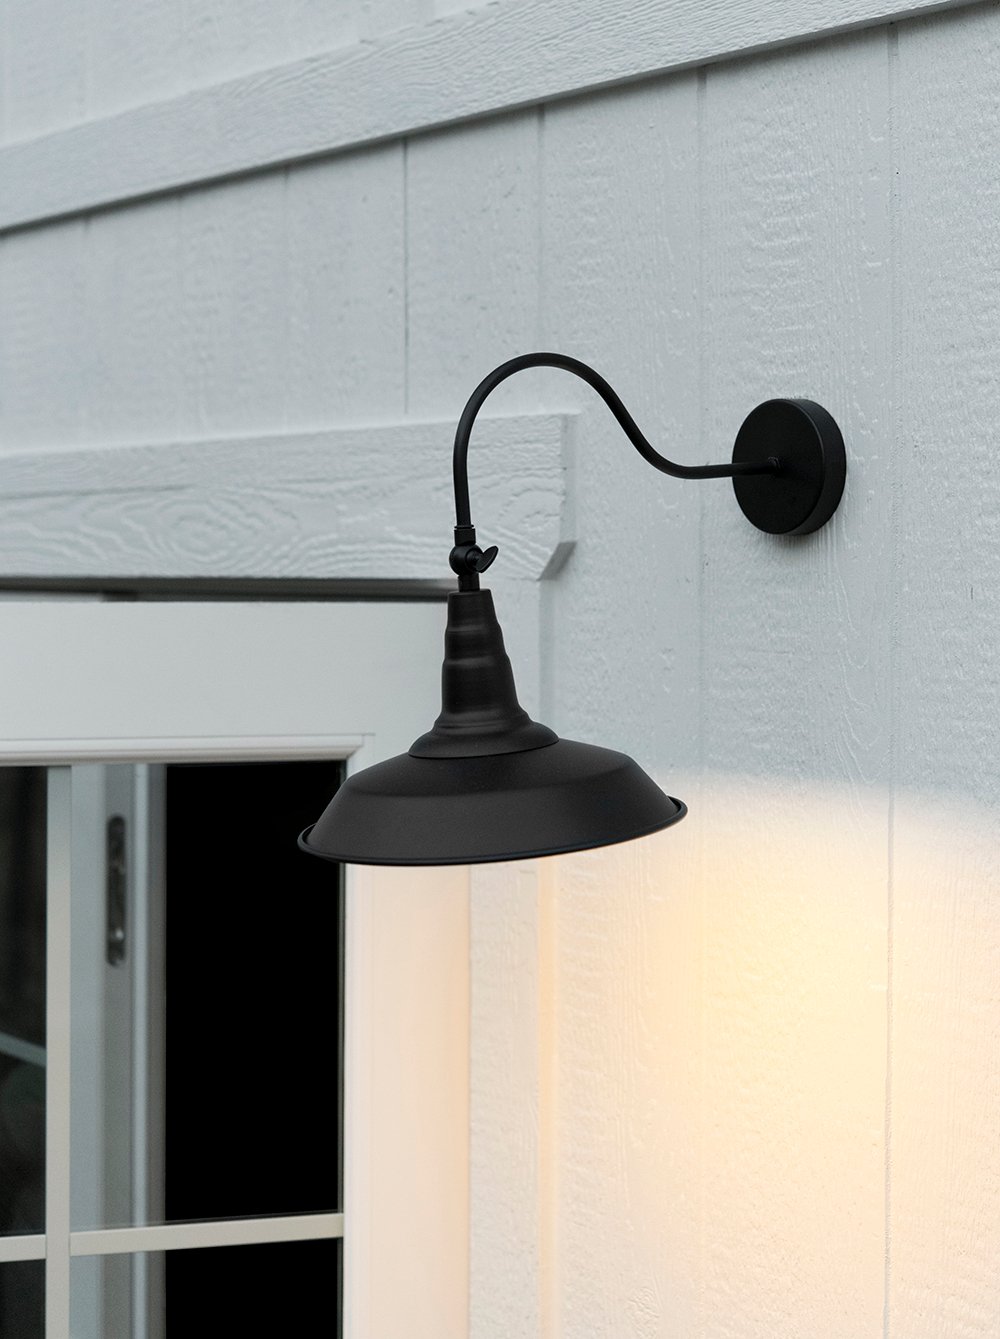 So how did we end up with functioning sconces, you might wonder? These black gooseneck sconces are actually solar powered! The solar panels live on the backside of the roof next to the vents and aren’t visible from our yard. They actually worked out perfect and fit the budget! They turn on automatically as soon as it begins to get dark outside and put off a nice, warm glow. They’re not too bright, not too dim, the color is right, and they really elevate the exterior look of the shed, providing function. I’m very happy with them!
 There you have it… the shed reveal! What do you think? Do you like the way it turned out? Did the project seem to move quickly from an outsider’s perspective? It’s crazy to think two months ago there was nothing here… just a grassy lawn. Emmett and I are both really thrilled with the way things ended up. It is a nice, functional addition to our property. Check back next week for a detailed post on the building process and the supply list I promised. For more on finding the right Purdy paint tools for your next project, click here. I’ll also note- our existing shed went to a great home and every single piece of it was reused… I’ll count that as a major win. Thanks for reading!

Bravo! Certainly the cutest shed in the west! As usual, your attention to detail is amazing. The little notches on the window and door trim, the monochromatic planter boxes (vast improvement!), the French doors with ultra-luxe hardware and perfect landscaping! Emmett definitely has a knack with plants! I really love the solar light solution, too; what a perfect fit. Also no surprise is that you worked your space-planning genius; I bet the backyard feels SO much bigger! (And for the record, I think all of your projects go lightning fast!) Great work, Gibsons!
PS Good to know about those brushes and rollers for extra rough surfaces; our fence is going to need some attention in the spring.
Haha! Our neighbors came over when we returned home to tell us how much they like it (whew!). Our backyard feels and looks so much larger and less claustrophobic now… it was a good move. We’re both really happy with how it turned out! That makes me feel good that you think we move at a decent speed. It’s easy to get discouraged when I receive messages like “did I miss this reveal, shouldn’t this be finished, is this project going to be finished soon?” type of messages, but then I remind myself we don’t live in an HGTV show with instant before & afters. Haha! We work in real time and I’m ok with that. Anyway- all of that to say, THANK YOU for always being encouraging and for cheering us on! Yes- that roller would be perfect for your fence… we used the same one all day long for multiple coats, and the rough surface didn’t mess it up. Happy Monday to you and have a beautiful week Peggi :) xo
I’m in love. Tongue out, drooling over the beauty. I love how much thought you put into your work. Hats off to both you and Emmet.
Aw thanks Traci! We both appreciate your kind words :) Have a wonderful week! xo
Awesome Sarah! Love it, and it has everything you could want in a shed. The details are so very pretty, gorgeous landscaping, amazing solar lights, beautiful doors and hardware. It looks like a tiny house, and a very chic-shed 😍 Bravo you two 🥳
We need a shed, but My husband and I do not have your skills or patience so we will hire a local company to build it for us. However, Your design is perfect and can’t wait to read your next post as I think it will help me big time in designing our shed this fall. Thanks Sarah another wonderful post with impeccable timing 🥰
Have a super fab Monday!
Thank you Colleen! :) I’m really pleased with the way it turned out. Not too shabby for a storage shed. Haha! You could definitely ask a local company to create something similar that fits your property and exterior aesthetic. I think my key takeaways were: landscaping really helps, swap the traditional barn / shed door for actual doors, and invest in good hardware & lighting to dress it up a bit. Hope you have a fabulous week!! xo
Sarah & Emmett, great job! Love the twist in design by adding french doors instead of the usual barn/farmhouse door. The door hardware makes it that much more aesthetically pleasing too!
Say what, theres solar sconces that look that nice? So now I am curious if you have any lighting inside the shed and is it solar operated?
Emmett did a wonderful job with the landscape and selection of shrubs and trees. Window boxes are beautiful. Love what a can of spray paint can do. How fun to be able to change out the plants each season. Maybe lights during the holidays? Can’t wait to see this in a year when they mature some.
Looking forward to the break down post. Have a great Monday!
Thank you so much, Danna! In my search for exterior solar lights, I found slim selections… there were maybe 2 or 3 good options on the market? These were tough to find! We do not have lighting on the interior of the shed… we have two vents (that allow light to flood in from the roof) as well as the three windows that provide plenty of natural light. Emmett did a fantastic job on the landscaping and I’m excited to watch it grow in the coming years! I’m definitely looking forward to swapping the planter boxes each season. Hope you have a wonderful week :) xo
It’s nice to see a shed that doesn’t look so generic and boring. What’s neat about yours is it’s not extravagant, you have shown what you can do keeping things simple, but still packing a punch and looking really fabulous! It would be fun to see a broad picture of the backyard so we can picture the whole layout.
Thanks Julie! It was definitely a budget shed and we tried to keep things simple (and shed-like). We built this for storage, so it mostly needed to be functional. I’ll have to take some wide shots of our backyard this fall :) Or maybe create a “floor plan” layout so you can see the overall shape- or hire one of my friends who has a drone to get some aerial shots. It’s a lot of space, but in a wonky configuration. Have a great week!
Beautiful, Sarah & Emmett! It was fun watching it come together behind the scenes in Stories, but something about these still shots make it look extra lovely and dare I say, dreamy!? The solar lights are ingenious and the window boxes, so classically gorgeous. All the little details that you’re so, so good at, really add up to make what could have been a pretty, but kinda boring utility shed, really pop and shine. I am curious about a couple of things – also interested to know if you have solar lighting inside or do you not need it because of the windows? Re: the windows, have you had to place items inside strategically so they don’t show through the windows? And lastly, had you considered painting the gorgeous French doors window trim, black?
Would LOVE to see an aerial shot or floor plan of your backyard! It looks like you have so many lovely nooks and crannies that you guys have really taken advantage of. Hopefully the weather will turn cooler soon and we can all enjoy our outdoors even more.
PS – welcome home from your beautiful vacation. The coast looked amazing and we’re so happy you were able to get away. I’m sure it was much needed. 💚
Thank you so much, Anne! Photographing this one was really fun. I waited until the sun went down and it ended up being a late shoot (8:30ish). Long story short- we made a “quick” run to grab ice cream while waiting on the sun to shift. It turned out the ice cream drive thru was super long, so we had to hurry back to beat the sunset (dramatic). I grabbed my camera a little later than I had hoped, but I think the images turned out really whimsical and a little moody (which I ended up liking)! We do not have lighting inside the shed (we have two skylight vent things and the 3 exterior windows). We weren’t really worried about seeing inside the windows for a few reasons- #1: they’re Pella windows and have a reflective looking tint during the day so it’s difficult to see inside (and keeps it cooler), #2: it’s situated at the very back of our property far from the neighbors, the road, etc- it would be quite a trek to go peek in, and #3: we grabbed some simple plastic roller shades (we have yet to install) for the interior in case we’re going out of town or want to keep the sun out.
For the french doors, I did consider black, but prefer when the mullions (window styles) match the exterior of the door… which I think feels more custom. Since we opted for budget-friendly doors (instead of a custom order) the mullions were white and I wanted to keep it consistent. I also like that it feels like it belongs with the shed instead of matching our beautiful black front doors. It’s not quite as awesome as the house because it’s a storage shed- I think that was also a design hierarchy decision. It belongs, but it’s clearly not the star of the show, if that makes sense?
I’ll have to work on getting some aerial shots and will create a floor plan of our yard! It’s such a weird shape (almost like a horseshoe).
Thanks for your kind words and welcome home! Vacation was amazing and definitely needed. I’m working on a recap post for tomorrow. It was absolutely lovely and coming back to the 90 degree temps made it tough to leave. Haha! Have a wonderful week :) xo
Would love to see how you organized the interior of this beautiful shed.
Great post idea, Ann! We’re still moving items in (from our garage), but once we have it situated, I’ll put together an organization post. It’s pretty spacious inside and we designed it to have a loft, so we have more storage options. Emmett still wants to hang some pegboard inside for extra hanging space for tools and whatnot. I made a note in my calendar to share the interior this fall!
It looks amazing Sarah! Wonderful. I have to ask, how do you always get your freshly planted flower boxes to look so…. natural? lived in?? does that make sense? Not so “freshly planted from Lowe’s into a box planter just for the pics” type feel. I envy you! This all looks great.
Thanks so much, Katie! Check out this post for a progression tutorial: https://roomfortuesday.com/how-to-install-window-flower-boxes/ … I used all Lowe’s products in that one too, and if you scroll to the bottom, there is a gif that shows how I plant them :) I think it’s all about texture and finding plants that feel organic and “full”- that way the boxes look great even when they’re newly planted and you don’t have to wait weeks for them to mature. Hope this helps! xo
I’m so impressed with how quickly you guys built the shed. I was invested in this project since the beginning (you had me at french doors). The design is so beautiful that it doesn’t even look like a shed, and the landscaping took it to the next level.
Q: Will you share a budget breakdown in a future post?
Need advice – Q: Where would you put a shed in a an L- shaped backyard?
Have an amazing week!! :)
Thank you, Anna! Emmett and I are both so happy with the way it shaped up. It’s definitely more functional for our space. Yes- I can breakdown the budget in the supply list / building post :) Great idea! For an L-shaped yard, it really depends on where your home is positioned, the surroundings, etc. Try to think of how you use your yard. It might be worth tucking it in a corner out of the way, or keeping it closer to your home for easy access? I think every situation is unique based on the property, surroundings, and how the space is utilized. Hope you have a wonderful week too :)
Can I ask a dumb question? When you change out your door hardware, do you have to have a locksmith re-key them all to the same key? I know big box stores sell smartkey options but I love the Emtek line but I am overwhelmed thinking about having all my locks re-keyed.
No dumb questions here, Caitlin :) Happy to shed some light on this topic. You would have to rekey your existing locks- but since we’ve been switching all of our existing door hardware, we have the same (new) keys from Emtek that fit all of our doors. It might be worth trading all of your exterior sets so the hardware matches and they have the same key? Not sure how many doors you have, but we only have two entry points into our home, and then the shed is keyed the same… so it’s not terrible. If you’re planning to keep your existing keys and hardware (and you want them to work universally), you would have to have your new set keyed. Hope this helps :)
Here’s a money saving tip on this topic. Lowe’s and Home Depot both sell re-keying kits. This is a DIY option that’s significantly cheaper than hiring a locksmith. Simple instructions-anyone can do it. We’ve done this method three times over the past 7 years or so, but it definitely helps to minimize the keyed points of entry.
I had no idea! This is SO smart. Thank you for sharing Lauren! The more you know :) DIY key sets are probably the way to go.
It turned out SO pretty!! How did you decide on the exterior paint color? My husband built two leaning sheds that are against our home and I don’t know what color to paint them.
Thank you Janet! I wanted something bright and neutral that would easily blend with our home exterior no matter how it changes in the coming years. This creamy natural (Sherwin-Williams Nuance) felt like a safe bet :)
Wow!! It turned out so wonderfully! My favorite elements are the solar sconces and the french doors- it completely elevates the look and gives it that colonial feel. I’m always impressed with Emmett’s landscaping, but what plants did you plant in the boxes?? I adore the green hanging vines. The leaves remind me of Eucalyptus leaves. So so beautiful! I’m sad you didn’t show us the space gain in the fenced portion of the yard, but that’s probably because you still need to remove concrete and plant some new grass; the doggos will be in heaven and I can’t wait to see it! Fabulous job to both of you as always!!
Thanks Lauren! I actually recycled the vinca (hanging stuff) from our front porch planters (that were overgrown)… I trimmed it wayyyy back and put the excess in the window boxes. There is nothing better than free plants. Haha! Yes- I still need to share our fenced portion of the yard. It’s just a concrete pad right now, but eventually we’ll get around the jack hammering that thing out and installing sod. That’s another project for another day, but I’ll get over there with my phone on IG stories to share how open it looks in the meantime :) The dogs are already happy to have more running space. Hope your week is off to an awesome start! xo
Great job!
Did I miss the paint color? LOVE the look!
Thank you Joyce! The color is Nuance by Sherwin-Williams.
So beautiful! Can u please link the hardware Again the link doesn’t work
What size is this gorgeous shed!?
It’s 12 x 14!
How long do the solar lights stay on … til morning?
Exactly! Until the sun comes up… they click on once it’s dark.