How to Install a Stair Runner with an Easy Staircase Landing
We’re nearing the homestretch of the entryway renovation, and one daunting task we’ve had on our to-do list is to install the stair runners. Our entryway staircase is comprised of two sets of stairs with a landing between them. I knew I wanted to keep the design classic, simple, and durable. I’m incredibly pleased with how it came together, and I’m excited to share it today! As promised, I’ve got the complete tutorial for you. I hope if and when you are replacing or installing a stair runner, this post will be useful- be sure to save it for later. Click through for my step-by-step tutorial on how to install a stair runner with an easy staircase landing (no miters, tucking, or sewing required)… just a timeless, seamless look.
If you’ve missed any of our entryway renovation, be sure to check out the following posts (in chronological order below) to catch up… as the big reveal is coming soon! Today, let’s get into the stair runner installation.
- Entryway Renovation : Before Images & Demo
- Our Entryway Tile + Alternative Options
- Entryway Renovation : Demo, Stair Parts, & Flooring
- Entryway Renovation : Millwork Details
- Entryway Renovation : Millwork & Electrical
- Entryway Renovation : Painted Stripes
- How to Faux Paint a Vent Cover to Seamlessly Blend with Stone
Supplies
Believe it or not- this is an easy DIY project once you get the hang of it! It’s very repetitive and just requires some patience during the installation process. Ready to get started? Here’s what you will need:
- Rug pad (included with our woven rugs from Tuesday Made)
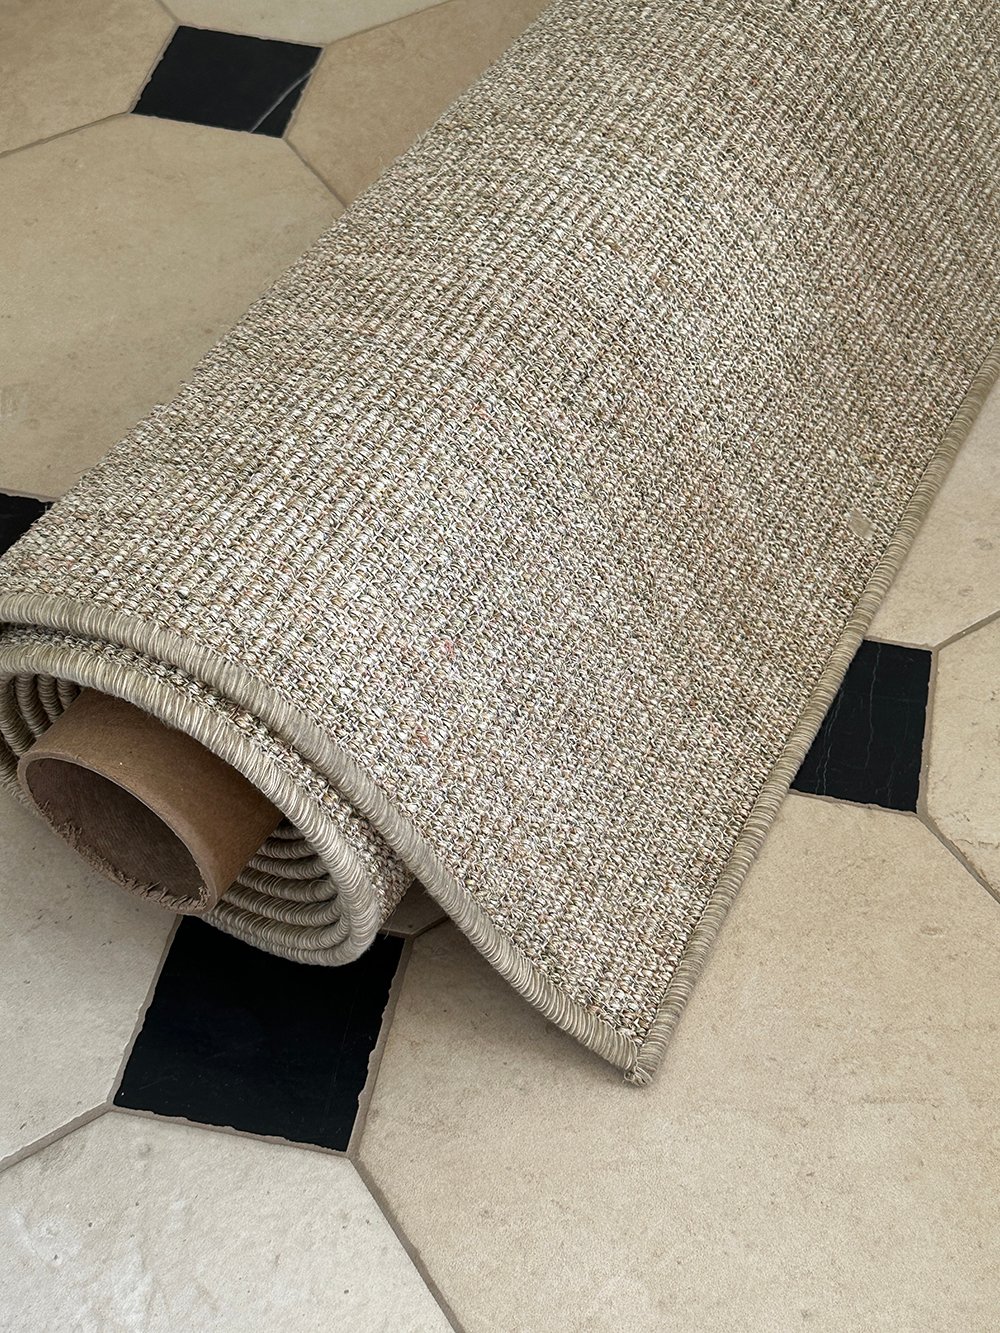
- Stair runner (linked the one we used- it’s available in custom sizes, too)
- Utility knife
- 1/4″ narrow crown stapler
- 1/4″ x 5/8″ staples
- Industrial scissors
- Air compressor
- Sharpie marker
- Tape measure
- Heavy duty (or carpet) tape
- Bolster chisel
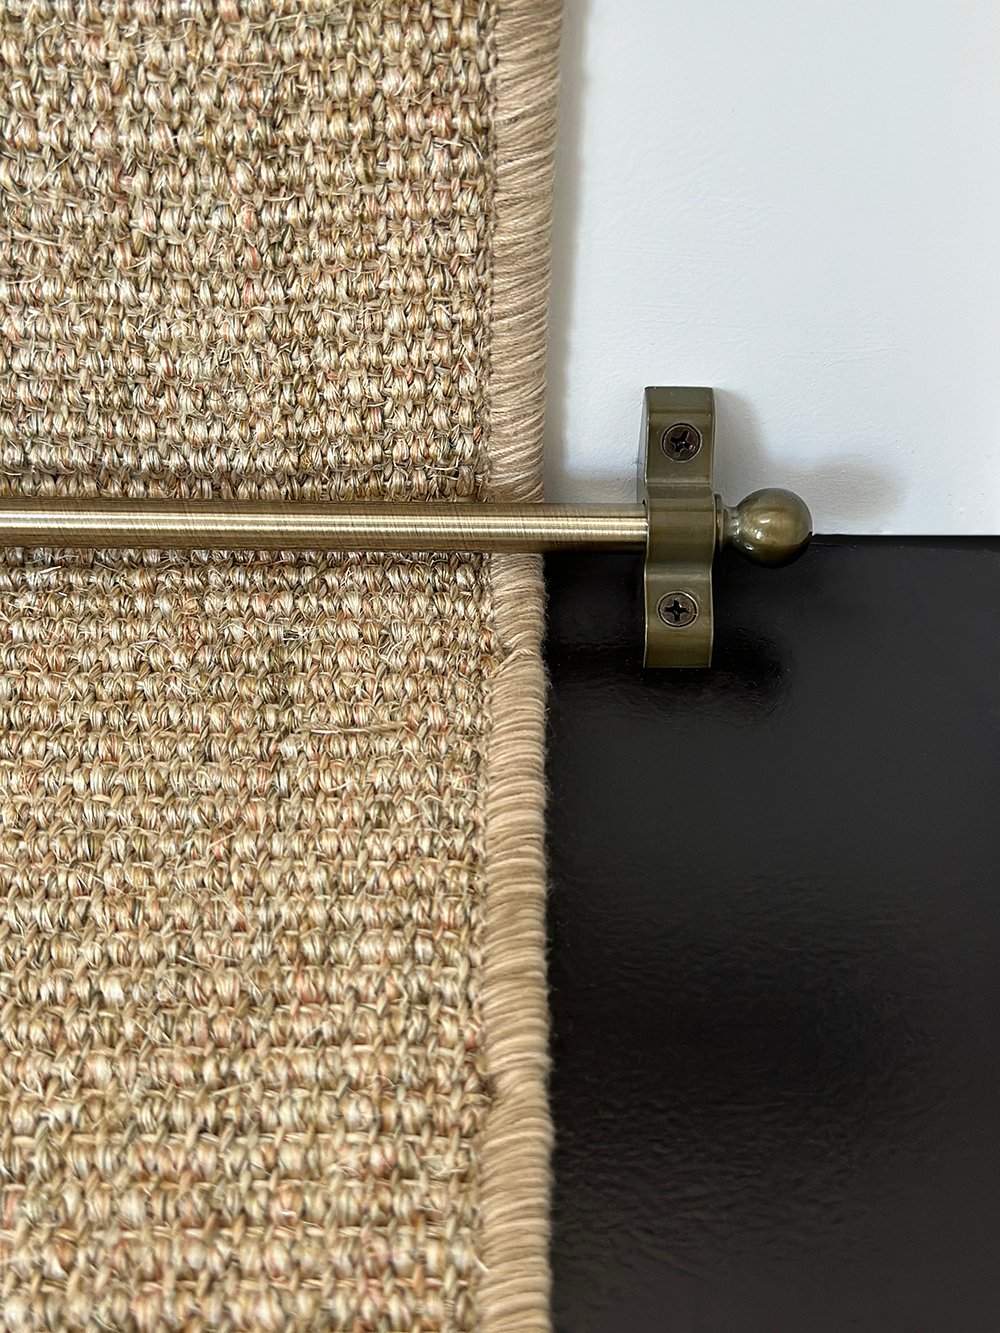
- Stair rods & brackets (optional / decorative)
- Power drill (if installing stair rods & brackets)
- Screwdriver (if installing stair rods & brackets)
Order Swatches
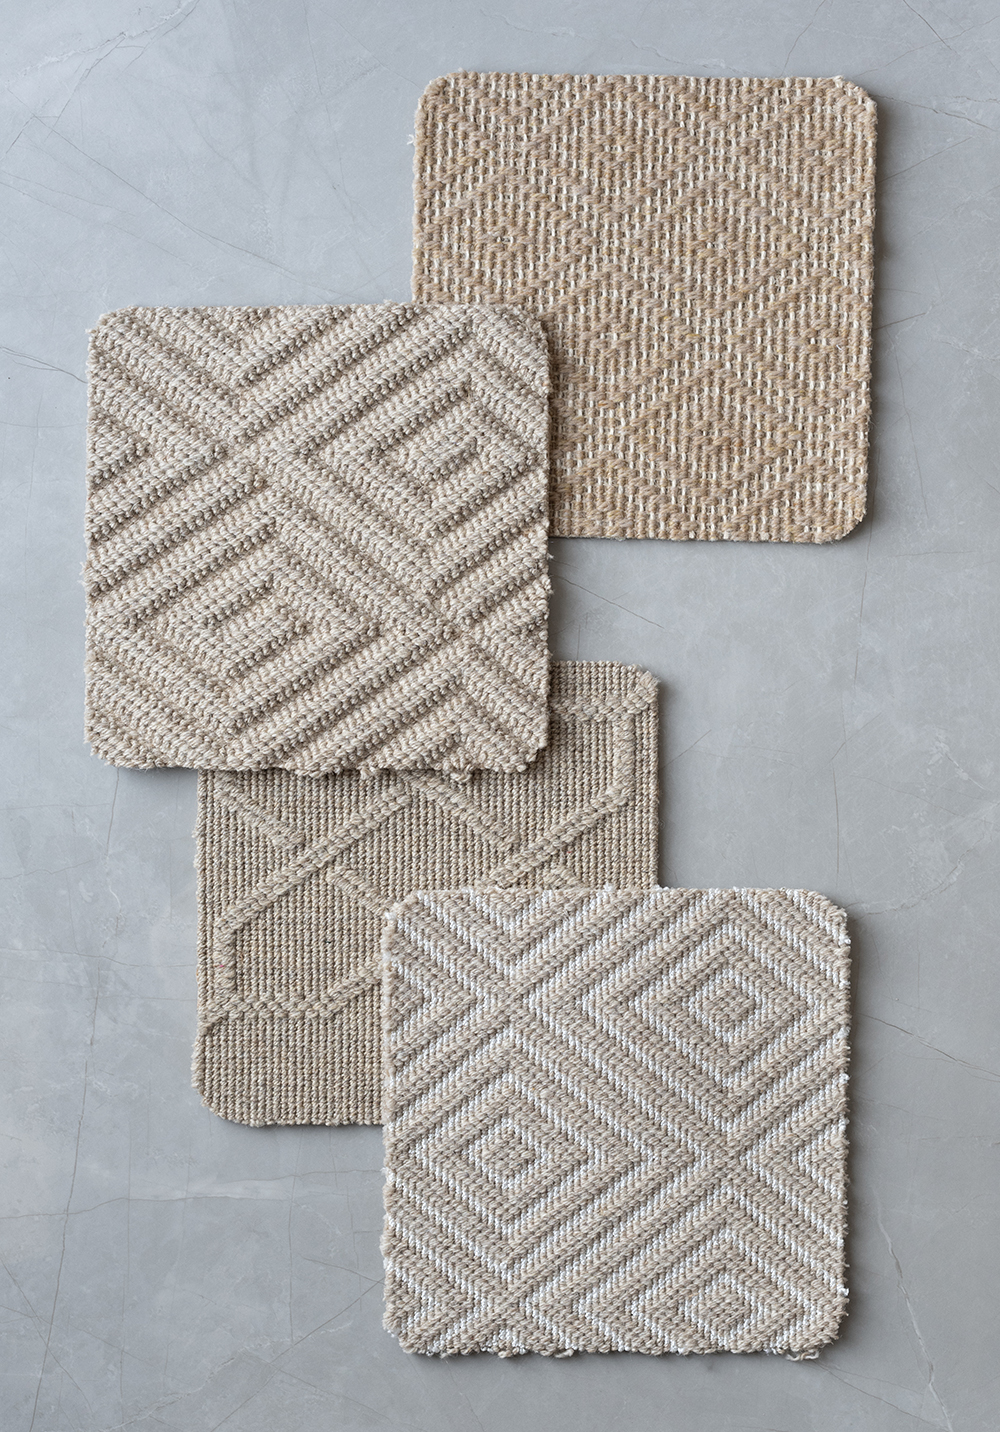
Check out this post for the best natural fiber area rugs and runners. All of the woven rugs in my shop can be ordered in custom sizes, have a timeless aesthetic, and are safe & durable. We also stock all of our samples ($5 per sample), so they ship rather quickly. Additionally, our natural rugs include a custom fit rug pad, so no need to order that separately!
Measure for the Runner
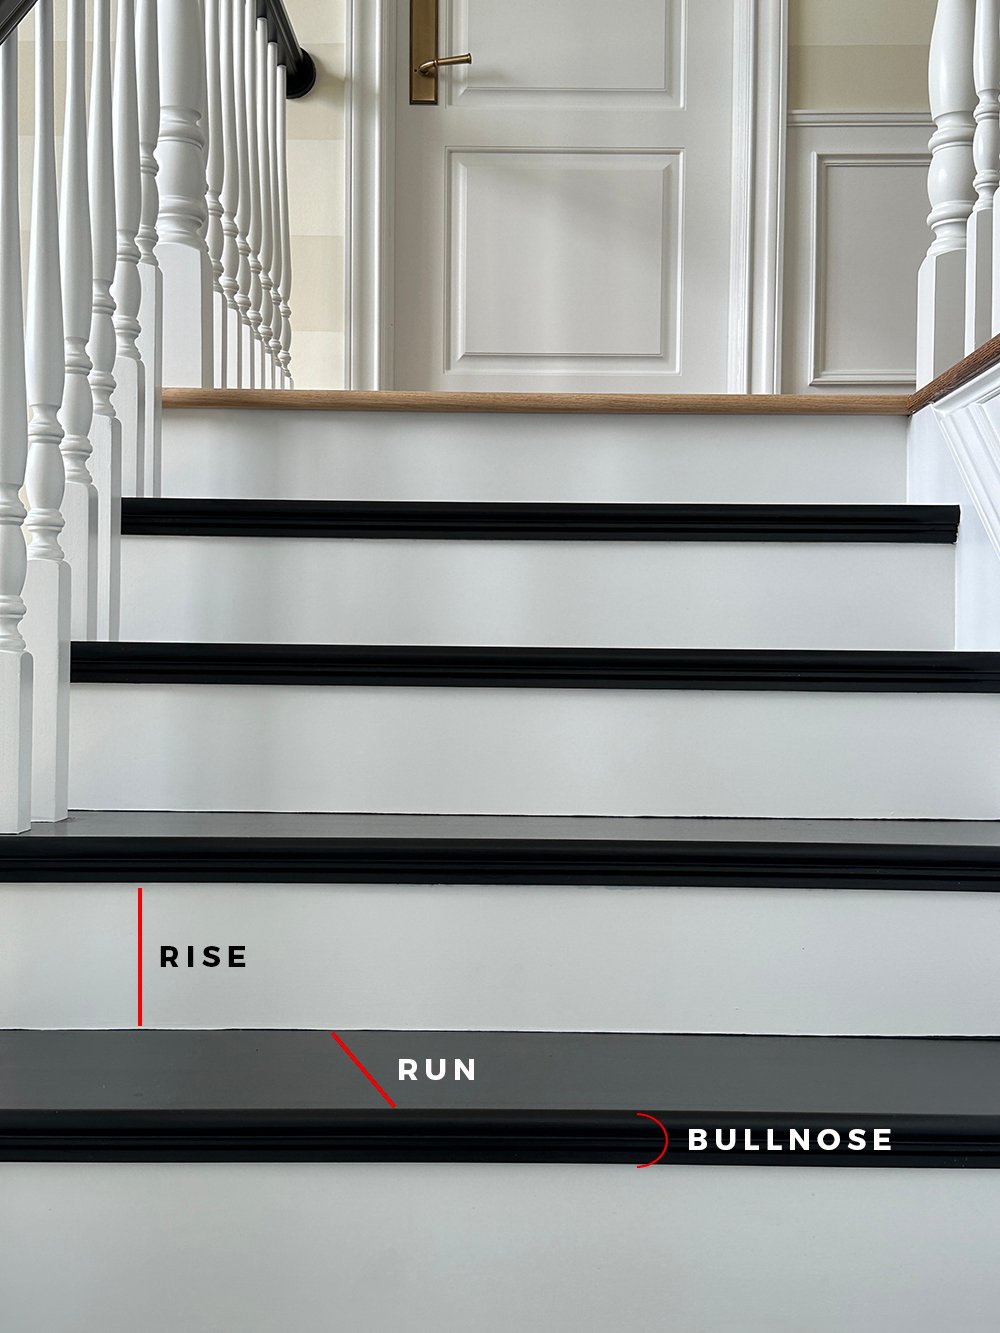
Once you’ve landed on the perfect swatch for your carpet runner, you’ll need to calculate the size. Measure the rise (height of the riser) and run of each stair (depth of the treads), also taking note of the bullnose of each stair tread (the end the runner curves around). Multiply that number by the number of stairs you have, then add 6-12 inches for overage. If you have a landing connected, you’ll also add that to your runner length. See how to plan & calculate the stair landing below…
Plan the Landing
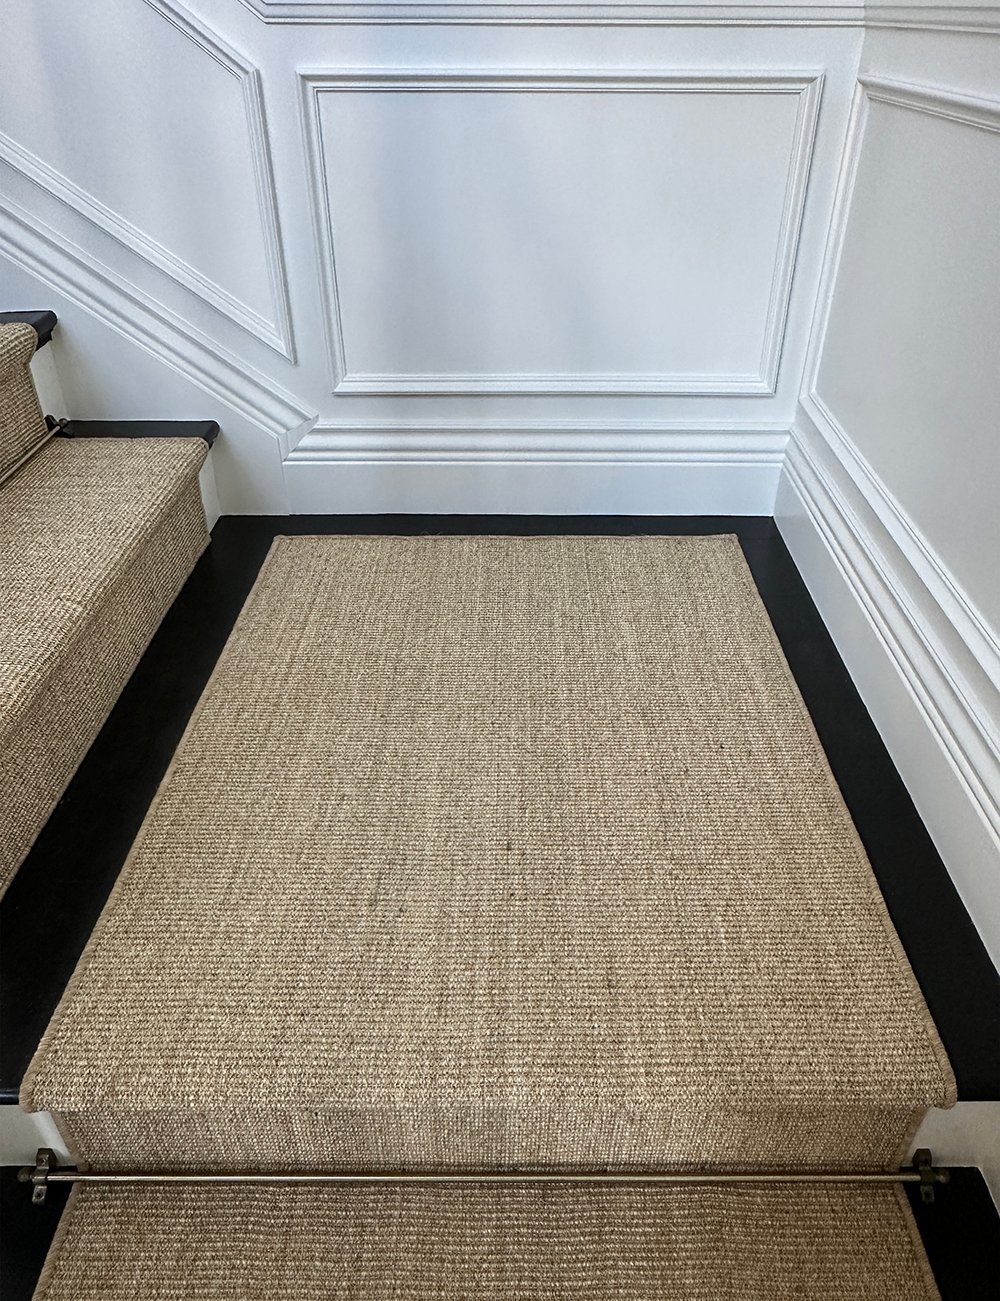
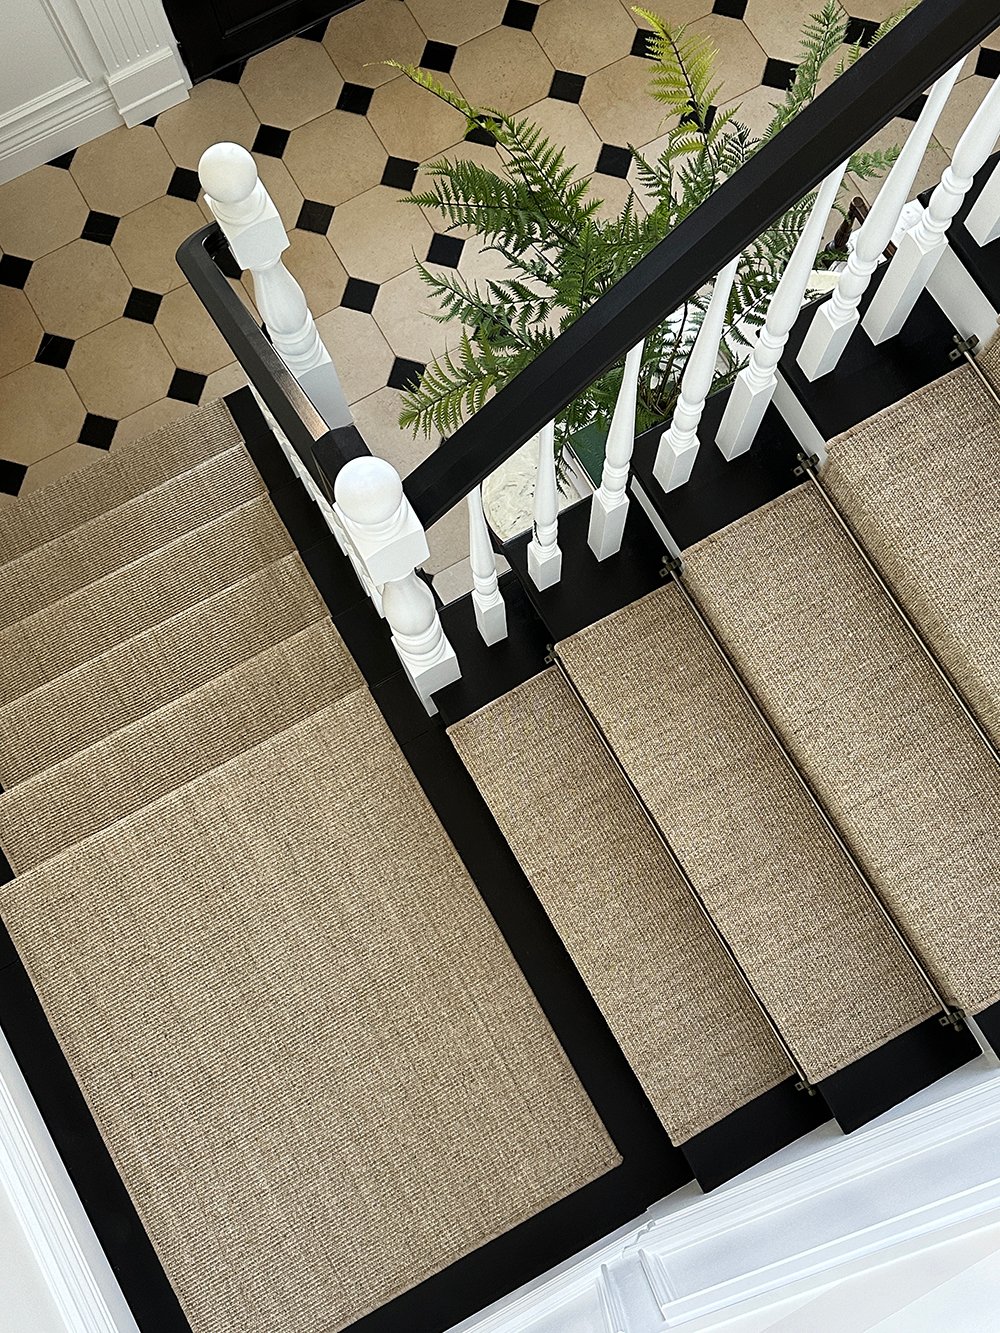
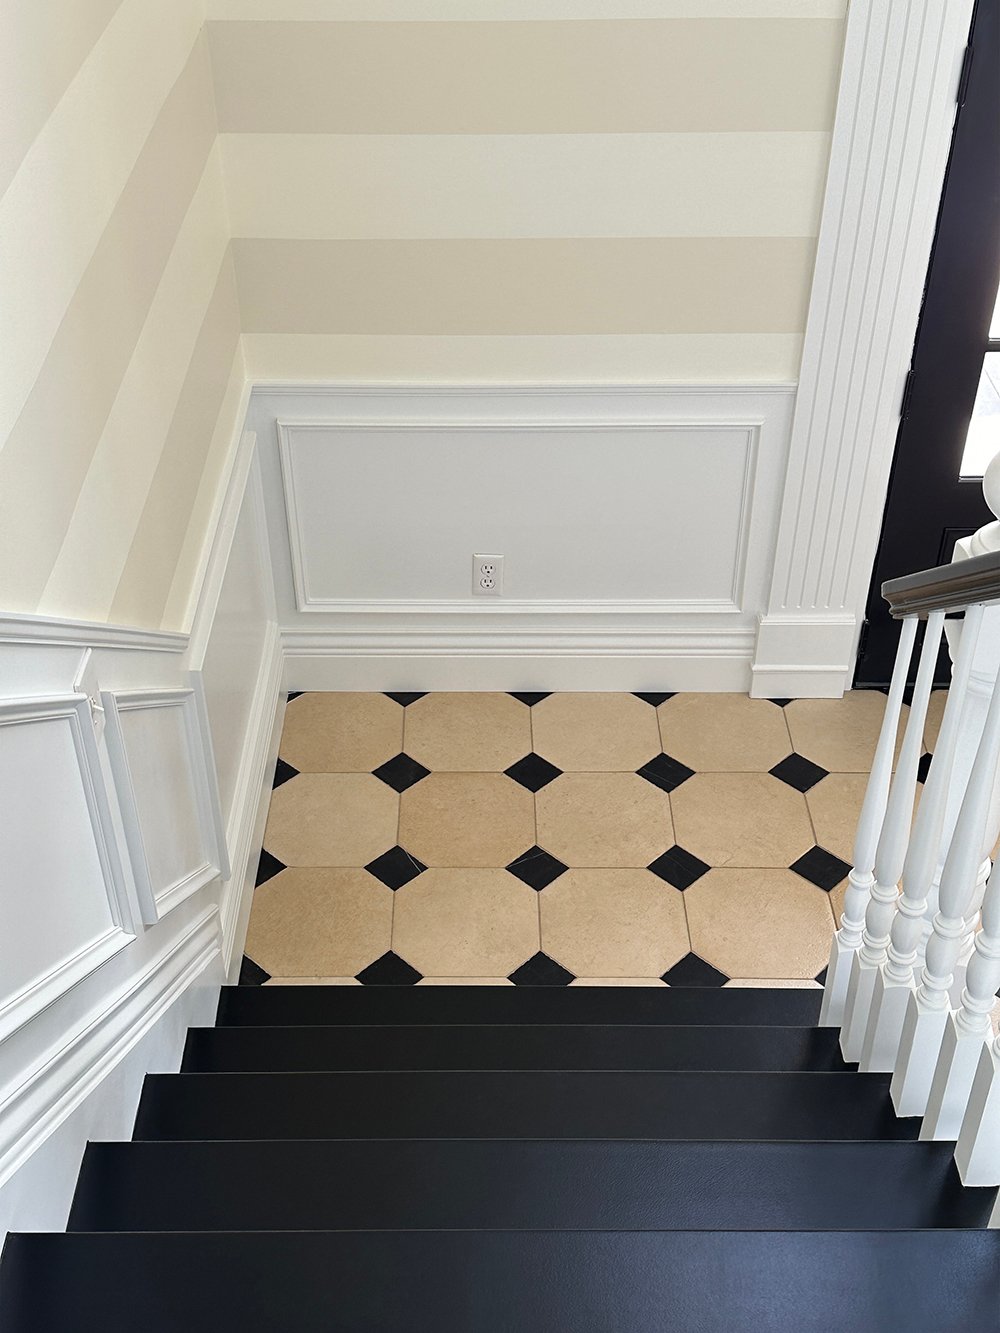
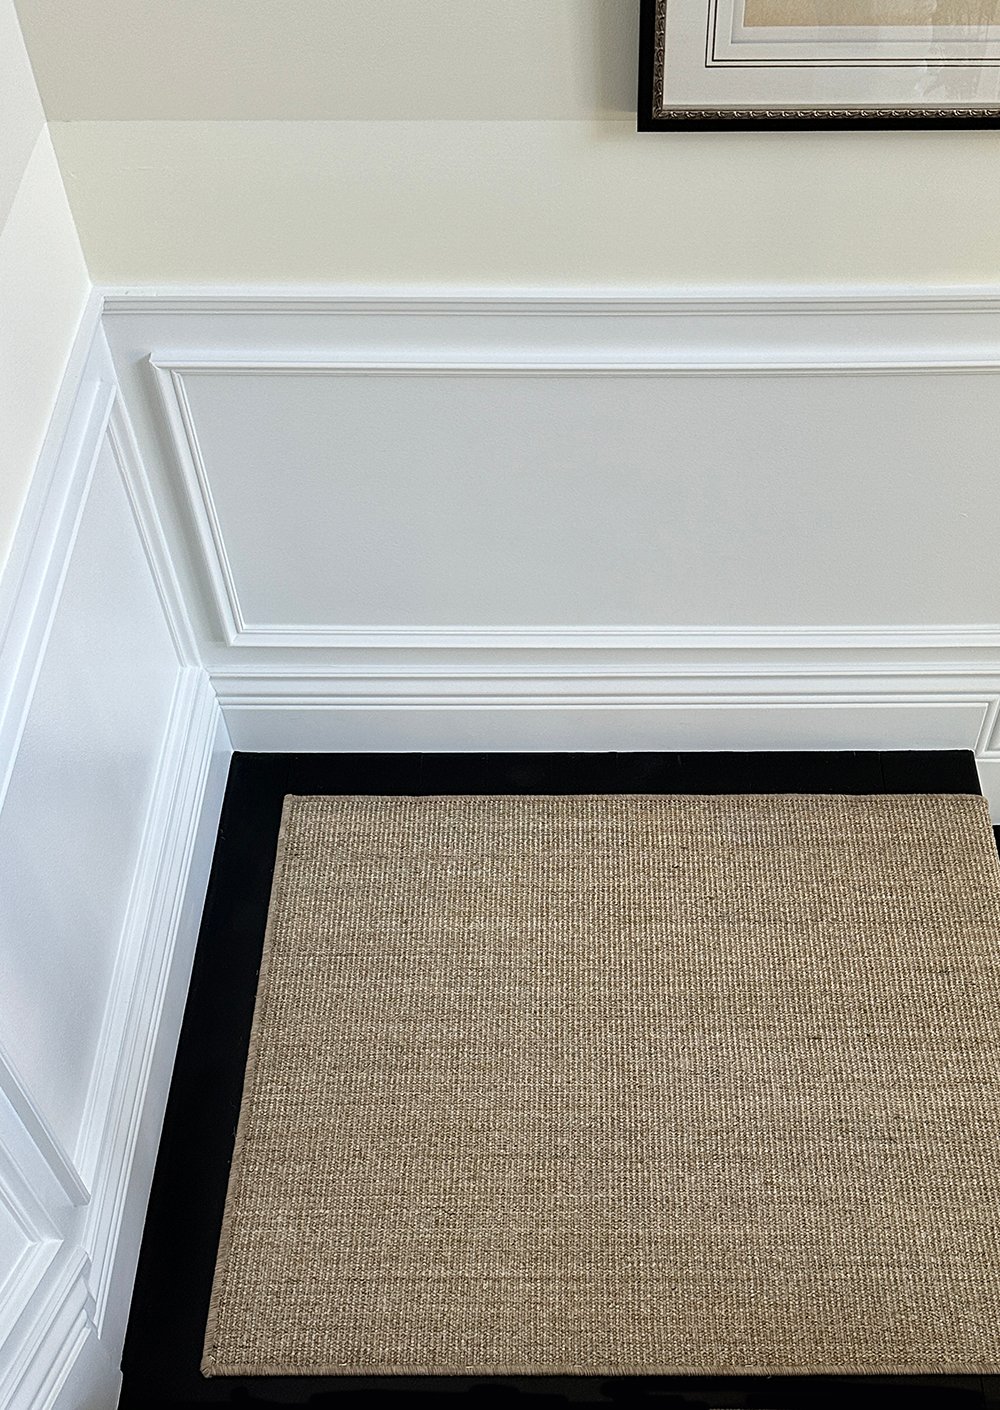
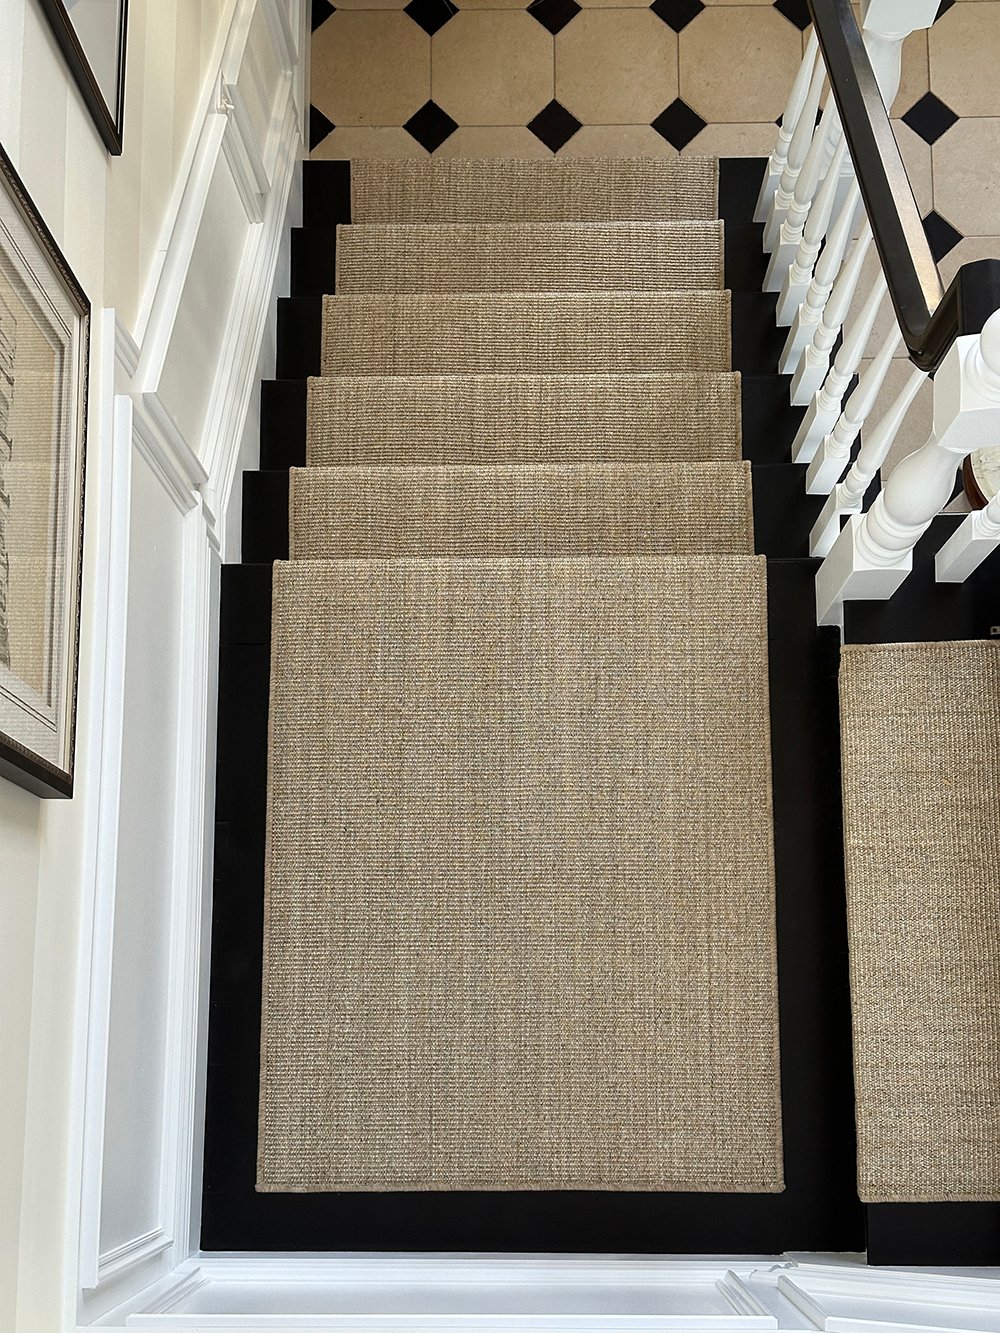
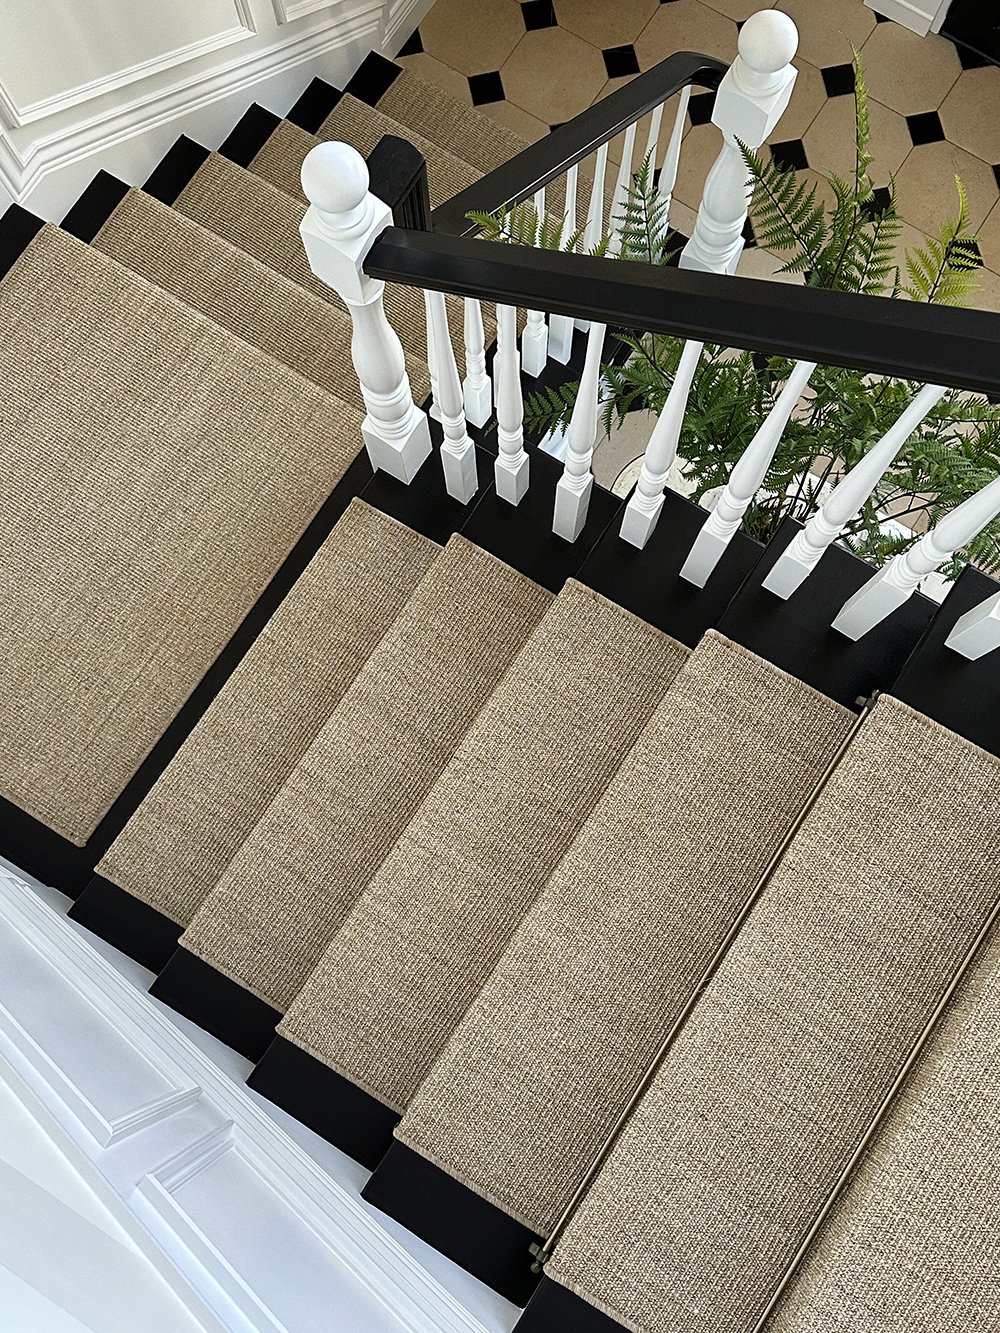
I like every edge to look finished, tailored, and seamless. The outer edges of a runner should all be bound with a finished edge. Therefore, I opted for a simple landing… no seams, no miters, no sewing or glueing, and no raw edges. We extended the stair runner from our lower staircase to encompass the landing area, leaving a bordered or contrast look with equal amounts of negative space around the perimeter (like the image above). Not only does it look timeless, but this is the easiest type of landing runner to install.
To achieve this look, you’ll need to add your landing dimension (with your preferred border spacing) to your stair runner dimension. Since we have two staircases, the lower runner included the landing and lower staircase, while the upper runner measurement only included the upper staircase.
Prep the Staircase
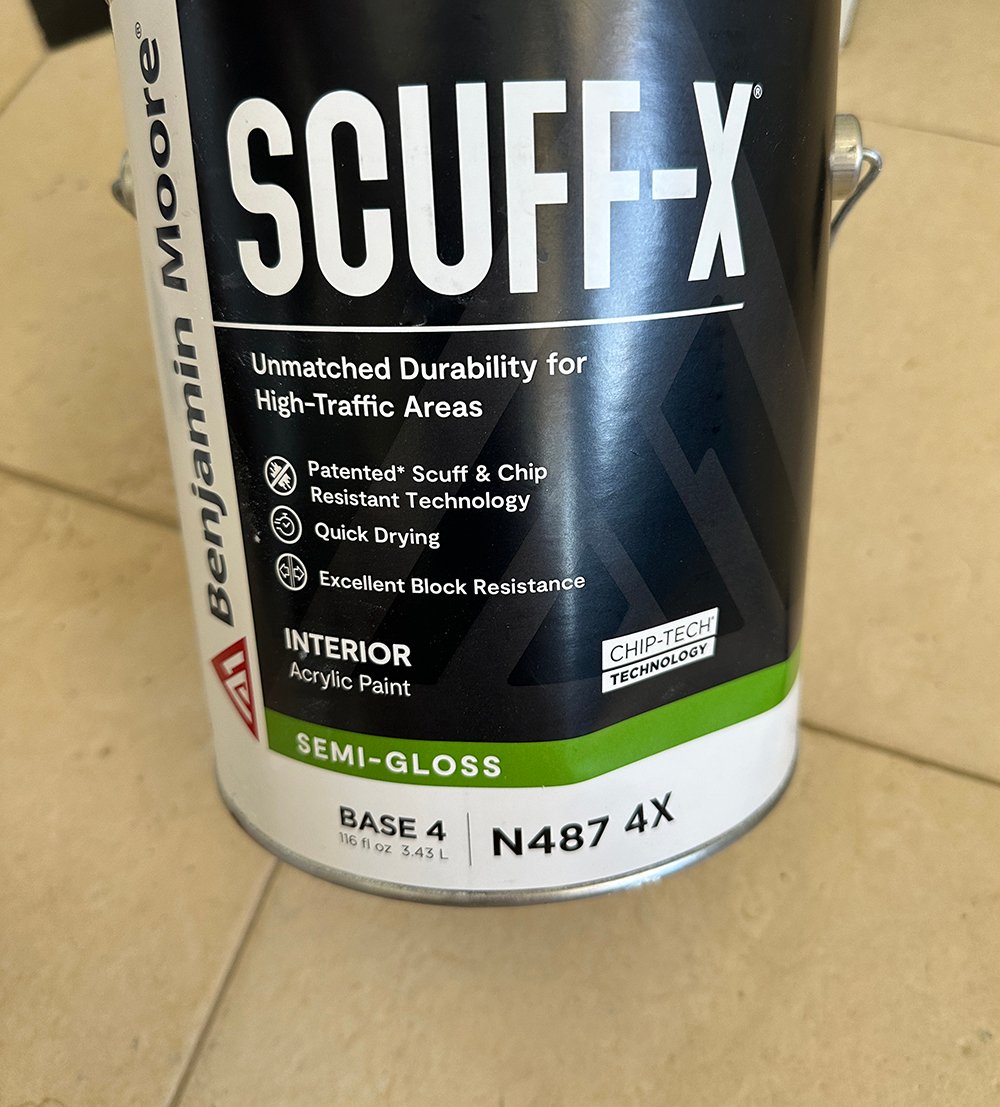
We completely rebuilt our hardwood stairs as part of our entryway renovation. Once they were primed, I painted them, and ordered the custom runners. The best way to ensure your stair paint withstands the test of time, is to use a high-traffic product, such as Scuff X. If your stairs are already painted or stained, be sure to clean them before installing your stair runner.
Install the First Stair Rod Bracket

Before installing the actual runner, we found it easiest to install a guide of sorts… one of the stair rod brackets. Alternatively, if you’re not using stair rods and brackets- you can use painters tape as a placeholder. Either way- it’s easiest to cut a jig (pictured below).
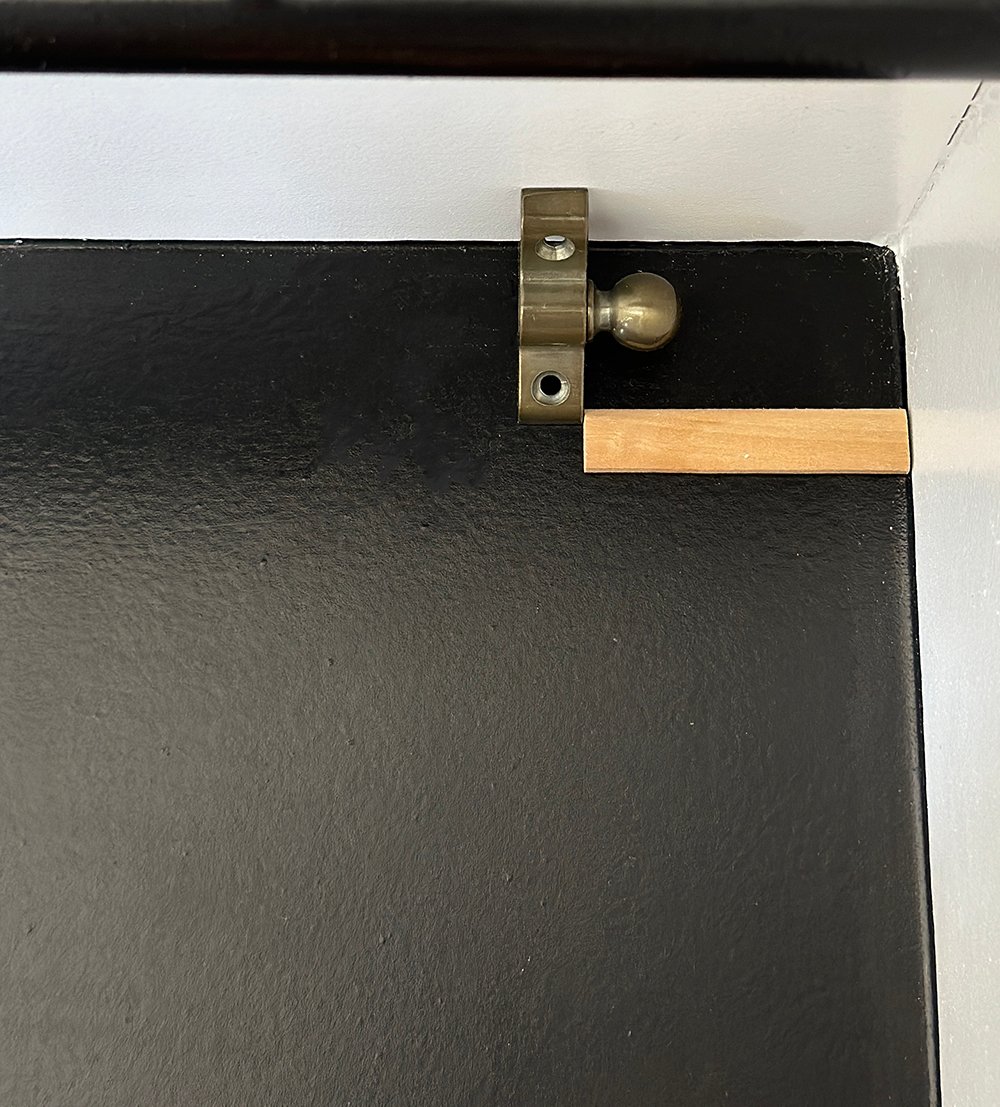
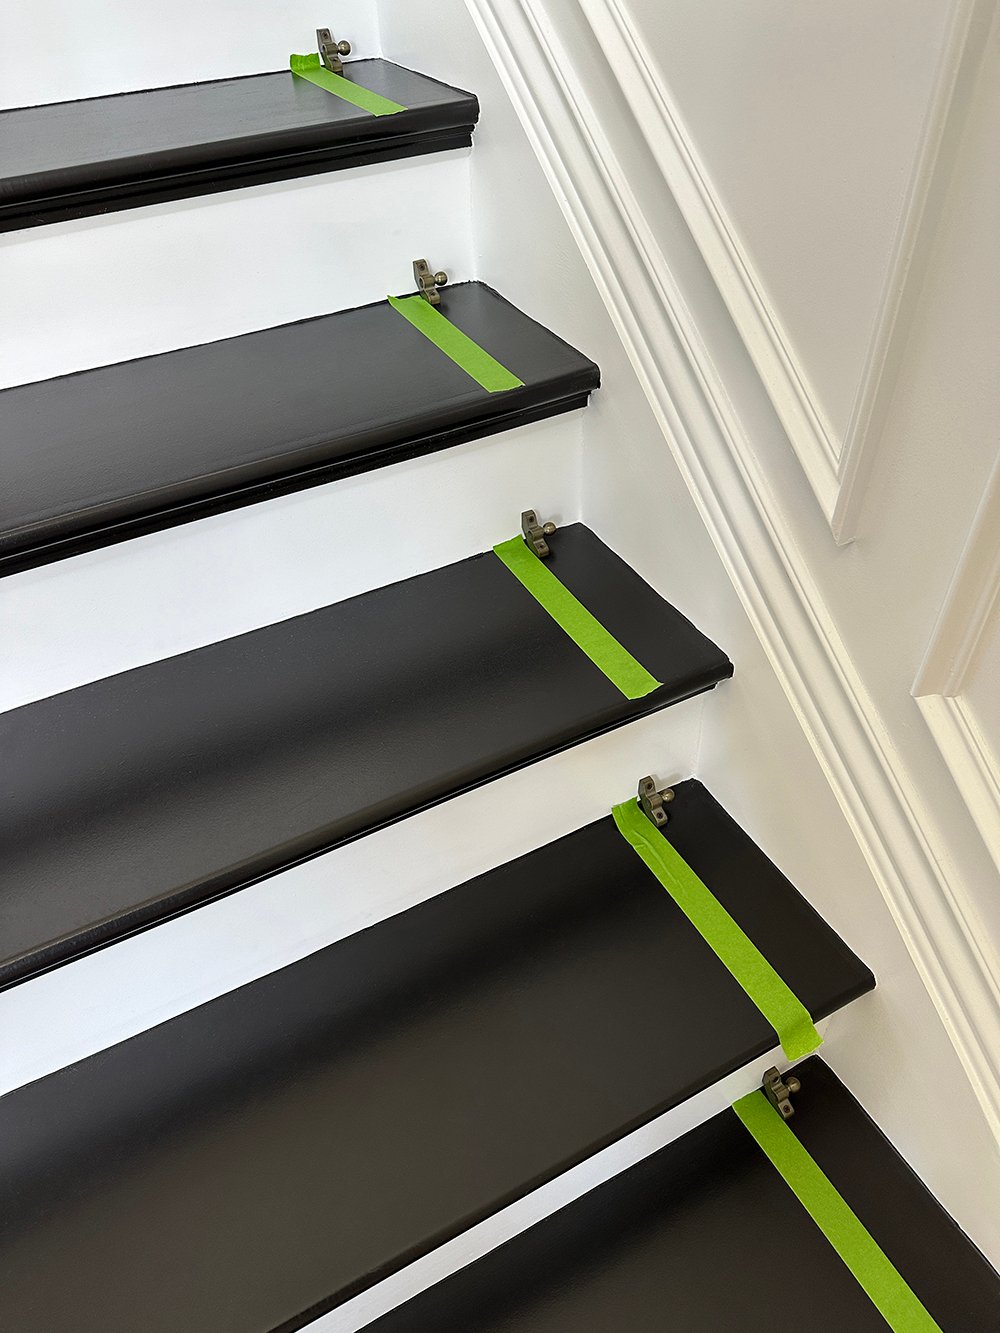
The stair runner should be centered. Measure the width of the stair tread, subtract the width of the hardware (the rod with the attached brackets), divide that by two, and that will give you the spacing on each side of the brackets. We ended up with 2 2/8″ on each side, so we cut a wooden jig to keep the measurement consistent from the wall to the edge of the bracket. We then installed a guide bracket on the base of the stairs, along with painters tape.
Cut and Install Rug Pads
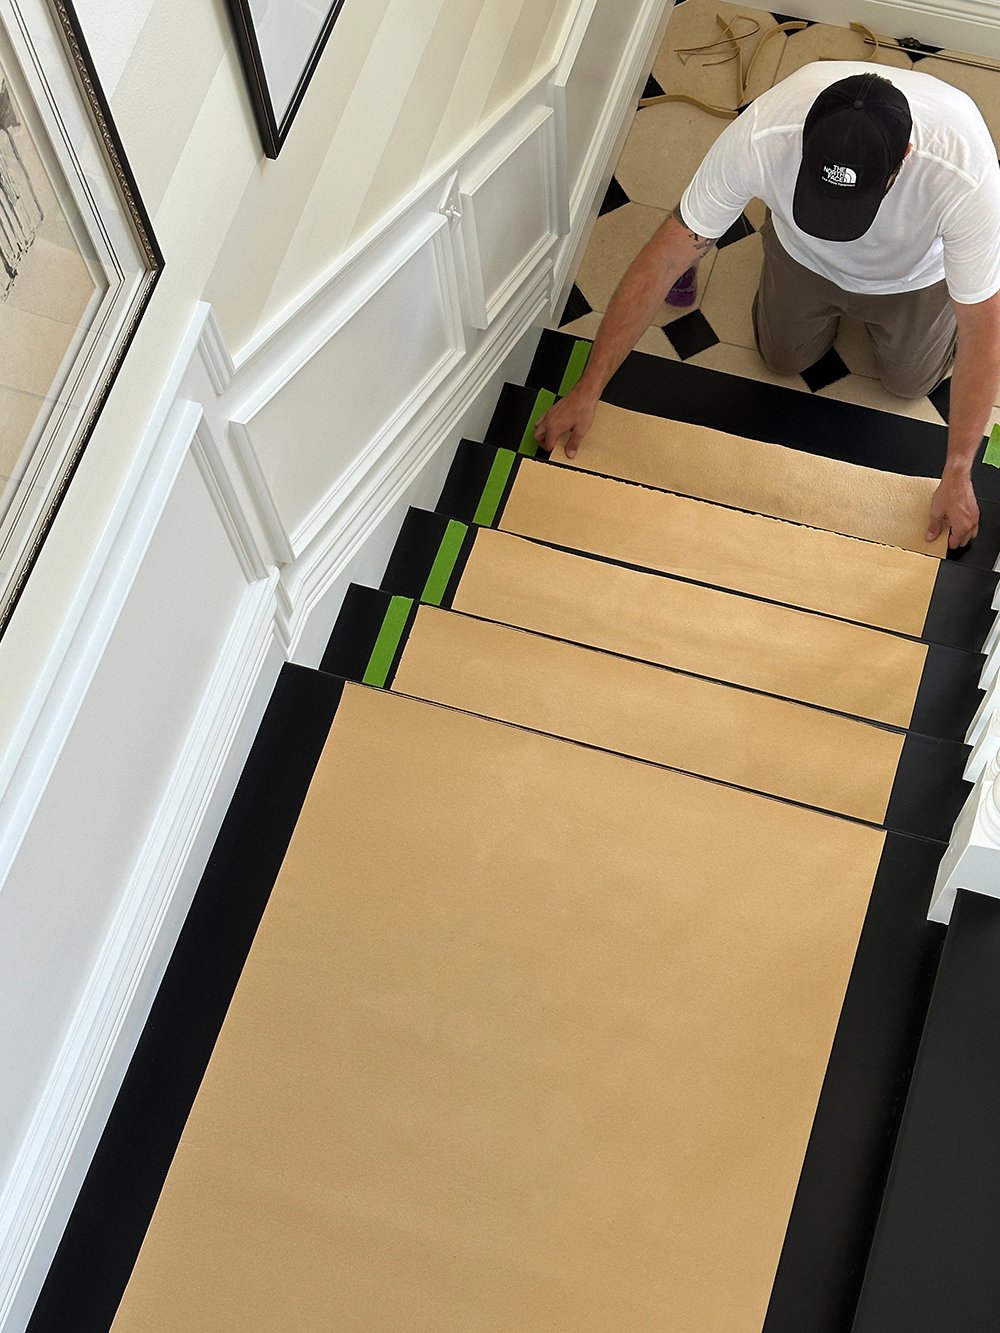
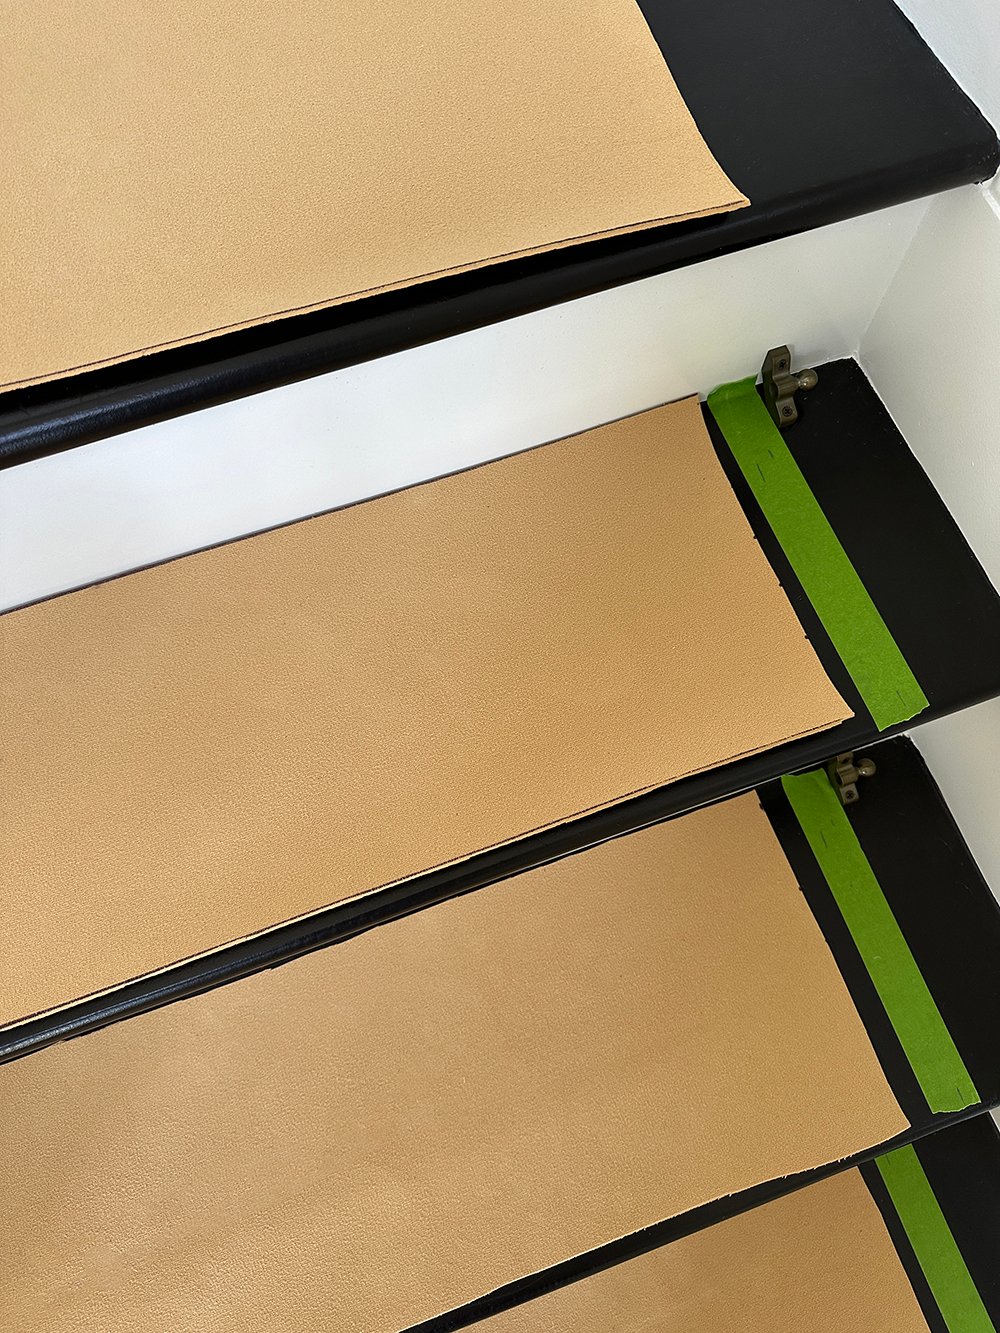
The next step is to cut a rug pad to fit each tread, leaving 1/4″ from the nose of the stair, and one inch from side to side. Since our rug pads are non slip and have extra grip, we only taped the front edge of them to hold each in place… rather than the entire perimeter. We didn’t have rug tape, so we just used whatever heavy duty option we had on hand.
Install the Runner
Unroll & Align

Roll out the runner and align it with the side you’ve measured, marked, and installed the hardware. You’re ready to begin installation…
Staple Down the Landing
Using the staple gun, set a staple in the corner of the landing, working your way around the perimeter, ensuring it is square. Apply even pressure and staple the border, securing it.
Staple the Runner Down the Stairs
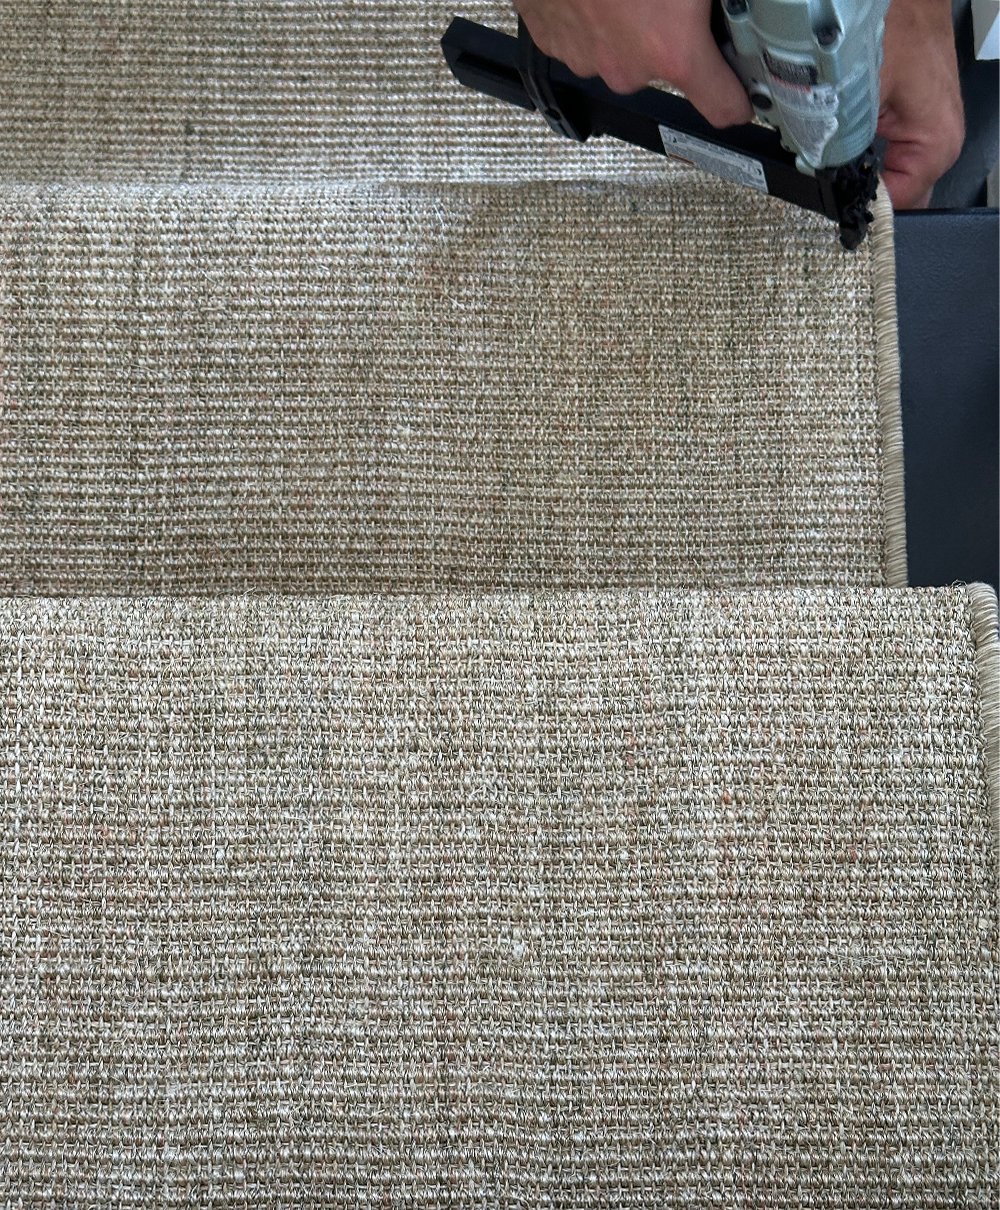
We began with a staple in the center of each riser (just under the stair nose)… to ensure the runner stayed perfectly aligned, working from the inside outward to the bound edges. Staple one tread and one riser at a time, securing the bordered edge last. A bolster chisel makes pulling it tight and creating straight crisp lines much easier. We inserted staples every three inches- indicated in blue below…

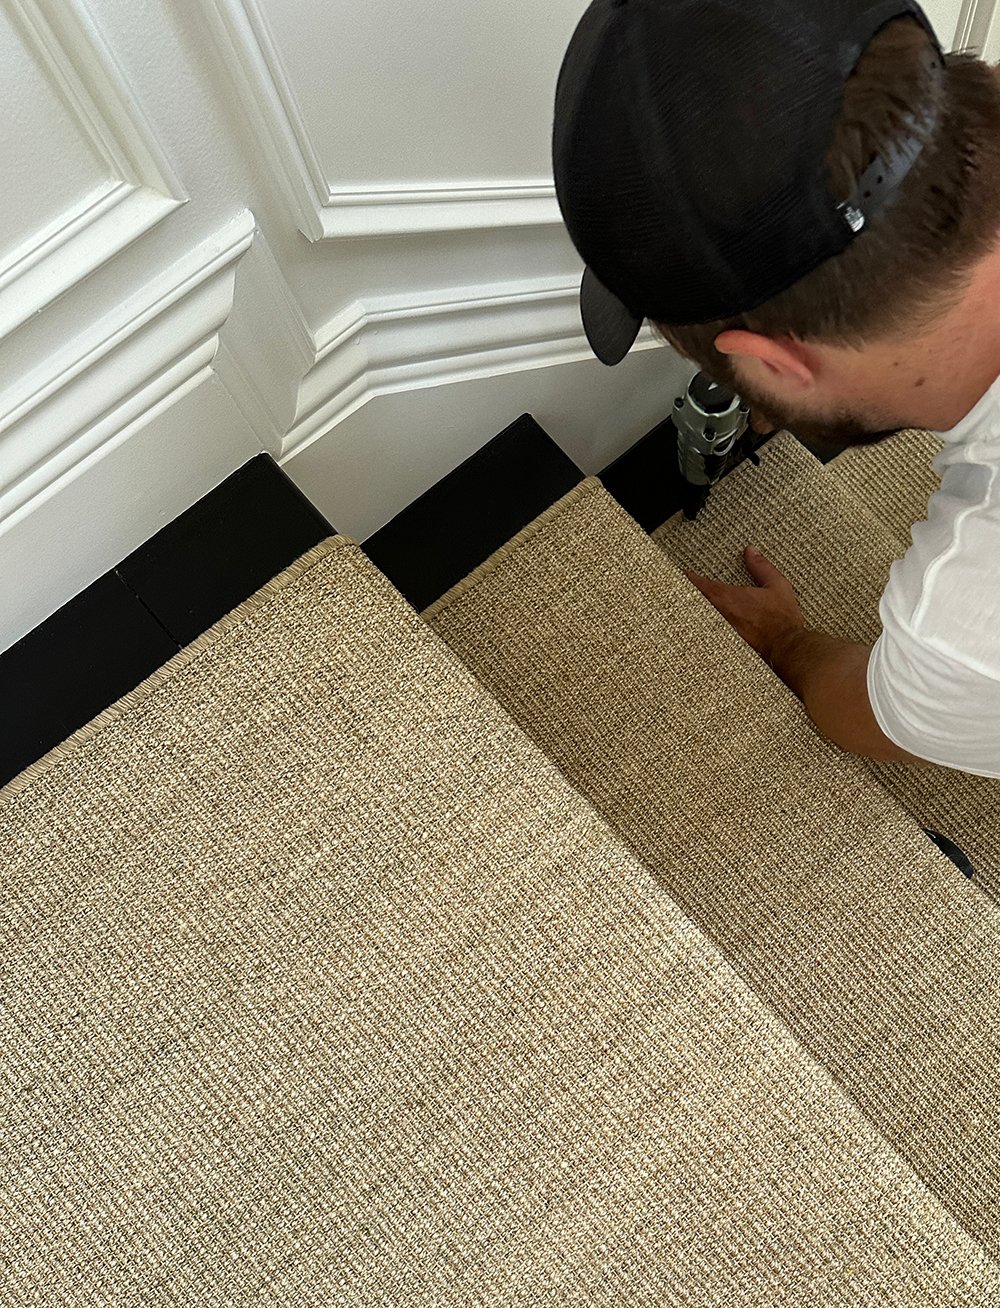
Continue stapling on the bottom of the bullnose tread, pulling each side of the runner tightly. It becomes a job of patience, alignment, and repetition at this point- smoothing as you go. Repeat the process until you reach the end of the staircase.
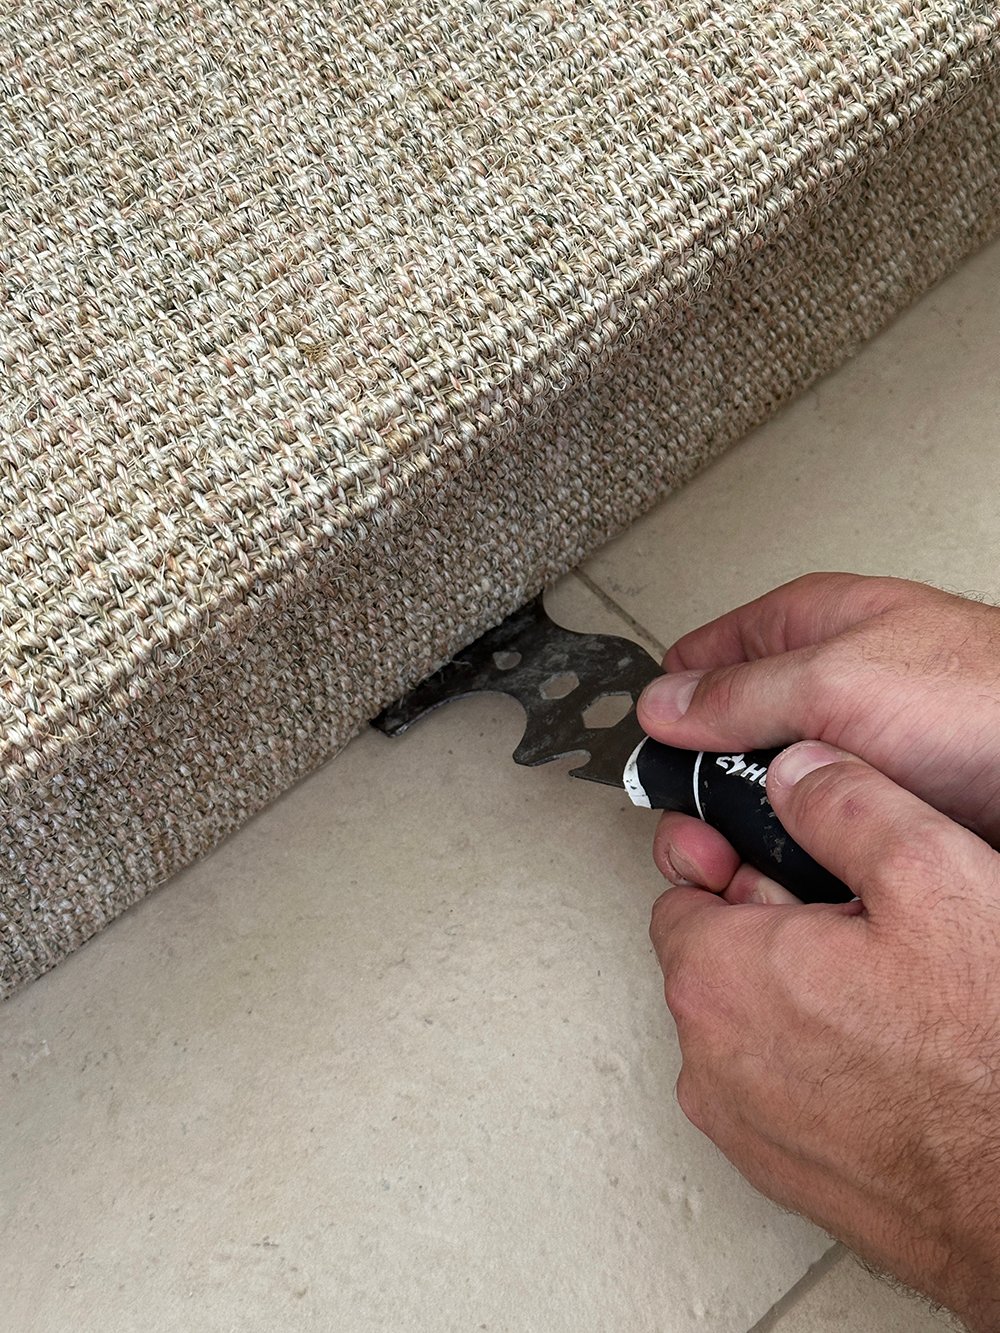
Trim & Finish the Ending Edge
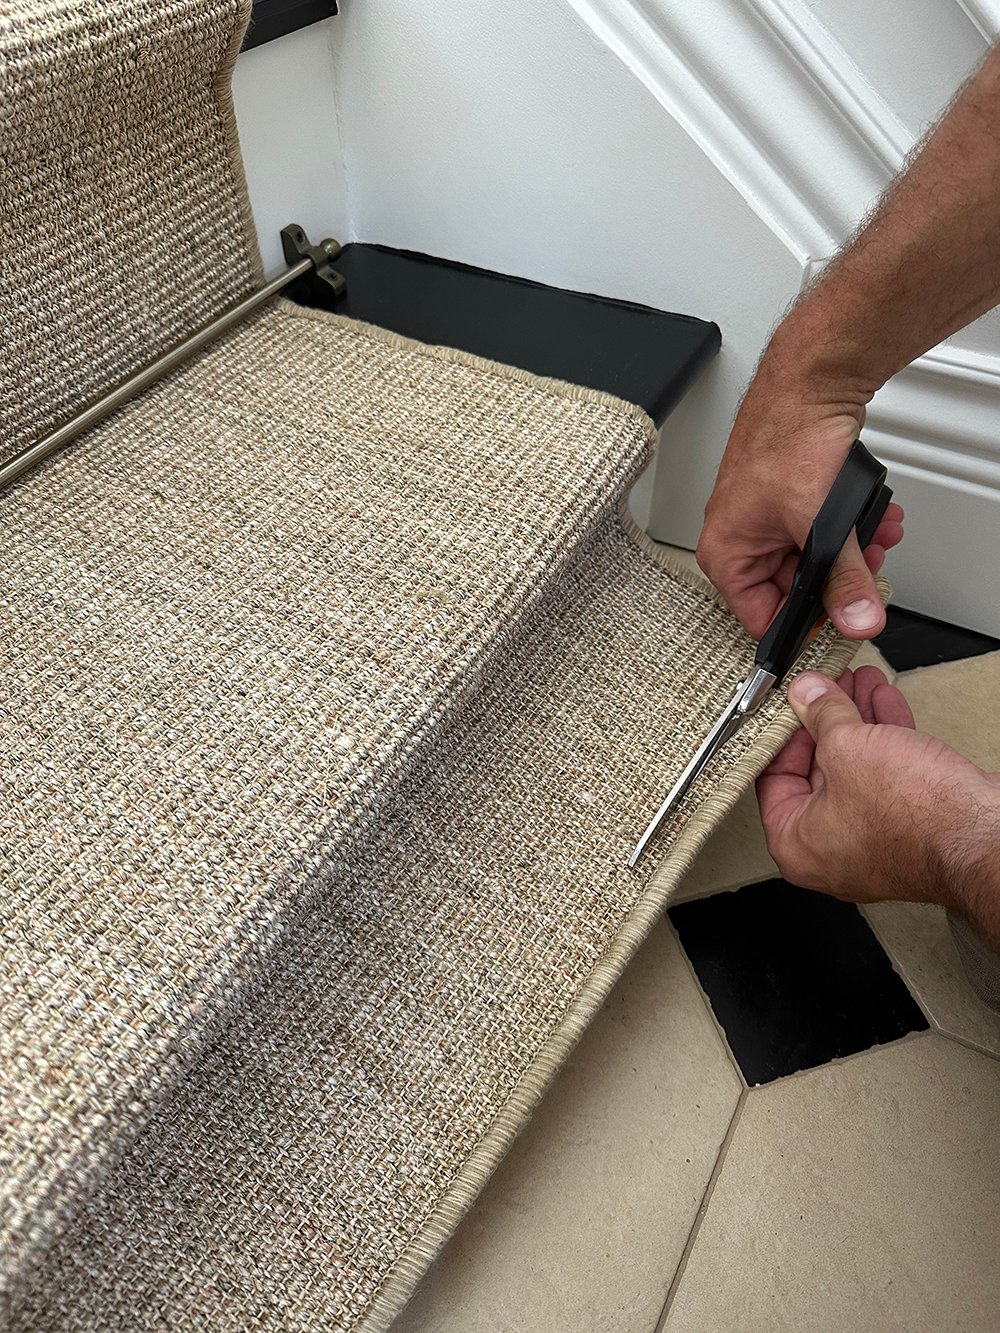
Once you’re on the last stair, take the end of the runner and measure carefully. Cutting 1/4″ longer than the floor, use industrial scissors or a utility knife to make a clean, straight cut. Conceal the cut edge of the runner by tucking it tightly into the tile, floor, or millwork, and securing it with a row of staples. A bolster chisel or sharp edge makes this much easier!
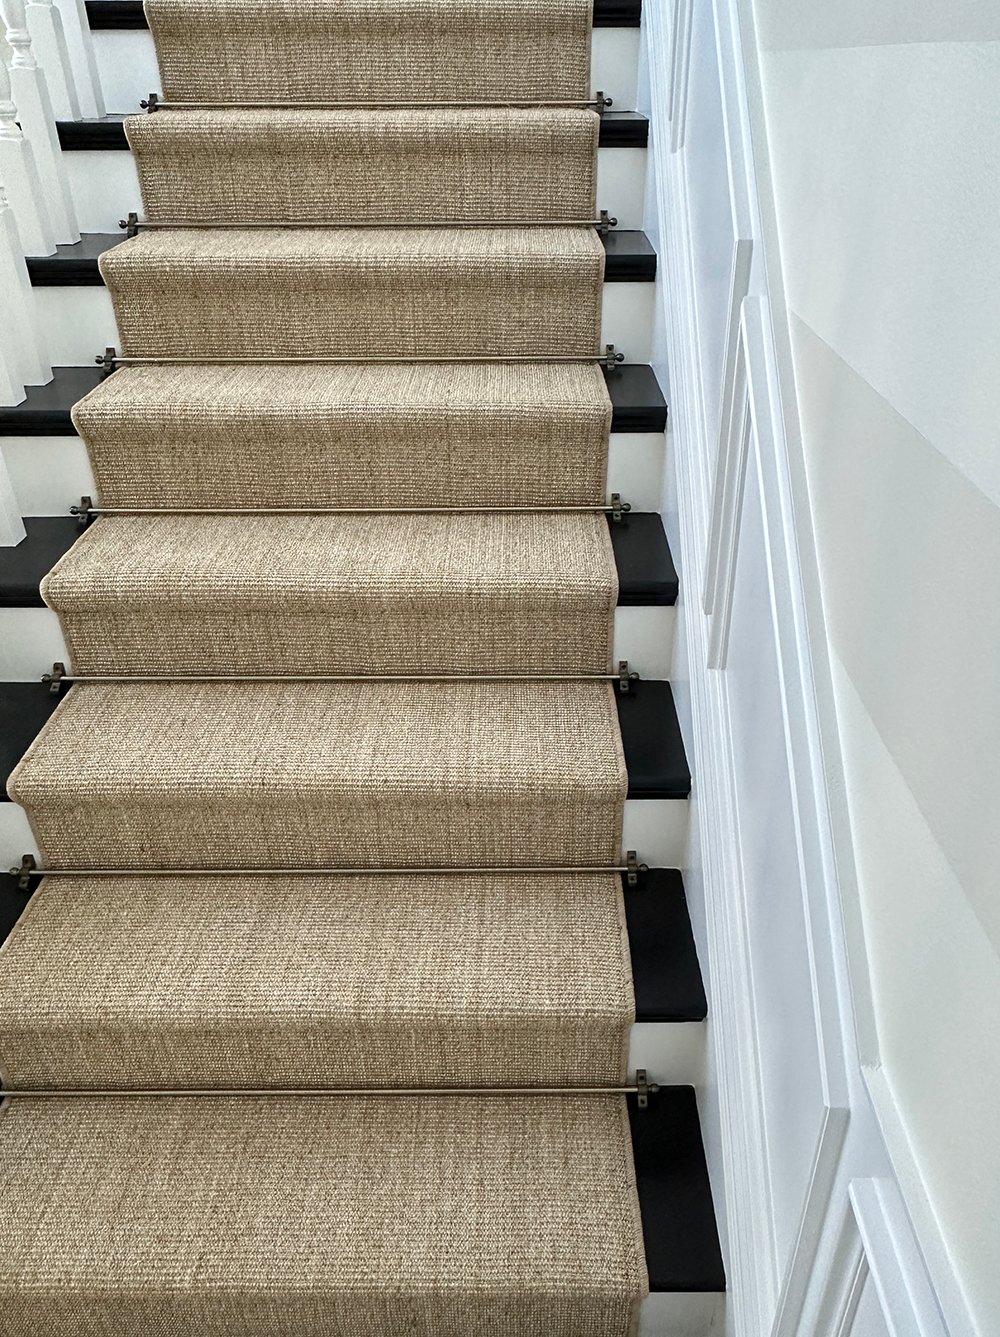
Install the Stair Rods
As you can tell by my images, we installed the majority of the stair rods as we worked, but if you’ve yet to screw in the opposing bracket and install the rod… now is the time. The stair hardware is really the finishing decorative touch.
This is the end result… I love how classic it looks, not to mention it’s much safer having the runner installed. No more slipping and sliding around!
FAQ
Make sure you’re pulling evenly from the center outward, stapling as you go. Secure the back of the tread as you move downward. The side guides are also really helpful! If you start to get crooked, pull the staples, and rework that stair. It’s well worth the effort to catch it early on!
Often times, I see runners that look too narrow for the staircase. Make sure the runner is at a minimum two thirds the width of the tread length… though I prefer a bit wider.
It’s totally dependent on the material, but I would vacuum it regularly and spot clean as needed. Of course, I also dust our stairs often… especially since we have pets.
Always make sure the trimmed edge dead-ends into a stair nose or the flooring. It should fit very tight and can be tucked in for a seamless look. Staple it well to secure!
I’m partial to durable and natural materials: jute, sisal, or wool.
Classic Runner Options
Click directly on each rug below to be redirected.

If you’re searching for different options, all of these would be durable, while giving a classic and clean look. I used the Florence sisal rug, and ordered two custom runner sizes. While sisal and jute are always a popular choice, wool also makes a great runner material. There are lots of good options to choose from!
Let me know if you have any staircase runner or installation questions in the comment section below! I’m always happy to help. We’re moving right along with this space and I’m looking forward to wrapping it up for the big room reveal. Thanks so much for following along, friends!