How We Choose : Grout for Tile
 This is something I’ve had to do often so far in 2018… between my own projects (the kitchen & laundry room), as well as client projects, grout selection has been on my mind lately because I’ve been dealing with a ton of tile. I thought a ‘How We Choose‘ post covering the grout selection process might be helpful for you as well. Click through for tips on choosing the appropriate grout for your tile and space!
 I’ll start by saying, this post is NOT sponsored… I just use Mapei grout because it works well for my tile selection and it’s easy for me to access at our local tile store. Of course every sample has their logo and color name on it, which means it was unavoidable to share my process and the color swatches without getting their logo in the shot. Anyway, I just thought I’d give a disclaimer. This process works for any brand of grout- whatever your preference may be!
T H I N K A B O U T . . .
Let’s dive right in, shall we? I always kick off these posts with things to consider / questions to ask yourself before you start shopping.
Questions to ask yourself prior to purchasing grout:
- What type of tile do you have?
- What is the aesthetic you’re going for (high contrast / emphasized pattern OR subtle / monochromatic)?
- What is the spacing / distant between each tile (this influences the product you need- sanded or unsanded)?
- Does this grout require sealing?
- What does the application process look like?
- How will the color wear? If it’s a lighter color, think about dirt, staining, etc.
- Where is the grout being installed (wall, floor, backsplash, bathtub surround, etc)?
- What does the cleaning process look like?
- How much will you need?
M Y D E S I G N P R O C E S S
My design process is pretty simple. I take the same steps every time I choose grout. I’ll outline it below…
- #1: Determine the Spacing // I always start by determining the spacing I’d like my tiles set at because this influences the quantity I’ll need. Obviously mosaics are set and can’t be changed if they have a mesh backing, but when working with single tile pieces or field tile, the decision is yours!
- #2: Calculate Quantity // I then calculate how much grout I’ll need (there’s a cheat sheet later in the post, pin that!).
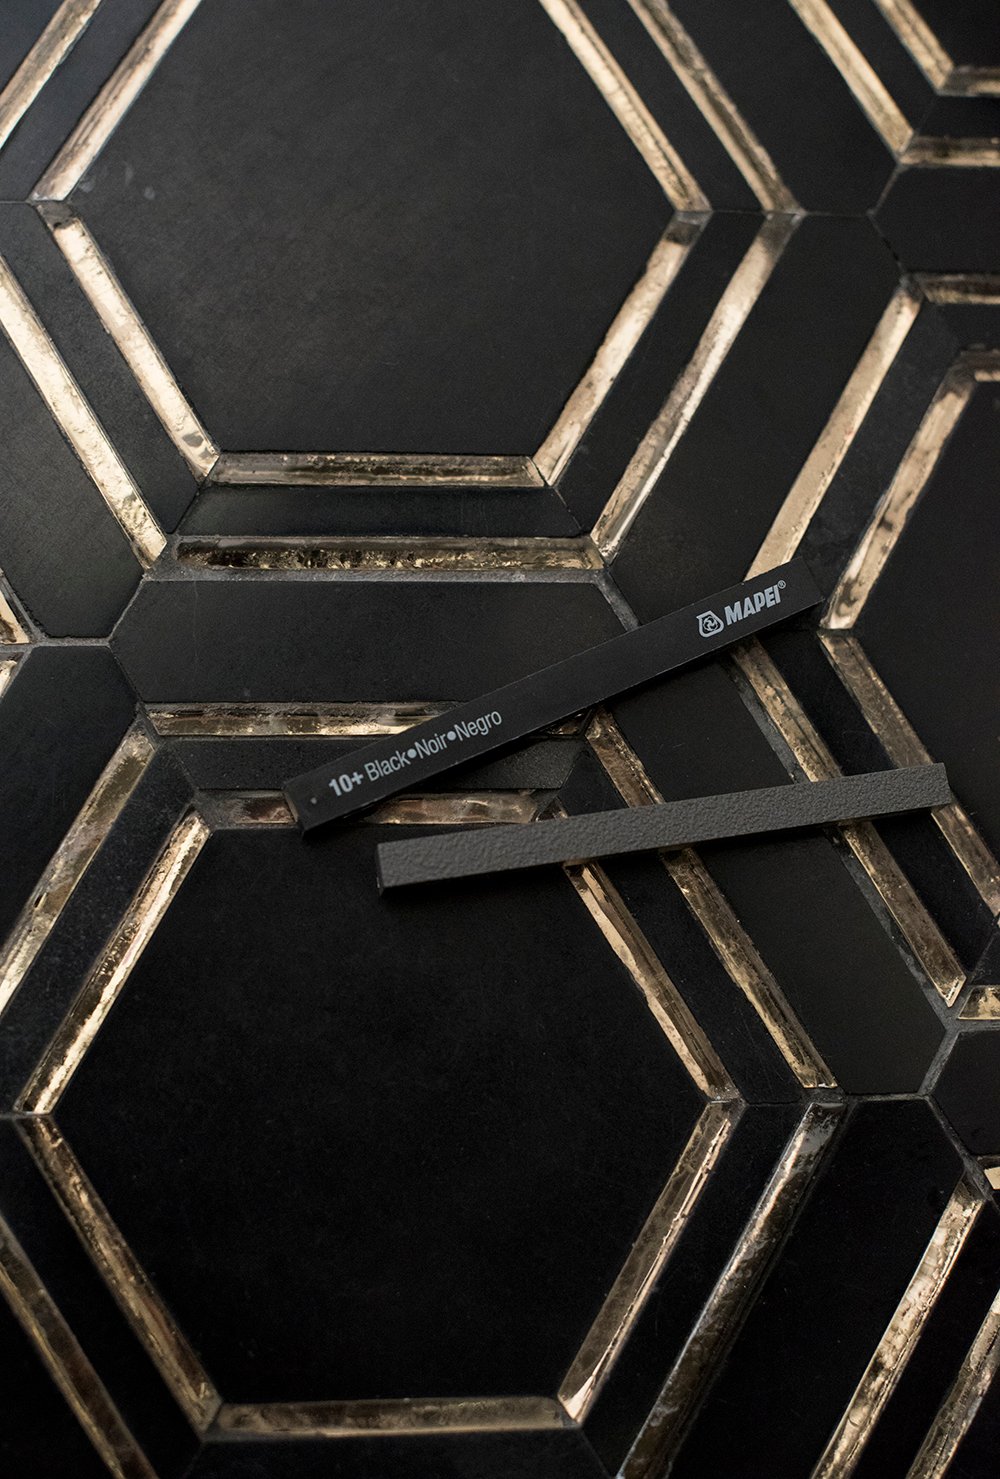
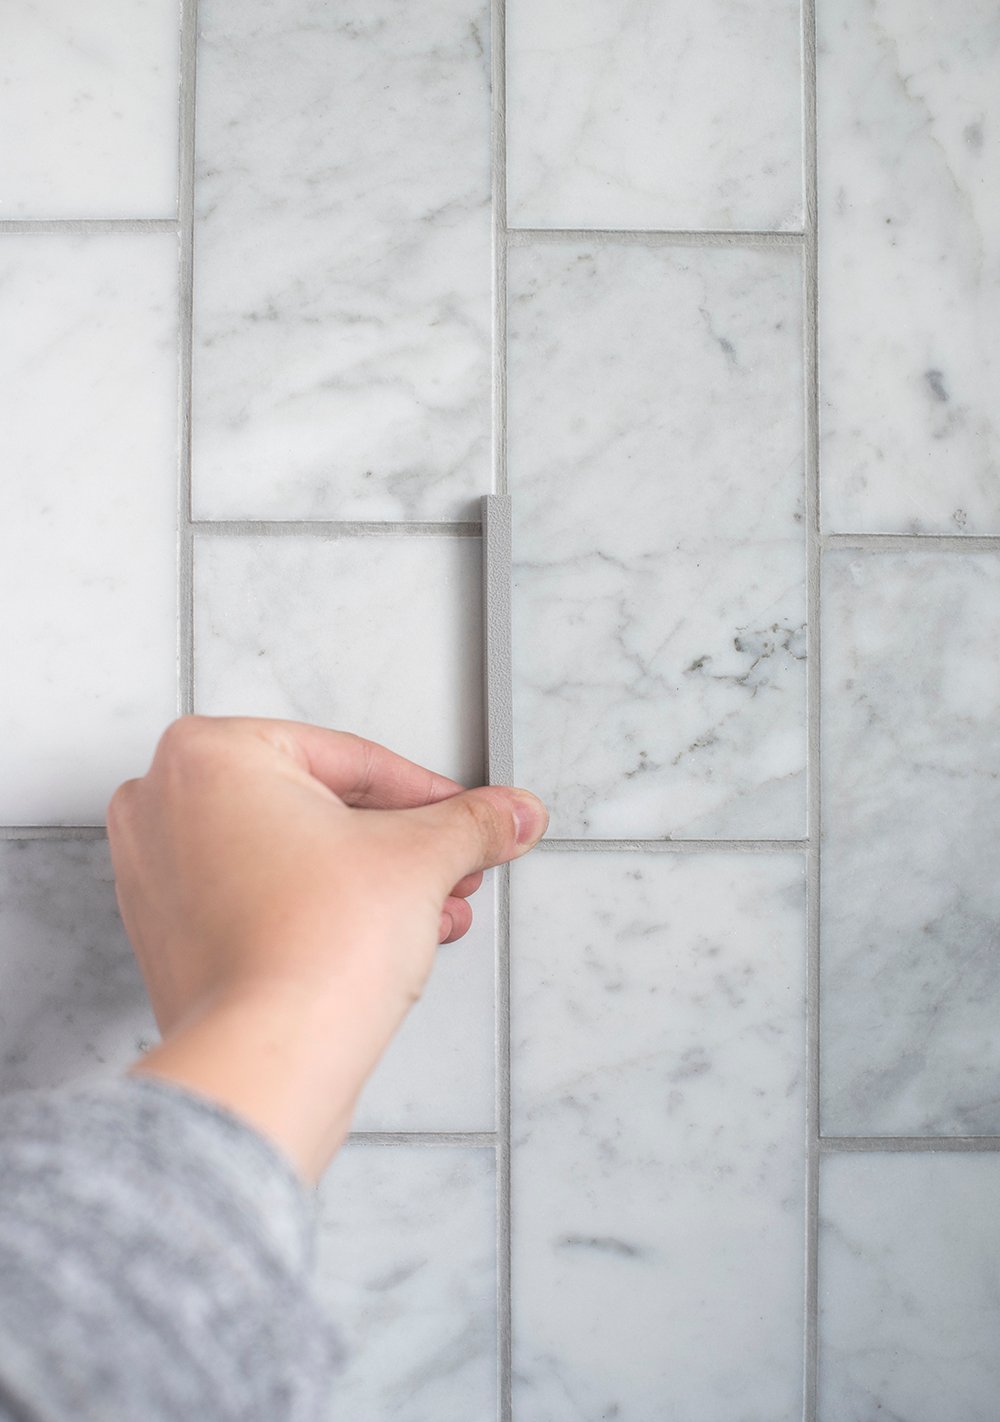
- #3: Determine Aesthetic // Next, I determine what aesthetic I’m shooting for. Usually I decide between one of two: graphic OR monochromatic. For graphic, think light tile and dark grout… it really emphasizes the pattern and draws attention to the grout line. For monochromatic, think subtle…. I try to match the grout color pretty close to the tile itself, or something within the same family for a softer look (depicted in the image below).
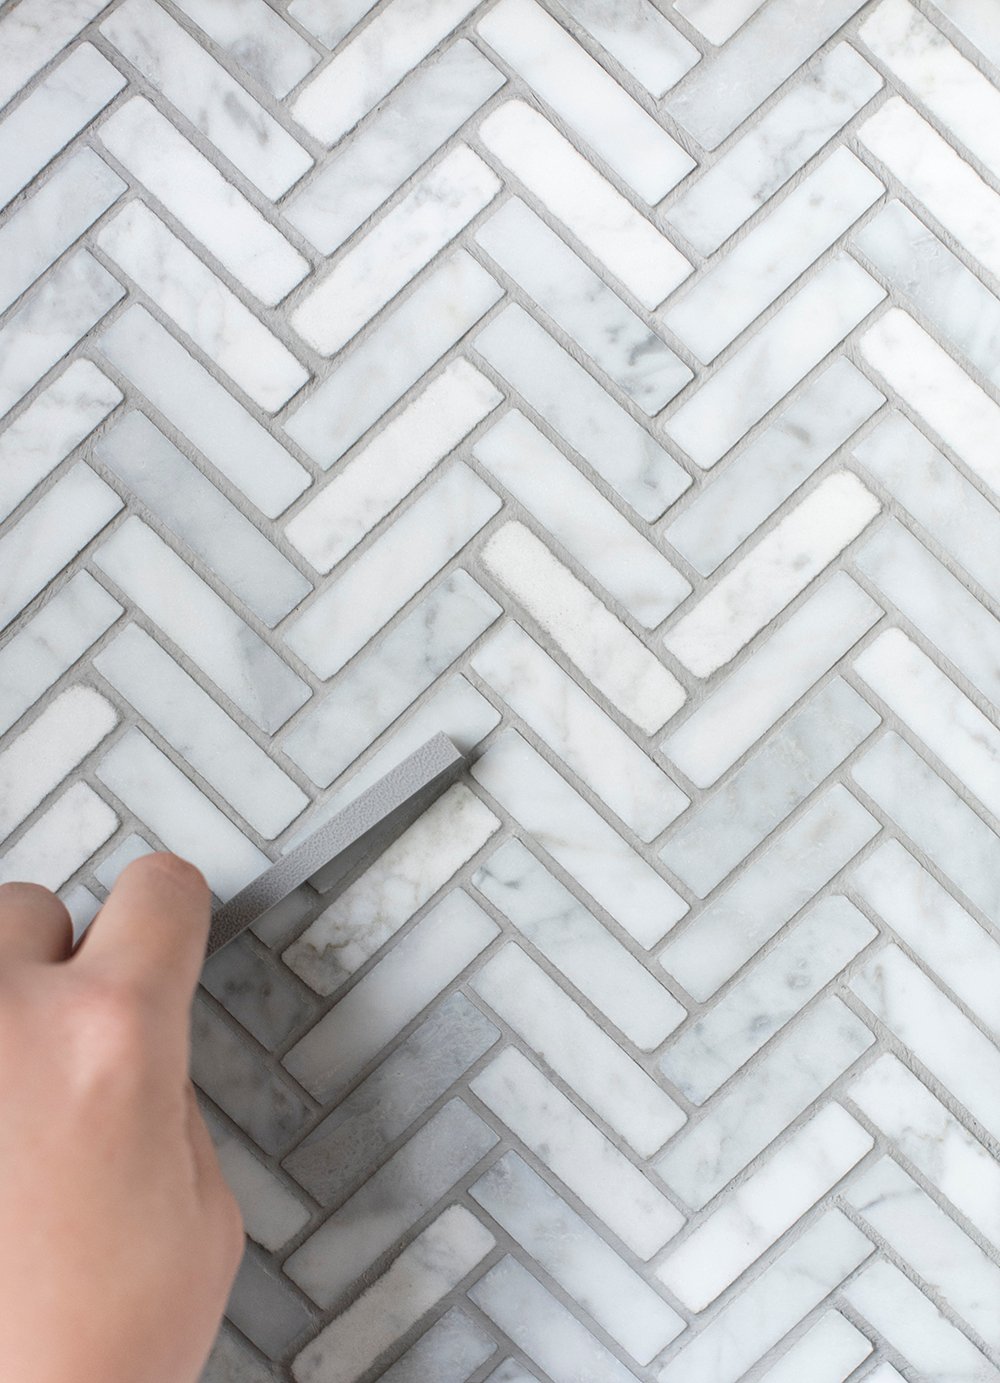
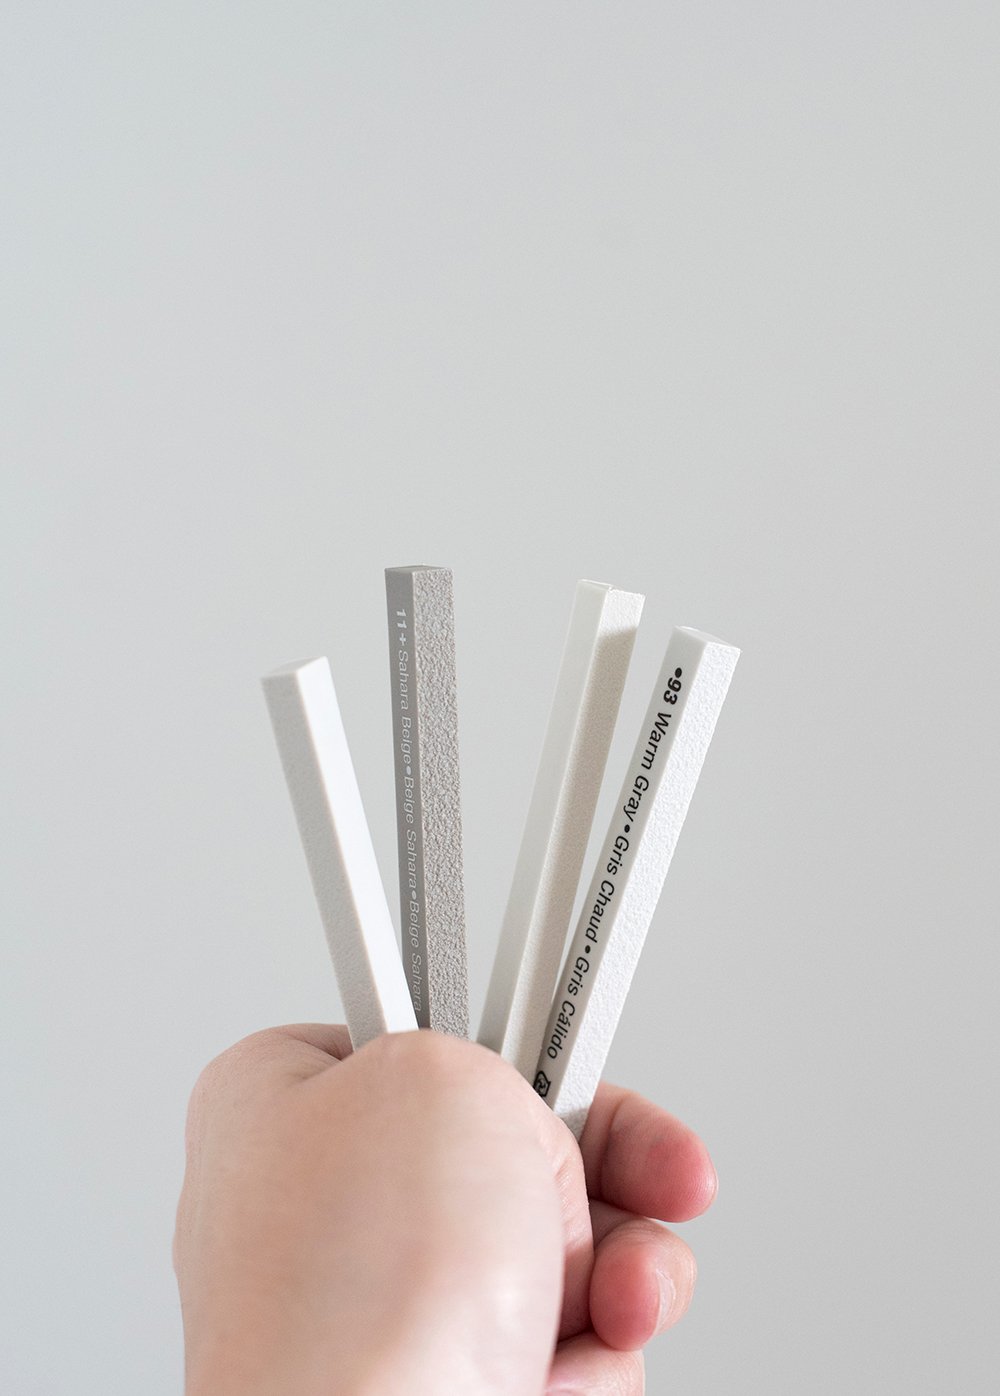
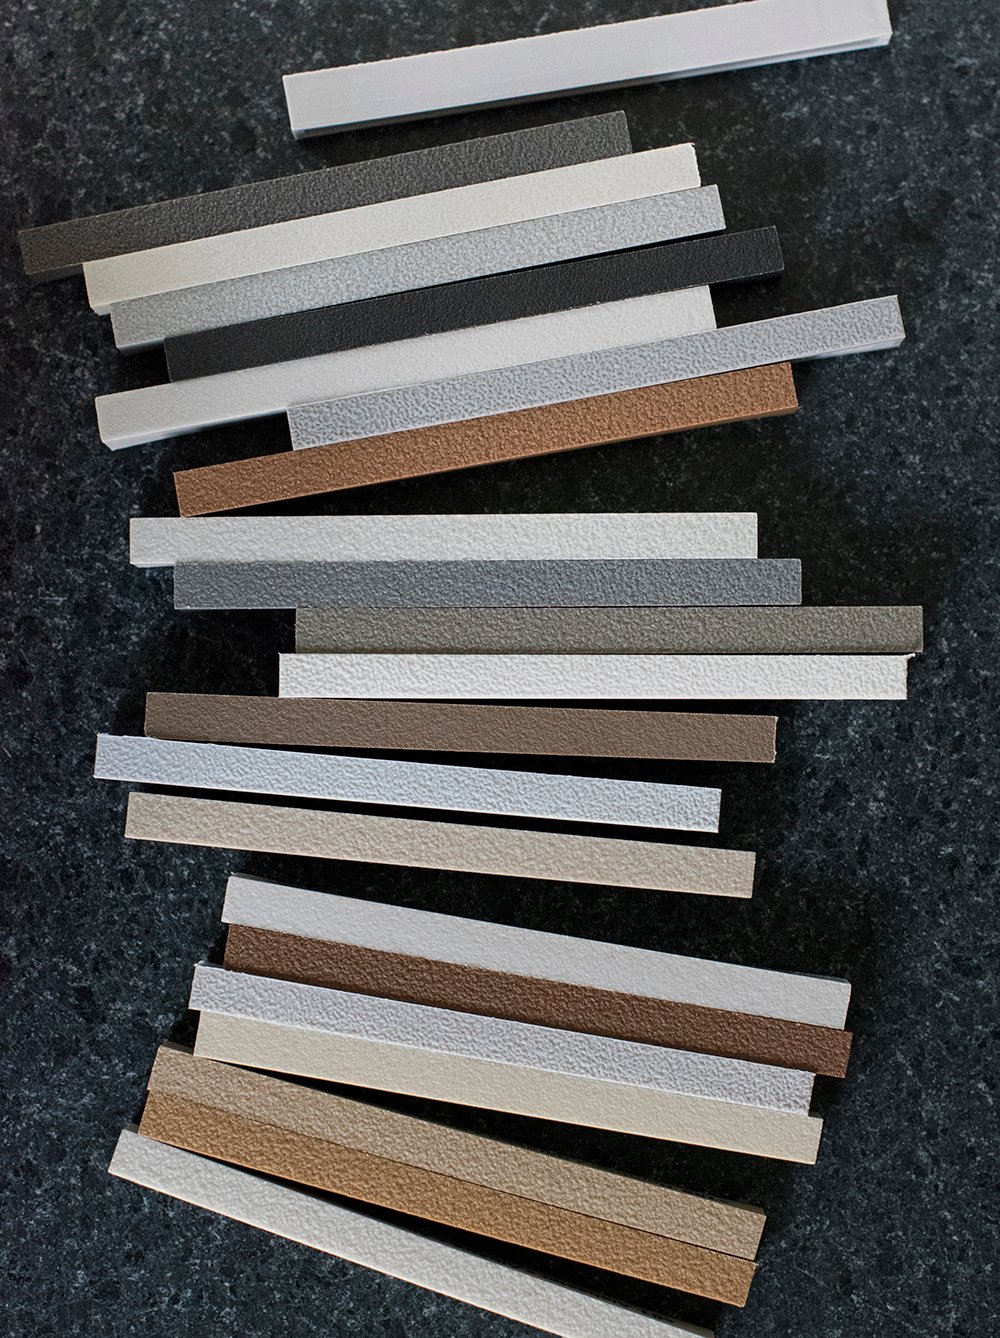
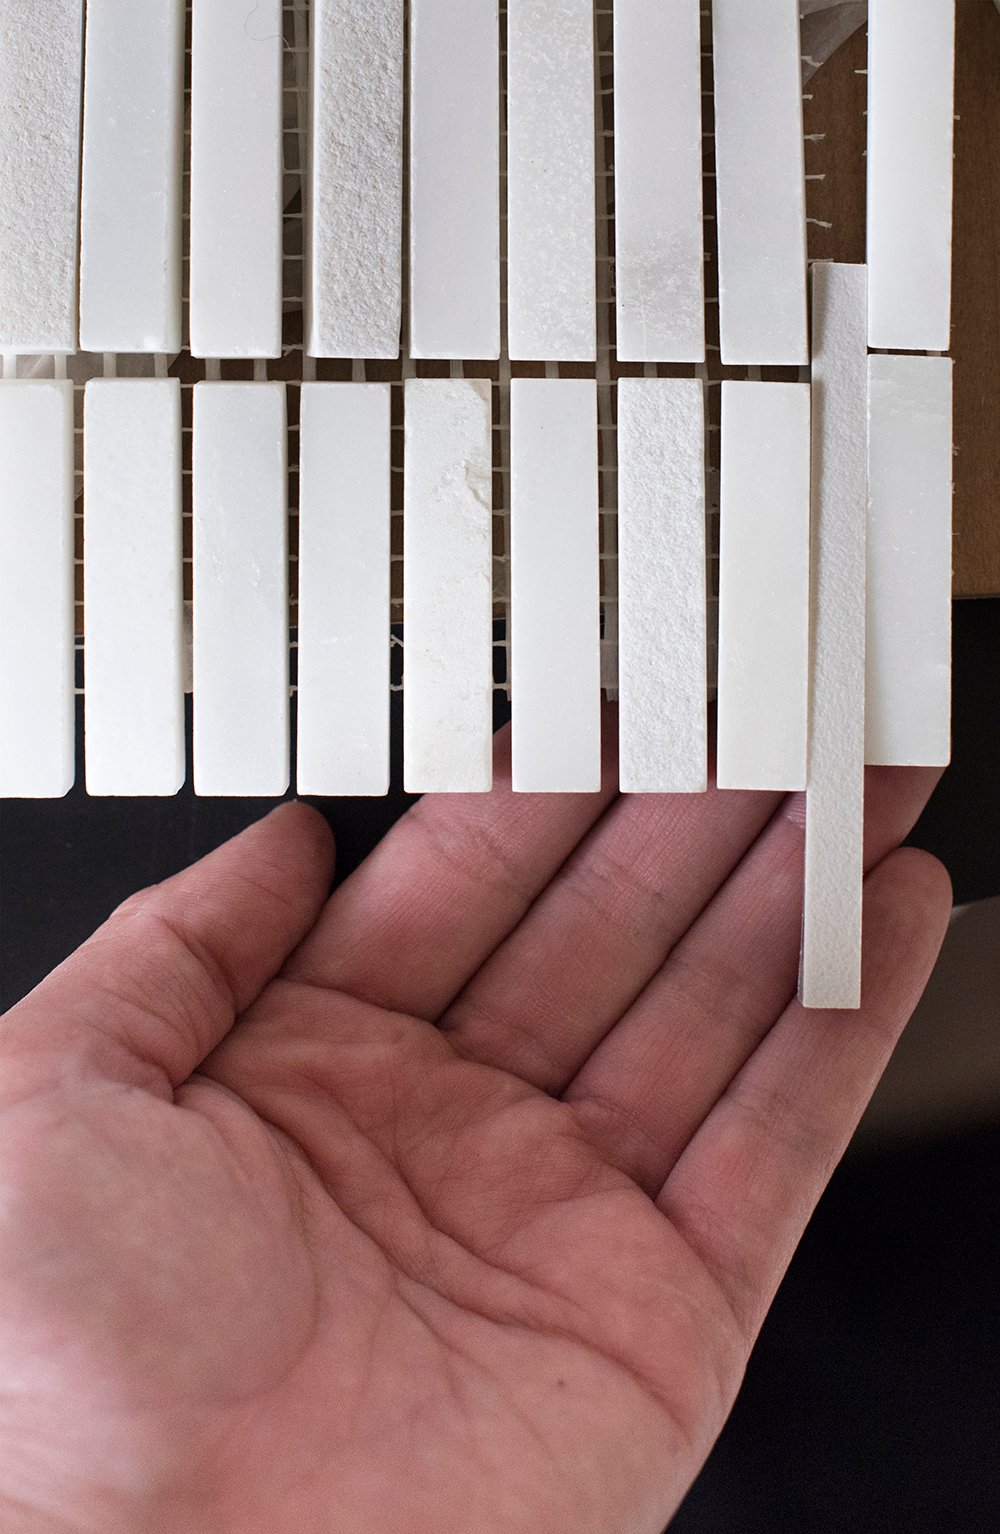
- #4: Choose a Color // I’ll grab a bunch of samples and begin narrowing down them down. Usually I’ll go from 5 to 2 to 1 (the winner). Always, always, ALWAYS look at the grout in the room alongside the tile when selecting the color. You don’t need to take it outside to check it under “natural” light because it will never leave the space it lives in. I also like to sandwich the grout between a couple tiles (see the image below). I’ll even ruin a mosaic sample by picking it apart to squeeze in the grout swatch because it’s important to see the color in context… sandwiched between the tile.
- #5: Pick the Product // Finding the appropriate product is super important. I then choose between sanded and non-sanded grout, and determine if it needs to be sealed… more on those terms later in the post. If I need any additional items (like sealant), I’ll grab it at the same time as the grout purchase.
S A N D E D v s . U N S A N D E D
Back to the sanded / unsanded discussion… there is a time and place for each, and it is determined by your tile. I’ll list the main differences below:
- Sanded grout is thicker, more textural, and more durable than unsanded grout.
- Sanded grout can sometimes damage smooth tiles, so it should be applied carefully. Since it has sand in the mix, it’s an abrasive product and can micro-scratch smooth or soft tile. It’s just something to be aware of, but usually goes unnoticed if applied properly.
- The main difference is the grout line spacing… sanded grout should NEVER be used for joints smaller than 1/8th of an inch. I prefer smaller grout lines, so most of the grout in my home is non-sanded.
When considering grout lines, keep in mind, the more (or wider) grout lines you have on a floor, the more traction it will provide. The same goes for wall tile grout lines… if you have wide grout lines in your shower, that might mean more cleaning or dirt could show more easily. Think of things like this when making your selection!
Q U A N T I T Y
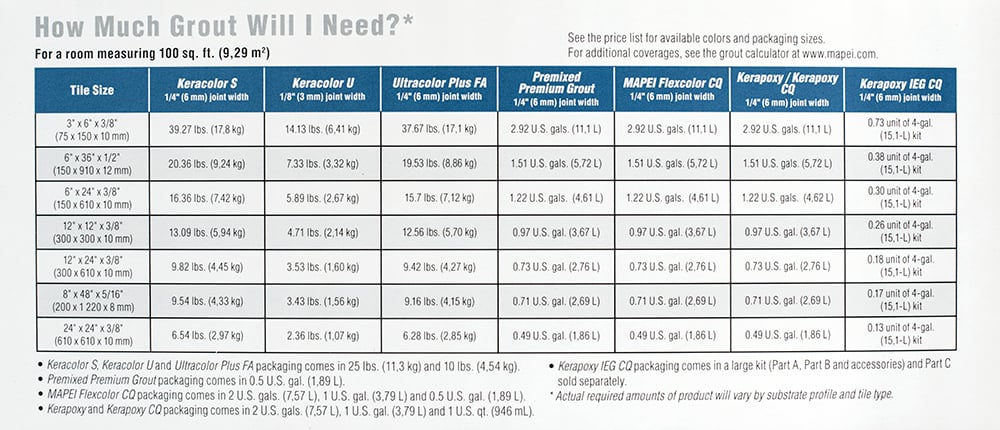
Now that you’ve determined your joint spacing, let’s talk about how much you’ll need. I like to use a cheat sheet because I hate math, so I photographed the one I use for you below.
 I always order overage, and sometimes even grab an extra bag- because the tile store I shop at allows returns for unused products. It’s definitely saved me a trip in the past.
F I N I S H I N G S T E P S
Once the tile is grouted, seal it (if needed). Not all grout needs sealed, so check the packaging to see if yours requires it.
 It’s also important to check the specs on the packaging for cleaning and post care. Certain cleaning products can break down grout lines, while others don’t clean very effectively. I usually test a small area in an inconspicuous spot before cleaning the entire thing… just in case.
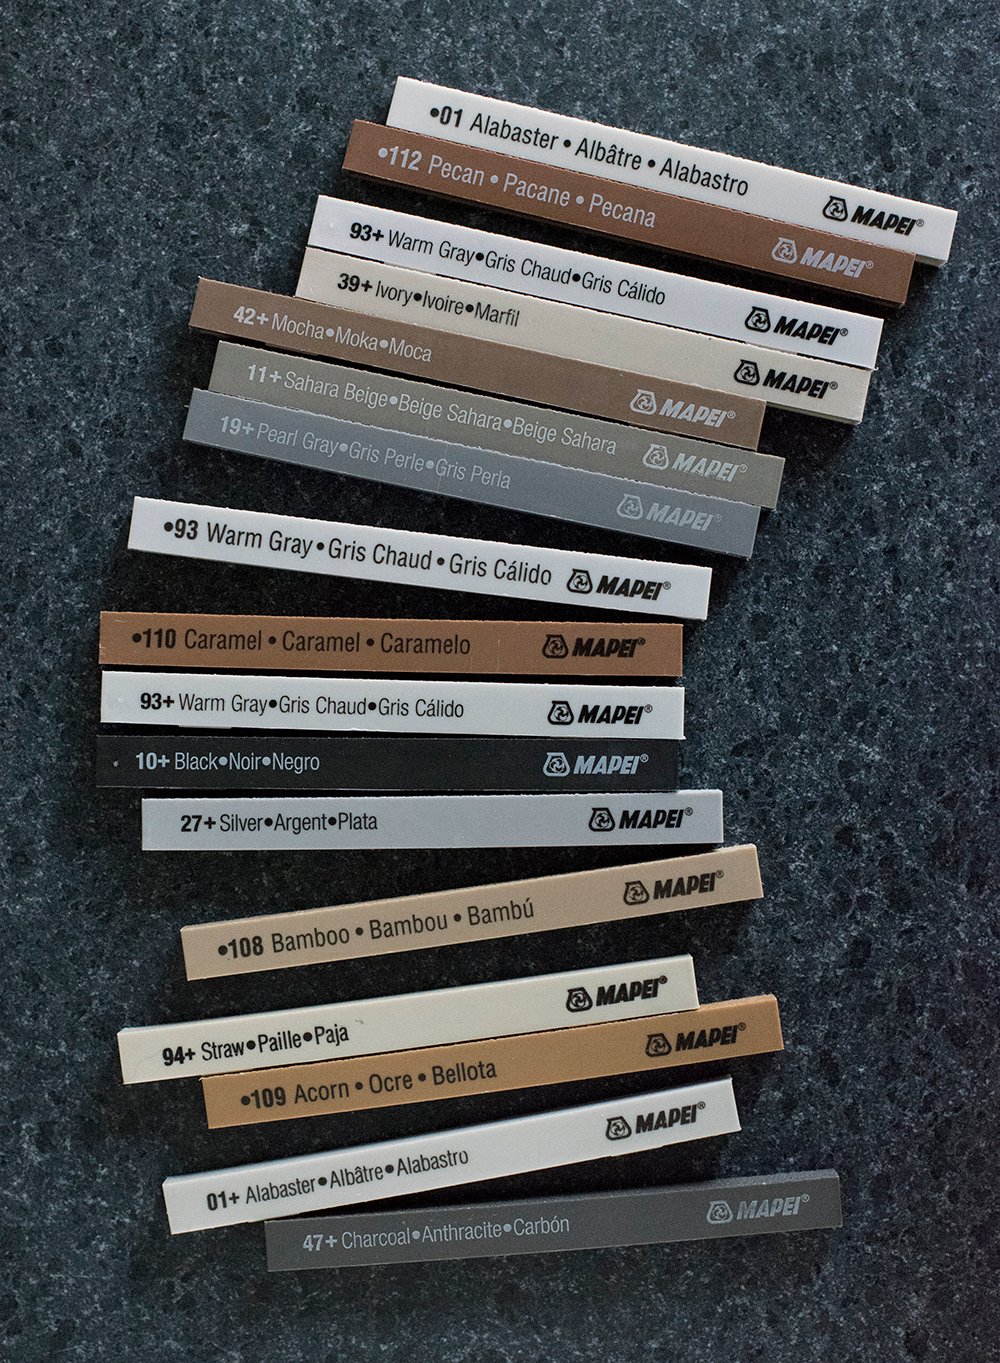
M Y G O – T O C O L O R S
This question comes up a lot… is there a “one size fits all” grout color? Unfortunately, no… but I do have favorites that work well with lots of tile. I’ll list my top 10 from the Mapei collection below…
- Timberwolf // 104
- Cobblestone // 103
- Pearl Gray // 19
- Alabaster // 01
- Ivory // 39
- Sahara // 11
- Warm Gray // 93
- Silver // 27
- Gray // 09
- Black // 10
 For more posts in the ‘How We Choose’ series, click here. Or you might also want to check out our how-to video on installing floor tile! As always, if you have any questions- leave me a comment below…
Cool guide, and it come right on time, as me and my girlfriend we’re moving in the summer, thanks!
So helpful, thank you very much ! I need to chose a grout in a few days and was looking for blog posts about it. I googled and googled, there are posts on how important the grout selection is etc etc but your Post is just what’s needed when one is looking for specifics. the Mapei chart is great. I was able to zero on 3 colors I would consider right away. Thank you for running such a helpful blog. Your post on mill work was also unique! I noticed that very often design blogs discuss topics but stop short of discussing nitty gritty details that homeowners need. Again, much appreciated!
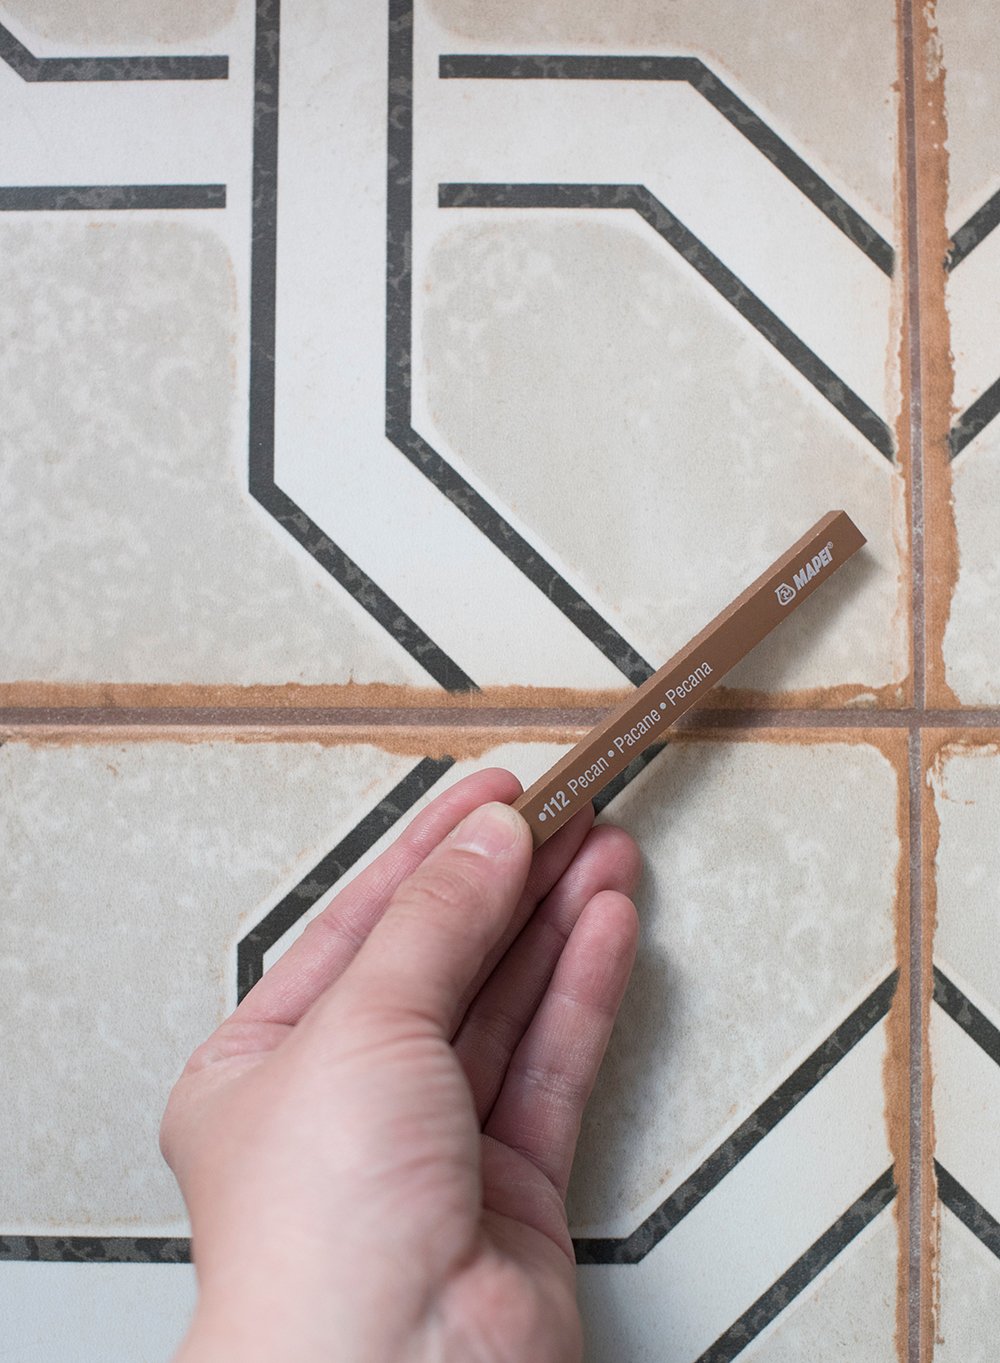
Great tips! How did you decide on pecan for the kitchen/laundry? I LOVE that choice, but would have never thought to go that route. Did you have another contender?
Can you share the name of the small white rectangular tiles?? My husband and I will be redoing our bathroom at the end of this year so I’m on the hunt for tile options. :) Thanks!
We used Mapei Pearl Gray in our recent bathtub/shower renovation. It turned out to be a little darker/more contrast than I intended. But I really like it. We used 1/16 spacers so had to use unsanded grout. I wanted dark because I think it’s easier to keep clean. I wish I knew there were sample color swatches.
And…I love the grout color you used in your kitchen. I might have used black. You’ve got a great design eye!
Thanks, Christiane! It’s looking so good! I think the darker / higher contrast will be perfect- and most definitely easier to clean. xox
Wha color grout did you choose for your shower tile!?
I’m sorry Lauren! I can’t remember. For some reason I’m great at remembering paint colors and can never remember things like grout or stain finishes. Argh.
Could you tell me what grout color was used with the carrara herringbone mosaic tile in the first image of this post or the brick carrara at the bottom of the post?…thinking its silver, but just not sure! I’m in the middle of a shower remodel and can’t figure out what grout color to choose. Tried frost & warm gray, but they just look like a dirty white color with my carrara mosiac tile. Looking for a soft silvery grey that will blend and not stand out too much. Any help would be greatly appreciated!
Yes, it’s silver Lara :) xo
Hello! Love your Style! Where did you get the herringbone on top – I love it! And the grout. I am having the worse luck with carrara.. so many can have slight rust or yellow stains here or there. yours is gorgeous consistently!
Thank you so much, Kelleen! You can find the tile here: https://bit.ly/2XuRNsK Are you using a sealant over your marble tile? I’d also recommend looking for a “white carrara” instead of a calcatta, if you’re not into the yellowish tones. Hope this helps :) xo
Thanks for the helpful tips! Where can one order the samples?
Hope it was helpful! I typically order samples from local tile stores… Arizona Tile, Contempo Tile, The Tile Shop, etc. You can go in the grab the samples too… they usually have them on display and you can take what you need for free to color match.
What color grout are you holding up with the subway tile? Redoing a shower and love that look. Thinking it’s silver but want to be sure.
Where can you get the grout sample swatches/sticks from?
You can grab those from any local tile shop that supplies grout! :) They’re free.
Love the marble vertical subway tiles. What color grout was used there?
Thank you! I believe it was Warm Gray by Mapei.
Cool. We have a similar tile (3″ x 9″) and we plan to use Cobblestone (our other 2 contenders were Warm Gray and Timberwolf). We felt like Cobblestone was the happy medium. Can’t wait to see how it turns out!
It sounds like it’s going to be beautiful, Ryan!
Hi Ryan,
How did the Cobblestone grout work out? Any regrets?
What type of Mapei grout do you use? Like most things, there are reviews of grout either not being consistent in color, or drying too fast, or hazing etc. Some suggest mixing with grout additive and not water. What do you do, or did I miss a step by step post? Thanks!
It really depends on the tile we’re using, that determines the grout: sanded, unsanded, premixed, etc. There are lots of options! We haven’t had any issues with any of their products and we’ve used a range of them. We’ve also never had to use grout additive. I think it’s more about the application, sealing your tile, prep, etc. Grout haze is totally normal and just takes some cleaning once it’s all said and done. I have a handful of tiling tutorials that link the products we use for each :)
Hi Sarah! I’m remodeling my bath, doing black marble look tile floor with dark grout, a new white tub and a tile tub surround. The surround tile is a s6x12 subtle marble-look polished tile. The salesperson recommended a bright white grout. I am now thinking about the fact I color my hair myself (brown) and think I should go with darker grout or the white grout could get stained with hair color. I have not found any discussion on this. What would your expert thoughts be on the grout color I should go with? Appreciate your opinion!
Hi Sheila! That’s so exciting- your bath design sounds beautiful. I’m personally not a fan of bright white grout (for functionality purposes), as it can stain. I’d opt for a gray or try to color match your marble tile for a monochromatic look instead… that should hold up better to staining. I hope that’s helpful!
Hi Sarah! Loved this post. So informative! Do you recommend using the same grout for your floor and tub-shower tile surround? I’m using silver Mapei on my penny round floor. Going for a more monochromatic look. Tub-shower surround tile is a 3×12 silvery-blue polished ceramic which I’m running vertically but slightly staggered. I believe I found the design from another one of your great bathroom posts! Thanks in advance for any suggestions!
I’m so happy to hear that, Emily! I don’t think you have to use the same grout for different surfaces (floor vs walls). I’d choose whatever looks best with the tile, and if you’re using different tiles- even more reason to choose a unique color that complements it. Your bath sounds beautiful! :)
Hello, thanks for a great post. I’m in the midst of trying to select grout for marble herringbone mosiac tile and think the Silver is lovely as well as the Warm Gray in the last post. I’m going to use white subway tile around the shower, do you feel that Silver or Warm Gray would work well with those? I’m assuming it’s best to use the same color grout throughout the room?
Hi Stephanie! You really can’t go wrong with either when pairing it with white subway tile… it just depends on the overall look you’re going for. You don’t have to use the same grout color through- often times I’ll use a different color for the floor tile and wall tile. Hope that helps!
This is a fantastic article and I wish I found it before we installed tile for our new house. We picked a Mt. Royal Natural colored tile for the family room, kitchen, and hallways. I originally chose a lighter grout (Light Smoke #145) but now is looks too light. Most of the feedback I have received said to leave it alone but it really isn’t the look I’m going for. We close in a few weeks so I am tempted to have them go a shade or two darker. Lessons learned!
Thank you so much, Eileen! Your tile sounds beautiful. My vote is if you’re not happy with something at home- it can always be updated or changed. You might even try a grout pen? Have a good weekend!
What color is the grout on the rectangle marble tile?