Easy DIY- How to Update a Bust With Plaster
I’ve always loved decorating with sculptural pieces. Busts instantly add a classic, collected, or gallery feel to a room, and are the perfect object for styling on shelves, consoles, or built-ins. I picked up this extra large resin bust from an estate sale… and while the color wasn’t my favorite, I knew it could easily be changed. Rather than painting it, I thought plaster would add nice texture and make it look more high-end and original. If you’ve ever found a beautiful bust that just needed a little character, this easy DIY shows how I updated a bust with plaster. The transformation is simple, but it makes the piece feel much more timeless and authentic. Click through for my quick process and to see how my thrifted bust turned out.

This isn’t my first plaster project; the last one I shared on the blog was my DIY cordless plaster lamp. Remember that one? Every once in a while when I pull out my plaster, I go on a rampage hunting for things around the house that could benefit from the finish. Here’s how to do it…
Supplies
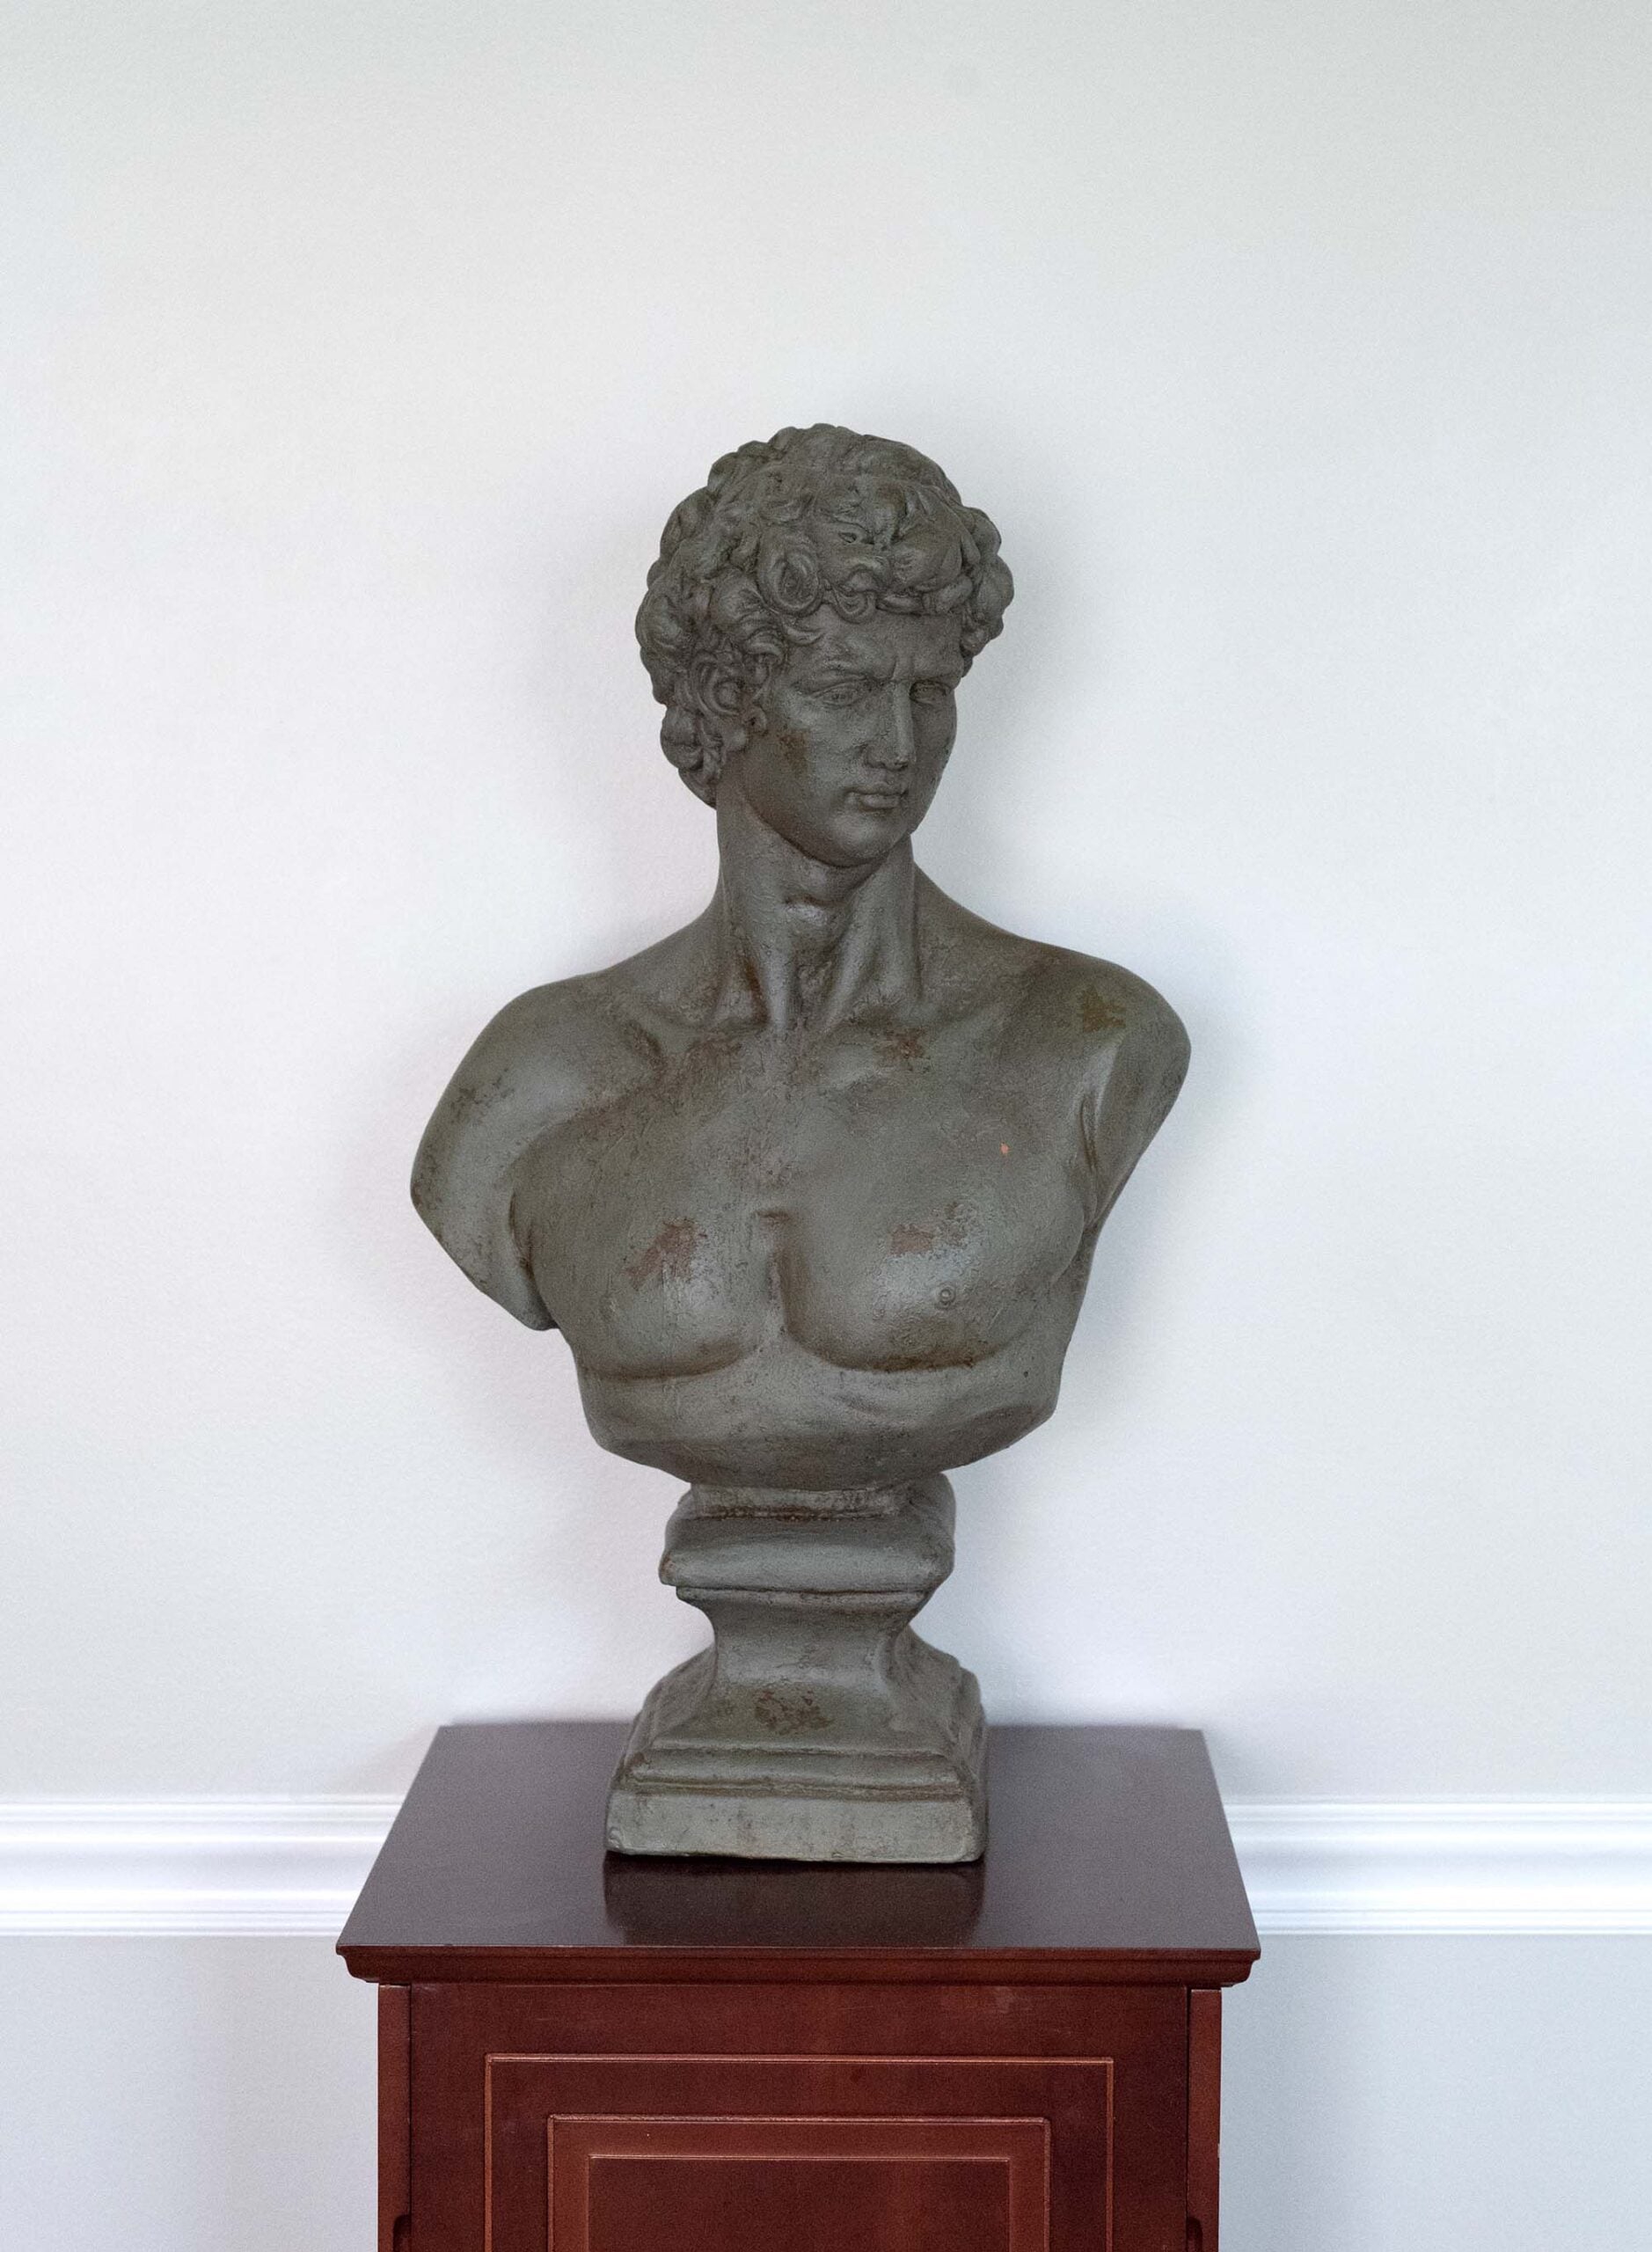
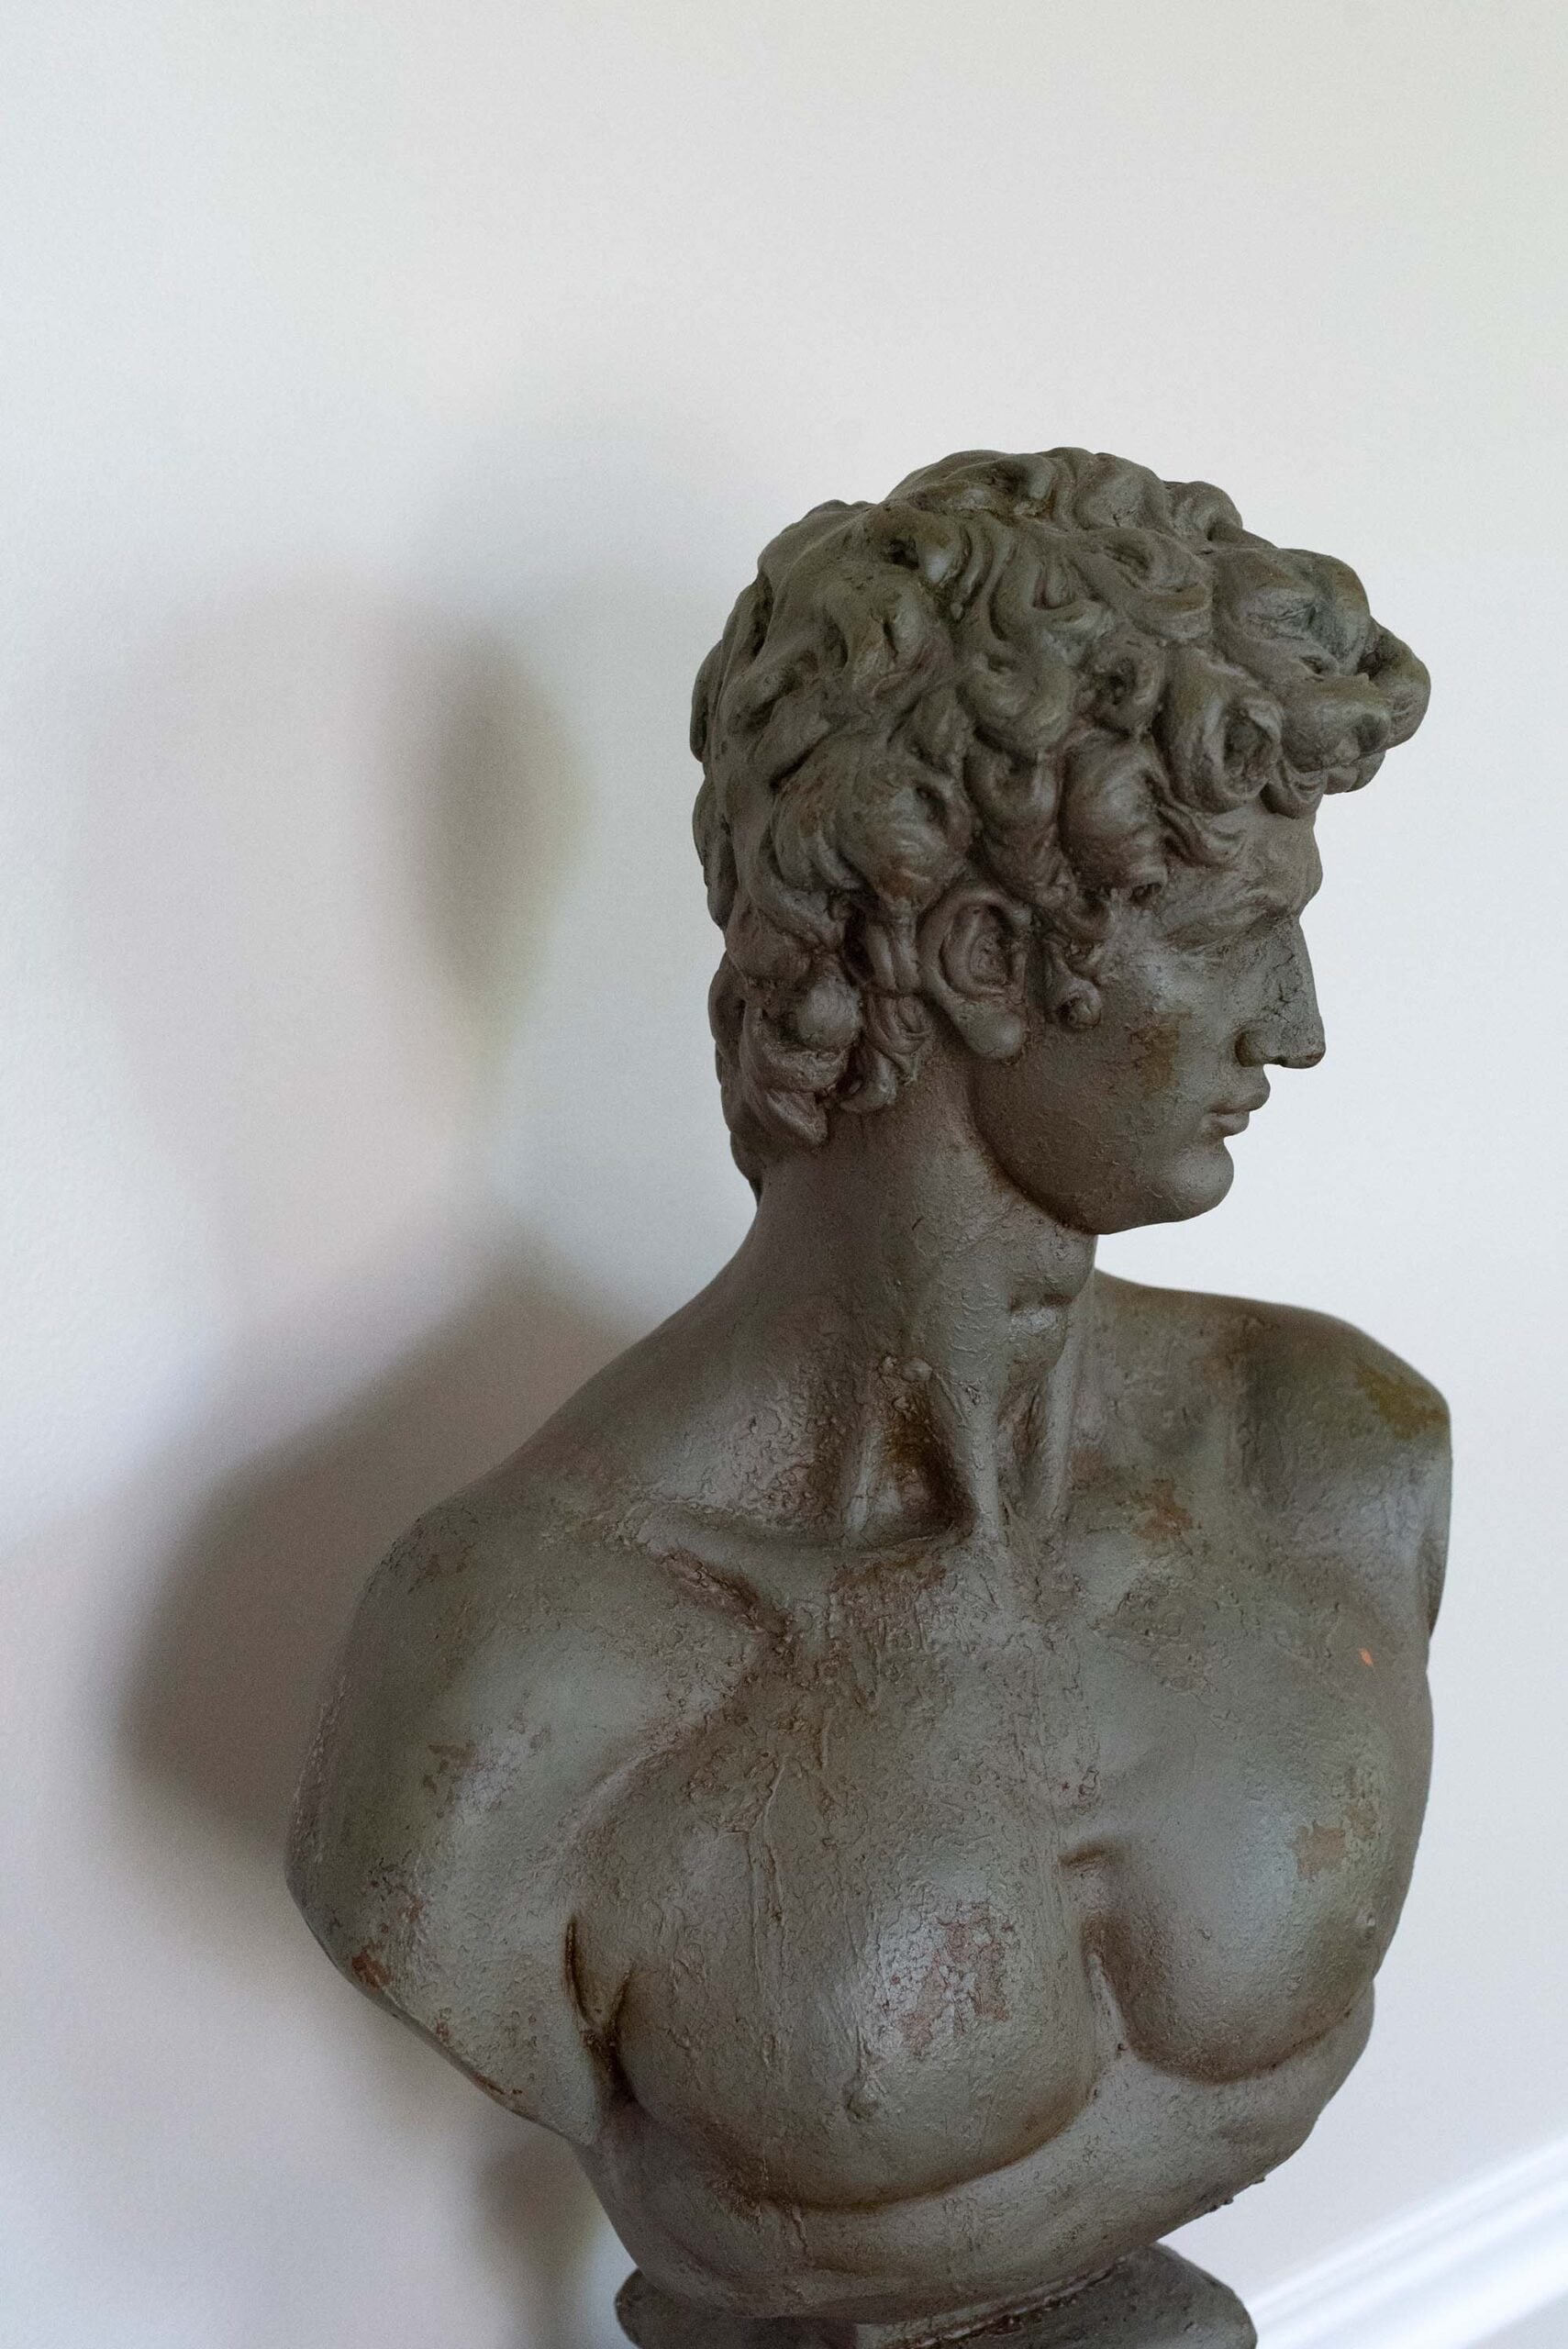
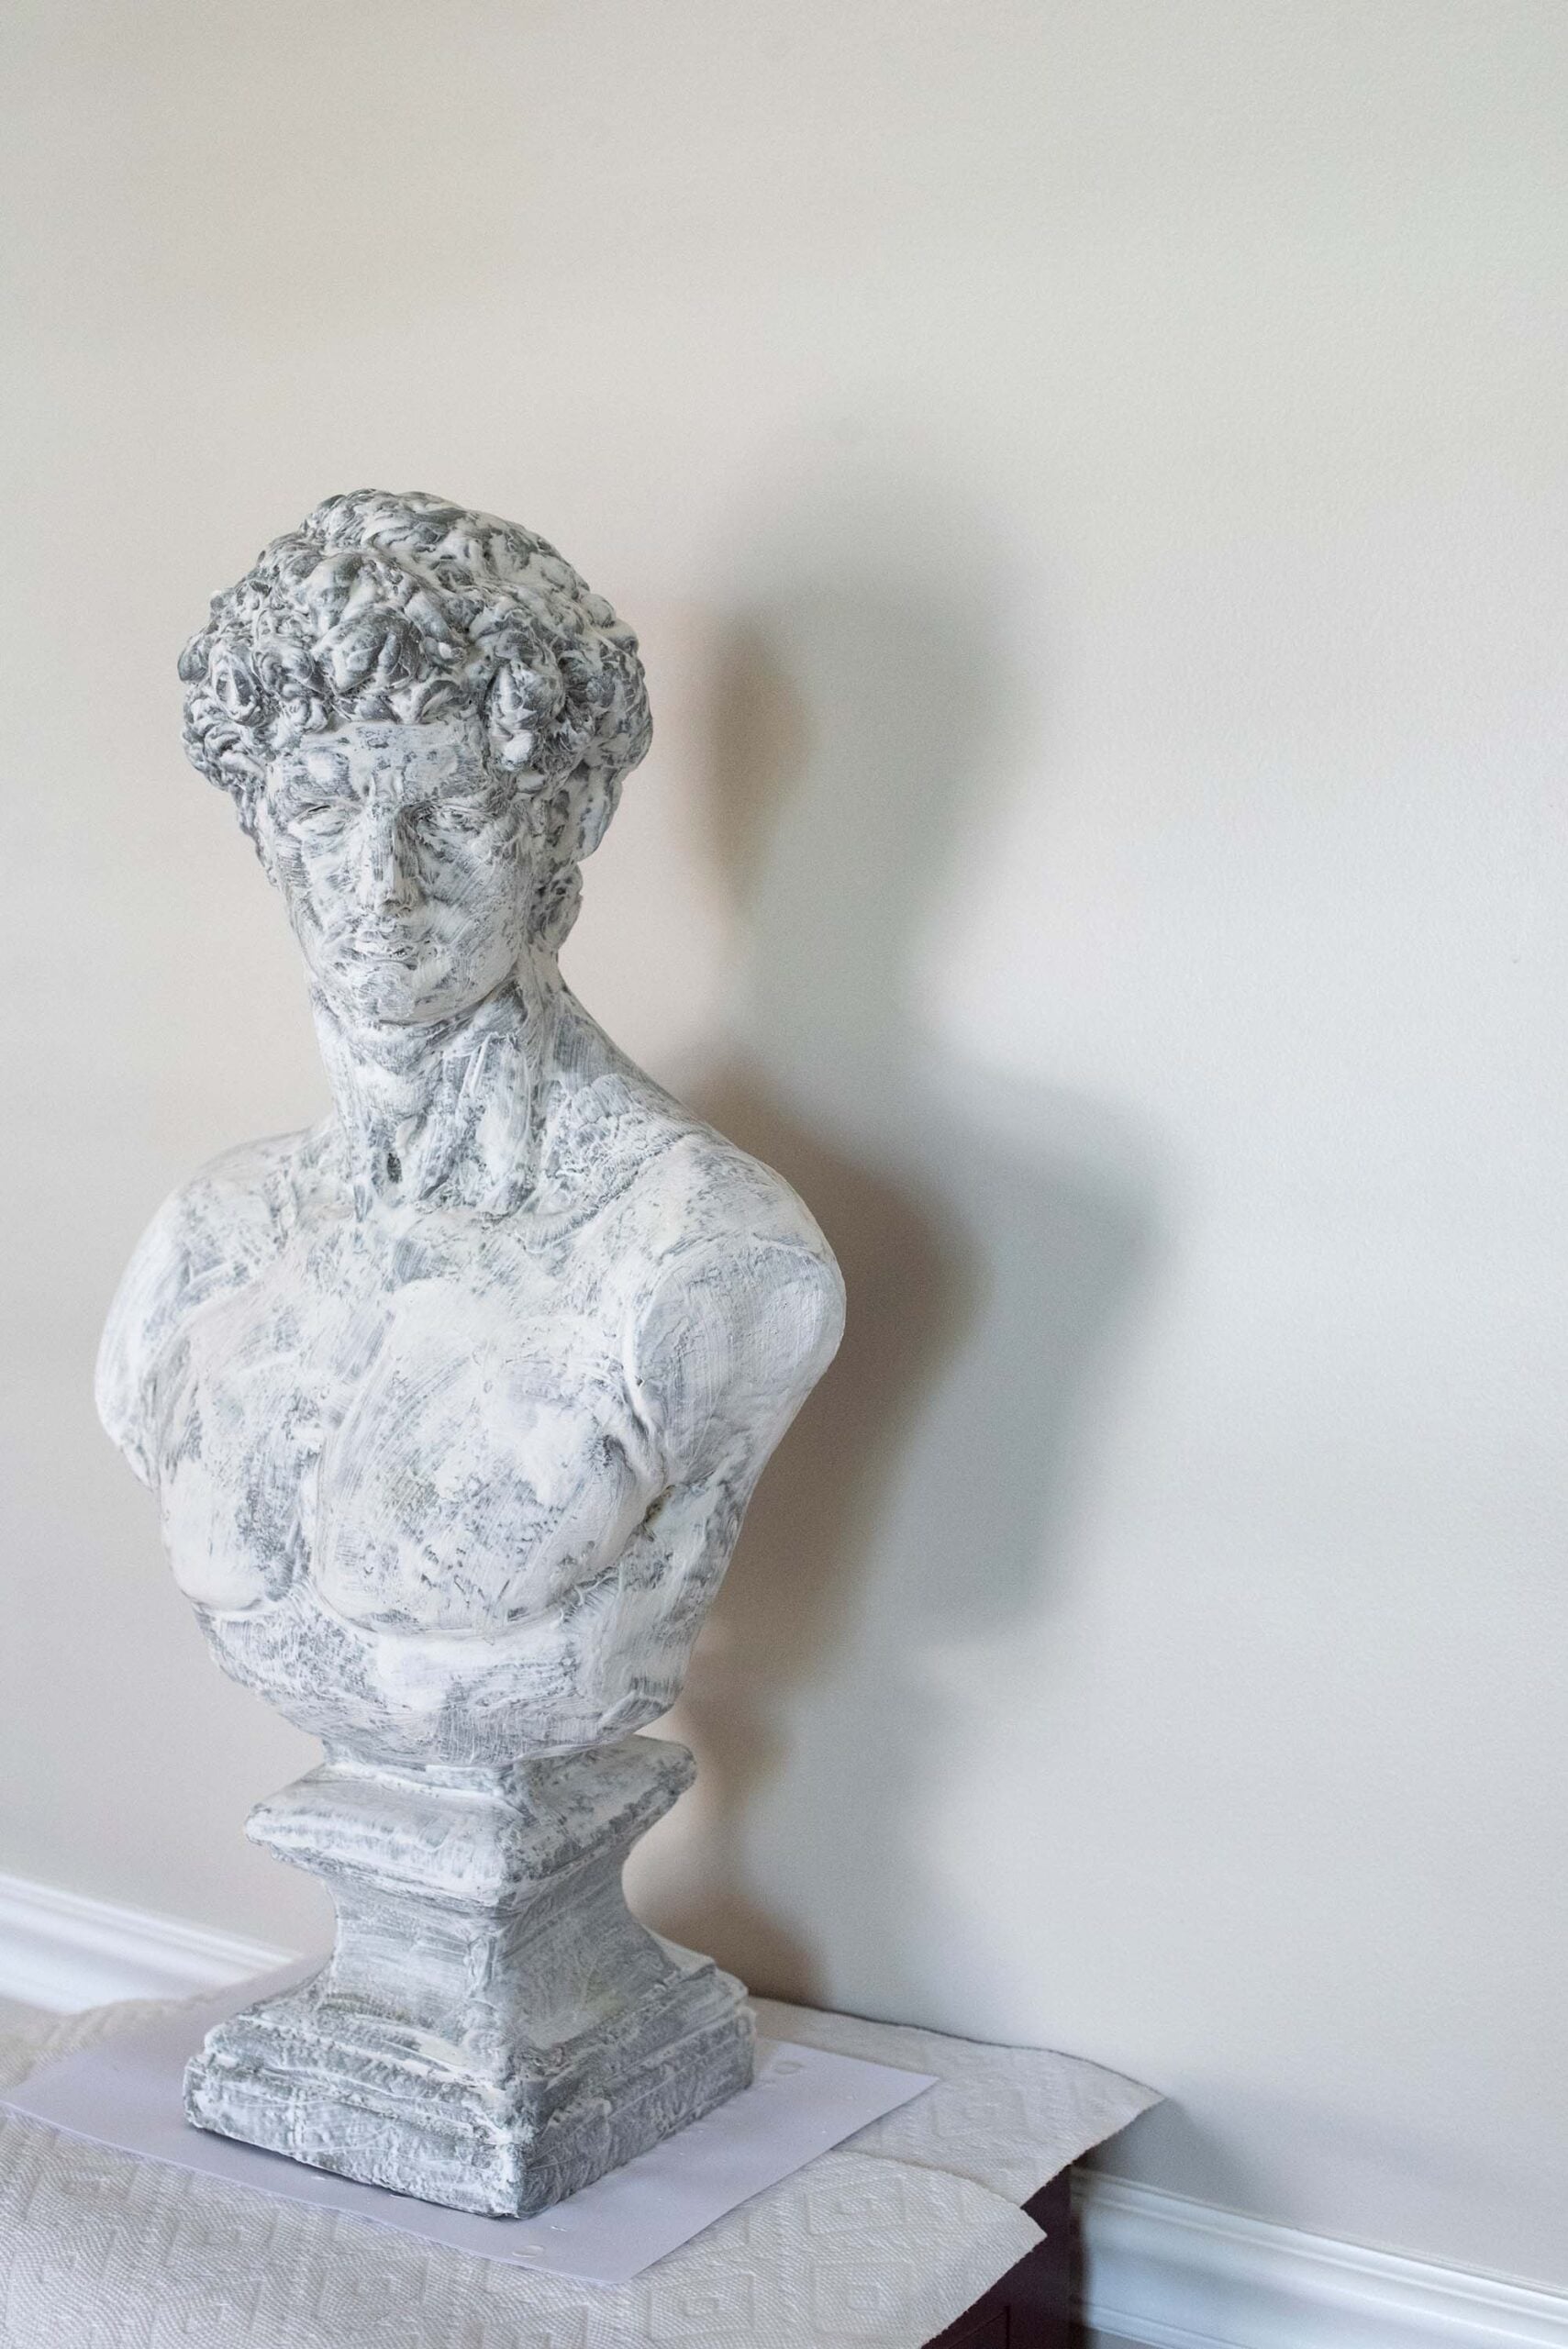
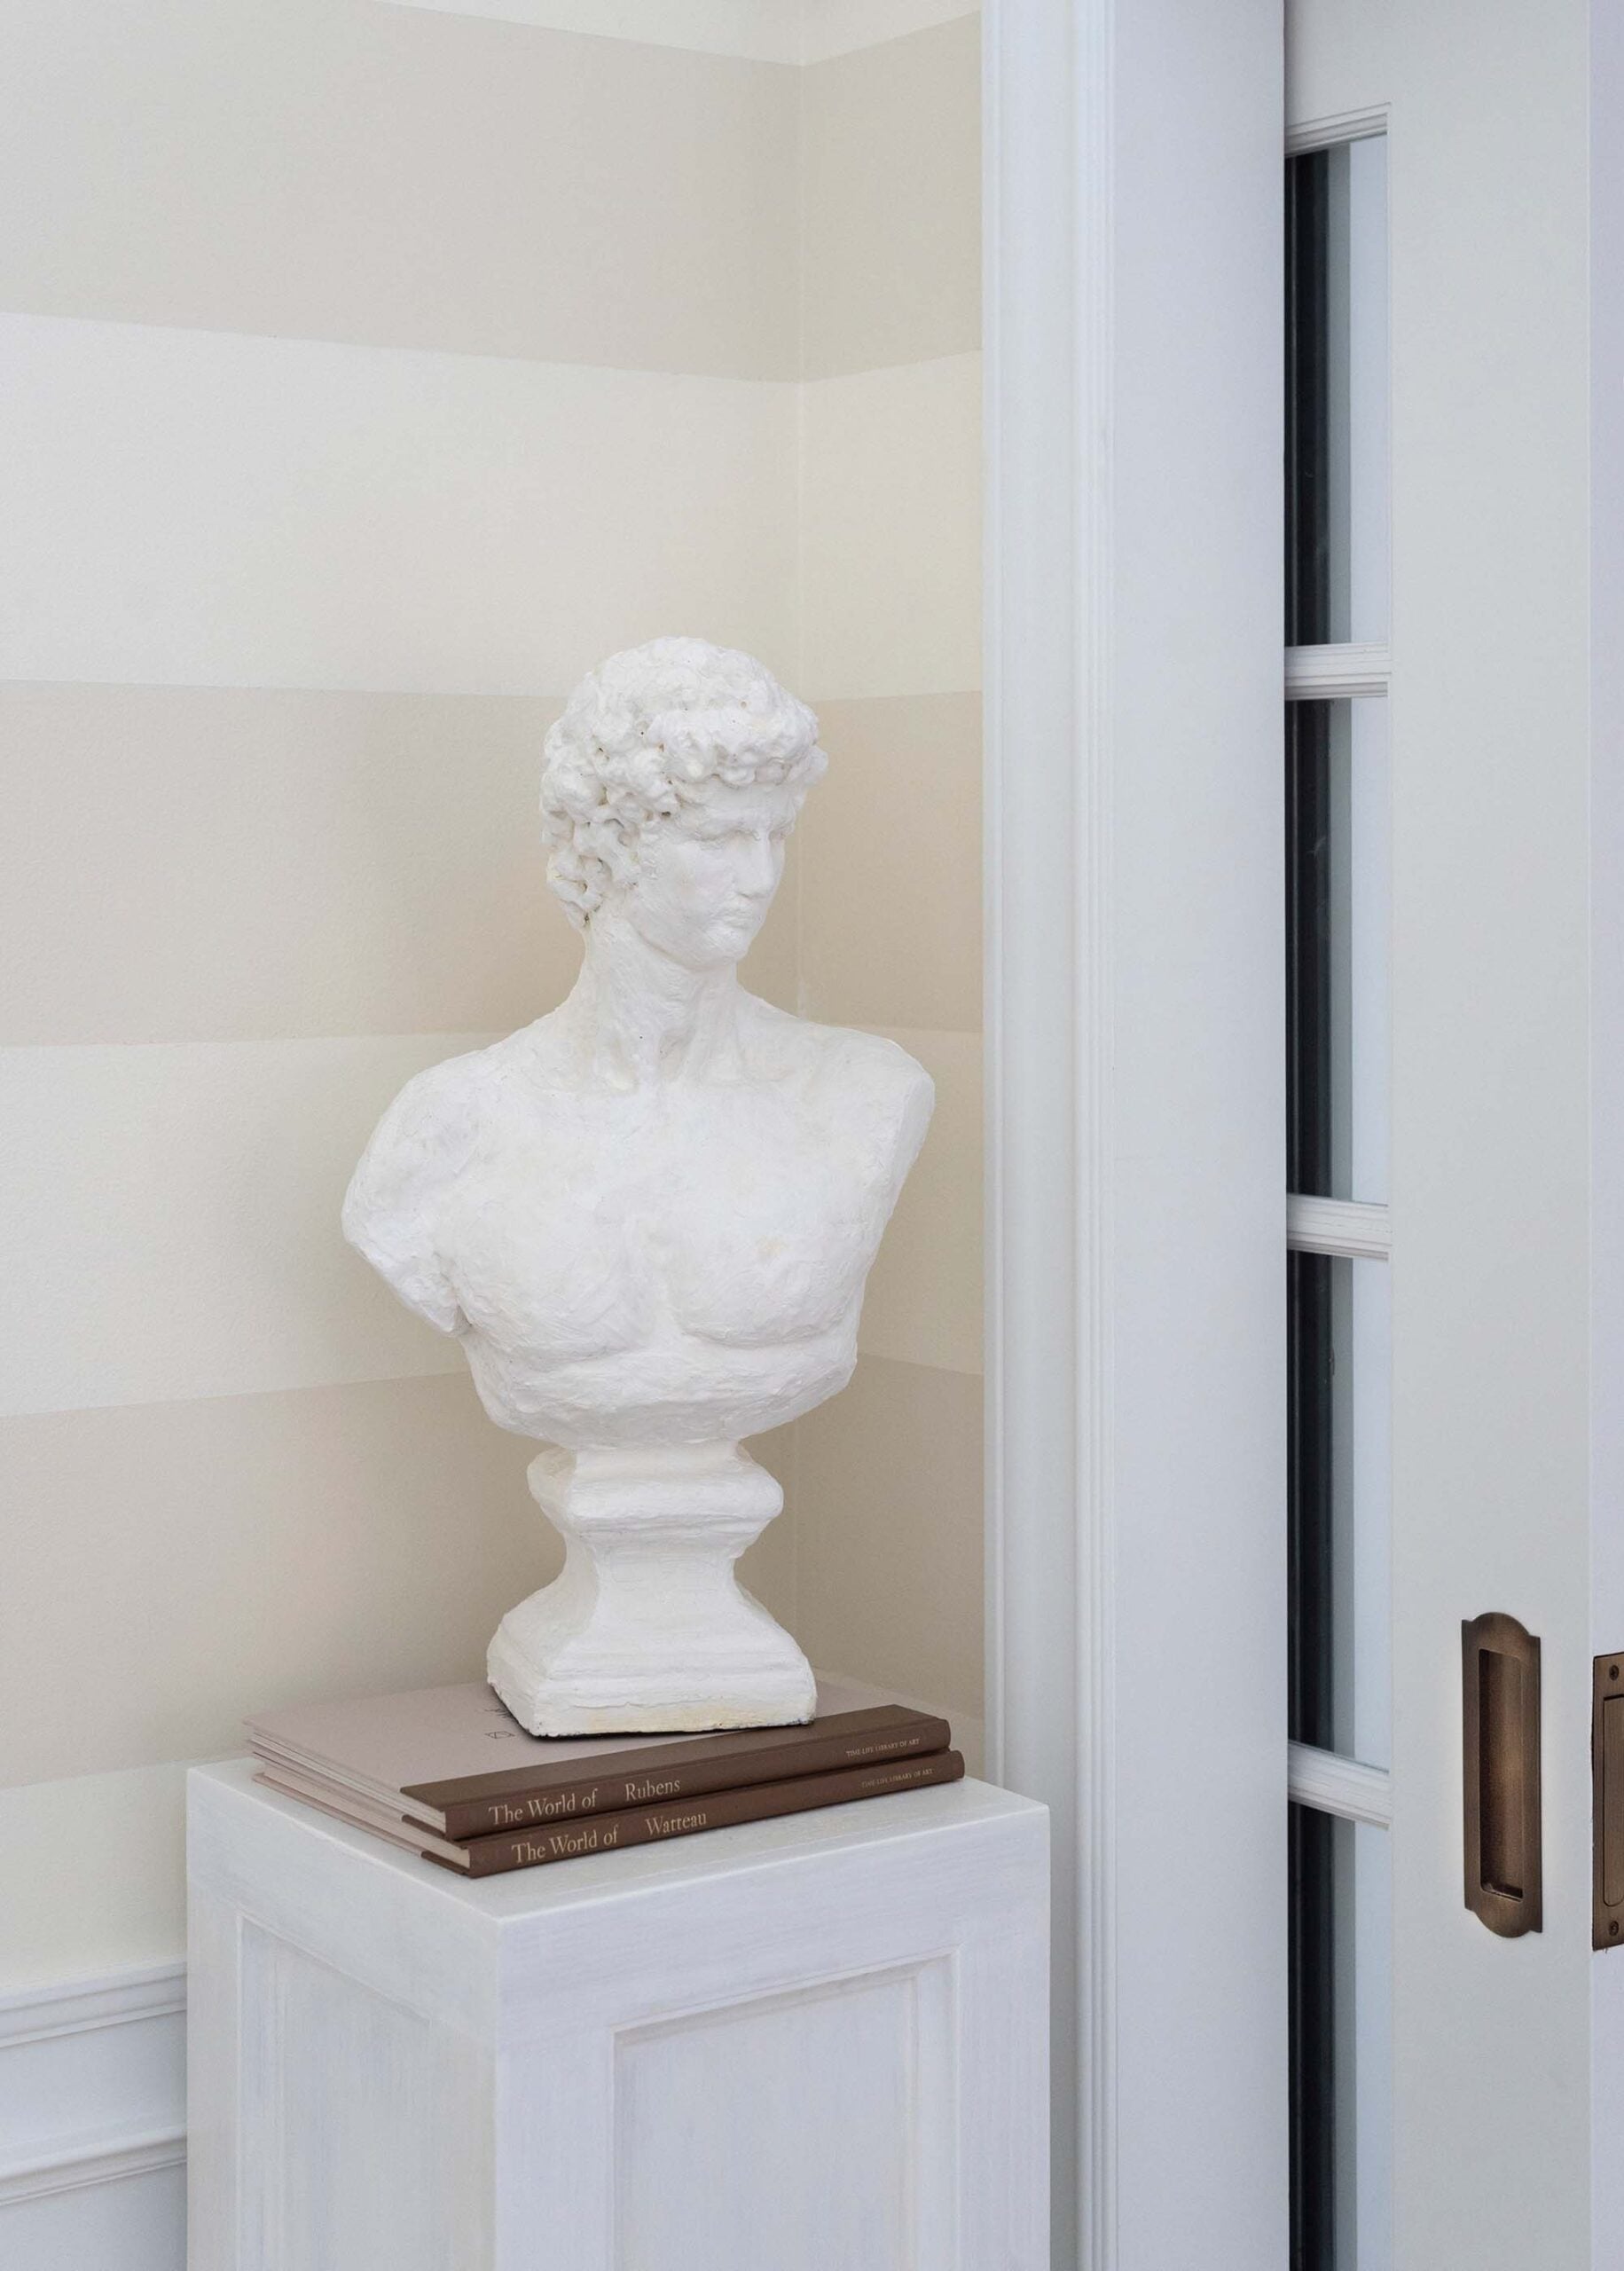
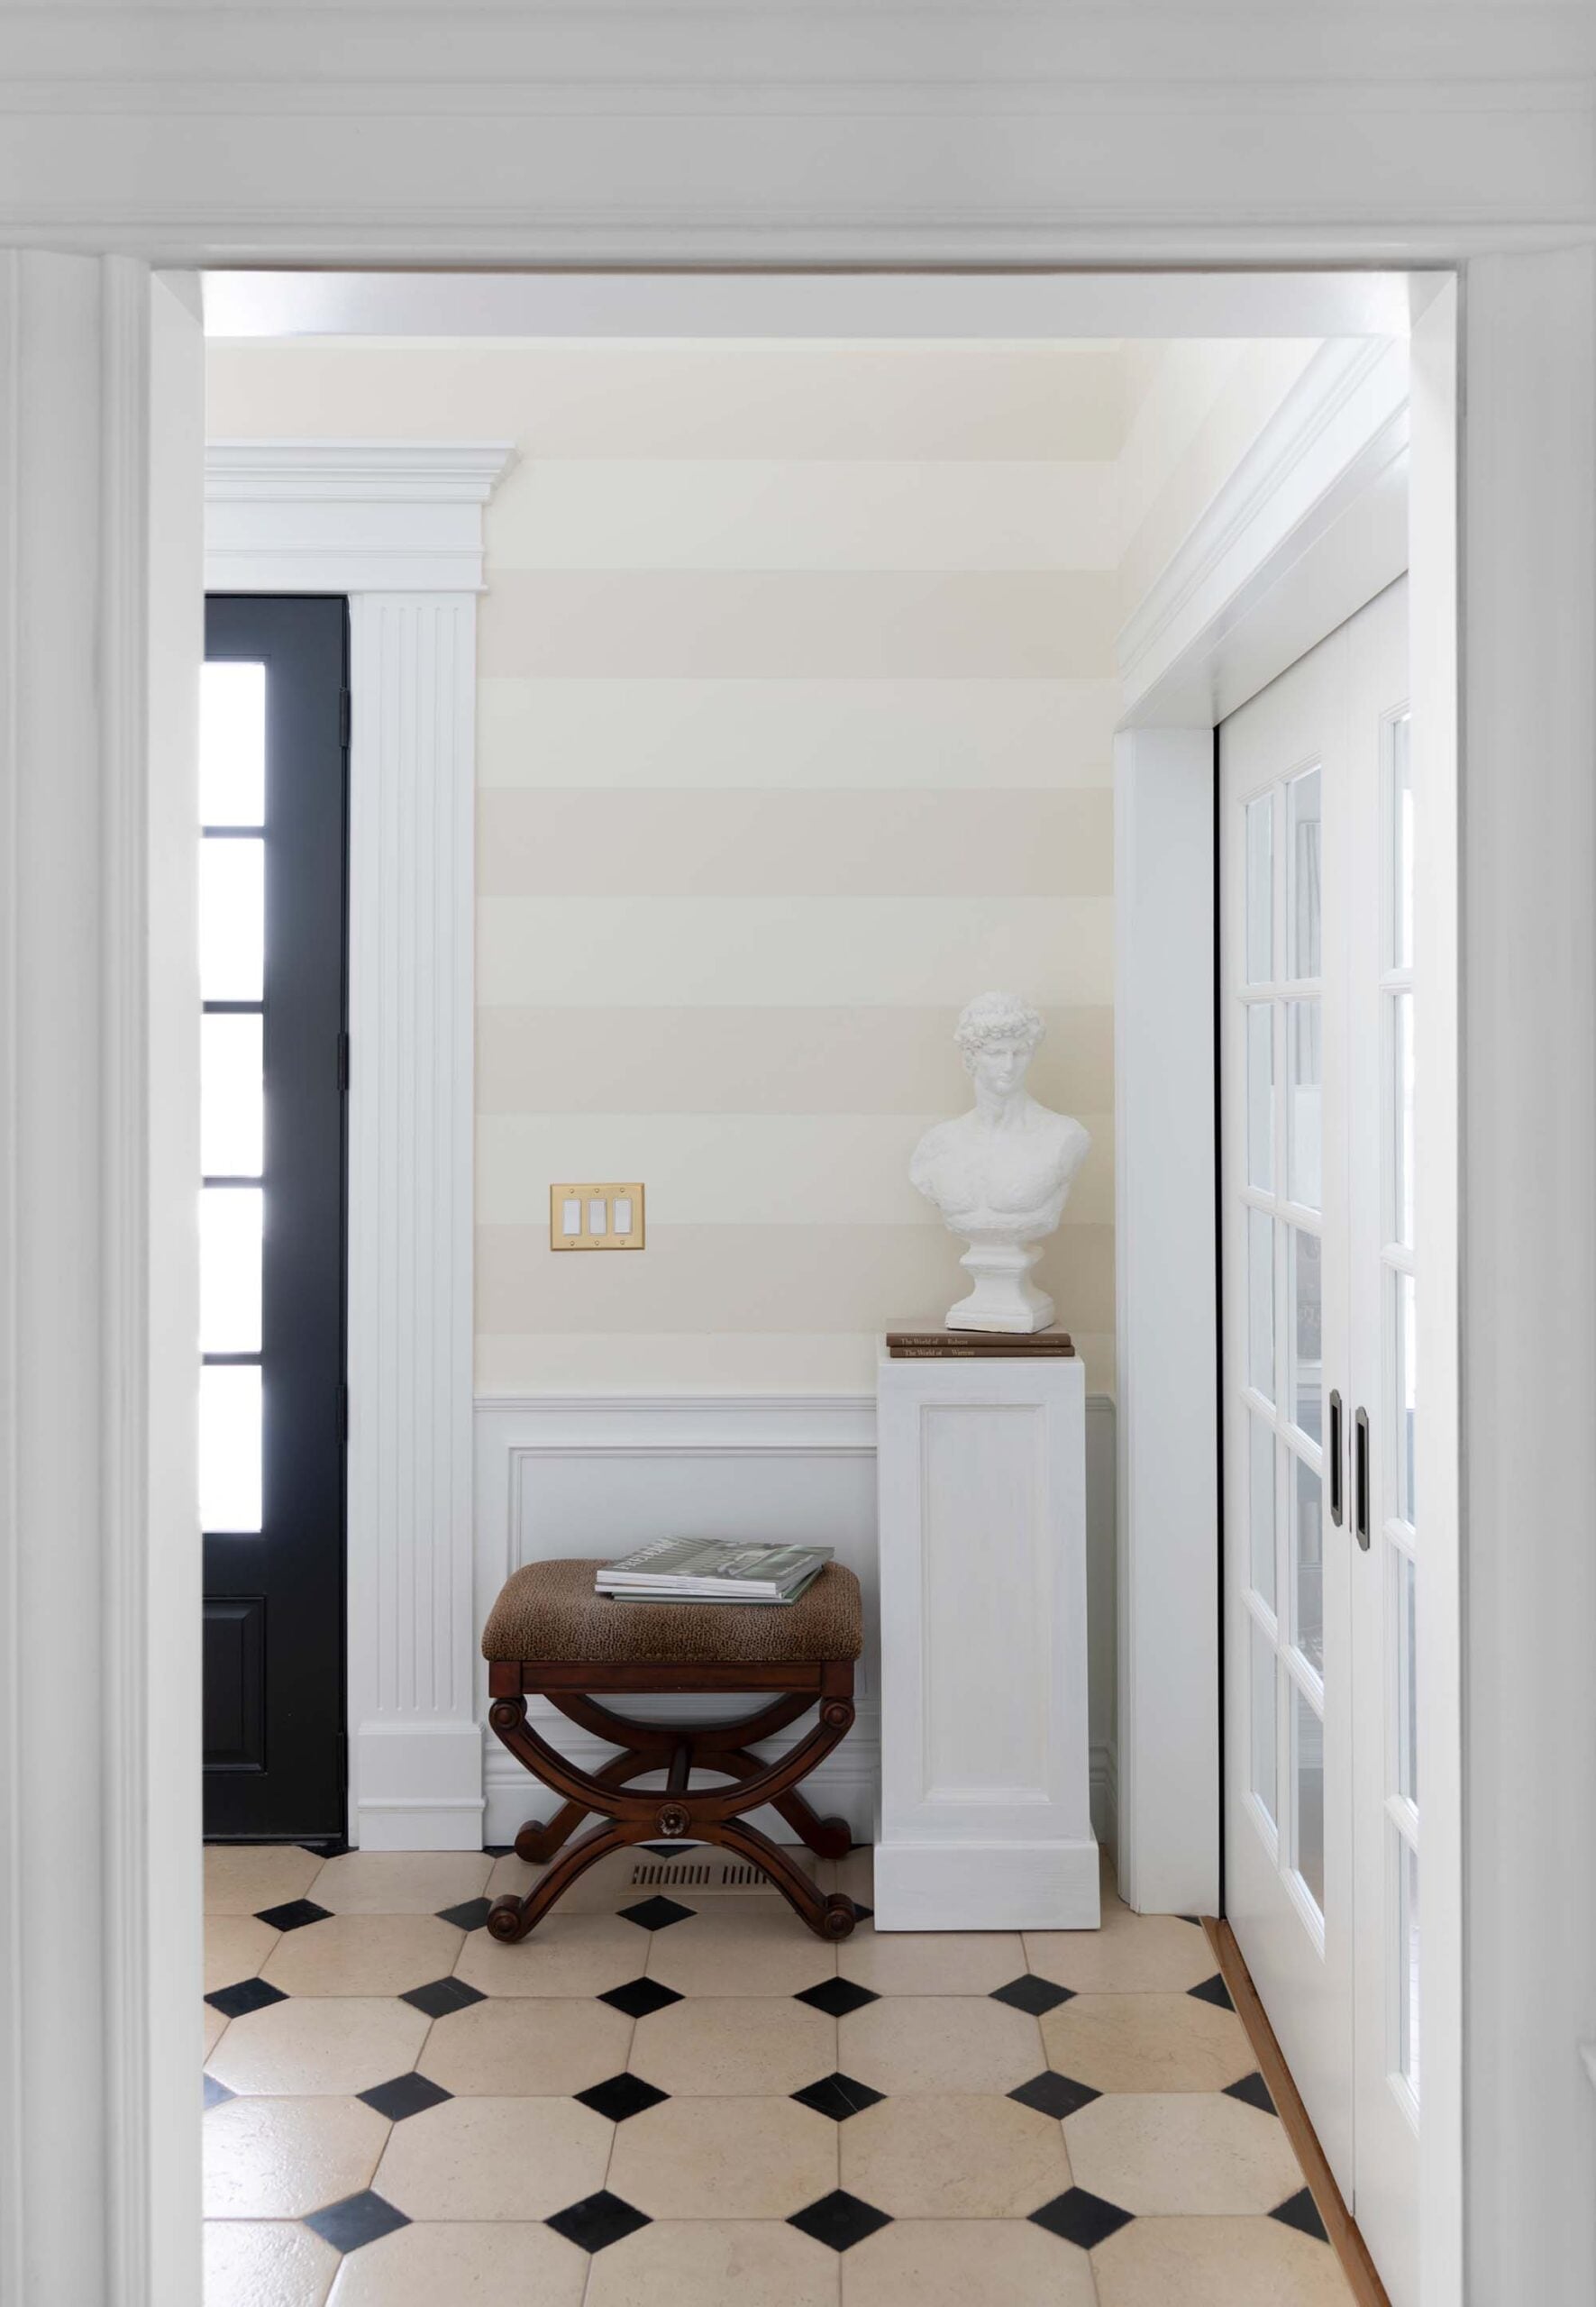
Here is my thrifted bust sitting atop my secondhand pedestal. They both have great scale and actually look pretty balanced paired together. First up? I was excited to tackle the bust with multiple layers of plaster. The existing finish looked manufactured and cheap. It had a plastic feel that wasn’t doing the large bust any favors. You only need a few materials for this project:
- Decorative Bust
- Drywall Joint Compound or Plaster of Paris
- Palette Knives
- Paint Brush
- Art Brushes
- Fine Sandpaper
Joint compound works especially well because it spreads easily and dries to a chalky, plaster like finish. This project is quick and easy!
How to Update a Bust With Plaster
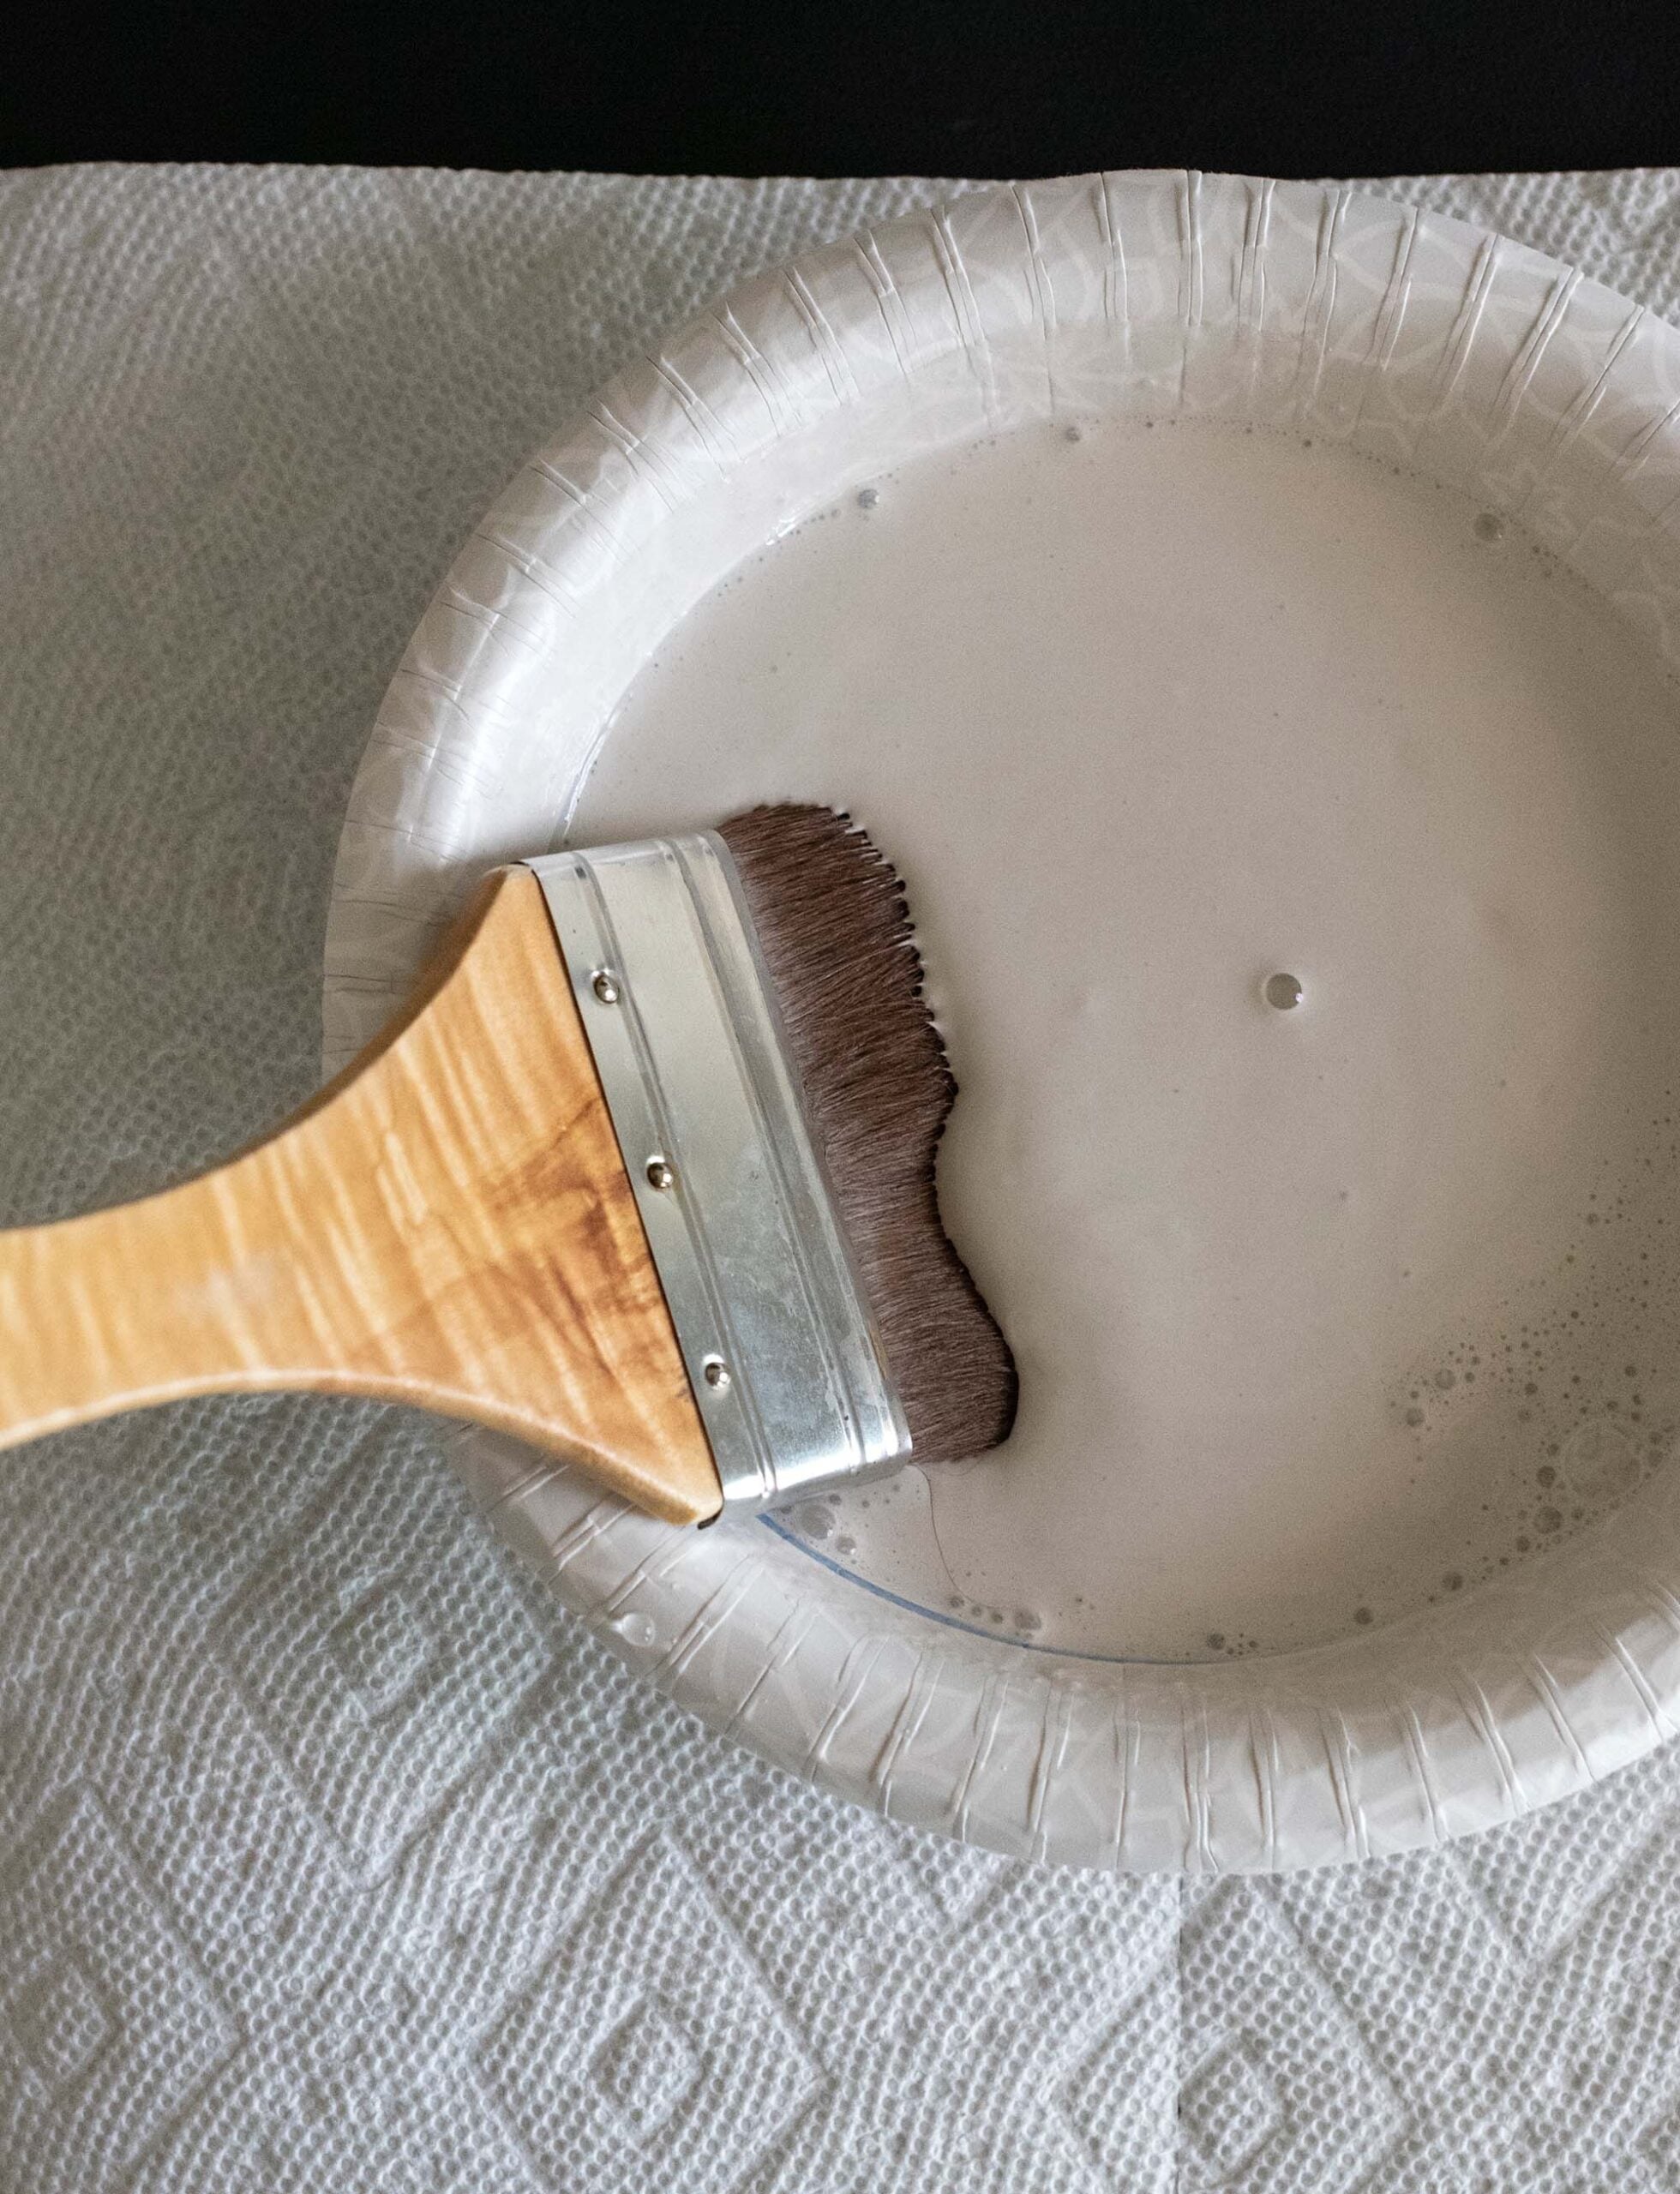
Start by wiping down the bust so the surface is clean. Add a splash of water to the dry plaster mix, smoothing the clumps until it resembles something that looks like pancake batter.
Using a putty knife and brush, I began layering the plaster onto the bust in thin, imperfect layers. My goal at this point in the process was coverage. Don’t worry about making the surface perfectly smooth. A little variation actually helps the bust look more like aged plaster. I applied the plaster directly to the bust, but feel free to prime your piece white, if you’re looking for a more perfect application.
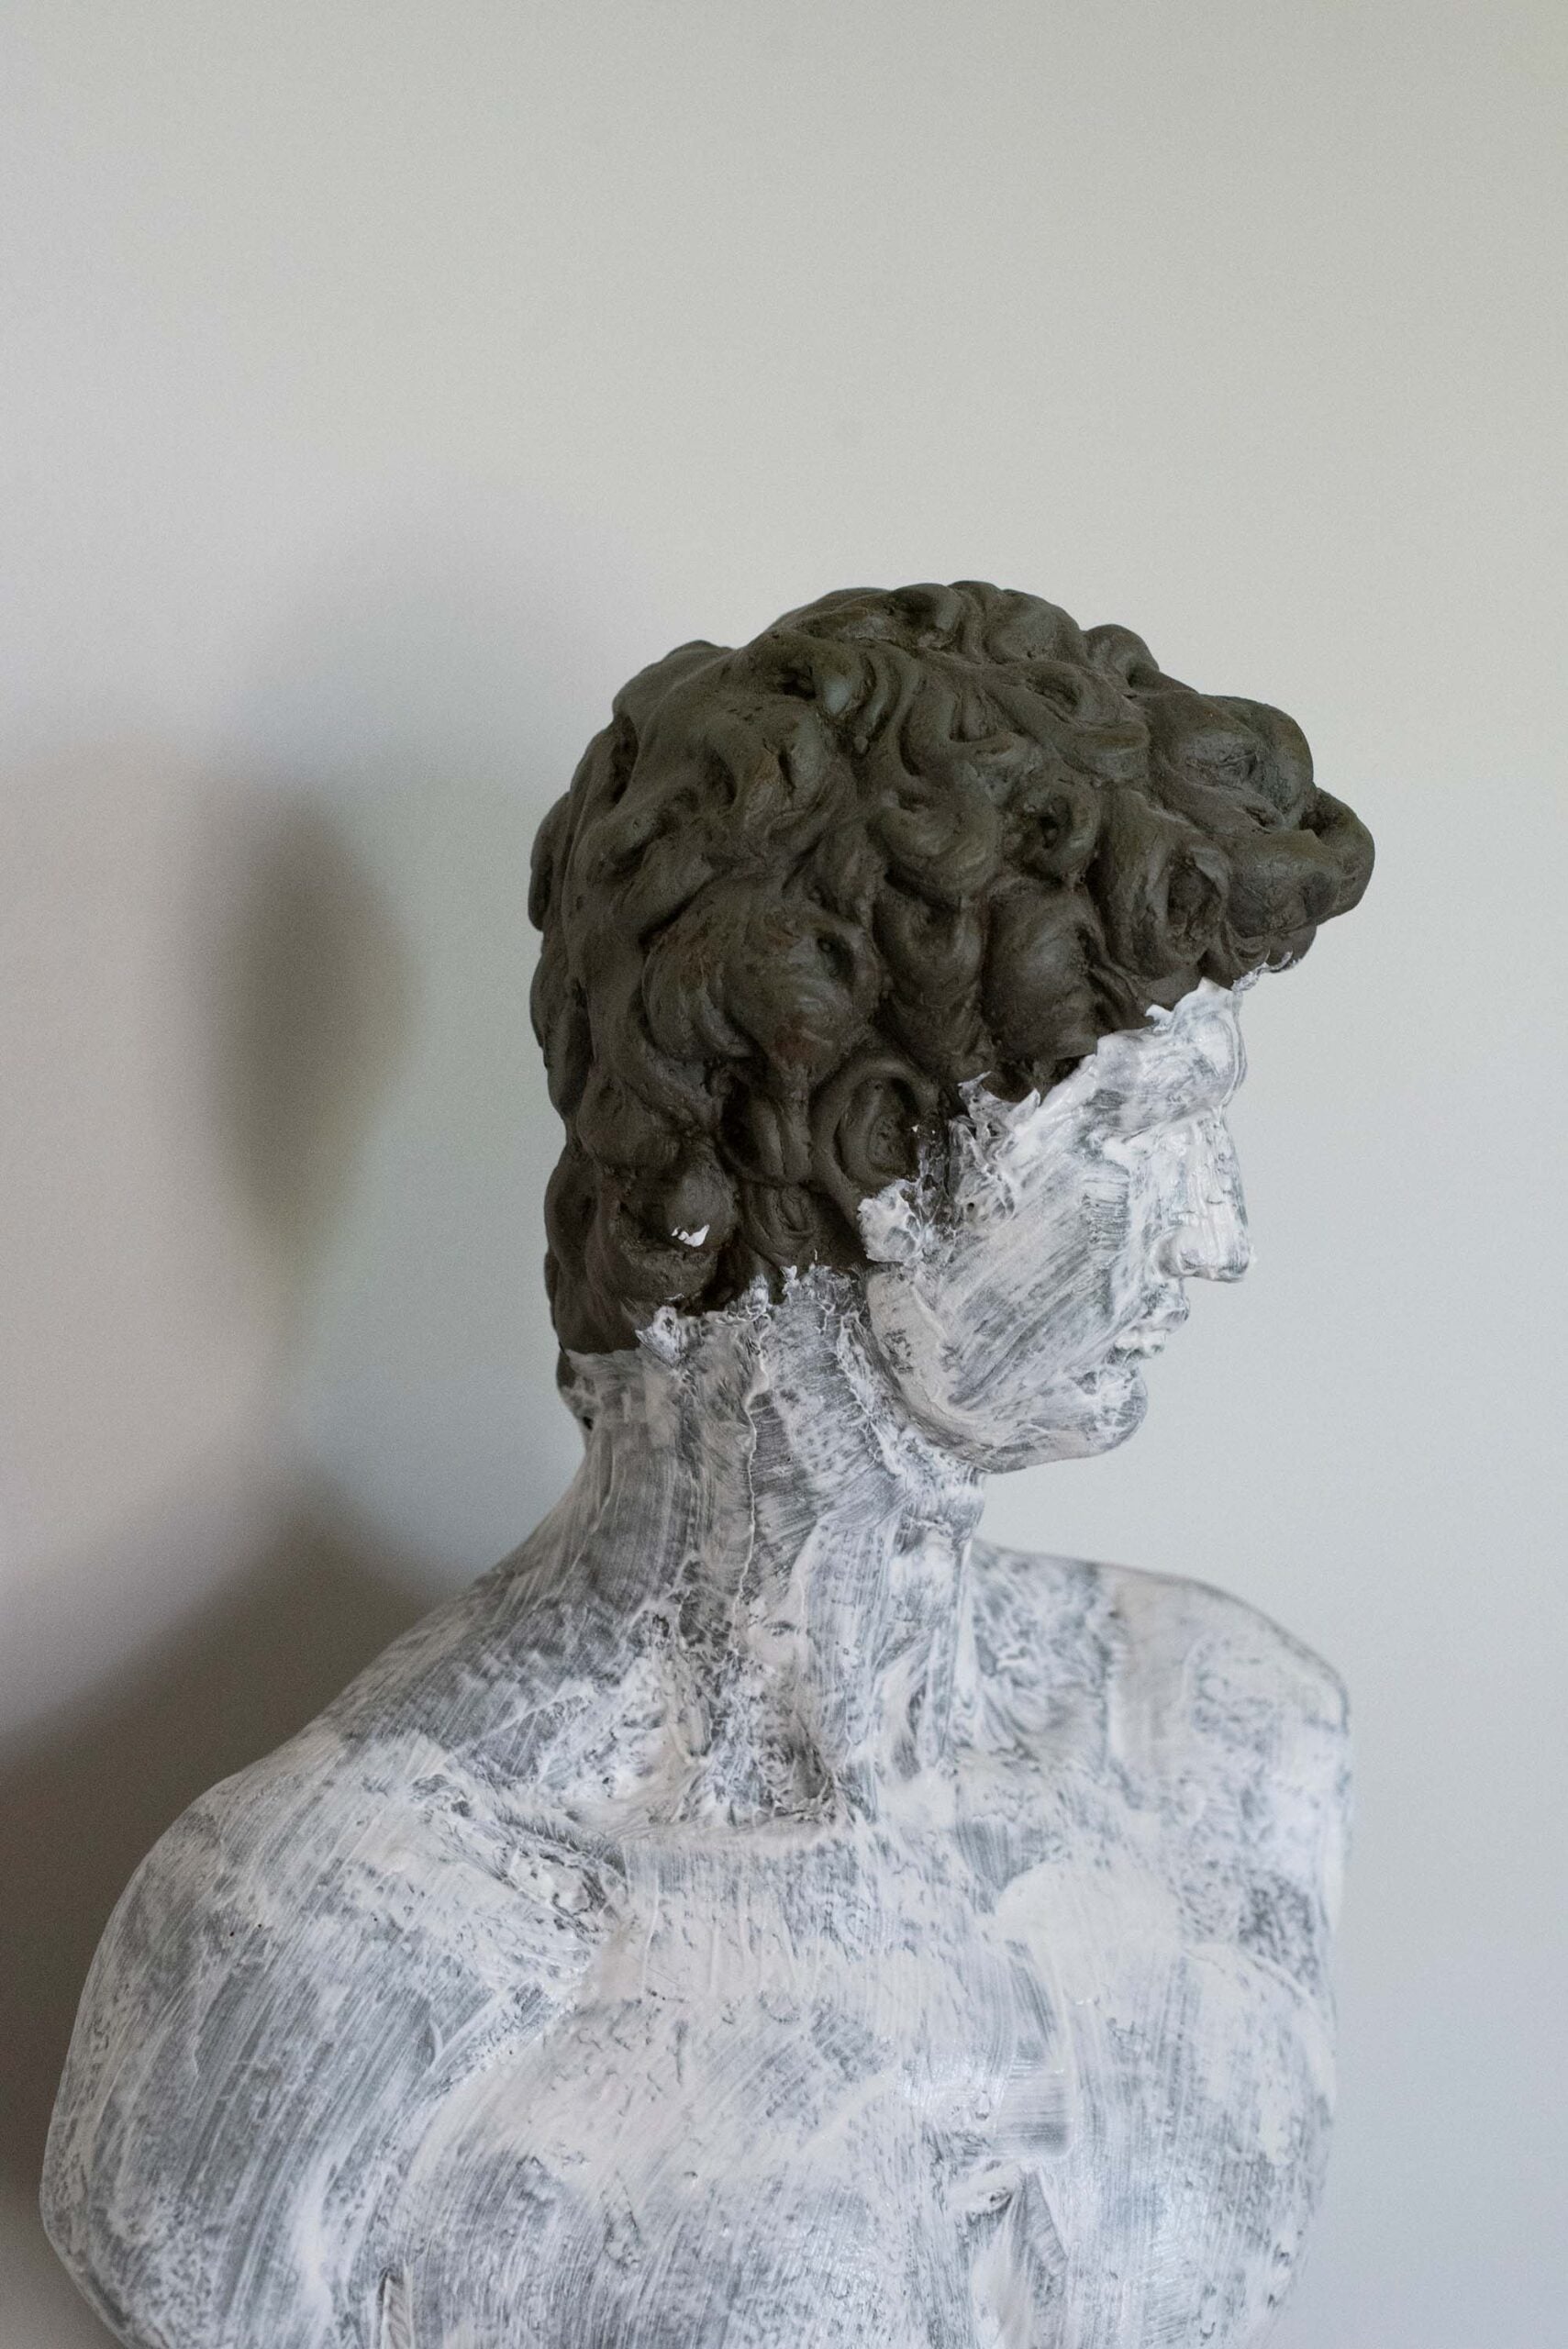
It will look pretty terrible and scary at first, but rest assured- the more layers you add, the better it gets! Unlike paint, plaster isn’t easy to layer. Allow each coat to dry completely.
With each coat of wet plaster, it pulls up the previous coat. The key is to think of your brush as a sculpting tool, rather than a paintbrush. Plaster and paint are nothing alike, so you really have to press the plaster onto the object (like clay or slip), smoothing and sculpting as you go.
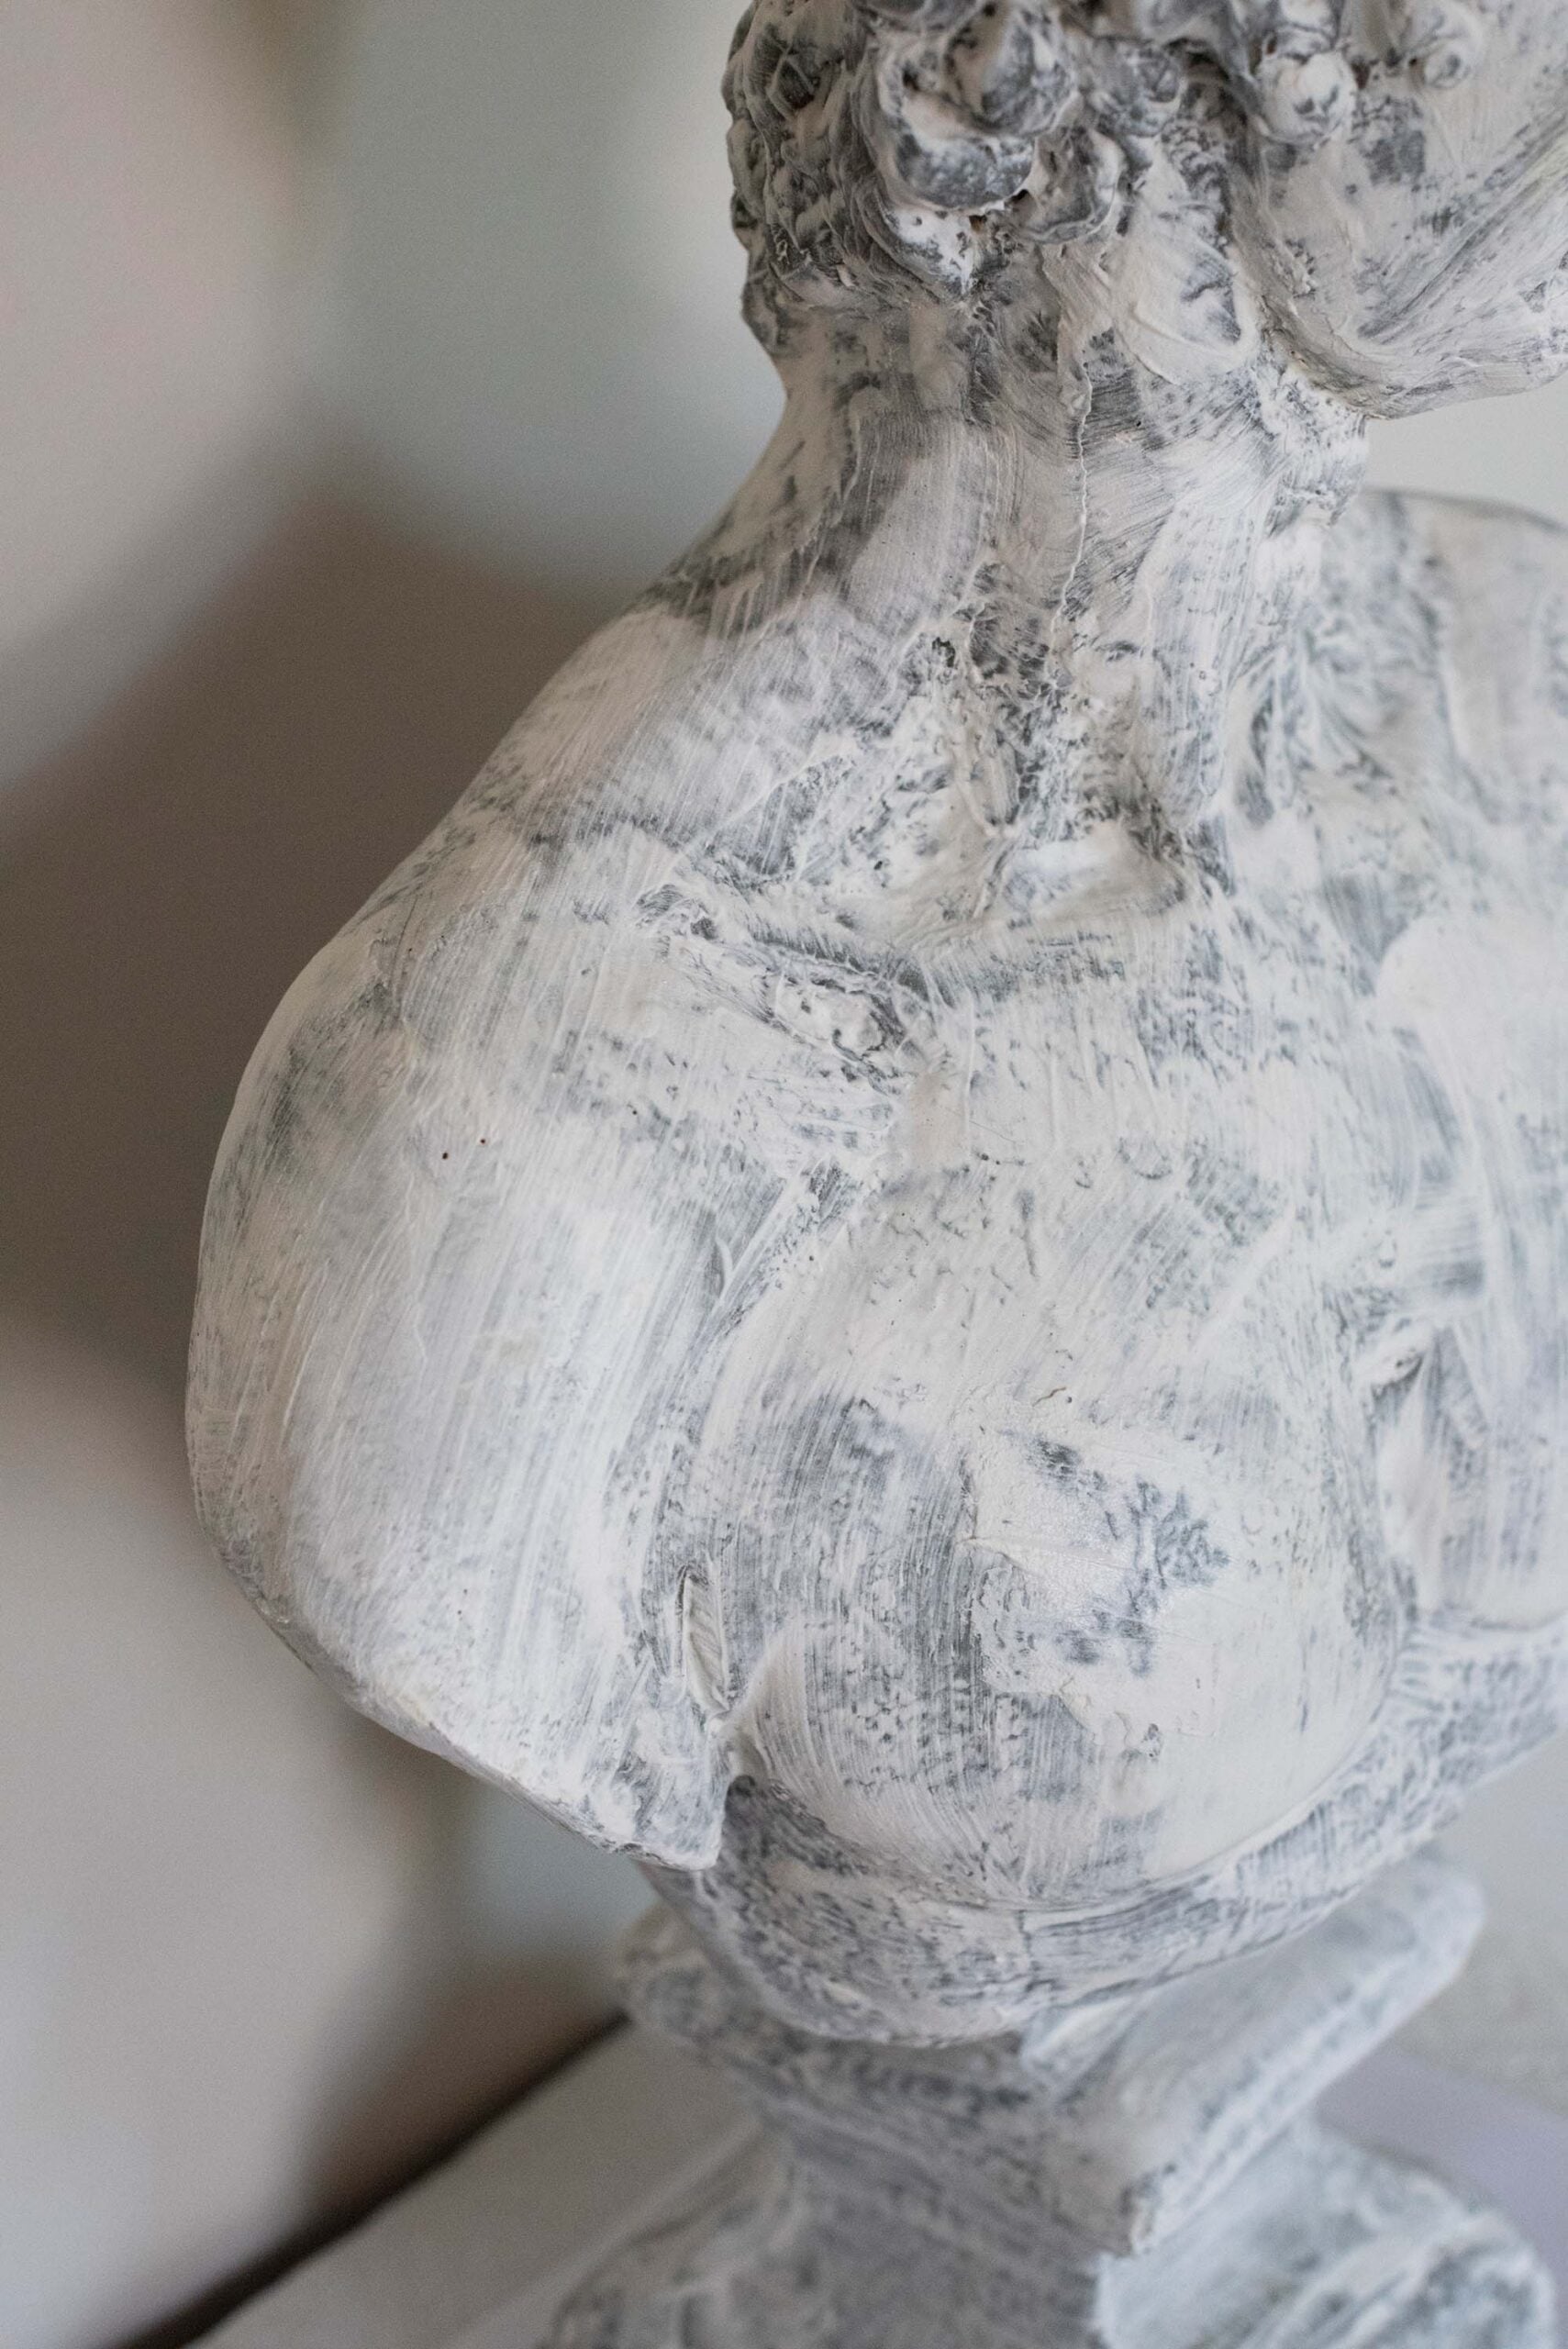
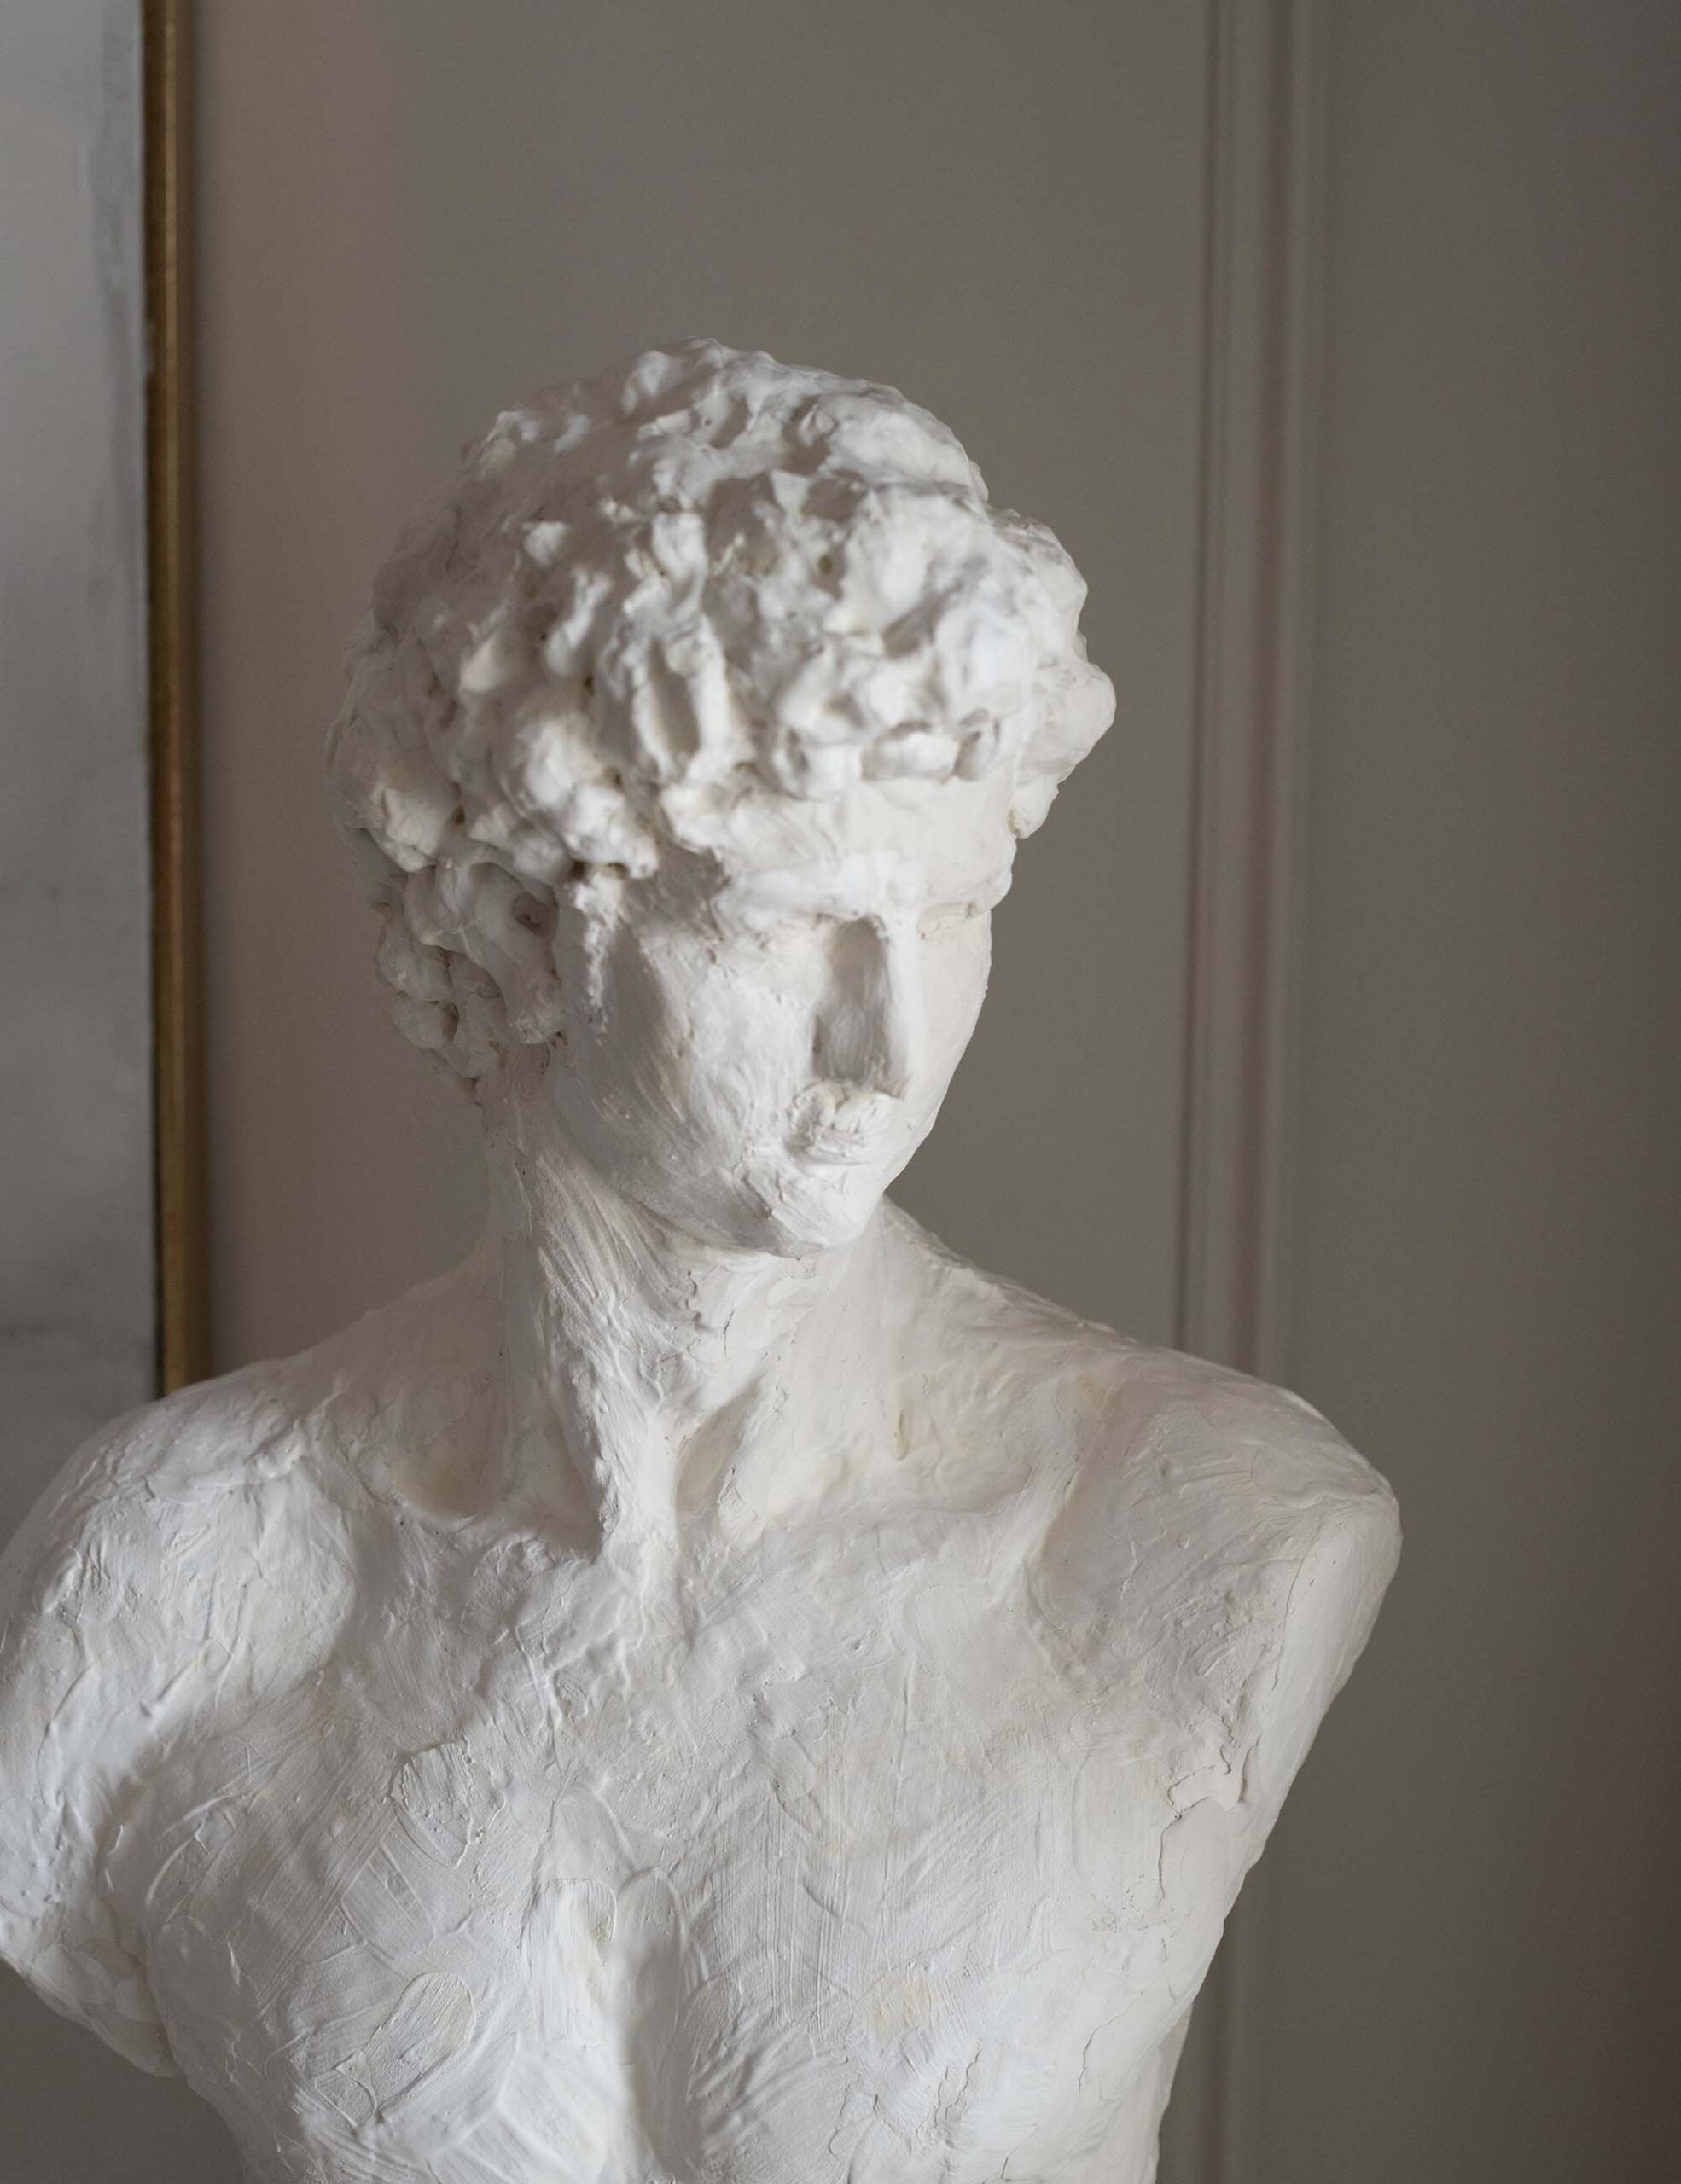
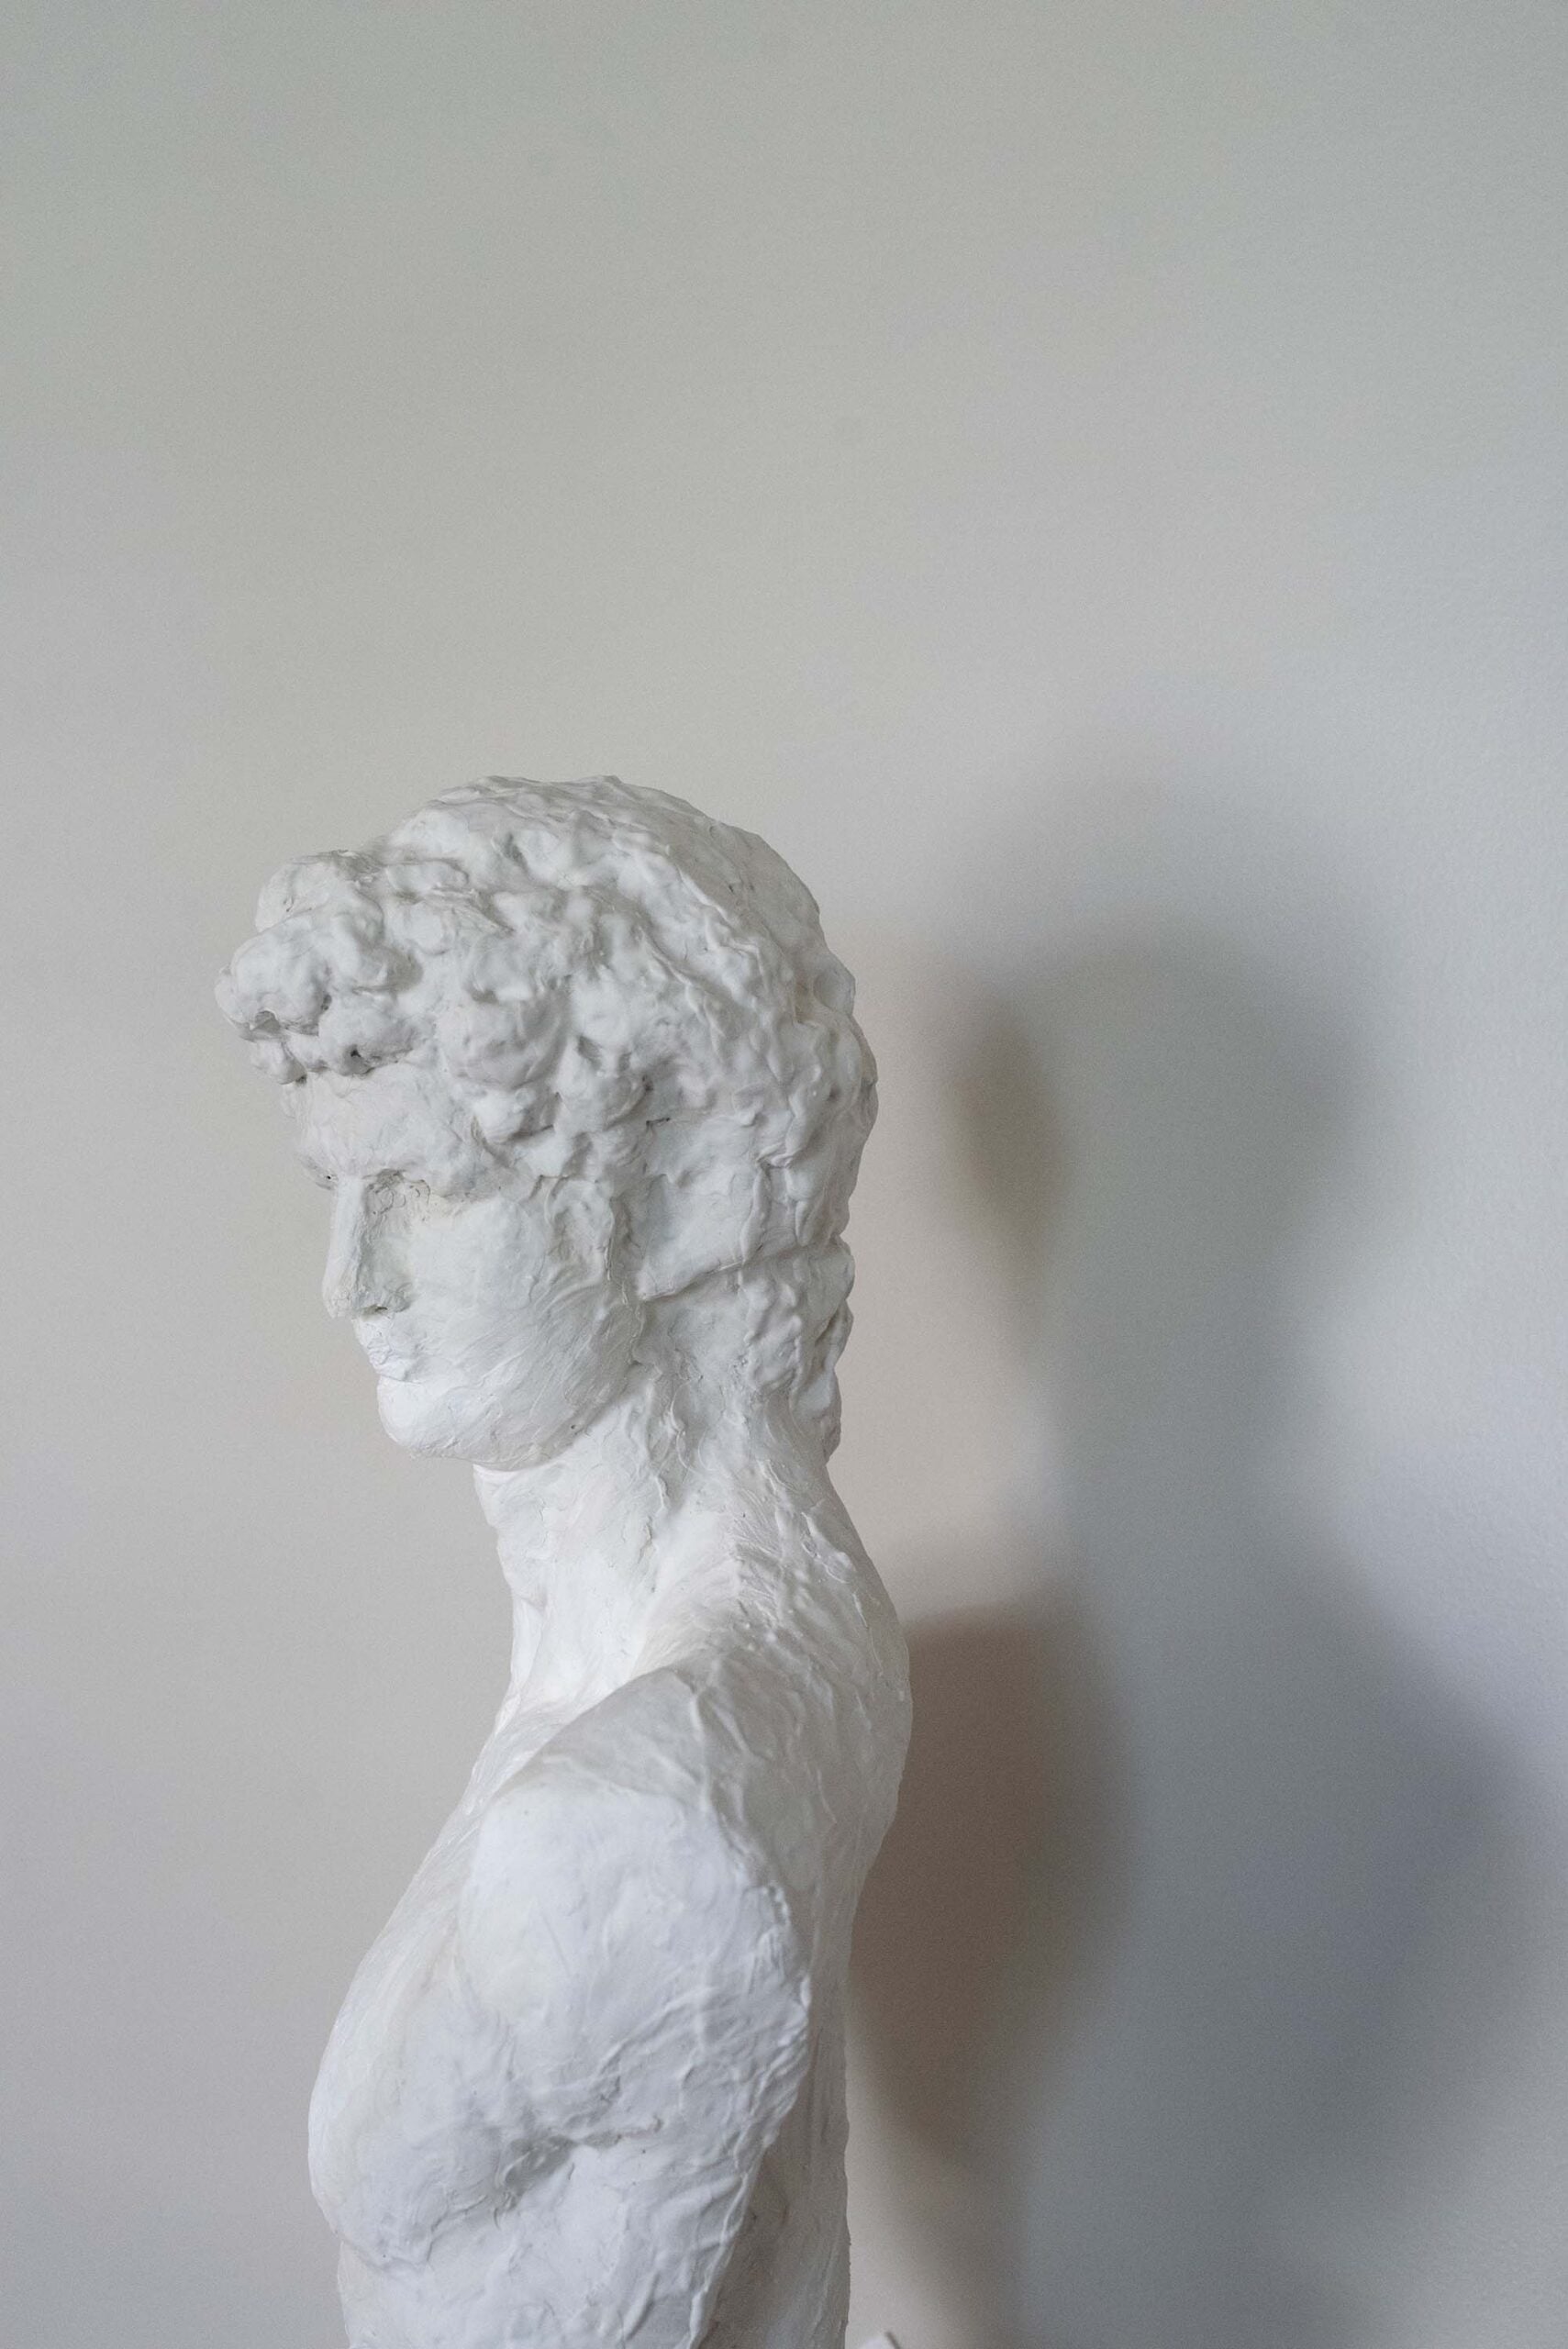
That’s when you’ll see the layers really begin to build, and the object will become more opaque. I was going for a molded, textural look (rather than sanded or smooth), so I really emphasized the brush strokes.
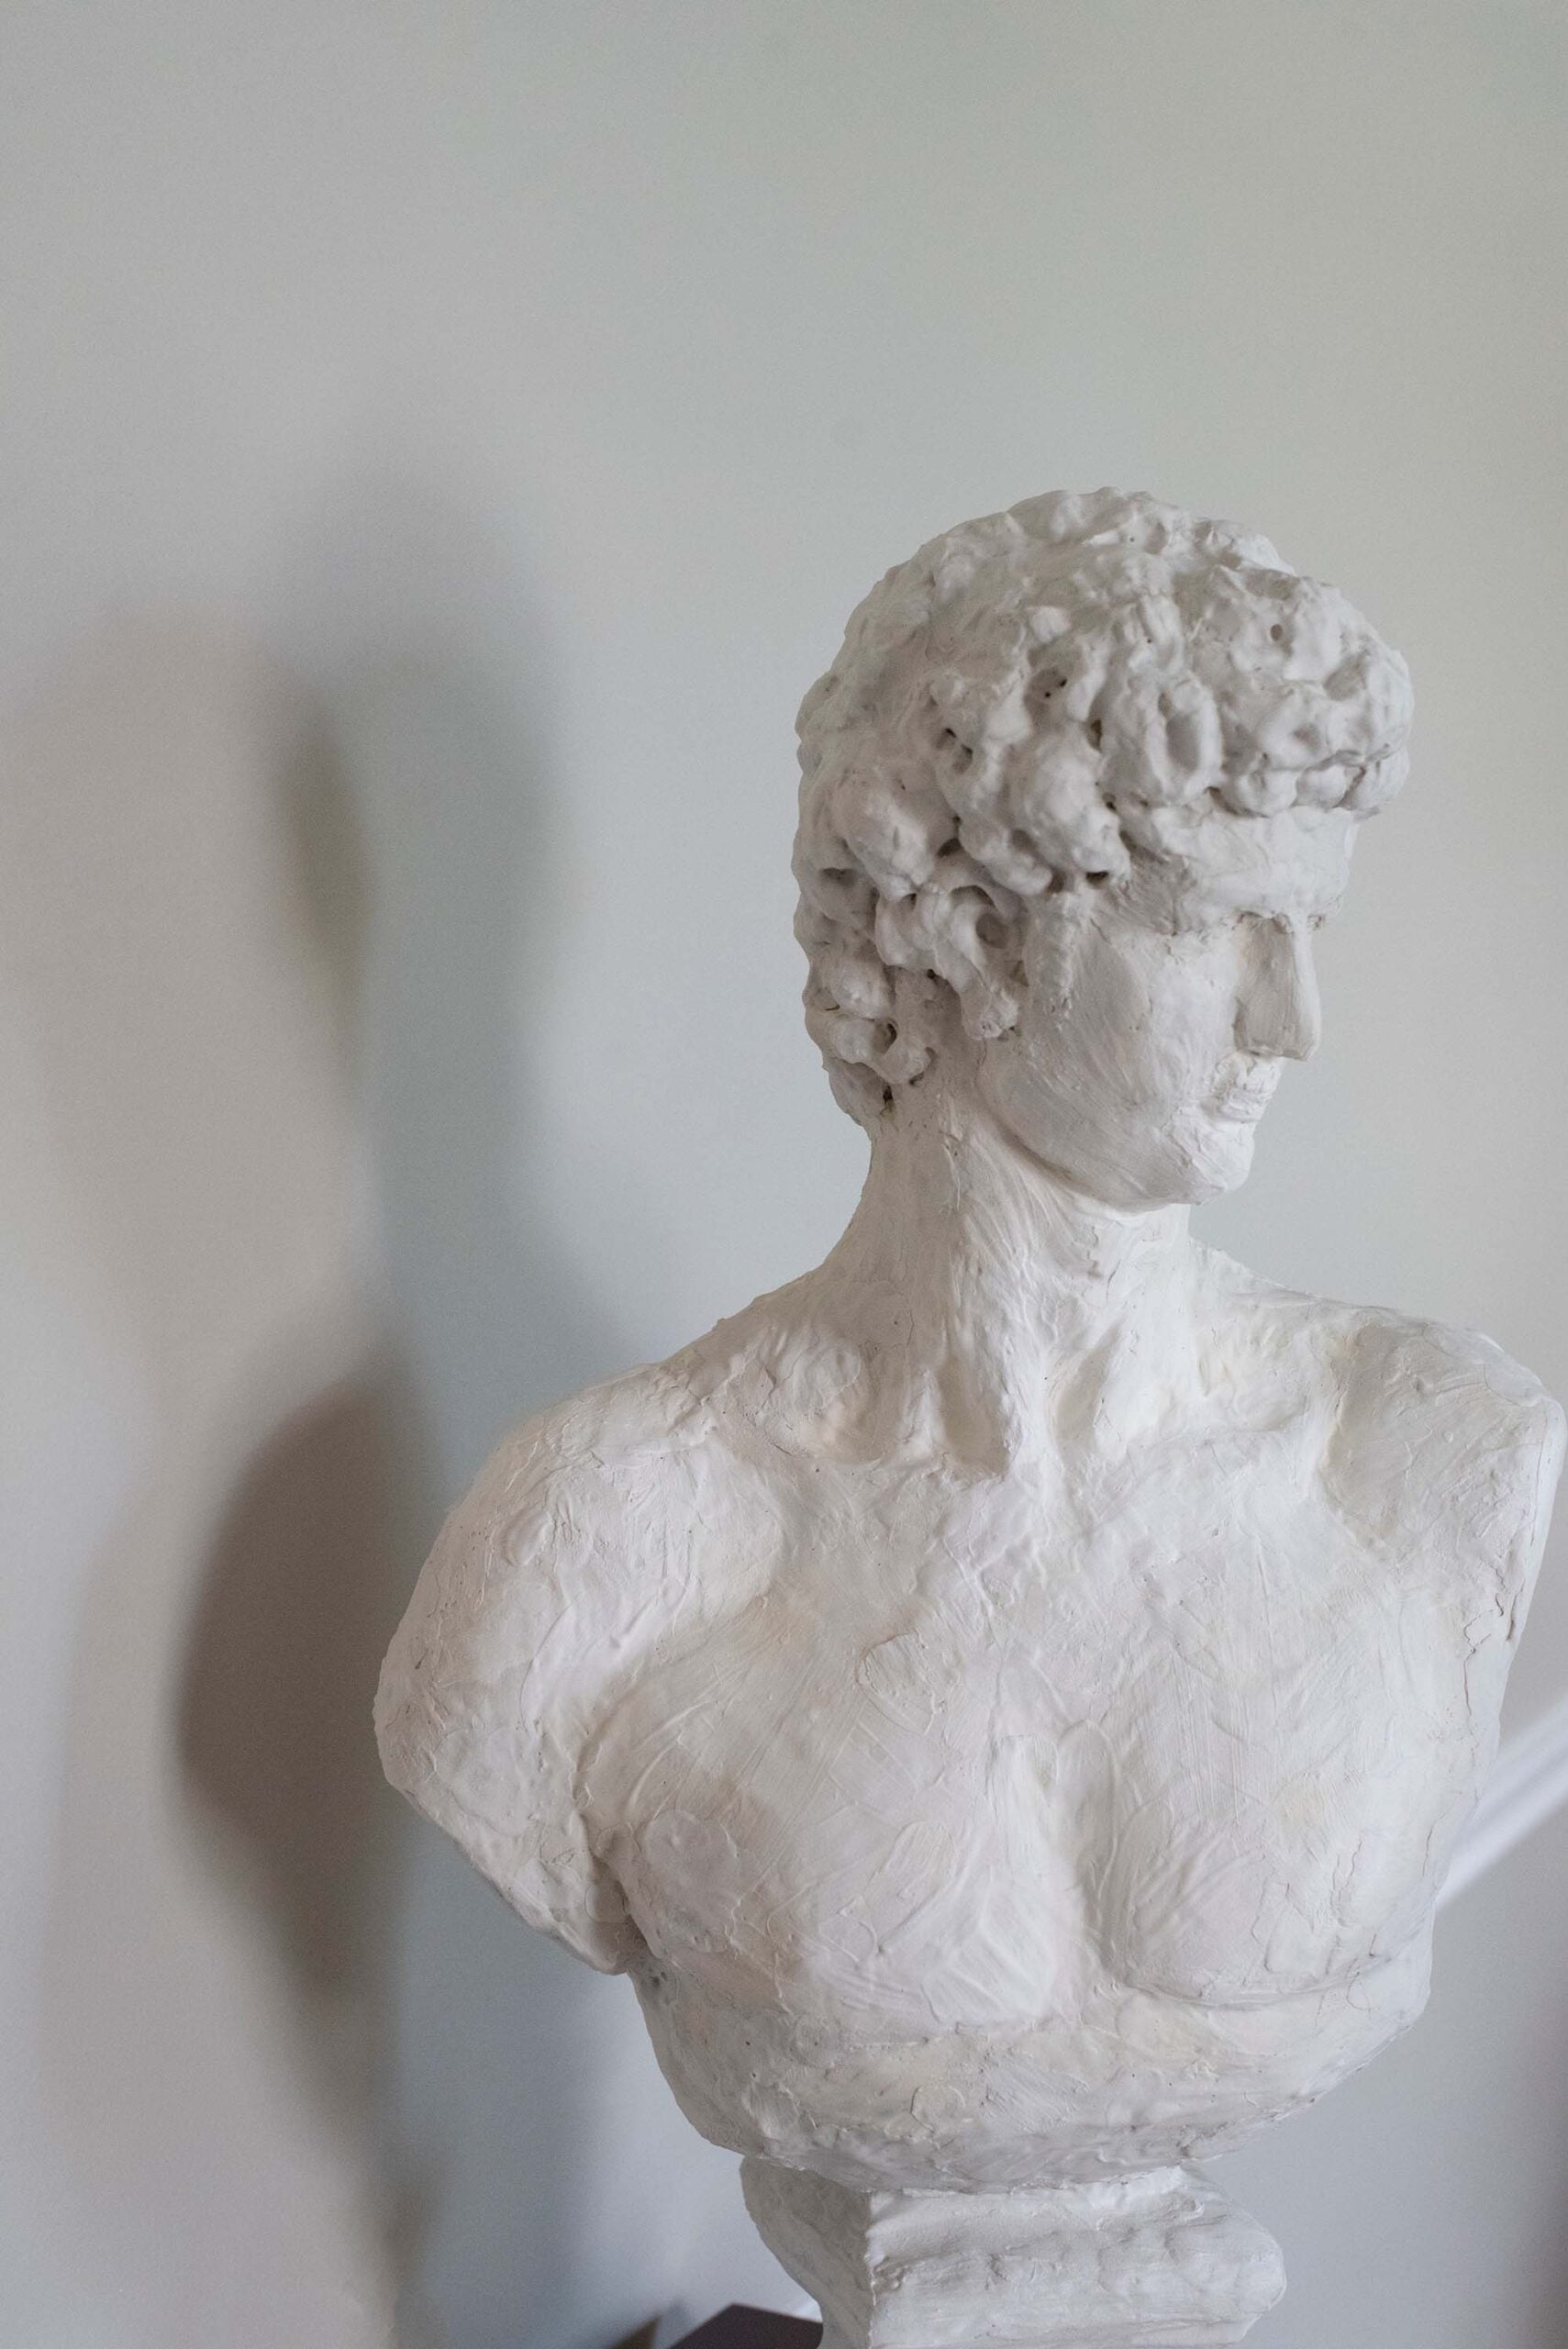
If the organic look isn’t your thing, you can still follow this same process, and sand the piece down at the end to smooth the finish. I really wanted this bust to have the appearance of marks and fingerprints- like someone had sculpted it by hand, so I leaned into the texture!
Styling a Plaster Bust
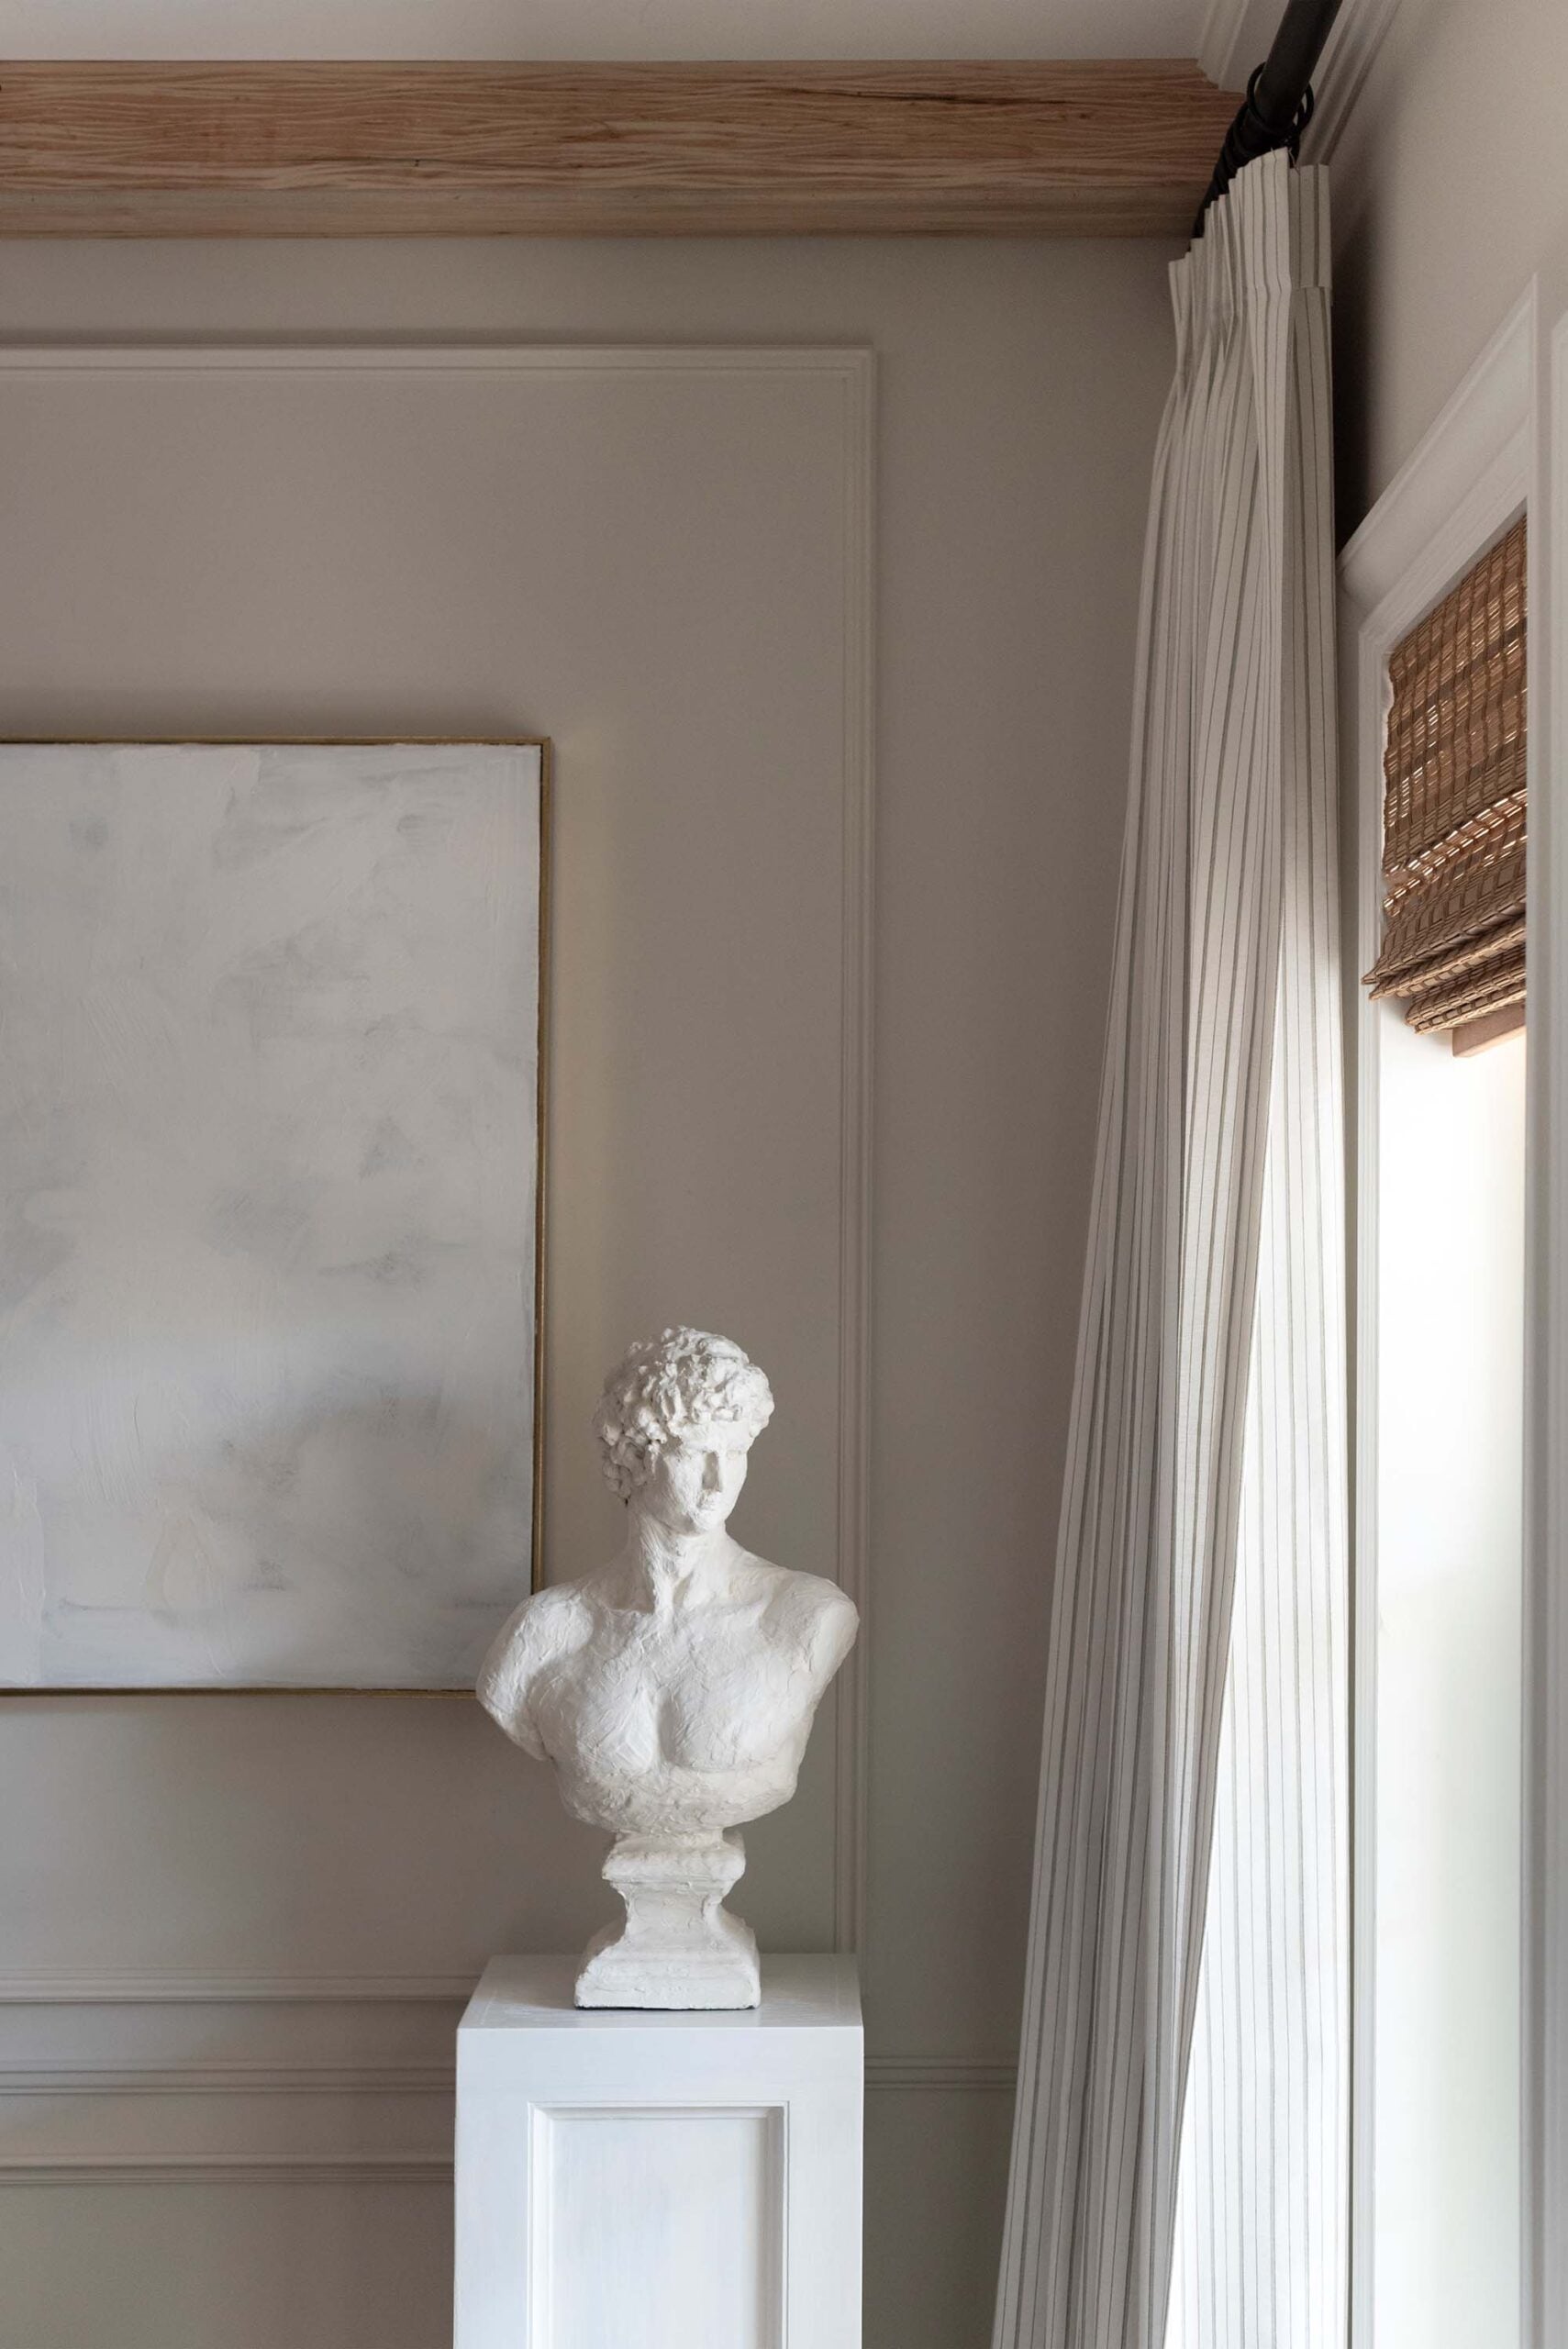
I thrifted a pedestal for this diy pedestal makeover, to display my newly refreshed bust. What do you think? The plaster bust and pedestal create a beautiful juxtaposition that easily fills negative space in a corner. I like to add height to the corner of a room. I think it turned out really nice! The finish is definitely more artistic and interesting than where it started, and it was a quick, budget-friendly project. I’m definitely calling it a win!
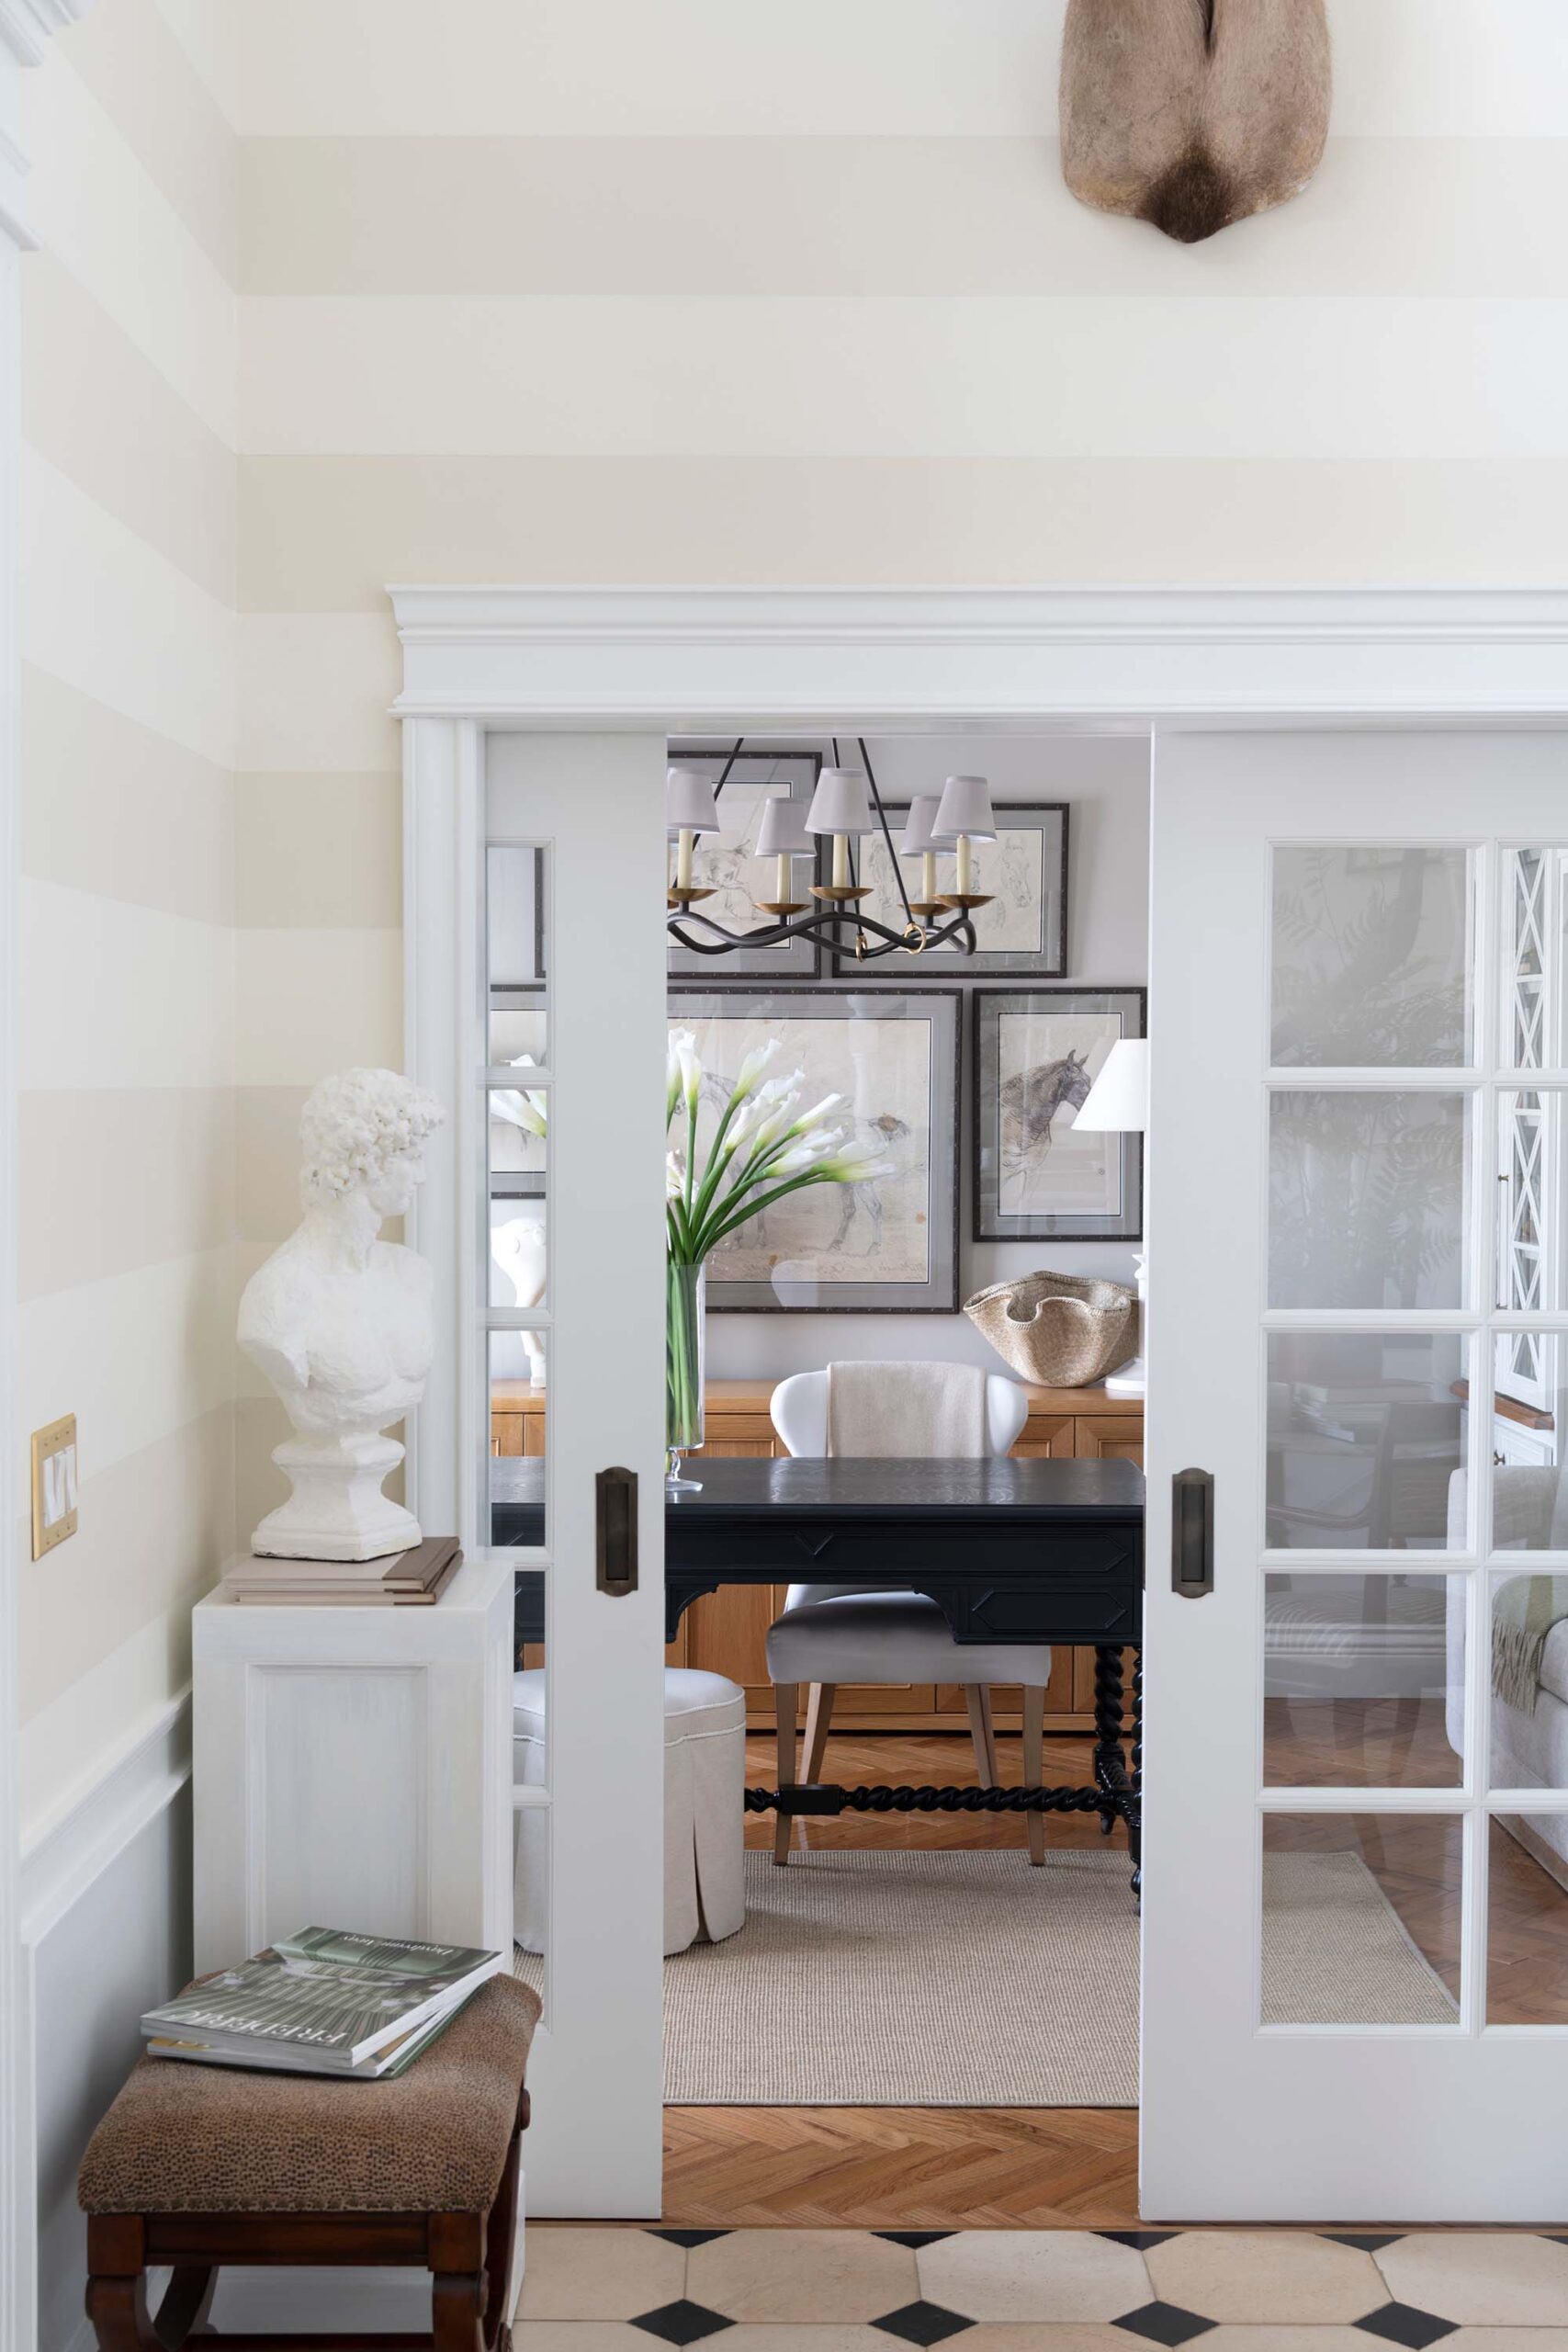
Busts are one of my favorite styling objects because they add height and a sculptural, organic form to a vignette. I love placing them on consoles, bookshelves, or pedestals where they can act as a focal point.
If you enjoy decorating with sculptural pieces, be sure to read my post on how to build a decorative pedestal to display your bust. Here is my roundup of busts & sculptures if you’re looking for a decorative bust of your own.
Questions?
Drywall joint compound is ideal. It spreads easily and creates a soft matte texture similar to real plaster.
If applied in thin coats, the details will remain visible while the finish becomes softer and more natural.
In most cases sealing is not necessary. Leaving the surface matte keeps the vintage plaster look.
Related Posts
Looking for more quick, easy, and creative DIY projects? I’m going to link some reader favorites for you below…
- How to Make Your Own Photographic Art
- How to Make a Custom Upholstered Bed
- DIY Sugar Scrub Recipe (My Easy 3 Ingredient Formula)
- Tiny Lamp Makeover & Pleated Shade DIY
- Succulent Arrangement DIY
- How to Make DIY Pressed Flower Wall Art
- DIY Cordless Plaster Lamp
This is one of those simple projects that made a big difference. Updating a bust (or any styling object) with plaster takes only a little time, but the transformation is surprisingly impactful. The finish becomes softer, more timeless, and far more reminiscent of an antique sculpture you’d see in an art gallery. It’s a little trick I come back to when I want decorative pieces to feel a little more collected and personal. This mindless creative project and getting my hands into some plaster was good for my soul. These little projects are always fun, and it’s a great way to switch things up or shake up your daily routine! Do you have any fun creative projects you’re looking forward to tackling? I’m working on finishing the artwork for the nursery right now… also made of plaster!

My favorite king of project- more fun than work. He turned out beautifully! Searching around the house for victims of me next project was me last week. Once I had the rub n buff out and my finger gold, I look high and low for items that needed a little ‘glow up’.
Exactly! Fun, creative, and relaxing. Thanks for your kind words, Melissa! Nothing is safe when I get the plaster out. Haha! And the rub & buff… you’re definitely right about that.
Very cool! And he looks great in the corner of your living room like this. I really like the texture it adds! And maybe when the dogs are outside they will behave because they know someone is watching them! HAHA!!
Thanks, Brittany! I like the texture, too. I think he’s going to stay in that spot! I’ll have to find a new home for my tree that usually lives there. LOL to the dogs. Those two are maniacs in the yard, constantly chasing each other. Can you imagine if all it took to keep them in line was a pretty roman bust?! HAHA! I would die. lol
I think it fits perfectly in your living room! I always admire your plaster projects and eventually the right piece will come along and I’ll try my hand at something like this. For now all of my projects seem to be paint projects, haha. I can’t wait to finish up those and really get into styling some of the rooms. It’s always nice to have those creative outlets that feed the soul, and your little soul project turned out beautifully. Have a great Thursday Sarah! Xoxo
I think so, too! Thanks Lauren. He’s looking nice over there in the corner. I moved my tree and it feels so much brighter with the bust in that place instead. I hope painting is going well! I’m always anxious for the styling part, too. You’ll get there! Keep up the good work :)
The whole time I was reading I was wondering what Emmett thought or said when he first saw it? Both my husband and son would be asking me questions and making comments about the man’s hair, etc. LOL!
But I absolutely love it and it does look like it was sculpted by hand. Great eye on this find. I would have passed it up because I wouldn’t not have thought about plaster…putting this away in the back of my mind for future project.
Haha!! Typical Greek or Roman bust hair- I’m into it! Emmett didn’t say anything, but probably because I’ve dragged him around quite a few art museums & galleries with me and I’m sure he has already made those comments over the years. Lol! He did crack up because I shared a sneak peek of the bust in progress on IG and people were messaging to guess what I was using. Among the guesses were sunscreen and toothpaste, which gave him a chuckle. Ha! It’s a good thing I slathered it in plaster and not the aforementioned products. Plaster is so fun!
How do you find such cool busts?! I literally never see them when I’m thrifting. He looks a great size, and I dig his Adonis hair! I love the way he turned out. Every single time you complete a plaster project, I am dying to slather something in that cool, white goop! Lucky for them, nobody at our house stands still long enough! Plaster pups, anyone? My brother actually got into the act, and I’ll be posting a picture of the coolest plaster gift he made me. I hope you, too, are enjoying your sibling time! Happy nearly the weekend, everyone! 🍕💜
Estate sales have been my friend for busts lately! People around here must be into them as much as I am. Haha! I dig the hair, too! I’m the same way once the plaster goop comes out… watch out, because I want to plaster everything. Haha! It’s just so fun. Plaster pups. LOL! I did see your brother’s plaster- HOW COOL and thoughtful. I can’t wait to see how you display that beauty. We’re trying to plan a quick trip to Alaska for our anniversary in September, so I may need your recs :) xo
Nice work. Thanks for sharing the process.
Thanks James!
I love this idea and have long been thinking about doing something like this to a few cheap lamps I have. Over the years, and especially with that lamp you originally made over back in the day, do you find that plastered finish flakes or sloughs off dust at all over the years? My lamps won’t be handled a TON, but there’s always some fussing and movement with turning them on and off, and if you think the coating might leave a lot of residue or even chunk off in the end, I might skip it. Thanks, Sarah!