DIY Cordless Plaster Lamp
 I hope you all had a lovely holiday weekend! Did you see our surprise visitors on IG stories? They drove 10 hours to see us and hang out for the weekend! Laurie Anne actually had an Alaska trip planned this month, too… although not with us, and we were bummed about missing our vacations. Since we’ve both been social distancing, we decided to make the most of the holiday weekend at home together. She called me Thursday night and said, “We’re driving up to visit!” To which I replied, “NOW?!” Haha! It was very spontaneous and as you might imagine, we didn’t get much accomplished on our house projects. Our house guests are actually still here. Anyway- as promised, I’ve got the lamp DIY for you today! It turned out so great. I’ve been wanting to plaster something for awhile now. I haven’t used the material for years (since art school), and after seeing my friend Jenny’s plaster lamp project, it motivated me to pull out my plaster mix. Click through for the tutorial!
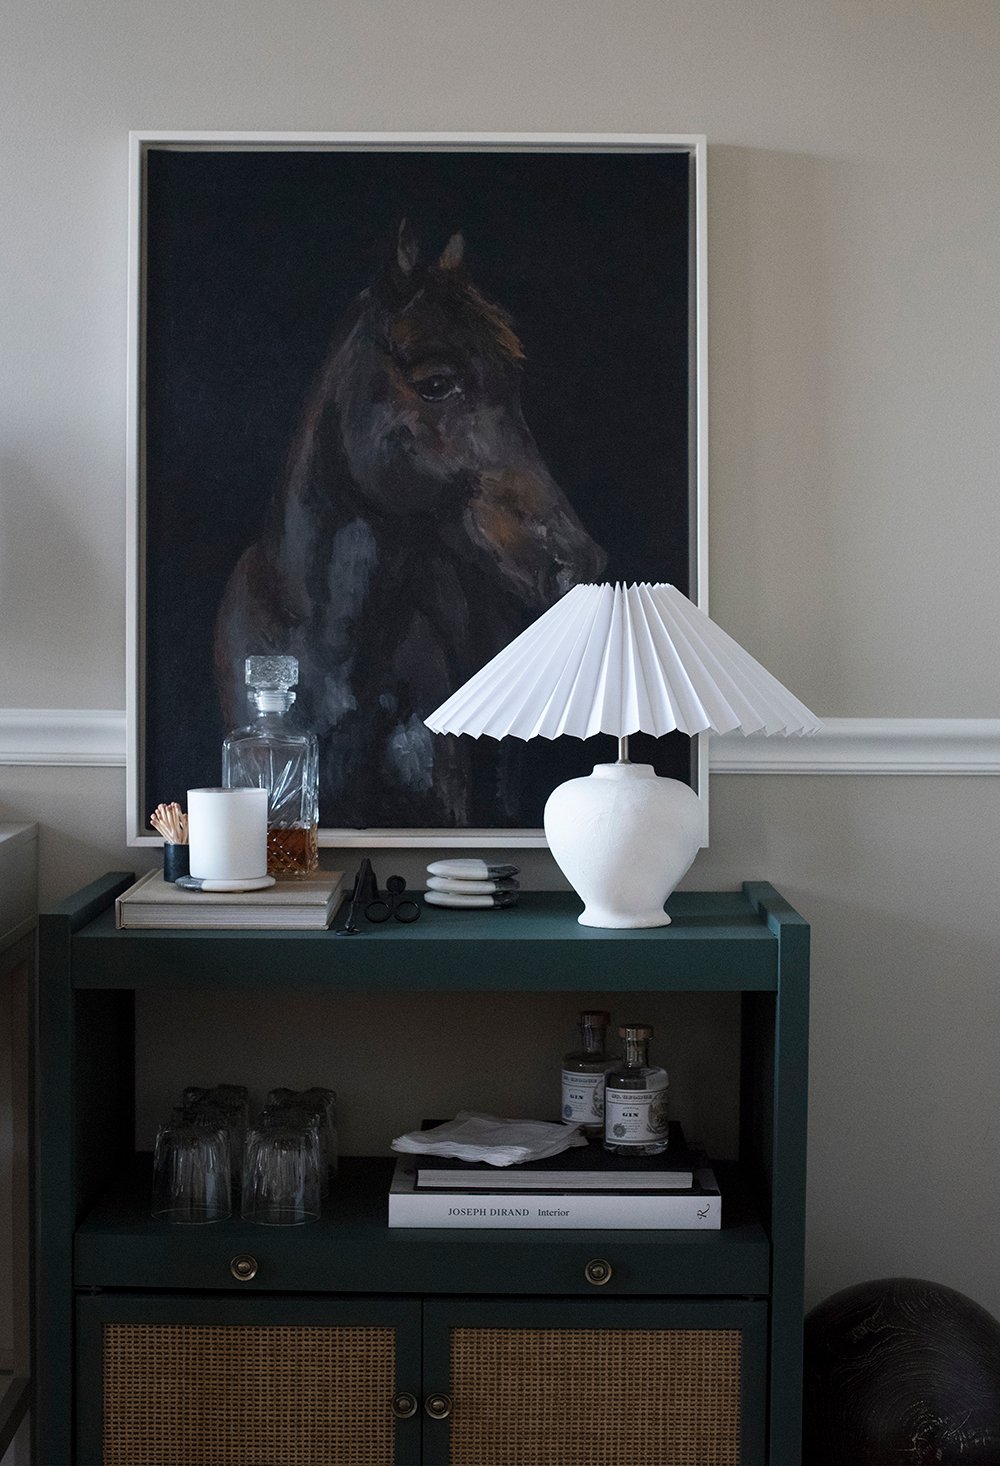 Eventually, I’ll probably move the lamp to the basement, but since we have visitors… I didn’t have time to shift furniture and style. This is what you’ll need to get started:
SUPPLIES + TOOLS
- plaster of paris, dry mix
- cheap paint brush (low quality bristles help add texture)
- puck light (comes with remote)
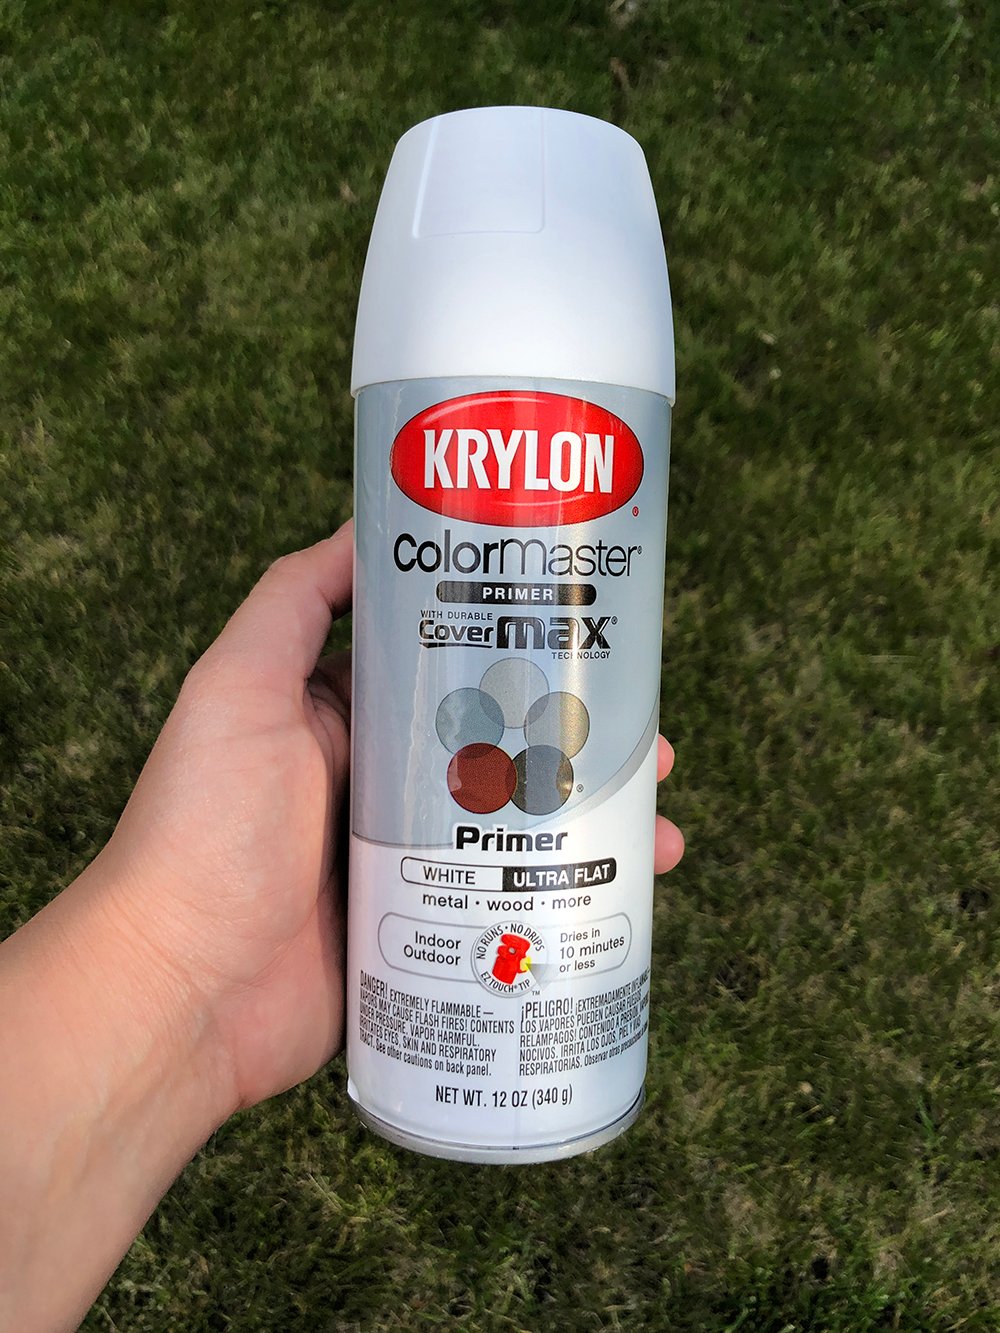
- Krylon Spray Primer
- Painters Tape
- lamp base, mine is vintage from this Etsy shop
- pleated lamp shade, mine is from this Etsy shop
- Sanding Sponge
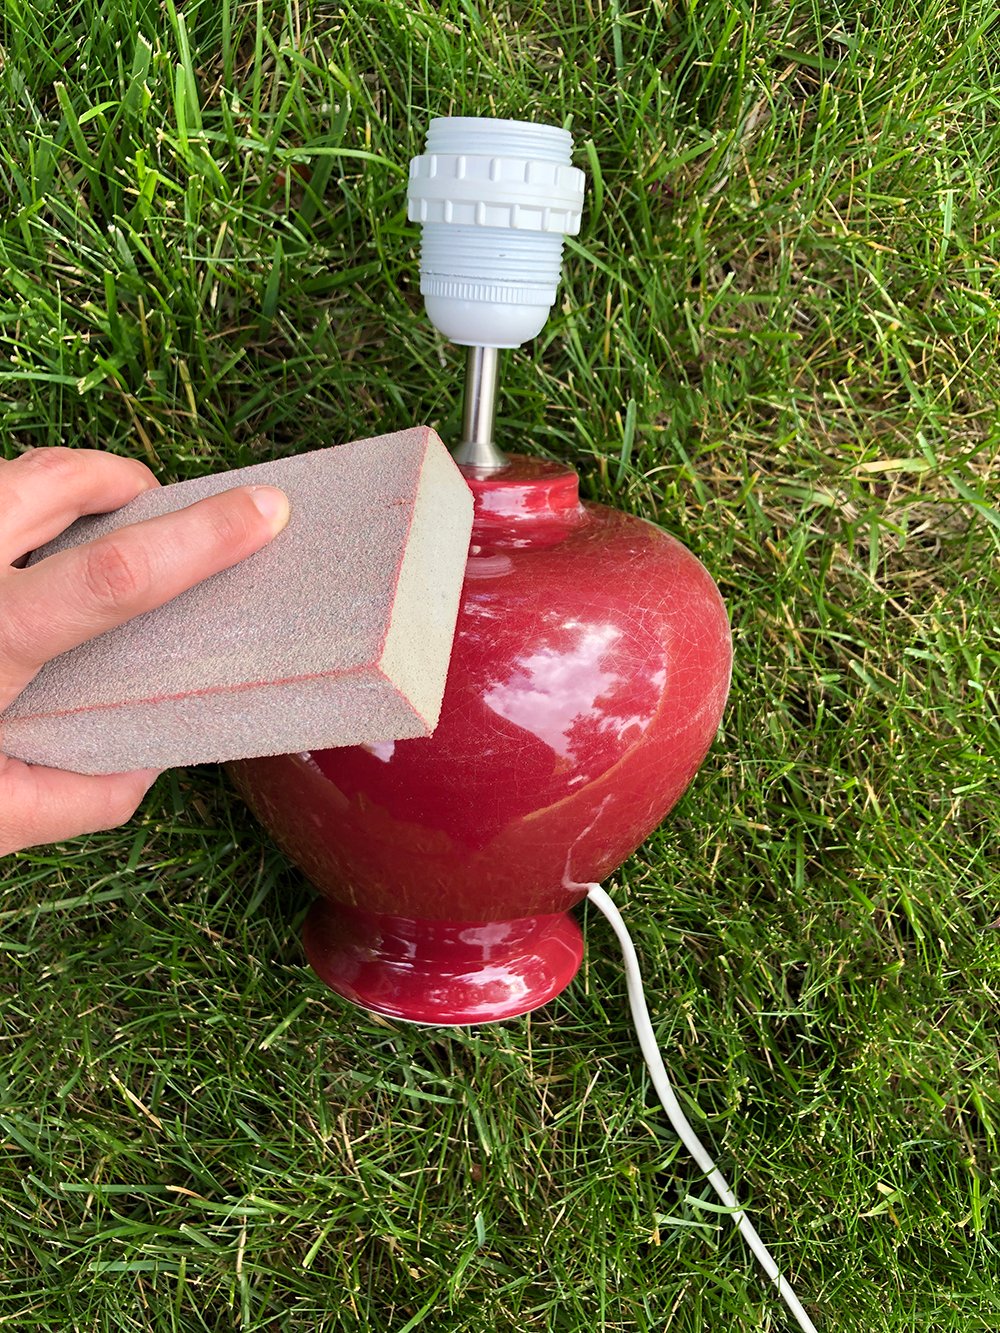
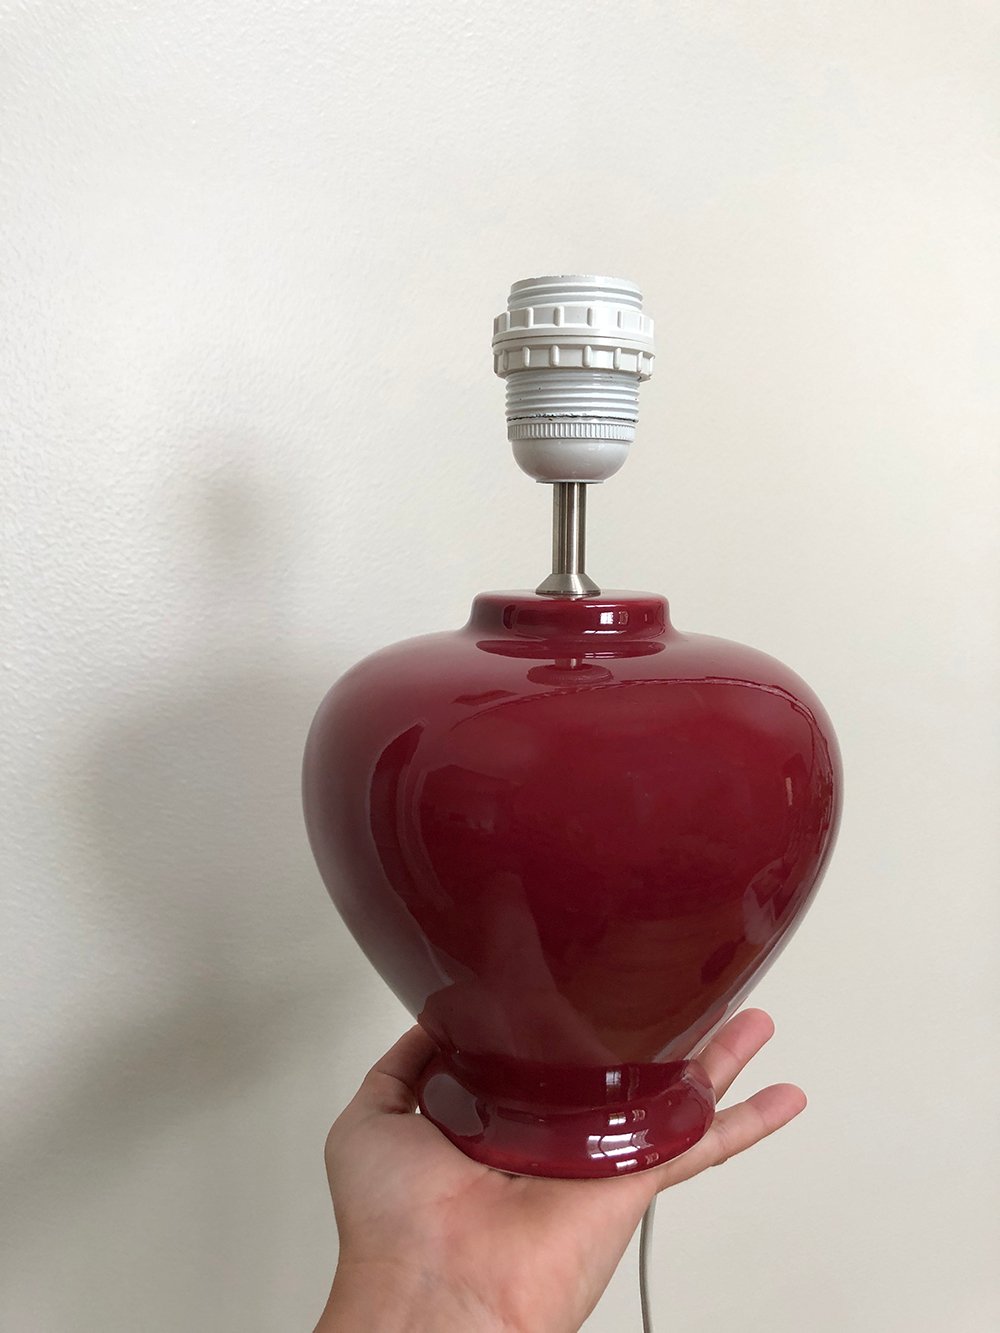 Step 1 // Sand the base. You’ll want to begin by roughing up the base surface. I used a sanding sponge, pictured below.
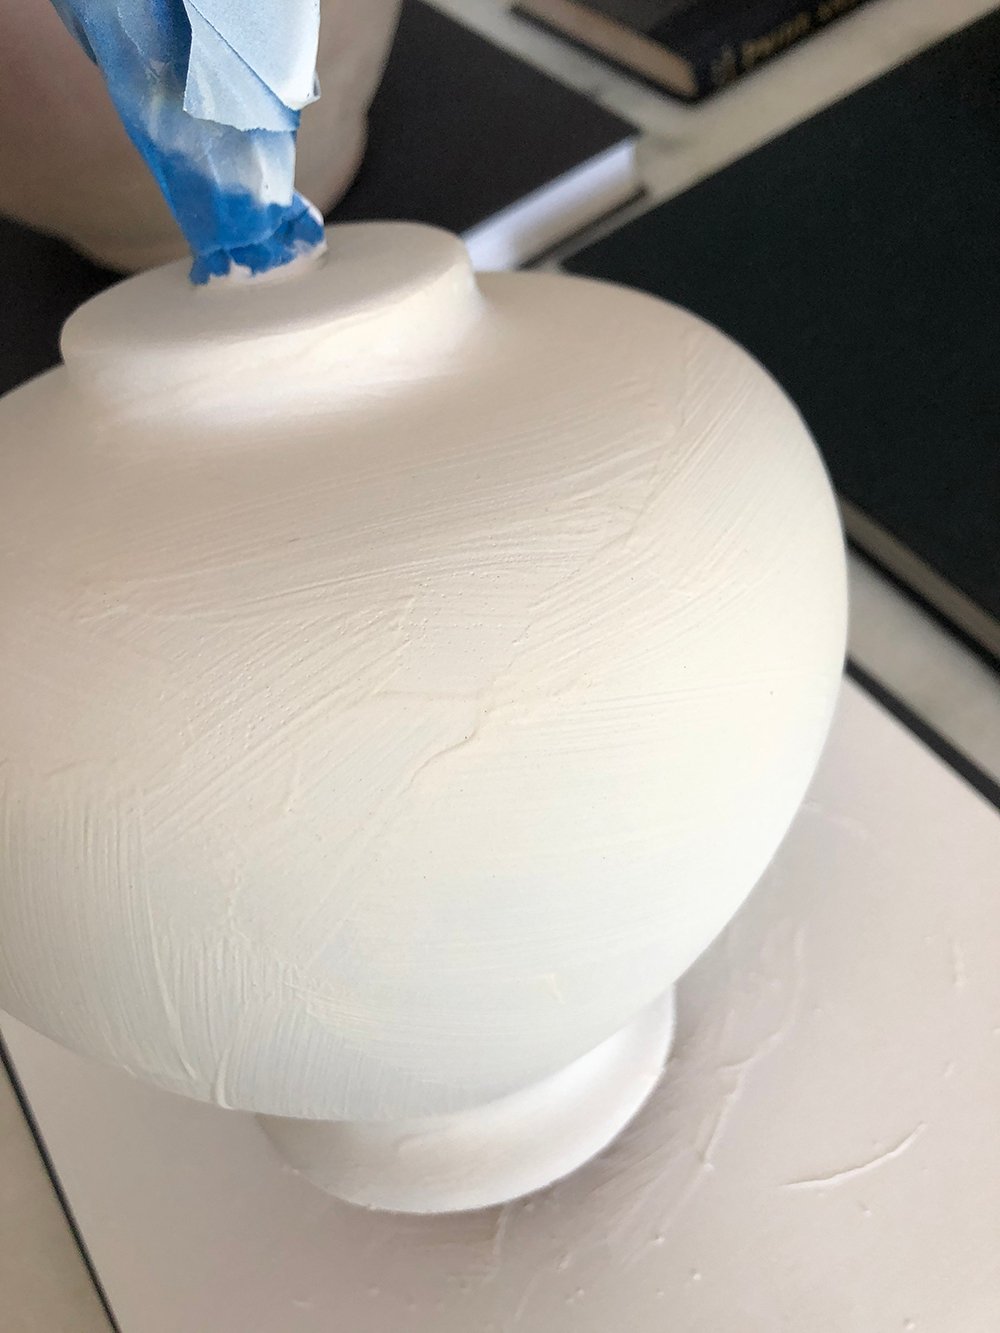
 Step 2 // Tape it off. Using painters tape, tape the areas you won’t be plastering. I ended up taping the cord, too… but this was before I decided to cut it out completely for a cordless lamp. This base is vintage and had a European plug. Eventually I may rewire it, but since it’s so small… the cordless look with a puck light seemed appealing. If you’d like a cordless lamp, instead of taping it off- use scissors and cut out the cord altogether.
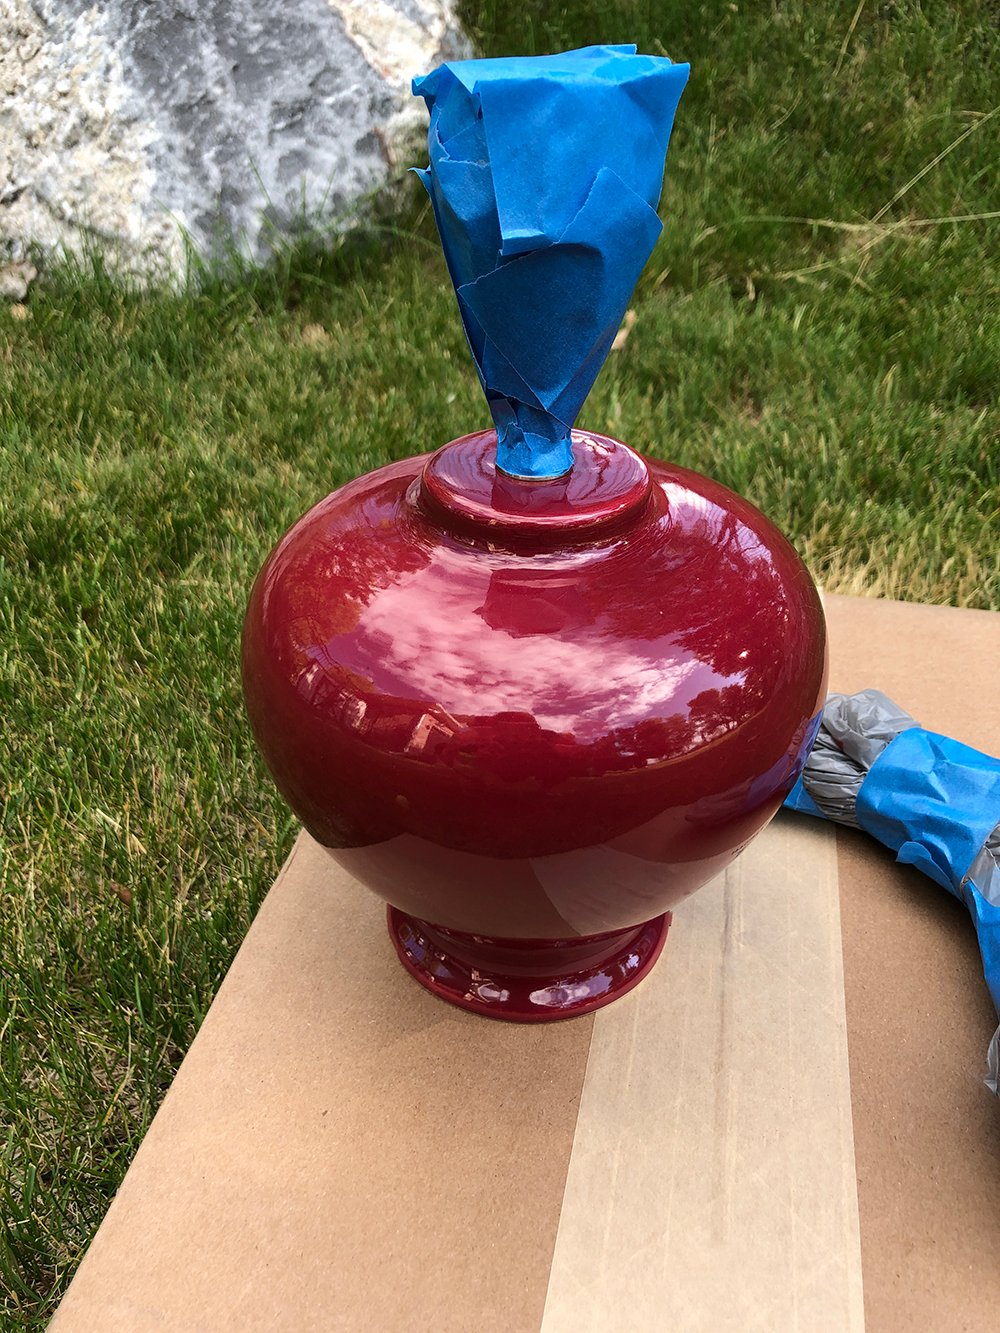 Step 3 // Prime it. After sanding, I used Krylon ultra flat primer in a few thin layers to prime the base. This works on metal, wood, stone, and all types of surfaces.
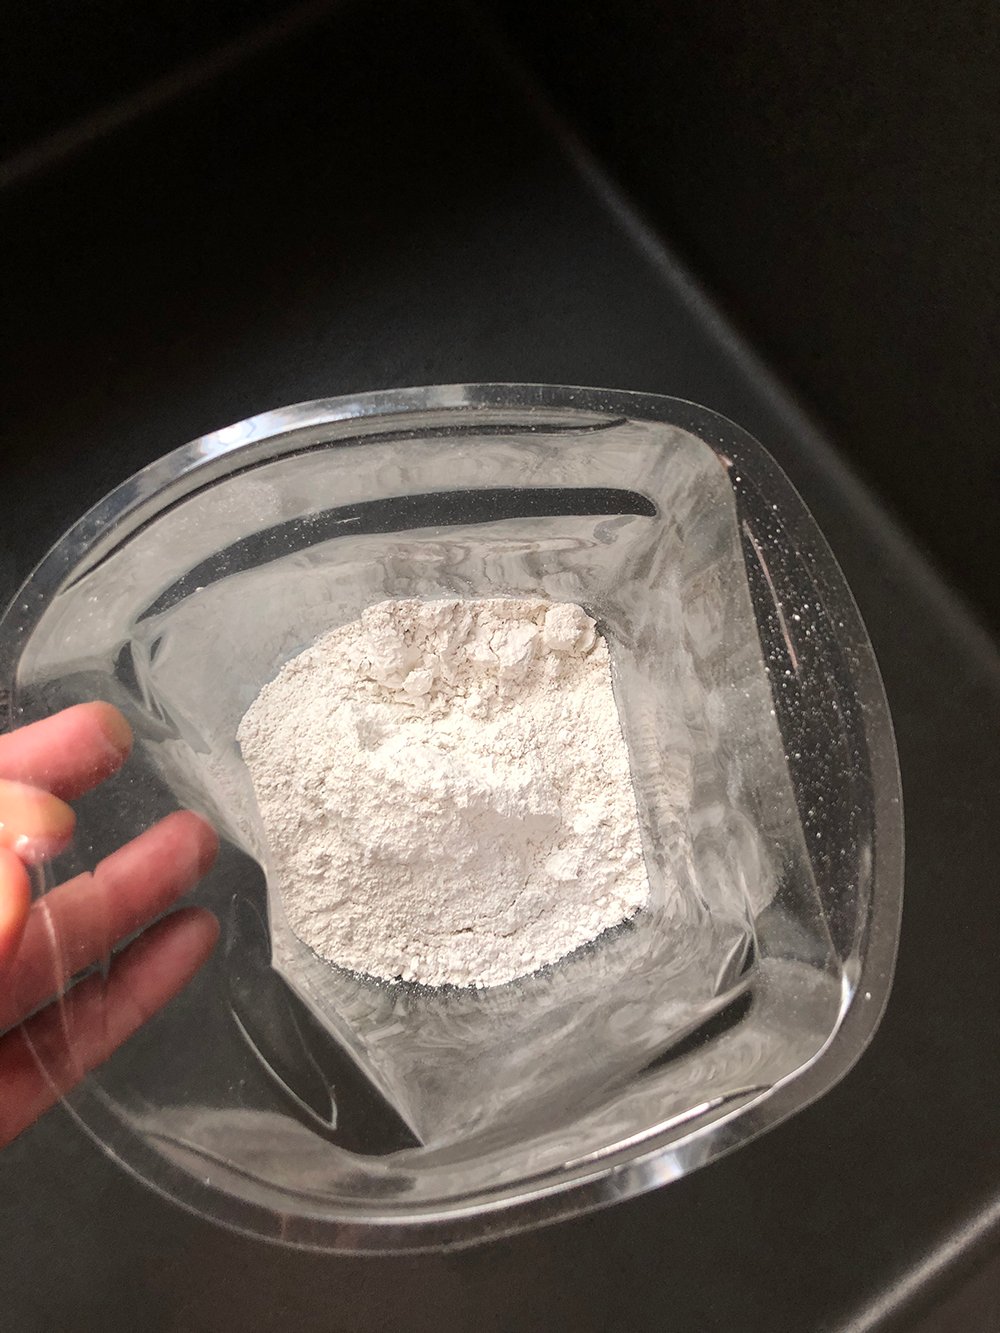
 Step 4 // Mix your plaster. Scoop 1/2 cup of dry plaster mix into a disposable container. Using your brush, add water and mix up the plaster.
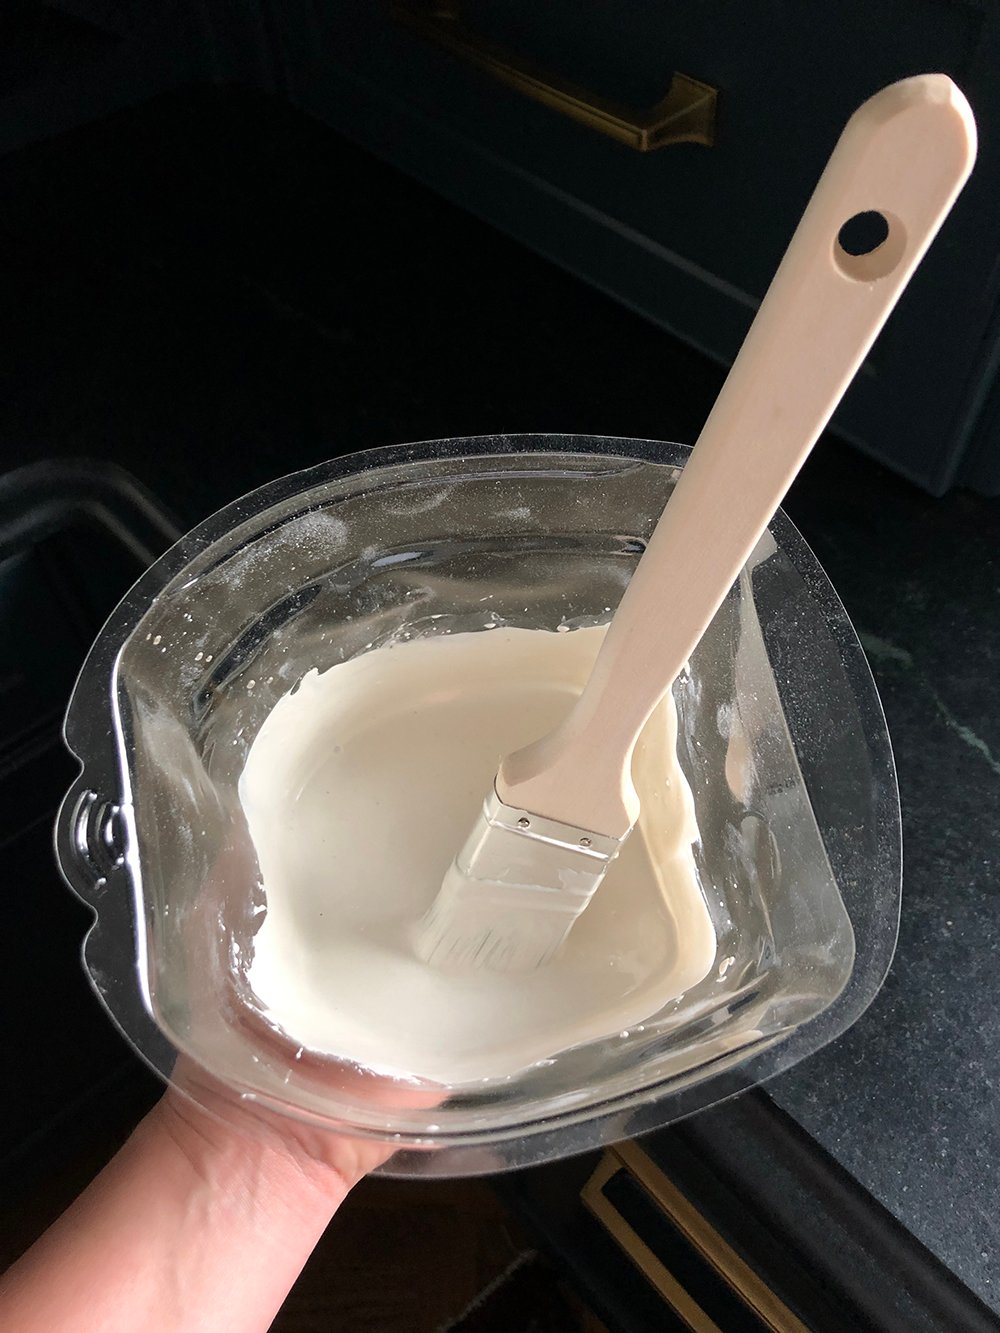
 You’ll want the plaster to look similar in consistency to pancake batter, like pictured below. Plaster has a working time of about 7 minutes, and it hardens quickly- so working fast is important.
 Step 5 // Coat the lamp. Brush the plaster on in thin layers, covering the base completely. I like to brush from all different angles to create a more textural look. The beauty of plaster is the organic, imperfections. As you’re working quickly, don’t overthink it or try to be too precise or smooth. Allow the first coat to dry completely. If it’s cool to the touch… it isn’t dry. Repeat this step 2-3 more times until you’ve achieved your desired look.
 Step 6 // Wet Sand. You can use a brush with water, a sponge with water, or even light grit sandpaper for this step… or you can leave it as is! If you’d like to smooth your lamp a bit, now is the time to perfect the texture. I used a clean brush dipped into water to smooth some of the more harsh looking lines.
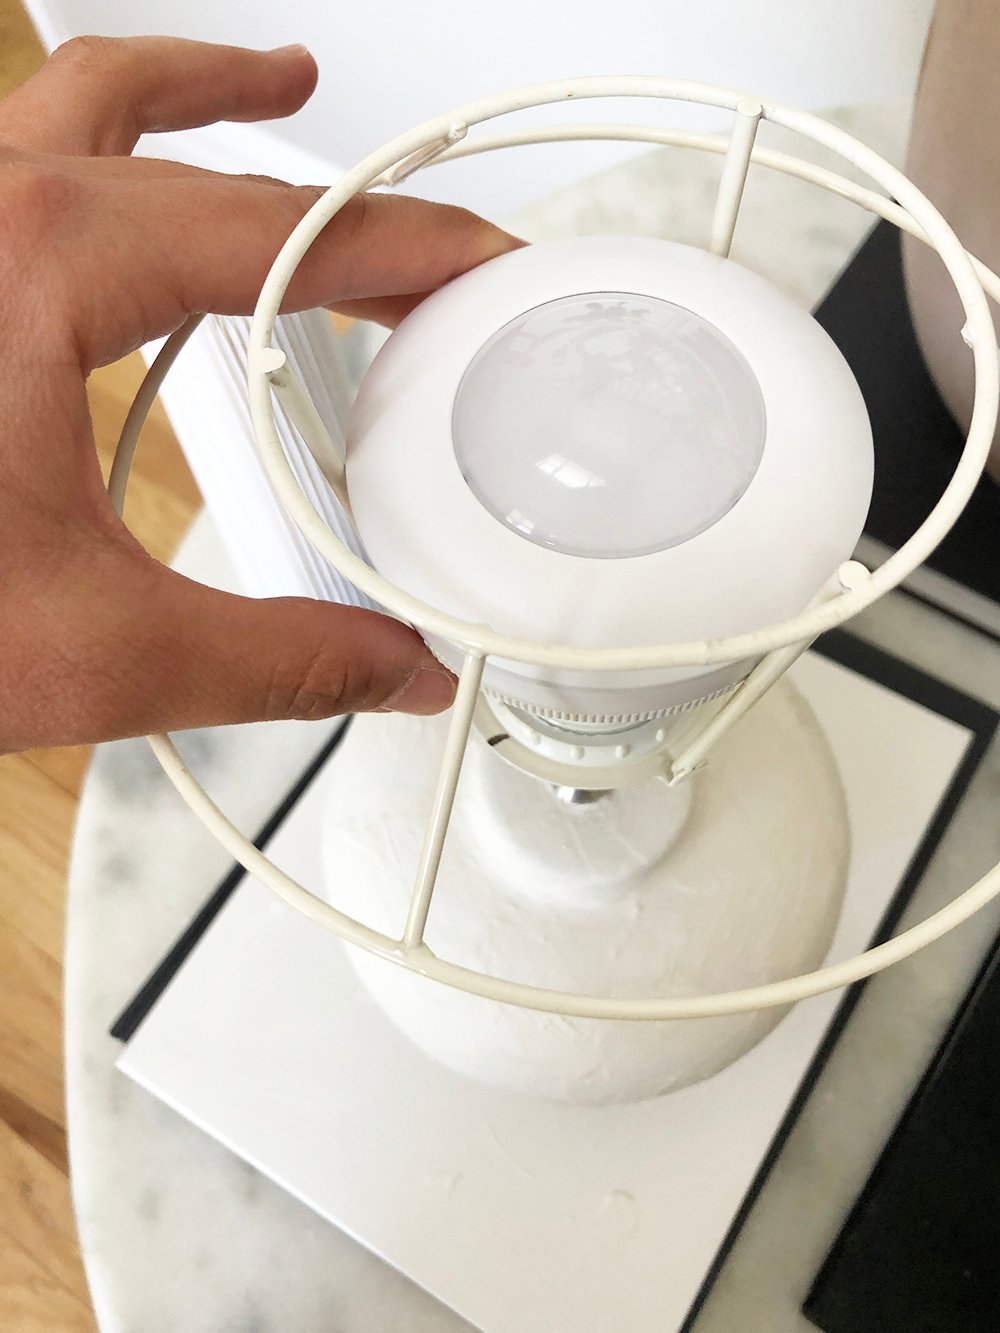
 Step 7 // “Install” your puck light. Puck light installation really isn’t “installation”, as you’re just adding batteries and resting the puck onto the empty socket. I don’t even secure mine, but you definitely could if you want.
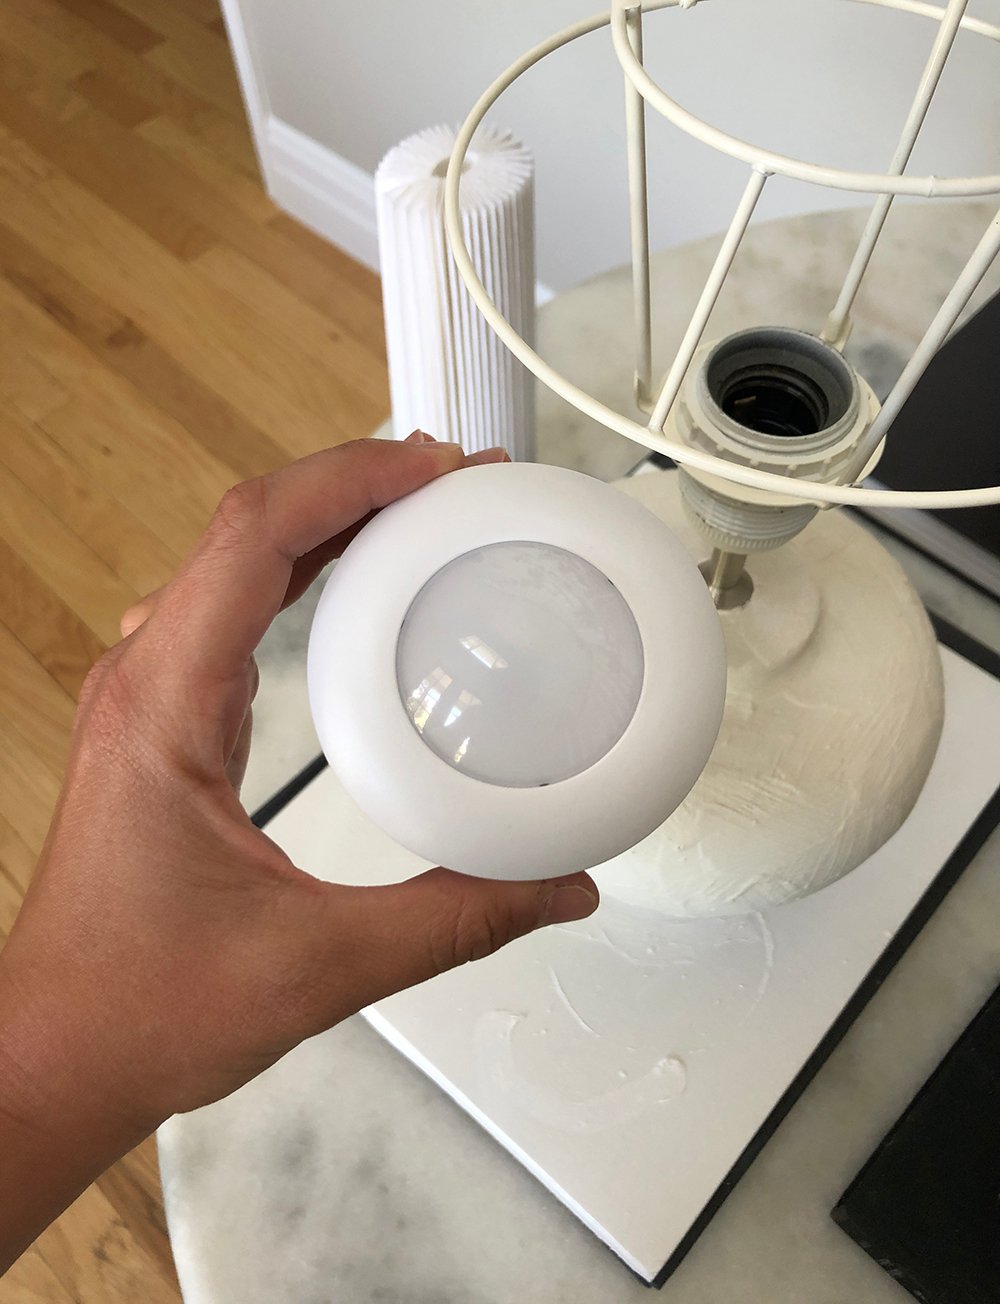 Puck lights can be turned on by tapping the top, or you can use a remote. They’re really easy and provide a good amount of light!
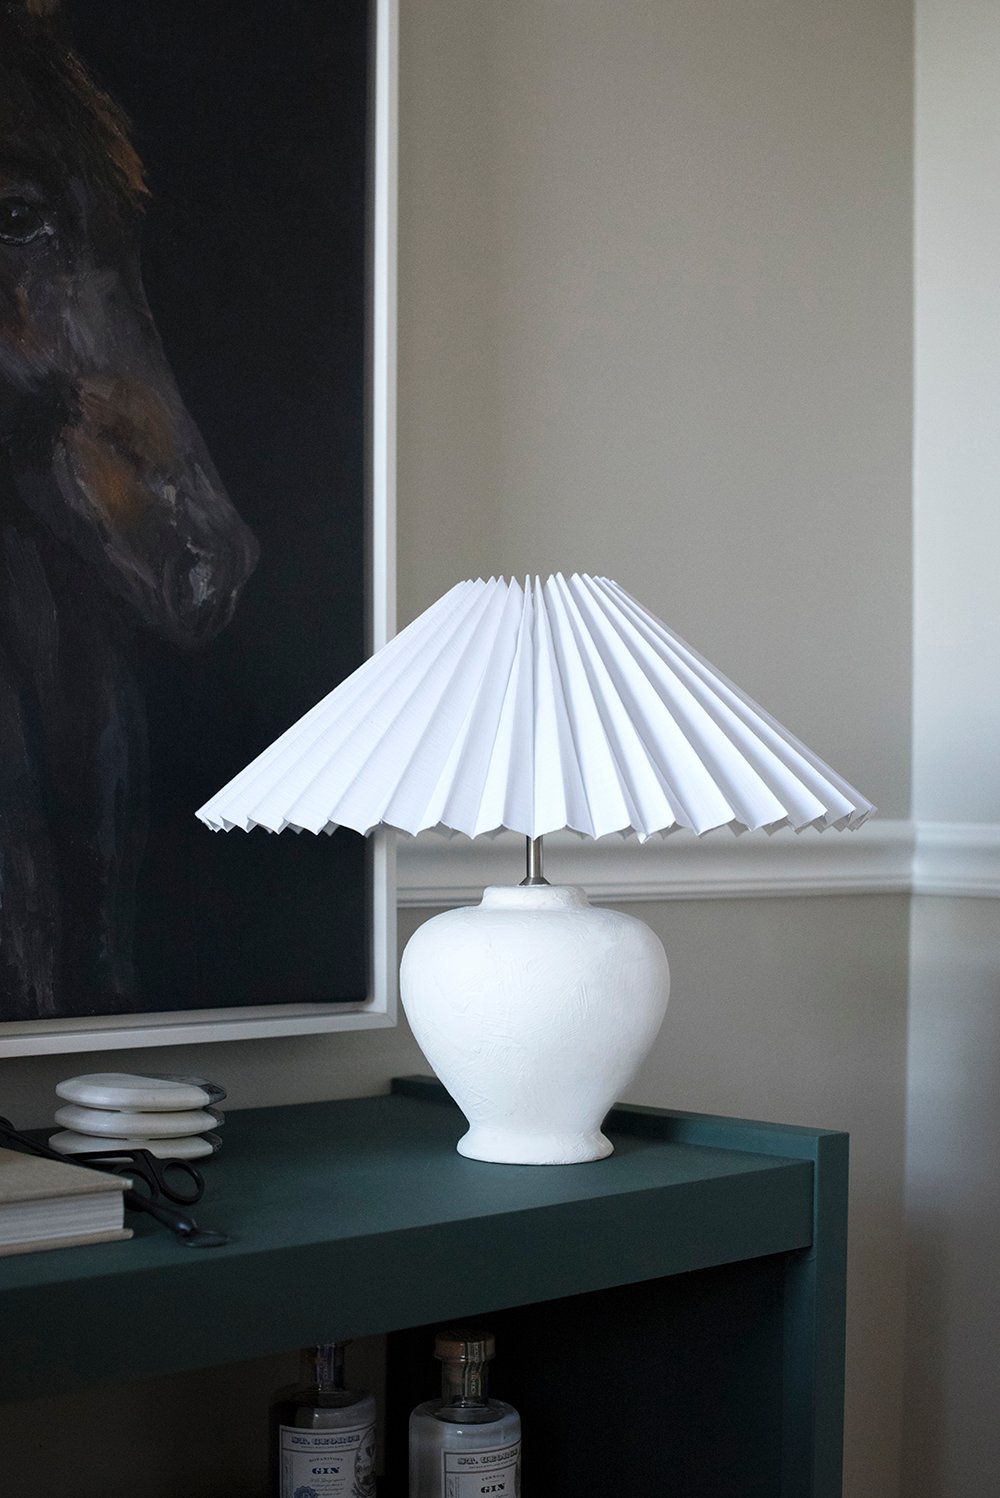
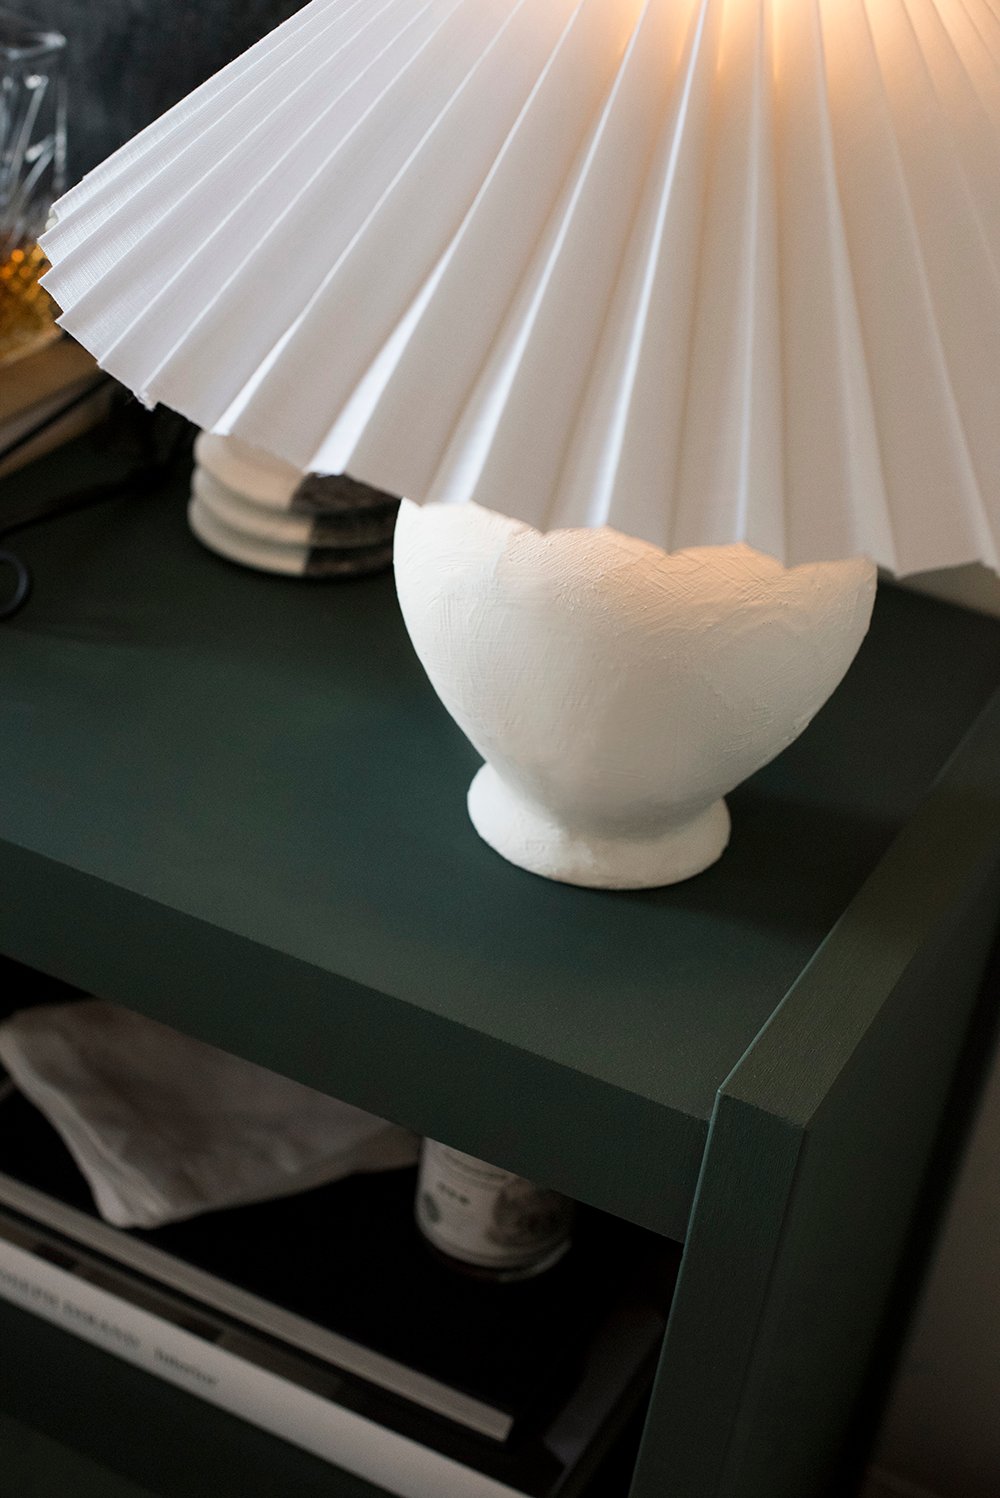
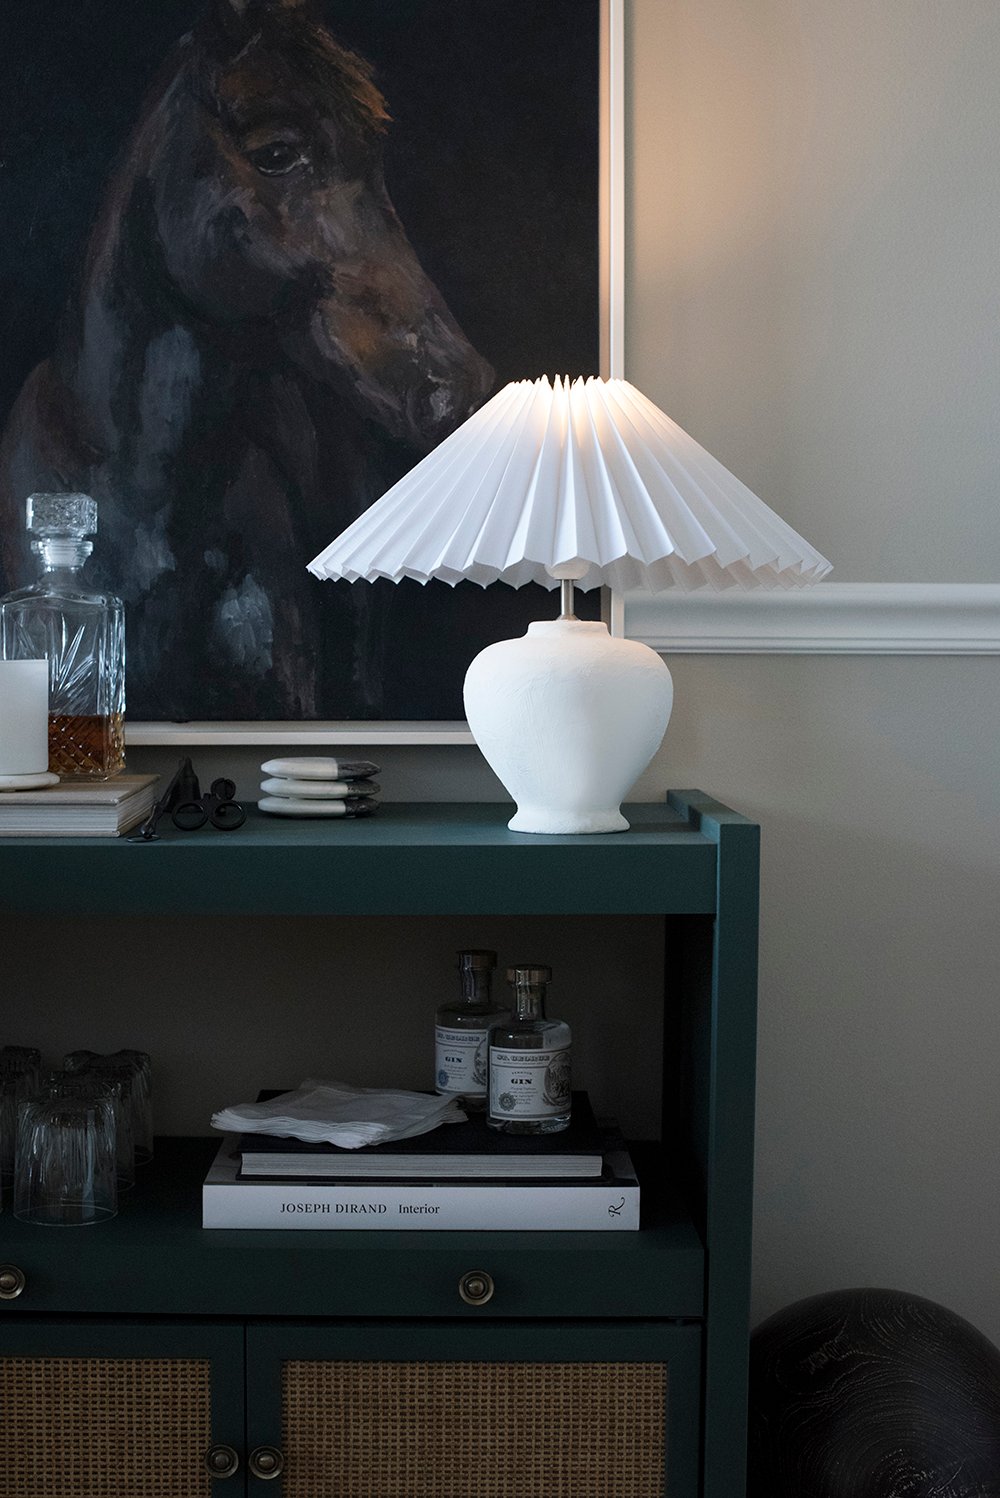
 My finished lamp turned out really beautiful! I love the organic texture paired with the geometric shade. It’s such a nice monochromatic contrast.
 You can really use plaster on anything… it isn’t just limited to a lamp base. I have another object I’ll be plastering soon (a bust), and I’m already wondering what else I can cover in this beautiful material. A vase would be a quick, easy project!
 What do you think? Are you into the plaster look? How about pleated shades? I’ve been seeing more and more of these resurface and I love the look! I hope you all have a wonderful week.

Good morning Sarah! Your lamp turned out beautifully!! Plaster wouldn’t typically be one that I’m drawn to, but that’s largely because when I think of plaster lamps an image of a particularly bad 90’s version pops into my head…this gorgeous clean looking plaster is not what I envisioned when I watched your stories!! I love the way the pleated shade looks with it, and that isn’t one I’d be drawn to either. All in all, I would pick something like this off of a shelf somewhere, because it looks so crisp and clean and different! You did a magnificent job, and I would consider this a great example of a plaster lamp, unlike any I’ve seen before. I may just have to try this myself! Question on the puck lights: does each one need its own specific remote? Or can you use one remote for all the puck light lamps in your home? It was a nice relaxing weekend, and this week it’s back to the bathroom shenanigans for me! I’ll be tackling the water closet paint next, and still can’t get over how much more beautiful it all looks with the contrast trim and painted door. I had wanted to replace our doors, but it’s not in the cards right now. I think I like our existing doors a lot more now that I’ve seen it painted!! Lol, but I’ll likely still replace them. Once the water closet is painted, I’ll be replacing the baseboards and giving that space a little something unique, I just haven’t decided yet exactly what that will be. Hopefully I make large amounts of progress this week! Cheers to Monday friend! I hope you’re able to make progress this week as well!!
Hi Lauren! Thank you so much. There was definitely some bad plaster happening in the 90s. Haha! To answer your puck light question- it doesn’t need its own remote. You can also turn it on by tapping the puck (without the remote), which is honestly what I do the majority of the time anyway. I’m so happy to hear you had a nice, relaxing weekend :) Good luck on your water closet this week. You can always replace the doors later on (that’s what we’ll be doing for certain rooms). It’s a process, my friend. Paint probably makes them look a lot better! Here’s to lots of progress and a productive week ahead, getting back into our regular routines! xo
Happy Monday! I’m glad that you were able to have a surprise visit with Laurie Anne; seeing friends is a real boost these days. After you mentioned vintage plaster lamps in stories the other day, I did some reading. What an interesting history! I learned that some of those animal leg stools that I find so creepy were made of plaster!
I confess that I find some irregular textures a little…off-putting. I do, however, love the cool, matte surface that plaster offers. I also like the look after the wet sanding. The combo with the shade is really spectacular! (Lately, I am strangely into all manner of interesting lampshades.🤷♀️) I hope that you get to enjoy your company for a little longer! Projects will be there when you are ready.💜
Happy Monday! Just coming inside from pouring concrete and our house guests are officially on the road. It was SO nice seeing friends! That really is such a boost these days. I think I needed that human interaction. Isn’t the history of plaster fascinating? I’m also into lampshades these days. Did you have a nice holiday weekend? I hope it was low key, restful, and relaxing! Thanks so much for being here, Peggi :) xo
Hello Sarah! I just love this sweet lamp with the cheeky lampshade. I want to try my own plaster lamp and am wondering if it needs to be sealed? (Wondering about dust hiding in the crevices.) So cute, thanks for sharing.
Thank you Suzanne! Great question- you can definitely seal it or paint it for added durability. Natural plaster is a very absorbent material, so it’s not a bad idea if you’re worried about staining or cleaning products penetrating the surface. So far, I’ve been air dusting my lamp (with my keyboard cleaner, haha). Hope this helps!
Still loving the crisp white and dramatic shapes of this lamp! I have only used plaster once for a school science project, so I’m not entirely sure this would work. In your pedestal post last week, there was a tall example that looked draped. I wondered if that could be accomplished with plaster-soaked fabric? In my mind, this is either genius…or a spectacular disaster! Haha. I hope all of your projects are sailing along smoothly!
Oh Peggi that sounds like fun!! I picture a very textured fabric like linen working very well. I think I know the exact pedestal you’re referring to…and I think it would be beautiful!! Let us know if you try it out! Cheers friend!
Me too! I use this little lamp every night. I’ve been working late evenings, so it has come in very handy. I LOVE your idea for the fabric soaked plaster. I feel like that’s a DIY project I need to try. I’m still trying to find fabric for my DIY upholstered bed, but after that- maybe that will be the next decor project I take a stab at. I’m with you… I think it’s genius!! It has been such a productive week so far. I hope you’re having a good week too, Peggi :) xo
Still digging this lamp! Still haven’t had time to do my own fun DIY…#distancelearning. 😂🤣 I think I’m just going to make a list of fun diy’s to try when things are more smooth sailing, and this will be at the top of the list. I love how crisp and clean it looks! I hope your week is productive and you’re having a good time finishing off your projects. Cheers to Wednesday! It’s hump day!
How is distance learning going?! I hope you and the kids are finding your rhythm. I vote yes to the list of DIY projects to try when you have more time :) I hope you’re also having a great week Lauren! I’ve been getting SO much accomplished over here. It has been wonderful crossing things off the list. Happy hump day! xo
It’s meh 😑. In terms of the schedule it’s going well and we’re all used to that. Everything else is like rolling into Vegas and betting it all on red, on any given day. We are trudging through it, crossing our fingers to be back in school soon. This is the hardest thing I’ve gone through with my kids as a mom. It’s a test of patience, will, and strength on every level…the will and strength I’ve got, but I was late to the game when God was filling out patience, so…😬😂 I’m at the point of the roller coaster where you submit and throw your hands in the air with everyone else and hope your seat belt is strong enough to hold. Lol.
*doling
Ohhh whew! I can’t even imagine having your job, Lauren. I have all the faith in you and know that you are incredible mom, teacher, and even if you’re feeling that lack of patience- you’re doing a wonderful job!! Keep it up the best you can and give yourself a break, if you can squeeze it in ;) Crossing my fingers for your seat belt. Haha! xo
Lauren I feel for you as a mom with kids doing virtual school. I can’t imagine the time and patience it takes to get through the day. Hang in there. I hope you have the support of other moms to help you get through it.
Sarah, this is one DIY I am dying to try! Each time I am near a Goodwill I go in to see if there is a lamp I can try this on. I am looking for vases as well.
Glad you are having a productive week. I am finally accomplishing some areas of our house with organizing and decluttering. It feels good.
Have a great Thursday! We are getting cooler weather tomorrow and I cannot wait!
Crossing my fingers you find the perfect lamp or vase soon :) It was a really fun and relaxing DIY. I would like to do another one… just because I really enjoyed making it. Hope you’re having a beautiful day! I’m just getting back from a hike. Crossing my fingers you also have cool weather! xo
Hi, I have never worked with Plaster of Paris, how does it hold up to cleaning? In my mind it would need to be sealed to protect from stains….red wine, coffee, dust etc. How does it hold up to cleaning etc?
Hi Aimee! I just dust mine- it’s easy to take care of and has held up well (it looks the exact same). I’ve never been worried about red wine or coffee stains, but you could definitely seal it if that’s a concern.