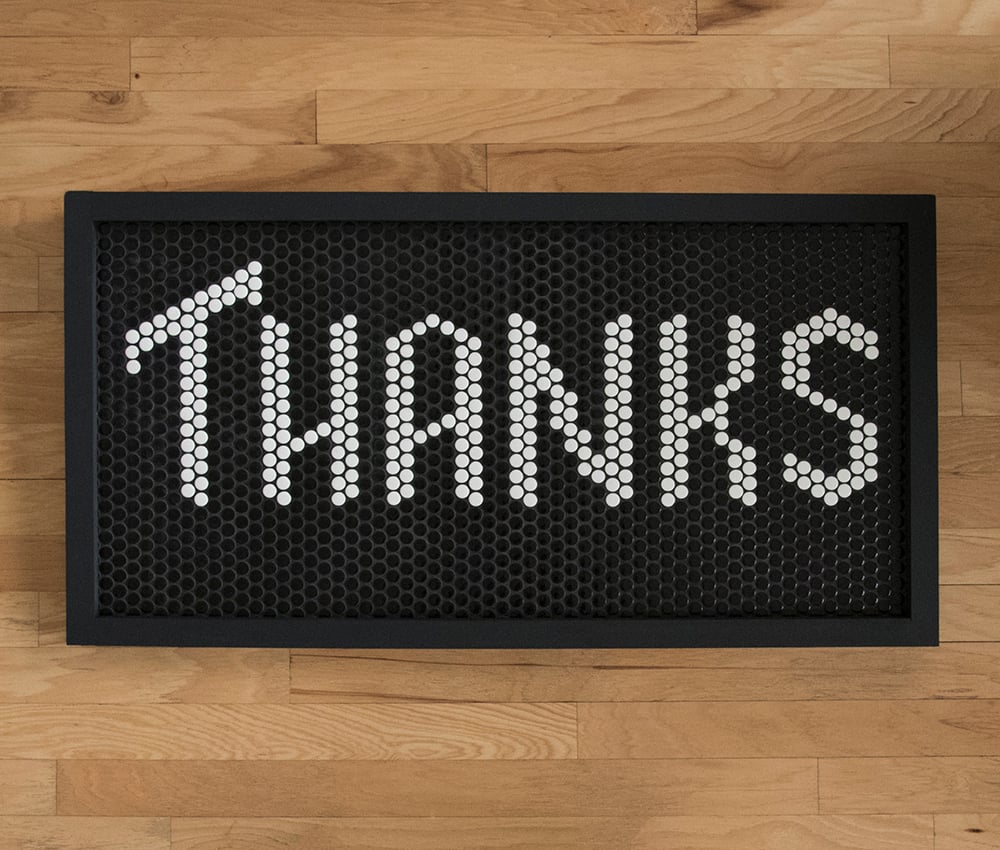
DIY Tile Text (+ A Big Thank You!)
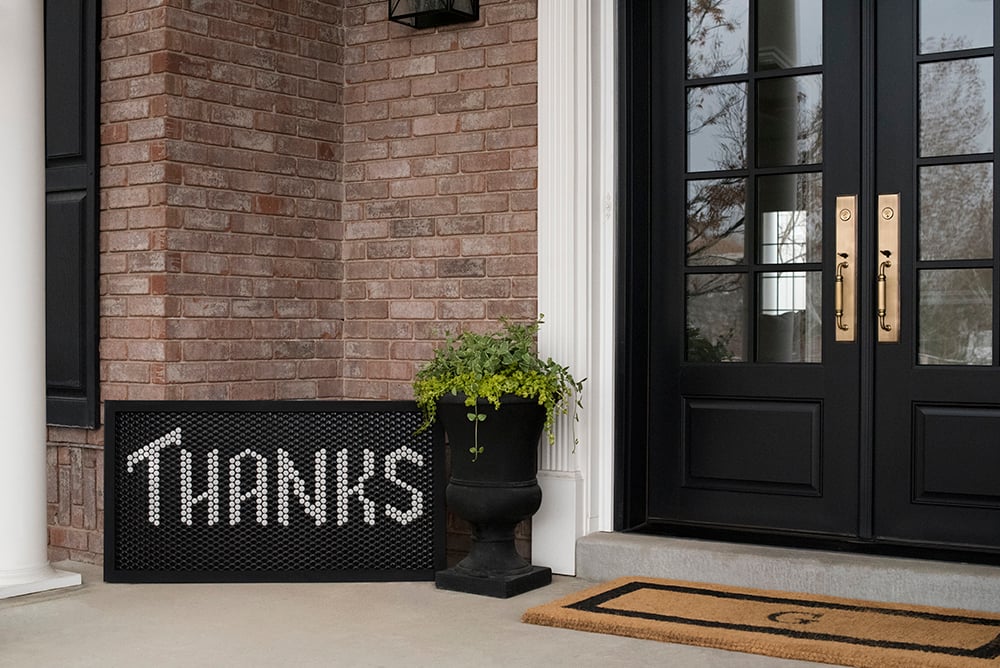
 I hope you all had a good weekend and are hanging in there! Today, I have a fun post that is equal parts home / interior DIY and a personal thank you note. While this post isn’t sponsored, Lowe’s started a #BUILDTHANKS initiative asking their partners, the DIY community, friends, and families across the world, who they were thankful for during the global efforts surrounding COVID-19. Of course, I was more than proud to join their efforts to say thanks and share the groups of people Emmett and I are especially thankful for during this difficult time. The challenge was to DIY a thank you message using items we already had at home, then display the thank you note outside of our home for the community to see. I’ve been wanting to test out “tile text” for awhile now. I thought it would be a fun way to take a stab at it before trying it someplace inside our home. Emmett and I had actually planned to put together a puzzle last weekend and joked that this mosaic tile project ended up becoming “our puzzle” and weekend shelter-in-place activity… which arguably was more fun! Click through for the tile DIY, examples of how to use mosaic floor tile type in an interior setting, and for a special video message from Emmett & myself thanking some pretty spectacular people!
First of all… the big THANK YOU! Emmett and I would like to thank those on the front lines- especially those in healthcare. They don’t have the luxury of staying home and social distancing like many of us. They show up every single day, putting themselves at risk, in high-stress situations to care for others. Their kindness and dedication does not go unnoticed. I’ve mentioned this before, but Emmett & I come from families containing many healthcare professionals. From our sisters and cousins to grandmothers, aunts, and even Emmett’s mom (who works in a nursing home)… and all of our friends out there in healthcare, we love and appreciate you all!
We also want to thank a group that doesn’t seem as obvious… those who continue to work in transport and delivery. Without you, our world wouldn’t continue to turn during this crazy time. Thanks to people like Emmett’s dad- who is a truck driver, making countless deliveries… the truck drivers, local Prime, FedEx, USPS, UPS drivers, and delivery people of all kinds also deserve a giant thank you. Because of these people, we can continue to stock food, supplies, necessities, and order carryout to support small businesses in our communities.
 Ready to dive into the tile type DIY? I’ve seen a lot of tile typography in bathrooms, entryways, and mudrooms. I love the personality and eclectic nature it adds to a home. I’ll share some of my favorite examples at the end of this post, so keep scrolling for those! Here are the supplies and tools you’ll need…
SUPPLIES + TOOLS
- mosaic tile, in two contrasting colors (we used this black and white penny tile)
- tile mastic
- v-notch trowel
- grout
- grout float
- utility knife
- sharpie marker
- sponge, for grout cleaning
- small bucket
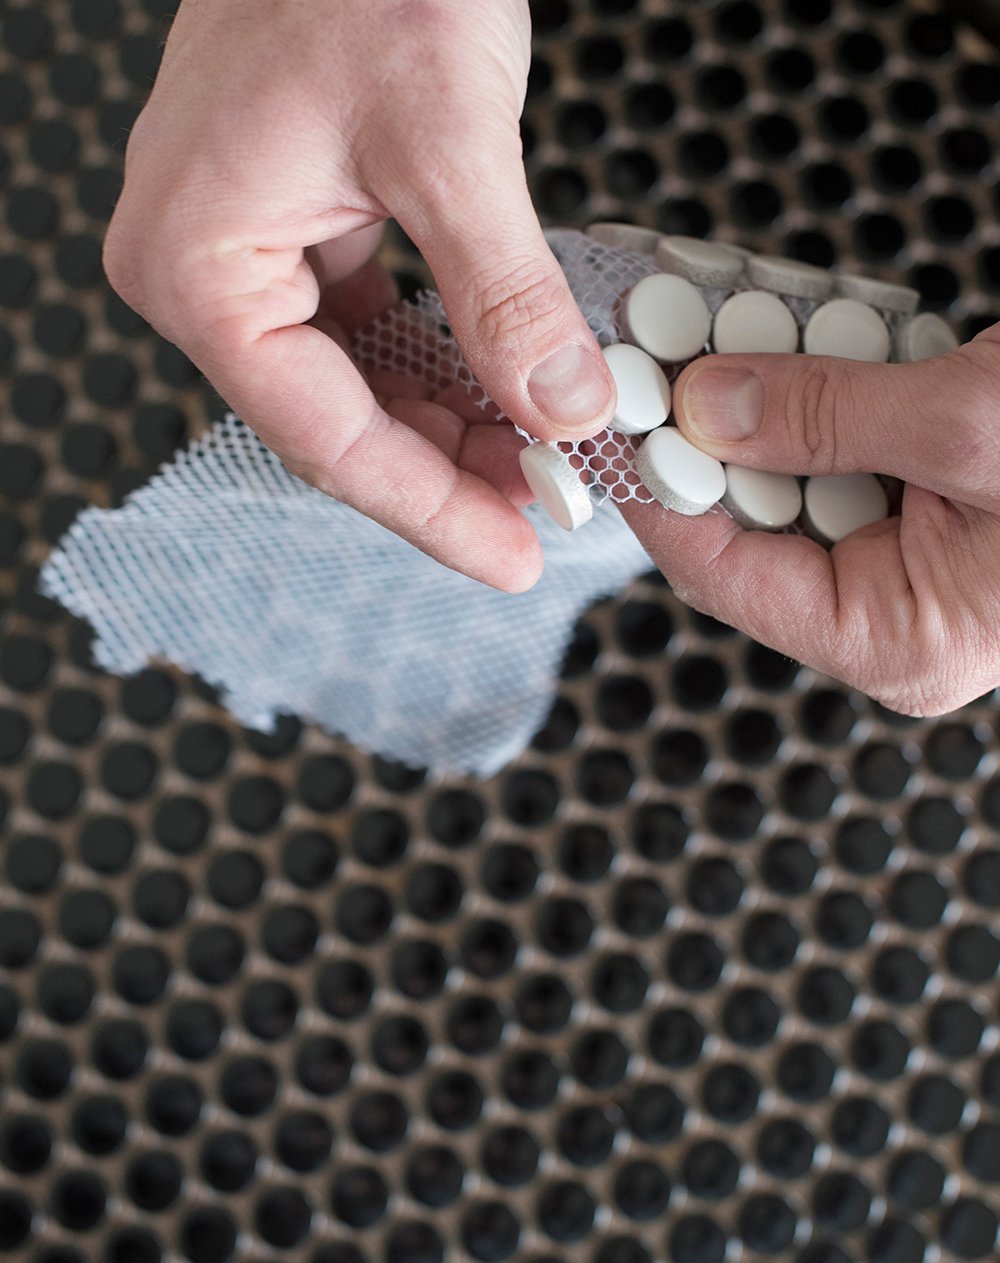 Step 1 // Determine your text color and separate. I decided to create white lettering against a black background. Therefore, Emmett and I began removing the white penny tile from the woven backing. The tiles peel right off! We dropped them into a plastic container for safe keeping once they were removed from the mosaic sheets.
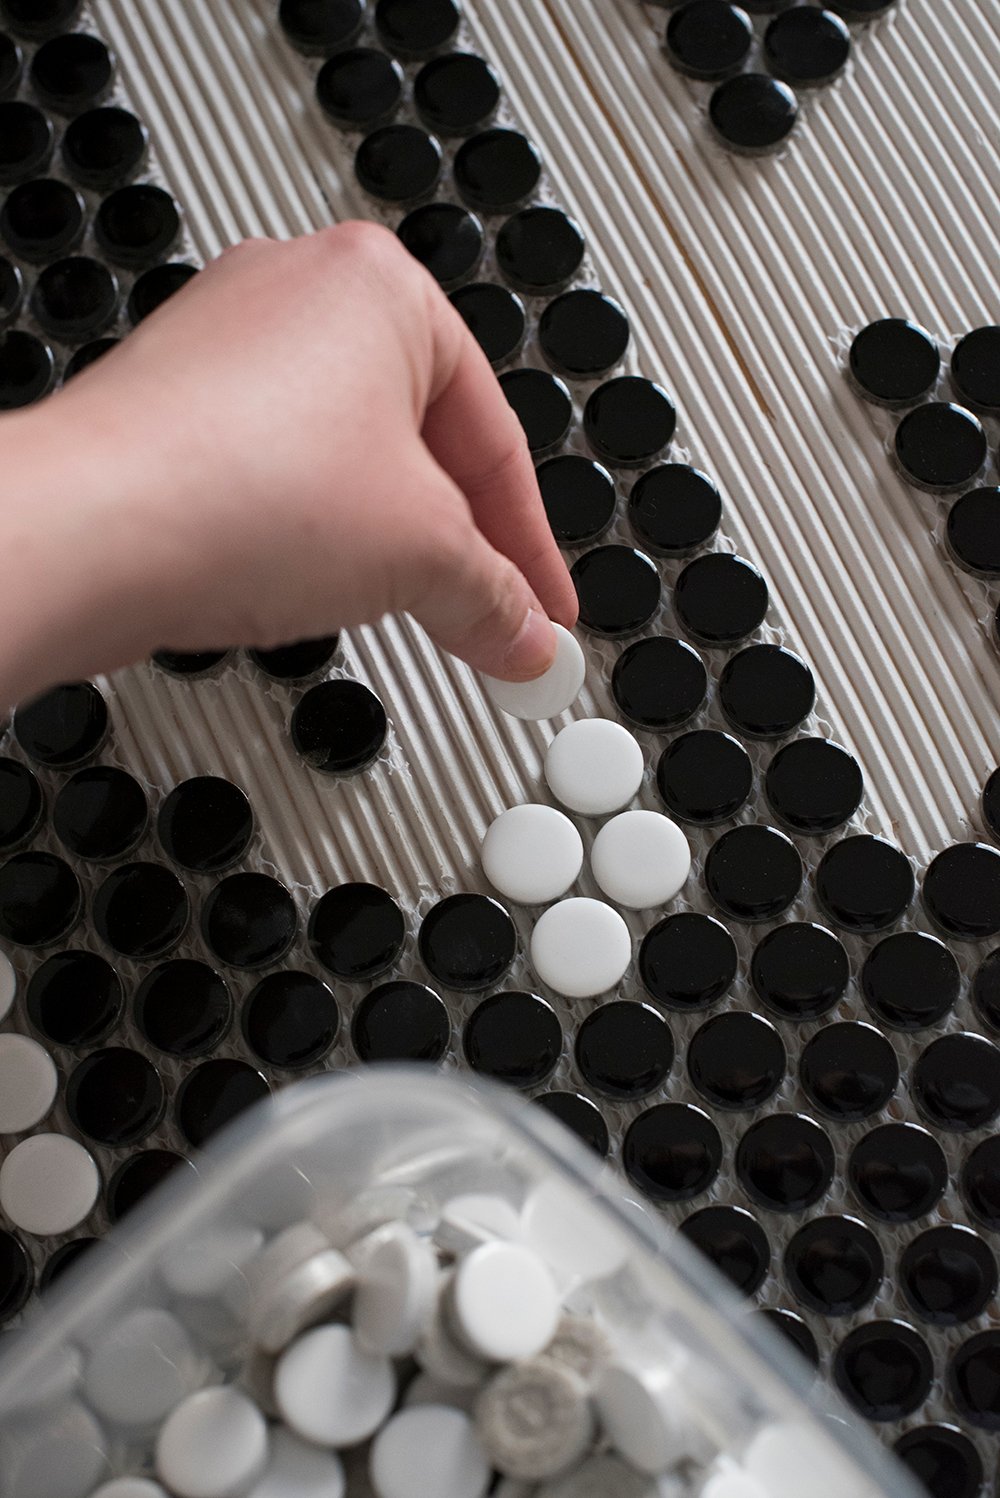
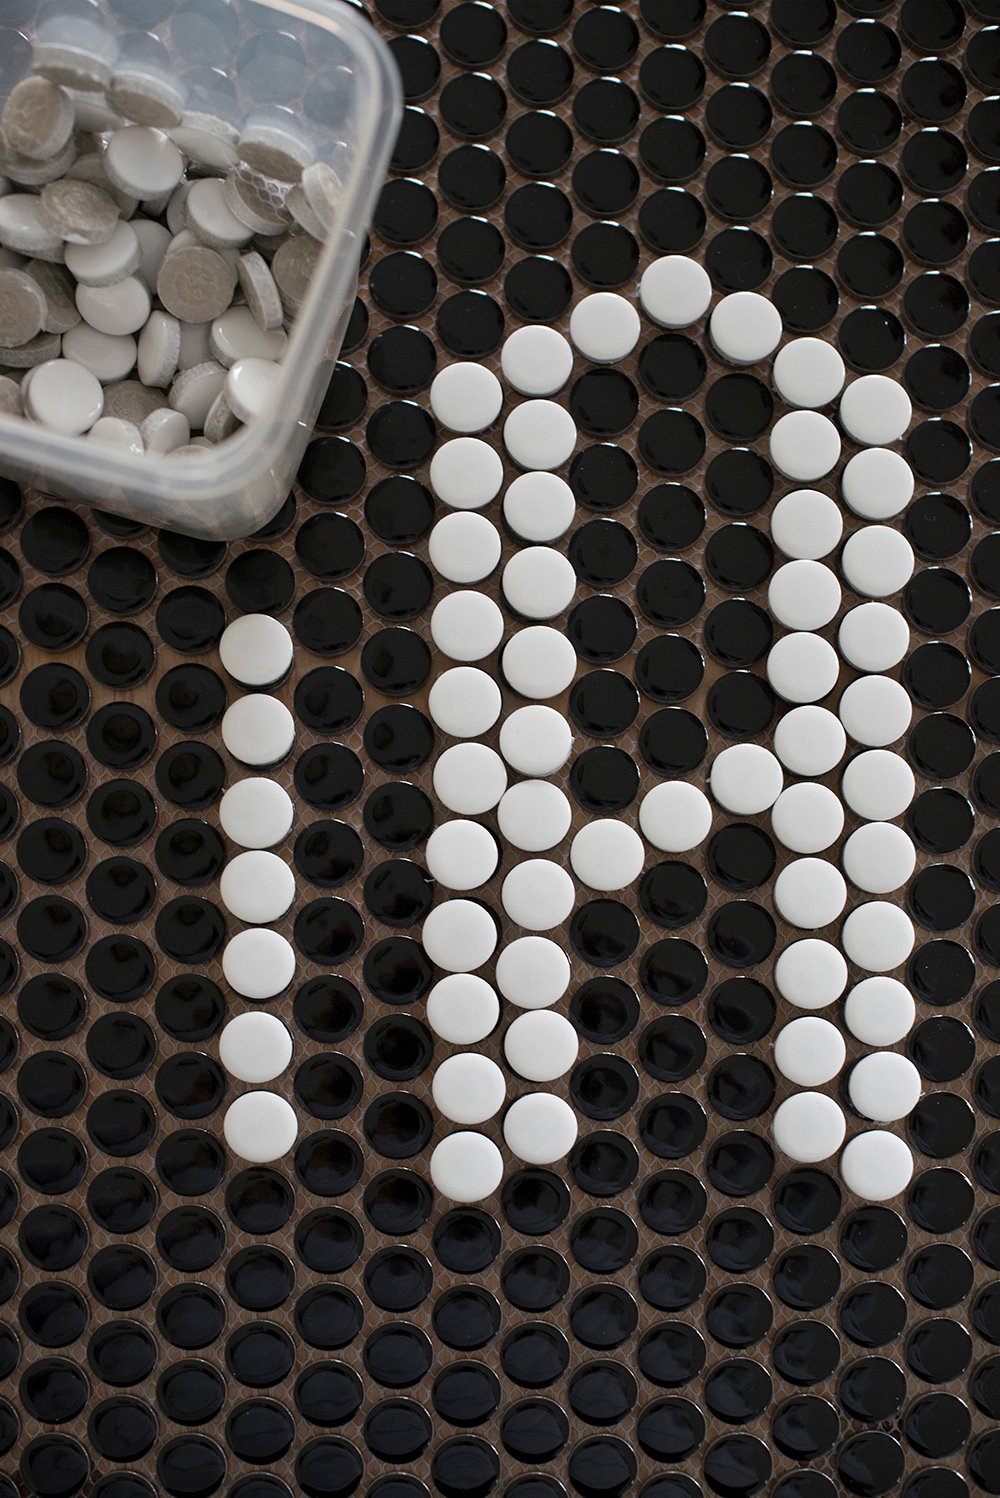 Step 2 // Begin laying out your type. After determining what you plan to spell, use the tiles in the container to layout your type. We simply sat the white tiles directly on top of the black mosaic sheets to determine the position and placement of our letters and word.
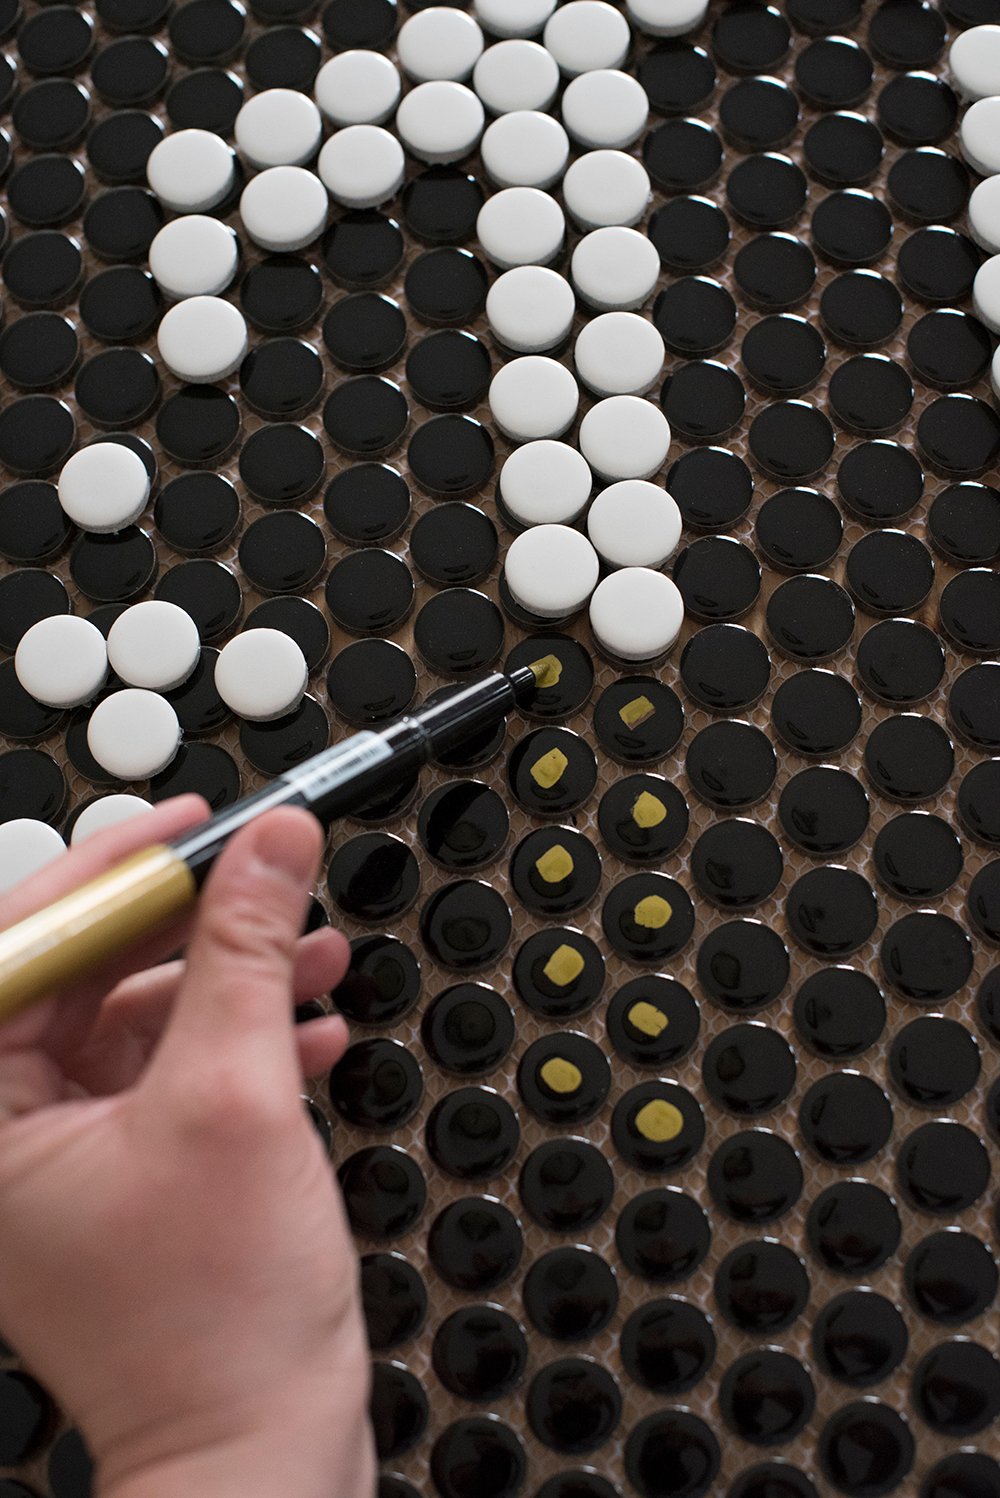
 Step 3 // Mark the placement. Once you have your word set and you’re happy with the layout, use a sharpie to mark the contrast tile placement. I put a dot on each black tile that would need to be removed and replaced with the white penny tile.
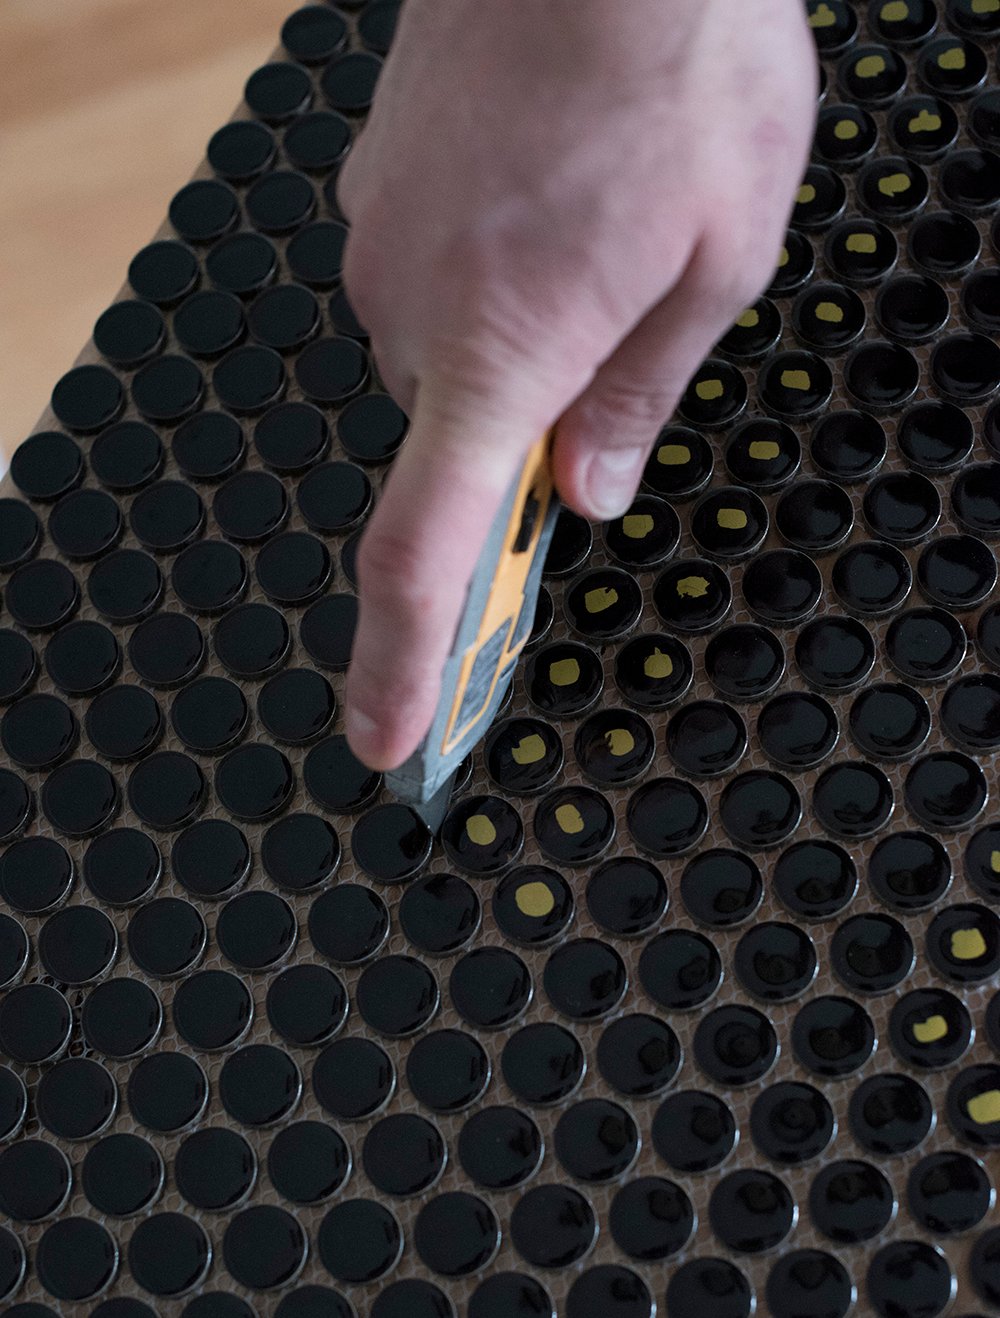
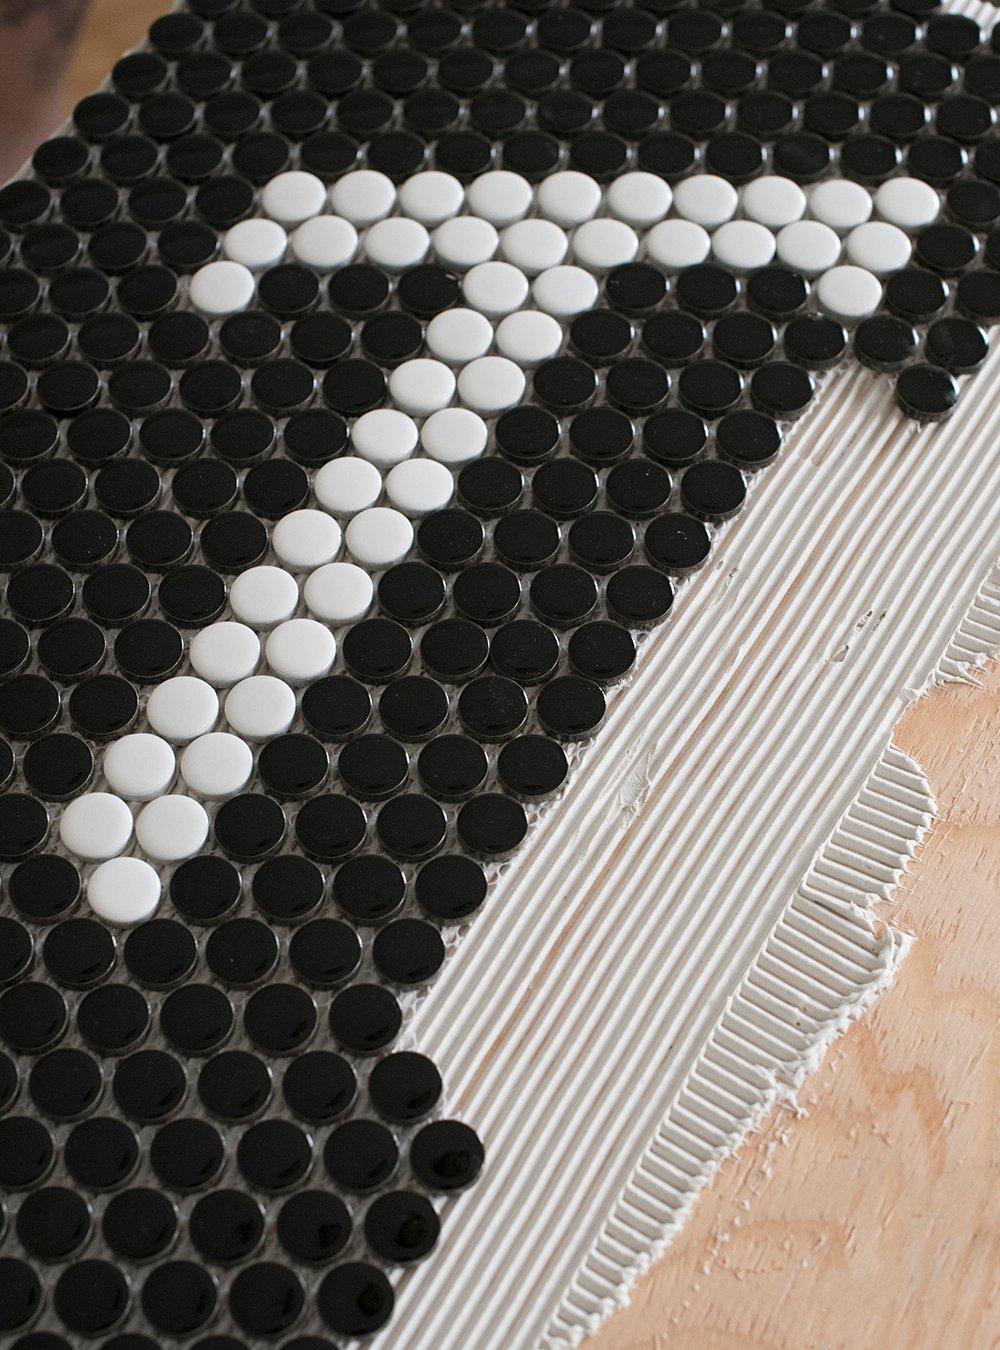
 Step 4 // Cut out the marked tiles. Once you’ve marked all of the tiles, use a box cutter or utility knife to cut the mesh and remove the dotted tiles.
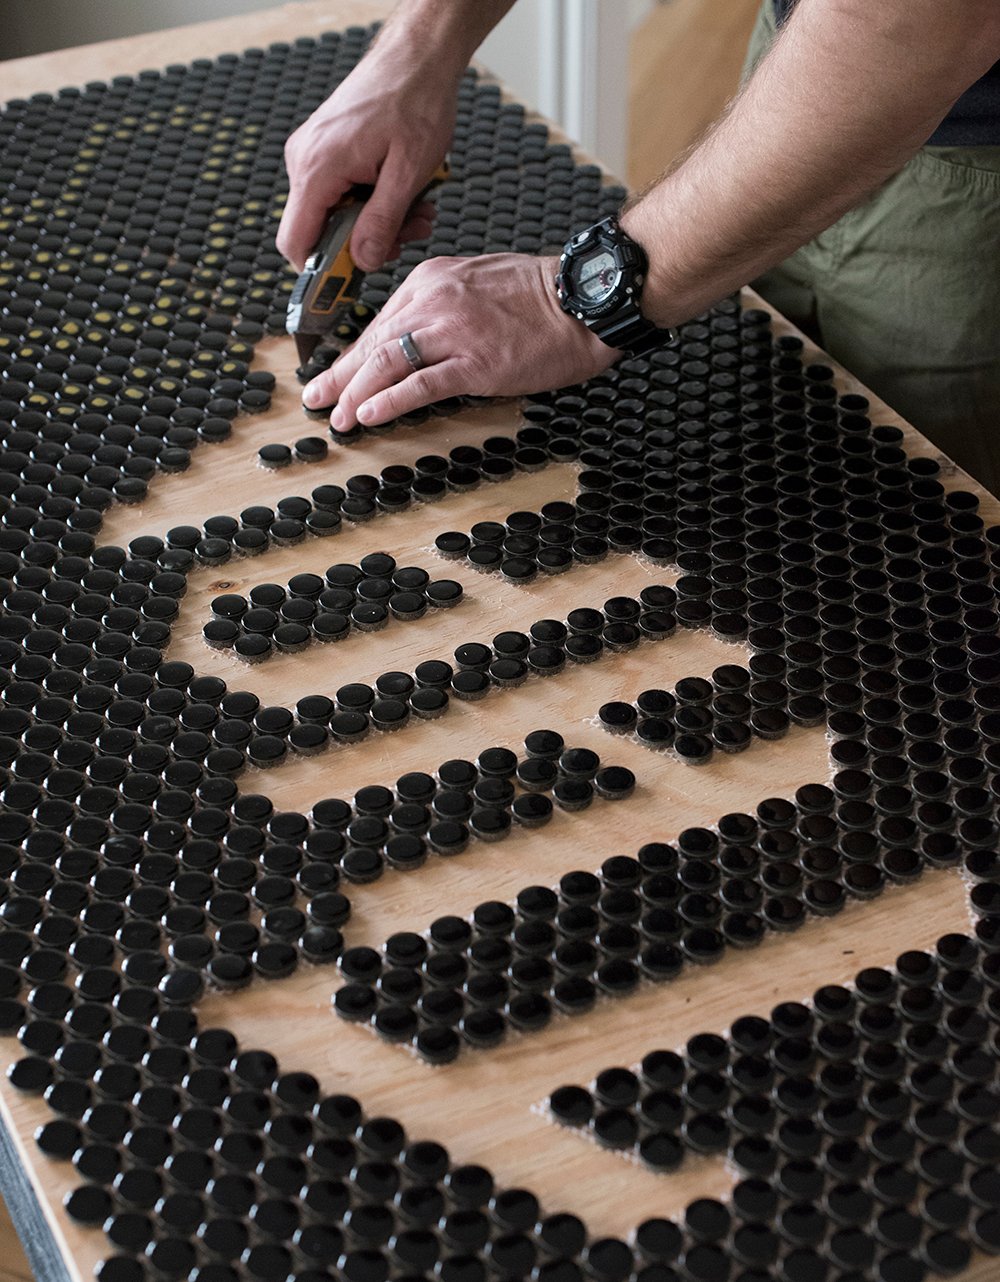
 Step 5 // Continue cutting and photograph the final layout. As you’re cutting the letters and removing tile, be sure to leave any counters or negative space (the shapes in the center of each letter) in place. While these are loose, it’s important to remember what shape goes where. Once everything was cut out, we took an aerial photograph with my phone to remember the layout. This will make an easy guide for reassembling later.
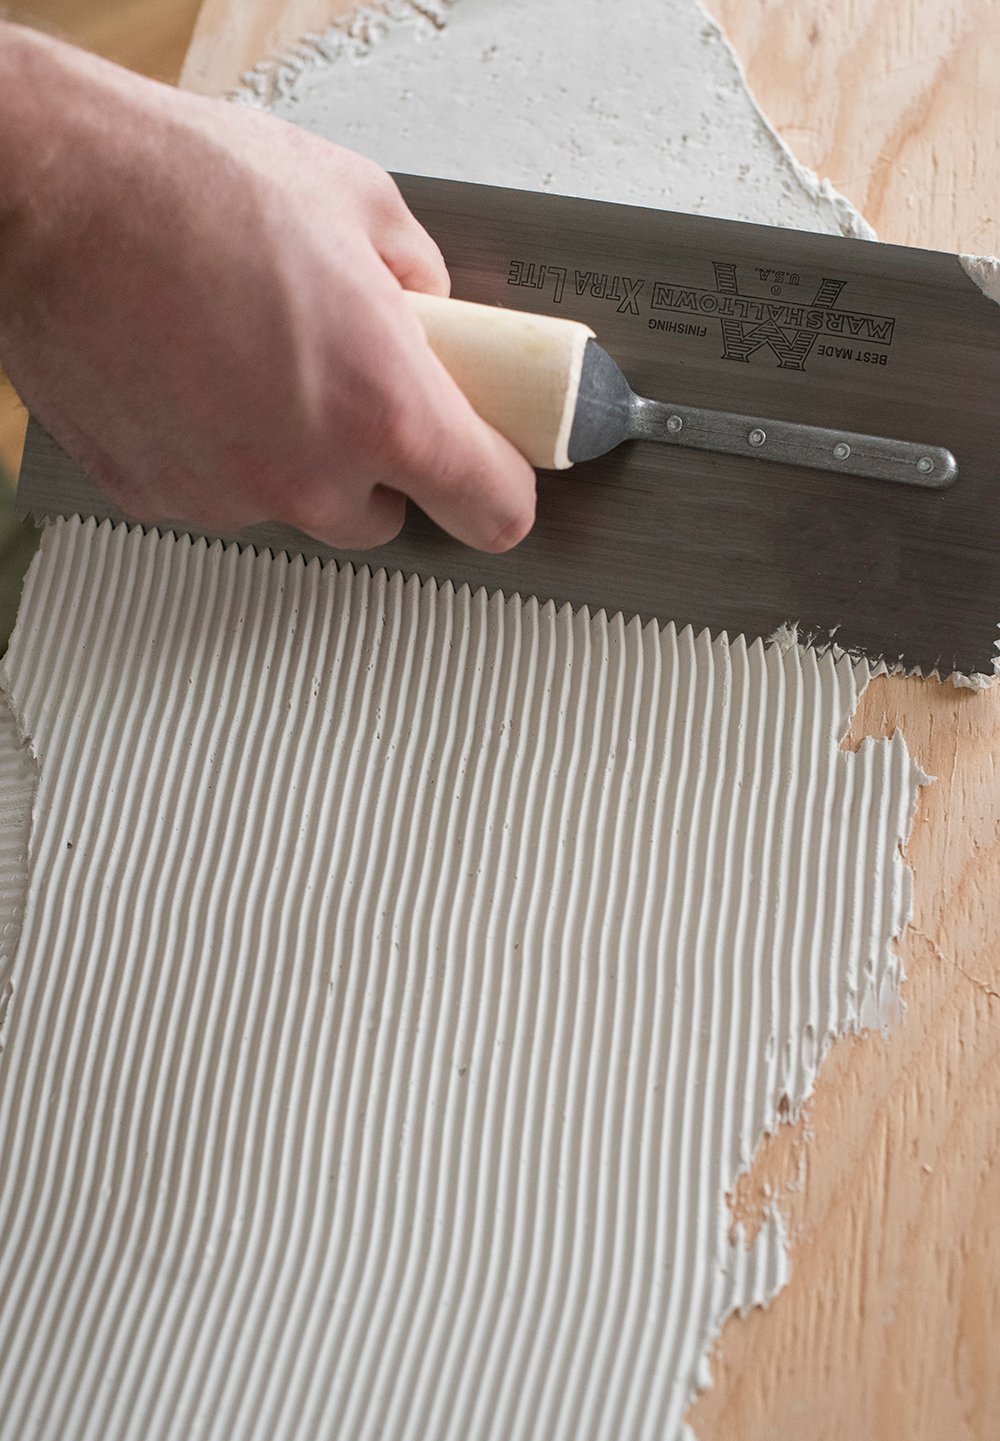
 Step 6 // Install the tile. Obviously, since we were making a thank you sign and not installing tile on our actual floor, you’ll see plywood backing instead of cement board, but the process remains the same. Using mastic and a v-notch trowel, begin installing your adhesive and tile.
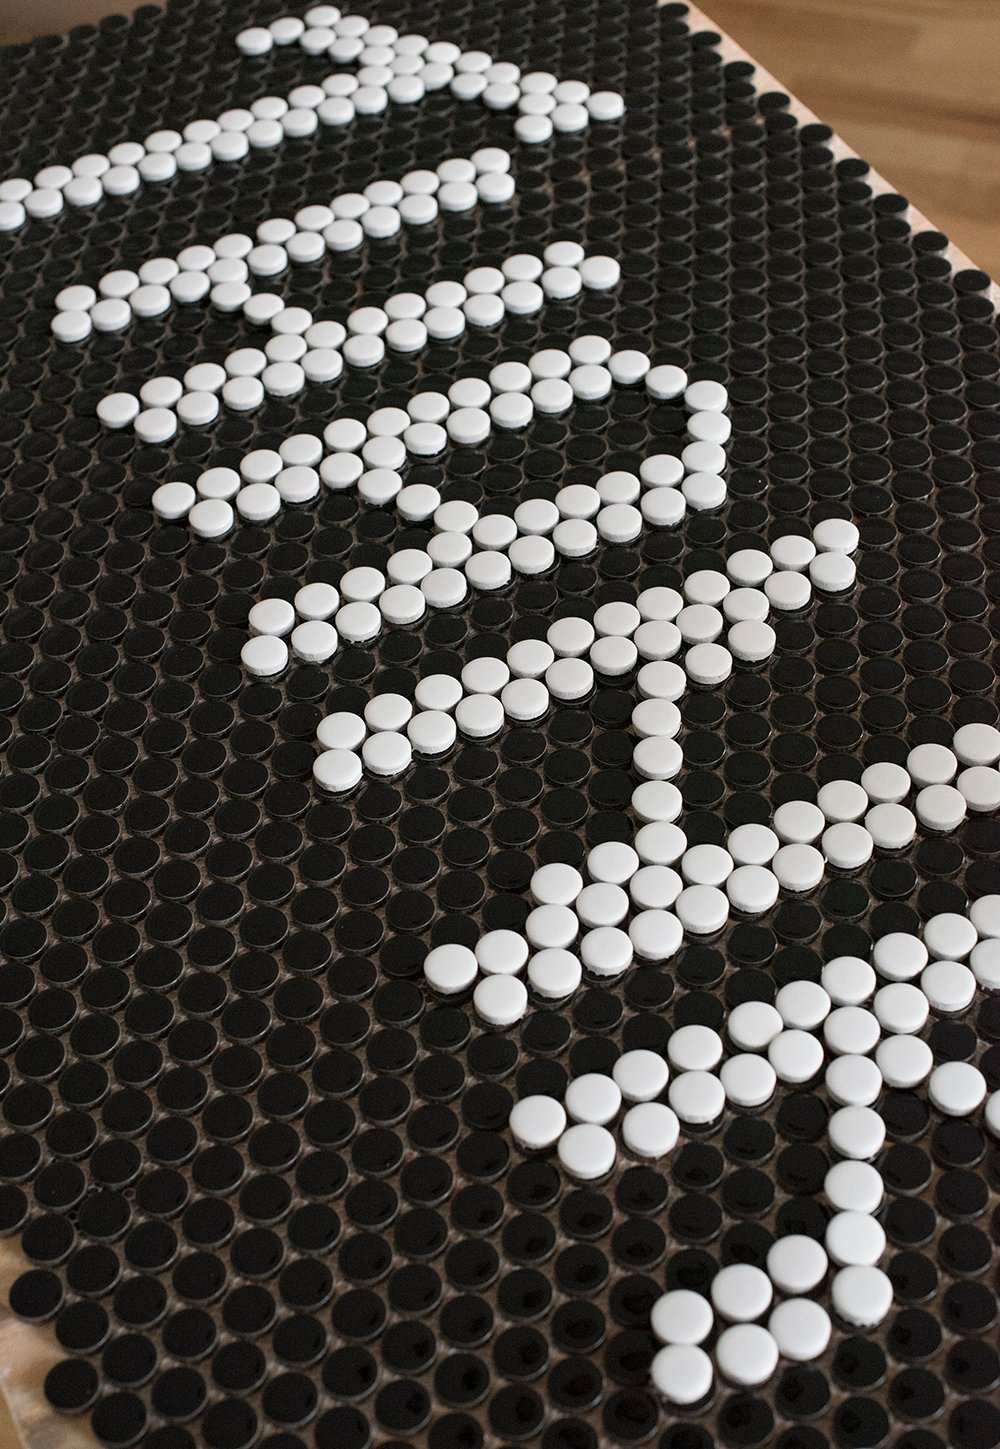
 Step 7 // Fill in the gaps. Press the background mosaic sheets into place, then begin filling in your letters with the loose tiles. Try to keep them consistent in spacing!
 Step 8 // Repeat this process. Continue pressing the tiles into place and filling the negative space until your floor (or sign, in our case) is totally complete.
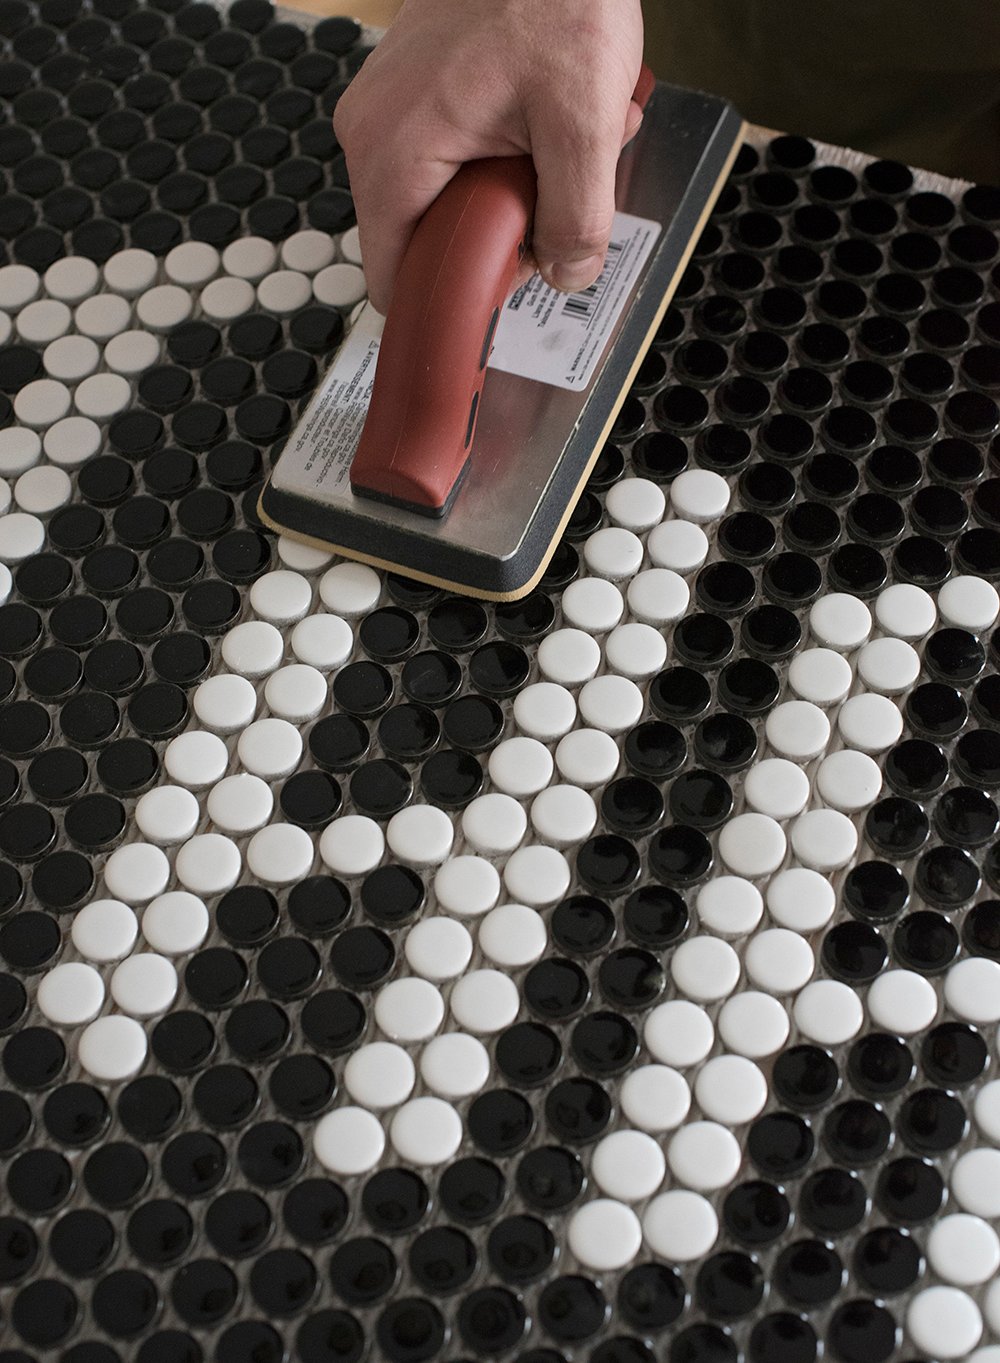
 Step 9 // Press the tile evenly. Next, using a clean grout float, evenly apply gentle pressure, pressing the tile into the mastic to secure it. All that to dry and cure for 24 hours.
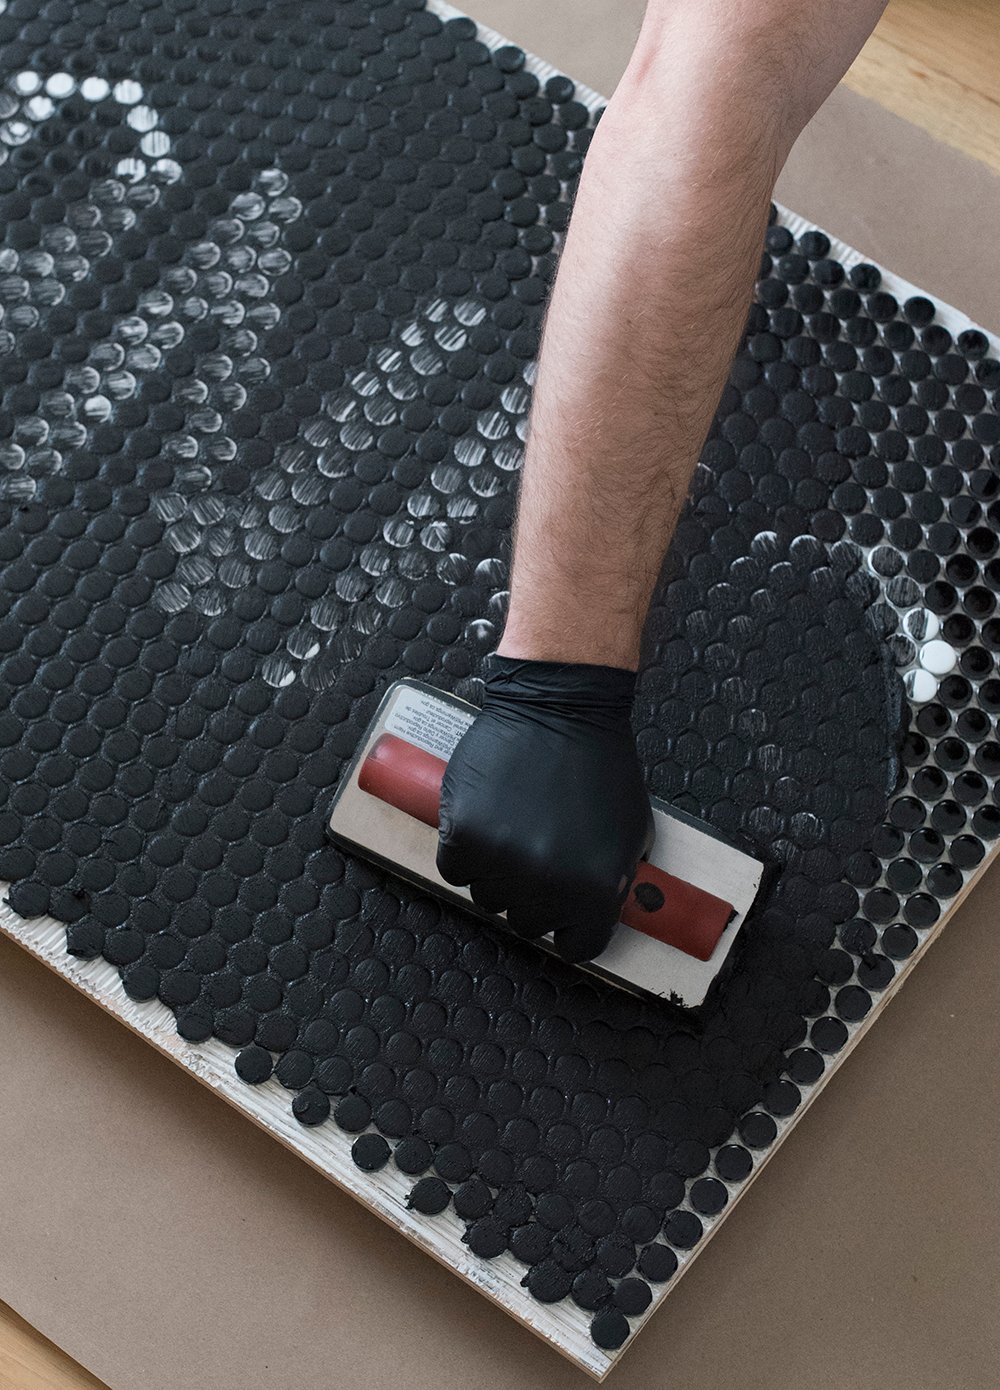
 Step 10 // Grout. The last and final step for this tile installation is grouting. Using a float and your preferred grout color (ours was left over from the basement shower floor), press the grout in between the mosaic tiles evenly. Follow the instructions on your grout product, wiping in between, and cleaning all of the grout haze to finish.
 That’s it! Tile type is really no different or more difficult than installing regular mosaic tile. It’s pretty easy and just takes patience. As promised, I wanted to share a few fun examples below…
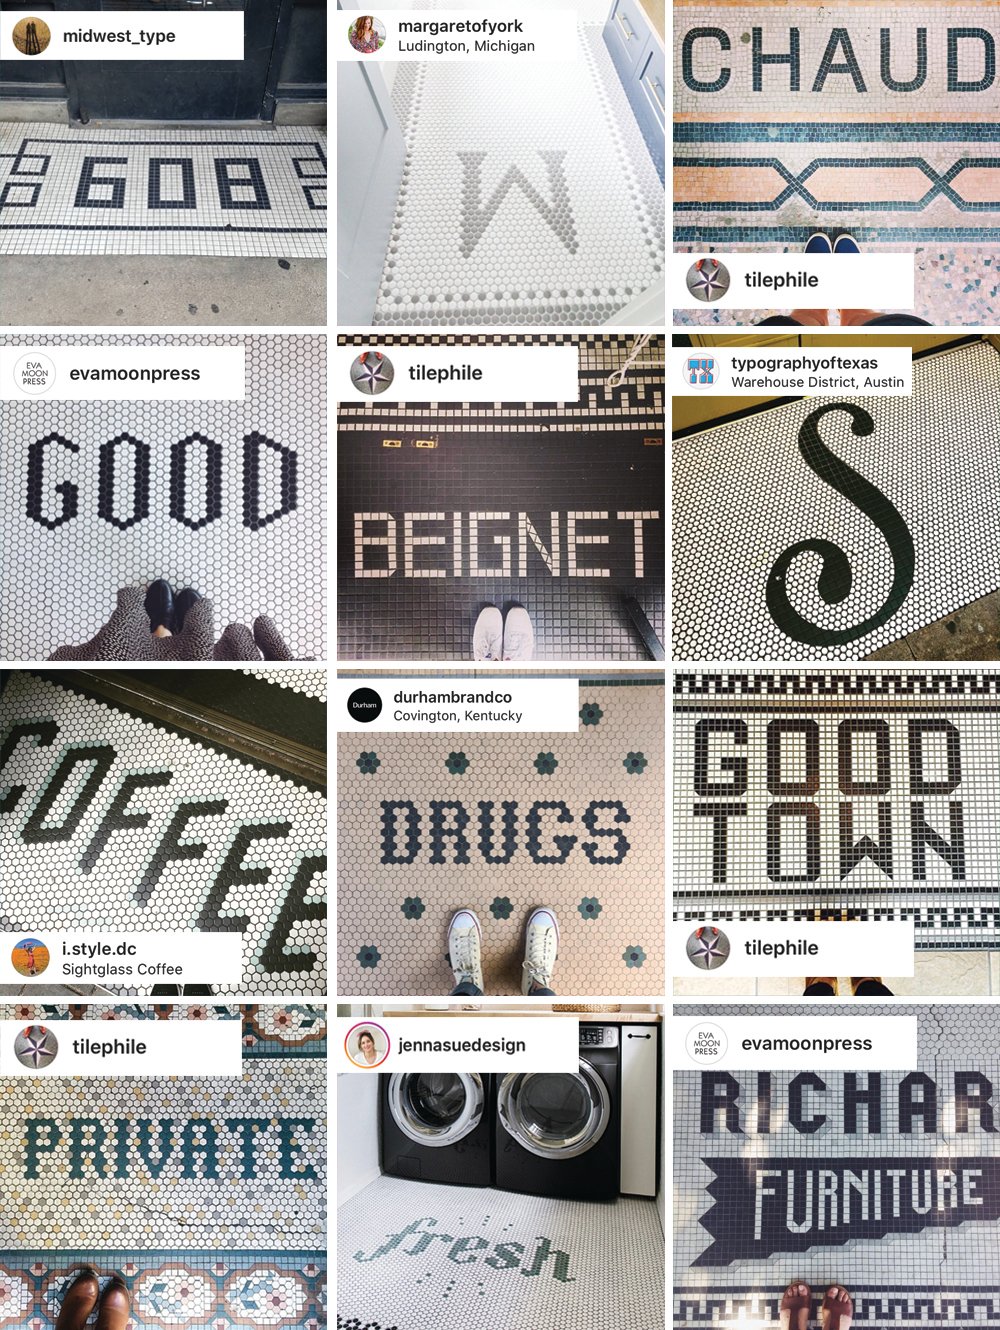 Would you ever spell something in your floor tile? Would it be some quirky & eclectic, or something more practical- like your house numbers or street name? Do you like the historic, typographic look? I kind of envision our house numbers in the entryway / foyer… but I’m still trying to decide.
 On another note, I’d love to hear and see who you’re thankful for. I can’t wait to scroll through the other #BUILDTHANKS projects to see what fellow designers and DIY enthusiasts came up with. This was a nice, light-hearted renovation break for Emmett and I. We also loved having the opportunity to share how thankful we are. I hope you all have a wonderful day!
*I want to personally thank Lowe’s for helping us support struggling families in our local community. They generously donated to deserving families I sent over, for my participation in this project. I’m thankful to work with such caring brands! #LowesPartner
Bravo. As usual, you make even the simplest projects look artistic and intentional. I love the historic typographic look. Healthcare workers definitely deserve all of our gratitude and support. 💖 I have also been thinking about delivery drivers; on our daily walks we see those vans everywhere. I’m also very thankful for the folks manning our local grocery stores; they are working extra hard to keep the premises clean, safe and stocked. Here’s to a healthy, productive week. 💪
Thank you, Peggi! Yes to everything you just said… I have SO much gratitude for so many people, now more than ever. We’ve also been seeing the delivery people everywhere. I’m assuming they’re busier than ever with everyone ordering their necessities online. From the healthcare heroes to our local grocery clerks, I feel very lucky to have people who care, lifting up our community and keeping things afloat. It’s much appreciated! Hope your week is off to an amazing start :) xo
What a spectacular project, for a spectacular reason by spectacular people 🤗 There are definitely so many people to be appreciative of in this unfortunate health crisis. When I get my groceries I’m extremely thankful for the wonderful people working in the supermarkets. And I take the time to recognize and thank them for being there for us. I think it’s so important to show appreciation and extend some gratitude, especially in a time like this 💗🙏
I love the tile project, so creative and the end result is fabulous! Thanks for sharing, and entertaining us with your blog, providing such wonderful inspiration and opening up your home to us. It definitely provided me with so much information for my own big projects last year and I’m very grateful! Love this spectacular post 😊
Awww thanks Colleen! There really are millions of people who deserve praise during this difficult time. I’m thankful for all of them! Like you, I also feel like I’ve had “thank you” on repeat in my vocabulary, but it’s true- a simple thanks goes a long way and I’m sure it’s appreciated by those keeping our world turning. Expressing gratitude here on the blog and helping to distribute gift cards (thanks to Lowe’s) has really been my pleasure. Have a beautiful day! xo
This is soo cool! Thank you!
Thank you, Joseph :)
So good!!! I was racking my brain all weekend to guess what you and Emmett would do, and this was a huge surprise that never crossed my mind! It turned out wonderful! In addition to those mentioned above, my thank-you goes out to those working in transportation services. Bus drivers and the crews that maintain them, as well as the manufacturing industry. Most people don’t realize that those people are still hard at work. My mom is in the manufacturing end, and has been going to work daily, even in conditions that aren’t adequate for the situation our world is facing. She’s nervous and scared daily, but keeps putting one foot in front of the other. Yesterday we purchased some home-made masks for her, because her company doesn’t provide them, and I’m glad we did; the county she works in just mandated that every person in public must be wearing a mask, even if they are in their car. She and her coworkers are on my gratitude list this week! Such a great DIY Sarah! Thanks for sharing how to do this! I’ve seen so many examples of it done really well. The ones I like best are in bathrooms…that I might consider! Happy Monday!
Thank you, Lauren! Such a great point about the transportation and manufacturing industries… so many deserve thanks for keeping our world turning! I love hearing that you got masks for your mom- that is so important and really thoughtful. I’m sure she really appreciated them and feels more protected. I hope you’re having a good week :) xo
What a fun and beautiful project, Sarah and Emmett! You made it look really doable and I love the type, along with the crisp b/w color scheme. I would love doing something like this in our future bathroom. I think it’s especially fun for bathrooms, laundry rooms and front door entry’s-slightly more utilitarian spaces that you can really enliven a bit. Look forward to seeing what you come up with in your home!
Yes, SO many unsung hero’s out there making our world still hum so those of us who have the luxury to stay home & safe, are able to do so. Some in particular who we personally owe a debt of deep gratitude for right now are the construction workers, movers, and realtors, home inspectors & stagers, along with our airbnb hosts who are truly providing a home away from home for us. Seriously, it’s been amazing just being able to have a real freezer so we can help support our local weekly ready-to-heat meal small businesses.
Thank you to Lowe’s for this special initiative and thank you to you both for participating!
Thank you, Anne! It does have a utilitarian look- and I’m digging it :) Great point! Yes to everything you said about the unsung heroes. I’ve been trying to find the silver lining through all of this- and there is one thing I keep coming back to: the people. Everyone is coming together, showing their love, and lifting each other. It’s so inspiring and beautiful, especially during a dark time. So many deserve thanks!! Hope you’re doing well and are keeping healthy. xo
What a wonderful way to say ‘thank you’ to all those who are helping. Your tile sign is so creative and beautiful!
I have been trying to figure out a way to do the same for our delivery people. I like that you are thanking more than just the delivery crew.
Oh, such escape artists our pets can be! Ha! Have a wonderful Monday!
Thank you so much, Danna! I thought about putting some snacks and water out for delivery people, but I wondered if they would be hesitant to take it (given the current germ situation). Yes, yes… our dogs are crazy! haha! xo
Hello, Sarah and Emmett. I would like to thank everyone who is doing what they can to make this situation better. From folks who make a conscious effort to help stem the tide of the virus by acting responsibly, to those on the front line and behind the scenes.
There are so many unsung heroes, including all ordering and shipping teams, food and other product producers, companies donating resources, people hand making masks and other supplies, etc. There are other people using their collective skills and talents to develop creative business models that may well set the stage for a new and healthier economy.
Most of all, I believe that every single action each one of us takes to help, really matters.
You two, for instance, host a kind and stylish virtual place to visit (and where people like me have the opportunity to get to know other wonderful humans as well, like Lauren, Peggi, et al). You are physically helping neighbors create a better and more enjoyable home. You lend your hands in many other ways as well. So thank you both. Thank you all.
Cheers, Ardith
Lovely and well said, Ardith! 💖
Beautiful, Ardith and totally agree. So many people are showing up as their best selves and it’s making us all want to be our best, as well. It’s terrible, but so much good is coming out of it that needed to happen. I do look forward to being on the other side of all this, but in the meantime, trying to focus on what I can and can’t control every day.
Sending you all love and light…
There really are SO many unsung heroes who deserve praise. It all matters greatly, and your message sums up my exact thoughts! Well said, my friend! Emmett and I only play a tiny tiny part, but we’re happy to help where we can. The least we can say is thank you to everyone contributing in big and small ways! I hope you’re having a lovely week so far :) Lots of love! xox
Happy Monday Ardith!!! Everything you just said!!! I just read this comment and tears fill my eyes. That’s why I adore your morning input here; always the voice of hope and optimism. I needed that today! It’s been a long tough one today, but you just rejuvenated my spirits. I imagine you are a calming soul to be around. This is the place where I feel like you’re my neighbor. Stay healthy friend! And Sarah, thank you. Your blog is like home. This is where I come to be at peace. Thanks for creating this space! Xoxo to all of you!!!😘
You all are SO incredible!! I love the sense of community we all have here. I also look forward to reading these messages every single day- they make me smile and remind me THIS is exactly why I pour my heart & soul into my little corner of the internet. Thanks for being a bright spot in my day too :) xox
And we so thank you for this beautiful gift from your lovely soul, Sarah. Group hug! Cheers, Ardith
I love this! So clever, and a beautiful way to thank those who are continuing to give up of themselves during this time of pandemic. Tile text in the entry way / foyer or at the front door would be awesome. But wouldn’t a large monogram also look amazing in a couple’s master bath? Might put that idea in my pocket for later!
Thank you so much, Rhonda! I love your idea of a couples bath with a monogram- that sounds dreamy :) xo
Wow! What a great way to say thank you! It feels like there is so little that we can do throughout this, and these seemingly little things have such a huge impact.
This is amazing and provides so much inspiration for other ideas! Reminds me a lot of the Letterfolk mats that are all over right now too! Did you happen to reference a specific font for this as inspiration? I feel like that might be the hardest part of this whole project!
Thank you, Ian! I hadn’t heard of them until posting my image on Instagram last week, someone tagged them- very cool concept! I didn’t reference a font… I just kind of laid it out and shifted around tiles until it felt right. Although using a font for reference probably would’ve made it faster! Ha! I have a background in graphic design.
Sarah and Emmett!!!!! Your Thanks DIY was in a Lowe’s commercial this morning!! I just about screamed with joy seeing it on TV! Congratulations guys, you sure did a great job on it!
Aww thank you for sharing!! We actually haven’t seen it on TV yet. Lowe’s emailed us a link to view online, but we’re eager to see it “in person”. Ha! :) xox
Wahoo! We know famous people! Nice famous people! Way to go, Sarah and Emmett! XO Ardith
Haha :) Not sure about that, but we were certainly proud to be apart of it! xo