Textural Front Porch Planters
 I hope everyone’s week is off to a great start! We had a beautiful Easter weekend with perfect weather, so I dug all of our planters and gardening supplies out of the shed and got some major planting and landscaping taken care of. It felt really good to work outside and address the curb appeal at our new place. This is the first home we’ve purchased that actually has nice outdoor areas and landscaping from the get-go. I’ll admit- it’s a nice change to have a great starting point with existing plants. Anyway, I promised to share my textural front porch planters, so consider this your DIY tutorial if you like the look! Click through to see how these came to fruition.
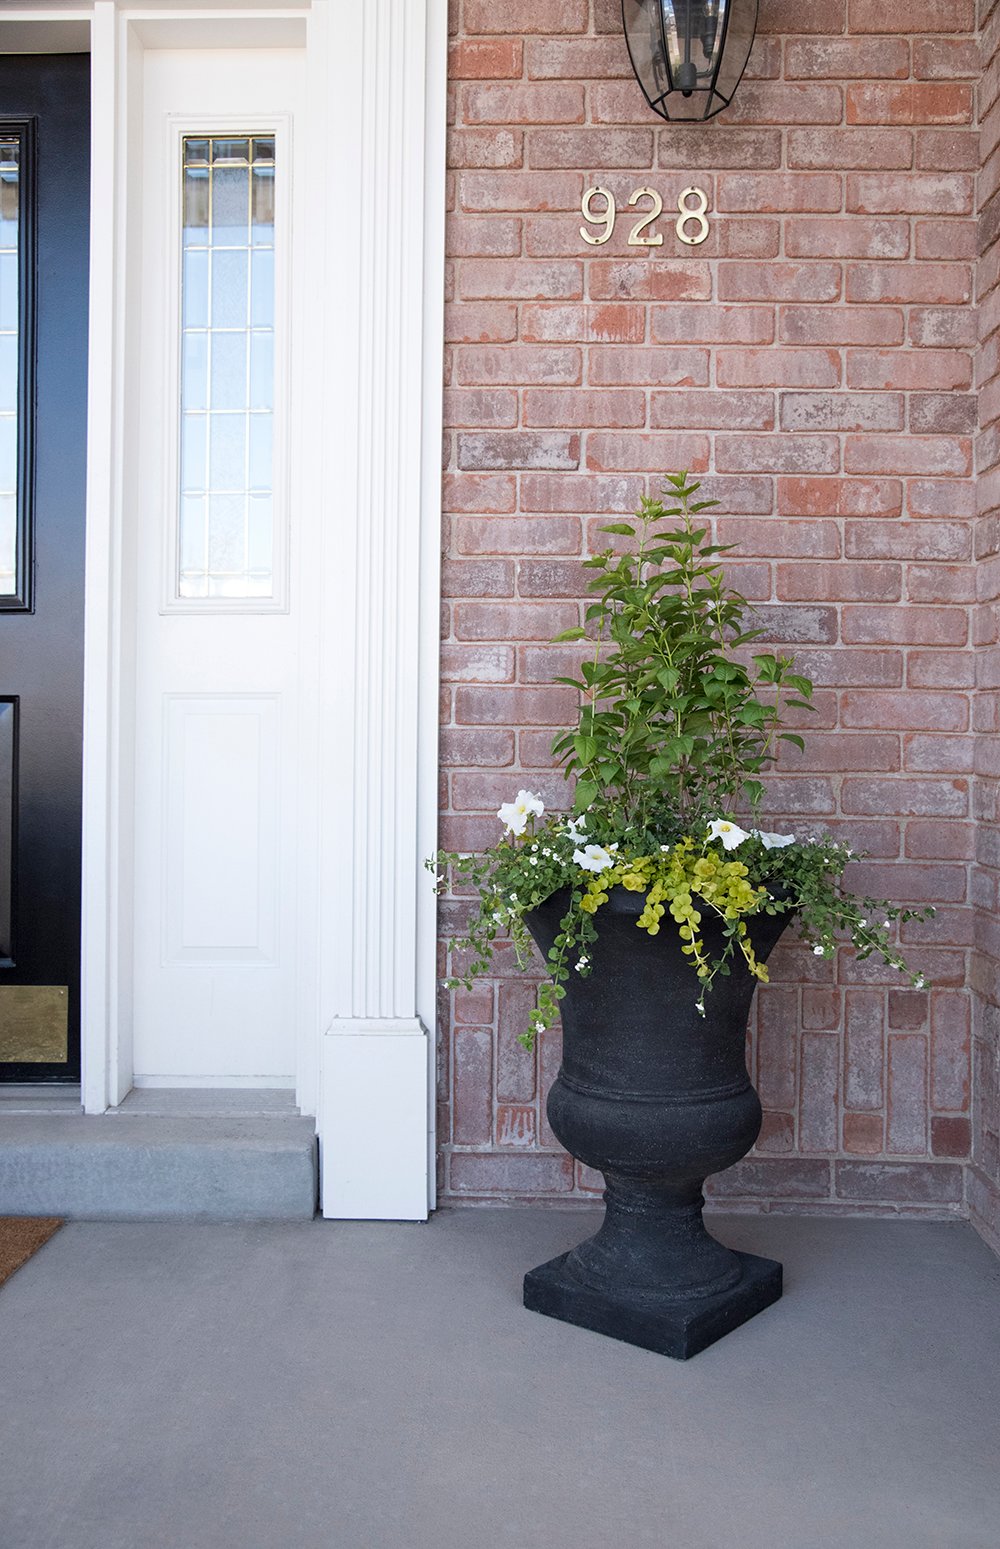
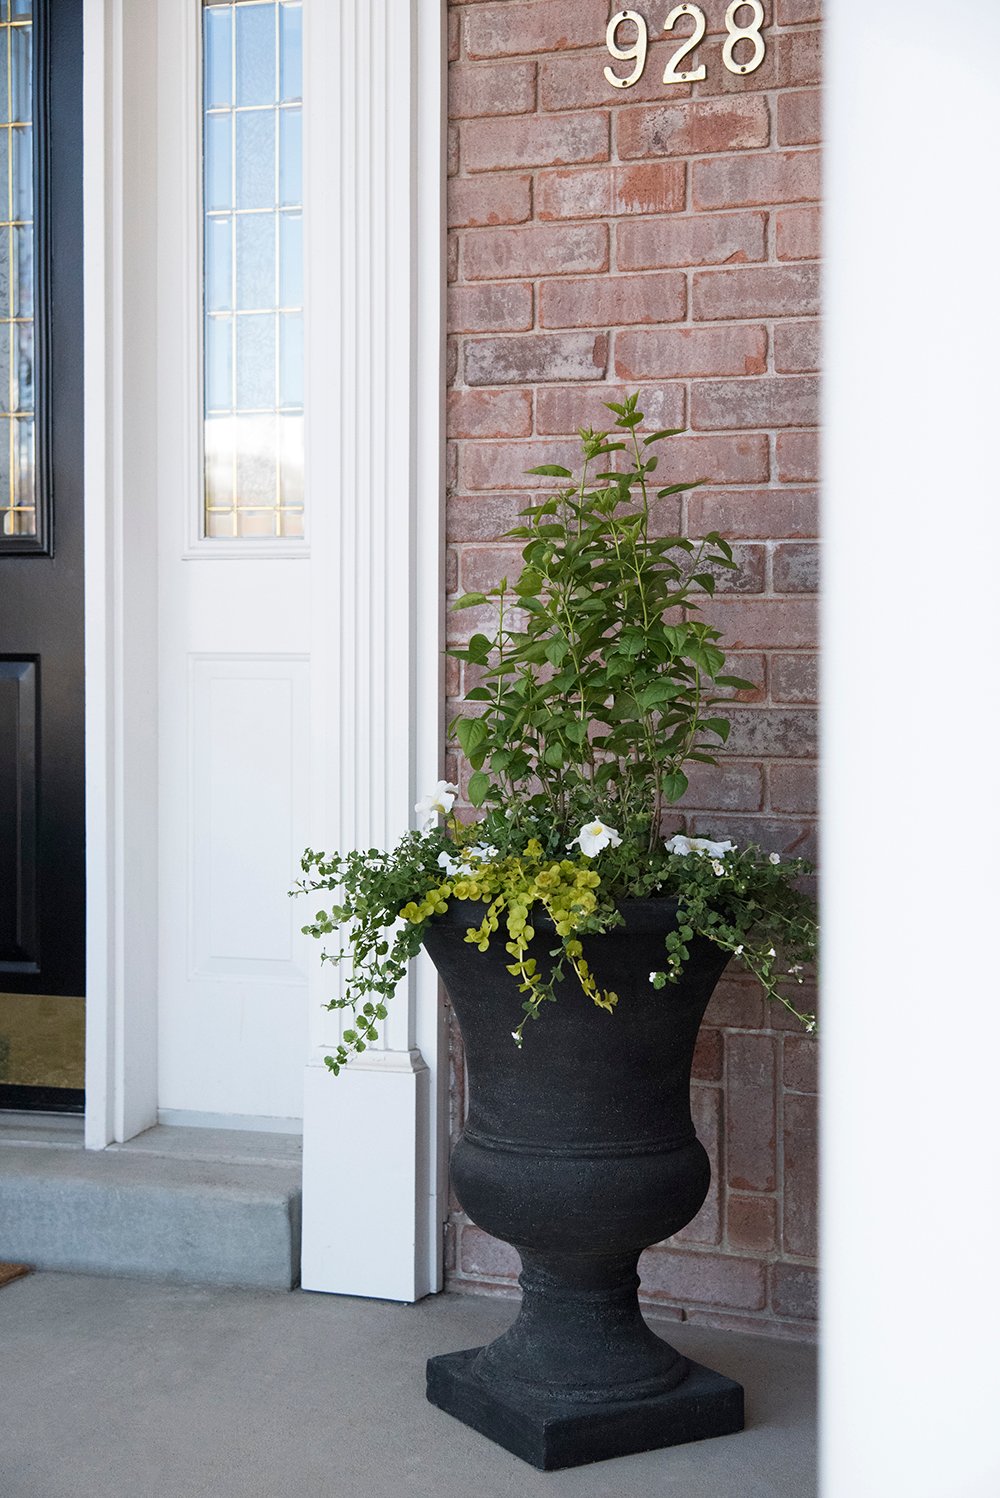
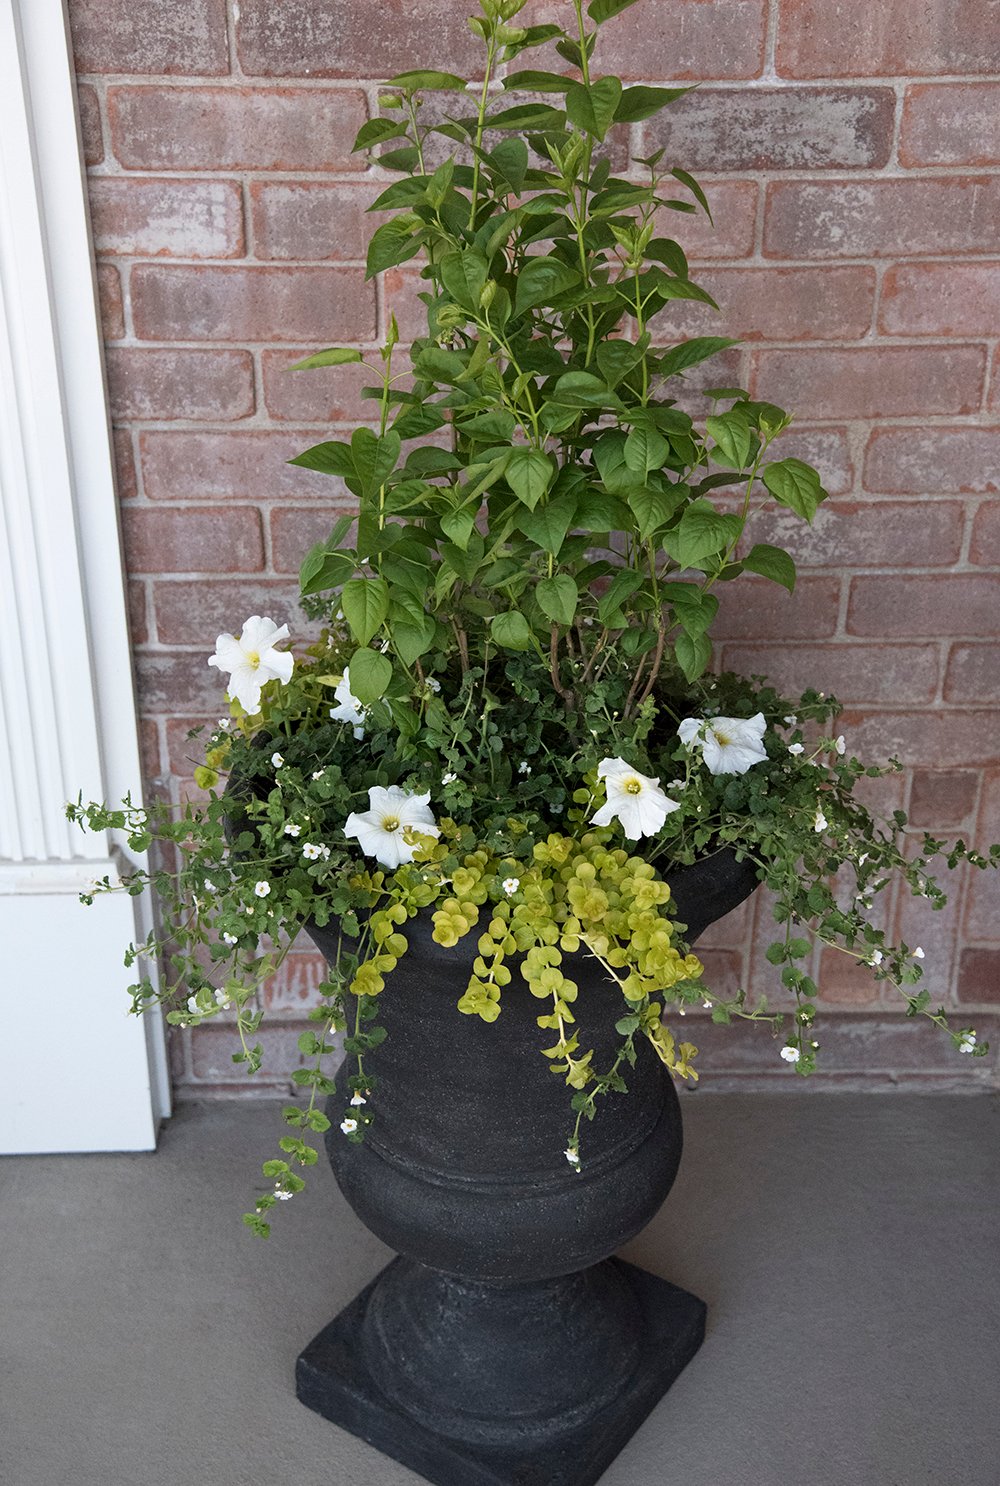 I really wanted a planter that was monochromatic (green with white florals), super textural, and would fill out over the course of spring & summer. These should look really amazing in a month once they grow, fill the planter, and spill further over the edge of the urn. The taller lilac plant should also produce white blooms later in the season. I placed one on each side of our front door and they create an inviting and sophisticated entrance.
SUPPLIES
- white lilac
- creeping jenny
- snowflake bacopa
- white petunias
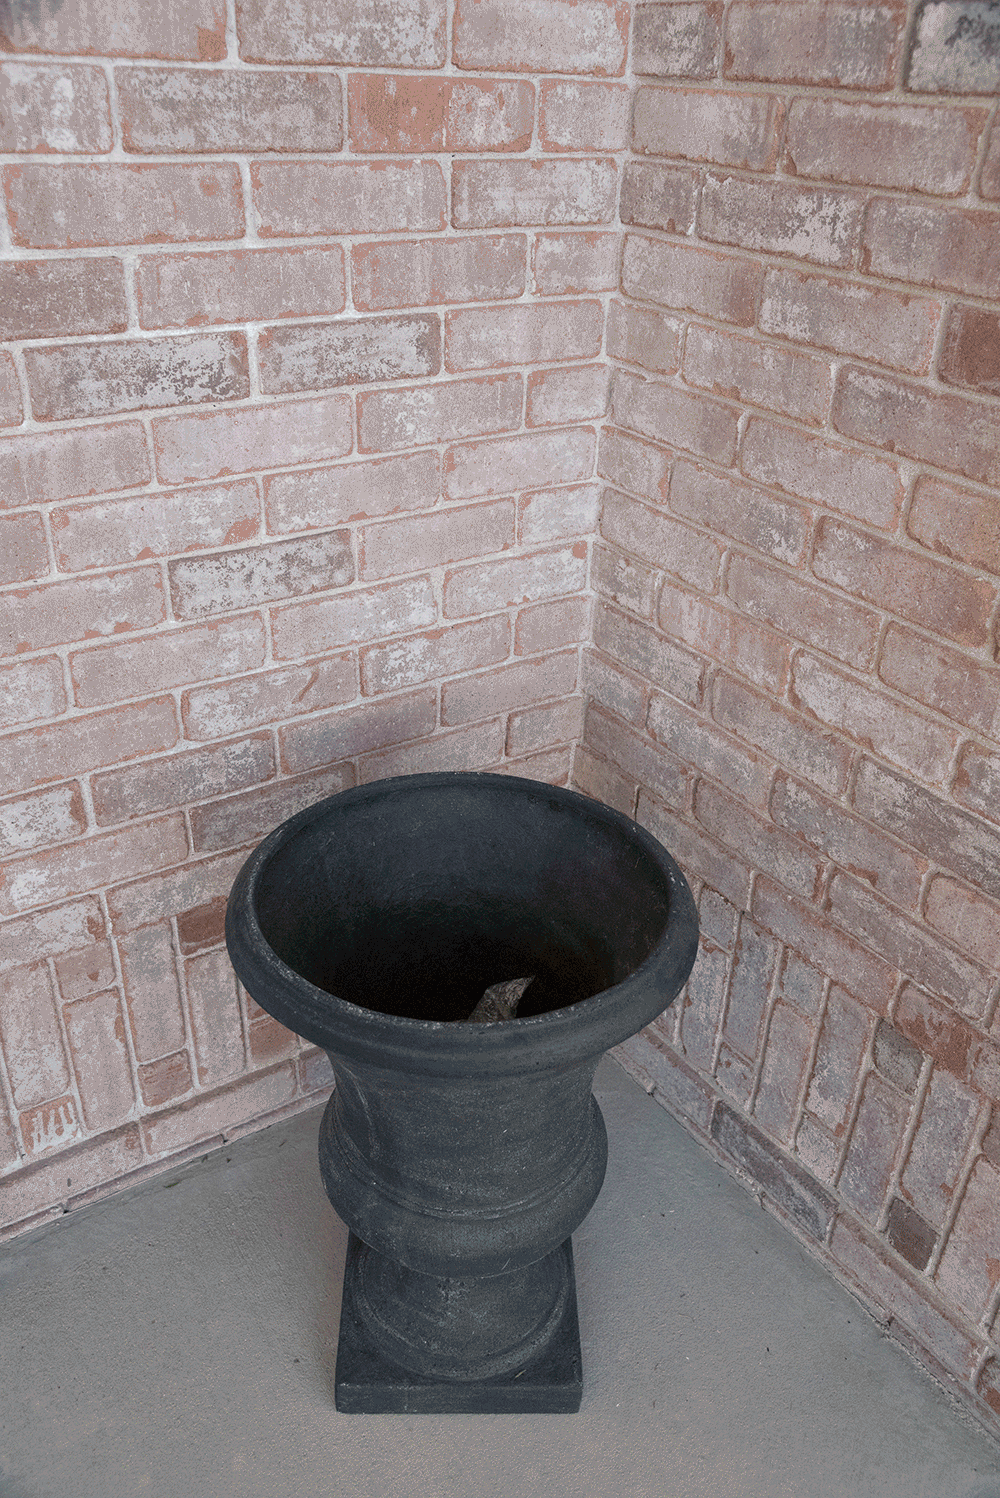
- black planter urn
- bubble wrap, or packing peanuts (optional)
- potting soil
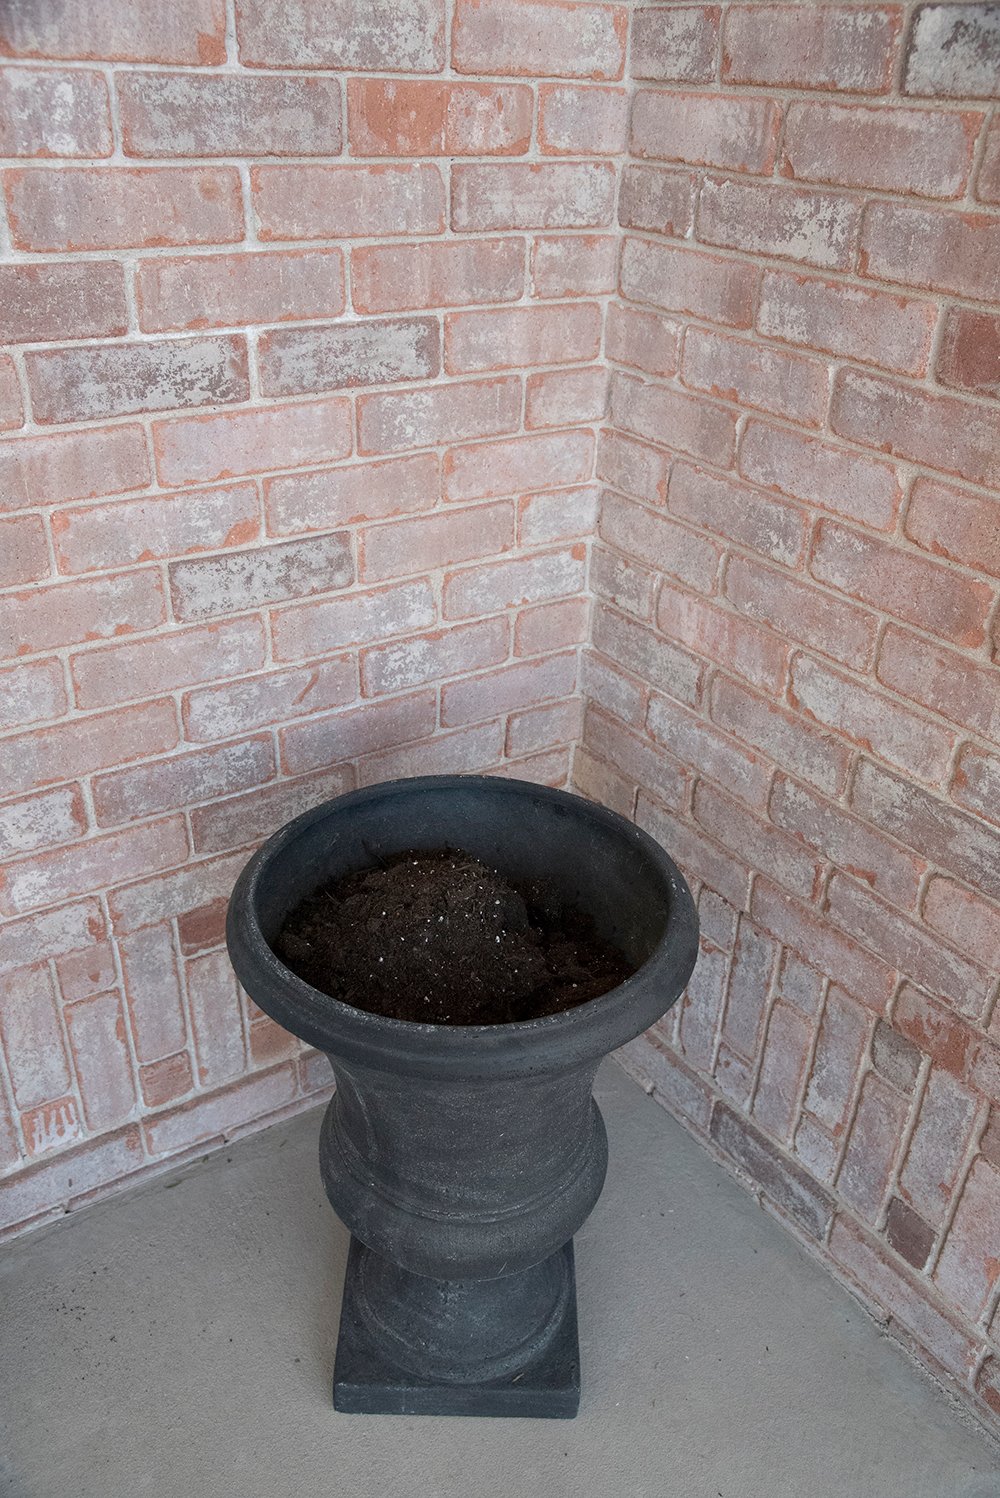
Step 1 // Fill the negative space. You might remember this hack from our window planter boxes last summer, but if you have a deep planter and don’t want it to be super heavy, or would like to save money on potting soil- fill the negative space with packing peanuts or bubble wrap! I typically use packing peanuts, but this time around I opted for leftover bubble wrap. You can see it peeking out below…
 Step 2 // Add soil. Next, add your preferred soil, breaking it up as you fill the planter.
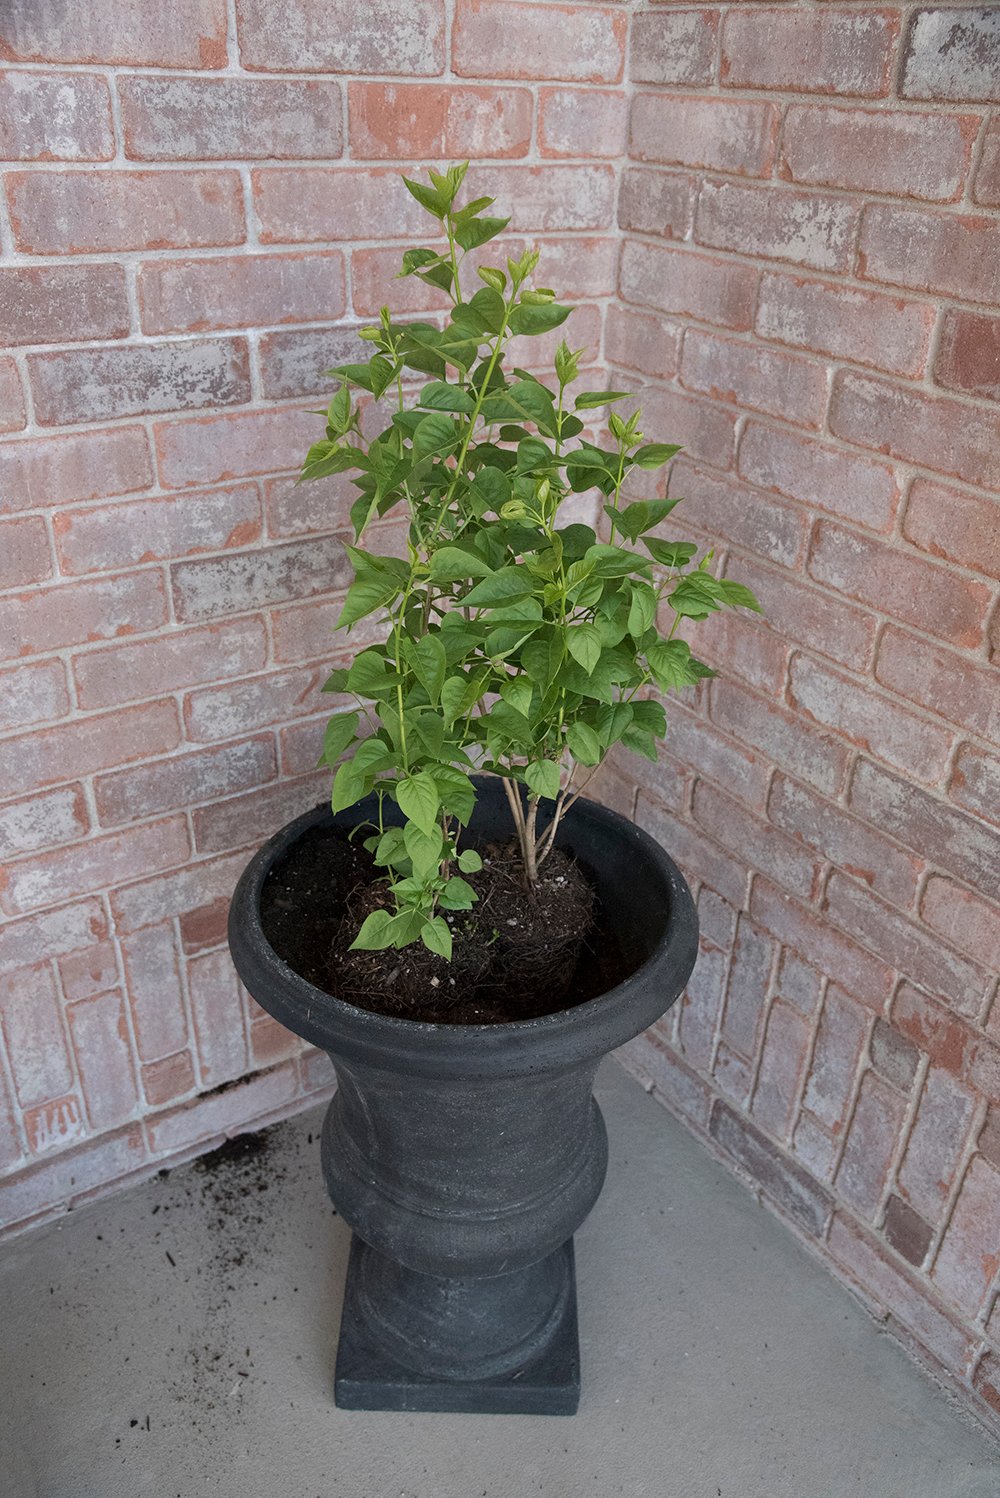
 Step 3 // Start planting the tall, center item. These planters needed some height, so I purchased 4 lilac bushes and used two per pot. Eventually they’ll produce white blooms, but for now- I like their size, texture, and color.
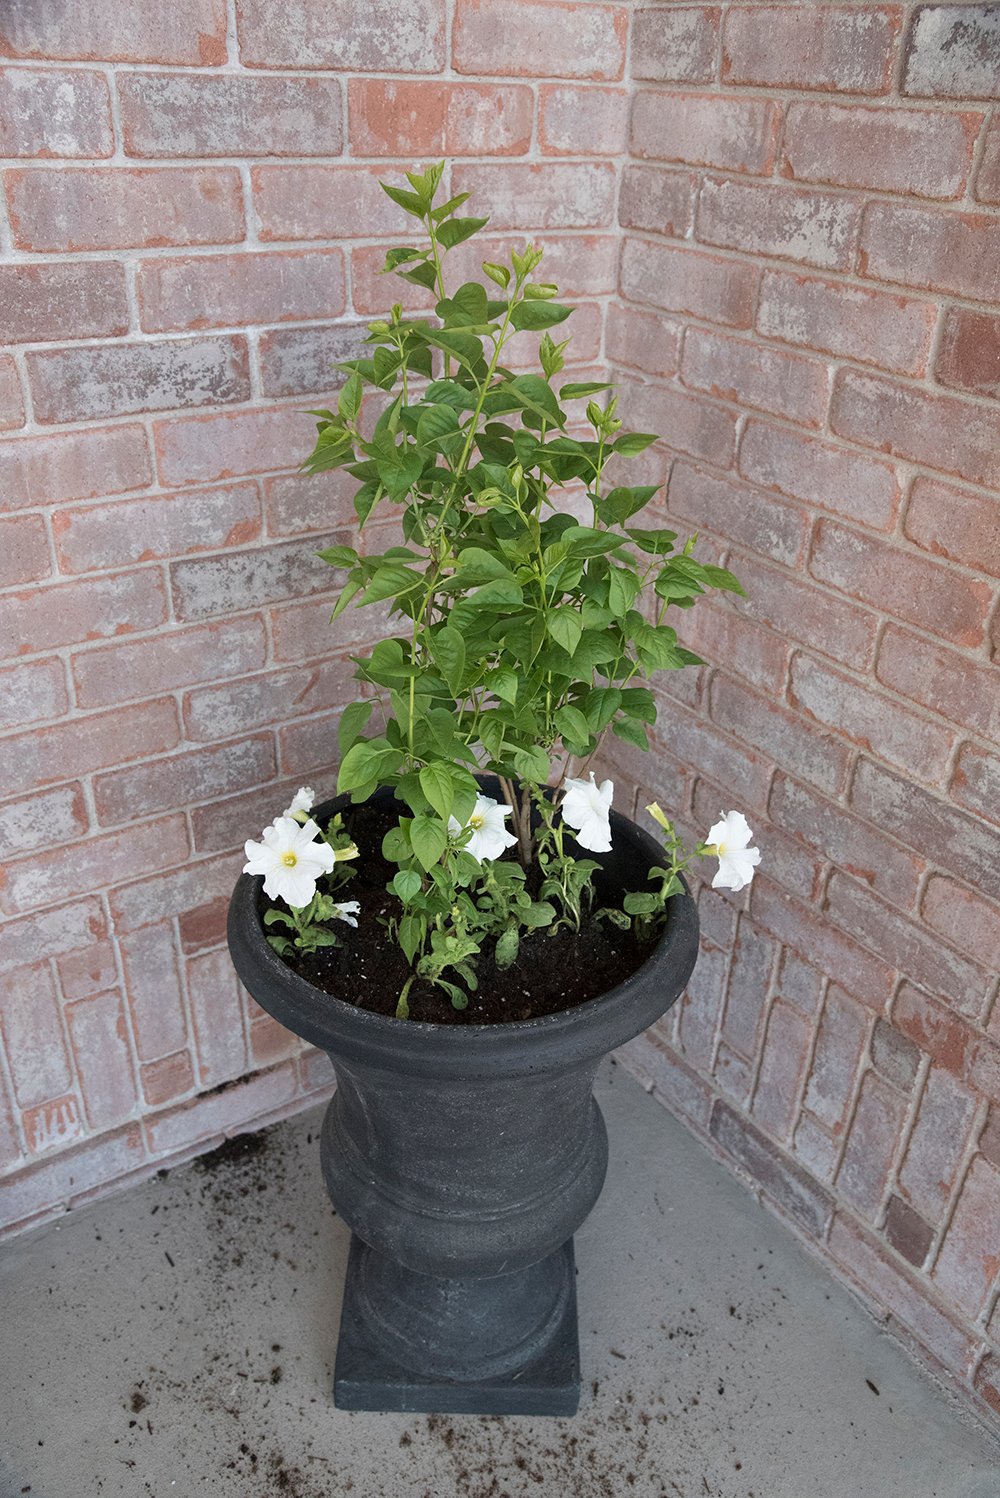
 Step 4 // Add florals. Next, I added some petunias surrounding the lilac- I knew I wanted some bigger blooms, and these fit the budget and were nice & neutral.
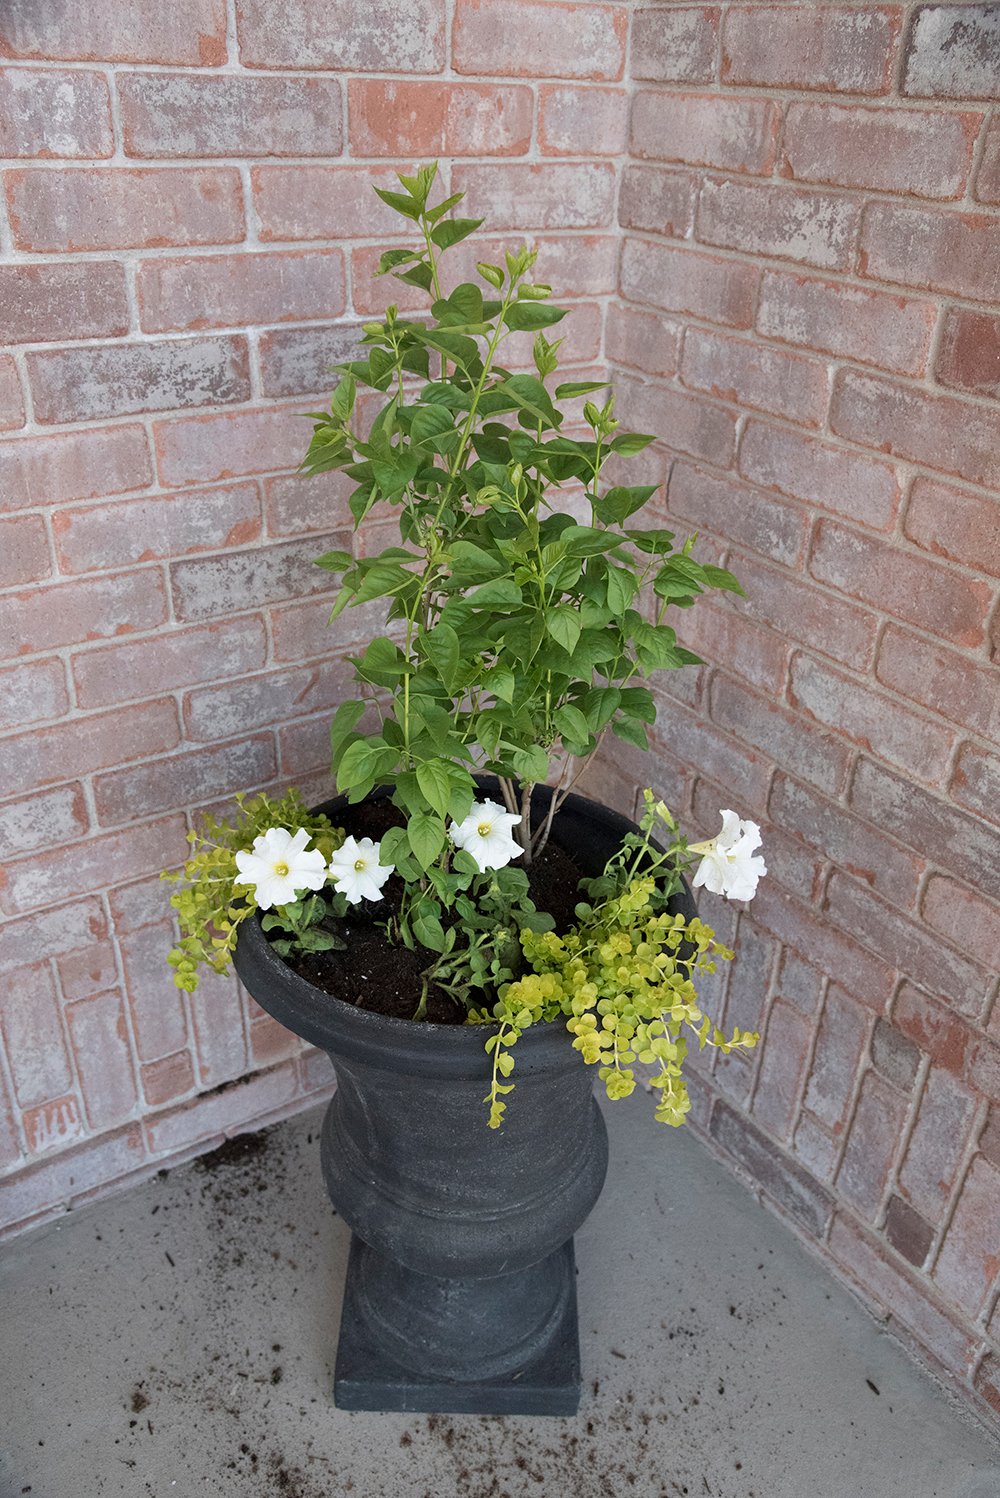
 Step 5 // Add the “spillers”. Then I added the “spillers”. I love plants that taper or spill over the edge of a planter. I used a variety of Creeping Jenny to add a nice romantic texture and draw your eye toward the pedestal planter base.
 Step 6 // Plant the “fillers”. Lastly, you’ll want to insert the filler plants. In this case, I used Snowflake Bacopa plugs. It really filled in the negative space, added a bunch of movement & texture, and darkened the composition with a different shade of green. Eventually these will also bloom upward, as well as taper over the edge.
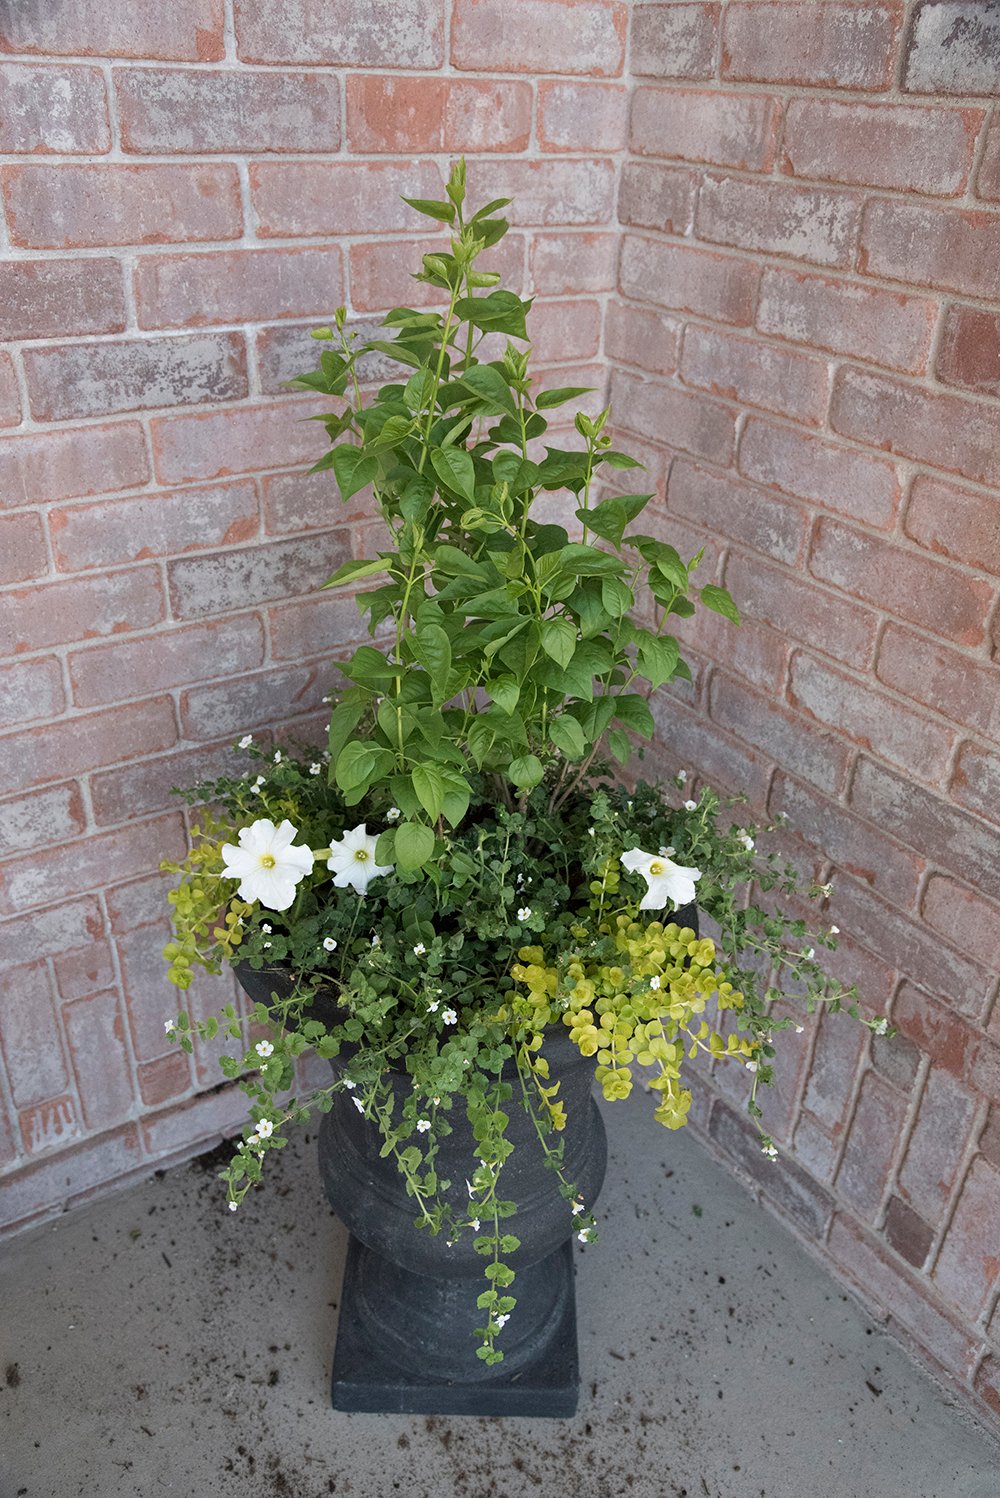 That’s it! In a month or so, this should really fill out nicely and look like a more cohesive, intentional unit… and less like 4 separate plants. I always try to get my planting finished in April, so I can enjoy it all the way until the fall. It just keeps getting better and better all spring and summer long. In regards to care, this arrangement will need part / full sun and I’ll be watering it often (soaking it a couple times a week).
 Did any of you use the weekend to get some work done outside? Are you planning to plant anything this spring? I also put together my yearly succulent arrangements- get that tutorial here! I’m currently working on an “Intro to My Outdoor Areas” post, that I’ll share soon. I have lots of short term and long term plans.
These look so pretty! I would never think to put a perennial (let alone a shrub) into a pot. So will the lilac stay in the planter, and you’ll just replace the annuals each year, or will you find a spot for it in your yard? As much as I love color, I really dig the freshness of a white & greens arrangement. So interested to see the rest of your outdoor spaces. (But where’s the next project announcement?!) Happy Monday!
Thanks Peggi! I’ll definitely plant the lilac at the end of the season and find a spot for them in the yard :) My plan was to photograph the outdoor areas today, but it’s raining… hopefully I’ll have better luck tomorrow. As for the next project, you’ll be the first to know- THE KITCHEN! I’ll be sharing the news on Instagram later this afternoon, with a giant blog post coming tomorrow. Have a great day! xox