Powder Room Makeover
 Happy Tuesday, friends! Time to get excited… I’m finally sharing the end result of my little powder room makeover with you today (click here for the design plan and before images). This tiny space is located inside our laundry room and despite the odd location, it gets a ton of use. It’s the one and only water closet on the main level of our home, and when we entertain- this powder room is the bathroom our guests use. Eventually we’ll demo this entire space, knock down the walls and reconfigure our powder bath and laundry. The laundry room will eventually become a mudroom, but that’s a story for another day. Anyway… knowing we’ll fully renovate someday, I didn’t want to spend a ton of time or money making this space better. Much like my laundry room makeover, I used temporary, budget-friendly materials in an effort to make this room feel more interesting until the day comes to bust out the sledge hammers and renovate. It feels more like our aesthetic and I don’t have to be embarrassed anymore, once we’re finally allowed to entertain and host friends & family again. Click through for all the details!
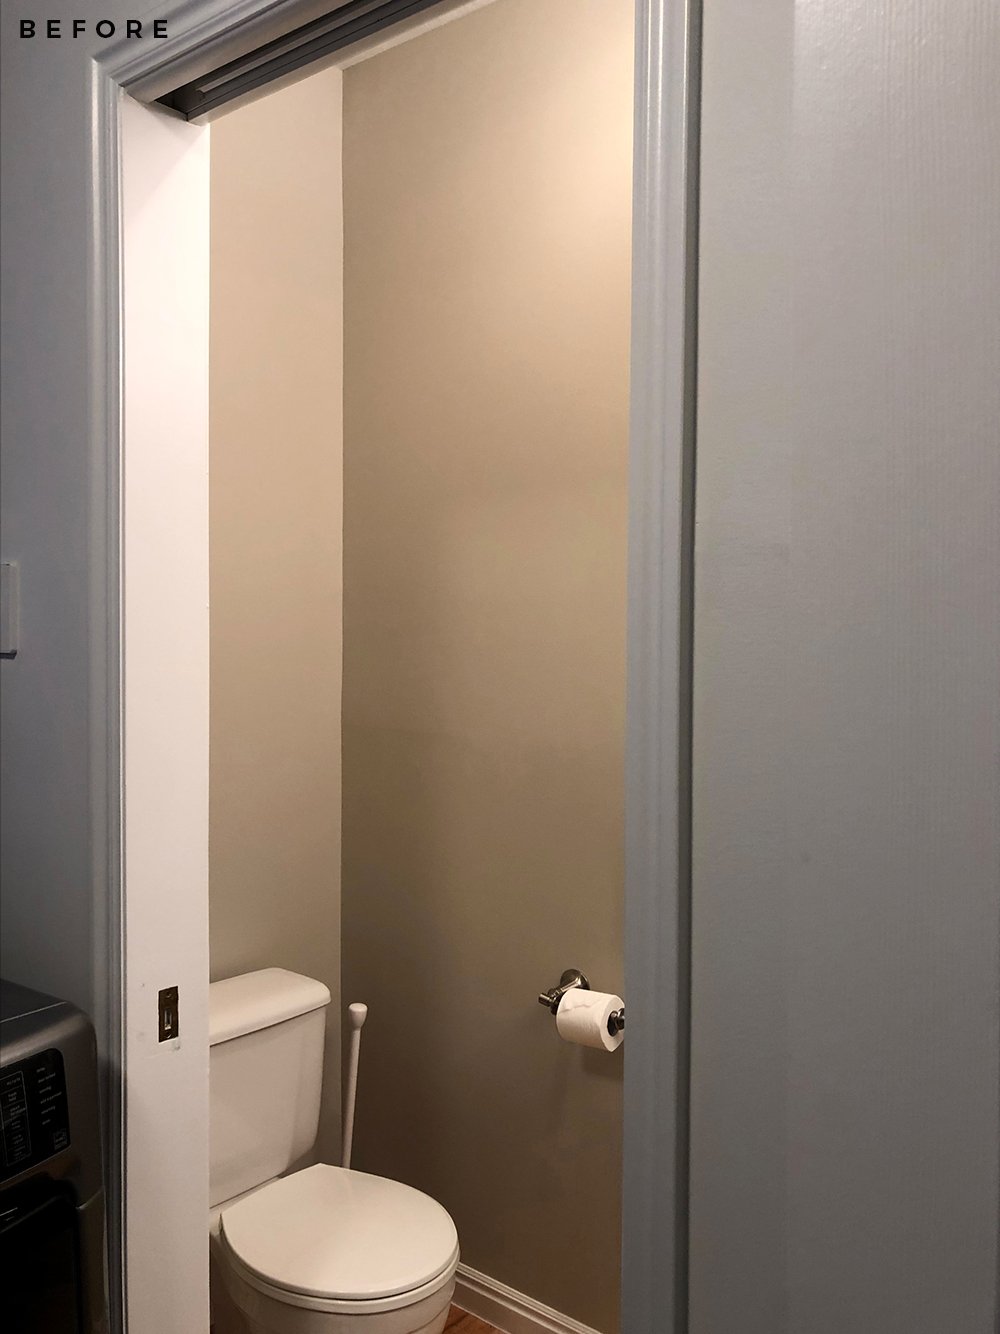 This is a little reminder of what the space used to look like. It was pretty blah and boring. A pocket door separates the powder bath from the laundry room.
 I updated cosmetic features while working with the existing footprint… think lighting, removable wallpaper, sticky floor tile, art, trading the mirror, etc. It was a relatively quick and easy makeover! Here is another before image…
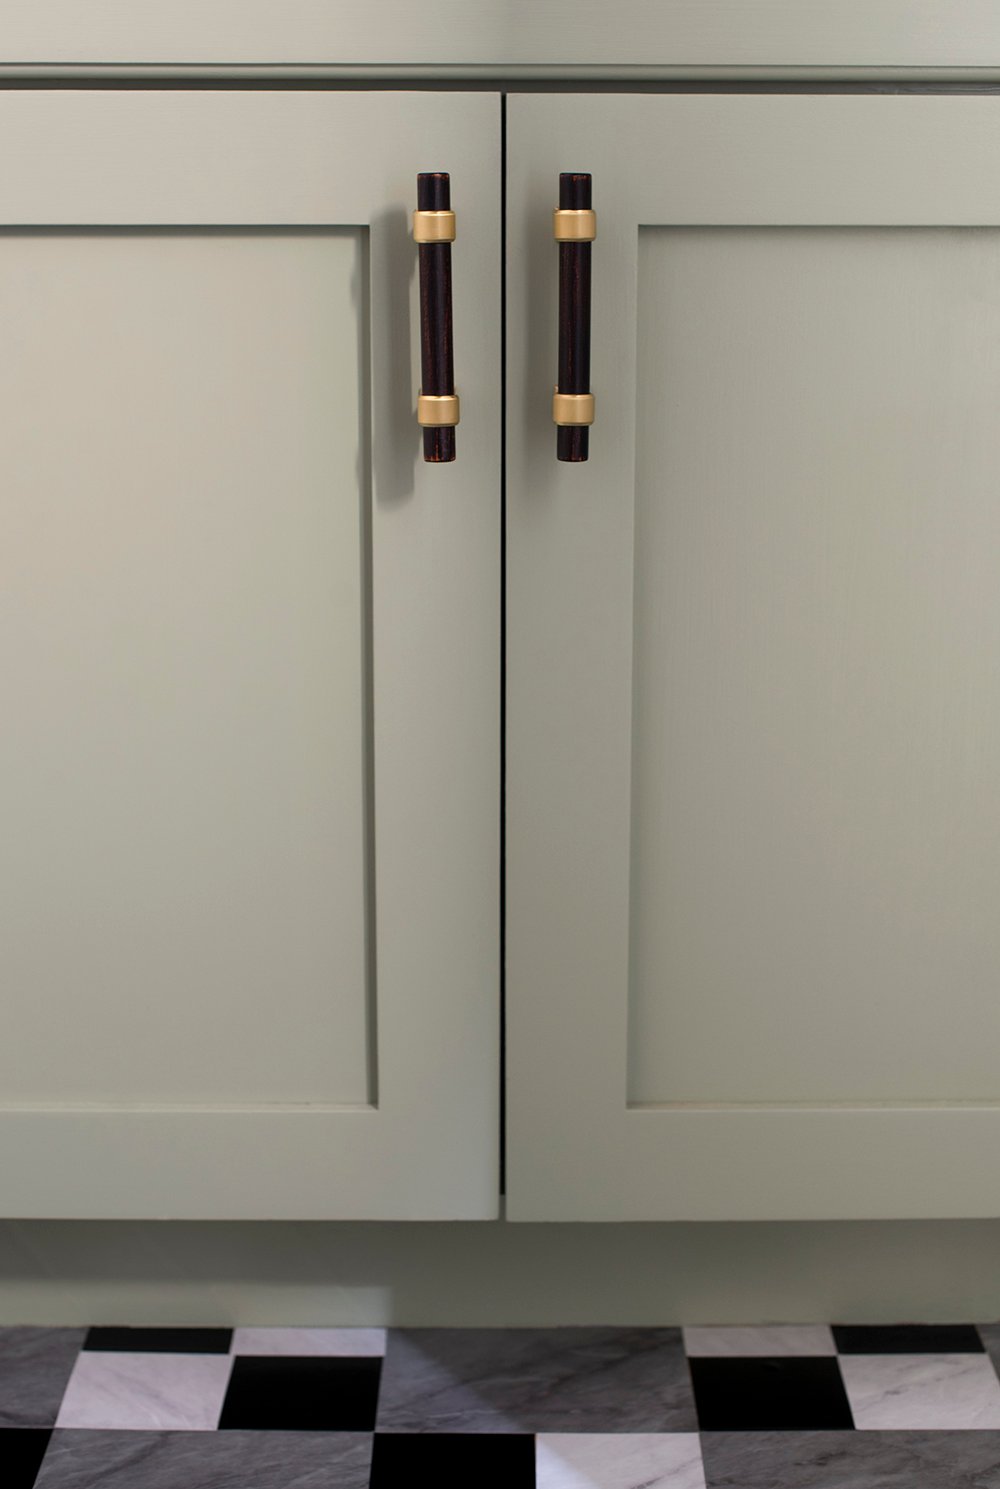
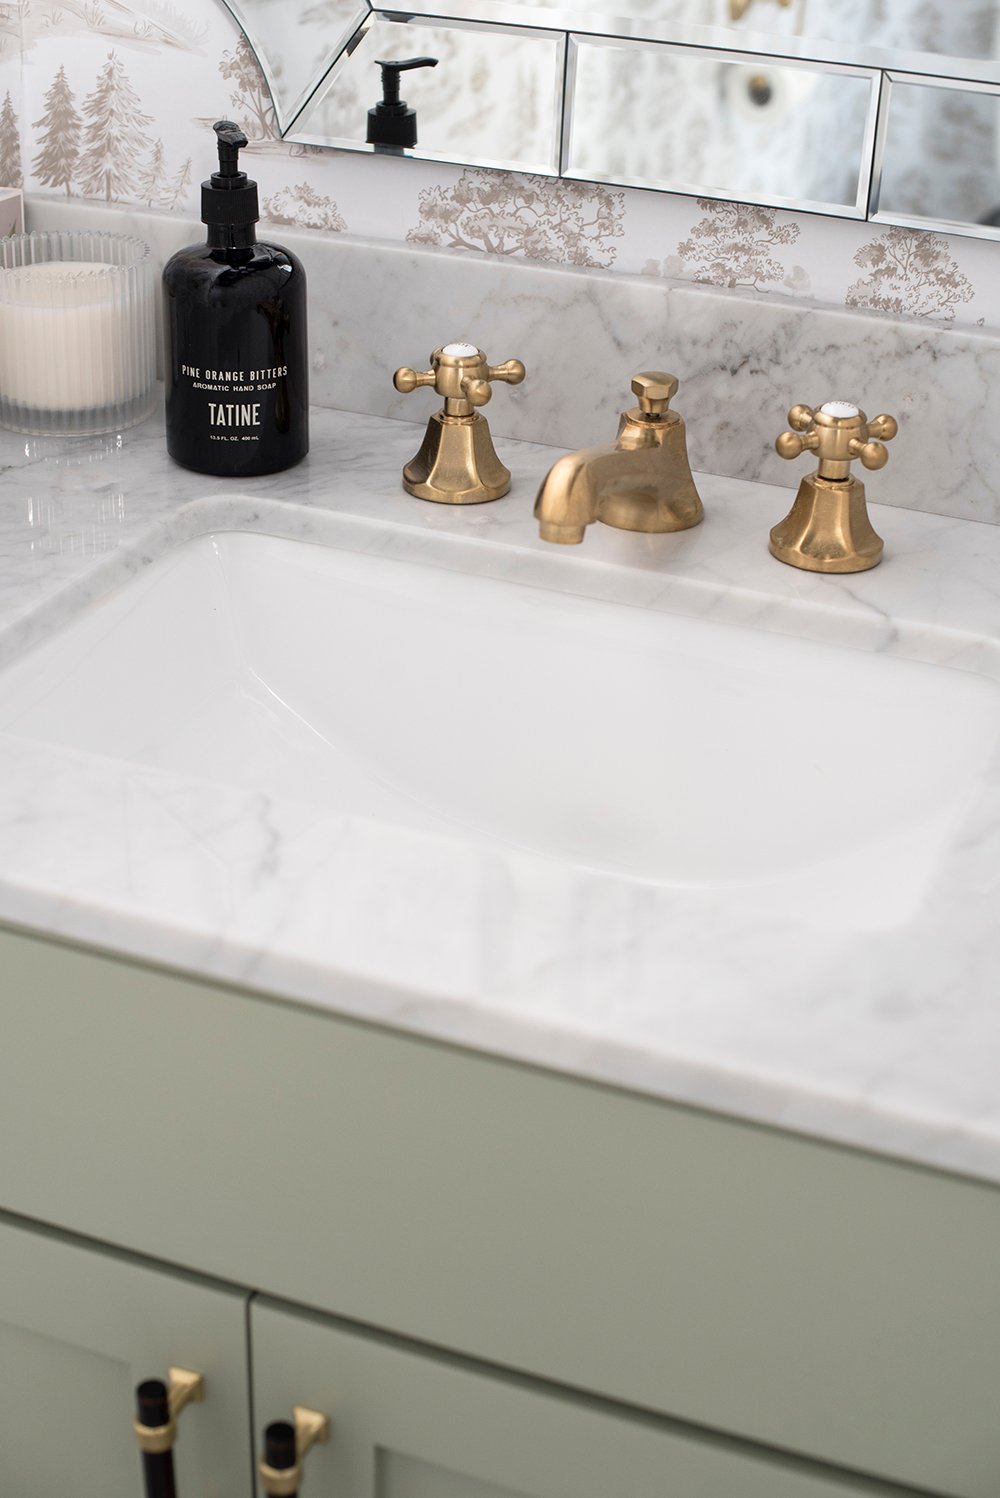
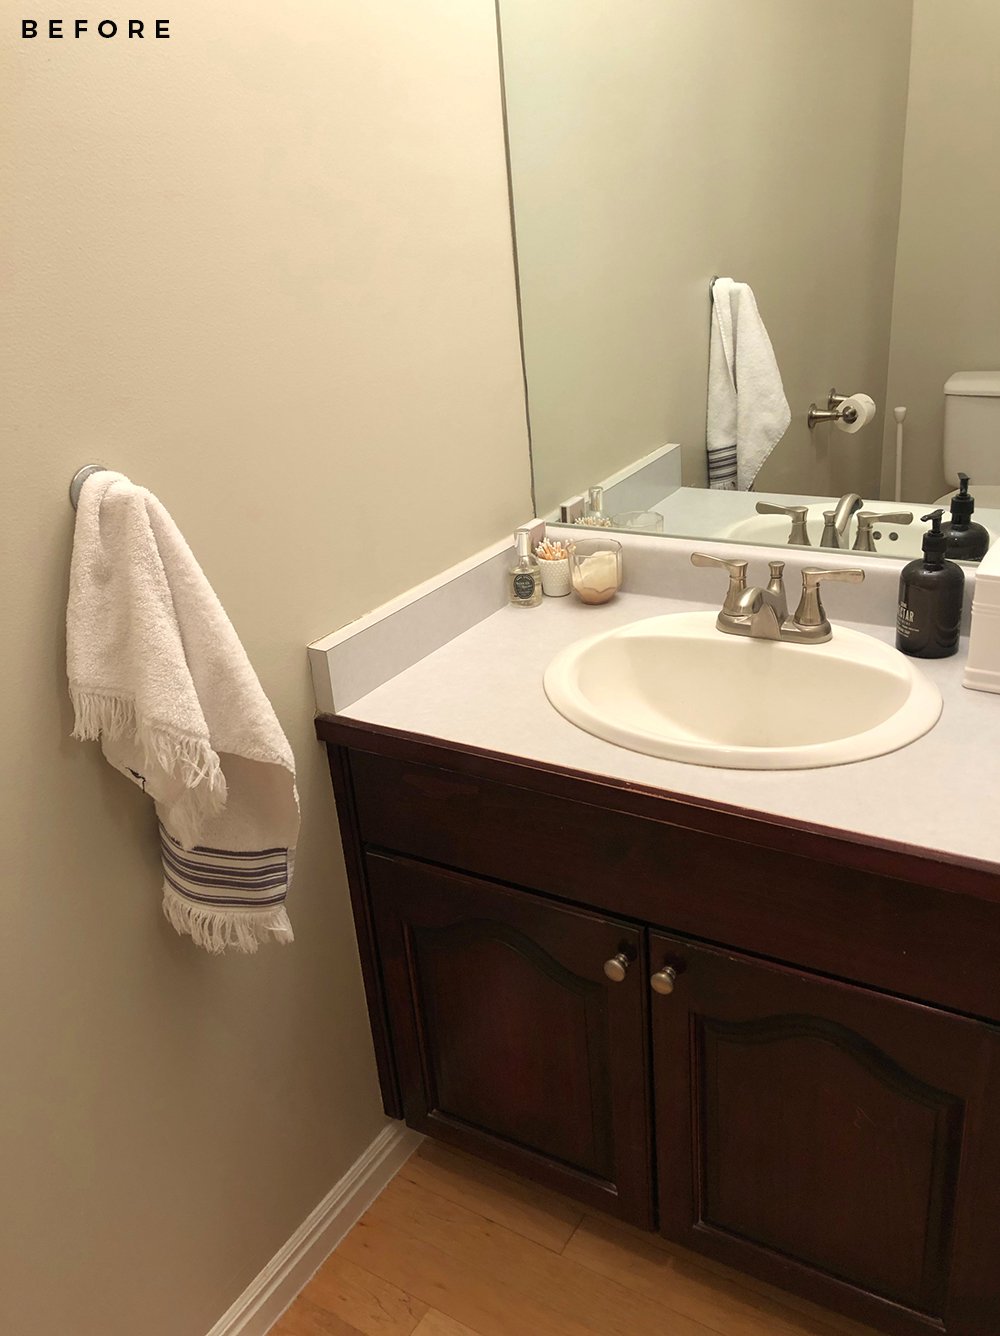 The vanity is probably the most dramatic change in the room. I kept the existing vanity, but swapped the doors for simple, shaker style cabinet door panels. I also traded the laminate countertop, sink, and faucet… in addition to painting the cherry wood. The vanity was kind of an overhaul, but it really didn’t cost much. It was mostly just my time and labor.
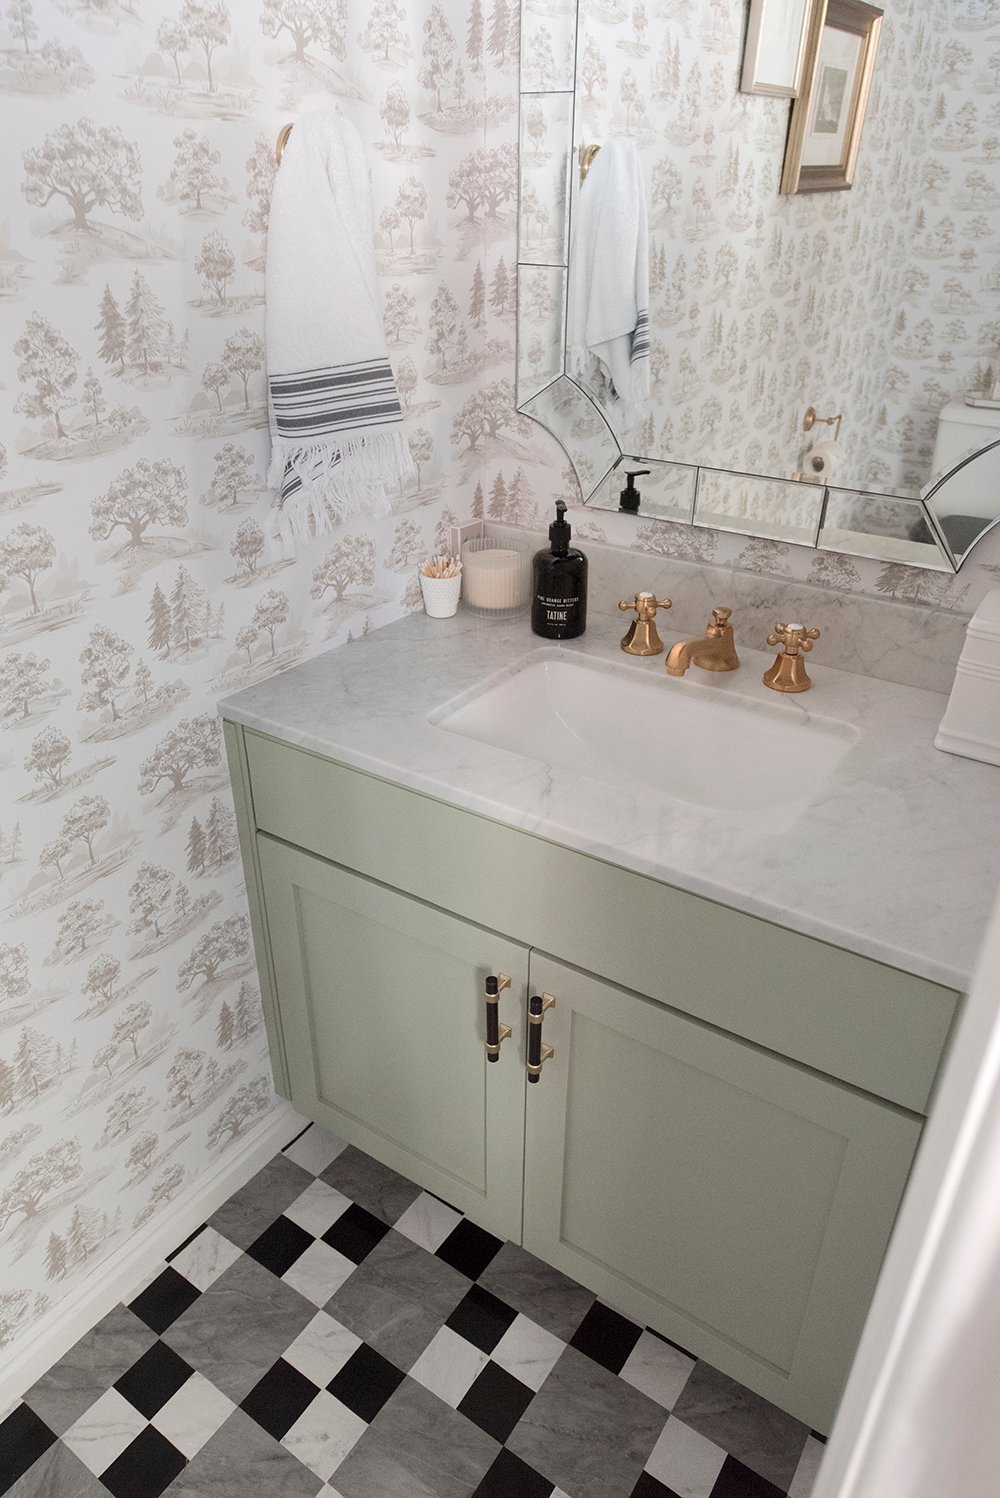 I tried to use leftover materials I had from our laundry room makeover, so you’ll probably spy some familiar items… the door pulls, the paint, the floor “tile”, and the towel. Given the powder bath is INSIDE of the laundry room, it feels natural that these space should look cohesive anyway.
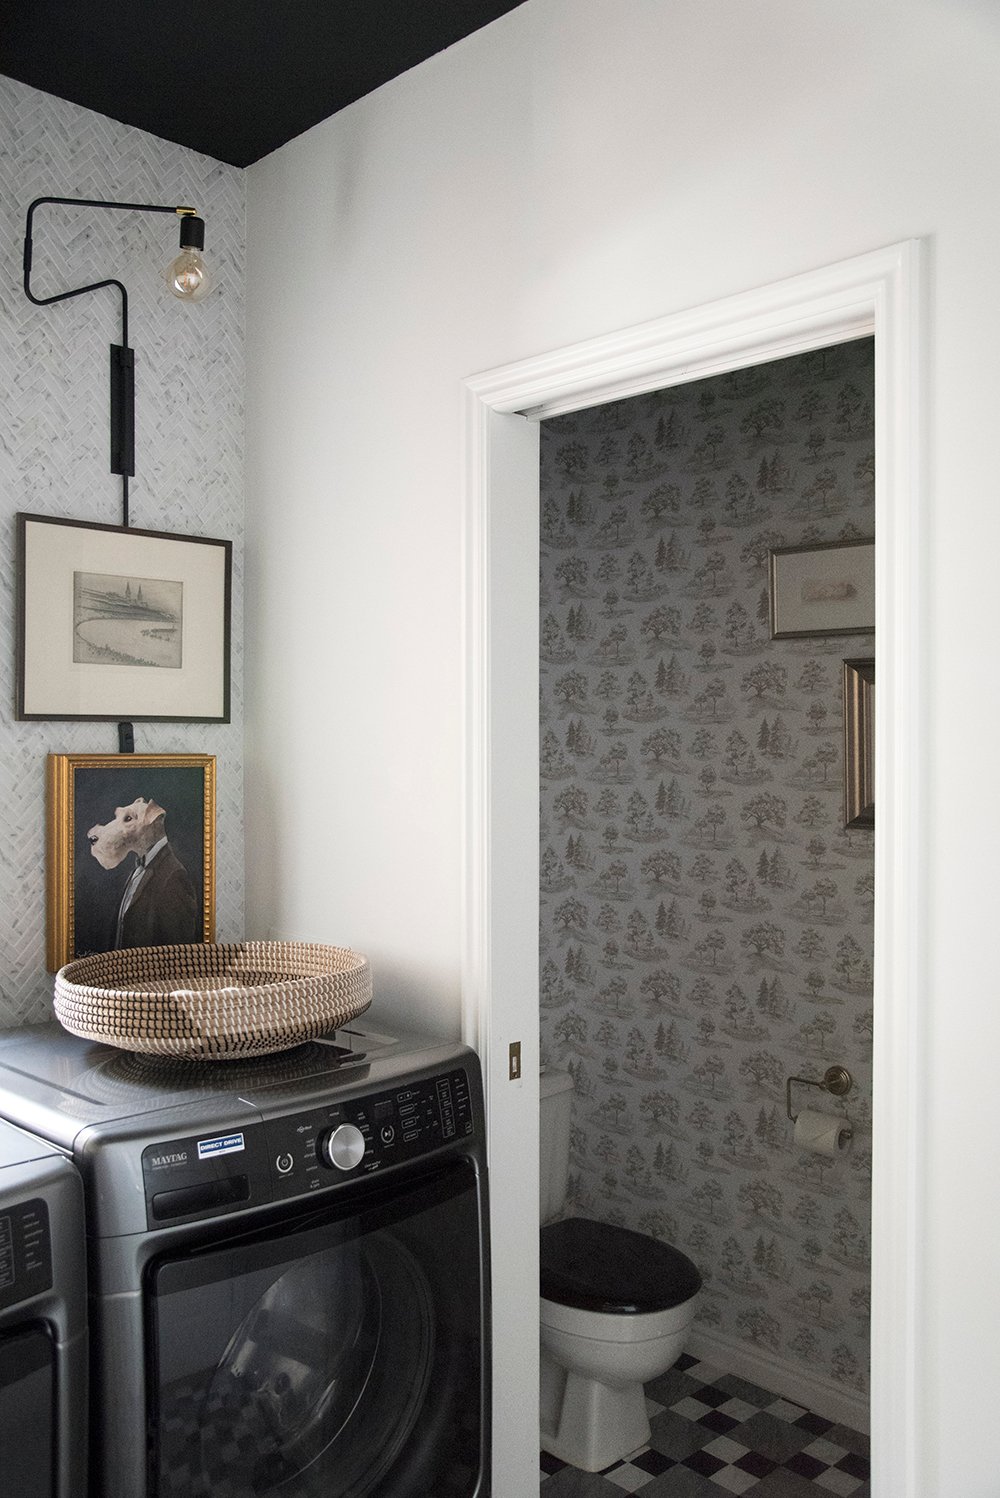
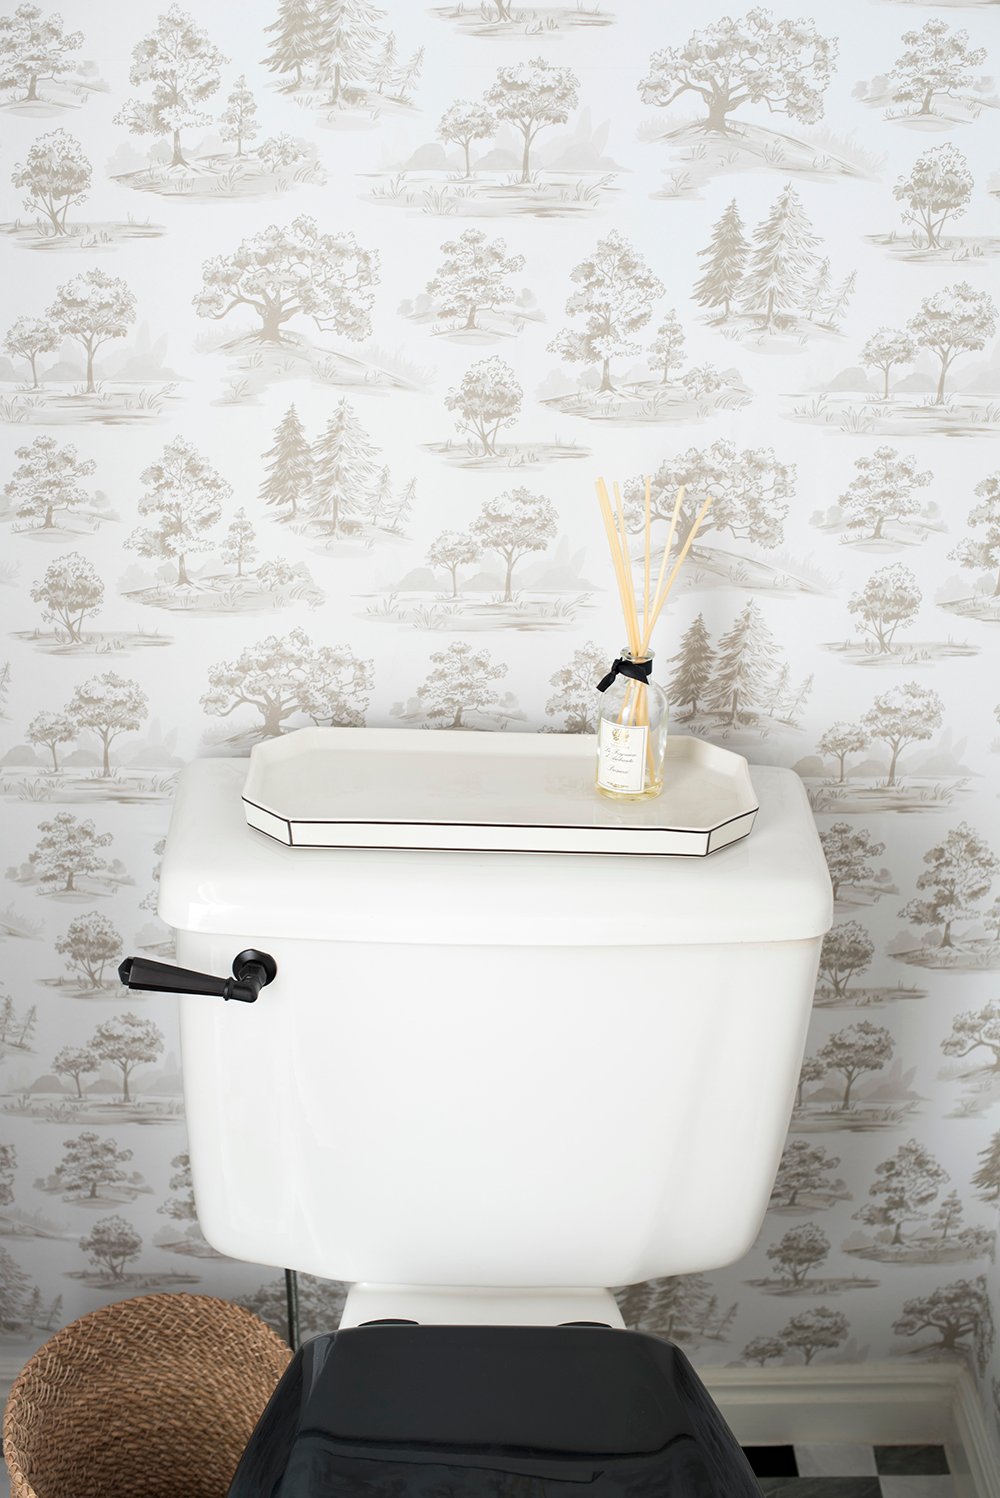
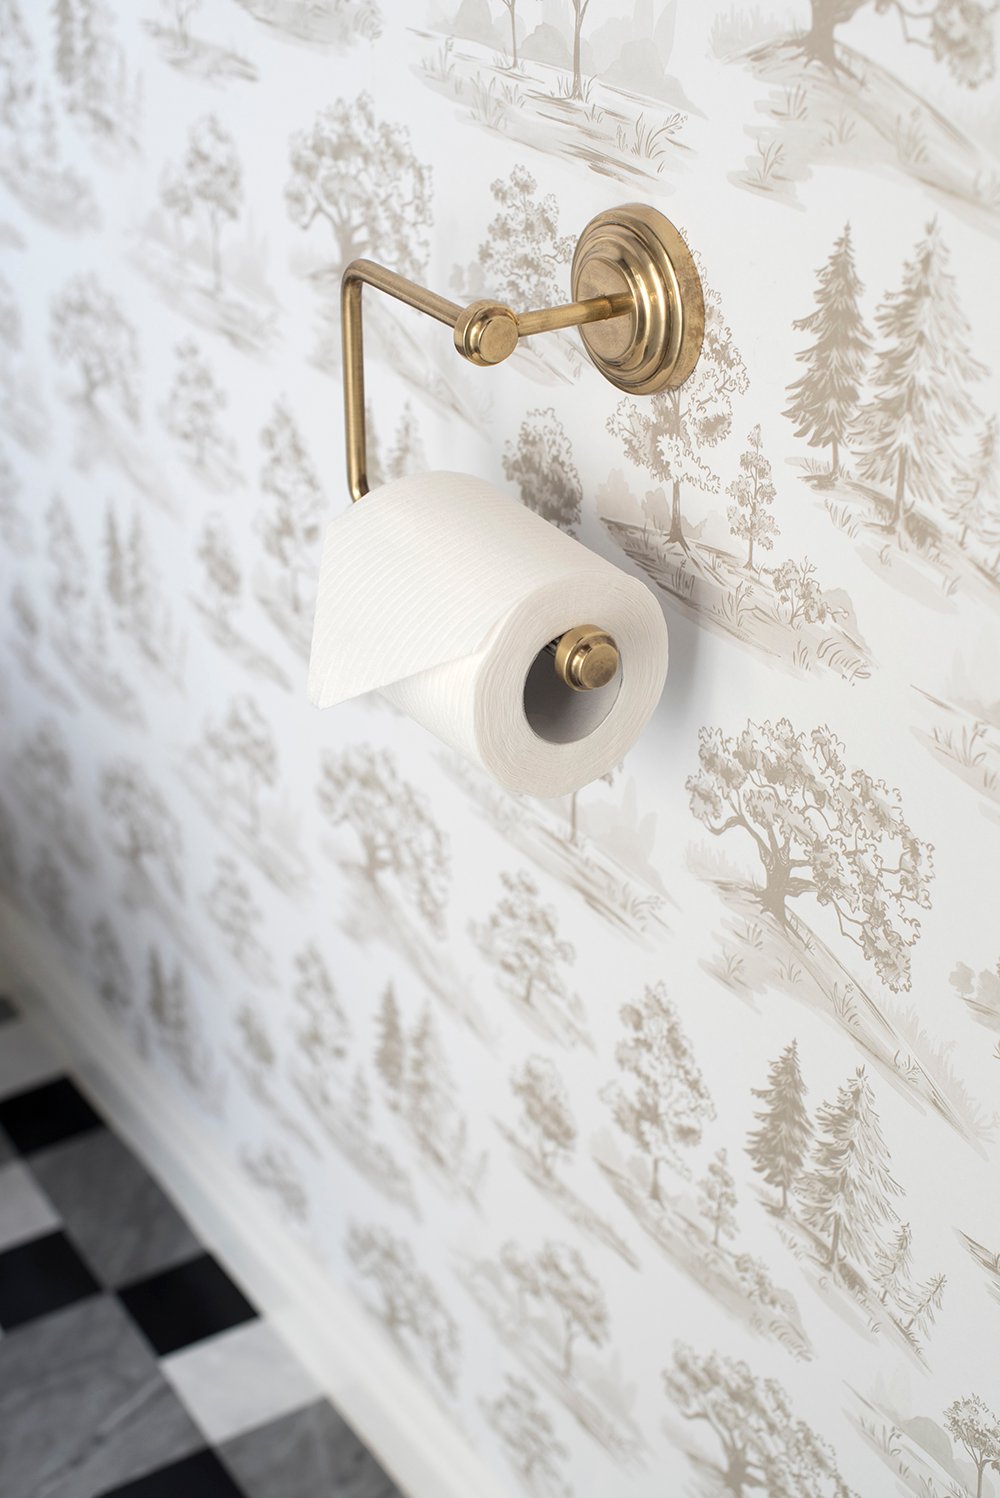
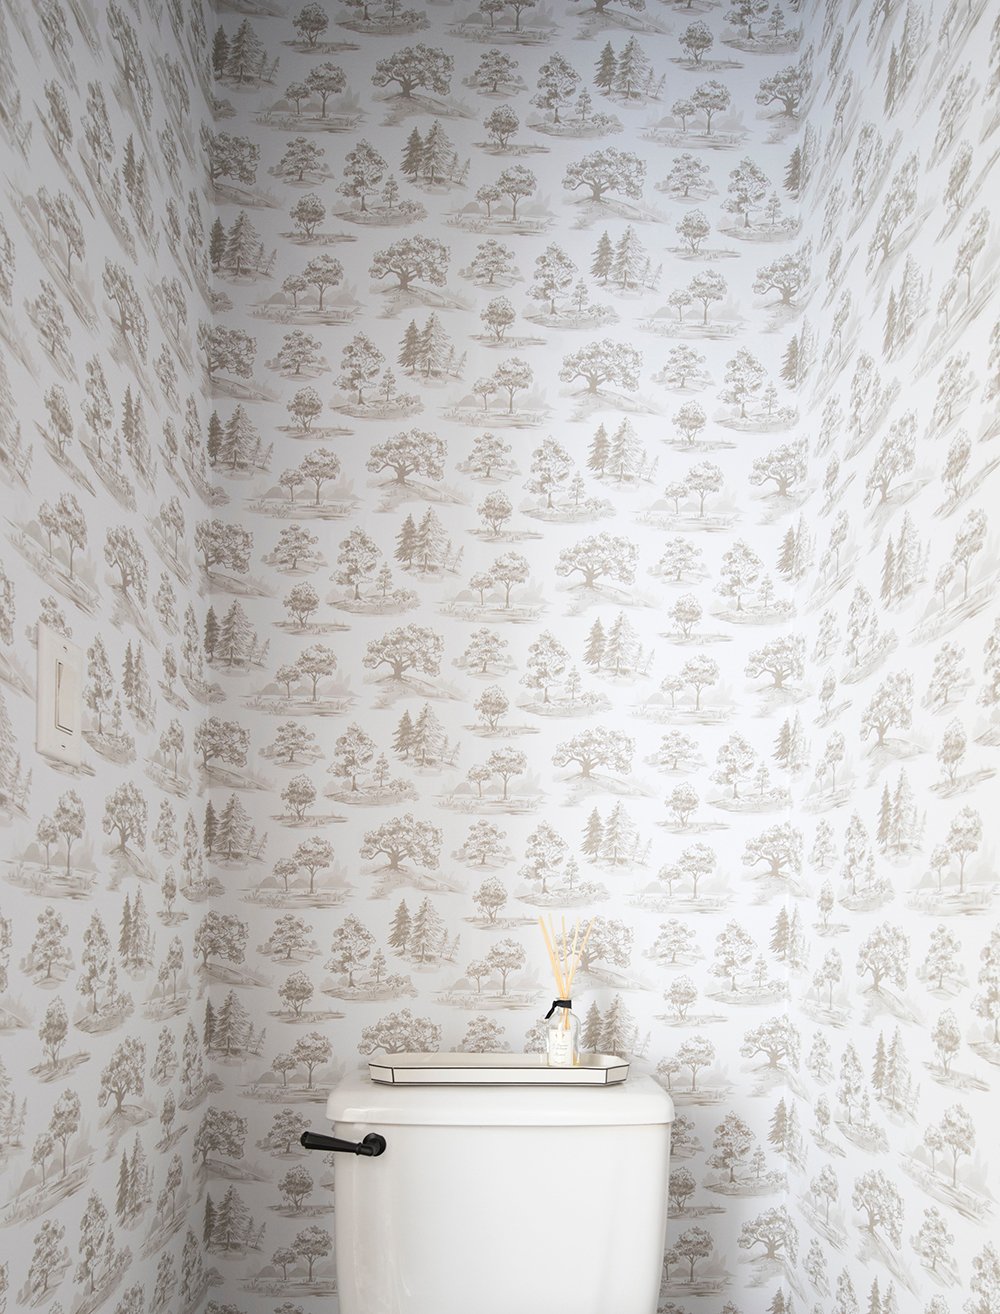 The toilet is original to our home, and it honestly looked pretty dated. I gave it a little budget refresh- check out this post for my toilet updating ideas… I’m serious. You guys know I like the high contrast look, so I swapped the lid and lever. It looks similar to our guest bath toilet upstairs!
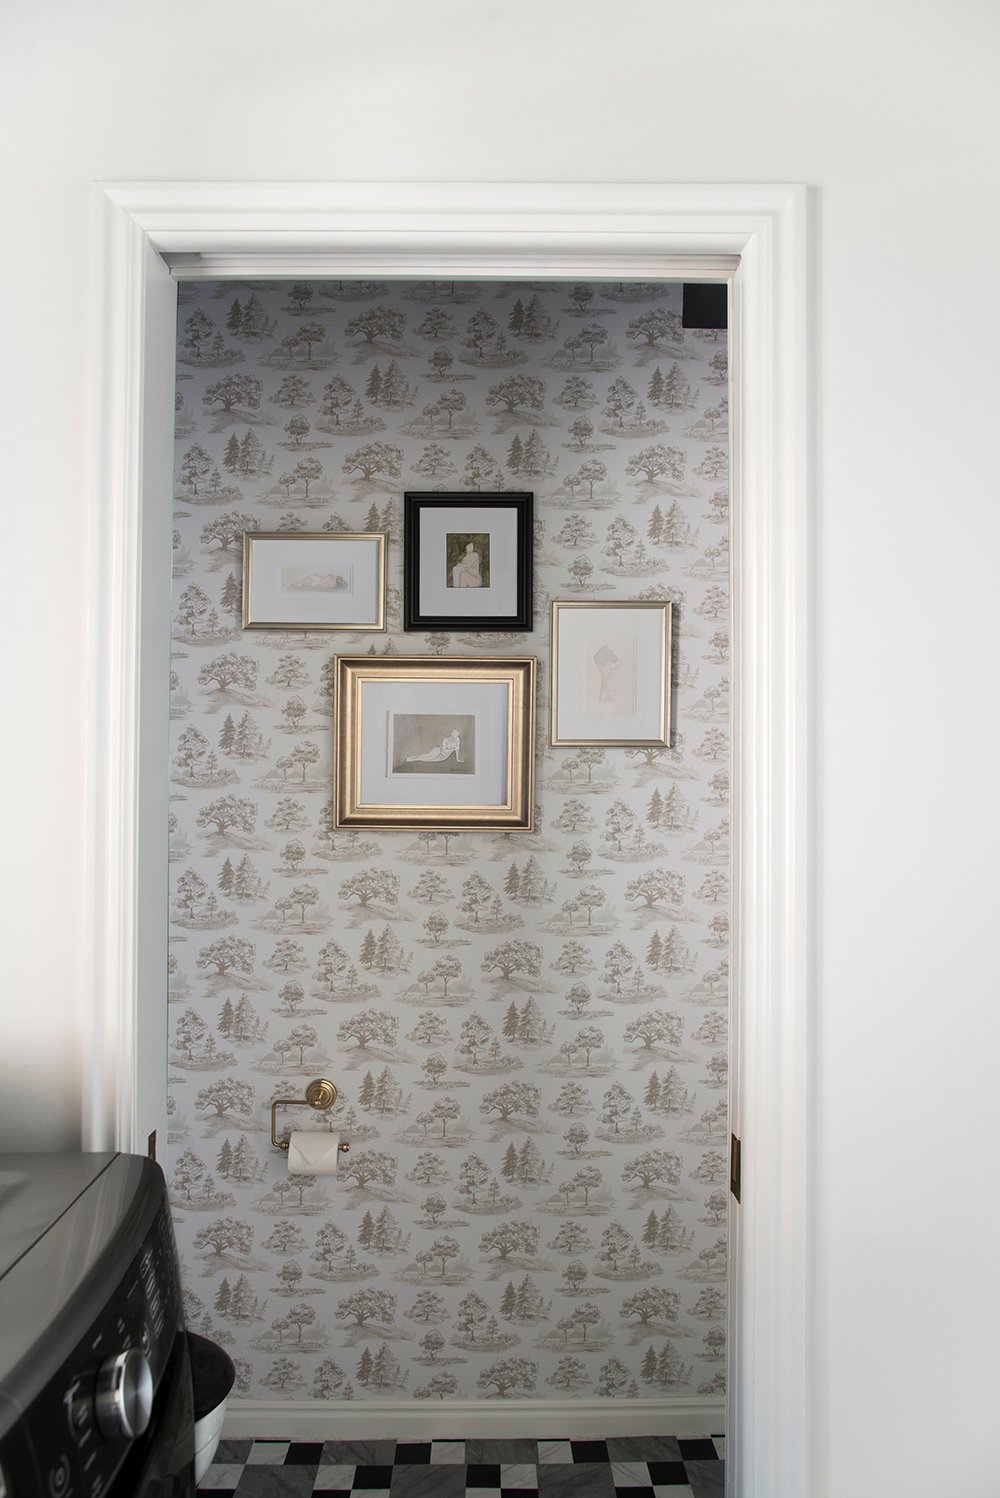
 The biggest change is probably the wallpaper. I used this peel-and-stick paper that went up easily and quickly. If you missed the tutorial, you can find that here. There is something about wallpaper in a tiny space that feels very designerly to me.
 To my surprise, Emmett LOVES the wallpaper. He even asked if we could incorporate wallpaper into our laundry room and powder bath once we actually renovate “for real” someday. Obviously, I’m on board. Ha! I feel like this is the point in our relationship where I now know we’ve been together for so long, and he’s been hanging around me long enough to start having a trained design eye (you’re welcome, E!). Ten years ago, he never would’ve been into or appreciated this look, but here we are.
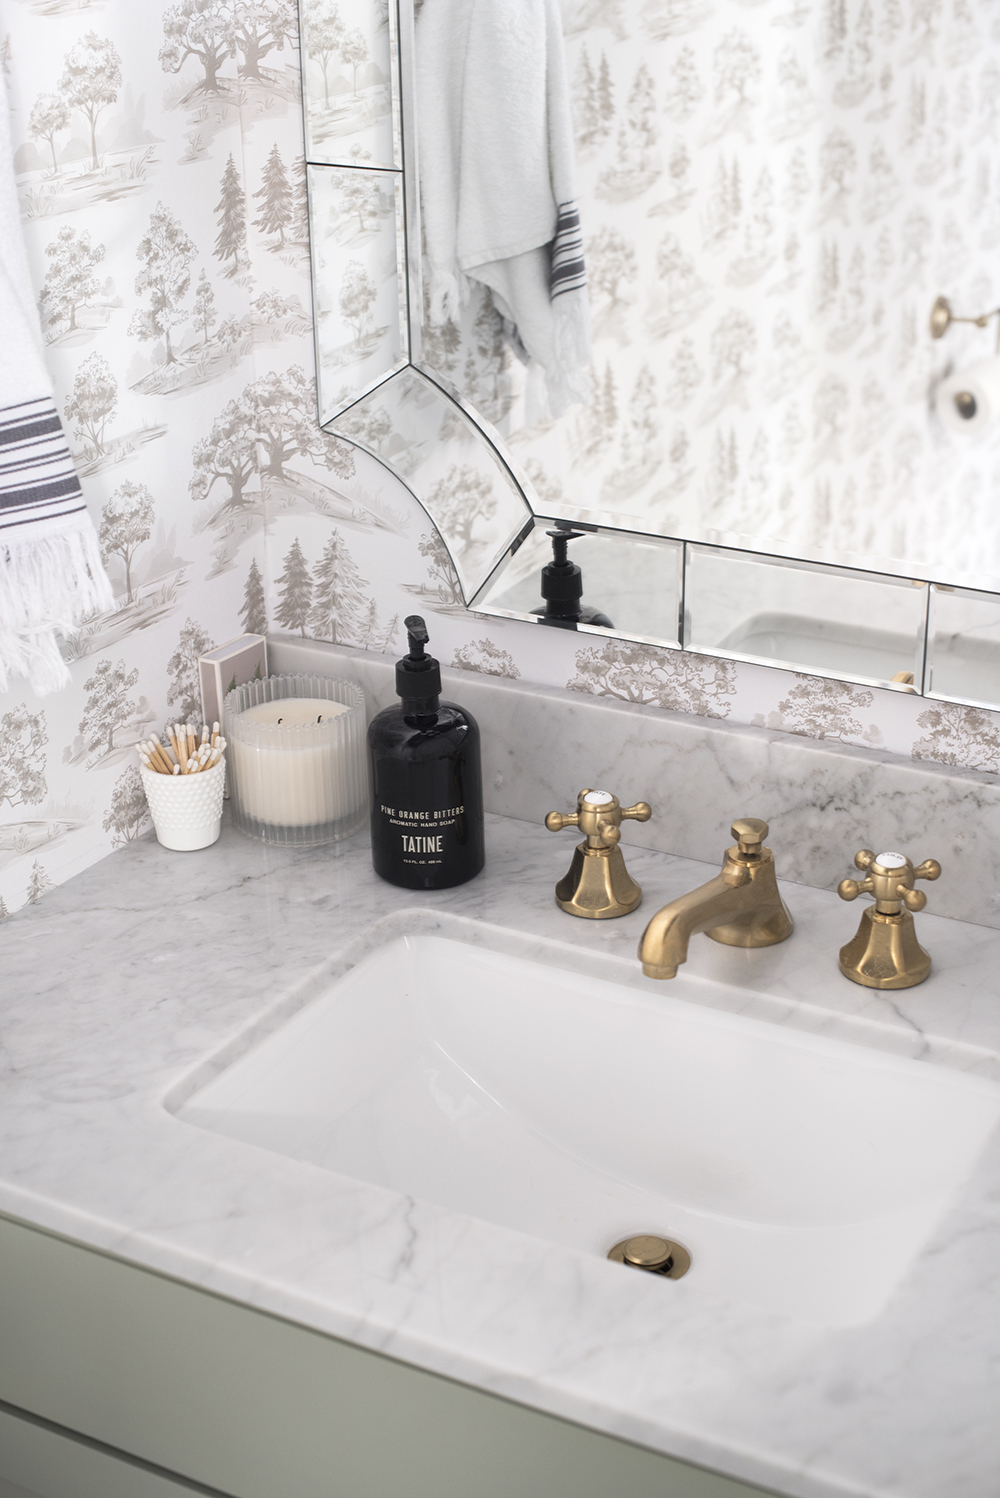 The countertop accessories remained the same. I’m a big believer that no matter what your bathroom looks like and no matter how dated it may be… splurge for your favorite candle, hand soap, towels, and any other small thing that brings you joy. It’s amazing how these tiny items can make a space feel more like home… even without a single update!
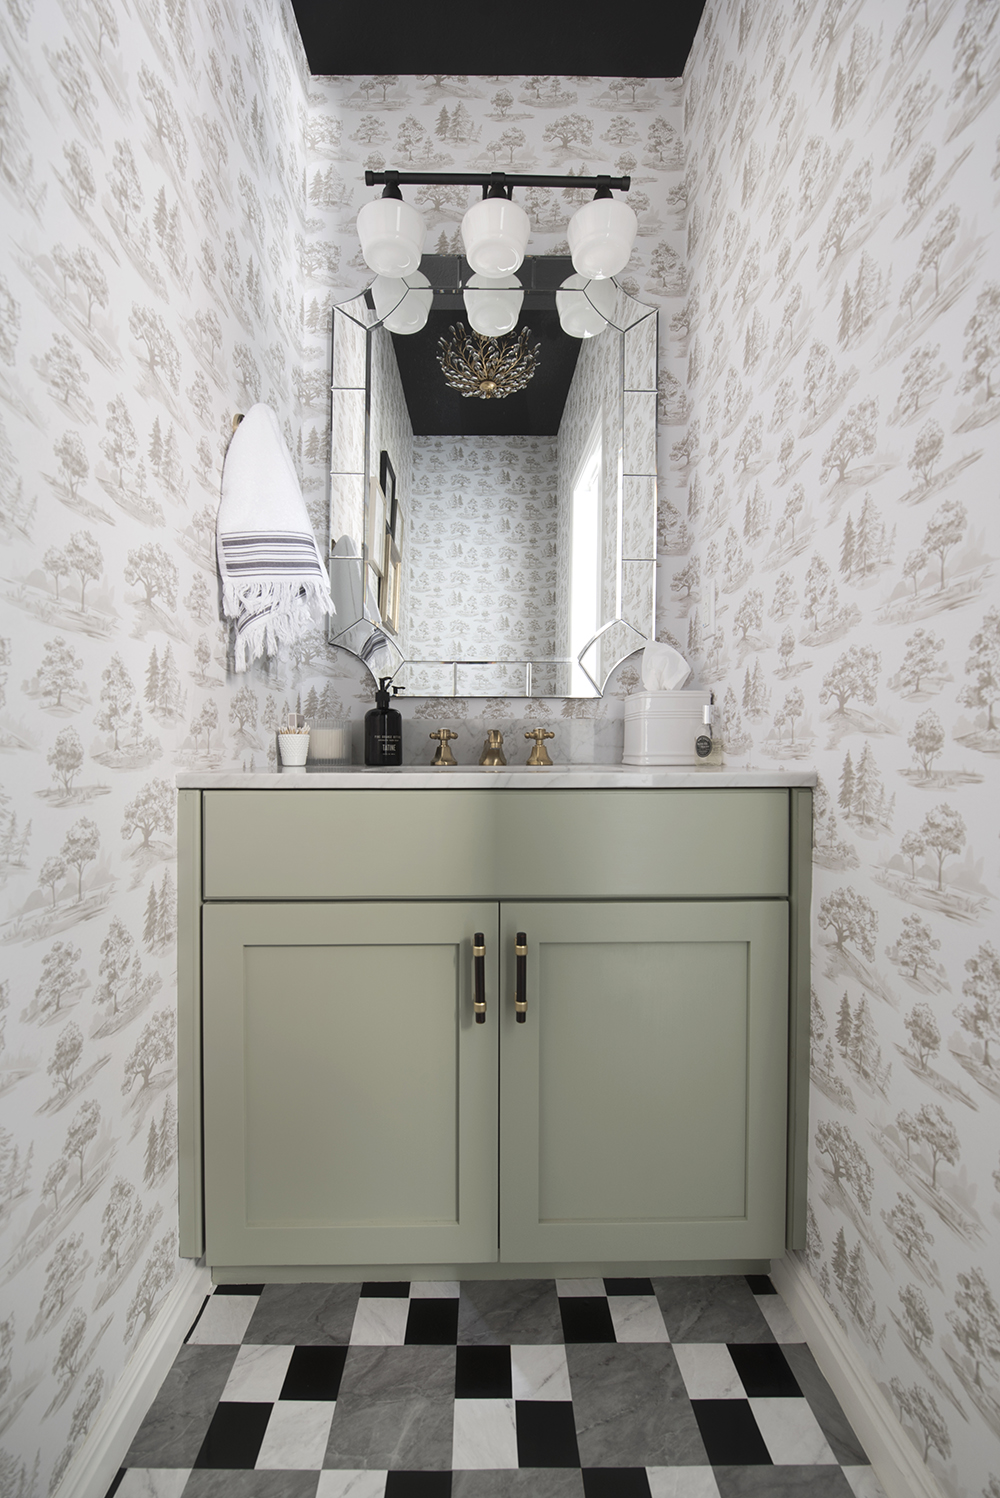
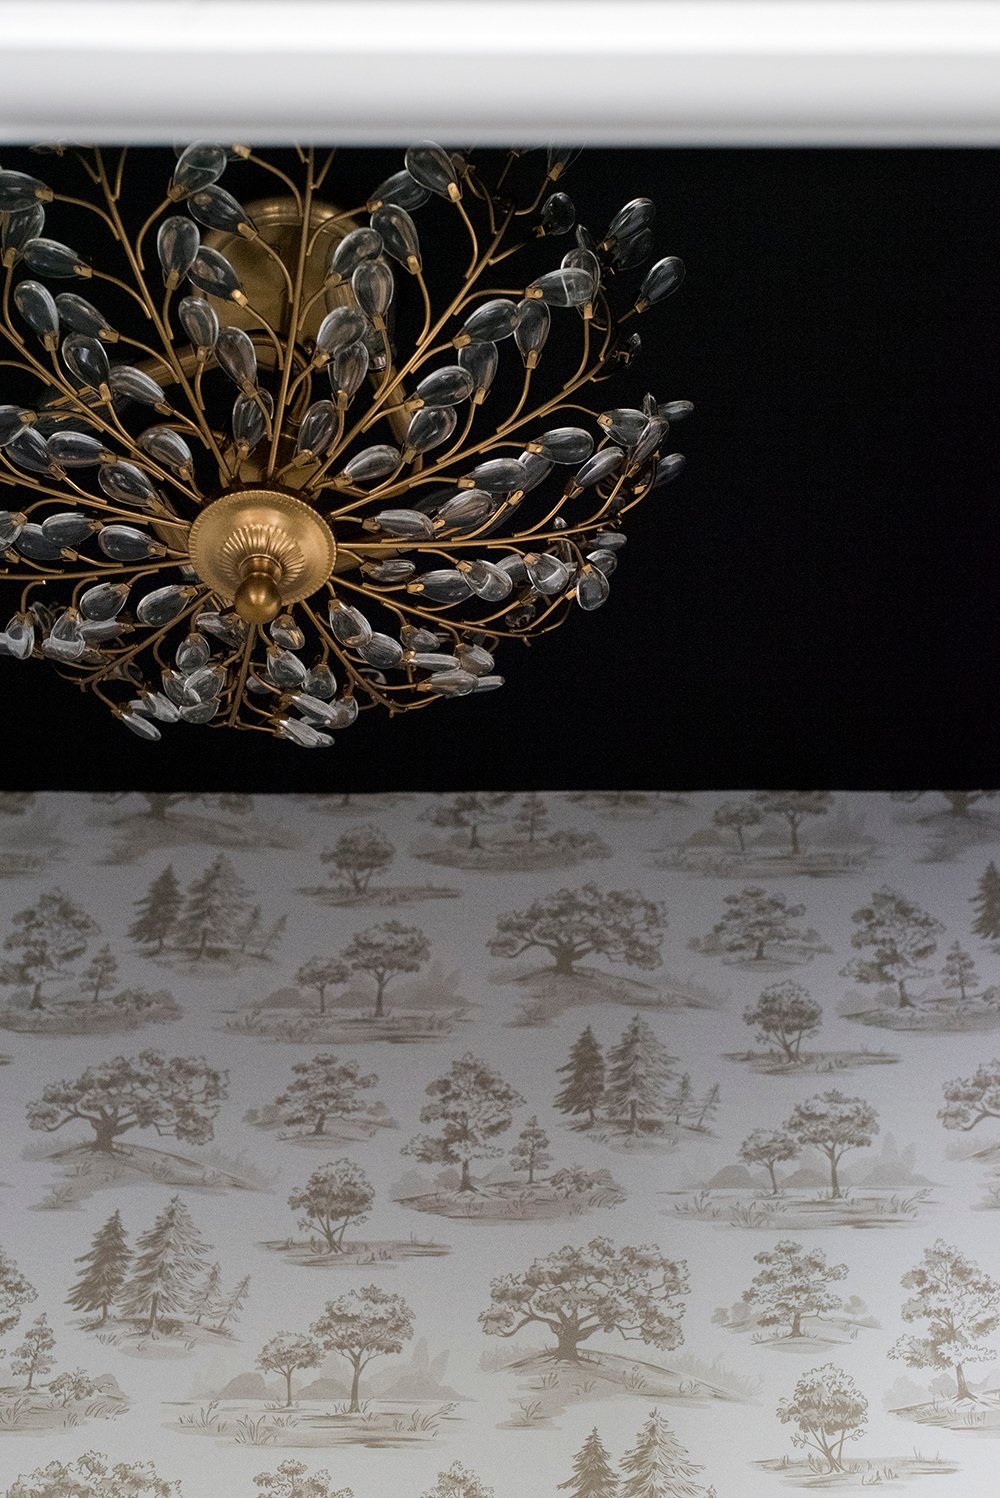 The lighting also got an upgrade. You guys know I couldn’t leave a boob light up there on our ceiling. When we renovate someday, my plan is to install the brass light fixture, pictured above, in my closet. It feels chic and feminine!
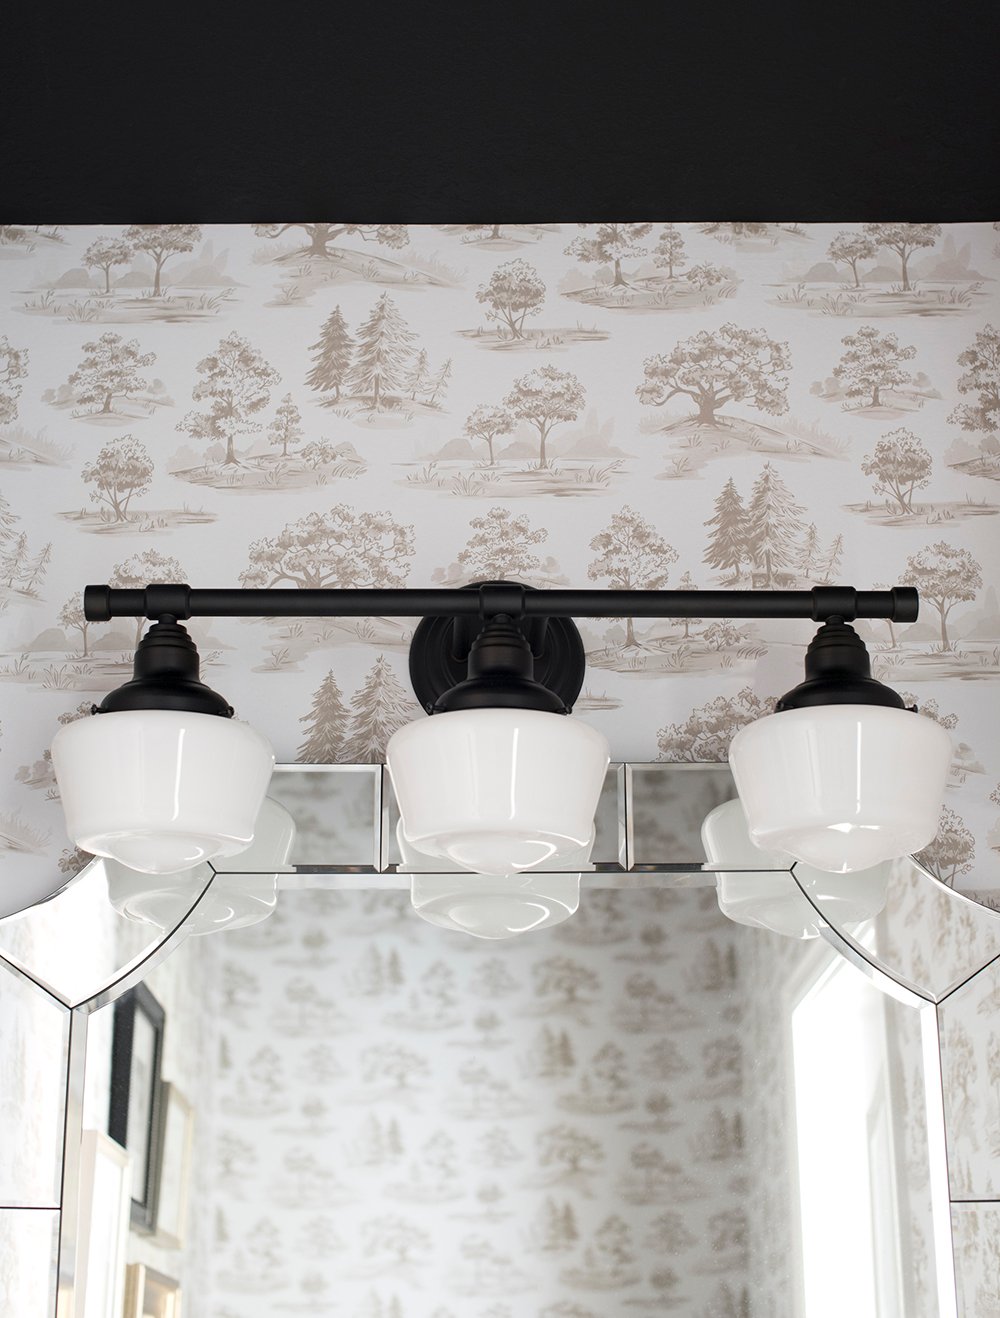 We also traded the vanity light. Although budget-friendly, this one feels more classic than the existing nineties sconce that used to live there. As an added bonus, it matches the semi flush mount fixture in our laundry room, shown below. Win / win.
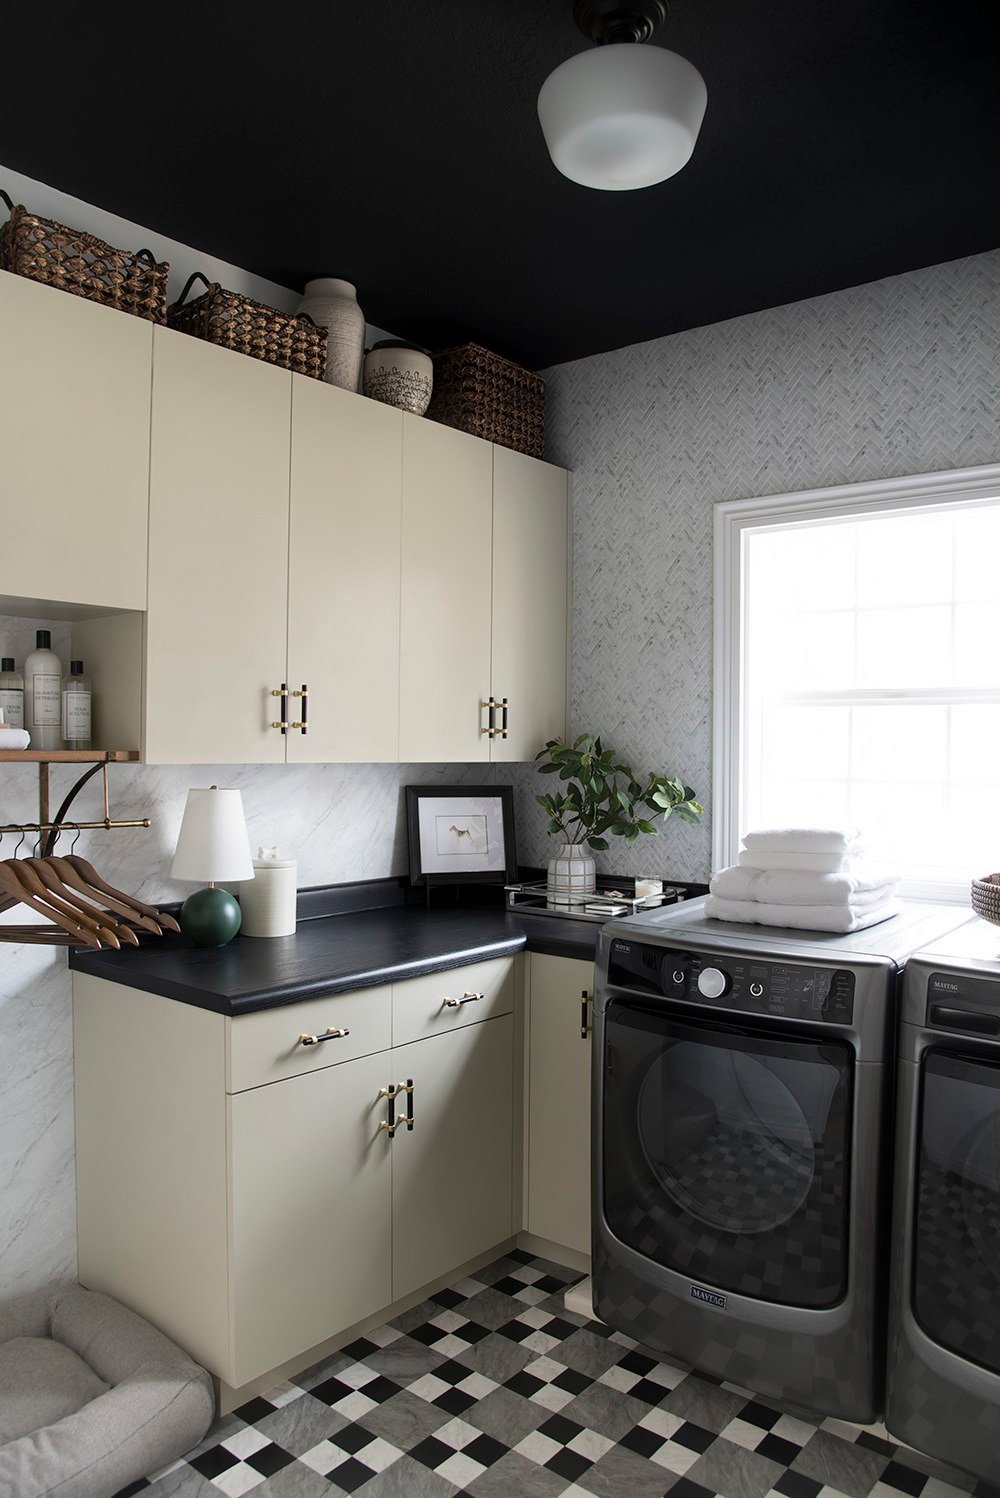 Don’t you feel like the two rooms are cohesive? They’re not “matchy matchy” like twins, but more like siblings… which is nice! They belong in the same family, but are also unique. It’s tricky to design a room-in-a-room. Do you have any odd spaces in your home like this (other than a closet in a bedroom, etc)?
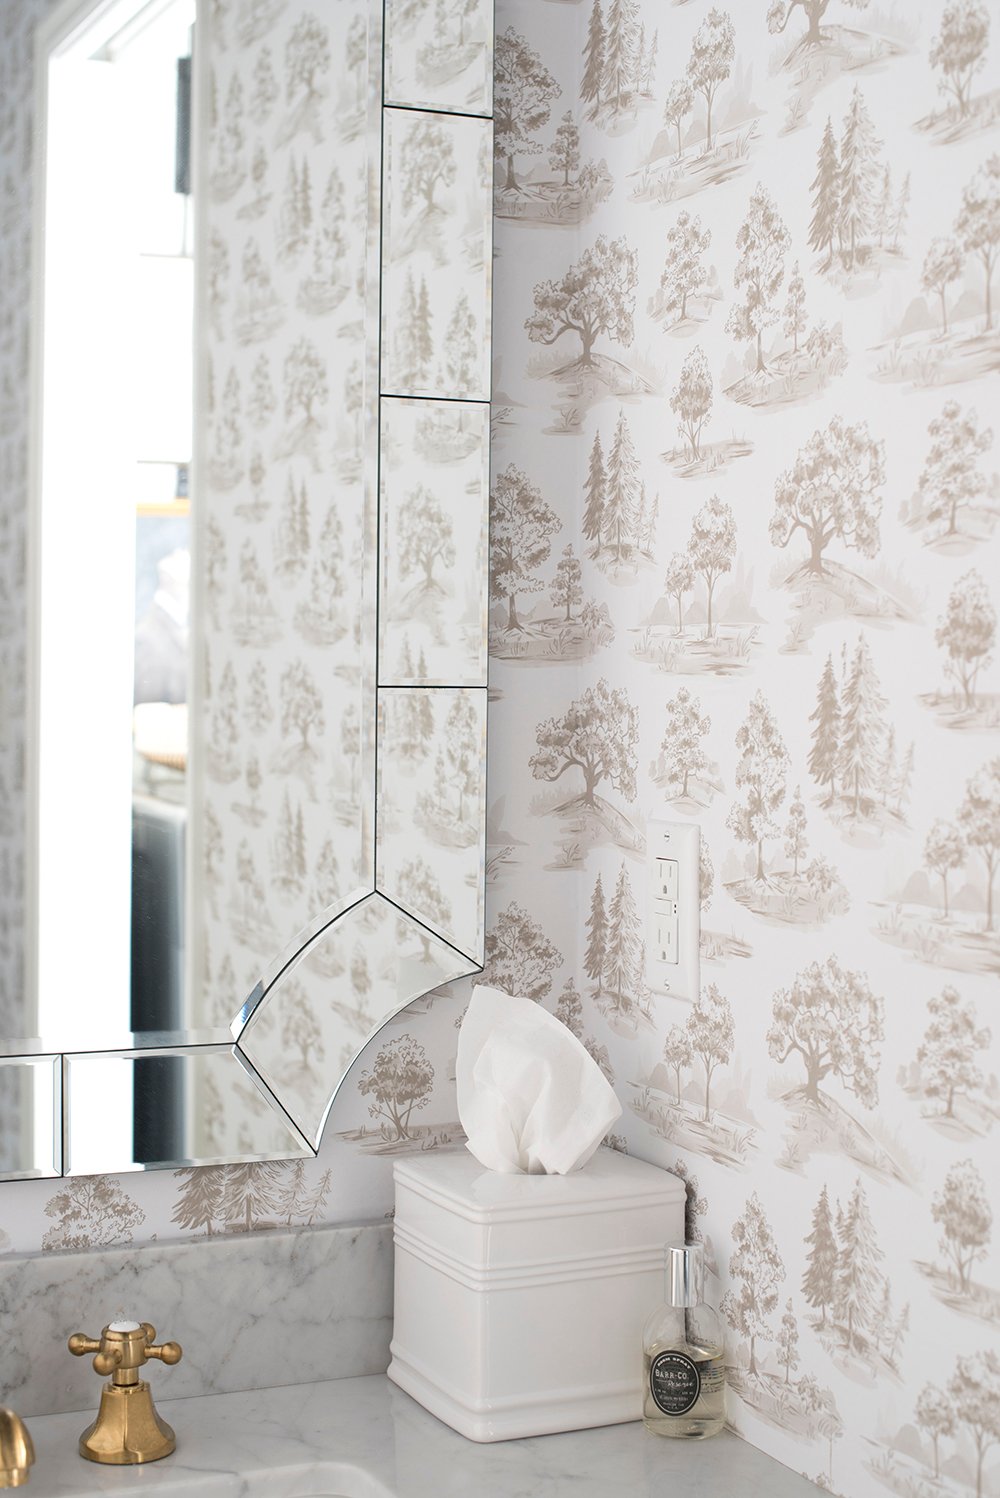 I’ve always loved toile, but seeing it in our house has convinced me it should live someplace permanently. I might have to invest in real wallpaper, fabric, or something in this gorgeous pattern in the future! Are you a fan of classic toile? It’s especially easy to use in a neutral color.
 Of course I know there will be lots of source and paint color questions, so I’m linking all of those details below! Click directly on the objects to be redirected to the source, or use the numbered links below to shop…

01: semi flush mount light fixture // 02: peel-and-stick toile wallpaper // 03: vanity light // 04: wall mirror // 05: nude art one // 06: nude art two // 07: brass widespread faucet // 08: carrara sink and countertop // 09: nude art three // 10: nude art four // 11: peel-and-stick floor tile (light marble / dark marble / black squares) // 12: toilet lever // 13: toilet paper holder // 14: black toilet seat & lid // 15: towel hook // 16: hand towel (similar) // 17: waste basket … ceiling paint color: SW Tricorn Black
Everything is super affordable in this makeover! I tried to stick to a tight budget for this one. The art should also look familiar! Remember the bathroom at our previous home? My best friend Laurie Anne painted those nudes for me.
 I’m a details person, so even when completing a small makeover or styling tiny vignette, I try to focus on those little things that make a room sing (and me smile). In this space it was the faucet, patterned wallpaper, and brass accessories.
 There you have it… my powder room makeover! I’d love to hear your thoughts in the comment section below. Not bad for a budget makeover, right? I’m really happy with how it turned out and am very glad to have personality in the powder room now. Happy Tuesday!

Yay! Such an improvement! I love, love, love the wallpaper. Definitely a fan of toile in all its iterations. The pairing with the graphic floor is fresh and bold! You said Emmett likes the paper; is the floor pattern growing on him?🤣 The ceiling fixture is vastly better, and I can definitely see it in a beautiful closet. (Where is your master on the reno list?) Laurie Anne’s ladies look right at home, too! These two rooms look like the chicest of siblings! Nice work! I kind of can’t believe this is the only bathroom on your main floor? This beautiful change must be so refreshing.
Here’s to a sunny, productive Tuesday! I *think* I’ve even convinced my SO to join me for the contour drawing later! 💖
Thank you, Peggi! I’m also loving the wallpaper… and am SUPER surprised that Emmett was into it. He’s not as into the floor. Ha! When it comes time to renovate for real, we’ll definitely go with a less busy tile for his delicate eyes (halfway joking, lol). He has already requested a “brick looking” tile, whatever that means. The master isn’t really on our renovation radar yet. We need to wrap up some other small projects we’ve been putting off (including another guest room makeover). I bought all of the things for it last year and we’ve yet to pull it together. The wallpaper, new doors, and materials are just sitting in the room. Argh. And yep- this little powder room is our one and only bath on the main floor. We have two bathrooms upstairs (our master and the guest bath), the powder room on the main level, and the basement bath in the basement. Four total! See you in a bit for drawing (and hopefully your S/O!!) Can’t wait!!! xo
hi, can you post the flush mount again? the link is not working
I’m sorry Jennifer! I think it has been discontinued. If I notice it’s available again- I’ll definitely update the link.
It’s so incredibly pretty Sarah! It’s an awesome makeover 😍 Bravo! So many lovely details and the toile wallpaper really makes it feel so fancy. Not to mention the sparkly ceiling fixture against the black ceiling. And that vanity makeover is superb ❤️ I think the laundry room and powder room are very cohesive without being duplicative. It’s perfect! Another project complete that must feel good 🥂 Have a fabulous day!
Thanks Colleen! I’m so glad it’s “finished”… we’ve been crossing things off the list this month, and I’m getting satisfaction tackling these little projects. I hope you have a fabulous day :) xo
Hi- such a great makeover. Can u re-link the semi flush mount light fixture? It didn’t work.
Thanks,
Alexandra
Thank you! I’m sorry, but I think the fixture is either sold out or discontinued… I can’t find it anywhere. I’ll be sure to post if it comes back in stock or I see it available elsewhere.
You make it look so easy Sarah! I adore every last detail in this space; especially the wallpaper! I’ve been a fan of toile prints since I was a kid because they are so versatile. I especially have a soft spot for the neutral and blue versions. This bathroom may be tiny, but it packs a serious punch now. That light fixture!!! It is perfectly feminine and a real stand out feature; the link wasn’t working for me by the way. I think the best part of this is that it is so cohesive with the laundry room without completely matching. I was waiting on pins and needles for this reveal and it is truly stunning! It must feel so wonderful to have it complete; you did a fantastic job! Cheers to Tuesday friends! XO
Thank you, Lauren! I think the light fixture sold out or got discontinued… I’m sorry! Thanks for letting me know though :) This room has been on the back burner, but I’m so glad it’s finally “finished”. I hope you’re having a great week so far! Happy Tuesday! xo
Oh wow – great job. Love it – the light and the ceiling color really stand out to me! Well, let’s be honest – everything stands out!
Thanks so much, Monica! :)
Looks amazing!! How did you go about getting new vanity doors? Or did you make them yourself? I have a similar project in mind but not sure how to tackle it. Thanks!
Check out more info on those, in this post: https://roomfortuesday.com/powder-bath-makeover-design-plan/ … I bought this online and they were super affordable ($15 each maybe?).
Well now, European casual chic at its best is what this makeover is. Brava! Sarah, you do know what this means, yes? You will have to wear something linen, airy dress or crossover apron, whenever you do the laundry. If Emmett does laundry as well, the same rule applies. Guests are also required to look casually Euro chic when availing themselves to this loo. I have my off-white boho blouse, boyfriend jeans, and ankle wrap platform espedrilles (oh, and requisite straw bag) at the ready. Cheers everyone, Ardith
Ahhhh here it is! I’m SO sorry I missed your comment, Ardith. I vote yes to the linen apron or dress while doing laundry. That sounds like my ideal French home away from home chore. Haha! I feel like I may need your styling help- your wardrobe is right up my alley. My espadrilles broke last summer (they started unraveling) and I need to find a new pair. They were my go-to summer shoes. I hope you’re having a fabulous week :) xo
Hi there, I’m just popping in again to sign up for follow-up comments, since I can’t see them otherwise. Cheers, Ardith
Do you get email notifications for comment replies? Since I’m an admin for my website, I can’t see comments and replies like everyone else would on the backend (just browsing the internet). Just curious! I wasn’t sure if that would be helpful or annoying. Maybe there is a way I can turn the notification system on and off. I’ll look into it!
Hey there Sarah! If we subscribe to follow-up comments when we’ve posted, it will email us anytime you or anyone else comments. For me, I sometimes forget to subscribe to that, and with your blog, I like to see and respond in real-time for the interaction and connection. I don’t find the email notifications annoying at all! I do wish there was a way to just “subscribe-all” one-time, and always get the notifications without having to remember to subscribe each day. The reason Ardith commented again, is because it only gives you the option to subscribe if you’ve left a comment. If you forget, you’d have to check back frequently, instead of just seeing them in your inbox. I hope that helps!
Super helpful! Thanks so much for taking the time to explain, Lauren! I was talking to Ardith in an email, explaining how the backend of my website is setup… so when there are multiple comments or readers start commenting on other comments, it’s hard for me to keep up / keep track with what I’ve already responded to (I missed Ardith’s comment on this post). I’m trying to figure out a more efficient way to make it user friendly for readers and myself. All of that to say- this is really awesome feedback, so thanks again!! xo
I love these budget friendly makeovers! So inspiring. Thank you Sarah
Love hearing that, Karen!! xo
Sarah, your new powder room is so nice! Love the wallpaper and your friends’ nude silhouettes on the wall. You are amazing at remodeling and making it look high end even if you didn’t tear out and put in all new.
Happy Tuesday! Oh, hoping to get on later when your friend Lauren and you do the live class. See you then.
Thank you so much, Danna! That’s such a nice compliment… day made :) Hopefully see you later for some contour drawing and styling!! Have a wonderful day.
Hi Sarah!
What is the paint color you used on the vanity?
I love the way it all came out!
Thank you, Maggie! It’s “Nature Lover” by Benjamin Moore :)
You are inspiring! I am probably not alone when I say that your room refreshes are what most of us aim for when looking to re-do a room. In other words, your in between look is my end goal look.
My favorite toile wallpaper designs are the tongue-in-cheek ones. Think a quaint Japanese village with Godzilla in the background, or trees and ponds with a spaceship hovering. You only see the details up close, and they make me laugh. Someday I will use that in a room.
Thank you so much, Jennifer! I love all toile papers- it’s definitely fun to discover those little anomalies and laugh about the eclectic nature hidden in the pattern :) I like those too!
It looks fantastic! You did such a great job.
Thanks so much, Arli!
I think it’s really great as a for-now budget update but overall it is a near miss for me… the soft colors are supposed to read neutral, I think, but the floor, wallpaper, and vanity all have different undertones that aren’t repeated again and that keeps it from being as good as it could be (I’m seeing blue-gray, taupey beige, and green-gray, respectively). Oh wait, the marble counter does repeat the floor undertones so that’s good. But yeah, too many unrelated neutrals in a small space to my eye, although yours skilled use of pattern and contrast helps make it look pretty great anyway!
It feels cohesive (in terms of color) in person, Julie. I’m happy with how the color palette came together, but I’m wondering if the photos are making the tones read differently online. It was a tough space to shoot, and in an effort to get it live quickly (for today), I shot as the sun was beaming into the laundry room. Not my finest idea. Anyway- to each his own :) Thanks for weighing in. I hope you’re having a good week!
I love that the floor and ceiling serve as high-contrast bookends to the space. And I love the toile wallpaper!
I do see where Julie is coming from in that the floor and wallpaper aren’t jiving perfectly to my eyes on my screen. BUT, I’m loving them together in the mood board so I think Sarah has a point about the lighting. Small space photography is so hard! I’m going to take her word for it that they look great together in person. :)
Thank you so much, Courtney! Haha, not my best photography work :)
Beautiful! Could you do a post on your favorite little decor items (i.e. candles, little match holders, laundry room baskets, trays on toilets, etc). I find these items are the hardest to find and they add such a special touch.
Hi Leslie! You can find all sorts of those type of items scattered throughout my blog :) I’ve rounded up tons over the years. They’re all searchable, if you’re interested to dive deep in the archives! Hope this helps! xo
Definitely feels cohesive and I can only imagine how difficult it is to design a room within a room, but I have to agree with Emmett that this flooring is not my favorite, especially with the toile wallpaper, whereas it doesn’t bother me quite as much in the laundry room. I do love the toile, though. In our old house back in VA we had a New Orleans (our favorite city) specific toile that depicted places like St Louis cathedral, etc. and loved it. I’ve definitely thought about using it again in our new place, possibly in our master closet. Also, love that gorgeous ceiling light (so sad it’s sold out), the cabinet handles, the mirror, the faucet and those nudes that Laurie Anne did. Gorgeous ladies.
I will say too, that as a photographer, it’s pretty much a nightmare to have to photograph a dark powder room with a bright laundry room and get accurate tones. The average size of a powder room, makes it more difficult, as well, so I think did a really great job showing the layout here, Sarah. Overall, I think it’s a great updated “temporary” reno – way nicer than the boring and bland before and I’m loving these little, more budget friendly projects, too.
SO enjoyed the blind contour IG Live yesterday, too. Hope you two will consider doing more in the future!
I love toile! The floor was inspired by one at the Proper Hotel (designed by Kelly Wearstler)… I love the graphic punch. Thanks for your kind words, Anne! Yesss- the photography was SO trick in this one. I wish there were natural light in the actual space. Maybe when we renovate for real, we can add a window or skylight. TBD! Thanks for joining us for the blind contour drawing & styling session yesterday :) That was so much fun! We’ll definitely do another live soon. I hope you’re hanging in there and you’ve been able to enjoy the outdoor area at your airbnb a bit! xox
Gorgeous!! I’m curious, was your vanity exactly 37 inches? I have the exact same vanity with the counter having two side backsplash pieces to account for the width of the counter just like yours did. My vanity measures 39 inches, so I was curious if the counter you used was slightly bigger than 37 inches.
Thanks Sherilyn! Our vanity is right at 37 inches.
The powder bath turned out AMAZING! You do the best makeovers! What species of wood did you use for the cabinet doors? Hoping to order a few for a small project in our new house :)
Thank you so much! I believe the doors are just MDF (that was the cheapest option). Hope this helps, Callie! xo
Well written and so wonderful post! Thanks for sharing such an amazing post with us Sarah ! Thanks again really amazing work!1
Thank you so much, Shauna! :) xo
Wow, I just adore that light fixture! What keyword/style can I search to find it? The Amazon link is dead now.