Budget Friendly Laundry Room Makeover
 What started as a weekend distraction while I was trying to stay out of Emmett’s way in our One Room Challenge space (aka- the formal living room), ended up as a full-blown budget friendly laundry room makeover. This laundry room is slightly larger than the one at our previous home, and I’m very happy to have a designated space for laundry and the dogs. However, we’re hoping to relocate the laundry room someday. Eventually I’d like to add a sink, a dog bath, lots of cabinetry, and really create the laundry room of my dreams in a larger room we aren’t using. A big renovation and the relocation of laundry units is very expensive and it could be awhile before we transition this space into a mudroom and end up moving the laundry. Not knowing when we’ll be able to tackle my dream laundry room (it could be years), I wanted to make our existing space better and beautiful in the meantime… more representative of my personal aesthetic. I gave myself $300 to spend to makeover this space. Click through to see how it turned out, the before images, the budget breakdown, tips for tackling your own mini makeover, and all of the resources!
*This post is sponsored by Sherwin-Williams®. All content, ideas, and words are my own. Thank you for supporting the brands that allow us to create unique content while featuring products we actually use & enjoy!
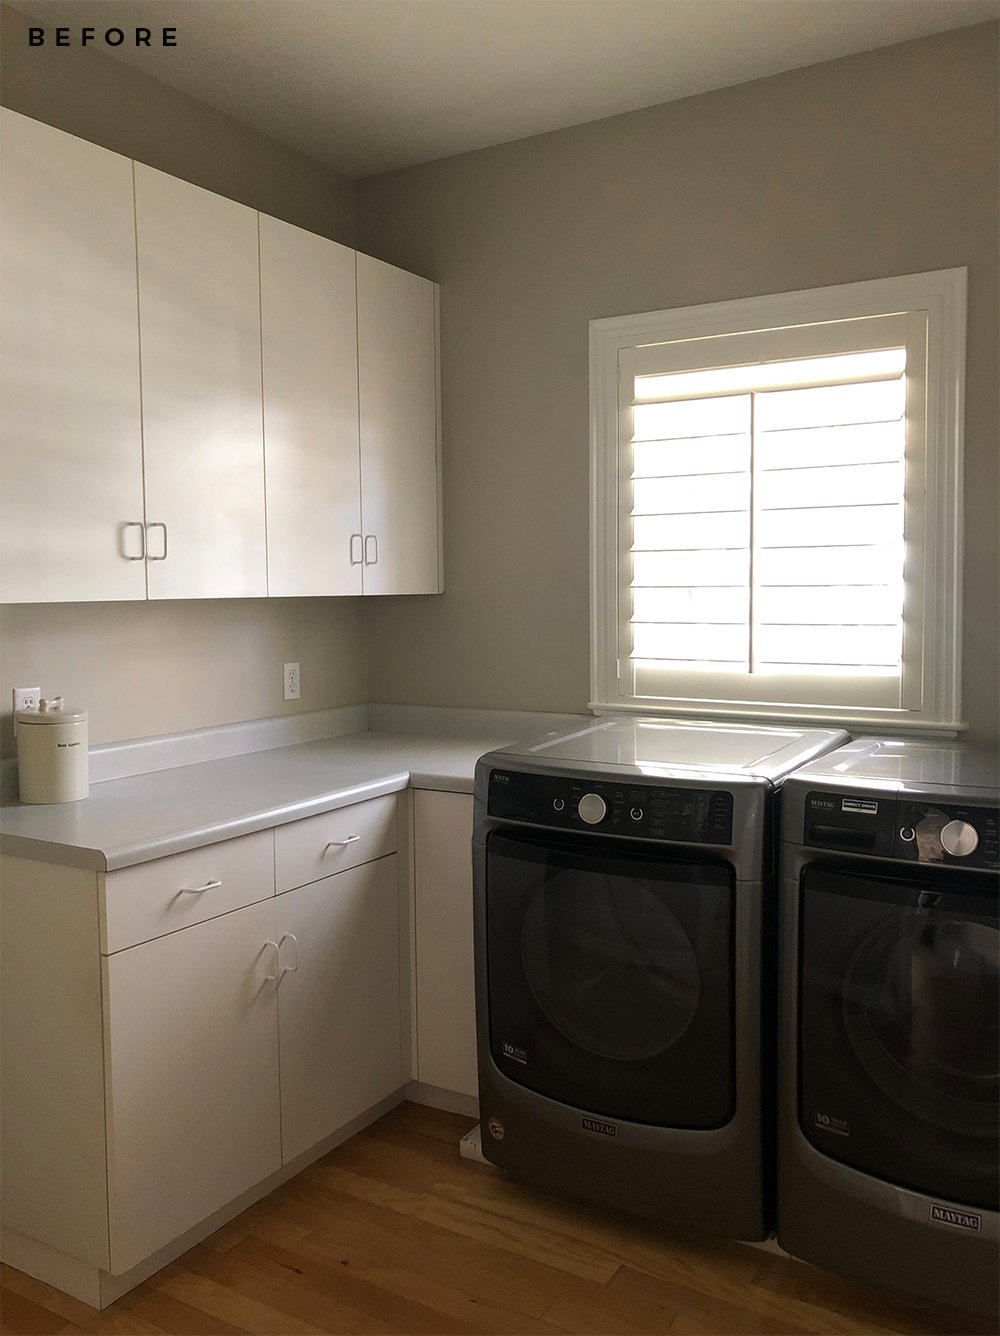
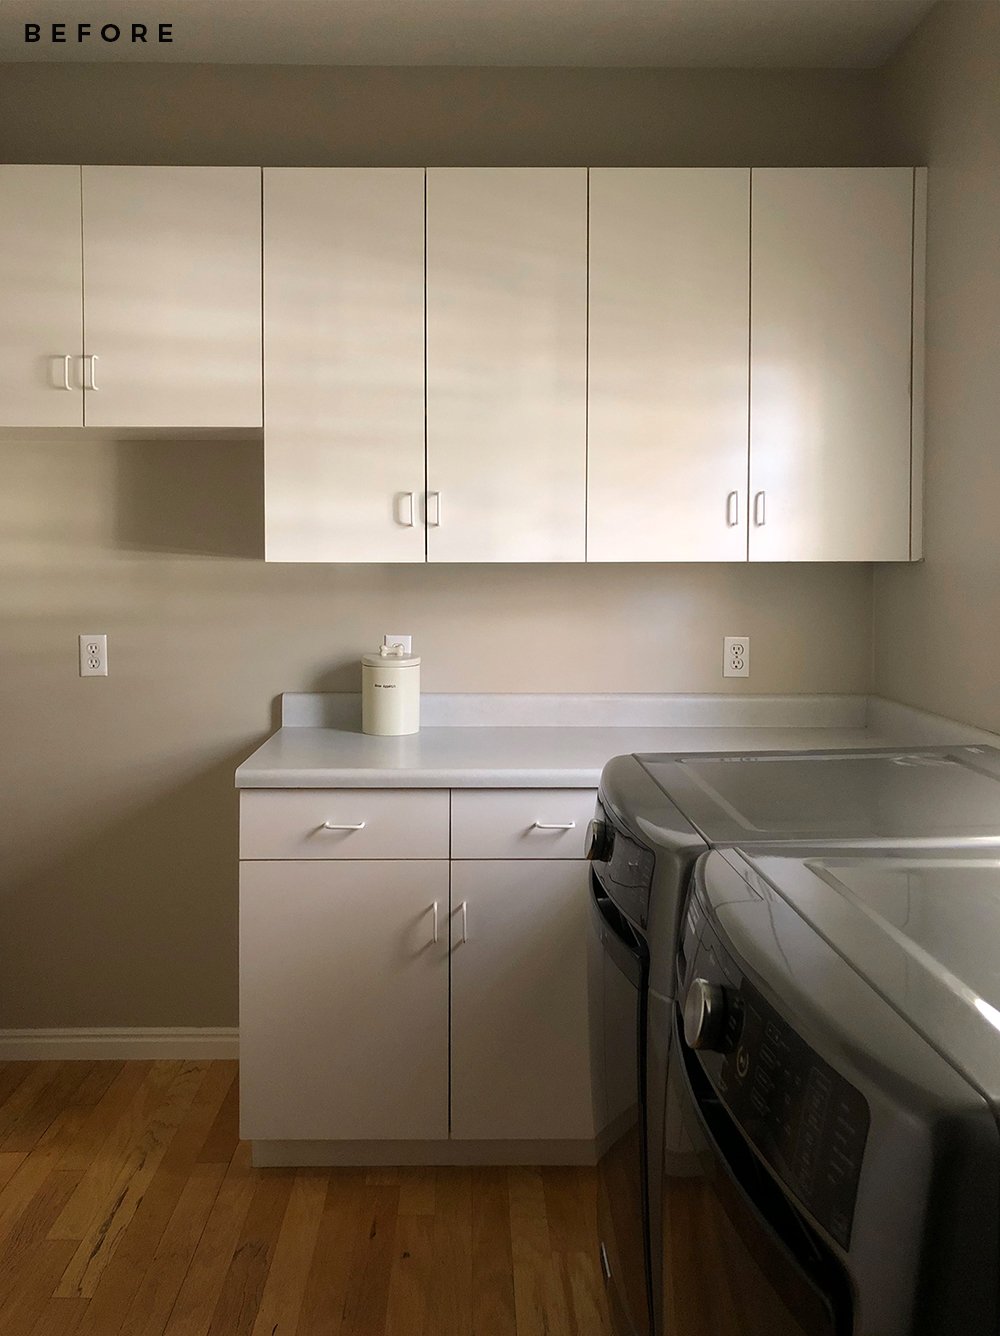 Per usual, let’s start with a before image. The cabinetry is laminate, as is the countertop. The overall space is pretty functional, but very bland. If you’re wondering about the niche to the left side of the room… it used to house a refrigerator for the previous homeowners. We already have a massive fridge in our newly renovated kitchen, and we have an apartment-sized fridge in our basement kitchen. It seemed kind of crazy and unnecessary to install a third(!) refrigerator in the laundry room. Ready to see the end result before I break it down?
 It’s amazing what paint, contact paper, and sticky tile can do for a space with a relatively small amount of money in a short period of time… talk about quick, transformative power! First let’s chat about the paint…
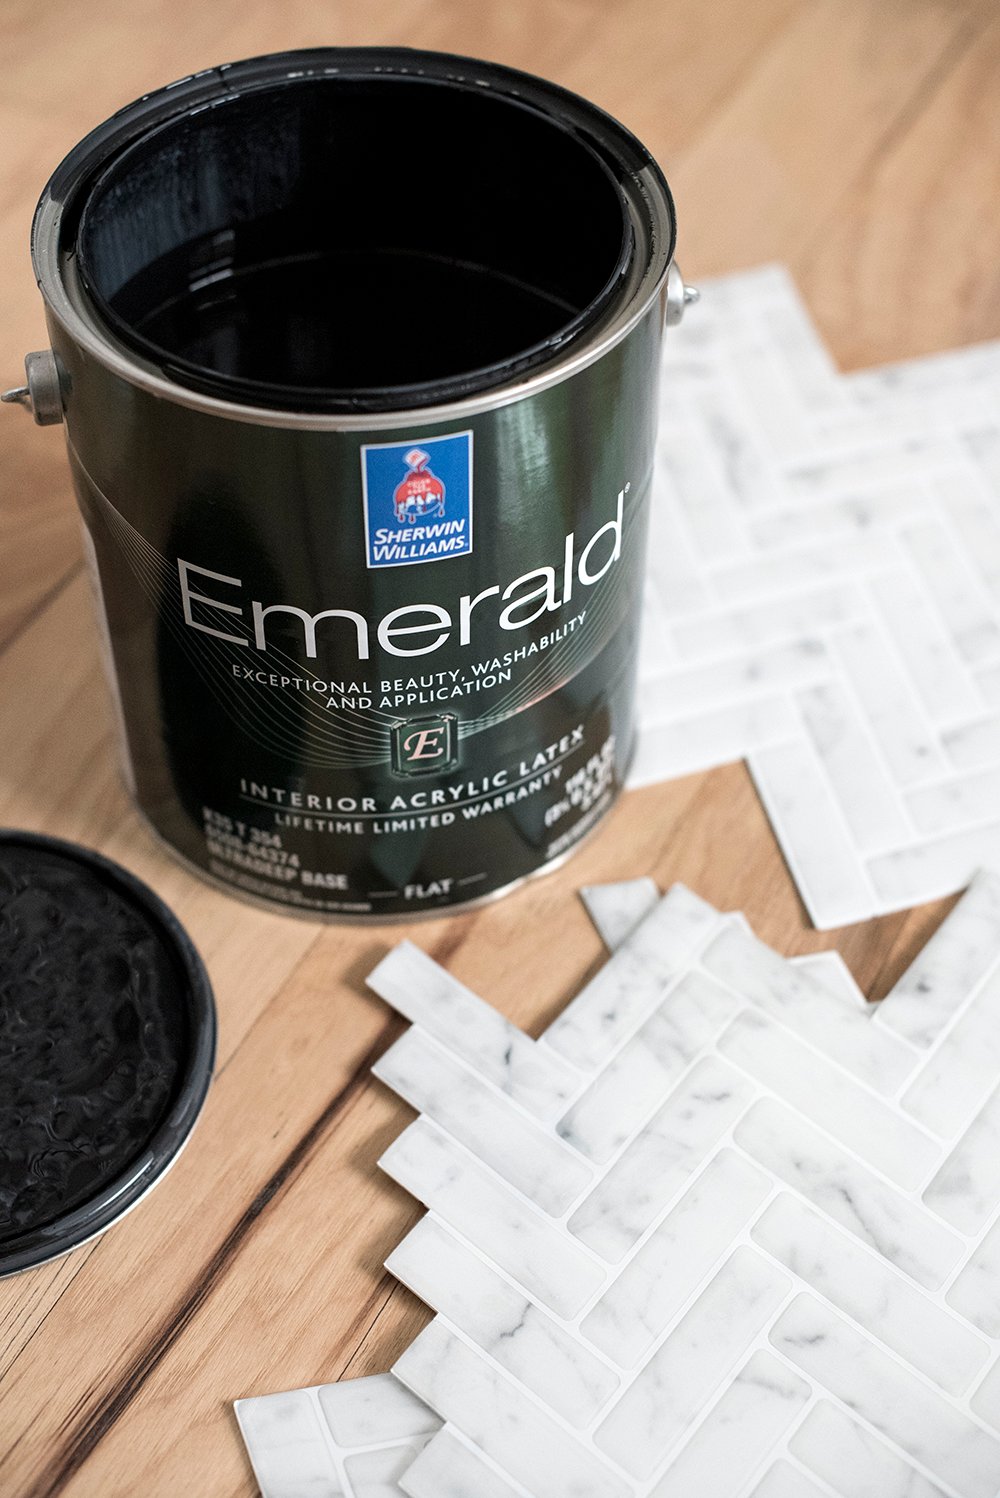 Many of you were concerned when I cracked open a can of Emerald Interior paint with the swatch name Cargo Pants SW 7738 on IG stories. I knew from the beginning I wanted to paint the laminate cabinetry a warm, putty color. My plan was to keep this space bright and neutral, with high contrast graphic moments. If you’re wondering how I applied the paint, I used the same exact process from this post. Check it out for the complete tutorial!
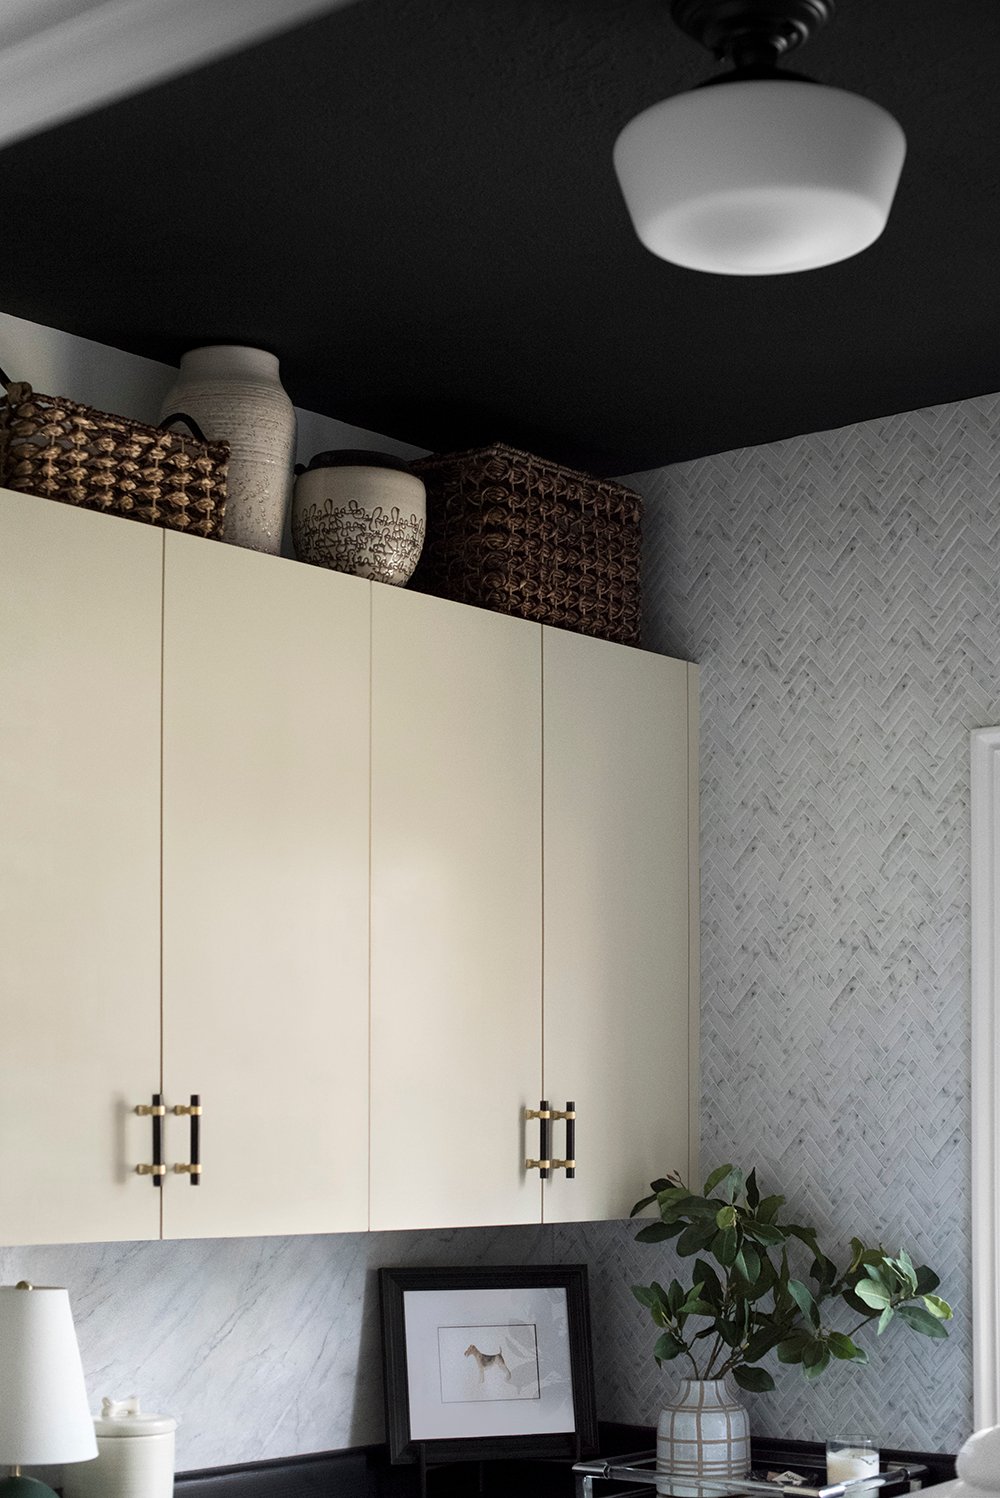
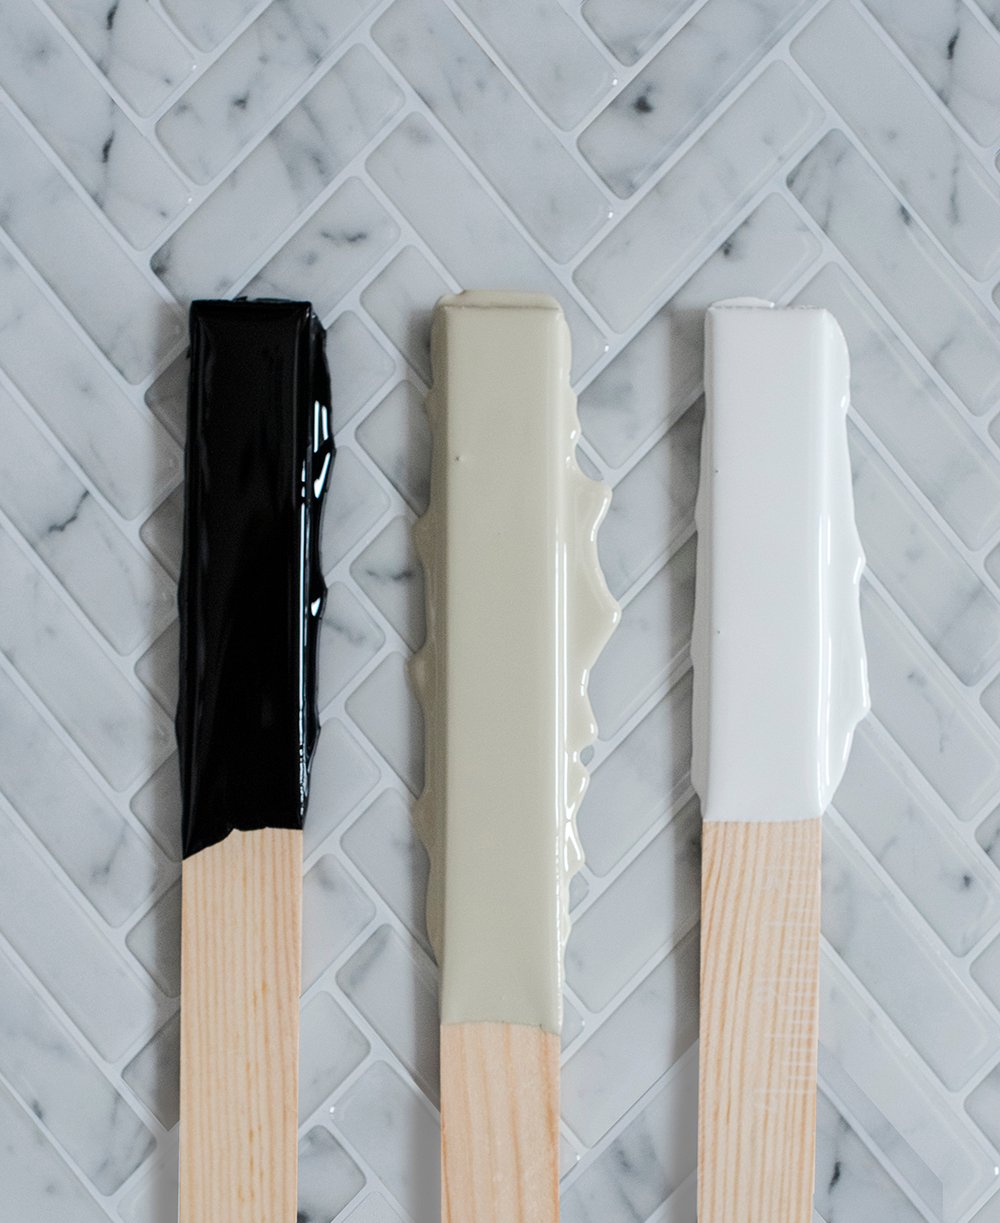 To go with my cabinetry color, I opted for bright white on the walls- Extra White SW 7006… and BLACK (yes you read that correctly… black!) on the ceiling- Tricorn Black SW 6258. Why did I paint the ceiling black? You’ve seen me use this trick before. Remember our previous bathroom? Painting the ceiling black can solve a multitude of problems. In our bathroom, it elongated and made the ceiling height look taller. On our carport, it covered old wood that wasn’t in the best shape, masking imperfections. In this space, it’s helping hide the textured ceiling. I prefer a smooth ceiling and given this was a budget makeover, I knew the best way to camouflage the texture on ceiling was to paint it a flat dark color. It almost made it disappear! I swear black paint is magic if you use it in the right place.
 Want to see another before and after comparison before we get into the nitty gritty details? I vote yes…
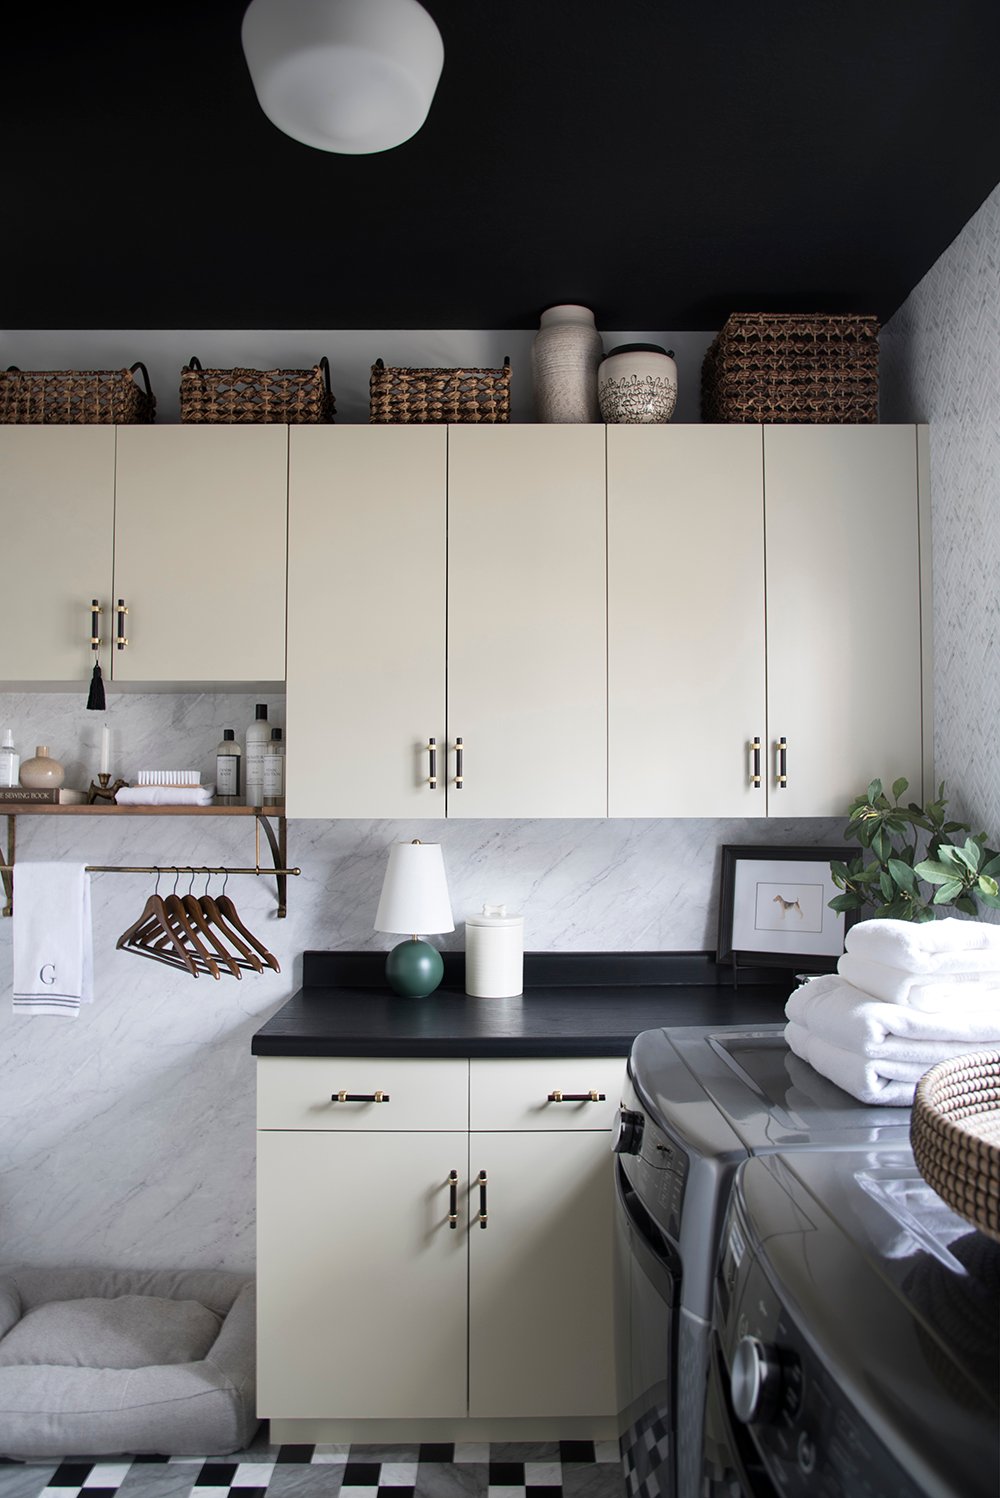
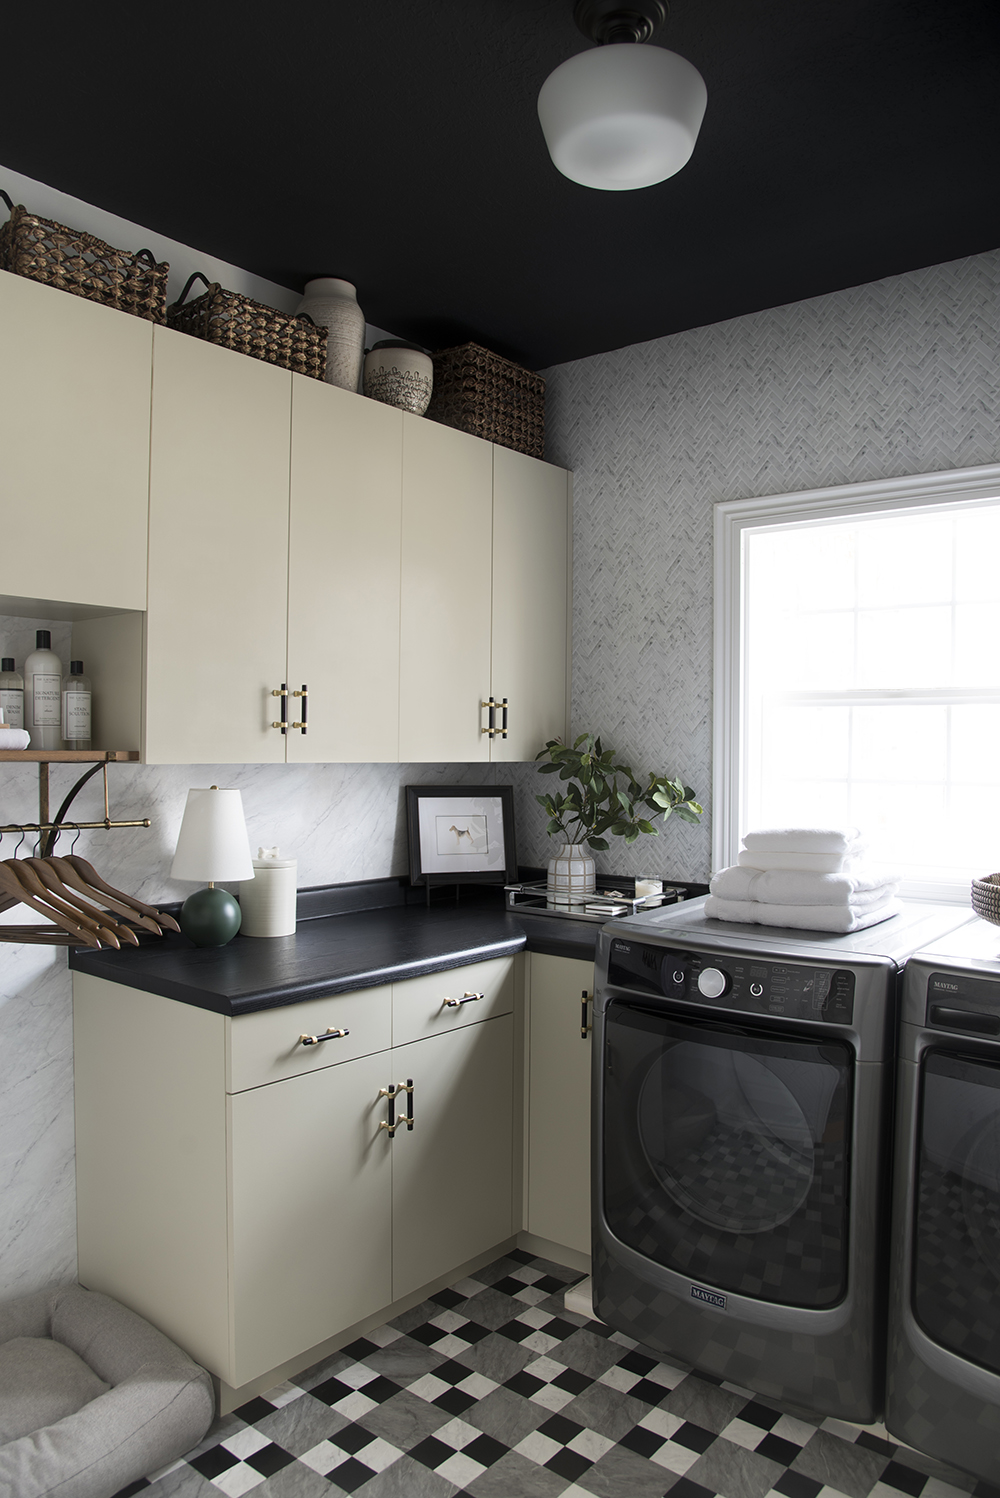
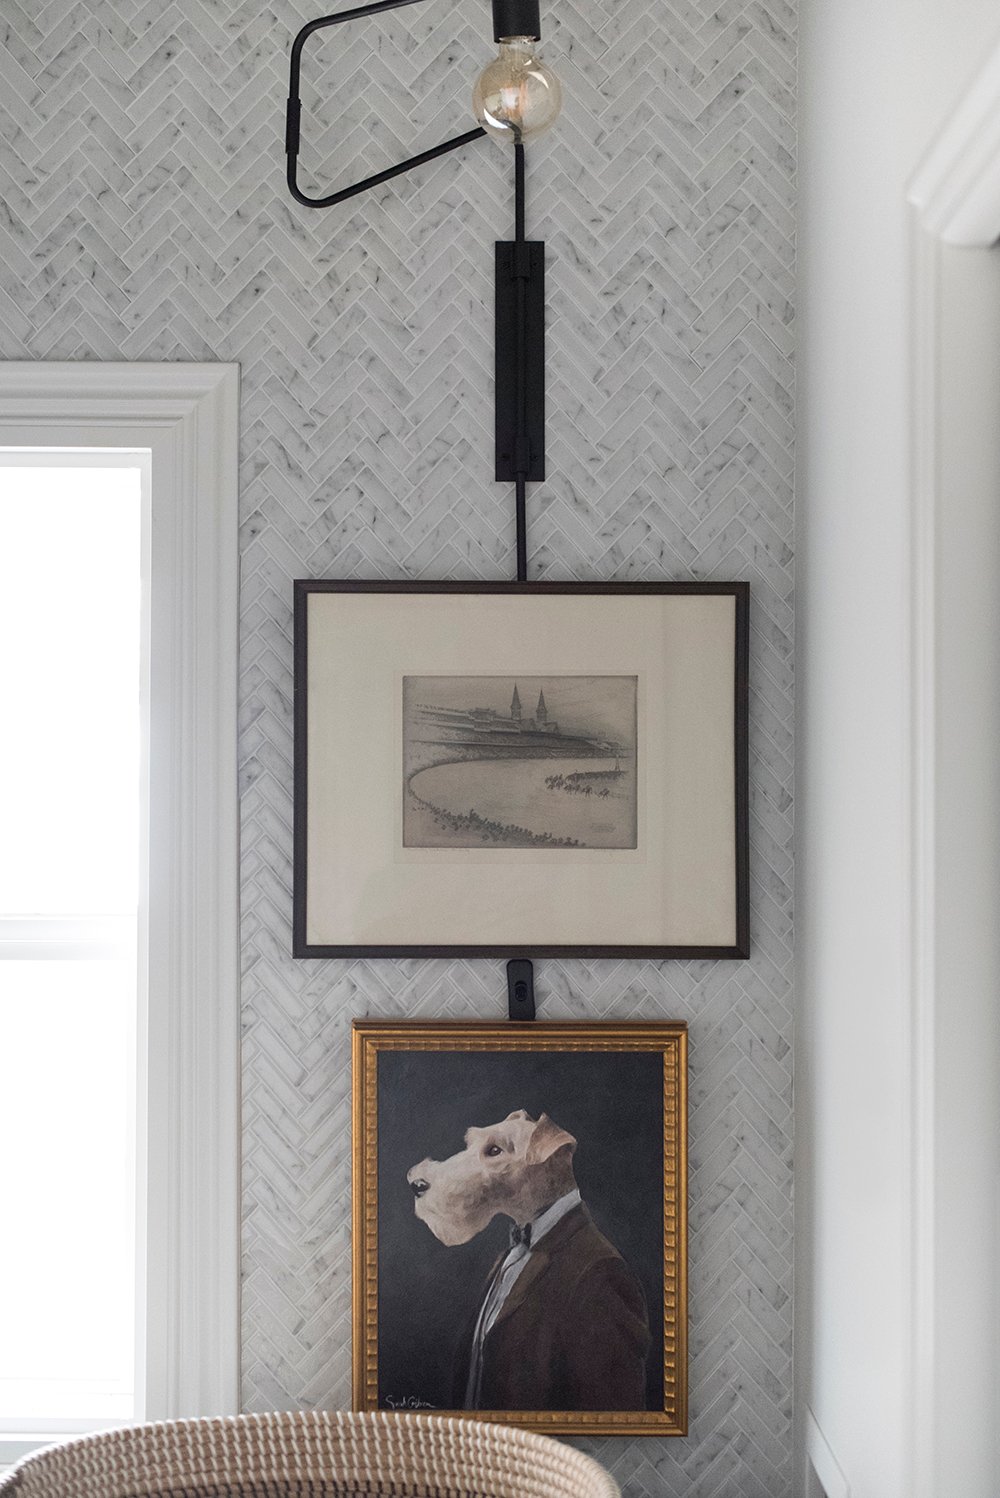
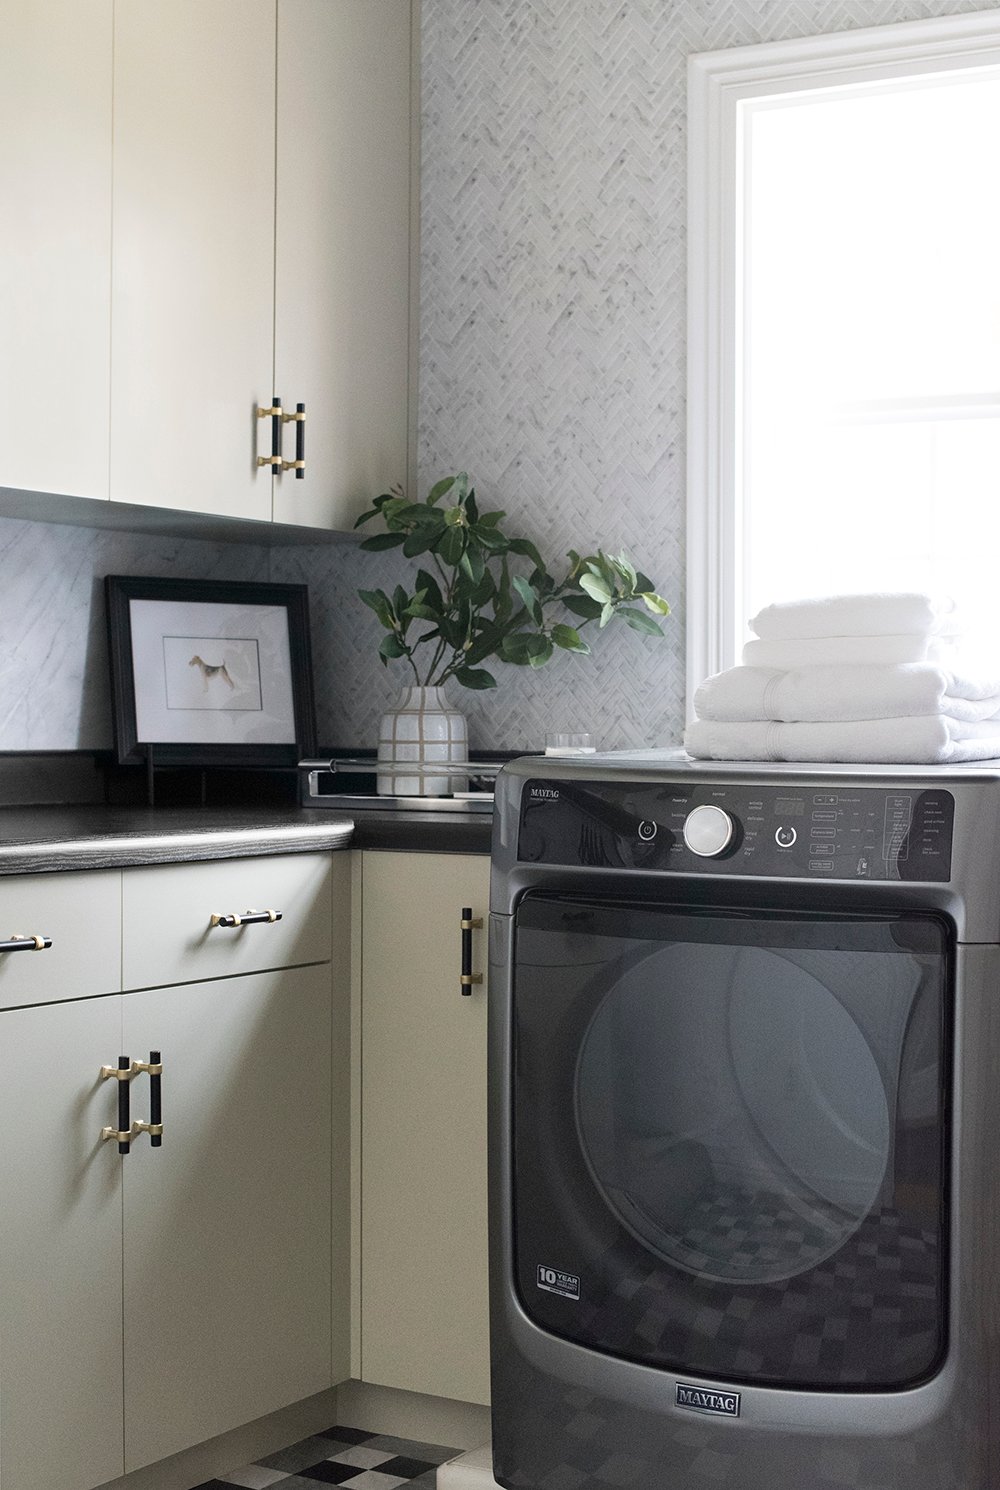
 Annnnd- the after. It’s a lot better, right? What exactly did I do to get from Point A to Point B? I painted the cabinetry, walls, and ceiling. I swapped the overhead light fixture, added a plug-in wall sconce, “tiled” the wall & floor, swapped the cabinetry hardware, installed a shelf, covered the countertop & backsplash in contact paper, and styled the space. It sounds like a lot, but it was really easy and pretty quick. Once things were painted, I felt pretty motivated.
 Without having to bust out heavy tools or construction materials, like we typically do, this room looks totally transformed without the stress, mess, and chaos of a full-blown renovation. It feels so much more like us. I’m honestly pretty impressed! Using these types of materials is new for me and I have to say- the end result is better than I expected. I’ll let you know how everything holds up, but for now- it’s doing great.
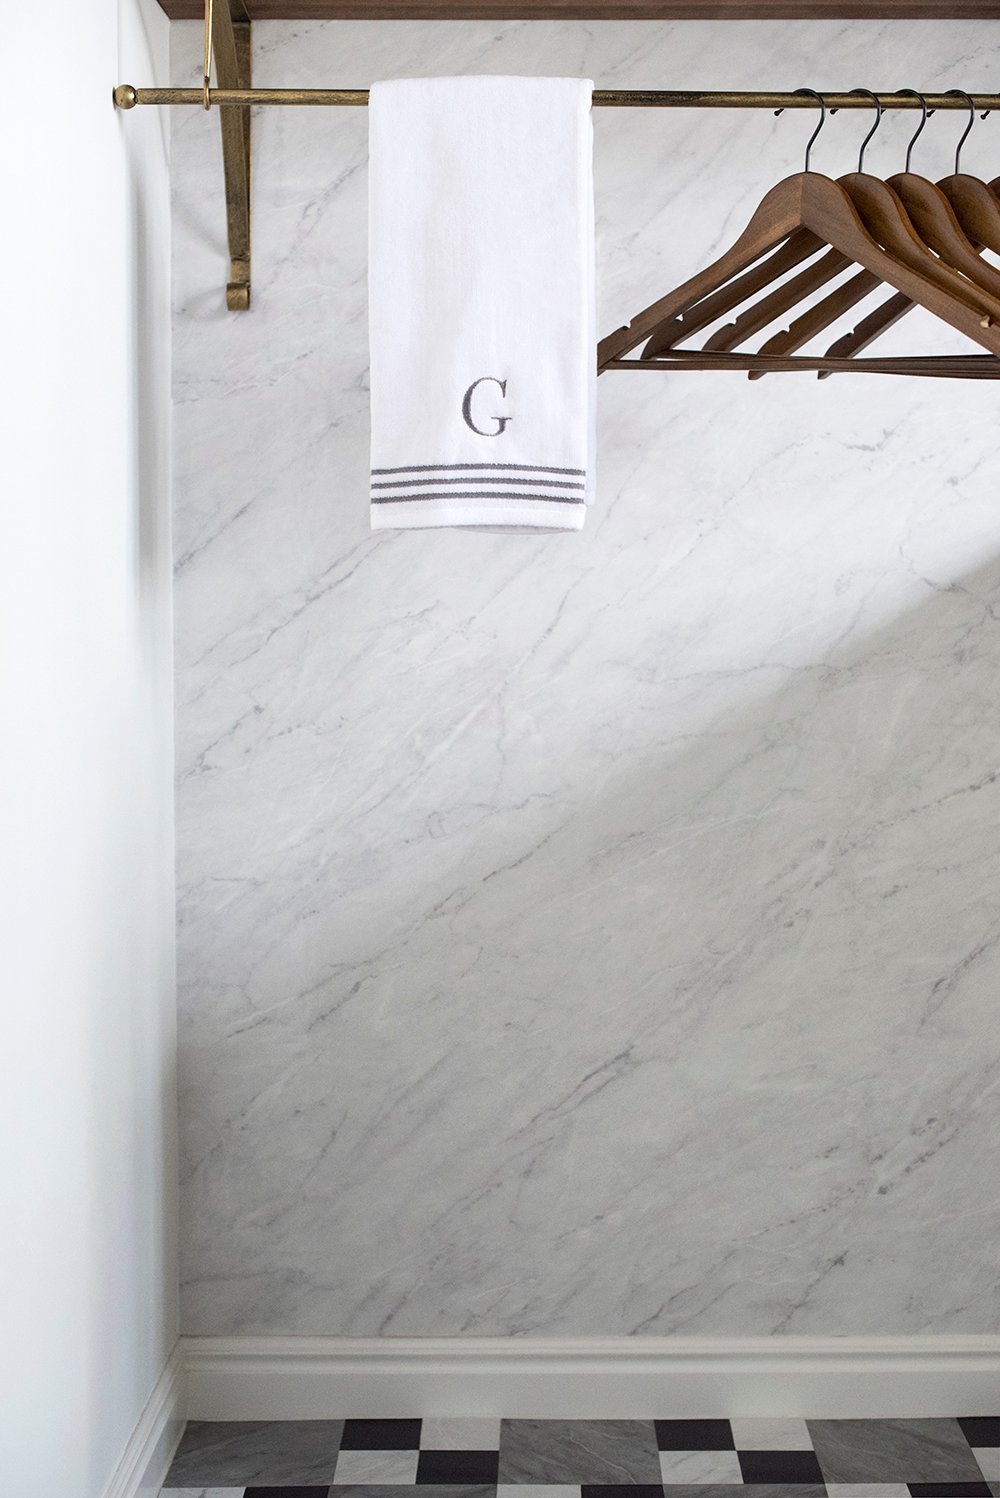
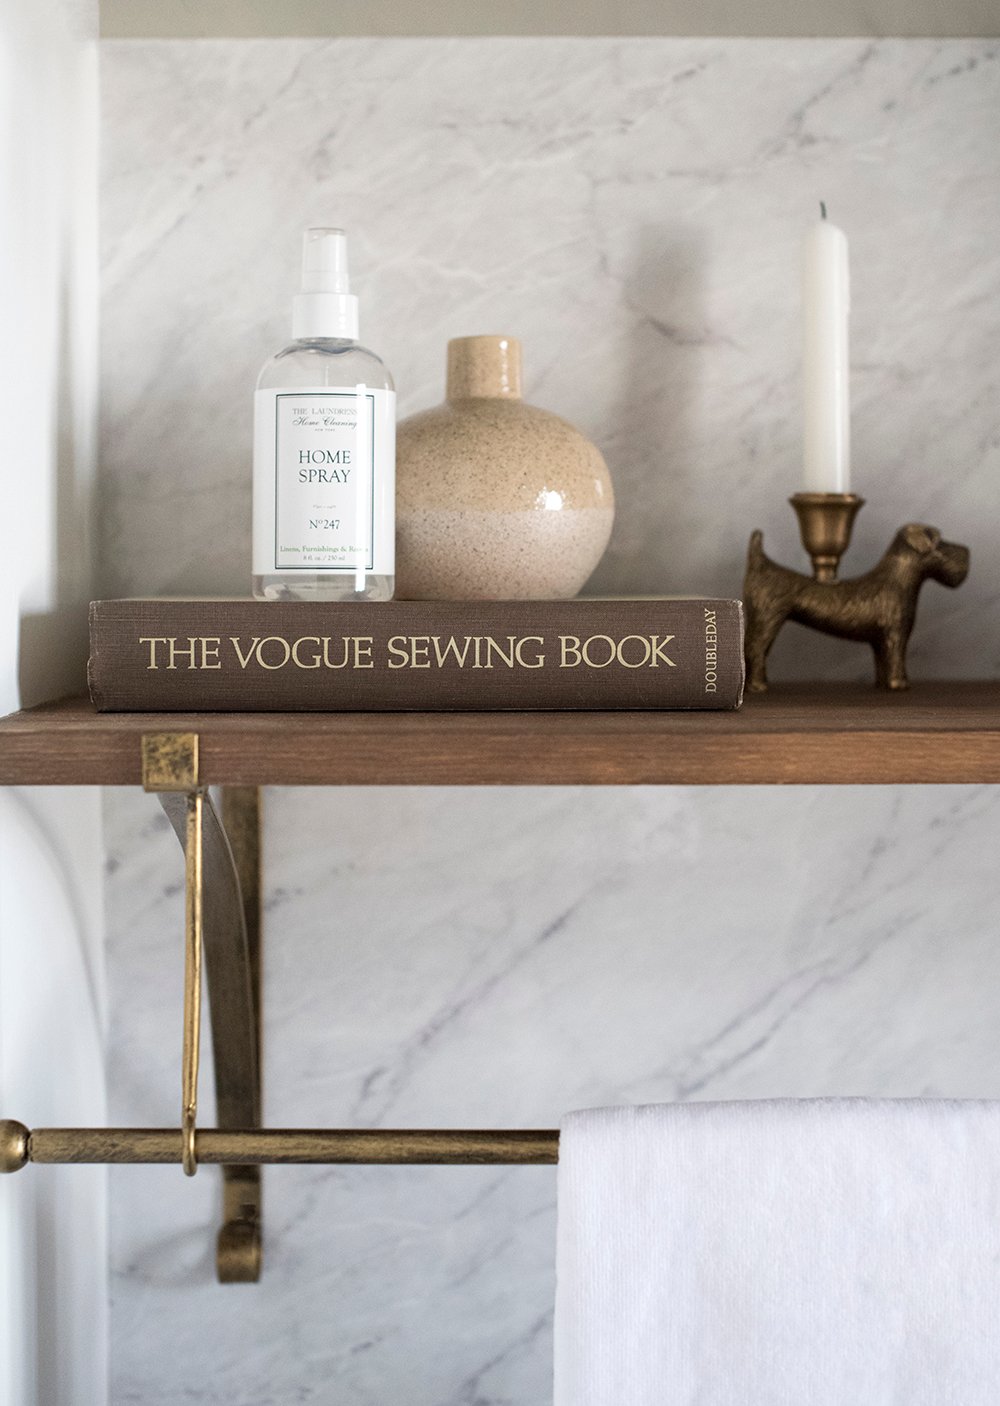
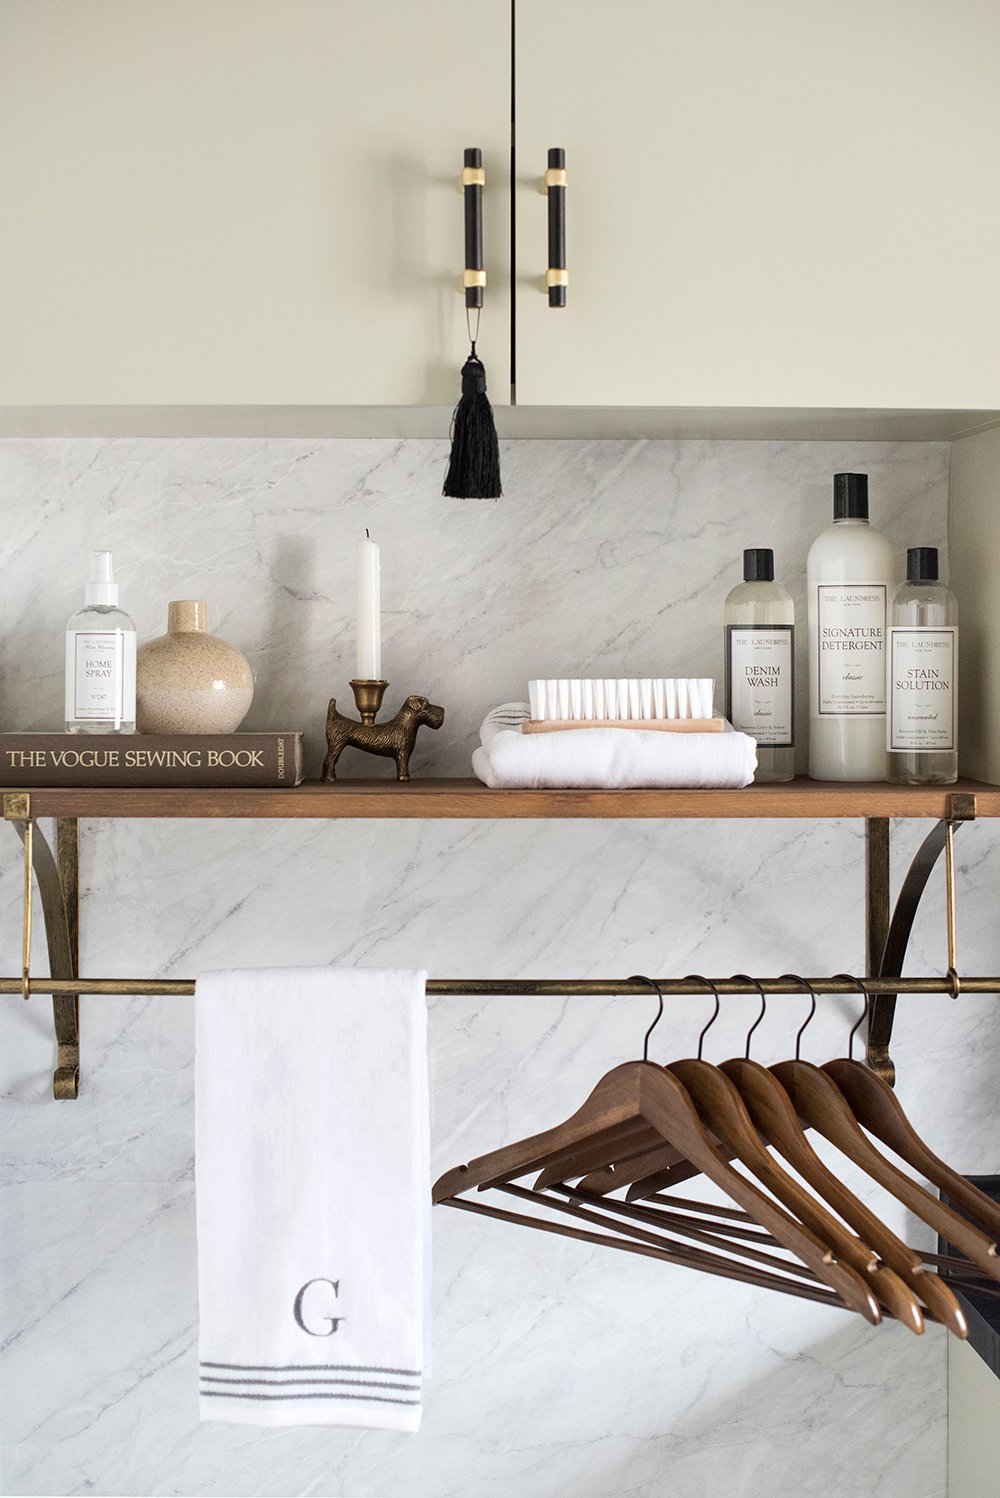 I decided to add a shelf with hanging space where the refrigerator niche is located to make better use of the negative space. Emmett wanted me to add another base cabinet, but this is a BUDGET renovation, my friends…. plus Crosby likes to sleep down there.
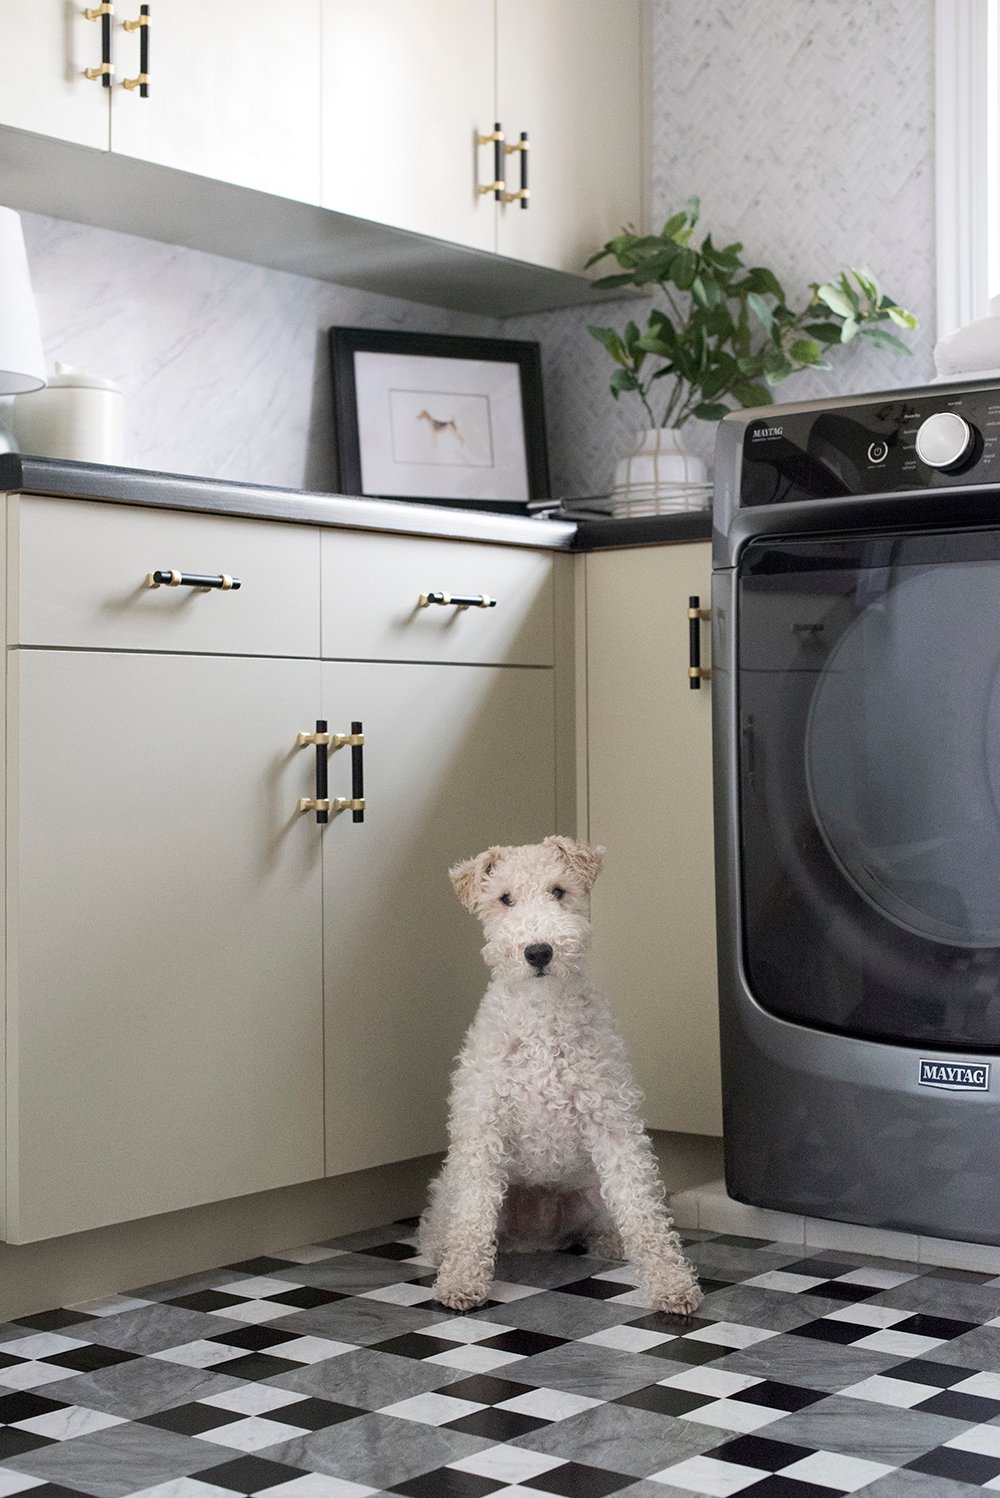
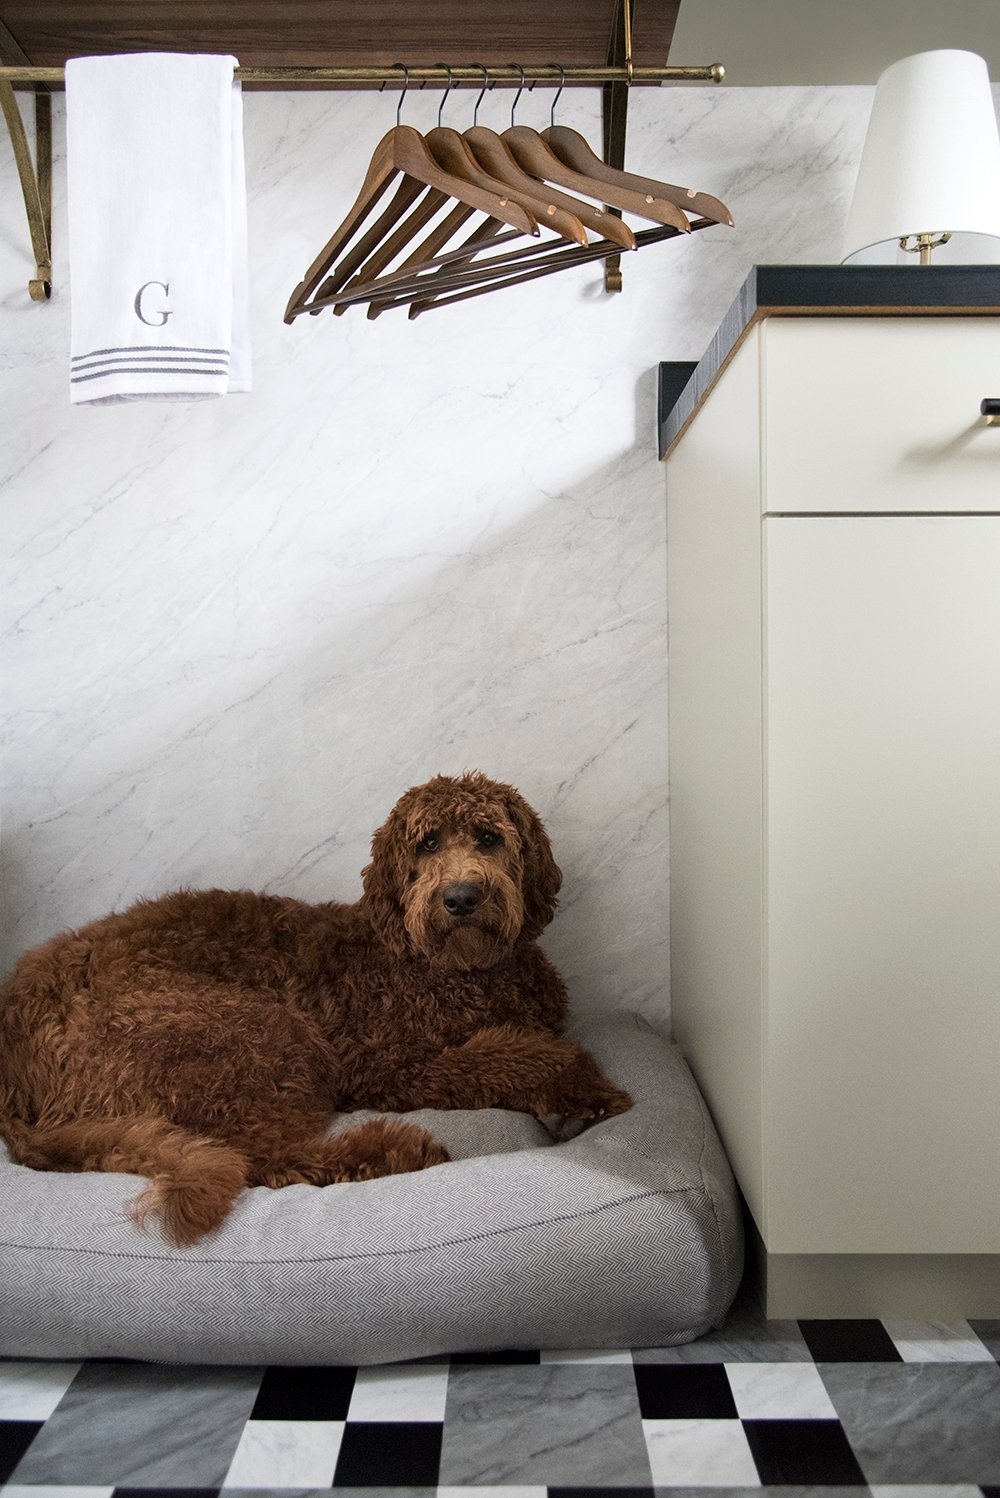 I bought this pet bed months ago just because it fit this particular niche. Cash has a matching one in a smaller size. Both dogs like to cuddle up in here and in addition to laundry, this is kind of “their room.” They’ve been ruling the roost these days and free roaming more than they used to, but we still keep them in the laundry room when we’re out and about. We usually have a construction zone somewhere in the house and it wouldn’t be safe to leave the dogs unsupervised.
 All of that to say- that’s the reason why my laundry room design plans always have some dog-related elements thrown into them! Anything for the pups.
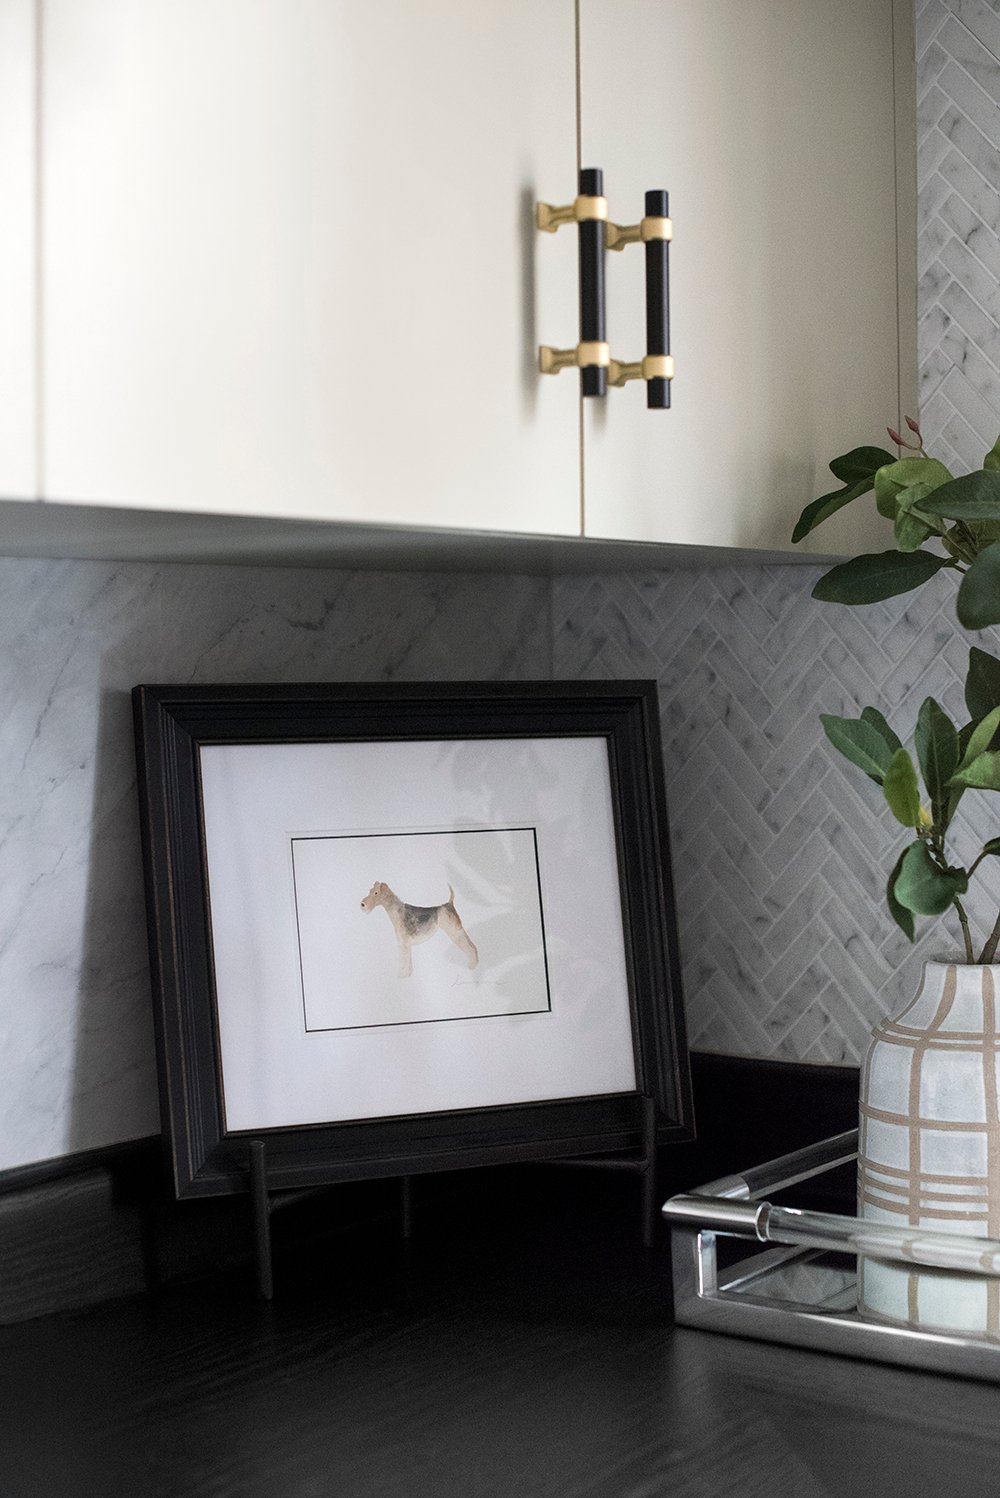
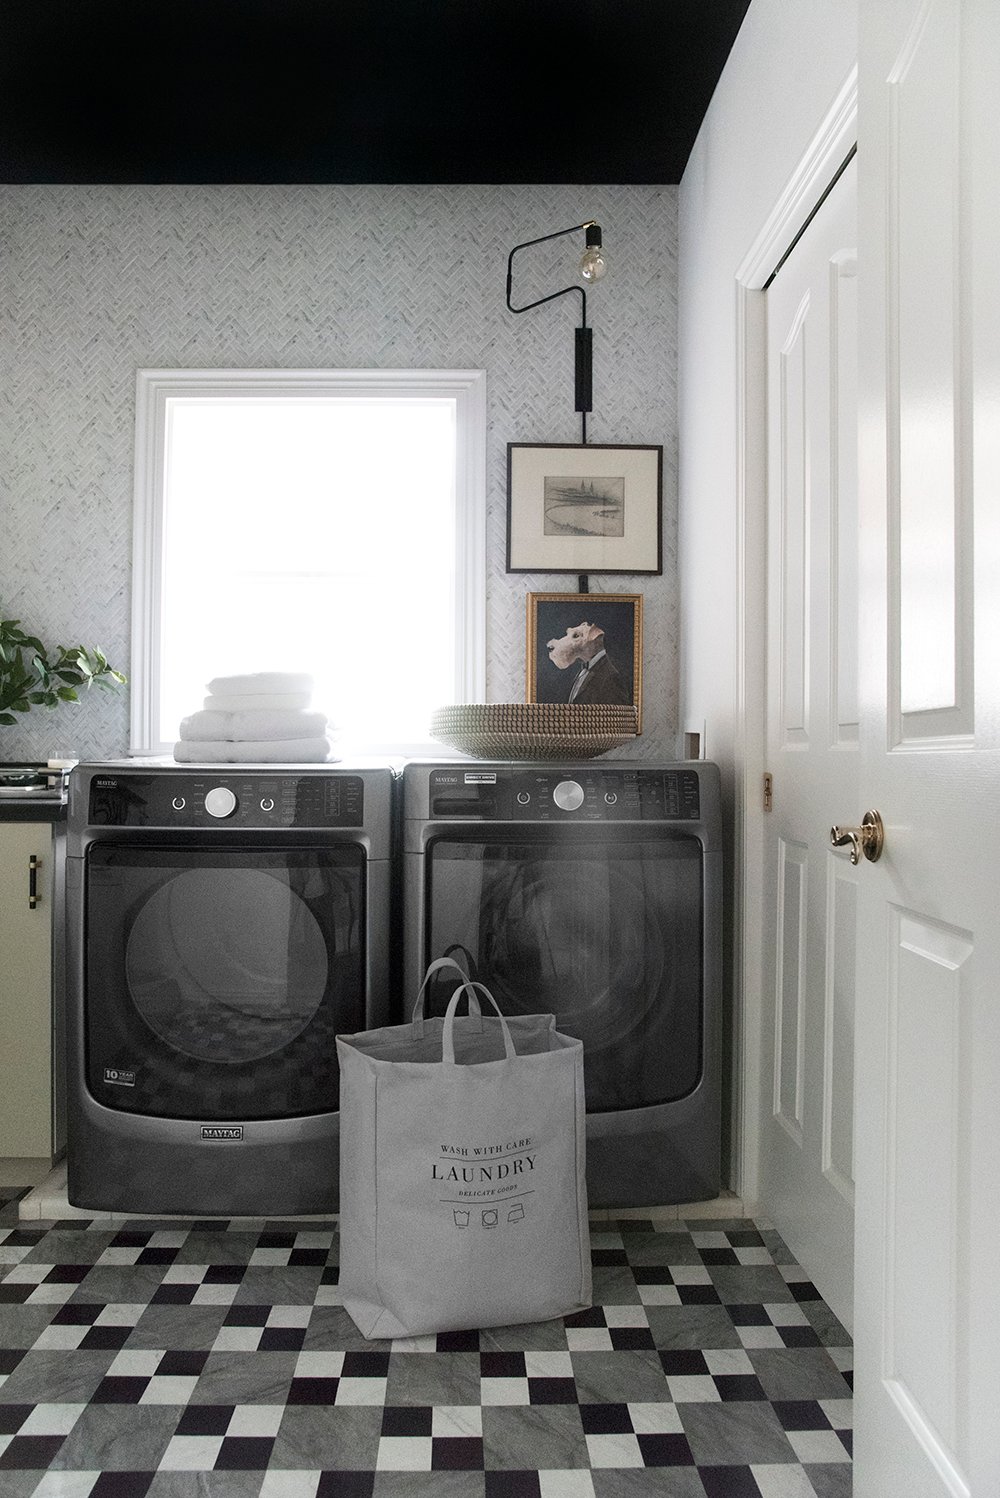 As for the herringbone peel-and-stick wall tile, it went up easier than I expected. Is it as great as the real deal? Obviously not, but it’s an incredible budget-friendly, fast solution that looks pretty convincing. I will say- I tried to caulk the edge and it didn’t work out very well. I ended up wiping it off because it made it look worse. I’d recommend clean cuts rather than correcting with caulk for this stuff… just a tip if you ever use it. It can be a difficult material to cut, but I found that kitchen shears work like a dream! Skip the blade or regular scissors.
 The floor tile is a mix of peel-and-stick floor tile squares and faux marble contact paper, cut to size. Remember when I shared my designer retreat trip to San Francisco? I stayed at the Proper Hotel and was super inspired by the shower floor tile. I wanted to replicate it (at a different scale) in this room. The floor honestly took longer than any other task in this space. Cutting each square was tedious, but I love the graphic end result.
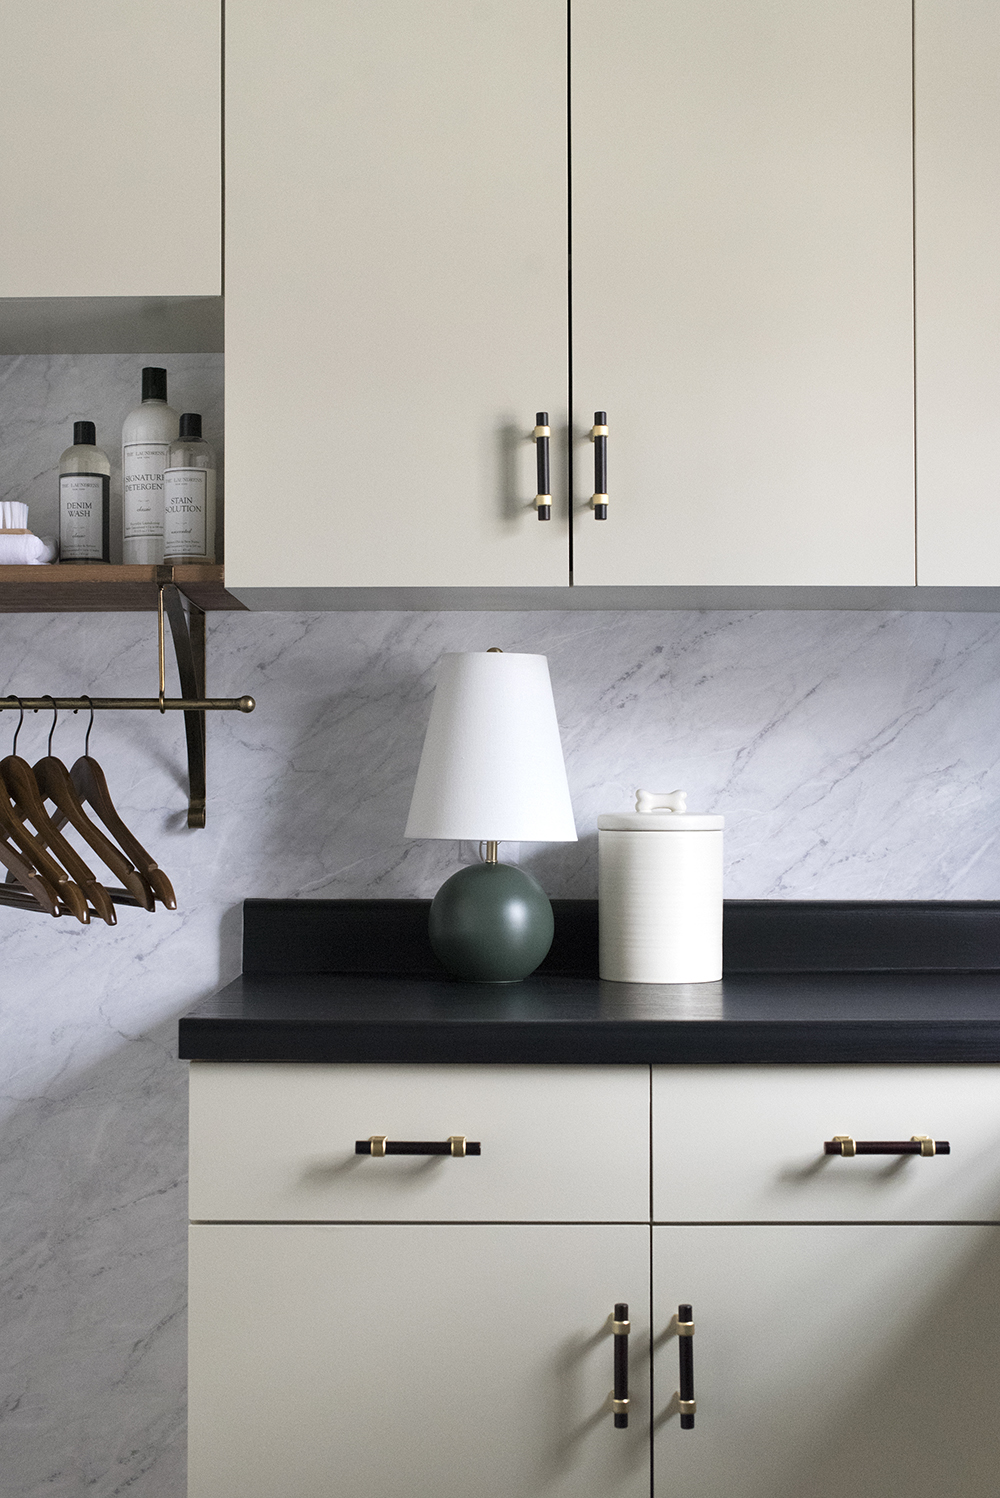
 On the backsplash wall, I used faux marble contact paper for a solid slab look. My biggest tip for installing contact paper in a convincing way is to grain match the marble pattern. If you look closely, you can see the seam, but matching the veining really helps to disguise it. Emmett actually couldn’t find the seam when I asked him to point it out, haha!
 I’d also recommend heat setting all of the “sticky” products once they’re installed. In high school and college, I worked for a design company that specialized in large scale graphics (fun fact, right?). I installed giant decals like this for a decade of my life and I’m still pretty good at it. Toss the squeegee the tile comes with and use a soft one (with a felt edge) for application instead, followed by the heat gun to really activate the adhesive and suck out any air. I’m hoping this will help things last longer and increase durability.
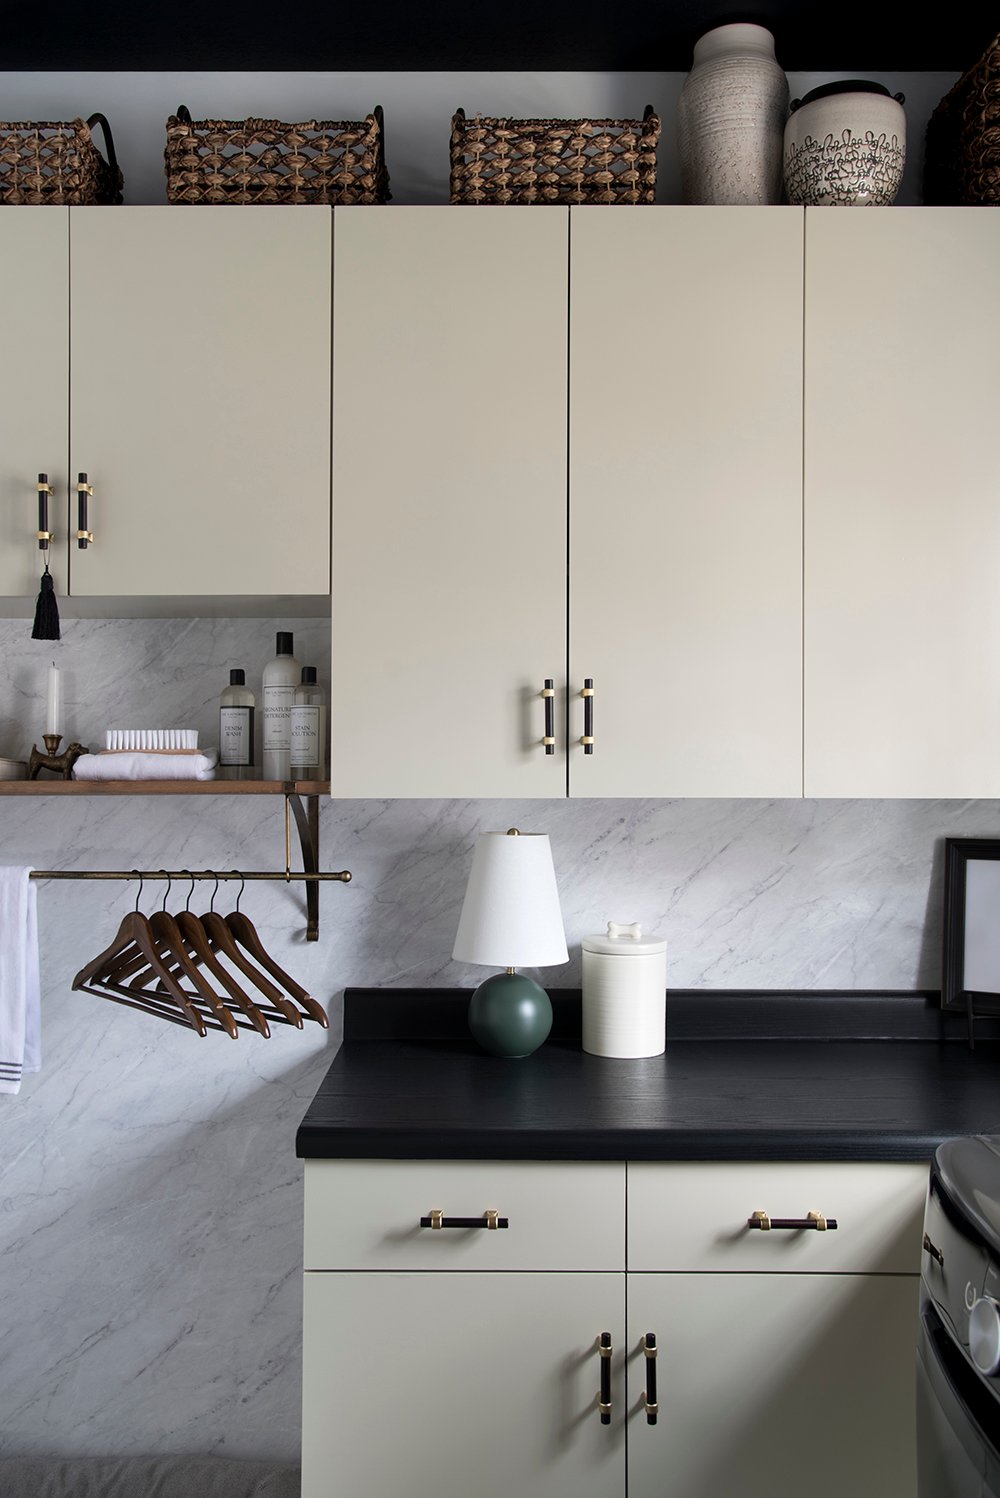 The same process goes for the contact paper. I thought a countertop with texture would help offset the curved laminate shape and backsplash- making it look… well, less like laminate. I found this rich black paper with a woodgrain pattern that was perfect for the space.
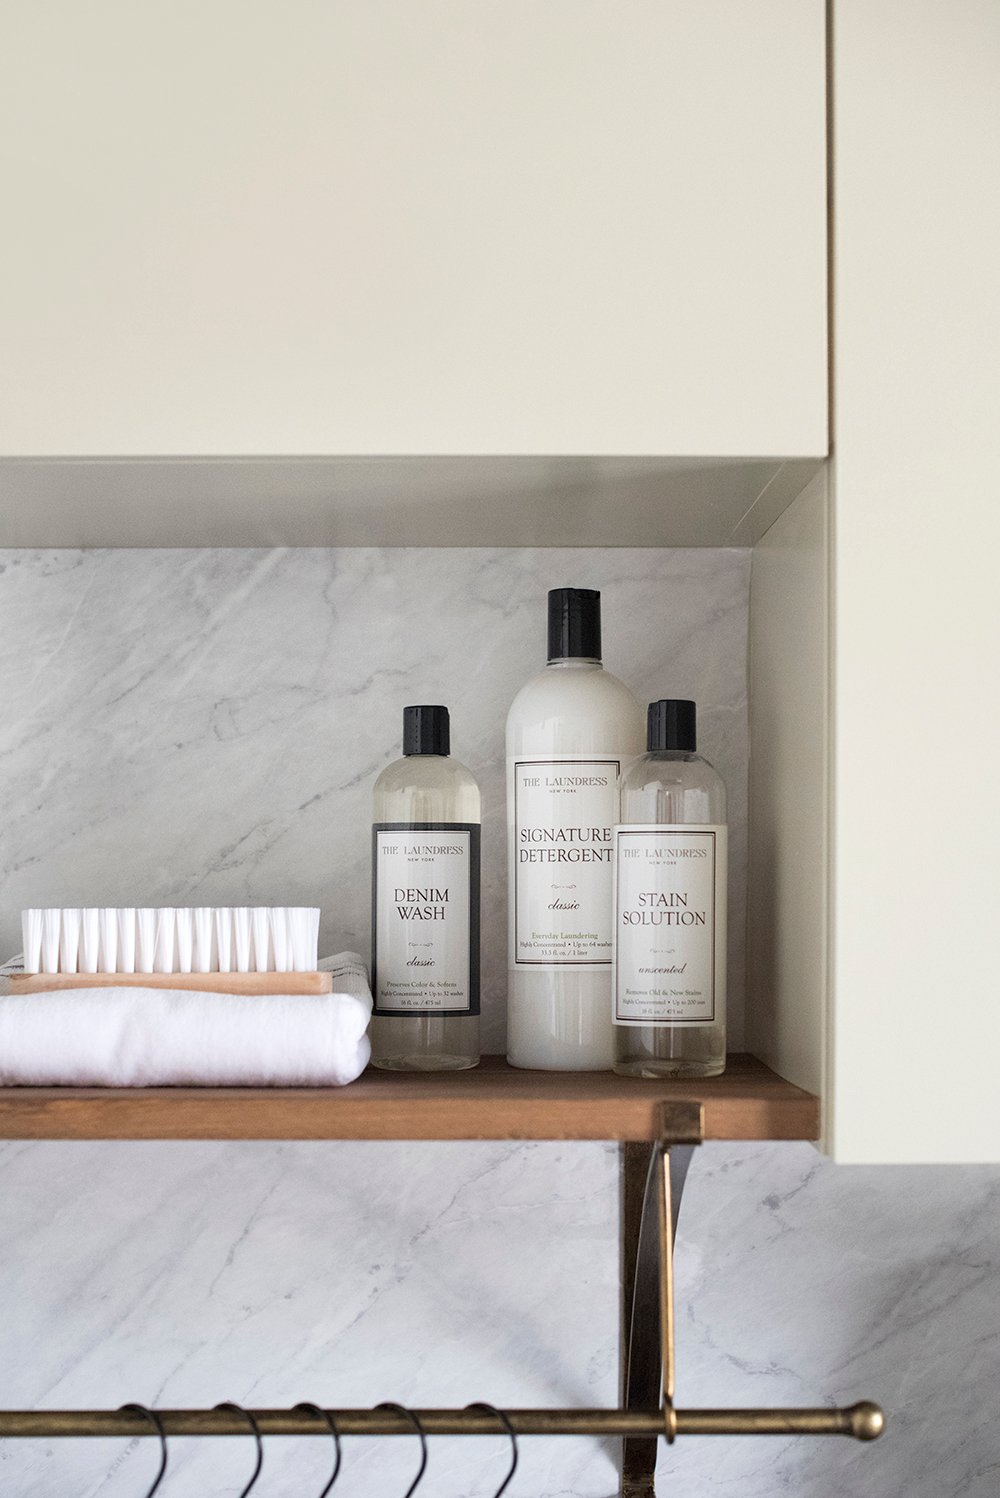
 Below, you guys already know this is my favorite detergent and laundry line (the Laundress). You’ve seen it in all of my homes and laundry spaces. I like that I can leave it out because the packaging is minimal and pretty. I also love that it’s not heavy or bulky, because you only add a cap full of liquid to the wash. Bonus points if it looks great next to the cabinet paint color. Ha!
 The name of the game for this makeover was saving money and making a BIG impact with a small budget. I’m not sure how many of you have been around since we moved into this house, but one of my biggest tips is finding appliances at the dent & scratch warehouse. I snagged my washer & dryer set immediately after moving in, for a fraction of the price. The dents are on the side and back- which isn’t visible, given their position in the room.
 I tried to use things I already owned to stay within my budget, which I’ll break down at the end of the post, but if you’re interested in alllll the sources- I’m linking those below!
Click directly on the items below to shop or use the numbered links at the bottom…

01: semi flush mount // 02: laundry brush // 03: peel and stick tile // 04: black tile sticker // 05: ceramic dog treat jar // 06: denim wash // 07: wood shelf // 08: dark marble contact paper // 09: fabric conditioner // 10: Cargo Pants SW 7738 // 11: carrara marble contact paper // 12: black wood grain contact paper // 13: woven basket // 14: vase // 15: mirrored tray // 16: table lamp // 17: wall sconce // 18: cabinet pull // 19: terrier art print // 20: home spray // 21: detergent // 22: laundry bag // 23: Tricorn Black SW 6258 // 24: tall hamper // 25: woven lidded basket // 26: Extra White SW 7006 // *not pictured : dog bed
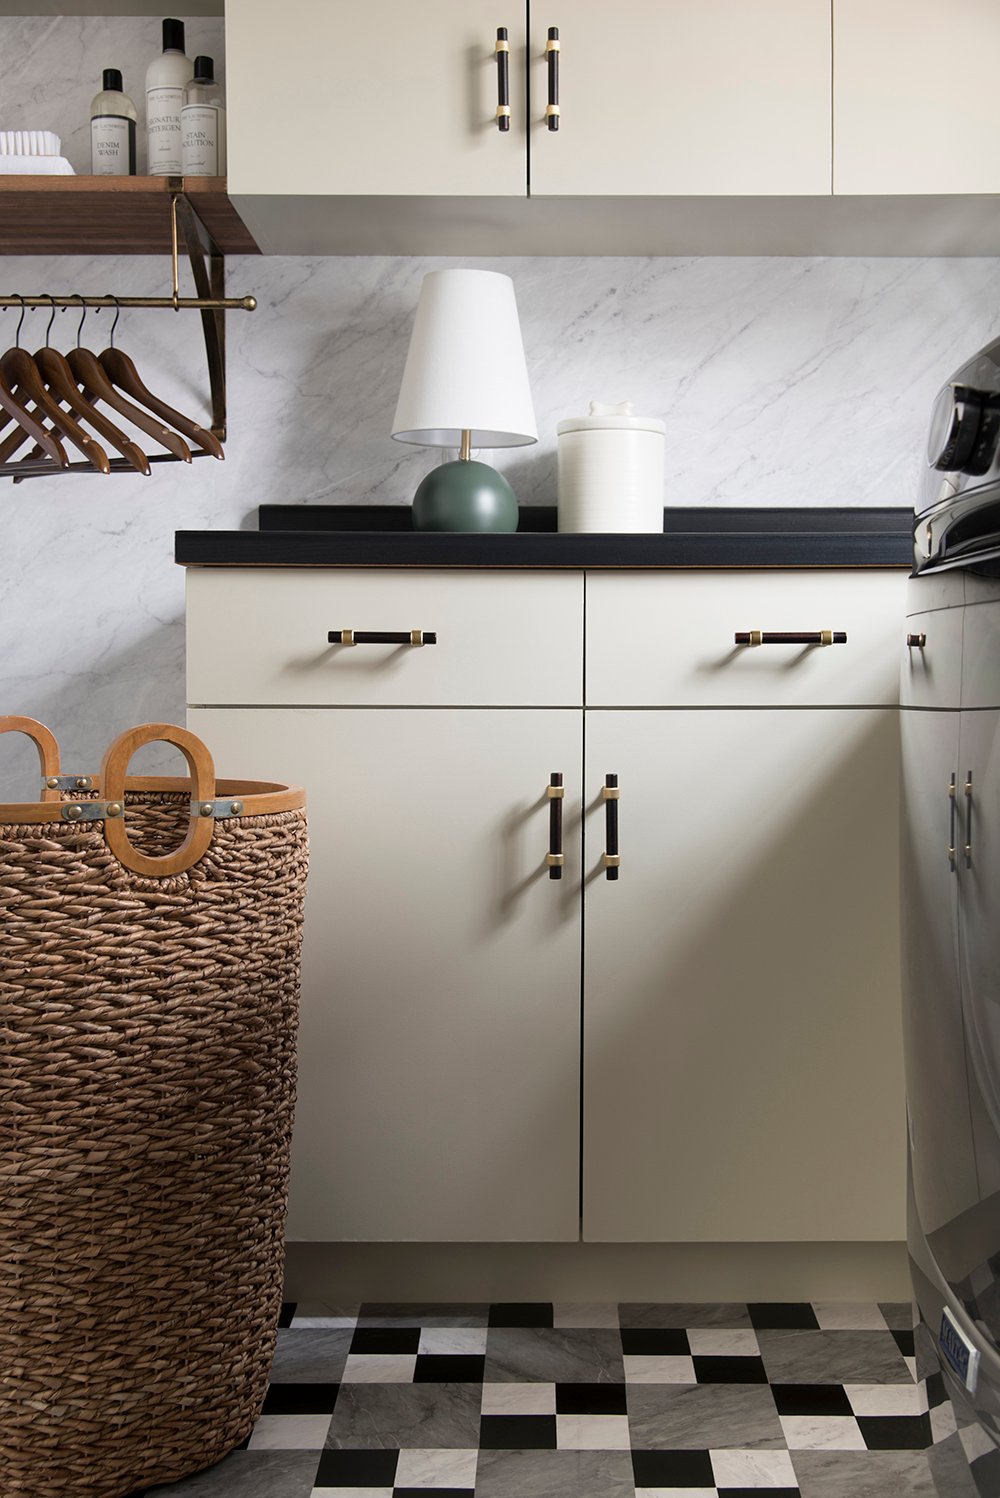
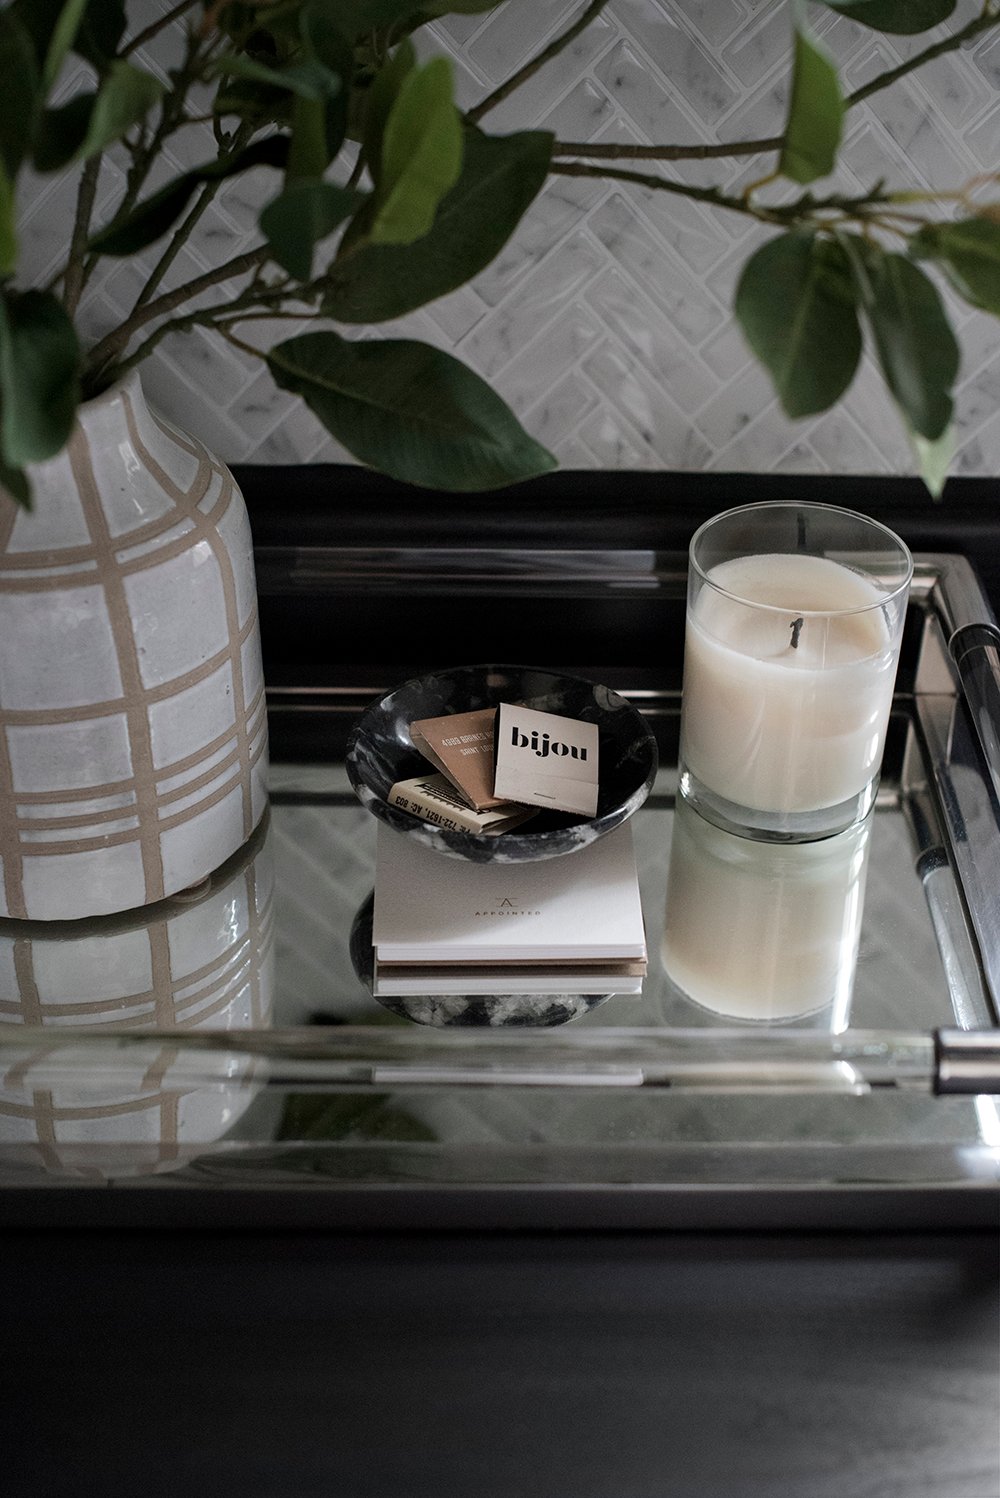
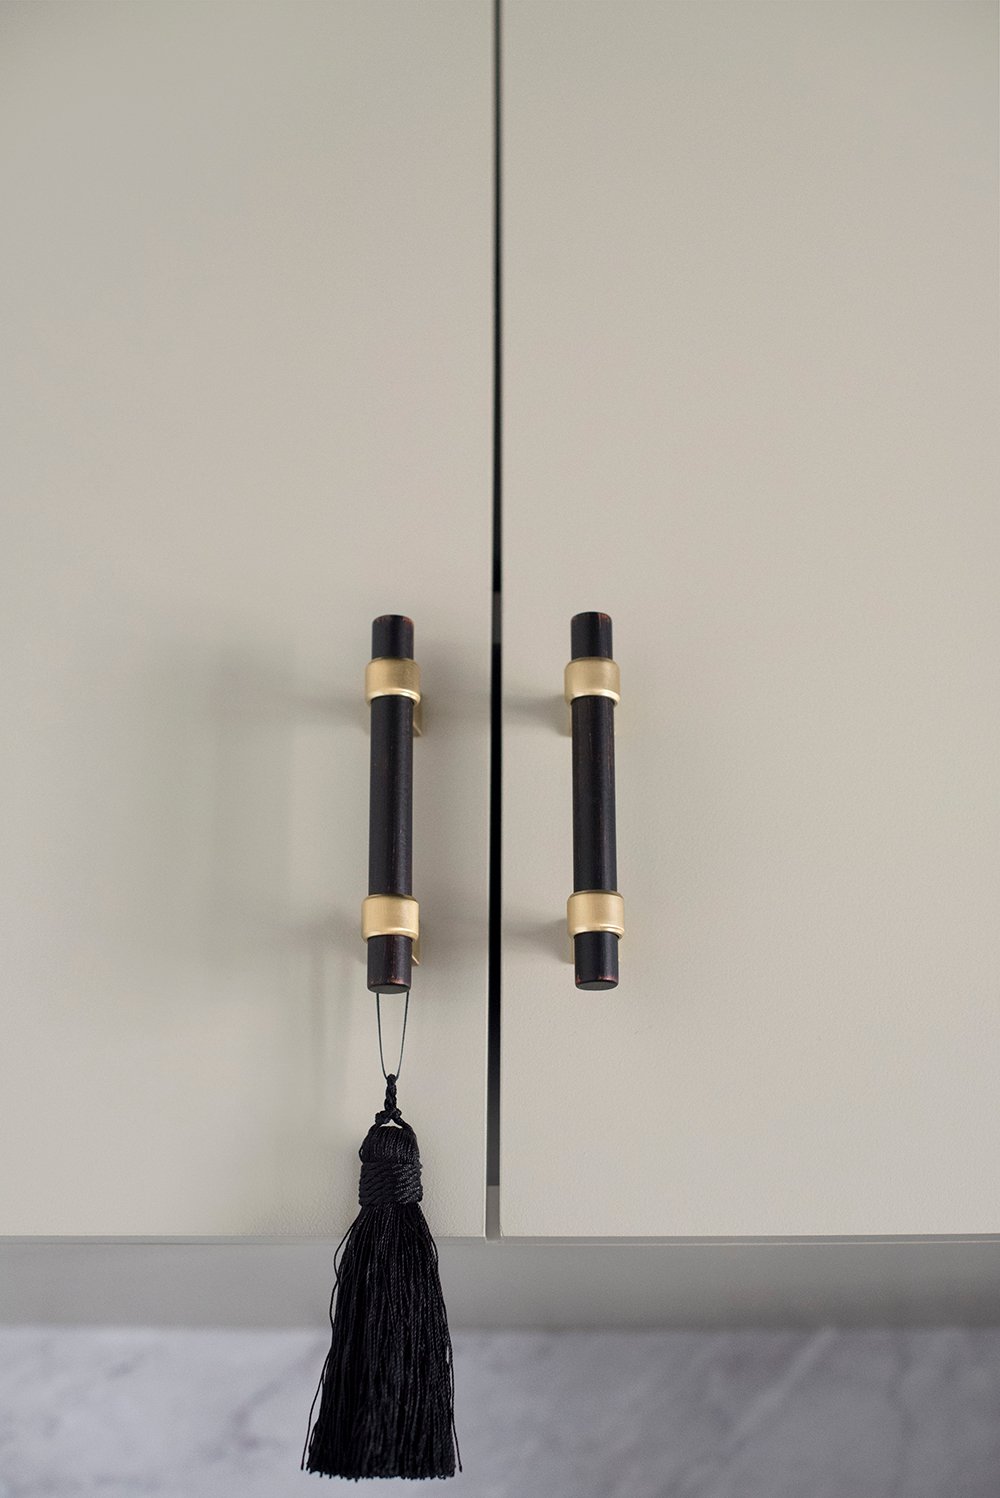 Lots of you have asked about the hardware. I needed to find cabinet pulls with 3″ hole spacing that felt taller than they actually were. That’s a good design trick to remember! If your cabinets have pre-drilled 3″ holes (typically the smallest pull size), opt for hardware that protrudes past the screws so it looks more grand. I added a tassel, just for fun.
 Ready for the budget breakdown? Spoiler alert… I went over my $300 allowance, but I’m still calling this a win! I didn’t anticipate covering so much surface area with peel-and-stick material… therefore, I ended up ordering more.
- herringbone wall tile // $200 (I ended up needing more than I thought – 4 boxes)
- light marble contact paper // $116 (I also had to order more – 2 rolls)
- dark marble contact paper // $46 (2 rolls)
- black sticky floor tiles // $10 (1 pack)
- black contact paper // $18 (2 rolls)
- cabinetry hardware // $30 (for a set of 24- I had a bunch leftover)
- wall shelf // $53 (1 shelf)
- wall sconce // $56 (1 sconce)
- TOTAL = $529
Everything else I already owned, and Sherwin-Williams generously provided the paint. I’d say for $529 this room was worth it. What do you think? Does it look more expensive than you guessed?
 I’d love to hear your thoughts in the comment section below! Did you like this quick and budget-friendly makeover? I’m used to totally gutting a space and completely renovating, so this was new for me. I love that we have a beautiful room that better fits our aesthetic until we can move the laundry room someday. For $500, I think it was worth having a room we like and can enjoy in the meantime. I’ll keep you guys posted as to how everything holds up. I’ll be interested to see how the materials wear and how they withstand our dogs. This space definitely sees a lot of foot traffic! If you liked this one, let me know… the door in the laundry room leads to the powder room and I’m considering giving it a little refresh as well. Would you want to see that?

High five! That’s pretty amazing looking for peel and stick tile and contact paper. (Sidenote: why would they use the cheap laminate in such a grand house?!) I love the high contrast look, and my three favorite elements are from Amazon?? The sconce, shelf and cabinet hardware look fab, and their prices are crazy-good. I will be interested to hear how the floor tile holds up to pups, but the look can’t be beat! If you still love the pattern when you eventually relocate the laundry room, will you try and recreate it with real marble tile? Dreamy! I need to keep staring at these images as motivation to spruce up my laundry room! And, of course we want to see a powder room refresh! Duh!
Happy (short week) Monday!
Thanks Peggi! I’m not sure about the laminate… the kitchen (and even the basement kitchen) had solid wood cabinetry- and the bathroom vanities, for the matter. It is kind of an interesting choice for the laundry room. I’ll keep you updated on the floor tile and how it holds up with the pups. I told Emmett I want to recreate the floor pattern in the relocated laundry room with real tile someday and he was not about it. HAHA! I think the high contrast pattern was a little much for him. He’s trying to talk me to into a brick / vintage looking floor tile. We have plenty of time to figure it out though. Have an awesome day and short week!! xo
It’s beautiful 😍 I absolutely love it and yes it definitely looks like you spent more money on this makeover. This space had great bones to start and you prettied it up perfectly!! My laundry room is located in a dark dingy unfinished space and will require more of a budget but you have given me some awesome inspiration here. Thanks so much Sarah!
Thank you Colleen! I love hearing that :) The laundry room in our first home was in the cold & wet basement. I can relate to having a dingy unfinished space. It was always my goal to finish it, but we never did. Have an awesome Thanksgiving week! xo
I love this transformation!! It’s way more up my alley than a total gut job, at the moment. We want to redo our kitchen, but that would be years away. But this is totally inspiring me to do a smaller scale transformation in the meantime…
I’ve always loved how you add tassels to knobs and handles. Do you make these yourself? Or where to you get them?
Thanks Stephanie! I think this is a great solution for a quick, inexpensive fix… especially if you’re only going to live with it for a few years until you can renovate. I’ll let you know how it holds up and wears! So far so good. I did make that little tassel, but in the past- I’ve bought them from the fabric store. I like adding those little extra details :) Thanks for noticing! xox
Wow, great job!! I think i need some dark marble contact paper to cover a round glass coffee table! :)
Oooh that would be a fun transformation to see, Karen! Let me know how it turns out :)
TOTALLY worth it! Looks amaze, Sarah. I was one of those questioning that putty color on the cabinets, but it totally works, especially with the hardware. And the black ceiling is such a brilliant tip. Our new condo is only going to have a closet big enough to hold a stacked washer/dryer unit and I’m totally bummed to have to give up my previous laundry room. It was tiny, windowless room, but just having a room makes such a difference.
LOVE the big reno’s, but it was great seeing how good the peel & stick can look. Definitely looks way more $ than $500. GREAT job as always!!
Thank you, Anne! I received soooo many concerned messages about the cabinetry color early in the process. Haha! It sounds like everyone warmed up to it. You’re right- having a room really does make a huge difference. I’m not taking this space for granted! Have a great week :) xo
Looks amazing, Sarah! Love how all the textures work together. Looks so much more high-end than a ~$500 update :) Yes, I’d love to see how you tackle your powder room. You’re making me want to redo my own!
Thank you Madeline! I’m so excited to hear that. I hoped it wouldn’t be an epic fail. Haha! It was so easy. I’m thinking I’ll definitely go ahead and update the bathroom while I’m at it. xox
I shrieked out loud when I saw the post this morning! The transformation is incredible! You have added so much value to this space! Laundry rooms should be beautiful since we spend a lot of time in them. The photos of the dogs posing are the sweetest!
I am heading to Amazon for that herringbone tile. You have me thinking more about black ceilings. What about rooms with no windows. Would you do the ceiling black and the walls light?
Team powder room refresh…..powder room, powder room!
Aw yay!! Thanks so much Danna. I feel the same way… it’s a space we spend a lot of time in, so I might as well make it beautiful in the meantime! I’m thinking the powder room will probably happen after Thanksgiving :) As for the black ceiling… this trick works for rooms with and without windows or natural light. I think you’ll be pleasantly surprised. Let me know how it goes with your peel-and-stick tile! xox
You’re so good at this stuff! I’ve eyed the black woodgrain contact paper myself before. Love how you reworked the old refrigerater niche – we had one just like it next to our entryway cabinets and I put in a worn wooden shelf set for purses, hats, and shoes. Funny about the heat gun thing, could you tell a little more about that technique? Wouldn’t a heat gun melt the plastic “tile”? I had to use adhesive velcro to hang a lightweight but large painting over our fireplace since I couldn’t drill into the cheap brick veneer (which I’d painted white I have to add!!) with the flue behind it, and command hooks didn’t work. After the first set of velcro fell off a week later, I intuitively felt that heating it with a hair dry would stick it better to the surface and yes, it has stayed up for months now so fingers crossed!
It’s been so good to see something budget friendly. Gives me inspiration that a first step can turn out really well and not to just wait until more can be afforded. Thank you! I have to ask…no Crosby art in the room? :)
Yay!! Great question, Sarah. Crosby isn’t framed quite yet. I also wanted to group the dog portraits together and there wasn’t room under the sconce. All 3 portraits will definitely live in the laundry room once we relocate it :) xo
Wow, this does not look like it was done on a small budget! Yes, please let us follow along on the powder room refresh, and do let us know how the materials hold up!
I love hearing that Jennifer :) Thank you!
You seriously never cease to amaze me! Great makeover! I wish I had the guts to try this!
Aw thanks so much Kacey! xox
Absolutely love your choices, it looks like you spent so much more than you did! I was wondering about the counter contact paper – which direction did you apply? Thinking about doing this on a countertop but I have a sink to contend with!
Awesome question, Andrea! I applied the wood grain contact paper from left to right (side-to-side) NOT front to back. You’ll waste less paper and I think it looks more realistic.
This is surprisingly fantastic for adhesive stuff! You’re a wonder! Do you have any experience recovering/finishing/painting/whatever sinks? I don’t want to have to yank out our vanity/sink because that would mean also pulling out and damaging the cabinet, which I’d like to keep. And would rather not hire out to a painting service. Kinda hoping your powder room has the same issue so I can learn from you!
Thank you so much! We had our bathroom professionally resurfaced at our old house. Does that count? Haha! Check out that post here: https://roomfortuesday.com/bathtub-refinishing-101/
I’ve been hoping to avoid resurfacing, but your post was informative and may have convinced me! Thank you!!
Happy to help :)
Beautiful and so creative! Did you seal the floor with polyurethane or some kind of floor protector? Thanks for sharing
Thank you Kari! I didn’t cover the floor “tiles” with anything. I’m going to see how it holds up and if it doesn’t do well, I might use an epoxy or something to seal it :)
Looks fantastic Sarah! Could you possibly do a video of your contact application process? Your finish looks flawless. Thanks!
Thanks Jody! When I start the powder room, I’ll be sure to record some videos :)
I am amazed at this transformation! Great work!!! Would love more of these type of posts.
Thank you Jessica! I’m going to tackle the attached powder bathroom next :)
OH. MY. GOSH. This is epic and you should win awards for this laundry room! (I’m obsessed with The Laundress too).
Aw thank you Sara! Their laundry products are my all-time favorite… they smell so good! xox
This room is beautiful!! If you didn’t know, you’d expect you had it built like this rather than a budget makeover! I was wondering if you could provide the dimensions of your space here? I actually am in the process of building and finalizing floor plans — our laundry room is a tricky size for placing cabinets with the side by sides but I really like how this looks and I think it would be similar to ours! How do you feel about the corner of the cabinet? Any tips to remedy that hard to reach space in the back since in a layout like this, it’s unavoidable?
Thank you, Kayla! This room is a pretty good size… 8 feet x 8 feet. The corner cabinet is definitely hard to reach because the units are in the way. The floor plan was like this when we moved in, but when it comes time to totally renovate- I’ll definitely switch things up to make it more functional :) Hope this helps!
Wow wow wow!!! Would you recommend the contact paper and sticky tile for textured walls?
Thanks Victoria! I actually don’t think either would work well on highly textured walls, unfortunately. If you wall texture is minimal or fine, I’d say try it… but otherwise, they probably won’t look awesome. I’m sorry!
Hi there!! I remember seeing this makeover years ago. Looks like it was 2019! I am heading into a project in our office and I’d love to use that contact paper on the desk. Do you have any tips for install? I I really love how it turned out on your countertop you but up the edges close or overlap and cut down the middle like a wallpaper installation? Thanks in advance!
Thank you, Ali! I’d definitely recommend cleaning the surface really well and just taking your time with the squeegee. I made angled mitered cuts that do not overlap, but fit snuggly together. Hope that helps!