How to Install Herringbone Hardwood Flooring
Let’s talk hardwoods! You know I’m a huge hardwood flooring fan. Emmett and I replaced the previous engineered hardwoods (that were in rough shape) throughout the main level of our home with these gorgeous solid hardwoods… in a herringbone pattern! Honestly, the installation process was much easier than both Emmet and I expected. Looking back, this remains one of my favorite upgrades we’ve made to our home. Today, I’m sharing exactly how we installed our herringbone hardwood floors, the tools we used, mistakes to avoid, and what we would do differently if we tackled this project again. Click through for the complete tutorial on how to install herringbone hardwood flooring.
In both of our previous homes, we refinished the original hardwood flooring, so it was fun to replace the carpet and install hardwoods throughout from the jump. Here’s how to refinish hardwood floors like a pro, if you’re working to revamp your existing floors.
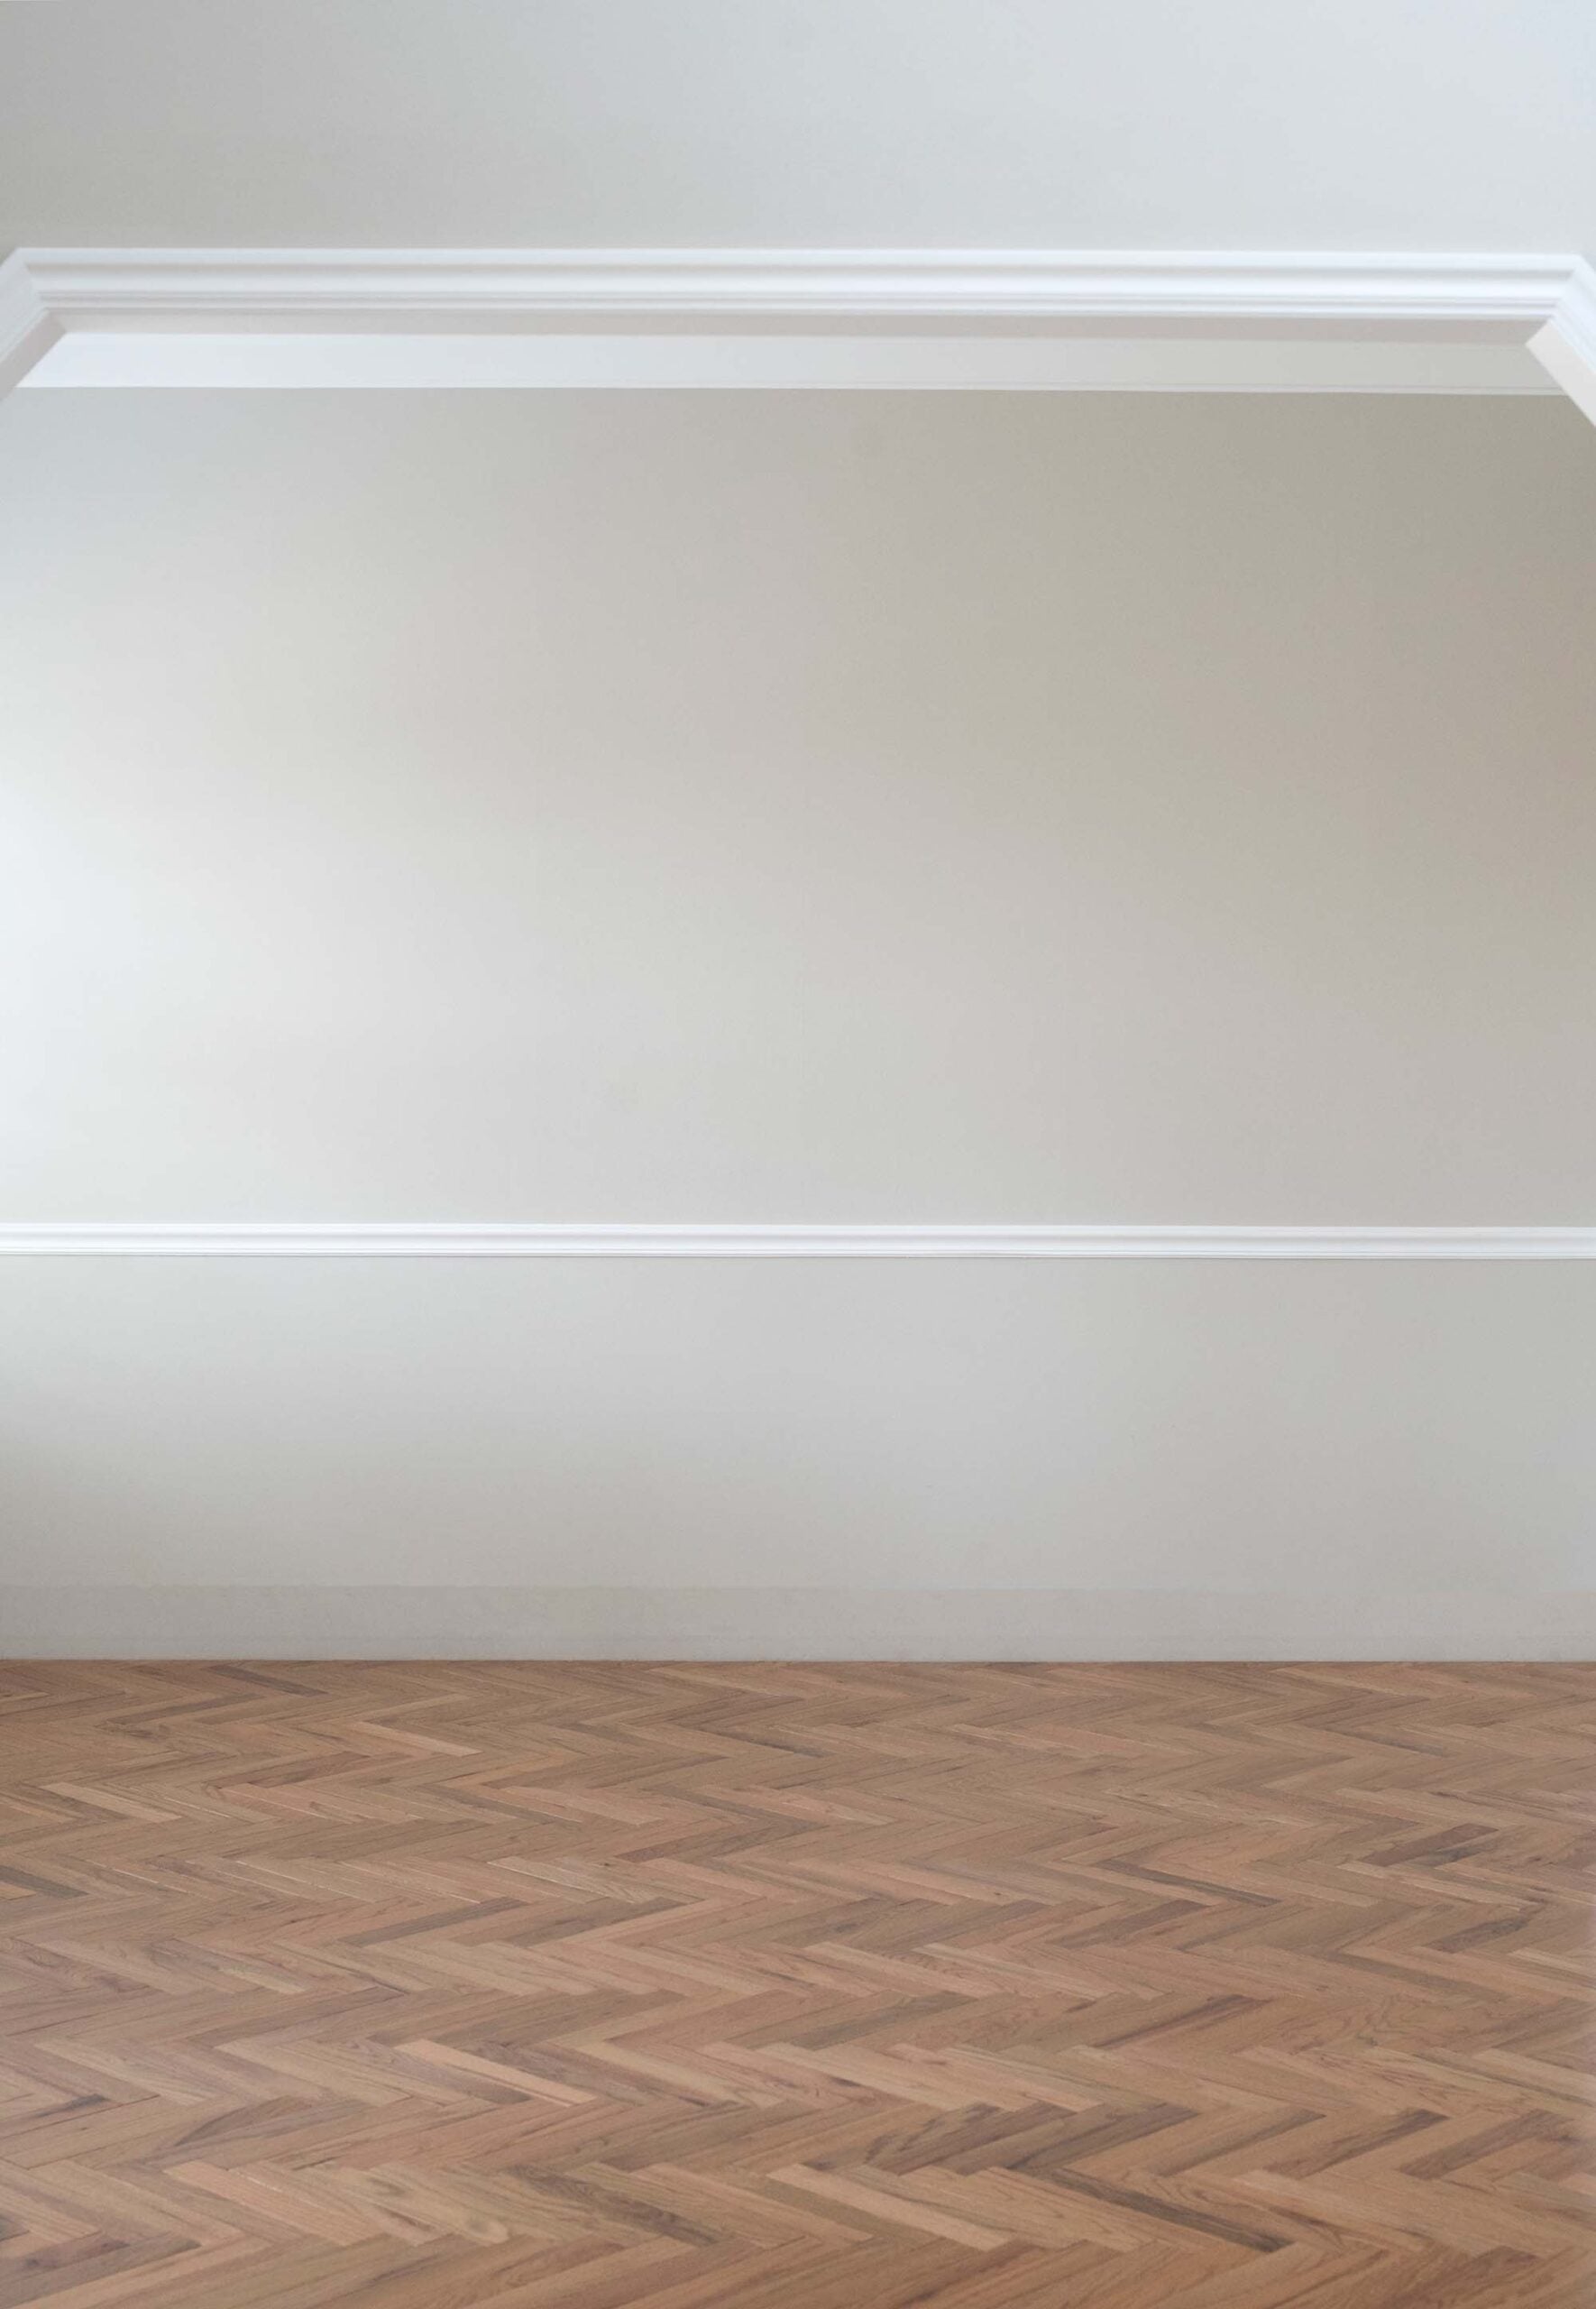
Before: The Flooring We Replaced
The flooring in our home was roughly 90% carpet. There was a lot of it. Unfortunately, it wasn’t my style. The dark color felt heavy, it wasn’t holding up particularly well to our dogs, and it contributed to the builder grade feel throughout the house. I knew the main living areas needed something warmer, brighter, and more architectural. That’s where herringbone hardwood flooring entered the conversation.
Why We Chose Solid Hardwood Instead of Engineered Flooring
I’m admittedly a bit of a material purist… the tried and true, classic options are always my first preference. Whenever possible, I lean toward natural materials and traditional construction methods.
We chose solid oak hardwood flooring because it’s the real thing. These tongue-and-groove boards are ¾” thick (one solid piece of wood). It can be refinished over and over again as it naturally wears and patinas. It may never need to be replaced, it will literally last 100+ years, it feels durable and sturdy underfoot (it doesn’t give at all!), and will increase the resale value of our home someday. The variation found within natural hardwood also emphasizes the herringbone pattern perfectly- which is exactly what I was looking for.
Choosing the Right Hardwood Color
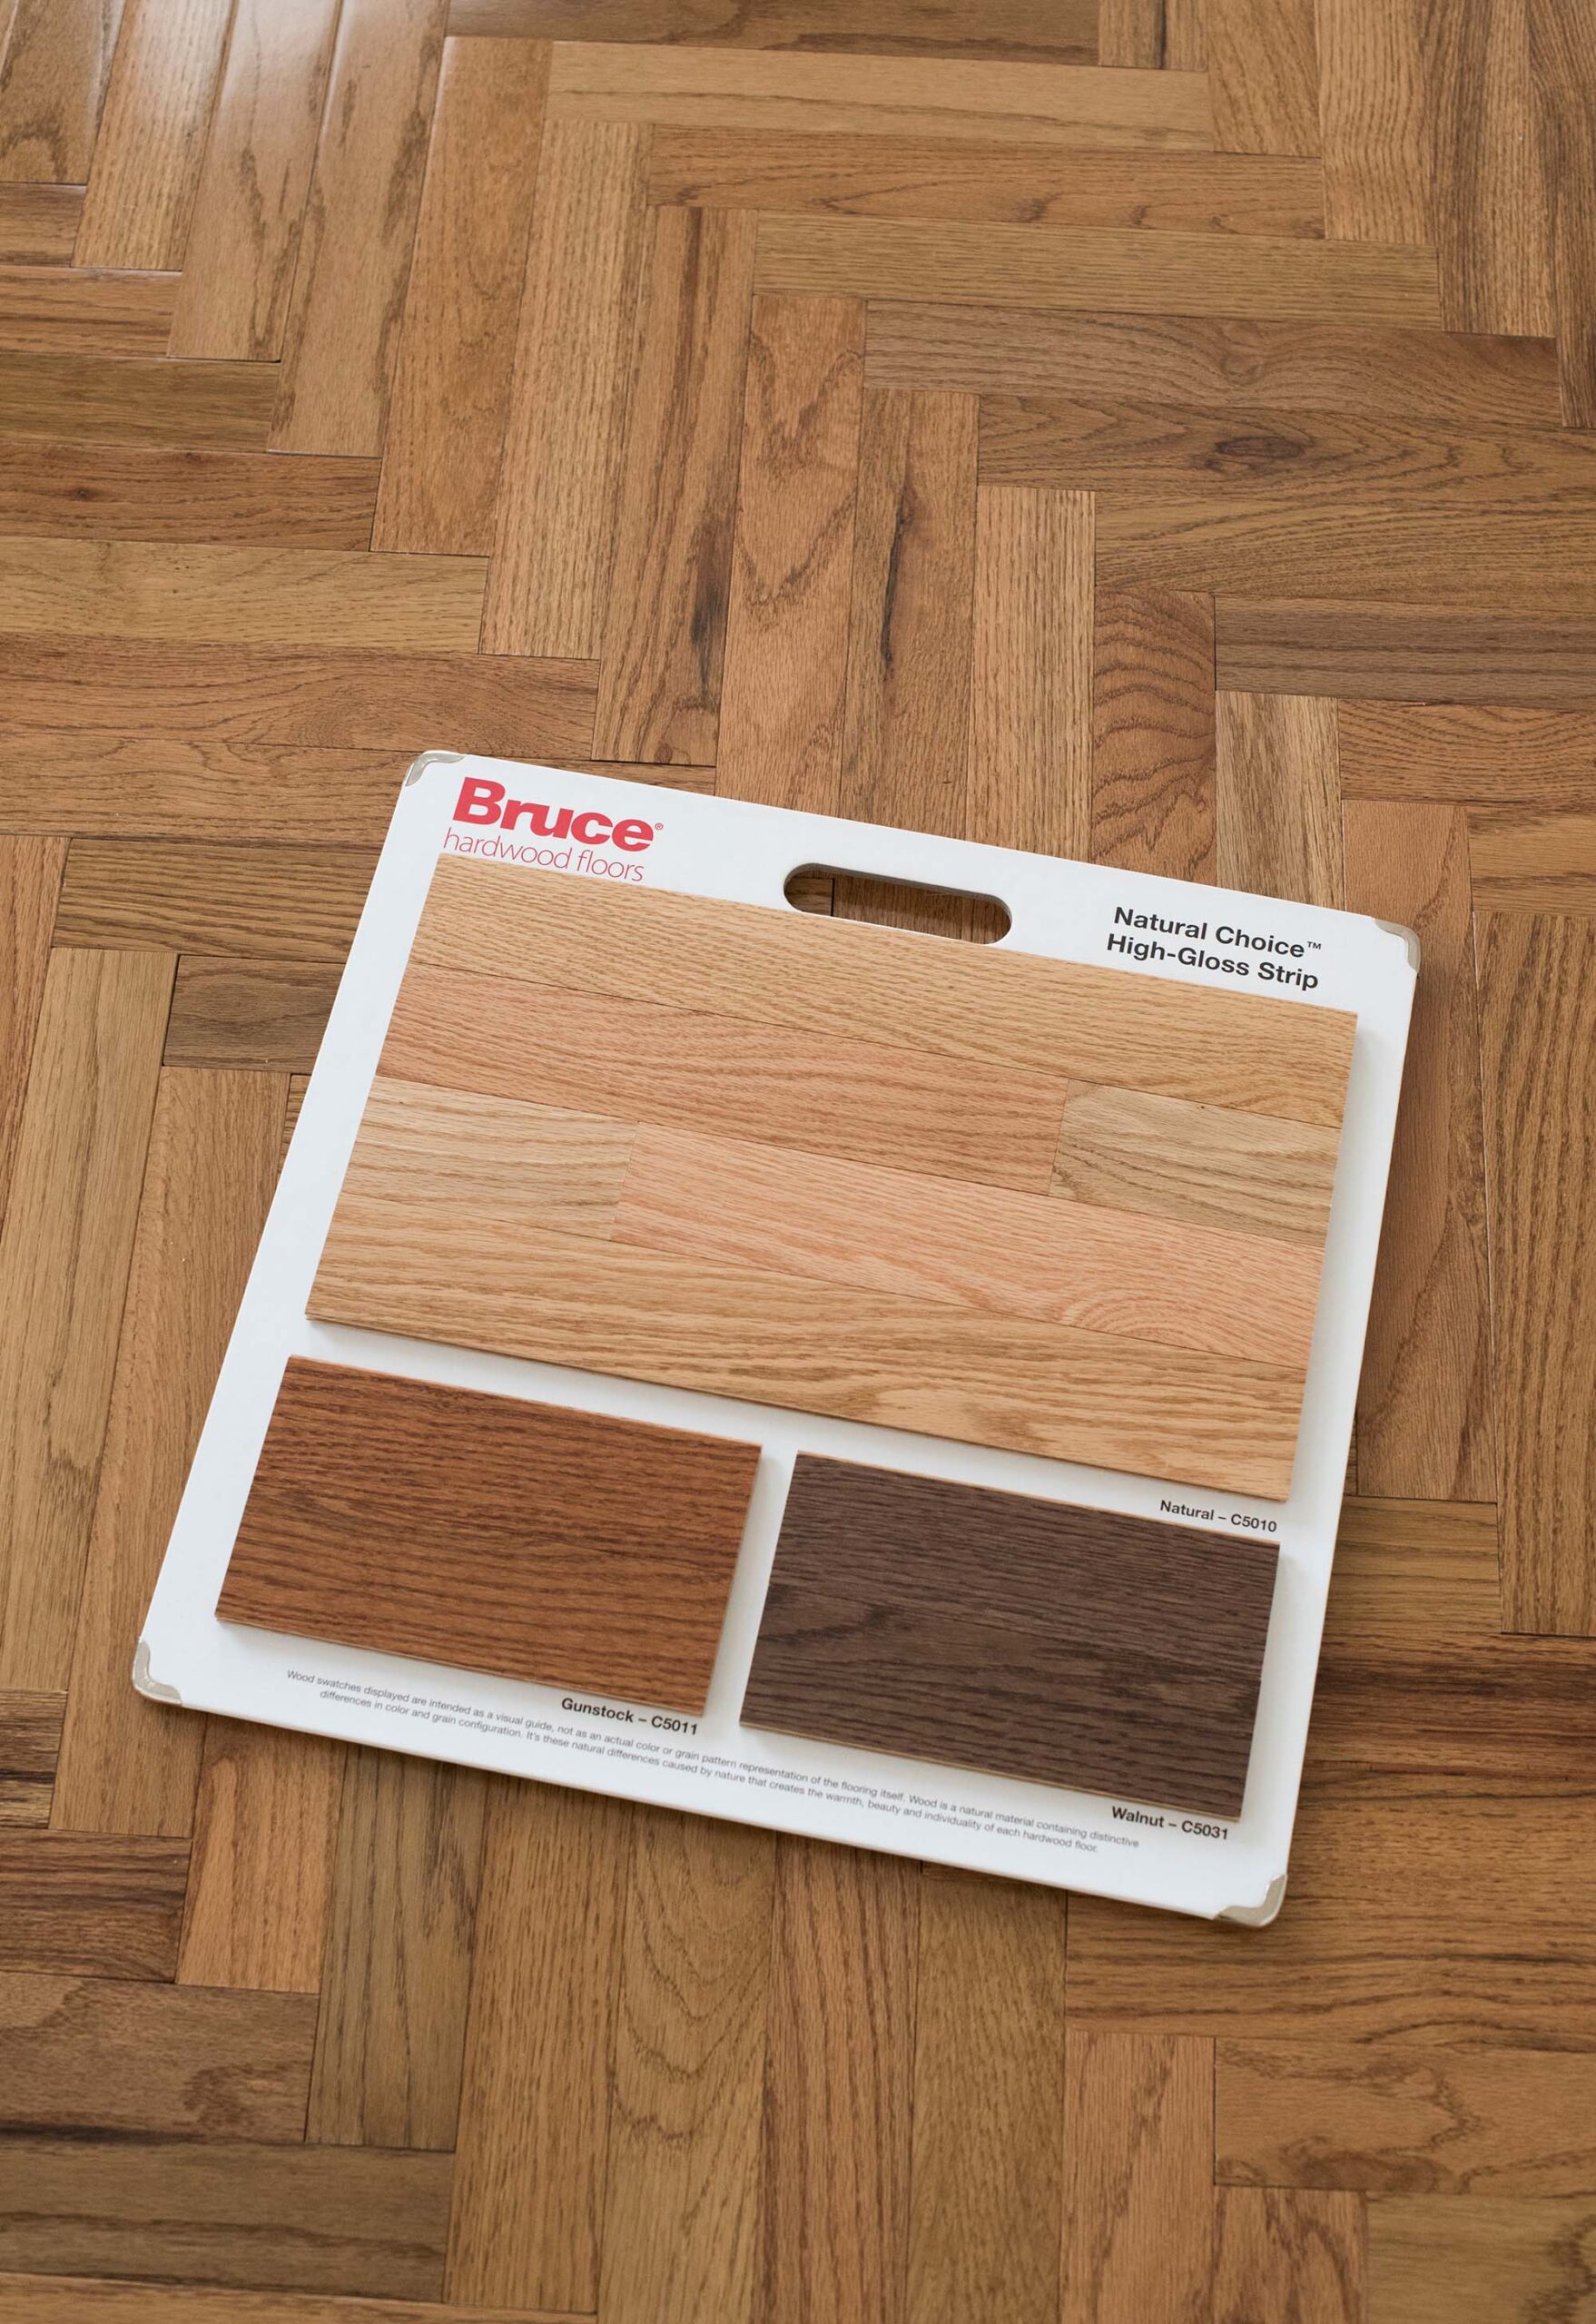
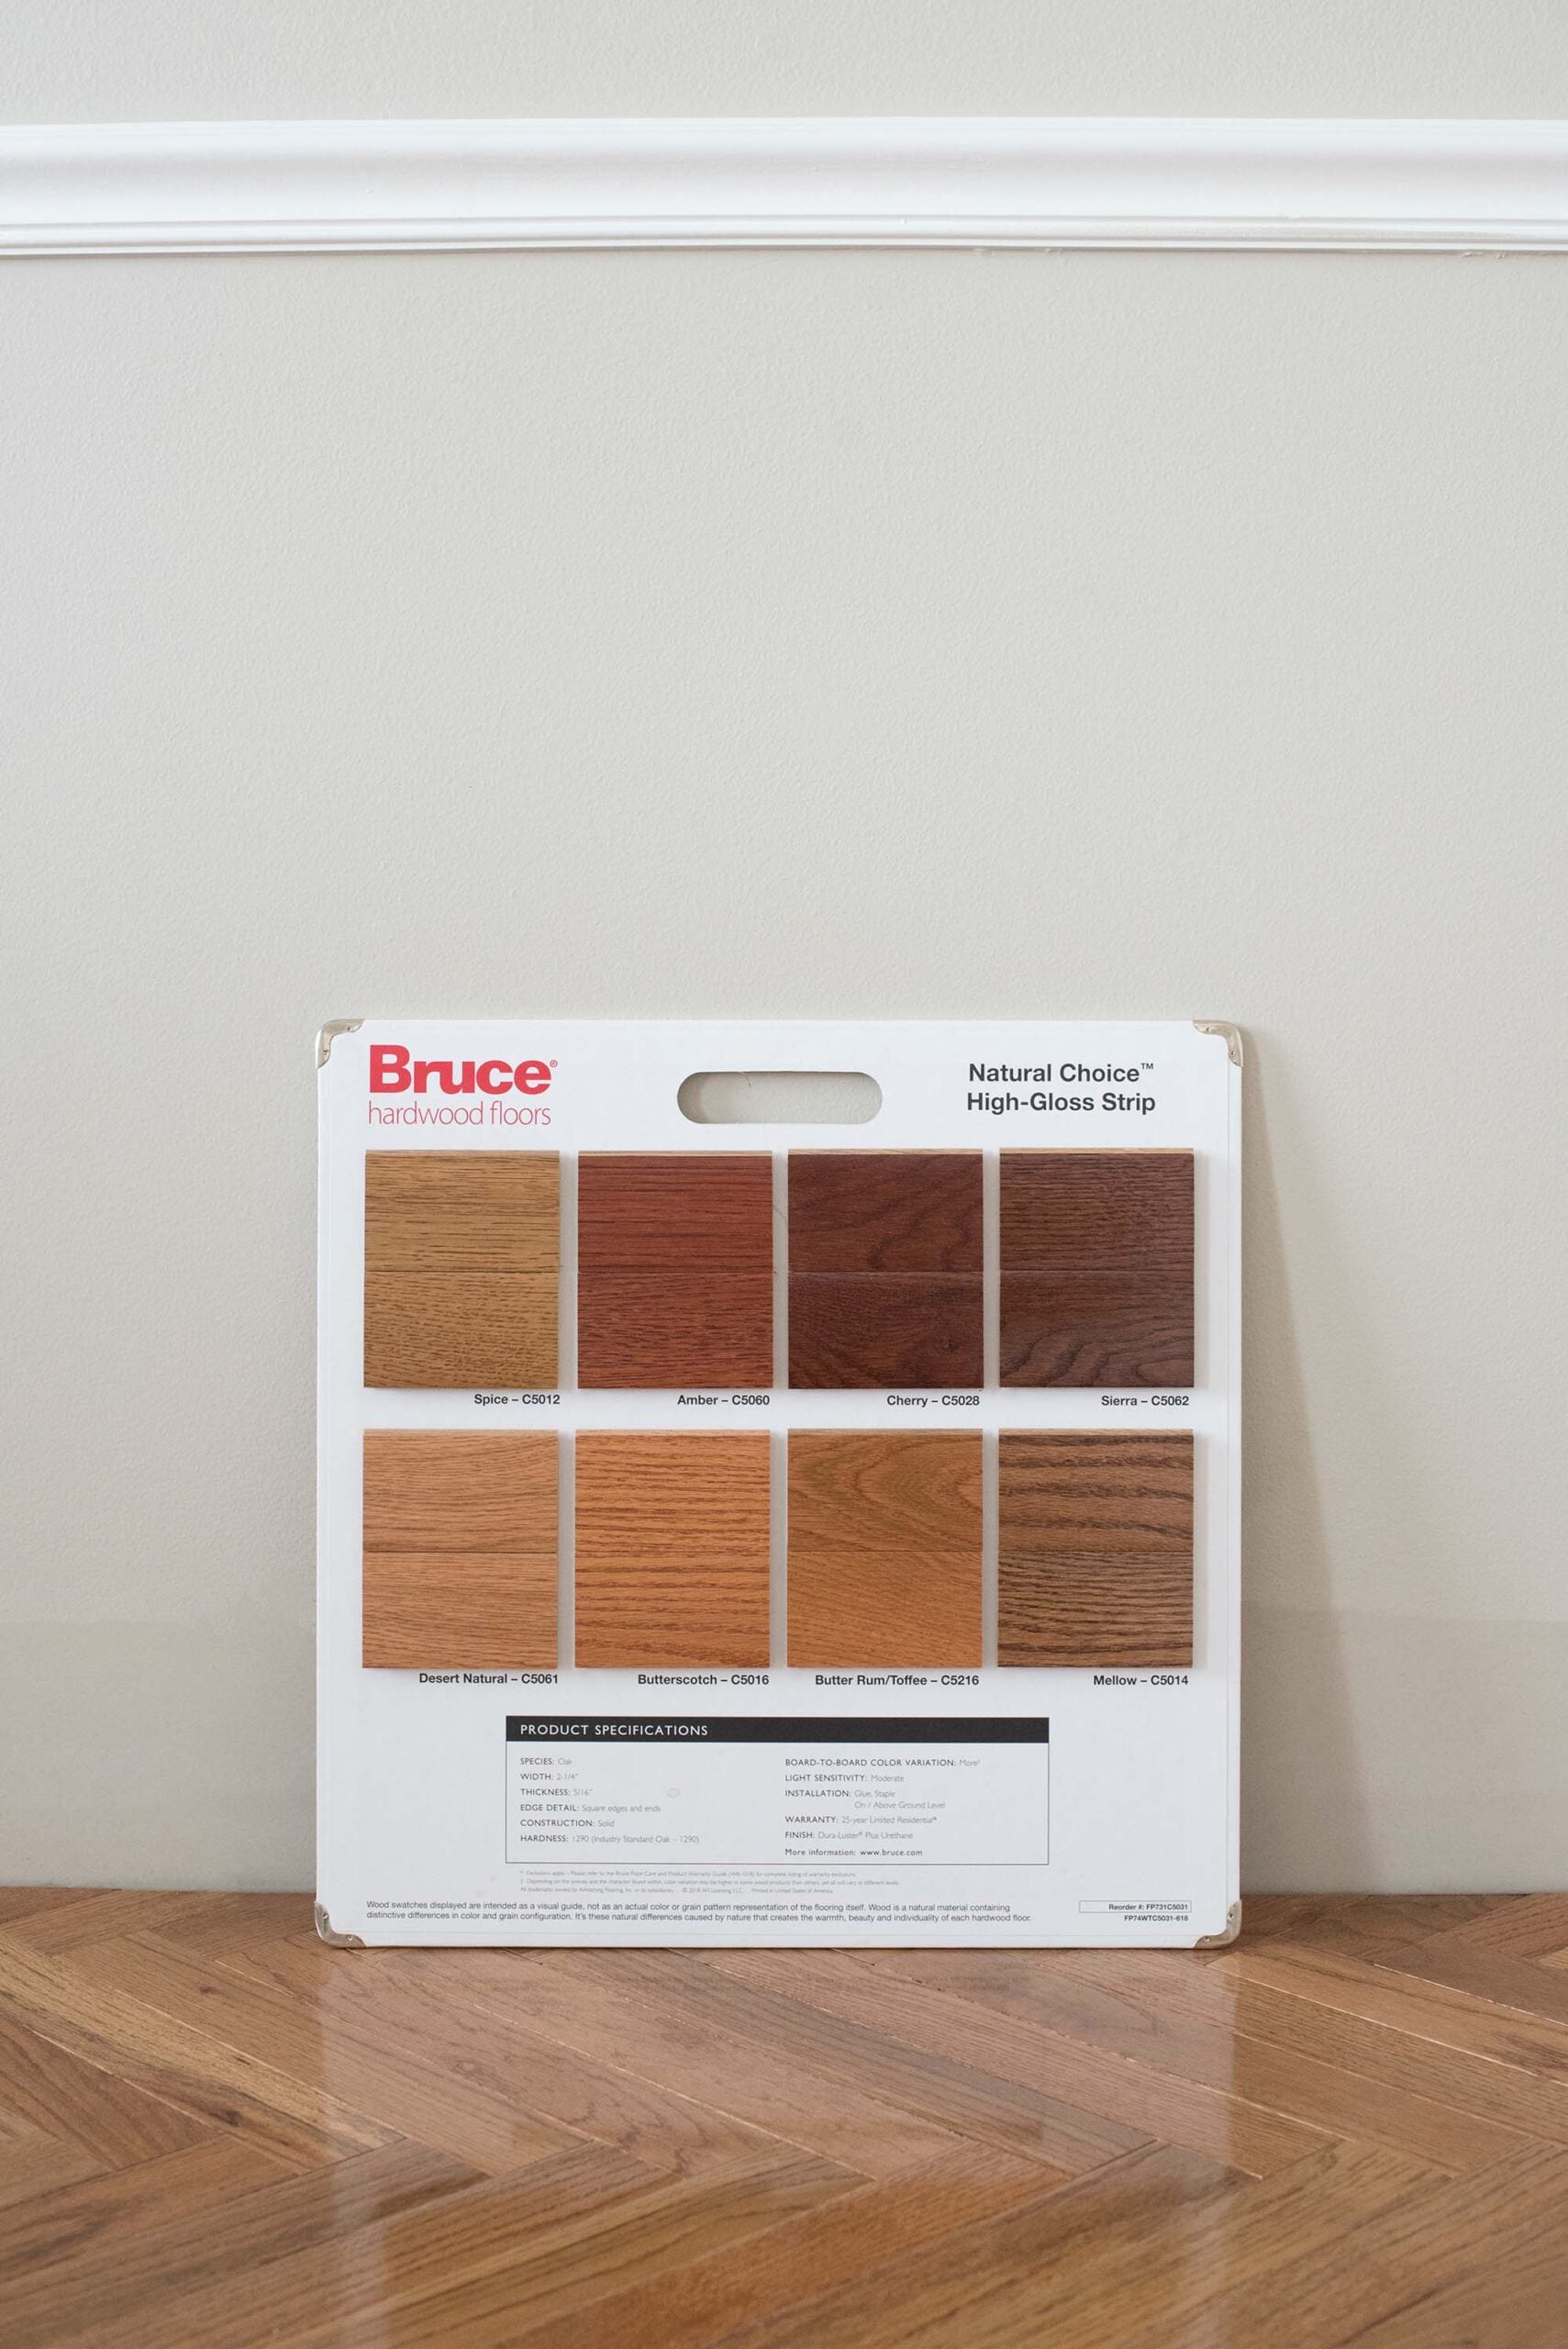
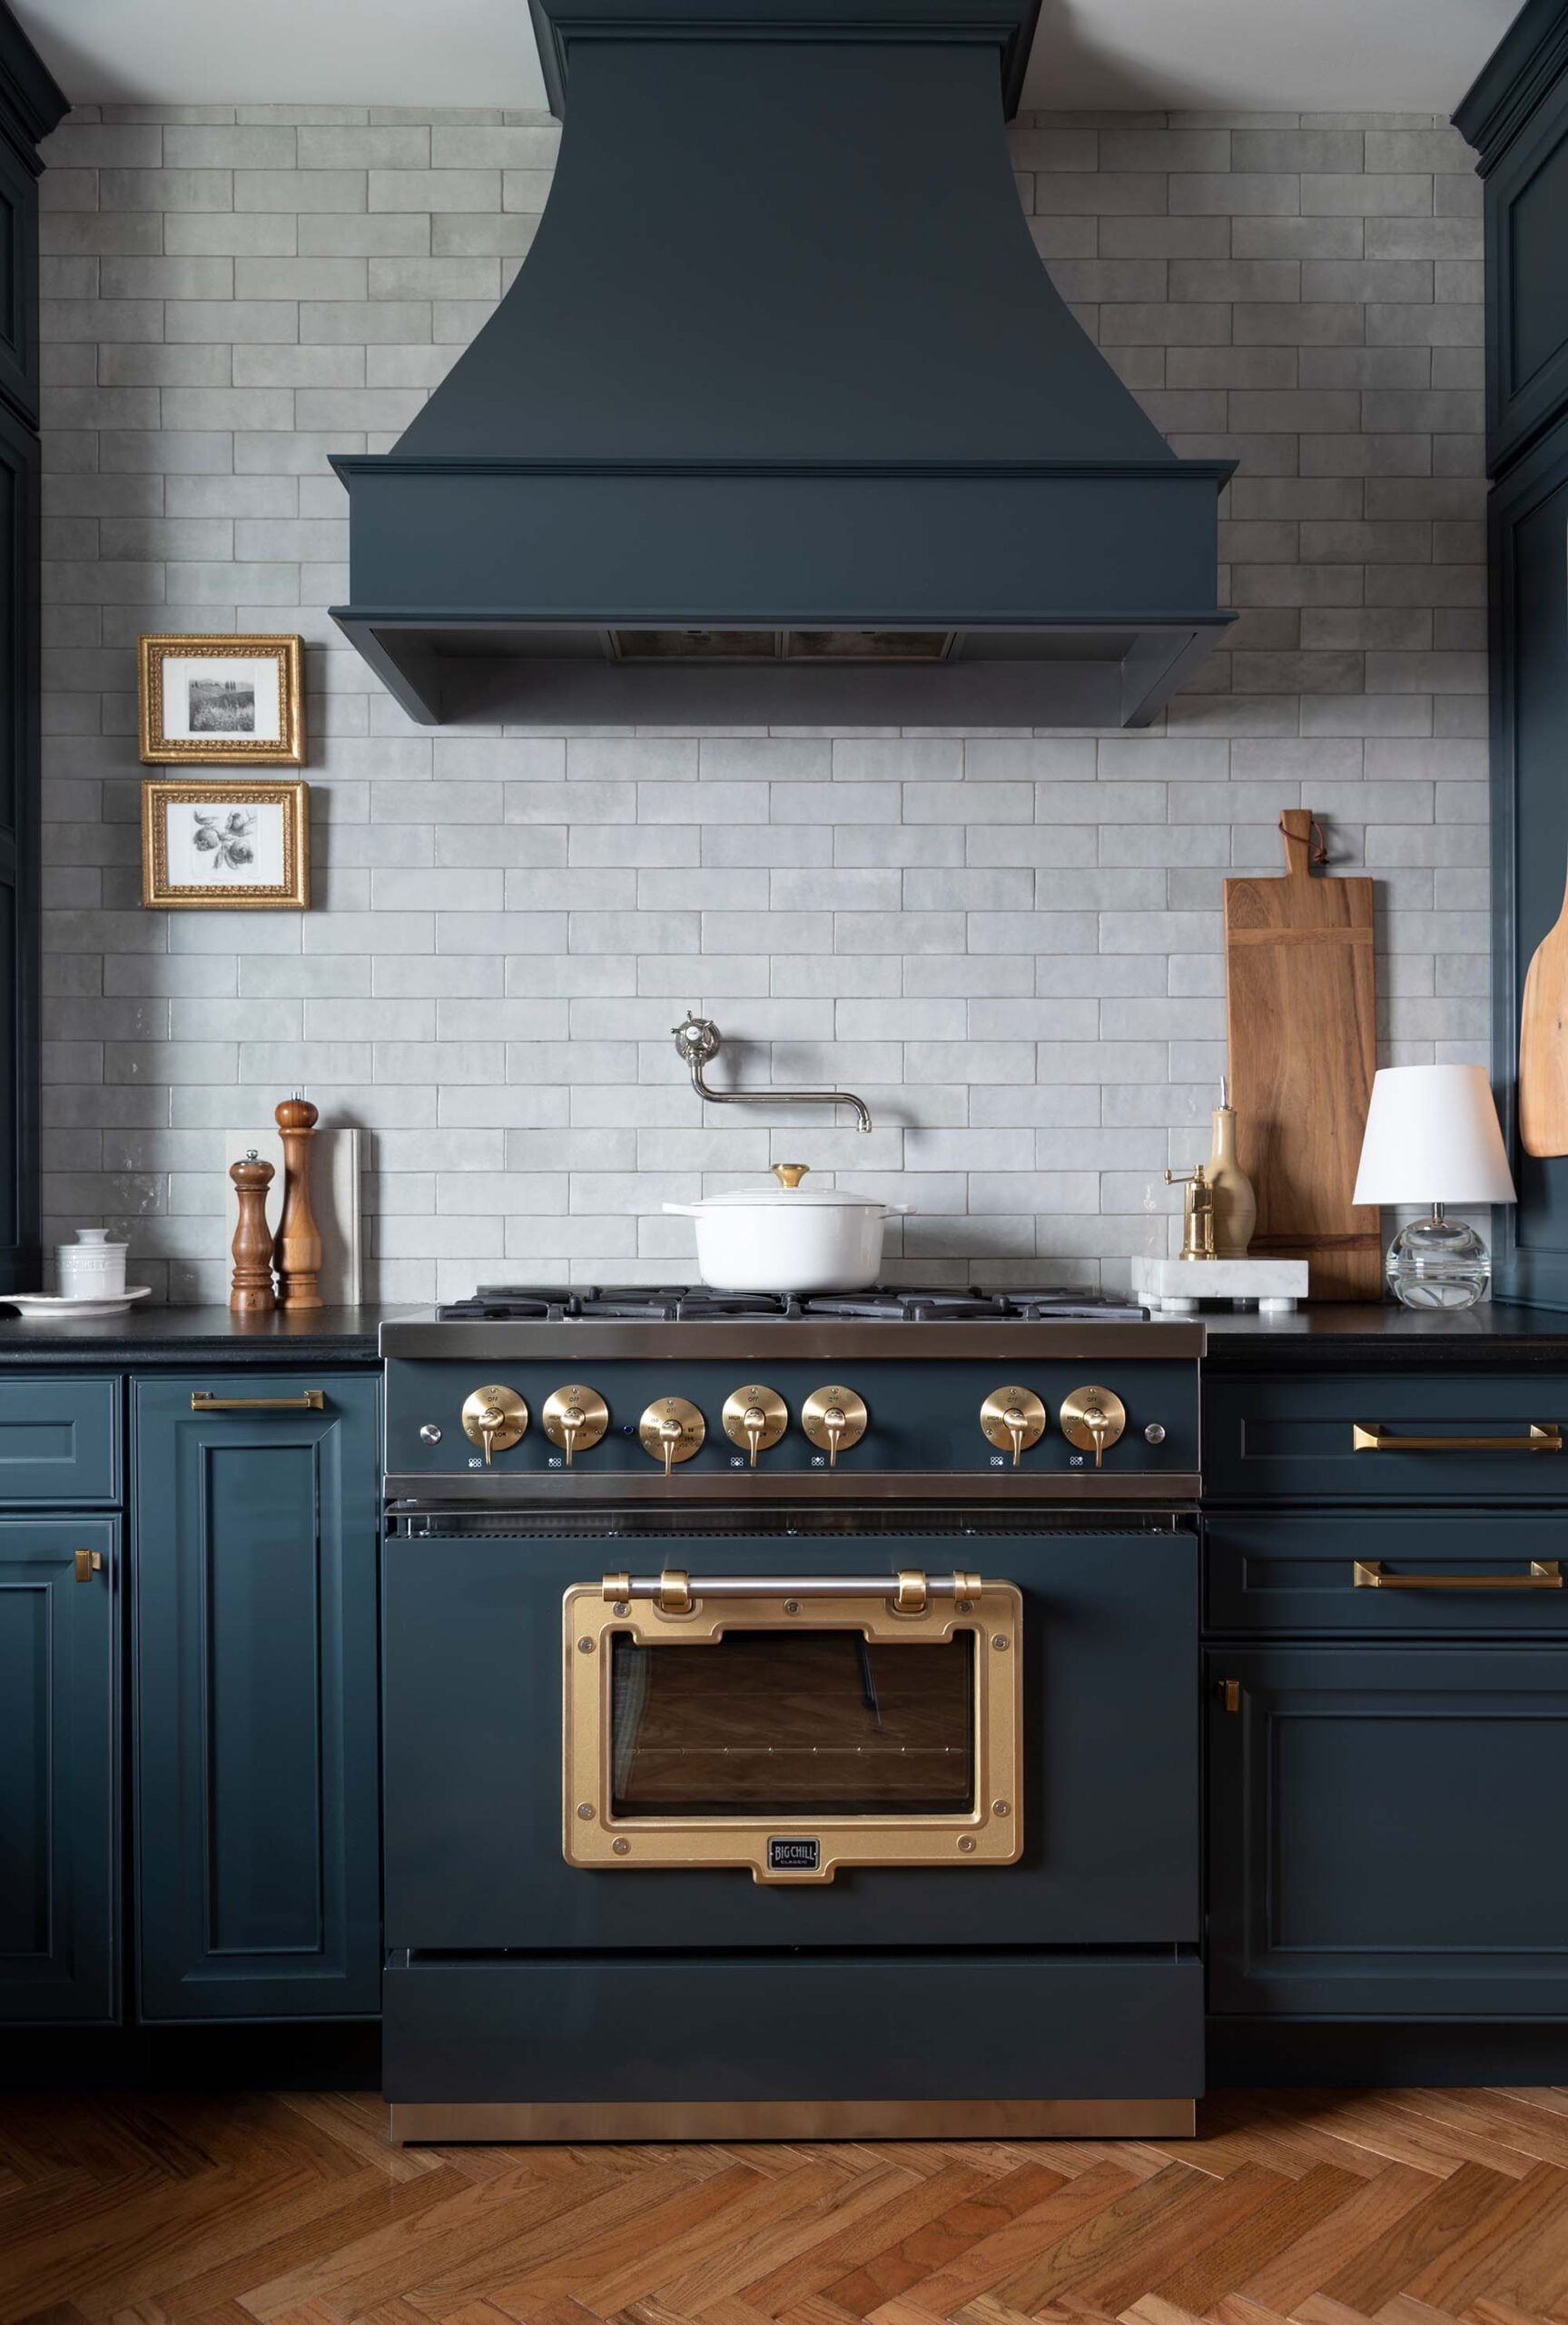
I visited my local Lowe’s to grab some samples and they actually have a giant Bruce Hardwood display in my store. I knew that would be the best fit for our house immediately upon seeing the display. It felt higher-end, had the most color selections, and the solid tongue-and-groove construction that Emmett requested. I immediately liked the Spice swatch. It’s a nice medium tone that is warm and inviting, but not too orange. The “Walnut” color is almost an exact match to our previous hardwoods in past homes. My top three picks? Spice, Mellow, and Walnut, in case you were curious. If I were selecting again today, Spice would still be my choice.
What You Need Before Installing Herringbone Hardwood Flooring
Here is what you’ll need for this project… I’m linking the exact tools we used below…
- Bruce Oak Solid Hardwood Flooring (we installed “Spice” color)
- Freeman Flooring Nail Gun (it comes with the rubber mallet)
- Bostitch Air Compressor
- Bostitch 2″ Flooring Nails
- Craftsman Measuring Tape
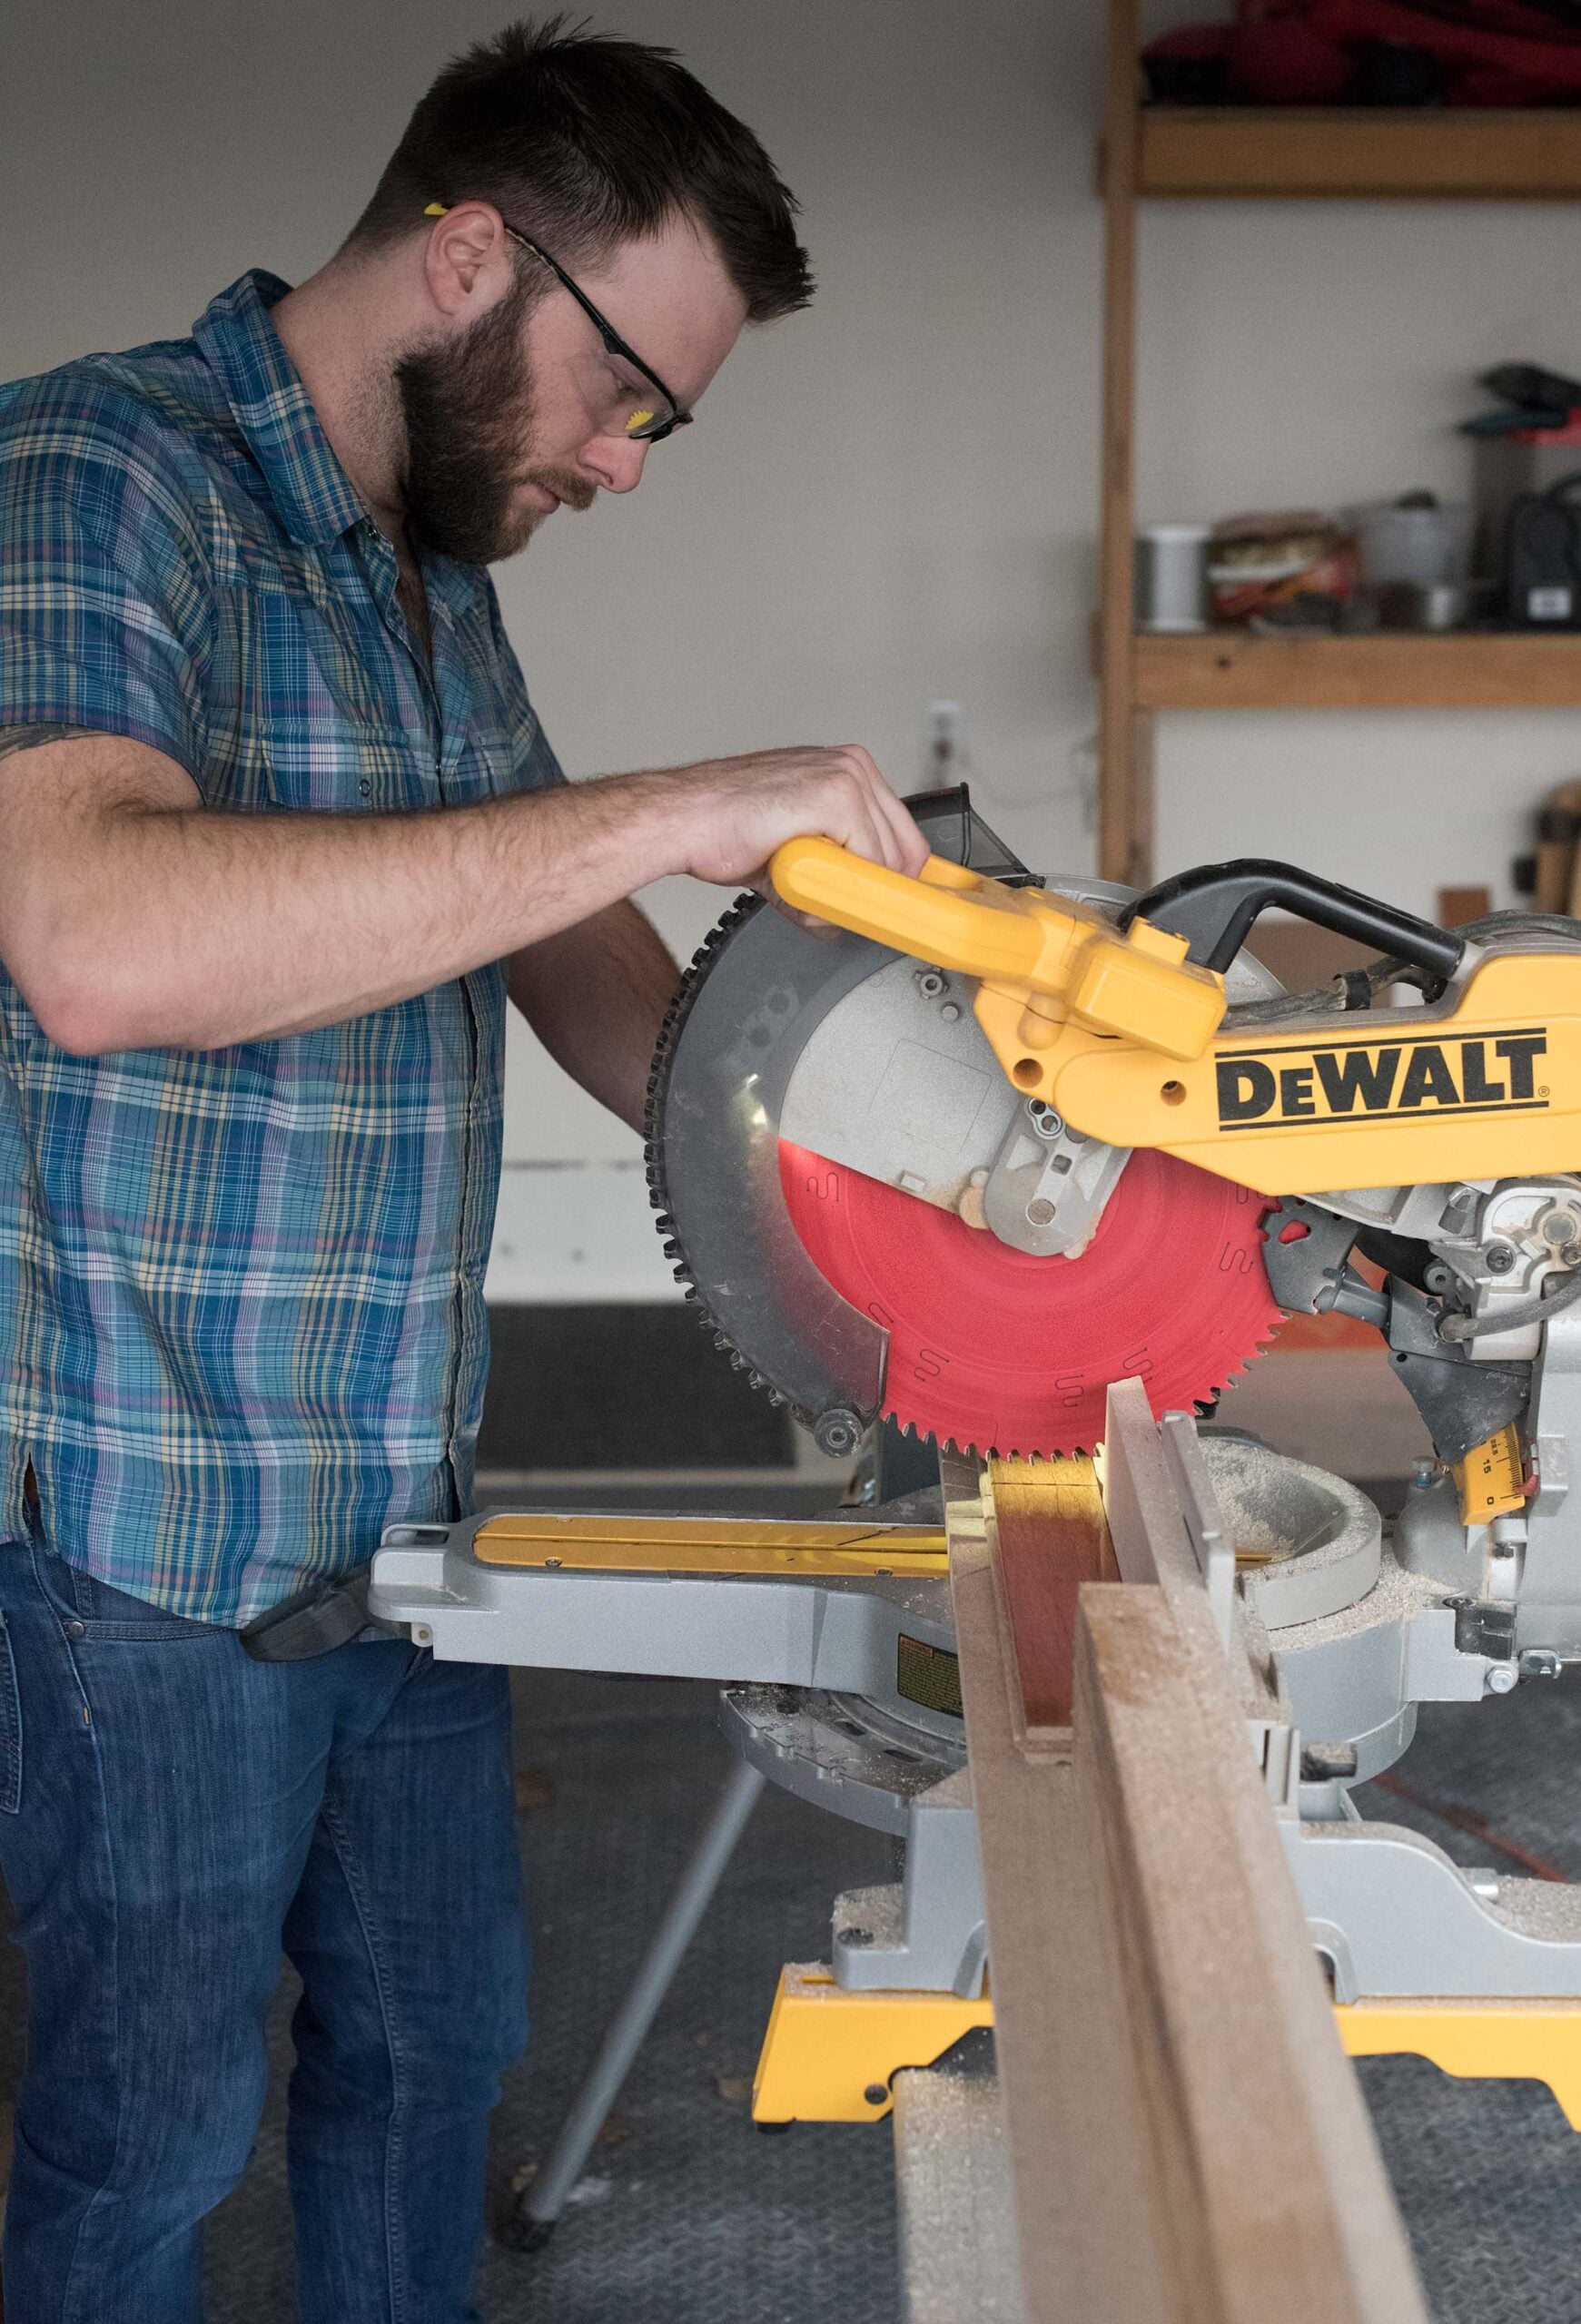
- Dewalt Compound Miter Saw (+ Stand)
- 15 lb. Roofers Felt
- Bruce Hardwood Cleaner and Mop Floor Care Kit
- Kobalt Fiberglass Claw Hammer
- Kobalt Pry Bar
- Screw Driver Set
- Bostitch Staple Gun
- Bosch Router
- Knee pads
Step by Step Herringbone Hardwood Flooring Installation
Step 1: Remove The Carpet
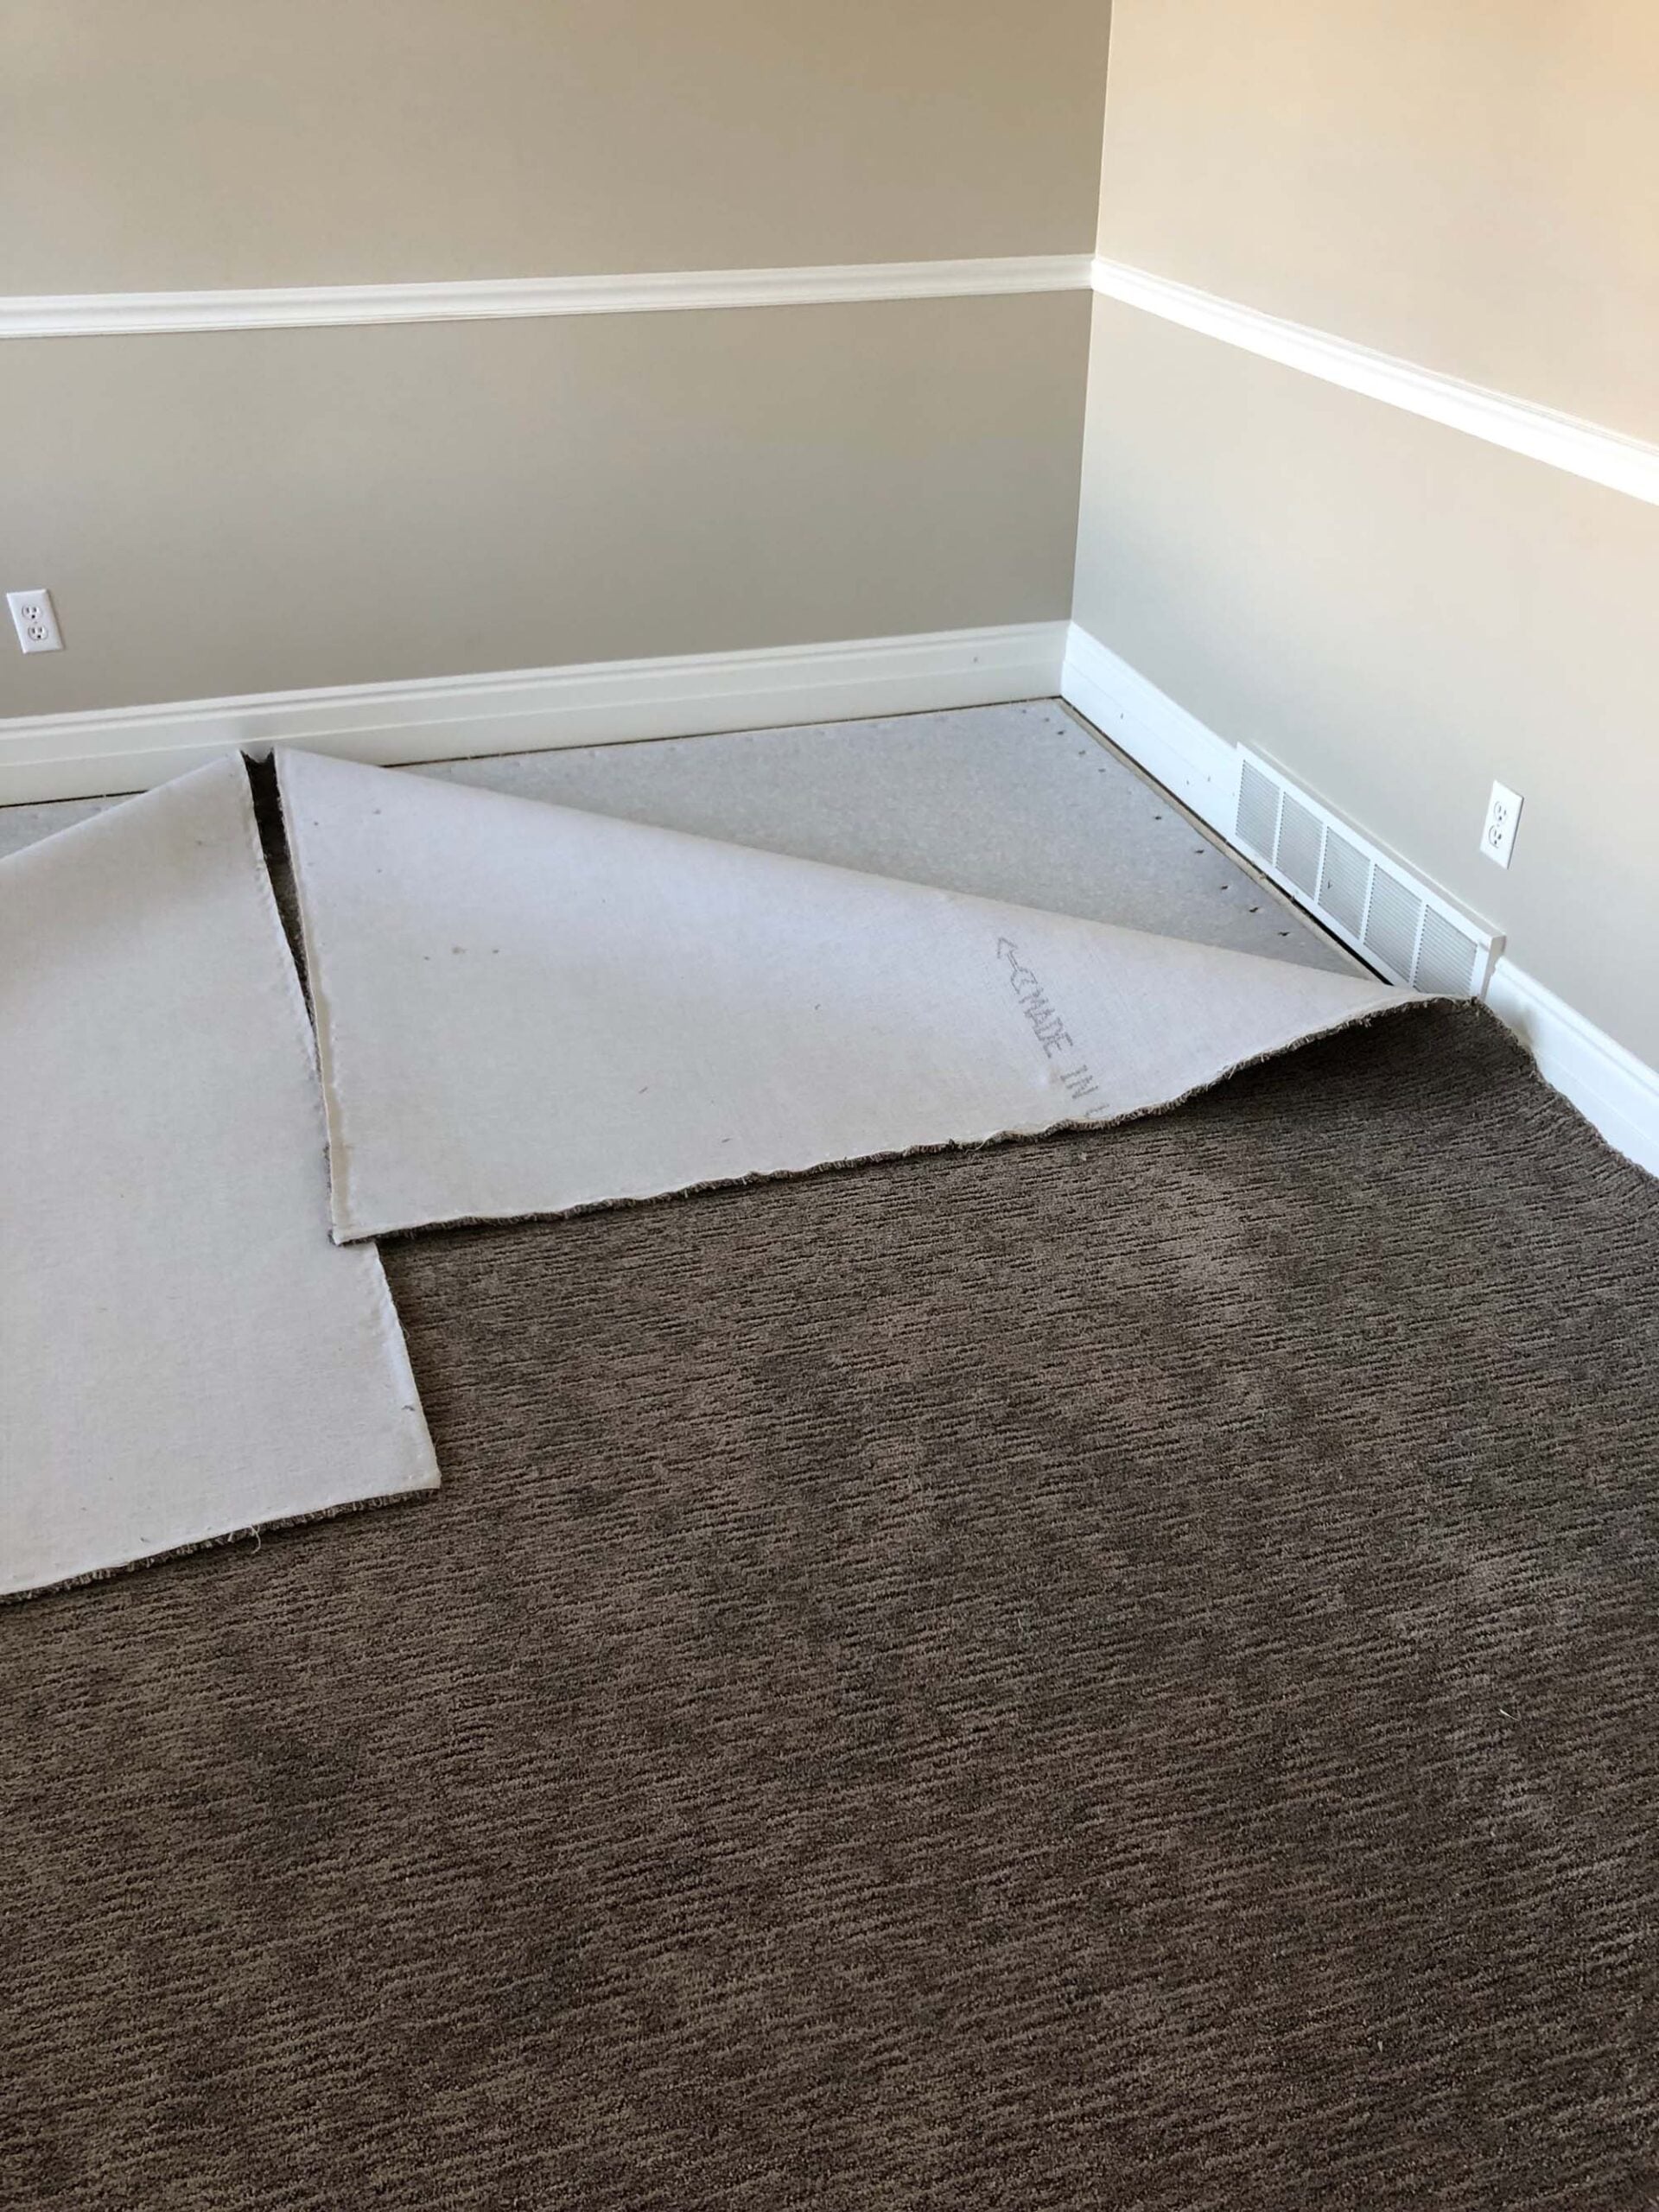
Carpet is generally easy to remove, so I tackled this part of the project. I just started in a corner, pulled it up, and rolled it out of the way.
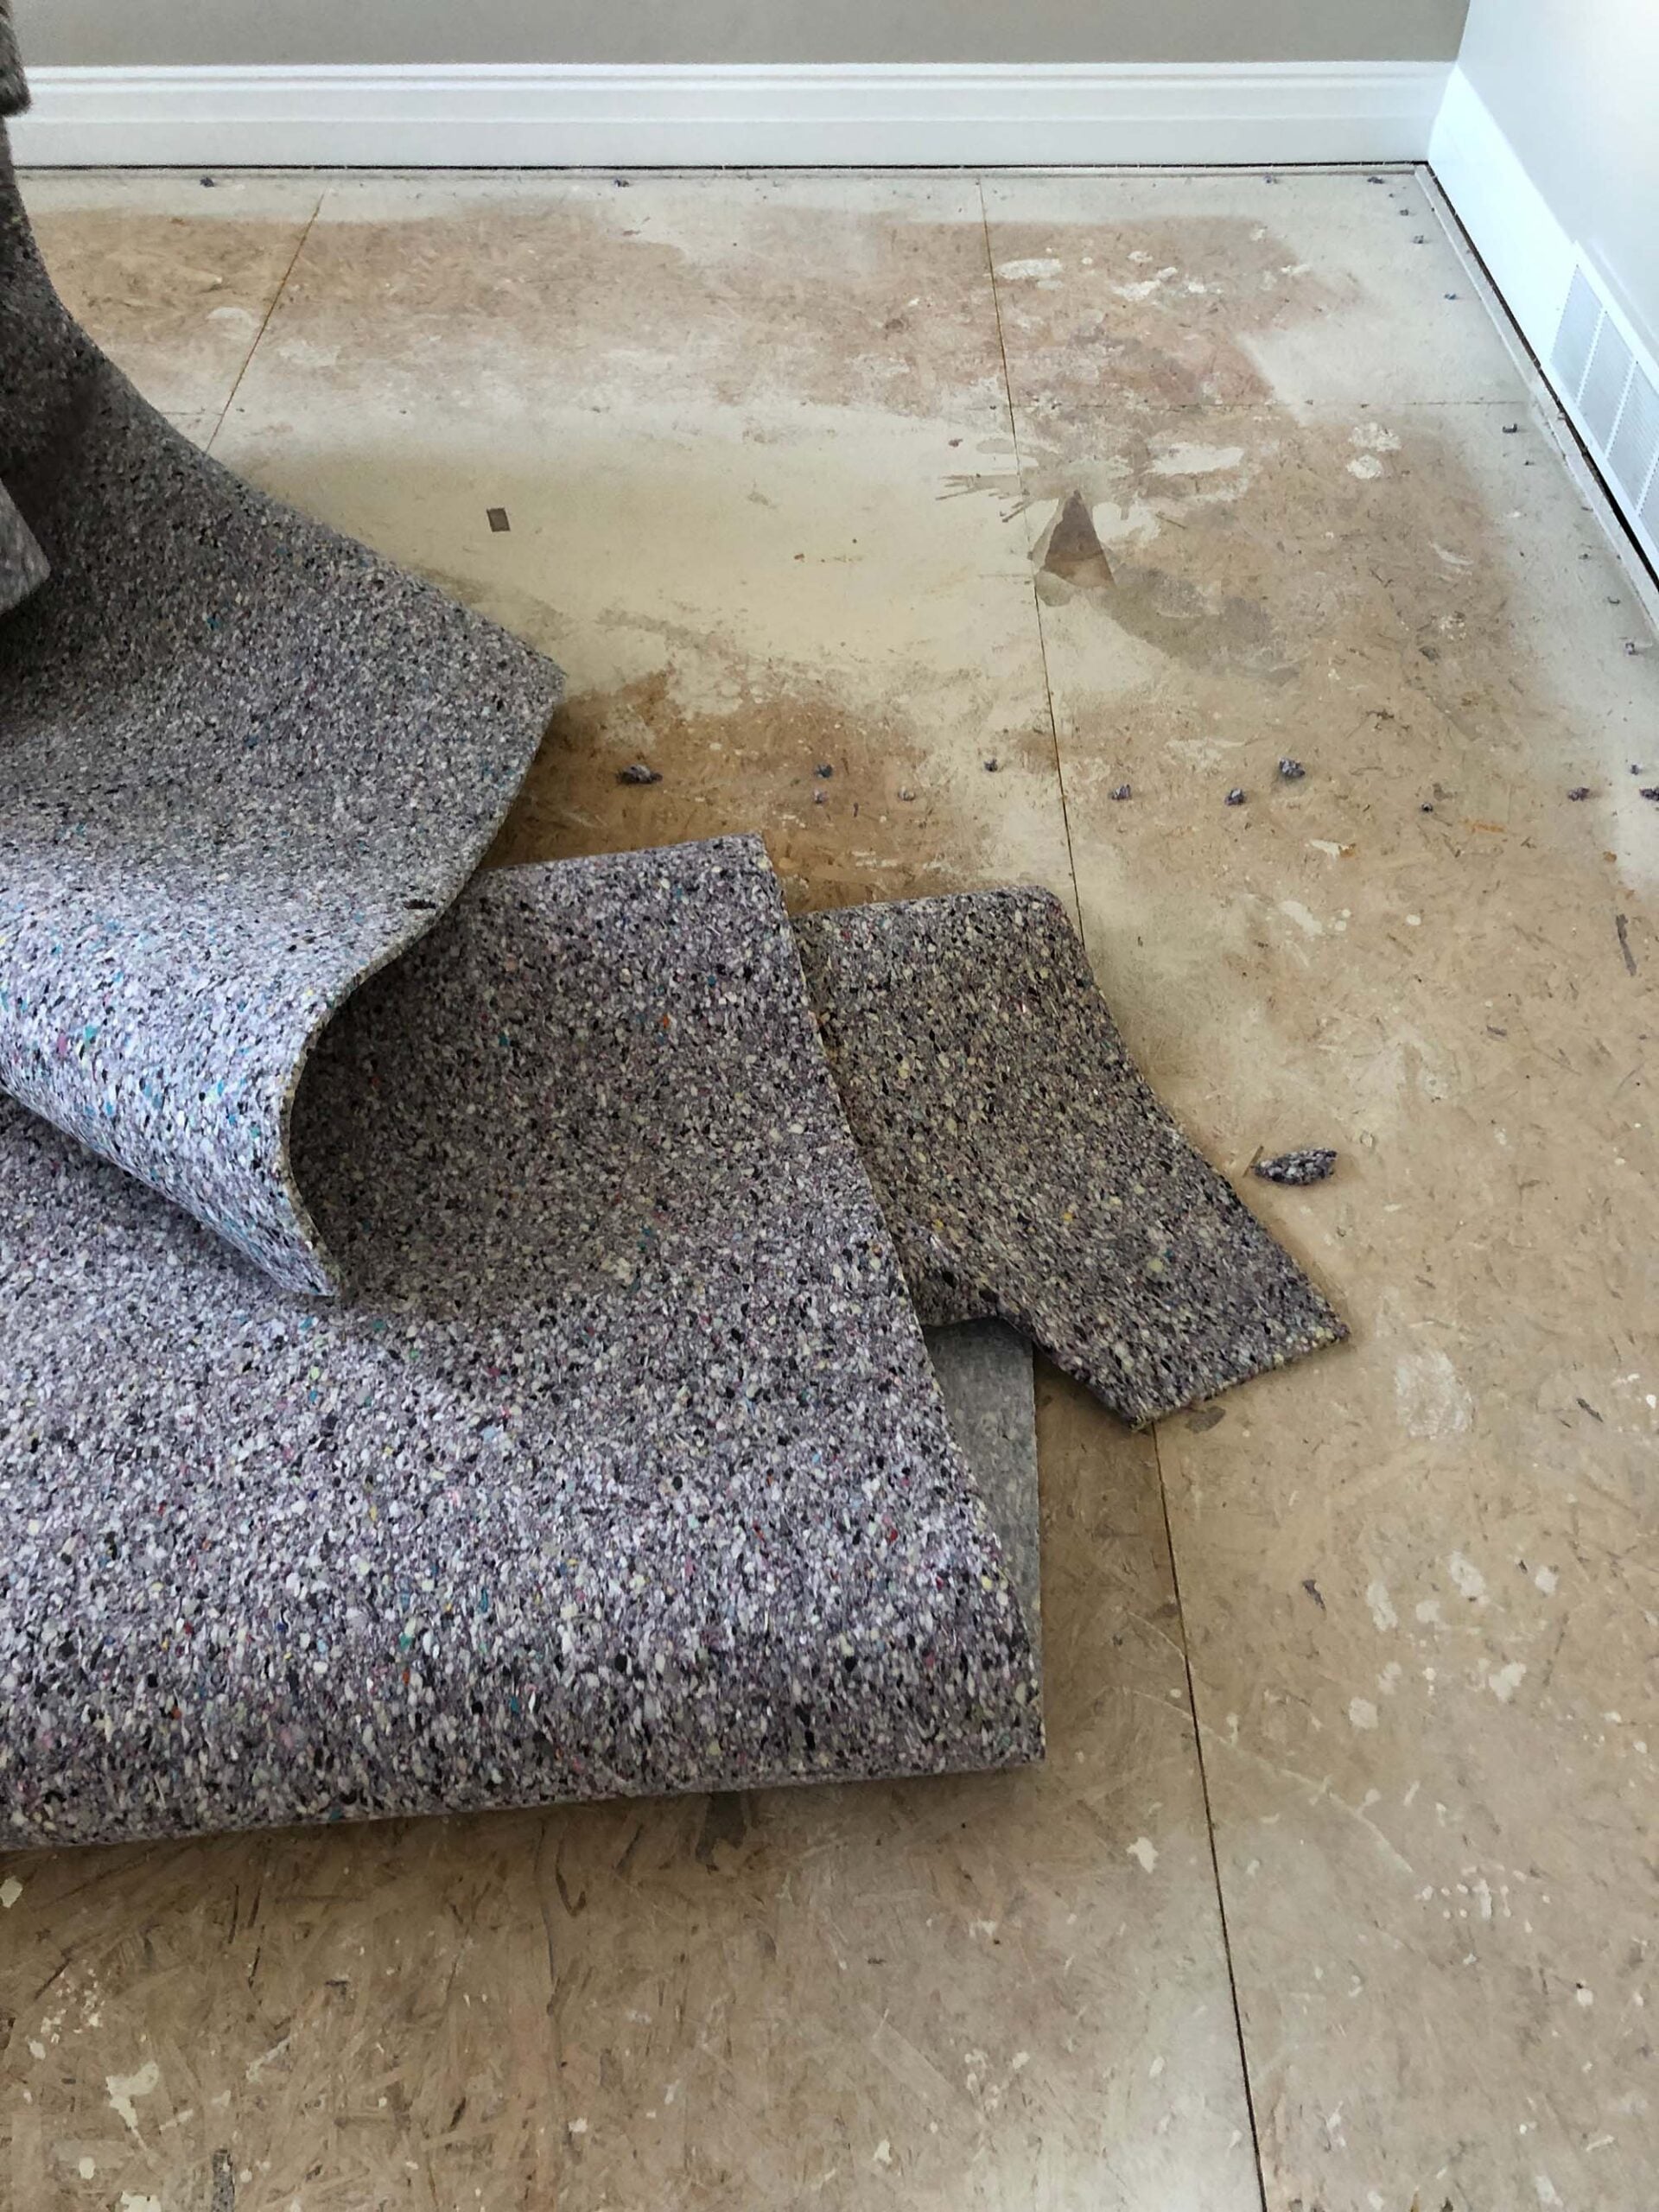
After removing the carpet, you’ll want to remove the carpet pad, as well as all carpet tacks and nails. That’s the tedious part of removing carpet. I used our Kobalt pry bar and a screw driver. It’s not difficult, just time consuming.
Step 2: Remove The Baseboard
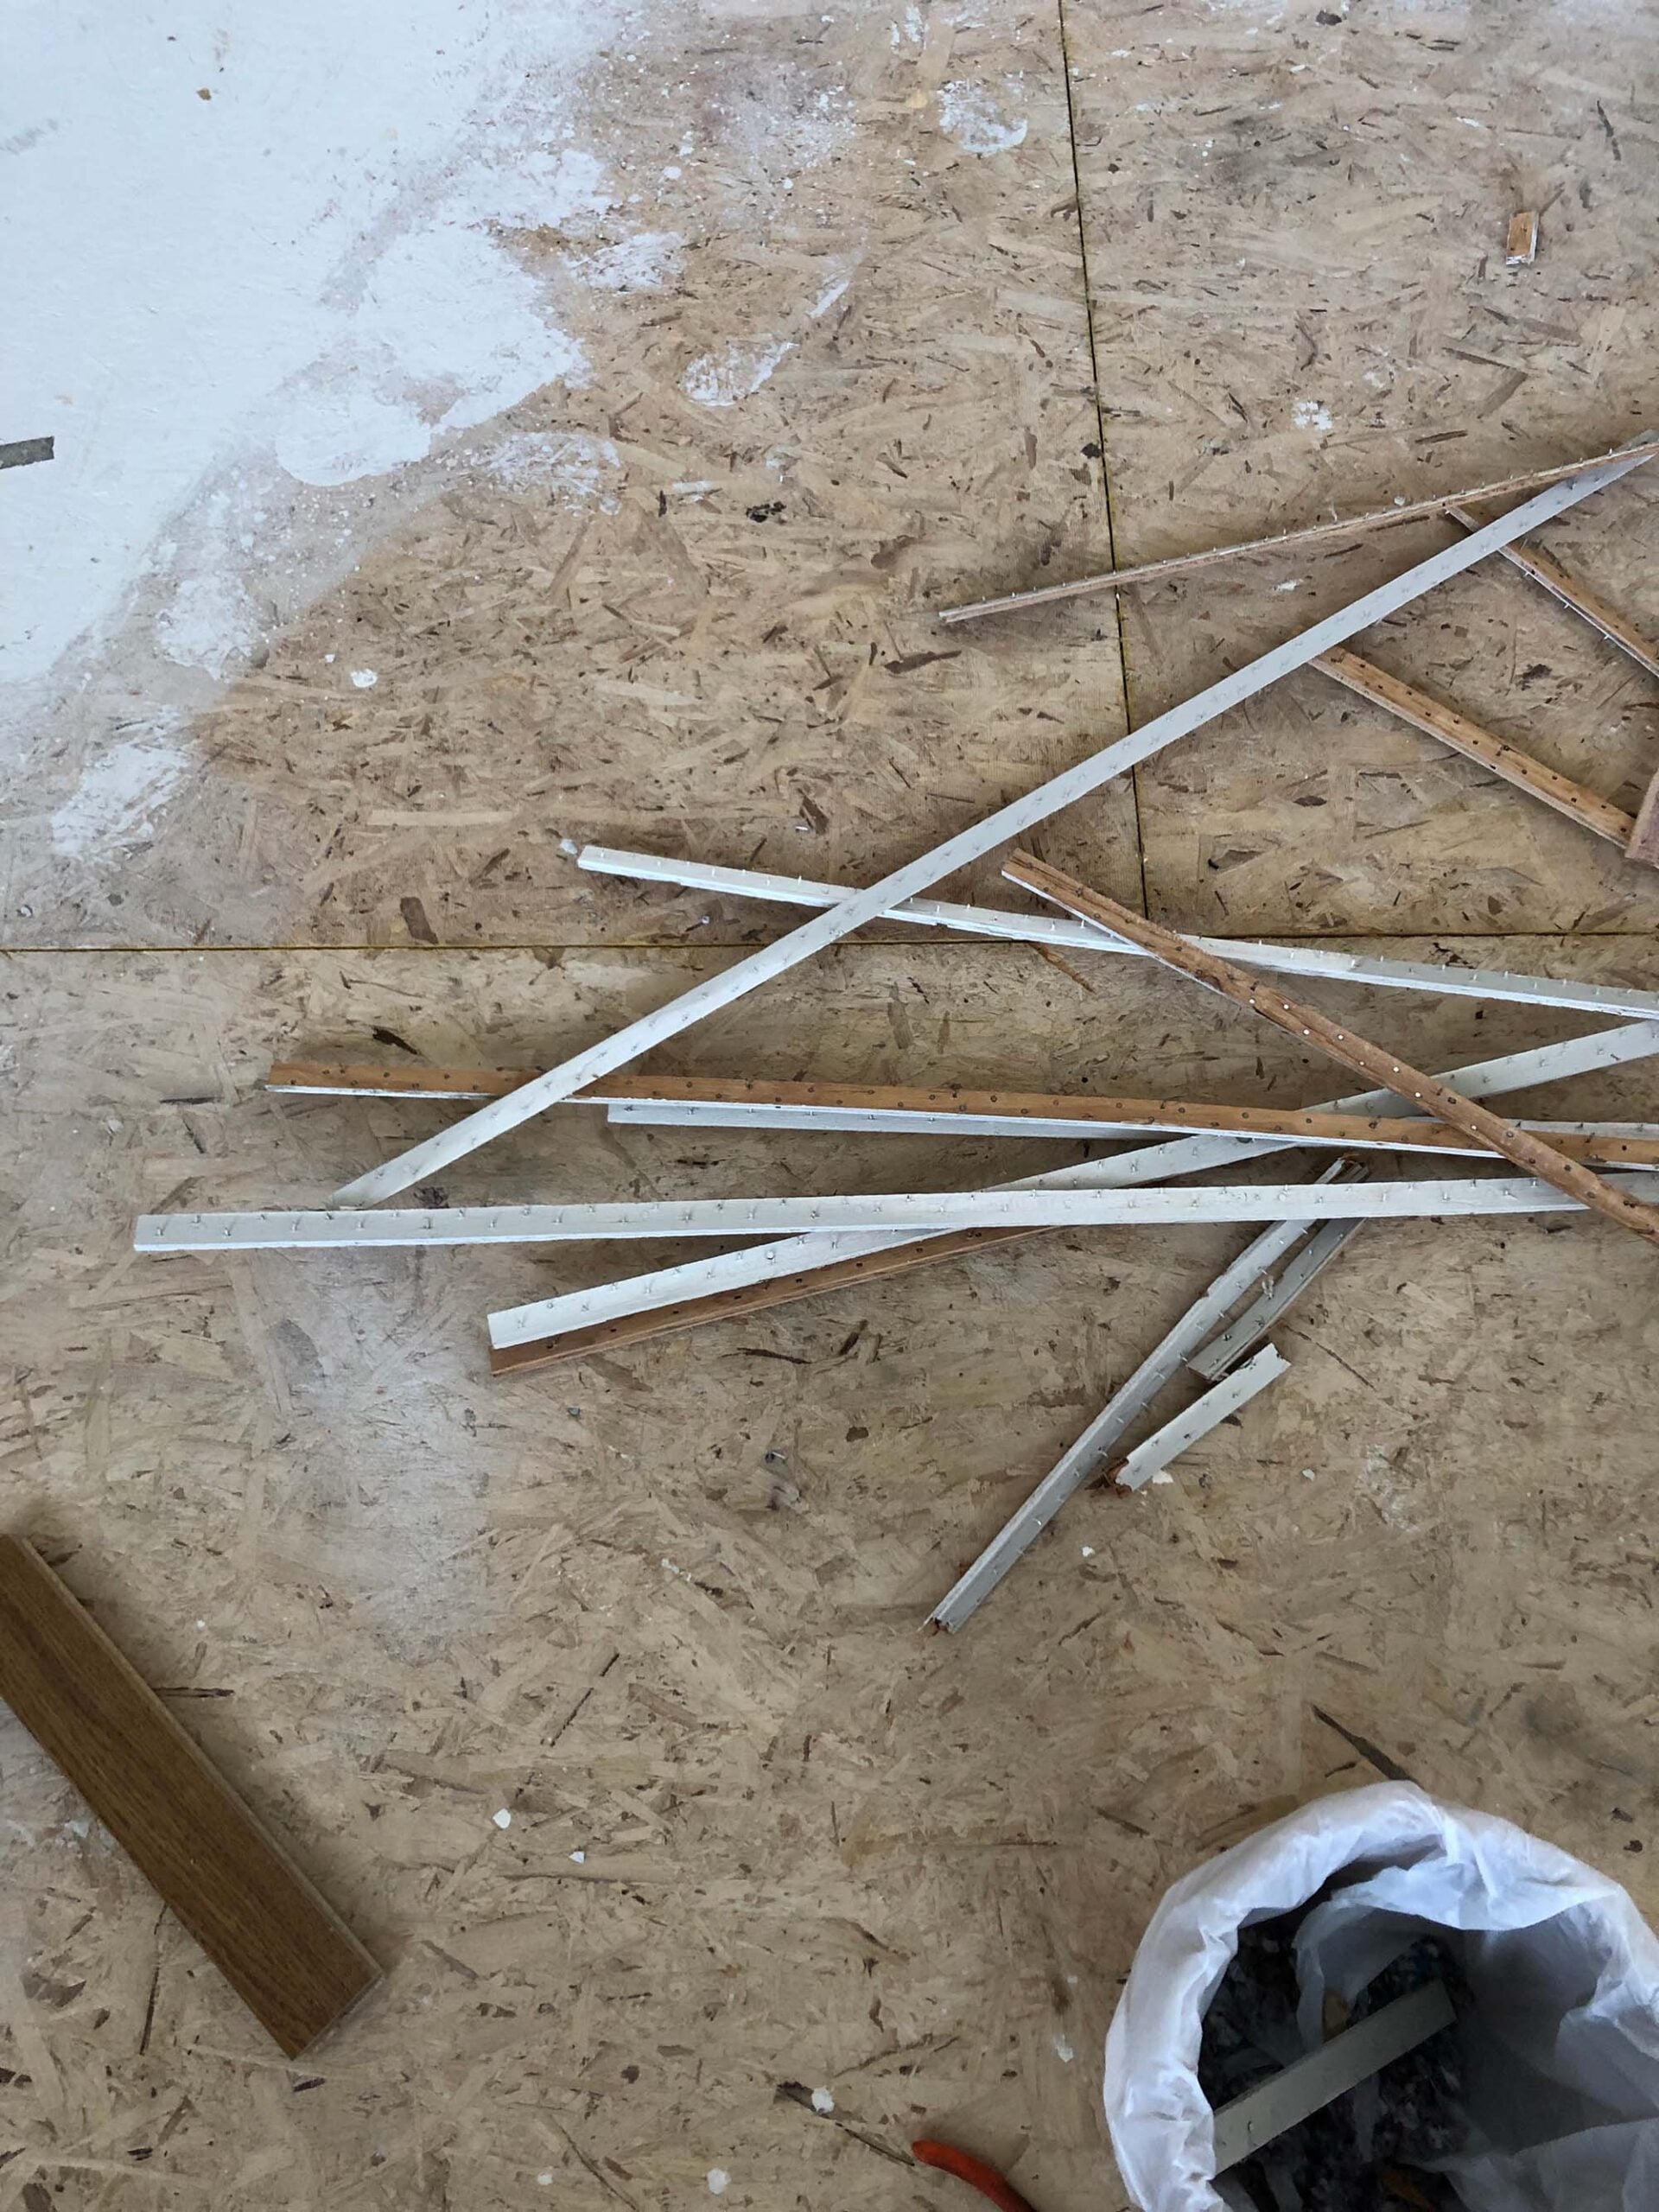
We were installing new baseboards, so we weren’t careful with those during demo. Once they were pulled off of the wall, we were ready to prep the area for hardwood.
Step 3: Install The Underlayment
Next you’ll want to unroll the roofers felt and staple it down to the subfloor. This will create a nice moisture barrier between the subfloor and hardwood.
Step 4: Establish The Layout and Find The Center of The Room.
Once you’ve determined which direction your herringbone pattern will run, you’ll want to find the center. That’s where you’ll begin, then work your way out. You can mark the floor with a chalk line or whatever is easiest!
Step 5: Create A Jig (A Template Piece) and Nail It Down
Emmett cut a piece of backer board to a 90 degree triangle that we used for a jig… a template piece. Make sure you screw the jig down so once you start laying the hardwood, it doesn’t shift. Trust me when I say, it will be VERY bad if the pattern gets off track. You’ll end up having to make a million cuts. Creating the jig may feel complicated at the time. Looking back, it was one of the smartest decisions of the entire project. The jig kept everything aligned and saved countless headaches later.
Step 6: Make The Hardwood Cuts
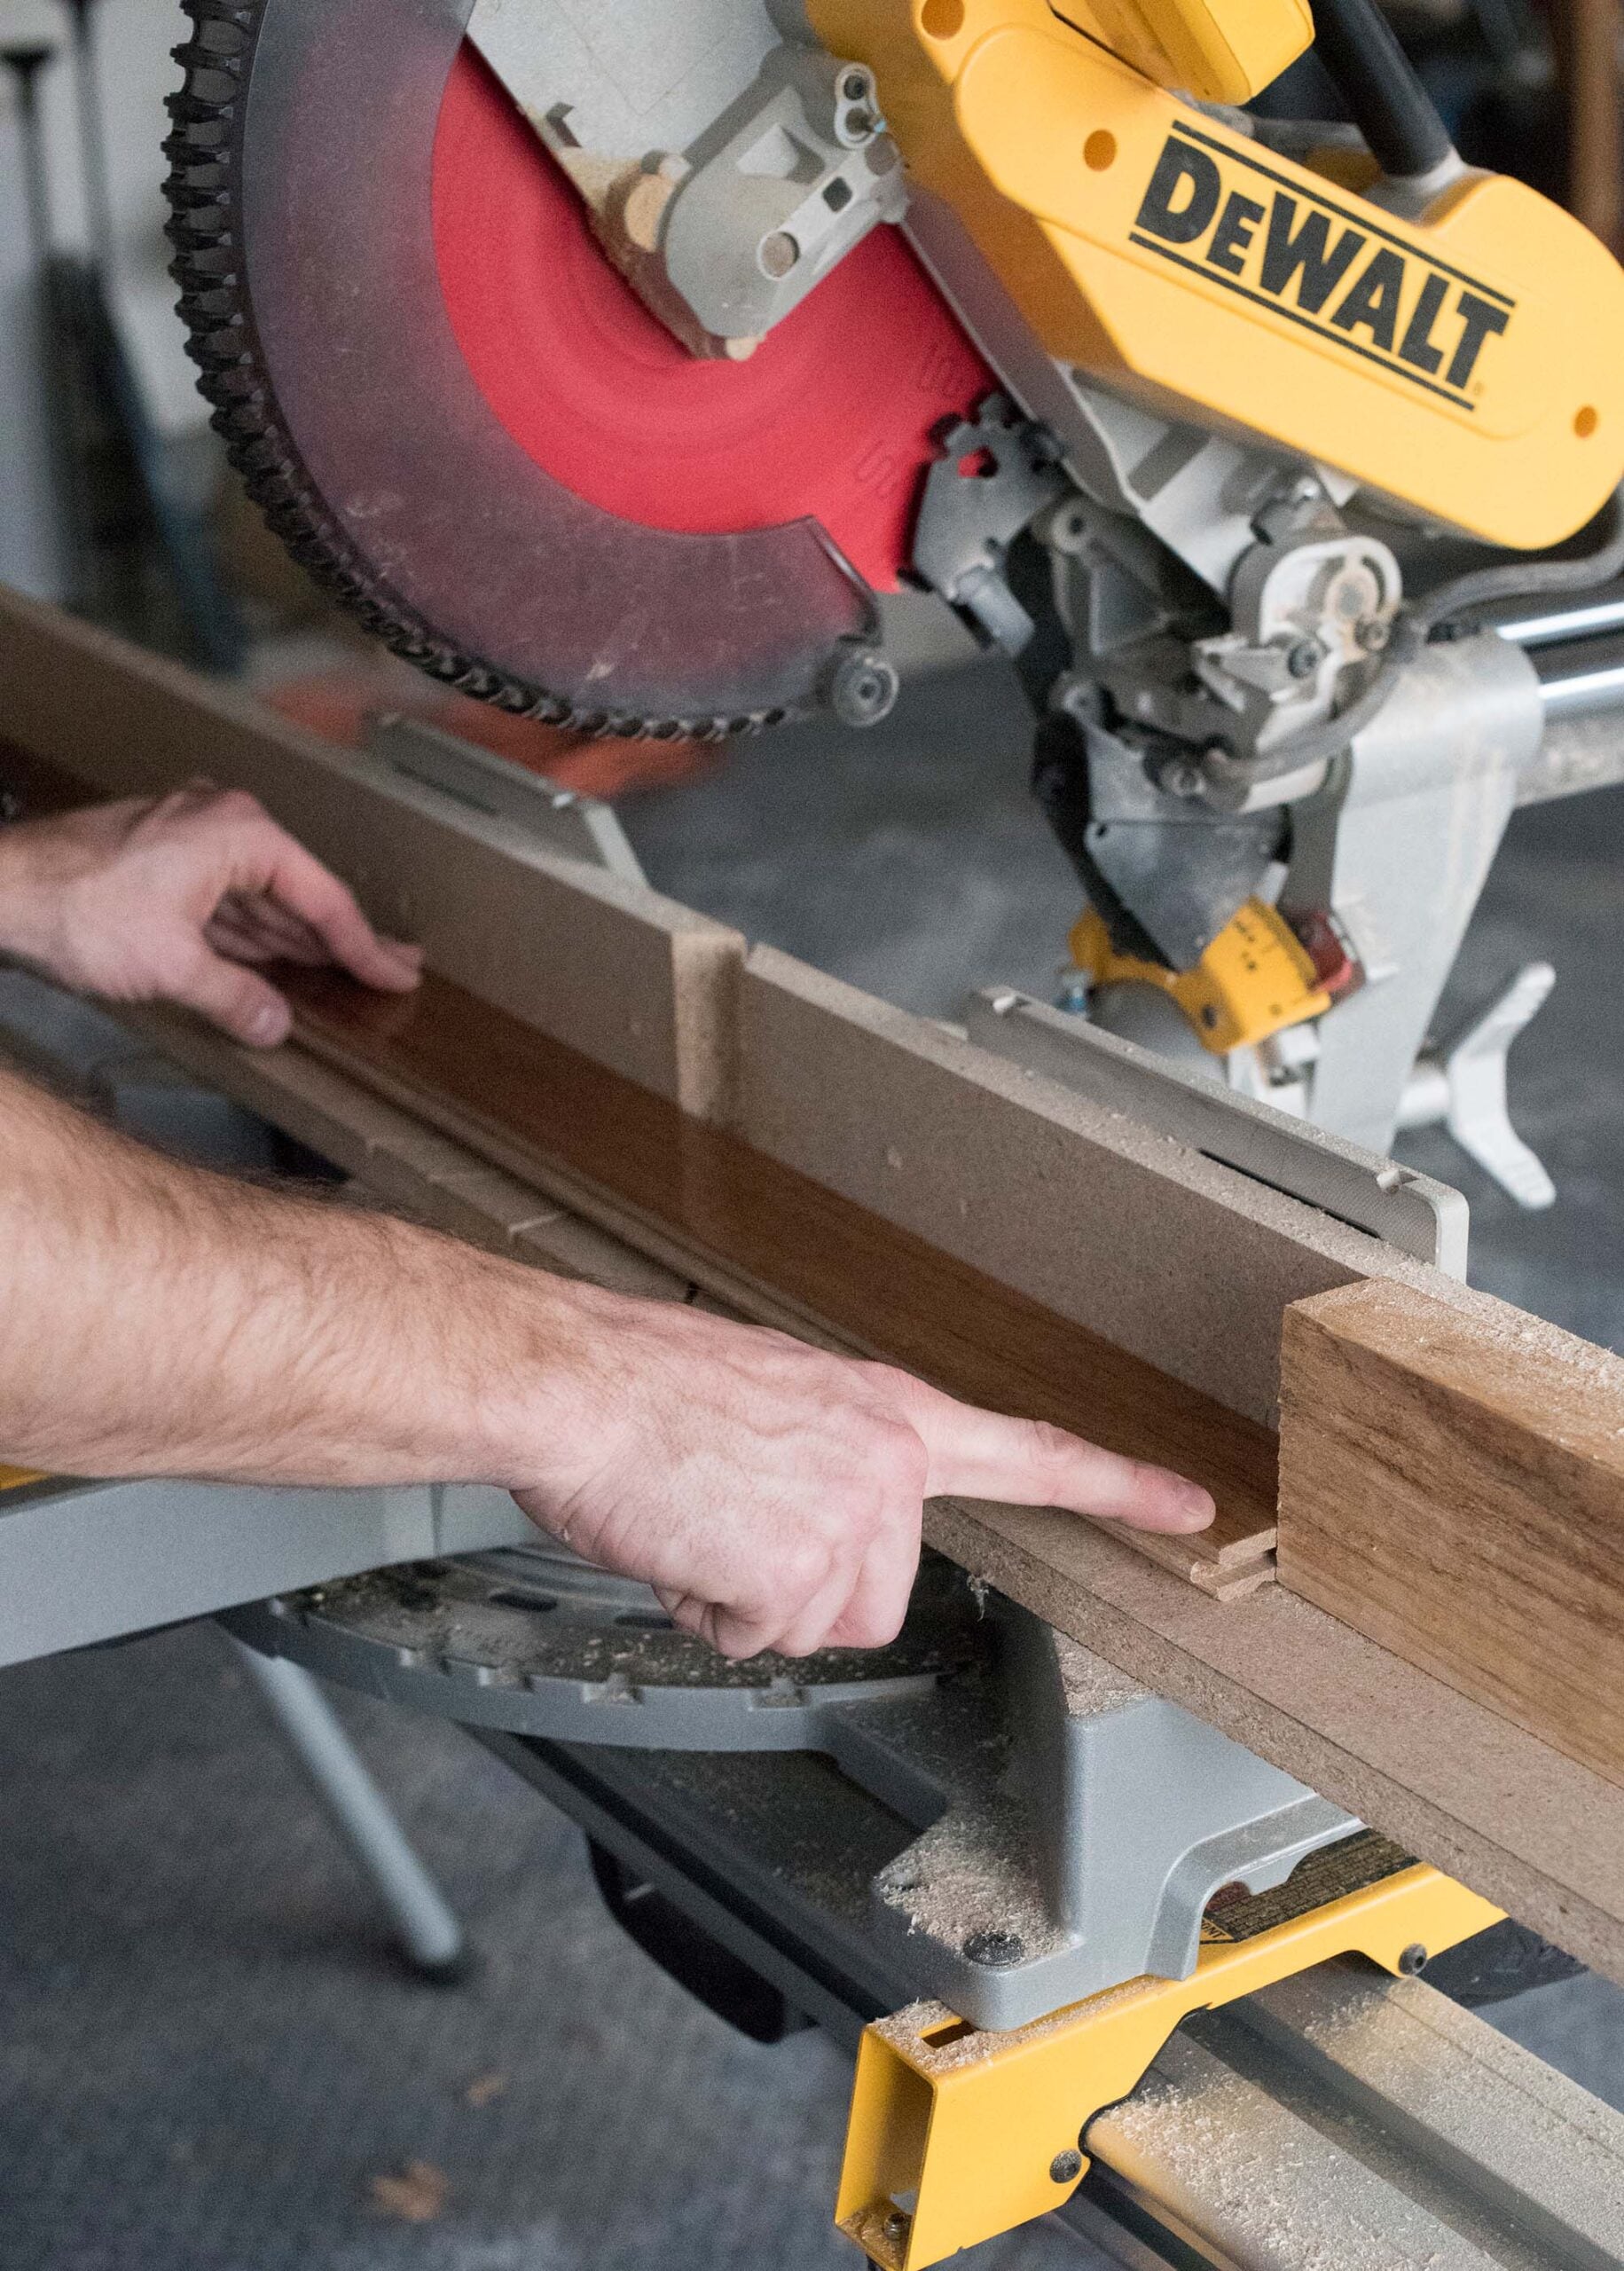
Using a circular saw (we used our existing Dewalt miter saw), cut the hardwood pieces to size. Emmett set the saw so that it would make the same consistent, precise cut for each piece…. it’s much faster than measuring each plank. He also cut an entire box at a time to accelerate the installation process.
Step 7: Router The Ends
Using a router with a tongue and groove bit, router a groove into both short ends of the plank. This ensures they lock together properly.
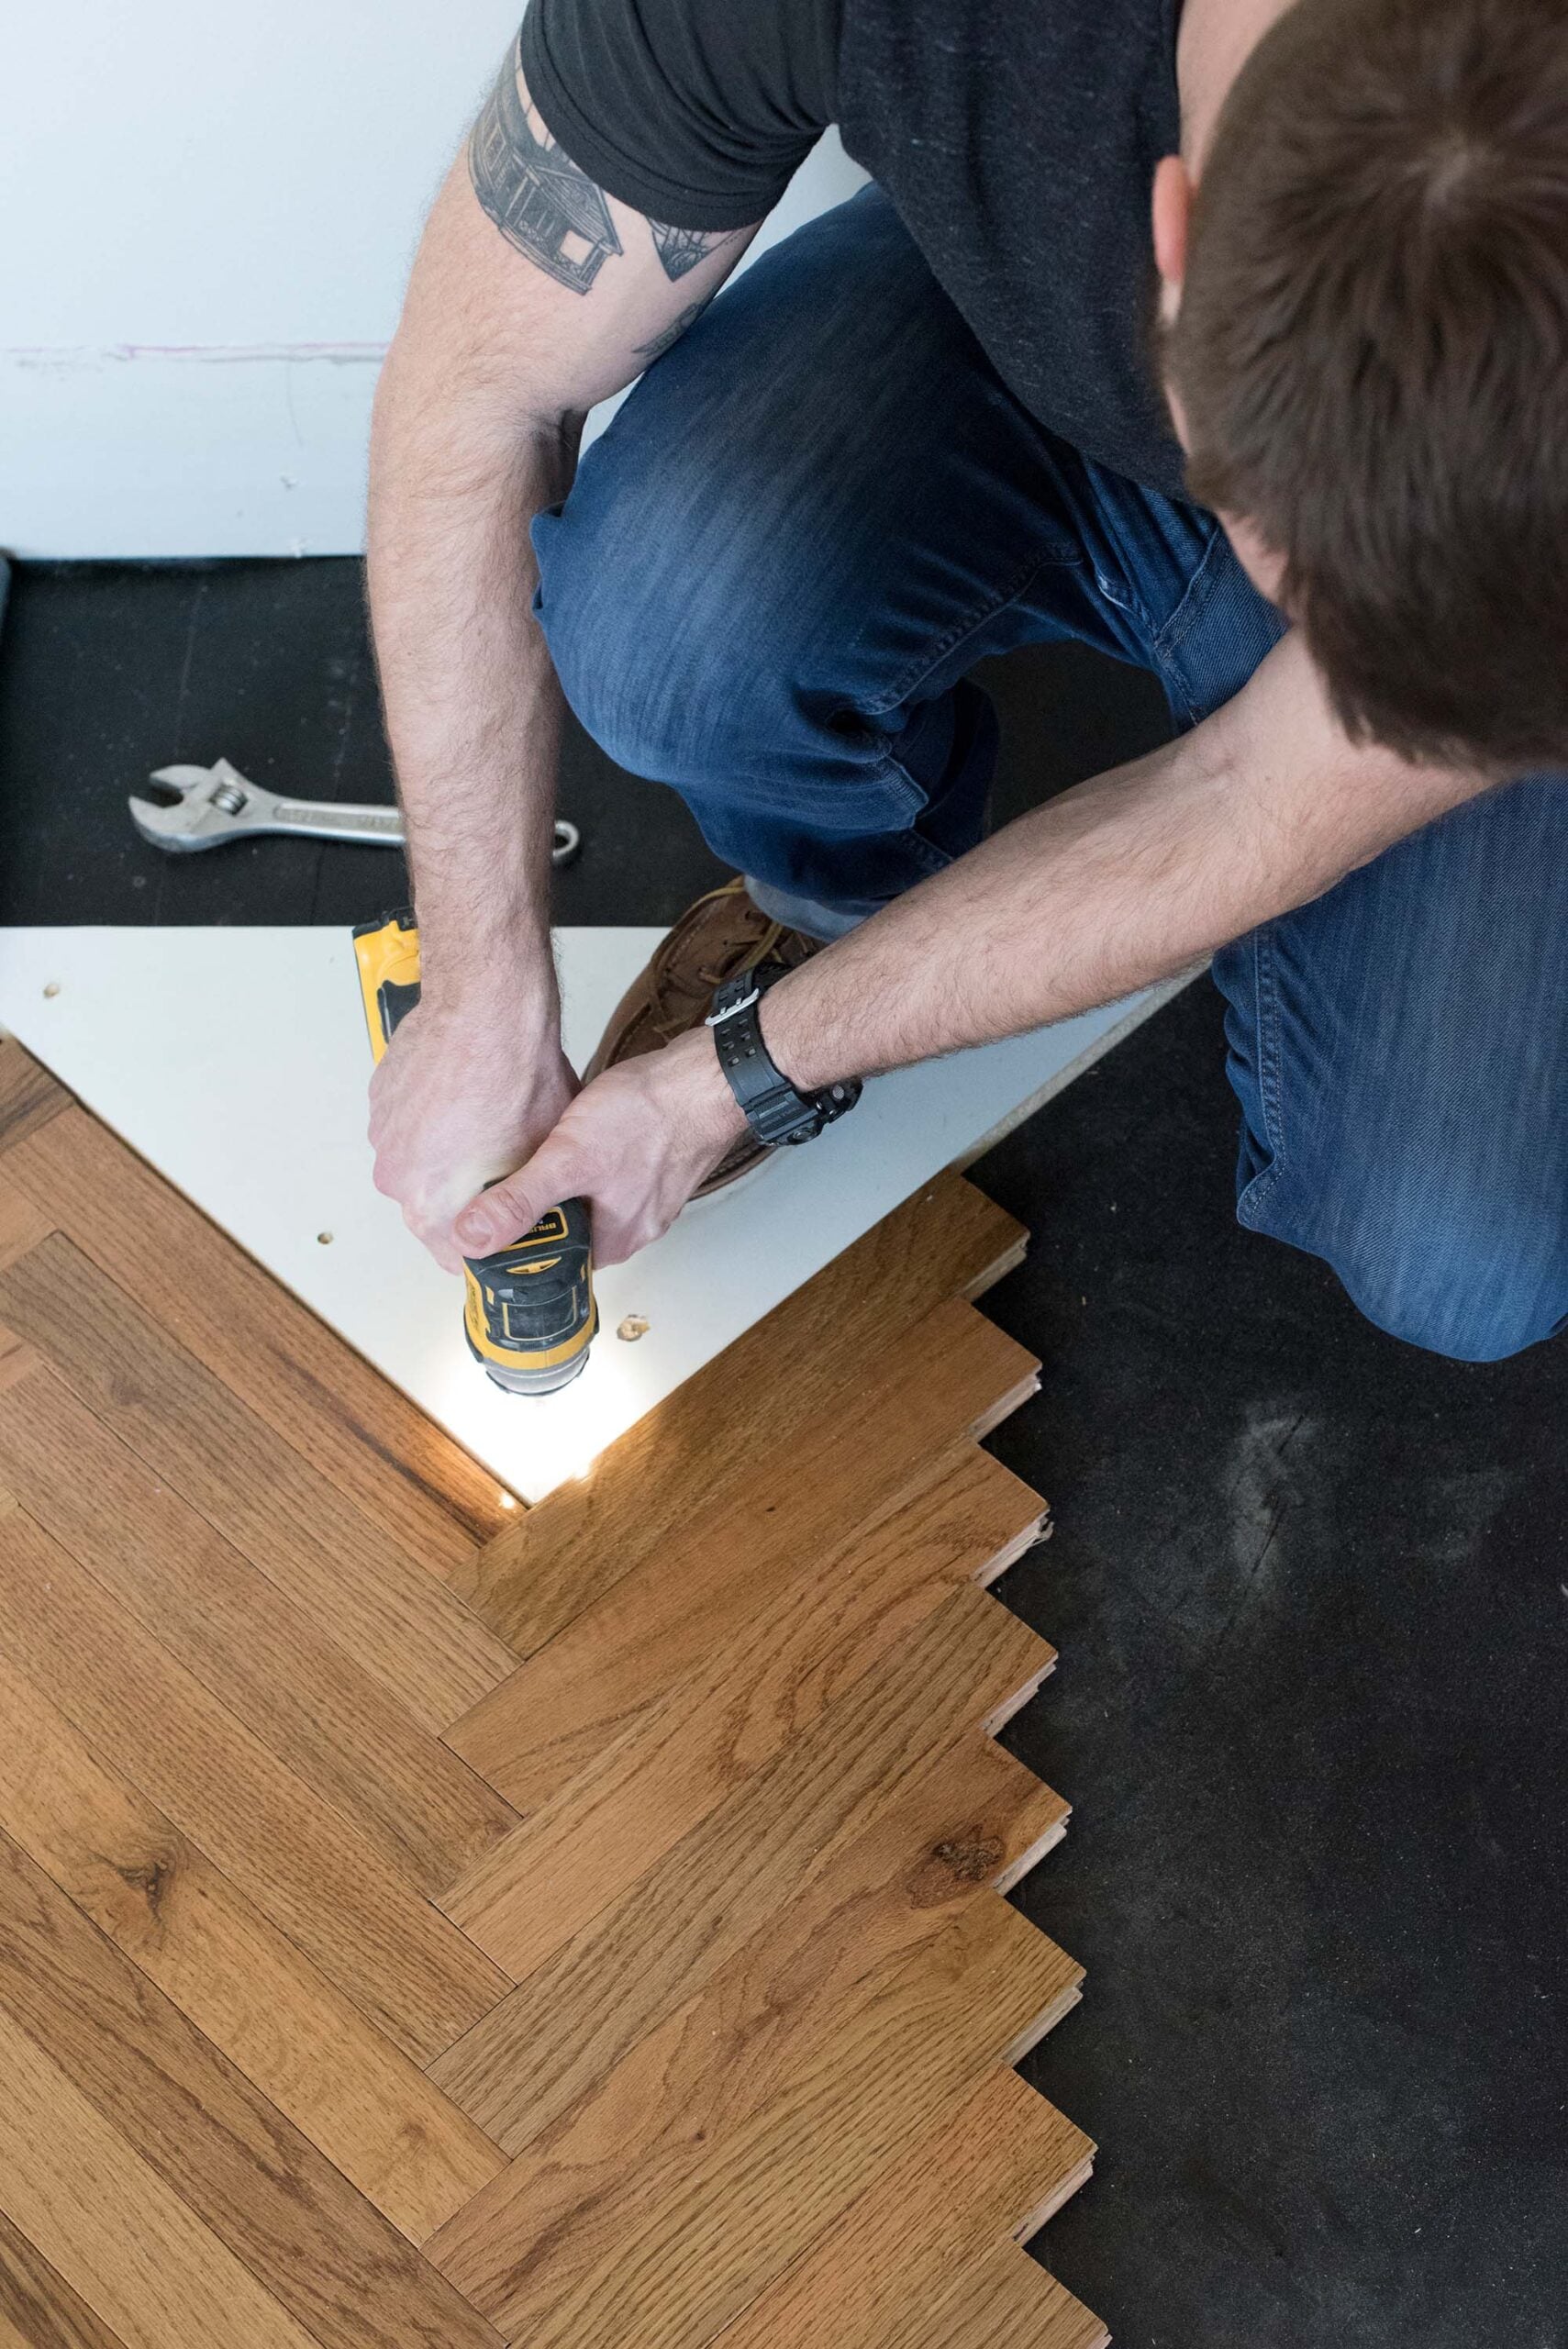
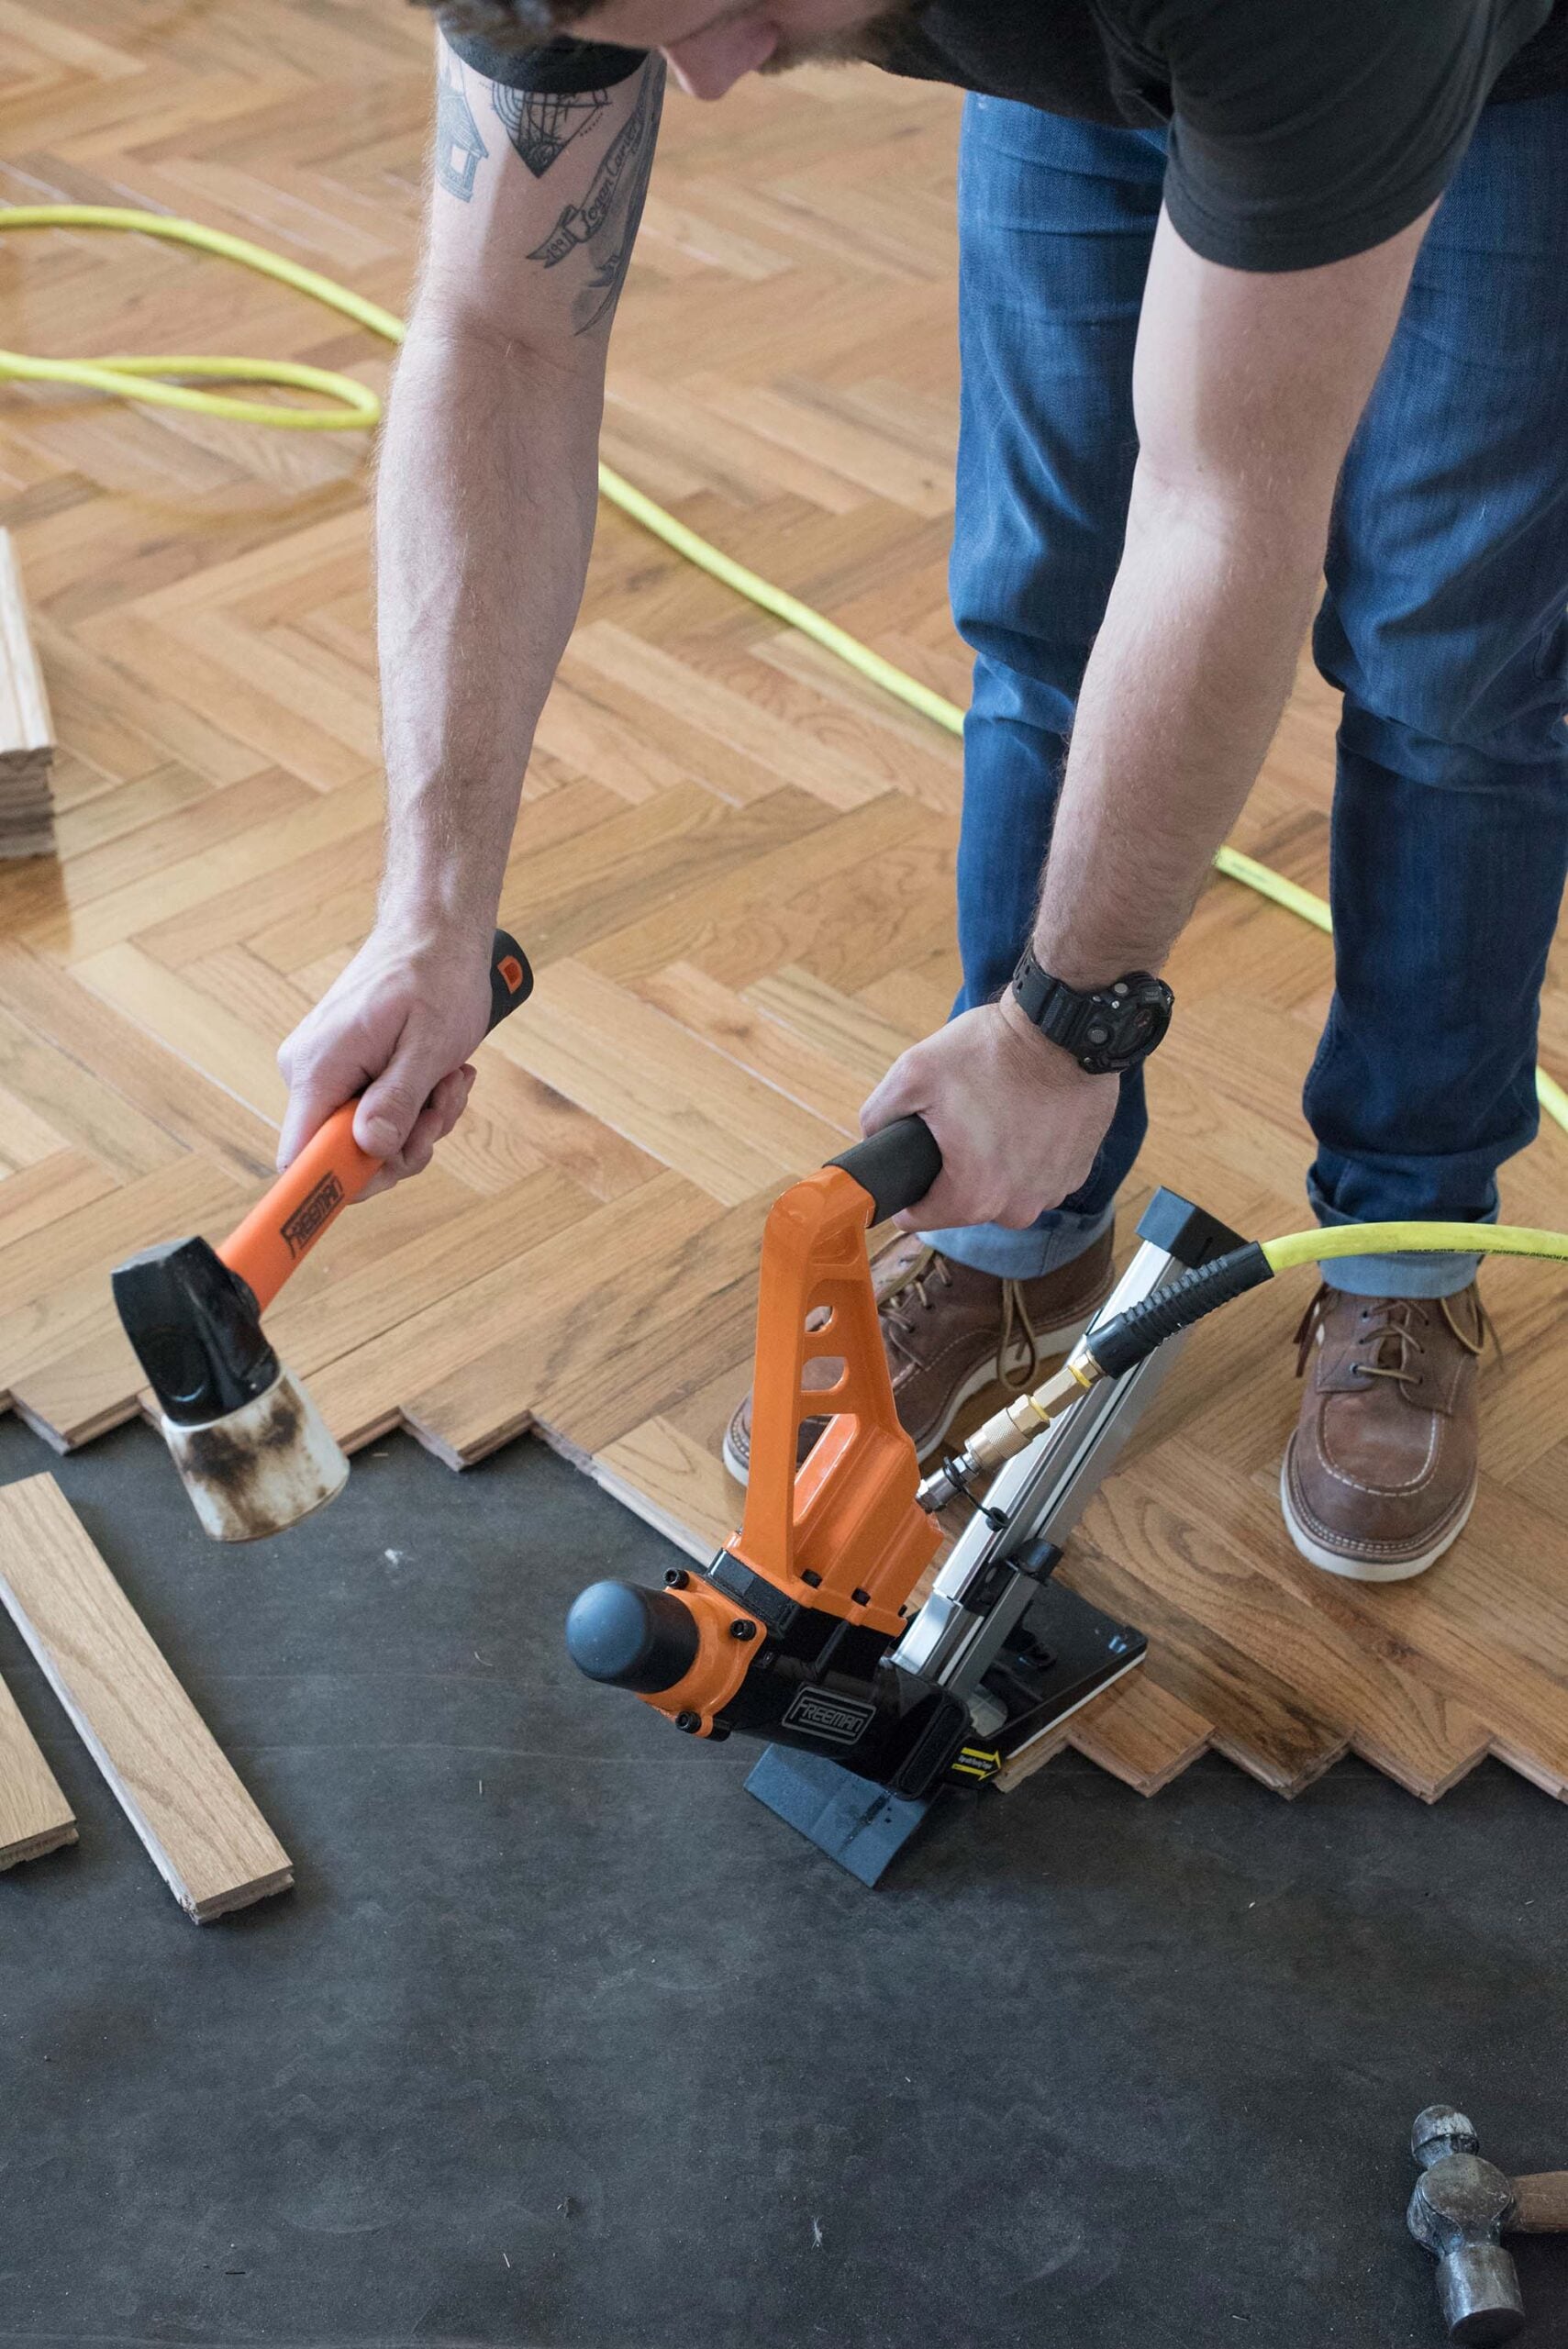
Step 8: Begin Installing The Hardwood
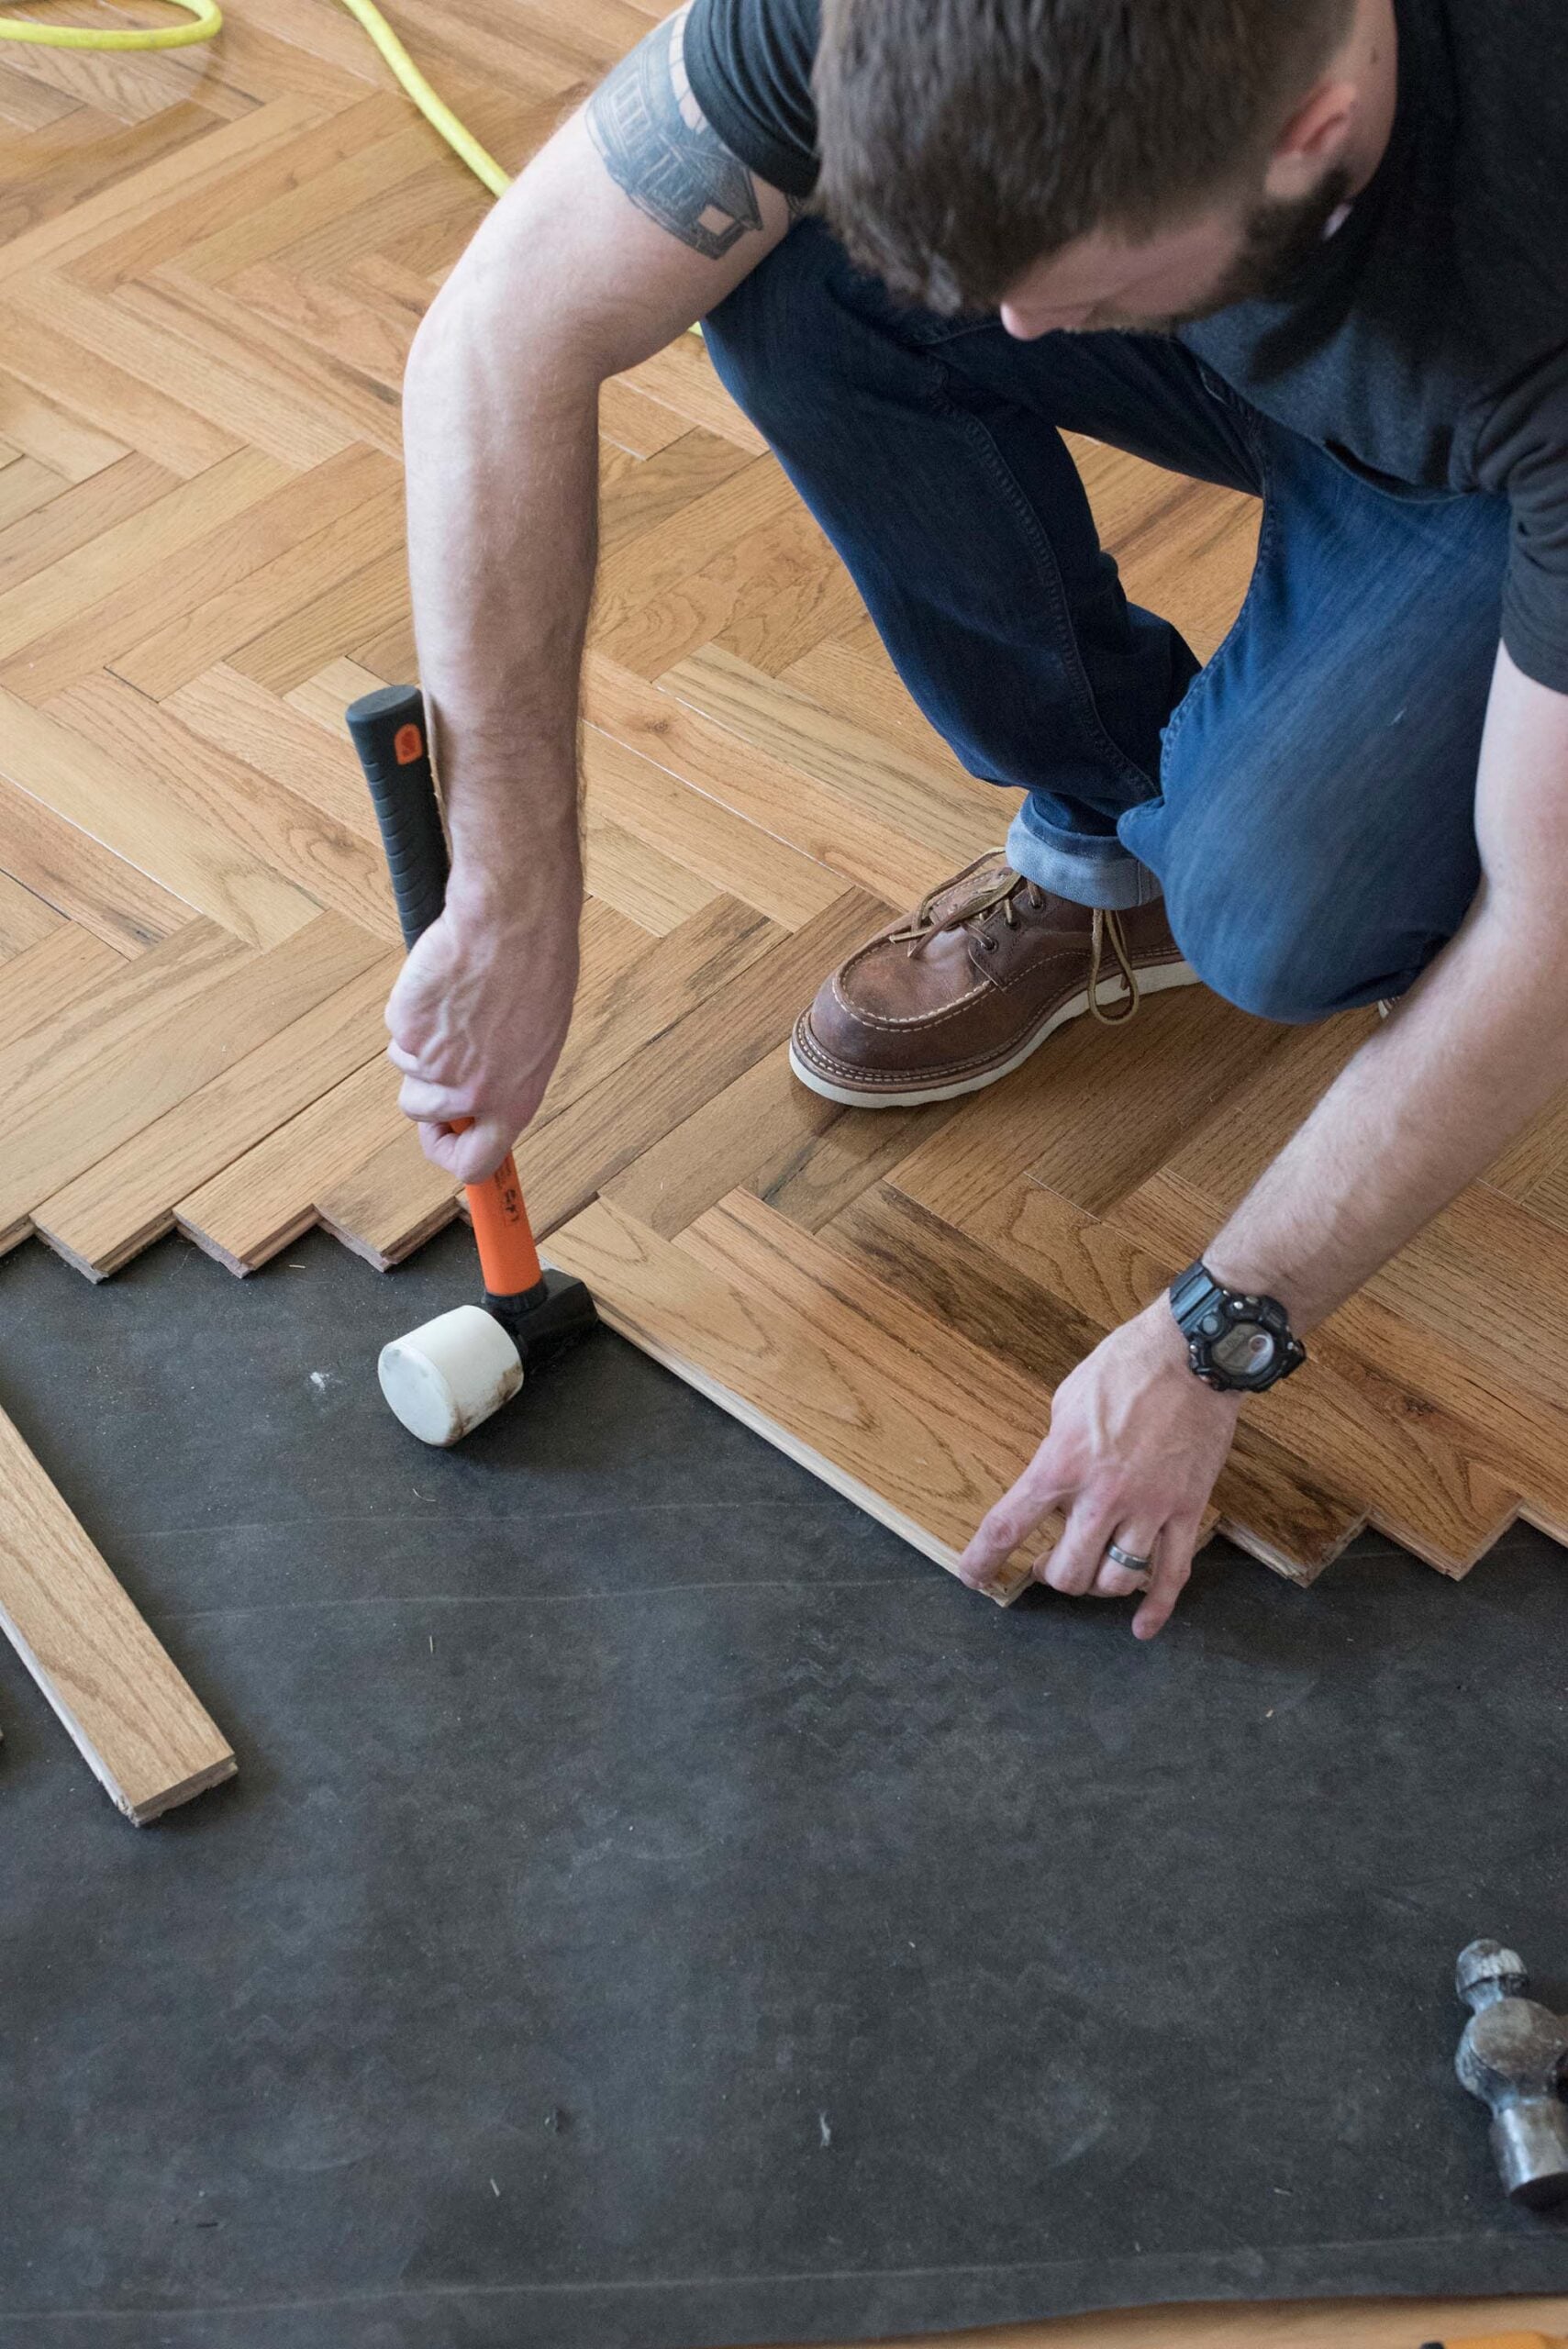
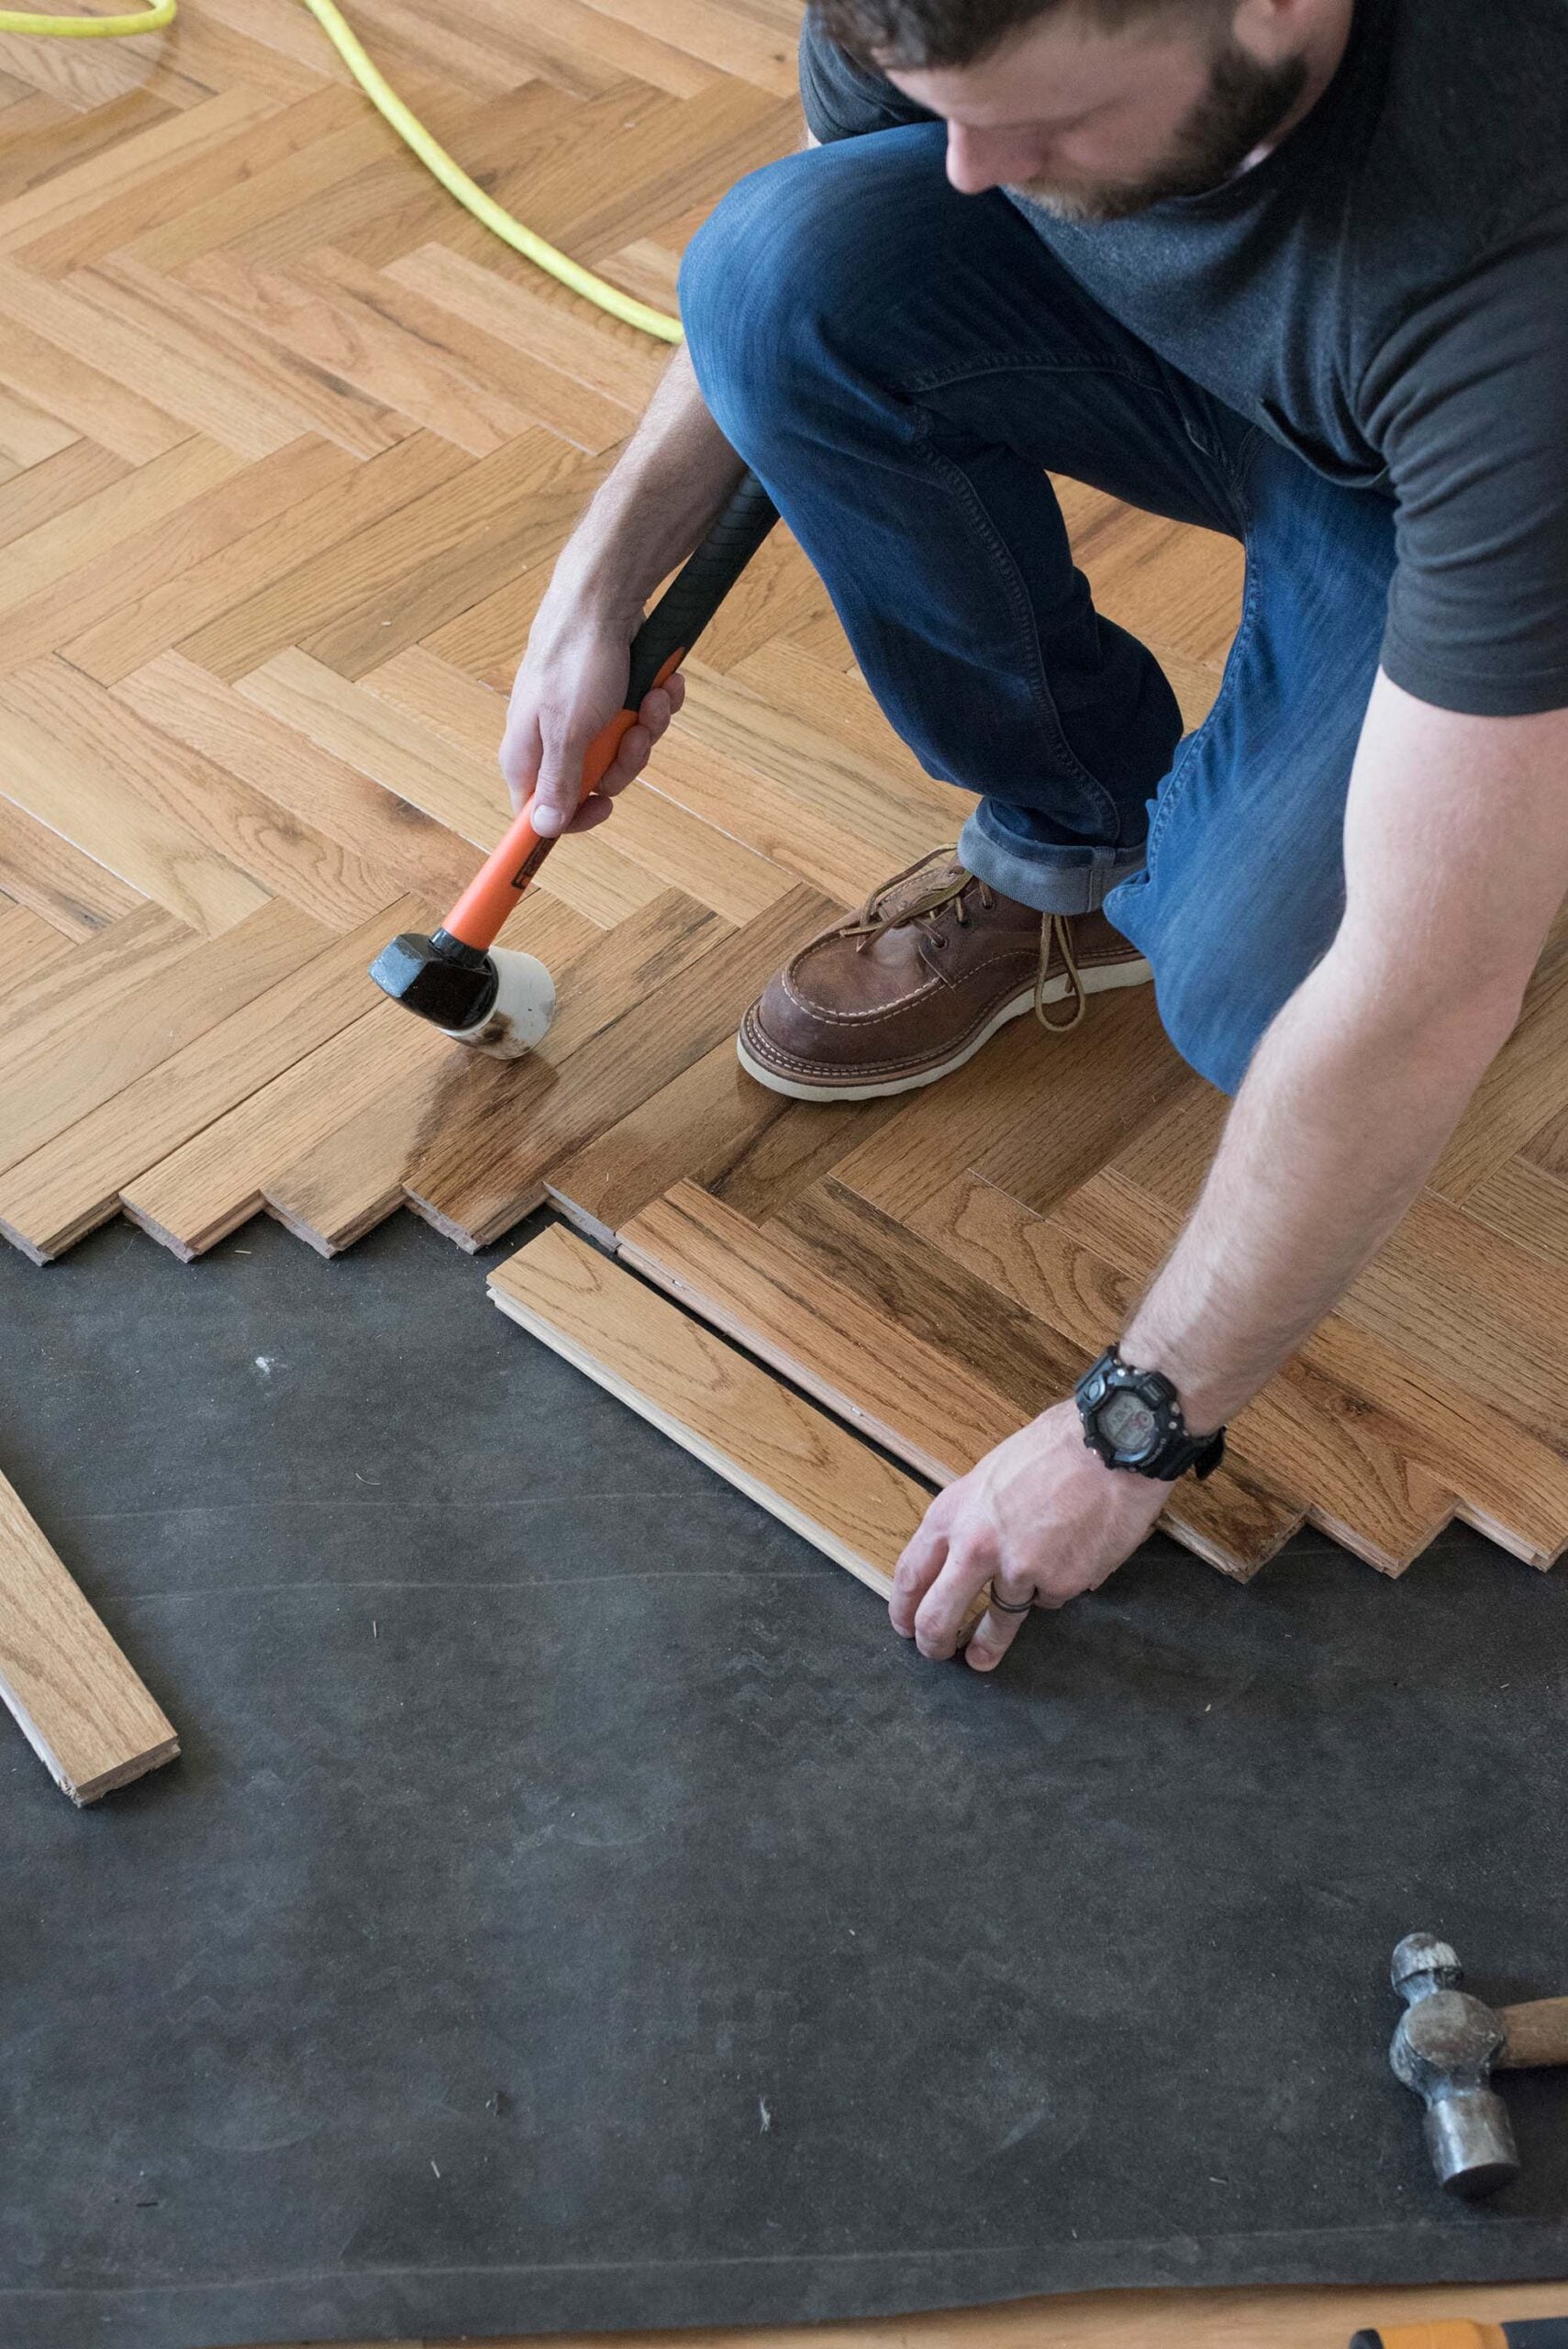
Push two pieces of wood perpendicular to each other, locking the tongue-and-groove, up against the jig. This is where the project finally became exciting. Up until this point, we’d mostly been measuring, cutting, and preparing. Seeing the pattern emerge for the first time was incredibly satisfying. Hammer them in from all sides using the rubber mallet, then secure each into place with the flooring nailer.
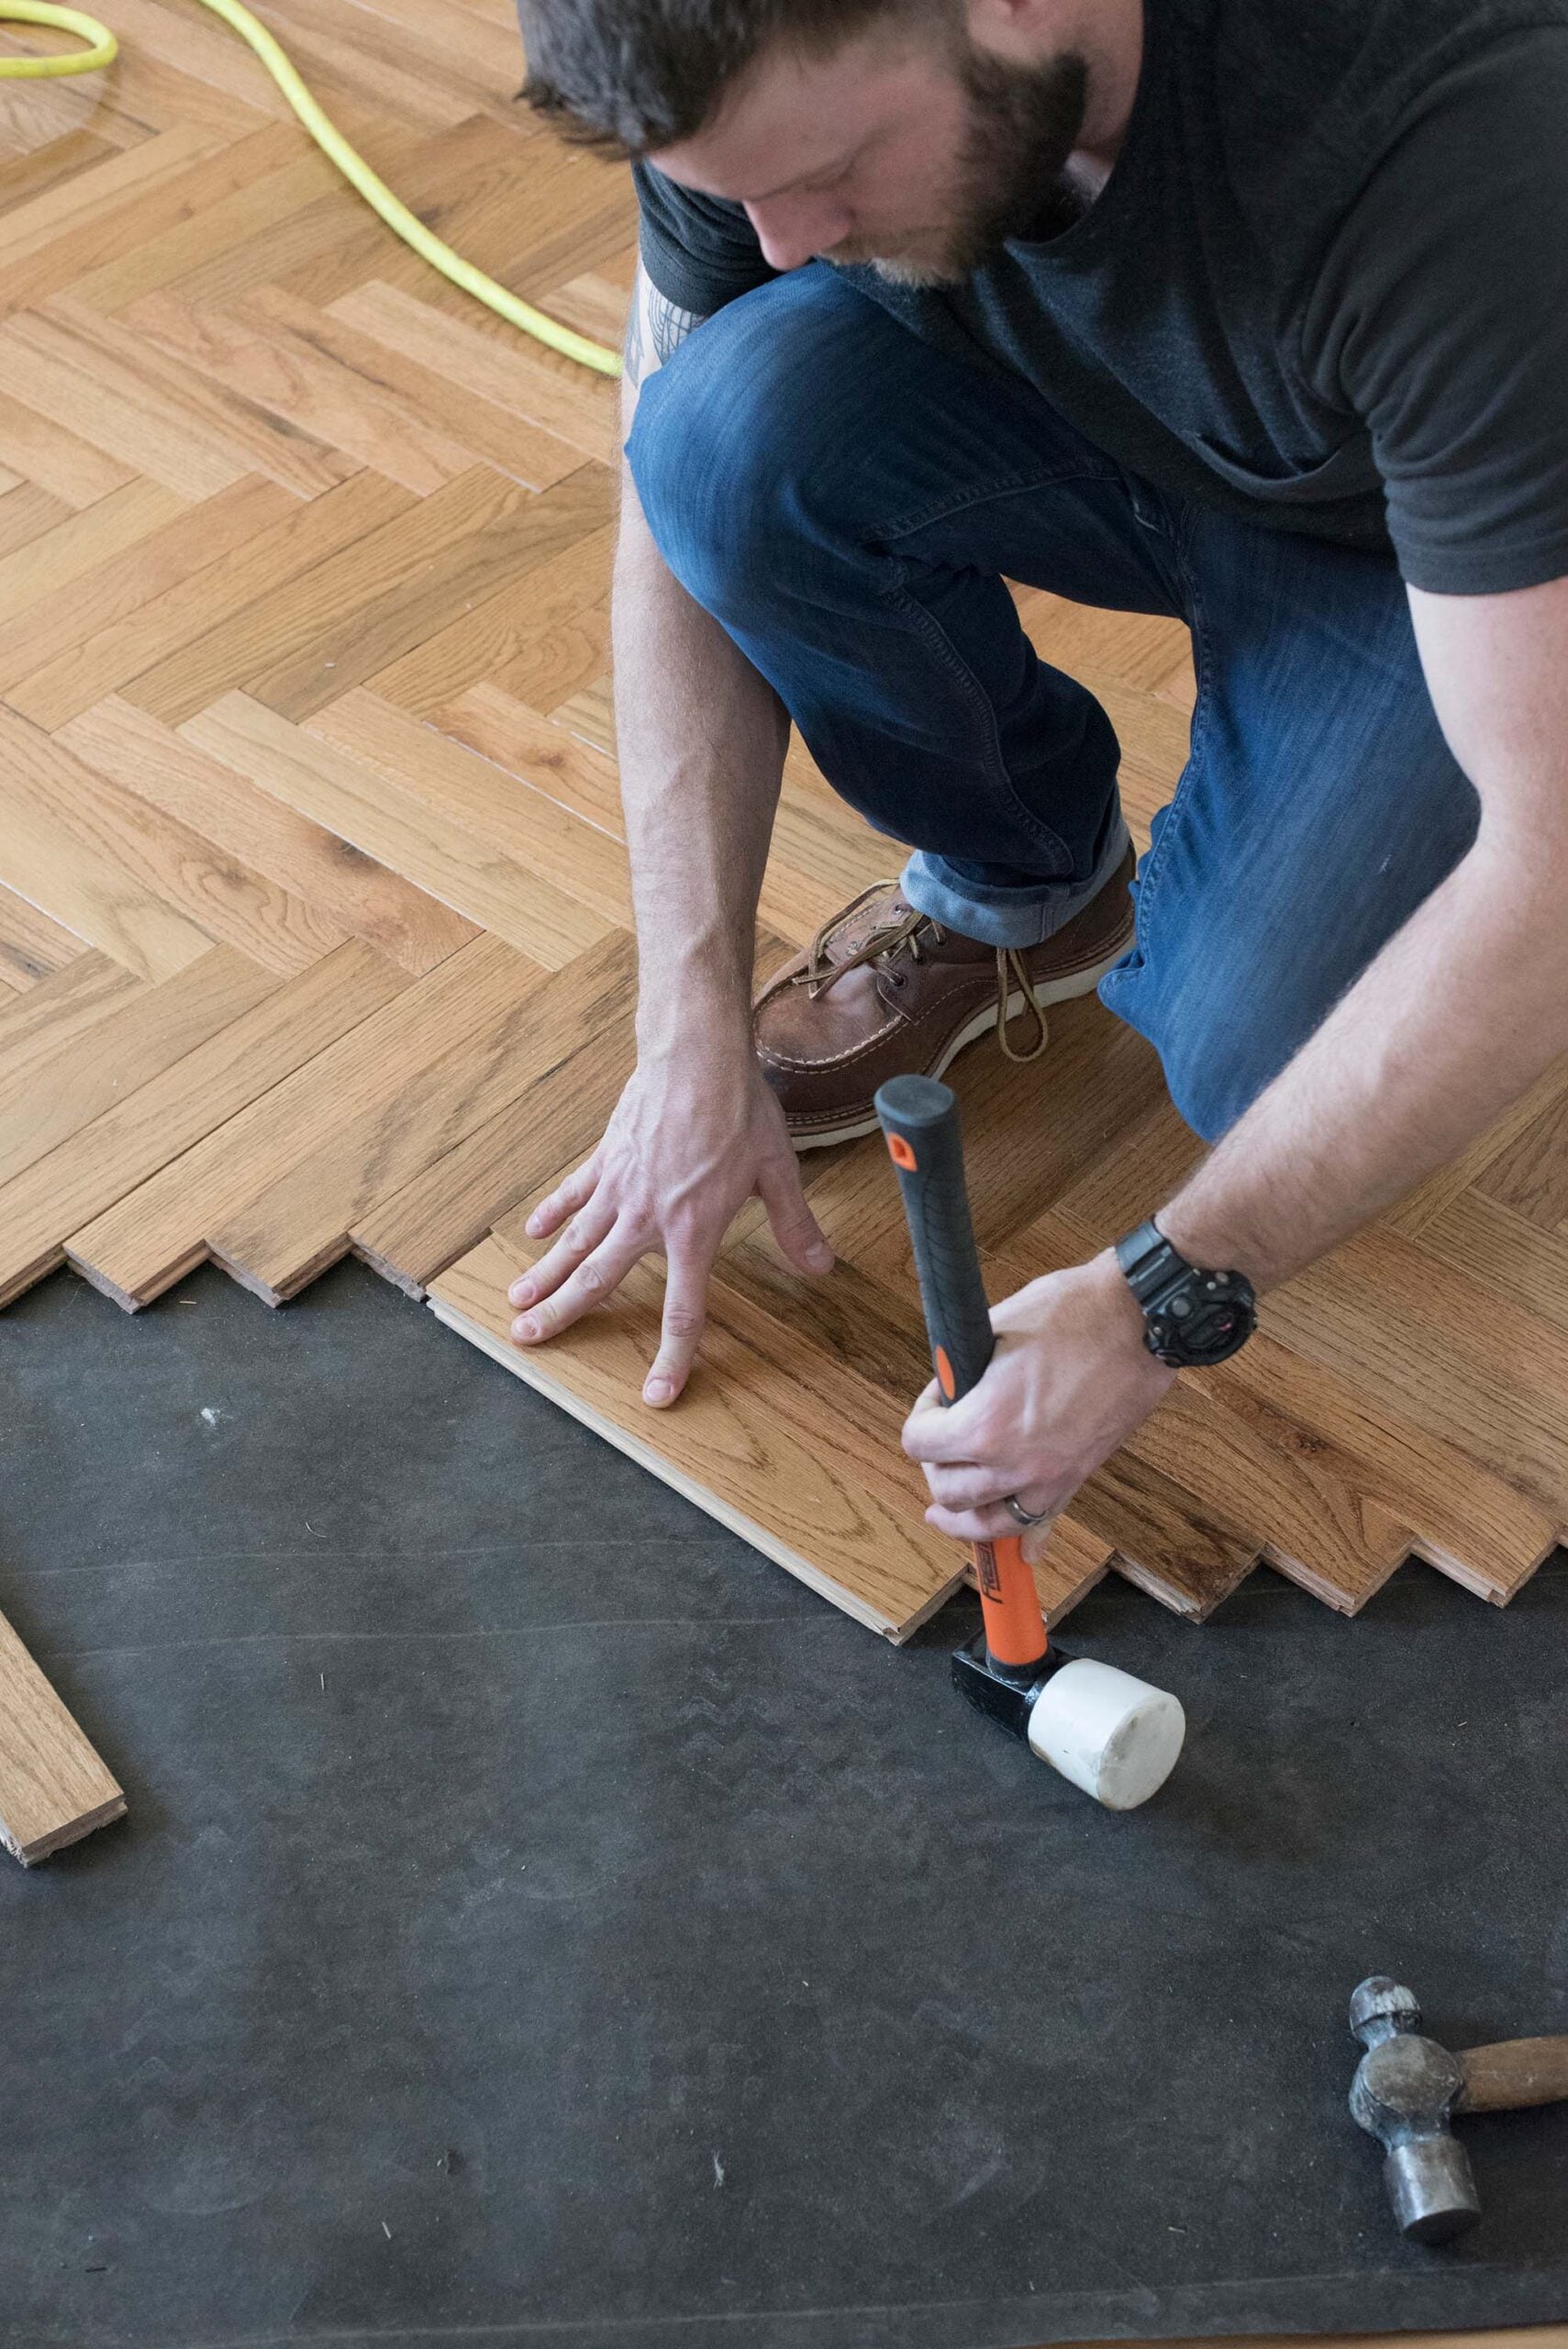
Each piece of wood gets 3 nails… one in the center and one on each end- no further than two inches from the sides. This Freeman flooring nailer is activated by hitting it on the end with the rubber mallet. It took Emmett a little practice before he started going quickly. Repeat this process until you get to the end of the row.
Step 9: Start On A New Row
Remove the jig and screw it into place on the next row. Work your way back down toward the opposing wall just as you did with the first row.
Step 10: Fill In The Corner Pieces
Once you have the majority of the hardwood installed, you’ll need to cut smaller pieces for the perimeter of the room. These can be tough to wiggle in, so you’ll want to cut them just slightly smaller, so they go in easier and allow for expansion and contraction. You don’t want them to fit super tight! This stage required the most patience. The perimeter cuts aren’t difficult, but they’re definitely less glamorous than laying the main field.
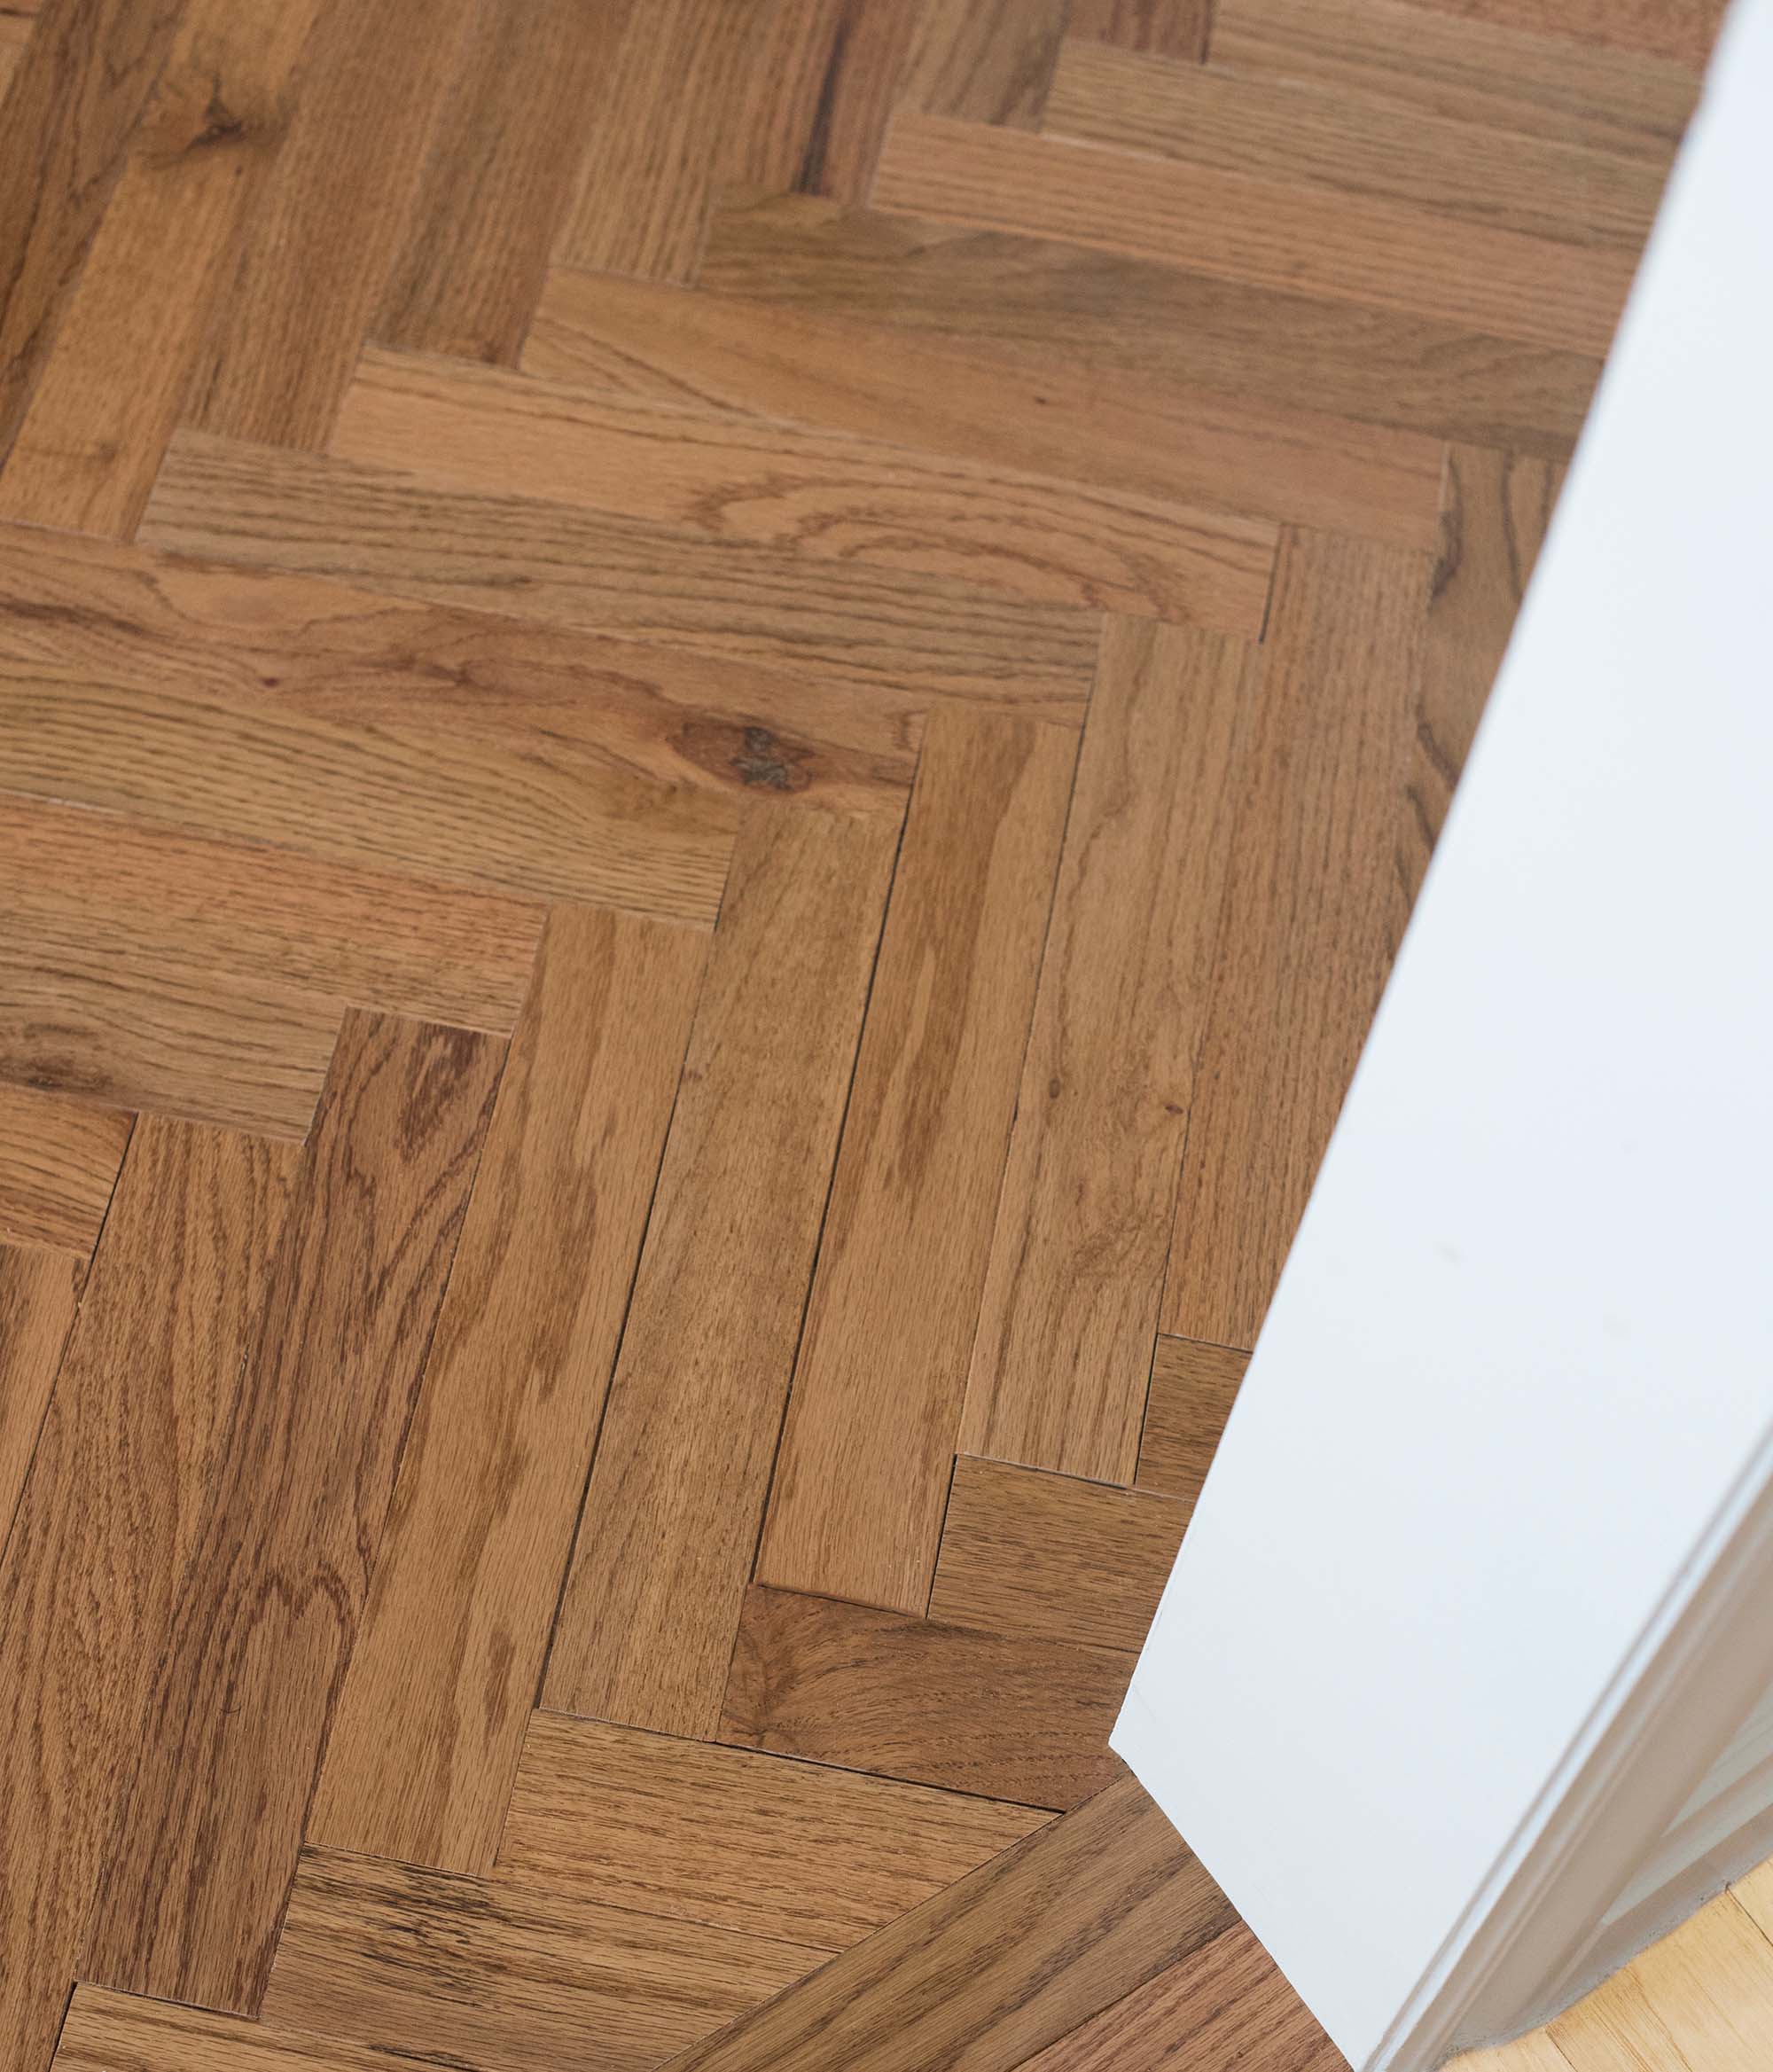
Step 11: Add Finishing Pieces
If you have a threshold or any finishing pieces, this is the time to add them. Since we tiled the entryway next to the office, we ran a hardwood threshold between the door jamb, for a finished look.
Herringbone vs Chevron Flooring
People often confuse these two patterns, but they create very different looks. Herringbone flooring uses rectangular planks that overlap at 90 degree angles. Chevron flooring uses boards cut at angles to create a continuous V pattern. While both are beautiful, herringbone feels slightly more traditional and timeless to me. Chevron tends to feel more contemporary and graphic. For older homes, traditional architecture, and classic interiors, I almost always prefer herringbone.
How Our Herringbone Floors Have Held Up
One of the biggest advantages of writing this post years later is being able to share how these floors have actually performed in a real home. We have dogs. I work from home. We entertain. We live here. The floors have developed the kind of natural wear that gives hardwood character. Yes, there are scratches (here is how to remove scratches from hardwood floors), there are signs of everyday life, and none of them bother me. In fact, I think they look better today than they did when they were brand new. Natural materials tend to age gracefully. These floors are proof of that!
Cleaning and Maintaining Hardwood Floors
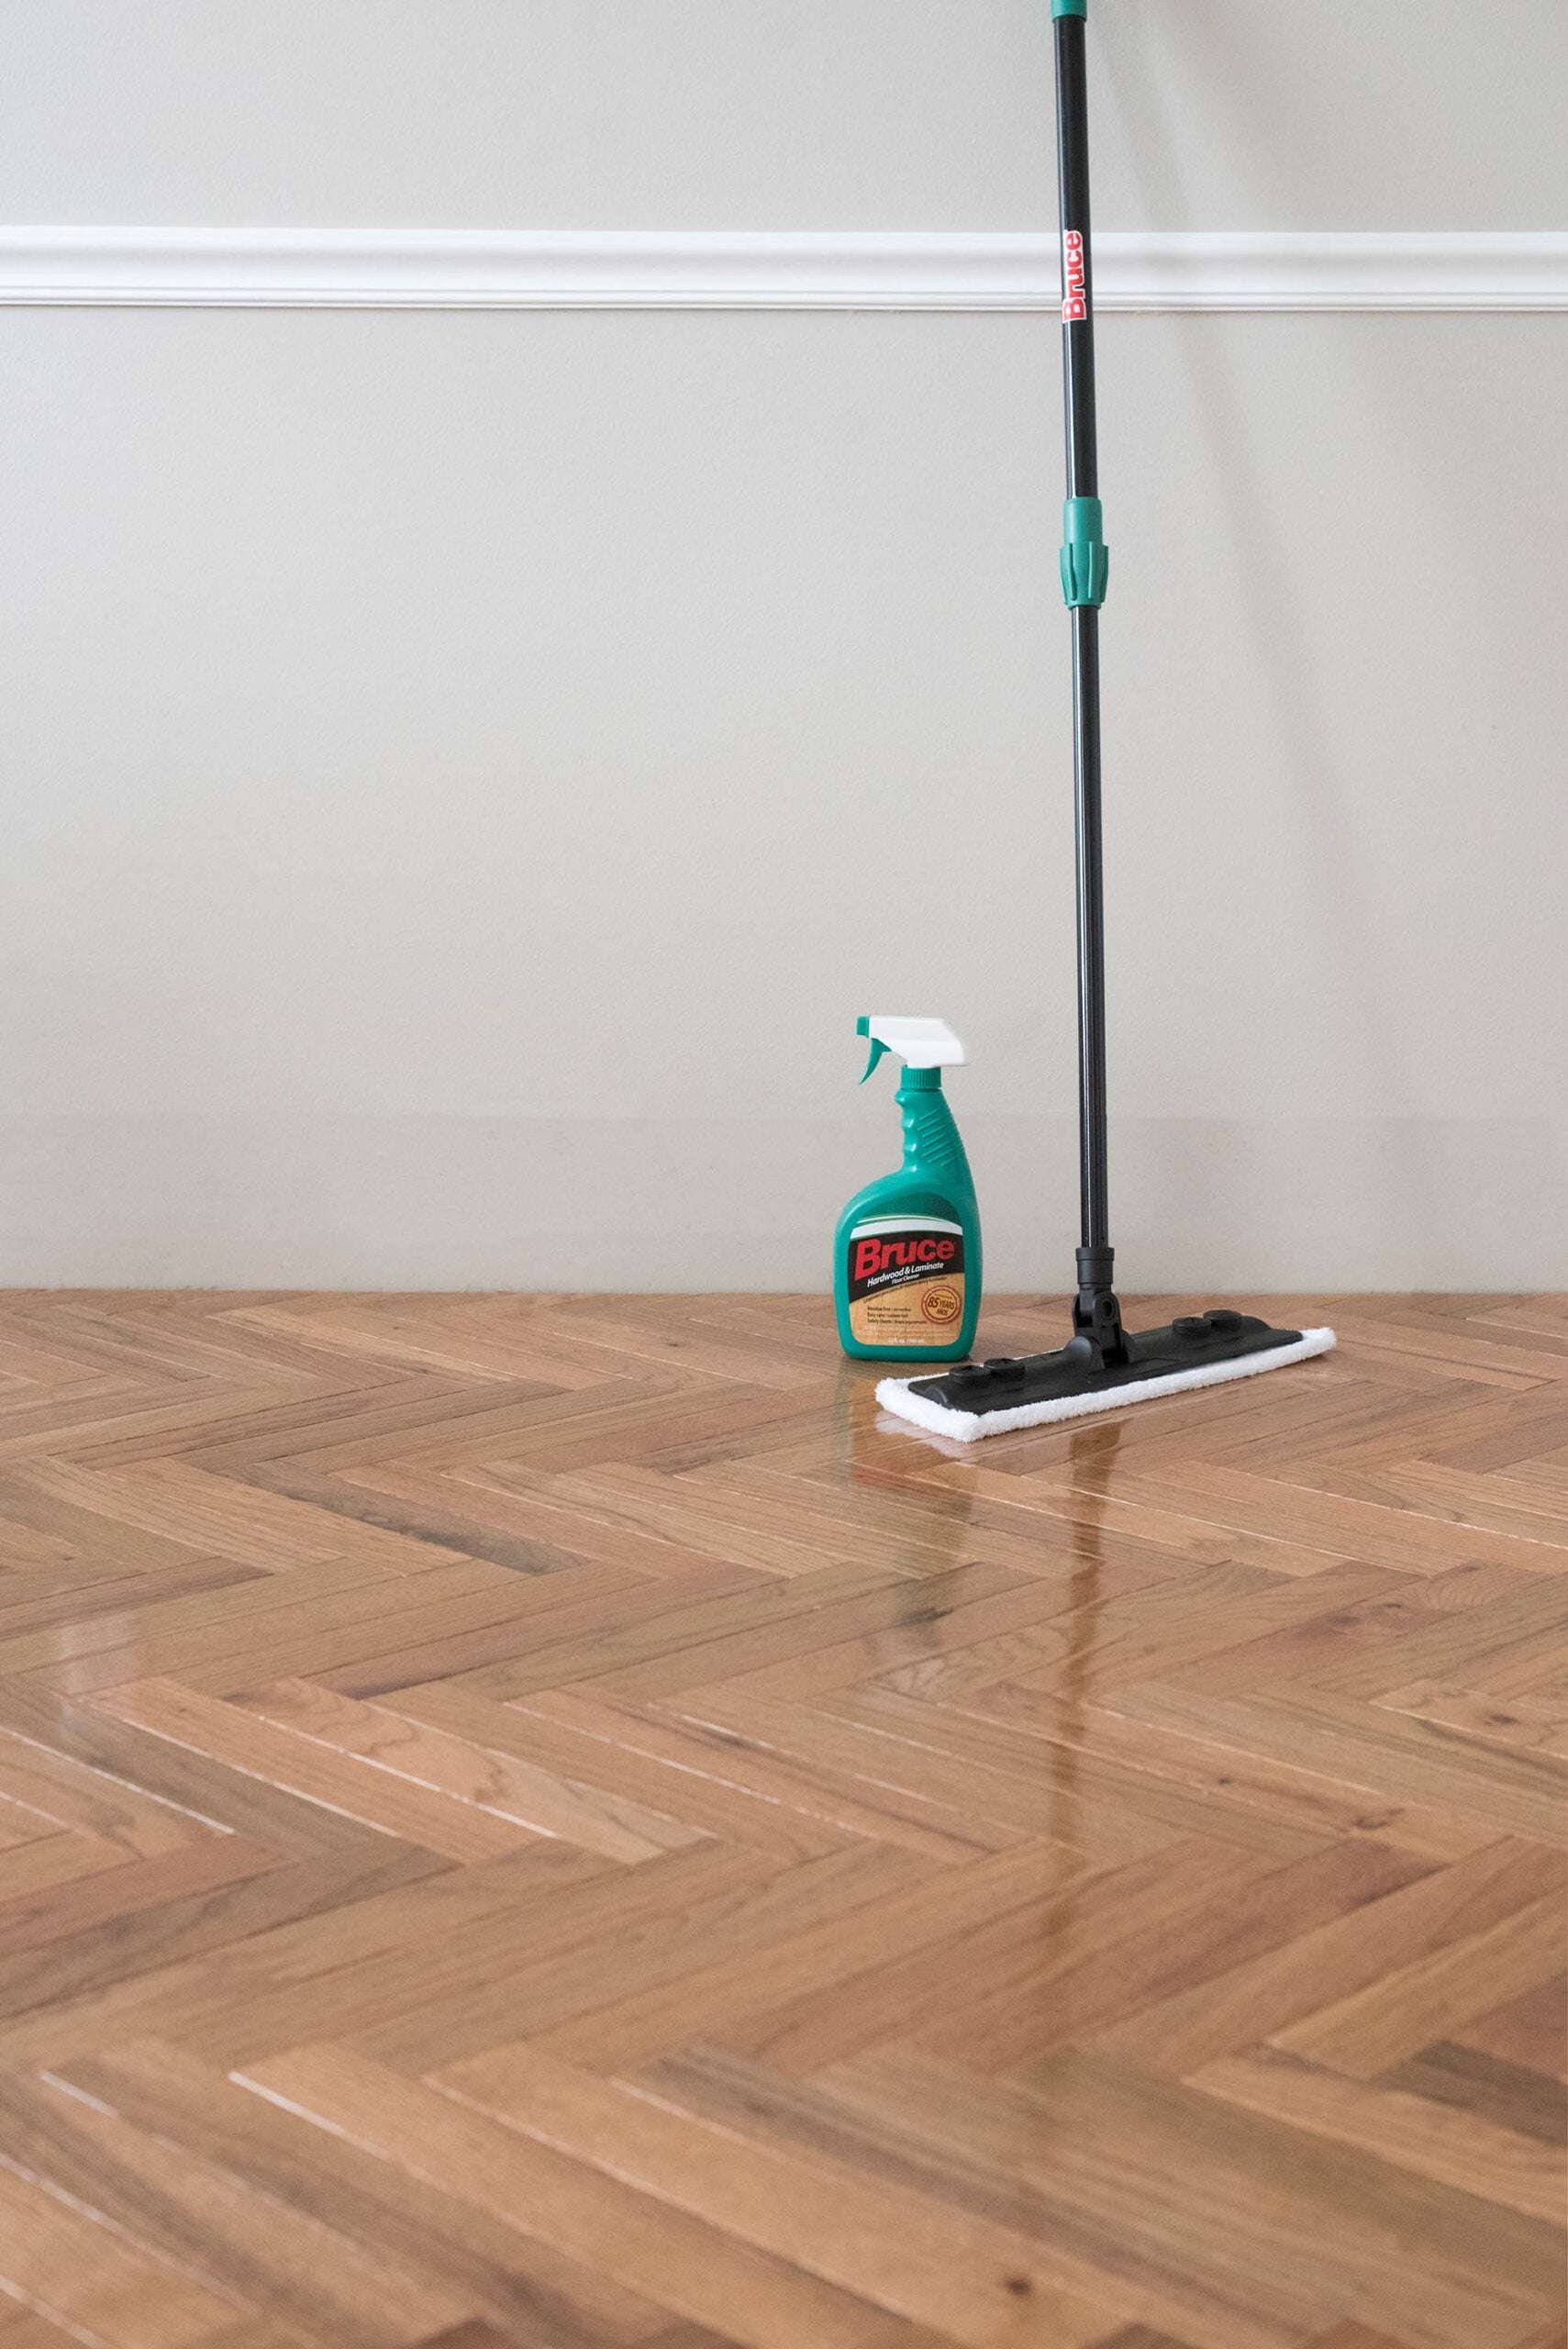
Lastly, I figured I’d quickly touch on the upkeep of hardwoods. Fortunately, hardwood flooring maintenance is fairly simple. Like any other natural material, these will patina and wear over time. Luckily, Bruce hardwood has a tough urethane finish that protects against traffic, wear, and stains. They also include a 5-year residential finish warranty. I vacuum and mop them regularly, and I’m definitely not gentle on them.
Questions?
I recommend ordering at least 15 percent extra material to account for cuts and waste.
I really just do this whenever I have time… a few times each year- or if I see a scratch glaring at me. For high traffic homes, seasonal touch ups keep floors looking fresh without major work. I usually tackle this during my big spring clean, which is rapidly approaching. Here is my process for how to remove scratches from hardwood floors.
Yes. It requires more planning and precision than traditional hardwood flooring, but once the layout is established, the installation becomes surprisingly repetitive.
This was not the easiest project. I give it an intermediate level rating. If you don’t want to buy the tools and don’t have time, consider hiring a contractor. Consider how to find and hire a reliable contractor.
White oak and oak are my favorites because the grain pattern feels balanced and doesn’t compete with the geometry of the installation. We installed a different hardwood in our basement, not in a herringbone pattern. Here is how to install hardwood flooring in a basement.

Related Posts
Looking for more DIY renovation tutorials and projects to tackle this season? I’m going to link some reader favorites for you below- all of which make for a serious upgrade…
- How to Install Panel Moulding: A Step-by-Step Guide
- How to Smooth a Textured Ceiling (Skim Coat Tutorial)
- How to Install Hardwood Flooring in a Basement
- How to Paint a Door
- How to Install a Hidden Kitchen Trash Can
- How to Tile a Backsplash the Easy Way Using Mussel Bound
- How to Easily Tile Over an Existing Concrete Patio
- How to Install a Stair Runner with an Easy Staircase Landing
- How to Order & Replace An Interior Door (With Designer Recommendations)
Of all the renovation projects we’ve completed over the years, this remains one of the upgrades that made the biggest impact on how our home feels. The herringbone pattern brings warmth, character, and craftsmanship into the space without feeling trendy or overdesigned. Even now, it’s one of the first things guests notice when they walk through the door. Any questions? Leave them in the comments below. I’m thrilled with the way our flooring turned out, and hope this was helpful if you’re considering herringbone!
Smashing! The herringbone looks dreamy, and I love the color. I bet if Emmett had known how easy it was going to be, you could have talked him into a parquet pattern! I’m curious about two things. Why did you choose prefinished over unfinished? I presume for ease and the durability of a factory finish. Also, it looks like the ends of each piece have a groove, but I can’t figure out how that would be the case for the cut pieces. Are my eyes being tricked?
Another big project that’s not your office?! Backyard? Can’t wait to see.
Thanks Peggi! We went with pre-finished because it was just a lot easier for us- one less step. Yes, great catch on the ends. The ends do have a groove that we added with a router (Step 7). As for our next project, we’ll definitely be tackling the yard- but hopefully it won’t be a “big” project or too much work. It’s in pretty great shape to start :)
Oh my – I LOVED seeing this! Emmett did such a great job!
Thank you so much Monica! I am loving the new floors… I can’t wait to see it travel throughout other rooms in the house :)
These look amazing – timeless and high-end! Emmett (and Kris) did such a great job! I’m so glad to hear it was actually quite an easy project. We have a carpeted hallway that needs hardwoods installed (to match the adjacent rooms), and I had hyped up the scale of the project in my mind, but you make it actually seem very approachable! :)
Thank you so much Julie! They really did an amazing job. I wish I could say I helped, haha! I only ripped up the carpet. I think you could definitely tackle your hallway. I also expected this project to be much worse than it actually was :) xo
Did you consider having some sort of border?
Great question Danielle! I definitely did. It would’ve been honestly been ideal, but this fall we’re planning to finish the office space and we’ll be adding built-ins, french doors, other architectural elements, etc. Unfortunately, I haven’t designed all of those additions quite yet, so without knowing what the footprint of the room will look like, it was just easiest to exclude a border in this room. I didn’t want to add a border and then have it look unbalanced or be covered up later on. xox
I just laid a slate herringbone tile in one of my bathrooms and putting it down was KILLER but the pattern is so worth it! Your floors are beautiful!
Oohhhh yes! That sounds gorgeous, but tiling is HARD work. We just finished our bathroom and I thought tiling would be the death of me. Emmett and I both agreed this was nothing compared to installing tile. Haha! I bet your slate looks stunning and was worth it though :)
Hi, Sarah! Those floors are absolutely beautiful. I read that the length of the hardwood pieces should be a multiple of the width. I was just wondering what length you used in your project.
Thanks Gabrielle! The box contains pieces anywhere from 8 inches to 5 feet- so lots of variation. We ended up cutting ours to 11″ because it looked best with the scale of the room. Hope this helps!
Hi! Looking at having herringbone hardwood installed and was concerned about the varying widths. Can you tell me about how much extra square footage you needed for waste?
The floor looks beautiful. I am just wondering when you go to refinish the flooring how it will work with the pattern? I envision a large sander that is supposed to be used with the grain of the wood. By doing a herring bone pattern, does this mean you can’t rent an industrial sander and will have to do it by hand? I love this pattern and would like to use it in our home but this is the only thing holding me back.
Thank you Helena! Wonderful question… you can still sand them down and refinish (with relatively the same amount of work). You would have a couple different sanding options- use an orbital sander or square sander, or use the drum sander in different directions. This article goes into MUCH more detail and recommends sanding straight across one way, then back in the other direction. The result should look the exact same! Hopefully that helps to answer it. You definitely wouldn’t need to hand sand the flooring- that would take forrrrrever. xox
Thanks for the quick reply. I am headed to read the article now. Great video of Emmett and Kris.
Thanks Helena :)
Do you have a list of engineered wood favorites??
I’m sorry, I don’t. That’s a great idea for a post though. Thanks LeeAnn! xo
What beautiful floors and your detailed step by step instruction is great! Just found your blog, can’t wait to read through your other posts.
– Leslie @ https://texasbuckeyewife.com/
Thank you so much Leslie! xox
Can you provide a link or some advice on what to buy for the Router bit to cut the tongue and groove? Seems like there are a lot to choose from on the internet.
Hi Cindy! Absolutely… we used this bit (linked). xox
Hi Sarah,
Sorry I have so many questions! 1) Did you have to worry at all that your floors weren’t perfectly even and have to correct for that? 2) Did you worry about putting wood in the kitchen where folks worry about water leaking damage? 3a) I assume you bought enough wood for the entire main floor at once so it would be from the same lot. Did you leave it sit for a while to acclimate in temperature? 3b) Will you install it in each room as you go, or do the whole house at once? 3c) Where are you storing it all in the meantime?
Hi Stephanie! No problem at all… #1- yes & no, you want to make sure they’re level (obviously), but we didn’t go to the trouble of replacing the subfloor or anything. The pattern is a little more forgiving. #2- not at all! We had wood in our first kitchen and loved it. It’s a great, durable, natural material. We also replumbed everything, so we knew there wouldn’t be any leaks. #3a- Nope… we actually have been buying room by room, and there isn’t any variation. With larger vendors (like Lowe’s / Bruce Hardwood), it’s very consistent in color and doesn’t vary batch to batch. We did bring it inside and allow it to acclimate for a week or so. #3b- We’ll install room by room, just because that’s typically how we work. We store it in our garage or inside (our house is pretty large). Hope this helps! xox
Do you know if this can be glued down onto concrete? I’m assuming the glue would also be a sealer.
I guess you could put subflooring onto the concrete and then the hardwood but then it would be really thick……wouldn’t it?
If it was glued down then the hardwood would need to be glued instead of nailed.
Was the Bruce hardwood cheaper than engineered hardwood?
Hi Judy! No, this particular product needs to be nailed. The hardwood was not less expensive than engineered hardwood. Hope this answers your questions! xo
How long are each of your planks? I know that box of planks comes in varying sizes, so what length did you end up cutting them all to and how much “wastage” was there.
thank you!!
We cut our planks to 14″ in length to maximize the product and cut waste! Hope this helps :)
Wow, I always learn so much from you! Even just the information about the types of hardwood floors was so interesting. Thanks for always taking the time to really dig in and explain things- your blog is a wealth of knowledge!
Thank YOU for taking the time to leave a nice comment. I so appreciate that and am really happy the post was helpful :) xo
Hi Sarah! I’m wondering if the finish on the floors is considered low-luster or glossy.
It’s not super glossy, but not low-luster either. I’d say it skews more shiny / glossy than matte or flat. Hope this helps, Kelly!
Awesome flooring!
Just throwing this question out there. I am planning on laying Herrington LVP. What is the best way to connect the adjoining rooms? The directions say to cut out triangle templates and lay them against one wall and build out. Should I do this for both walls in both rooms on the same side of the wall or start in one room and connect across to end up in the center of the other room and build out from both sides of that room?
Thanks Olivia, and great question! You’ll just do this on one wall. It’s important to build out from one direction only- even when moving into different rooms, so it lines up perfectly.
I recognize this install was a year ago, but do you remember what your calculations were? My husband is concerned that in doing this type of floor the waste is super high and we won’t know how to calculate how much we need with that consideration. Can you tell me how much wood you ordered for your number of square feet? Thanks!
Just discovered your blog and loving it! What kind of floor registers do you use?
Thank you Caroline! We used custom wood floor registers and stained them to match our hardwoods :)
Could you please ask Emmett what other nailer or strategy he used on the floor, close to the walls? I keep hearing brad nailer / finish nailer / other nailer and just a specific product would really make my life easier, I’m just buying everything you used. And I’ll buy that router as well, and the attachment but do I also need to buy a table or plunger? I so appreciate both of your help on this, especially the great video!
For the edges- it’s the same process, we just used a 16 and 18 gauge nailer (face nailed), where it is covered by the baseboard! Hope this helps, Kristel :)
Thank you!! (Sorry, I’m just seeing this now — I appreciate your time and helpfulness!)
Hi Sarah, that floor looks great and this post was so helpful! I’m thinking of doing herringbone as well, but the sales guy in the flooring store warned me that it wouldn’t be a good idea to just cut boards and put the non-beveled ends up against the beveled sides of the boards. (Because of how it would look and also because there could be a raised edge if the subfloor isn’t perfectly flat.) He said we would have to cut bevels into the ends and also apply finish to them. What do you think about that issue? Do you notice a difference in the places where there aren’t bevels?