DIY Abstract Diptych Art (+ A Video)
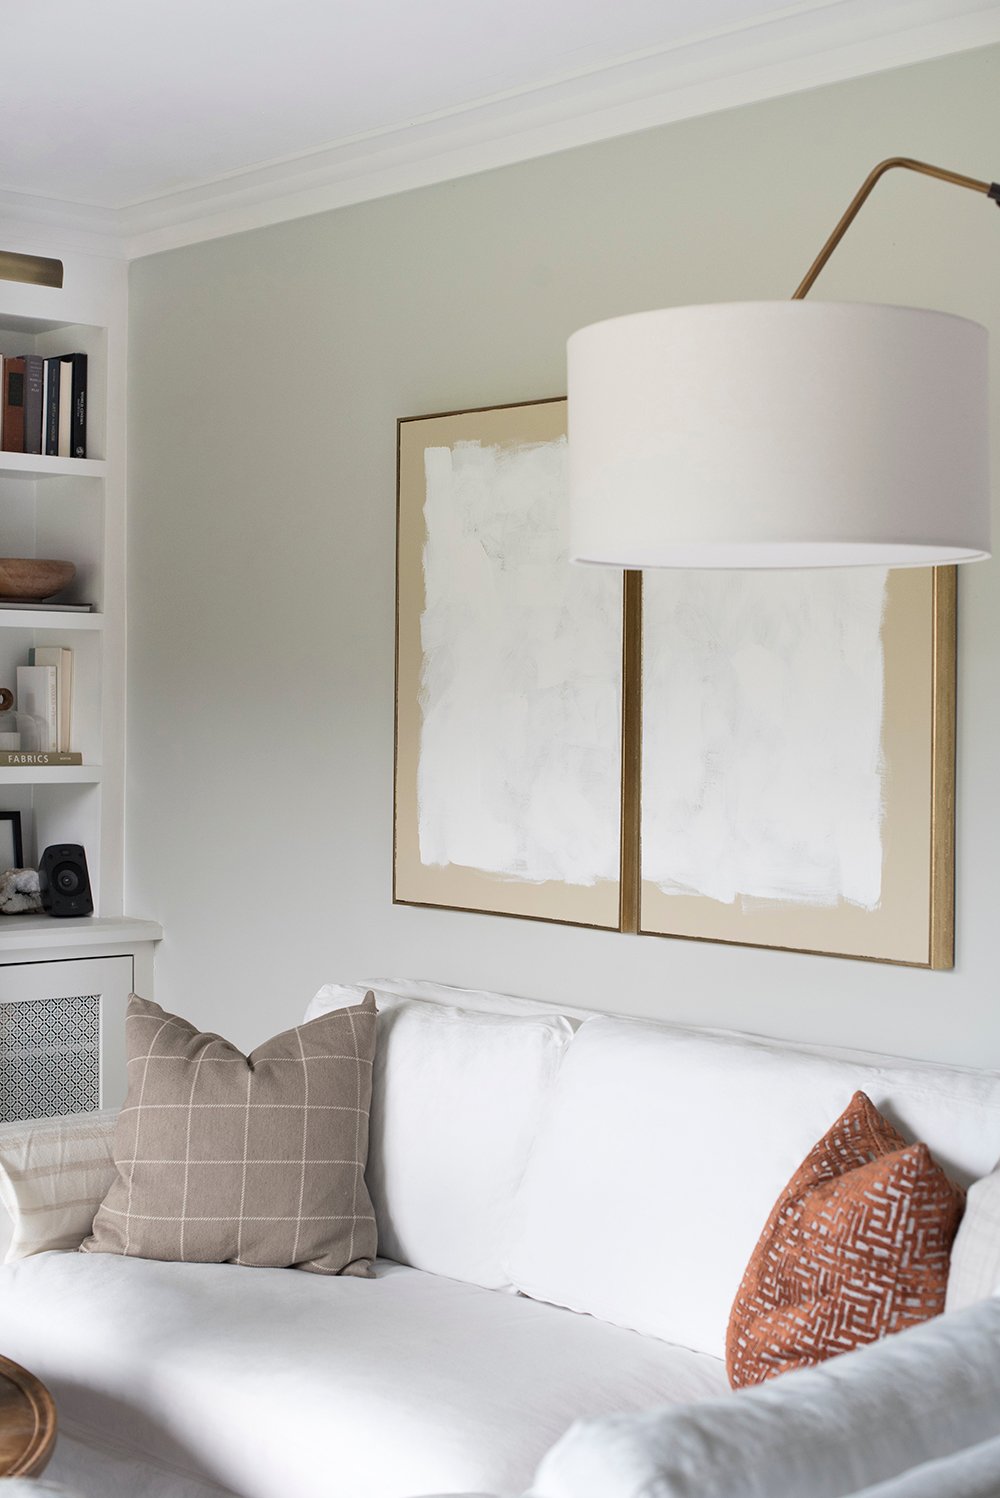
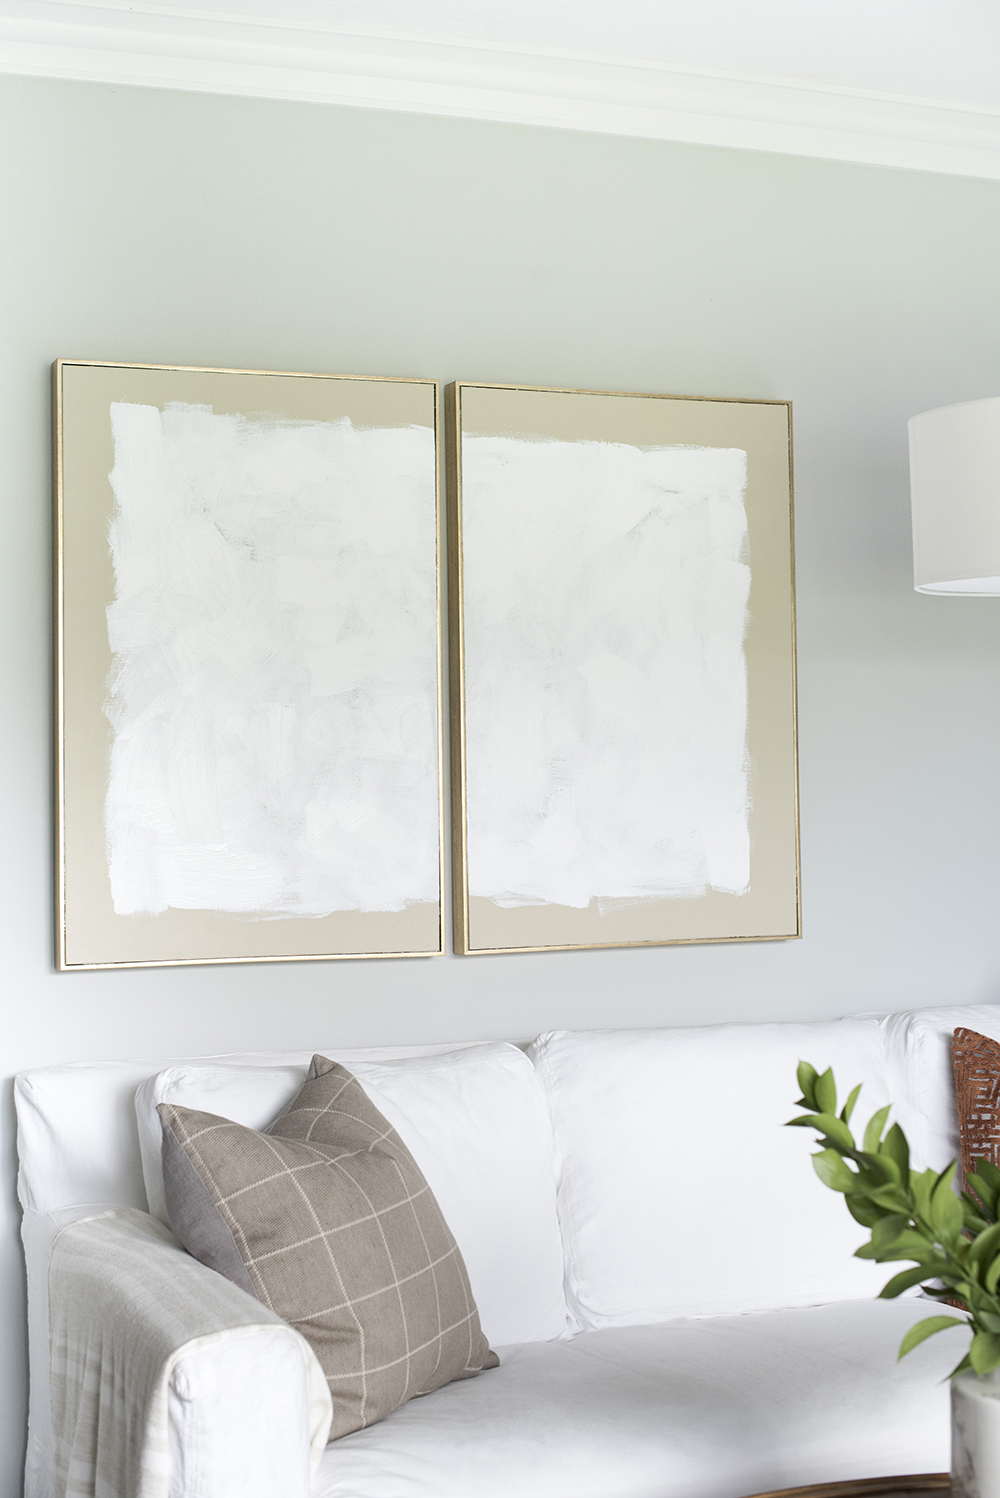
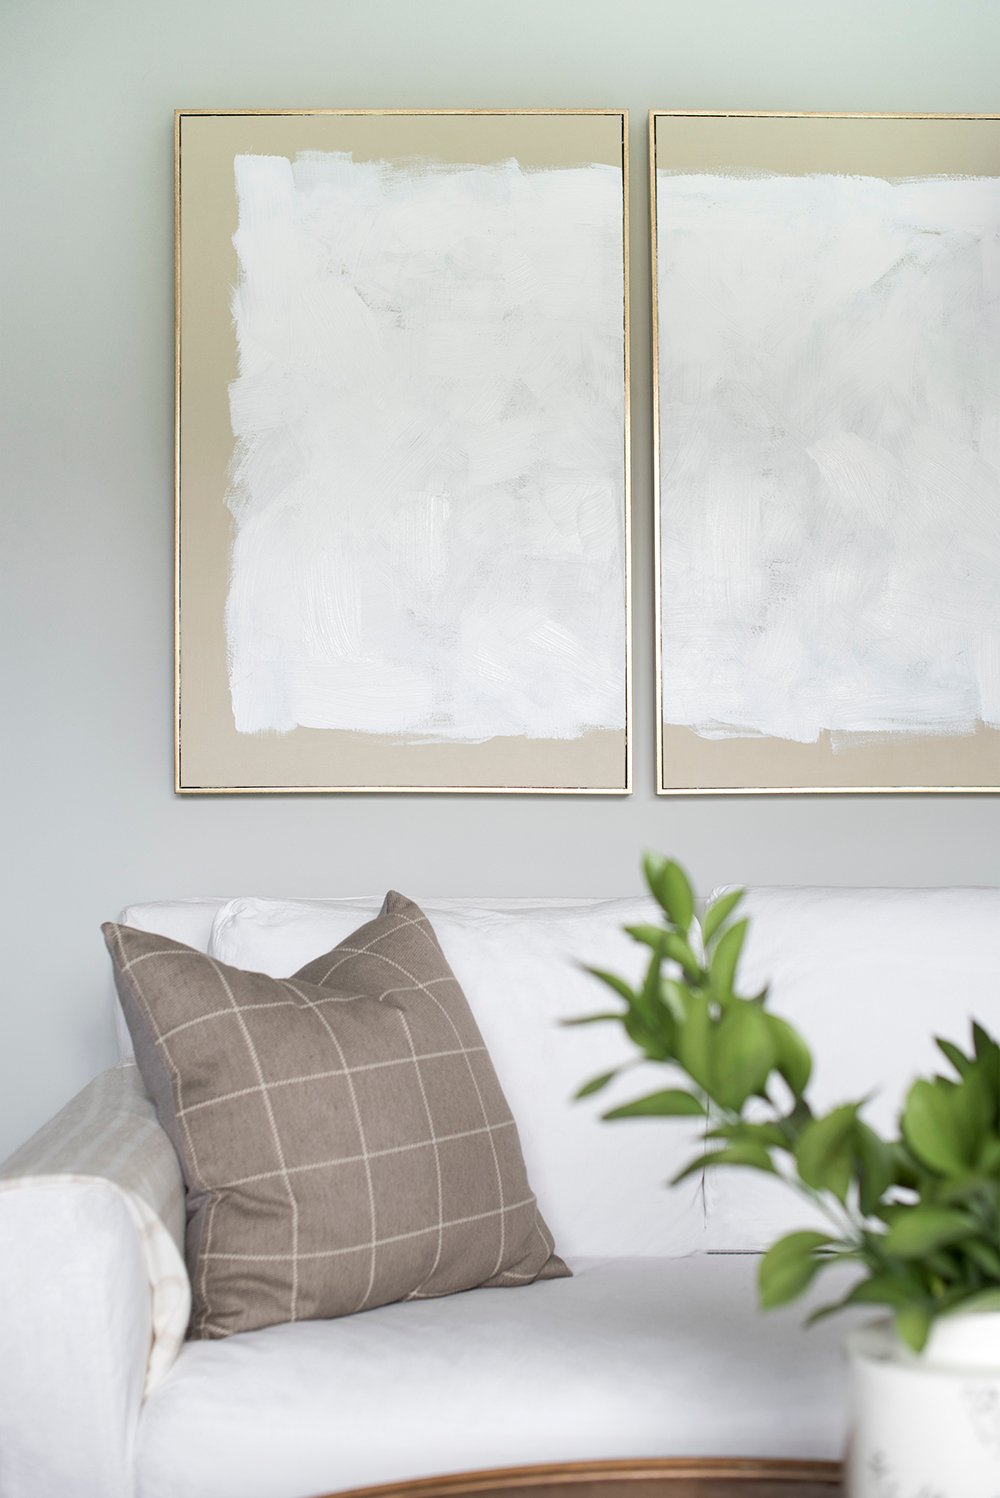 I’ve been struggling with one wall in our living room since “finishing” it. Let’s get real… there isn’t a room in my home that will ever be completely finished because I’m constantly restyling and switching things around. I think that’s the downside to being a designer… you’re never 100% satisfied. Anyway- the wall behind the sofa has been driving me crazy. I love our giant sconce, but the wall has never felt balanced. Click through to catch an easy artwork DIY that made me love this space SO much more. Everything feels happier and evenly balanced- I couldn’t be happier. Your DIY abstract diptych art awaits…
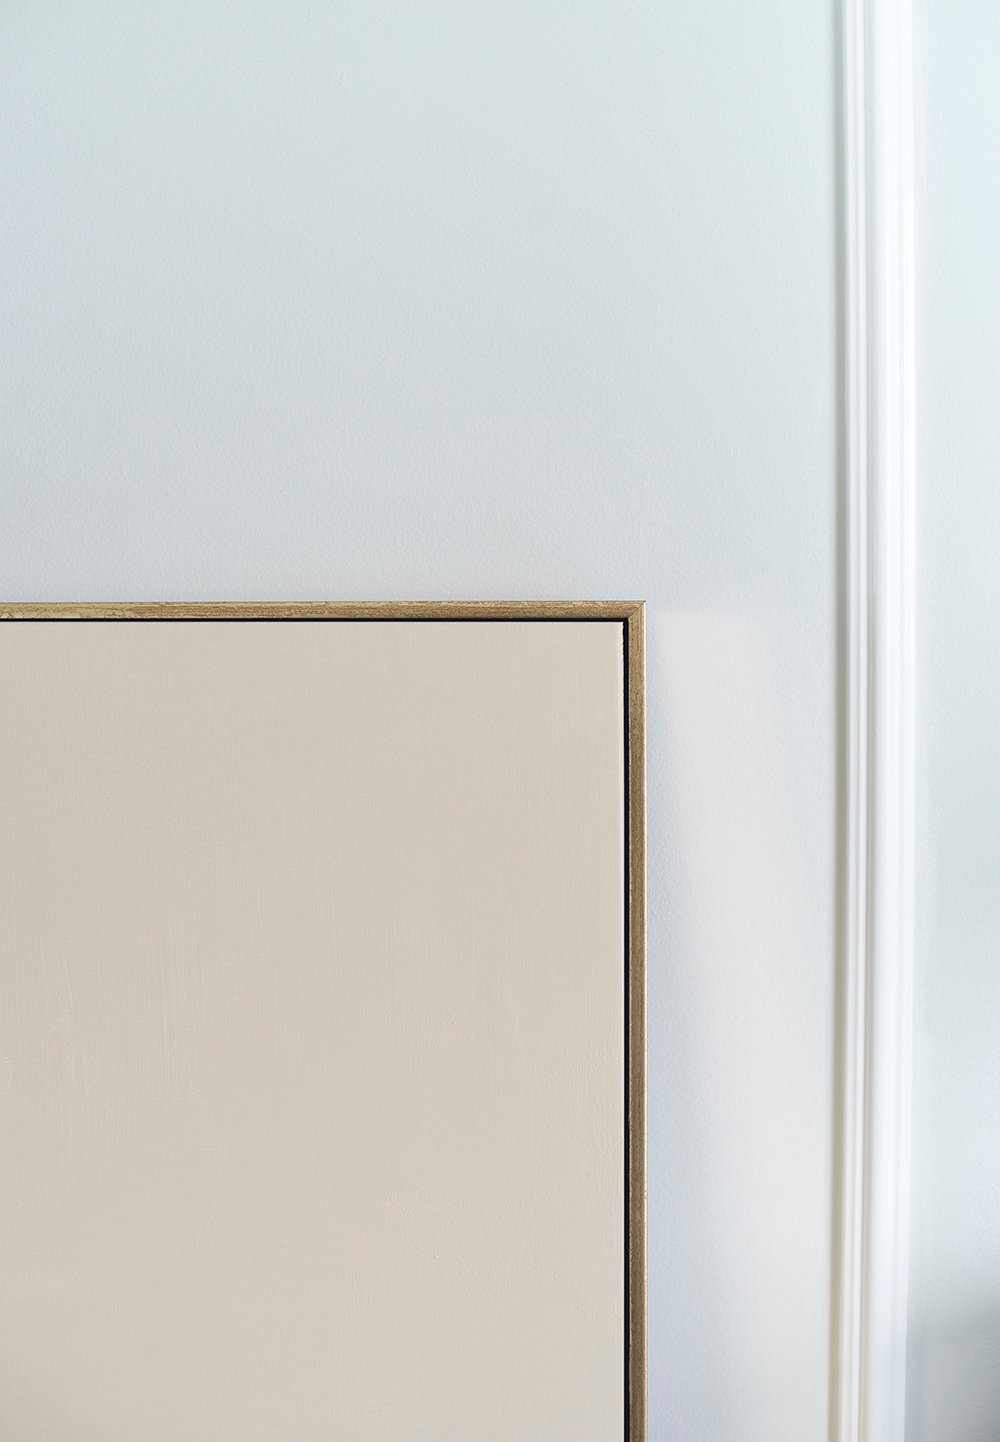
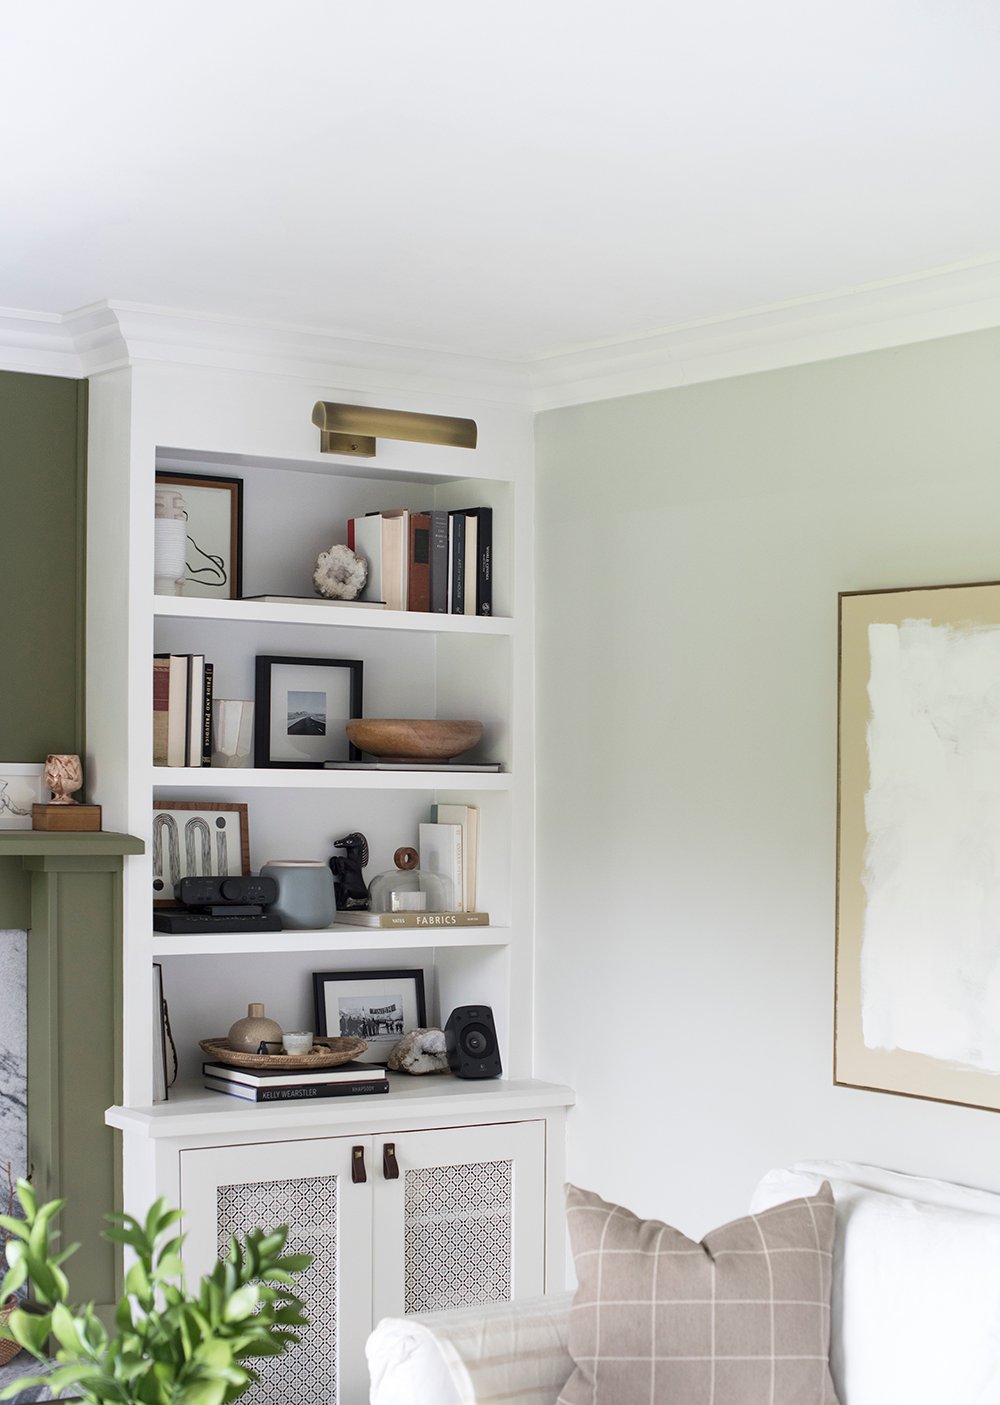 If you remember my living room reveal, I absolutely adore our custom horse portrait, but it was way too small alongside the sconce. Another challenge in the living room? We already have a gorgeous piece of large-scale art (the windmill print) in the room that made it challenging to find something that didn’t overpower that piece… and let’s get real- it’s one of my all-time favorites and it deserves to be the show stopper in the room. AND, there’s a built-in. That means visual clutter, see the example below… beautiful, but busy.
 The last thing I needed in the room was another giant piece of detailed art, or something intricate that made the space look even busier. Insert my DIY… a neutral diptych that sort of acts as background noise to balance the weight of the wall.
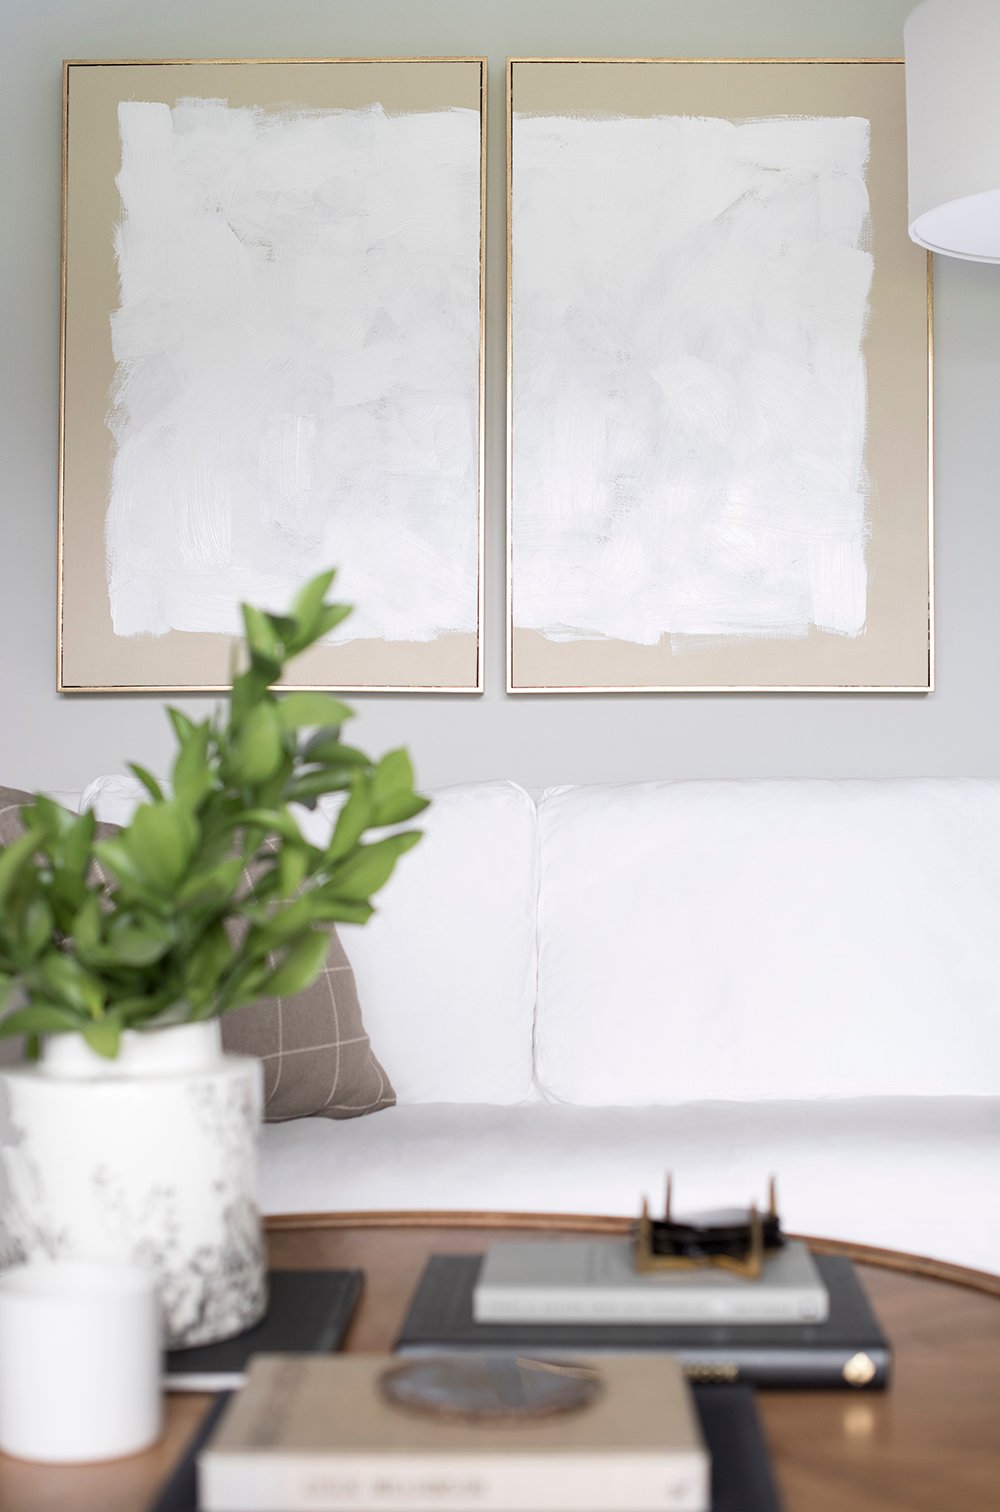 I came across this artwork from Williams Sonoma and fell in love with the soft, neutral aesthetic. I thought it would be the perfect inspiration for my DIY. Shoot, I even thought about buying it. The problem? The $1200+ price tag.
 Alrighty, so if you’re wondering how I made this thing… it cost under $100 and took about 1 hour. The key is buying a framed piece. I prefer to run to HomeGoods for something like this (more tips on shopping at HomeGoods in this post).
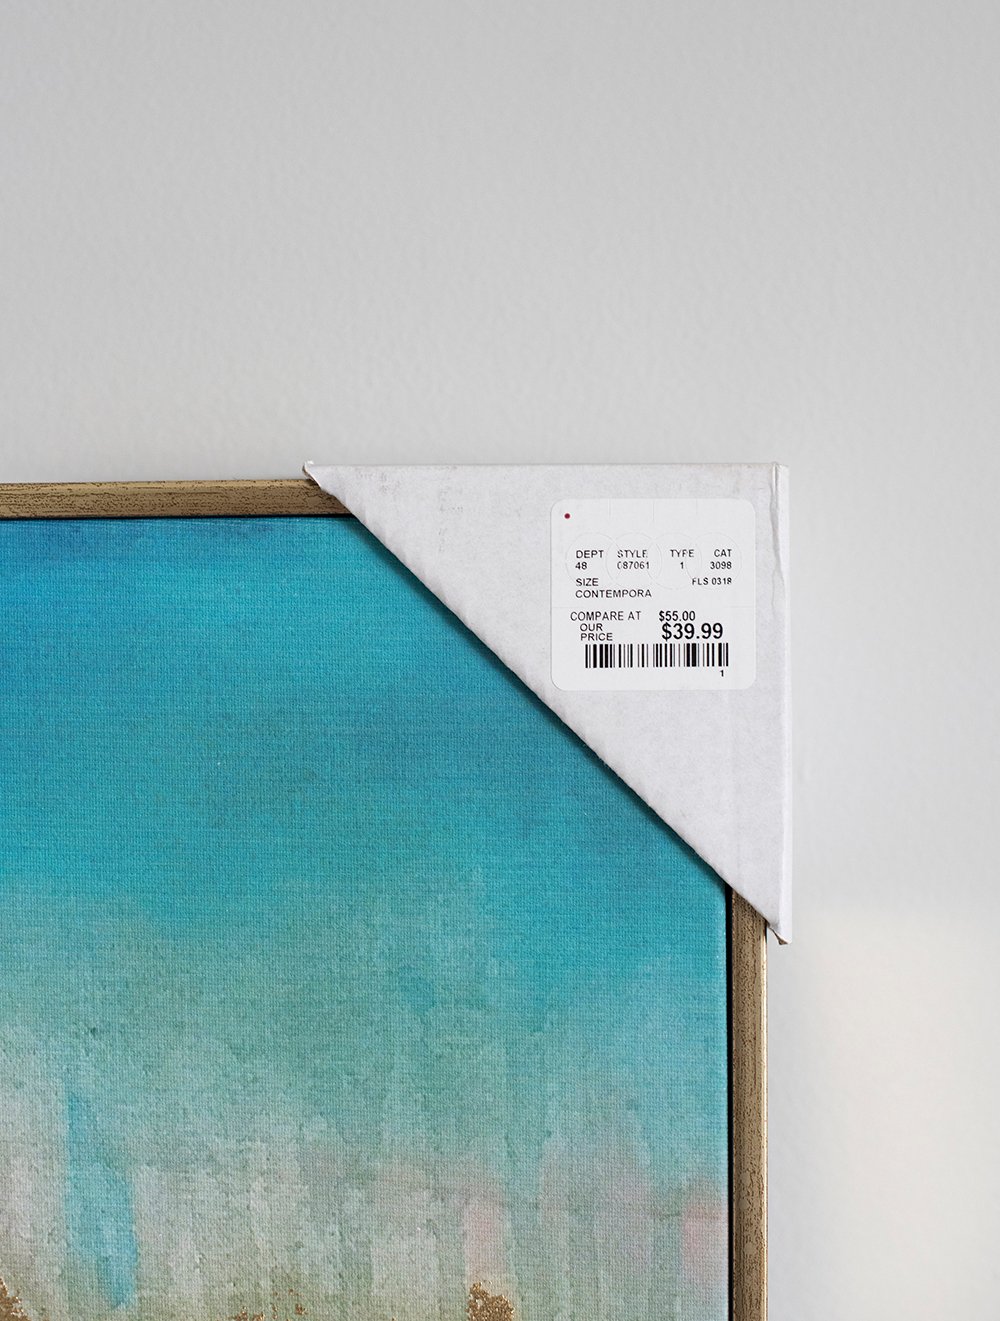
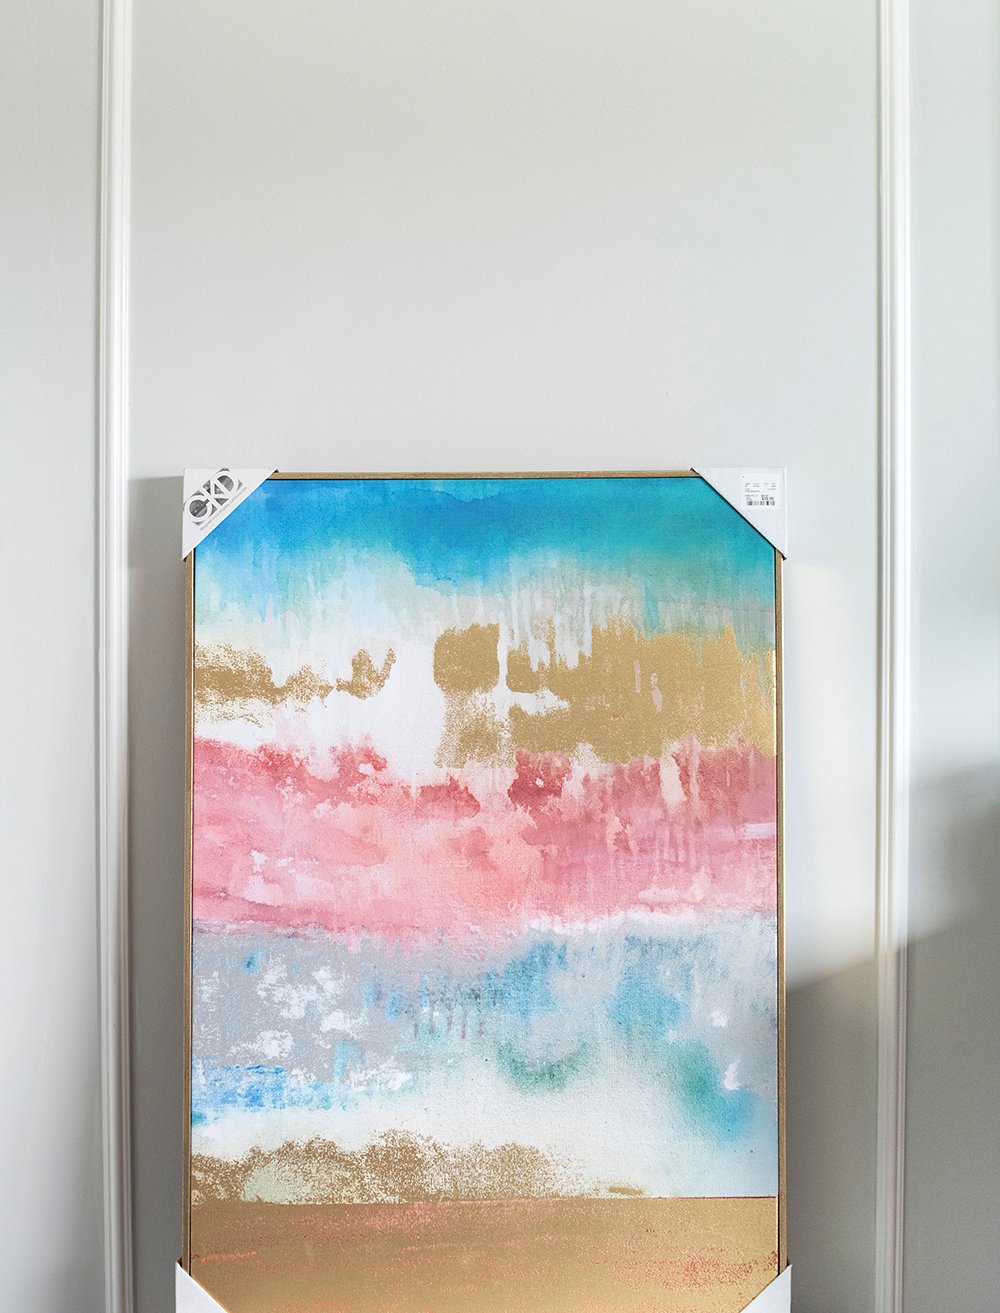 I purchased two identical (ugly) canvases for $39.99 each. They’re just cheap reproductions, but they have the potential to be beautiful and custom to your home! Obviously, this post is proof.
 Things to look for and remember when doing this DIY and buying the art:
- The artwork itself doesn’t matter- obviously the one I bought looks hideous, but nobody will ever see it.
- Look for nice frame quality.
- Look for a good frame finish (I opted for a brass / gold finish this time around).
- Consider the canvas quality (heavier is better).
- Look for a frame that has mounting hardware installed on the backside (it will make your life easier).
- Look for a canvas that is flat or minimally textured. A lot of the art has a giclée finish that you’ll have to scrape off before painting. It’s fine if it’s consistent, but often times it will be shaped like a flower or whatever the subject matter is. I prefer to add my own texture.
- Lastly, check the size. Make sure it fits your space accordingly. I needed a giant piece and couldn’t find one that met my criteria, so that’s why I ended up with two and opted to make a diptych for the same effect.
Once you’ve purchased your not-so-gorgeous artwork with a fantastic frame, you’re ready to start painting! The video below sums up my entire process, and I’ll link the sources afterwards…
You can find everything I used in the DIY / video linked below…
 If you want to replicate my art, this is exactly what I used:
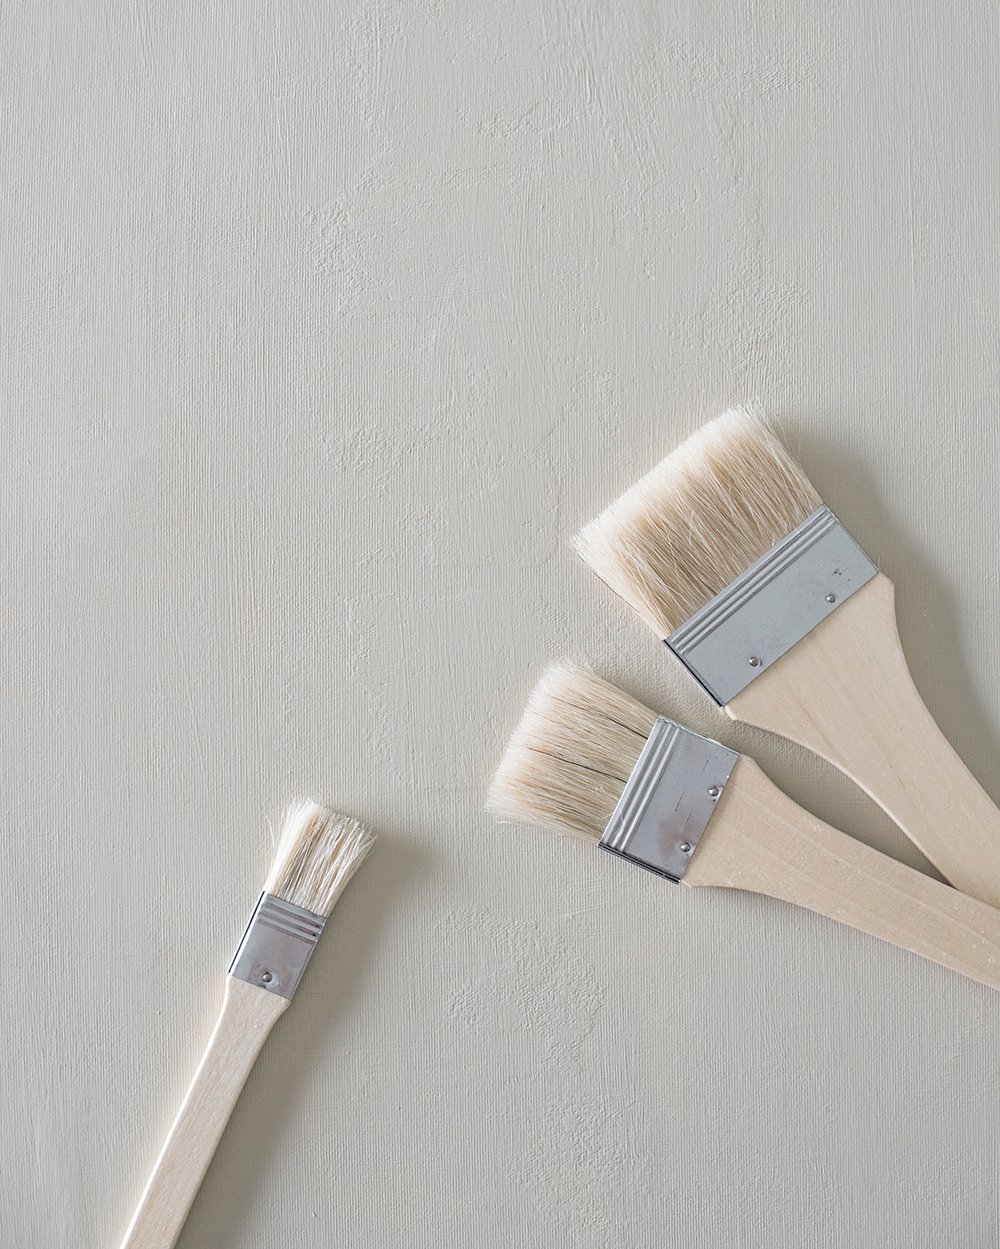
- Paint Brush Pack
- Gesso
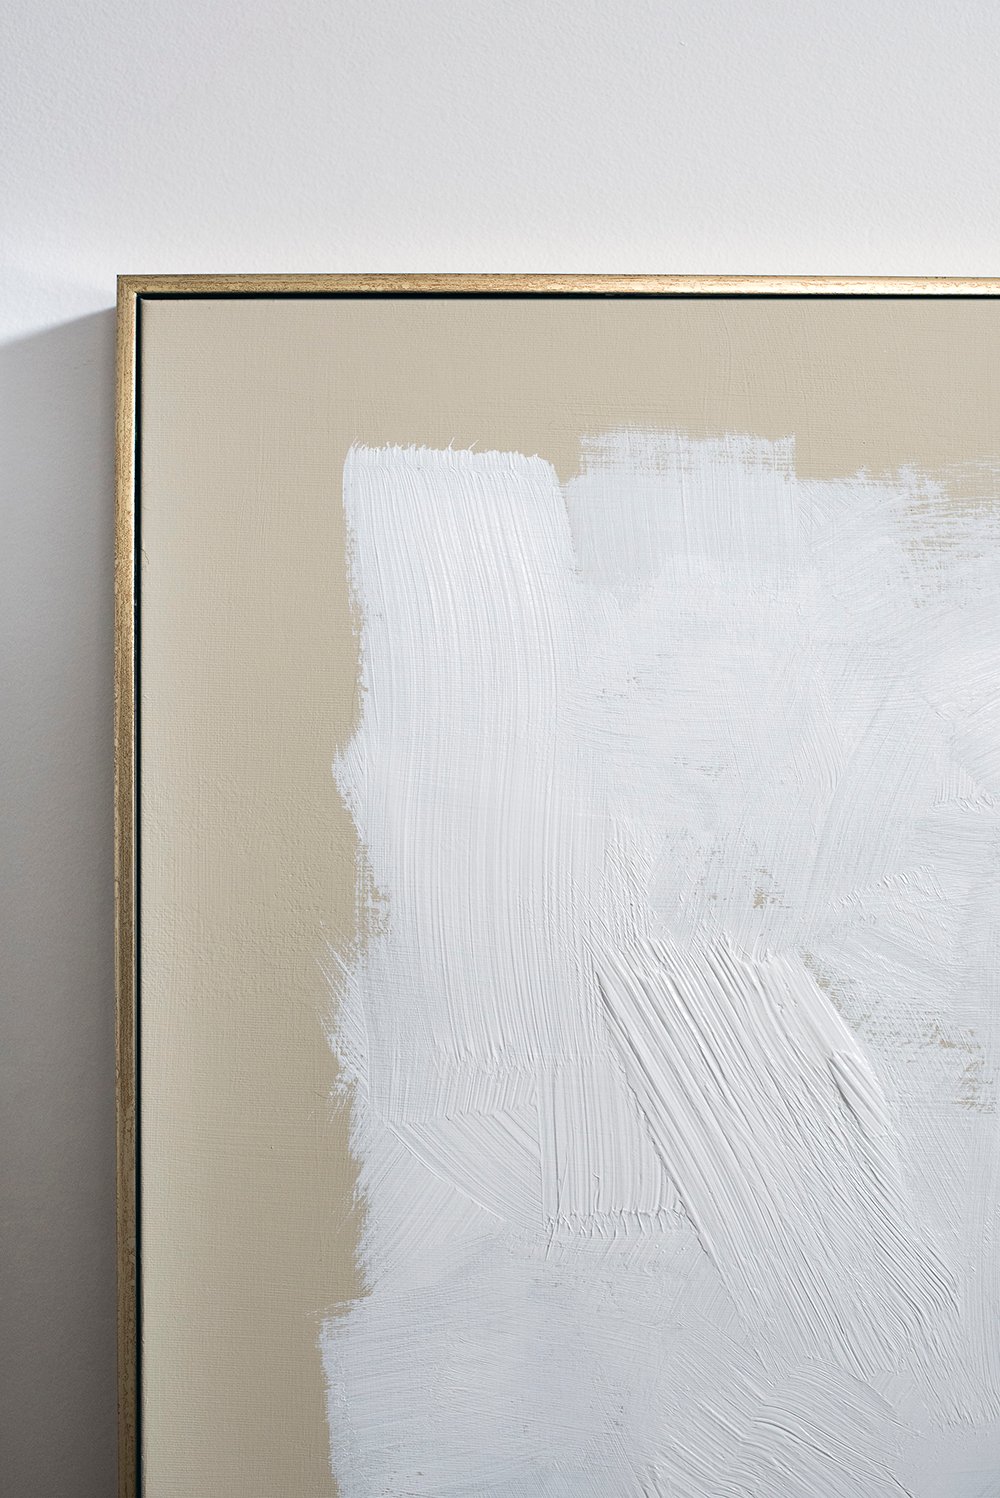
- Paint ( I used Artist’s Loft ‘Unbleached Titanium’ )
- Golden Extra Heavy Gel Gloss (if you want to add texture)
- Framed Art (from HomeGoods or somewhere similar)
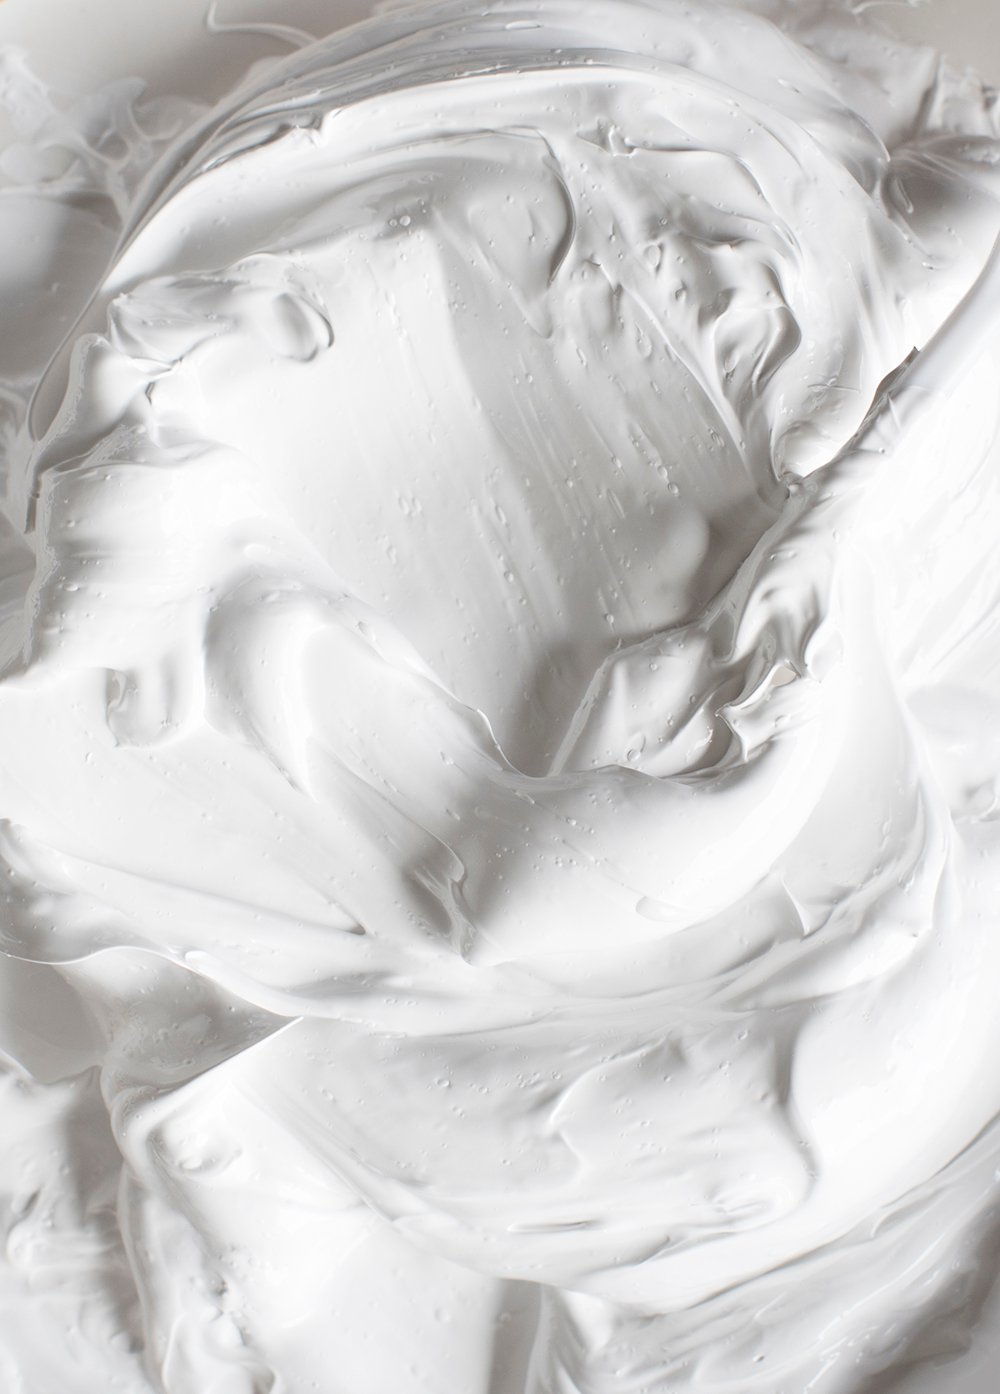
 The key for this piece was to keep things neutral and go heavy on the texture. I experimented with tools other than paint brushes (like a palette knife) to build-up the paint. Don’t be afraid to layer it on heavy!
 To wrap things up, I’m so happy with how things turned out. Everything feels more balanced in the living room and I saved a TON of money doing this project myself.
 My inspiration art is slightly smaller than the diptych I created and the inspiration cost $1,250 (not including tax or shipping)… my piece was around $100, so I’d call that a win.
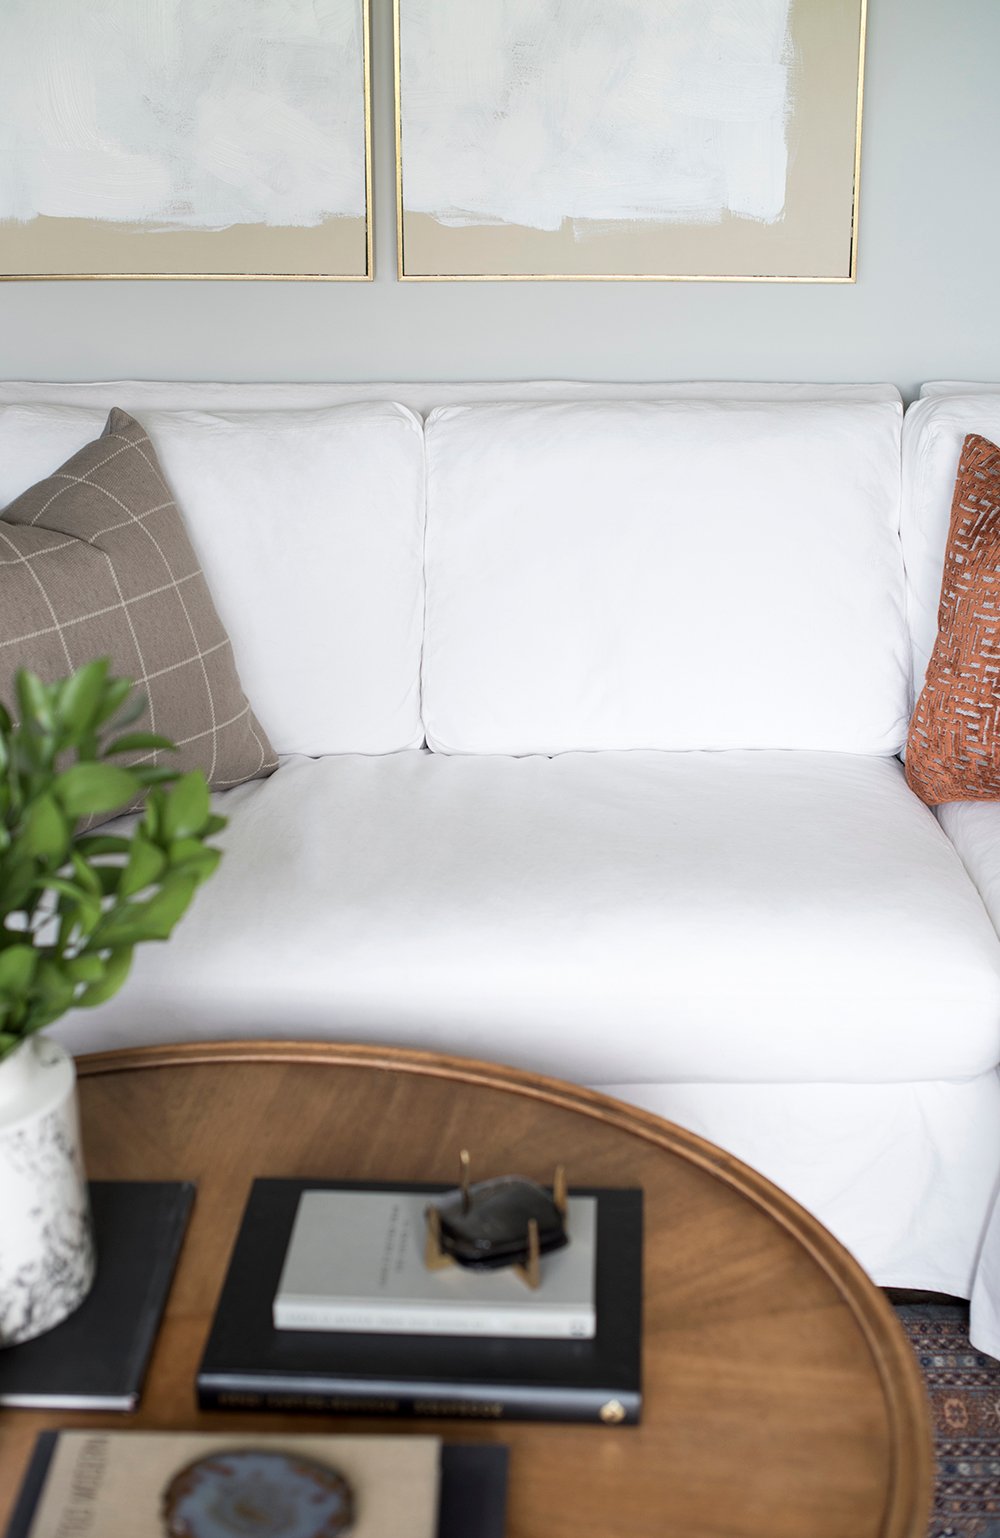 I’m already feeling a lot better about the space and I know it’s because the artwork is balancing out the room in a “non-cluttered” way. Sometimes rooms are tricky like that (especially small ones)… you have to live with something to know what isn’t working and then make changes as needed. This was definitely one of those tricky rooms to decorate.
 What do you guys think? Is this a DIY you’re going to try? Pin it and save it for when the time is right! Also, let me know if you have any questions at all in the comments below. My video skills are SLOWLY (like, really slowly) improving, so hopefully I can do more tutorials like this. Subscribe to my Youtube channel for more (and to see videos a few days in advance)!
I love this idea!! The finished product looks great in your space. I have been wanting a large abstract piece of art for our living room too, but did not want to spend $$$. I think I will definitely try this!
Love this!! I’m definitely going to try it! Question – is the “Unbleached Titanium” the tan color in the background or is it the white? If it’s the white, what paint color did you use for the tan? Thanks so much!!
Thanks Annie! So happy to hear you’re going to give it a try. It’s really super easy! xox
Oh, and the tan paint is linked… titanium something- it’s in the bulleted supply list linked within the post.
I love this so much! You are so talented! Im all about the designer look on a dime 😊 I plan on attempting this DIY at some point!!
Thanks so much, McKenzie! So happy you’re going to give it a try :)
I’m with Annie. I’m still not seeing the tan/parchment link in the bulleted list. So you use the titanium white to cover the canvas first, then use the tan paint to cover over that, then use the titanium white again mixed with the gesso? Sorry, I just want to make sure I’m doing this the right way to get the same effect. I love this DIY. So good! Thanks!
Thanks Kiley! Absolutely happy to clarify. First layer: gesso… Second layer: unbleached titanium (the tan color), Third layer: white mixed with the golden gel.
Okay, I think I have it. Is the white already mixed in with the golden gel? Or is the white something you buy separately? Sorry! And thank you.
Haha! Nope, you buy them separately. You can use whatever plain white paint you’d like to mix into it. Easy peasy!
What white did you use mixed with the golden gel? I assume an acrylic? Sorry, but you are dealing with painting neophytes here, ha! ;)
Haha! No problem :) Acrylic!
Got it! Thanks so much for clarifying, Sarah!! I can’t wait to try this!!
Yay!! You got it :)
This is definitely on my to-do list. Yours turned out AMAZING! When you were painting, did you remove the canvases from the frames or did you protect the frames some other way?
On the first canvas, I used painter’s tape… only to discover, I still HATE painter’s tape. Haha! On the second canvas, I just freehanded around the edge (which worked much better for me). I left both frames on when painting the canvas. I think it’s just a personal preference as far as the tape goes. I’d leave the frame on if possible because sometimes they’re cheaply attached and it might be difficult to get it on/off without the risk of breaking it.
Love this DIY!! Excited to try a version of this soon!
Woohooo!! Excited to hear that, Keah! Let me know how it goes. xox
Love it. I like your version better too.
Best compliment ever!!! xox
Nice DIY & looks great. I prefer unframed canvases and assume you could totally do the same thing?
Most definitely, Brenda! Framed / unframed… whatever you like.
Best idea I’ve seen in a long time. I often find ugly art with nice frames at thrift stores, so your idea of doing abstract art over the ugly art would also work well with the thrifted finds. Thanks for sharing!!
So excited to hear that you liked this one, Adrienne! xox
Turned out very pretty and one (or two!) of a kind!
Thanks so much, Flo!
This is my favorite DIY of all time!!! I tried it this weekend and am absolutely thrilled with the results. I am not artistic *at all* but the painting turned out great. Wonderful to have a large scale piece of art for an affordable price!
BEST NEWS EVER! Thanks for sharing your success with the project, Erin :) xo
What is the sizes you used? I love this DIY and plan on doing it, I just want to makes sure I get a similar size.
Each panel is 24″ x 36″ !
You are an absolute genius. Every time I see a photo of this in your old living room I think how perfect this is for the space. And to see how you accomplished it — amazing!!
Aww you’re the sweetest Kim! That art was so much fun to create. It will definitely have to be installed in our new home sooner rather than later. I still love it! xo
This is amazing! What size frames are these?
i’m going to knock this out this weekend over some art i painted 10 years ago that i am tired of! i hope I do it right! haha! Cheers!
Yay!! How did it turn out, Allison? :)
Hi Sarah! I absolutely love this DIY tutorial. I just bought all the supplies on your list but after reading comments I wanted to clarify something.
So first I do gesso, then the tan color, then the gel. Does the gel have to be mixed with white paint? Thank you so much!
I’m so glad to hear that Samantha! To answer your question… gesso the canvas first, then paint tan, mix the white paint with the gel, then paint that mixture on top of the tan :) xo
Hello! I bought everything on your list but after reading the comments I’m confused if the gesso is the white paint that you mix with the gel? White paint wasn’t on the list of supplies to buy so I just wanted to ask for some clarification 😊 if you did use a white paint which one did you use ?
Gesso is a primer for the canvas… so don’t mix that with the gel :) Once the canvas has been primed with the gesso, then use the white paint mixed with the gel. Hope that helps to clarify!
This is super nice, love the subtility of it! And your space looks amazing. Thank you for sharing this DIY process :)
Thank you so much!
Six years later and your post is still relevant! Thank you for your inspiration, I just tried this DIY and thrilled to see the outcome!
I love to hear that, Caroline! So thrilled you gave this one a try. They still hang in my living room (just in a different house at this point).