Designer Guide to Mixing Metals by Room
Mixing metals is a question I get all the time. I wanted to break it down by room, keep things simple, and share my go-to tips for mixing metals, the way an interior designer approaches it. Personally, I think you should mix metals in every room. It adds depth, interest, and a layered quality that makes a space feel well curated and designed. In our kitchen, I mixed antique brass, polished nickel, and yes… even a little stainless. As a designer, I don’t think twice about doing this. It might feel unintuitive to mismatch metals, but think of it as an intentional complementary approach. Sometimes having loose formulas can take the pressure off. My hope is that by walking you through my process, you’ll feel equipped to mix metals in your own home. I also sprinkled in a few things to avoid because guidelines and visual examples always help remove the guesswork. Ready to dive in? Click through for my process, combinations that always work, and a few scenarios you want to avoid…

Before you dive into choosing finishes, make sure you have a good idea of your personal style or the aesthetic you’re trying to achieve. Check out this post for tips on determining the aesthetic of your home, as well as how to design a cohesive home that flows!
Why Mixing Metals Is a Good Thing
There are more metal components in your home than you might expect… plumbing fixtures, light fixtures, hardware (cabinetry hardware, towel bars, door knobs, etc), accessories (mirrors, frames, etc), and furniture (chair legs, tables, etc). When you really consider how many metal finishes share a space, they quickly add up.
Mixing metals is a great way to create intentional contrast, which adds depth and balance (two things designers always do). When every finish matches perfectly, a room can feel overly uniform, flat, or even sterile. Layering a warm brass against nickel or grounding the palette with a dark bronze brings dimension to a vignette. The right combination completes the look and adds personality. Each finish carries its own mood. Polished nickel feels refined and classic. Aged brass adds warmth and a hint of vintage patina. Bronze is clean and modern. When they’re thoughtfully combined, the room feels rich and intentional.
How to Choose Your Metallic Palette
I like to begin with one dominant finish that appears most throughout the room. From there, I add a second finish to introduce contrast or juxtaposition… and in larger spaces, I’ll bring in a third finish sparingly, sticking with 2-3 metals (max.) Too many finishes in one room can look chaotic. Pairing a warm metal with a cool metal usually works well, like antique brass with polished nickel.
The goal is contrast. You want each finish to stand on its own without feeling mismatched. Design with proximity in mind… leave negative space between metals of different finishes if they compete. Consider the texture of the metal… combine matte, polished, and living finishes to create an interesting and textural look.
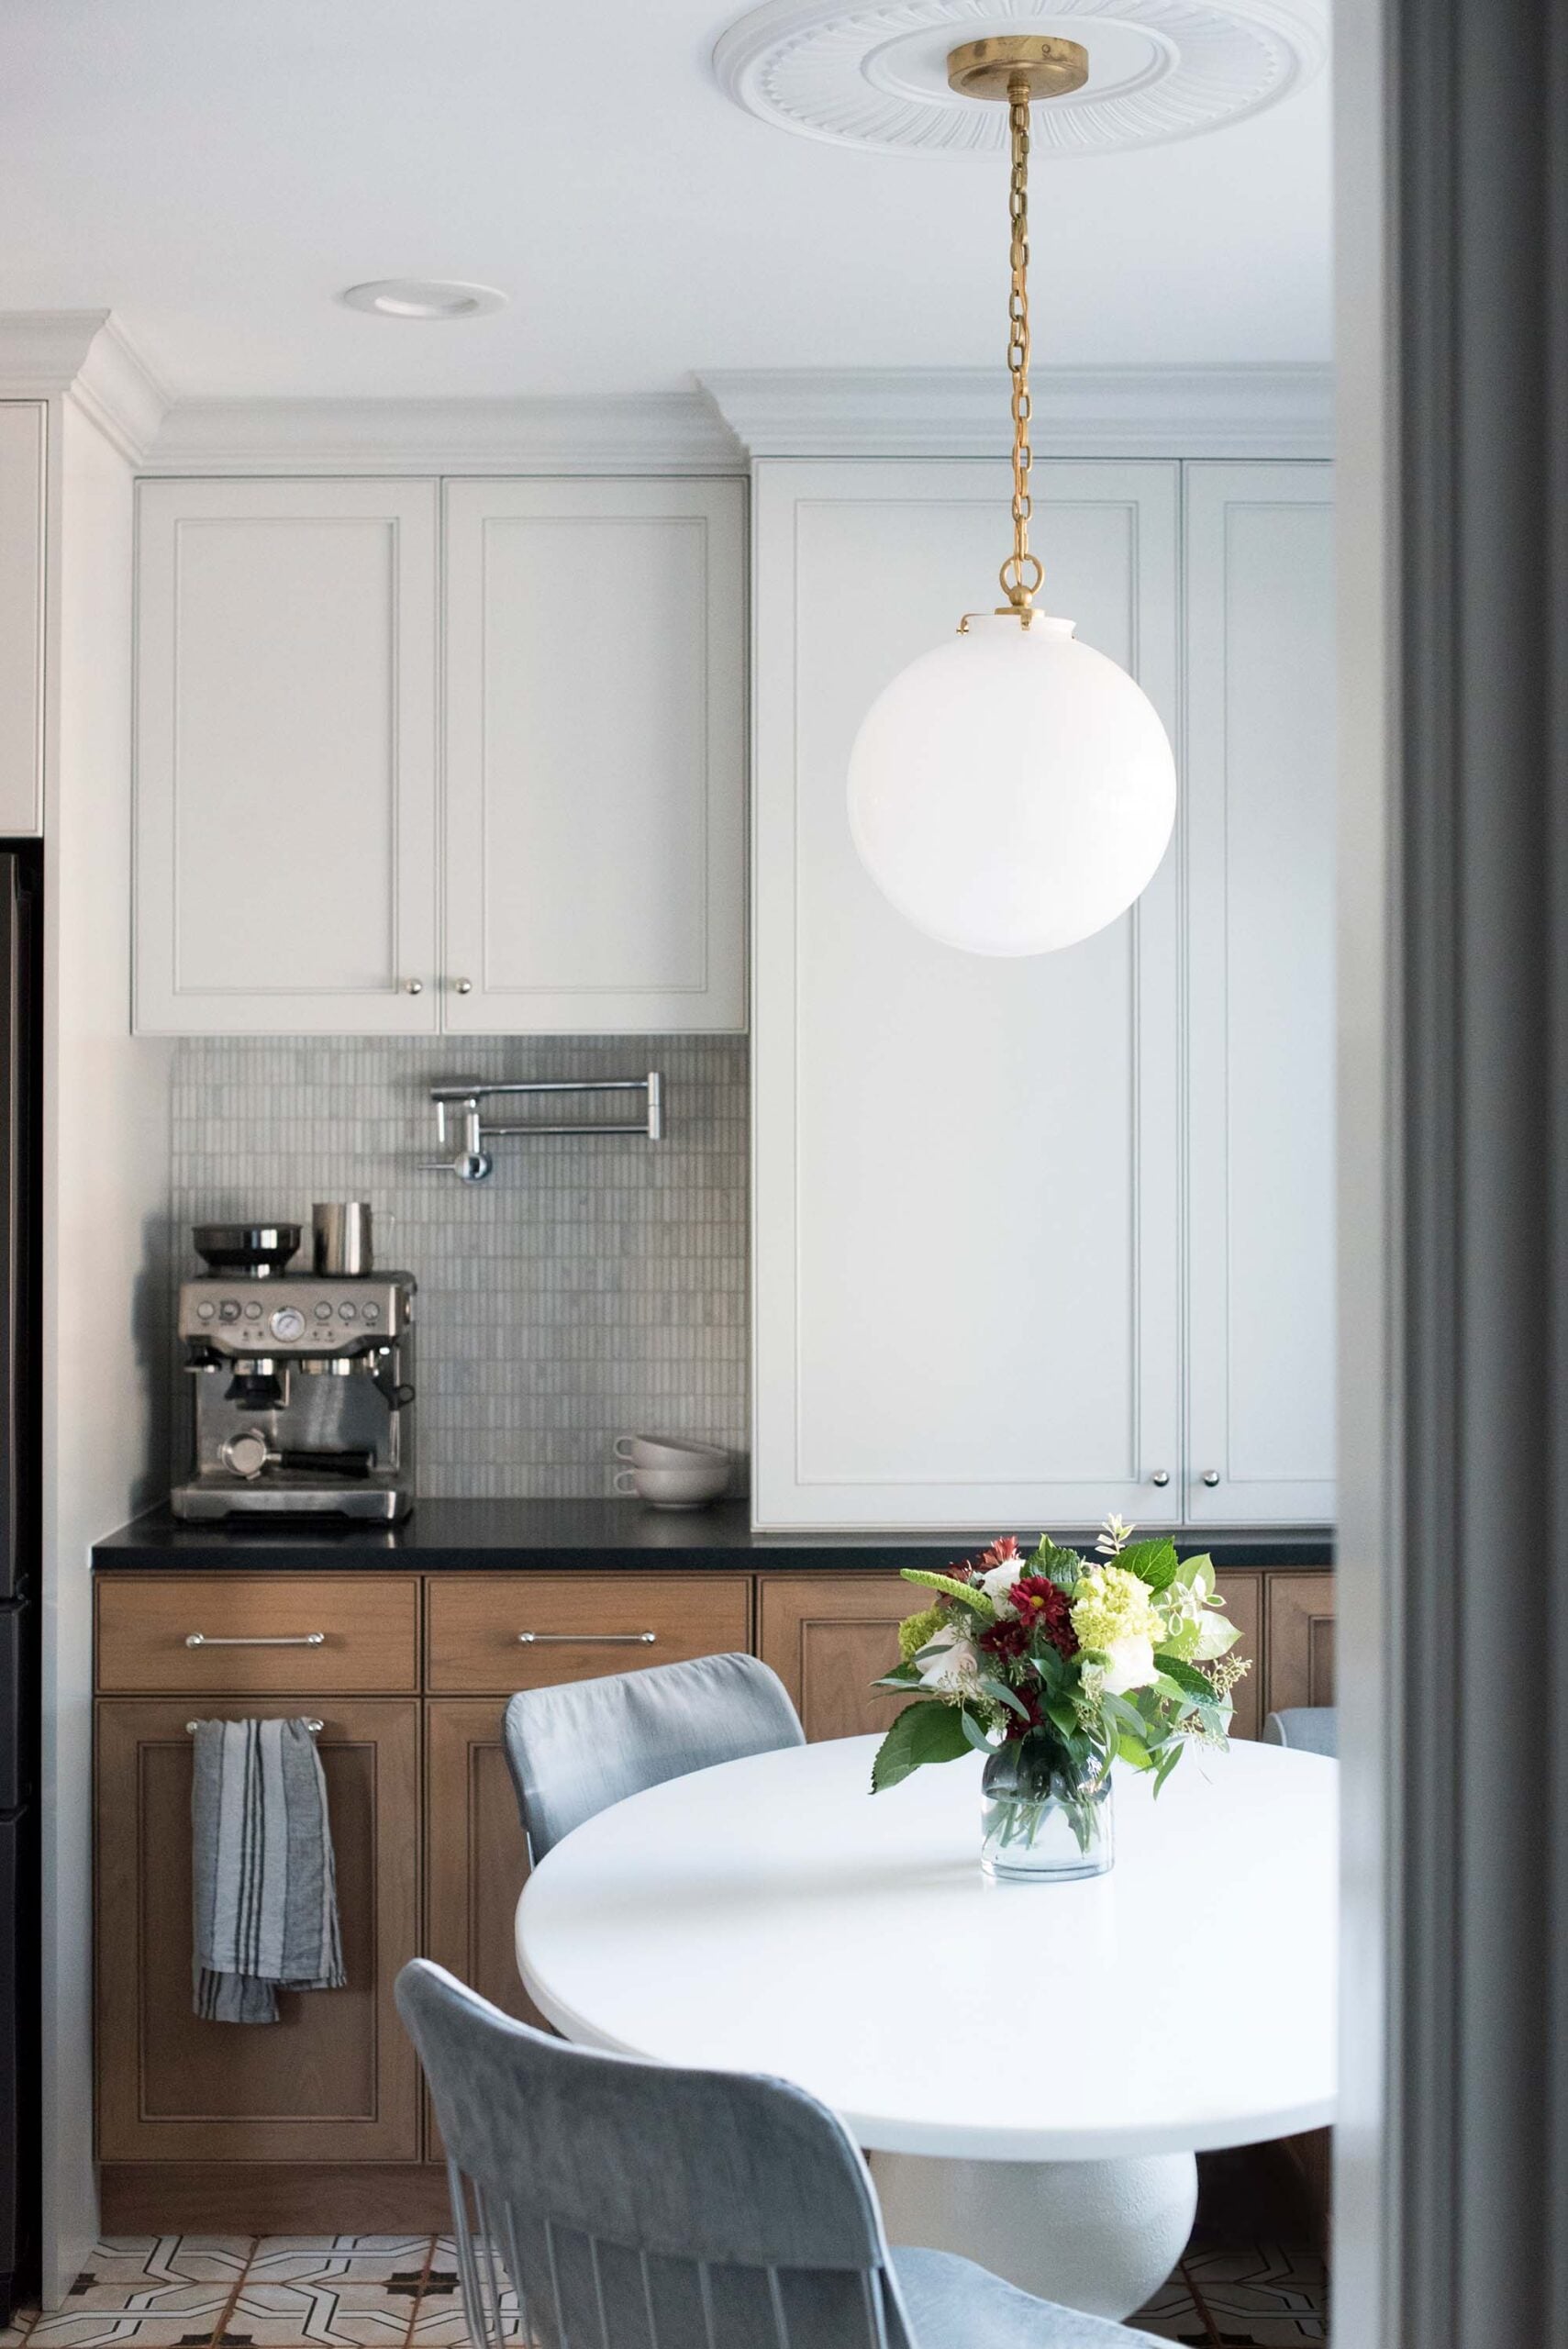
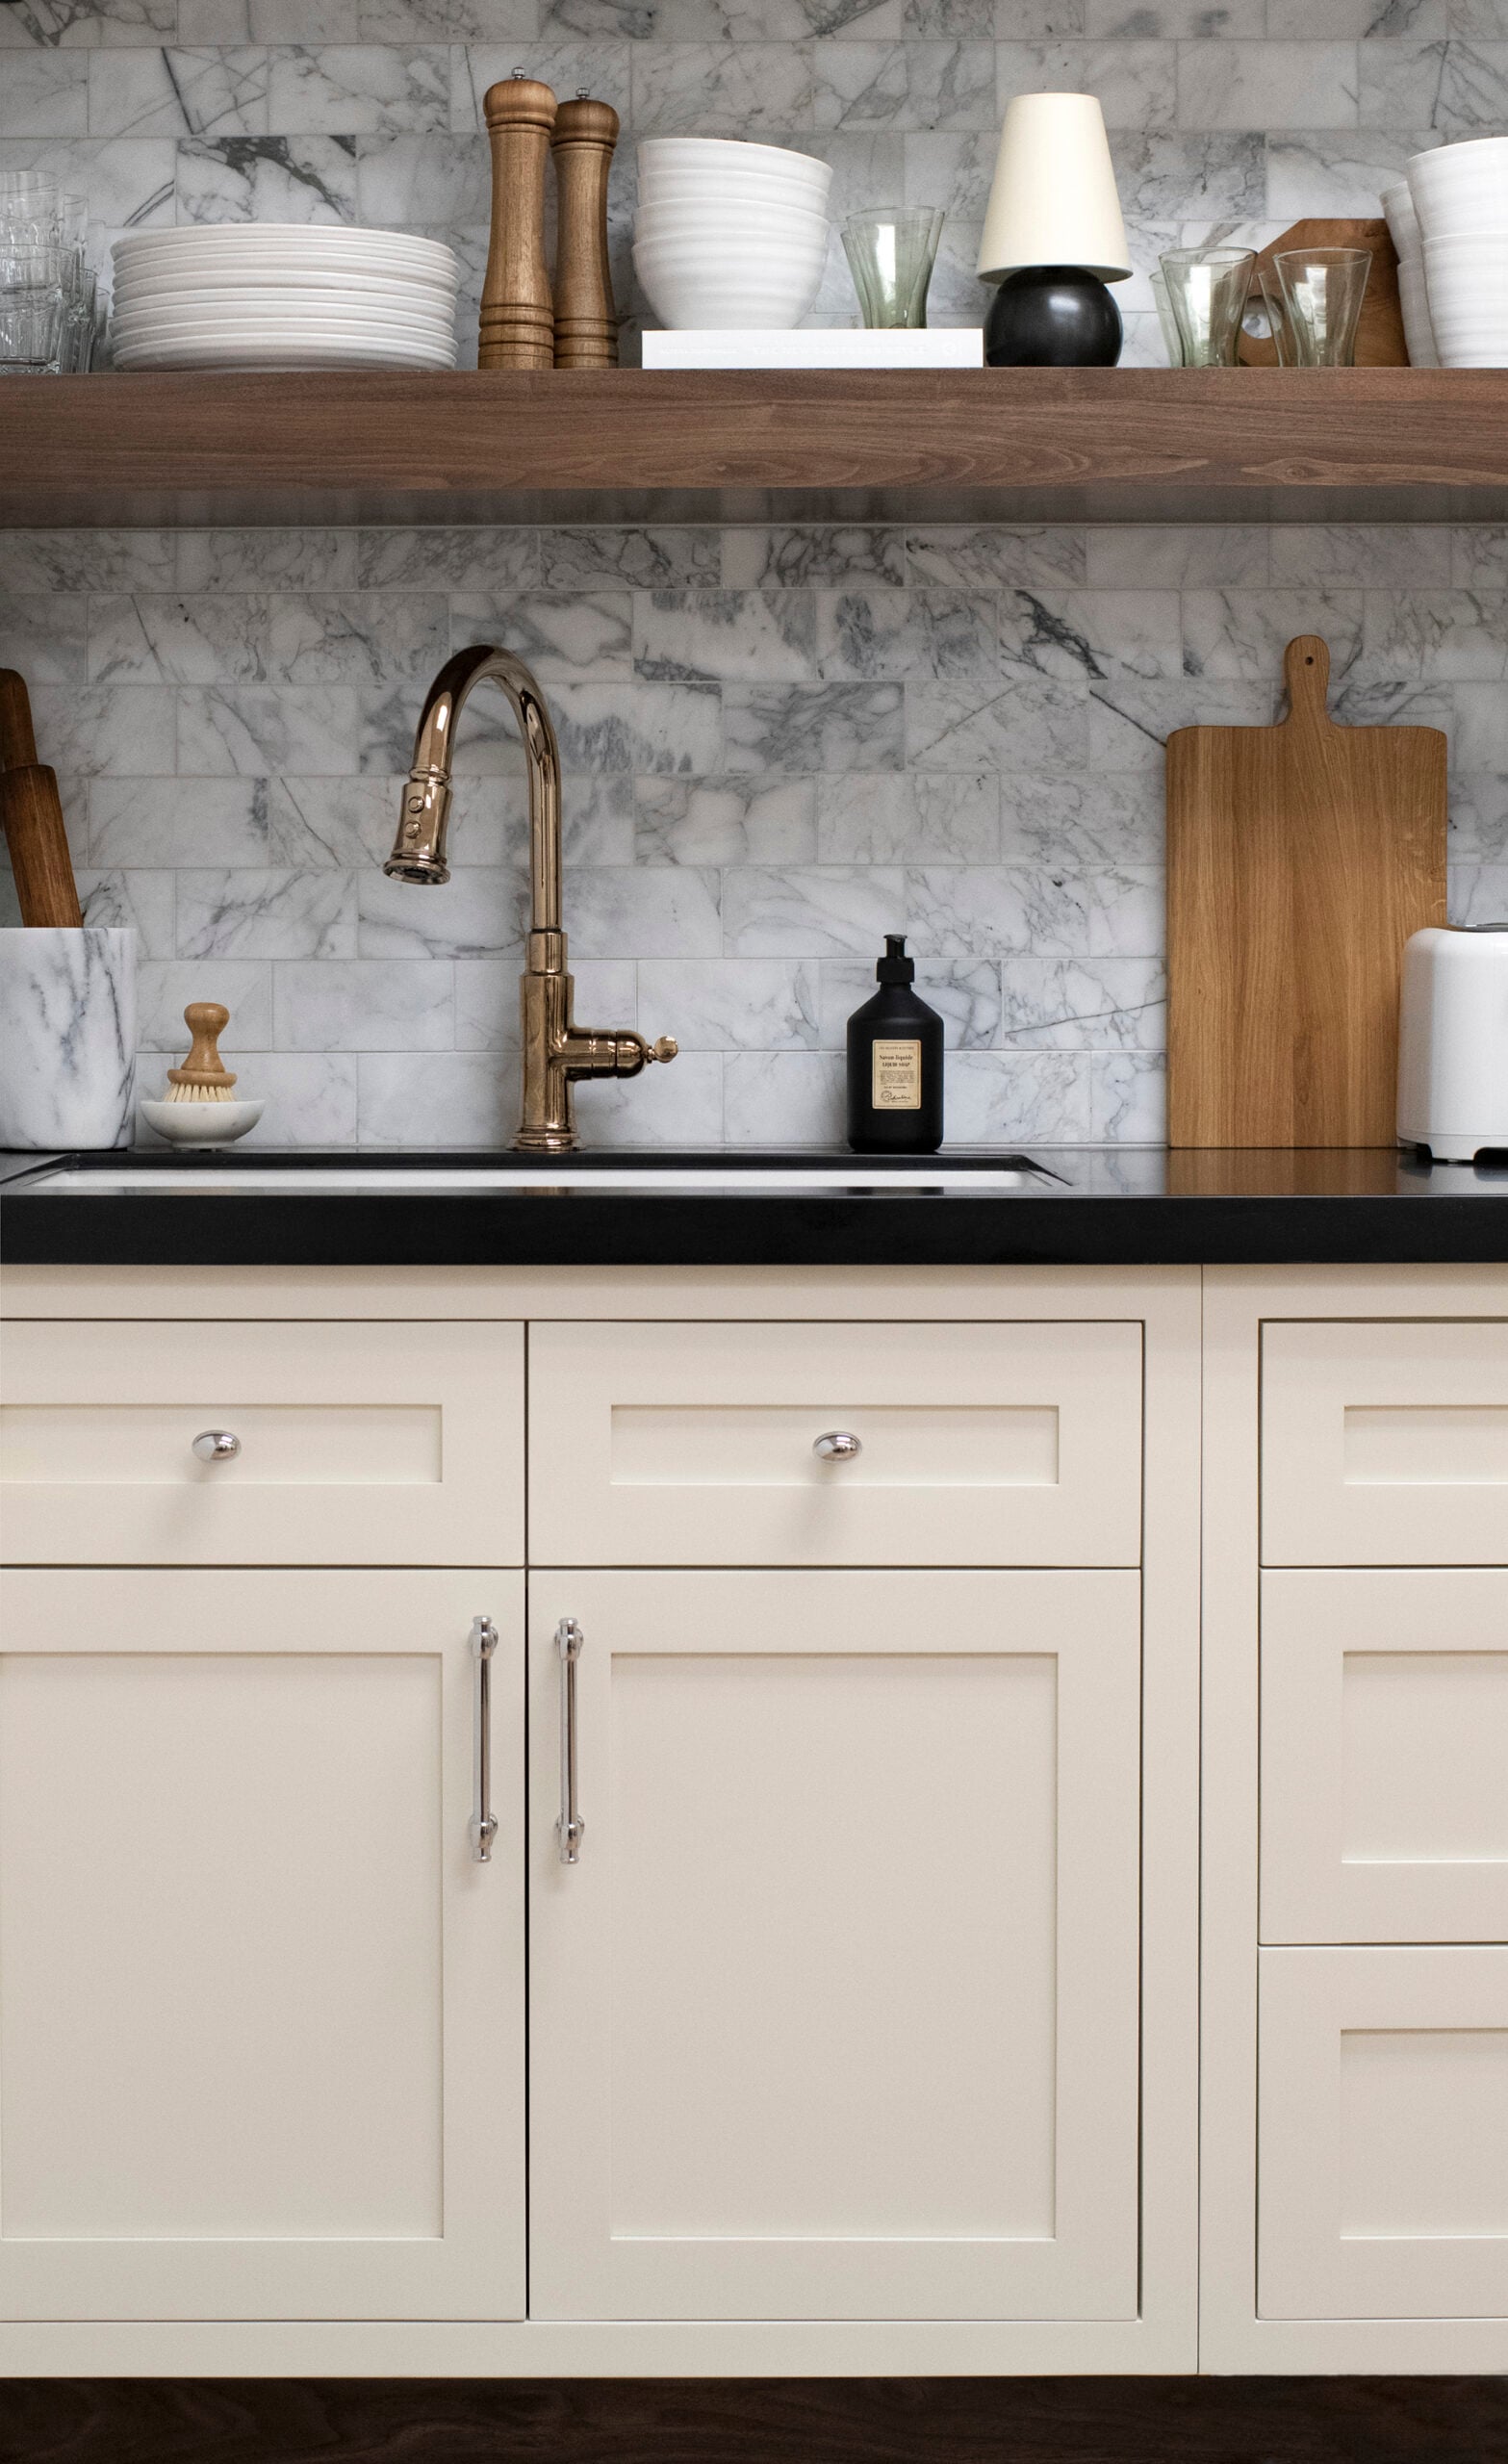
In our previous kitchen pictured above, I mixed a lot of cool metals throughout: chrome, stainless, black stainless, so adding a warmer hued antique brass light fixture was an intentional design decision to add a bit of warmth and contrast. Ask yourself where you could use a little variety. Avoid finishes that almost match, but instead feel like a mistake… for example, I’d never mix satin brass with polished or living brass. Stick to the same finish for each metal you incorporate.
Avoid cheap or fake metal finishes. Metal is one of those materials that either looks expensive and heavy, or cheap. There really isn’t a good in-between, so make sure you’re sourcing and installing the real deal.
Where to Mix Metals in Your Home
Metals appear in almost every room and category, from hardware and lighting to plumbing fixture and decorative accents. My strategy shifts slightly depending on the space. I always recommend following your instinct, because there really is no wrong answer and it’s your home. My personal preference is to mix metals in every single room, because it feels more designerly and layered. Here are some quick examples…
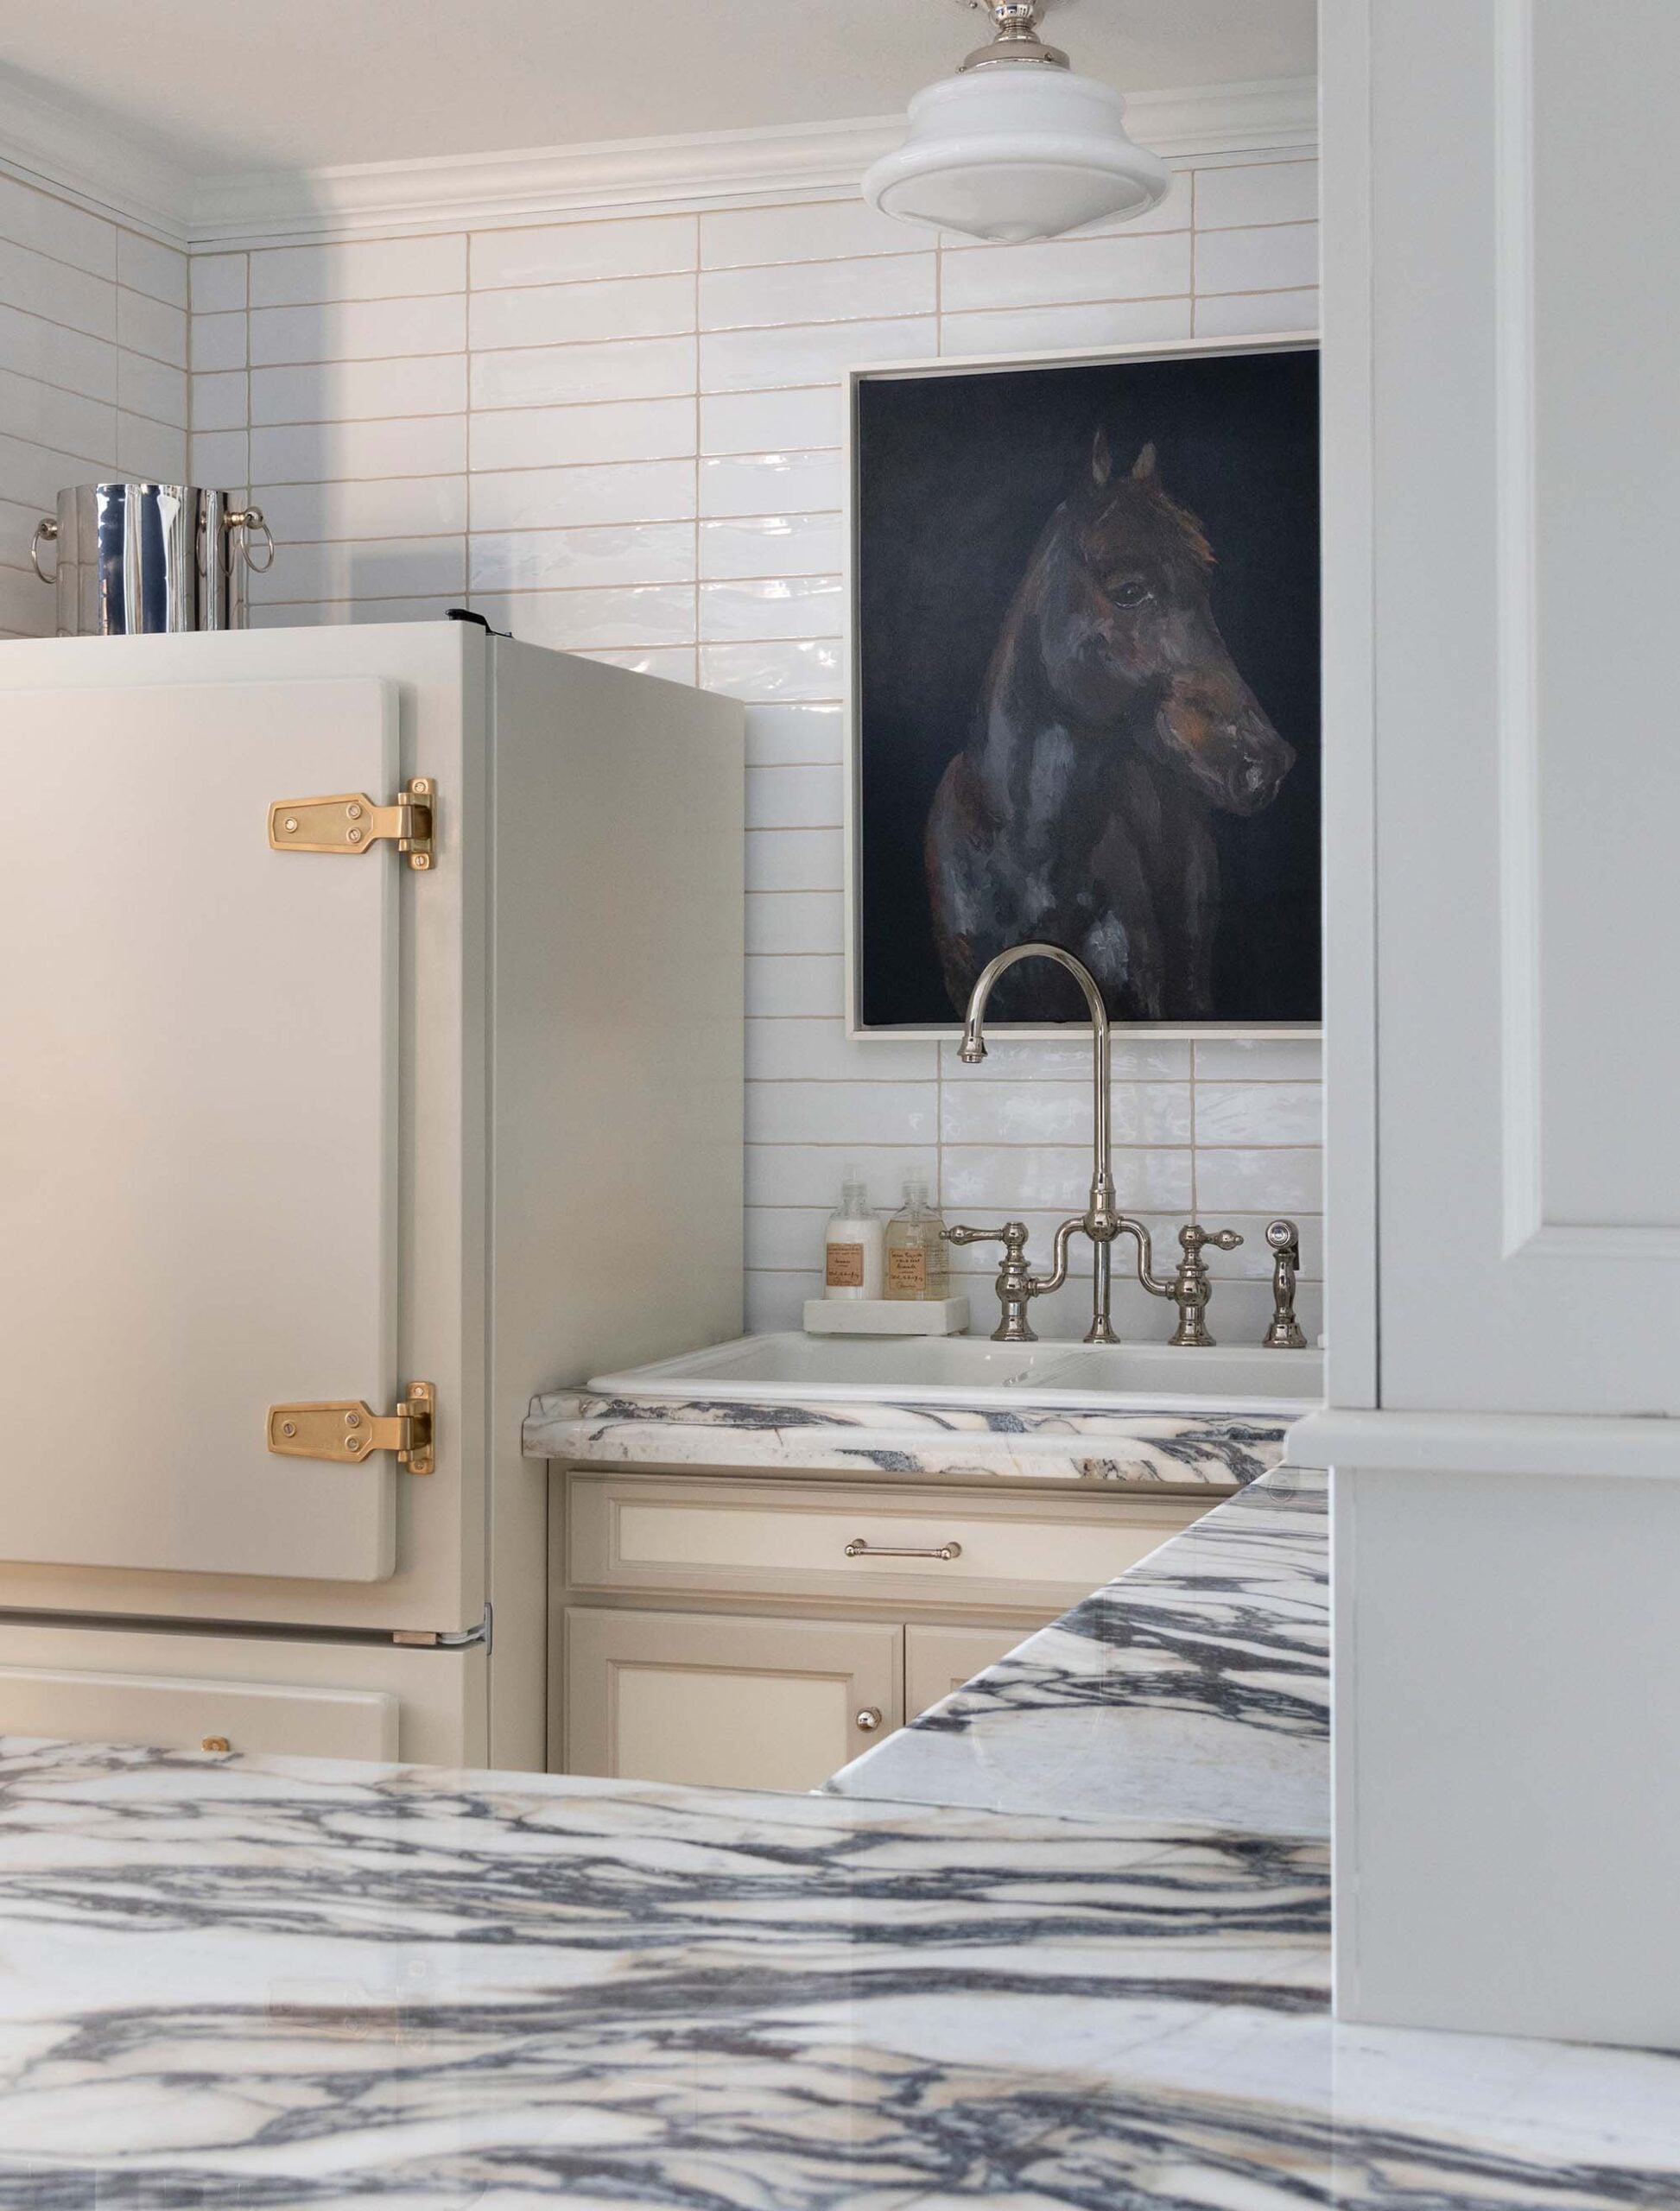
Kitchens
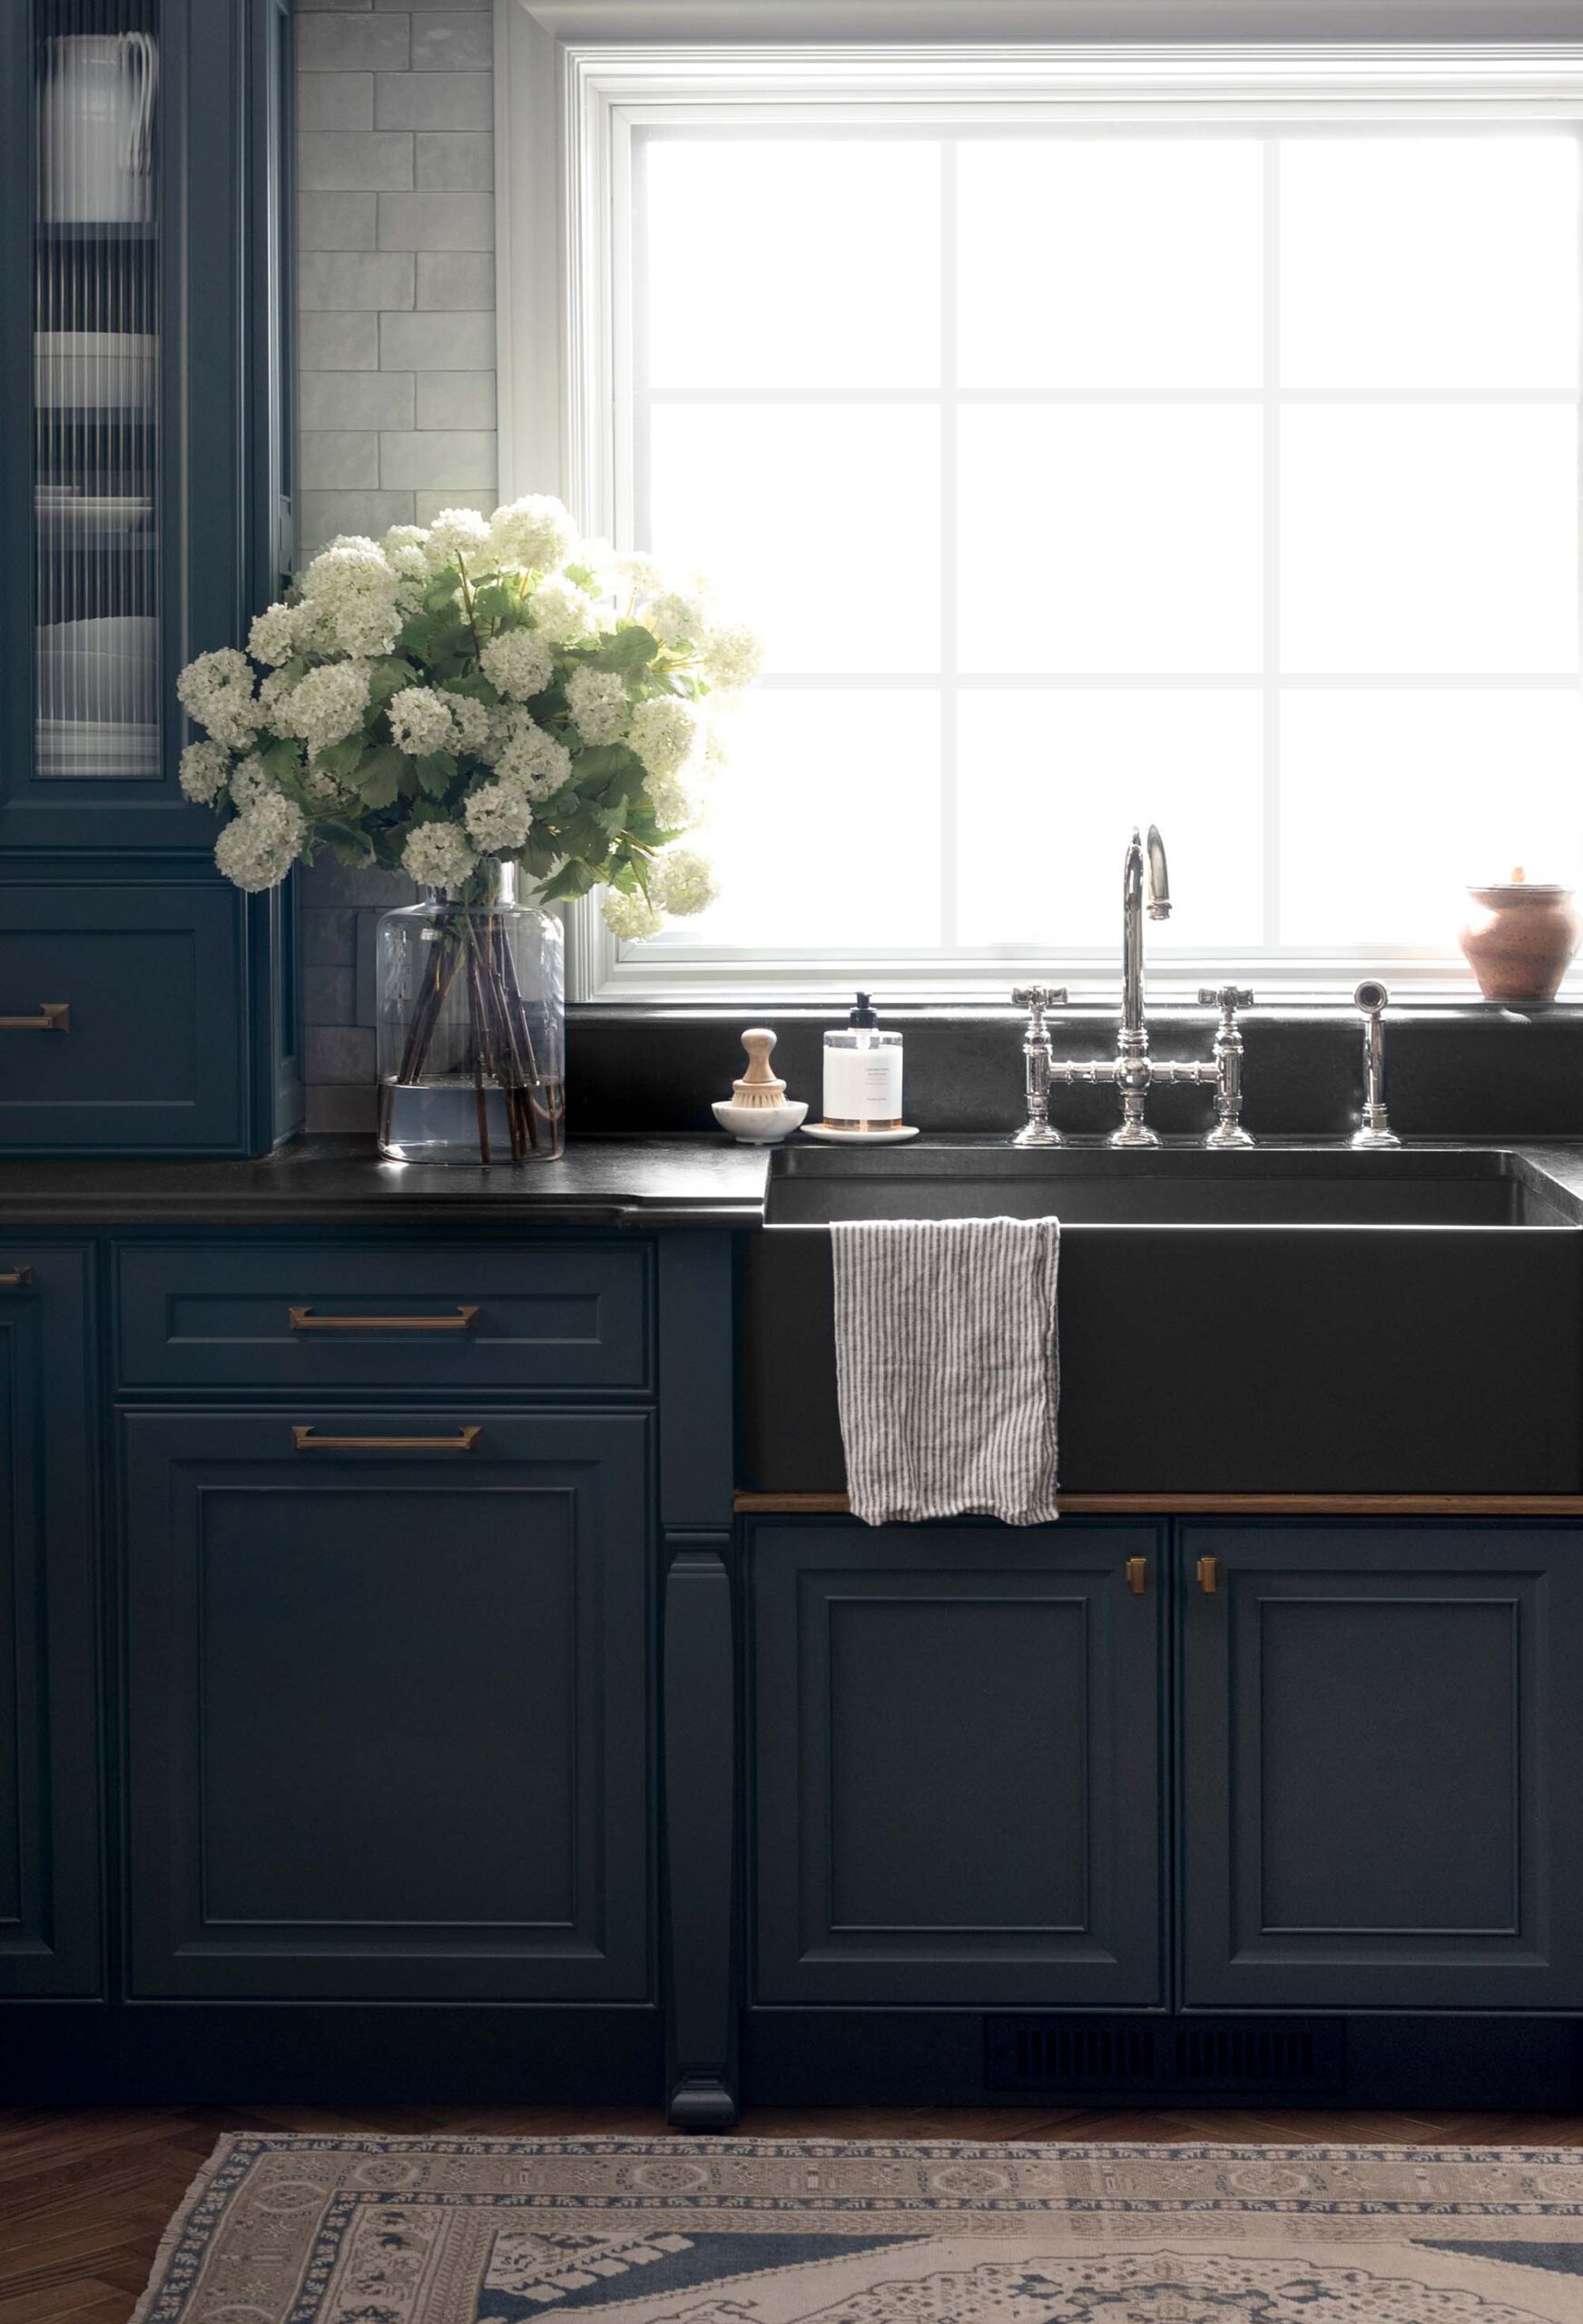
Kitchens are an ideal place for mixing finishes. If your faucet is polished nickel, try pairing it with brass lighting, copper, or dark bronze. Keep appliances in mind because stainless steel naturally acts as a cool-toned finish in your palette. In my kitchen, pictured above, I mixed antique brass, polished nickel, and a little stainless. I prefer to keep plumbing fixtures consistent, then bring in alternative metals with cabinetry hardware, lighting, and accessories. For more specific details you can read about how to mix metals and choose kitchen plumbing fixtures & hardware.
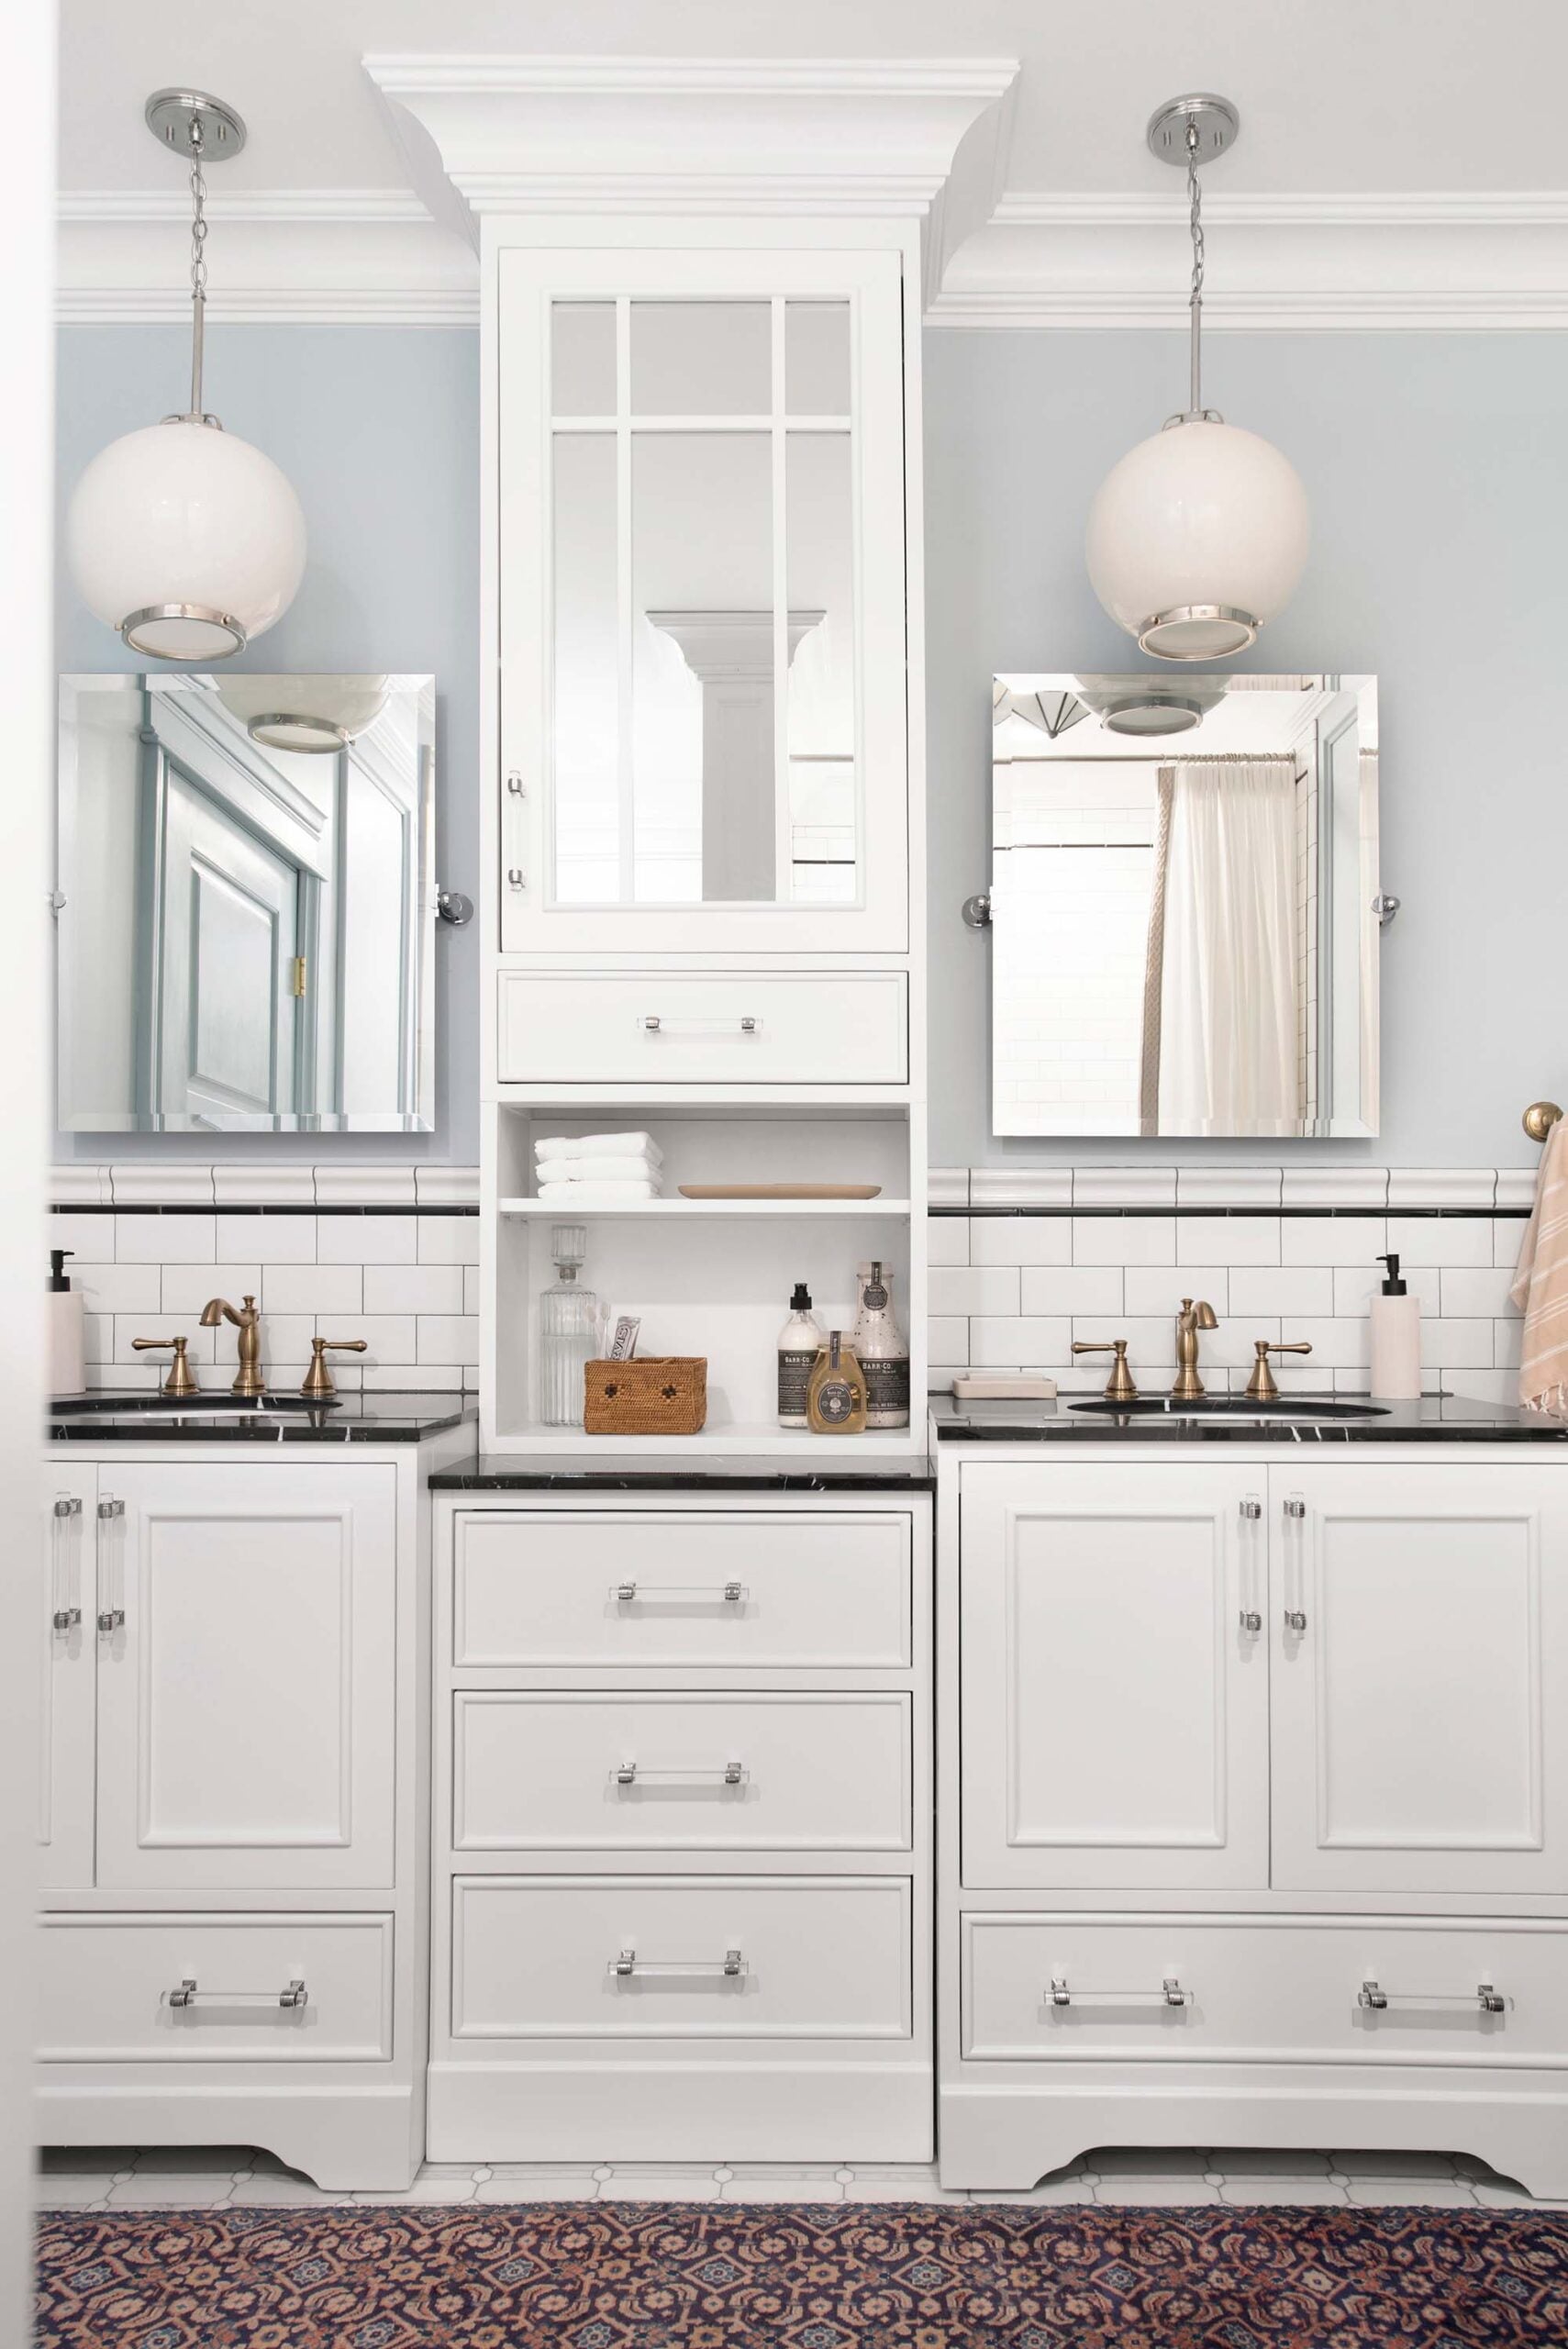
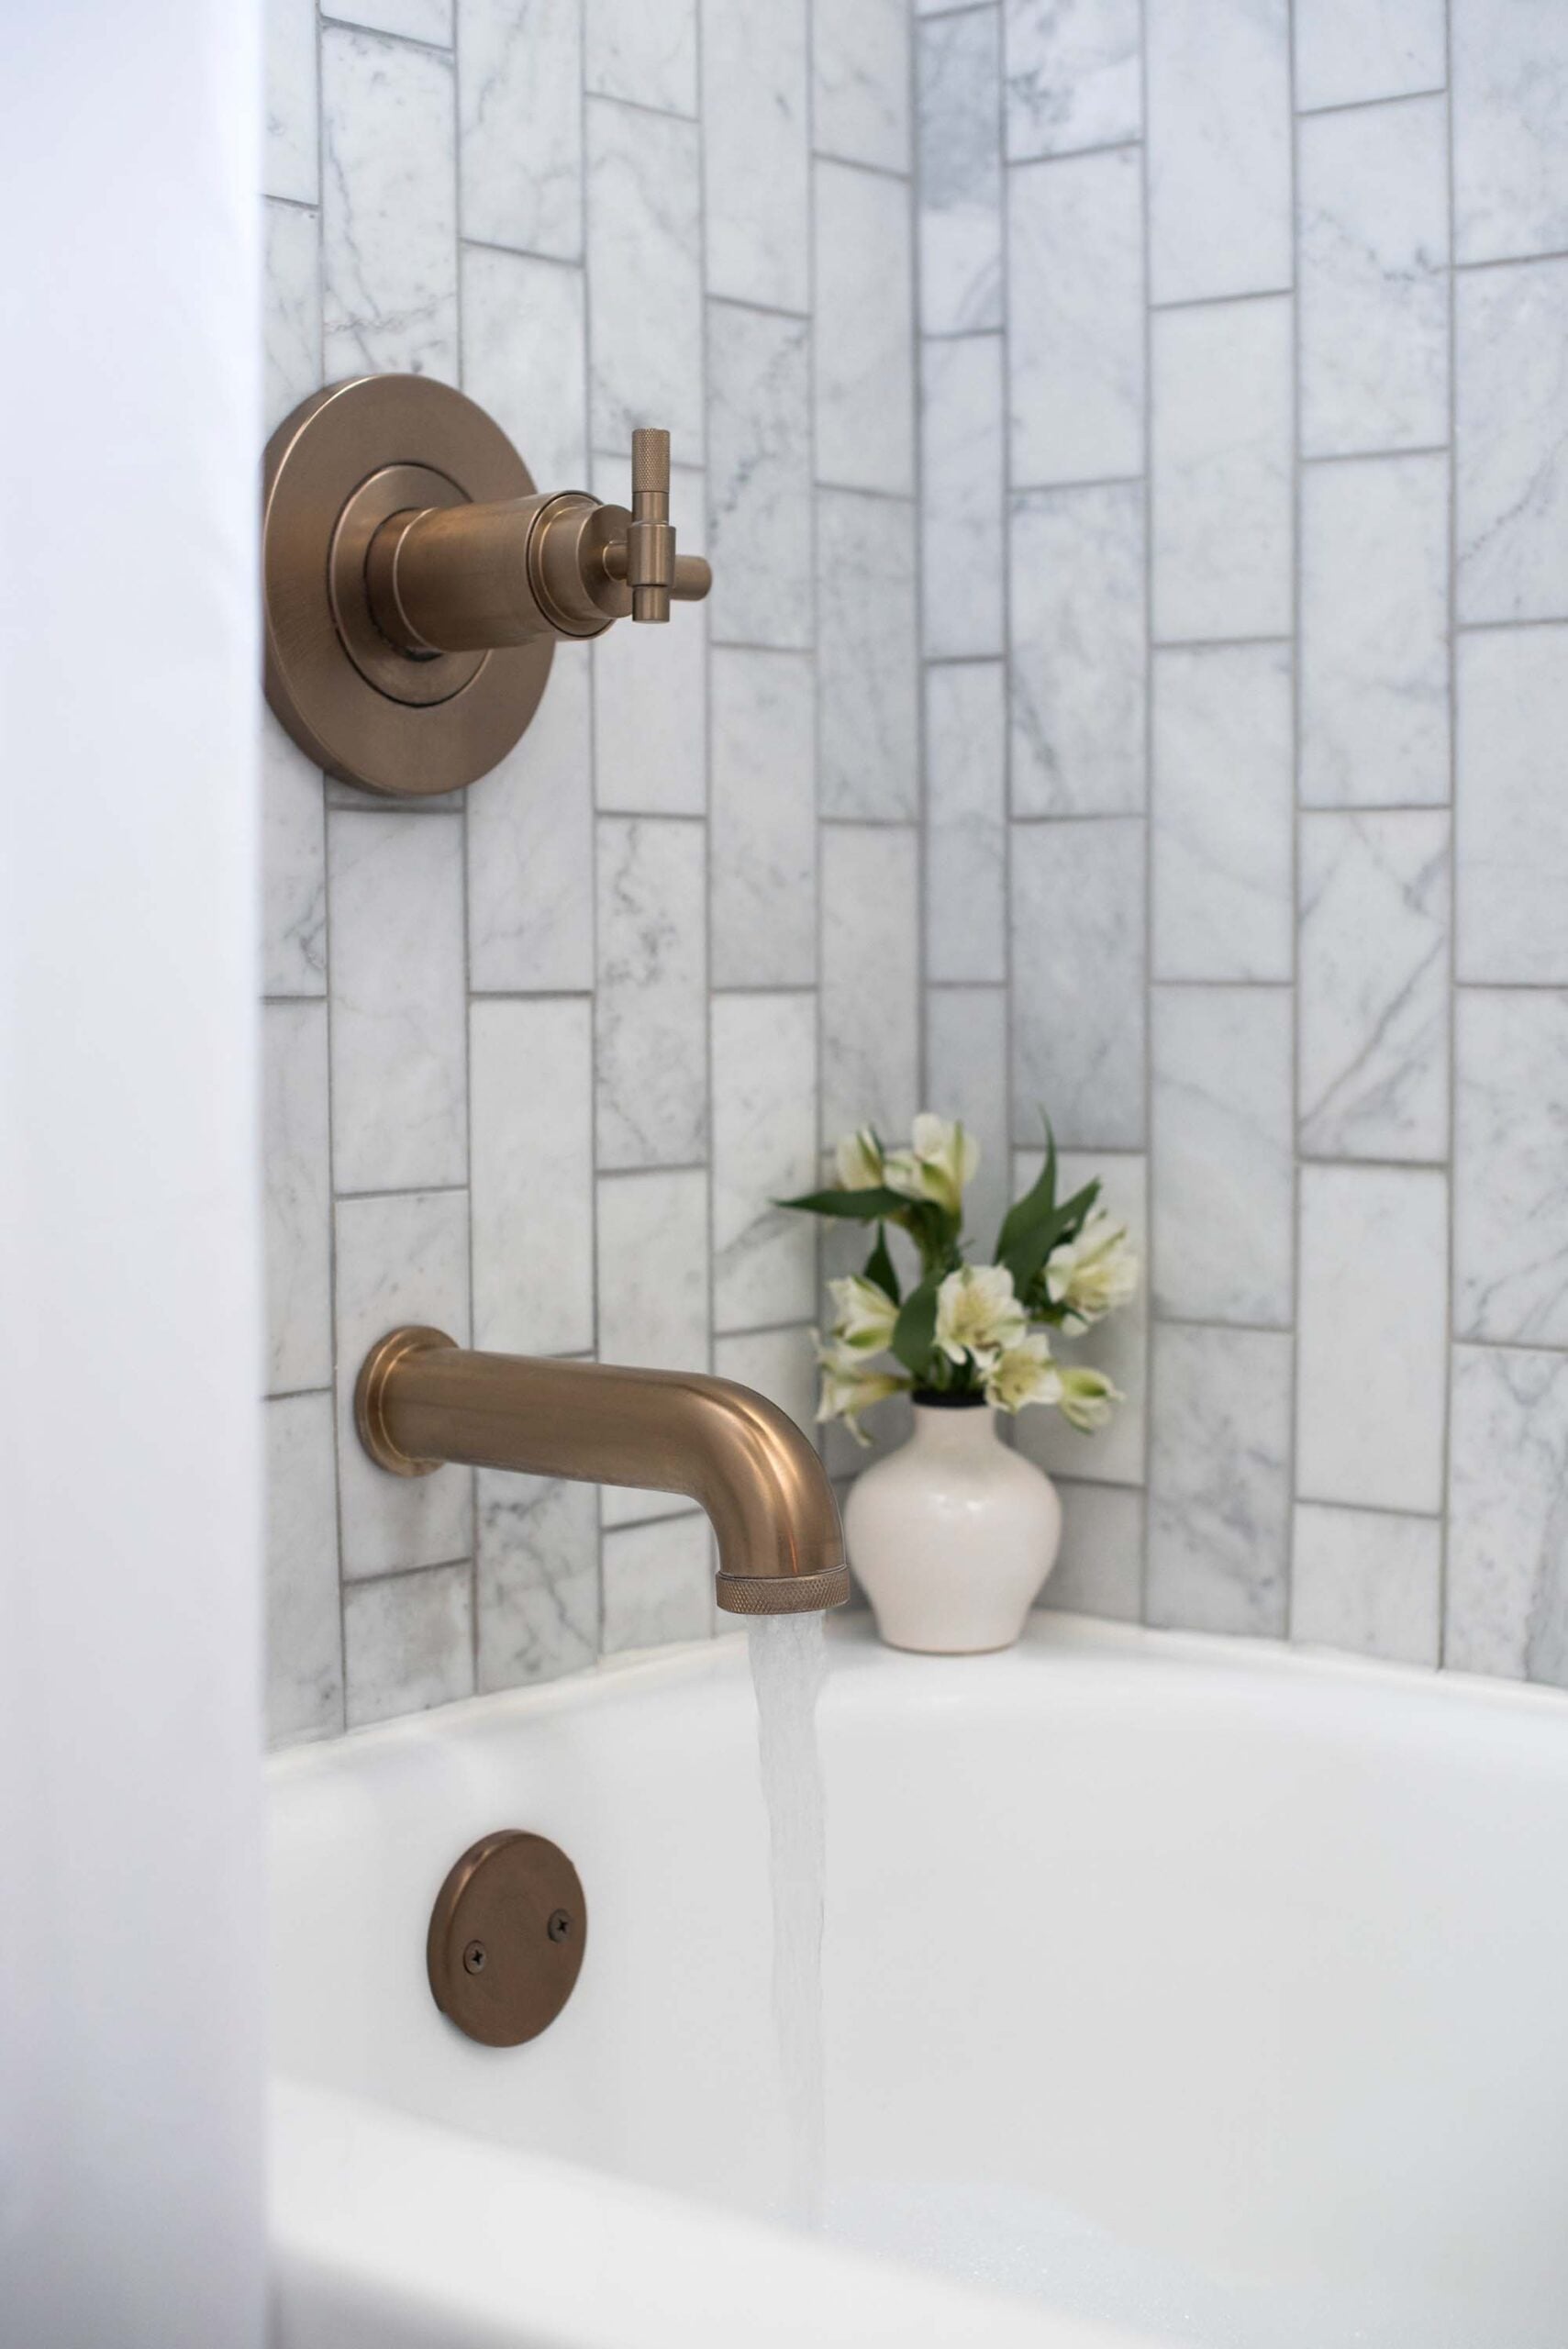
Bathrooms
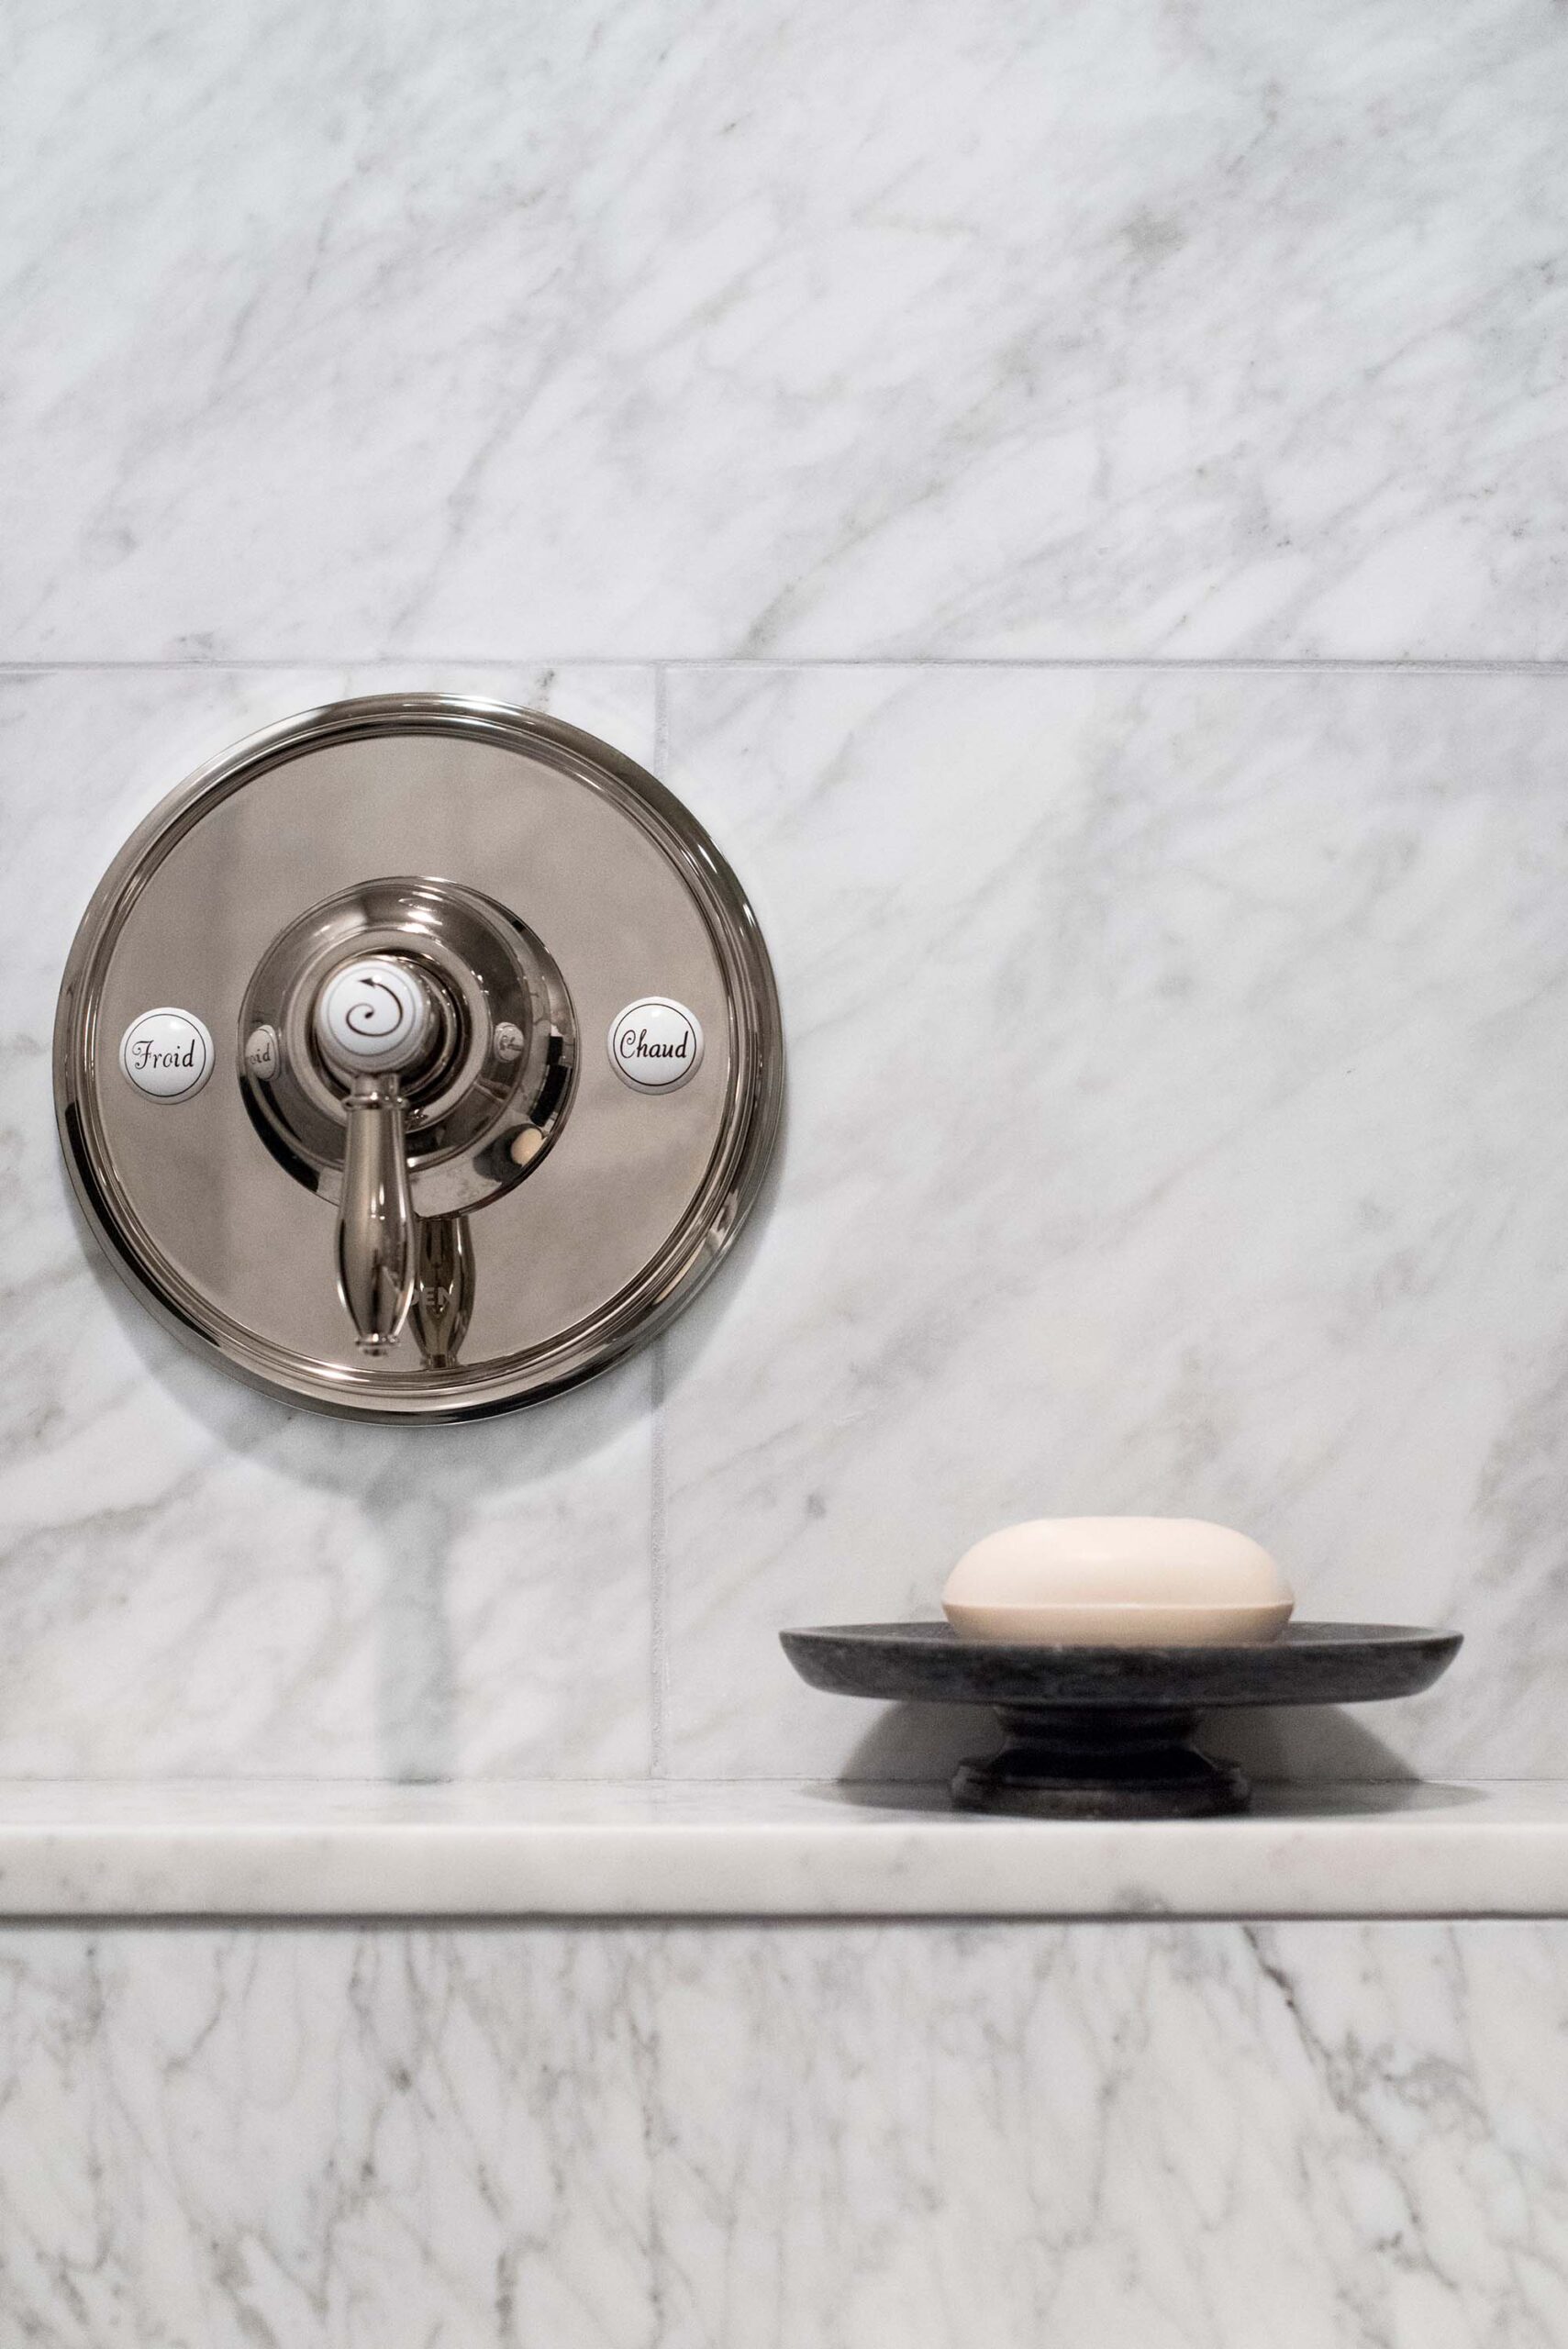
Bathrooms feel more elevated when the finishes aren’t too coordinated. I often use polished nickel plumbing fixtures, brass lighting, and a grounding finish like bronze for smaller details such as hooks, towel warmers, or mirror frames. A brass tub filler paired with a bronze shower head makes zero sense. I like to keep ALL plumbing fixtures the same finish. Keep metals of the same function consistent and intentional (example: matching brass plumbing fixtures includes the shower trim, sink faucet, tub spout, drain, etc).
Living Spaces
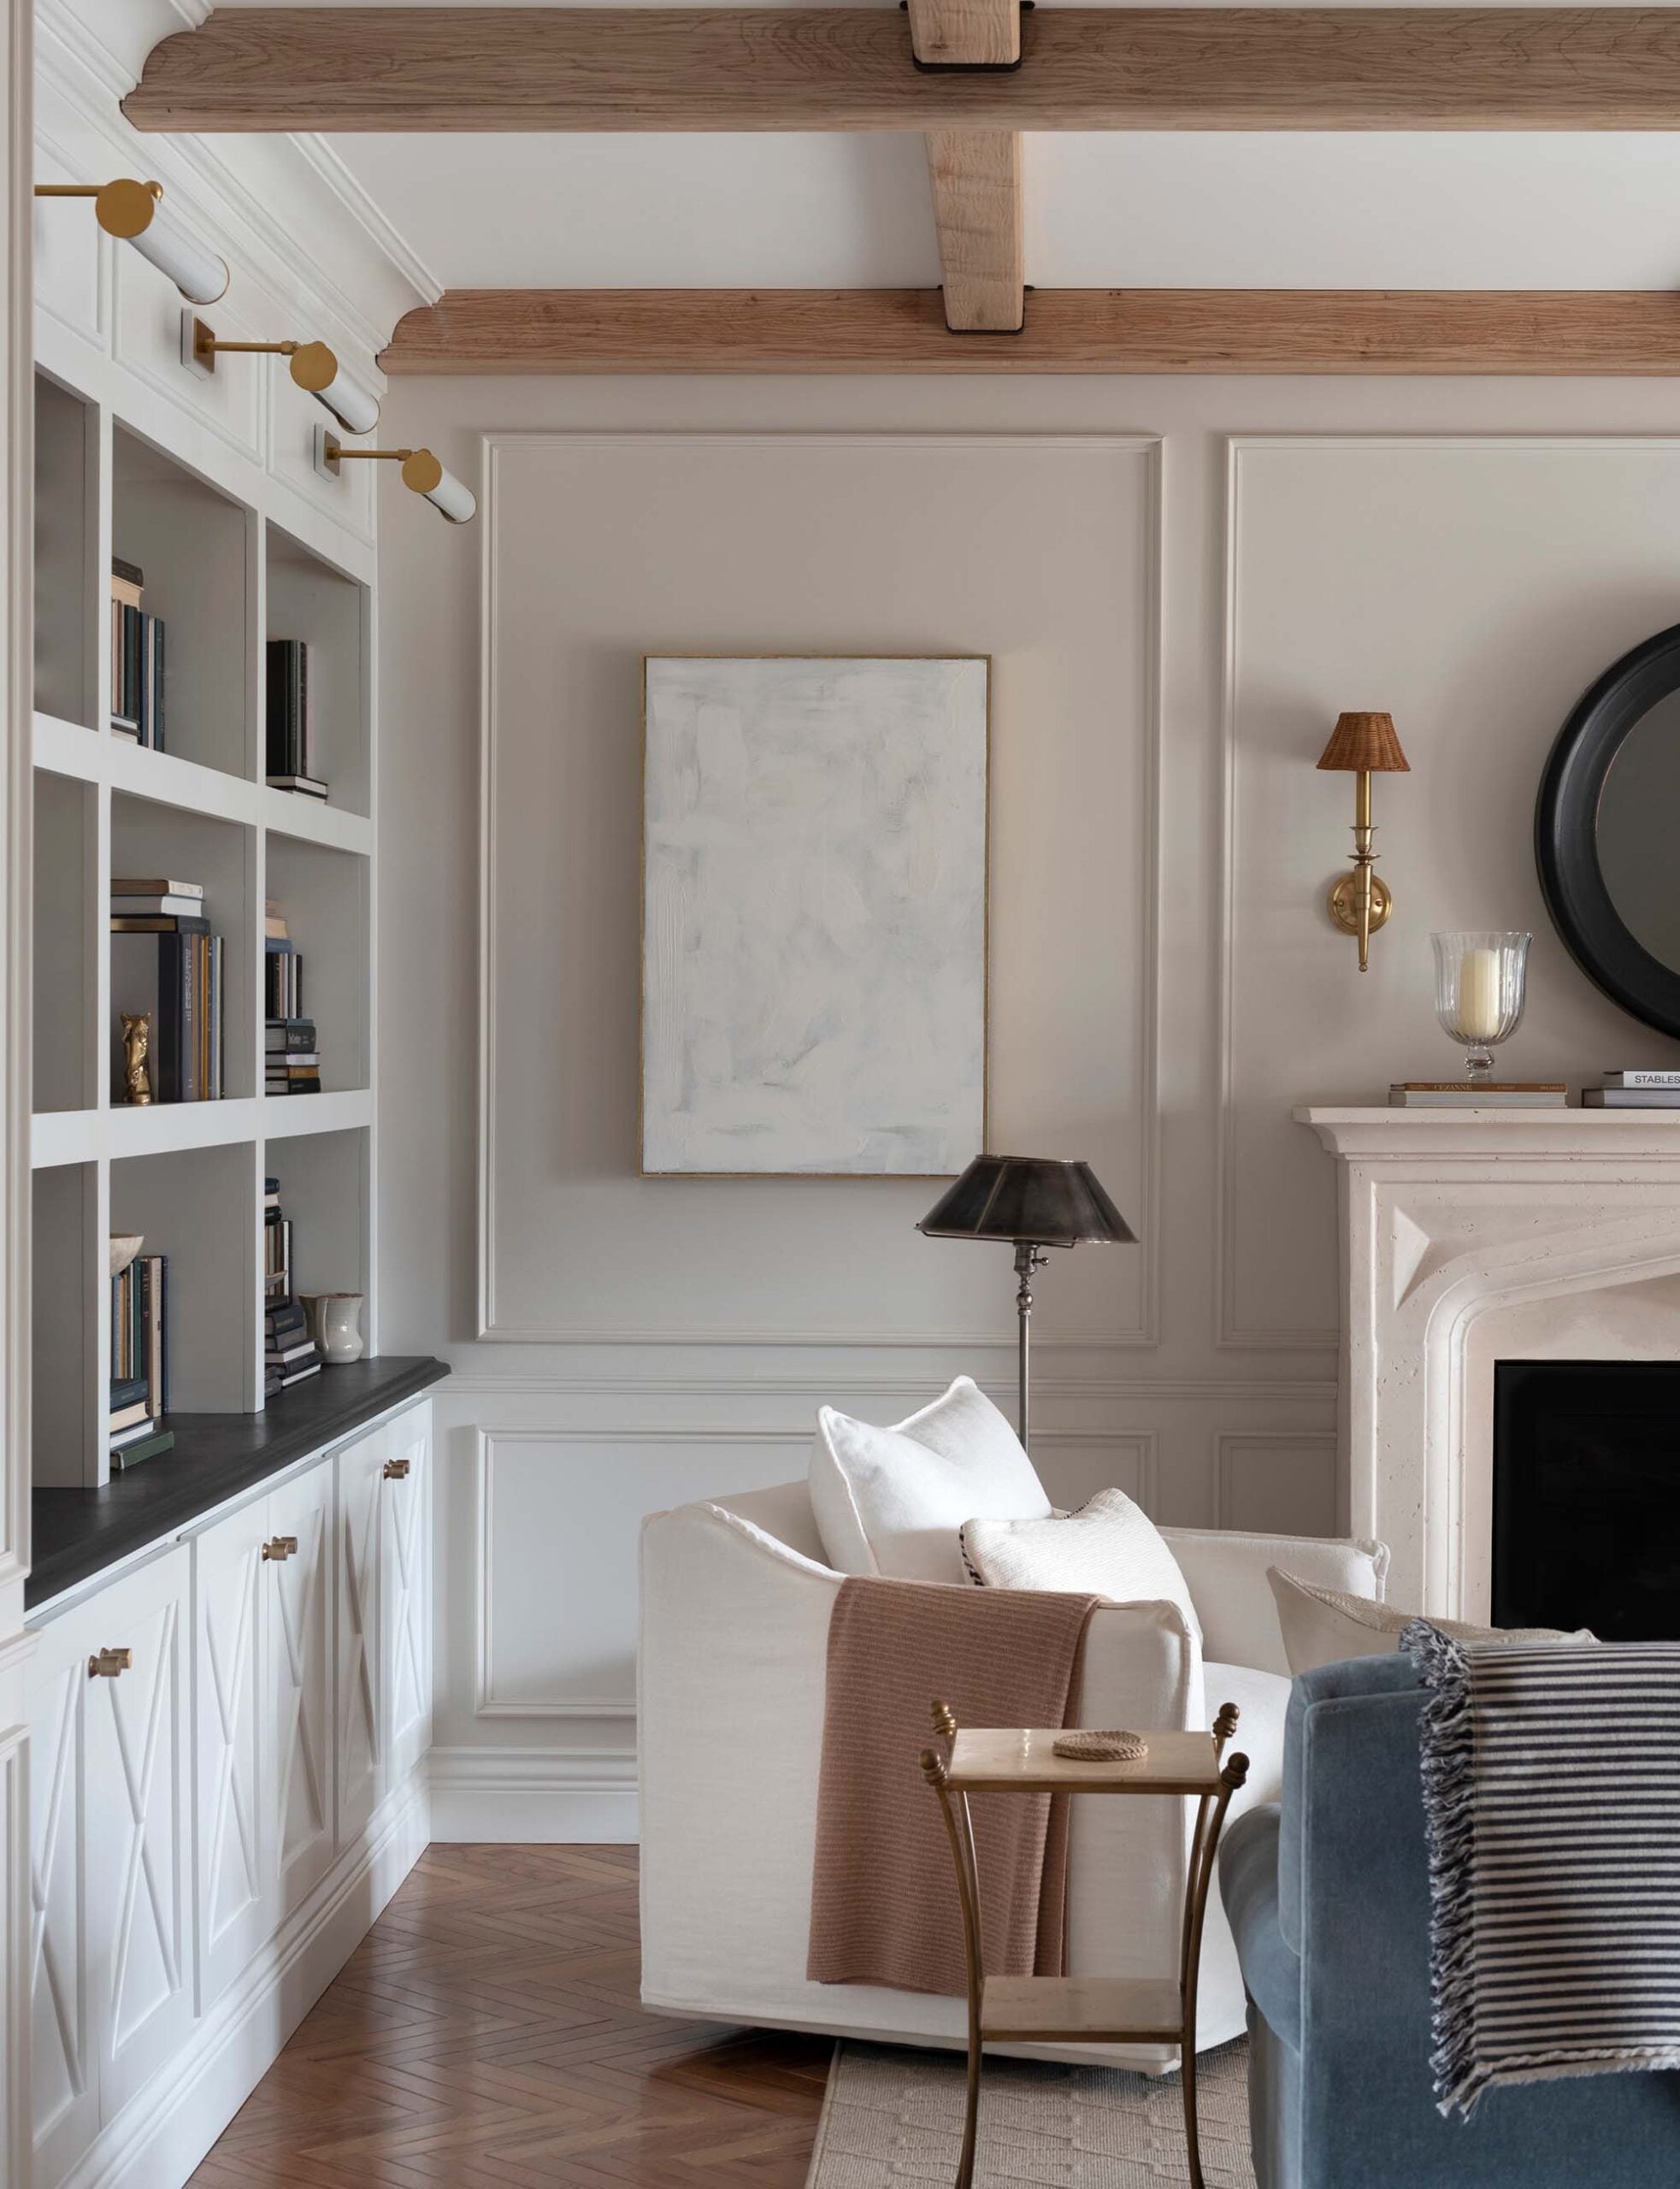
This is the most flexible room for blending metals. Table legs, lighting, hardware, fireplace screens, and decorative objects all offer opportunities to repeat finishes without needing them to match perfectly.
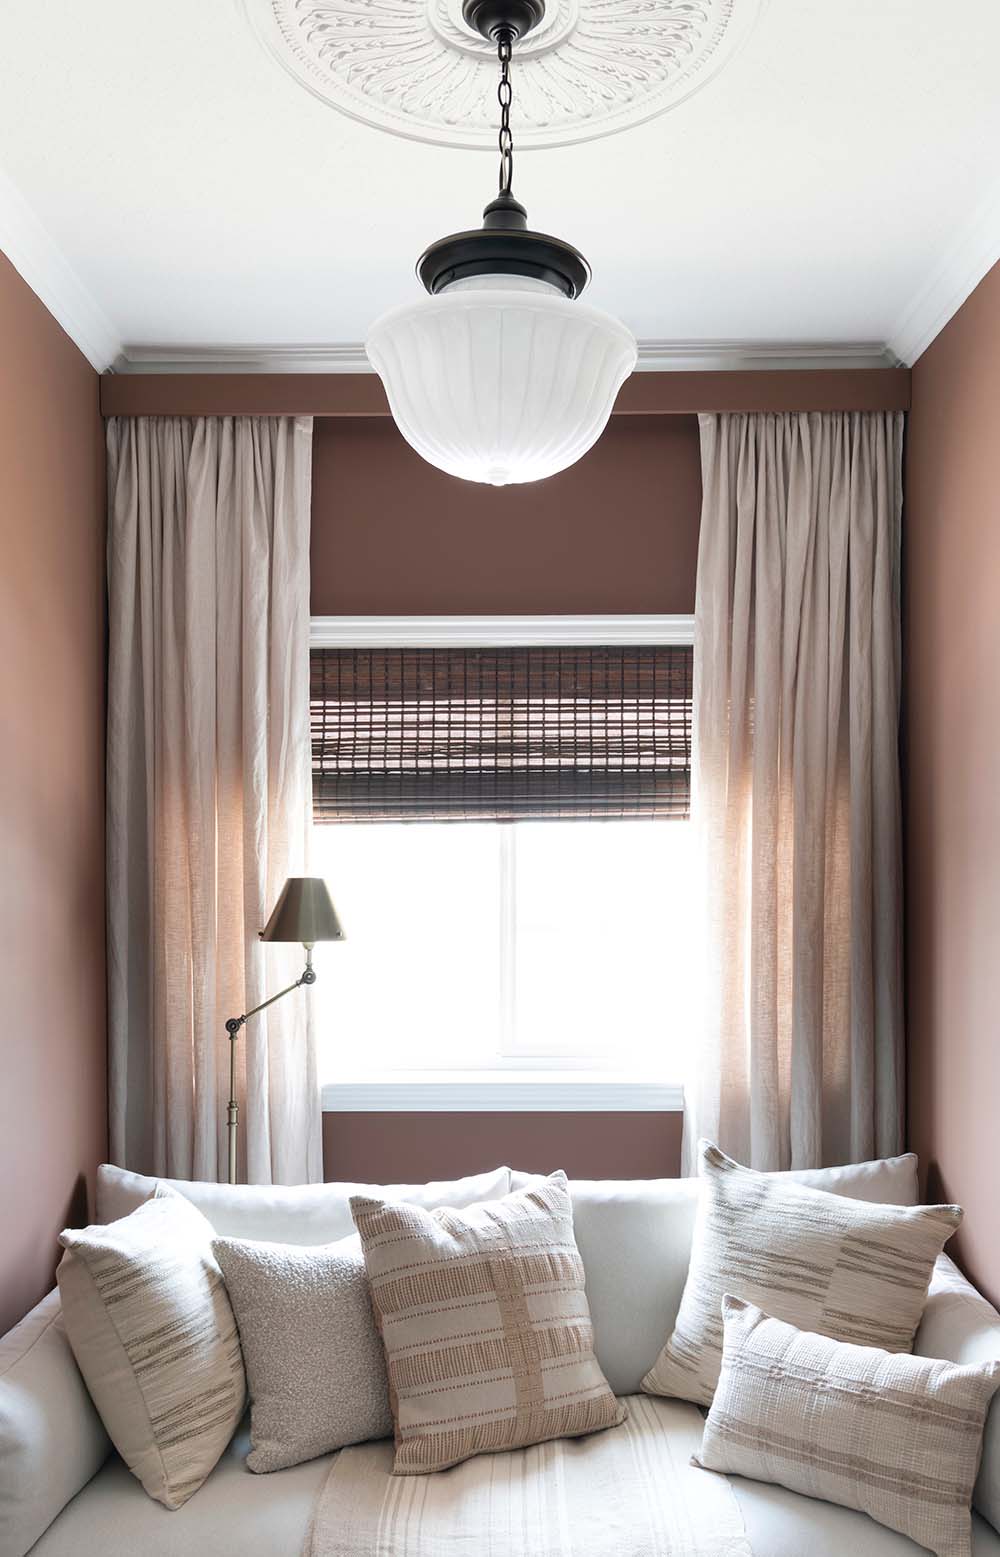
Bedrooms
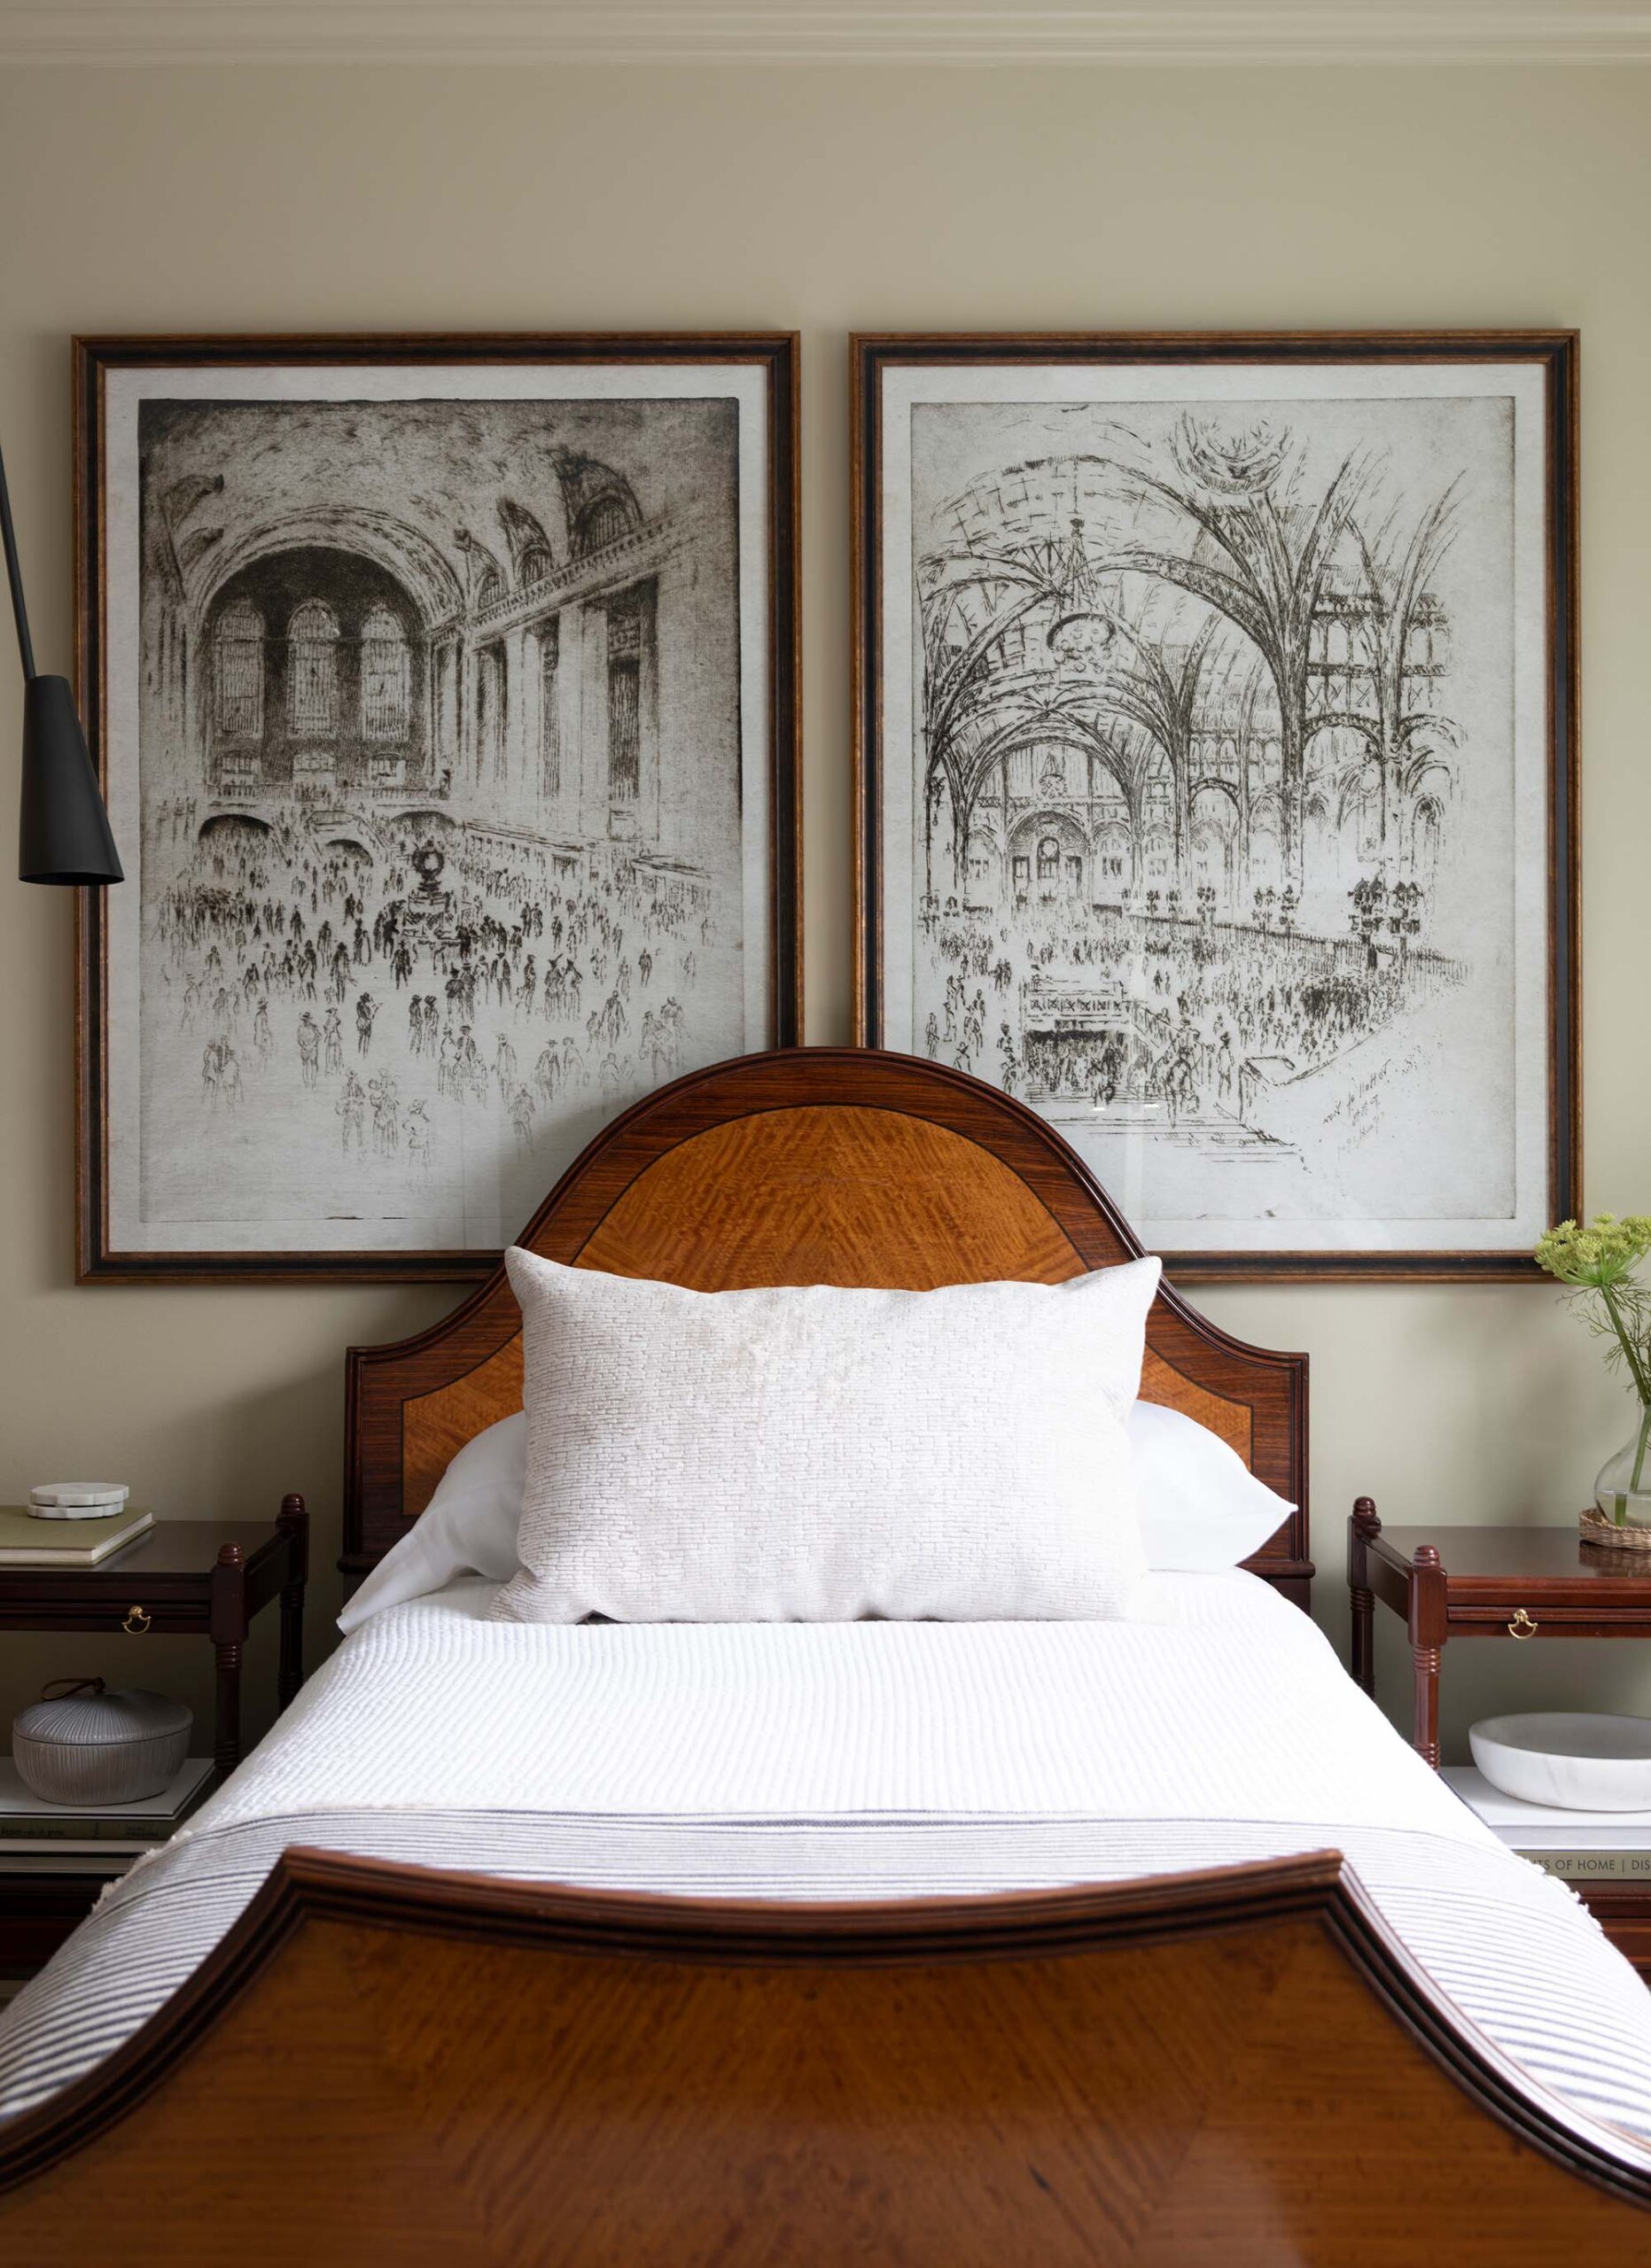
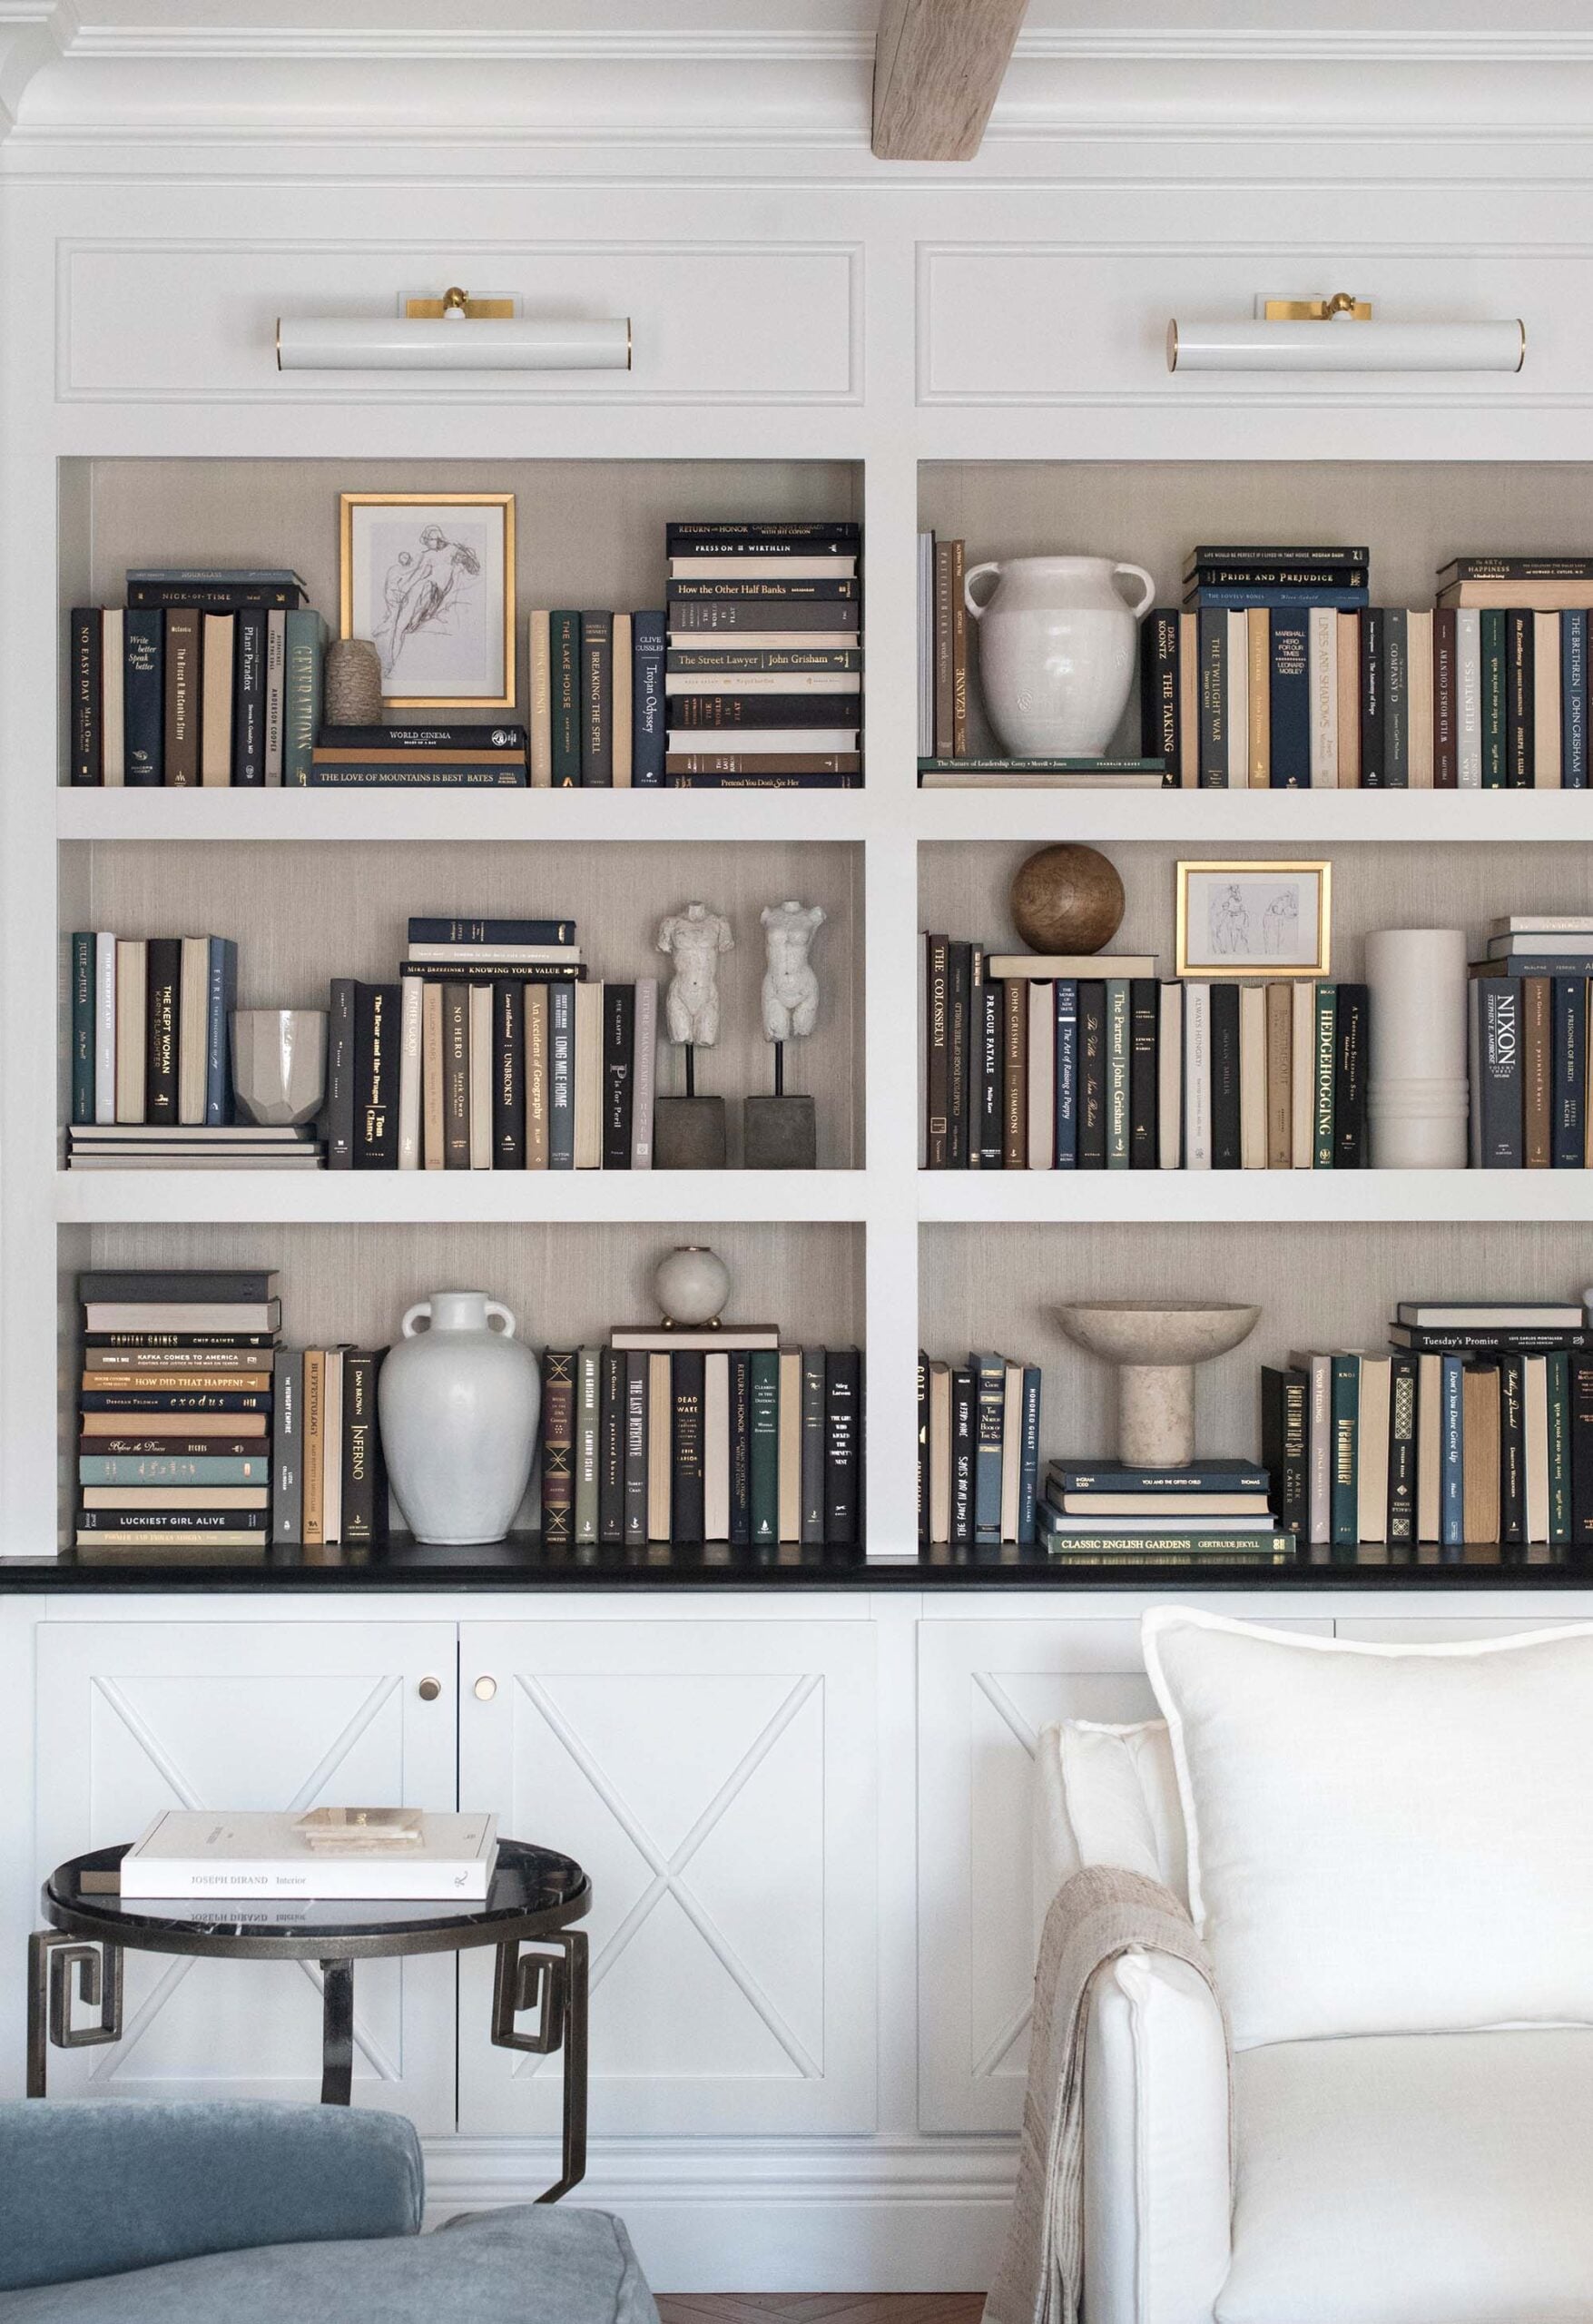
Don’t forget about finish sheen. Combining polished, aged, oxidized, antiqued, and burnished textures add another layer of depth and sophistication. In our basement bedroom, I paired a bronze sconce and framed art with polished brass hardware.
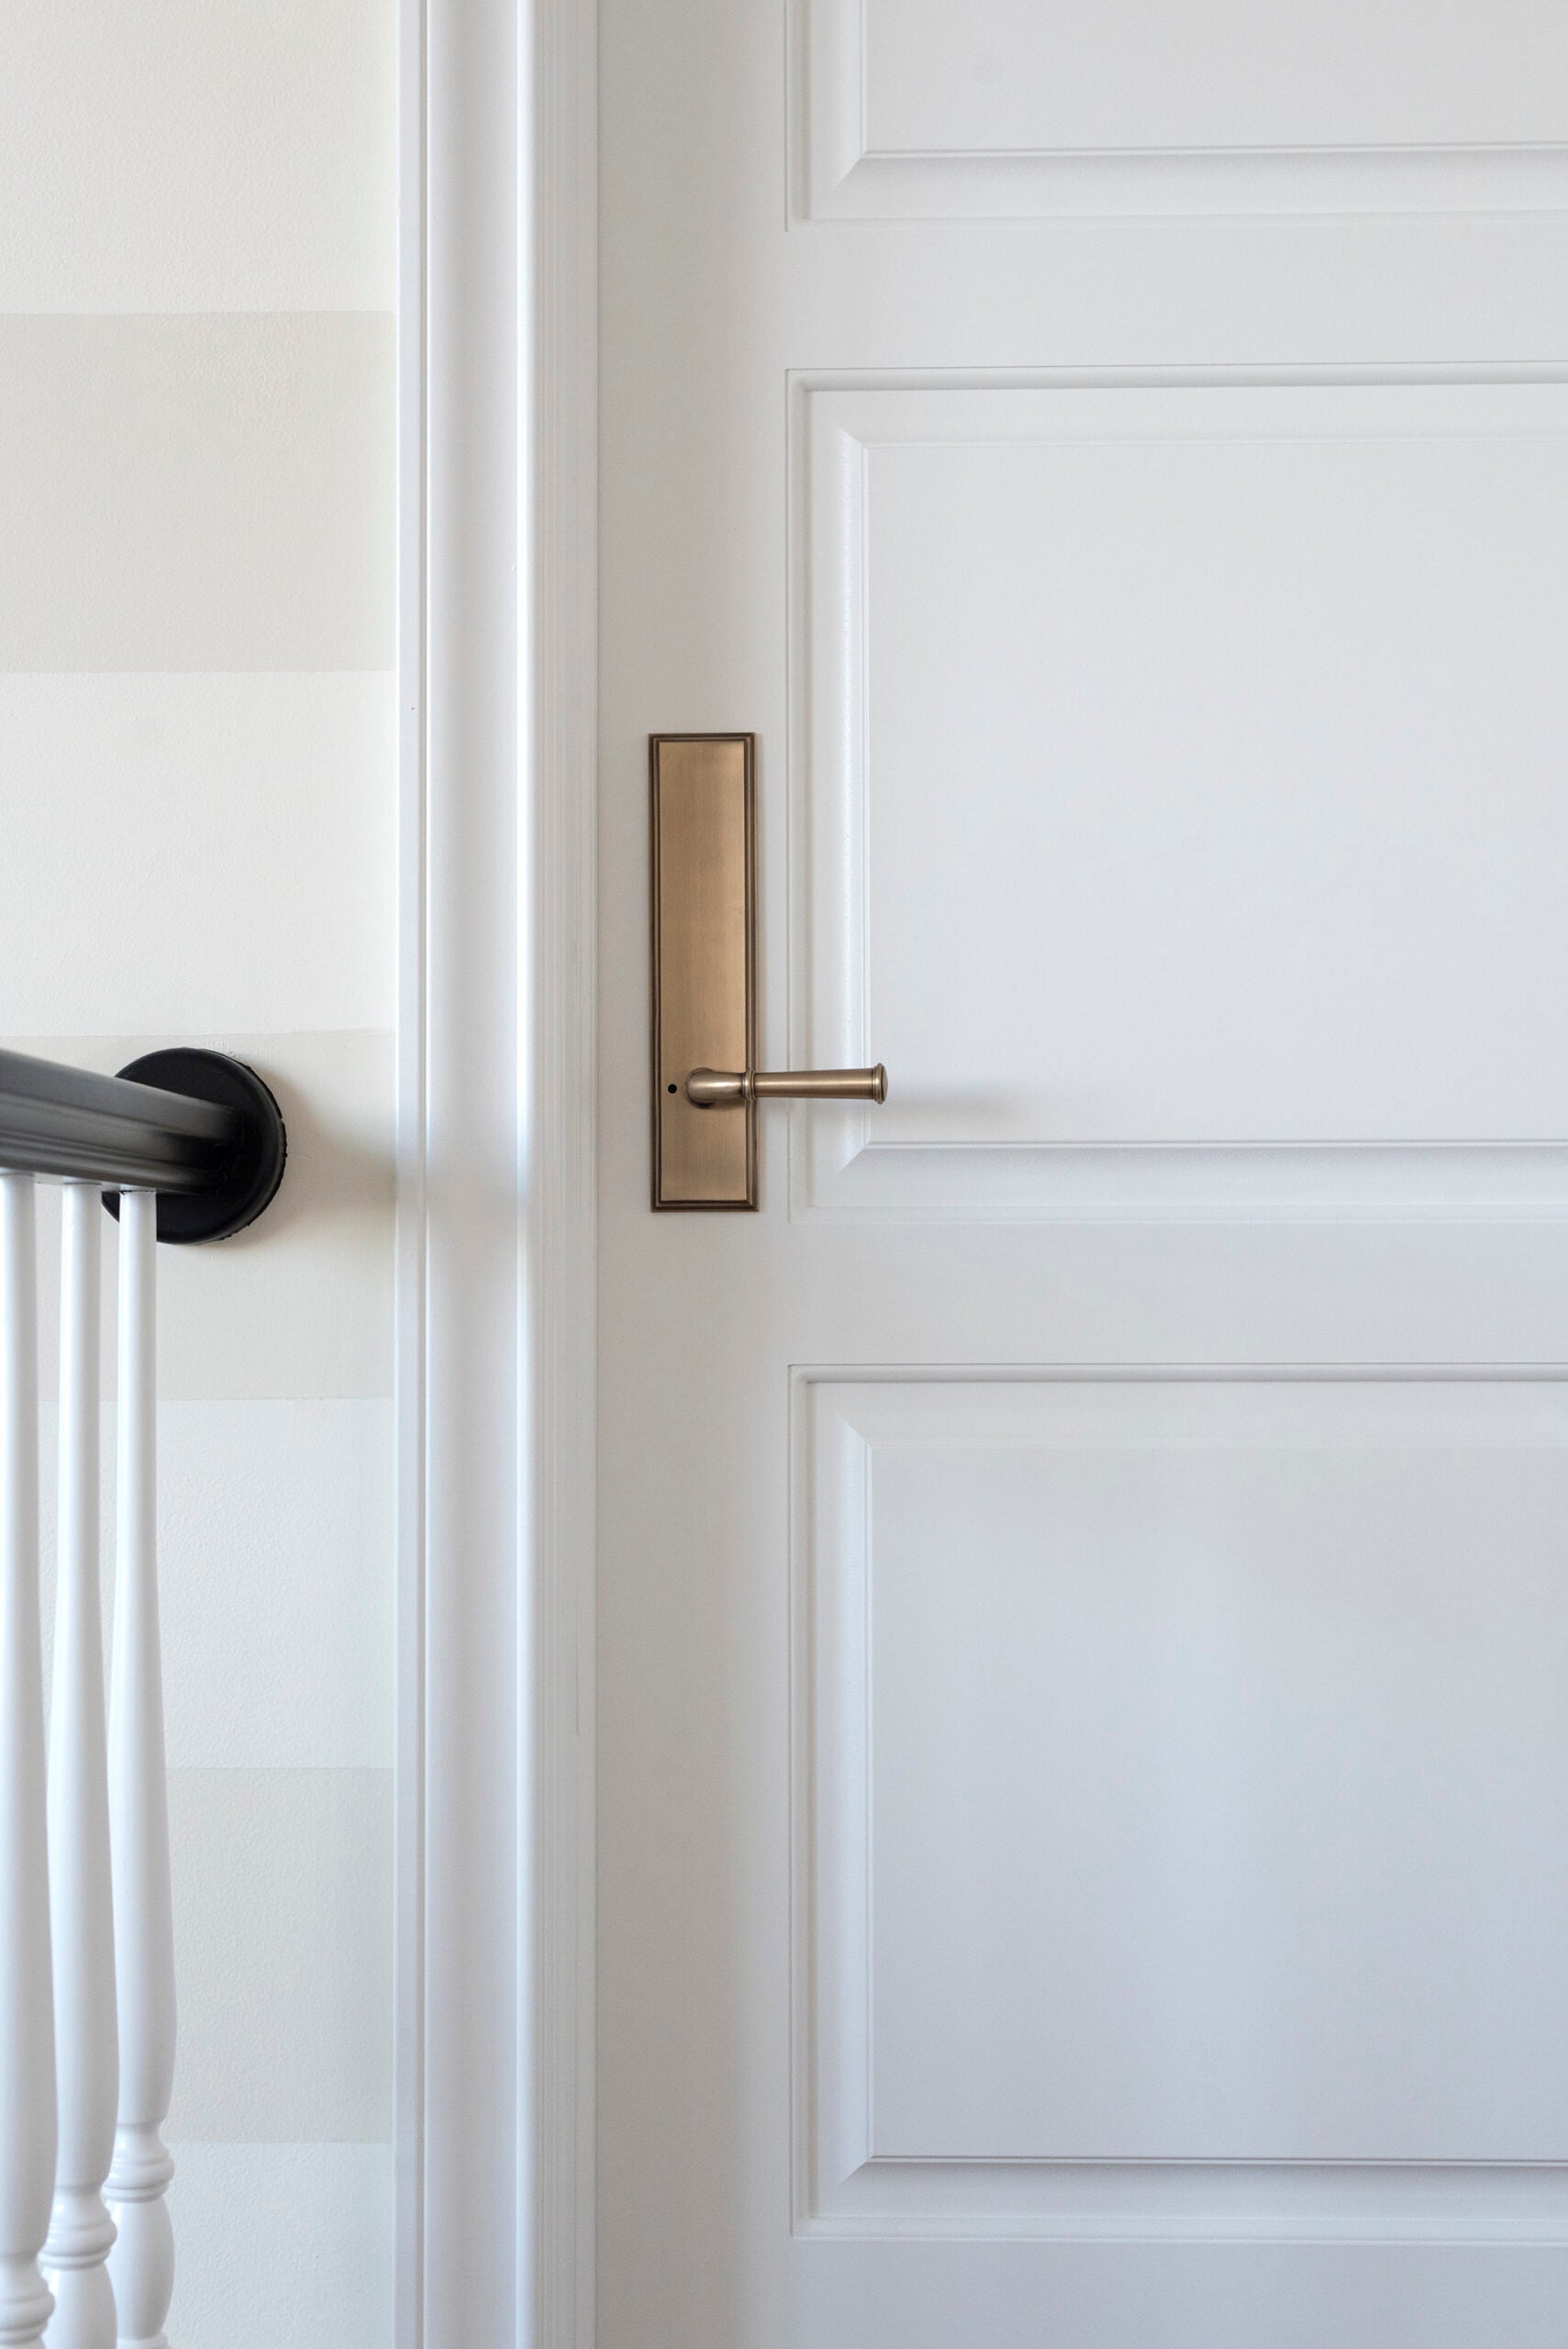
Foyer or Entryway
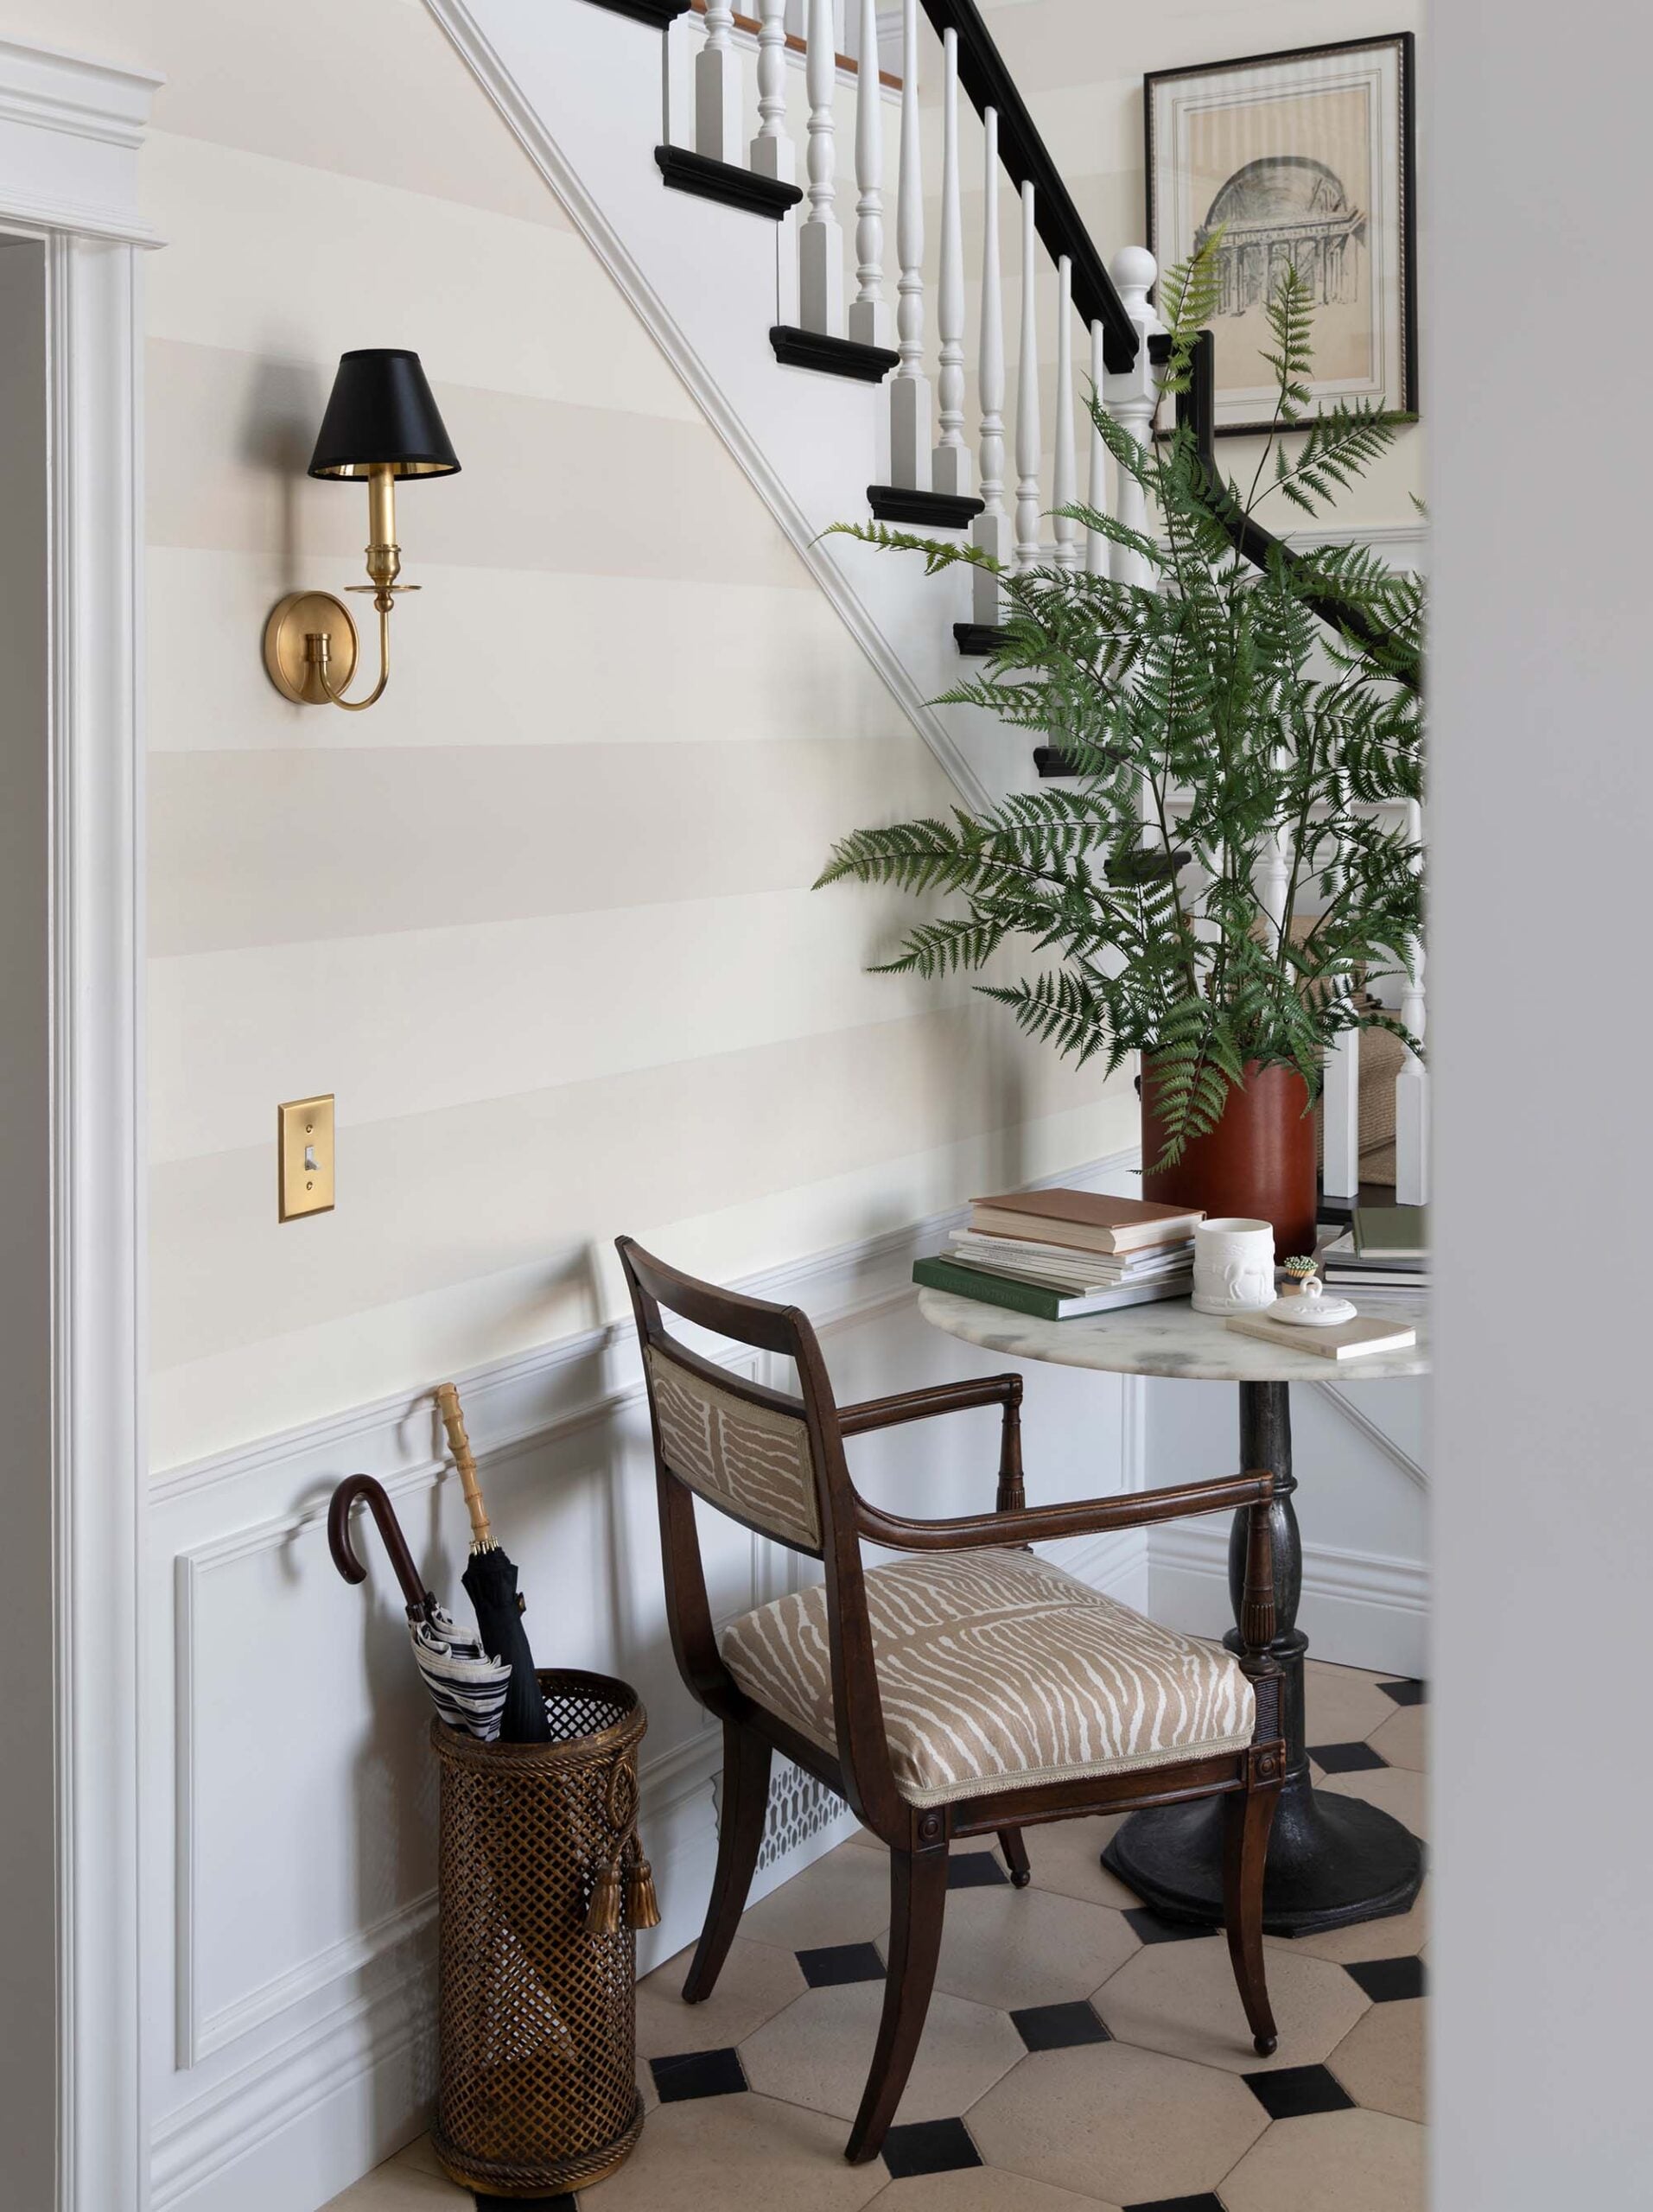
Our entryway hardware as well as the door hardware throughout our home is antique brass and so are the sconces in our foyer. I also installed brass switch covers to carry the tone throughout the space. I mixed metals in this area by adding accents on our entryway table (which has a heavy iron base).
Laundry Room
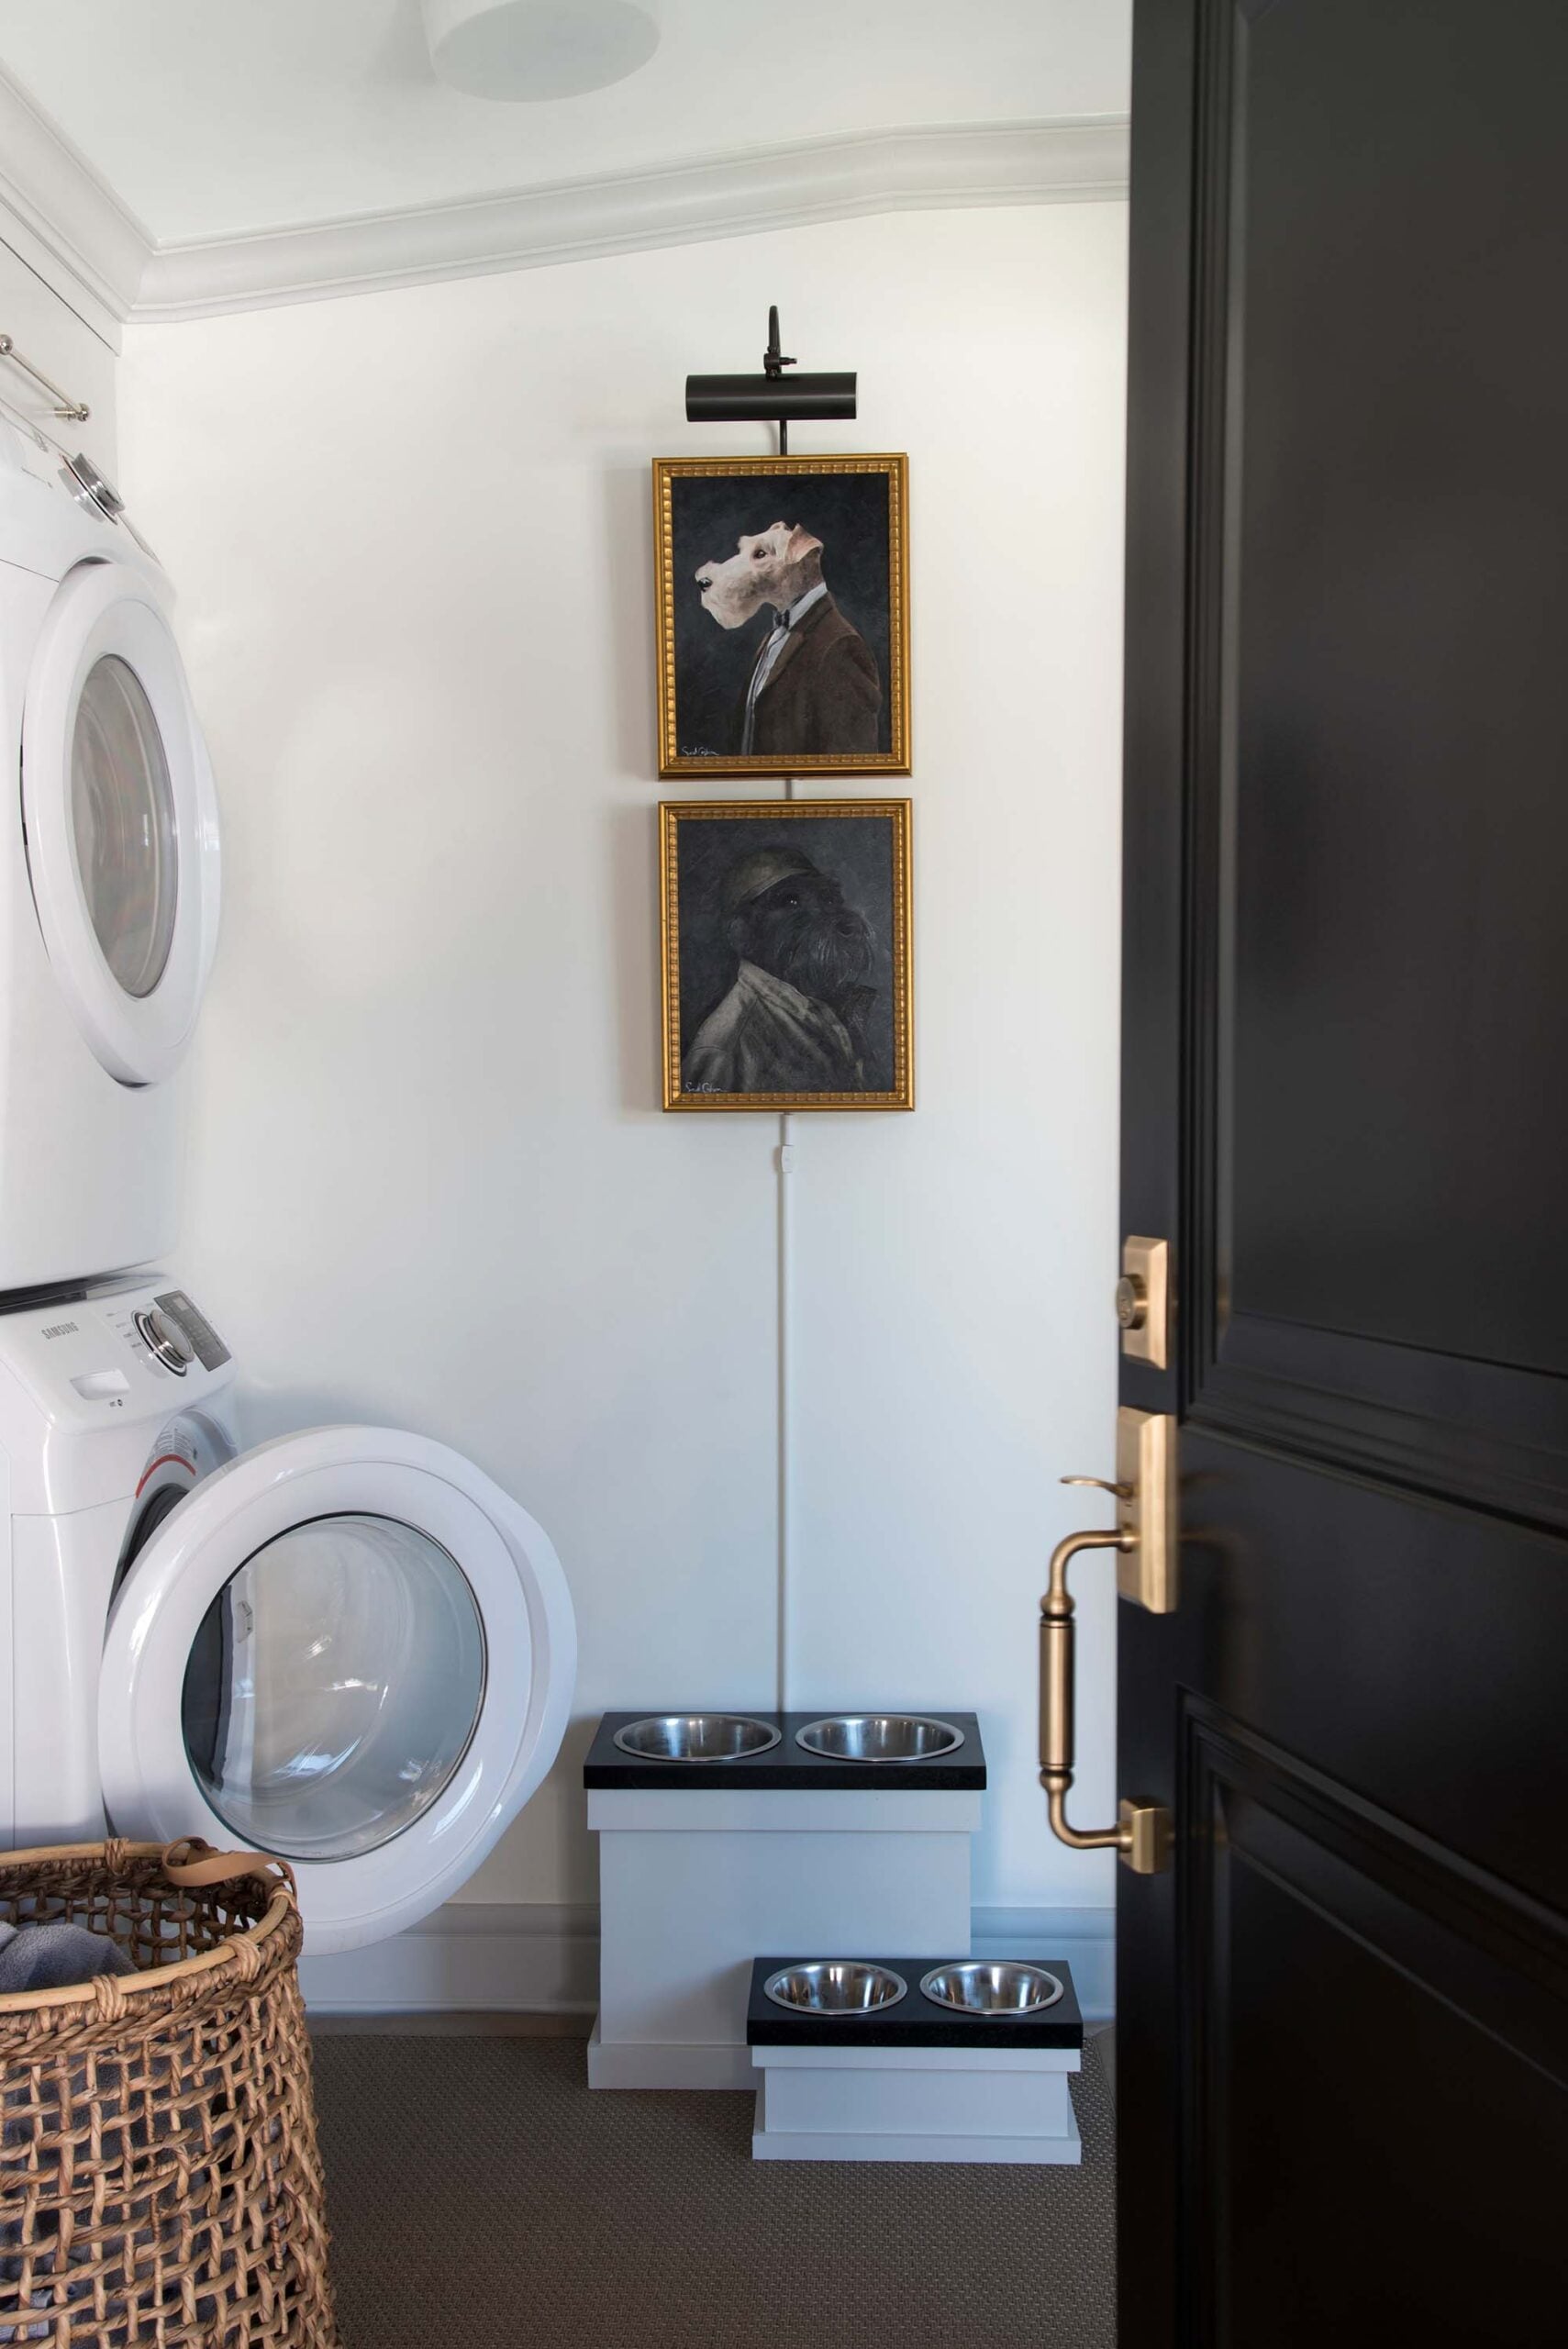
In a laundry room or mud room you have more opportunities than you might think to mix metals. You may have stainless steel appliances or a stand alone stainless wash tub. Choose contrasting accents such as brass lighting, hardware, or framed art to introduce warmer tones. Our previous laundry room (pictured above) had polished nickel cabinetry pulls, aged brass hardware, and a bronze picture light.
Designer Tips for Effortless Mixing
If your finishes feel disconnected, style an accessory in the missing metal. An iron bowl, nickel frame, or brass accent can quickly bridge the gap and make the palette look more cohesive. It doesn’t have to be a permanent fixture… styling is an easy fix! I also like to repeat each finish at least twice in the room. It keeps the eye moving and creates unity without looking overly coordinated.
FAQ
This is a controversial question, but I think nickel, antique brass, and bronze are timeless finish options. I actually wrote a post on this, if you want to read my in-depth opinion… Is Brass Out? How Polished Nickel is Replacing the Favorite Metal.
Start with styling your accessories. These smaller vignettes are low risk and instantly show whether the new finish plays well with the rest of your palette.
Begin with the finish that best aligns with your home’s overall style or your personal aesthetic. From there, layer in a second finish that brings contrast, like warmth or coolness where the space needs it. I always choose the dominant finish first, then build the palette around it.
Take a step back and look at the big picture. If the space feels flat, introduce a contrasting finish in a small way first to test the balance. If it feels busy or disjointed, simplify by repeating one of the existing metals to ground the palette.
Not at all! Lighting is one of the best places to introduce a secondary metal because it naturally feels separate from cabinetry or furniture.
Two finishes work well for most spaces. Three can be beautiful when used thoughtfully and repeated intentionally. I typically aim for 2-3.
Matte black. I always choose bronze over matte black- it feels much higher end.
Related Posts
If you’re looking for more design advice, I’ve linked some reader favorites below… hopefully these will steer you in the right direction!
- How I Designed a Classic Kitchen That Still Feels Timeless
- Designer Tips for Making Outlets & Light Switch Plates Look Better
- Timeless Tips for a Bedroom Refresh Without Renovating
- 12 Designer Tips to Make Your Ceiling Look Taller
- My Top Paint Color Picks for Dark Kitchen Cabinets
- How to Make a Small Bathroom Look Larger
- The Best Interior Design Books for Timeless Home Inspiration
- Classic Bathroom Plumbing Fixtures from Wayfair
- Designer Trick : Floor Planning
- Designer Trick : Tips for Getting Scale Right
- Designer Trick : Mixing High & Low
Mixing metals is an easy way to make your home feel more designerly. Once you understand how to balance warm and cool tones and repeat finishes with intention, the result feels elevated and interesting. This is one of my favorite ways to add personality and depth to any vignette. If you decide to experiment with a new metallic palette, I’d love to see which metals you choose. I always hope these posts are helpful in designing your home and transforming your space. Have any questions about mixing metals? I love chatting in the comment section below! Feel free to drop your questions there…
Perfect timing! I’m so stumped on cabinet hardware. White quartz countertops and white kitchen. Sink faucet is Stainless Steel hi-rise arc bridge. I originally thought about matte black or some type of brass but not sure if the brass would seem too dressy for our old cape cod. So I bought a polished stainless look hardware. #boring? 🤣 Kitchen lighting Is just recessed. Any thoughts?
Suzanne I love antique brass against white, and I think it would look beautiful and traditional in a cape cod; while the stainless brings in a more modern element. It sounds lovely!!
Thank you Lauren! I’m going to go back and look for some antique brass. 😃
Woohoo!! My thoughts, Suzanne… stainless can look very clinical- especially in an all white kitchen. Unless, you’re going ultra modern, I’d actually recommend bringing in a warmer metal: antique brass or polished nickel. I think that will give you a more timeless look and still fit your beautiful cape cod home. Since your recessed lighting is basic, perhaps you could install art in your kitchen with a battery operated or plug-in gallery light above it? Or maybe a countertop lamp if you have the space? There are easy ways to add ambient light without having to run new electrical or swap hard wired fixtures. Hope this helps!! xo
So many beautiful images from your homes! As for mixing metals, I’m definitely in favor. I do have a couple of thoughts (natch). It seems that all of the “silver” metals look very similar within a room. Your current pot filler does not look different from your stainless range in the photo, but I don’t think they’re the same. On the other hand, brass finishes can vary widely…and some are blech. I’m also noticing that other items in the room can help make the metals mesh. Warm wood tones can mirror the brass finishes; black tile or accents meld the black or dark bronze fixtures. There’s a lot to consider, and designer rooms makes it look so effortless! This series always makes me run around my house and reevaluate all of my choices!🤣 BRB, gotta go add some warmth to a couple of my rooms. Thanks for the education, as always!💜
Right Peggi??? I find myself going room by room critiquing the previous owners choices (because most we haven’t changed), and the elements that we have brought in. Lol.
Thanks Peggi! Love your thoughts :) The “silver” metals in our space are similar, but more different in person… for the example- in our kitchen, the polished nickel plumbing fixtures are definitely shiny and the stainless is more matte. They’re similar in temperature though! Brass finishes probably have the most variation- great observation that is totally accurate. Another thing I probably should’ve touched on is the surroundings and environment in which the metals live. Just like paint colors, metals reflect their surroundings and it can influence how they look in a space. I’m pretty sure you’re making perfect choices in your home… and like I mentioned- some design rules were meant to be broken, so if you’re happy in your home- that’s really all that matters! Haha! Hope you’re having a great week. xo
Haha…your timing is spot on! Jeff always throws a wrench in the plans somewhere along the renovation highway…in this case, my design for our bathroom consisted of antique brass lighting with brushed nickel plumbing fixtures and aged bronze accessories and hardware. I had already ordered the hardware. He pops up with “black everything”. My response: “boring, too trendy, too cool in an already cool room”. Ladies, this is a guy whose style preference is jeans and a plain white or plain black t-shirt. (Nothing wrong with it, he just doesn’t have an artistic vision to pull multiple things together; but clearly he still doesn’t trust my judgement after renovating an entire house 🧐). Point made?? Lol, he’s a plain sort of guy. Can you do a designer trick series “How to Get Your Husband on Board”??? 😂🤣😂 Now I’m stumped. Truly stumped. The Scorpio in me wants to fully rebel and go with my original plan because I like it THAT much; the good wife in me says maybe it’s the particular finishes I chose, and maybe I should redesign with different finishes. But I designed a monochromatic bathroom around the one light fixture I loved!!! 😞He thinks brass always looks dated and 90’s…my response: “yea if it’s cheap, and all of it is shiny”. So I did my best to pull together a “mood board” so he could see what I see without having to imagine…I’m not skilled at that so clearly, no dice. Then I tried showing him the photo examples of everything I would be putting in the room; no dice. Emmett is handy…can you have him invent husband vision goggles??😂🤣 Anyway, I’ve been focusing on paint and trying to design the water closet instead (a task I was going to put off until the main area was done), because I just can’t bring myself to change my original thought process. I see it in my head and I can’t unsee it! What do you all think?? Sarah I’m pinning every blog post you’ve done on mixing metals because somewhere along the way it might help me tackle this hurdle…or maybe I should just tackle my husband???🤣😂 This is my favorite series I think, because I love hearing what everyone else has to say in these posts. Thanks for sharing this!!
Hahaha! “Maybe I should just tackle my husband?” I’m cracking up, Lauren. Husbands have a way of doing that. I think at this point in our marriage, Emmett finally trusts my design vision. Is there any black in the space at all? Maybe you could use a black soap dish or pump? Paint the ceiling black? Bring in some small black accents, instead… to make him happy? If it were me (also a scorpio), I’d just keep going because there is always a turning point where Emmett has the “Oh!! It’s going to be amazing” moment. Ha! That’s probably not helpful. I can’t wait to see it and hear what you decide :) Happy Wednesday! xo
😆😜Spoken like a true Scorpio Sarah!!! So the plus side is the light fixture comes in black, aged bronze, antique brass and polished nickel. I could easily switch the metal finish of the fixture to black, and then go with brass hardware for the drawers and cabinets (there’s not many in the room), and stick with the brushed nickel plumbing. In answer to your question, no black in the room at all; it’s generic white currently. It just doesn’t hold the same pizazz for me and definitely changes the monochromatic look I was going for, but the contrast could be pretty. I guess marriage is about compromise right? Scorpio wants to win!!! 🤣 What are your thoughts on the metal combos Sarah?
Right?! haha! If it were me, I’d match your light fixture finish to your cabinetry hardware. I think you could either do brass or black (keeping your brushed nickel plumbing fixtures). Brass would definitely add more warmth and femininity, whereas black would add more contrast, and make it feel more modern & masculine. Not sure if this helps?! I know you want to win! ha :)
Definitely helps Sarah!! Thanks for your input; I feel like we’ll end up finding the compromise that works for us. Once the vanity is finished getting it’s color, I think there will be a clear winner. Thank you! XO
I think so too! Finish the vanity and see what feels right :)
DY-ING laughing over here, too, Lauren! Definitely think you should tackle him! In all honestly, if you shared the design with him before you ordered everything and he didn’t have any objections, I’d say “too late”! But, I love Sarah’s suggestions of how to bring in some black. Did he mention why he’s interested in having it all black? If he’s just looking for a more masculine look & feel overall, maybe you can bring that in with easily replaceable textiles, like a dark, rich rug and black towels? Your design plan sounds beautiful AND well thought out, though so maybe you can “call marriage” on this one! 😂
🤣😂I honestly have no idea where the black is coming from. I know he likes very clean and crisp, and loves high contrast everything. He’s also very “match-y match-y”. So it does make sense. I’m definitely brainstorming a lot over here and trying to see a different vision. Marriage card! I love that Anne! Maybe I’ll keep that as my ace on the hole.😏
Good luck and let us know what you end up doing!
“Too late!” would my response, too Anne! Hahaha! I’m terrible.
Enjoyed your thoughts and rules for mixing metals. So if you have all brushed nickel plumbing fixtures and you wanted to add black knobs on cabinets, would this warm the room? We have a mix of marble and a golden brown (bad description) tile. Our walls have been dromedary camel for 10 years and will be painting them either swiss coffee or alabaster soon. I put black handles on our Ikea closet system in our master and thought this might be a good time to add knobs to our bathroom. I’m just talking this out (more like rambling) since we are making plans on updates.
Have a great Wednesday!
So happy to hear that, Danna! To answer your question- it wouldn’t “warm” the room (because black is a cool toned metal), but it would definitely add a nice contrast and depth. I love the idea of adding black cabinetry hardware! :)
I can’t seem to get enough of Mixing Metals posts. It’s a design trick that always fascinates, and if I’m honest, often confuses me. I had seen someone (McGee’s maybe?) mentioning to keep metals on similar eye planes consistent, ie. sink fixtures are in the same metal as towel bars, but that seems easier said than done sometimes. Do you just go with your gut for the most part about which metals you pick for which places, Sarah? What do you think of using the same metals on cabinetry hardware and the light fixtures as a general “rule”? Also, is there a good ratio/percentage breakdown to keep in mind when mixing, ie. how much the dominant metal should be and then the accent metals? In that same vein, should the dominant metal be one you love the most or the one that works the best visually, if those two are different? Figuring out where to use other metals in a kitchen, for example, with the huge stainless steel appliances so many of us have, often stymies me. Sorry for all the Q’s, but fascinated/confused as I mentioned. 😂
As for designer tricks posts, one thing I’ve always wondered is where designers go when they’re unsure of what to do or does that just never happen? 😆 If you’re ever stumped (unlikely), where do you personally go for inspiration/advice/validation? Also, how do designers choose which storage options are best for certain items? I see a fair amount of beautiful storage, but for some, if not all, of the items, it’s holding, doesn’t seem very practical. Not sure if those are really tricks, though!
Thank you, Sarah!
Yay! Love hearing that, Anne! I’m not as much a fan of keeping things consistent on the same plane… I think it’s more about grouping by function (plumbing fixtures, accessories, etc), for me at least. I’ll keep the toilet lever, faucet, and shower trim the same because they’re all “plumbing fixtures” and bring in a different metal for the lighting, towel hooks / bar, soap dispenser, vanity hardware, etc. I’d say instead of percentage, it’s more about balance when it comes to mixing metals. In our kitchen, for example, I used polished nickel for our plumbing fixtures (pot filler, kitchen faucet, side spray), antique brass for our cabinetry hardware, polished nickel for the lighting (sconces), and then stainless came into play with our range. I don’t think any one feels too dominant, but they all feel balanced together. Hope this helps! I know it can be confusing.
To answer your question about designers- I think we turn to other designers for a second opinion… at least I do, if I’m stumped. I find a lot of inspiration in nature and travel! Thanks for all the great blog post ideas, Anne :) Have a happy Thursday! xo
SUPER helpful, Sarah. Thanks so much and the countdown is on to Pizza Friday!
Woohooo!!! Negronis and pizza and definitely on the menu tonight, after this crazy busy week :) Cheers!!
Hello Sarah – My husband and I are building a home and are at the stage to choose & order lighting. Our space is an open concept great room; cabinets are a pale grey with brushed nickel hardware on pulls & doors; light tile floors & a pretty light shade of gray on the walls. I’m trying to find fixtures for the island (3 lights), a large chandelier for the living room and one for over our DR table. I’m so confused with trying to coordinate the fixtures & keep changing my mind. I was thinking that the dominant shade should be black, to break up the shades of grey. I love bronze fixtures but am not very brave about choosing that metal. Any suggestions?
I’m so glad I found your post! I’m having panic attacks over my renovation choices. I have polished chrome handles in the kitchen on maple cream cabinets. I’m thinking of warm bronze and antique brass lighting fixtures to stay consistent with my other lighting choices in other room, but am stumped on what finish to do my French doors, interior doors and exterior doors. Should they all match? Does antique brass make sense for all the doors? I’m wishing I did polished nickel instead of chrome but I can’t go back now.
Oh no, Jennifer! I hope the rest of your renovation feels less stressful… that’s renovating for you though. It can be tough mentally and physically. I like my door hardware to match, but that’s just personal preference!
Hi Sarah! I have a small bathroom I’m about to renovate. I’m planning on doing all plumbing fixtures in chrome and using brass for the light future and vanity hardware. Should towel hooks and toilet paper holder also be brass? How do you treat glass shower enclosures? Would the door pull and hinges need to be chrome to match the plumbing fixtures? Trying to make a cohesive plan for a small space is hard 😂😅 thanks in advance!
Hello:) Congrats on your news-a baby is such a gift!
What are your thoughts on lighting finishes/metal needing to stay the same within a room?
Thank you!
Thank you so much, Jen! I prefer to layer and mix metals in a room… I never just choose one. Check out this blog post: Designer Guide to Mixing Metals by Room
There is definitely an art to mixing metals, and an art to have the words to talk about it. Some how I can come up with a scheme, but I don’t know how to describe what I did. For the last whole house I designed, I thought in groups and kept a consistent base metal and then did touches of other metals as accents. For example, all the door hinges and door hardware were satin nickel. That’s the base, and it’s a spec home, so with the satin nickel/stainless steel appliances I embraced that base metal. Then on the kitchen cabinets I did a soft brass knob and pull (champagne bronze). Lighting was a variety of metals, soft brass, black, white, and even more stain nickel in closets. In the bathrooms, the base was polished chrome (thanks plumbers for that staple), and I just ran with it for all the plumbing fixtures and toilet accessories, but added the soft brass or black metal for other things like the mirrors and lighting.
It feels safe when I pick a base metal and run with it, and then add other metals as accents.