How to Install a Vinyl Privacy Fence
 As you know, we’ve been knee deep in our backyard reno. Things are really shaping up, but so far the biggest difference has been replacing our rotten old wood fence for a beautiful white privacy fence. Emmett and I were both surprised how ‘easy’ it was to install a vinyl fence. It’s the first one we’ve ever done and it went really smoothly. I use the term ‘easy’ pretty loosely because the fact of the mater is this… it is a difficult, strenuous project that requires a
 little lot of elbow grease. If you have a small yard, it really wouldn’t be that bad- comparable to a tough workout. Our yard, on the other hand, is pretty large and we had to dig a lot of post holes. By doing it yourself, you can save a TON of money though- well worth it in my book! So technically speaking, it was an easy project… physically, sort of challenging. Click through for a complete, detailed tutorial on how to install one of these babies in your own yard.
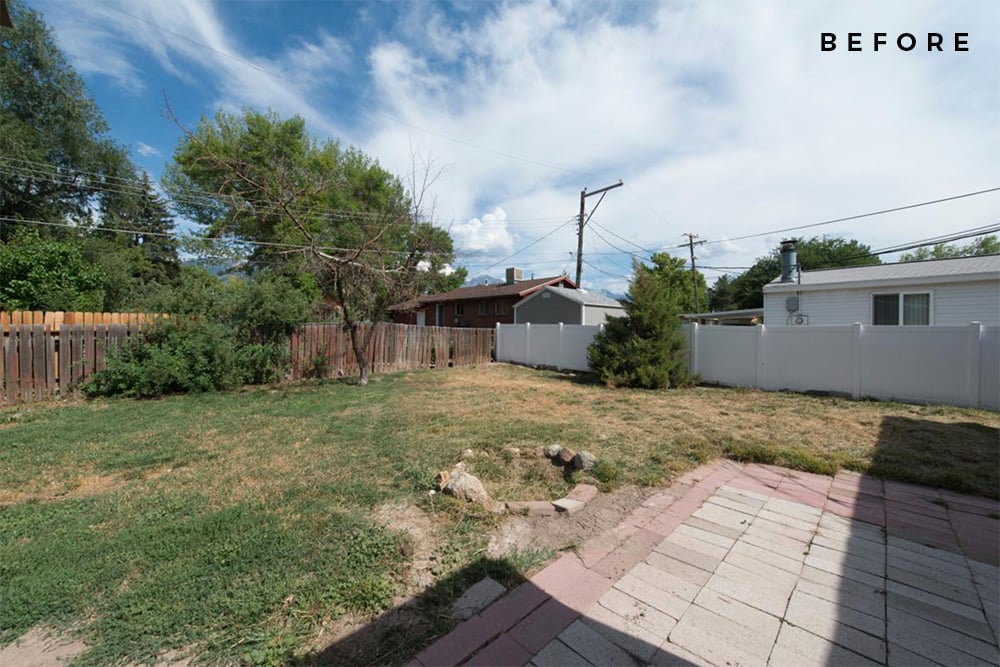
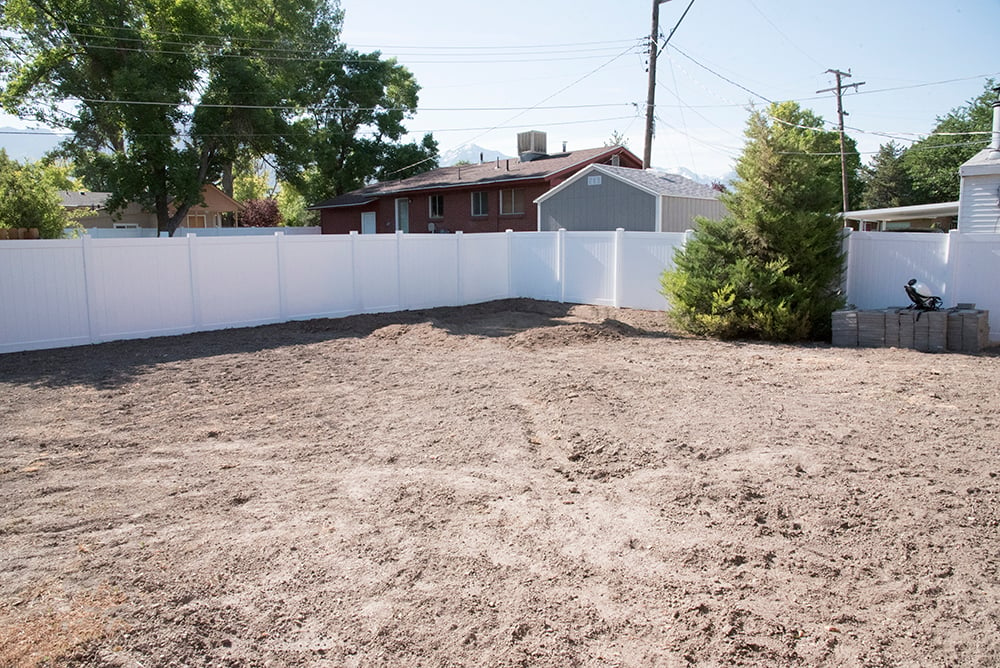 I’ll start by saying the process images in this post aren’t pretty (unless you like dead grass, curing cement, and a whole lot of dirt), but the reward is well worth it! Whether you’re transforming a space indoors or out, it always has to get worse before it gets better. The same is true with installing a fence. It’s going to look like a wreck for a few days. In this case, we’re transforming the entire backyard (sod, pergola, pavers, etc), so the “after” image only shows the fence progress as of now.
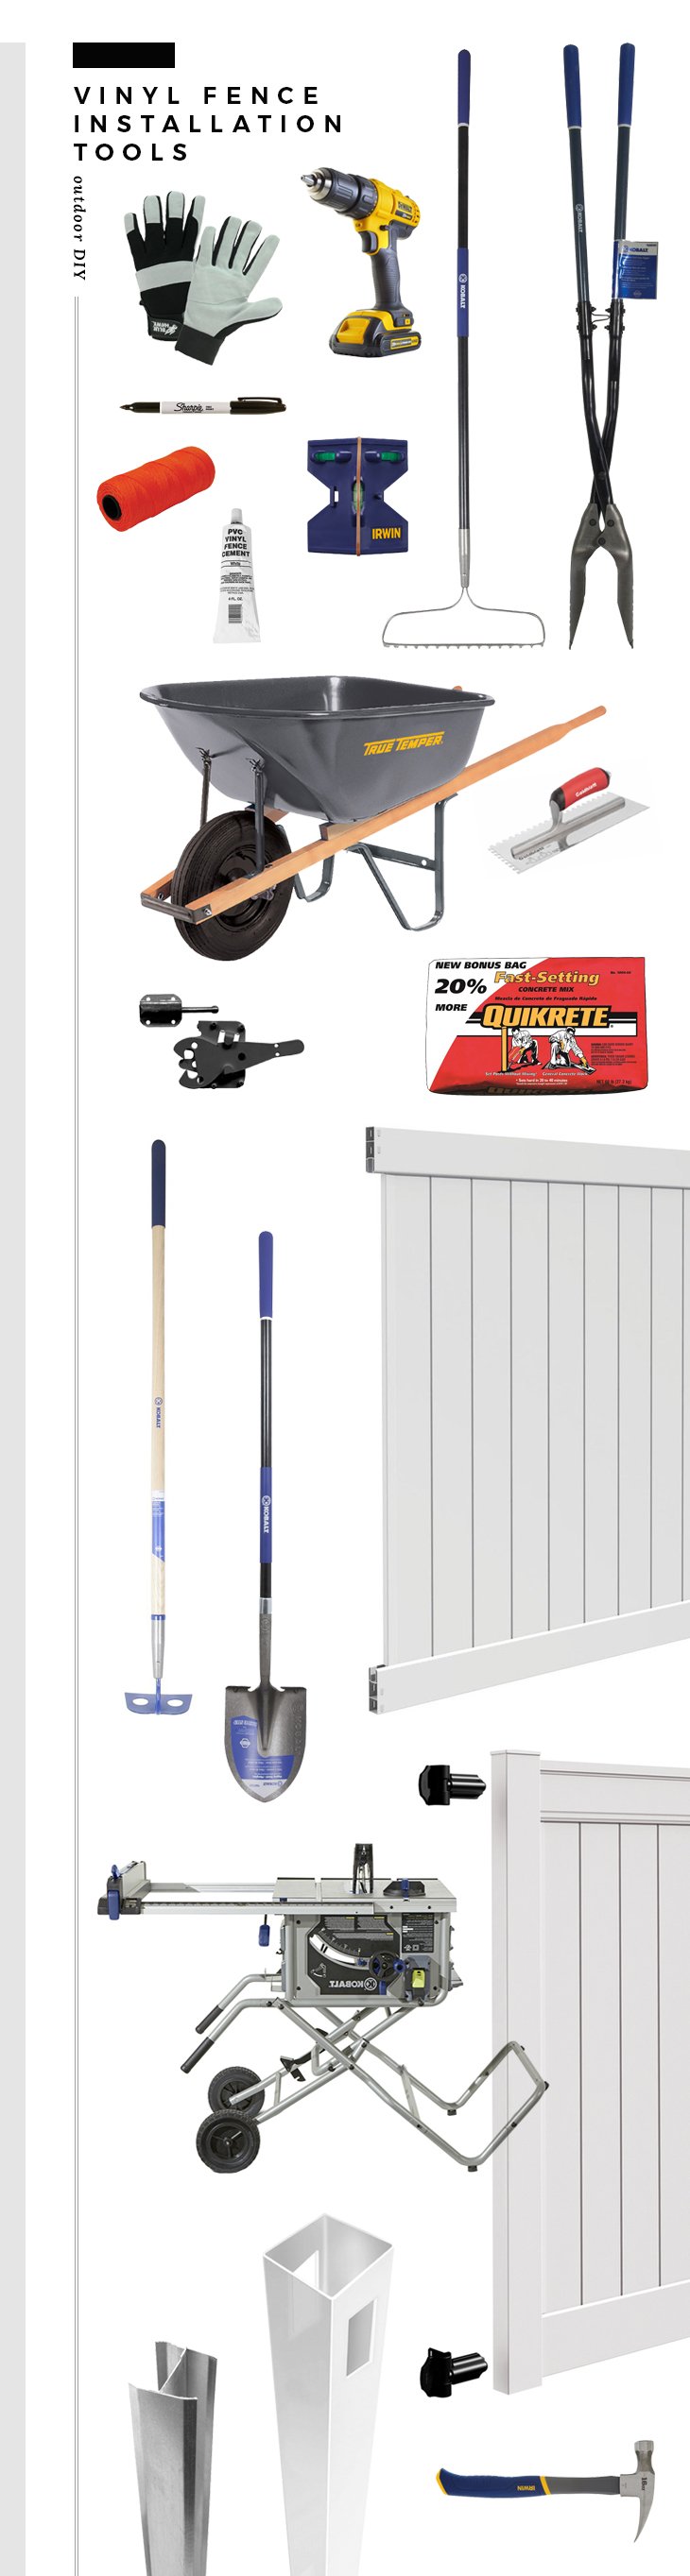
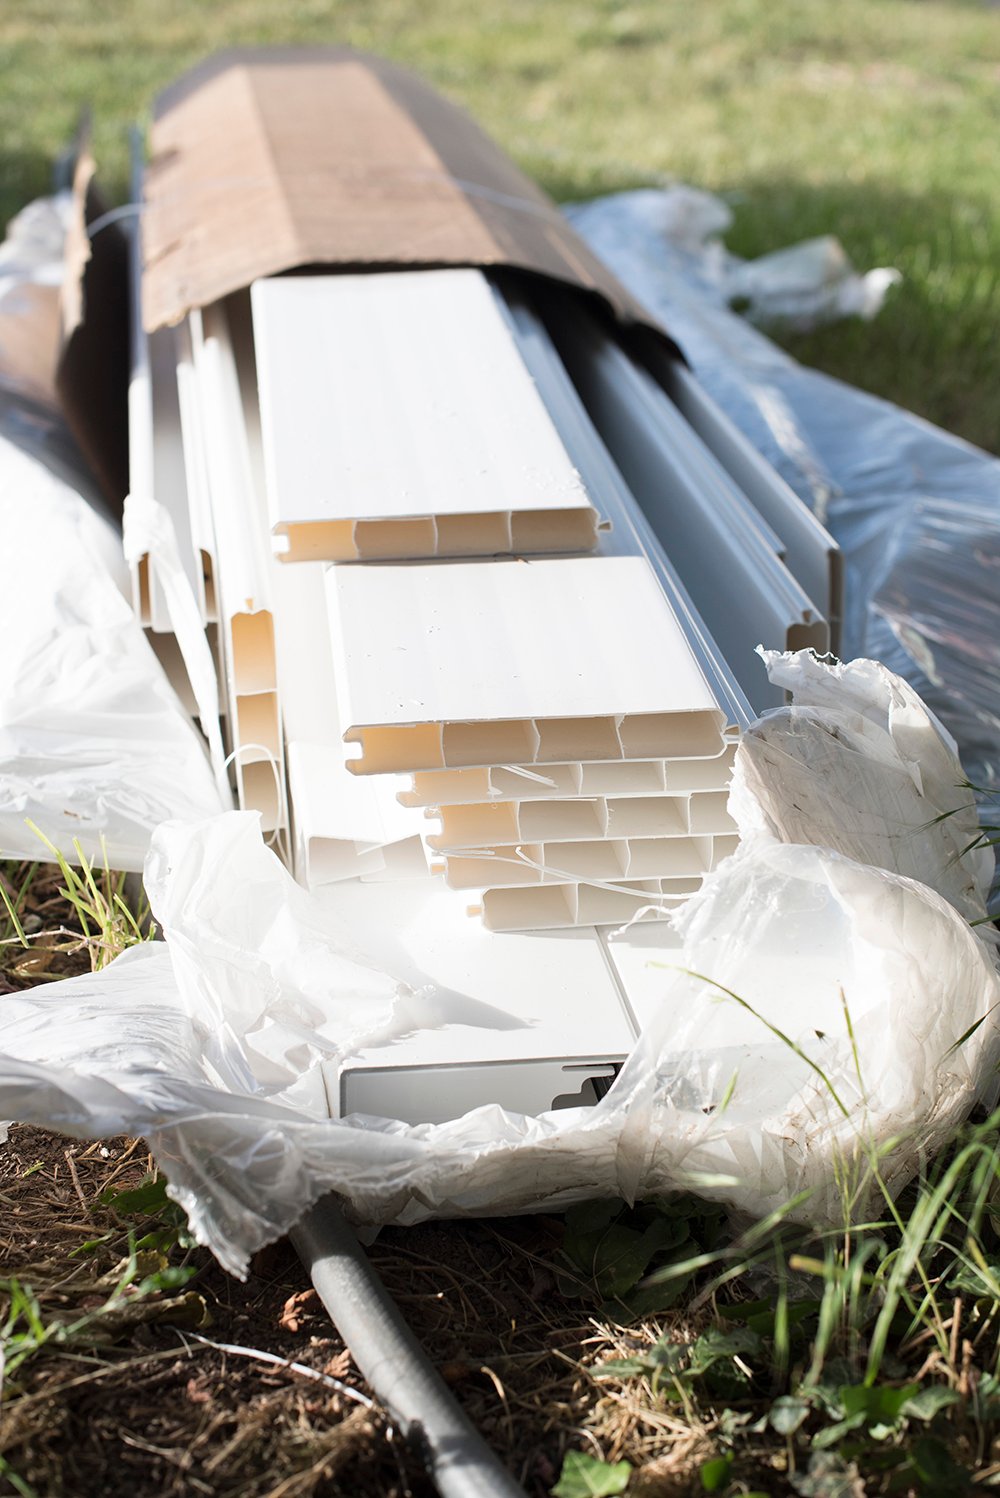
To begin, gather all of your supplies- shown below. You can hover over the image for the specific product links…
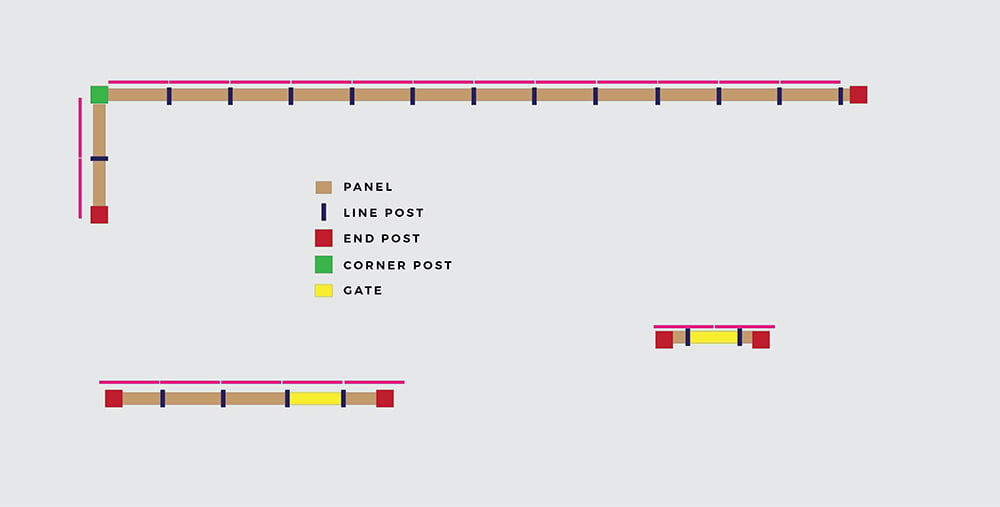
Step 1 // Plan! Prior to ordering- it’s important to plan everything out! Measure twice and be absolutely sure. It’s also a good idea to chat with your neighbors. If you happen to have rad neighbors, they might let you tie into their vinyl fence. We did that on one side of our property, but on the other side we had to push our fence posts as close to the neighbor’s as possible. It totally depends on your situation. Either way- sketch it out, measure, and formulate a plan. Given my graphic design background, I put a scaled rendering together in Adobe Illustrator, but an old fashioned pen and paper work just as well.
You’ll need to calculate the number of panels, line posts, end posts, corner posts, as well as if you’d like to incorporate a gate. We opted for two gates- one on each side of our home.
 Step 2 // Order and inventory delivery. We ordered all of our materials from Lowes and they were delivered on a palette directly to our yard. I opened all of the packages and carefully counted the pieces to make sure the entire delivery was accounted for. Once I knew we had all of our supplies on hand, it was time to actually get started.
 Step 3 // Demo and prep. The first task was removing our existing fence. Luckily, we have an ATV and pulled it down within a matter of minutes- to be fair, the fence was in terrible condition. If you don’t have equipment to help, a good ole sledge hammer or post pull will do the trick.
Next you’ll want to measure carefully and tie off your orange, nylon string, making sure everything is nice and level. We used little flags and sticks to mark where the post holes should be placed. Here’s an example of how it will eventually look:
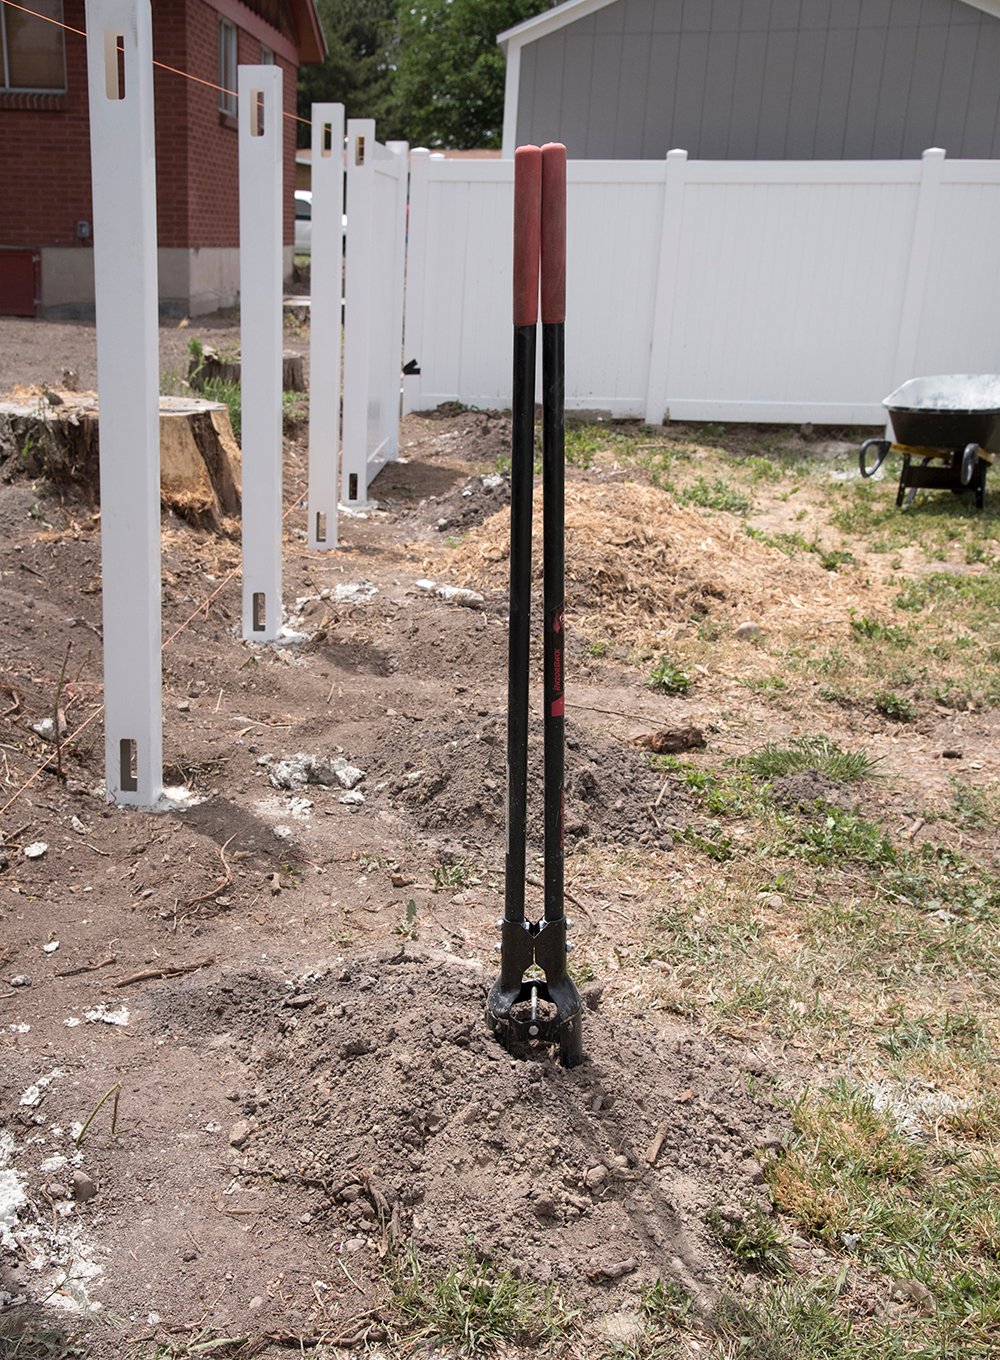 Step 4 // Dig the holes. This is no doubt the worst part of the entire process… digging the post holes. You’ll want to dig the holes below the frost line (which varies by your area & location). Our holes were around 3 feet deep. Although a post hole digger is the easiest tool for the job, you’ll definitely want to wear gloves. It actually gets easier the deeper you get- so don’t give up!
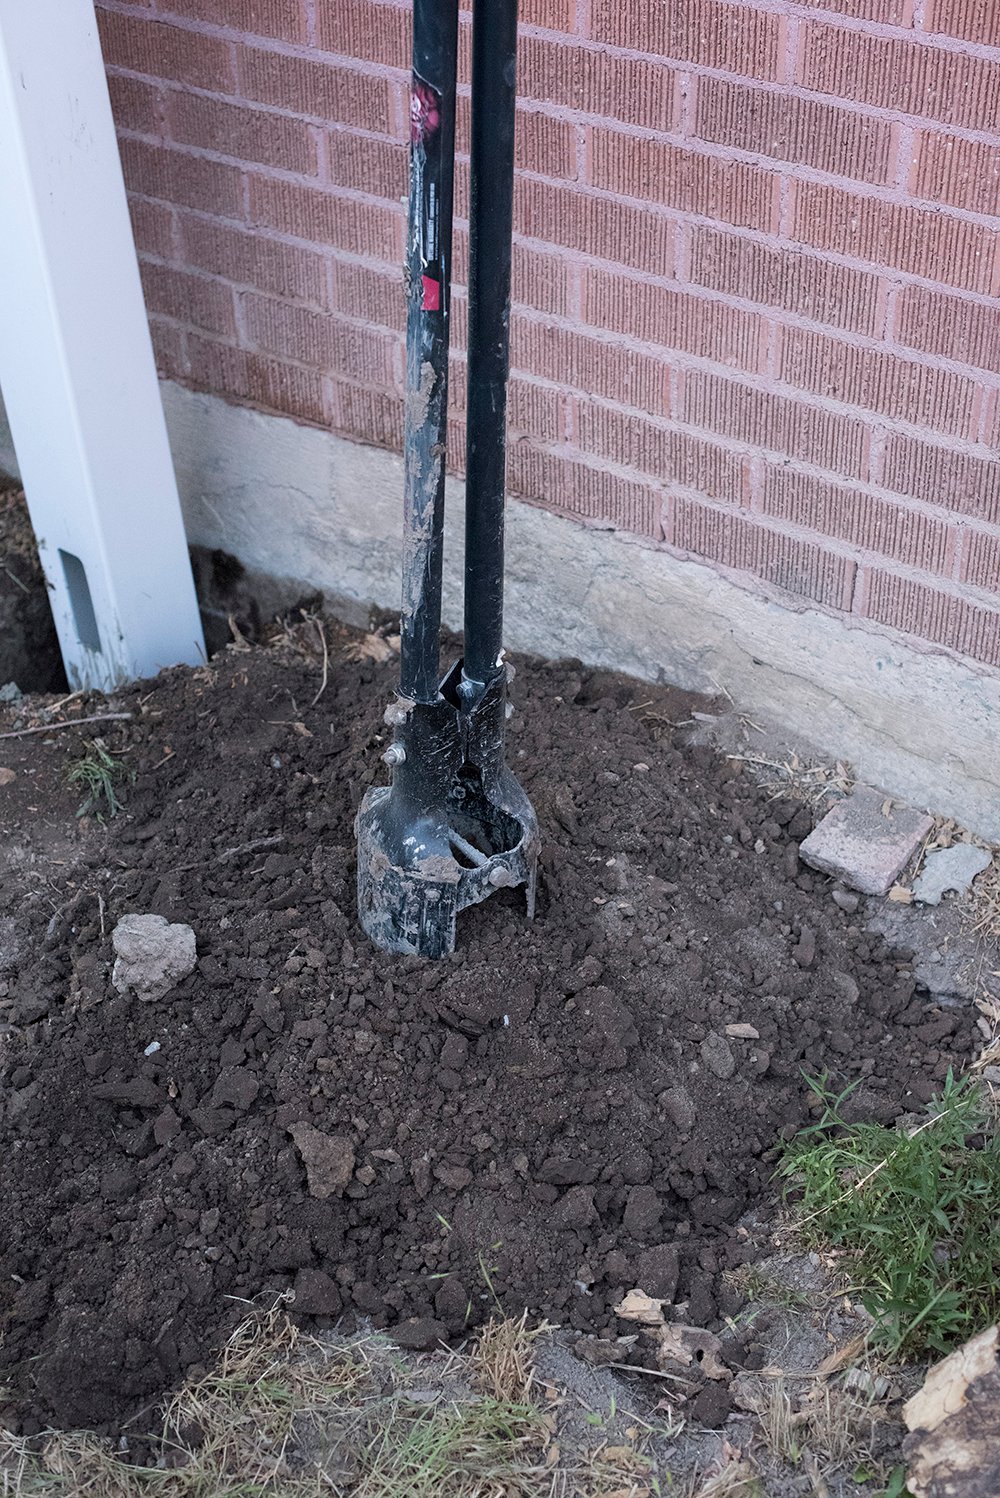
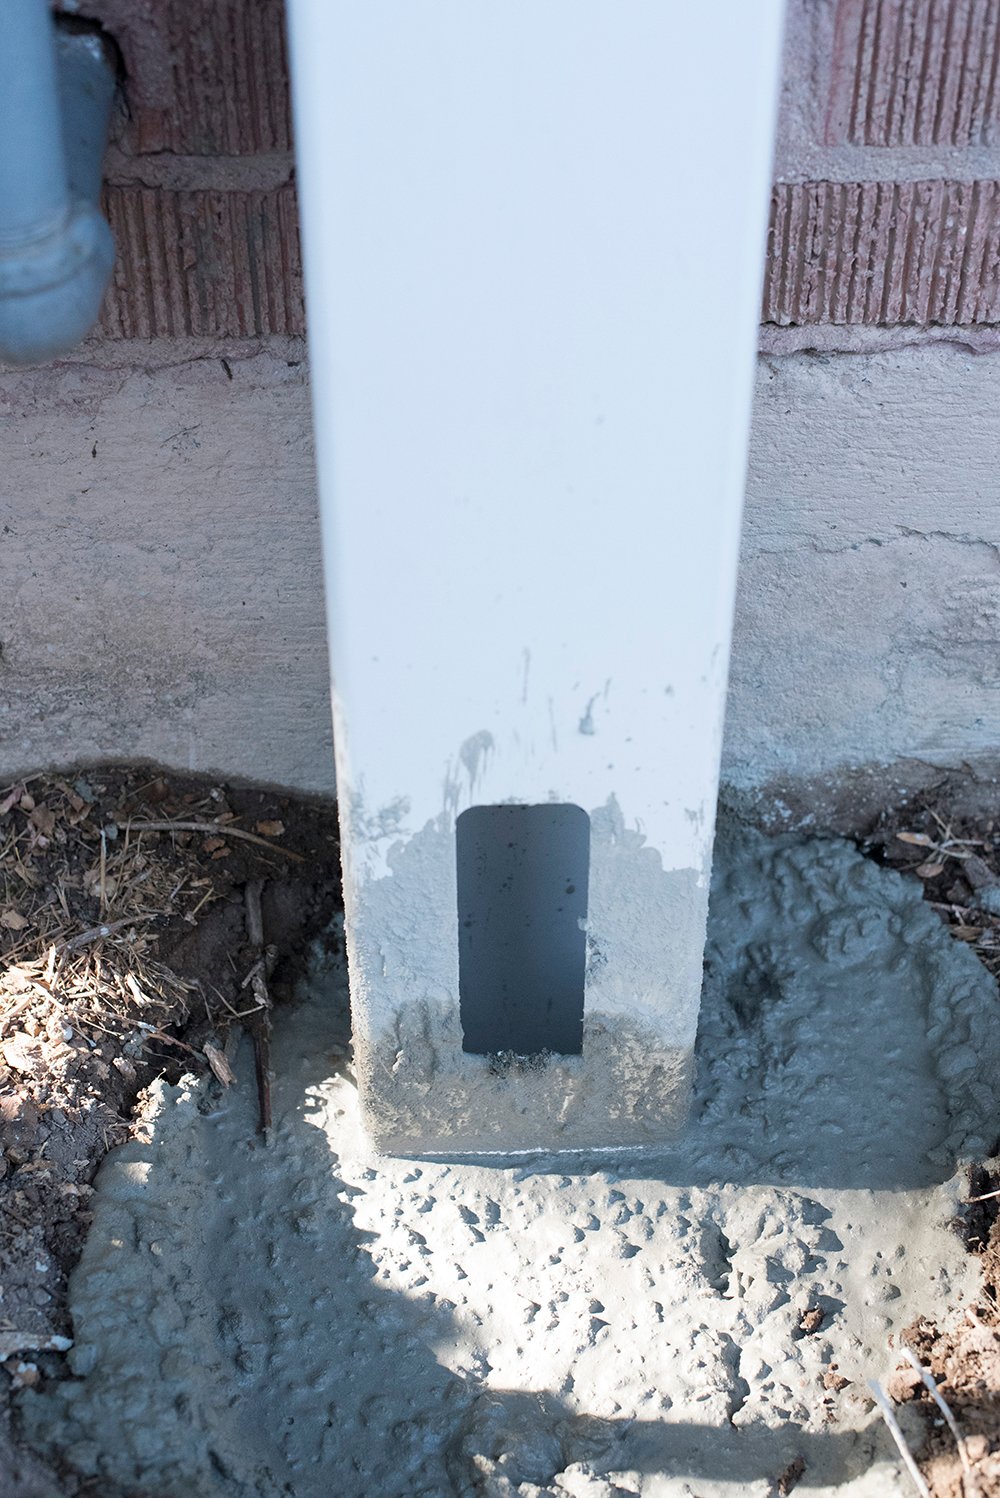
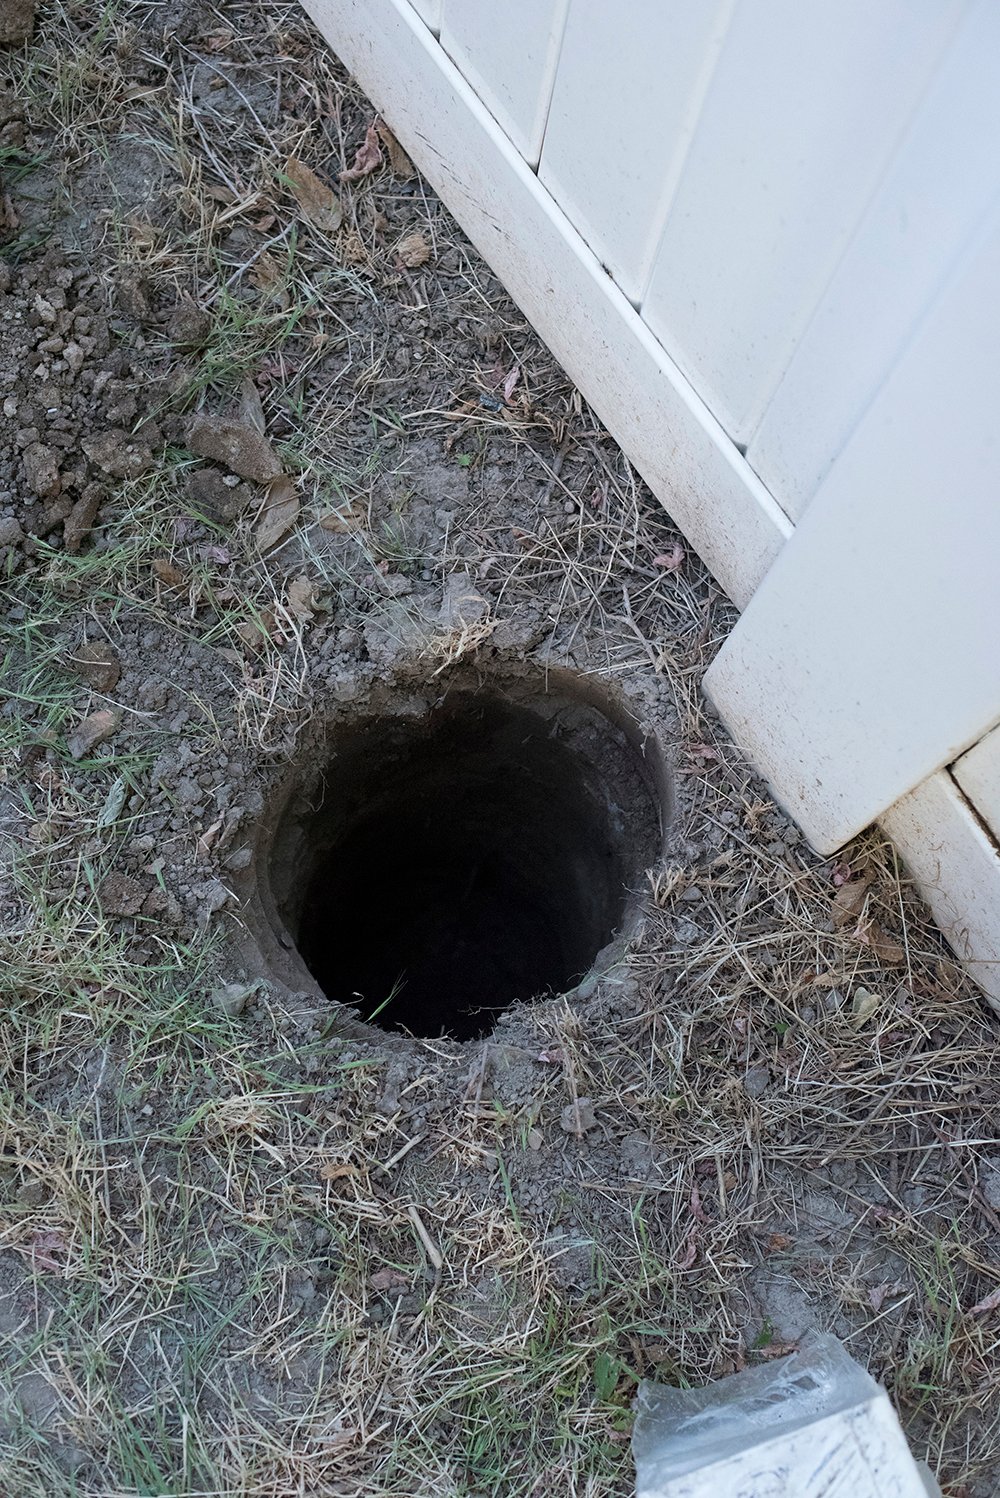 The lower perforated hole in the fence post should sit a couple inches above the ground. An easy way to test your depth is by putting the fence post into the hole and seeing where it lands.
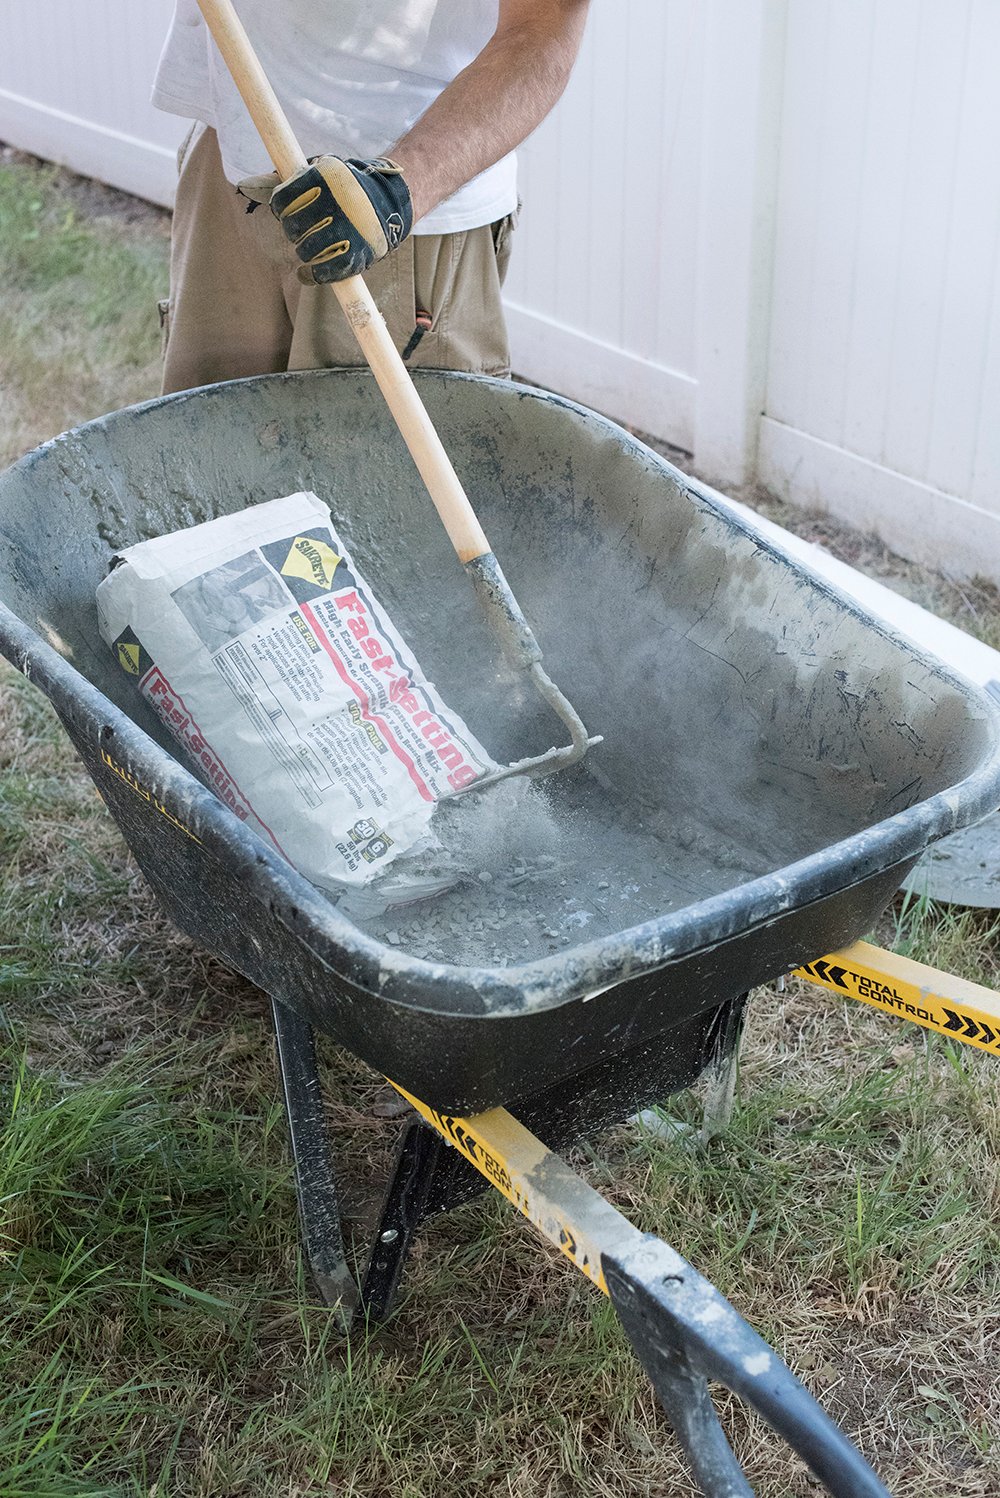
 Step 5 // Mix the concrete. I actually love mixing concrete! I have no idea why I find joy in this easy task, but I suppose it’s sort of like baking in the kitchen.
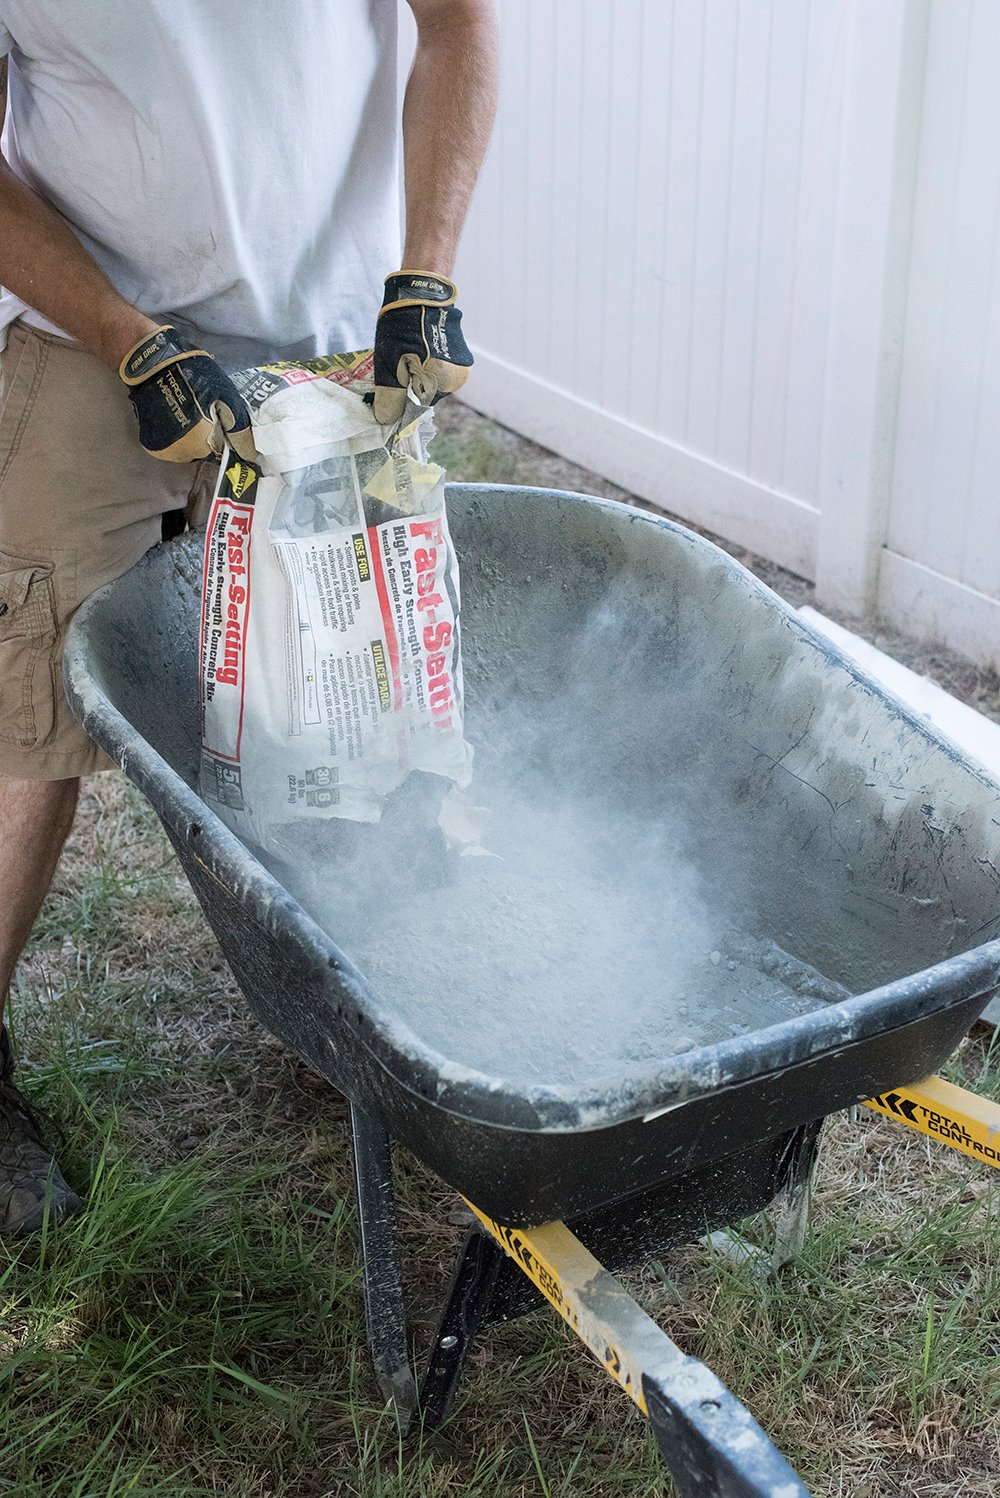
Make sure your concrete is fast setting– this is really important! Here’s a pro tip: toss the entire bag into a wheelbarrow and use a hoe to chop or pierce the bag. It’s so much faster than opening each one (especially if you’re wearing gloves).
 Add the appropriate amount of water (following the instructions on the bag), and thoroughly mix the concrete using the hoe.
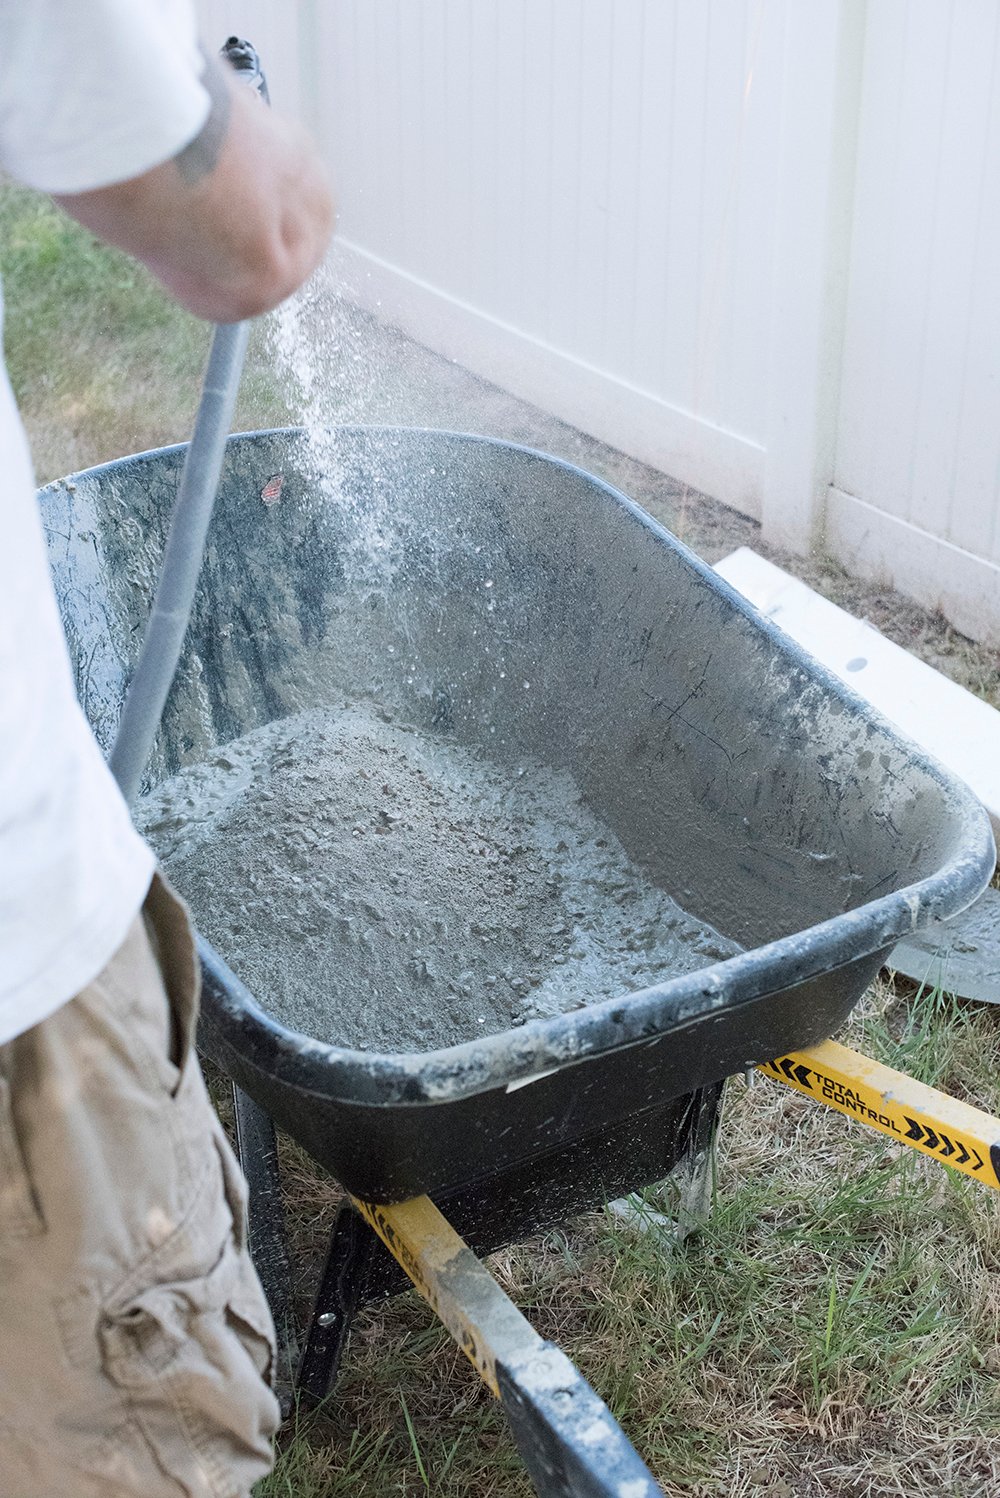
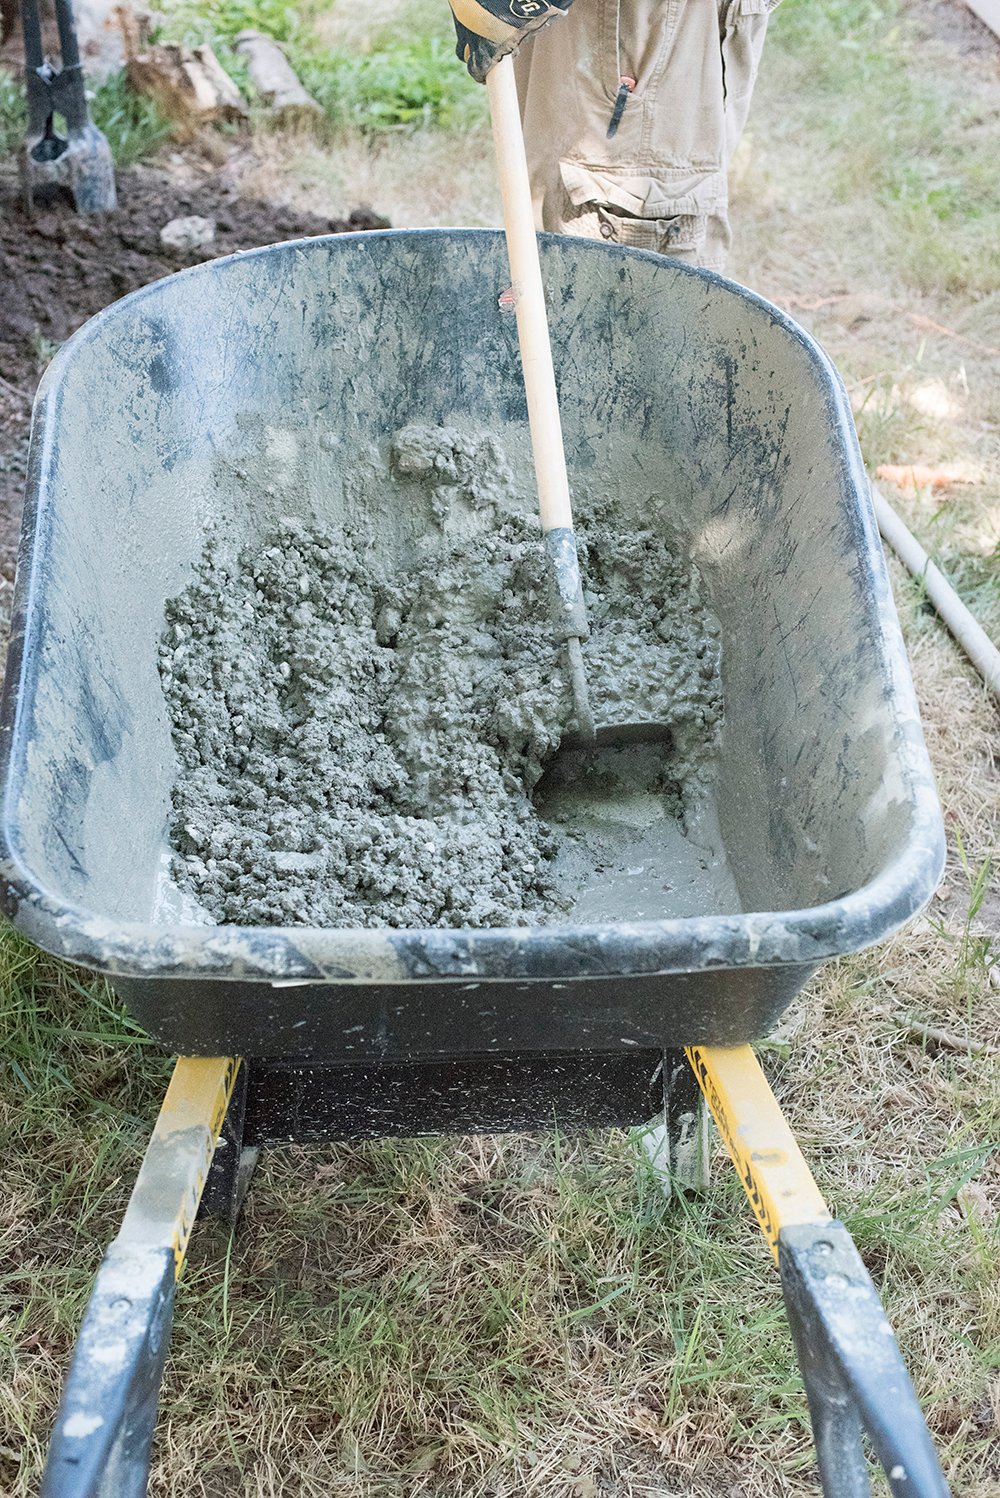 You want the concrete to be pretty wet, but it shouldn’t have standing water on top of the mix.
Step 6 // Set the post and fill the hole. Now it’s time to set the post. Using a shovel, fill the hole surrounding the vinyl post with the concrete.
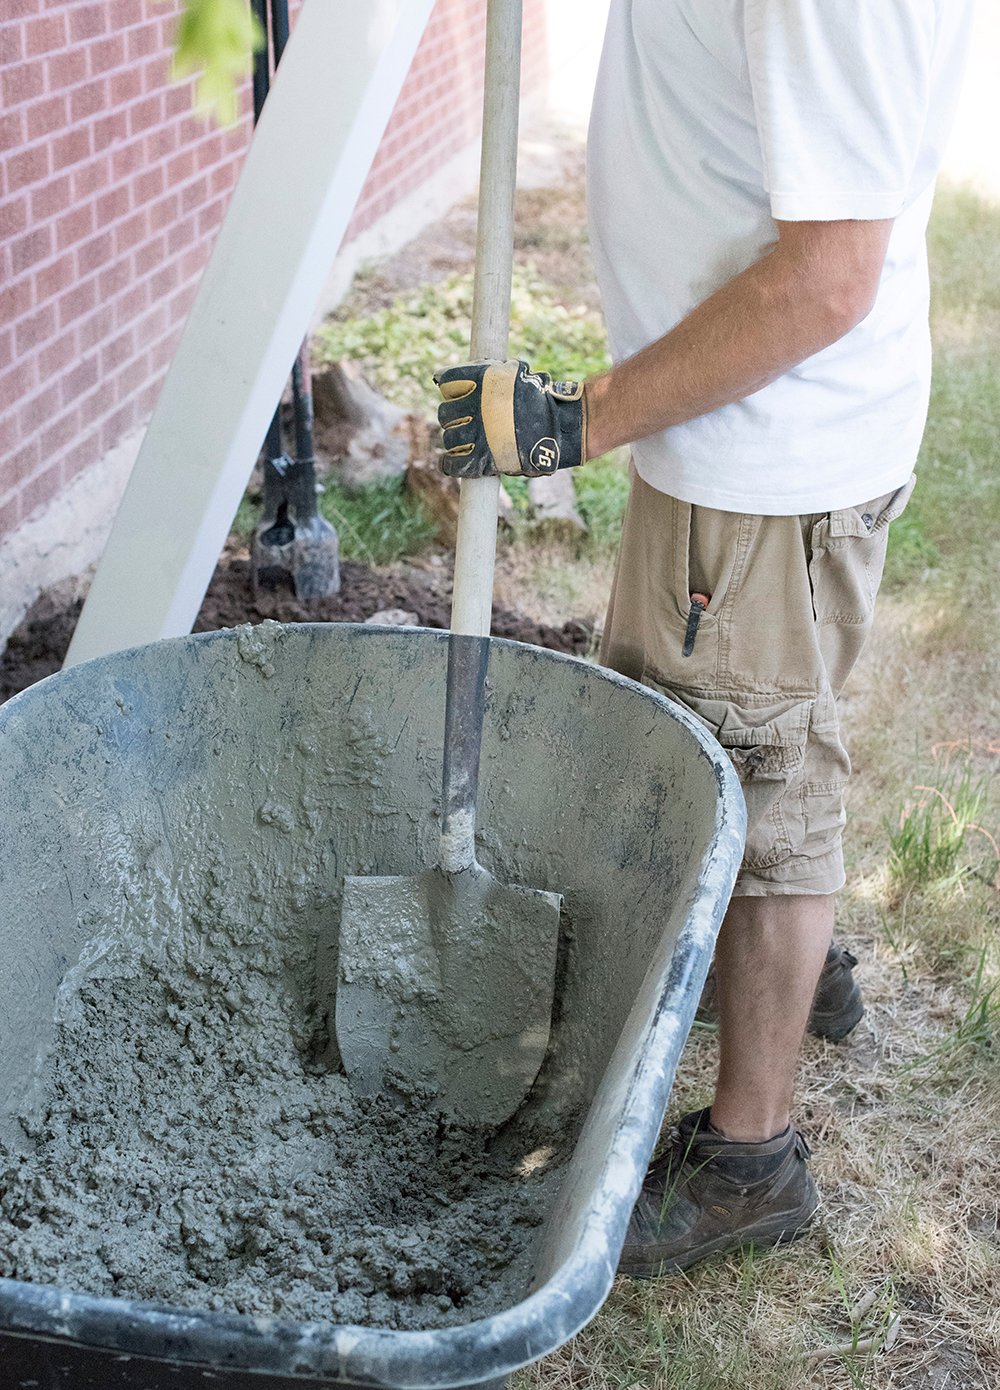
 We used approximately 3 bags of concrete per post hole. Yes, I know that’s a lot of concrete, but that’s pretty typical for this type of project. Trust me when I say your arms will be toned once you’re finished moving around those 50 lb. bags of cement.
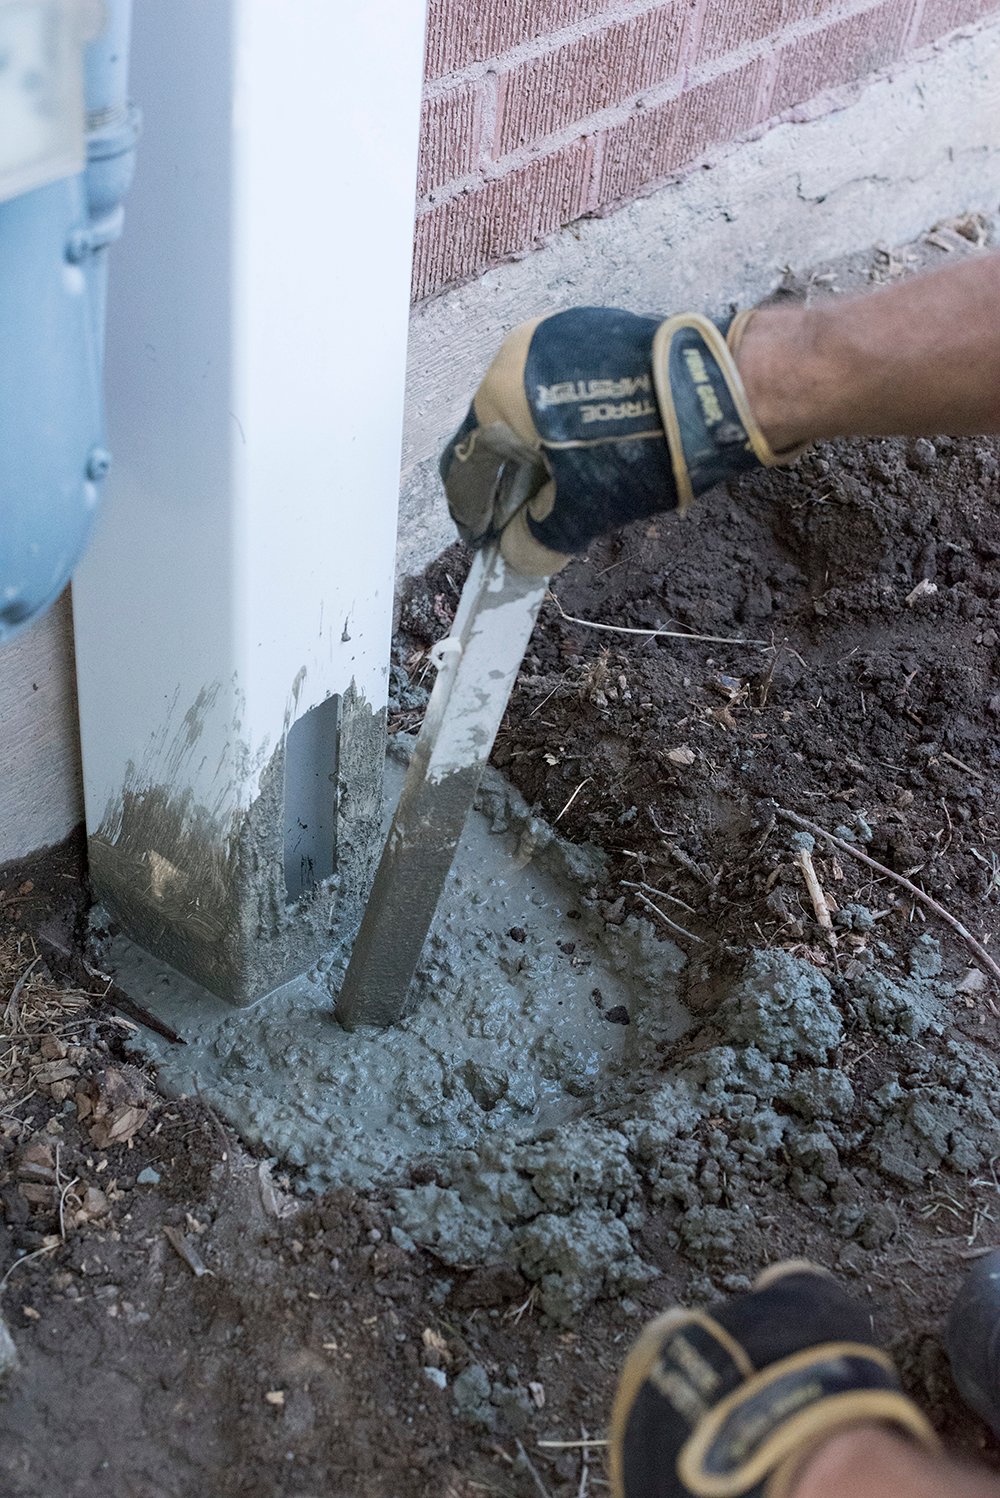
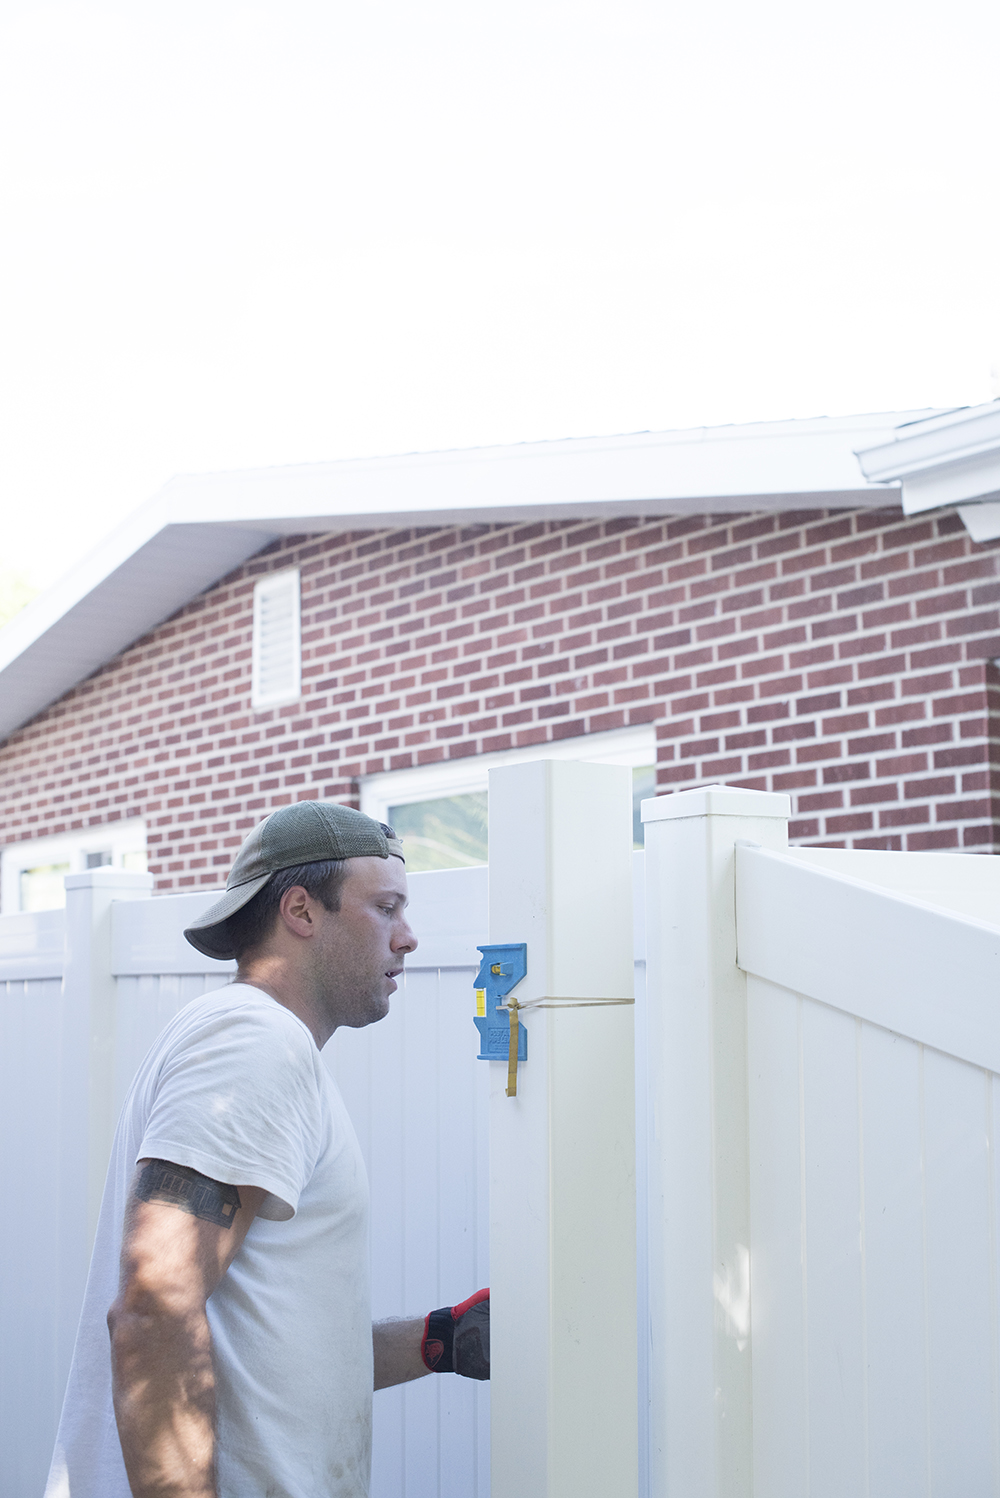
Step 7 // Level the post. To fill the hole entirely, use a stick or scrap piece of fence to push and poke any air pockets out of the concrete. Continue doing this and checking the level until everything is compacted and perfectly square.
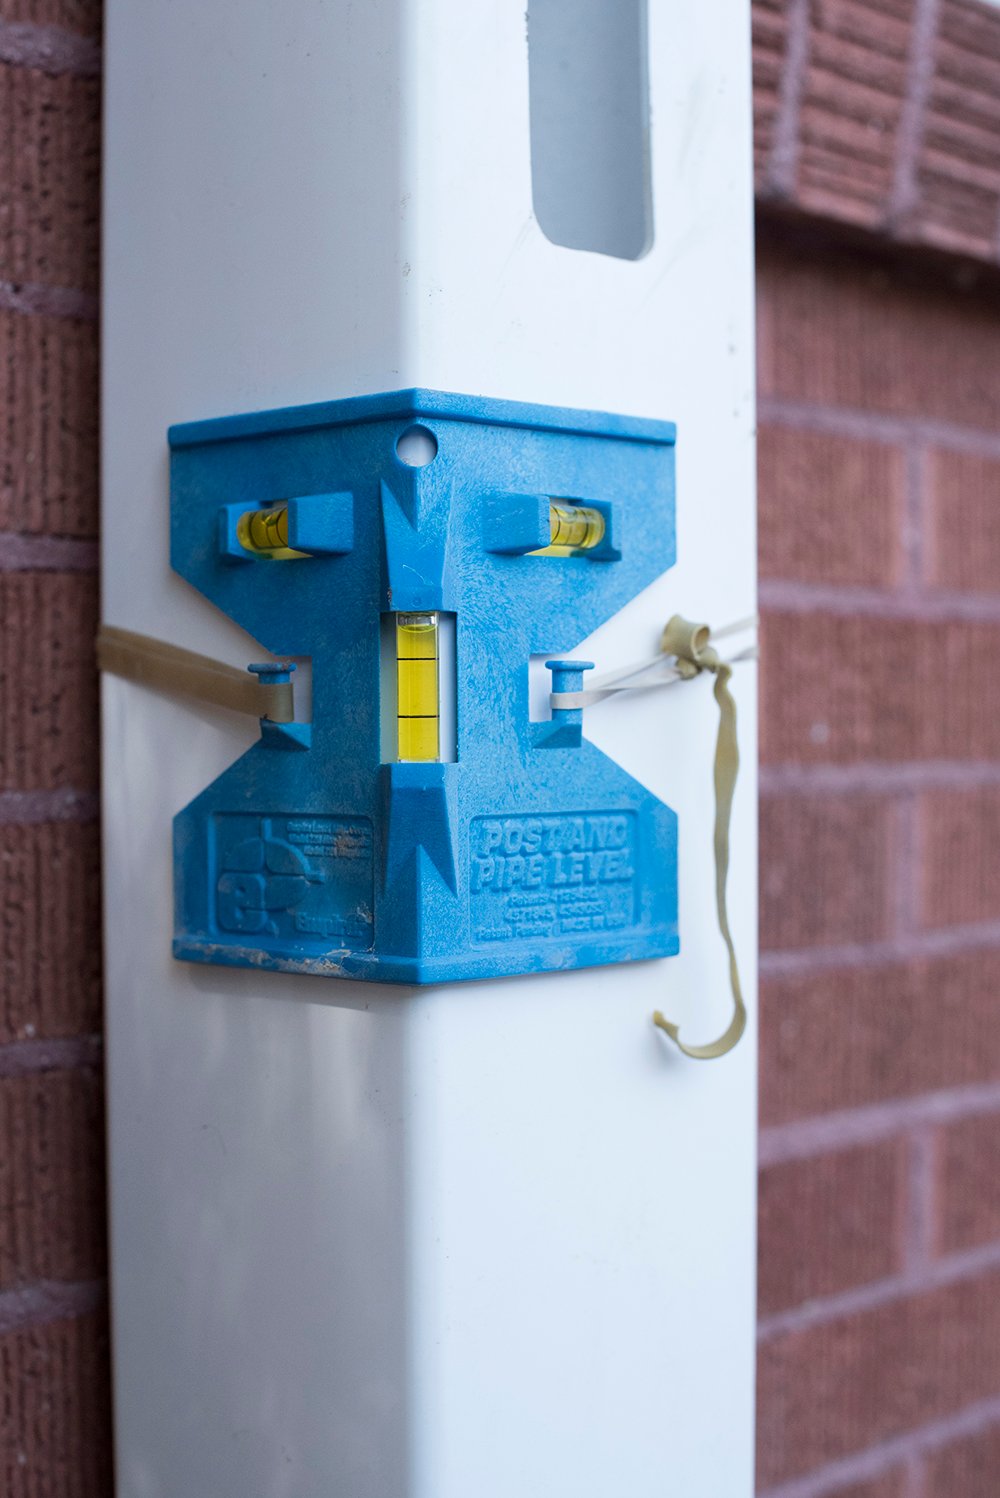 This $5 tool is a must for any fence project. Make sure the level bubbles on each side of the post are perfectly centered before the cement is completely set. Tweak the post if necessary! You can forcefully push it around in the cement until it’s perfectly level.
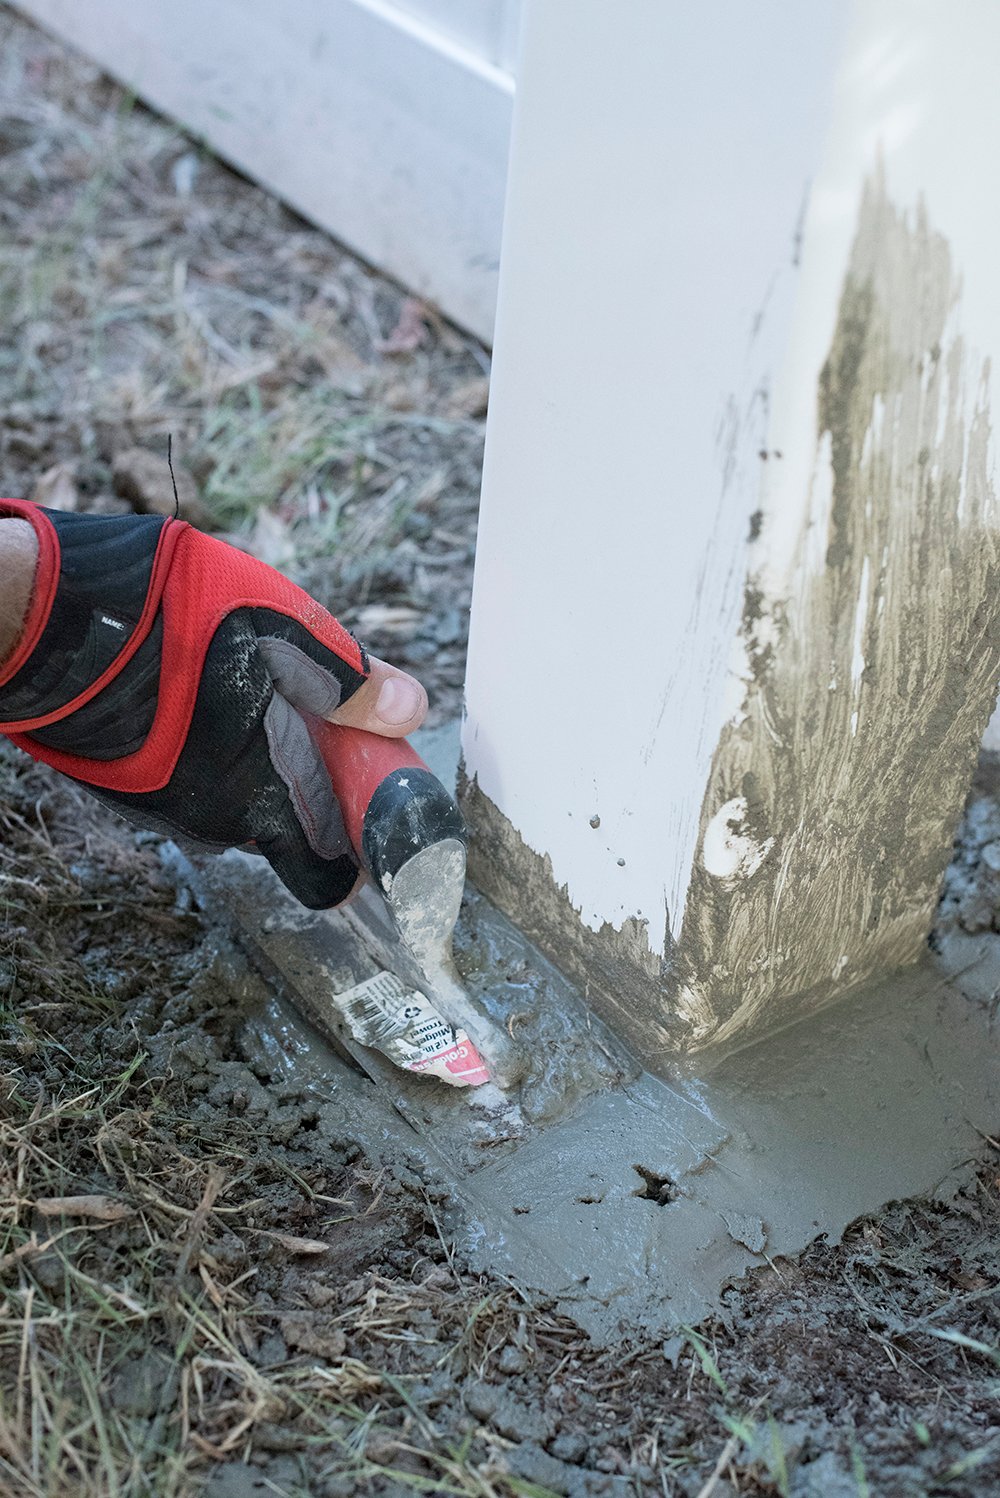
 Step 8 // Smooth the cement. Using a trowel, smooth and finish the top of the exposed concrete. Don’t worry if the concrete gets all over the vinyl post, it rinses and scrapes right off!
 Step 9 // Repeat these steps. Continue with these same steps until all of your fence posts are set. They should all be spaced according to your plan and exactly level.
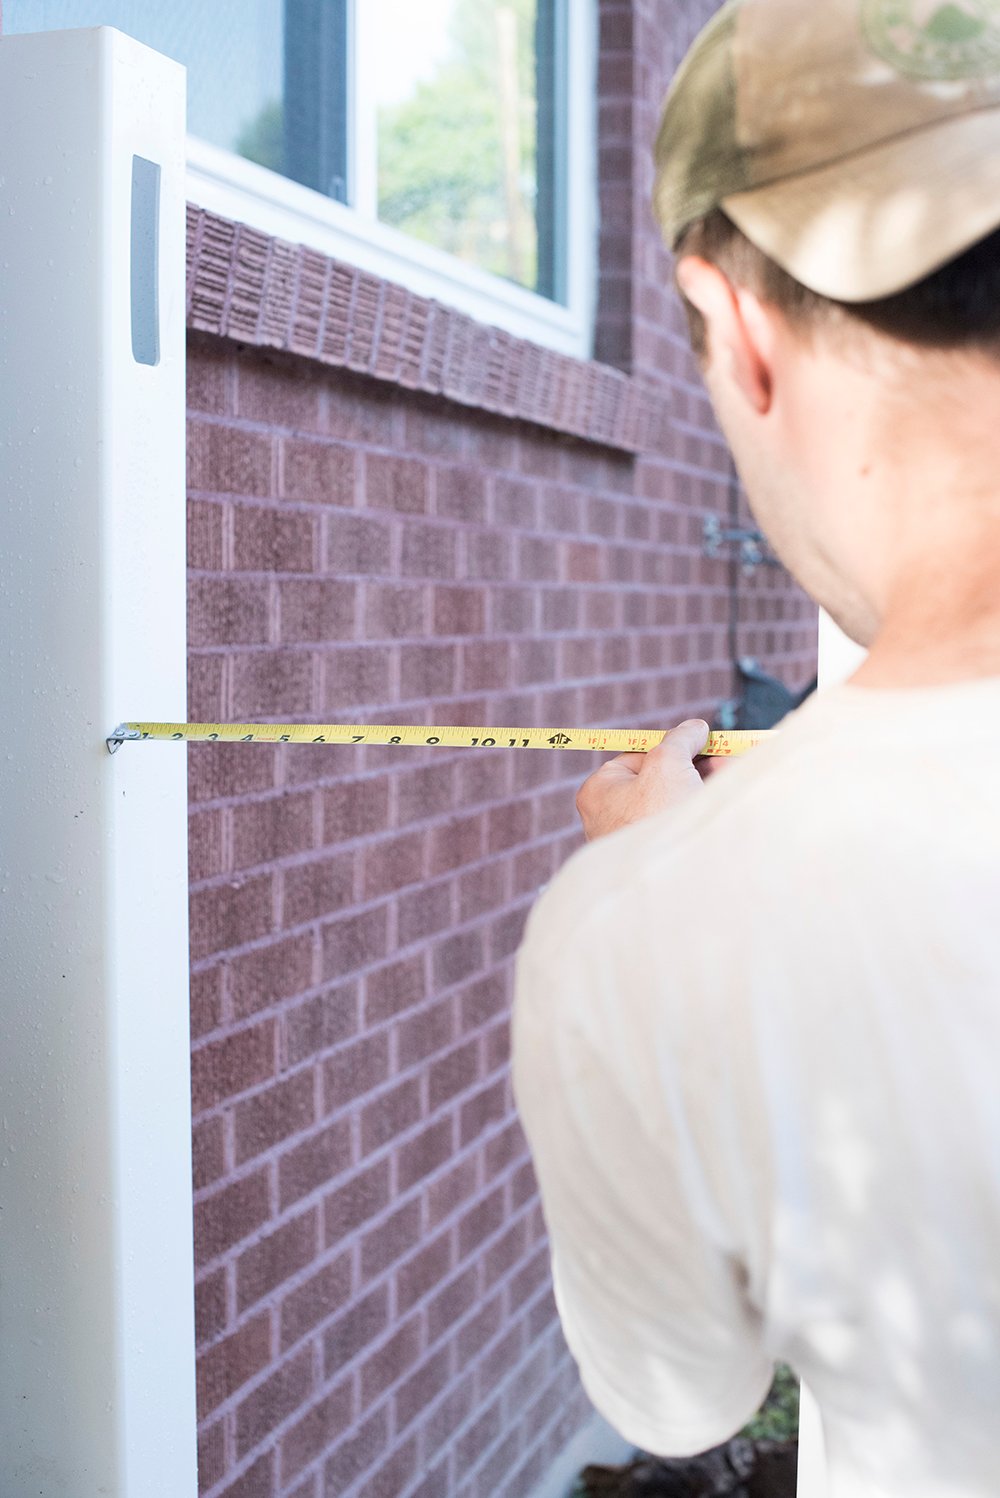
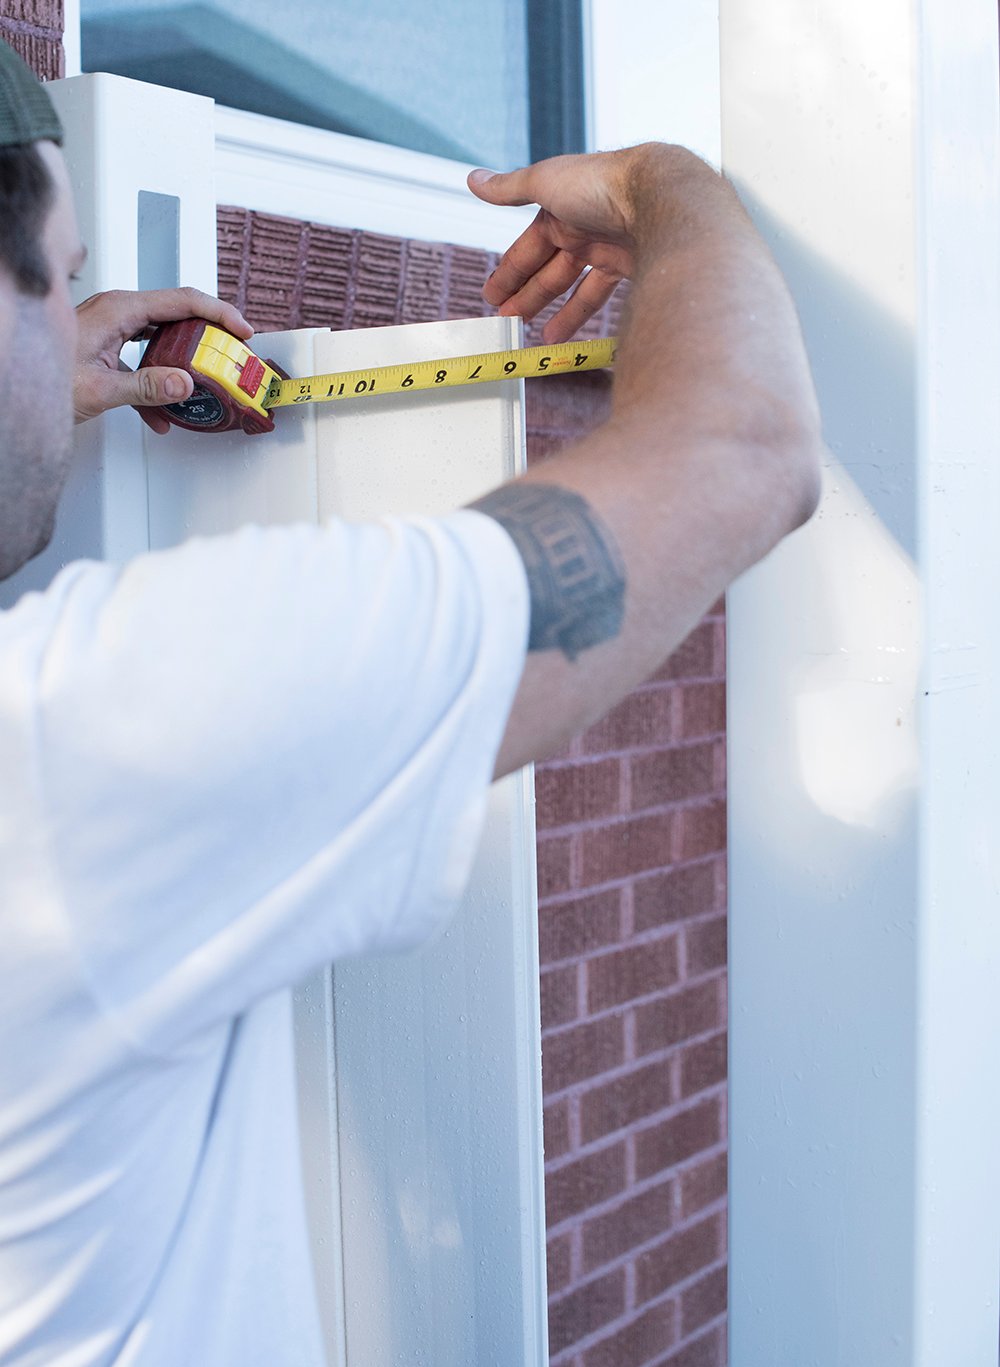
 Step 10 // Measure for the panels. Next, you’re ready to begin installing the panels. Measure the distance between the two posts for the horizontal rails.
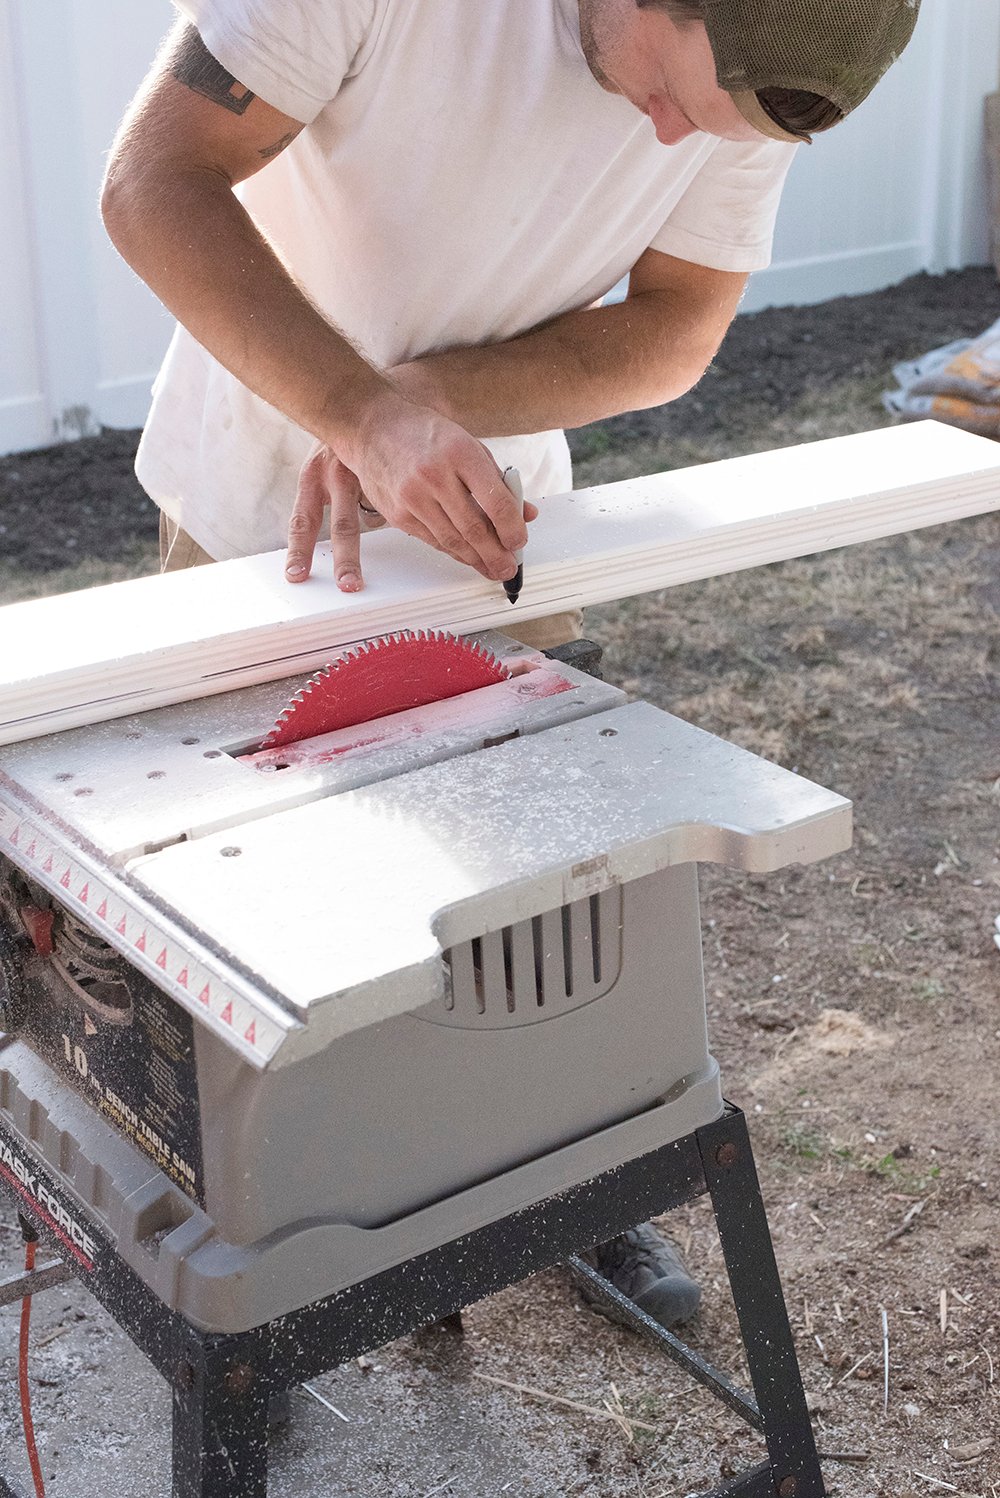
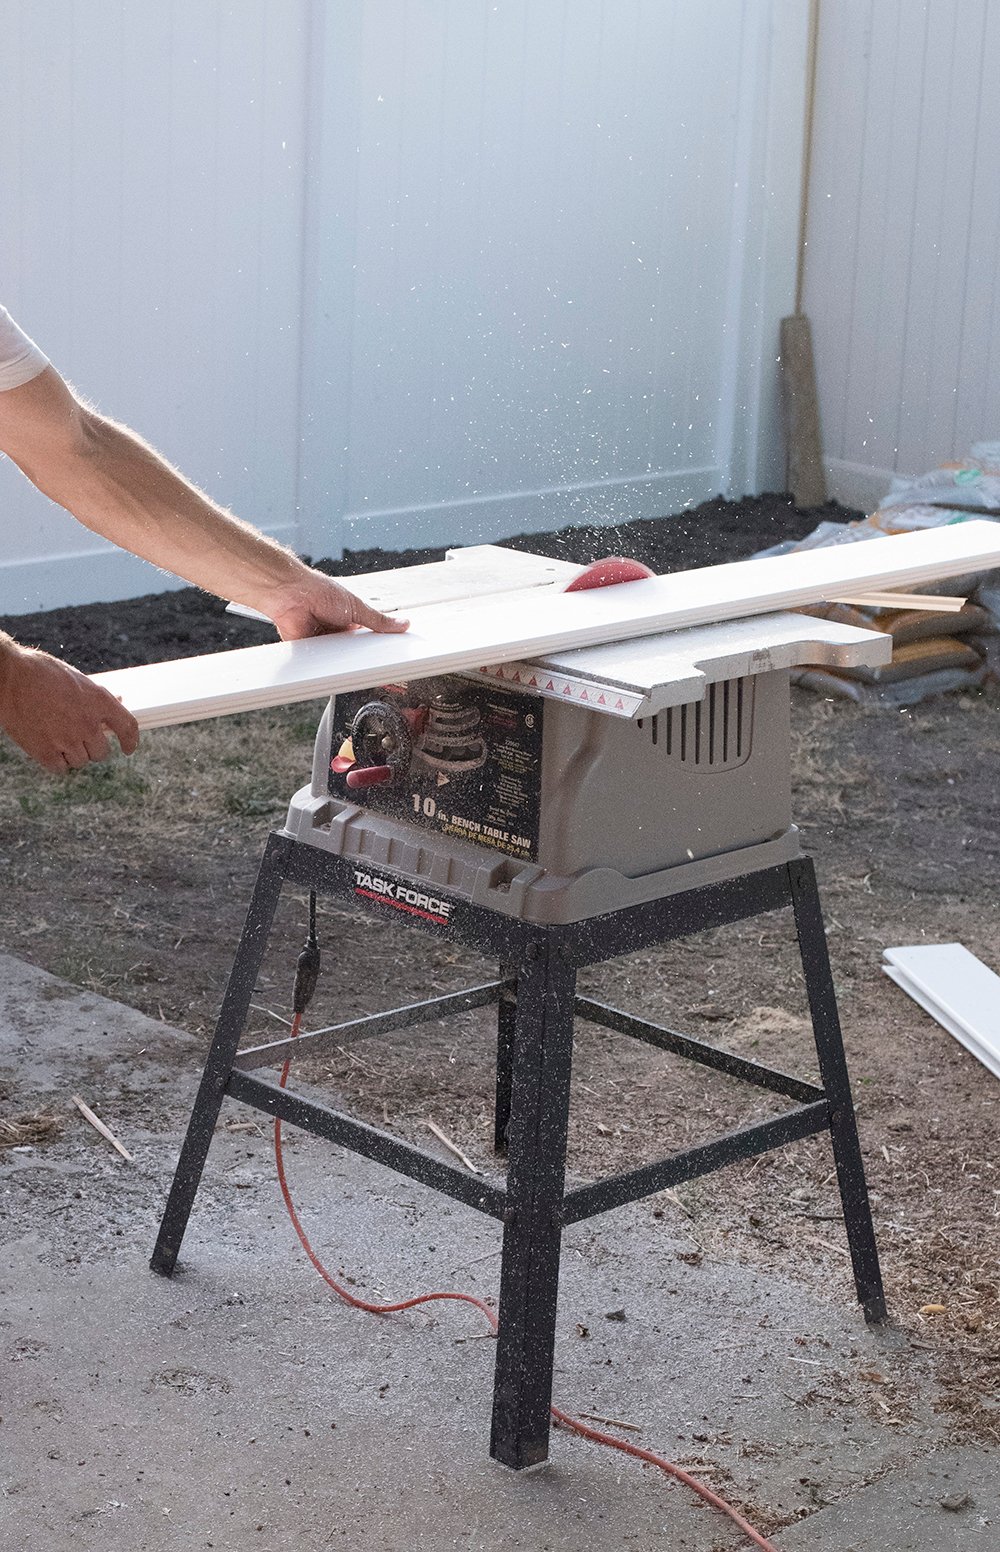
 Step 11 // Cut the rails to size. Using a table saw, mark the measurements and cut the rails to size.
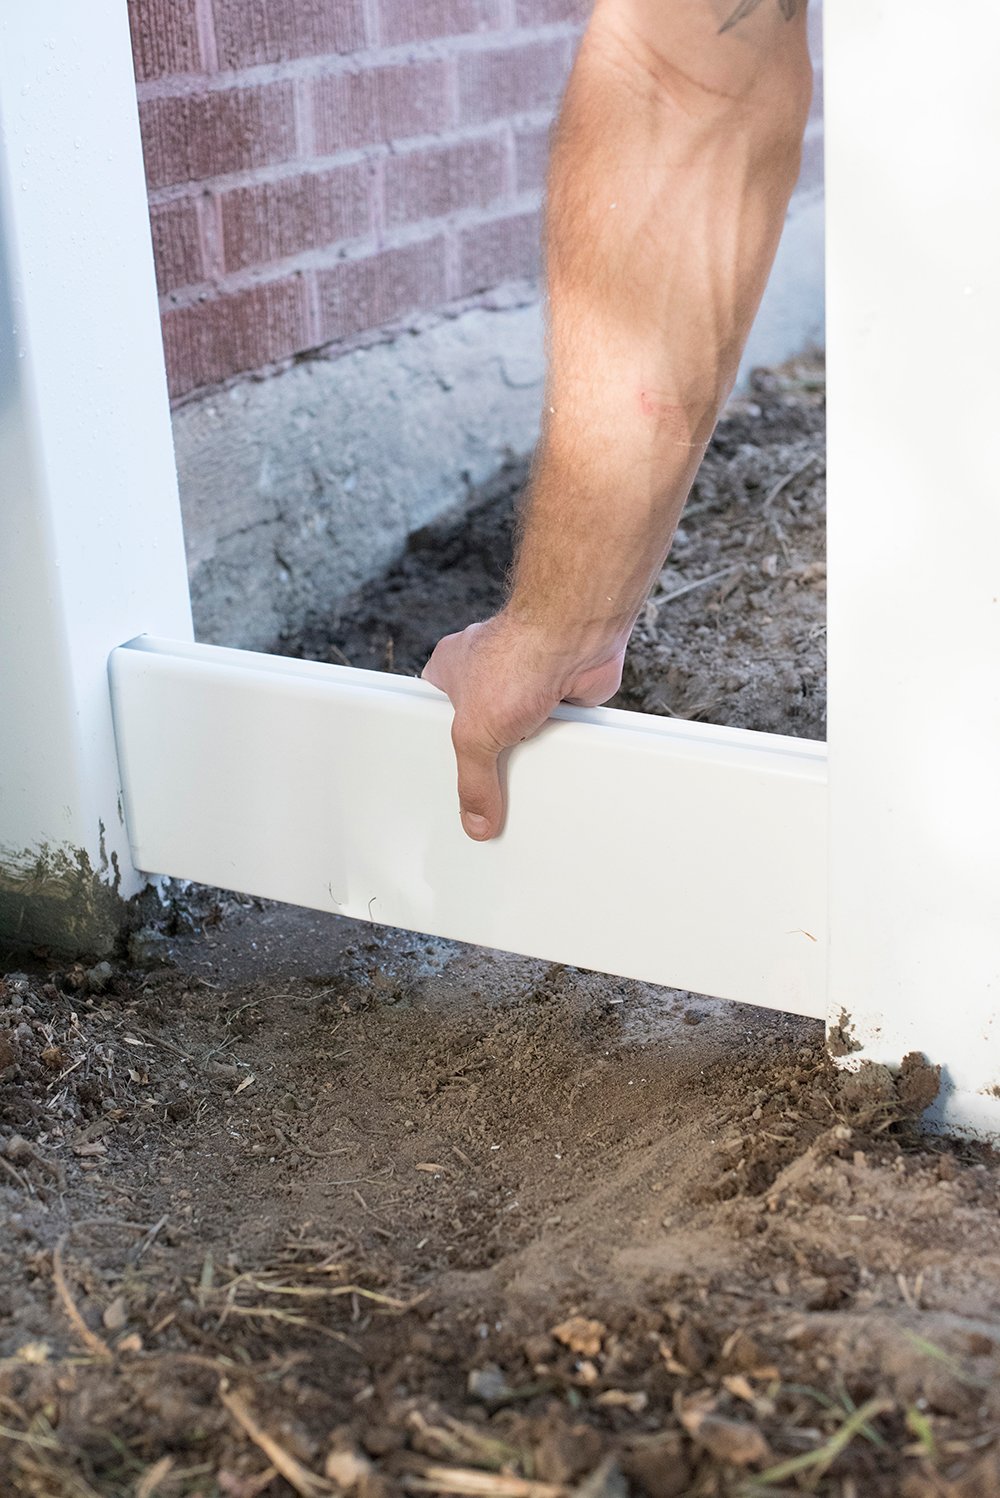
 Step 12 // Insert the bottom rail. Slide and lock the bottom rail into the lower notches. With a tiny bit of force, it should snap right in.
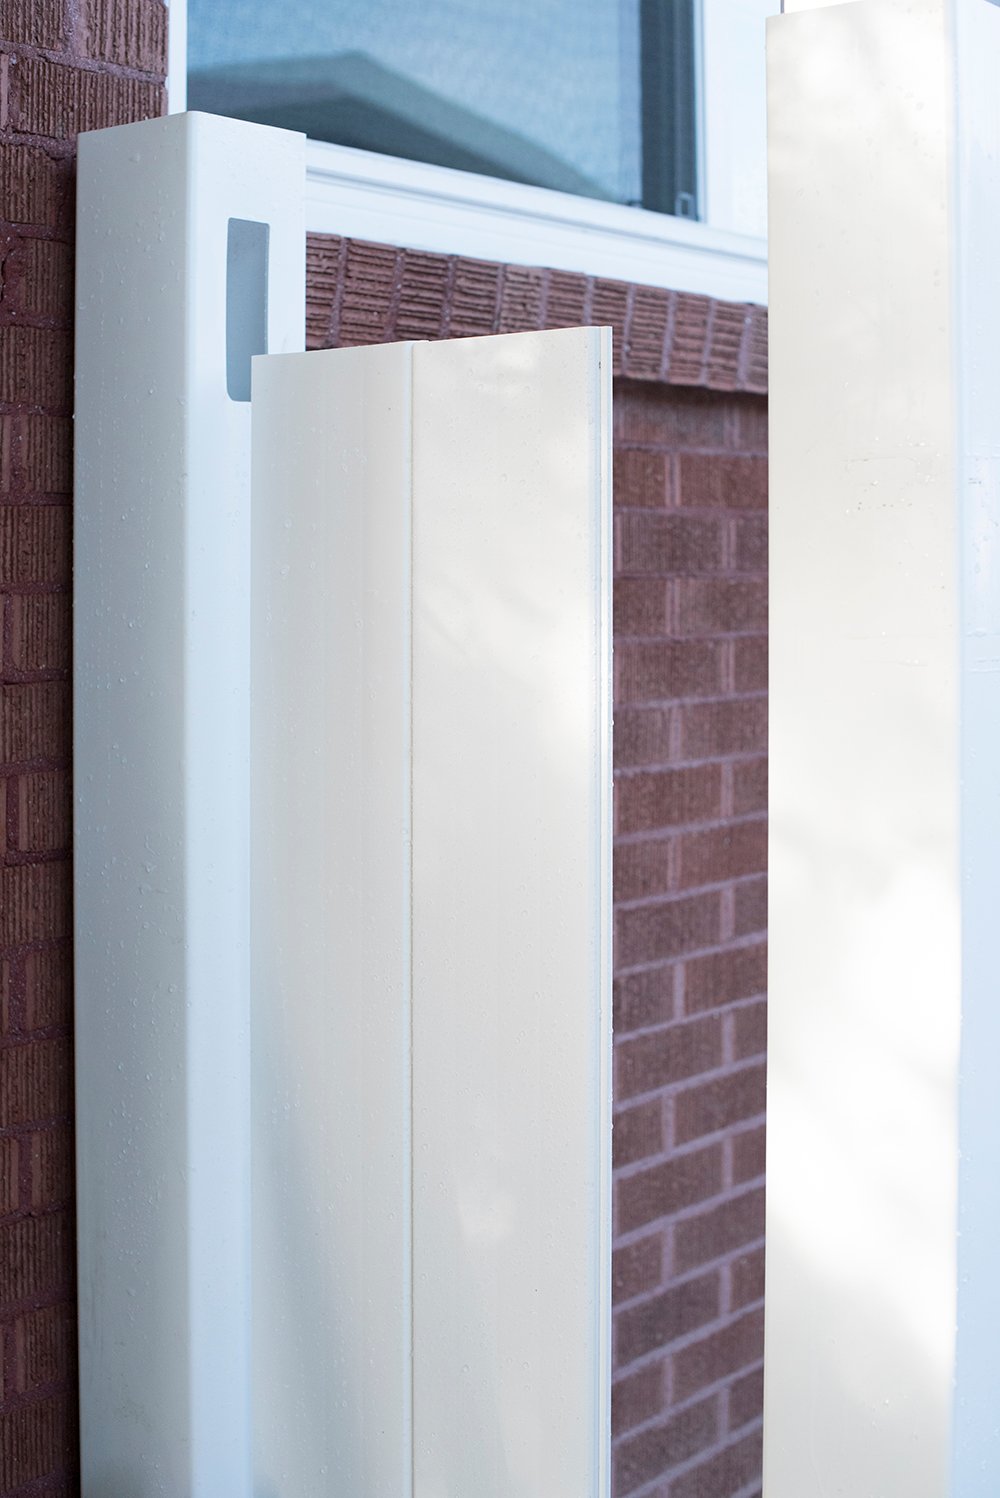
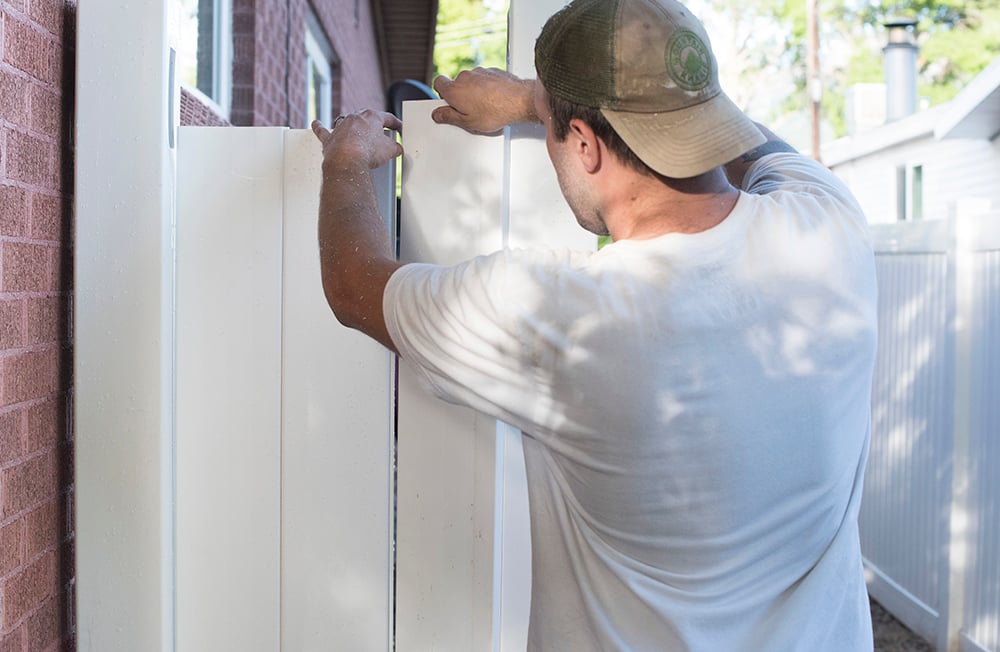
 Step 13 // Assemble the panels. Now you can begin snapping in the vertical panels. This is the most gratifying part of the entire process. They go together so easily and instantly give you privacy, rewarding your hard work!
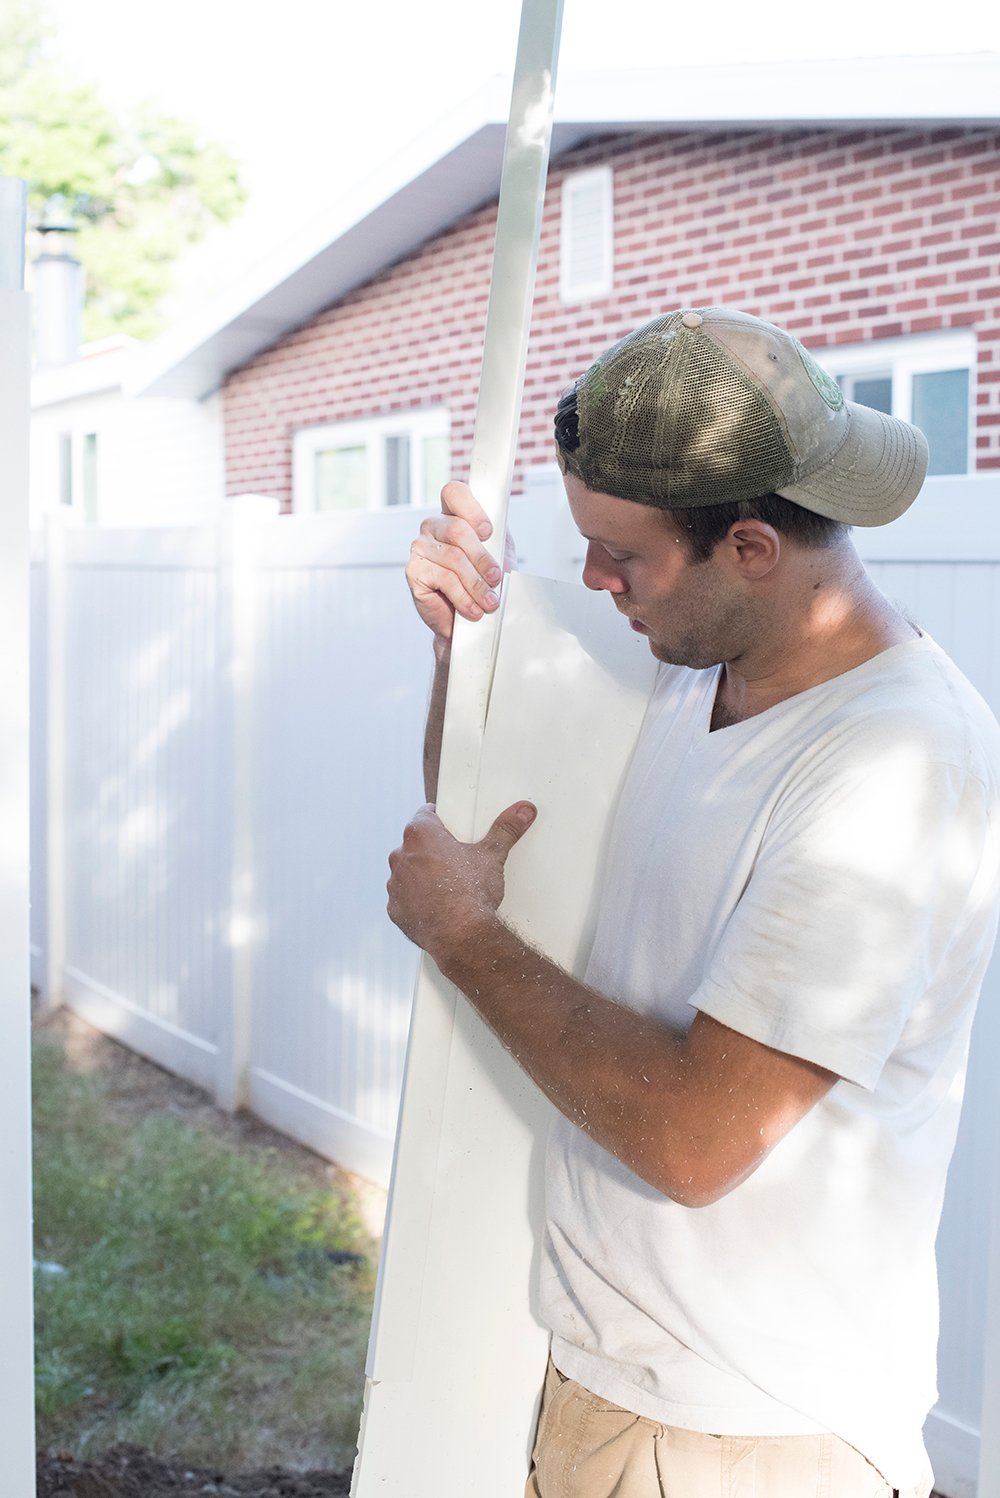
 Step 14 // Cut the last panel. Not all panels need cut, but if you have an odd size, you can easily throw it on the table saw and make a quick adjustment.
 Take a measurement, make the cut, and slide on the edge cover. If the side of your panel looks jagged from the table saw- don’t panic! The edge cover hides any imperfections and you’ll never see it.
 Sidenote… after cutting the vinyl fencing, you’ll be covered in what I like to call ‘fence dandruff’. Those little plastic specks get everrrrywhere.
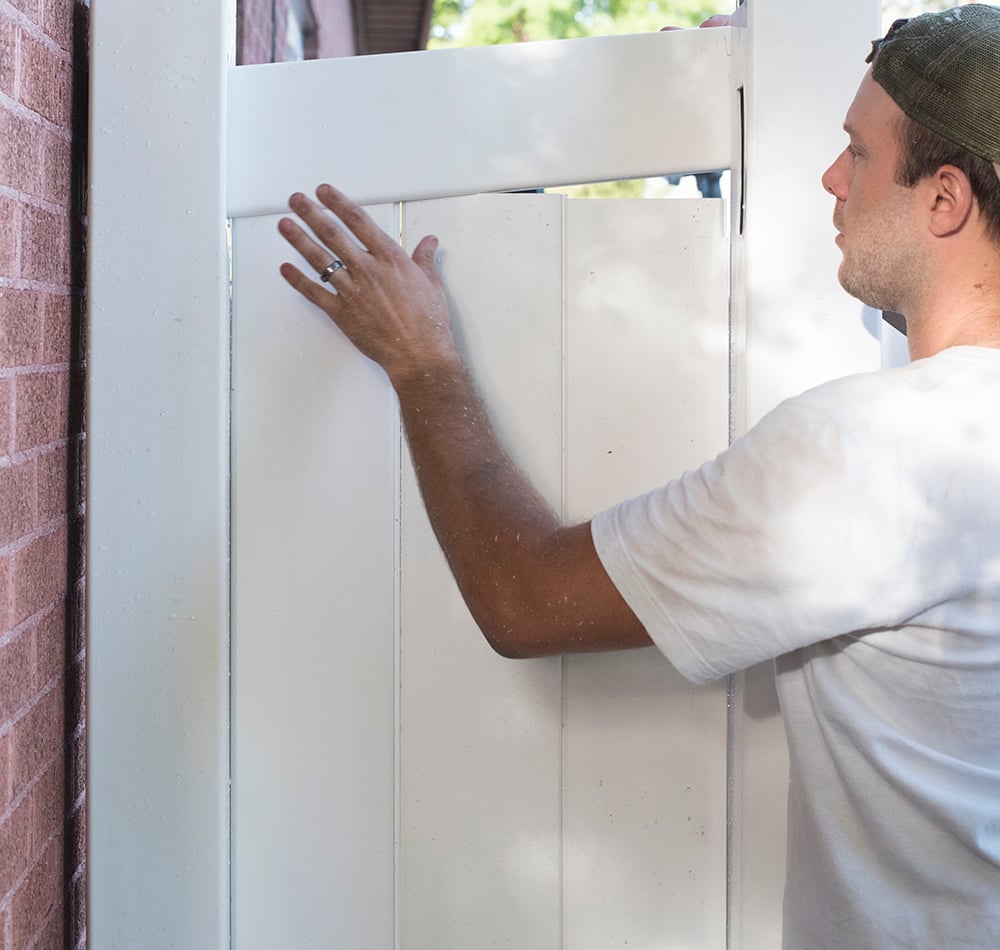
Step 15 // Snap in the last panel. This is pretty self explanatory… that last panel should snap in, closing the gap.
 Step 16 // Add the top rail. Measure, cut, and install the top rail in the exact same way you did the bottom rail. It should slide over the panels and snap into the upper post notches.
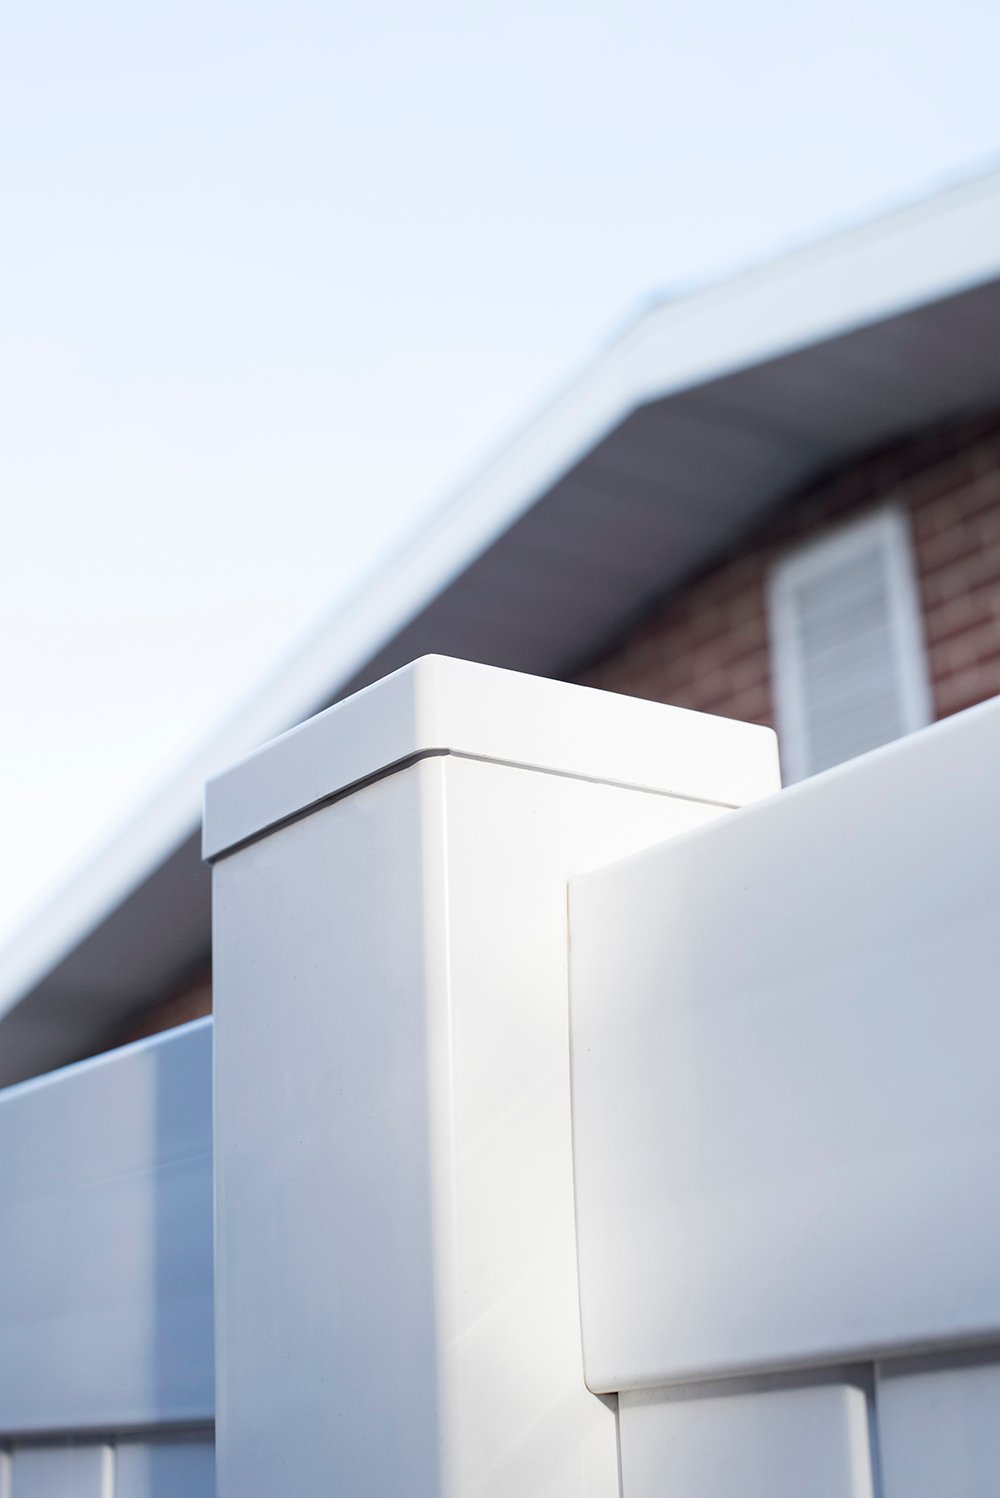
 Step 17 // Add the post caps. The last step of the basic fence assembly is adding the post caps. Use the vinyl fence glue to secure those babies on and finish the look!
 Step 18 // If you have a gate… If you opted to use a gate in your plan, I thought I’d include instructions for that as well. The building process is the exact same, except the posts on each side of the gate will be lined with a heavy duty galvanized steel post insert. Immediately after installing the vinyl fence post in the wet concrete, slide your heavy duty post into the center.
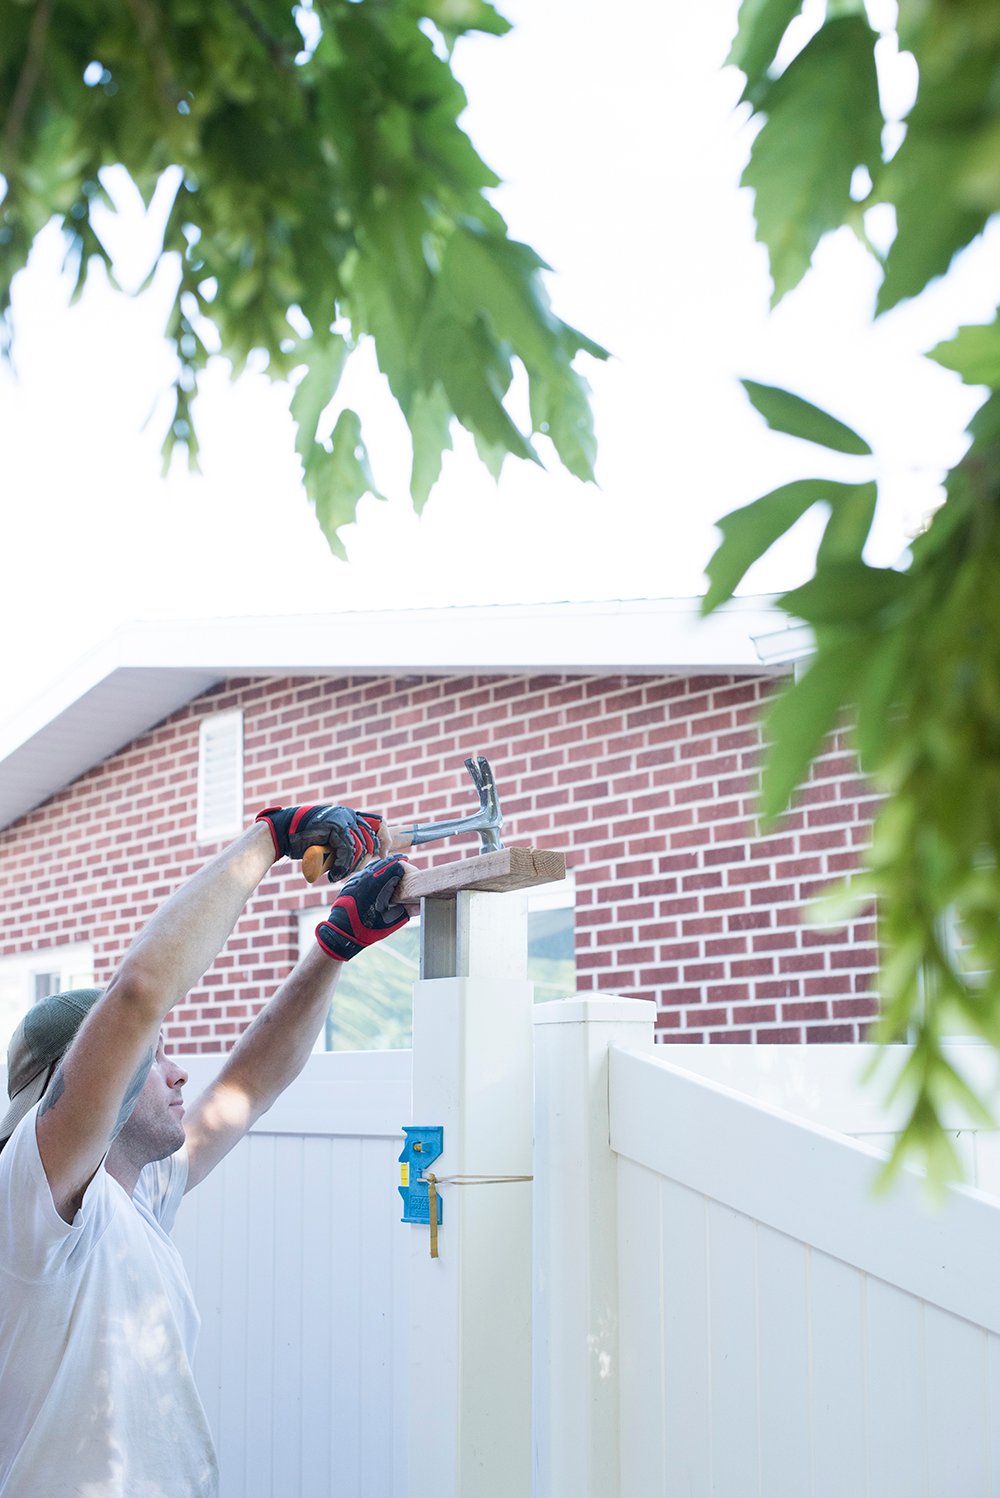
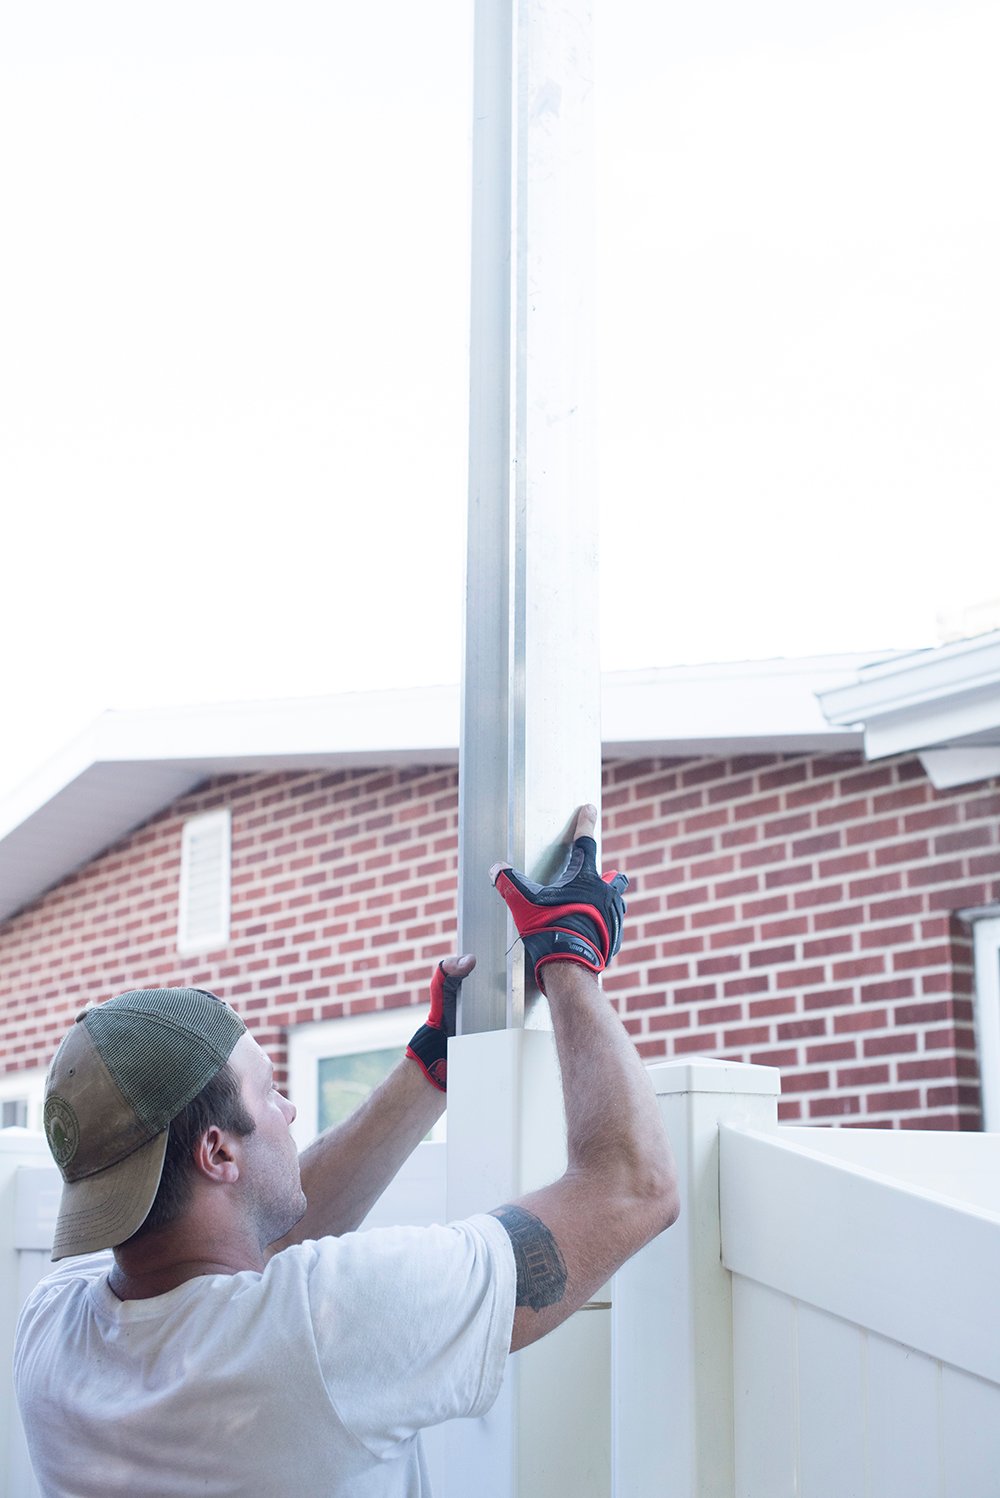 It’s sort of tough to get it deep into the concrete, so work quickly. In the end, you’ll have to use a hammer to bang it in the rest of the way.
 Once the post is flush with the vinyl exterior and the concrete has completely cured, you can install the provided gate hardware using a power drill.

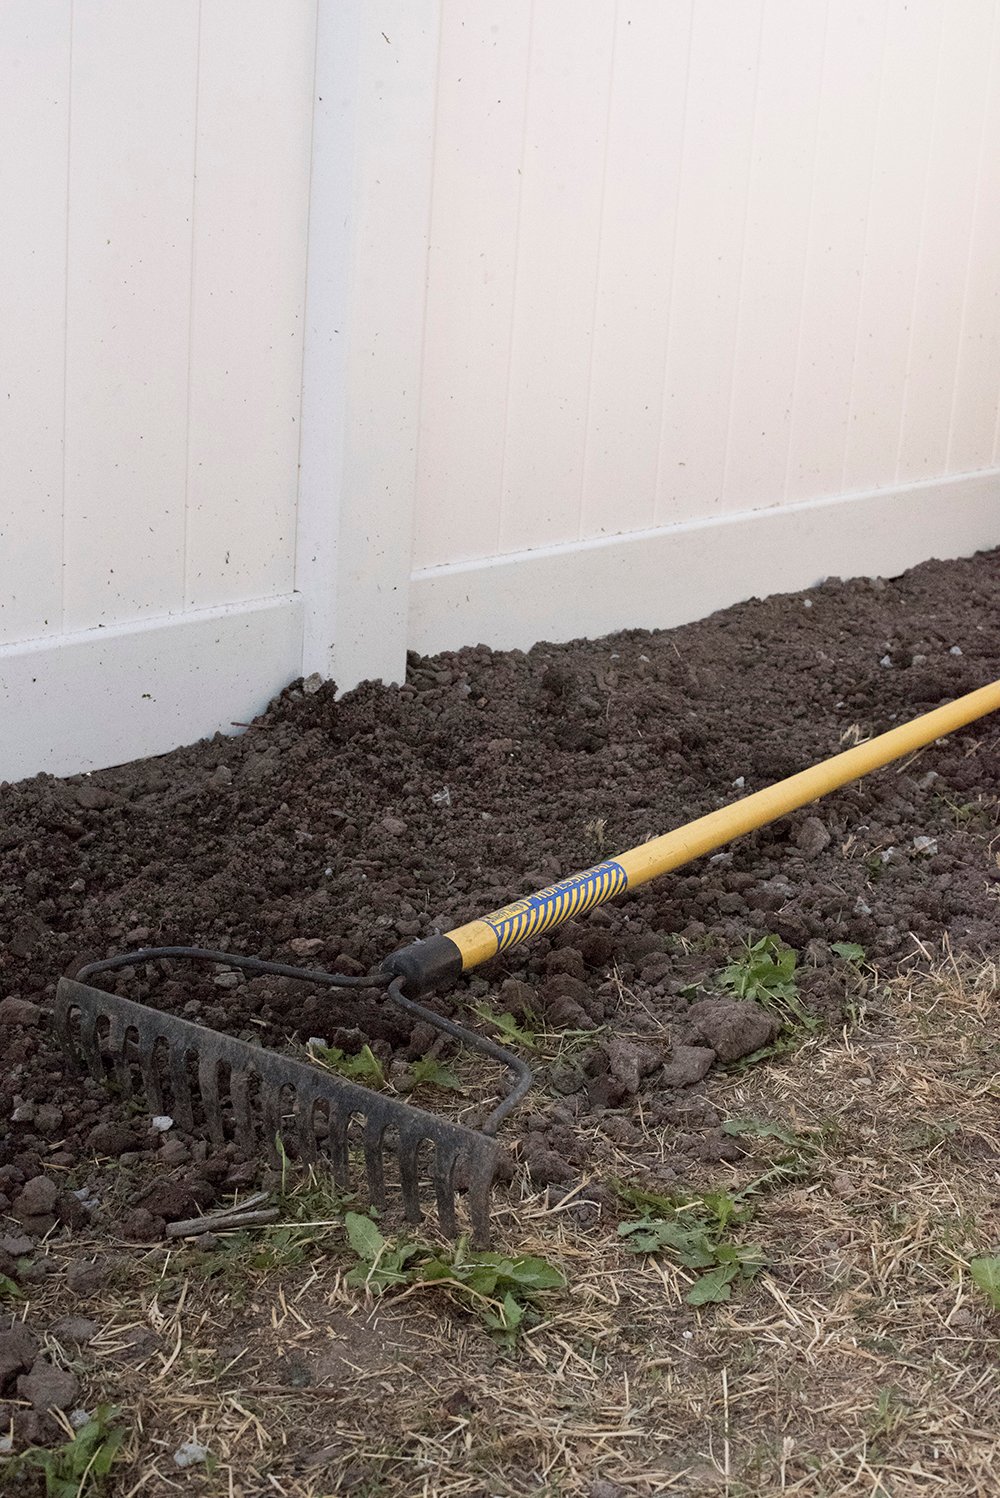
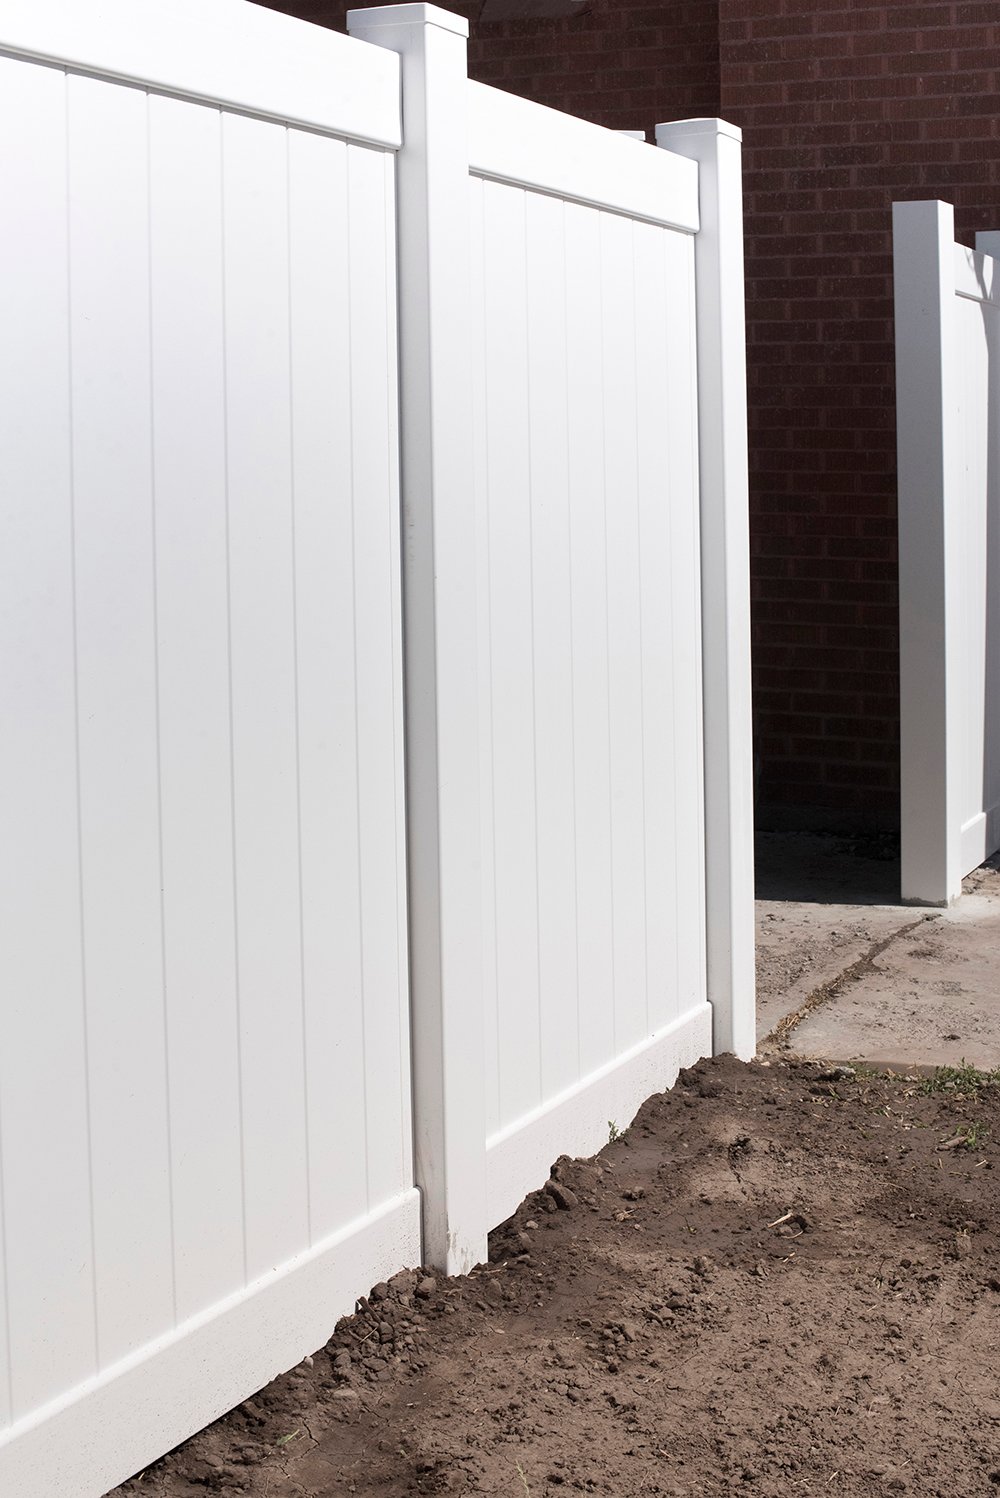
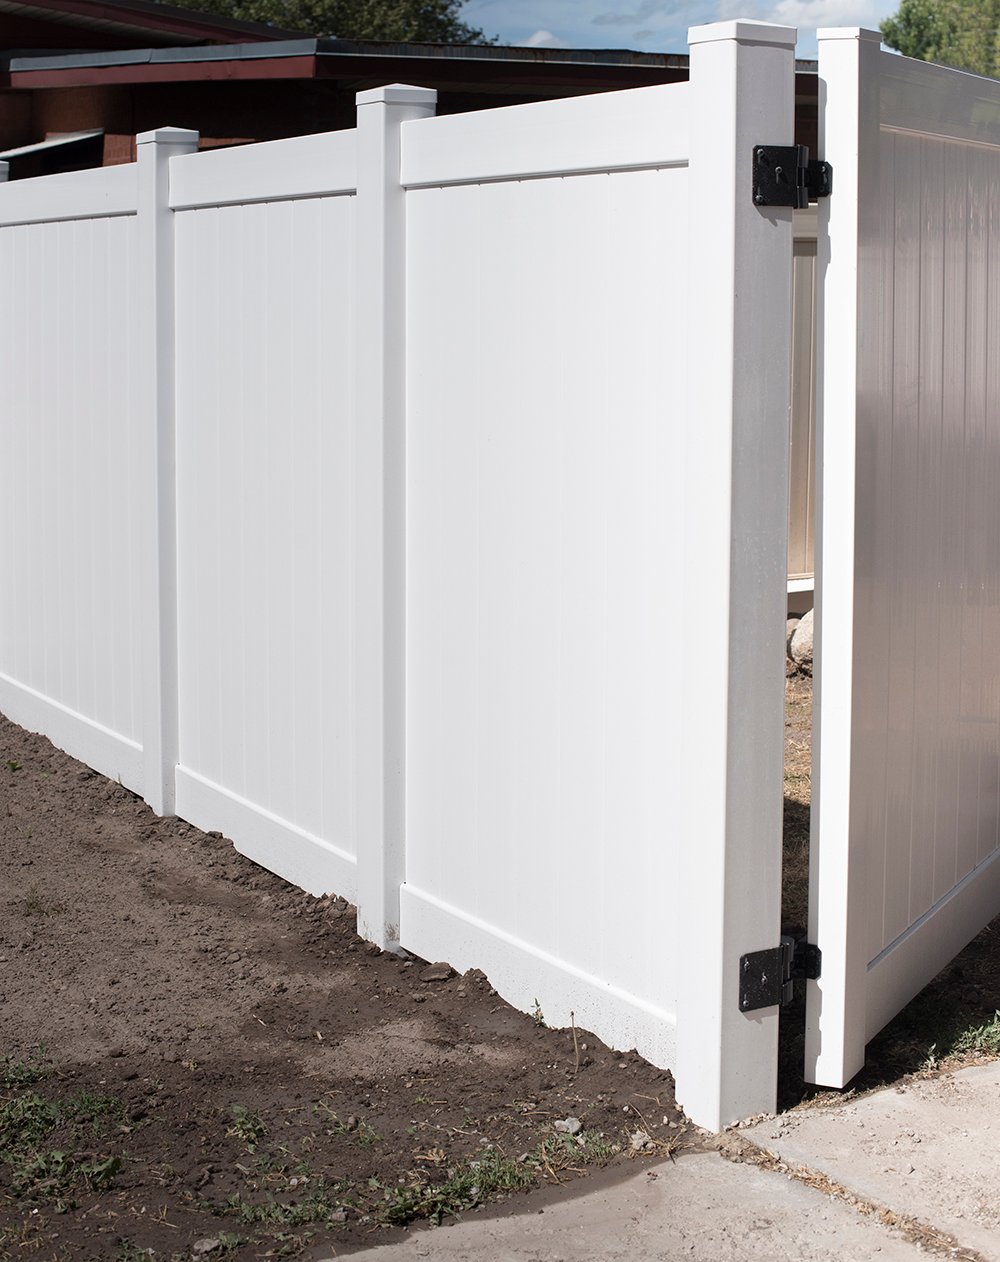 Step 19 // Level the dirt. The last and final step is leveling the dirt. There should be piles of dirt next to each post hole… rake and level those out, closing in any gaps on the bottom side of your fence. If your fence got dirty throughout the process, any dirt and debris will spray and wipe right off. Feel free to take an extra step and clean it if you’d like. I was totally zonked and out of energy, so I didn’t get to that in time for the photos.
 I’m here to tell you, we did this ourselves for the very first time and if we can do it- you can do it. I promise! Our next door neighbors also installed a new vinyl fence at the same time (simultaneously with ours), and they also did an amazing job. Our yard is pretty large and it took us two full weeks to complete the project. We worked the entire weekend and weeknights after work. Don’t let the images fool you… I helped just as much as Emmett. I just happened to be on the other side of the camera. So if you’re not a dude, or don’t have a guy who is willing to help put in some elbow grease, you can totally do this lady friends! Although it does go more quickly with help.
 Last question… why vinyl instead of wood? Here’s the thing, if I’m going to go “high end” I’d rather have a stone fence than wood. Wood is SO much maintenance. I also wanted our yard to be bright and welcoming, meaning a white fence. Painting wood would’ve been so much more work, and stone was way out of our budget. Vinyl fences last forever, are super easy to clean, require zero maintenance, are budget friendly, and are way easier to install. It was a no brainer for us. After landscaping, it’s going to blend in beautifully with our home and backyard- the exact aesthetic I was looking for.
You know what they say… fences make good neighbors. Luckily, this time around we have amazing neighbors. Our last home… not so much. Let’s just say one of our previous neighbors went to jail for attempted manslaughter. Long story short, a good privacy fence is 100% worth the time, labor, and cost! I’d do this two hundred times over. Hit me with any questions in the comments!
*This post is brought to you in collaboration with Lowes. All content, ideas, and words are my own. Thank you for supporting the sponsors that allow us to create unique content while featuring products we truly use and enjoy!
Looks beautiful!!!! I can’t wait to see the backyard finished!!! Good job you two! That’s a lot of work.
Thanks so much, Leah!! xo
Wow! Sarah i really appreciate how you walk us through of putting up a vinyl fence. I am a new homeowner and I do need privacy in my back yard. I am only looking to do a “L” shape private fence sense by garage hides the other side of my yard. Thank you
Of course, Annet! Good luck with your fence. Let me know if you have questions. xo
I hope you have good luck with your vinyl fence. I have seen far too much evidence of their NOT being durable or zero maintenance to ever install one. Plus, there is no air flow (you at least get a minimal amount with wood). If you want white I agree that it’s probably the way to go, though. It’s great that you are encouraging people to do their own fencing; we’ve done two cedar fences and it’s a tremendous cost savings. I’ve also seen some “professional” fence installations that left a lot to be desired! Like you, I love having a fence. Looking forward to seeing how your backyard takes shape.
Thanks so much! That’s sort of our philosophy too… we like to install things correctly and the best way to achieve that result is by doing it ourself (and saving money along the way!). I will definitely post how it holds up. Thanks for the comment!
Great job on the fence and your project report. Very helpful.
Can you elaborate on step #1? Once you have the sketch of the fence, how did you figure out the different parts needed. I am trying to estimate the cost and have been to the store but have not been able to figure out the parts I need to buy for end post, corner post, gates, etc.
Thanks.
Hi Jorge, basically the parts of the fence include: the fence post, fence cap, and fence panel. If you plan on having a gate, you’ll need to calculate for that as well. I just sketched a plan to scale and figured out how large the posts, panels, and gates were. Then I divided to see how many of each I would need. Hope this helps!
Thanks for doing this! I bought a condo that needs a new fence or major repairs on the one that is there. This was very helpful in seeing how it is done and what work needs it go into it. Not sure I. Can do it by myself as I live more than a thousand miles away and may need to get help from my grandson. Expense is an issue.
What you said about calculating the number of panels and posts made me rethink my plan to install my own fence. I want to have something in my yard to keep my dog from wandering into my neighbor’s garden, and I wanted to do it myself. I’m not good at mathematics, so I think I’ll hire a professional fence installation service that can calculate the materials and put them up for me.
Did you get a quote to have it installed before you decided to do it yourself? Wondering what they quoted you compared to how much you spent doing it yourself. Any insight would be appreciated. Also did you pull the fencing permits yourself?
We did not get a quote prior to installing the fence because we knew that was definitely something we could do ourselves. Sorry! And yes- you can pull any permits yourself… you don’t have to be a licensed contractor. I’d check with your local city office. Hope this helps!
what all was the total cost for the whole fencing project if i may ask Sarah
You can find the budget for every project in my backyard here: https://roomfortuesday.com/backyard-budget-breakdown/
Thank you, Sarah. I reviewed all kinds of videos on how to install fence. Yours was the best over the manufacturer’s own how to videos. Your are an amazing communicator.
So happy to hear the post was helpful, Jim!
I like the detail you provided in your post. Good thing a link was provided by Lowes. Now to see how much this will cost and lay it out.
Looks great! One question: How big is your back yard? I have a little less than half and acre and was hoping to get an idea on how much I’m looking at. Thanks!
Thanks, Brandi! Our backyard is 1/4 acre.
Hello Sarah! What a great tutorial! My husband and I are DIYers as well! We are about to put up a vinyl privacy fence ourselves too, it arrives today. I have seen two ways to install the fence and wanted to know what you thought. Obviously your way I saw and the other is to install a post, then slide in the bottom rail, insert the panels, slide in the top rail, and then install the second post and snap the two rails into the second post. So instead of installing all the posts first, as you did, they did each section as they went, if that makes any sense. From what I understood was this way they thought it was easier to make the panels tighter than installing all of the posts first. I personally think your way sounds easier! Wondering if you debated this as well or not and if you found your way to still result in a tight fitting paneled fence? Thanks!! Your backyard turned out amazing!!
Hi, nice job explaining. Is the galvanized steel required for all the posts?
Thank you! No- it is not… just the posts that will have weight (like a gate).
I feel like this is something I can do but please tell me the easiest way to figure out the measurements (math is not my strong suit). We have a HUGE oddly-shaped yard that was quoted $8,000-$9,000 for a white vinyl fence. Also, when you say each post needs 3 bags of concrete; do you mean 3 50lb bags?
Oh wow! Yes… each post hole needs 3 (50 lb) bags of concrete :) Hope this helps!
I have one question. Since there seems to be enough flex to get the tope rail into the hole in the post, what keeps it from popping out in a blow. We live in West Central Florida where we do get hurricanes and I have seen fences come apart in non hurricane force winds,
Great question, Steve! It’s kind of tough to get it in the top hole, and it fits very snug. It all fits really well and once the entire fence is up, it helps to support the entire structure and keep things in place. Although we’re in Utah, I wouldn’t worry about it popping out in a blow. It kind of clicks into place and is incredibly difficult to remove once it’s in. I think it would be more likely for the entire panel to blow over. Hope this helps!
This is beautiful and exactly the kind of tutorial I was looking for. We just bought a home that sits on just under an acre and want (need) a fence for the safety of our kids and dogs. One question… our backyard slopes down toward a trail. Do we need to adjust how we do this based on the slope of our yard? Thanks so much!
So happy to hear that, Melinda! Congratulations on your new home! You should be good to move forward according to your plan and tutorial- just make sure you have a straight grade so the fence is even, lines up, and snaps together easily.
This is really helpful Sarah! The featured Vinyl Fence looks so neat and clean! I’m doing some home repairs and having 8 ft tall privacy fence panels being put up around my Arizona property which is being provided and serviced by https://www.trexfencingfds.com/shop/seclusions-privacy-fence-panel-kit-8ft/ and I hope it really finishes up well! I’ll post an update soon once it’s done! thanks again!