How to Antique a Mirror with Paint… The Easy Way
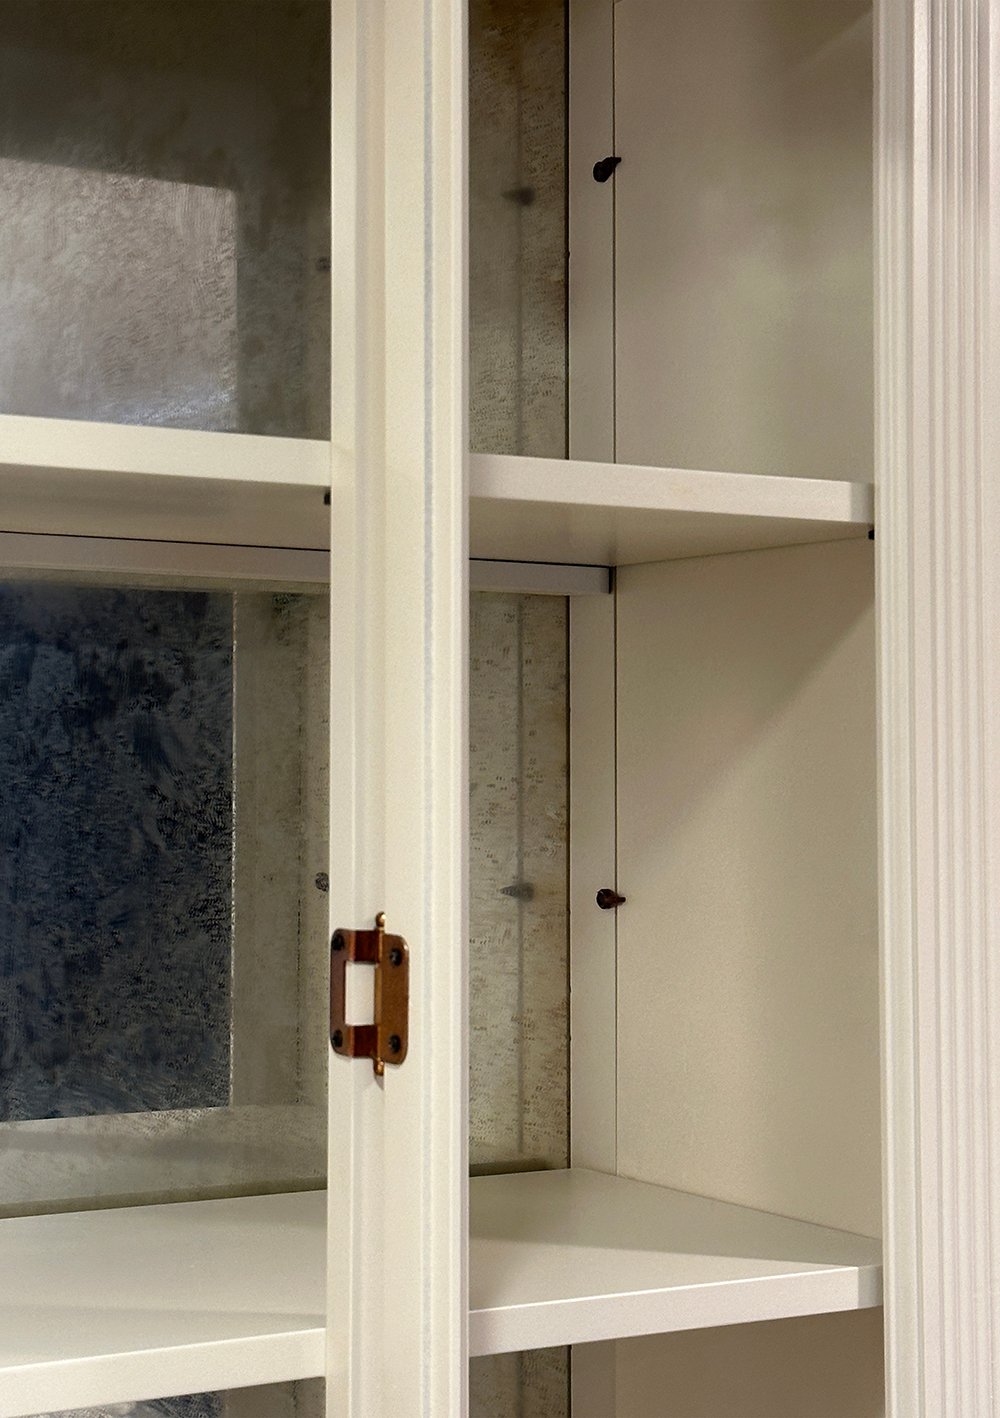
Our vintage hutch or bar cabinet in the basement kitchen was a lucky Facebook Marketplace find. I’ll share the complete transformation in an upcoming dedicated blog post. While Emmett took on the carpentry side of the project, my role was finishing details… part of which included antiquing the mirrored back. I scoured hundreds of tutorials for antiquing mirrors and most of them didn’t give an authentic antique look. Others were extremely messy and time consuming. I knew there had to be a better way, and I’m very pleased with my end result! Click through for my easy tutorial on how to antique a mirror with paint, from the front side… no harsh chemicals, no messy paint stripper, no rubber gloves needed, and it only took 20 minutes per mirror (I tackled two). This antique process actually produces a natural looking patina. Click through for the details!
I’ll preface this post by saying this… photographing a reflective mirror tutorial while my hands were covered in metallic paint was quite difficult! I tried to snap the best photos I could in the moment. Give a girl some grace when scrolling through these, ha.
Supplies Needed
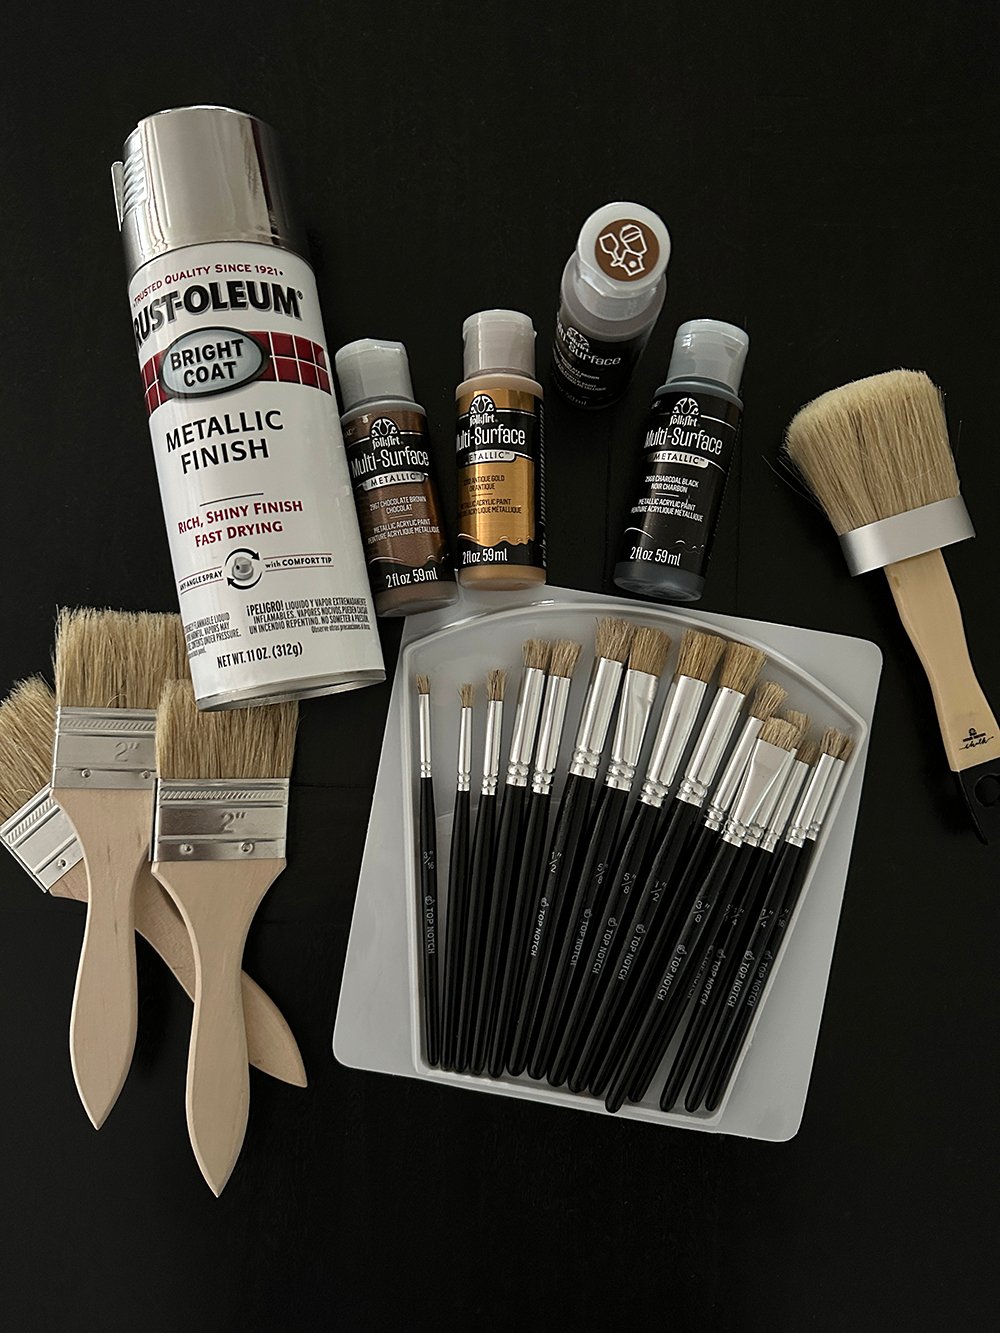
This is everything I used… and you could definitely dial down the brush selection. I took them all to the garage with me (just in case), and ended up only using 3 brushes: the fluffy wax brush, a craft brush, and one of the larger sized black brushes. Buying metallic paints for this project is key, as they give it that reflective, yet aged, look. Here’s the complete supply list:
- Spray Bottle
- Metallic Mutli Surface Paint (I used black, silver, chocolate, and a dab of gold)
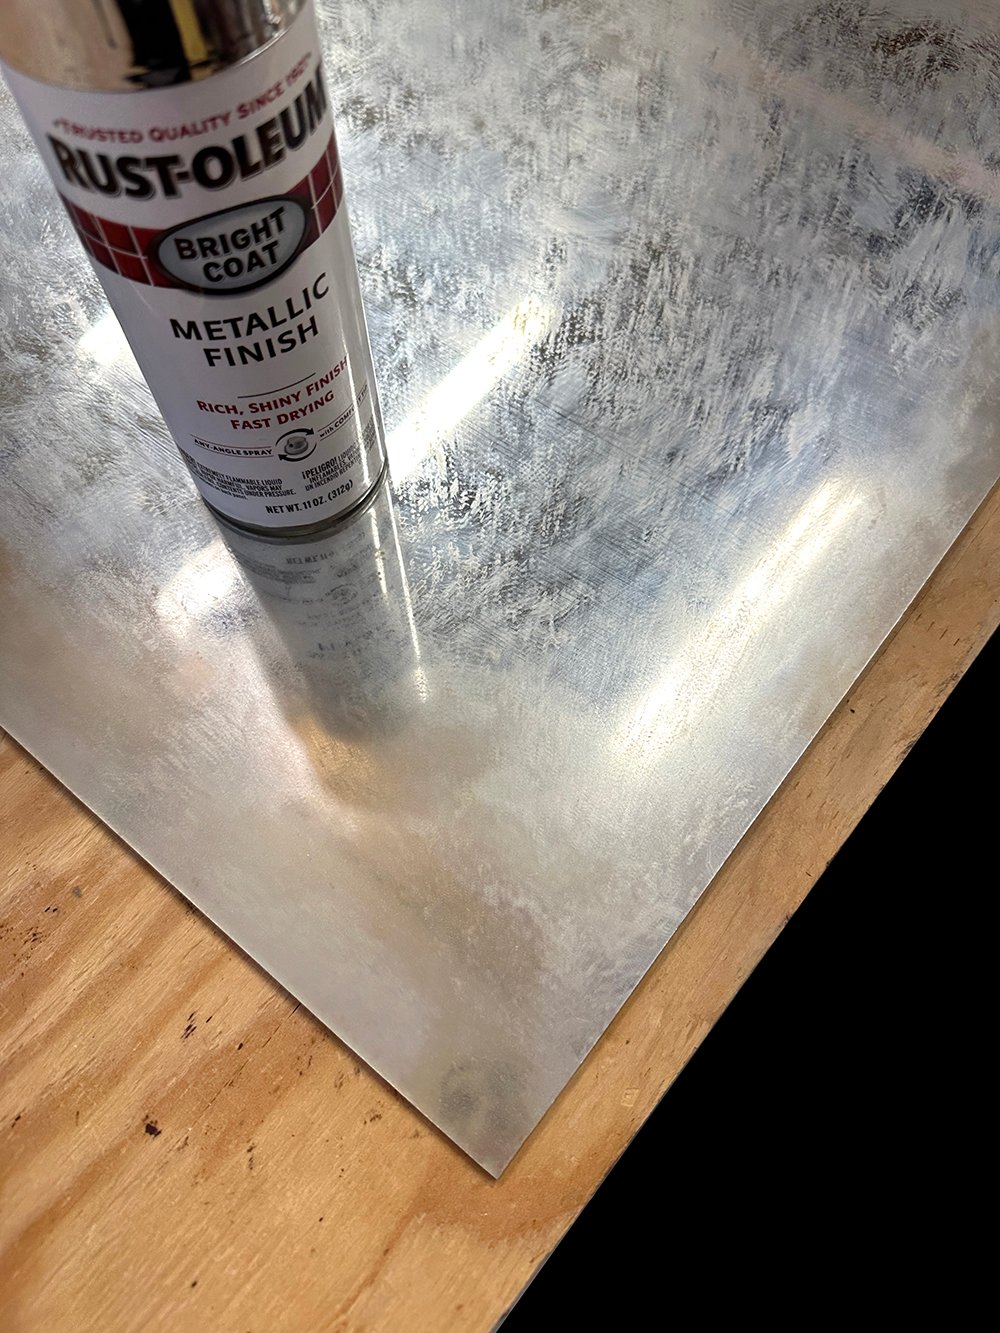
- Metallic Finish Mirrored Spray Paint
- Towels or Paper Towels
- Glass Cleaner
- A Mirror
Step-By-Step Tutorial
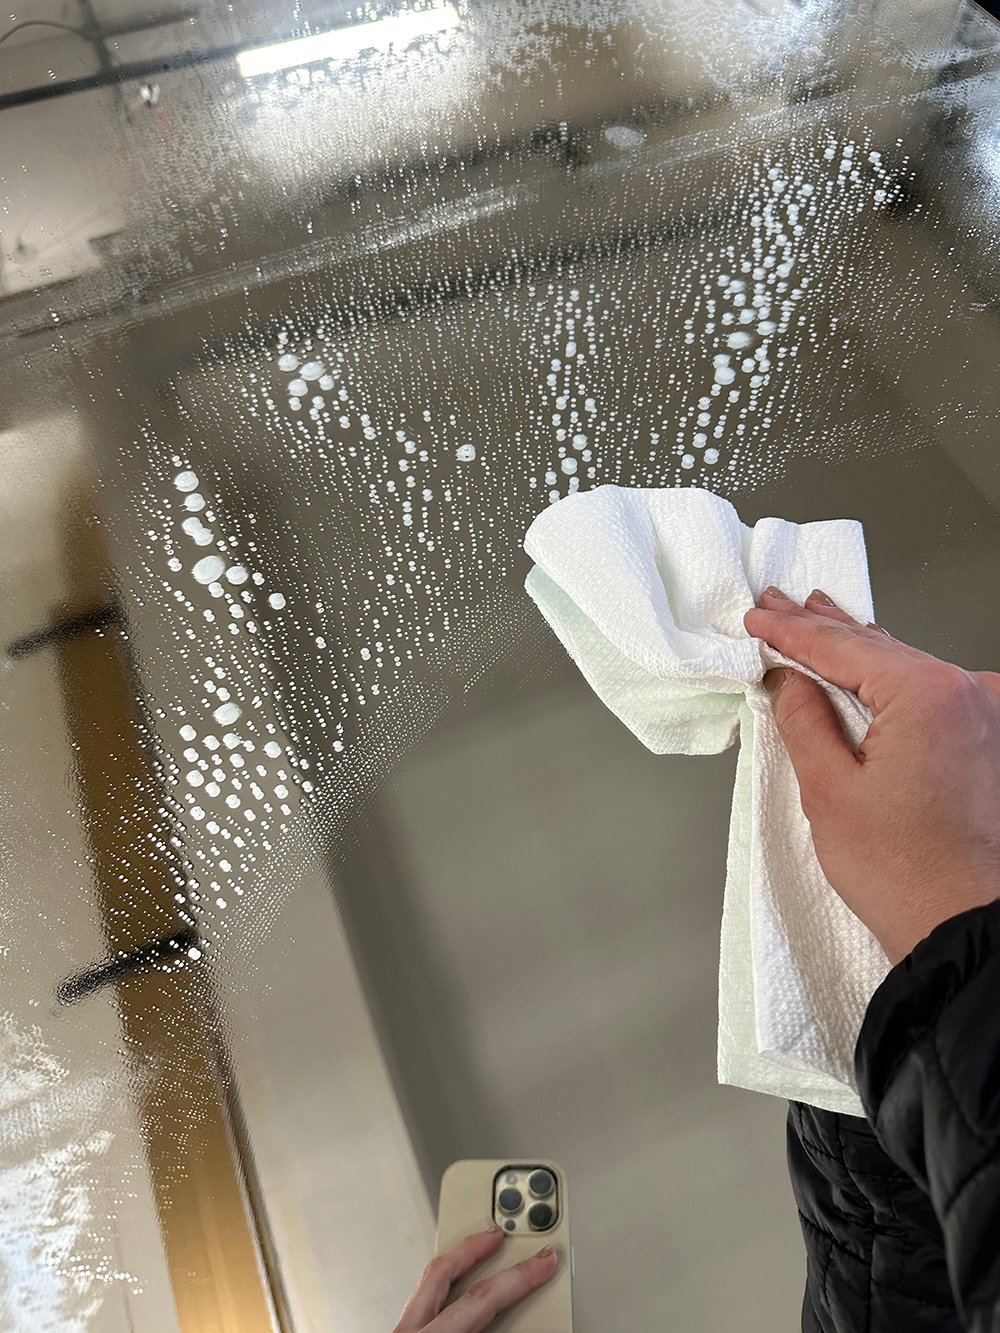
Clean the Mirror
First, make sure the mirror is really clean. I just used Windex with a towel, but any glass cleaner will work.
Begin with the Spray Bottle
I mixed a heavy squeeze of black paint, silver, and chocolate with 4-5 tablespoons of water, and shook it vigorously in my spray bottle.
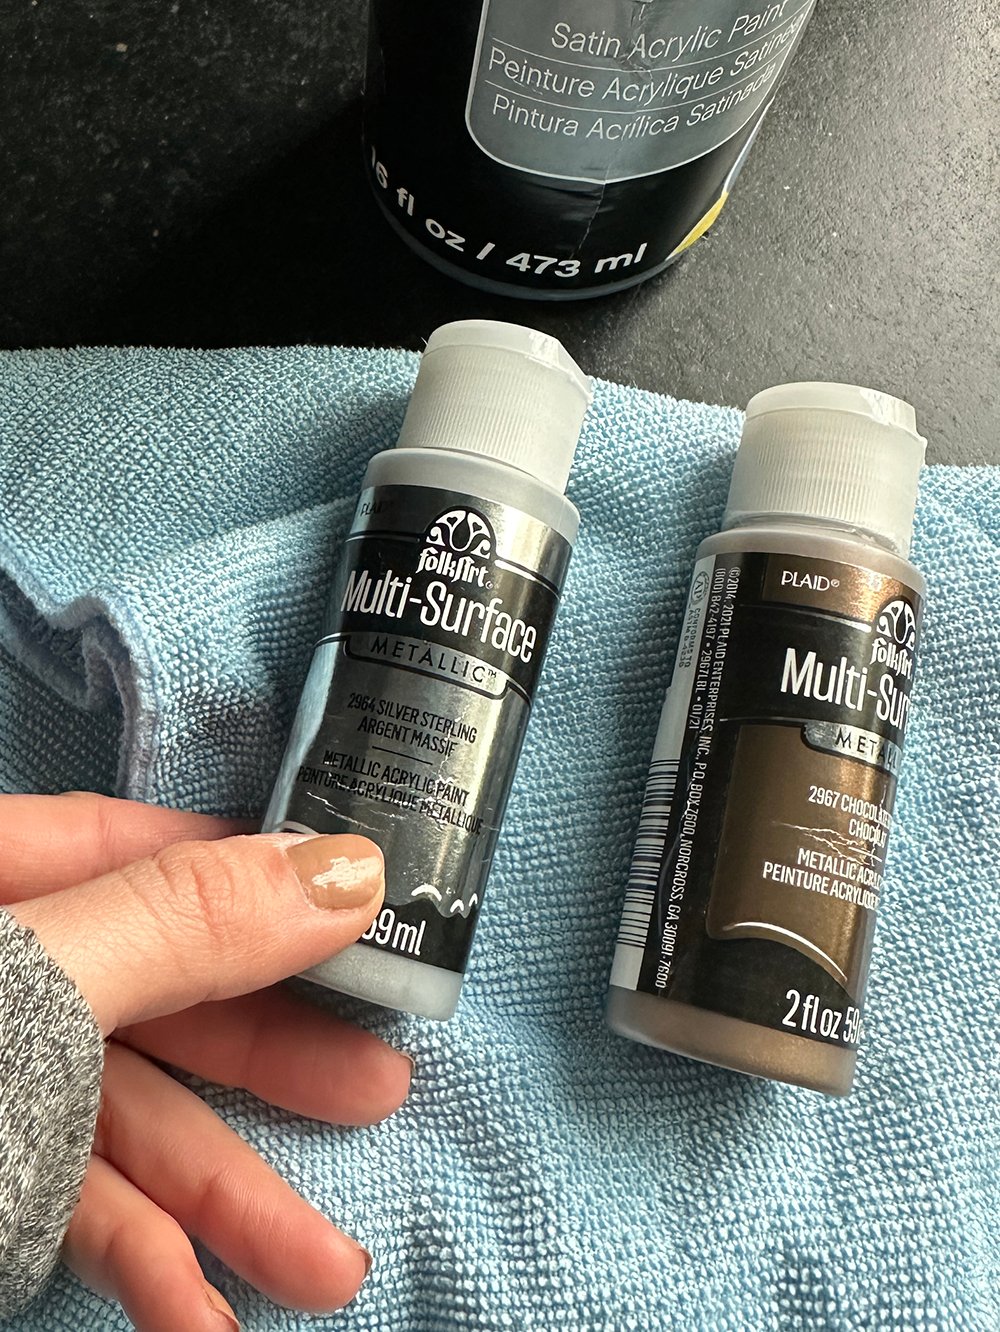
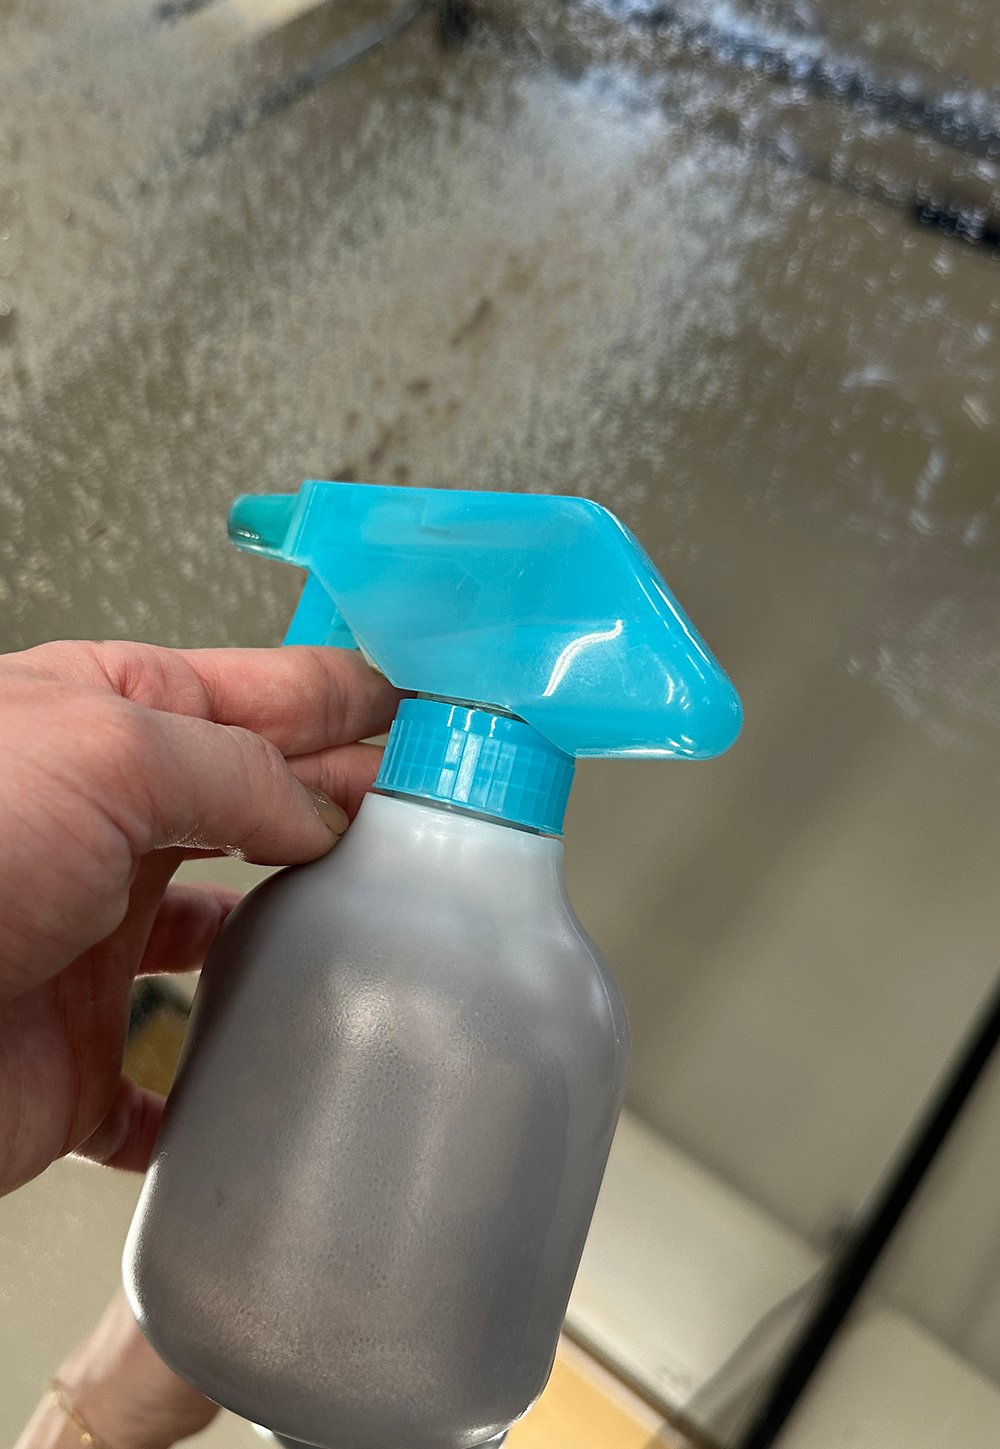
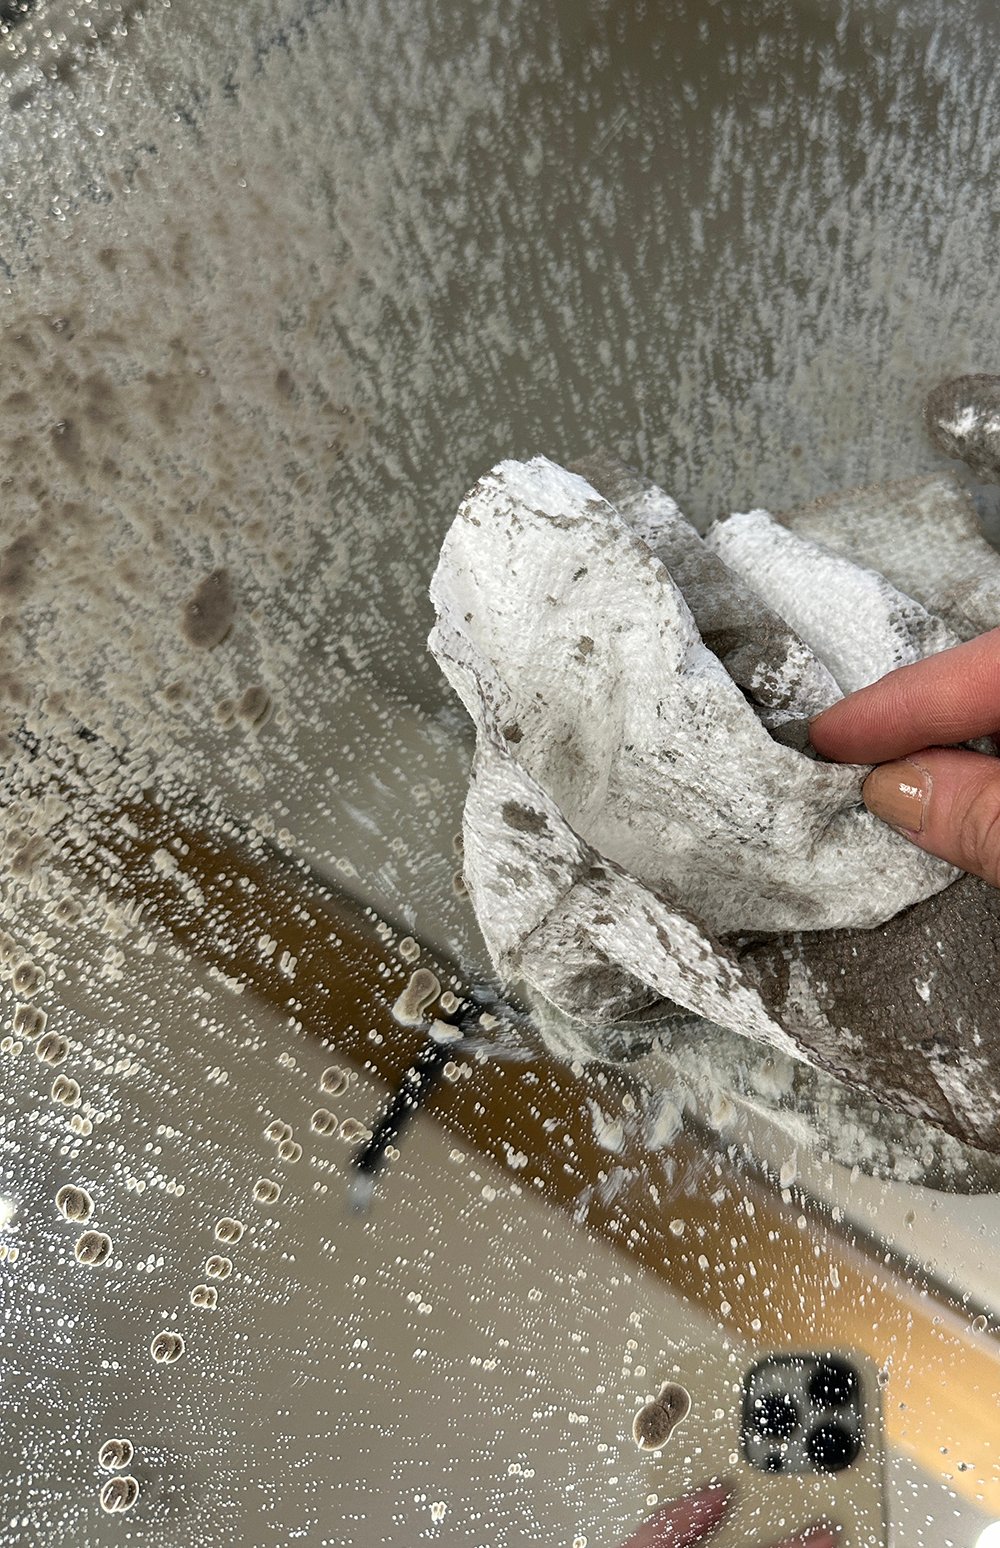
I evenly sprayed the mirror 3-4 times, immediately followed by a lot of paper towel dabbing and pressing. You don’t have to be too careful or consistent about it… it should look organic and not too perfect. Given the paint is acrylic, gloves are optional. My fingers turned a metallic copper color, but it washed right off with soap & water.
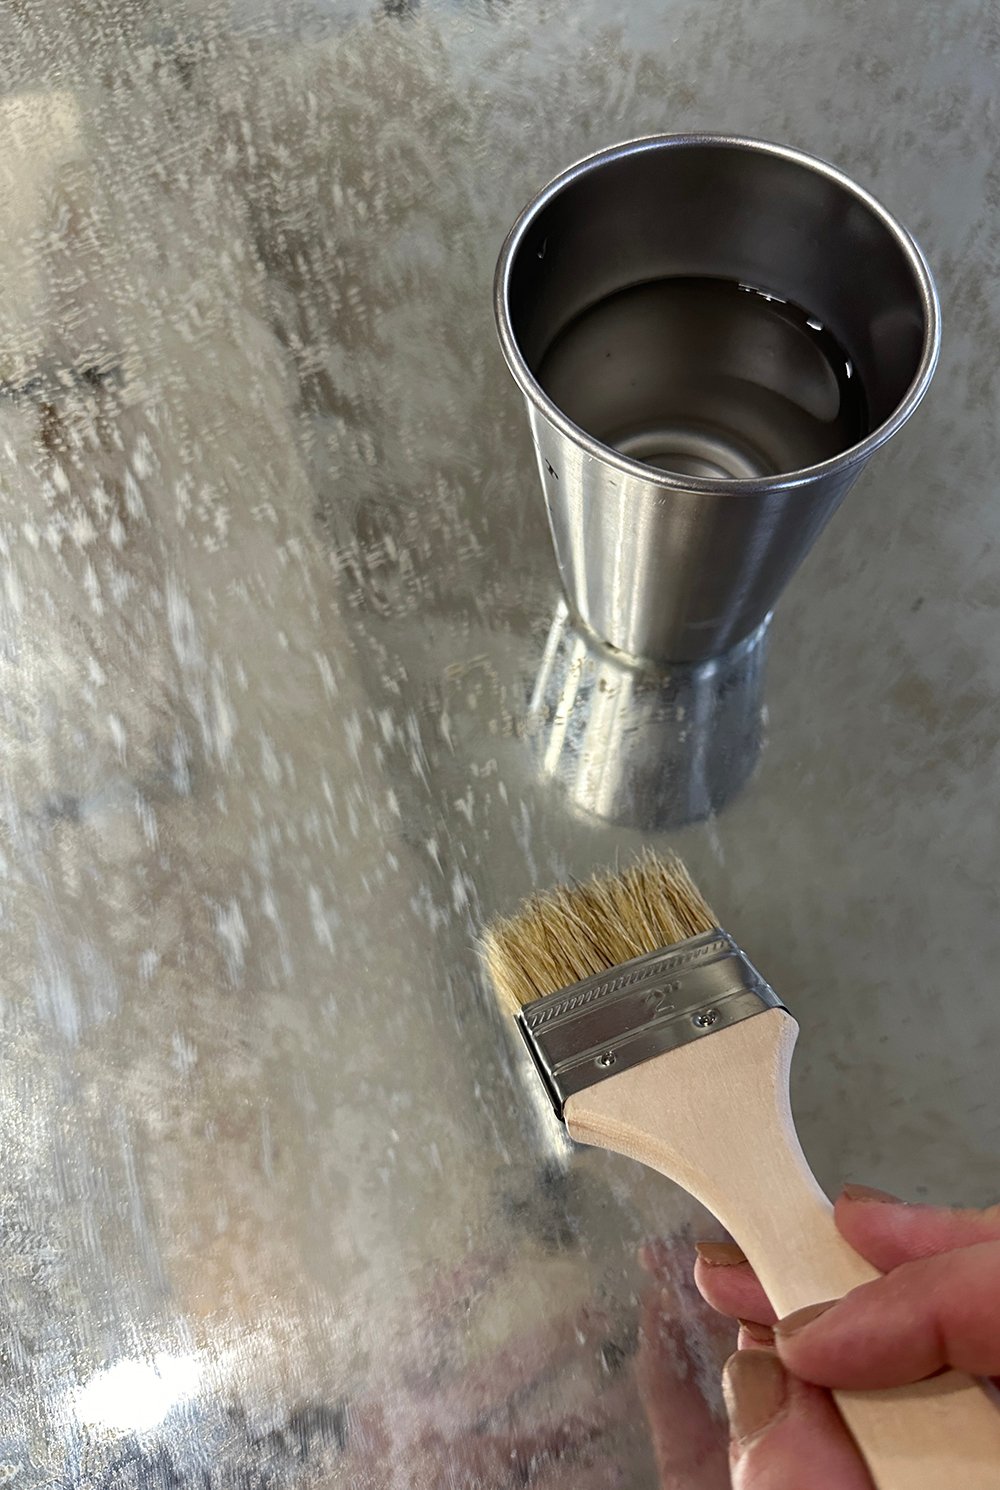
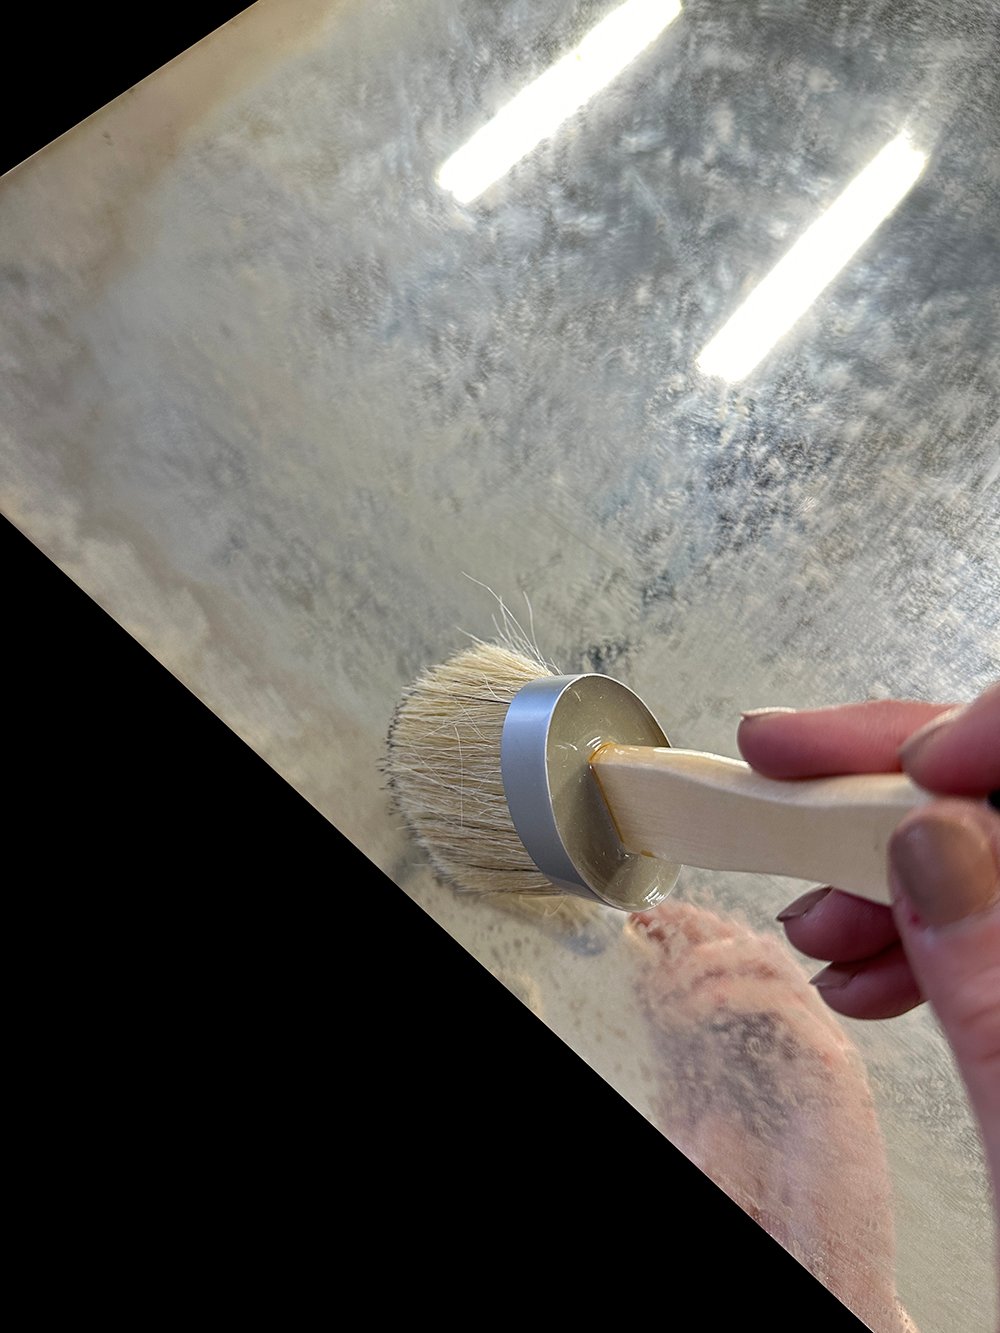
Use a Textured Brush with Water
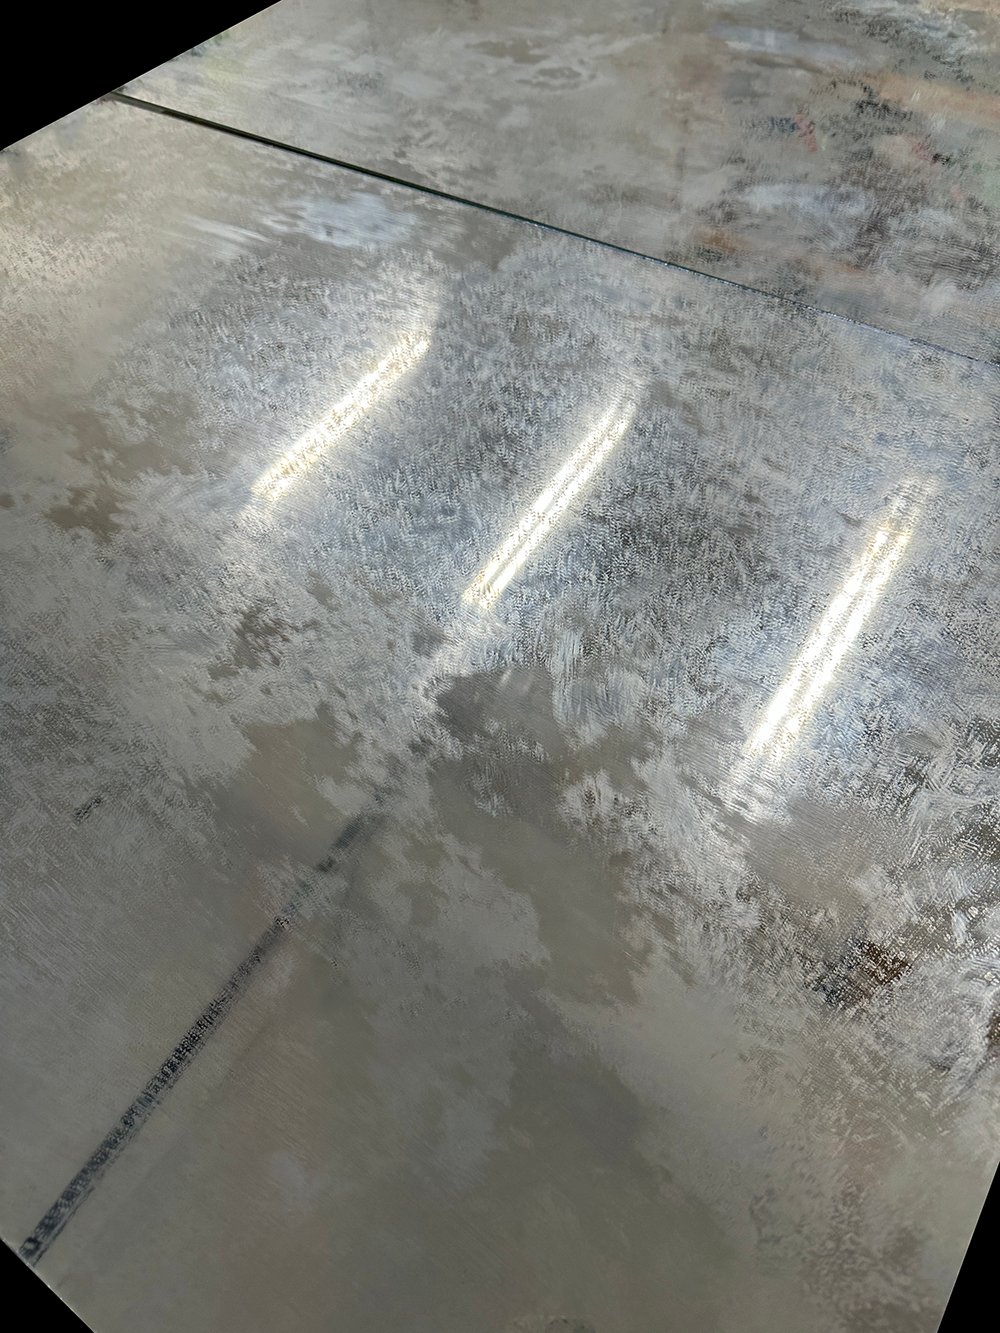
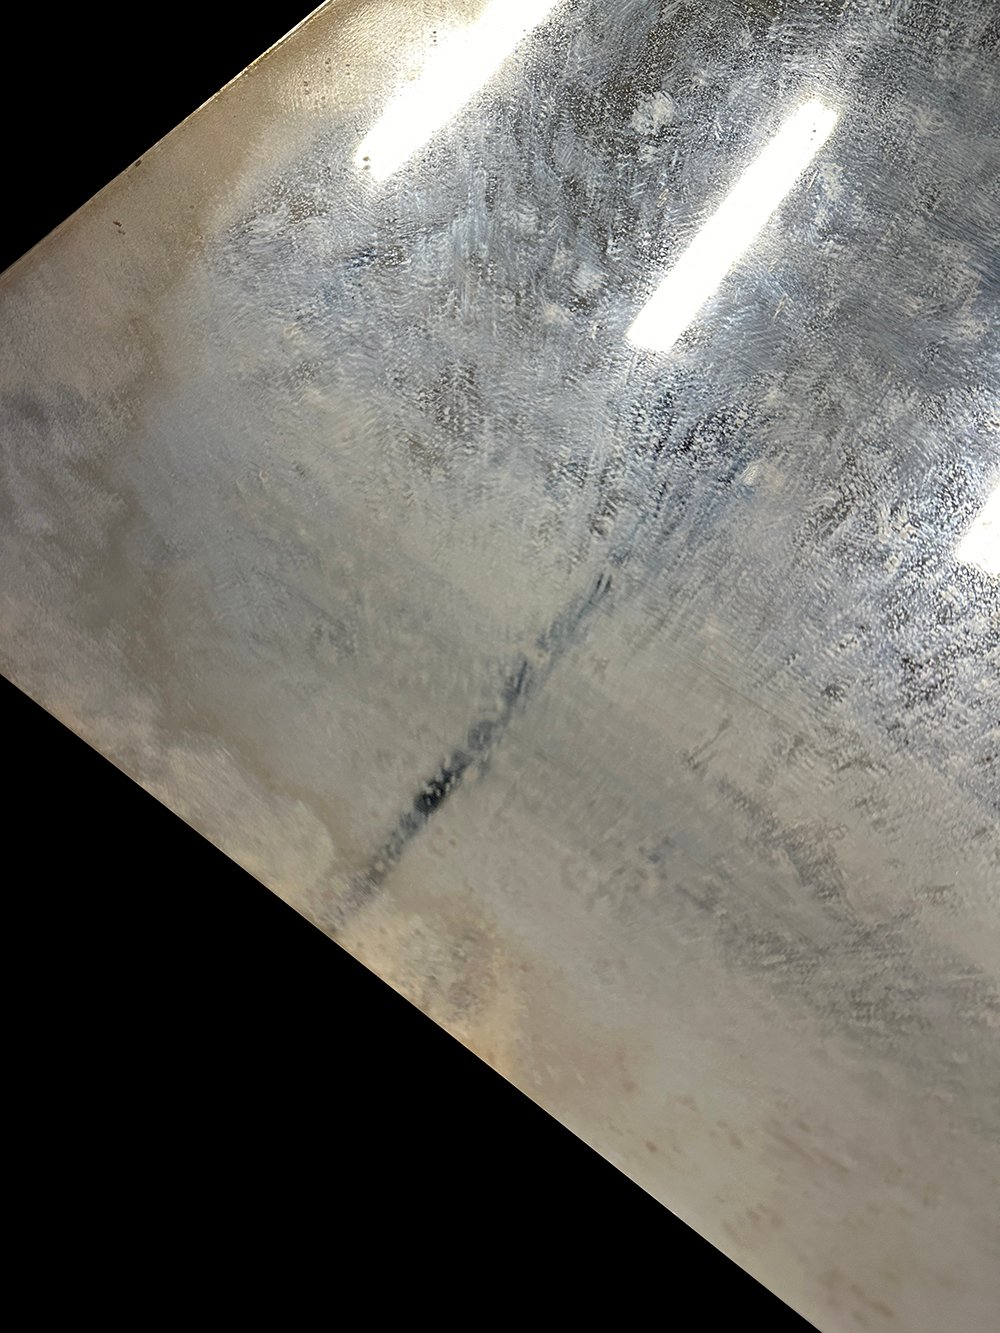
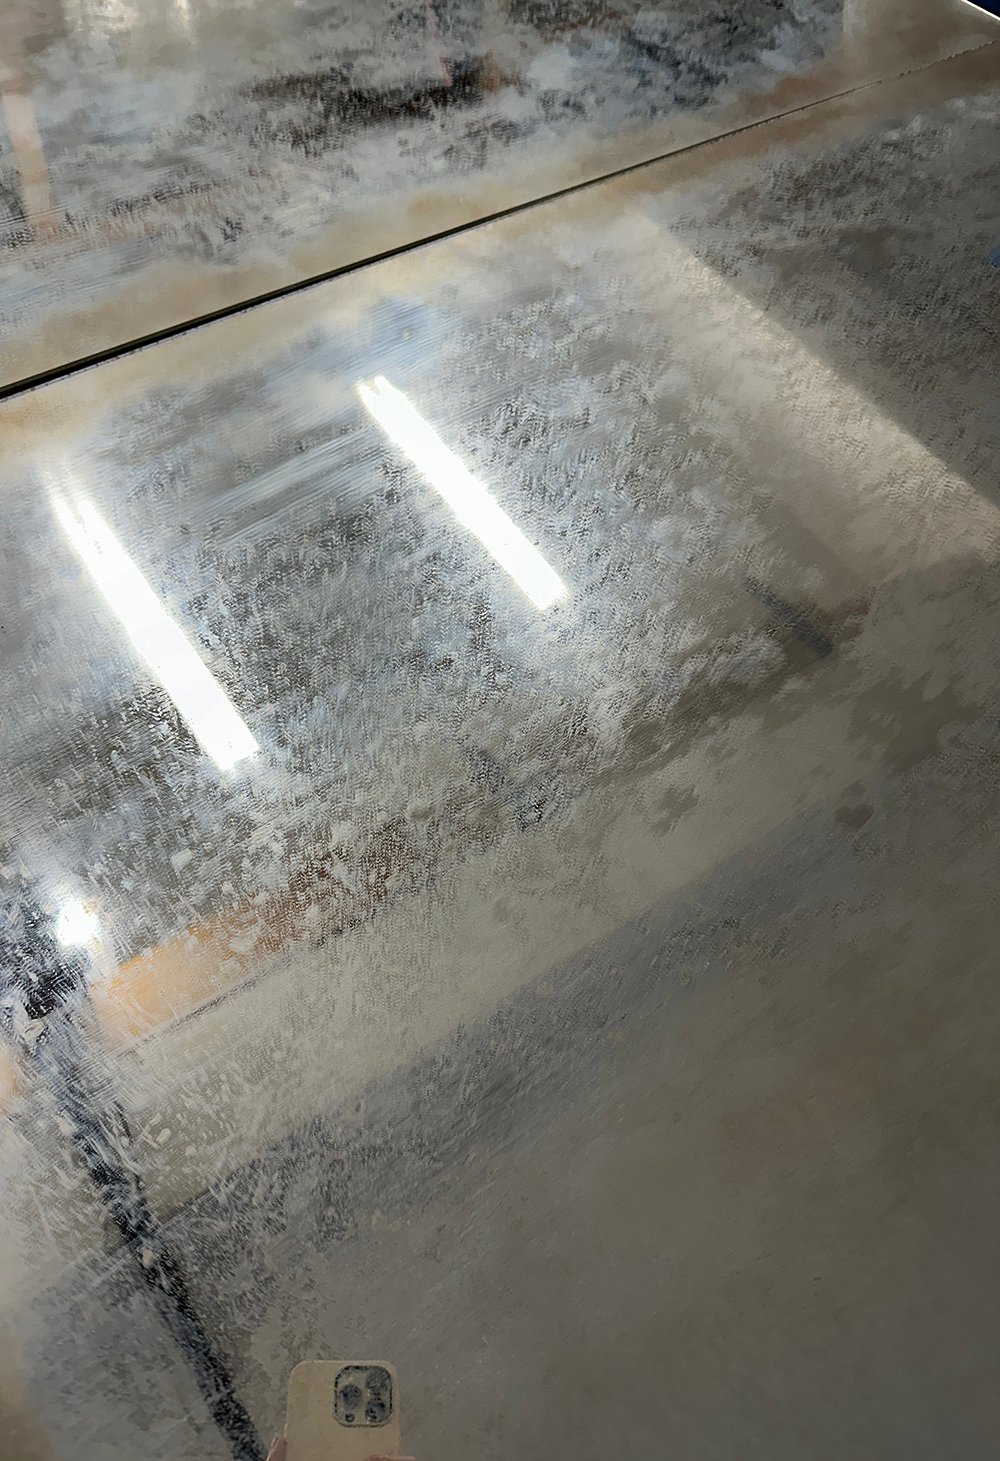
After the paint sat for 5 minutes and felt almost dry, I went in with a heavily textured brush. You can try dry brushing first, but if the paint has set… dip the brush in a little water, soak the excess with a towel, and then begin pulling the paint downward on the mirror. It will give kind of a streaky patina, as shown below…
Once I had finished this part of the process, my mirrors looked like this (below). If you’re into the simple, monochromatic look, you can definitely stop here. I kept layering for a more dramatic antiqued look.
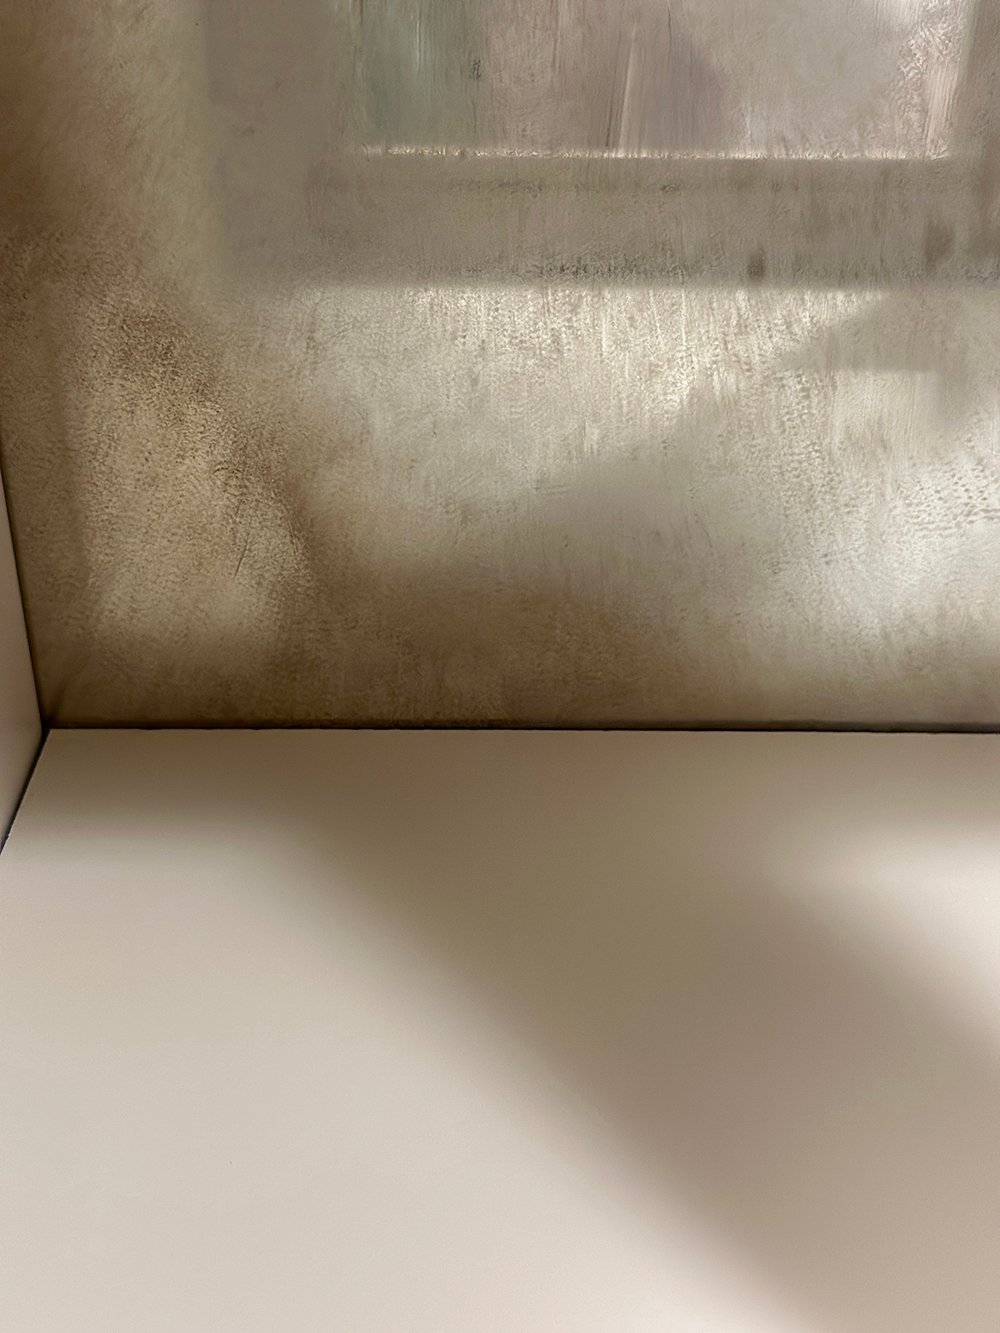
Add Warmth Around the Perimeter
As a mirror naturally ages, the edges are typically the first to show wear with a heavier patina. I wanted to recreate that and add a little warmth to my mirrors. I mixed up some more metallic paint: chocolate, a little gold, and a hint of black…
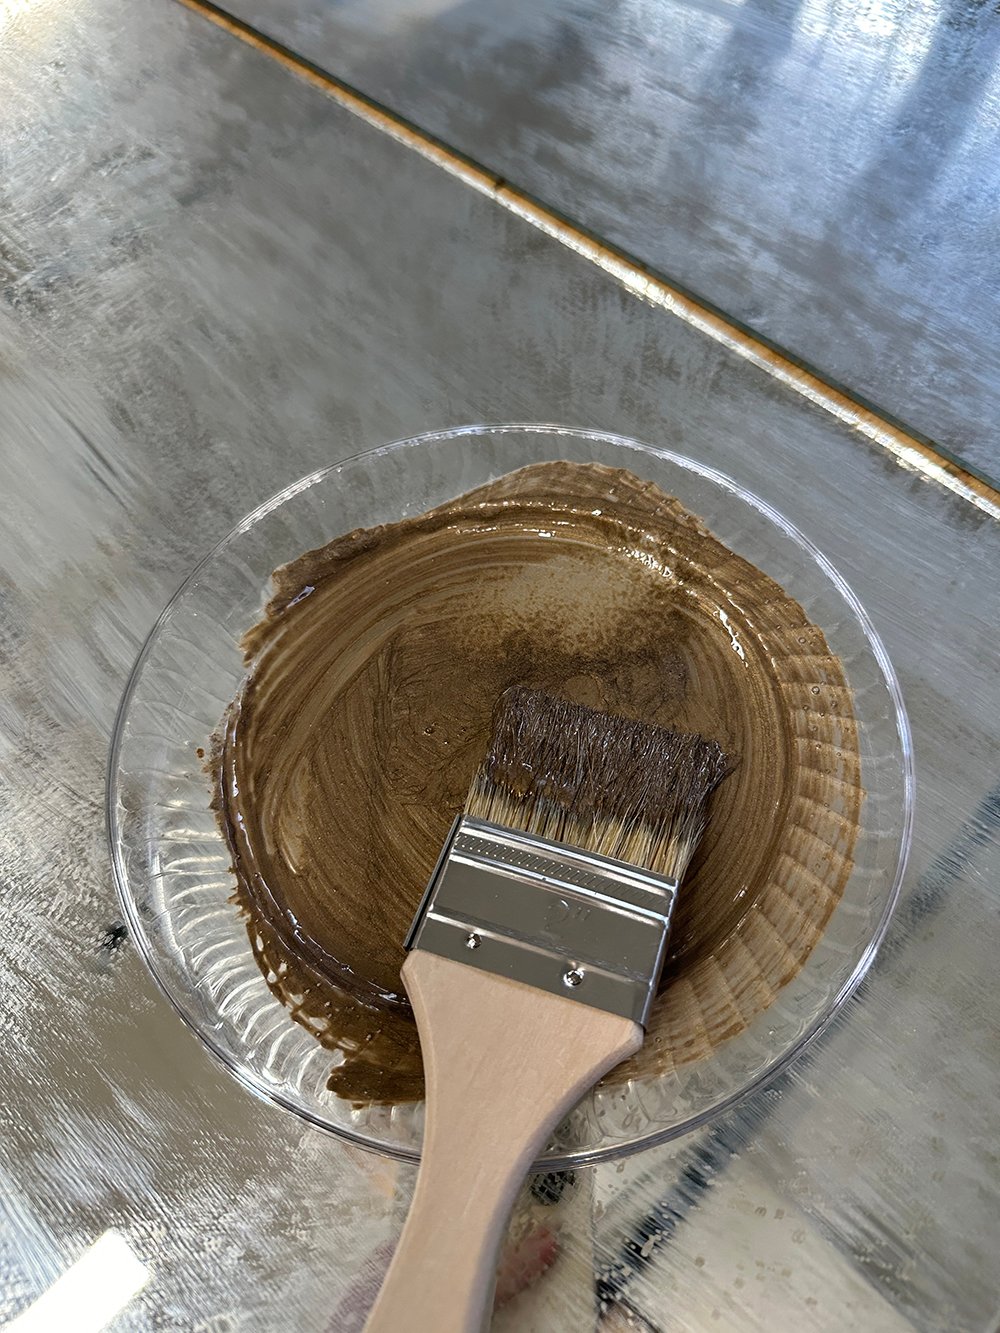
Using the the fluffy wax brush, I applied it in a dabbing motion, concentrating mostly on the edges and corners…
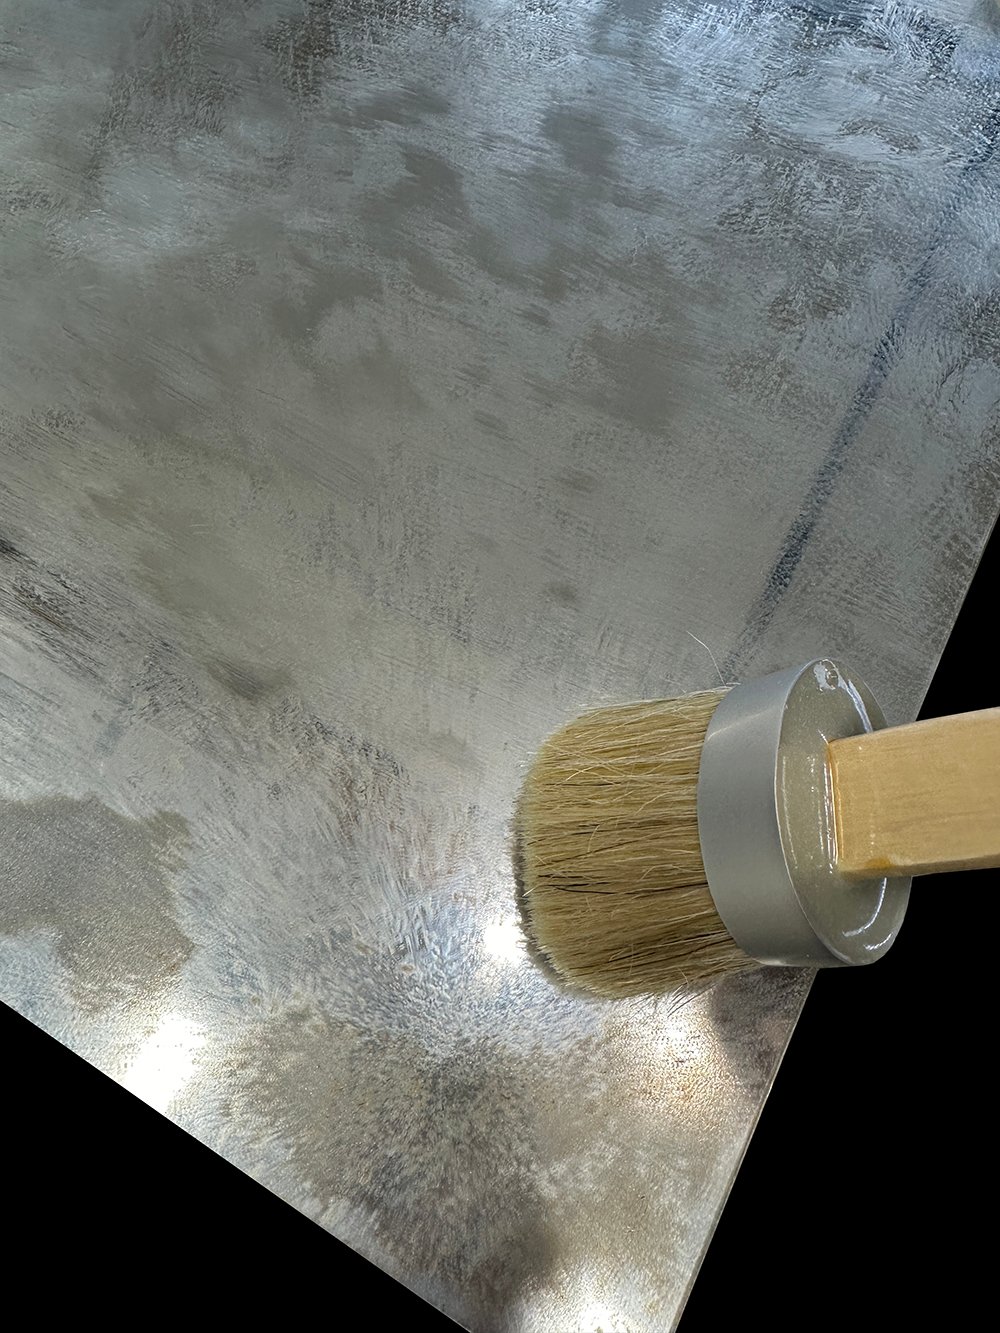
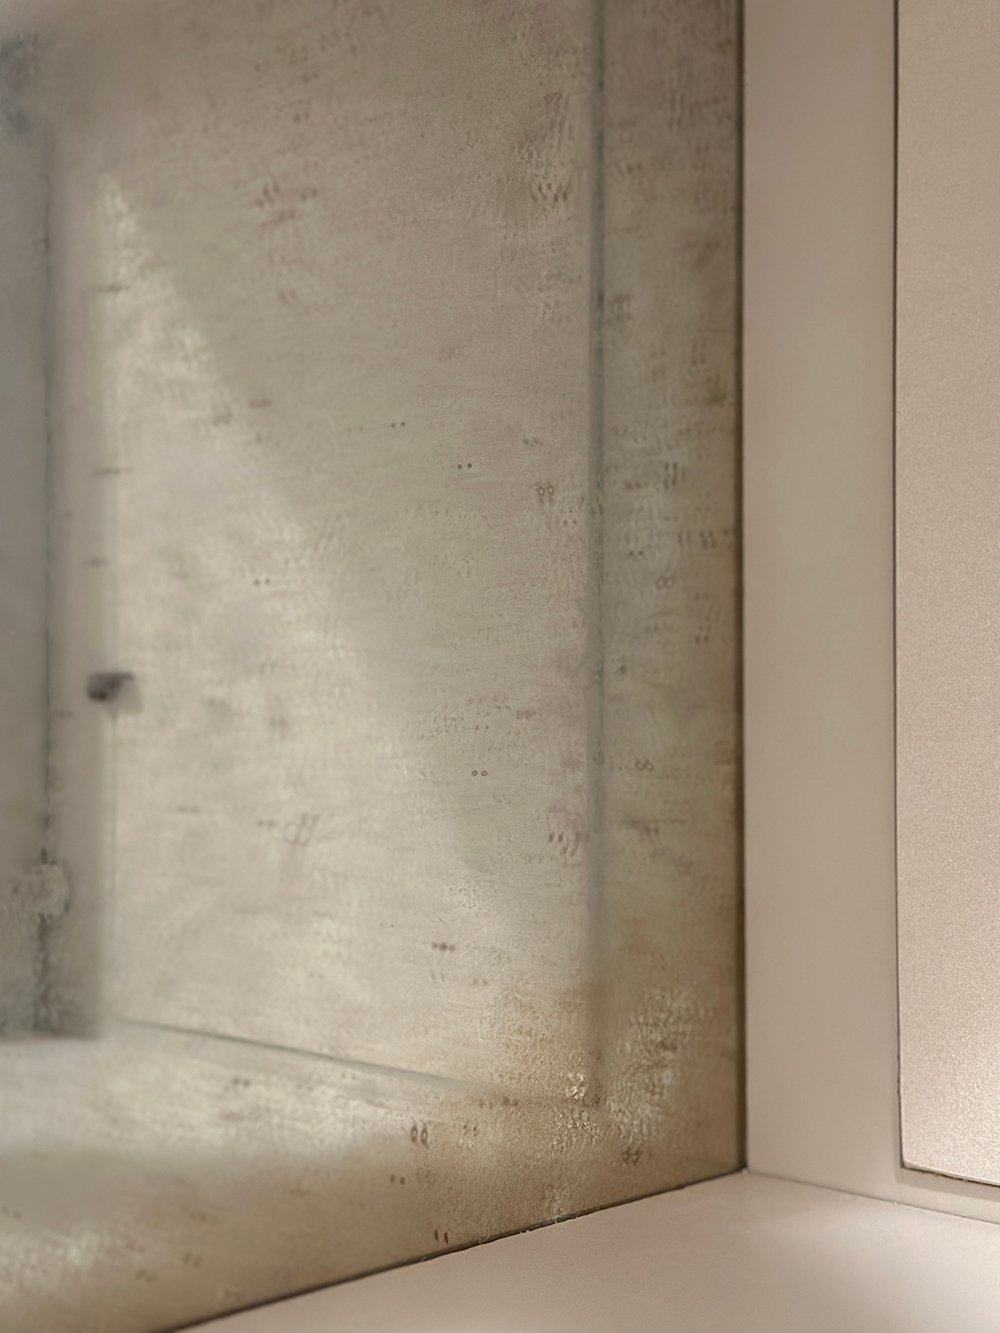
Again, don’t worry about perfection or symmetry, as it should look organic. This is what my mirrors looked like once I had finished that step. I like the subtle warmth it added.
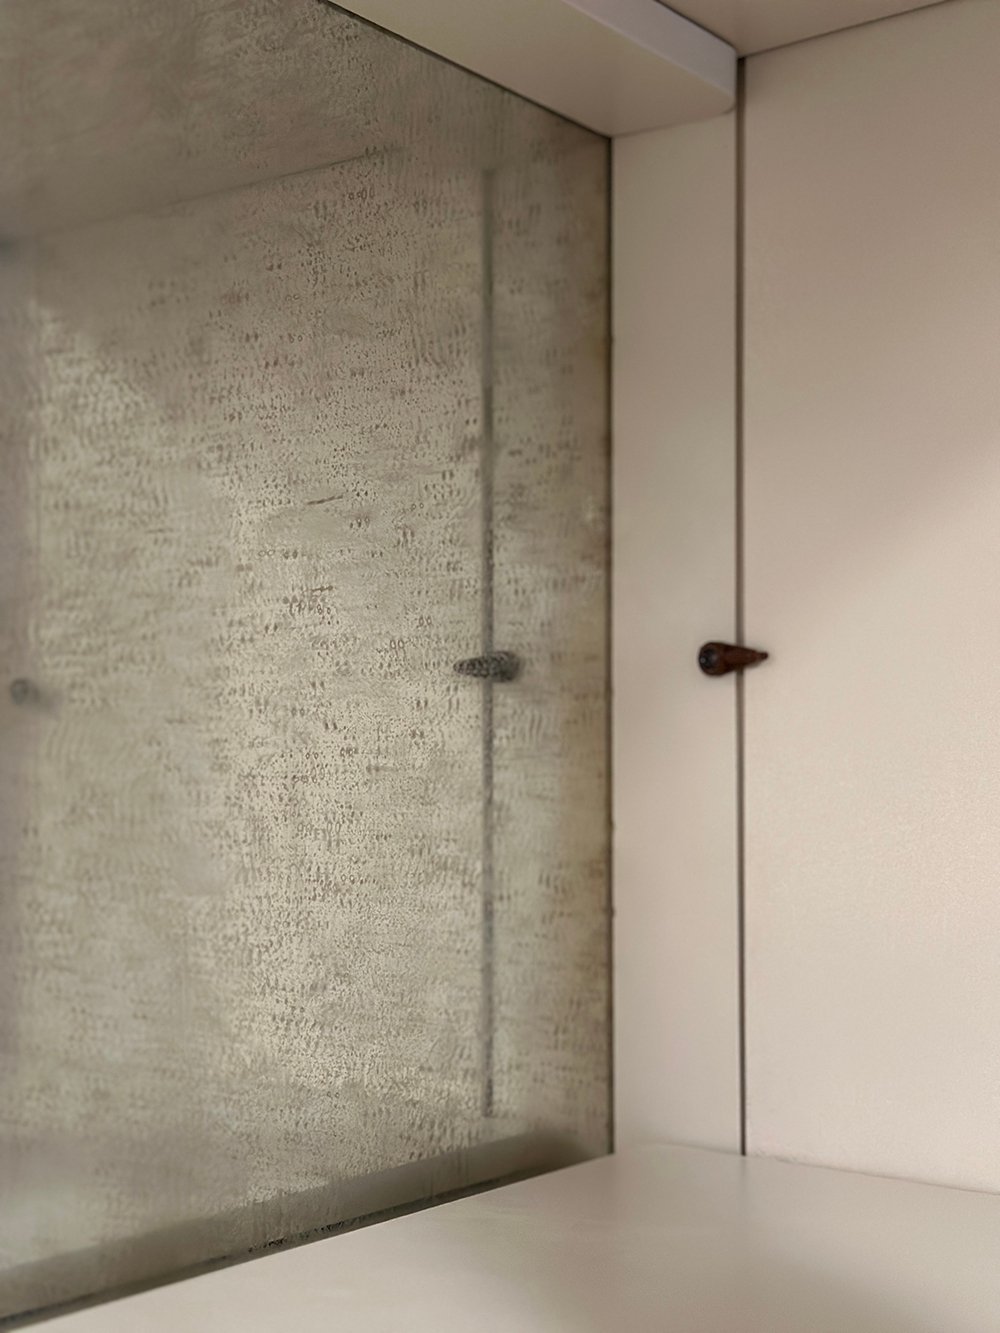
Add A Tiny Amount of Spray Paint
The last step is honestly optional, but I lightly sprayed (just a mist) mirrored spray paint over the entire mirror. It made the mirror a bit more reflective, and hopefully sealed the acrylic paint, making it a bit more durable. Something to note… make sure you are using mirrored spray paint and not silver.
Technique Tips
A few quick tips for perfecting that antique look…
- Start with a light hand- you can always add more. You still want the mirror to look reflective and shine through.
- Layer and don’t be afraid to mess up… imperfection actually looks more realistic.
- Focus the paint more heavily near the edges of the mirror, like it would naturally patina with time.
- Experiment with tools- splatter with a brush, dab with a sponge, use a towel to press paint, or experiment with different spray nozzle settings. There are no wrong methods. I found my fingers to also be helpful tools for blotting and moving the paint around (it easily washes off).
- If you mess up, don’t panic… just scrape or wipe the section and start again.
The best thing about this process is if you mess up or aren’t happy with a section, you can wet it, wipe it, and start over. It’s very forgiving! You can even start over once it has dried… just scrape it with a blade. You can keep working, adding, and removing until you’re happy with it.
FAQ
For surfaces that aren’t highly used or touched (because paint on the surface of a mirror or glass can scratch off). If you have a bar, the back of a cabinet, or a decorative mirror… it’s perfect! Would it be ideal for a heavily used backsplash in the main kitchen? Probably not. It’s a great time saver that produces a genuine look though!
I just use a dry dusting cloth. While it can scratch, it’s not going to scratch easily from cleaning. Just don’t use anything abrasive and avoid harsh chemical cleaners.
This project is all about using your creativity and adjusting as you go, which makes it fun and customizable. I think it’s also helpful to print out or save some images of antique mirrors you like, to model your mirror after. Having those in your workspace will make a good point of reference and keep you on course with where you’d like to concentrate the paint, add warmth, or apply texture!
Soon! I’m hoping to share the finished hutch transformation and basement kitchen renovation at the beginning of March. I’m really proud of it and I’m equally excited for you to see it.
Have you ever tried to antique a mirror? It was easier than I expected! I’m glad I didn’t spend time and money on the chemicals and paint stripper to tackle it the traditional way. I’m really happy with how these turned out and they look perfect in our vintage hutch. Let me know if you have any questions about the process!
Good morning! You’re Sarah Gibson. Of course you devised a better way. 😉 Yippee for projects that are easier, faster and sans harsh chemicals! But also look incredible. I love a DIY with loose parameters and a simple do-over function. Ha. Seriously though, your tutorial is clear and concise, with über helpful images. The tip about warming up the edges really aids the authenticity. While I do believe your skills make everything seem dangerously doable, this antiquing method *almost* looks foolproof! Now to brainstorm a spot for some mirror! This sneak peek also has me champing at the bit for the full reveal! (pats self on back for horse metaphor) I hope your work/fun trip was wildly successful and your travel uneventful! I actually took a glass blowing class this weekend with a couple of friends. It was seriously cool! (Um, actually it was wicked hot, but…) Have you ever done it? I can’t wait to see our finished pieces. Between that and your mirror undertaking, I’m itching for a little creative endeavor. Something to ponder on this last Monday of February! Here’s to an amazing week, friend!💜
You are sweet, Peggi. Thank you! This was really a fun DIY project. I’ve missed doing this fast ones with instant gratification. Love you for all the horse metaphors, ha! I can’t wait to share the big reveal tomorrow morning :) xo
Good morning! This looks like a fun project- and from what you’ve shared here, there’s no wrong way. I love the additional texture it’s going to provide, and I love even more that the color blend you chose seems to enhance and liven the paint color of the hutch. I know that wasn’t an accident. Your creativity amazes me. I can’t wait to see how it all comes together! Thank you for sharing this fun and easy diy; I hope you’re having a fantastic time with family! Cheers to the start of a fresh week. Xo
Thank you so much, Lauren! It really was a fun and fast project. There are no wrong ways this project! I’m super excited to share the reveal tomorrow morning. xo
Oooh la la! I love antique mirrors and your method to create one looks so good! Cannot wait to see the completed cabinet antique mirror and all!
Have a great Monday!
Thank you so much, Danna! I can’t wait to share everything tomorrow morning :) Hope you’re having a great weekend!
Hi!
Thank.you for your tips! I want to make a wall mirror (in a heavy frame) antique looking for the holidays, but I want to also add a Christmas transfer. Do you have any advice on the best way to do this; should I just add the transfer after the paint but before the mirror spray; should I skip the mirror spray (concerned it will ruin the transfer)??
Any advice is appreciated!!
Hi Gigi! What type of transfer are you using? I would definitely be worried it would pull the paint if it’s a vinyl adhesive and probably wouldn’t recommend this type of antiquing (if that’s the case)- you may want to antique the mirror from behind.
Can I do this on a wall mirror behind my bar? I can’t remove it to lay flat for this process. Not sure if you removed the mirrors or not.
Exactly the tutorial I was looking for! Thanks for sharing. A friend who is a designer took me aside recently and said, “Hey, your mirrored dresser is out of style.” But I love that dresser! So I went on the hunt for an approach that might grunge it up in an adorable manner. Please do consider promoting this post again, so that your helpful message can be heard by others who can’t bear to part with their mirrored furniture.