Budget Drapery DIY
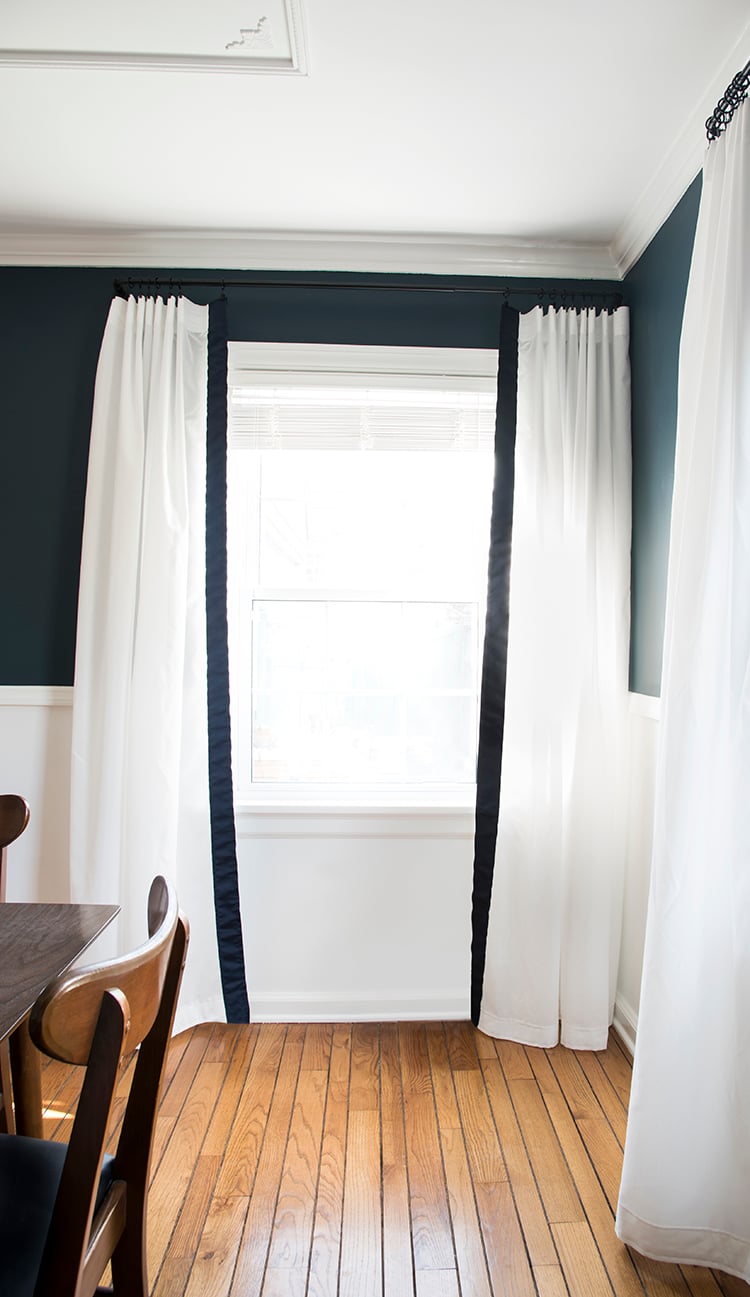
If there’s one thing I really appreciate but hate spending loads of money on, it’s drapery. The first time I purchased “real” drapery (you know, trying to be an adult), my jaw dropped at the price tag. From the hardware to fabric, it really adds up. I’m also a big fan of layering… I like to use bamboo shades behind curtain panels, or sheers in addition to blackouts- remember my bedroom? Long story short, it gets super expensive. Jacqueline was in the market for drapery, so she let me test out a budget drapery DIY option in her dining room. I have to say… for a fraction (and I do mean a FRACTION) of the cost, they look really nice!

Adding details like drapery trim makes a huge difference, as well as customizing the panels to fit your window. In six easy steps, here’s how to get the look…
What you’ll need for this project:
– Curtain Panels (I used Ikea- AINA and VIVAN are both great choices)
– Straight Pins
– Scissors
– Measuring Tape
– Sewing Machine (or you can sew by hand)
– Iron & Ironing Board
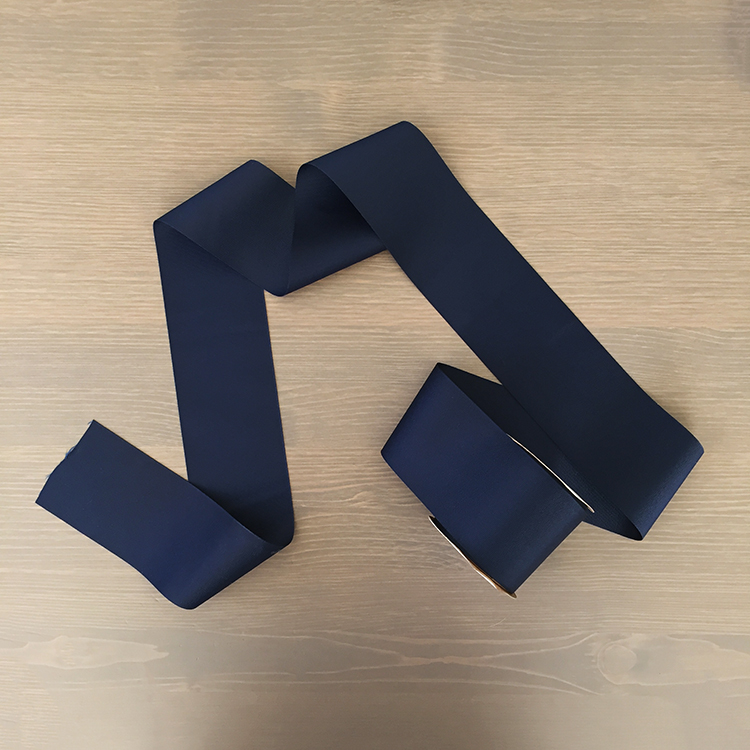
– Ribbon or Trim (I used 4″ wide)
– Drapery Hardware (rod, brackets, carriers, screws, etc.)
Step 1- Measure & Plan: Measure your window. I like installing hardware just below the crown moulding to elongate the window and make the space appear larger. I roughly measured a few inches below the crown to the floor (the drop). I also measured the width of the window. Typically you want to double the window width to determine the width of the fabric you’ll need. Sometimes this means you’ll need more than one panel. In this case, we only needed one panel per side (they draw from the center).
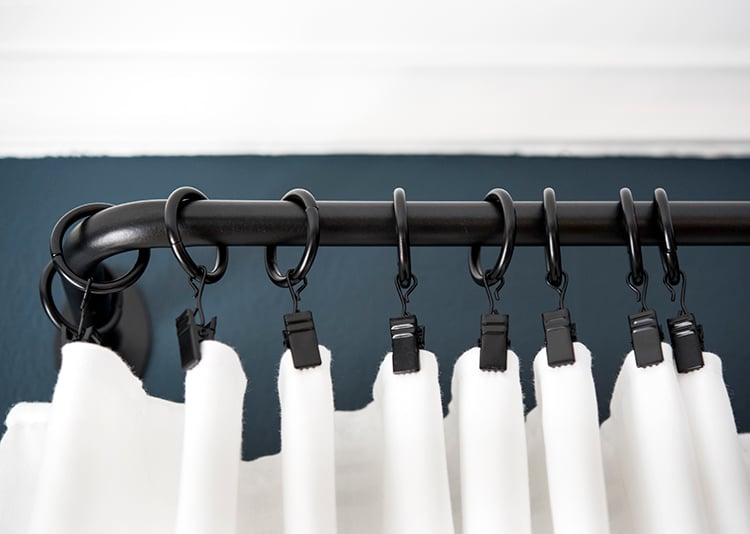
Step 2- Install the Hardware: Many people believe the hardware should be the same width as the window. This usually isn’t the case… you should always extend the hardware past the window frame. You’ll need to take the stack into consideration (when the curtains are pulled to the side). Here’s a little explanation if that seems confusing. We extended Jacqueline’s drapery rod around 8″ past the window frame.
Install the hardware…usually it comes with instructions. Be sure to install a center bracket if your curtains are heavy or your window is really wide. You don’t want the center of the rod to sag from the weight!
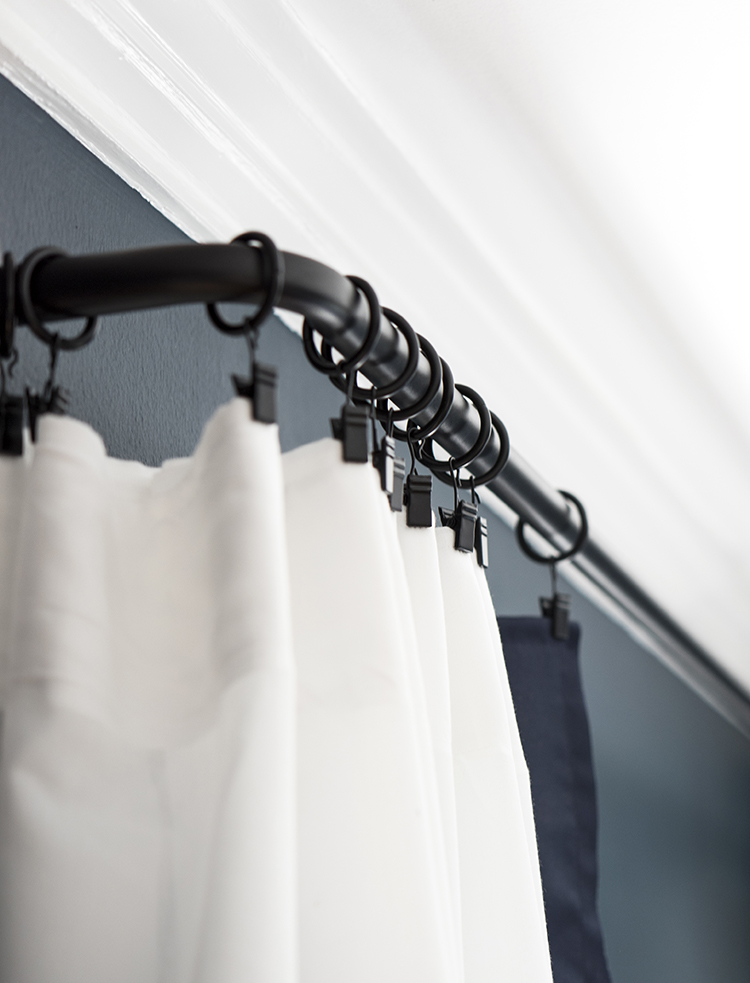
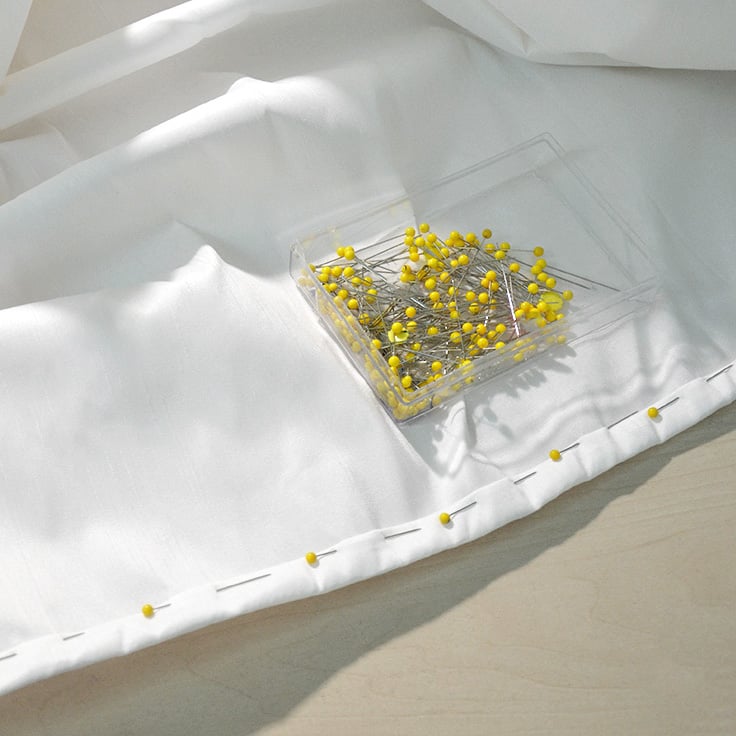
Step 3- Hang Panels & Pin: Now that your hardware is installed, go ahead and hang the curtain panels. This is the most accurate way to customize the length. The curtains should almost or barely sweep the floor. I like them to slightly float 1/8″ to 1/4″ above my hardwoods. Be sure to hang all of the panels and pin them while they’re installed. Remember which panel goes where because sometimes floors are uneven and it will influence the outcome!
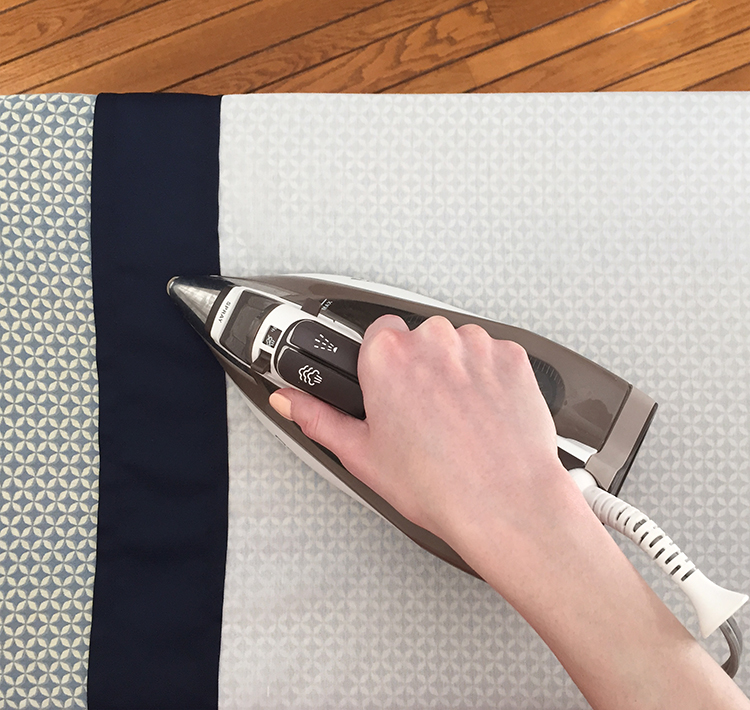
Step 4- Hem to Appropriate Length: If you have BASIC sewing knowledge, you can totally do this (I promise)! Now that you’ve pinned your drapery, place it on the ironing board and crease the bottom where it’s pinned. Repin the fabric, and prepare to begin stitching. I just used a basic stitch on my sewing machine hemming to the desired length. You can definitely do this by hand, it just takes a little bit longer.
If you don’t know how to hem… there are a TON of YouTube tutorials, just search “how to hem with a sewing machine” or “how to hem by hand”, depending on your preferred method.
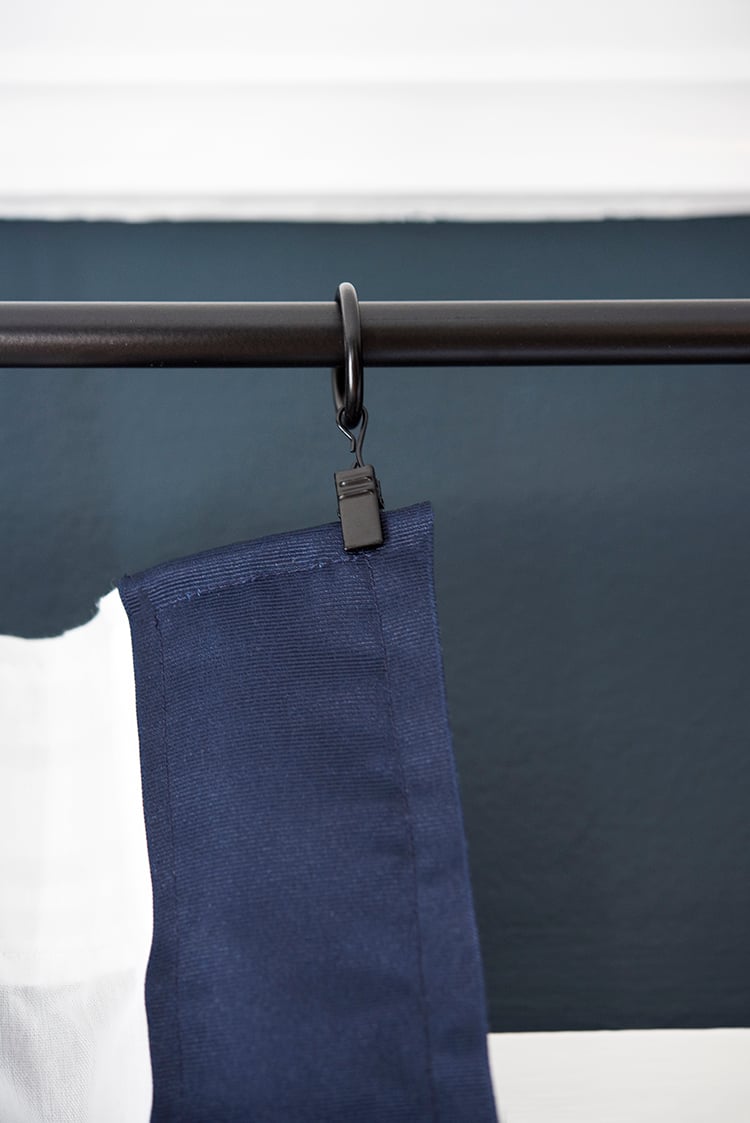
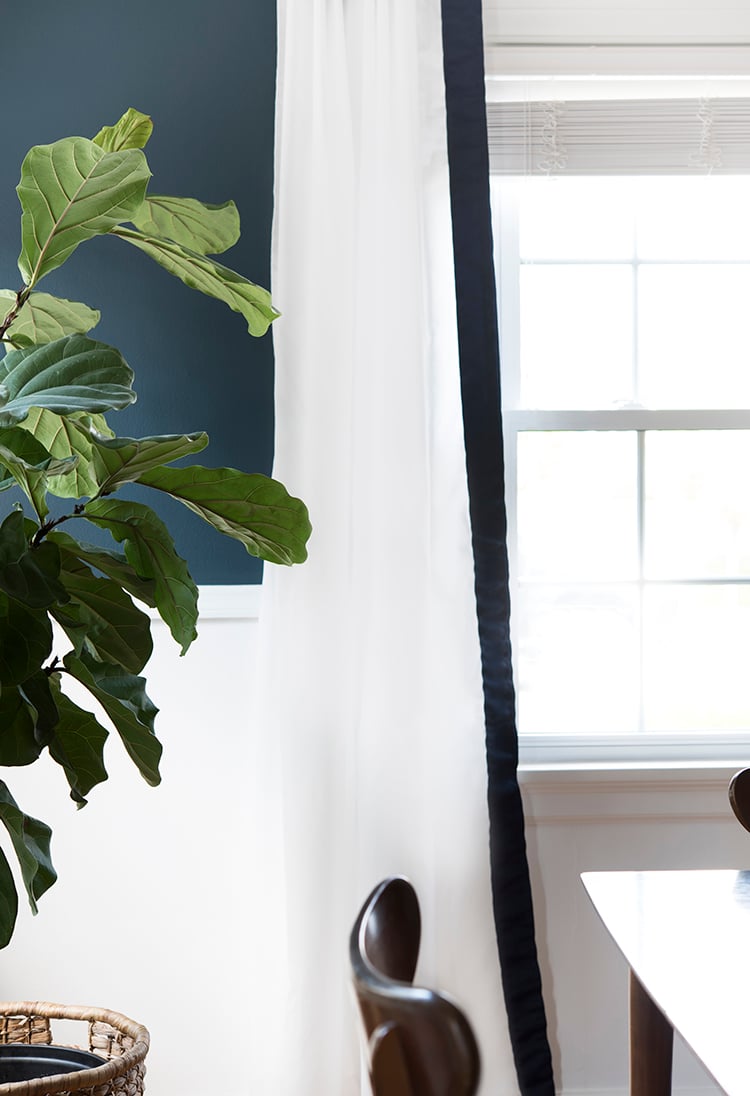
Step 5- Add a Contrast Edge (or any other trim detail): I really love the simplicity of monochromatic drapery. I’ve always been a fan of tone-on-tone palettes. Jacqueline and I decided that a navy ribbon would be sufficient for the inner center draw detail. I ended up sewing the ribbon around the edge, but you can totally take a shortcut and use fabric glue if that’s easiest for you (I’ll admit, I’ve done this before)!
Step 6- Iron & Install: The last step is ironing your drapery panels. You’ve made it this far, so please don’t skip this step! The final detail of getting the wrinkles out really does make the entire presentation look tidy and put together.
That’s all there is to it. We completed window treatments for two windows, spending under $100 per window (including the hardware). Most custom drapery costs at least a few thousand dollars, so I’d say the savings were definitely worth it! Even if you’re on a budget, you don’t have to skip the drapery… it really does soften and tie a room together.
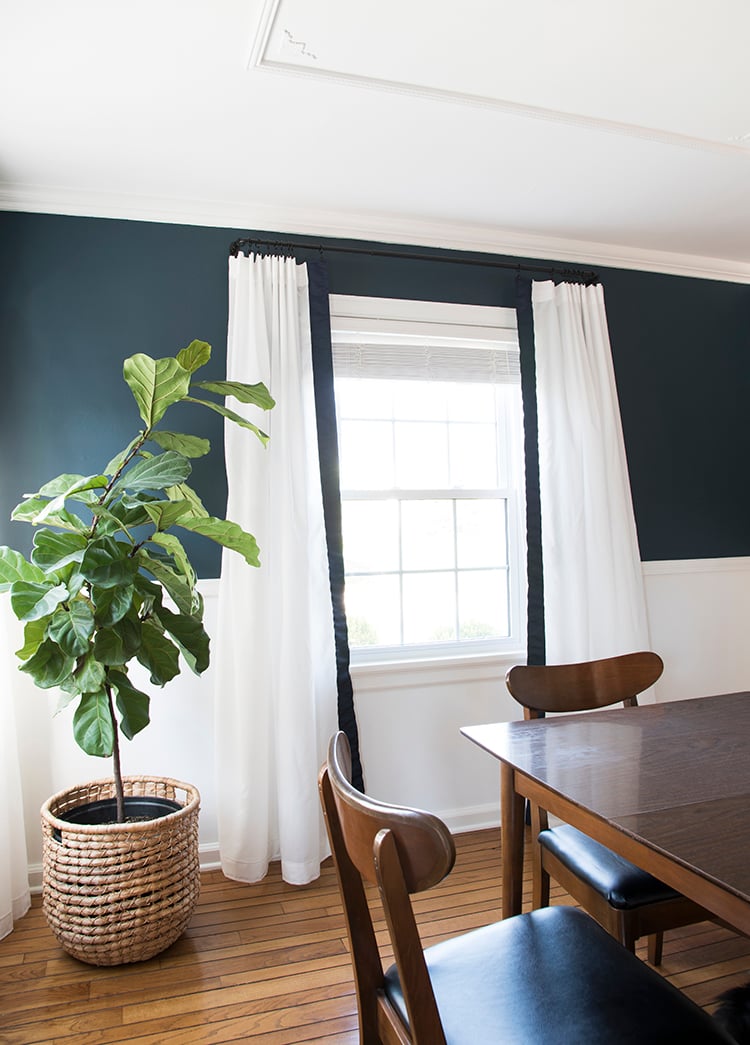
This was a fun project for me because I haven’t had a chance to sew in awhile. I also really loved the hardware… I’m always a sucker for a minimal french rod and that price can’t be beat!
So, would you give this DIY a try? Maybe someday, I will be able to afford custom drapery, but for now… I’m satisfied with doing it myself. What type of drapery are you attracted to? If you guys have questions about this project, let me know!
Hi Sarah,
I swear I remember a post where you provided really specific instructions on hemming ready-made curtains in addition to this post but now I can’t find it. Maybe I’m imagining this but if not, could you point me to that post. I finally found ready-made drapes that I like but they need to be hemmed. Thanks!
I think it might have been IG stories instead of a blog post, but I do have this post (on a shower curtain… same process)! https://roomfortuesday.com/extra-long-shower-curtain-diy/