DIY Built-Ins and Office Organization
 *This post is sponsored by Lowes. All content, ideas, and words are my own. Thank you for supporting the brands that allow us to create unique content while featuring products we actually use & enjoy!
The office is finally finished, but before I share the big reveal- I wanted to break down a quick DIY for our built-ins. So many of you asked where to buy them, and were surprised to learn we built them from scratch! It’s not as difficult as you might expect, I promise. Click through for the tutorial and for a sneak peek at how I’m organizing my office and the newly constructed shelving. If you’re only interested in the styled images and want to bypass the DIY, just keep scrolling to the bottom…
 I’m not sure why or how my office became the last room renovation on the punch list, but it did. By the end of this post, you’ll be wondering why it wasn’t the first project we tackled. It really didn’t take us long to make the space ten times better and so much more organized.
 Although I have a gorgeous reveal post planned to share the entire room, this one is all things built-ins. Let’s dive into the DIY and then I’ll share how I’ve been keeping my drawers, cabinets, and shelves organized. Here is the master source & supply list:
01: large bin // 02: wide bin // 03: medium bin // 04: cabinet pull // 05: pen organizer // 06: drawer organizer // 07: grasscloth // 08: MDF material // 09: poplar // 10: dewalt miter saw // 11: miter saw sand // 12: nail gun // 13: tape measure // 14: caulk // 15: clamps // 16: stud finder // 17: orbital sander // 18: hinge hardware // 19: level // 20: bosch table saw // 21: screws // 22: finishing nails // 23: dewalt drill // 24: wood glue
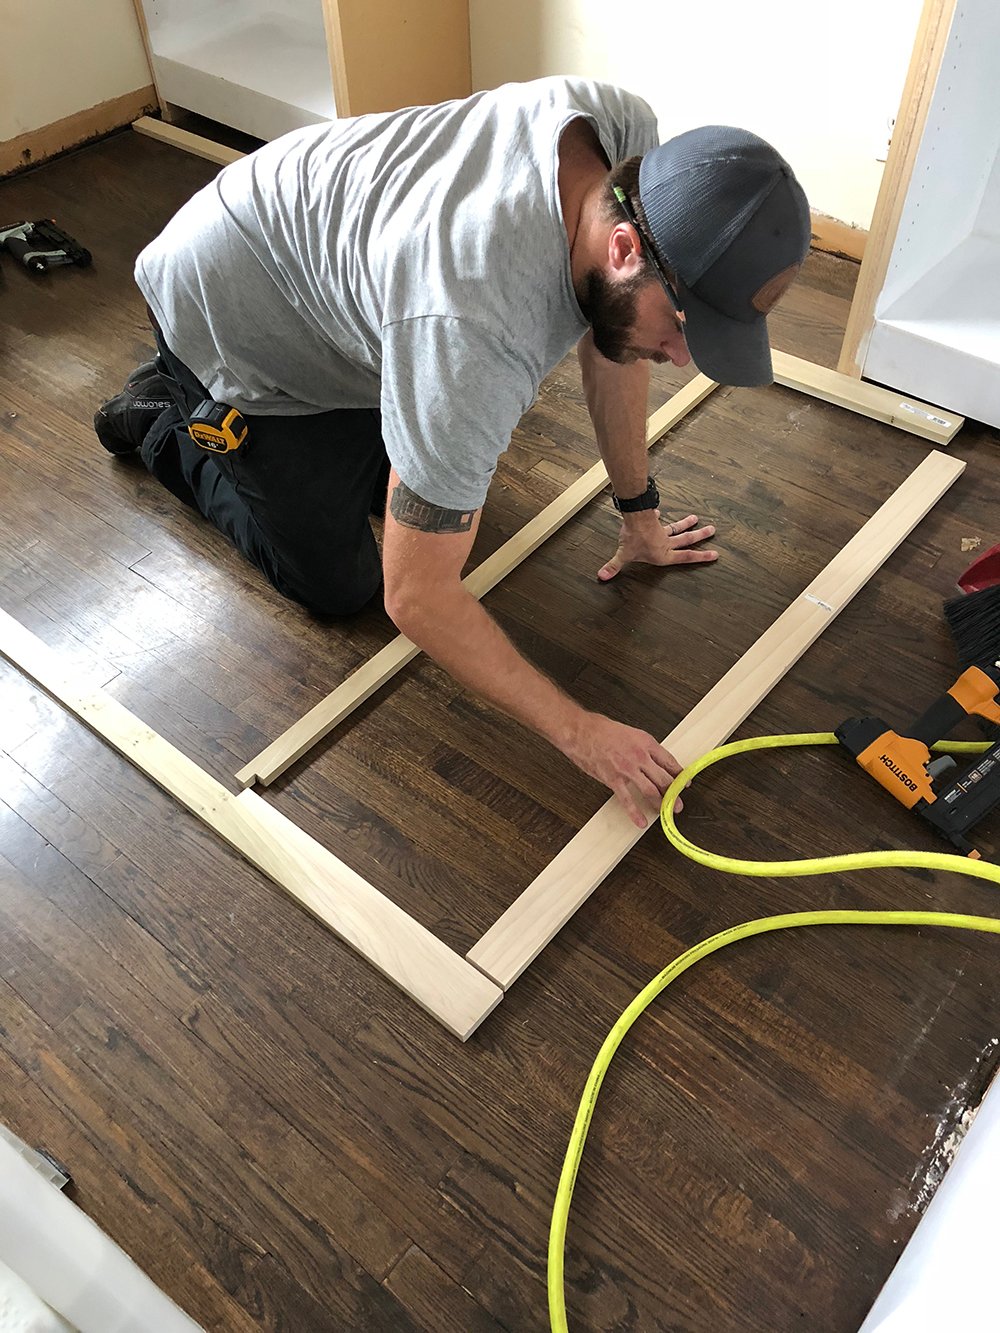
 Step 1 // Measure and plan. I always like to sketch out the wall, add dimensions, and formulate a plan prior to heading to Lowes for supplies. Much like our living room, I wanted these built-ins to have open and closed storage. Once everything is planned out, then it’s time to grab the goods.
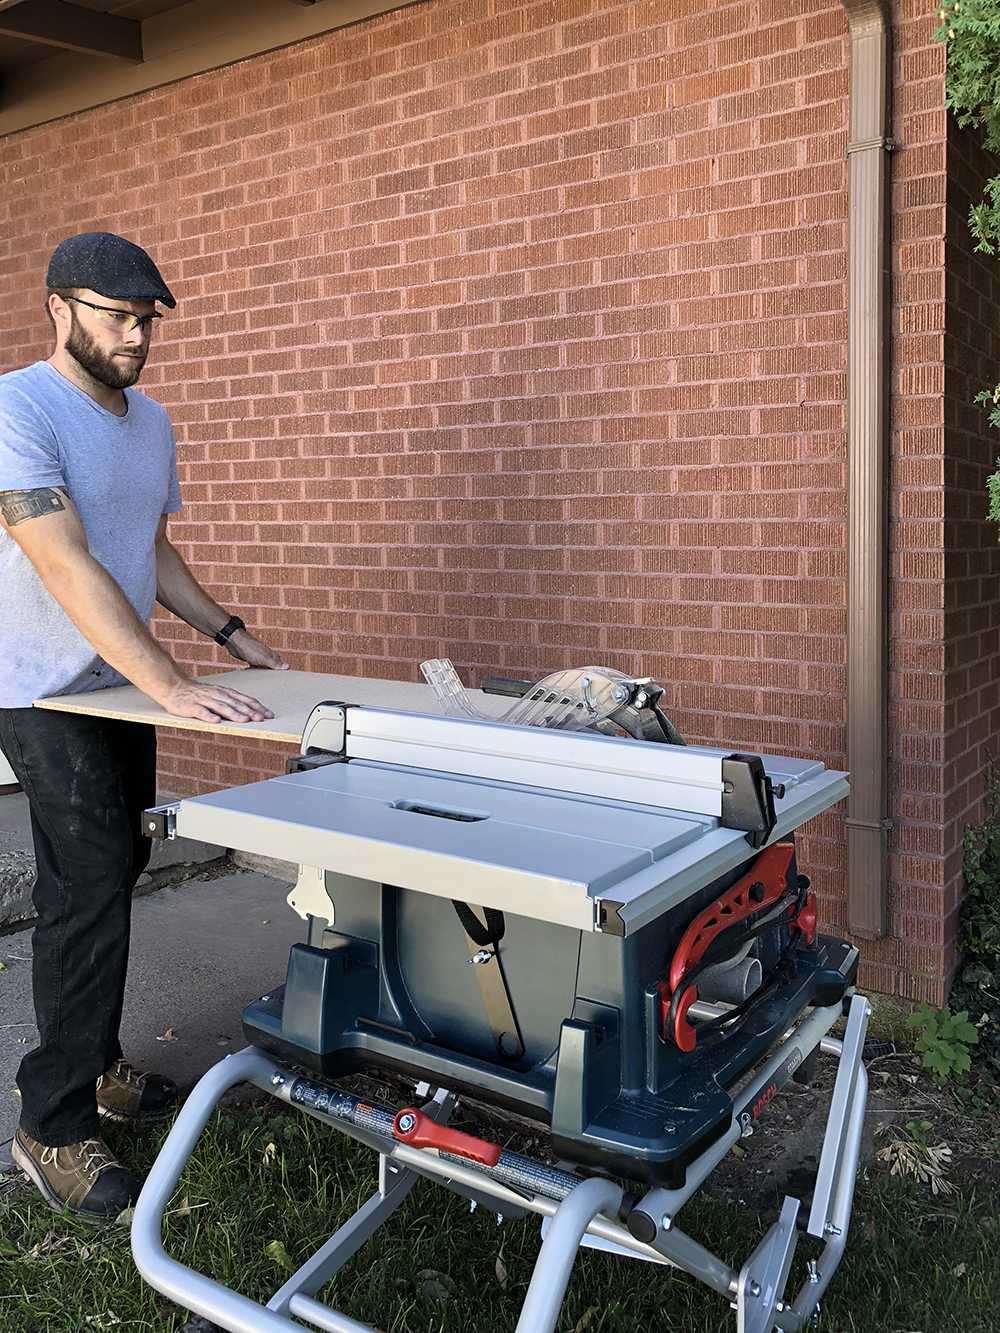 Step 2 // Cut the material. Use your plan and cut each MDF built-in piece to size (side shelves, edge panels, etc). I let Emmett get this new Bosch table saw and this is seriously his baby- he’s obsessed. I’m totally fine with that though because he’s already formulating and planning all of the projects he’s going to use it for. Ha!
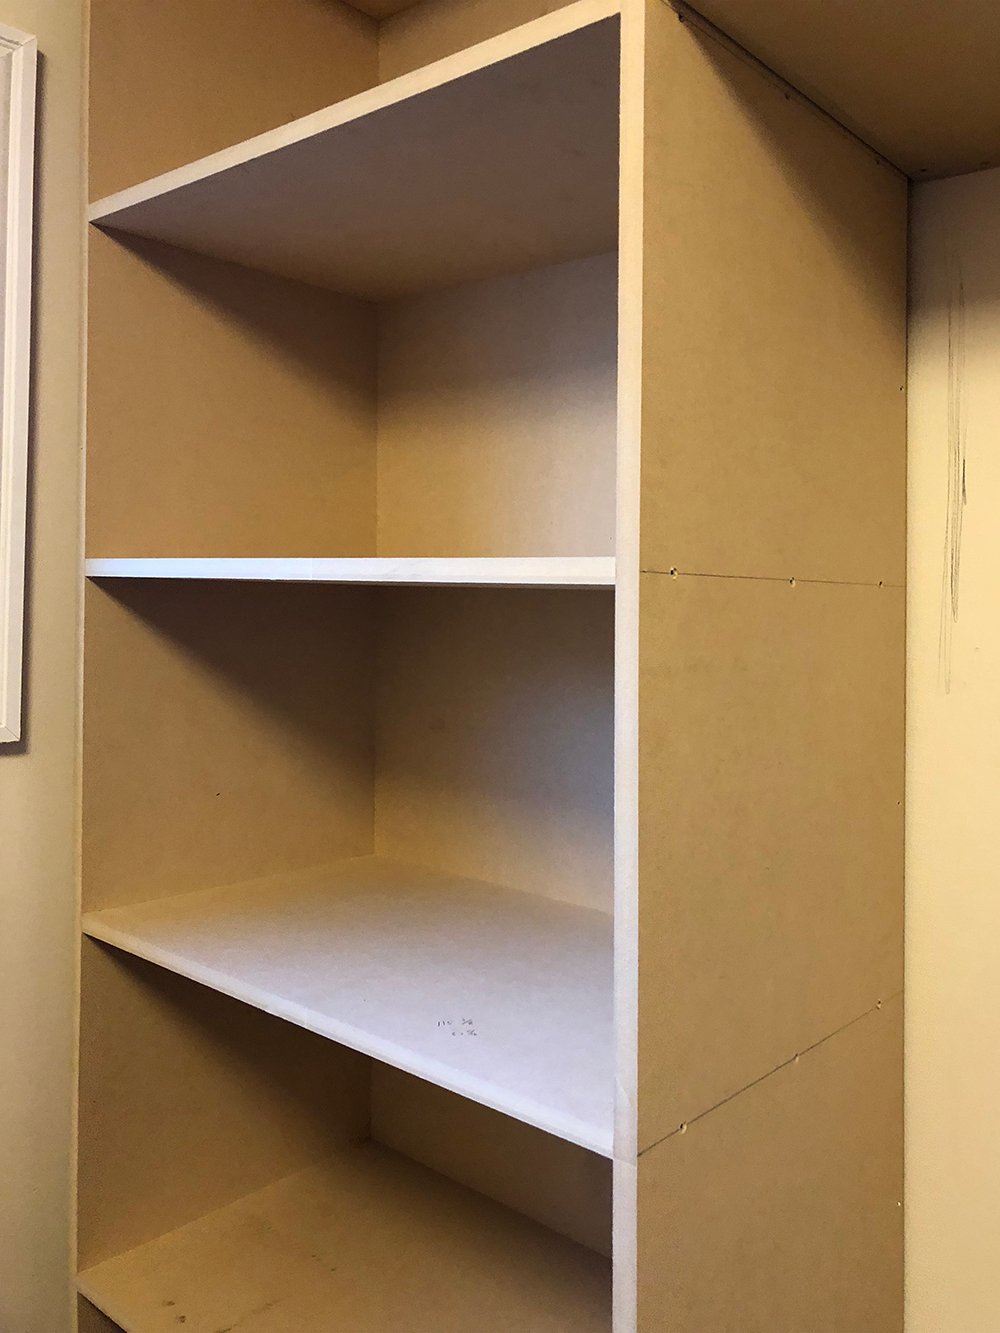
 Step 3 // Assemble the cabinet carcass. The main built-in structure is called the cabinet carcass, in terms of carpentry. Using a counter sink bit, screw each shelf into place from the outside panel. It should look like this…
 Step 4 // Dry fit the cabinets to the wall. Next you’ll want to ensure they fit the wall as planned. Emmett actually screwed them in because it made the unit easier to paint. We used a stud finder to make sure it was securely mounted.
 Keep in mind, my built-in design connects in the middle- but this process works for any shape or size! It should look something like this…
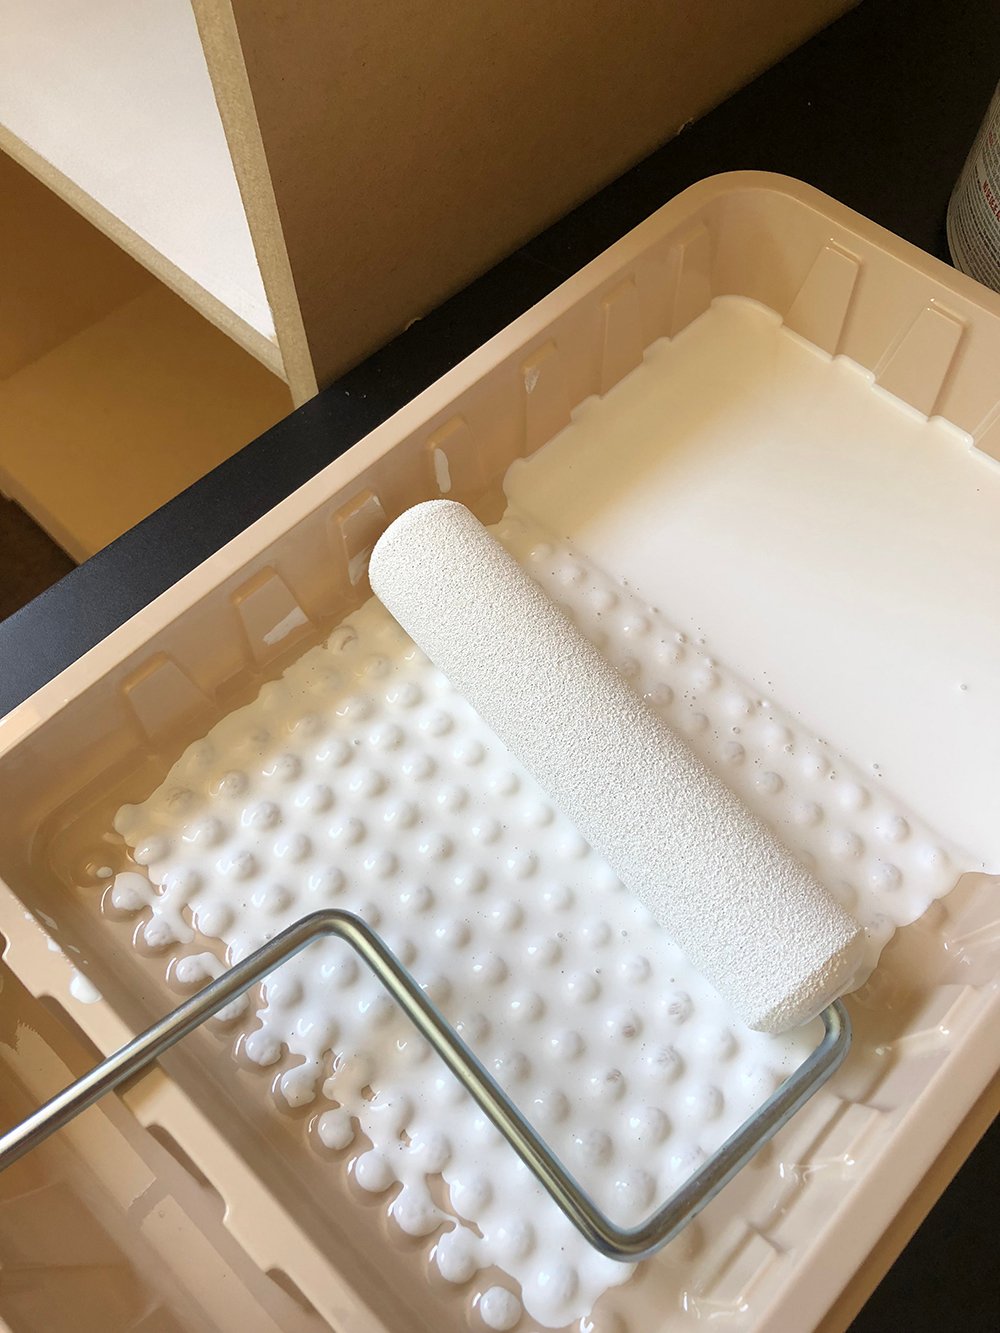
 Step 5 // Prime the cabinet carcass. MDF soaks in a lot of primer. Once the built-ins were affixed to the wall, I quickly applied the first coat of primer using a high density foam roller, specifically made for cabinets and doors.
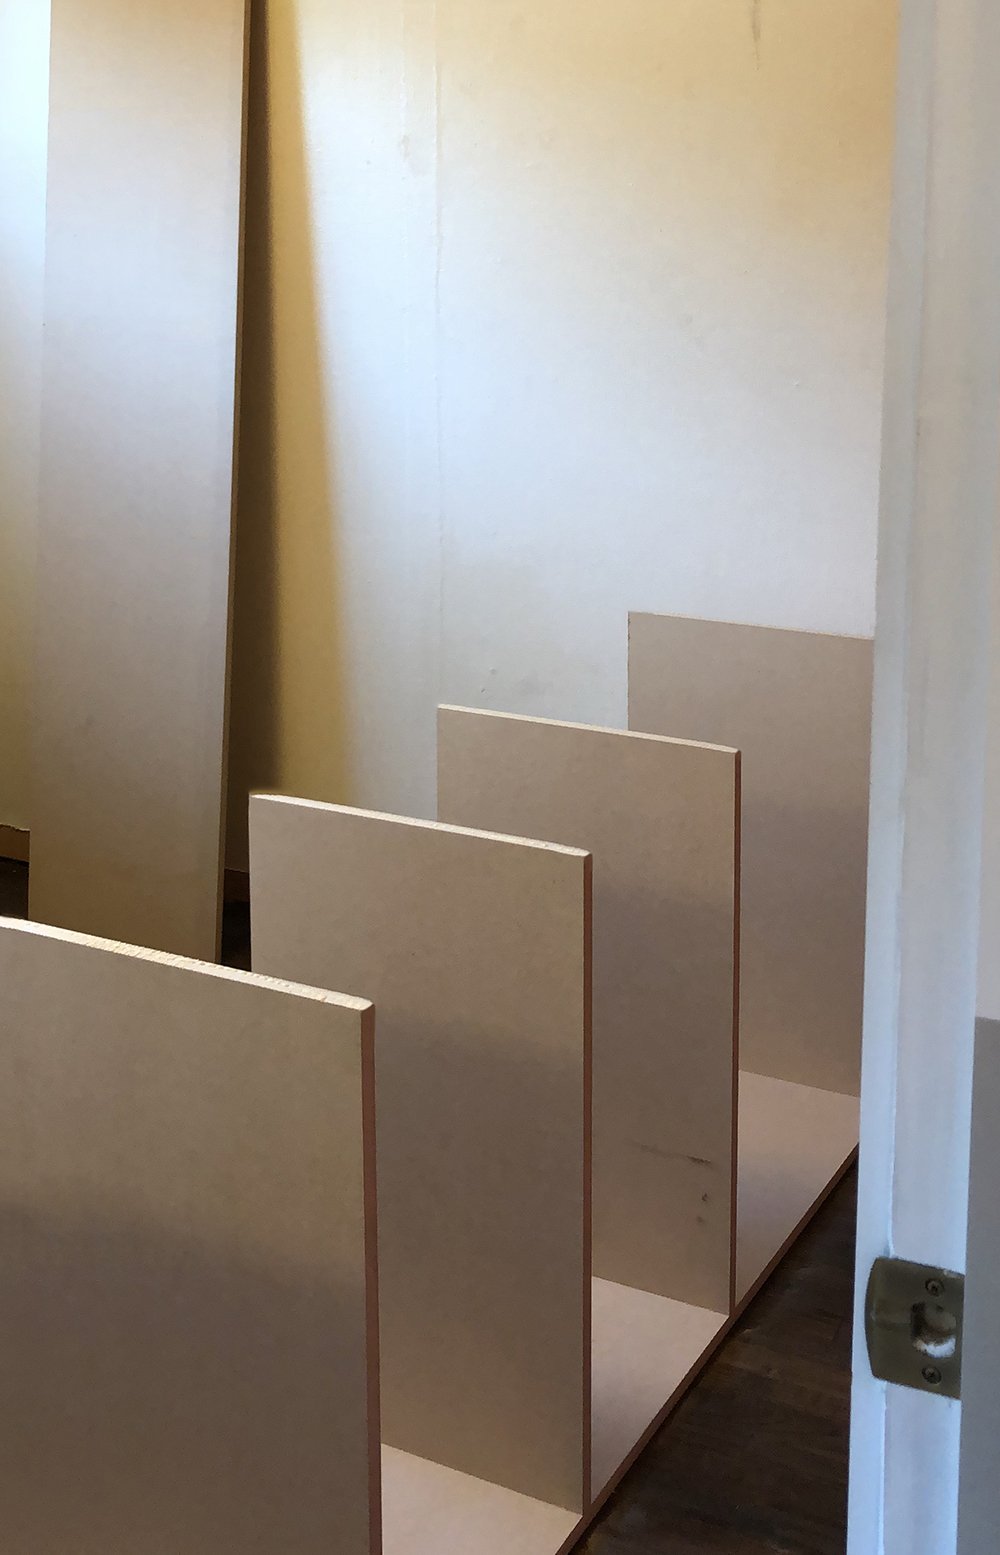
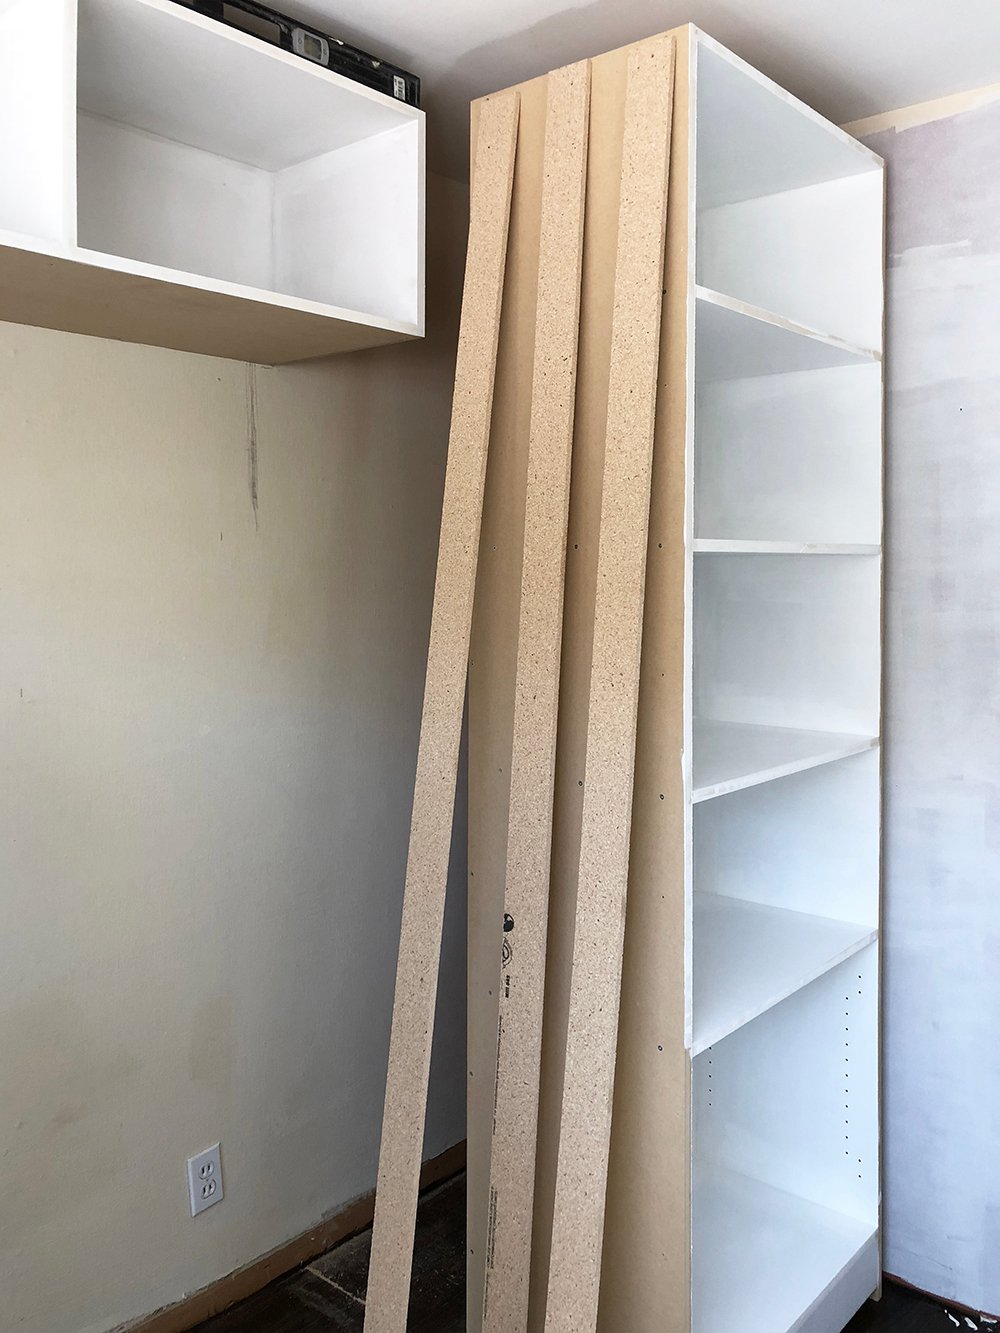
 Step 6 // Add the filler pieces. Built-ins don’t look “built-in” at the beginning of the process. You’ll notice gaps and negative space between each section. This is the step where you’ll essentially “close in the gaps” with scrap filler pieces. Keep in mind, the scrap pieces don’t have to cover the entire side… it just needs to bump out the gap and fill the negative space between the cabinet carcass and end panel.
 Step 7 // Apply the finished end panel. Next, you’ll add the end panel. Notice how it will mount to the filler pieces and close the gap?
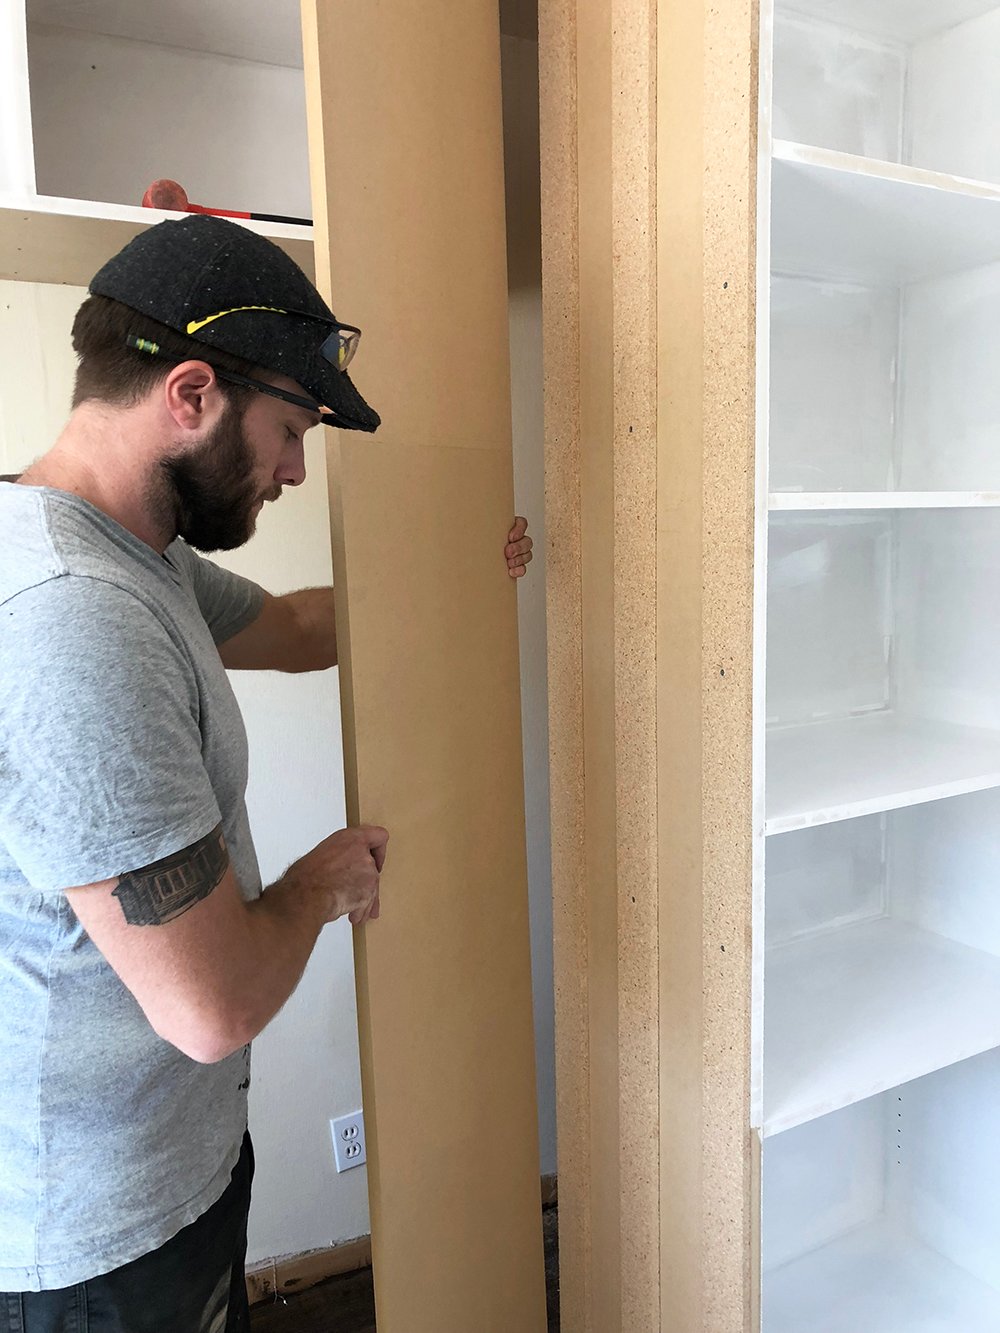 Install the panel using wood glue, clamp it into place, then secure it with screws…
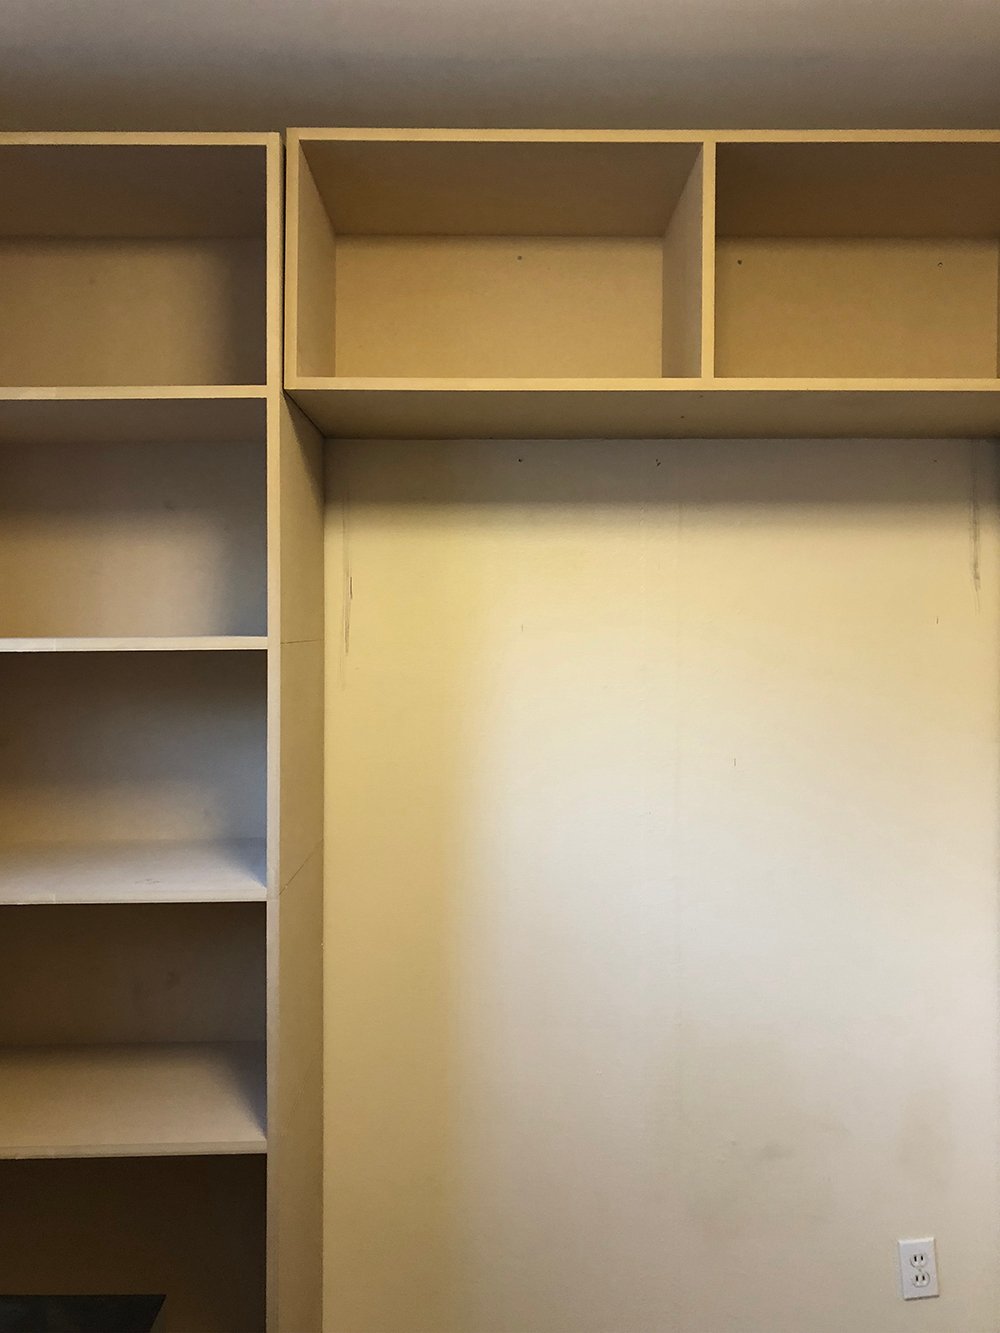
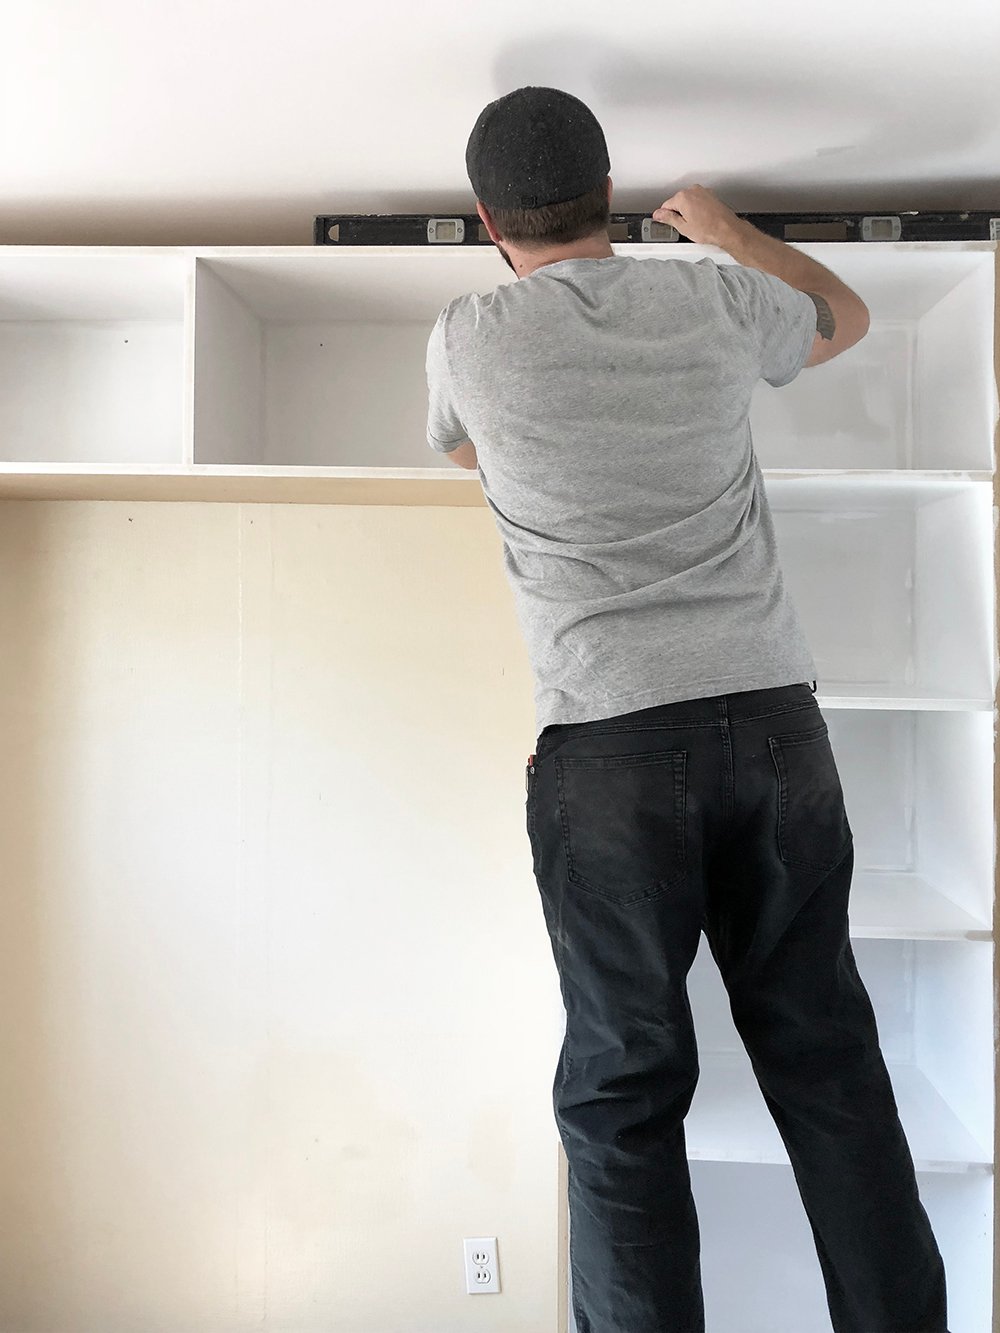
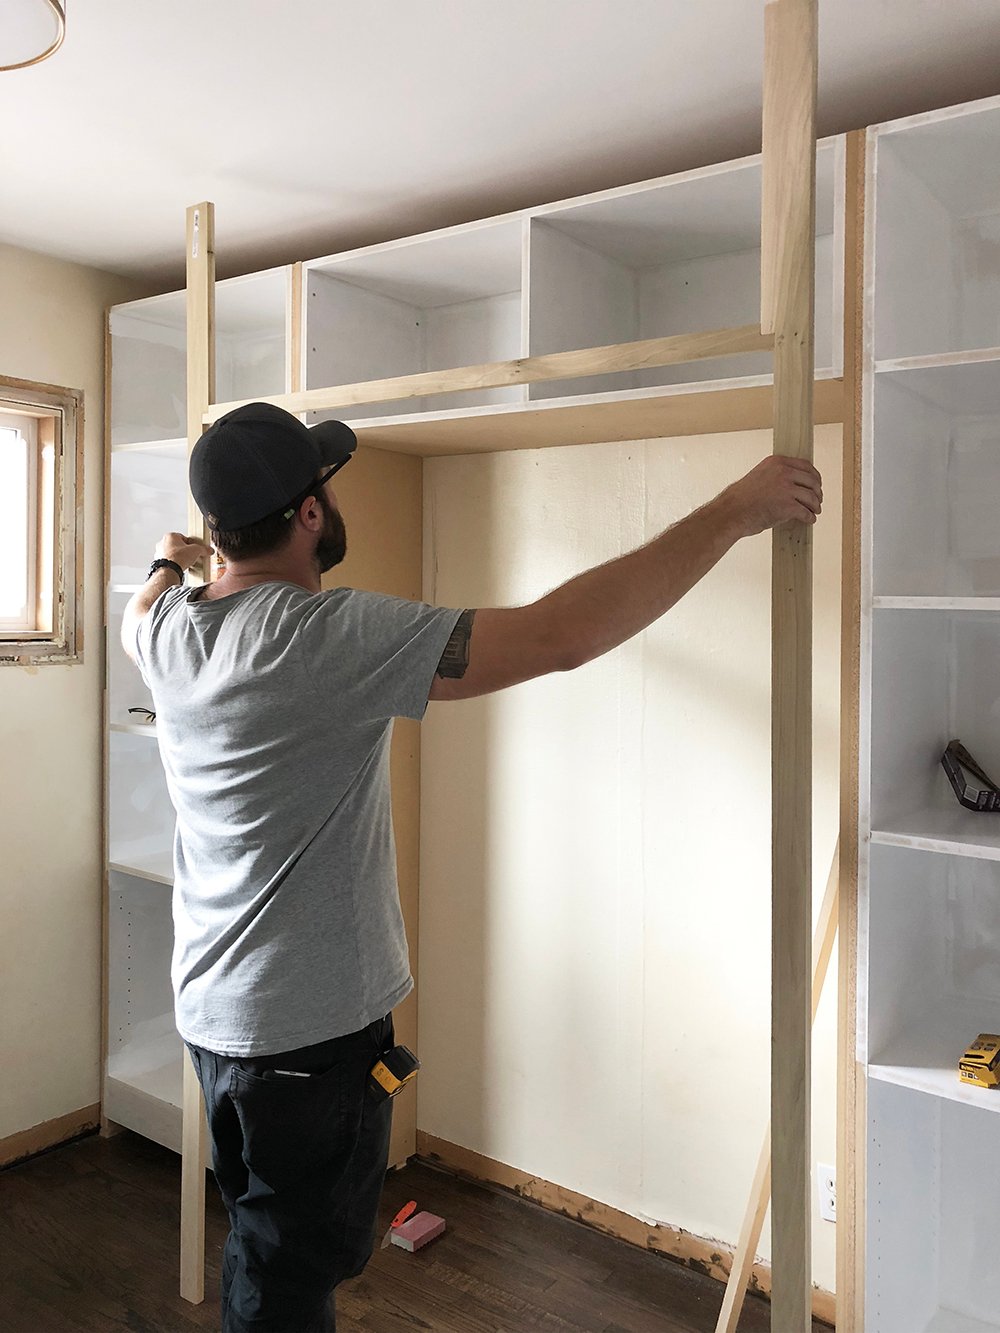
 Step 8 // Align and level the cabinet carcasses. Next, you’ll want to permanently affix the shelving to the wall and to each other (if you also have a center section).
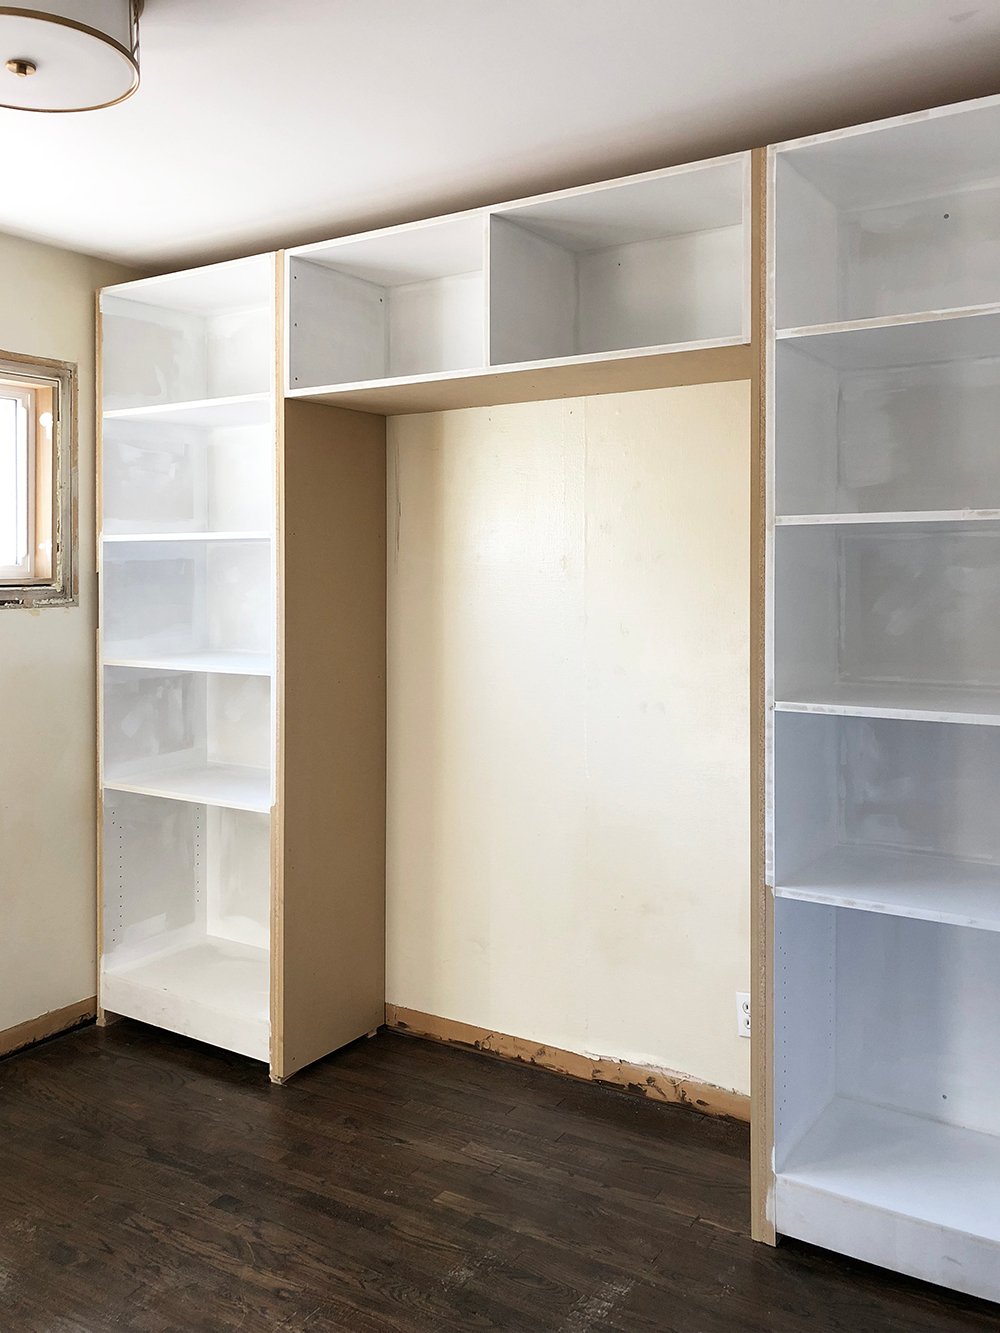
 The built-ins should look like this once they’re installed…
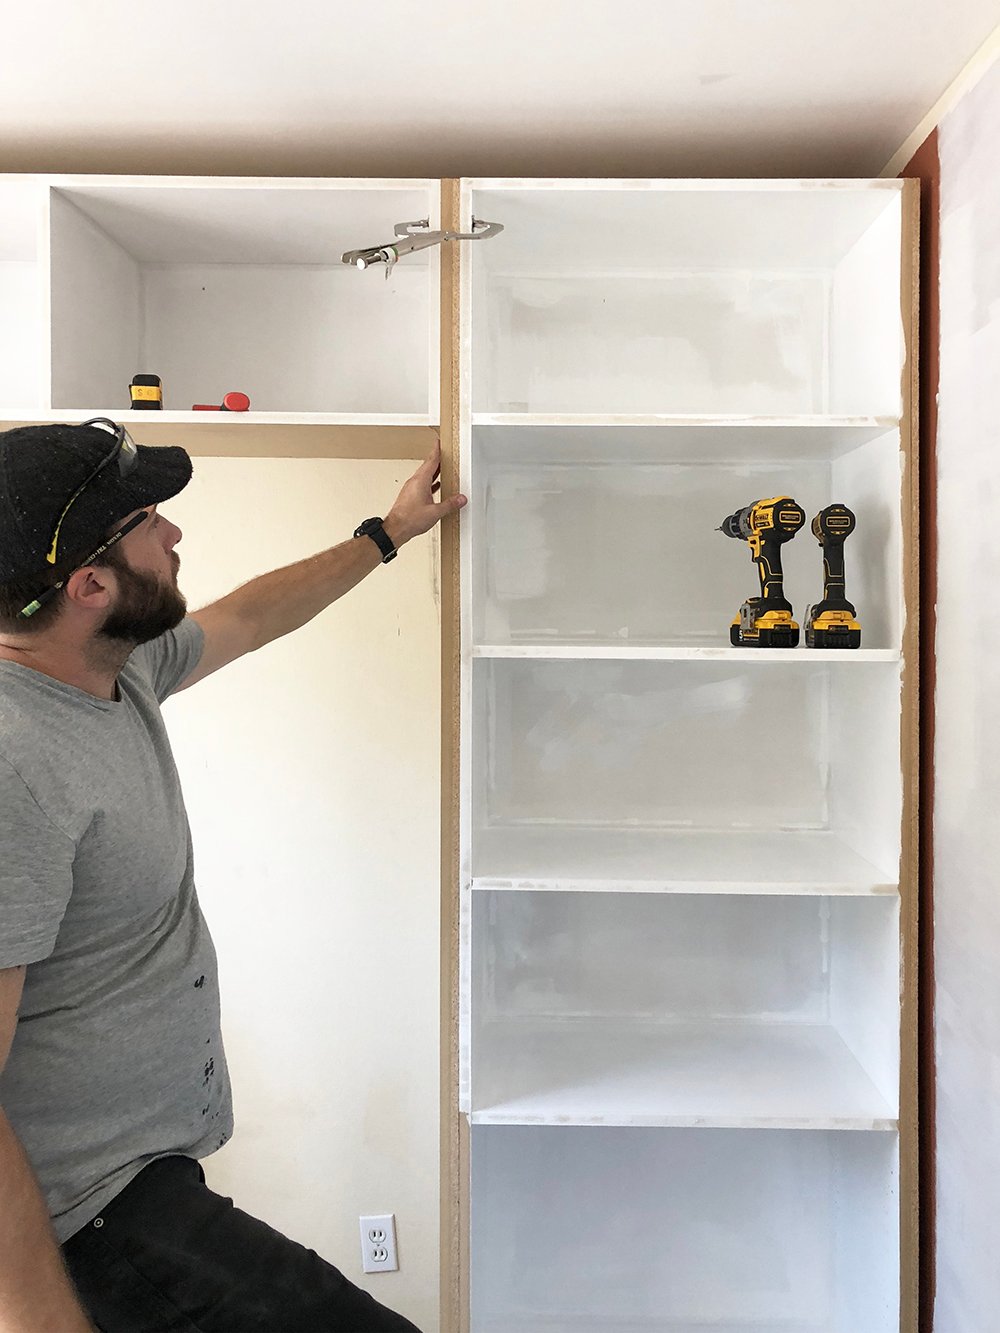
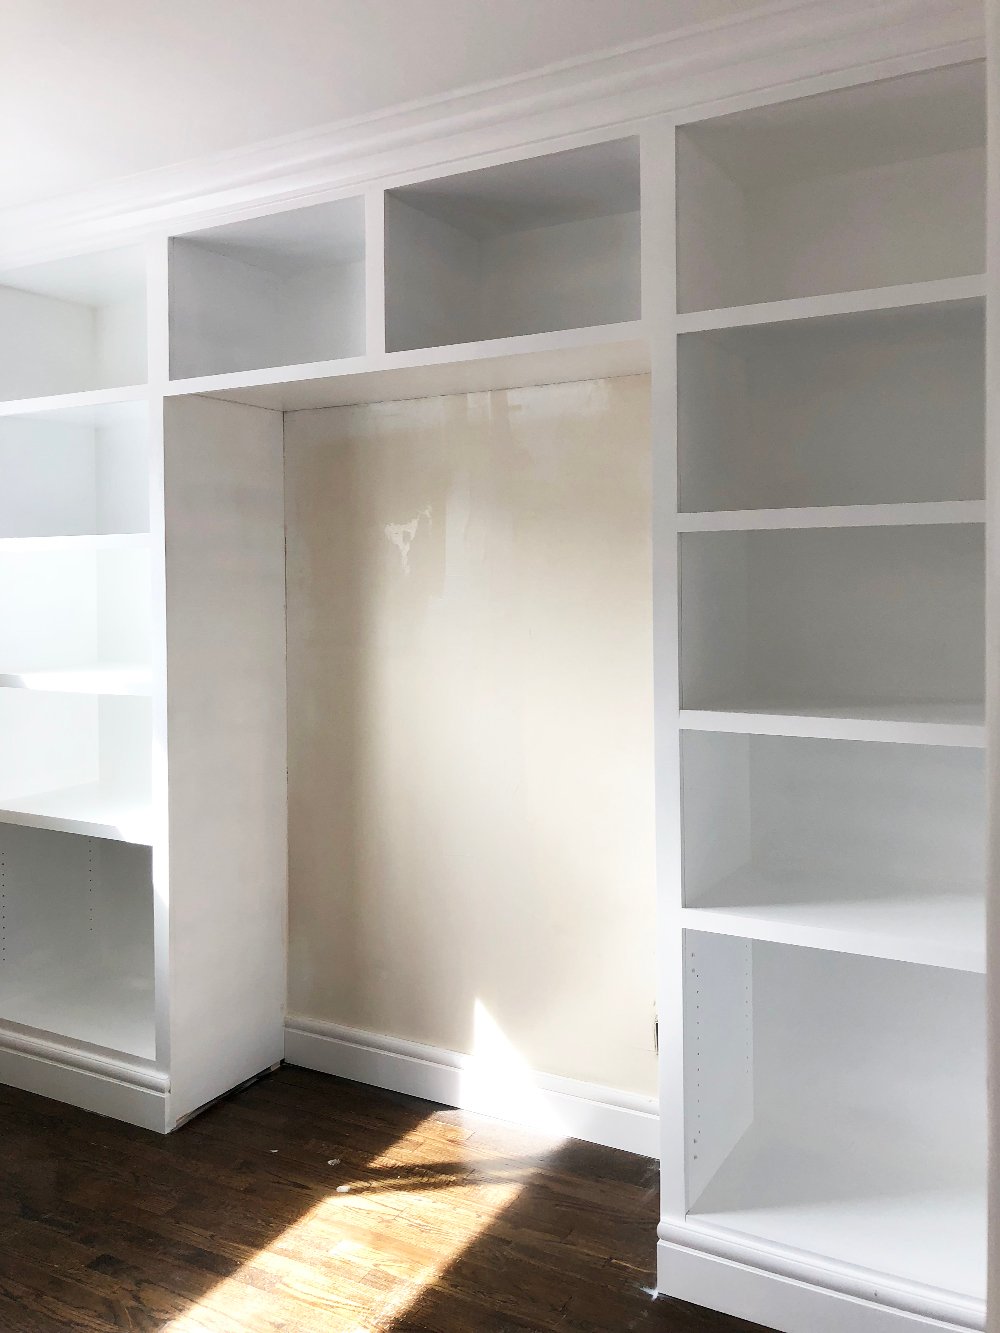
 Step 9 // Measure, preassemble, and install face frame. The above built-ins don’t really look that pretty or finished- and that’s because they’re not!
 Using a hardwood, like poplar, you’ll want to encase them by installing a face frame. It takes a lot of measuring, but the result is well worth the tailored look. See how it works?
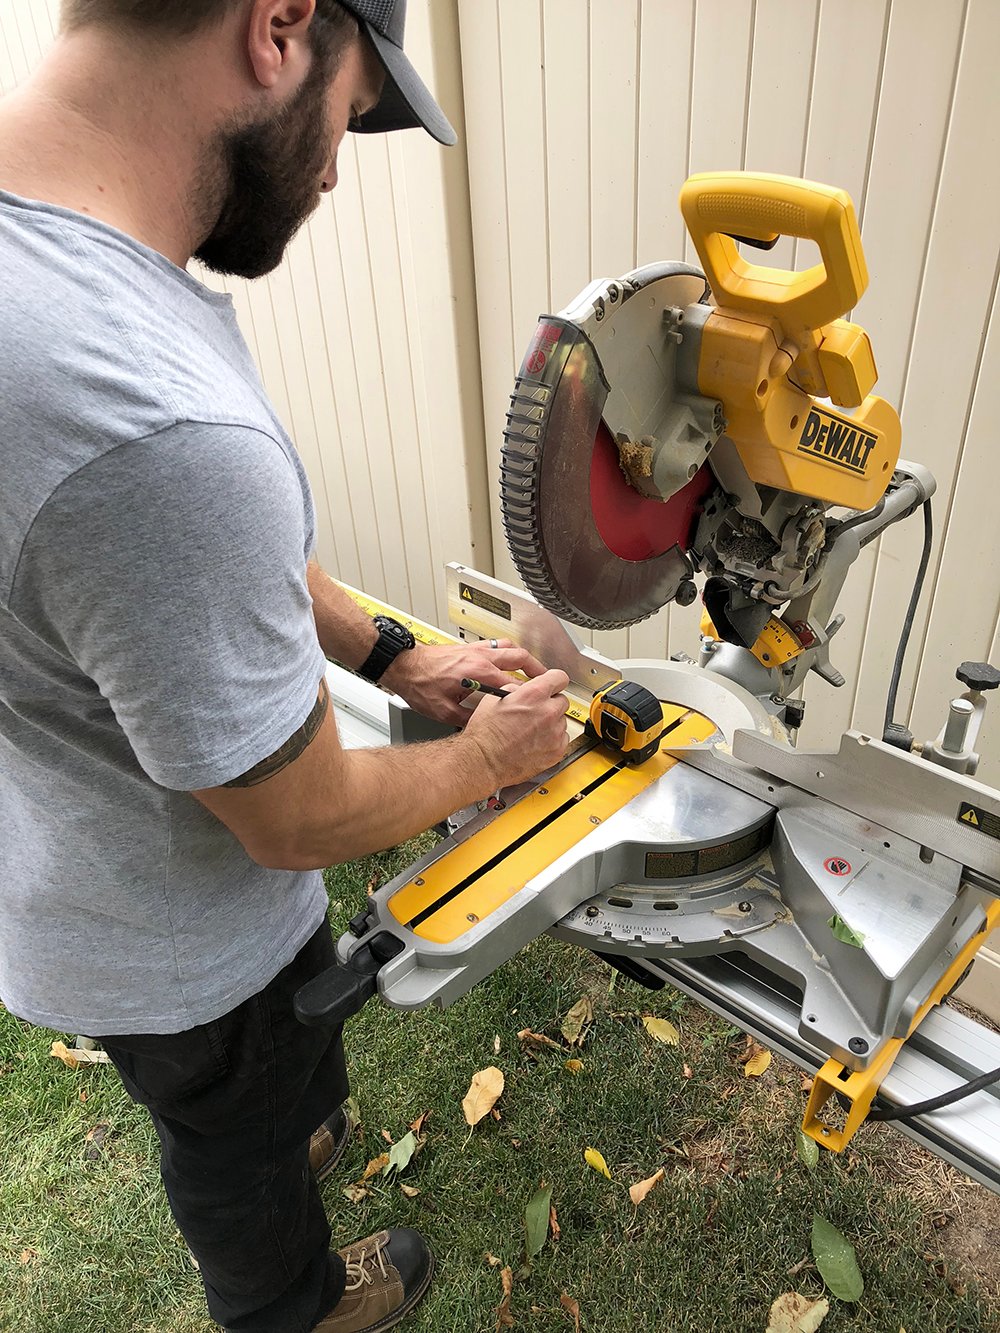
 Step 10 // Install the crown moulding. Using a miter saw, make your cuts for the crown moulding and install it to the top of the built-in.
 Adding millwork really makes built-ins look custom and finished. See the difference the crown made?
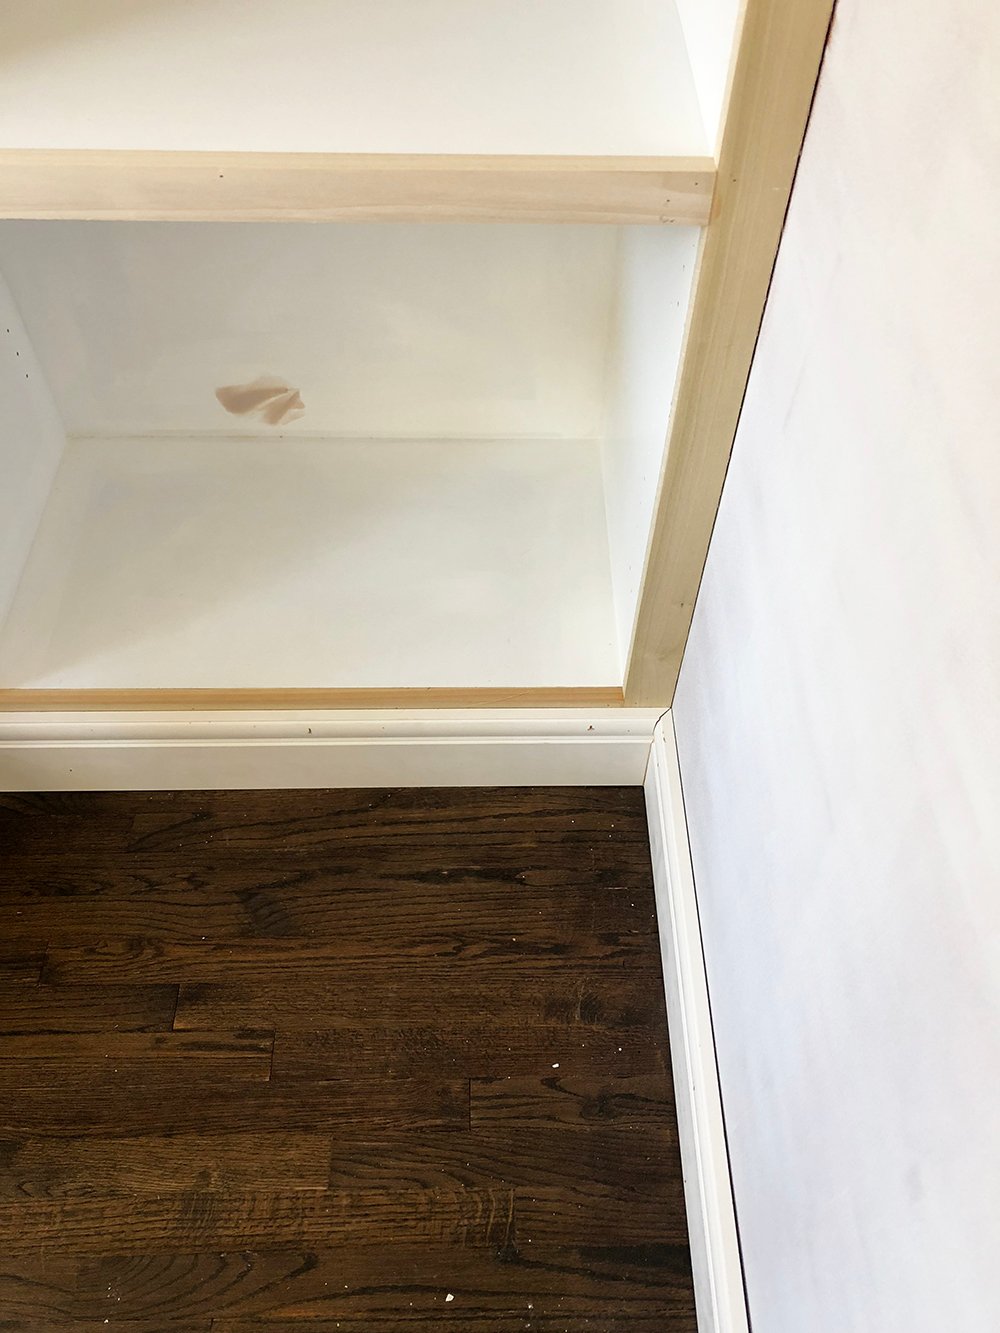
 Step 11 // Install the baseboards. Repeat the same millwork process with the miter saw for the baseboard, wrapping it thoroughly around the built-in base.
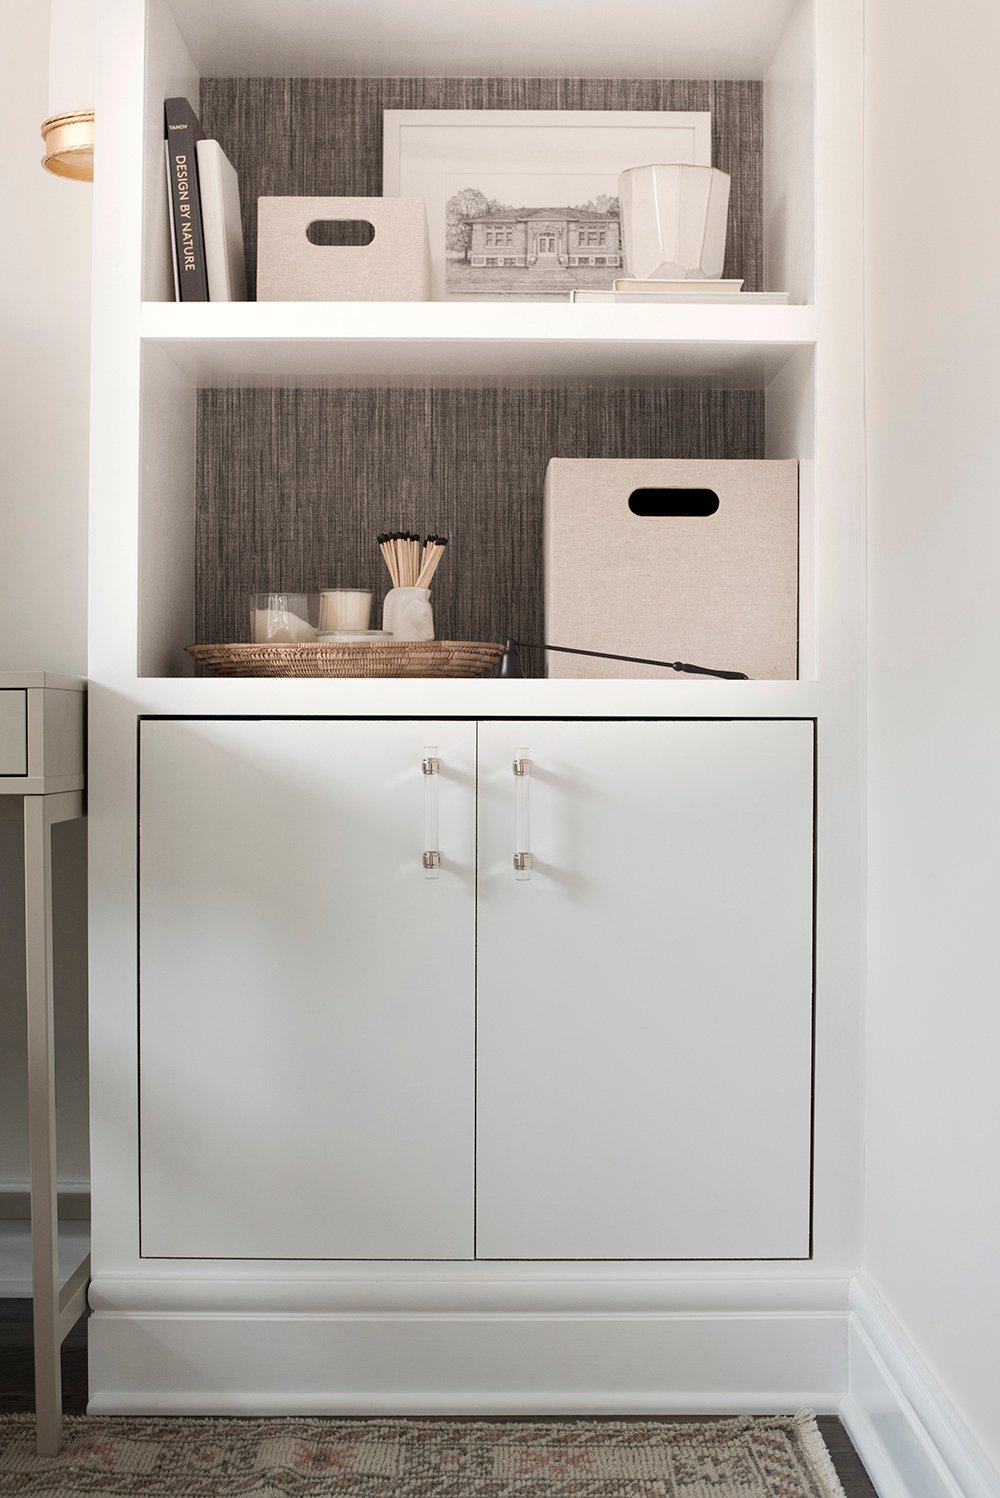
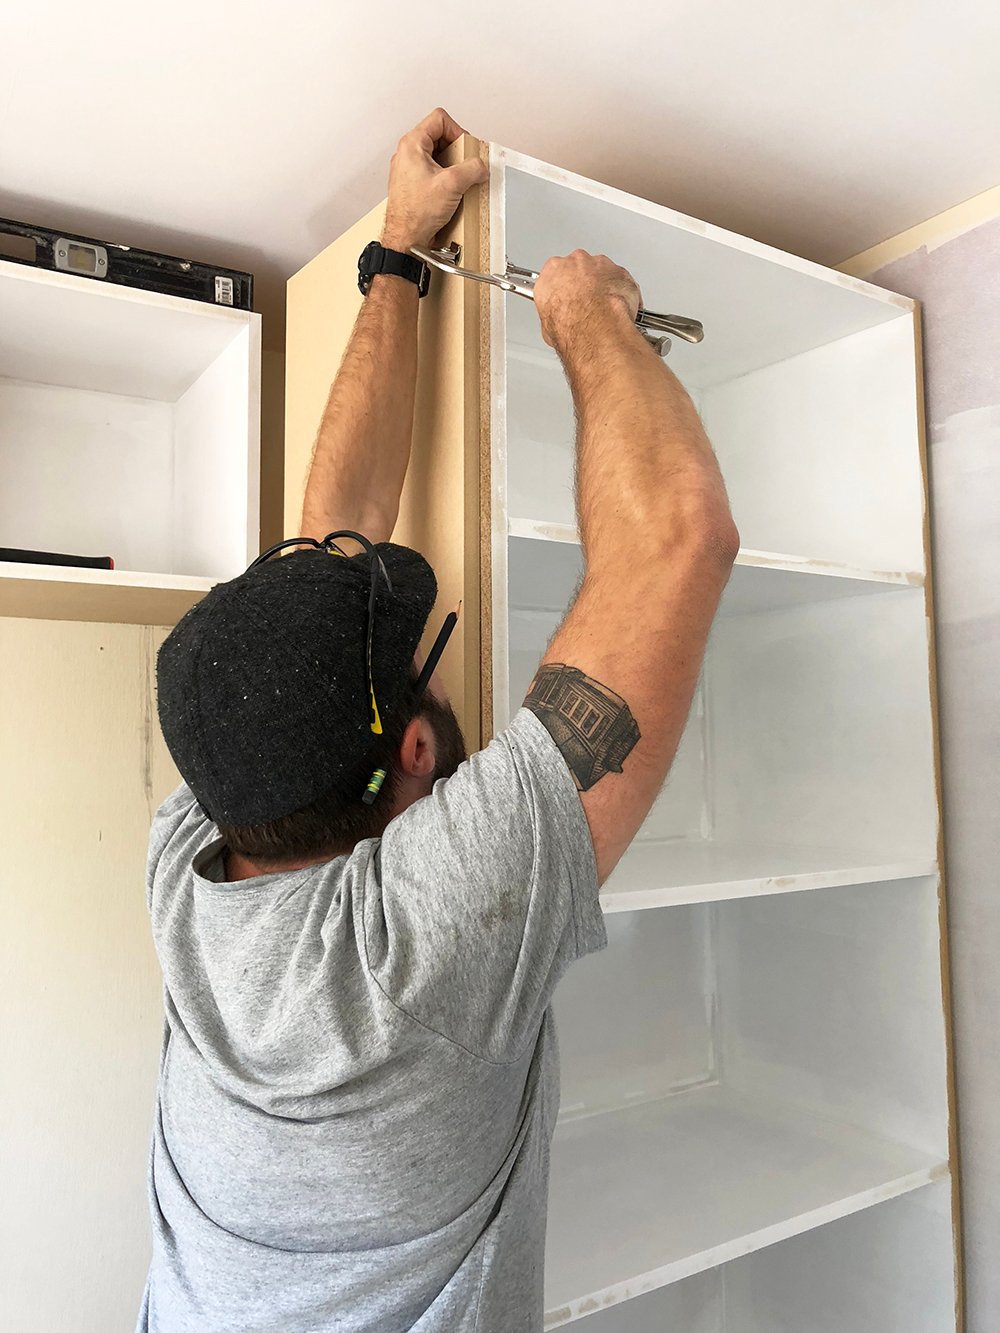
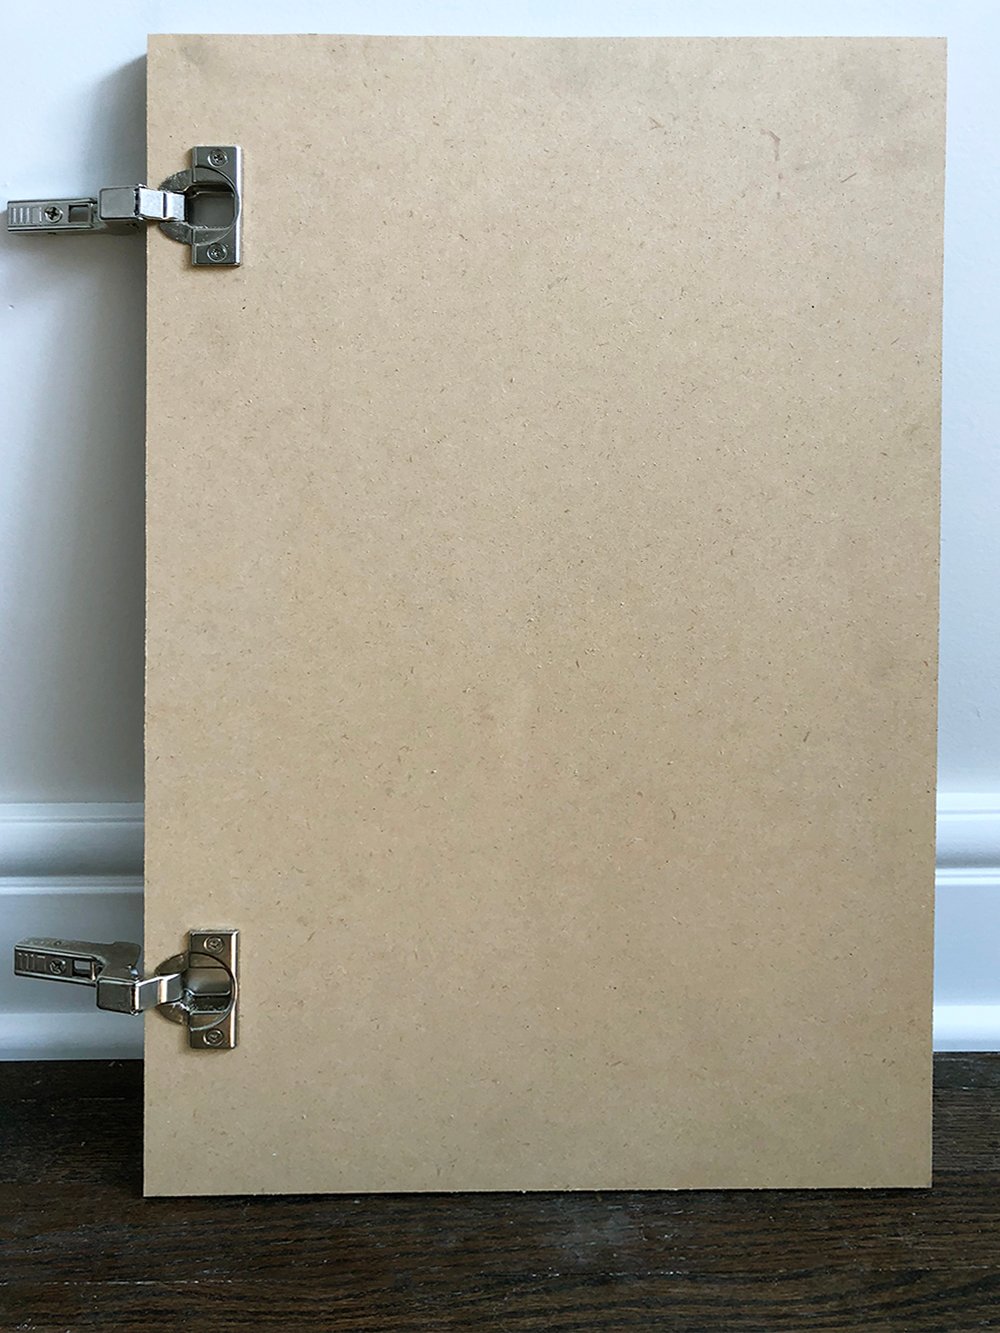
 Step 12 // Install the doors. If you designed your built-in to have closed storage, now would be the time to install the doors (wait until after painting for the exterior door hardware installation). We used simple hinges to affix the doors to the closed storage portion of the built-in.
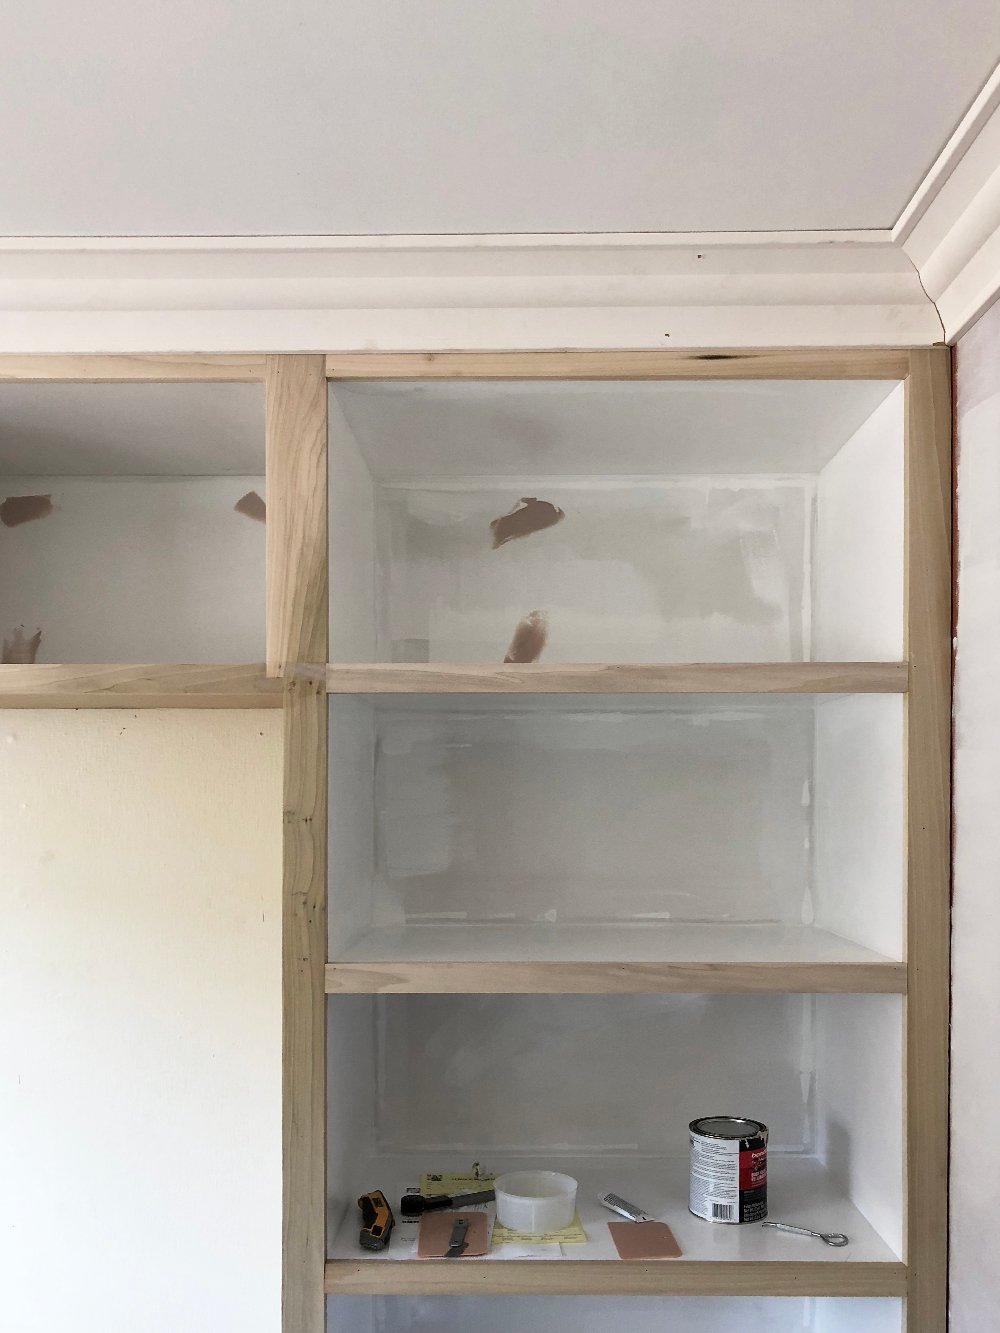
 Step 13 // Finish the built-in. Now for the fun part… fill the holes, sand, and caulk the unit. Once the prep work has been completed it’s time to prime once again and paint the finished piece. We made quick work of this by using a Bosch orbital hand sander.
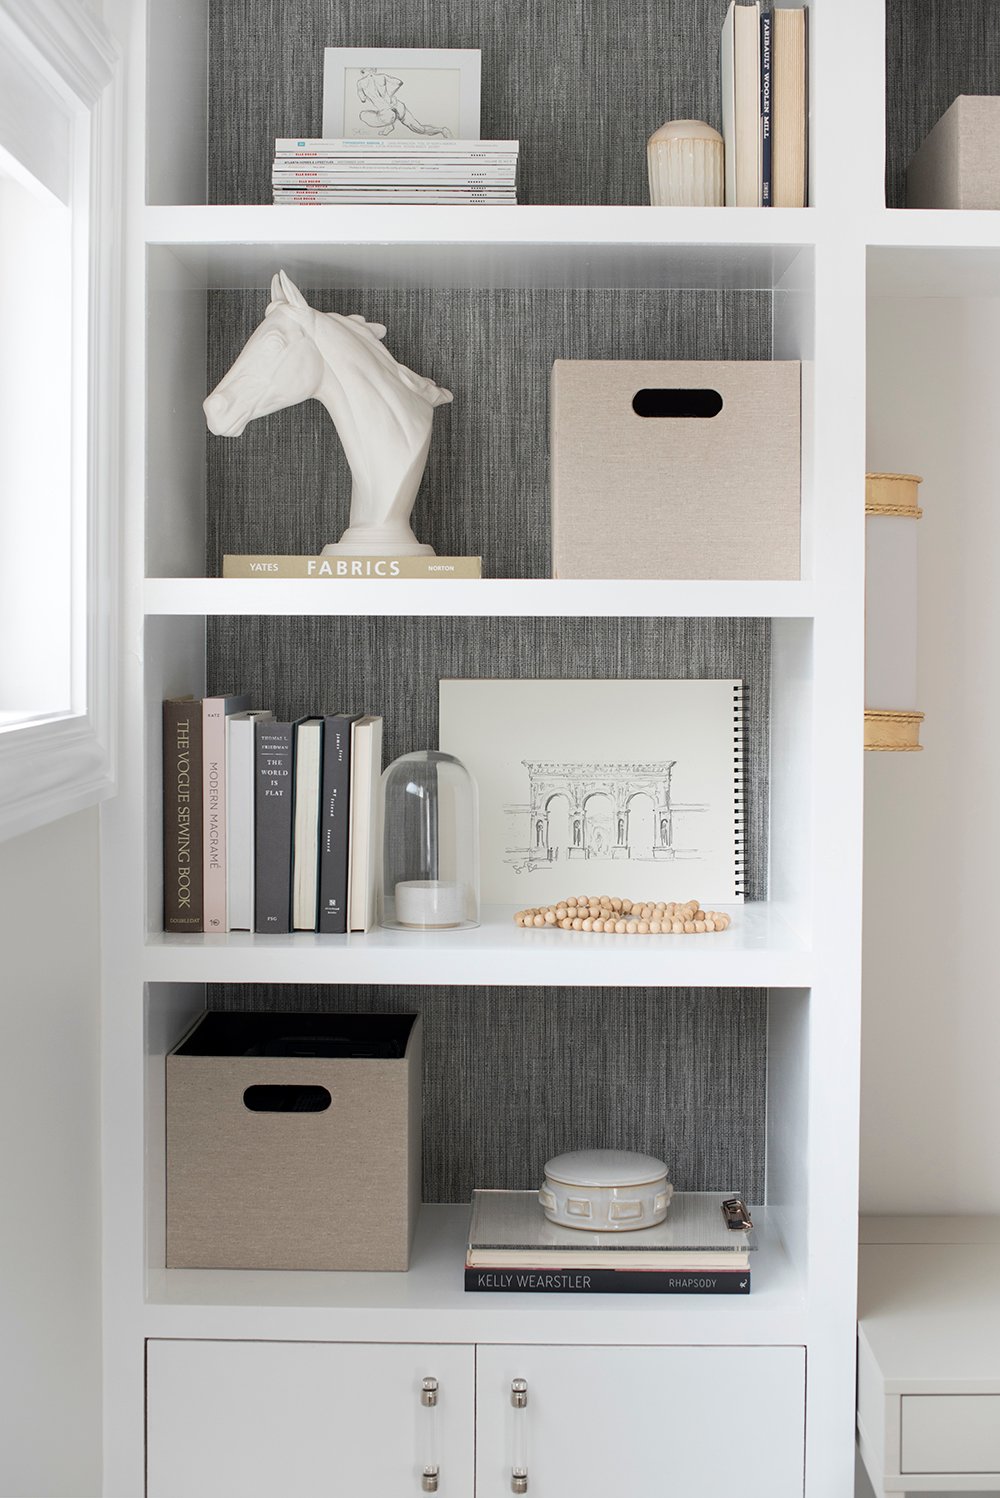
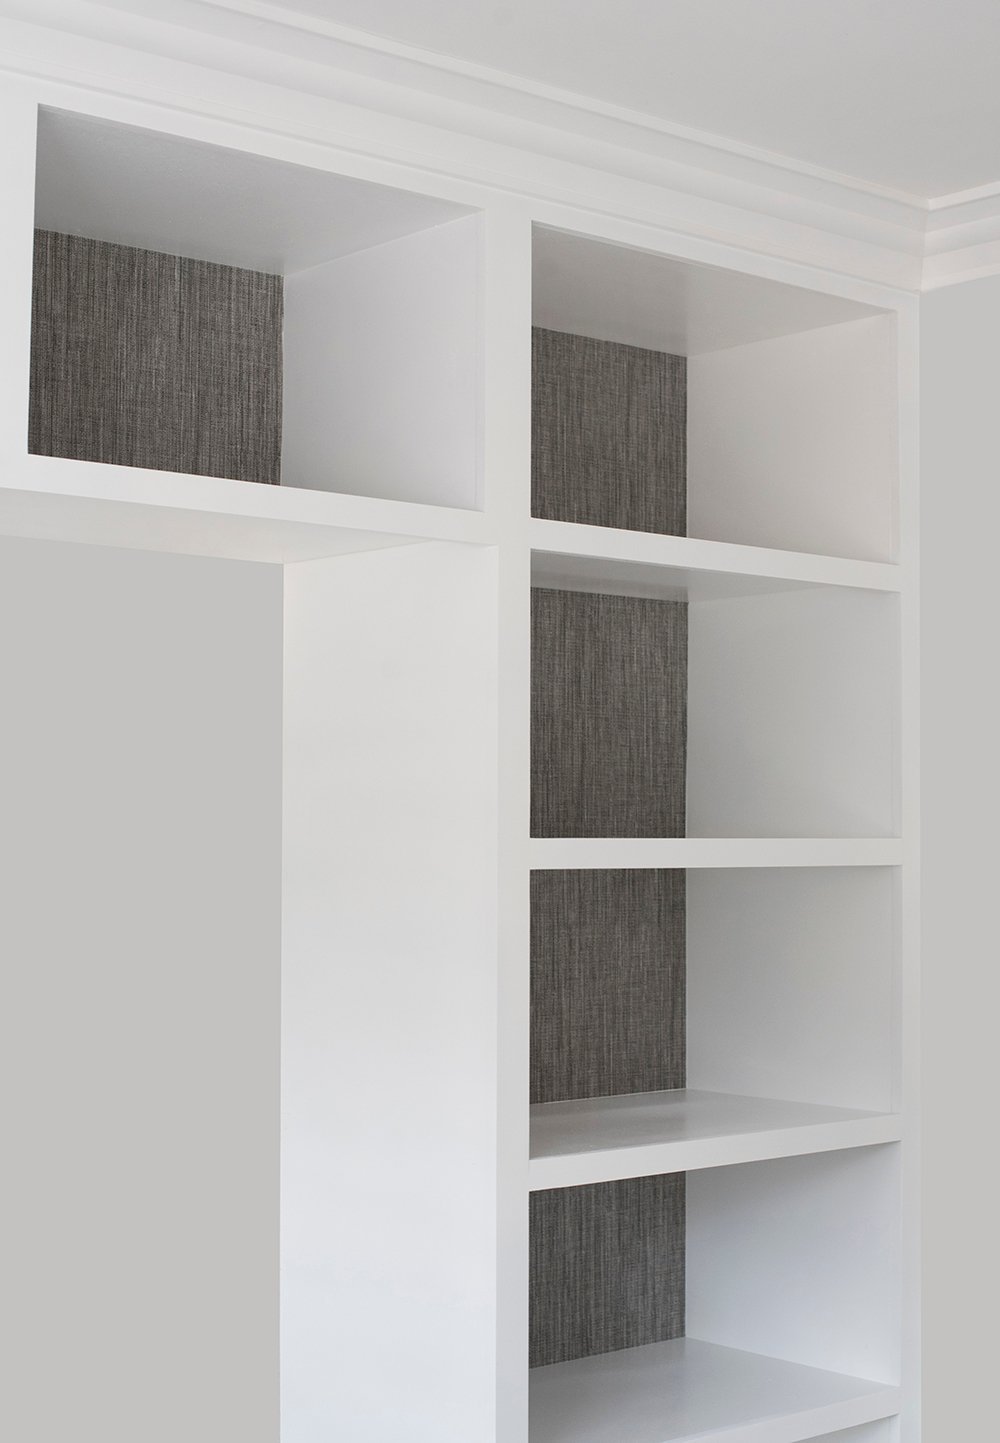
 I also decided to add grasscloth to the back of the shelving. I did a separate tutorial for that. If you’re interested- find it here!
 Ready for the finished result? Would you have guessed this built-in wasn’t original? It really feels cohesive to the room and basic-shaped architecture. It’s an easy way to add instant charm to a boring space.
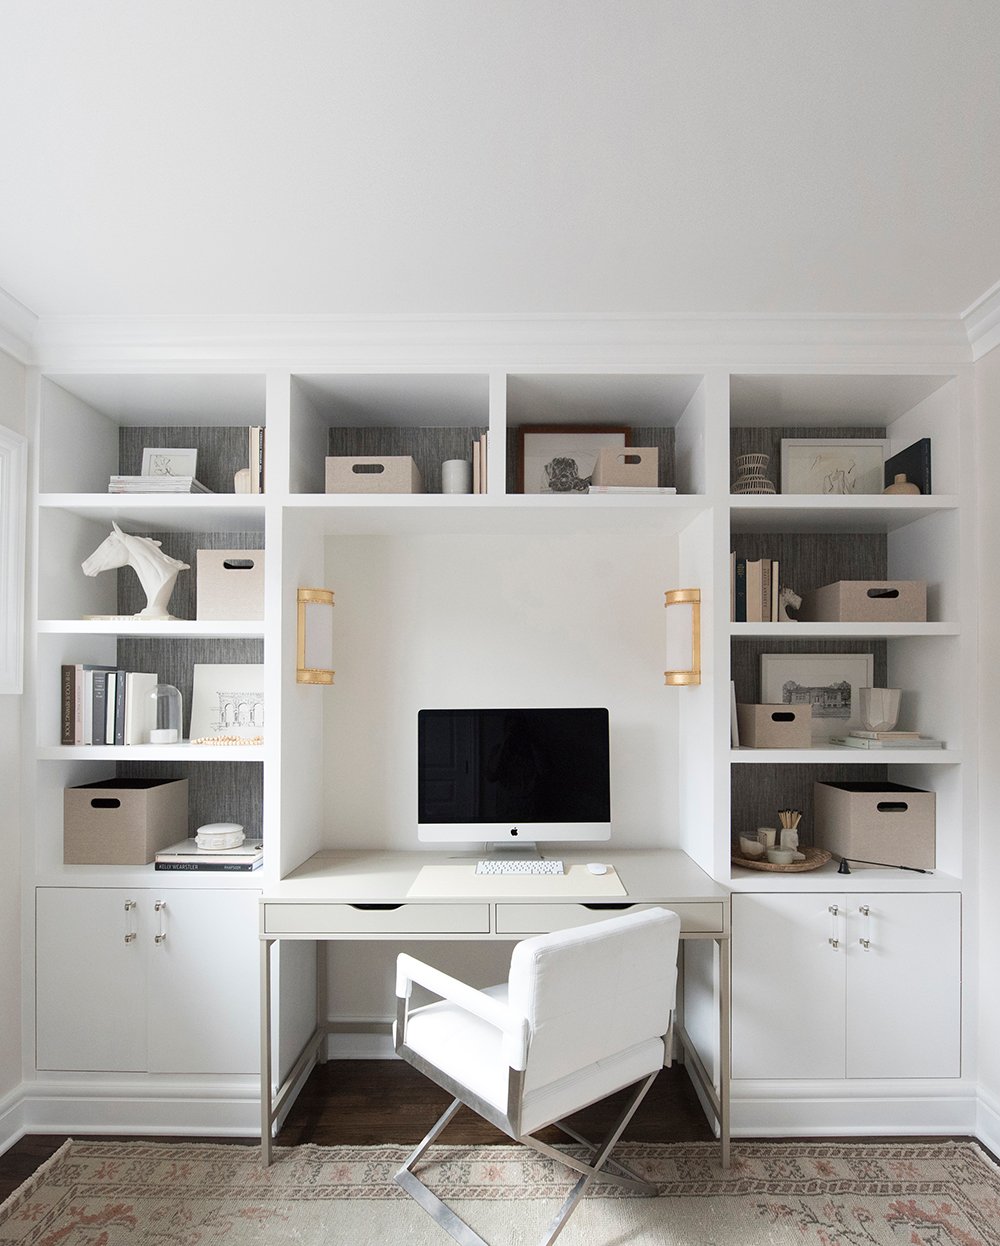 I’ll be sharing the entire room reveal soon- and believe it or not, things have already been moved around, but I did want to touch on keeping built-ins organized. This space is obviously functioning as my office (although a full-size bed can fit into the recessed niche), and I wanted everything to have a place.
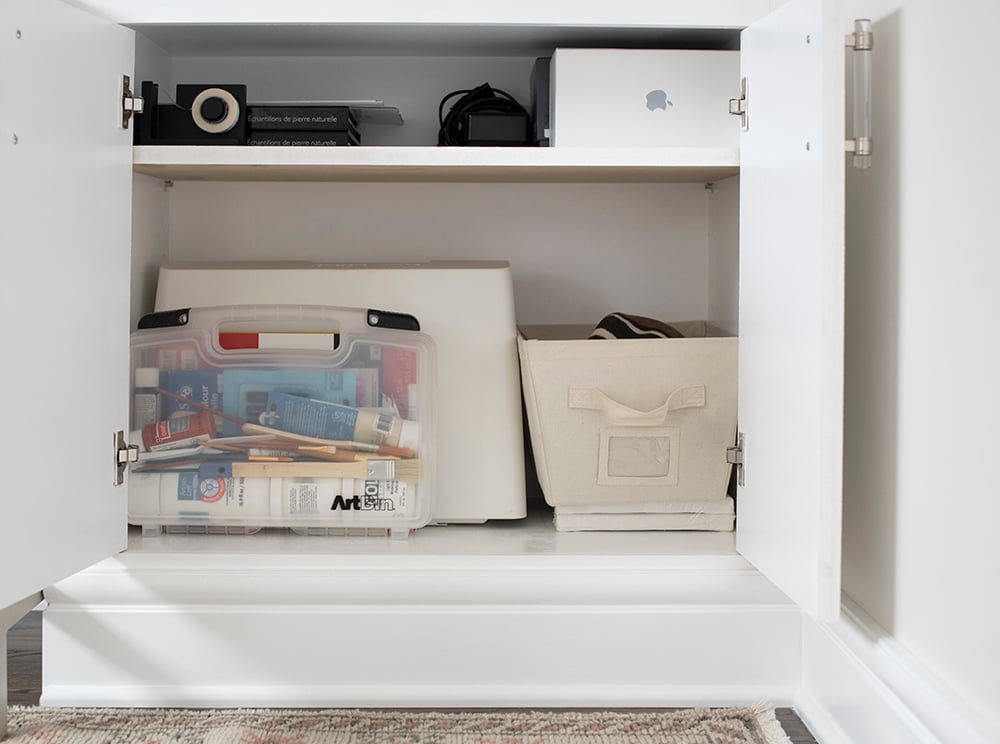
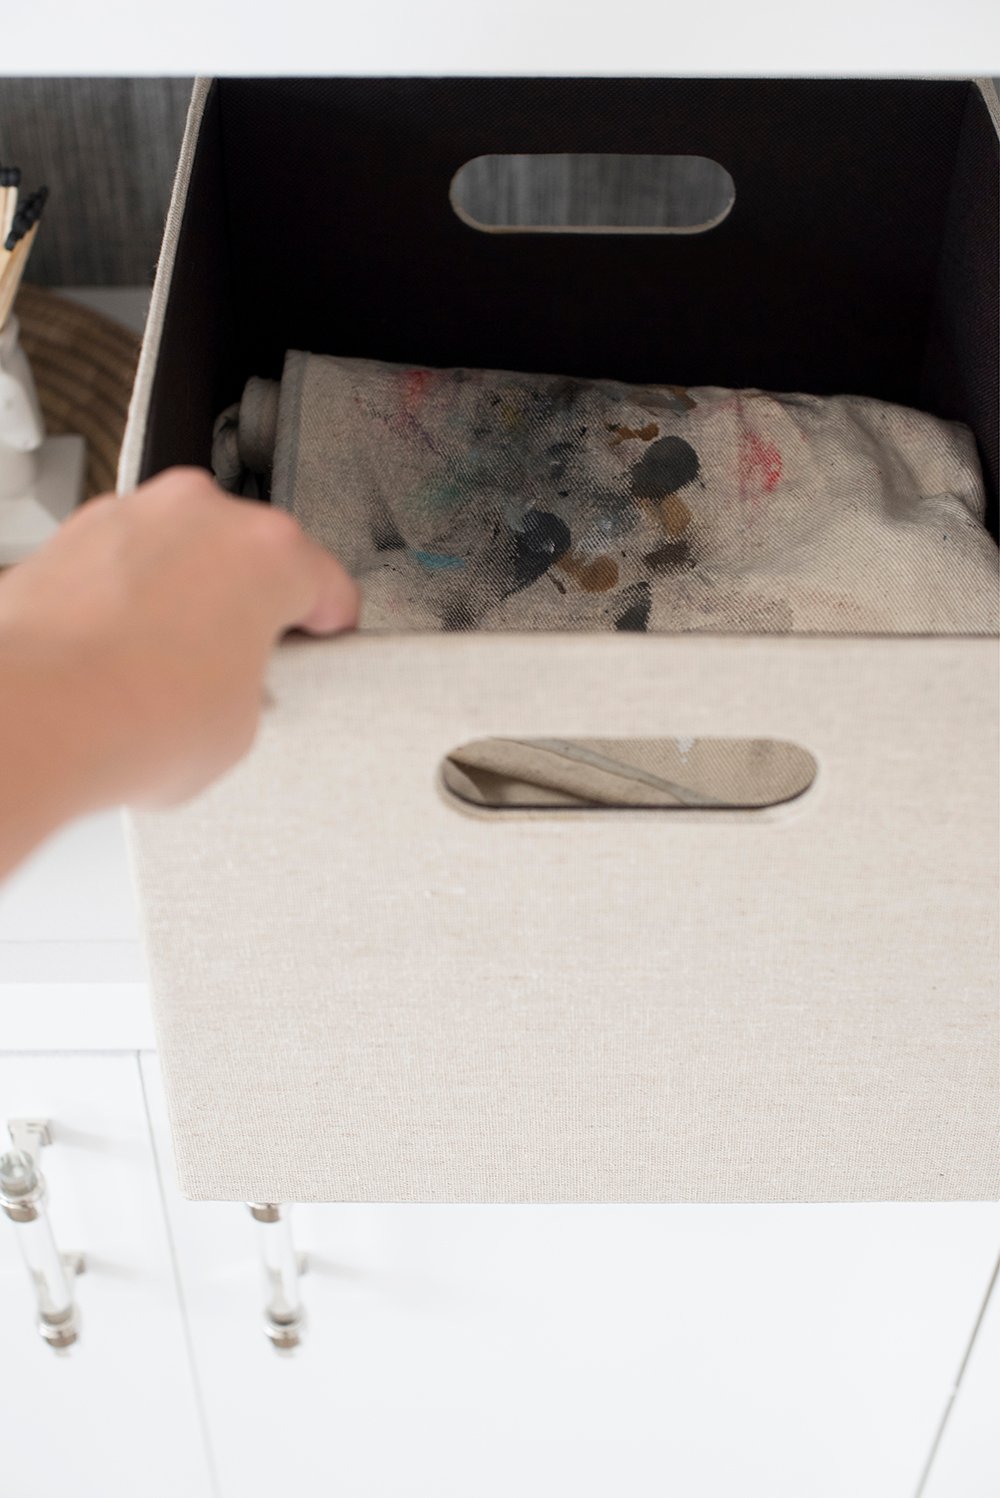
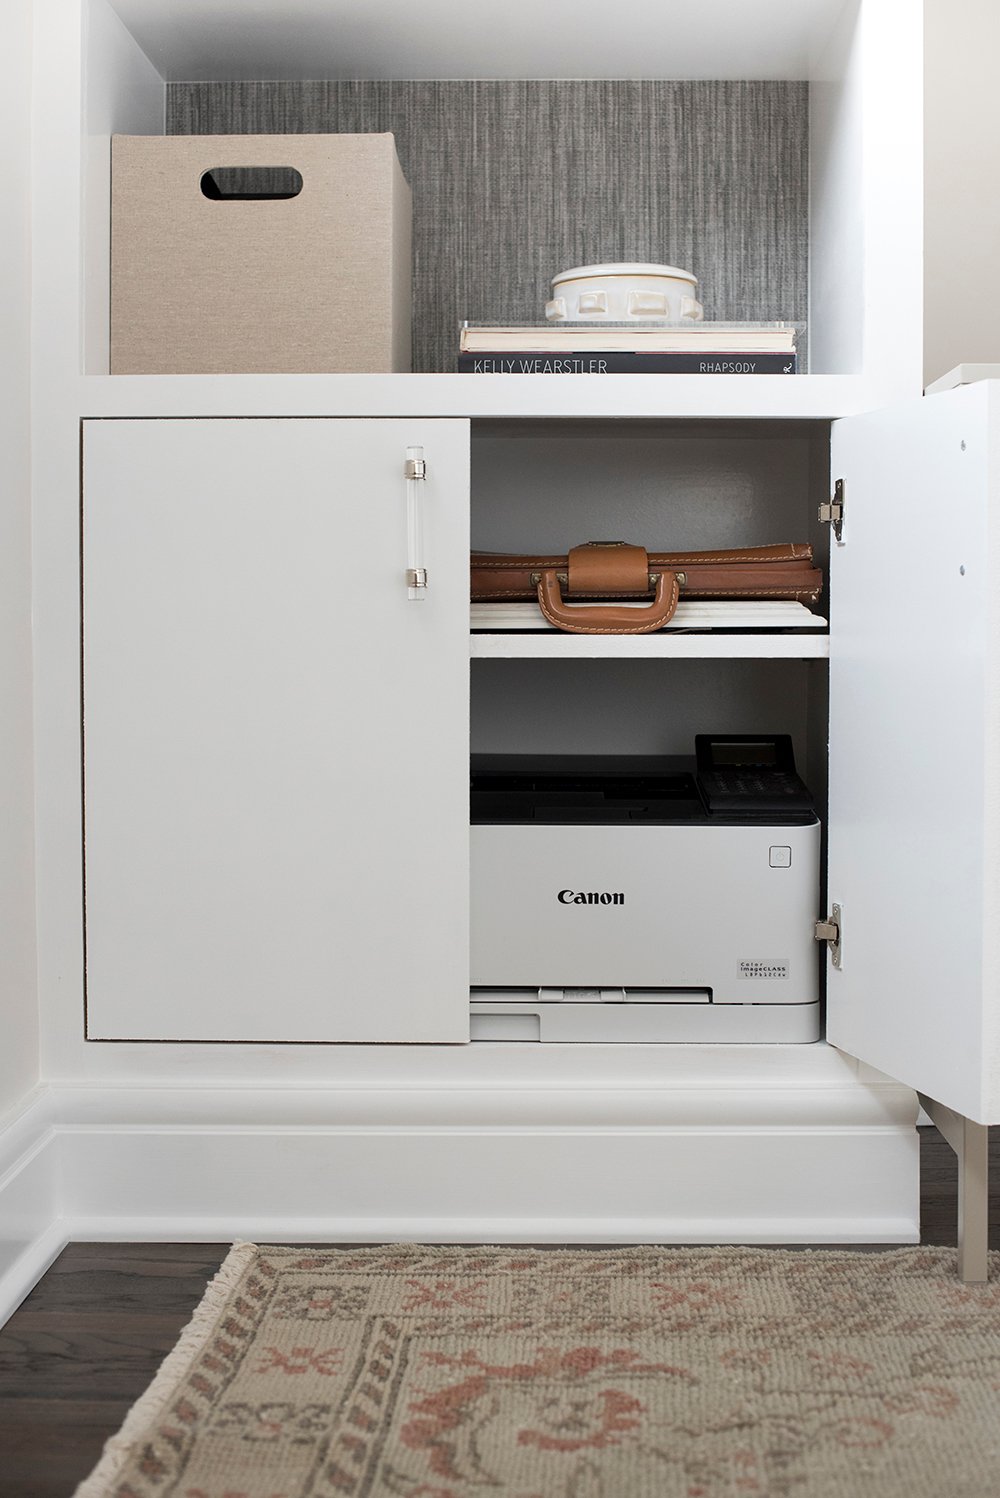 The obvious, larger items live inside the lower closed storage: my wireless printer, sewing machine, art supplies, portfolios, larger cutting mats, etc.
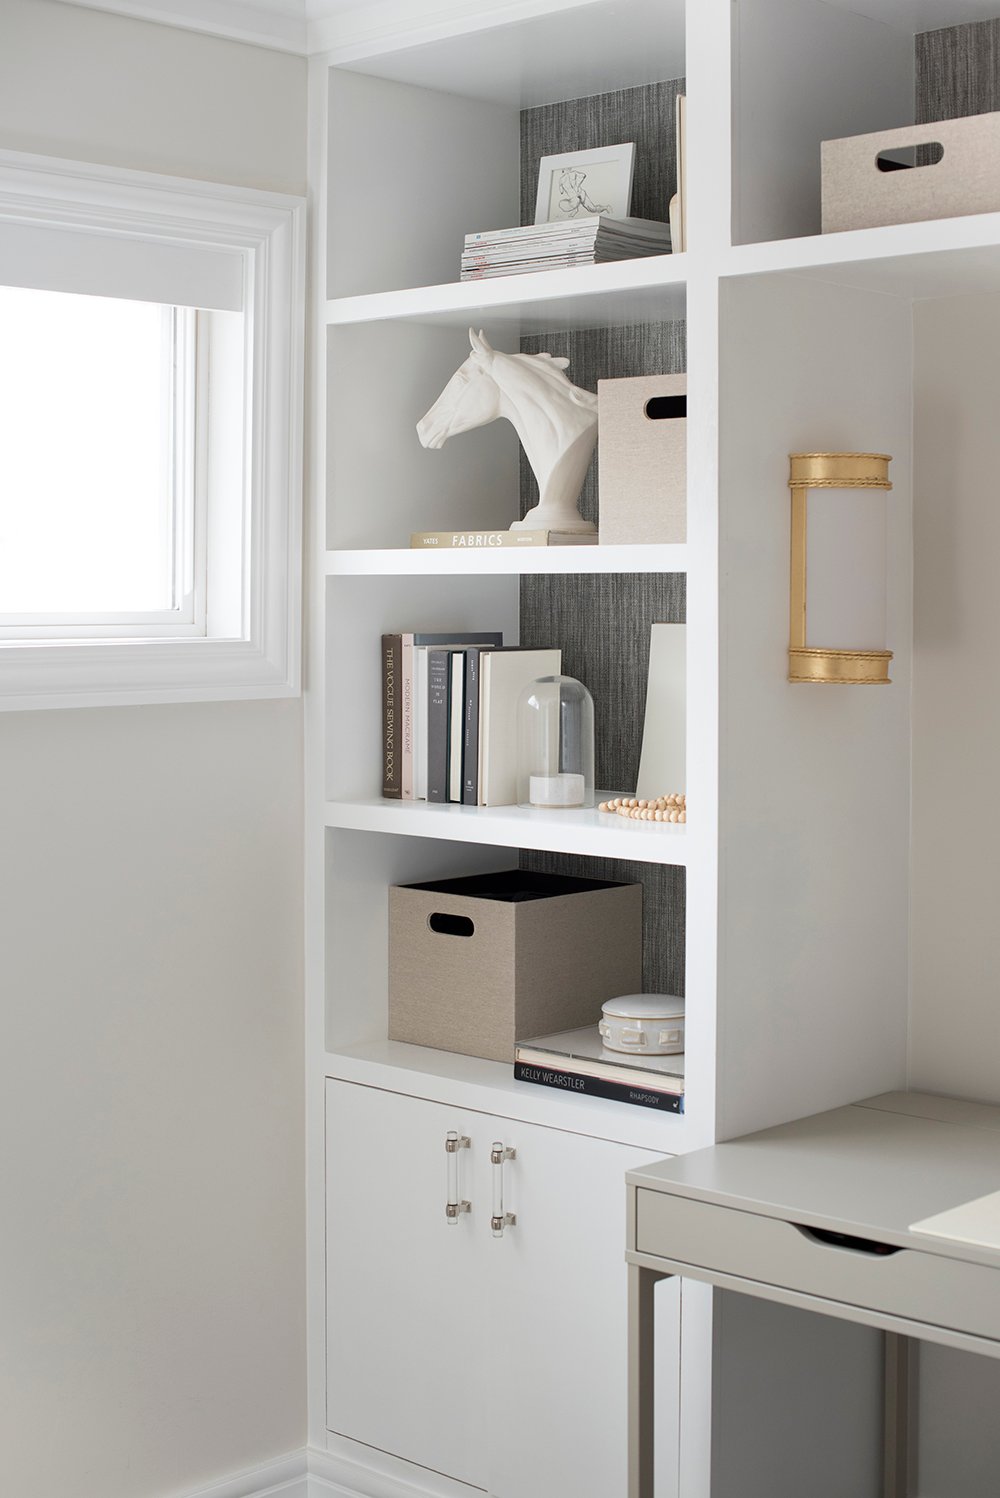
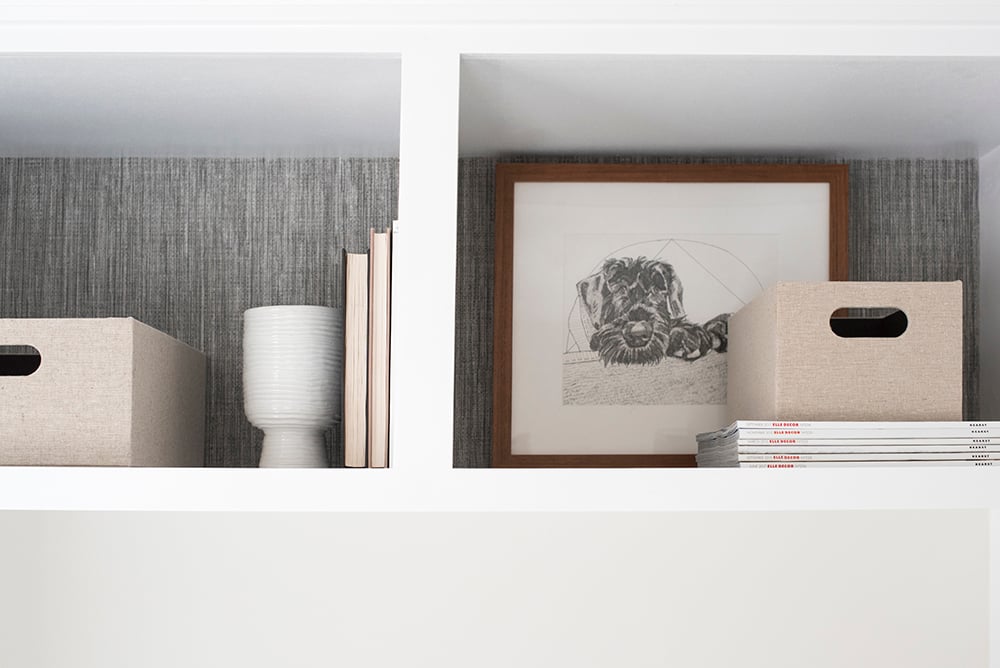
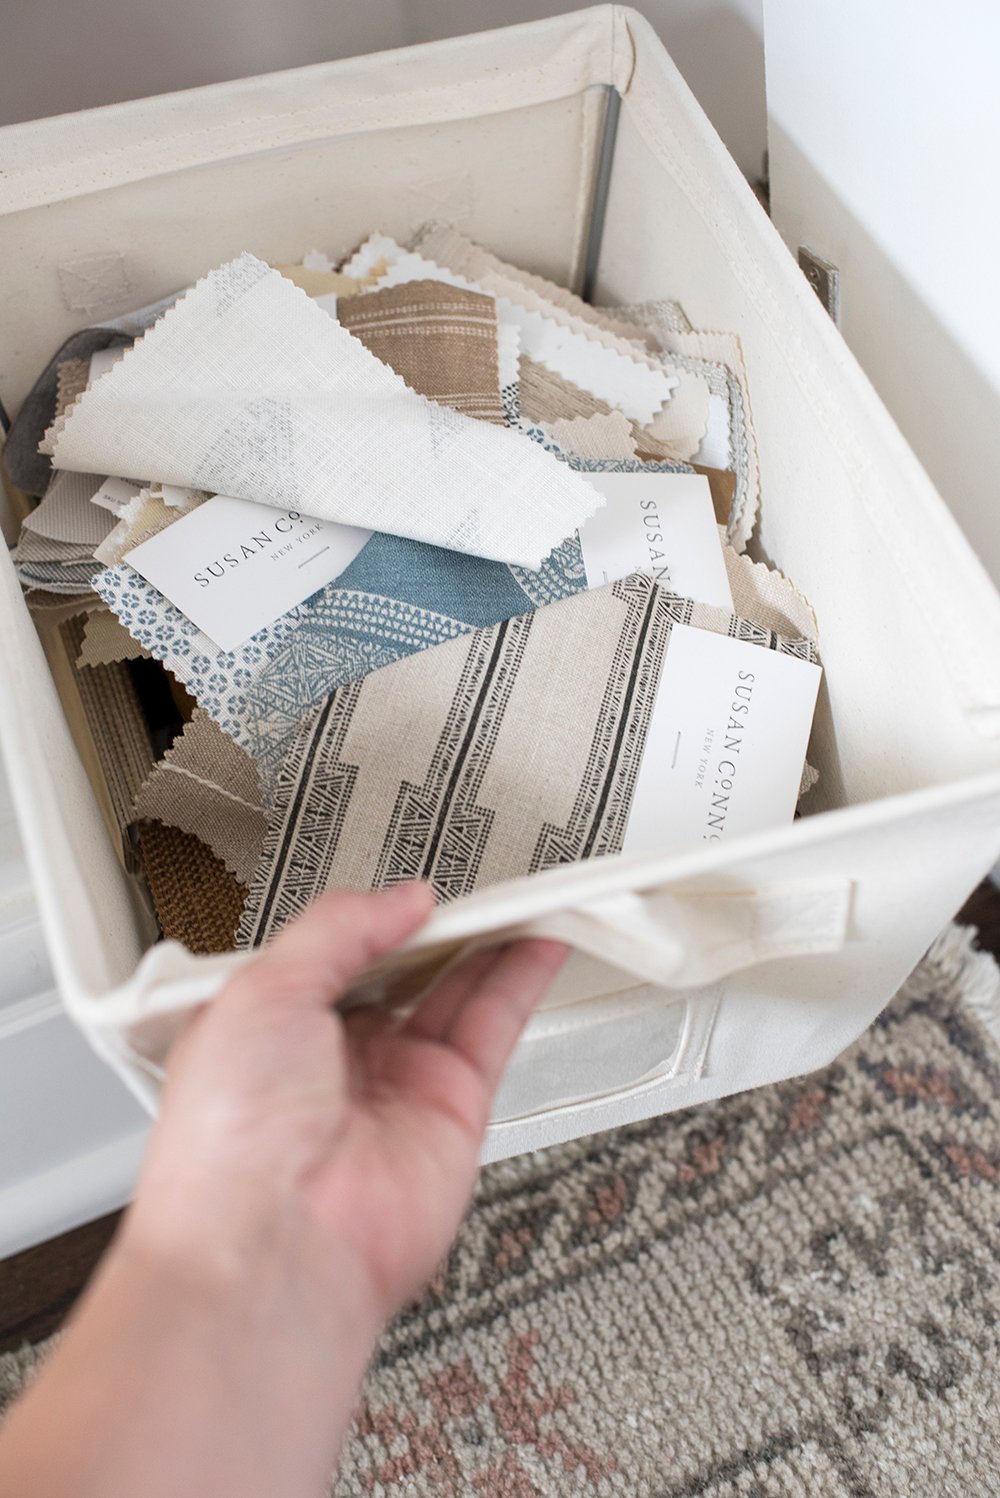 The styled linen bins on the open shelving also have a storage purpose. Every single one of them is full. Any guesses on what I keep inside?
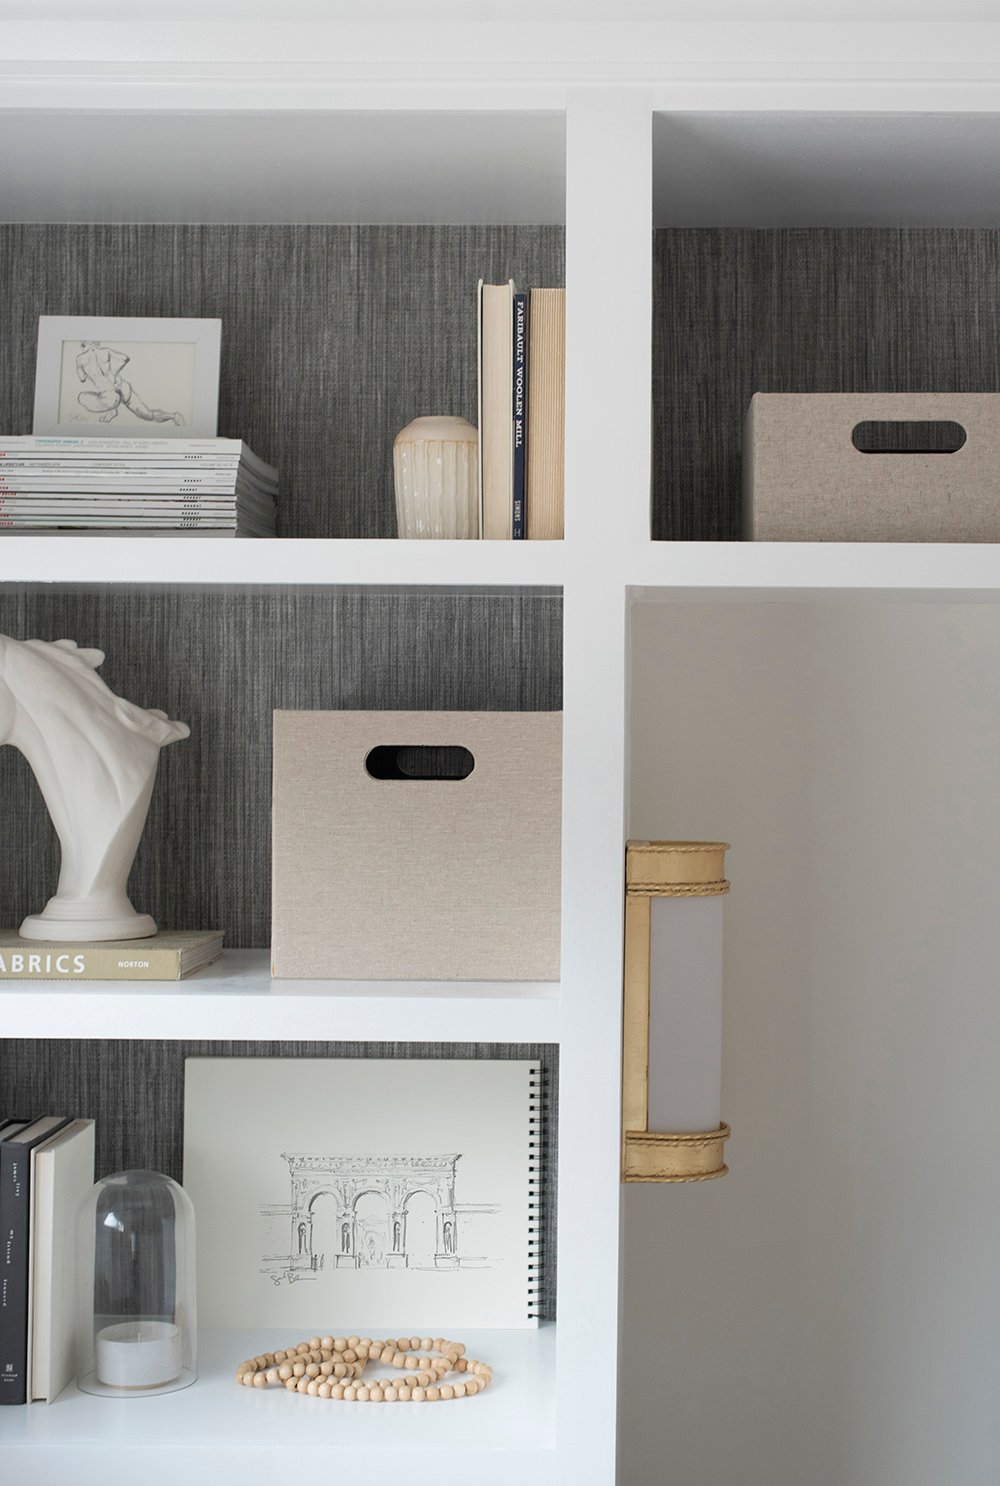
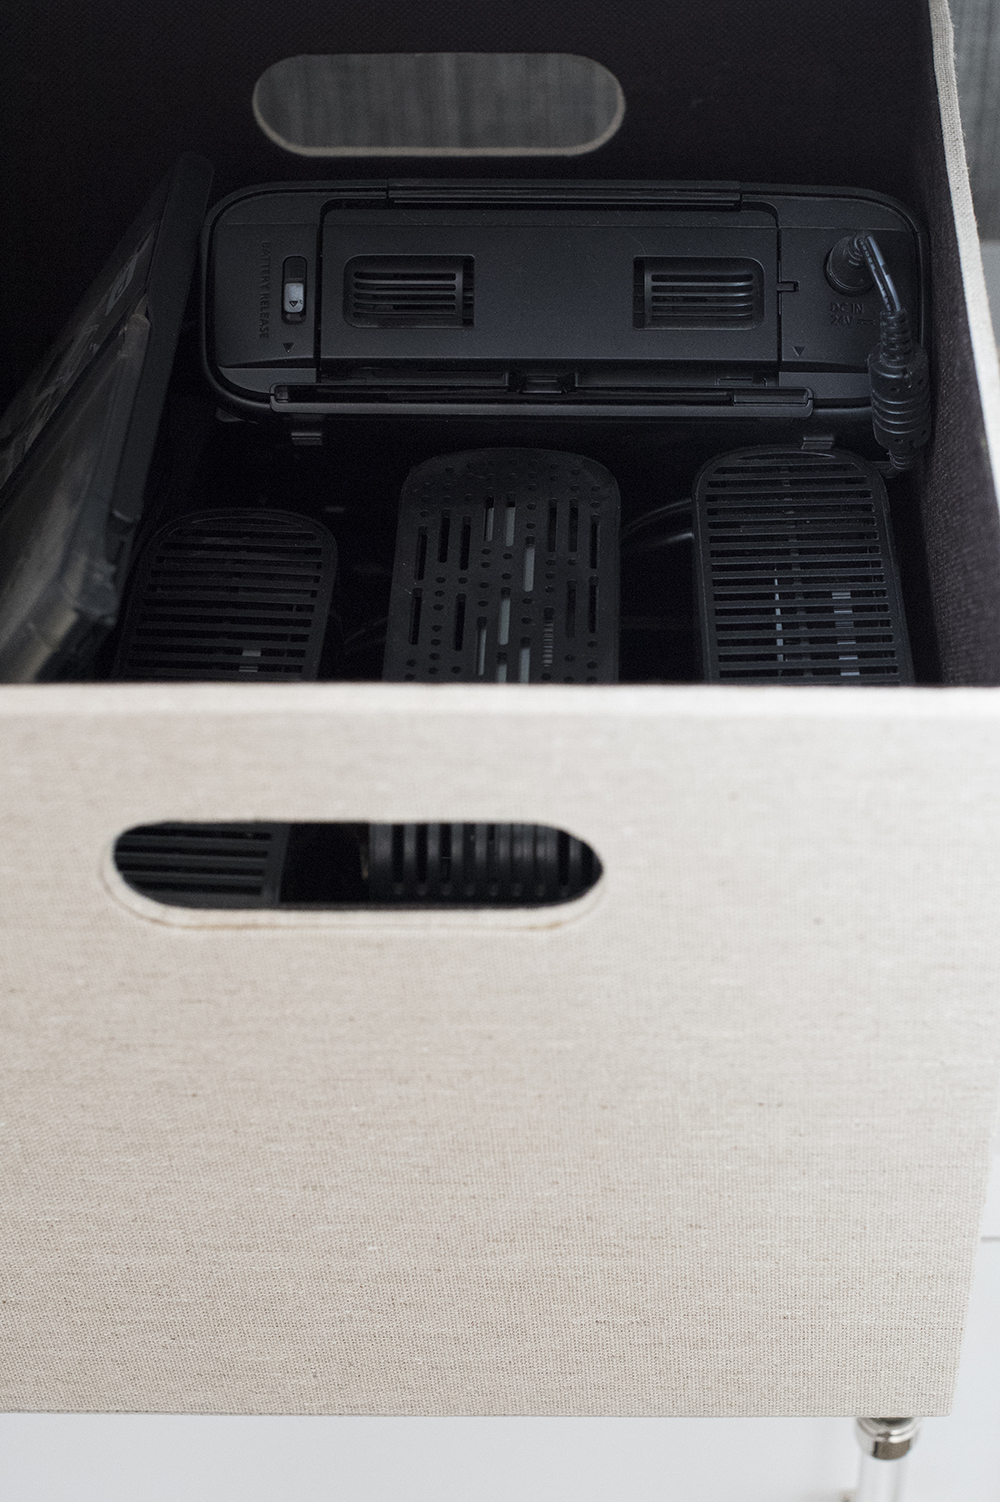 Basically anything and everything… one is filled with hard drives and portable printers, one is filled with additional art supplies, one is expense receipts (Emmett, my husband the accountant, wants to murder me because of that), one is mailing items- stamps, envelopes, address labels, etc. You get the point. They’re handy, but they also look nice styled on the built-in.
 I’m also a fan of using organization containers inside desk drawers! I’m the type of person who wants every single item to have a designated place.
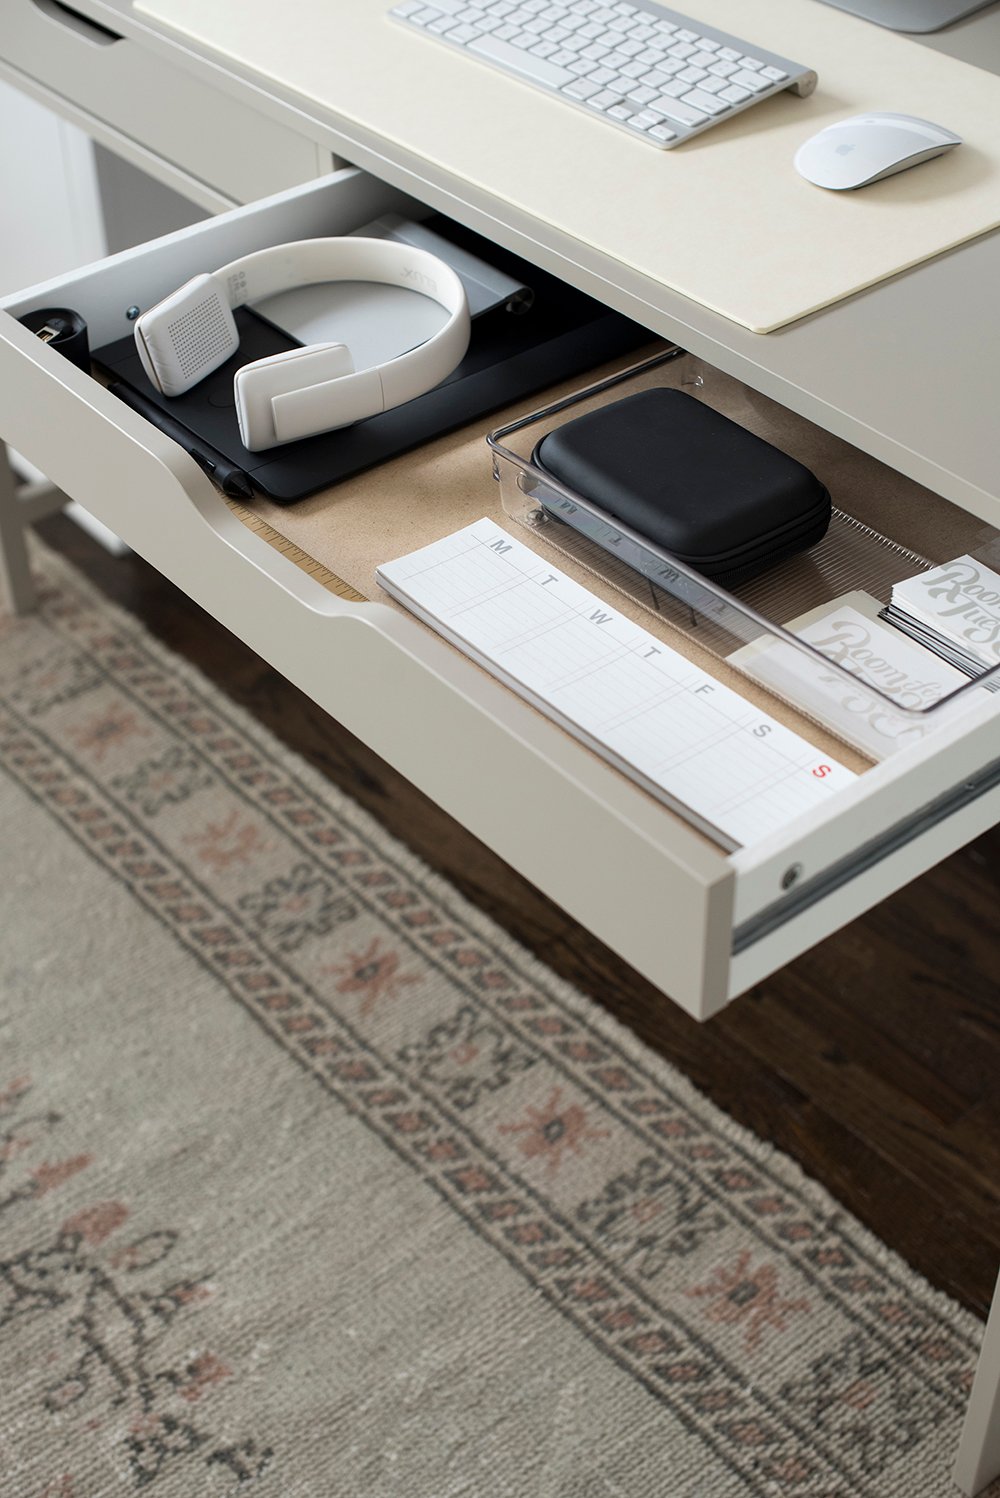
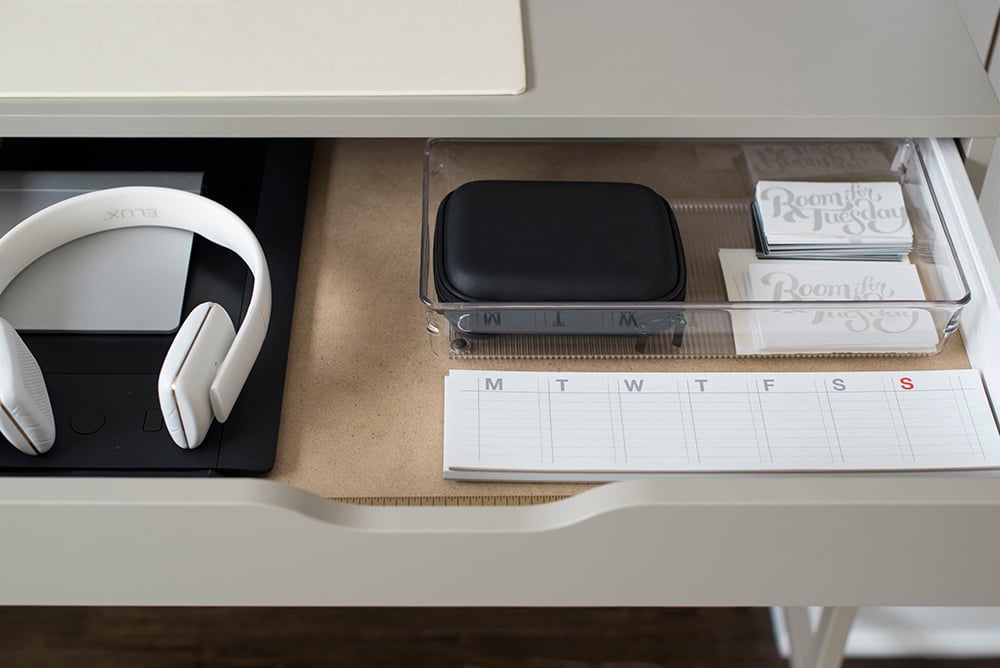 I like that the plastic organizers are clear, so I can still see behind them, all while corralling my items- like business cards, shipping stickers, pens, and pencils.
 There you have it- I know that was a lonnnng post, so thanks to those of you who scrolled all the way to the end. I wanted to squeeze in the organization AND the built-in DIY since they were both popular requests. As always, I’d love to hear your thoughts or questions in the comment section below! Stay tuned for the big office reveal. There is so much more to this room I haven’t shared yet- including a fun pet DIY.
Bins hide a multitude of sins! As always, the carpentry and styling look topnotch. Pretty genius that you designed it to fit a bed. Random peek-inside-your-desk question- are those one week calendar post-its or did you just chop up a calendar? I kind of need them! Can’t wait for the full reveal!!
They do! Thank you so much Peggi! The weekly stick notes came from this Etsy shop… but I’m not sure if they make that exact one anymore. xo
“This space is obviously functioning as my office (although a full-size bed can fit into the recessed niche)…” = genius resale-value design move. Bravo!
Thanks so much Karen! Yes- I think a small bed would also look great in the niche instead of the desk! xox
Oh Sarah, it’s absolutely perfect! You and your husband make a great team! Can’t wait for the big reveal!!
Thank you Brandi!! Your comment made my day :) xox
I love it, especially the grass cloth and light selection. Good planning for the full sized bed niche.
Thank you so much Amanda! xo
Wow Sarah, this is so perfect. I love all the fabulous space and you have it so well thought out and organized. Great job.
Thank you Marty! I definitely feel much more organized. I wish we would’ve tackled this room sooner! xo
I absolutely love these and am genuinely totally inspired to build my own… if I can only find a spot for them in my house! :) A super specific question for you (or Emmett): On step 9, the faceframe piece that goes underneath the center section is notched on its top corners, and the other pieces are reciprocally notched to fit it. Is there a particular reason for this, as opposed to just blunt-cutting all the edges? Does it make for a tighter fit or something? I always love learning tricks of the trade! Also, can I ask about how much the materials (MDF and poplar) would have run for this project? Thank you!
So happy to hear that Julie!! We bought 10 sheets of MDF and it cost around $320… I’m pretty sure we over estimated and had a couple leftover though. The poplar cost $132 for the framing pieces and end panels. And I let Emmett buy his Bosch table saw, but that will be worth it for us since we’ll use it a lot. That was the priciest item on our receipt.
Great question about the face frame joint! it just makes a better joint. It provides more glue-up surface. Either way would work though! Hope this helps. xox
Super helpful! Thanks, Sarah!
As for the cabinet doors, did you make them, buy stock ones from the hardware store or have them custom made? Wondering this question for your living room built-ins as well.
We made them! It’s really easy… we just cut two pieces of material to size. They’re just simple, flat panel, inset doors, so it’s just a plain rectangular piece of material with hinges screwed on.
BRILLIANT!
Thank you Anne! xox
These are SO beautiful and I adore the styling! I’ve thought of doing built ins in my new office as well, and leaving a space between that could fit a queen bed! I, like you, am always thinking of how my house can function best for me, but also for resale. ;) Can’t wait to see the full office reveal!
Thank you so much Jamie! You’re a smart one. It’s also about making good design choices that will also give you a return on investment :) Thanks for following along! xox
It’s gorgeous, Sarah and Emmett. Oh lucky are the people who buy this masterfully customized home. Cheers, Ardith
Thank you so much Ardith!! I hope someone will love and appreciate this place like we do. Hope you’re well! xoxo
Thank you Sarah for posting this! I will say I don’t think my husband is as happy as I am that this was posted haha! I have been wanting built ins in my future dining room (current offshoot of the living room that has zero purpose) I am so excited to get to work on this project!!!
Haha!! I can’t wait to hear about how your future dining room built-ins turn out :) xox
I am so happy I ran across this project by accident!! I love built-ins and have been looking for something similar to this for my office/craft room. I’ve seen many examples using store bought bookshelves, and had considered them. However, they still look cheap to me. Your project is so easy and it’s the face frame that makes it look so perfect. I do have one question… In your final picture you have light sconces above the desk, attached to the side of the built-ins, are these hardwired in? If so, where did you hide the wires? Thanks
Hey! You guys always do such great built ins! Question, can you buy MDF with the little shelf holes on the side premade or did you add those? Also, how did you hide those? Thanks!
Thank you Jessica! We drill the holes ourself for adjustable shelving. I’m honestly not sure if you can buy the MDF with the precut holes. I’m sorry! I’ll check with Emmett.. he might have the answer. To hide them, you can buy little plugs that fill the holes / blend seamlessly. Since ours are in the base cabinets and are covered by doors, I’m not super worried about those :)
What kind of paint did you use after you primered?
We used Sherwin-Williams Emerald Interior in Semi Gloss.
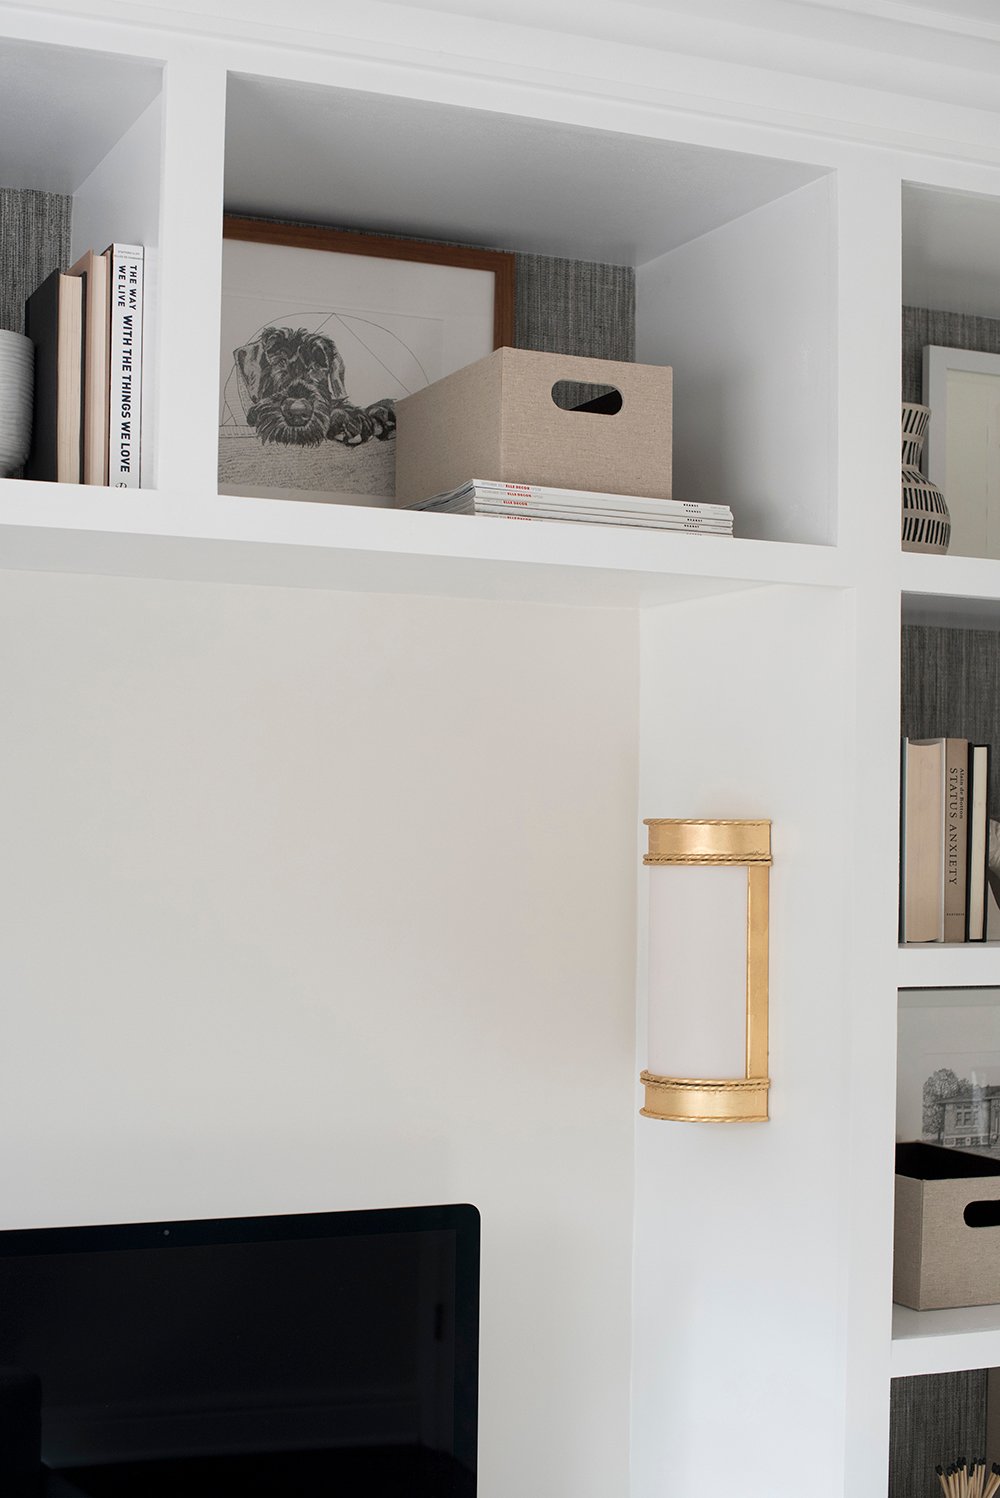
Where did you get the gold light sconces? Are they corded or battery operated?
Those are linked in this post (they’re hardwired): https://roomfortuesday.com/office-reveal-3-ways-to-get-the-look/
This is exactly what my husband and I are looking to do! We love it so much! How did you mount the center piece to the wall?
Thank you Elyssa! Just like the two column bookcases, the center section also gets screwed to the wall (into studs). You can see the screws in the process images!
Hello, beautiful office!! two questions……is the desk the IKEA Hemnes? Did you paint it? If so, what type of paint and what is the color?
Well done! Love!
Thank you so much, Becky! It’s the Alex desk from IKEA, but I don’t think they make it in that particular color anymore.