Custom Built-In Update
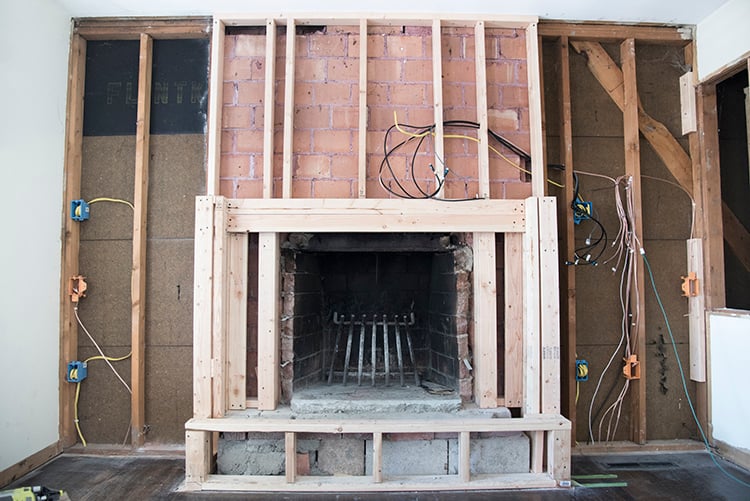
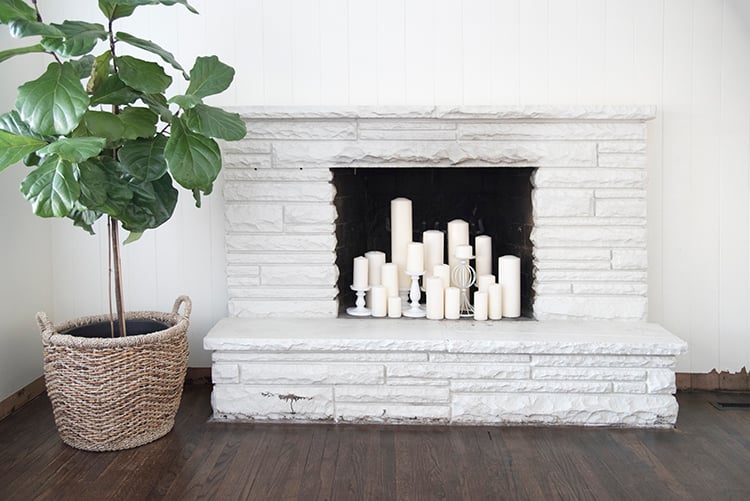 Here’s a little reno update for you guys. The above image is the BEFORE shot. Getting rid of the outdated 60’s fireplace was a must. You might remember it from the flooring post? Luckily it looks a lot different now than it did then. Emmett has been working on the custom built-in slowly, but surely. We’re waiting on the black marble to arrive, then he can finish the fireplace, mantle, and I can finally paint (hallelujah!). Click through to see our progress on this specific project so far…
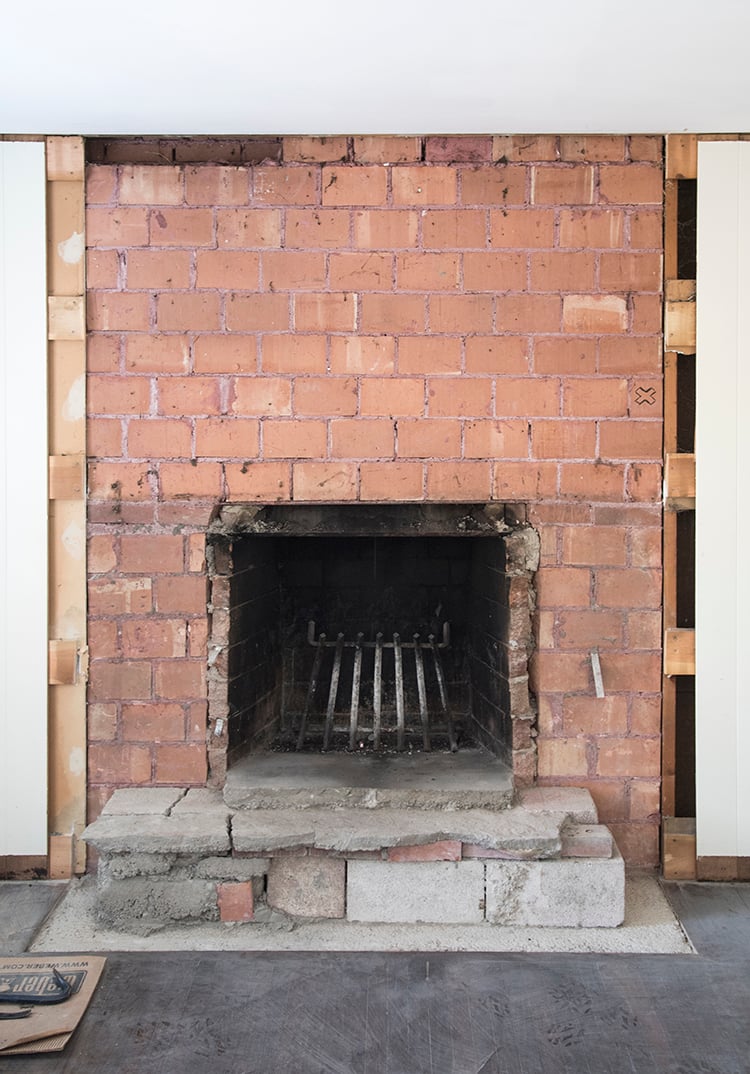
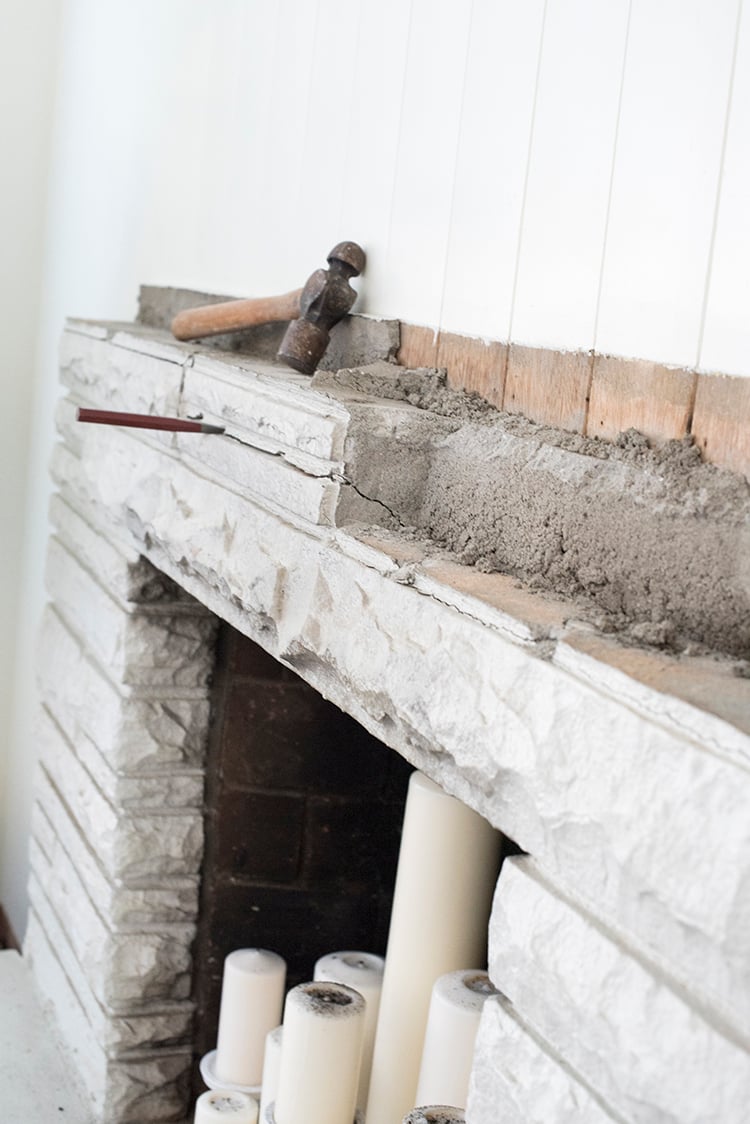 The first step was obviously demo. The limestone was no easy feat because it was original to the home and very heavy. We (meaning Emmett) took it all the way down to the studs and exposed fireplace brick.
 After demo had been completed, I was able to tackle the fun part of the process… dreaming up what would replace the original fireplace.
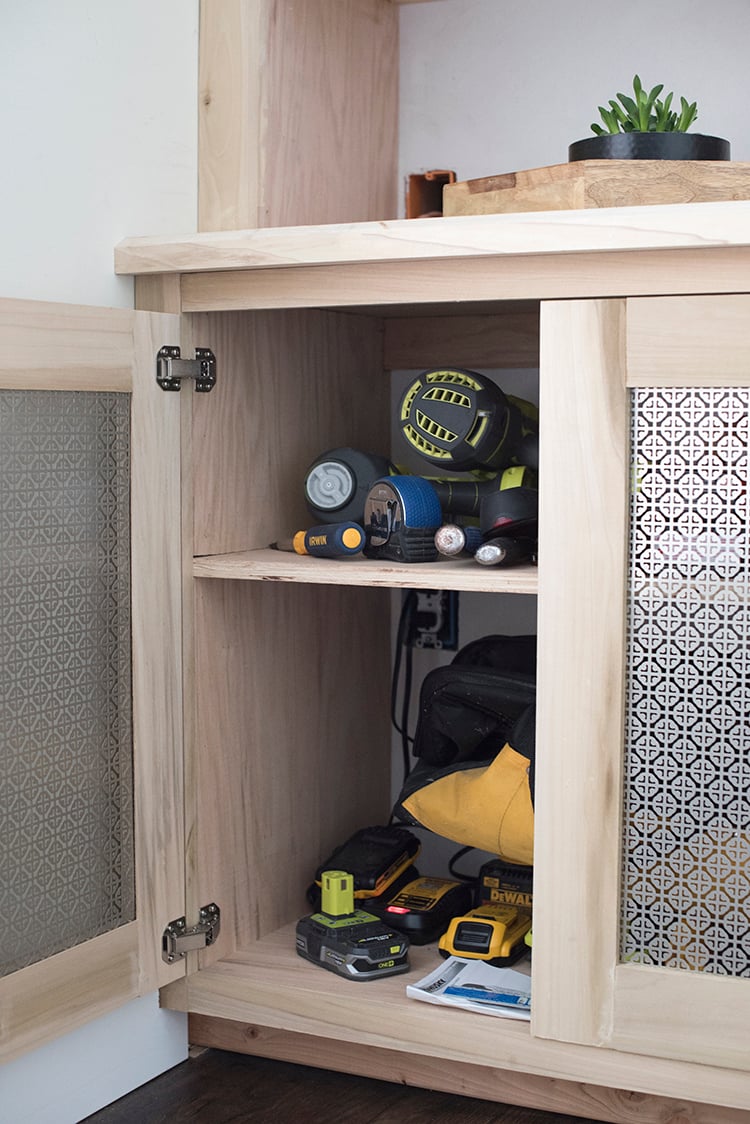
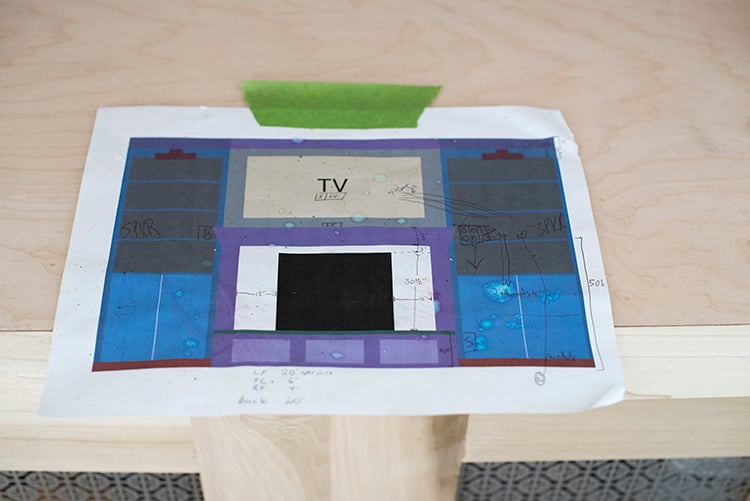
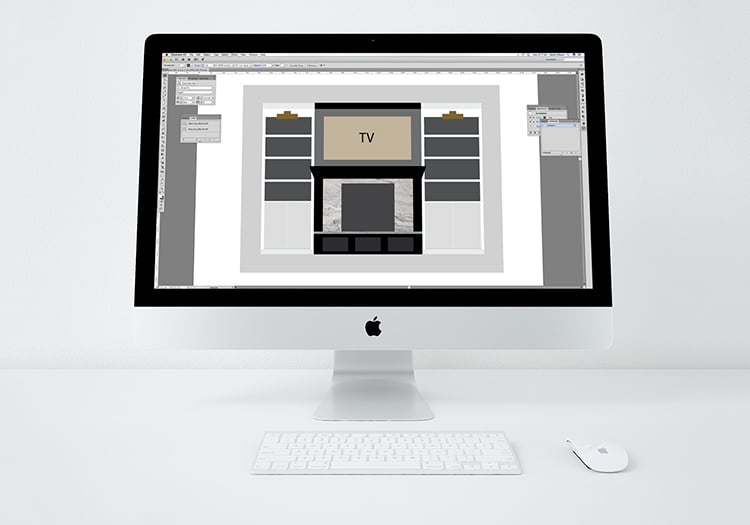 I created a digital rendering for Emmett to use as a guideline. We did a lot of meticulous measuring to make sure the diagram was to scale, and also to make sure everything was super functional. I knew I wanted tall and deep shelves to fit irregular sized books and objects. One of his “musts” was surround sound. You can read about our compromise here. To keep the entertainment, media, and speakers hidden, together we designed closed cabinetry. To allow the media to breathe properly and prevent overheating, we settled on perforated inset cabinet panels. You’ll see all of this later, but these were the type of solutions we fleshed out in the rendering.
Next, Emmet began to work from my diagram to begin framing out the project.
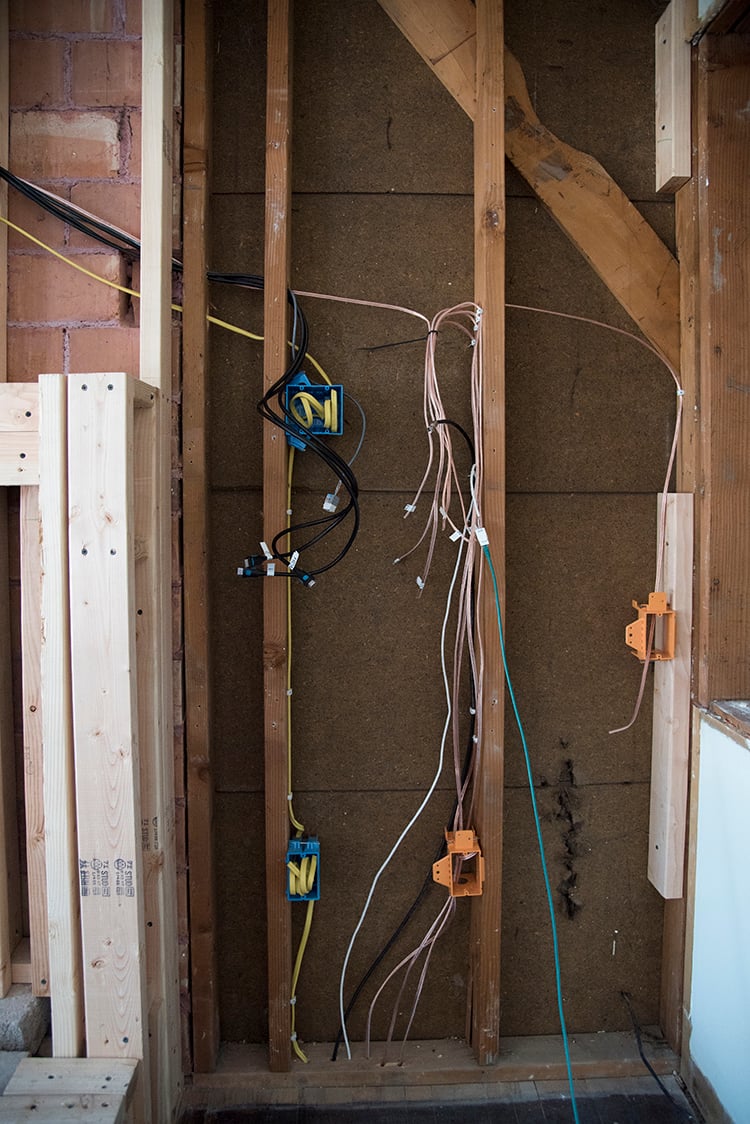
 This was also the point in which he rewired and updated electrical. We love having outlets inside cabinetry, so that things can charge without being seen. We also added a handful of electrical boxes into the shelves, for our sonos speakers and pet cam. This step always looks scary and crazy because the studs are exposed and wires are running in every direction. I typically try to avoid the space when it’s like this, simply because it stresses me out.
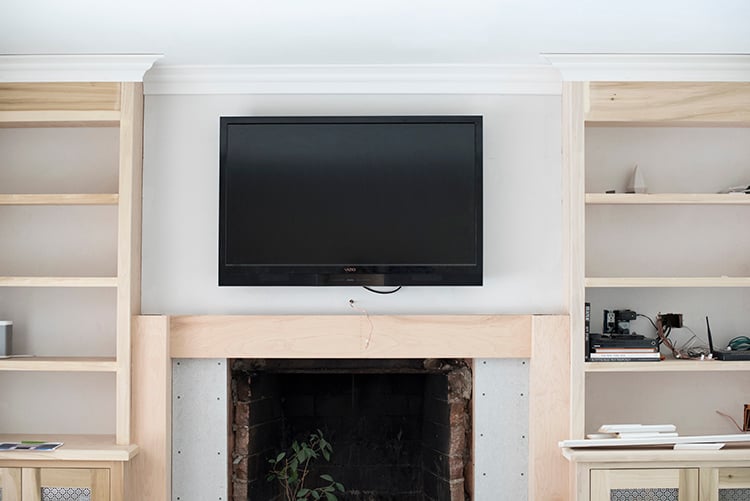
 After that was taken care of, I sort of slacked in the photography department. Emmett continued to build from the rendering, but I failed to take photos. You can probably imagine how it got to this point though… a little drywall makes a huge difference!
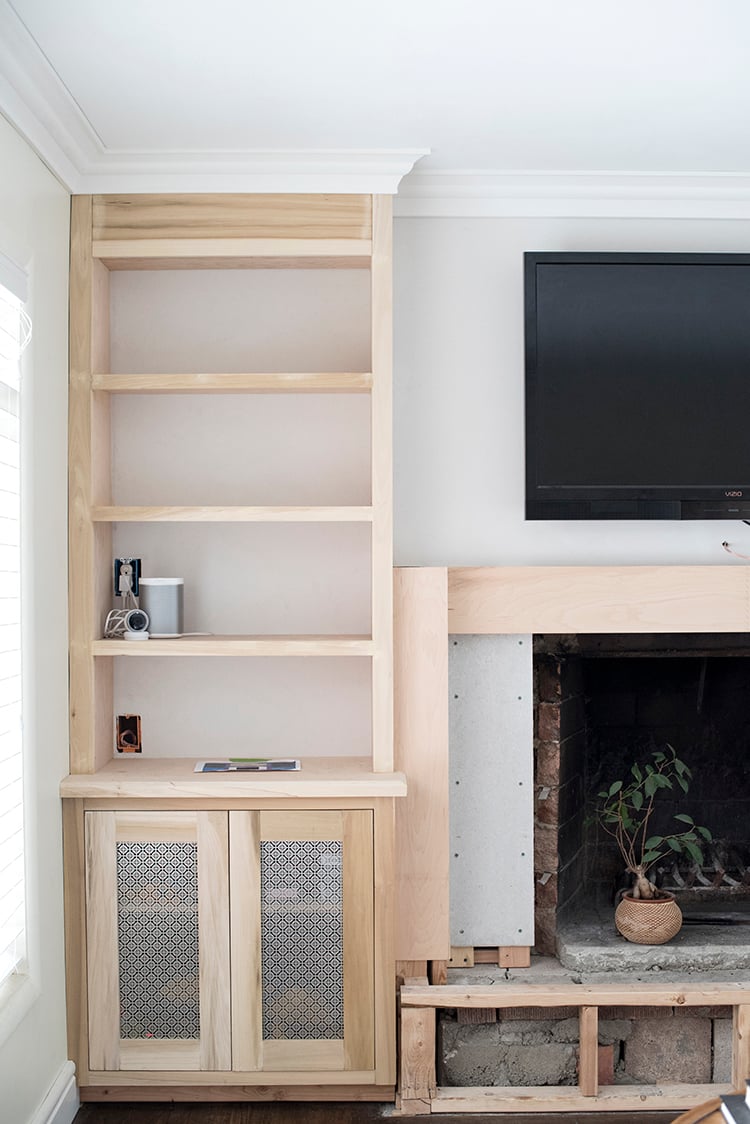 Obviously it’s still in progress, but this is what it looks like today. We’re waiting on our marble to arrive, which will surround the fireplace. He’ll also add a nice mantle and finish trimming everything out. After that, it will be my job to sand, prime, and paint the built-in. The mesh door panels will also need sprayed.
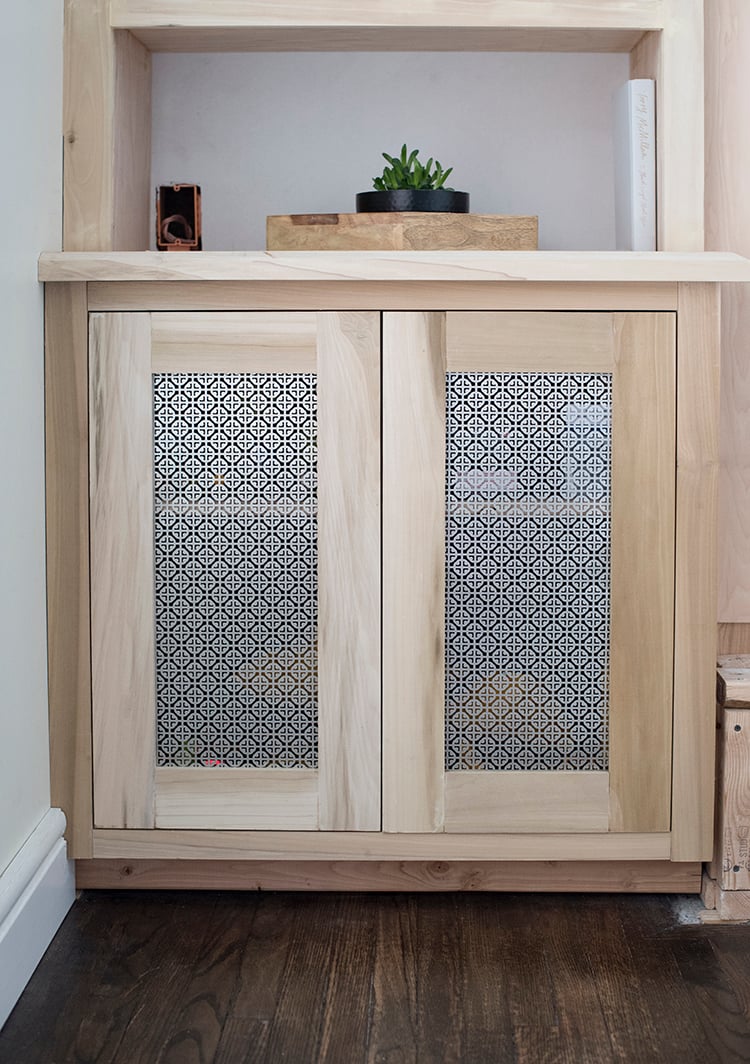 We’re currently using the cabinet to store tools, since this room is under construction. Note the outlet inside the cabinet… super functional!
 Here’s a little glance at a color coded printout of my rendering. Obviously he’s been working from this from day one, so it’s a little dirty looking, but hey- that’s the story of renovating.
 I’m eager to see this completely finished. Not only is it going to provide a TON of storage and functionality for our living room, but it’s going to add an updated stylistic element that is FAR better than the original limestone fireplace.
 What do you guys think? Emmett and I both feel as though our renovation is creeping along (probably because we’re living amongst the mess), but after looking at process photos, it makes us feel a little better knowing where we started.
It’s looking amazing Sarah! You guys have awesome skills 🔨 I love your blog – will be using it as a reference to those awesome build-ins I’m trying to convince my husband to ad on to your living room. Have you chosen a color for the room yet? I’m dying to know , I saw you are using ShW so I’m even more curious what you pick 😀
Thanks so much, Margo! I’m definitely lucky he knows how to do these crazy things. Good luck convincing your husband! I have selected paint colors. I’m sharing my paint color predictions for 2017 later this week… check back for that! xo
Looking good Sarah and Emmett! Emmett you are doing fantastic work! Are you staining or painting the wood?
Thank you, Ann!! I will be painting the wood. I’m thinking two different colors. xo
Wow! It looks awesome! You must be so excited about the progress. I’m excited to see what it will be when it’s all done! I love that even in the midst of the reno, you beautify the space with plants. Love that plant/planter on the hearth.
Thank you! I feel like things are progressing so slowly this time around. It’s funny… that plant has been so unhappy here in Utah, and I stuck it in the fireplace to get it out of the way, and now it’s thriving. I guess that’s the lucky spot. Ha! xo
Loving your blog! The progress looks awesome.
Thank you so much! I can’t wait to see this painted and finished. xo
Looks amazing! The mesh screens are so good.
Thanks, lady! Excited to paint them. xo
Hi – love this, looks great! Where did you get the mesh screens / mesh panels? Looking for something similar for our media room. Thanks!
Thank you, Carrie! You can find the mesh at any big box retailer, like Lowes or Home Depot. They have all different styles. xo
So pretty! Where did you find those mesh screens they’re gorgeous!?
Thank you, Caroline! You can find the mesh at any big box retailer, like Lowes or Home Depot. xo
It’s impressive, Sarah and Emmett, and sure to be gorgeous when it’s done. Two great minds working together. Cheers, Ardith
Thank you very much, Ardith! I hope your year is off to a great start! xo
I love the look of the built-ins so far! Can’t wait to see what they look like when finished.
I have a bit of a random question for you. In the first picture, you have your fiddle leaf fig tree in a woven basket. Is that a basket specifically made as a planter? Or do you just use it as such? I ask because I just got a fiddle leaf fig myself and love the look of the basket but for practical watering reasons, can’t figure out how it would work with a regular basket. Thanks for any advice you can offer!
Thank you, Kelly! The basket is just a basket. I just bought a cheap (ugly planter) from Lowes and sat it inside the basket. You can read all about it here: http://roomfortuesday.com/how-to-repot-a-fiddle-leaf-fig-tree/
Holy smokes, lady! Amazing job!!!
Holy smokes, lady! Looks amazing!
Thanks so much, Kacey!! xo
Love love love this.
Thank you! It’s still in progress because the backyard is taking up all of our time. Ha! xo
These are gorgeous! What wood option did you go with for your chunky shelves? I couldn’t tell if it was multiple layers of plywood with a face frame or just one solid thick piece of wood. Thanks!
Thank you, Sarah! The interior is made out of 11-ply birch plywood and the face frame is built-out of solid poplar. Hope this helps! xo
Have you finished it yet? I’m dying to see the final pictures!
Hi Sarah, I’m curious about the roman shades in your large picture window and where you sourced them from. I didn’t see them included in the shop your house post. We just bought a very old dated house and looking to try and achieve something similar in our large picture window.
Hi Val! Those came from Blindsgalore :) Would highly recommend! They’re all customized to fit your window exactly.
Hi Sarah, what material did you use for the upper shelves?
Thanks!
Hello, is this finished if so I would love to see the finished product!