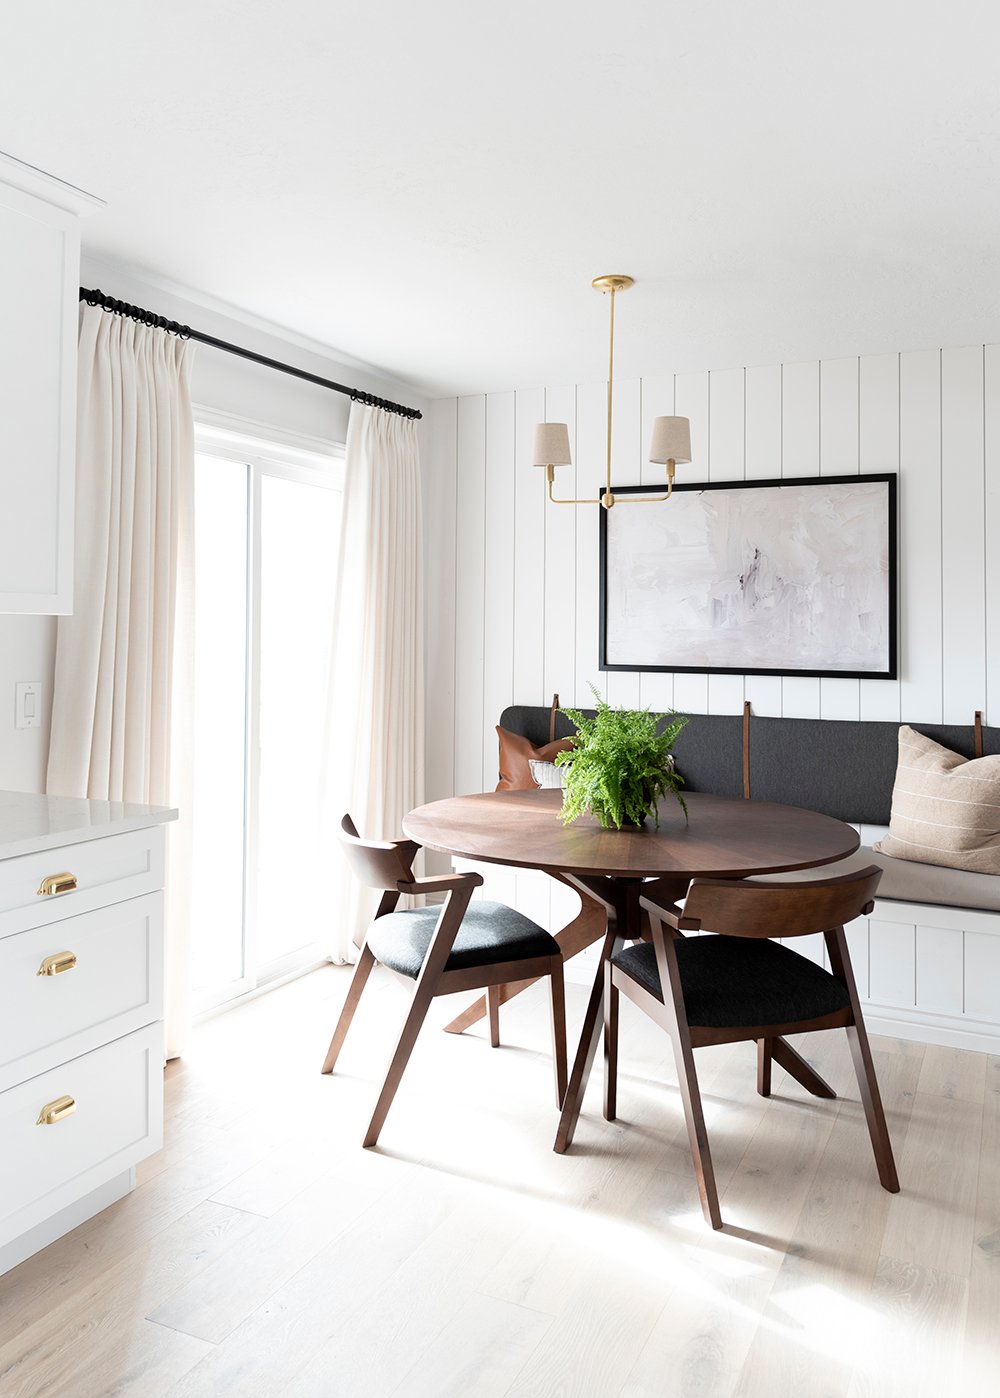
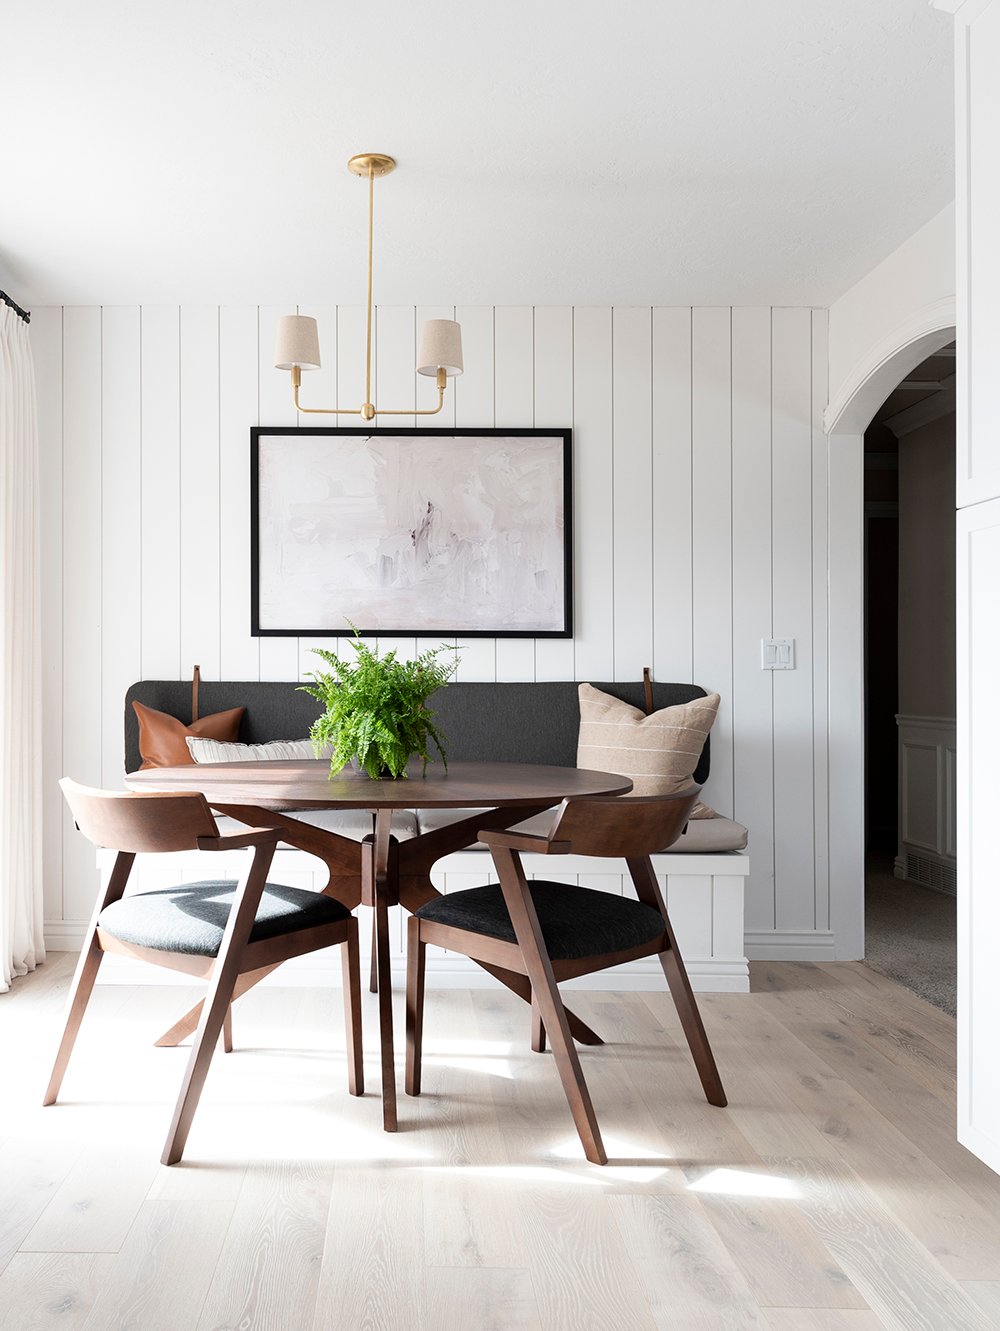
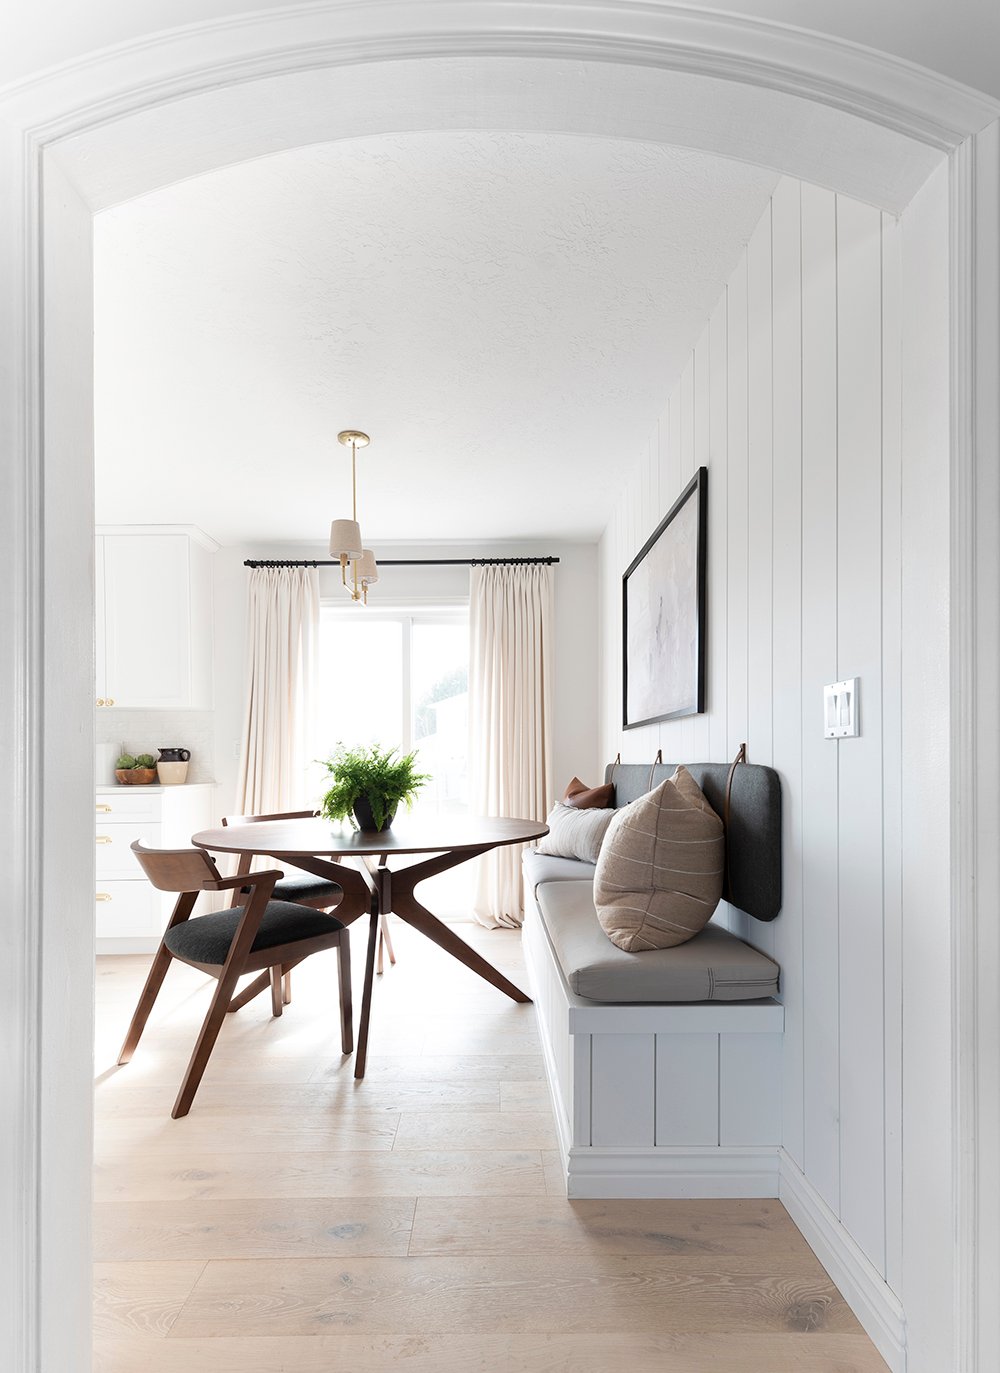
Banquette (or Headboard) DIY Back Cushion
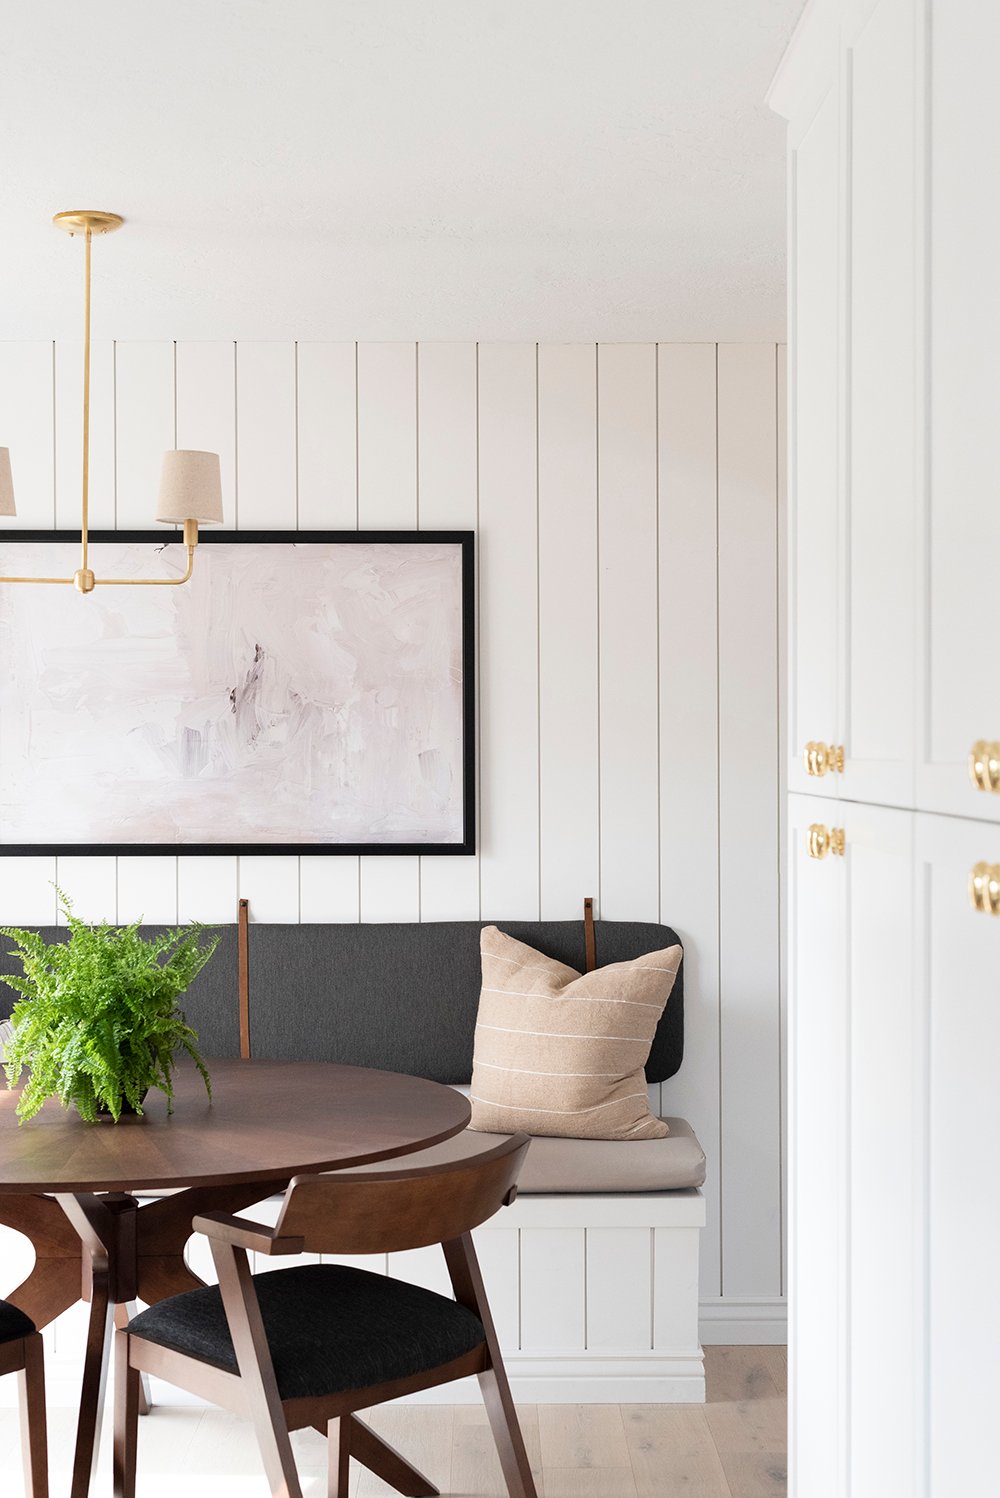 How was your weekend? I wanted one more day. Haha! We spent Saturday and Sunday working, but it was nice to cross a lot off of our list. I’m not going to lie- I definitely forgot to publish this post last week. I promised to share it and totally spaced! Sorry, friends. Better late than never, I suppose? Today I’m sharing the basics of how I upholstered the banquette back cushion for the surprise kitchen and dining room makeover. This is perfect if you have a bench seat, banquette, breakfast nook… and it would also make a great budget-friendly, modern headboard! Click through for the tutorial and sources…
 As I previously mentioned, we were in a time crunch for this project, and I didn’t plan to share a tutorial or take photos, but since so many of requested it- I put one together using what I had. I’ve shared multiple upholstery tutorials over the years and was able to pull images from some of those, so you could see each step. This project was really easy and is probably self explanatory! Here is what you’ll need…
SUPPLIES + TOOLS:
- wood or MDF, cut to size for your structure
- batting, cut to size
- staple gun & air compressor
- staples
- upholstery weight fabric (mine came from a local shop, but I used canvas cotton duck cloth)
- scissors
- dust cover cloth
- super 77 spray adhesive
- screw covers
- clamps
- leather
- seat cushion
- laser level
- power drill
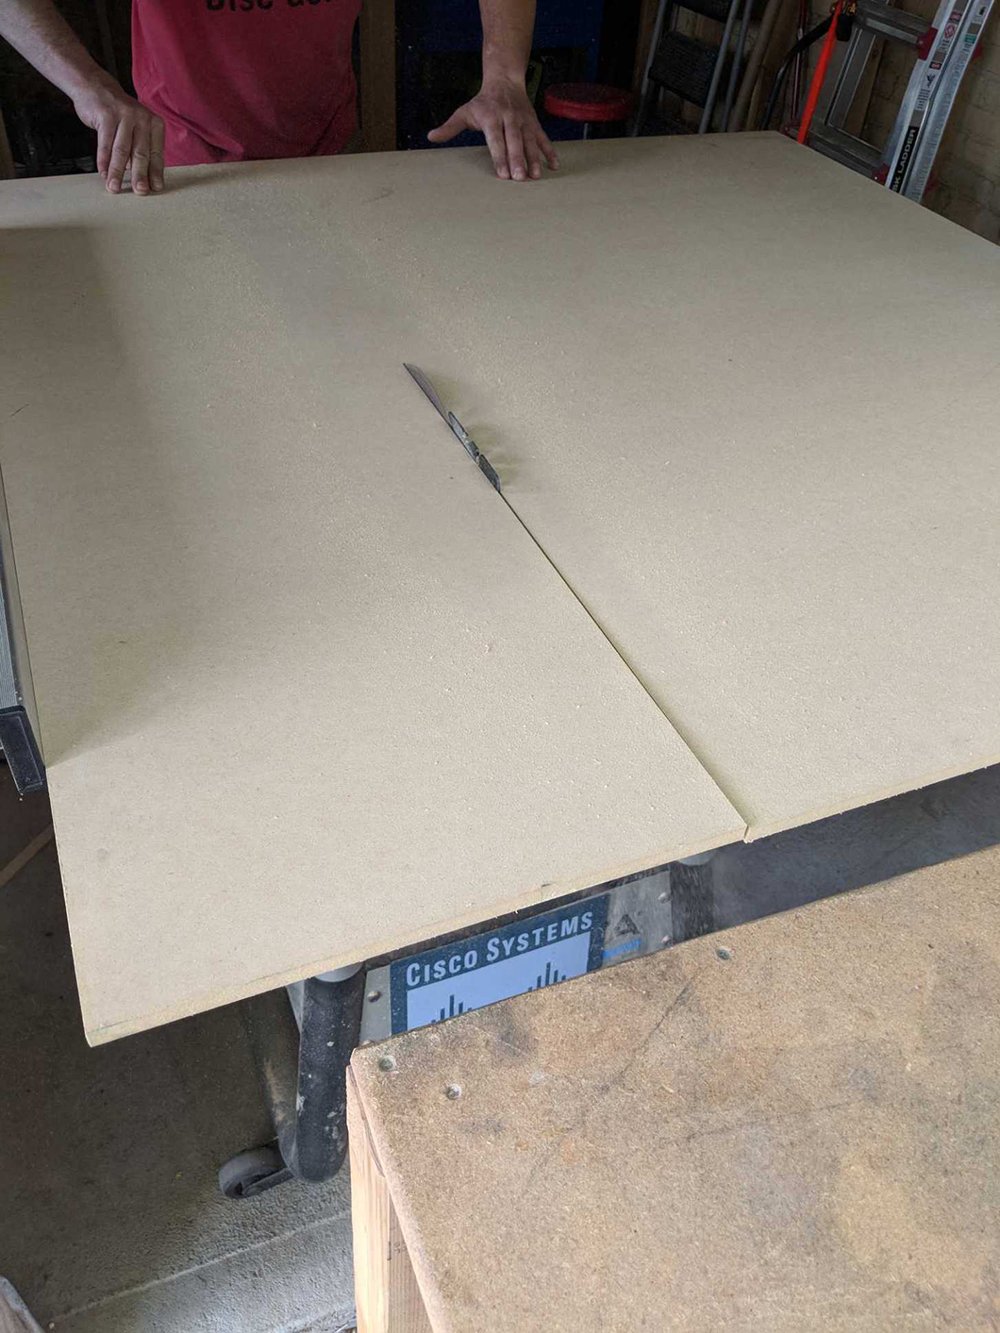
 Step 1 // Determine your backboard size & shape, then cut it. Once you have your measurements and vision, you’ll need to cut your material to size. You can do this at any big box store if you’re buying wood or MDF- they’ll even cut it for you. Once we got our material home, I asked Emmett to cut radius corners for me, for a more stylized look. You can also use a sander to add a subtle radius.
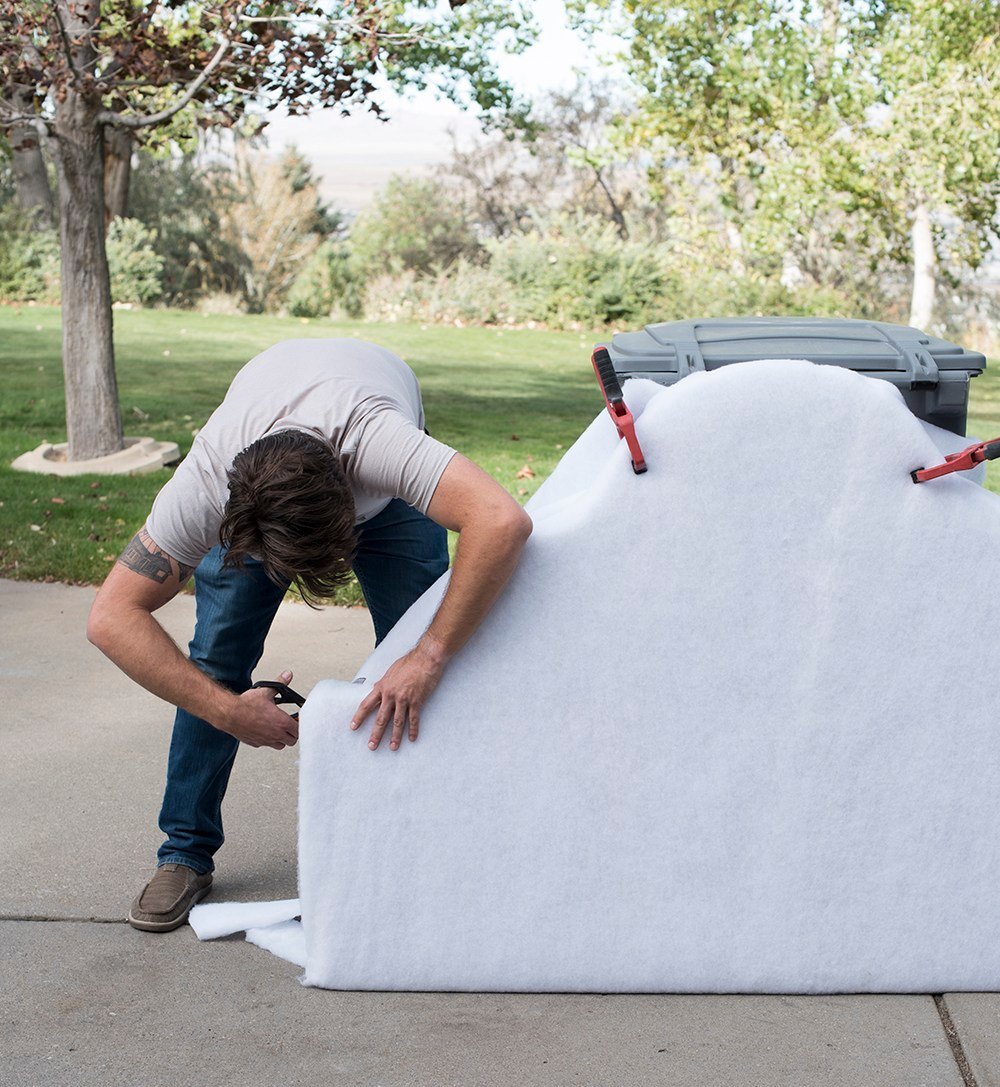
 Step 2 // Adhere the batting to the board. I used Super 77 to spray the board before pressing on the batting. This will help hold the batting in place and keep it from slipping or sagging over time. This step is critical in keeping your fabric wrinkle free! If your piece is larger, use clamps to help with this process, while smoothing it out. They’ll make your life easier! Here’s an example image from our DIY upholstered headboard…
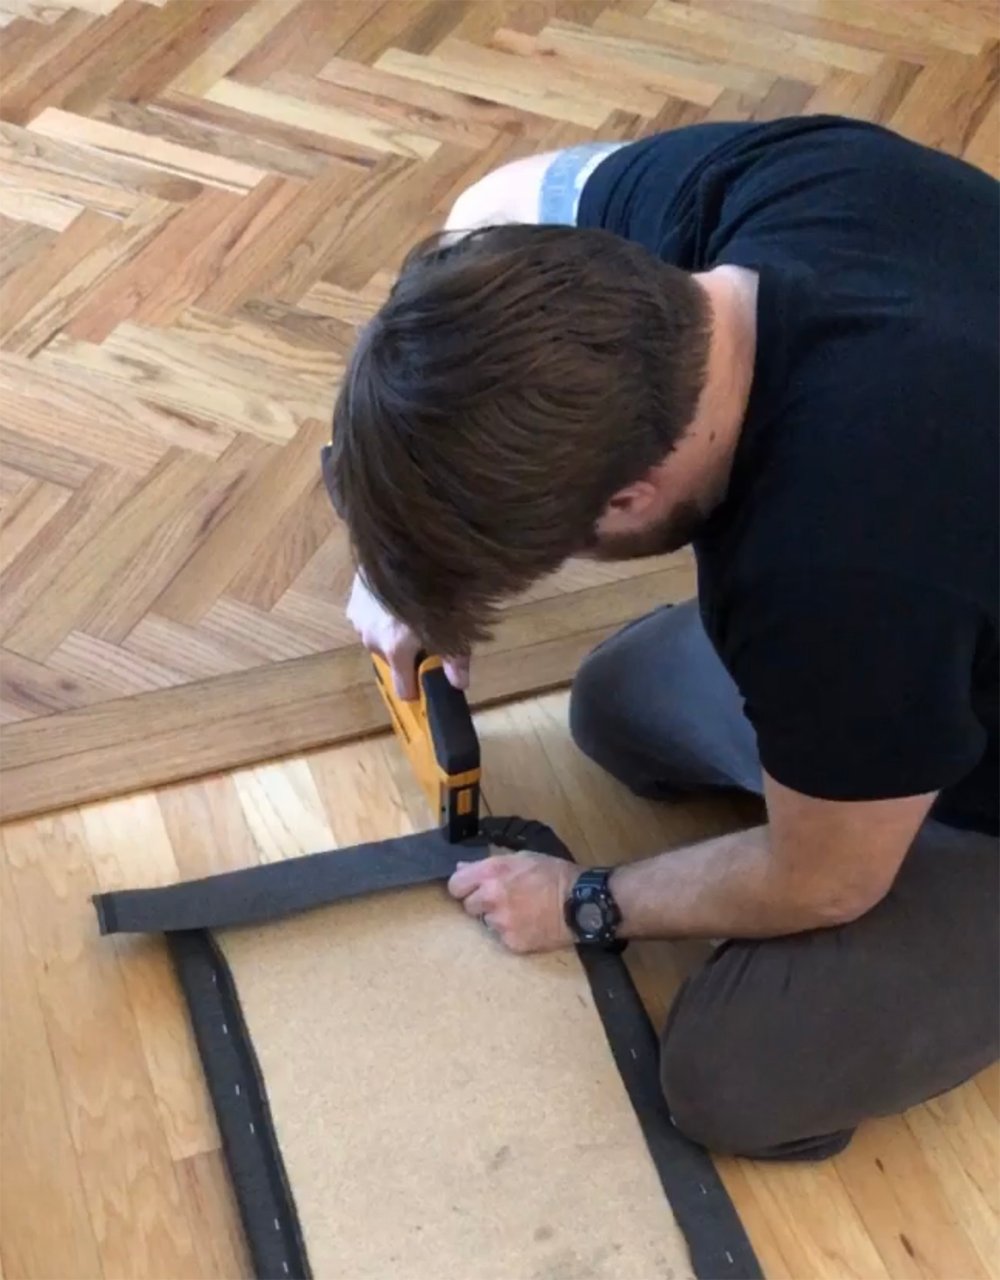
 Step 3 // Staple the fabric to the board. Once your board is covered in batting, cut your fabric to size (leaving 3-4″ around the perimeter), and staple it around the board. Cut off any excess fabric once it’s finished.
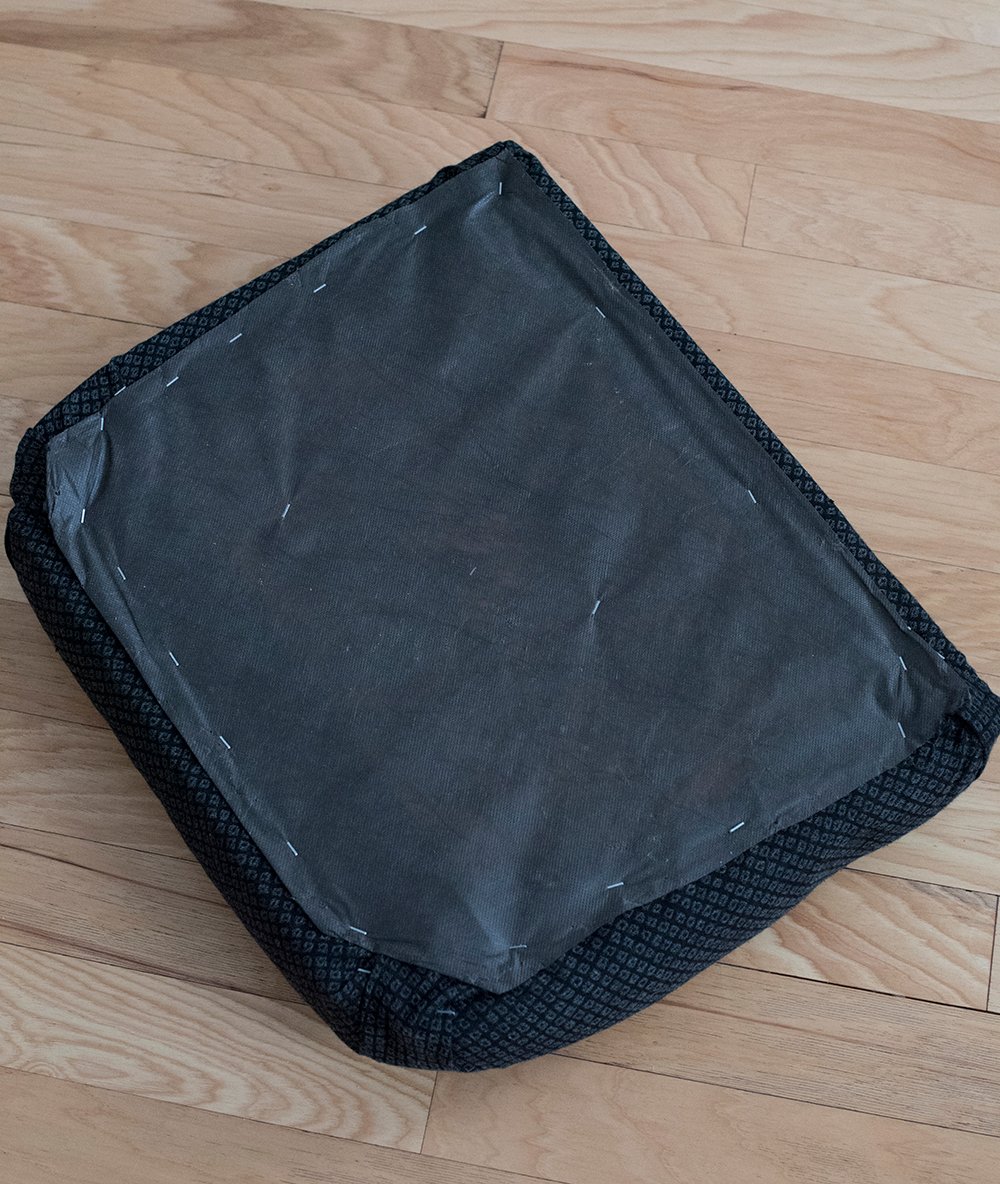
 Step 4 // Attach the dust cover. This step is optional, but if you’d like the backside to look clean & finished, you can attach a dust cover. Cut it to size and staple it to the backside of the board, concealing any uneven lines or excess fabric. Here is an example of the dust cloth backing from my previous post, how to upholster the seat of a chair.
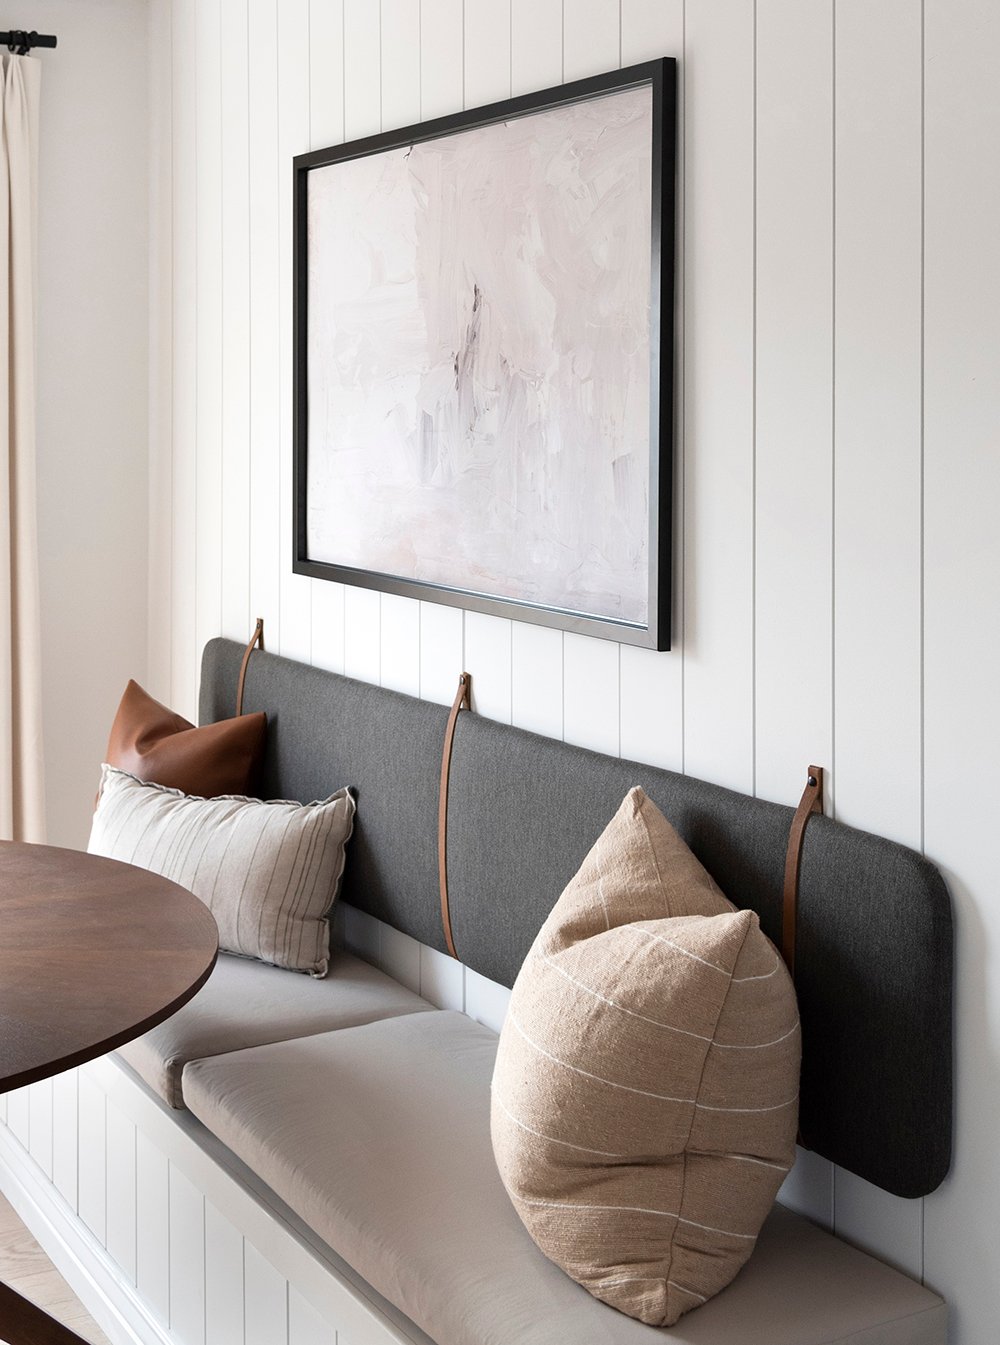
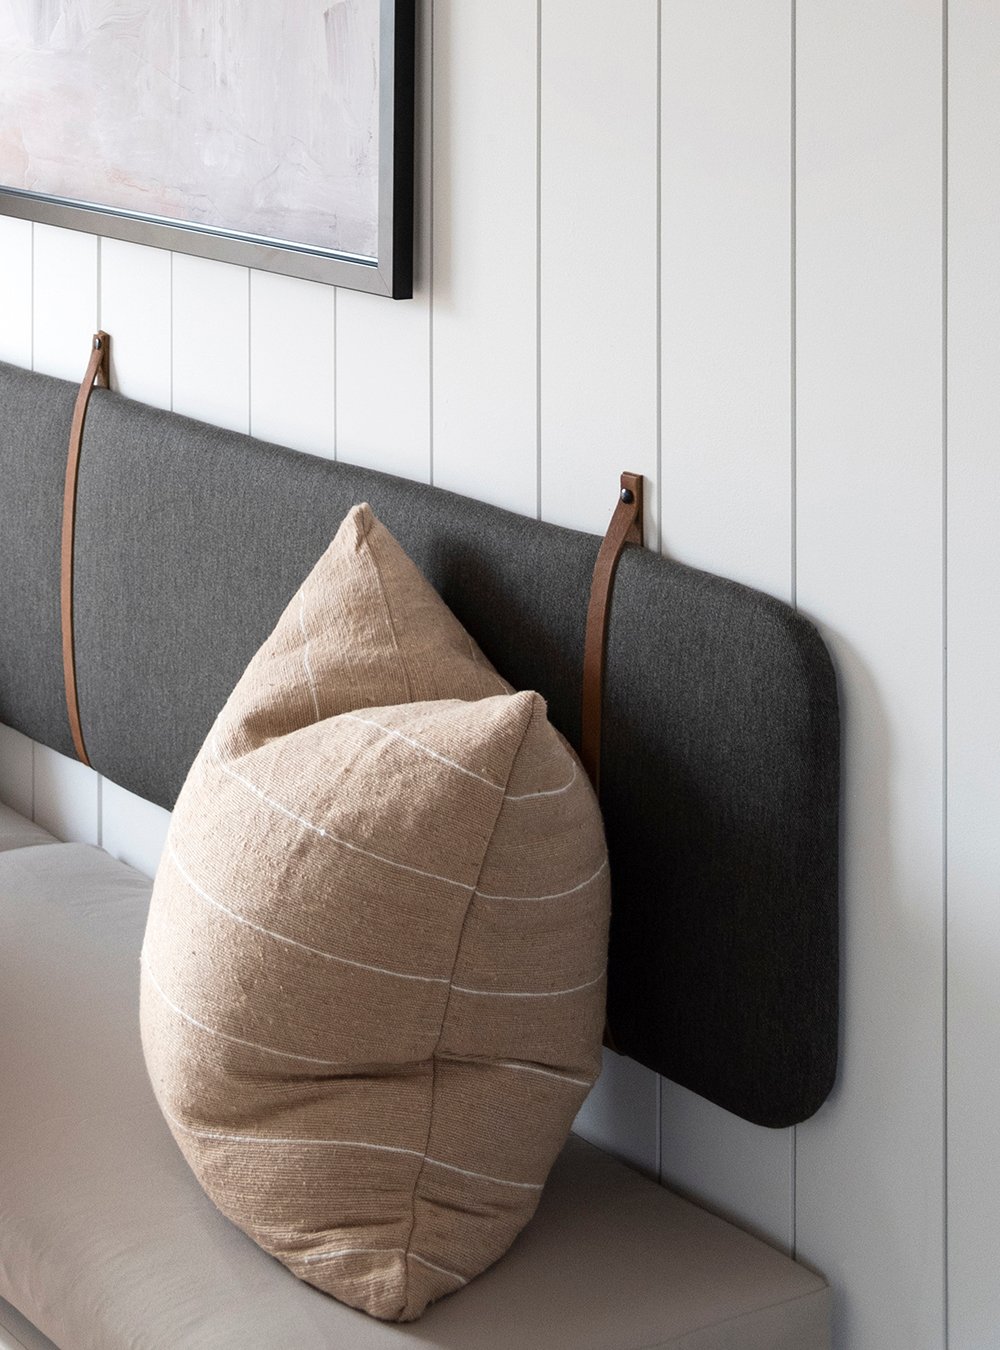
 Step 5 // Cut your leather to size. You know I like odd numbers in design, so I opted for three leather straps. Crystal initially envisioned two, but I thought three looked best AND since the straps are actually functioning and are holding the board up, a third strap offers support in the center. Depending on your leather weight and size, you could do more or less. It’s just personal preference! We held up the board, looped the leather straps around it, determined exactly where we wanted the straps to hang, then cut them to size.
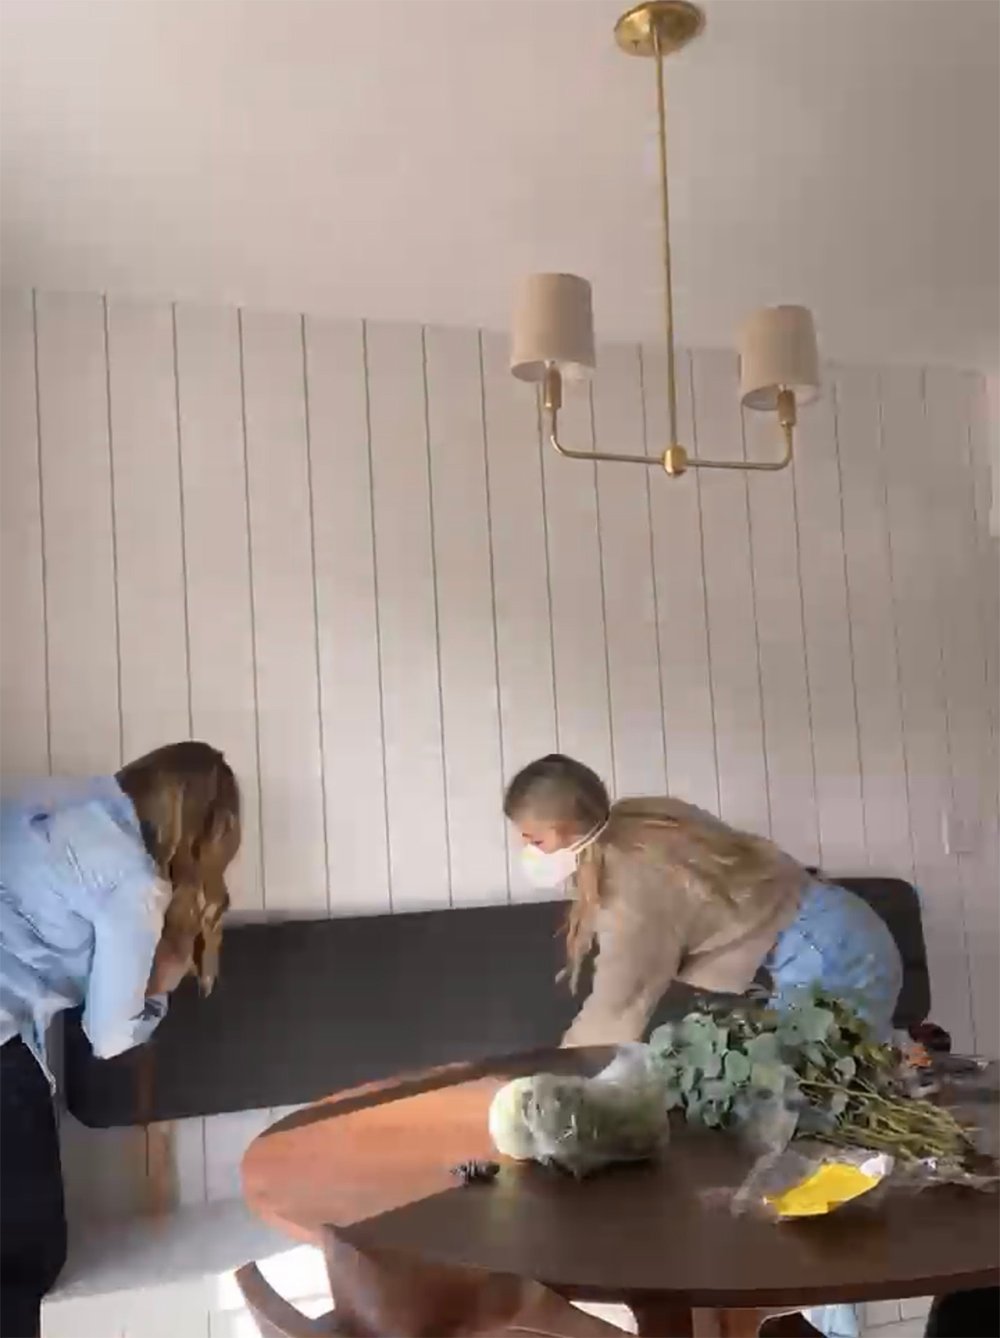
 Step 6 // Install the board. Drill three (or whatever number of straps you choose) pilot holes into your wall. Using the drill, push the screws through the leather, creating a hole. Now it’s time for the install! Position the looped leather around the board, push the screw through the leather, and drill it into your pilot holes. Repeat until the board is hanging. Here is a VERY blurry screen grab (sorry) from a time-lapse Crystal took of us installing the board… it’s really a two person job.
 Step 7 // Install the screw covers. The silver screws don’t look very designerly drilled into the leather, but they’re holding up the backboard. To make them look more stylized, or like decorative buttons or grommets- we snapped black screw covers over top of them to complete the look. Check out the close up below…
 That’s it! It’s really an easy DIY that looks great, but is also comfortable. Crystal and I both tested it out and it’s definitely nicer than leaning directly against the wall.
 For the seat cushions, I sourced those from Amazon (they come in a variety of colors and sizes), then Kristen built the banquette seat to fit. That was easier and less expensive than taking the custom route, since Kristen had to build the seat anyway. In our previous home, I ordered custom seat cushions to fit our banquette / breakfast nook, so that’s another option. You can read more about that here!
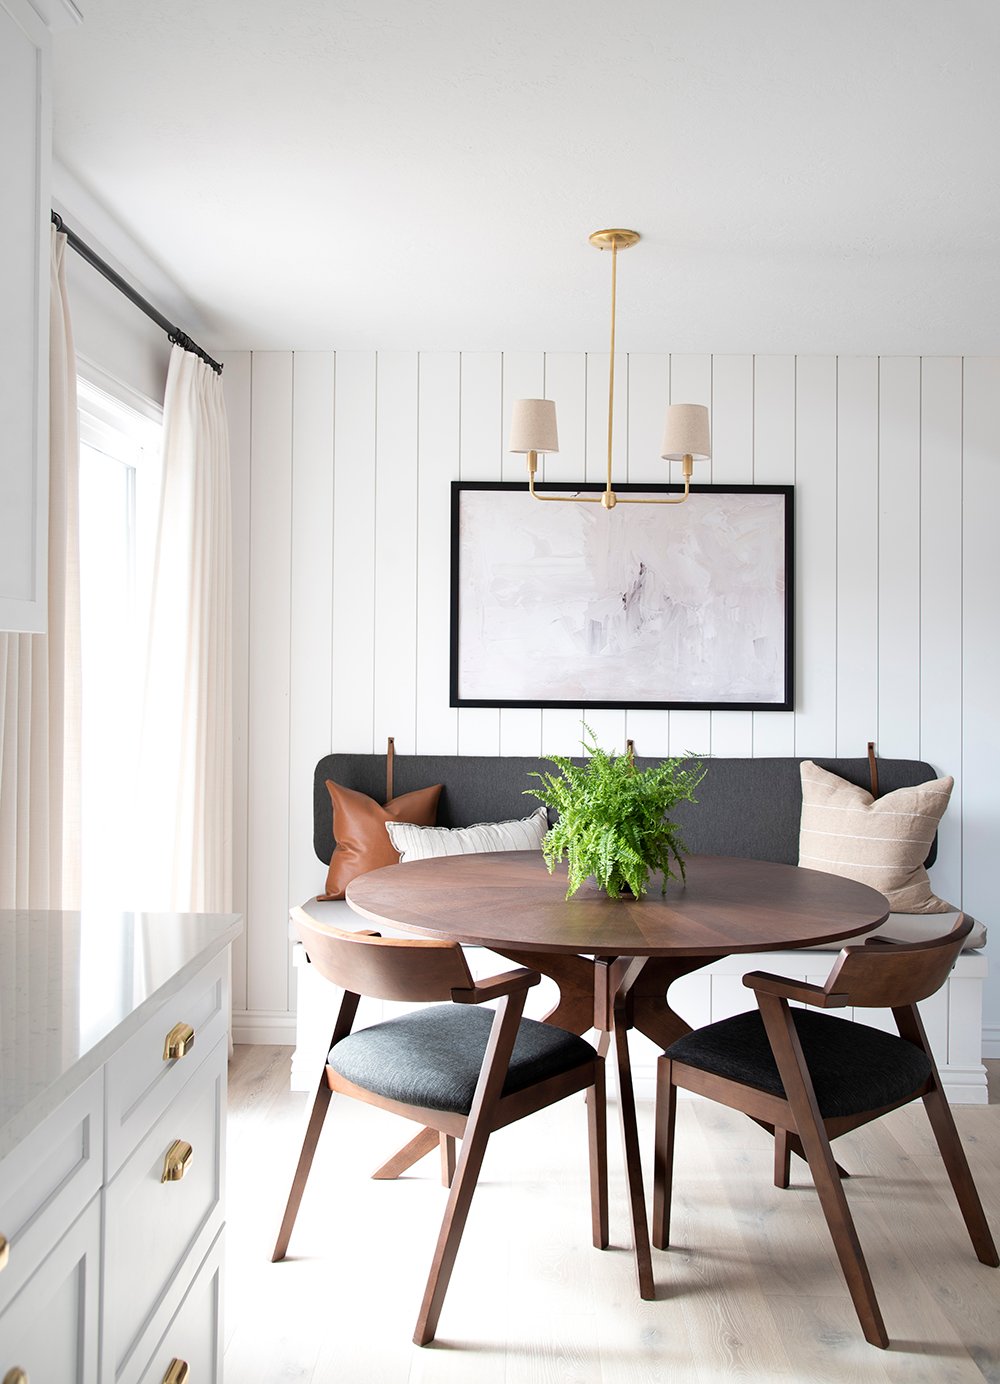 Let me know if you have any questions! I know this tutorial was kind of a mashup of this project mixed with past upholstery projects, but I think you can get the idea. I promise it’s easy! Next time I’ll anticipate tutorial requests. Haha! I didn’t realize this would be so popular. I’m really happy with how this little seating spot came together and I know Patty (the homeowner) is absolutely thrilled, so that’s a major win. I hope your week is off to a wonderful start!

I always love the look of a banquette! So smart to buy the cushion and make the bench to fit; I bet that was a major savings. The proportions of the back look perfectly balanced with the seat. Is there some sort of back height to seat ratio to follow, or did you just eyeball it? The color of the leather with the charcoal looks so rich. I’m imagining the different looks you could create with varying widths and shades-to say nothing of the limitless fabric options! So many combinations! A versatile, attractive and relatively simple DIY. Definitely a win! Happy first day of March…and here’s wishing you swift and easy office demo!💜
That definitely saved us a lot of money… Kristen was building it anyway, so it just made sense to do it that way :) I decided to keep the back cushion within 1-2 inches of the bench seat, so that it looked really balanced. I think too small might have been weird, and too long would’ve felt top heavy. Keeping it aligned felt like the right move for this one, but I’m sure it’s situational depending on the space, table shape, etc! For the back height, I just eyeballed it. Crystal & I actually took turns holding it for each other and sitting down to test it out. Haha! We wanted to make sure it was comfortable and installed at the right spot for people to lean on. If this were a space in my home, I definitely would’ve went with a pattered fabric- there are so many fun options, and different types of straps or leathers you could use. It really does have endless possibilities and was so easy to do. Happy first day of March to you! I’m ready for spring. I’m looking forward to office demo this week. Woohoo!! Have a good week, Peggi. xo
I love the way this turned out! I have long envisioned a banquette seating situation for my kitchen. We have a small area in between the kitchen and what is now the living room. It’s not exactly sizable enough to be a proper eat in-but it would be perfect for a banquette, a small pedestal table and a few extra chairs for added seating-especially when the living room becomes the dining room! The leather strap detail on this is everything-and such a nice touch to add the screw covers! They offer beautiful contrast against the leather. I noticed there is no cushion to this one. Was that a purposeful choice? Can foam be added to this project for a little extra padding, or do you not recommend it for this application? This is such a simple and smart diy! I always adore your upholstery projects. We had an awesome productive weekend, and today is lamp day!!!! I can’t wait to get her home and installed! Cheers to Monday friends-and cheers to office demo!
Thanks, Lauren! The leather straps are my favorite, too. It turned out really nice! This actually does have a little cushion since we used batting, but I definitely didn’t want to use foam since it’s a back cushion and hangs on a vertical wall. For the seat, I think more cushion is awesome, but I wanted this to be comfortable while looking low profile (not as bulky). Instead of using foam, I’d just add more batting if you’d like it to look more full in terms of the cushion! I’m so excited that today is lamp day for you :) I can’t wait to see!! Have a great Monday and a good week ahead. xox
This turned out so awesome and looks so high end, definitely not like a DIY job!!
Thank you so much! It was really a quick and easy project :)
Happy March 1st! I have missed your posts & everyone’s thoughts, ideas, questions, etc. Banquette seating has always been a favorite! Even so when we go out to restaurants, I prefer to sit in booths or banquettes. I love the cozy feeling you get when people are gathered around you. I too was wondering about if there is a good height for the back cushion to be hung? This project warms my heart! You all did such a fantastic job! Hope demo is going smoothly.
Where can I find the table and chairs??? I looove this look!!
Thank you, Sol! They’re linked in this post: https://roomfortuesday.com/surprise-kitchen-remodel-living-room-makeover/
Hi! This is the exact look I’m going for in my house! Do you mind sharing the dimensions of your back cushion? I saw that you put it 1-2 inches above the seat cushion. But what are the dimensions of the cushion itself? Thank you!!
I believe it was 18 x 84, but that’s just what’s in my memory. I should’ve recorded that somewhere, I’m sorry!
Hi Sarah. This is beautiful. Where did you get your leather straps? And am I correct in understanding you screwed them to your studs?
I have them linked in the post (amazon)! :)
I love what you have done here. It’s beautiful and thinking about doing the same for my kitchen. I have one question. Since every inch in a relatively small kitchen is crucial, by doing the “headboard” style of seat backing, does that allow for the 24″ bench recommendation to be reduced? I am working it girl. Thanks.
Thank you, Jocee! I don’t think you’d be able to reduce the measurement, unfortunately. However, I’d do what best fits your home! Sometimes you just have to work with what you have. I hope that helps!
This is SO lovely. It’s transformed the space. I love a banquette at home, makes me think of breakfasts, you can pull up your legs and get cozy with a cup of coffee.
The back looks a bit like a headboard for a bed – perhaps if you are not as dapper at handiwork maybe that is a way to get a similar look.
Thank you so much, Sille!