A Peek At Our Cabinetry Installation Process
 Happy Friday, friends. I promised a kitchen update and this is a BIG one! Things are looking a lot different, right?! Click through for the latest kitchen update, a video, and a peek into our cabinetry installation process. This has been the easiest cabinetry install we’ve ever tackled… and that’s saying something- especially given Emmett works for a custom cabinetry company. We were very impressed!
*This post is sponsored by Lowe’s. All content, ideas, and words are my own. Thank you for supporting the brands that allow us to create unique content while featuring products we actually use & enjoy!
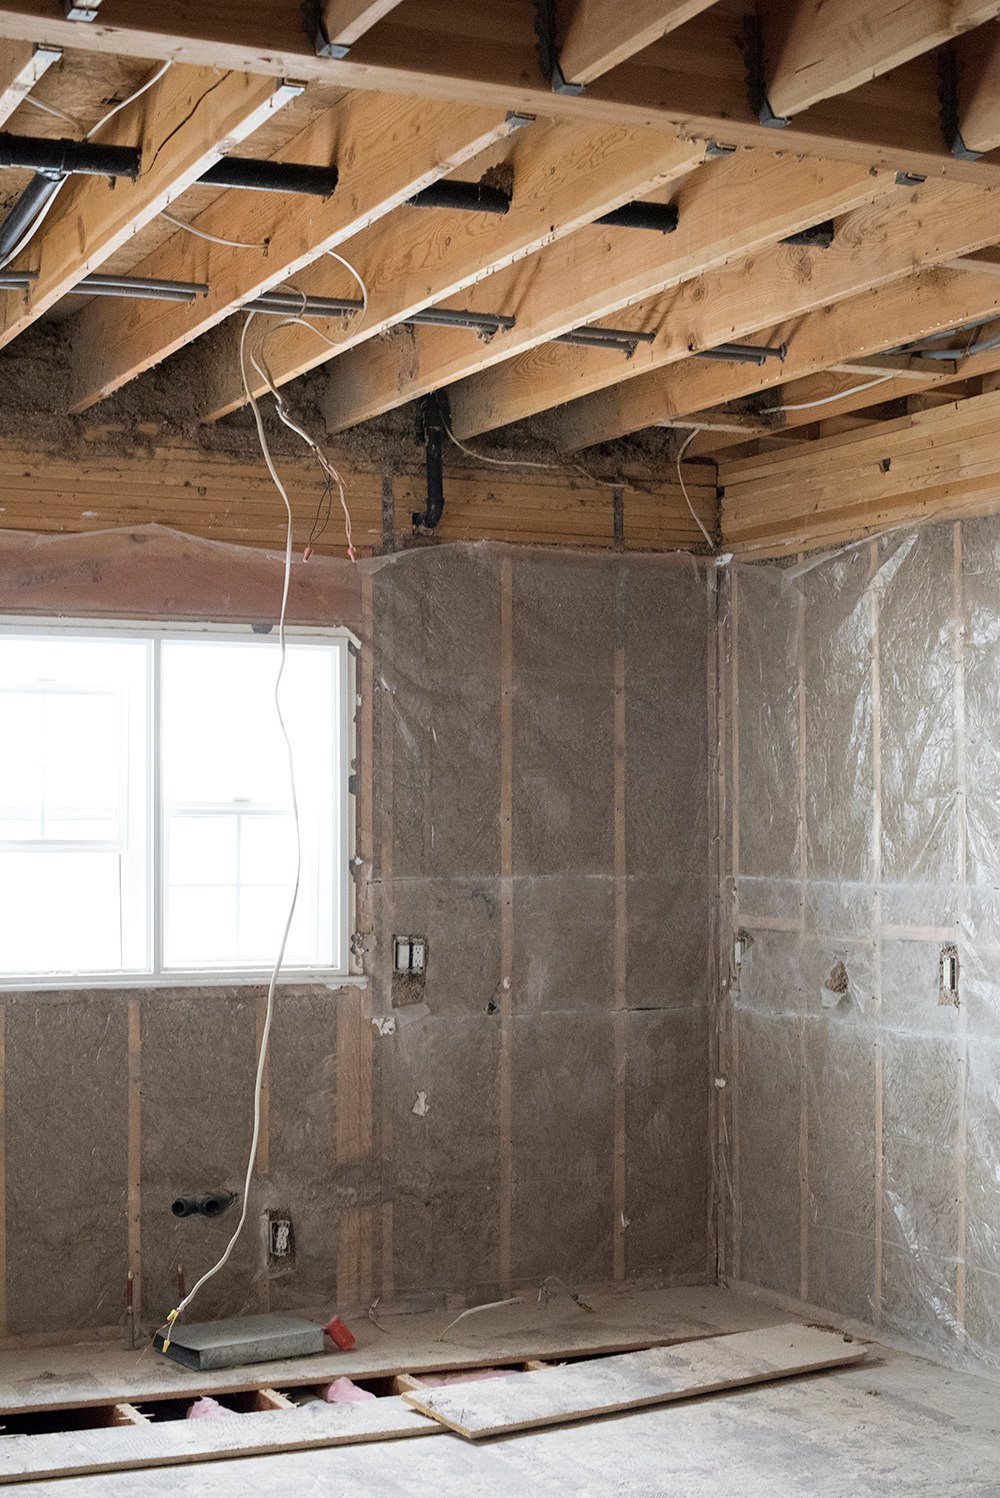 I’ve talked about my cabinetry selection and design process at Lowe’s, but the last time I shared images on the blog of the actual kitchen… it looked like this (pictured above). Today, this is the current state of the space:
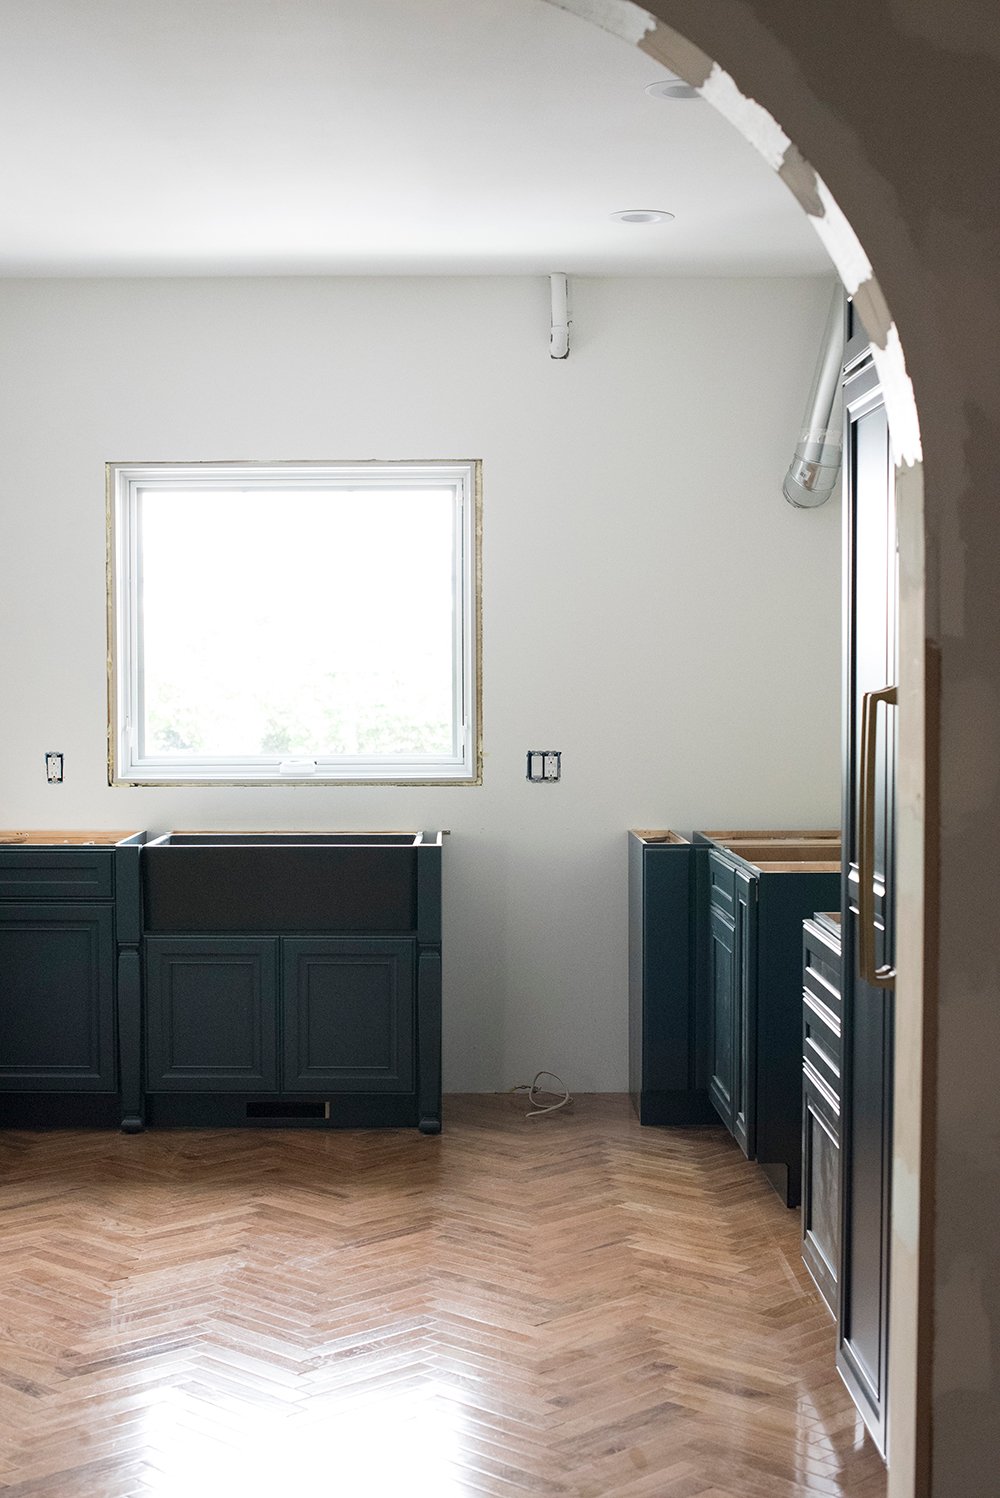
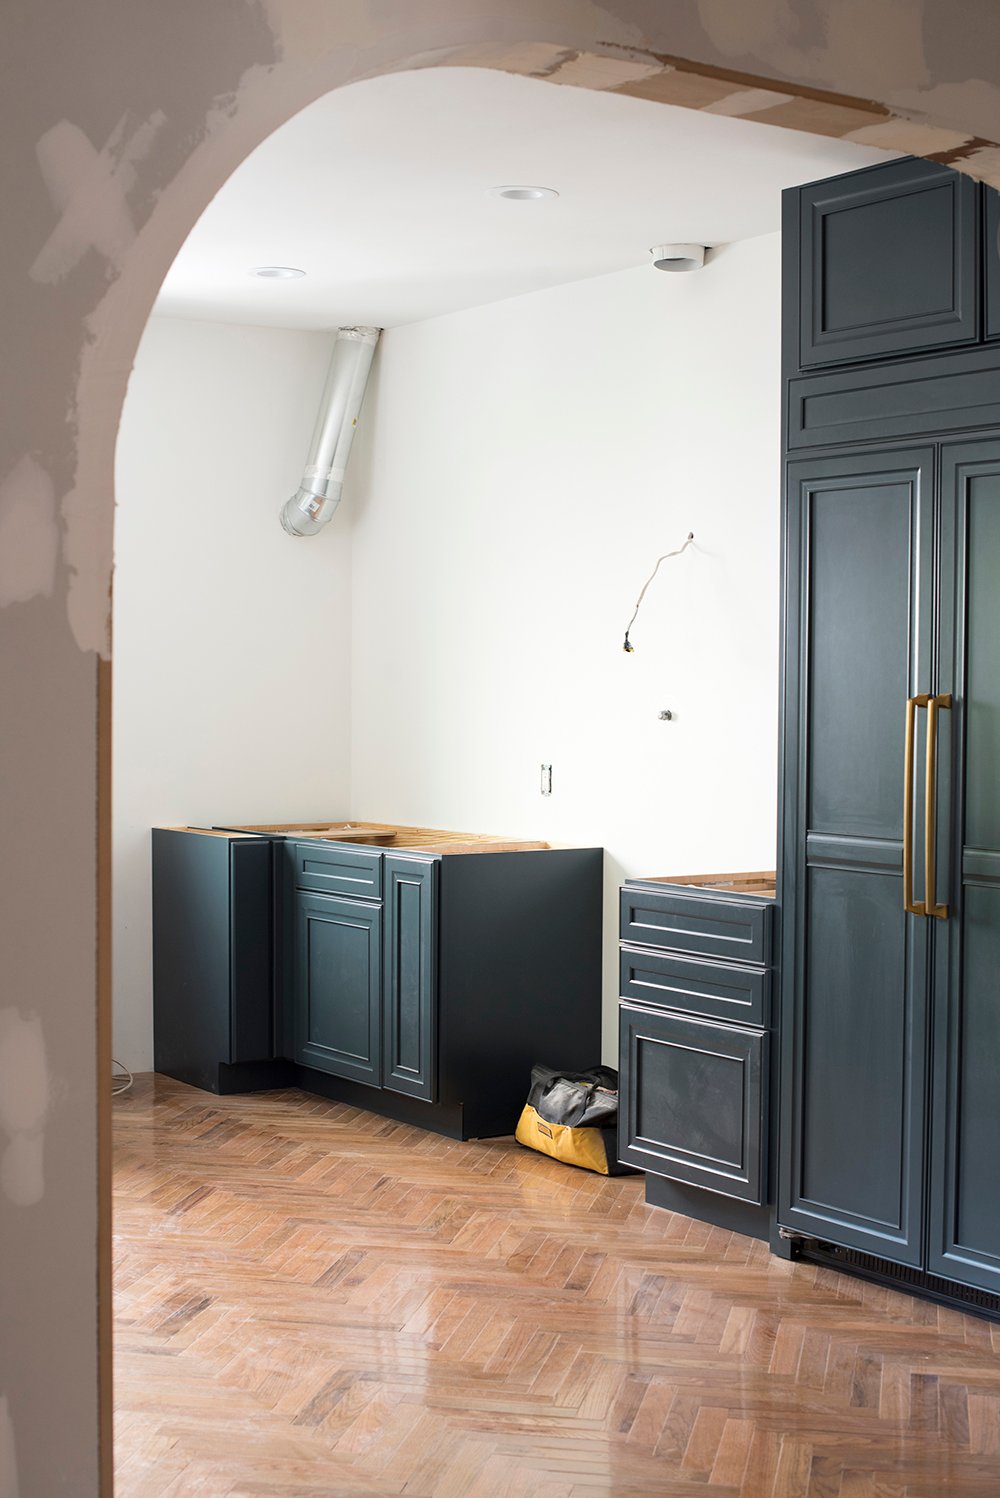
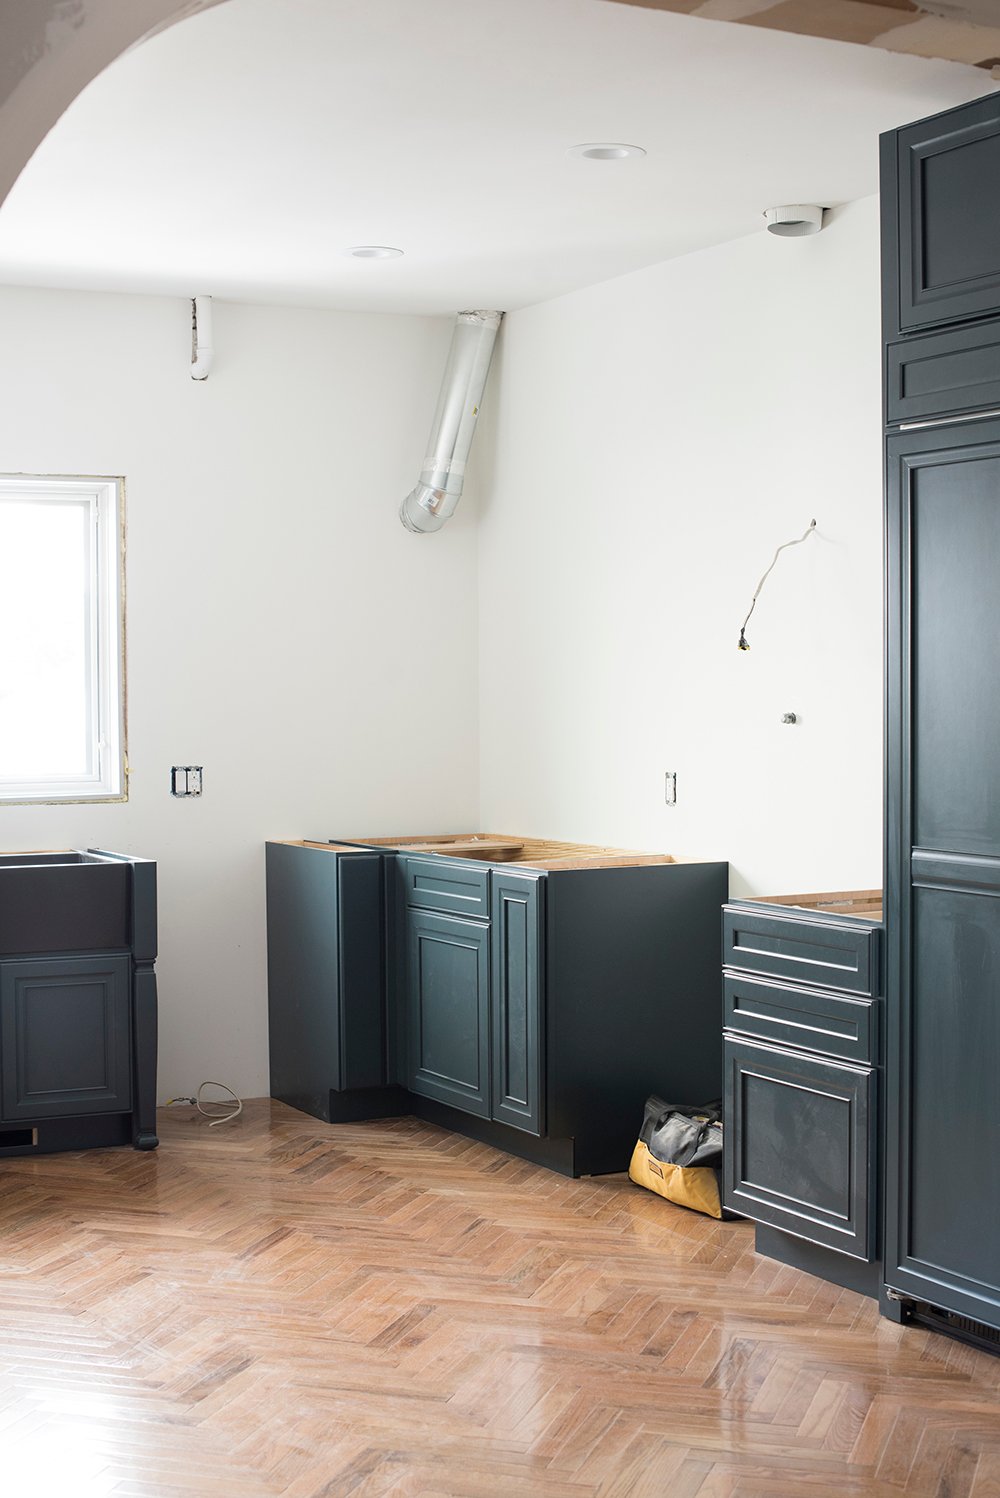
 Things are looking SO good in here! Obviously it’s a construction zone, so it’s a bit of a dusty mess, but we’ve made a ton of progress. The floors are installed (click here for that tutorial), the drywall is mostly primed, plumbing and electrical are finished, and best of all- the lower cabinetry is installed! I’m smitten. Countertops are being installed next week, then we’ll finish installing the upper cabinets and move onto tiling the backsplash. It feels like we’re finally on the homestretch of this renovation. We even have the KitchenAid refrigerator up and running! It’s the big cabinet with the beautiful brass hardware.
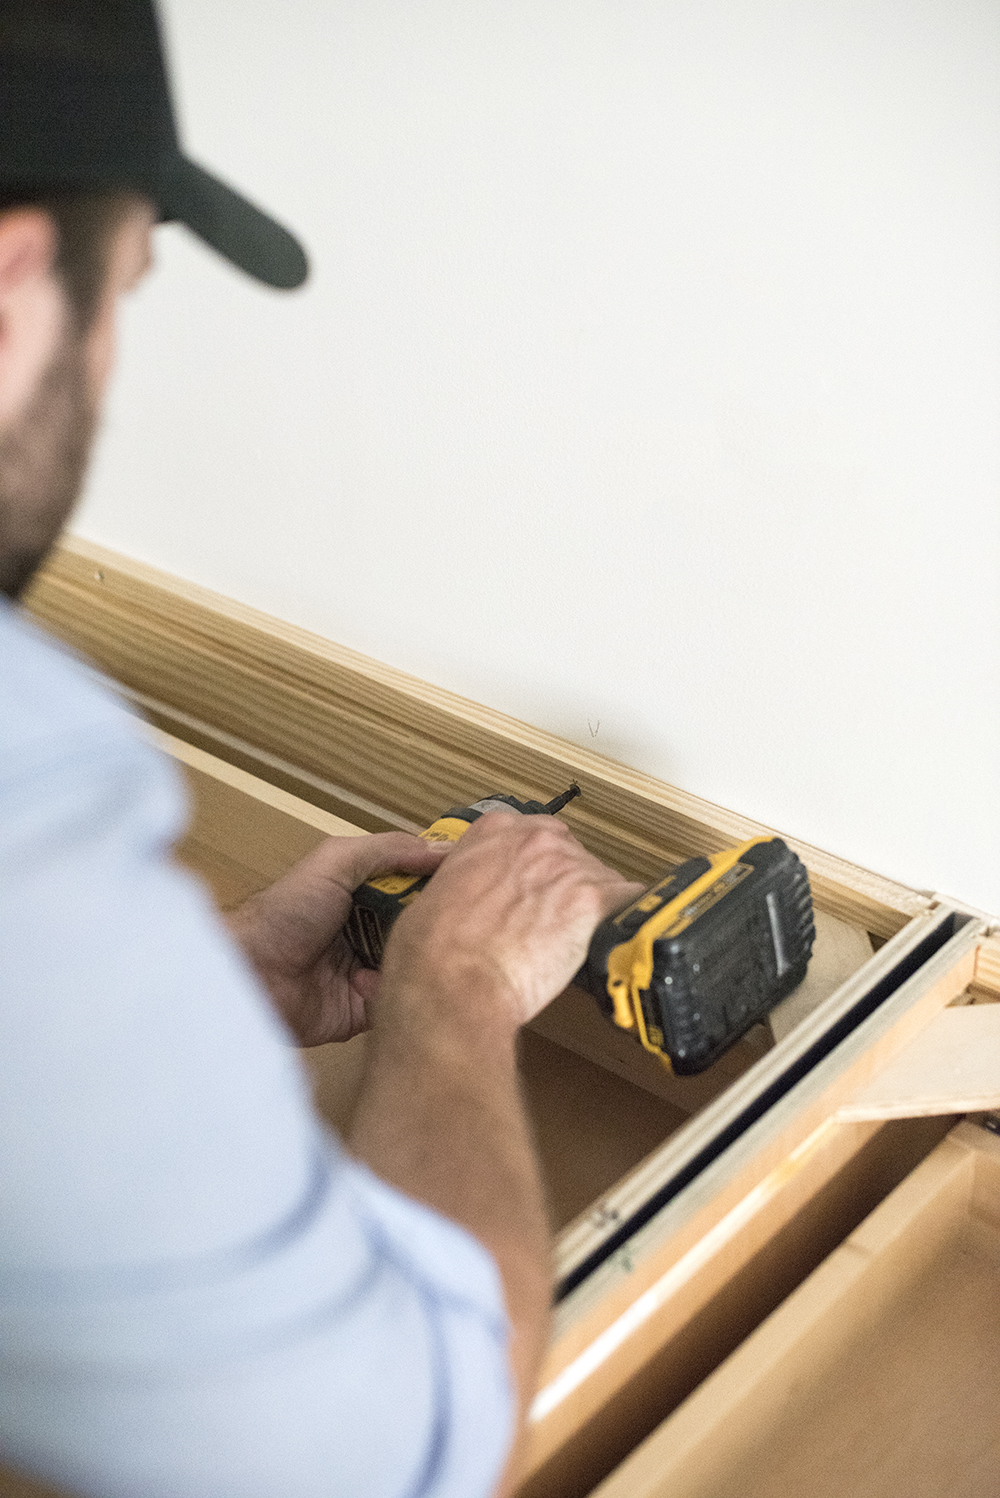
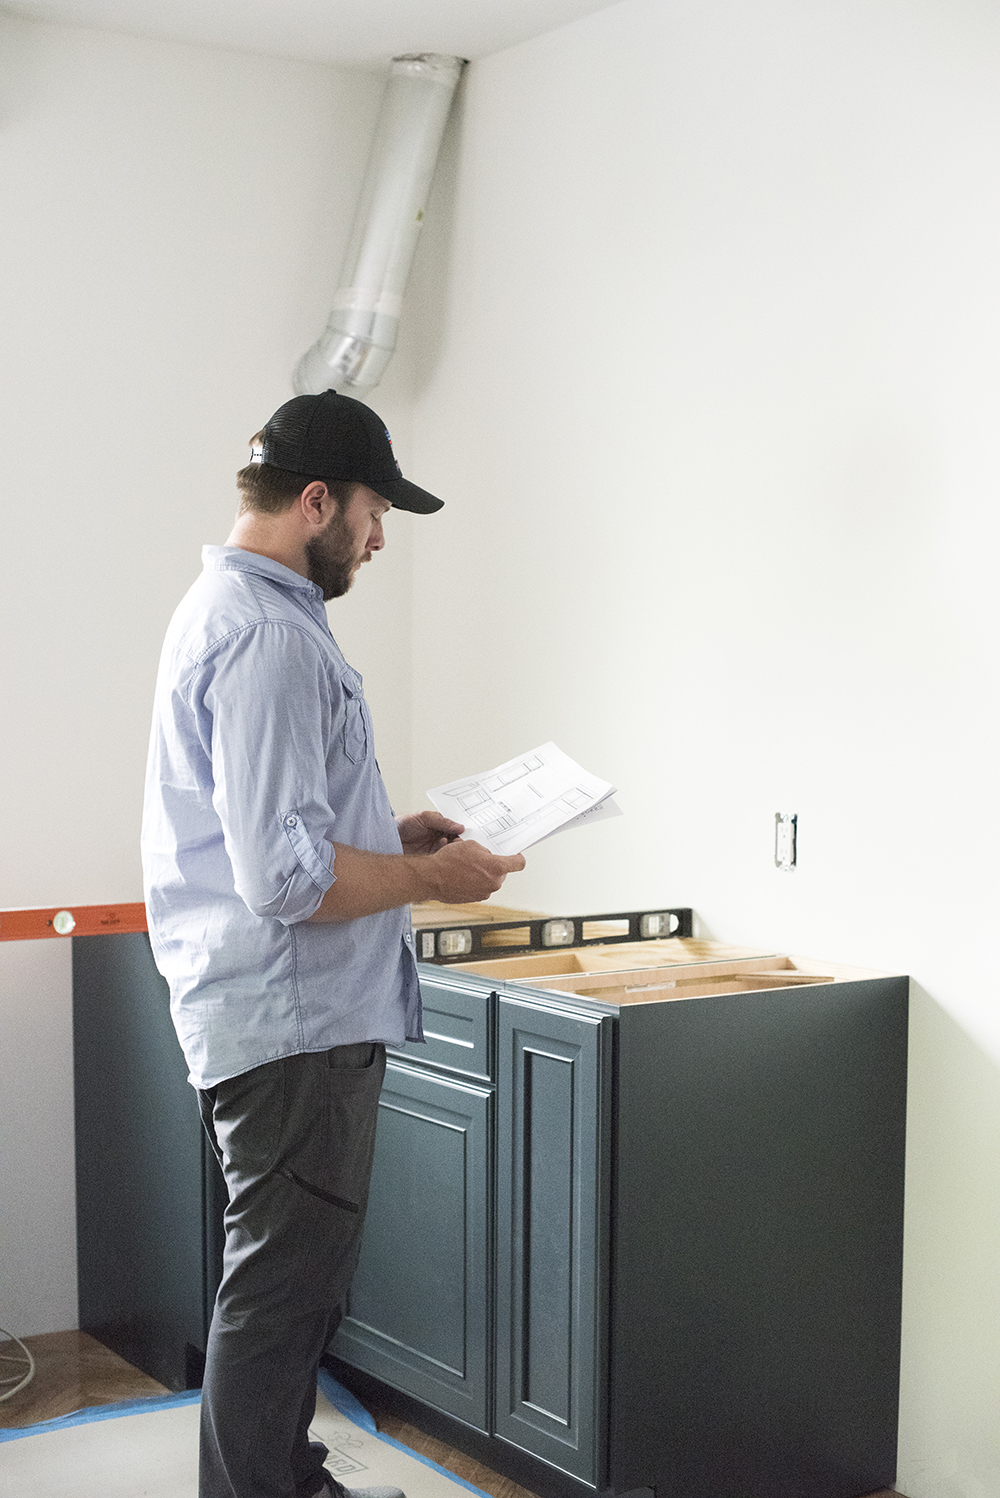
 Rather than just giving you an update on the space, I always try to keep blog posts helpful and informative, so I thought it might be beneficial to give you a look at what the cabinetry installation process is like, if you’re the DIY type… like us. Emmett and our good friend, Kris (who works with Emmett), have installed cabinets all over the world with their company. They’re actually off to Haiti next week for a project and they make a great team! Even though I’d consider them both professionals, each one said the installation and accompanying packet made the process super easy- even a beginner DIY enthusiast could tackle this installation. Check it out…
What do you think? Would you try installing cabinetry yourself? It’s not as intimidating as it looks! Otherwise, Lowe’s offers installation as well… we just wanted to save money and knew we were more than capable.
 The other big part of the installation equation was the amazing packet Samantha (our Lowe’s designer) put together for us. It was 20+ pages with EXACT instructions… from unboxing, where to start, to modifications we might look out for, etc. It’s basically like the kitchen cabinetry install bible.
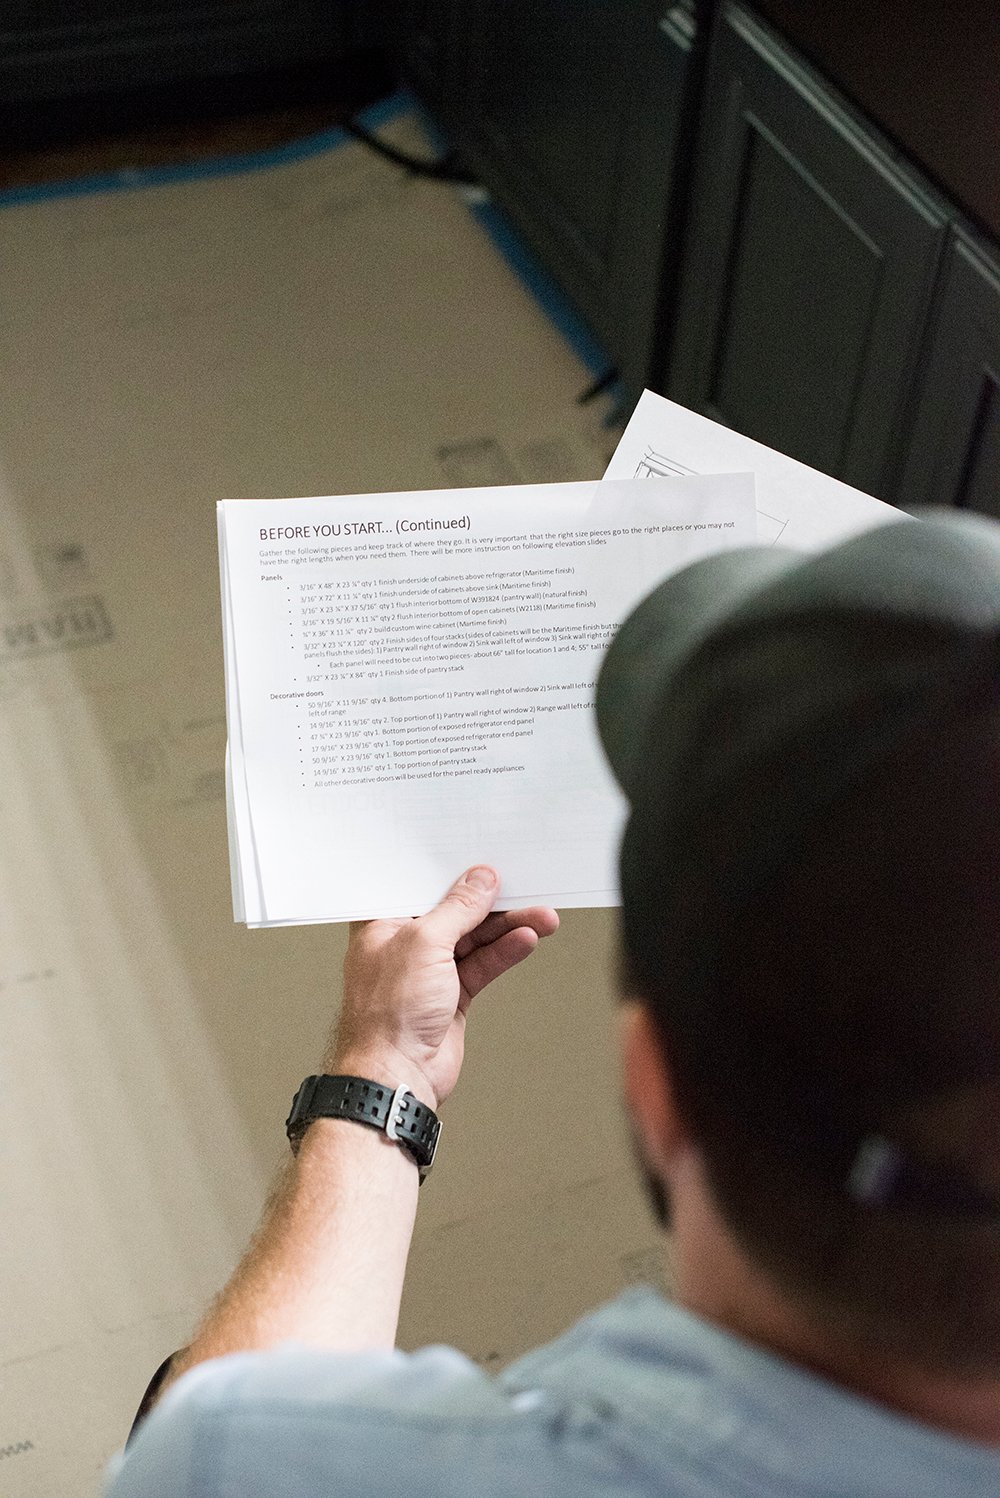 If you’re wondering what tools Emmett & Kris rely on during cabinetry installation (as seen in the video), I’ll link them below. They have a ton of experience and only use the best…
- Dewalt Power Drill
- Johnson Box Beam Level
- Johnson 24″ Level
- Irwin Clamps
- Kobalt Countersink Drill Bit
- Zircon Stud Finder
- Pro Twist 3″ Screws
- Bosch Laser Level + Tripod
- Ram Board (to protect the floors)
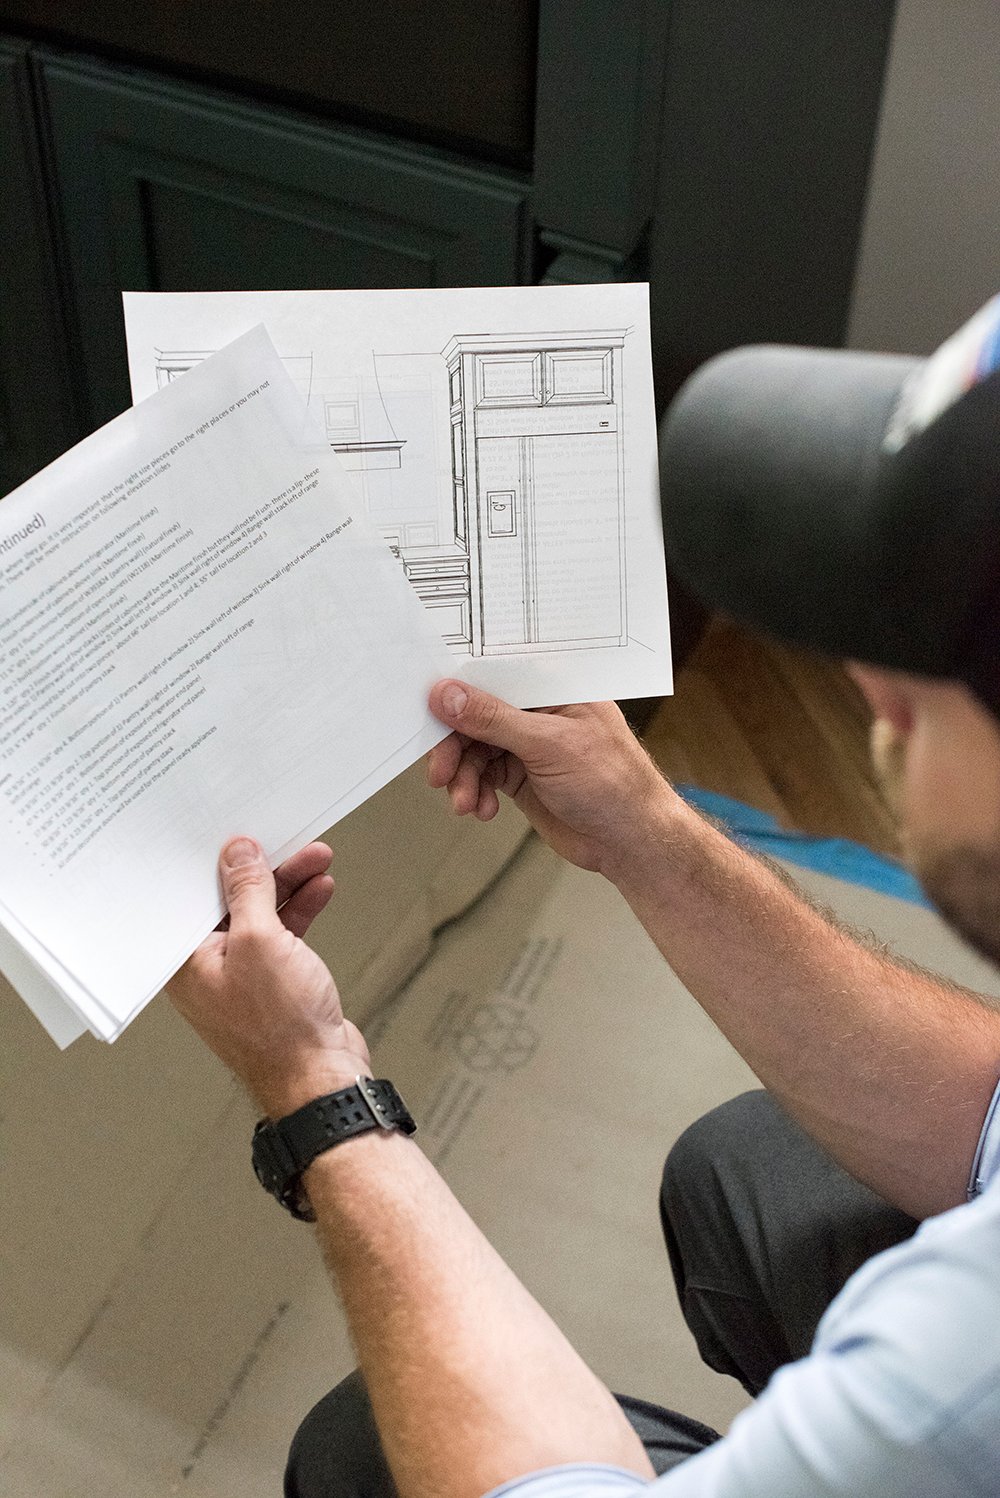
 The elevations, specific labeling, and detailed measurements also ensured everything ended up in the correct spot within our kitchen. It’s always nice to have a visual of how things will look once they’re in place.
 As Emmett mentioned- stay tuned as we install the upper cabinets and hardware next week! We’re just waiting on the countertop to arrive before we tackle those. After that- it’s tile, plumbing, and then we’re basically finished! For more information about our Diamond Cabinets, appliances, and the process at Lowe’s, check out the following posts:
- My Cabinetry Selection & Design Process at Lowe’s
- My Favorite Readymade Cabinetry Colors
- How to Choose Appliances That Fit Your Budget
 Questions? Comments? You know I love hearing what you think! I’m VERY excited with the way things are shaping up. It’s hard to believe we’ll have a finished kitchen by the end of the month. I’m already looking forward to cooking delicious meals!
Eeeek! They look so amazing! That color is dreamy. Do you find excuses to walk by during the day just to gaze at them? I am still not certain that I am up to cabinet installing, but it sure seems like Lowe’s process and support is gold standard. So exciting!! Happy Friday!
Thanks Peggi! The new windows definitely let more light in and highlight the gorgeous color. To say I’m excited would definitely be an understatement. haha!
love the color of the cabinets and the floor stunning!!! Can’t wait to see the finished project! Happy Friday.
Thank you so much, Lynn! Happy Friday to you… have a great weekend :)
The cabinets are gorgeous! The color, profile, and quality are totally beautiful. So much hard work but Lowe’s certainly made the process much easier which I’m sure is so helpful. I will definitely seek out Lowe’s for a new kitchen once it’s time for an update. We recently moved into an old 70s home and had to focus on adding/renovating bathrooms and we added a dog wash station that I have wanted for a very long time. We did purchase all the tiles, and a vanity, from Lowe’s and love how it all turned out. Our Lowe’s doesn’t have as large of a selection as the one you deal with but they are improving and I’m so thrilled to see you are having such a wonderful experience in a room I consider to be the most important. Well maybe a close second to the dog wash shower that is 😜 Yay to your beautiful new kitchen! On the home stretch 🥂
Thanks so much Colleen! I’m super impressed with the cabinetry… the quality, material, selection, and installation has been the icing on the cake. Emmett and I are both so happy with them! I have to say- I’m so envious of your dog wash!!! We’ll definitely be adding one of those to our laundry room when the time comes to renovate that space. Enjoy all of the dog baths because I’m breaking my back over here bathing my boys in the shower. lol! I bet it’s beautiful! Hopefully your local store will continue to get more and more selections. Have an amazing weekend!! xox
Oh yes Sarah you absolutely have to put in a dedicated dog washing shower/station. It’s a game changer for us and finally realized after 30 years of having these sweet fur babies we prioritized this from the start of our new/old home. It has made our lives so much easier especially with all the rain we had this spring as our back garden was a big mud bowl 😳 Amazing! Have a super weekend 😎
Definitely!! It sounds like a must. I love that you have one! Hope you’re having a fantastic weekend, Colleen! xox
You had me at Emmett. I love that name! xo laura Now i have to go back and read the post ;0)
Hahaha!! Definitely check out the post :) Have a great weekend!
They look so good! And I’m impressed how fast you guys move. Can’t wait to see this kitchen all done!
Thank you!! The waiting on countertops has been challenging… we’re ready to go, go, go! More like start tiling. Haha!
Gorgeous! Can’t wait to see the finished project!
Thank you, Elizabeth! xo
Wow amazing progress! I can’t wait to see the finished product!!
Thanks so much Ashley :)
I just love each progress post! It really helps me to see the process. It also makes seeing the end of the project so much more fun!
Will you include an approximation of what Lowe’s would have charged for installation in one of your final posts? Just for our information.
I think so too! I love hearing this Jennifer. I know it’s not the prettiest part of the project, but it’s definitely necessary in getting from point A to point B. I don’t have the installation cost since we didn’t get that estimate, knowing we would do it ourselves, but I’ll email and find out for you :)
I love everything about this space! Well done! I’m curious what the silver piping is in the corner? It wasn’t in the demo picture.
Thank you so much, Brittany! That is the vent for our range hood. Previously there was no over the range exhaust (just a microwave), so we needed to drill to the exterior of the home for proper ventilation (to code). It runs through the ceiling, to the corner, and vents outside. The ductwork will be hidden behind cabinets, so you’ll never see it :) Hope this helps to clarify! Great question!! xo
I love love love integrated appliances! And those floors are still drool-worthy.
X,
Bailey
http://www.baileybeeblog.com
thanks so much Bailey! :)
This is a really helpful post & video. One question, though: what happens to all those shims that are under the cabinet? How do you cut them down so they’re flush with the front without taking them out and ruining the leveling?
They get cut down and are covered by finishing pieces! You can use a dremel. See this post: https://roomfortuesday.com/kitchen-demo-a-new-handy-tool/
Hi. I have been working with my mom who is looking to purchase cabinets at Lowes. Your cabinets are beautiful. Is there a level of Diamond that you would recommend on a budget?
Hi Nicole, Thank you so much! Our cabinets are from the Diamond Lisette line. For us, it was more about the aesthetic, but I’m sure the Lowe’s representatives in that department could share how their tiered pricing works or break out some budget-friendly Diamond profiles for you :) They have lots of options!
Hi Sarah, do you know if the detailed instruction packet that you received from Samantha a normal service provided by all Lowe’s, or just that location? Thank you for your time-this is a very helpful video! And a beautiful kitchen :-)
I believe it’s a normal service. You may have to ask- but it should be included. The Lowe’s designers can definitely help and printout or send any additional info you may need. It’s pretty handy! Hope that helps :)
I love your kitchen! And have been searching your posts for any measurements or renderings or list of cabinets purchased? I have an L shaped kitchen with big island. I’m trying to dubkicate your oven wall & sink wall. Thx so much & live your style & work!
Thank you, Kristin! You can see all of my relevant kitchen posts, here: https://roomfortuesday.com/kitchen/