A Fire Pit Makeover
 This will be our third summer using our fire pit, which I really love! It works great, I’m still into the aesthetic, it fits our patio space well, and it’s very convenient because it runs on gas. However, the fire pit has seen better days. I’ll admit, the first summer we got it, Emmett & I were toasting marshmallows, and in an effort to get the sticky remainder of the mallow off of the metal skewer, HE SCRAPED IT ON THE FIRE PIT. Metal to metal… it was a bad sound. You should have seen my face. Haha! I have no idea what he was thinking, but it scratched up the surface pretty badly, revealing white etched lines. I used some touch up paint to try to fix it, but the paint didn’t match that well, which honestly made it look worse. Fast forward to the next summer, I let it go and just lived with it… you know, called it “patina”. This past winter, the cover (we cover our outdoor furniture during the snowy months), ripped during a storm. The fire pit went most of the winter without a cover and the wear was looking pretty bad. As I pulled our patio together this spring, I decided to fix the fire pit once and for all! If you’re interested to see how you can easily makeover any fire pit, this post is for you. Click through to see the before & after, the process, and some tips for painting things that get really hot– like fire pits and grills.
*This post is sponsored by Krylon. All content, ideas, and words are my own. Thank you for supporting the brands that allow us to create unique content while featuring products we actually use & enjoy!
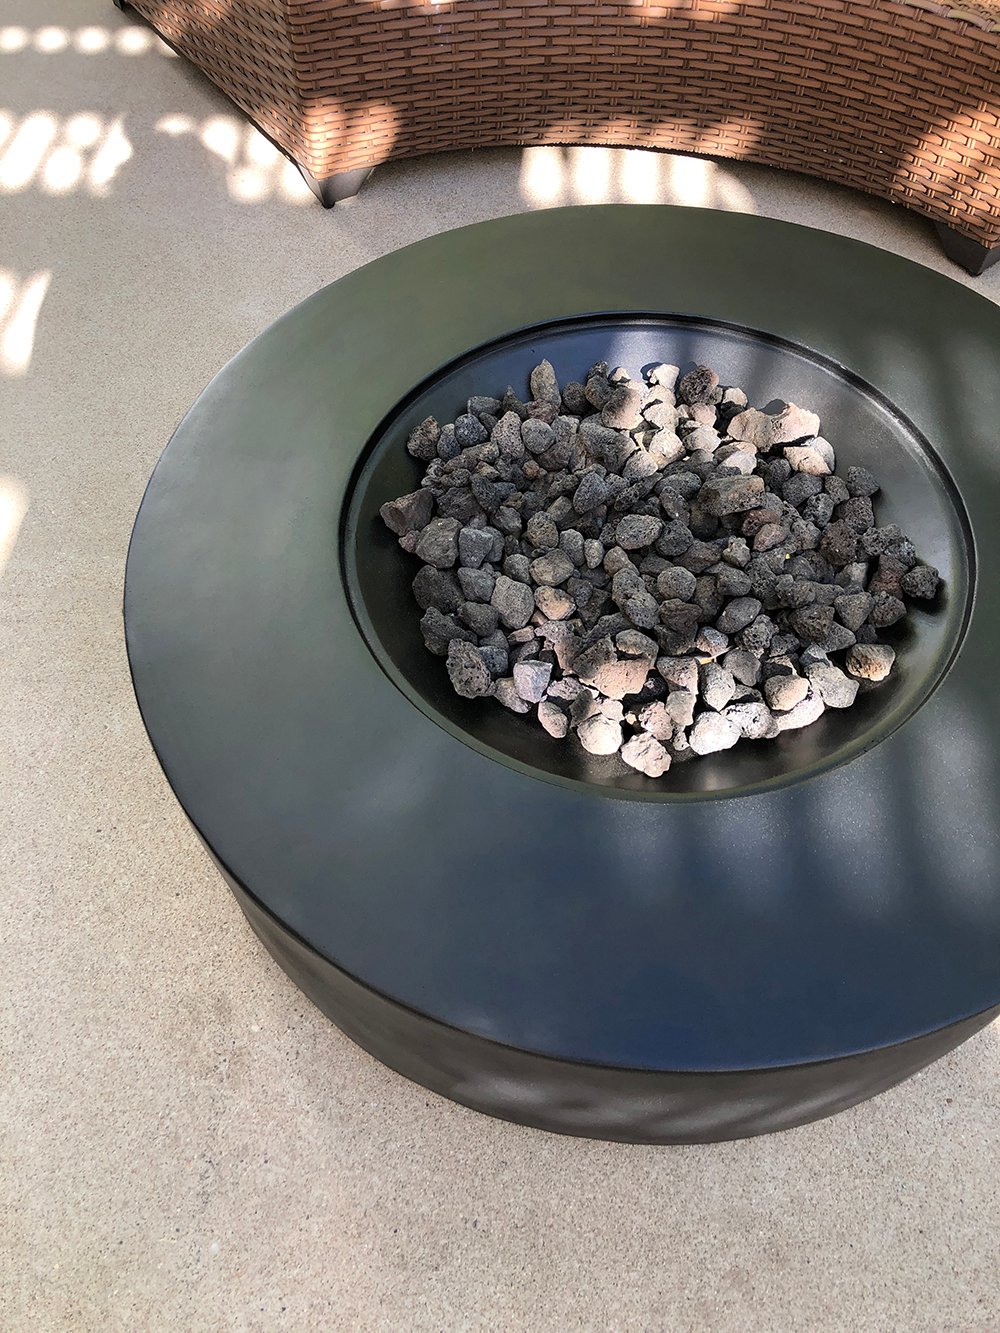
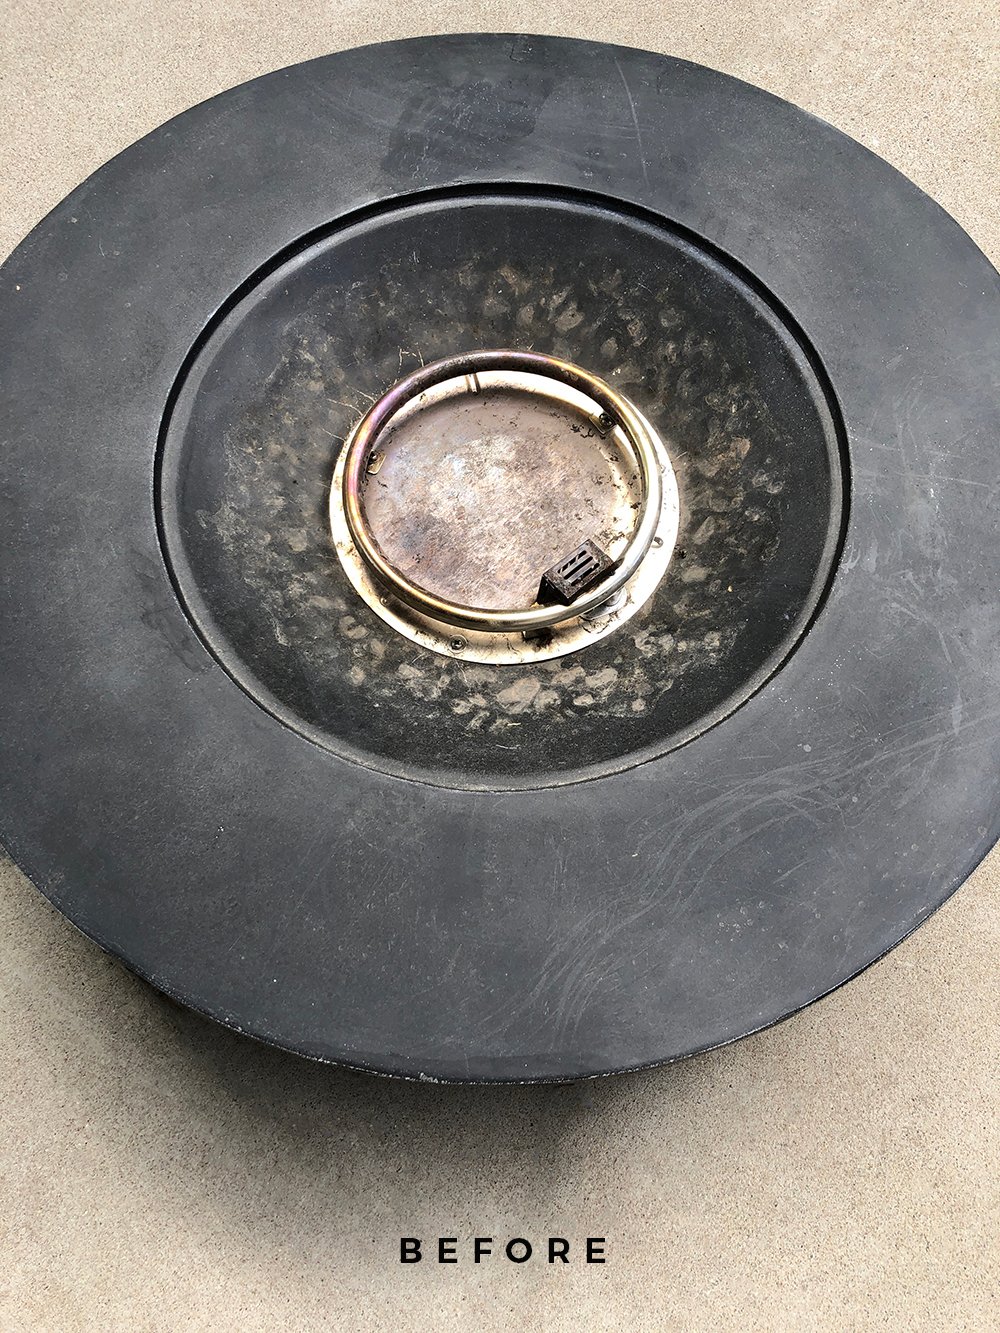 Let’s take a peek at the before, shall we? Do you see the touch-up paint over Emmett’s etchings at twelve o’clock? It’s honestly less noticeable now that the rest of the surface has been scratched equally as bad over the winter. Between debris, branches, stormy weather, and our dogs, it looked pretty rough. This is what I used for the makeover…
SUPPLIES + TOOLS:
- Krylon High Heat Spray Paint– I used flat black
- Krylon Snap & Spray Handle– this makes painting so much easier and more precise
- A sander of some sort- I used this Dewalt Orbit Sander
- 100 grit sandpaper, followed by 320 grit sandpaper
- Towels- for wiping
- Masking tape
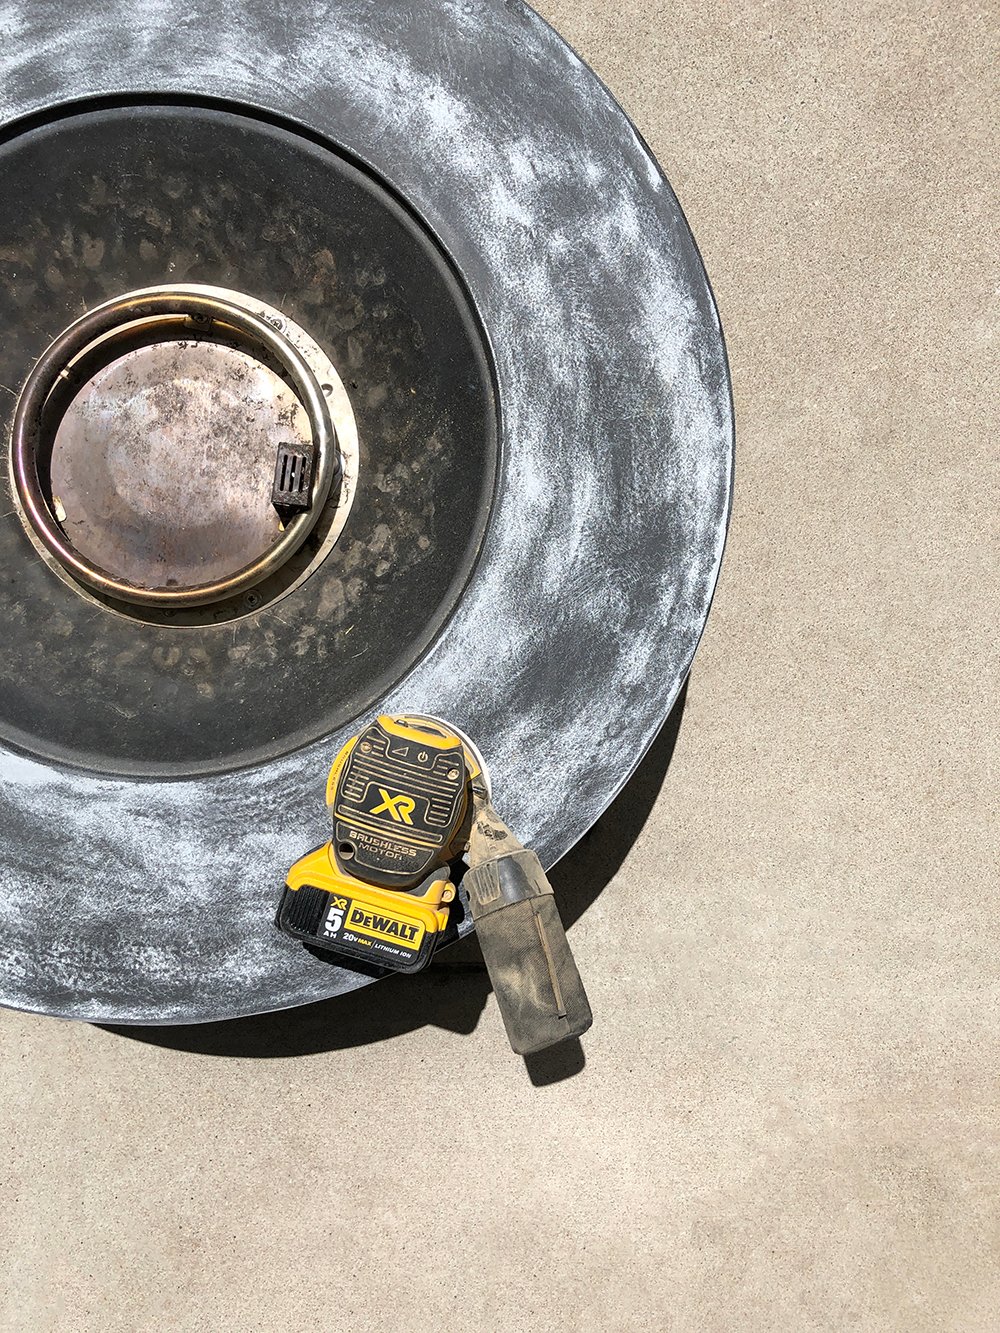 Step 1 // Sand. In an effort to make this last for awhile and to eliminate the deeper etchings, I decided to give the fire pit a really good sanding prior to painting it. I used our cordless orbit sander to make quick work of the project. I started with 100 grit sandpaper, then moved to a 320 grit for a smooth finish.
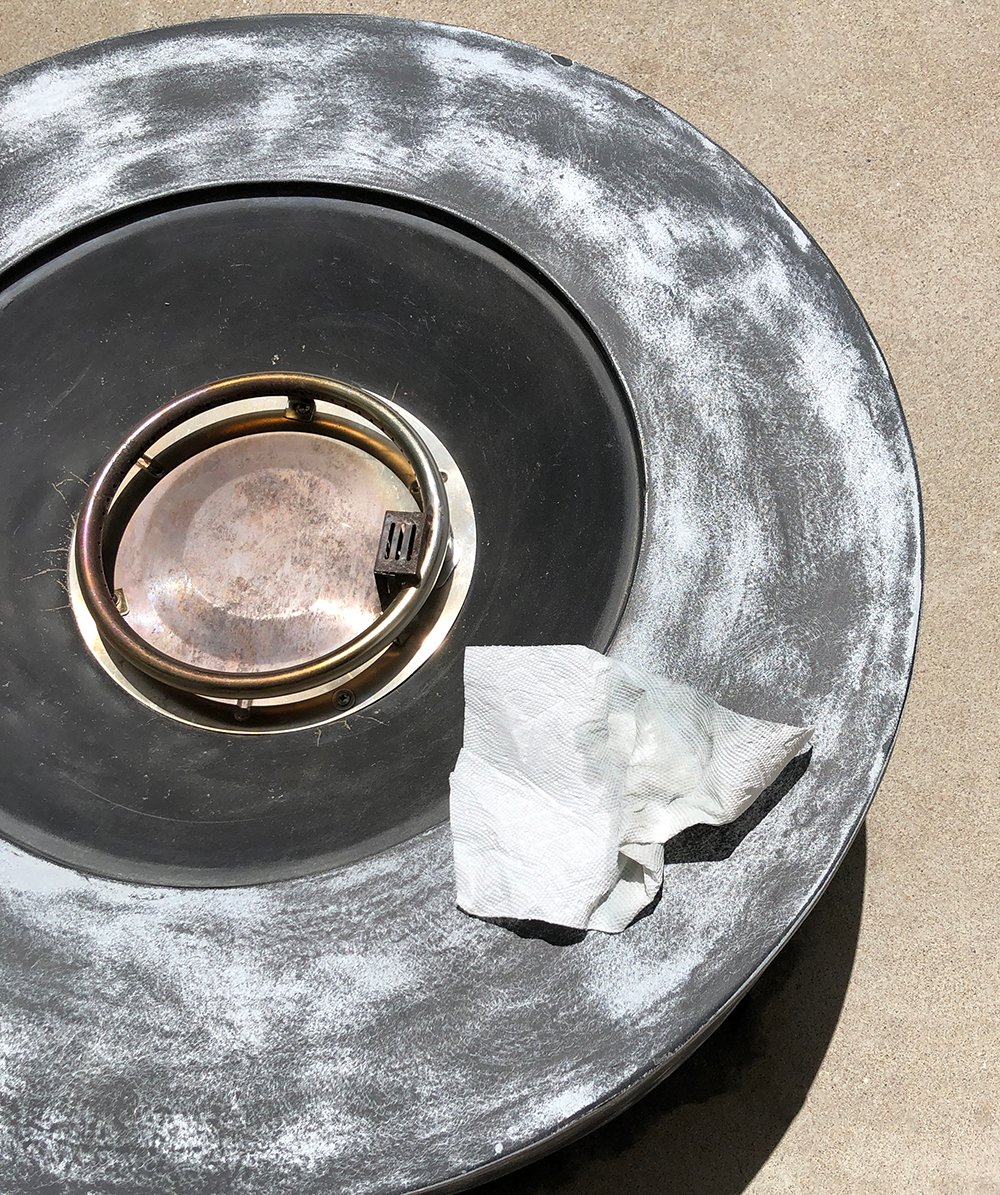 Step 2 // Wipe it clean. Before painting, you’ll want to wipe the surface really well, removing any debris or residue from sanding. I just used soap & water and a towel, then I allowed it to dry completely.
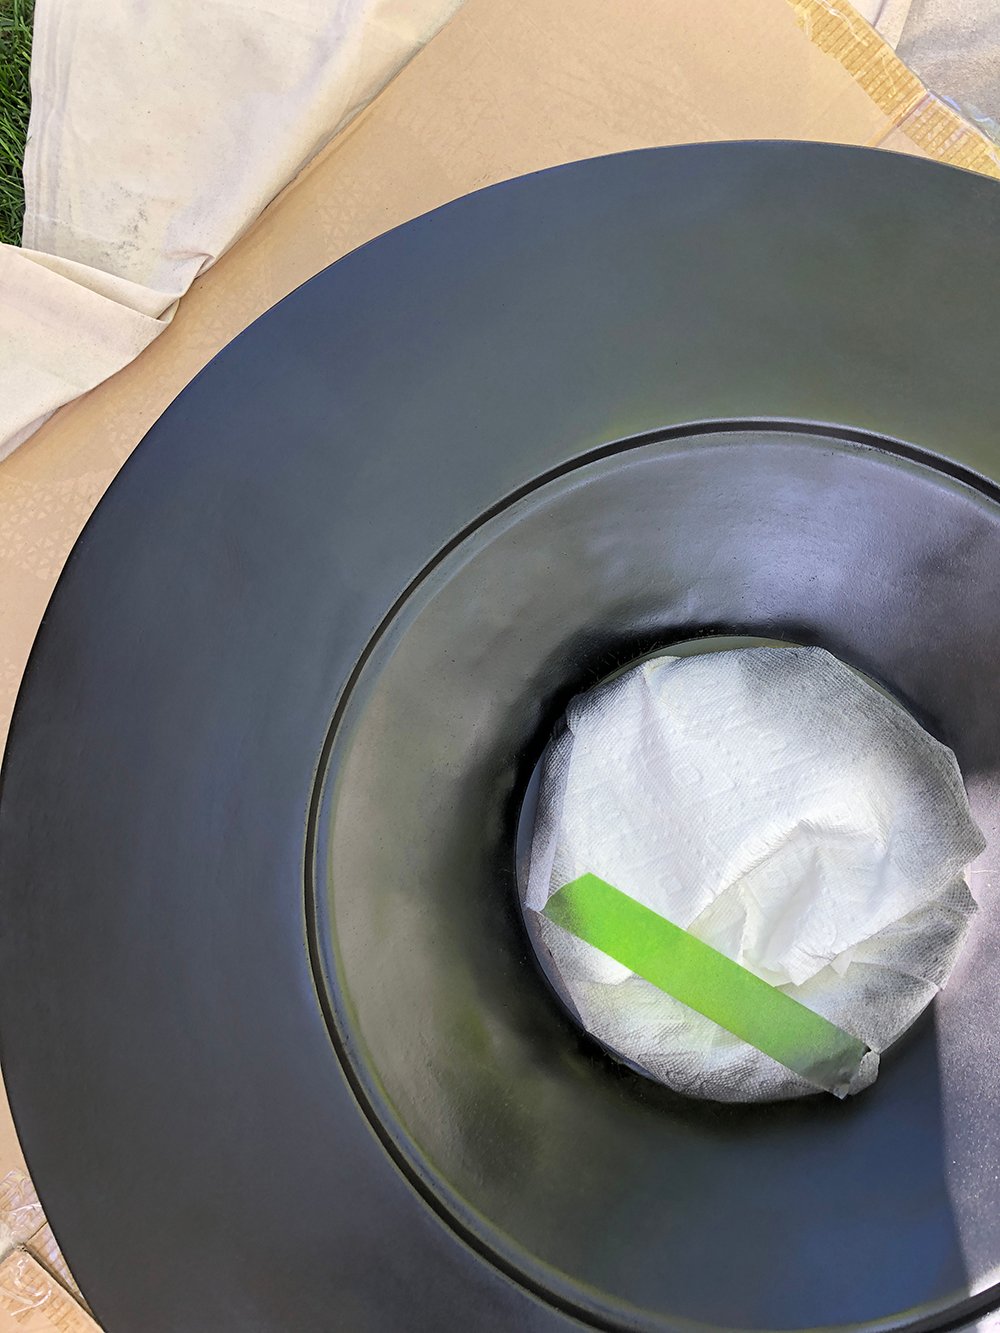
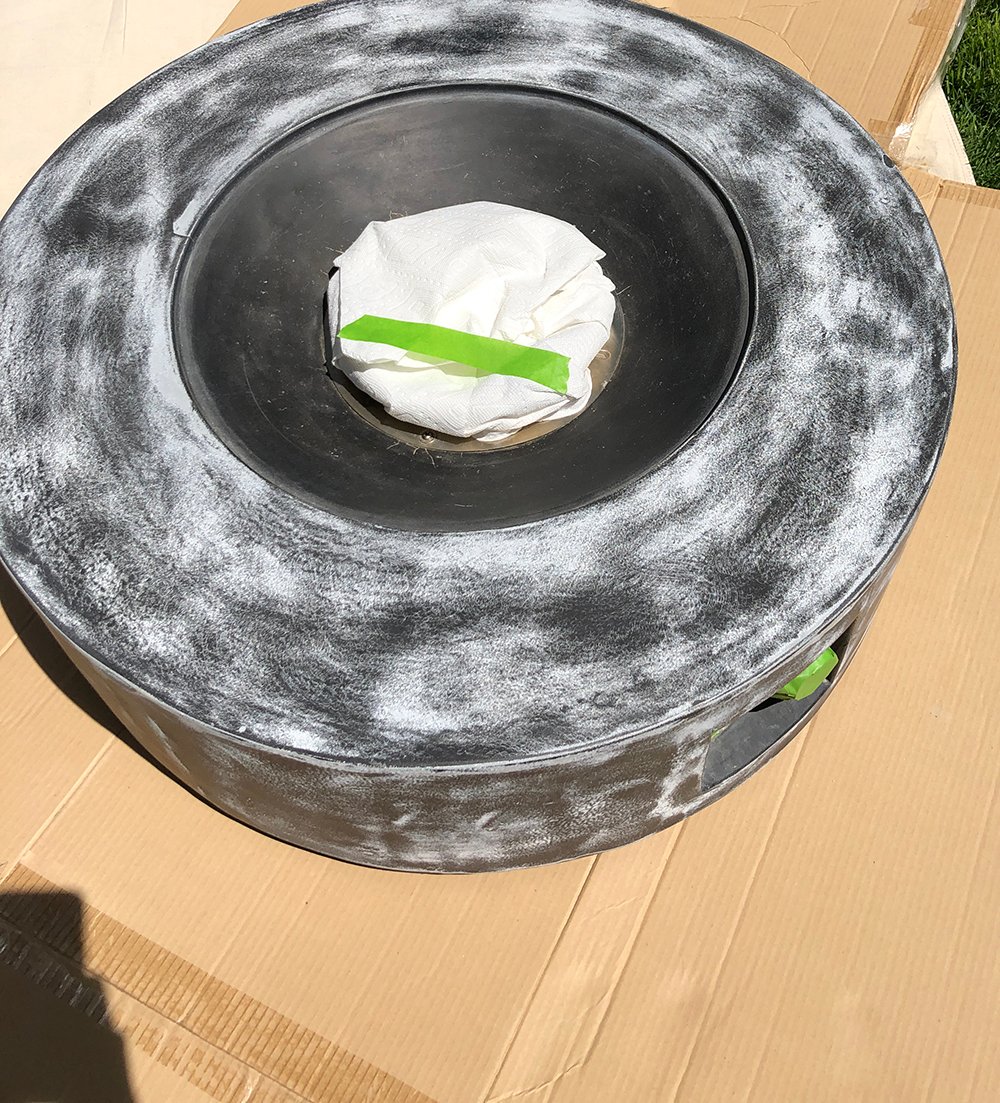 Step 3 // Mask it off. I carefully masked off the electrical and gas components.. the center portion, as well as the control panel and knobs. Once everything is masked off- you’re ready to paint! Thin, even coats is key. This has great coverage and you can layer as many coats as you need, but my fire pit only required one coat.
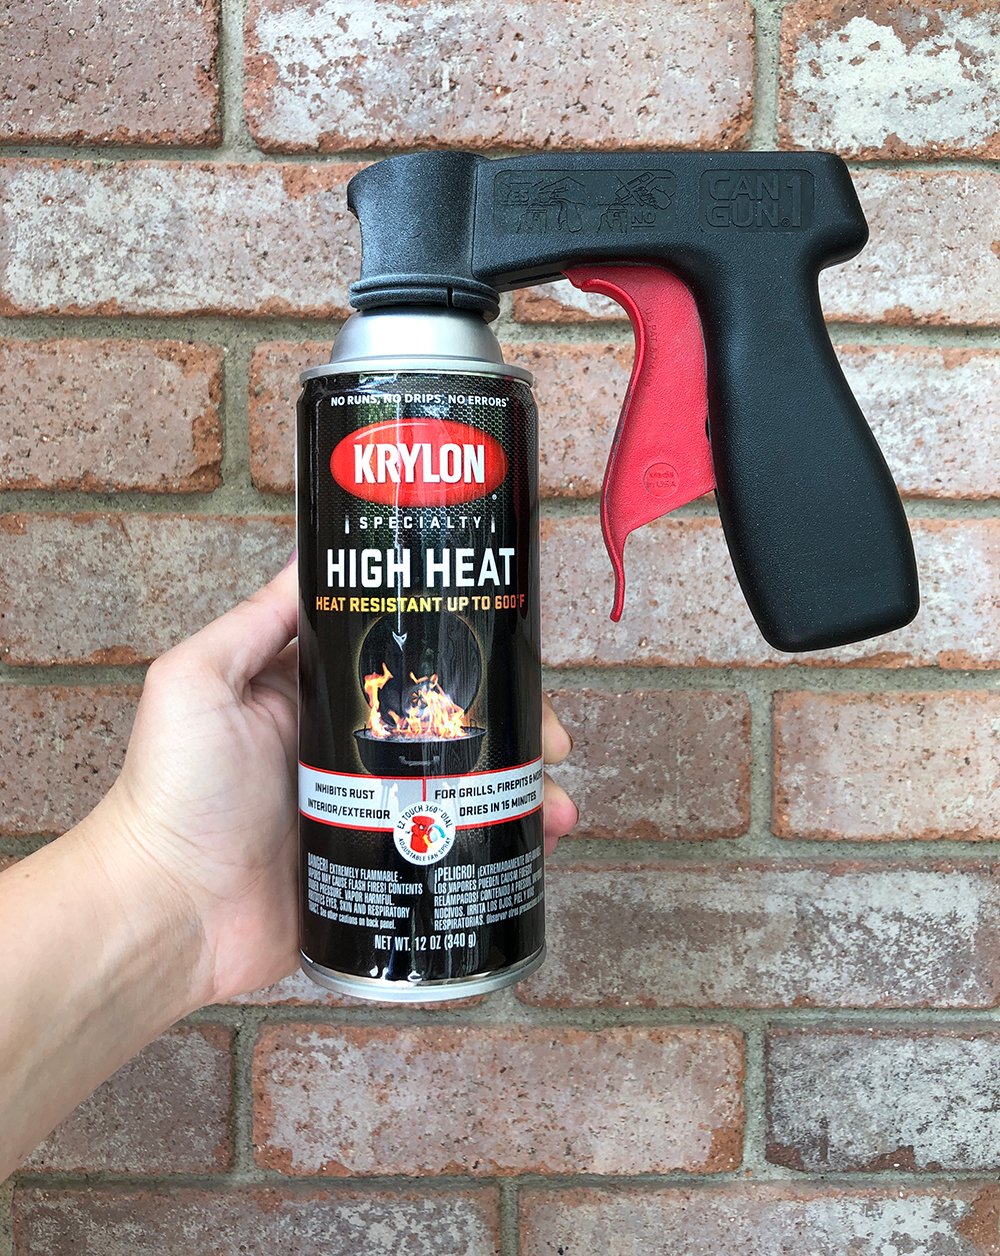 Step 4 // Spray paint. I used Krylon’s High Heat spray paint in flat black. This paint withstands very high temperatures (up to 600° F) and protects against rust. It’s an awesome product for very hot surfaces- fire features like a fire pit, fireplace, or wood stove, grills, etc.
This actually isn’t the first time I’ve used this paint… who remembers our previous backyard? I painted the faux veneer brick fire pit a beautiful white color for an updated, budget-friendly look. This fire pit only required one coat of paint, so I didn’t even use the entire can. Here it is drying, pictured below. I left it to dry for a couple hours while I ran errands, which was more than enough time.
 Step 5 // Reassemble. Luckily, my fire pit didn’t require much reassembly. I did remove the volcanic rock, so I could hit the inside with a fresh coat of paint. I also scrubbed it really well!
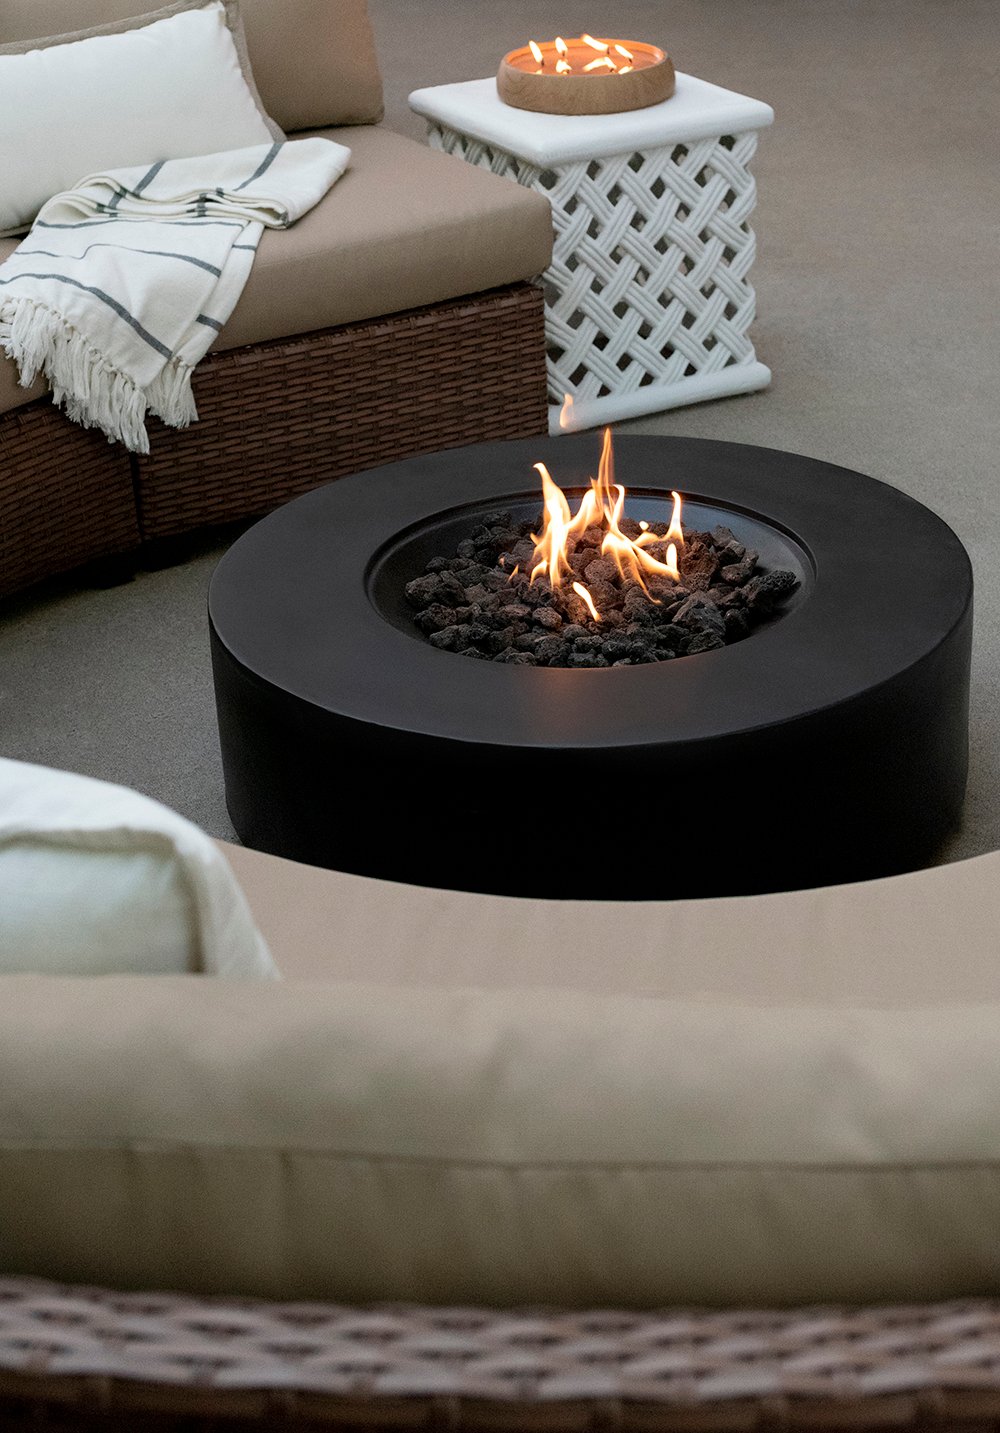
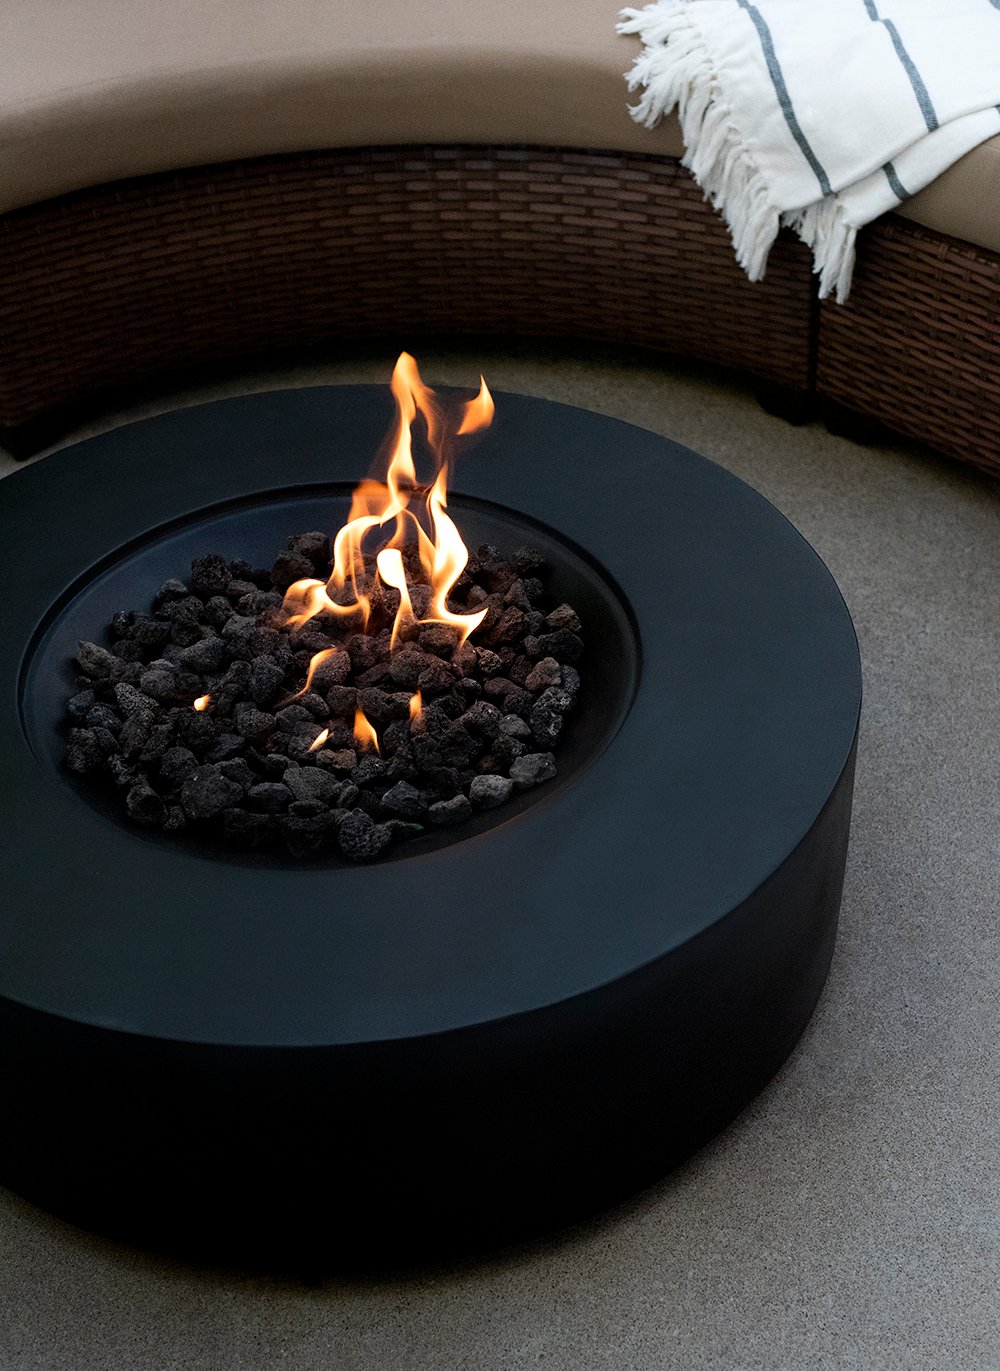
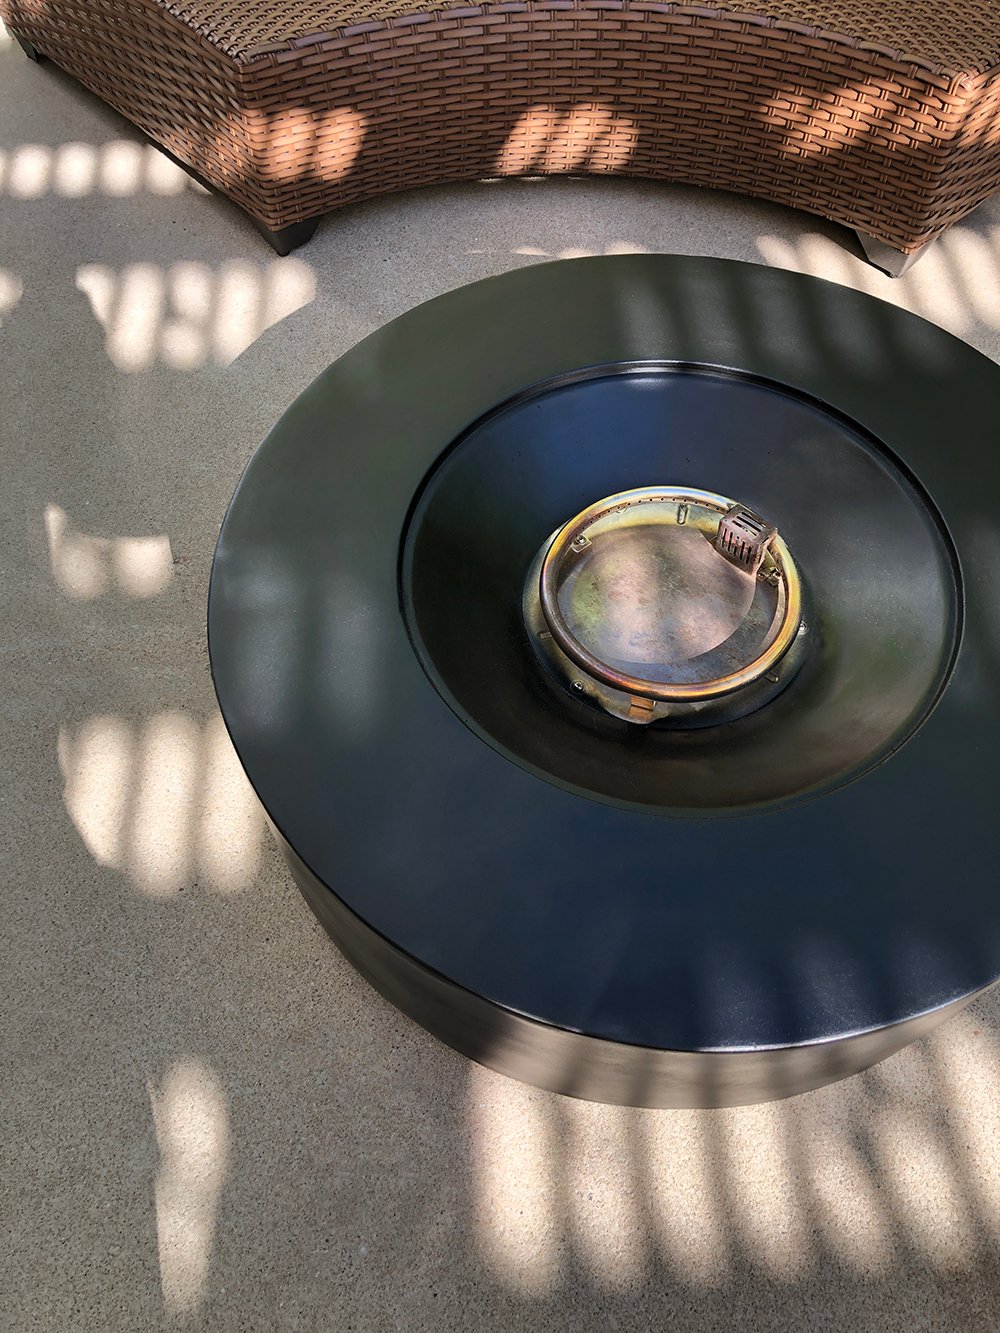 The final step was to add the rocks back into the center portion of the pit. Doesn’t it look so much better? It feels new again!
 Want to see the after? That’s obviously my favorite part of any good makeover- putting the completed project to good use.
 I’m thinking we have many more years sitting around this fire pit, enjoying laughs, good conversation, warmth, our beautiful patio, and of course toasting marshmallows… although Emmett will not be allowed to use the skewers. Ha! I’m only halfway joking.
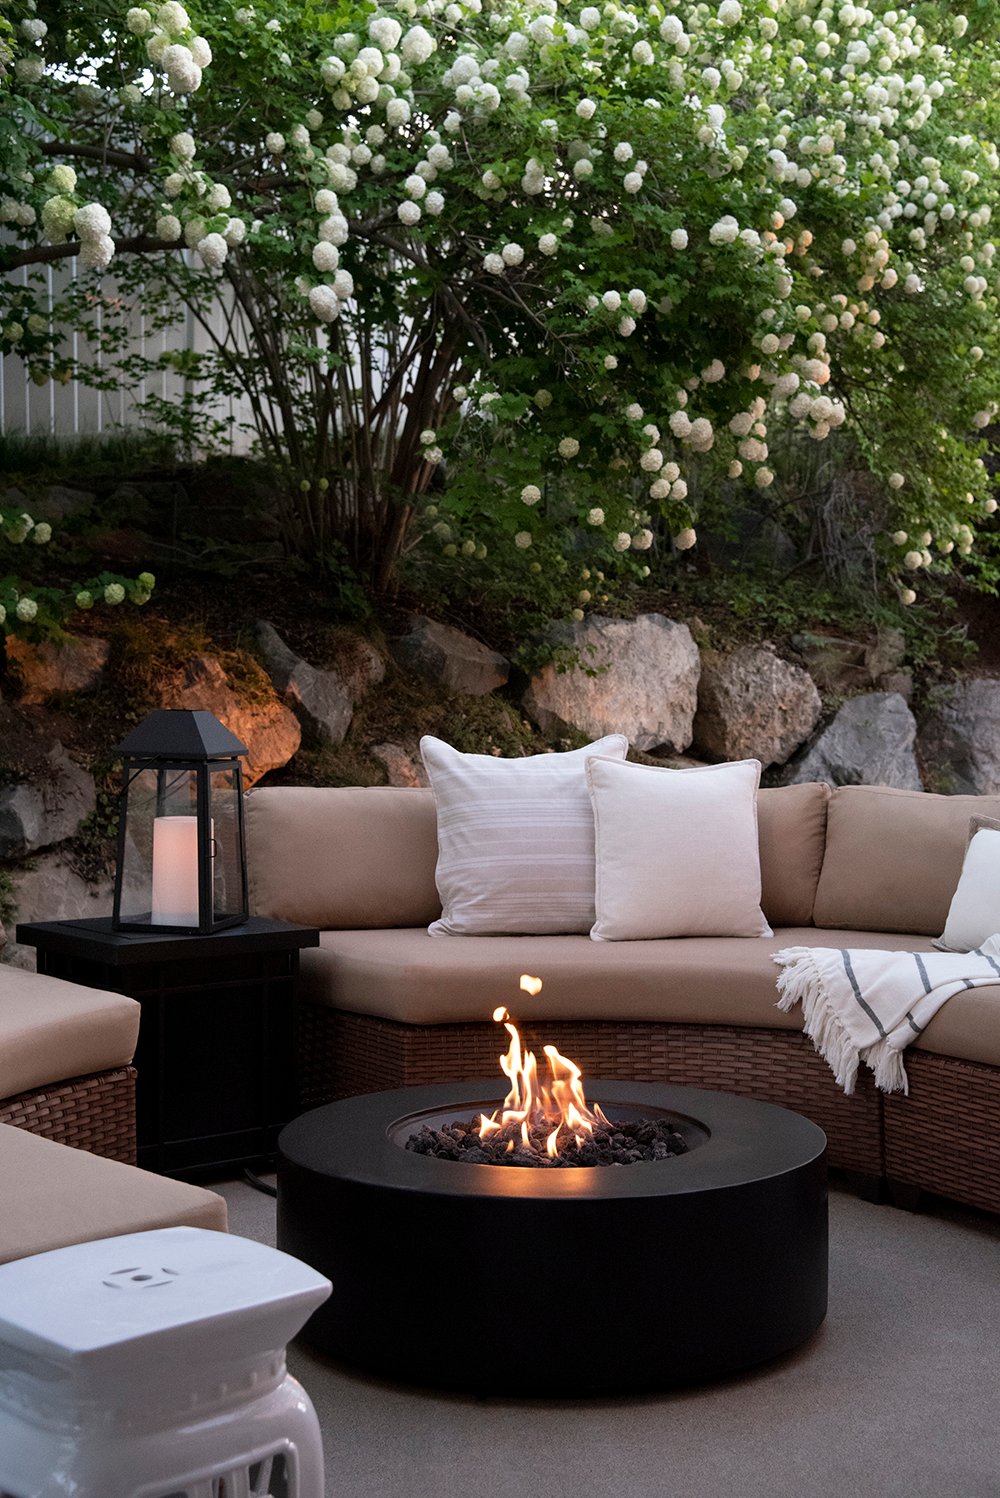 Have you ever had to use high heat spray paint? Do you have a fire pit of your own? It’s a place we always end up gathering around. It might be my favorite piece of patio furniture! There’s something about the warmth and ambiance on those cool Utah summer nights that I really love. We’ve spent hours around this fire pit and I’m looking forward to making more memories this year. For more Krylon project ideas and inspiration, click here.

This is such a lovely, (relatively) quick improvement – it really does look brand new again. It’s such a fine line between a bit of natural weathering and suddenly looking the wrong sort of shabby, isn’t it?! Gas fire pits are very much my preference – wood ones are definitely a little more authentic, but, golly, they leave you absolutely reeking by the end of the evening! I can just see a line coming from yours – do you keep the gas canister under the side table (that’s always a stumbling block about the gas fire pits)?
Ah – I’ve just seen that lots of these come with an included or optional tank holder!
Yes! Such a nice feature. I had to try to find a matching one and buy mine separately.
Thank you so much, Sally! There certainly is a fine line of pretty patina versus shabby wear. Ha! You hit the nail on the head. I love having a gas fire pit because it’s so easy. Instant fire with the turn of a knob, quick warmth, a flickering flame, and then when you’re finished- turn the knob and head inside without the smell. It really is nice! I was bummed to see ours looking so worn, and I’m glad it cleaned up nicely with paint. I wasn’t ready to part with it since it still works perfectly. The gas tank lives under the black side table between the two sofas :)
Wow. Now that’s a before and after! I agree that some patina feels more acceptable than others. (No more metal skewers for Emmett! I always thought hunting for the perfect marshmallow stick was half the fun anyway. 😉) I do love a camp fire; the draw to gather around one is primal. If our patio were bigger, I’d definitely be eyeing one.
Your spray paint jobs always look flawless. You’re motivating me to tackle my next outdoor project-a fresh coat of white on my vintage chaise! I’m not excited about the sanding, but I know it will look 100 times better.
Here’s to enjoying plenty of patio time! Happy June!😲☀️
Exactly! If it would’ve aged naturally… fine. I wouldn’t mind, but Emmett’s skewer trick was not amusing. I’m with you- I like a good ole stick for roasting. Campfires are my favorite and this definitely feels like the easy suburban (we usually have a natural fire ban in our neighborhood) remedy to get the same warmth and flickering flame. Ooooh a vintage chaise?! Tell me more! I also hate sanding, but then I’m always glad once it’s finished and holds up well. Worth the mess (unfortunately). Hope your week is off to a good start and you had the best relaxing holiday weekend! xo
I’m always inspired by how your spray paint projects turn out. I can’t say mine turn out quite as crisp and clean looking as yours-and I’m definitely picking up one of those nozzle thingys for the next one. The fire pit looks brand new! We have a fire pit-it’s nowhere near as nice as yours, and it’s wood burning (I cringe at the smell of fire on clothing), but I think ours is beyond remedy, ha! We have used high heat spray paint for a ton of projects-it’s one paint product we always keep on hand. I have long wanted to try and spray ours- seeing yours makes me want to even more. I may try my hand at it and see if my results are anywhere near as nice. It definitely would be an improvement even if it isn’t perfect, lol. We have high winds slated for the next week, so it will have to hold off, but these before and afters are giving me the courage to give it a go! Thanks for the motivation on this lovely, sunny, first day of June! I hope today kicks off a great month ahead. Happy Tuesday!
The handle is a game changer- seriously. It makes it easier to control and apply even coats. I really do love our fire pit and I’m happy it cleaned up nicely. I was not happy with Emmett’s little marshmallow stick trick. Ha! Let me know if you try painting your fire pit. Fingers crossed it goes well and the winds die down. Hope your week is off to an awesome start and you had a relaxing weekend with the fam :) xox
Your fire pit looks so good! I love the fact that it is gas and logs are not required like our old one. I bought the krylon high heat spray paint for ours but when I removed the lid the bottom had rusted out and collapsed. Need to check out one of the gas ones. We are really missing a fire this summer. Give me all the roasted marshmallows.
Great update to a nice fire pit Sarah. Hope you have a great day!
Thank you, Danna! It really is nice to turn the knob and instantly get fire- without the smell (which I admittedly love… when we’re camping). Ha! Lots of the gas ones come with the propane tank cover these days, which is nice. I had to buy mine separately. You had me a toasted marshmallows- we make smores often in the summer… SO good! You’re making me hungry. Hope you had a lovely Memorial Day weekend and were able to rest & relax :) xox
Oh wow Sarah it turned out wonderfully. Awesome job, it does look like new again. That’s fantastic! I actually didn’t know Krylon had a high heat spray paint. That’s good to know, we have a fire pit, it’s natural gas. We put it in last year with the pool and patio. We knew it would help extend the outdoor season for us and we were not wrong on that. We used our pool and patio right up to mid November the fire pit had a lot to do with that. Regardless if you have a pool or not a fire pit is an excellent way to extend the use of the outdoors. We love ours and we got from wayfair last year. You have many beautiful recommendations with your post though. I still have to paint my end table and some pots and I’m excited to try the Krylon. Just have to do it on a calm day, I messed up on that before and spray painted in the wind, not a good idea. Lol. Your patio looks beautiful and you spray paint like a pro 😍 You have inspired me as always
Thank you, Colleen! I’m wishing I would’ve tackled it last year… such an easy fix! Having a patio heater or fire pit definitely keeps us outside longer and extends our season, too.. especially being in Utah. I can relate! Such a great point about having an outdoor heat source. Wind and spray paint don’t mix- I also learned the hard way, haha! I hope you’re having lots of fun on your patio and are enjoying sunny pool days!! xo
Thank you for sharing your expertise!
I just picked up a firepit and refinished the top following the steps you shared and with the Flat Black. Mine is really flat, and it looks like yours might have a bit of sheen to it. Maybe because I am looking at mine in the direct sun. In any event, the paint finish came out awesome!!!!
And I also used the Paint Can Gun – HELLO that is the best kept secret EVER! What a great and cheap tool. Really appreciate you helping us DIYers do cool things. Thank you!
With sincerest gratitude from California!
I’m thrilled to hear this, Chantale! So glad the spray gun worked out well. Hope you have a great week!
Okay I know this post is so old. I just bought a vintage ufo outdoor fireplace *swoon*, but I need to fix some discoloration in the paint. If you still have it, how has your fire pit held up now that it’s been a few years?