10 Painting Tips for Cutting In
 After sharing my balcony column project, I was surprised how many messages I received about not using painters tape, drop cloth, or protective plastic. I never use painters tape and am not a very messy painter. I’m confident, can cut in a perfectly straight line, and with a little practice- you can too (if you’re not already)! A crisp sharp line is always the goal, right? I promise it’s not difficult… it just takes understanding the method and a nice brush. I’m breaking my technique down in today’s blog post! You can find 10 of my best tips for cutting in a perfectly smooth and clean line. The best part? Save your time and money when it comes to installing painters tape before each project. You really don’t need it! I know some of you are probably thinking, “yeahhh right” but it’s easier than you think. Click through for a confidence booster and a little painting pep talk… plus, a fun giveaway.
*This post is sponsored by Purdy. All content, ideas, and words are my own. Thank you for supporting the brands that allow us to create unique content while featuring products we actually use & enjoy!
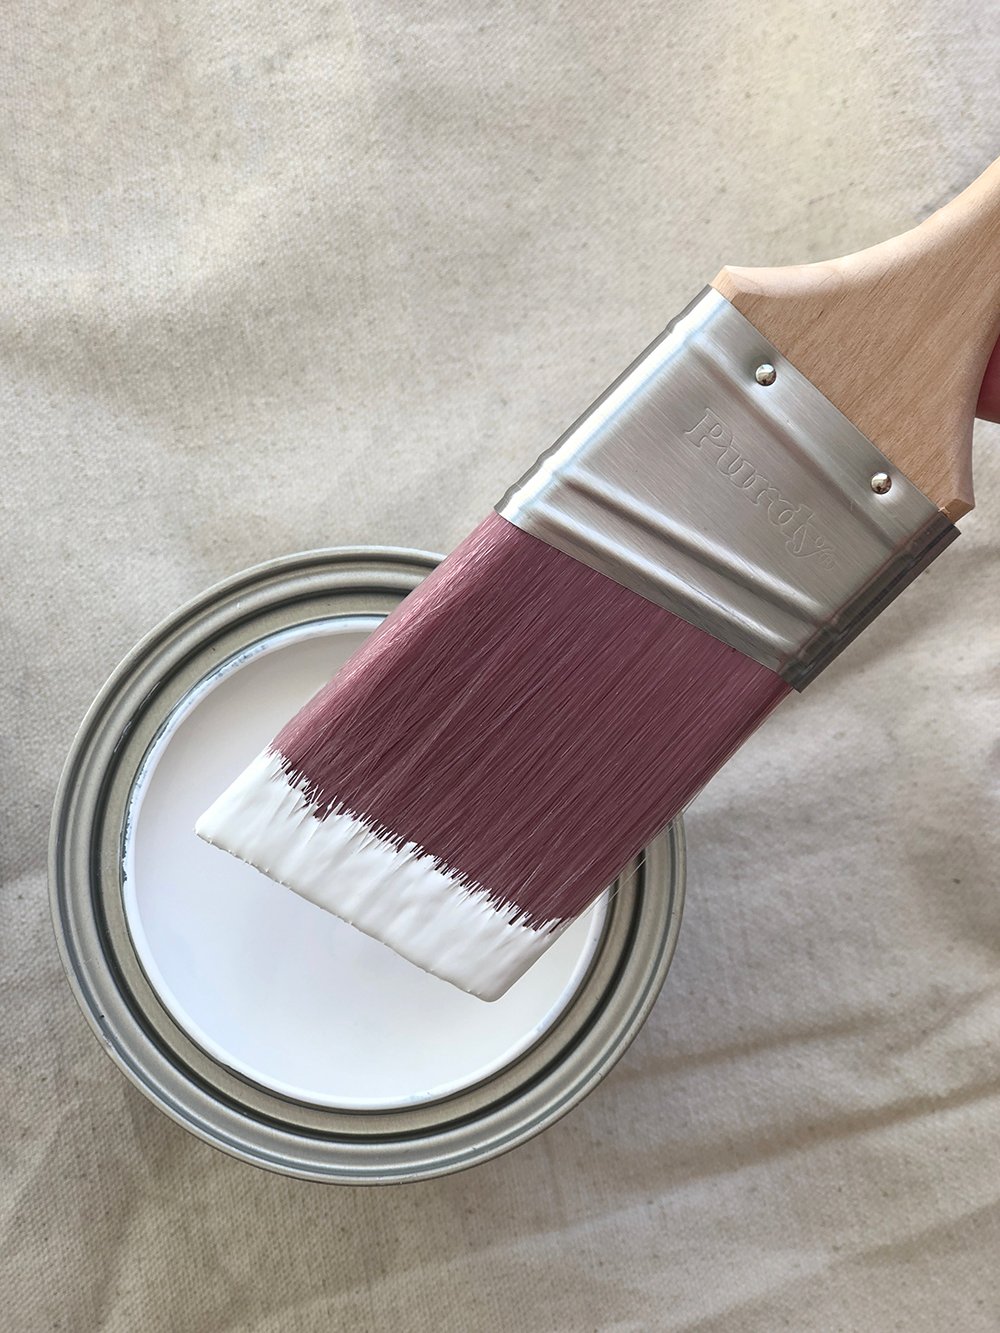
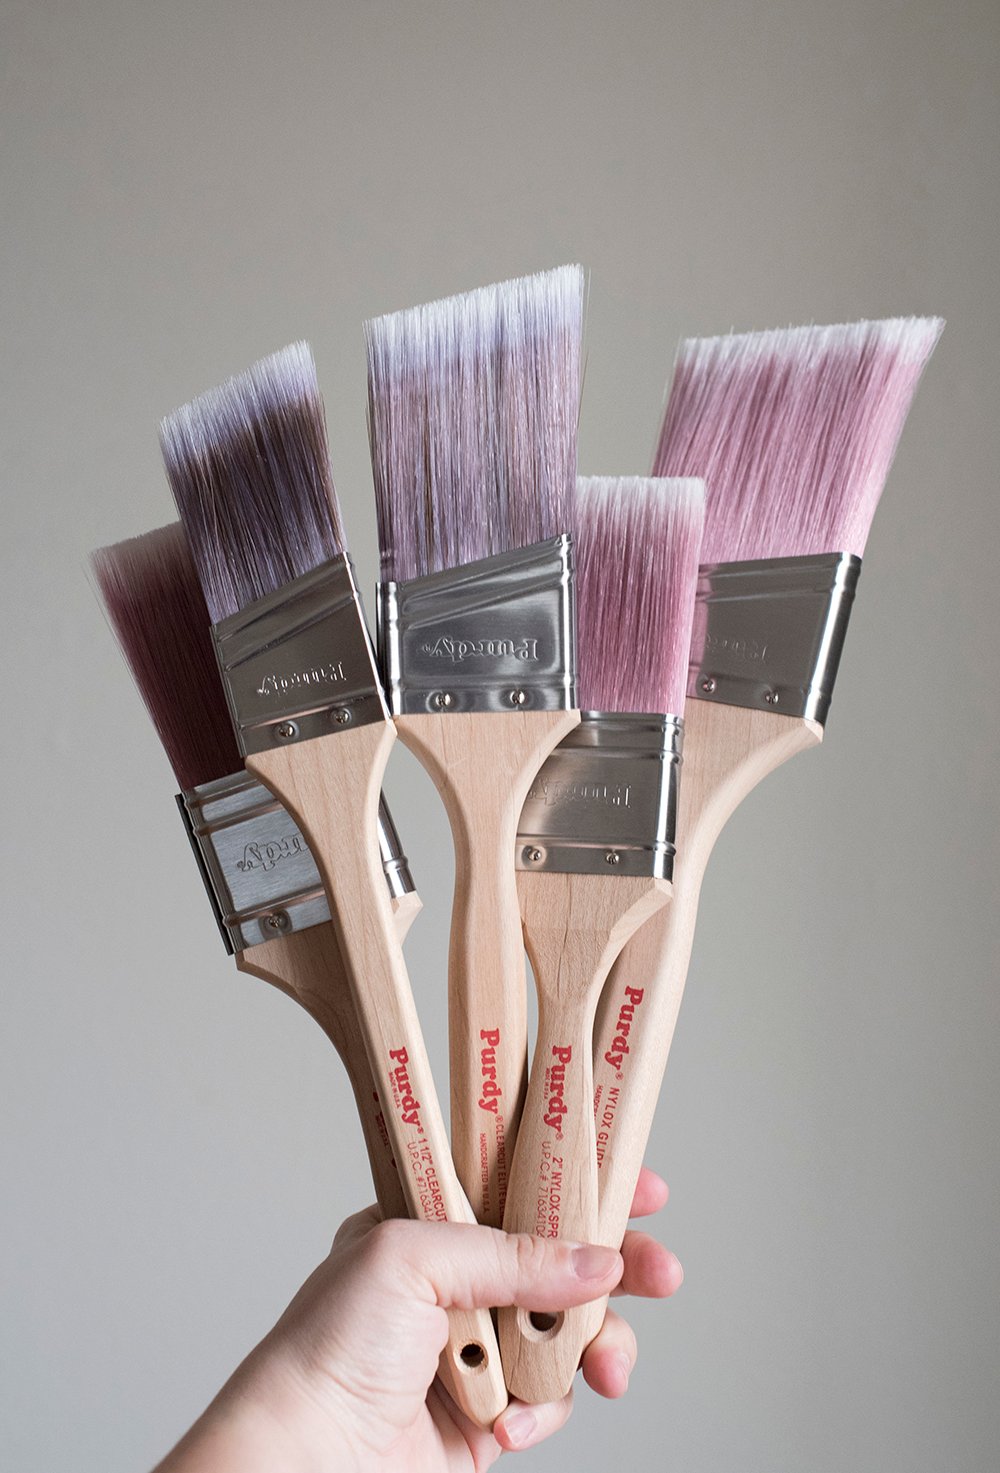
#1: Invest in a High Quality Brush
 I’ve said it before and I’ll say it again- investing in quality paint brushes is half the battle. For cutting in, I always turn to Purdy’s Clearcut or Clearcut Elite brush. I prefer the angular version, but it’s a great brush that produces a sharp, crisp line with minimal brush strokes. I take really good care of my brushes and most of them are over two or three years old. Did you know 100% of Purdy brushes are handcrafted by craftspeople (for craftspeople), using raw materials to build each brush? They’re all handmade. That’s why you’ll notice that each brush is “signed” by the person who created it with a personalized sticker and the brush maker’s signature. I try to buy paint brushes that will last and that personal detail has been a favorite since I learned about it!
#2: Skip the Painters Tape
 Don’t waste your time taping things off (seriously). I’ve found that painters tape doesn’t do a great job to begin with, and I’m able to achieve better results with my trusted brush. That’s usually why I grab the Clearcut brush- because it allows for crisp lines and the perfect paint release. Painters tape usually ends up just being a mess and takes up a lot of time. However, I will use painters tape to tape out art, determine scale, or catch drywall dust if I’m screwing something into the wall… I just don’t use it for its intended purpose of painting. It’s not totally worthless. Ha!
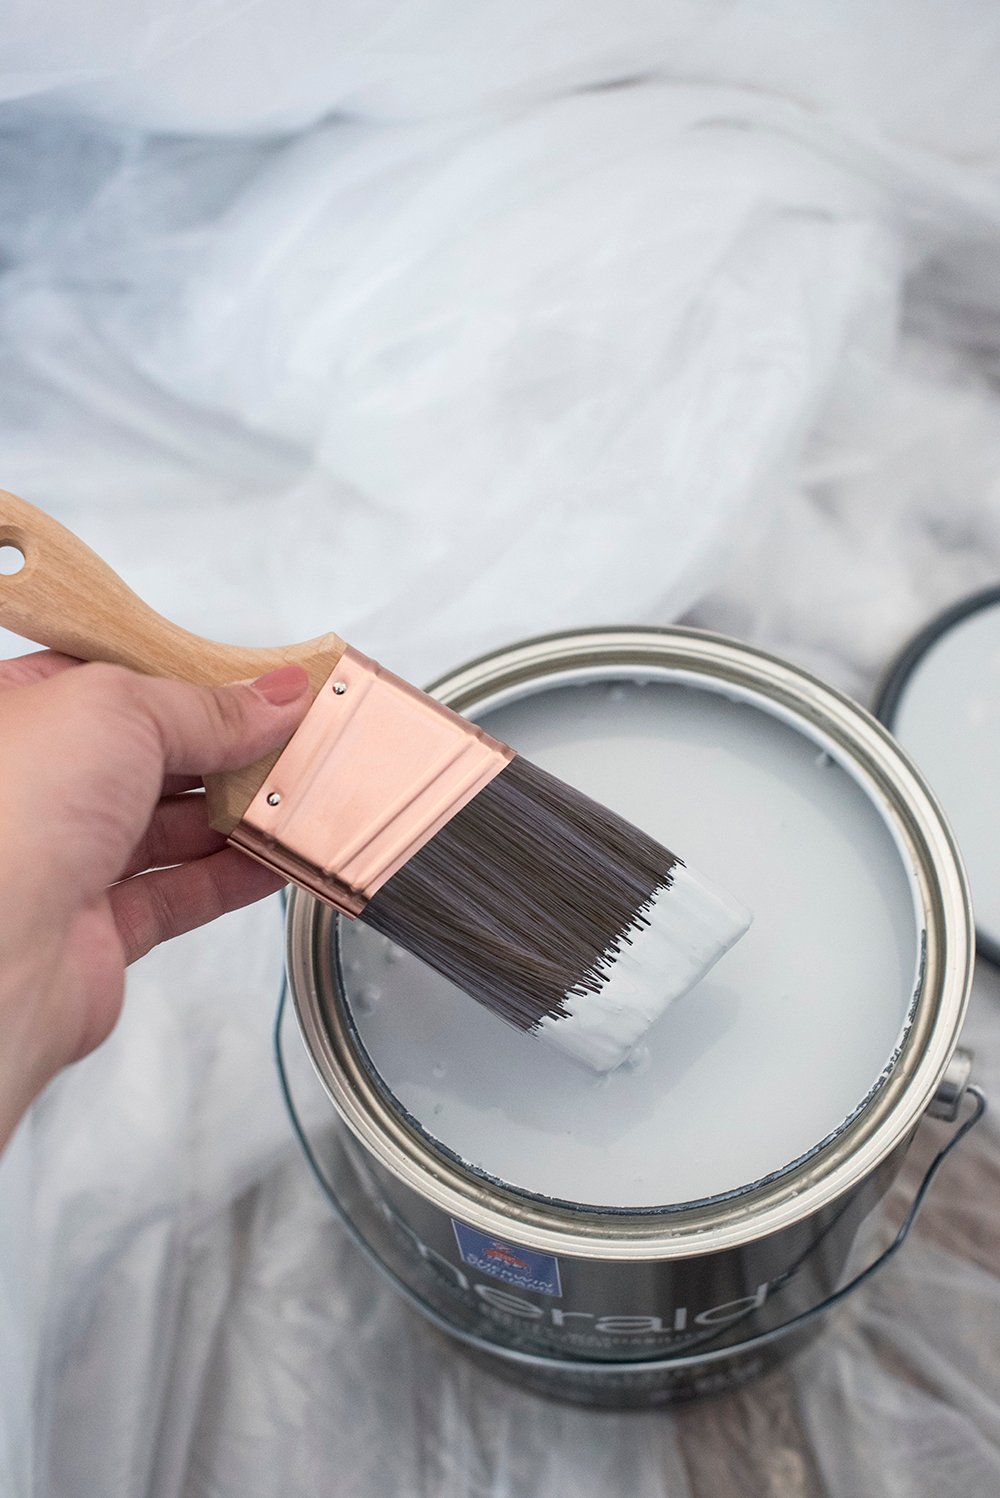
#3: Lightly Load Your Brush & Keep It Clean
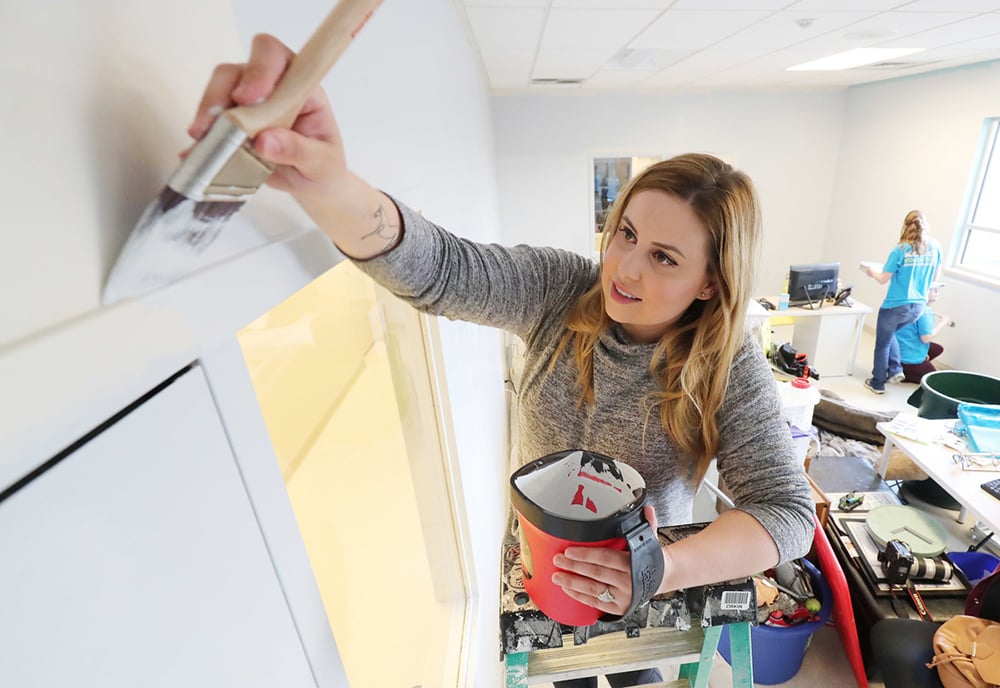 I only use the bottom quarter of the brush when cutting in… and make sure it’s not dripping! A mistake I often notice is a loaded brush that contains too much paint. An overloaded brush can get messy and doesn’t create that crisp line. Try to keep your brush relatively clean, only using the bottom portion. Funny story… when Emmett & I tackled the Humane Society makeover, a newspaper reporter showed up and asked me if he could take my photograph painting (at the time I was prepping a different wall), so a volunteer handed me a paintbrush. It was a MESS, haha. I grabbed it and started trimming out the door casing. Long story short, the above photo ended up in the Salt Lake Tribune and that messy brush is totally not representative of how my brushes normally look when cutting in. I’m sure nobody noticed, but ugh. Talk about a pet peeve! Moral of the story? Keep your brush tidy- it makes for a clean line and less accidents.
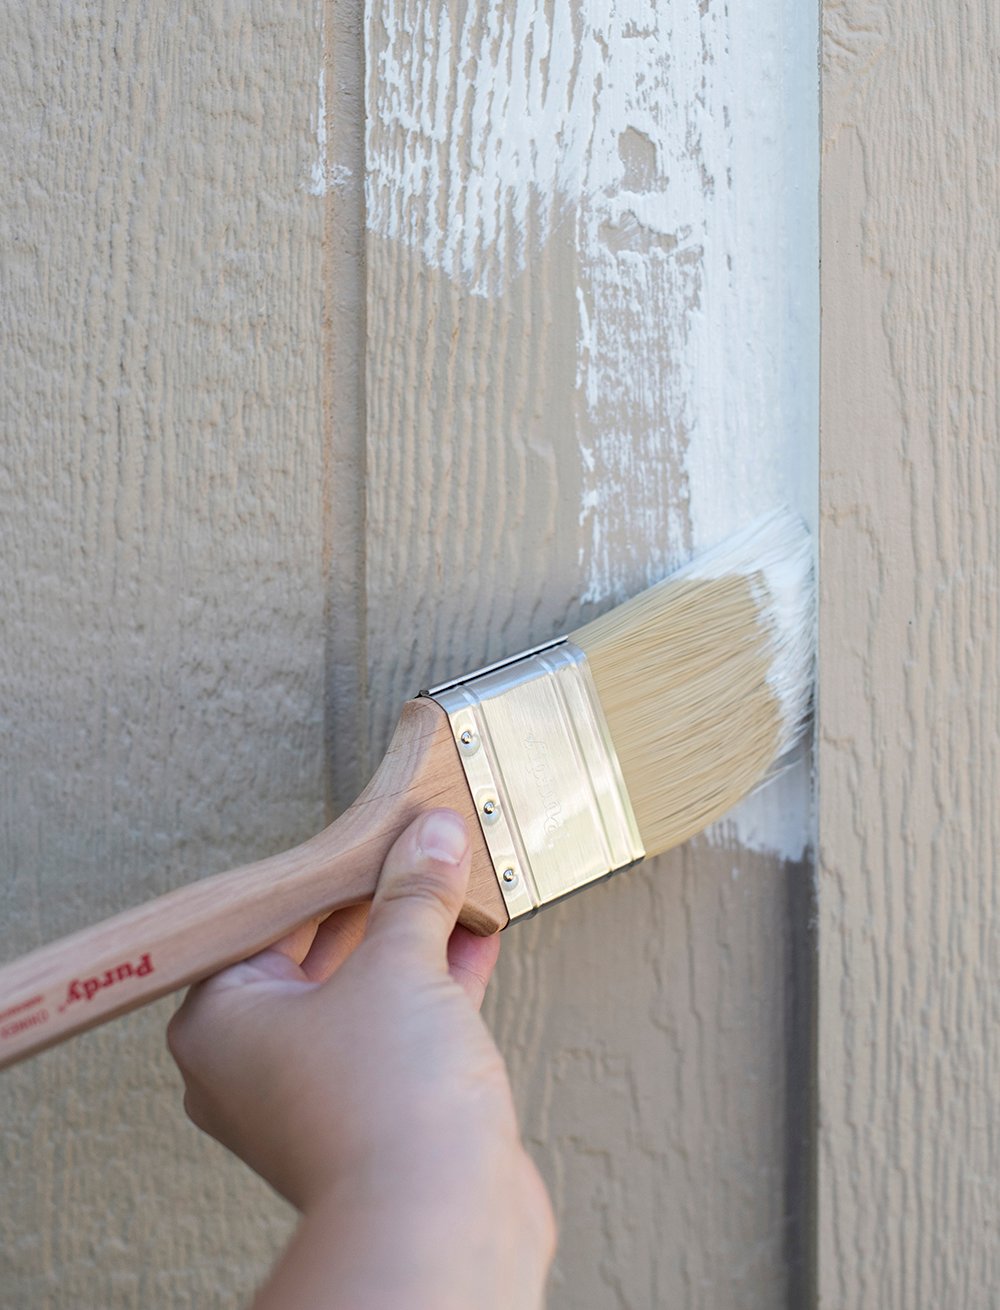
#4: Don’t Start Exactly on the Line
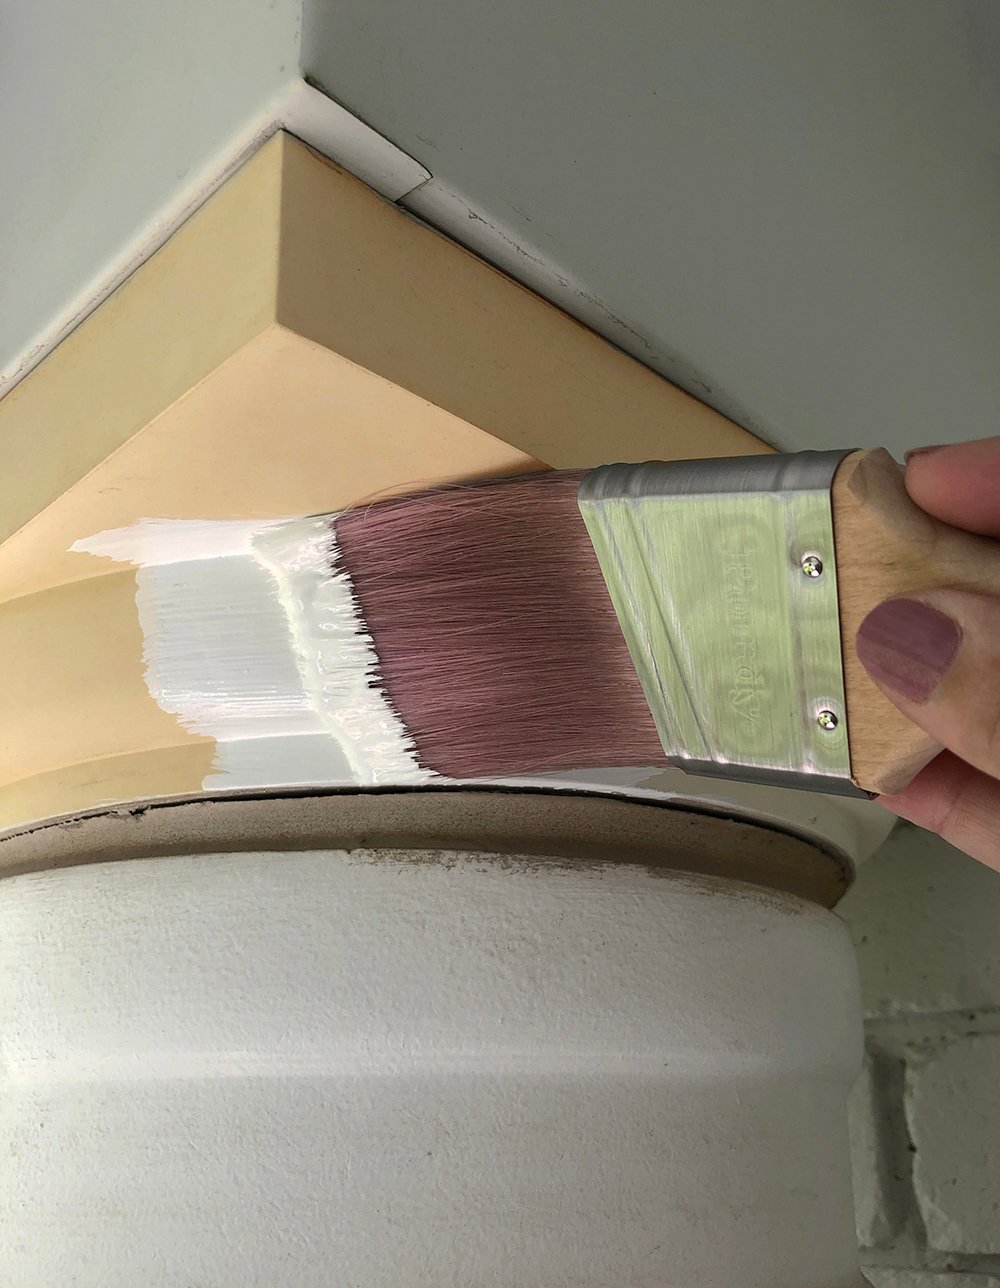 When you gently press your brush to the corner, don’t place it exactly on the edge or line you want to paint. Pull back about a quarter of an inch to begin with, then slowly move closer as you gain control of the brush. That first bit is always the most challenging, but once you find your rhythm, it’s smooth sailing.
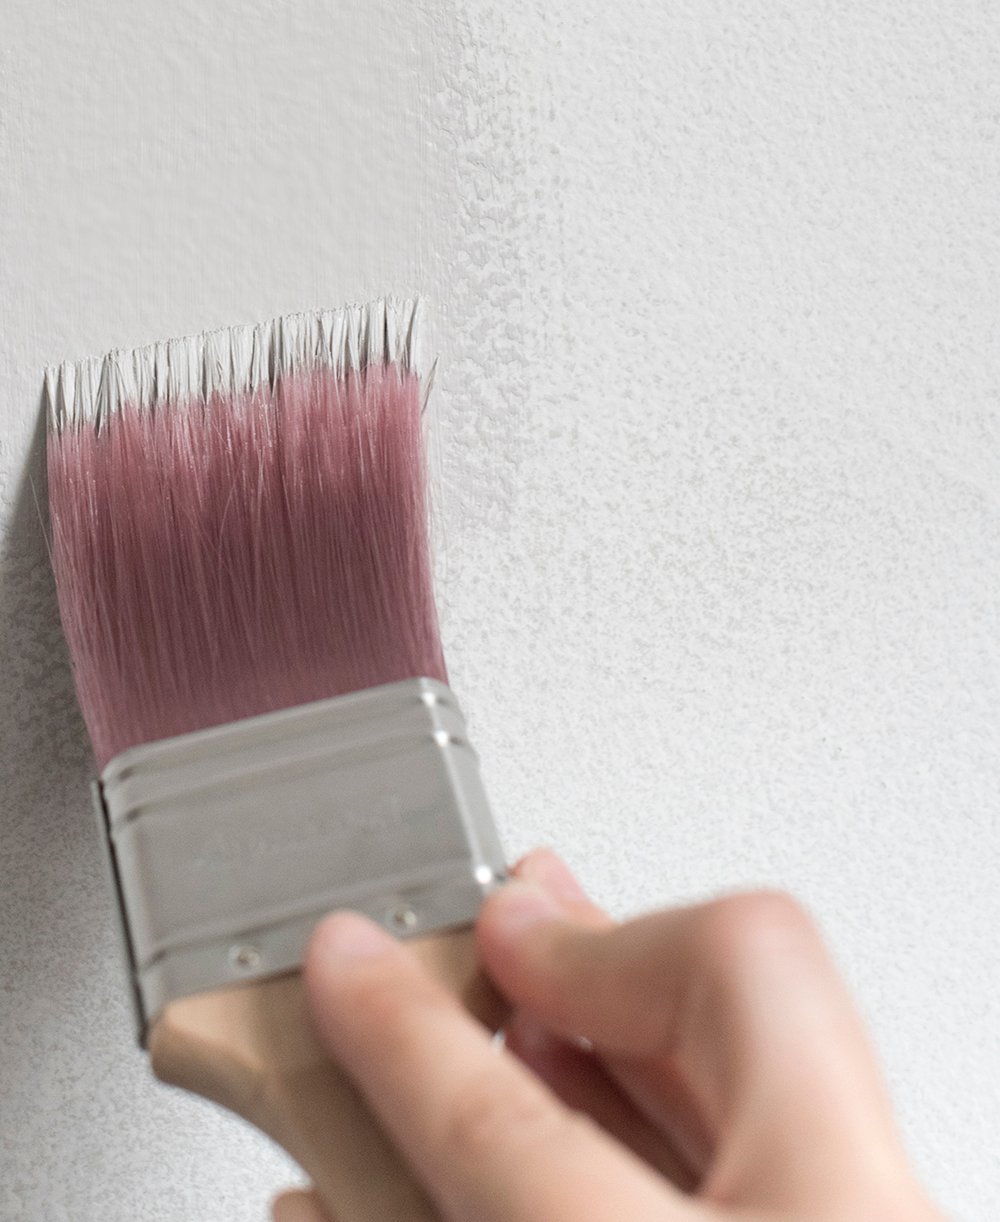
#5: Fan Out The Bristles & Apply Even Pressure
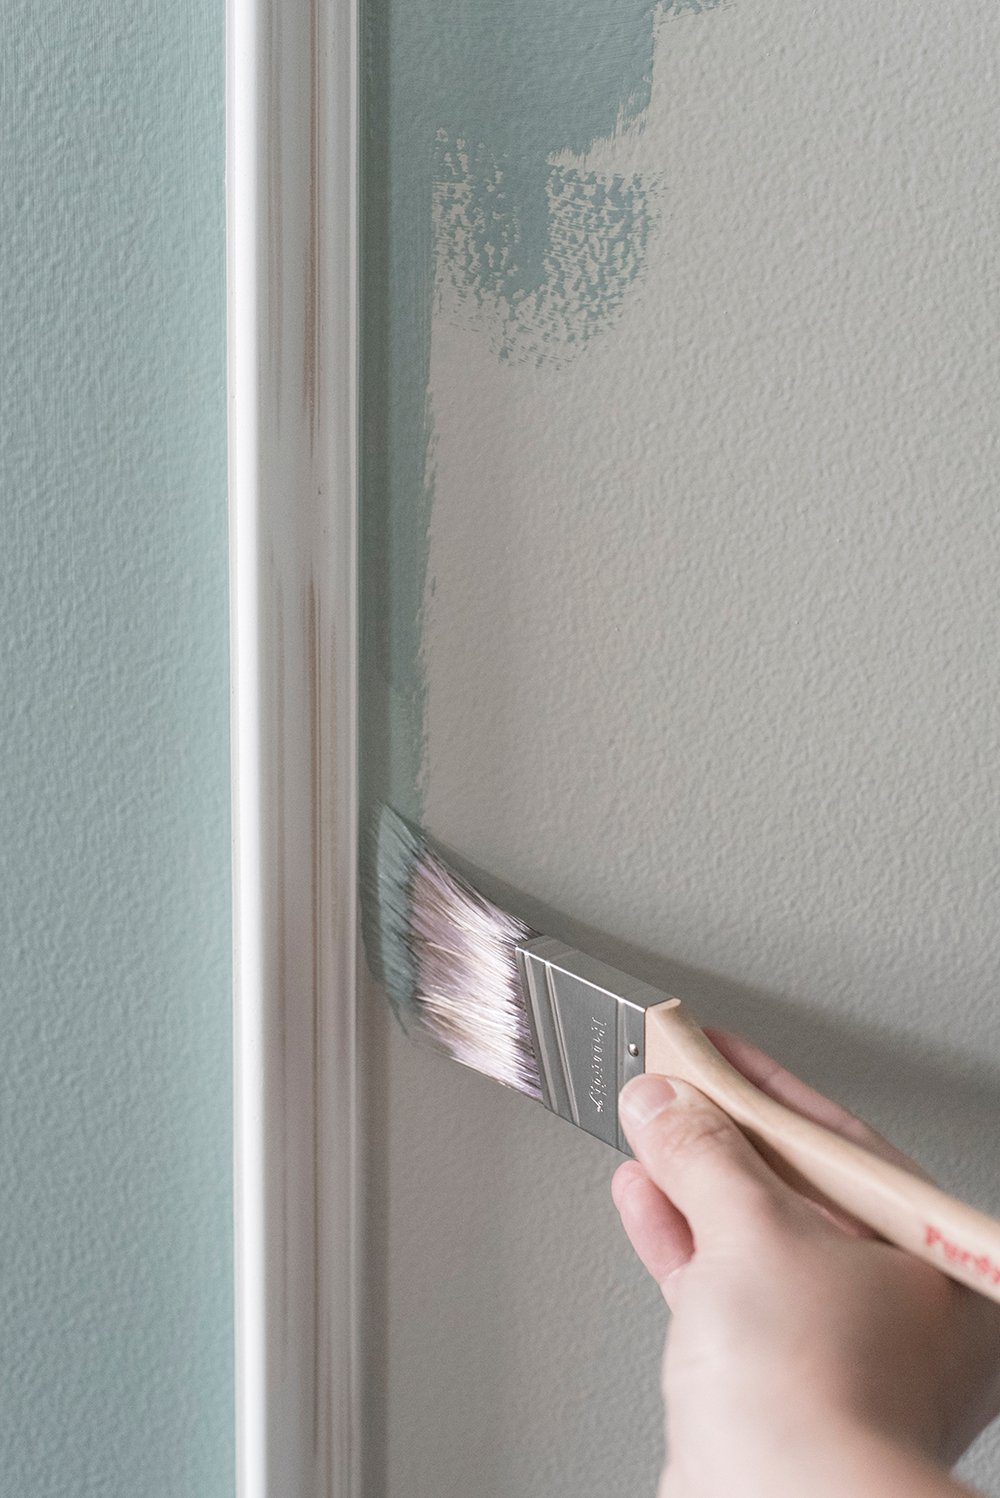 As you’re dragging your brush down the line or edge, apply gentle even pressure, fanning the top bristles slightly as you pull the brush. The fan should barely touch the edge or corner, creating a crisp line.
#6: Use a Light Hand
 Applying too much pressure can cause the paint to ooze or drip from your brush. Try to use a light, gentle, and steady hand. I’ve found that if you pull the brush too slowly, it can actually be more difficult. Find a good medium pace with light pressure.
#7: Feather It Out
 If you’re noticing any excess paint or ridges, use the backside of the brush to feather it out, blending any harsh edges or noticeable brush strokes.
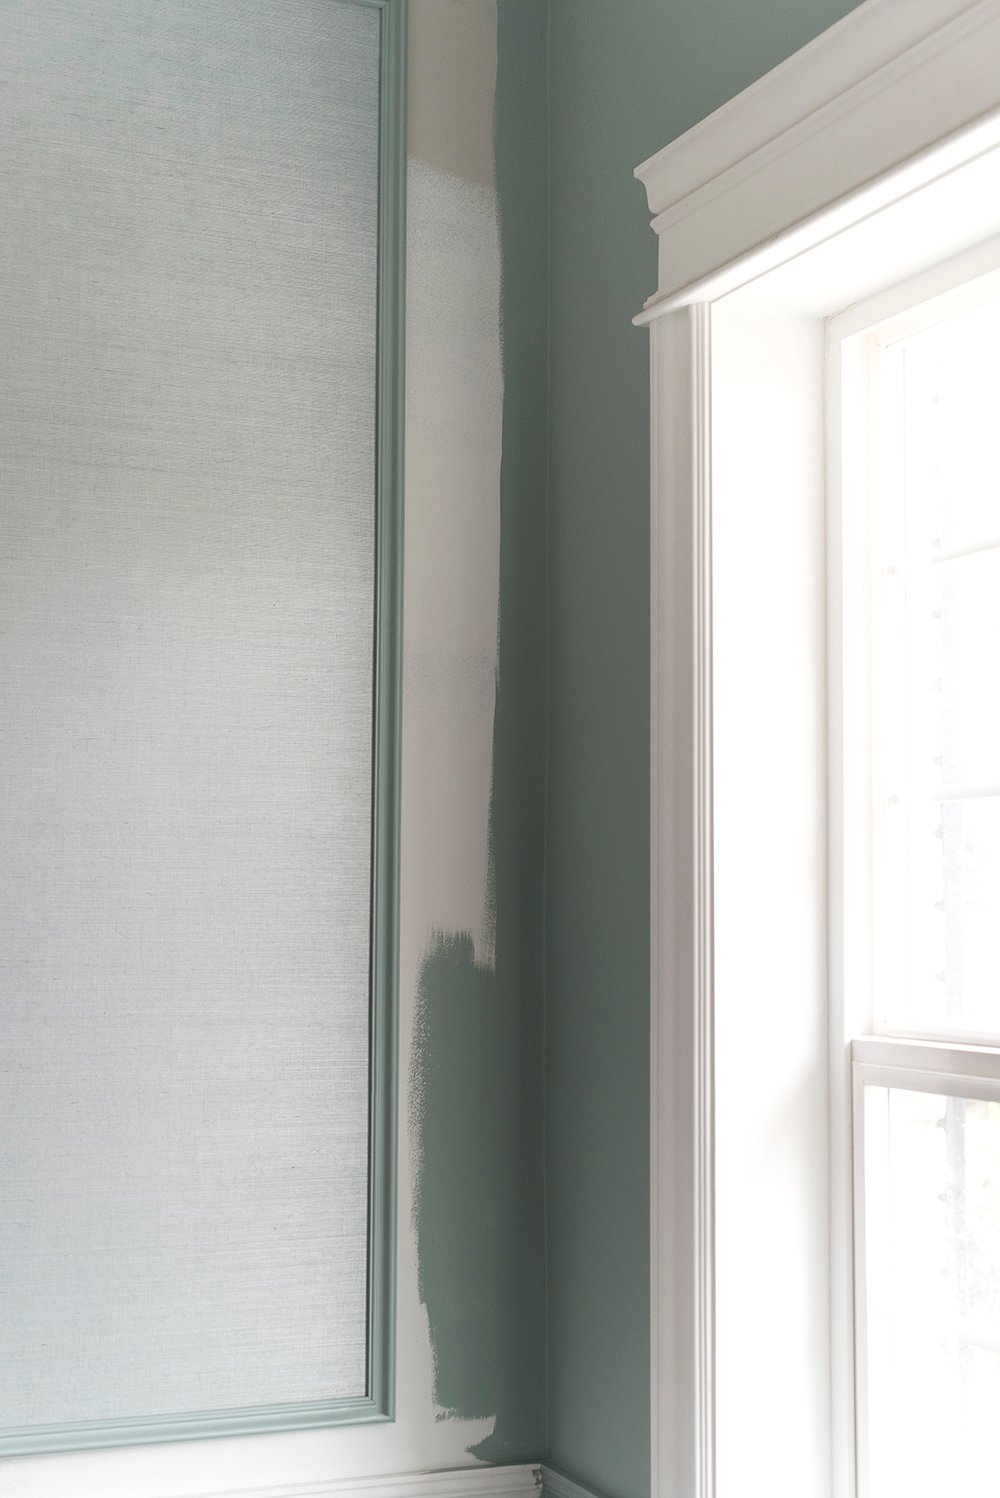
#8: Work in the Appropriate Order
 It’s important to cut in before you beginning rolling a wall. Always work from the edges inward. The texture or nap from the roller should seamlessly blend over top of the border that you previously cut in.
#9: Tackle One Wall at a Time
 I always recommend finishing one wall completely before moving onto the next. This way, you’ll have a seamless transition and all of your walls will match perfectly. It’s also important to continue stirring your paint throughout the duration of a paint project, so the color and viscosity is consistent.
#10: Keep A Wet Rag Nearby
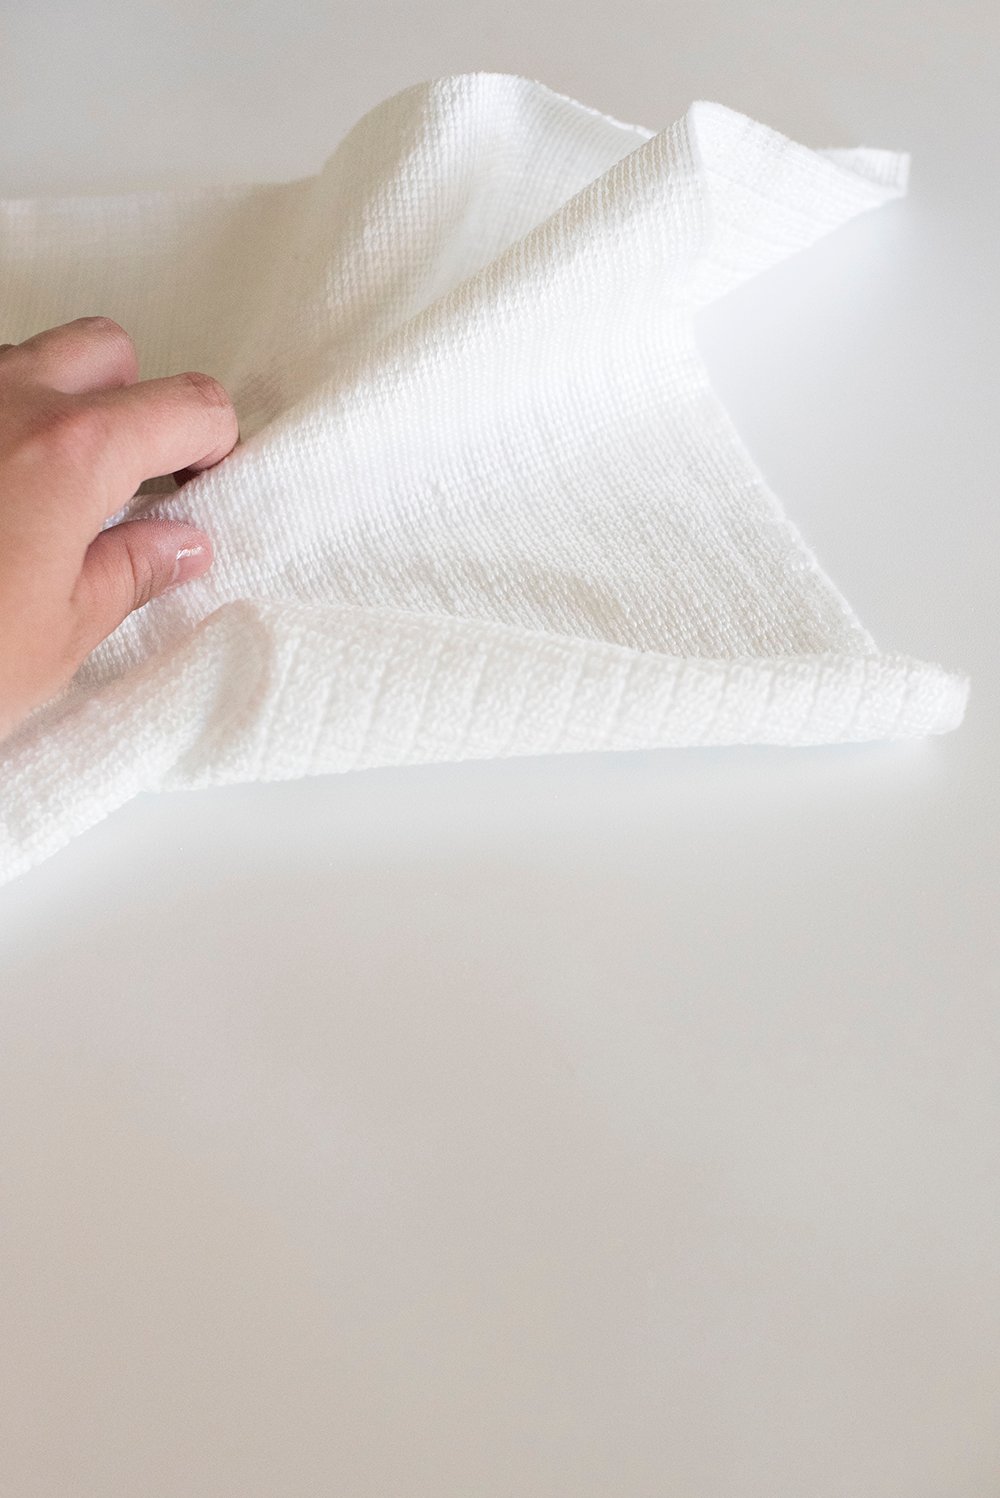 Keep a wet rag nearby and clean mistakes immediately… paint is more forgiving than you expect, and is easy to wipe off if you mess up. If you don’t cut in perfectly the first time, wipe it up and start again! No harm done.
 Ready for the giveaway? I’m giving away a bundle of my favorite Purdy brushes! Here’s how to enter…
*Giveaway is now closed! Congrats to the winner- I’ll do another brush giveaway soon!
- Follow @purdypainttools on Instagram.
- Follow @roomfortuesday on Instagram (if you’re not already).
- Comment below on this blog post.
Of course practice makes perfect. It may take you a time or two to really nail the technique, but I know you’ll be cutting in like a pro in no time at all. You’ve got this! Let me know if you have any questions- I’m always happy to help. To find your own Purdy brushes, click here.
First of all, I have to say that if my picture was taken while I was painting, the messy brush would be the least of my worries!😂 I actually gave up painters’ tape a long time ago. I learned on my own that it doesn’t work and creates SUCH a mess. I do find it handy for visualizing rug sizes or art and furniture placement, so it’s not completely useless! I have a fairly steady hand and intuitively load less paint on the brush when I’m cutting in. I have also noted that, surprisingly, you can clean a fair amount of wet paint mishaps! I haven’t ever completed one wall at a time; I finish all the cutting in, then all the rolling. Making a mental note of this tip! My two problems are rushing and subpar brushes. The prep for painting can take so long that I start to get anxious for the good part (pretty colors!). I have to remind myself to enjoy the whole process. Does that sound silly? Am I the only one who has to occasionally give themselves a pep talk? Mindset is everything. A tougher switch for me has been purchasing premium brushes! I usually opt for mid-range, no name brand. Probably because I’m not that diligent about caring for my brushes, I think of them as disposable. Gulp. Can we still be friends? Also, I generally buy all of the paint first, and sticker shock can make me skimp on brushes. I guess I should buy my brushes first! I actually don’t have any paint projects planned, but my friend has an entire house to repaint. I should show up for paint duty with a set of new Purdy paint brushes! Thanks for the tips and the perfect gift idea. Have the most amazing sibling trip! (I can’t wait to wrap my brother in a big sis hug 😍) Cheers to squeezing in Pizza Friday and safe travels for all!🍕✈️💜
Hahah! True, true. It’s always SUCH a mess… painters tape. It never works for painting, but I definitely love it for the different applications you mentioned. I’m with you on slowing down and enjoying the process. It’s actually one of my favorite home improvement tasks to do, paint. I find it really relaxing, but I have to be in the right headspace before I get started. Rushing never works well for me either. We can still be friends, even though your brushes are disposable. Hah! I’m so picky about my brushes. I don’t let anyone use them and spend forever cleaning them. It’s a weird thing, but my brush collection is getting old and they’re my favorite. So fun and sweet that you may hop over to help your friend paint! That really would be a cool gift idea. Why have I never thought of that? I hope pizza Friday was fantastic and you have a wonderful trip! xo
Thank you for these tips! They are super helpful and I can’t wait to try them on my next painting project!
I love hearing that, Brittney! :)
Thank you – these tips are so helpful! I’m about to start painting pretty much all of my house (and trim!) and will have a lot of cutting in to do!
I’m so happy to hear that, Jessica! Happy painting :)
Thanks for the tips!
In terms of caring for your brushes so they last, how do you clean them and store them? A couple times I thought I cleaned them but then when I pulled the brushes out a few months later they were stiff and clumped.
I chat about cleaning and storing in detail in this post: https://roomfortuesday.com/10-pro-painting-tips-a-giveaway/ Definitely check it out… and keep the brush packaging- that is KEY!
Ohh the timing is perfect for these tips. I always use Purdy brushes and we are about to move in to our new house and will have tons of projects.
I’m going to drop my best tip for painting which is to dip your brushes in water before you start. All the way to the root of the bristles. Then squeeze them dry with a rag or paper towels. The water in the bristles will help keep the paint from wicking upward into the brush making it easier to clean.
Congrats on your new house, Korin! I love that tip! It’s something I haven’t tried, but definitely will for my next project. Thank you for taking the time to share!
Great tips! I didn’t know that Purdy brushes were handmade and signed!
Thanks, Sara! Isn’t that cool? I enjoyed learning that, too.
These are great tips for people who rely on painters tape and would like to ditch it! I don’t use painters tape or drop cloths either. I was just painting the kitchen last week, and Jeff was staring at me for at least 15 minutes. I asked him what was wrong and he said “I don’t know how you can paint like that and not get paint everywhere.” Messy painters are a huge pet peeve for me. I’d rather spend a week tackling a large paint job on my own, than get it done in two days with a messy painter that needs all the extra prep of painters tape and drop cloths.
Purdy’s clear cut elite is the most legit paint brush I’ve ever used!! I will never go back to other brands-after using any of their brushes you will understand why the majority of a good paint job is in the supplies you use. Care and maintenance with a good brush is key!
I have a tip for cutting in as well: don’t cut in your entire wall at once. Think of your cut-in as an active wet edge and work in sections. I love the Handy Paint Tray for this- the magnet for holding the brush, the notch for holding the roller, plus the large capacity for paint, all make a paint job quick as can be! Thanks for sharing your tips Sarah; you have me itching to finish up the last small walls in my kitchen so I can move on to other areas! We have a ton of painting to do, but I enjoy it and am looking forward to seeing the transformation.
Haha! Emmett does the same thing. It used to make him really nervous, and now I think he *finally* trusts my ability. It only took a decade. Haha! That is hands down my favorite brush from their collection as well. It’s the best for trimming! Great tips, Lauren! Thanks for taking the time to share. I also love the paint pails- those are the best invention. Hope you have a wonderful weekend ahead. Stay cool! xo
Thanks for the tips! I never tape off either. I’m pretty sure my worst paint jobs we’re the ones someone made me tape (at their house, not mine).
SAME! I wholeheartedly agree and have been in that same situation.
Great! Thank you for the tips. Have you had any supply issues with pain lately? I have three Sherwin-Williams stores located near my house in Charleston, and every single location has been low on stock and isn’t offering any samples. It’s been that way since March! I wonder if any other areas are noticing this shortage. I need to pick up one of those cut-in brushes. I’m working on painting my son’s bedroom and our screened in porch.
Actually, yes! Our local SW has been out of some products we use (Emerald Interior). Unfortunately, I think the supply chain issues aren’t going away anytime soon… we’re experiencing them with many products- it certainly seems like a global issues right now :( Good luck painting your son’s bedroom and porch, Sarah! xo
Love these tips! Would love to win a collection of Purdy brushes for some upcoming projects.
Thanks for reading and taking the time to comment, Kaitlin!
Thanks to you and all your wonderful tips Sarah, I am less messy at painting. I still cannot forgo the drop cloth. I have been known to knock over a bucket of paint or drop the paint brush onto carpet. I am also a very messy cook! It ends up looking good and tasting delicious but the process is a bit of a mess…Ha!
Love love the Purdy paint brushes. I too used the mid-grade ones until you talked about quality and why they are best for painting. In fact, I use the paint bucket and large tray like you suggested some time ago and they all make the job easier. Keep the tips coming!
Have a wonderful family trip! Family is the best!
I love hearing that, Danna :) Ha! I have to laugh at knocking over the bucket or dropping the brush. That’s what the drop cloth is for! That sounds kind of like me, but because I can be clumsy. Ha! Hope you have a wonderful weekend. We’re excited to have family time and make some memories with our nieces and nephews we haven’t seen in years. So crazy! Happy Friday! xo
I’m obsessed with my Purdy brushes — they really do make a big difference in quality of line you get! :)
Me too! They really do create the best outcome.
Thanks for the tips! I’ve tried cutting in and usually make a mess, so can’t wait to try again with these tips. One more question for you… it looks like sometimes you use the short tip of the brush and sometimes you use the whole width of the brush. How do you decide how to angle the brush? Do you start with just the tip and then switch as you have less paint in the brush? I have a hard time getting the right amount of paint in the brush… after you dip the bottom fourth, do you still scrape off one side or both sides?
Great questions, Charlotte! I typically use the entire end of the brush, but it looks more evident as the project progresses and the brush loads with paint. I probably just documented the photo at the beginning of a project versus the end, but I usually do it the same each time. Sorry if that was confusing! As far as the amount of paint goes, be sure to not overload the brush… sometimes I’ll scrape one side of the brush. I’ll work on a video during our next paint project :) I think that will be easier to see and explain with a visual.
I’m with you, Sarah, I don’t use painter’s tape, either. Decades of practice have given me the confidence to paint those cut-ins without it. Having a quality brush like the Purdy angled brush is definitely a key to success as is good paint and not overloading that brush. It’s a million times easier to be careful from the get-go than have to clean up later! Thanks for this great tutorial!
It really is the key to success- and you’re definitely right about not overloading the brush. So much easier and cleaner! Have a great weekend, Molly!
I don’t do Instagram so can’t take advantage of your giveaway but thought I’d chime in with my tips:
– A stubby handled angled brush seems to give me better control – I’ve had mine for almost ten years.
– I cut in and roll the walls first – getting just a tiny bit of paint on the trim (maybe 1mm or so). Then when I paint the trim I get as close as possible to the wall – overlapping that bit of wall paint for no gaps.
– Moving slowly causes more wobbles so I start somewhere less noticeable and build my confidence for the more visible areas.
I’m getting ready to paint a hallway with seven doors – lots of trim and cutting-in. Three of the doors will get painted later with the room they belong to and one was painted with the only room we’ve painted since moving in – but that still leaves me one louvered door, one set of wide bi-fold six panel doors, and two regular six panel doors. But I’m hoping to transform a dark cave into something lovely – wish me luck!
I love your tips! Thanks so much for taking the time to share, Cheryl! Those are really great points that will be helpful for everyone. Good luck painting your hallway! Wishing you the best of luck and a beautiful transformation. I have no doubt it will turn out amazing.
Purdy brushes are my favorite! I am slowly becoming more confident about not using tape, but I do rely on it sometimes.
Same! They really are the best. Practice makes perfect. With every paint project, we improve :) Thanks for sharing, Jamie!
These are all great tips. I’ve always finished all my cutting in before rolling but your way makes much more sense- will try it next time. The single best thing I learned for clean lines is the tip about starting your brush away from your line. I think I watched a video years ago that explained that technique and it made such a difference.
Yes! That one is a favorite of mine too… once I started doing that, it really helped. Have a wonderful weekend, Melissa!
Love the tips! I am the painter in my home and Love purdy brushes. They do make all the difference. Would love to know how you clean them to make them last. I am certainly doing something wrong because I am constantly replacing them. uugh!
They really do! Have you tried Purdy’s cleaning tool? I linked it in this post: https://roomfortuesday.com/10-pro-painting-tips-a-giveaway/ … I think it’s all about timing. Clean them right away after painting, or if they get too gunked up- I’ll even switch my brush midway through a project and clean it. Use warm water (sometimes I’ll even add a drop of dish soap) for latex paints, and mineral spirits for oil based paints. Use the Purdy brush comb to straighten the bristles and remove any remaining clumps of paint before letting your brush air dry completely. That thing works like a charm. I have some brushes that are going on 5+ years old.
You certainly have a knack for making cutting in sound simple and fun! Could you, would you do a video? Hand technique is so important- I think seeing is believing. Thank-you for sharing!
It really is fun! It’s one of the more relaxing and mindless tasks when it comes to home improvement… it also means you’re nearing the finish line. Painting is always the fun phase! I’ll definitely record a video the next time we paint (probably my home office here in a week or two). Have a good weekend, Jen!
Thanks for these tips!
You got it, Allison! I hope they’re helpful :)
Excited to learn all these tips as I need to work on my door frames!
Yes! Door frames are tricky to paint, but with the right brush and technique, you’ll breeze right through them :) Happy painting!
I love your paint tips! I invested in one nice canvas drop cloth and ditched the painters tape! My husband accuses me of trying to paint like “Sarah” and I’m like “YEP 100%”.
So glad to hear that, Caitlin! Hey, I bet the project took you less time and turned out great. Haha! I have to laugh at your husband. I’m flattered!! Happy Friday! Have an awesome weekend :)
Thank you for your insightful tips always! Room for Tuesday University has taught me so much and made DIY’s a little less scary. I’m dying to make over our office in this beautiful blue that you used in your guest room and can’t wait to see yours! I’m sure it will be nothing short of great. Have a great weekend Sarah❤️
Haha!! RFT University, I love it! I really enjoy painting. It’s one of my favorite tasks when tackling a room. I love the idea of a blue office. My home office is going to be neutral (for the sake of lighting), but I really do love the color in our guest room. Hope you also have a fantastic weekend, Cathy!
I am also the cutter to my husband who is the roller! I joke that his is the glory job, while mine is that of the unsung hero. 😉 Thanks for these great tips! And also this great contest opportunity.
EXACTLY. My thoughts, too! Haha :) Have a good weekend, Lisa!
These are great tips! We are redoing are basement after a flood and have a lot of painting in our future.
Thanks, Megan! So sorry to hear about your basement flooding. That’s terrible. Hopefully you can tackle the painting and get it back to looking clean again. That sounds like a big project.
My husband is the painter in our family and always does an incredible job. I help him by keeping the kids out of the way (ha!). Painting is such a great skill to have in your housekeeping arsenal. Thanks for these amazing tips (and for the chance to win some awesome brushes!).
Haha! Hey, that’s an important job! Fingers crossed on the brushes, Rhonda :) Have a good weekend!
I was taught by my pop-pop as a child how to cut in and have never used tape because of him. We used Purdy brushes mostly just from trial and error and always felt the finish was just better in the end. I actually love painting, especially cutting in…I find it very relaxing. I think more people would be comfortable if they read your post. It’s not as hard as it may seem! Thanks for the info as always!
I love that. It sounds like your Pop-Pop was a smart one! I agree that the finish from those brushes can’t be beat. They truly are my favorite. I also find painting very relaxing- it’s one of my favorite home improvement tasks. Have a wonderful weekend, Megan!
Only use Purdy brushes – the absolute best!
Same here, Terri!
Thanks so much for the helpful hints. Tape is so time consuming and im happy to hear that someone else also thinks it doesnt do a great job! If I can master these tips, itll make for a much better and easier job.
Tape never ends well! I’m confident you can do a better job without it :) It’s definitely much faster and more precise, in my opinion!
I understand now why so many people love to paint! I have not tried these, but will certainly purchase them in the future. Those edges are so intimidating for me, and you are correct that painters tape is time consuming. Thank you for the detailed instructions. Cant wait to paint!
Paint is so transformative and it’s honestly a process I love. Turn on some music, get busy, and it’s instant gratification. I love it! Happy painting, Rebecca!
I’m in need of a new brush or two! Fingers crossed.
Fingers crossed :)
Great tips! Thank you!!
Thanks for reading!
Excellent tips! Thank you! I don’t use painters tape either, but I used to. I had the biggest shock when I pulled off the painters tape and some of the paint came with it!
I’m with you, Jennifer. In my experience, painters tape always ends up messing something up. It’s a pain and very seldom does a good job.
This is such a helpful post! I never aspired to learn to cut in but now I feel like it could be attainable!
It’s pretty easy once you get the hang of it! I actually really enjoy it. It’s a fun, mindless, repetitive home improvement task :)
This couldn’t have come at a better time! I have what seems like miles of baseboard, a fireplace mantle and a mudroom to paint. We are the same when it comes to couple’s painting roles.
I feel like we have endless paint projects around here, too! Good luck with all of them, Virginia. Have a great weekend!
Thank you for the awesome tips
Of course, Shannon! Happy Friday!
All of these are so true! A quality brush and a little practice make a much nicer finish than painters tape!
I’ve never been a taper. I don’t have the patience so I’ve really had to perfect my cut in over the years. A nice Purdy angle brush always helps!
Oh my goodness!!! Love the tips! Just bought my FIRST home! Could use those brushes!
These are great tips! We recently bought a new house and are in the process of painting all the rooms ourselves. It’s a fun but slow going process! I never use painters tape either and I’m always trying to make my lines perfect. It’s so hard! Thanks for sharing what works for you. Hopefully these tips will work for me too!
What a good guide! I’m a notoriously clumsy person and that applies to my painting as well. The tip about dipping the paintbrush was particularly helpful.
I love hearing that, Sophie :)
Such good tips for painting, all the taping off is the worst part, so I’d love to forgo that step!
It’s been awhile since I tried w/o tape but I’m inspired to try again soon! I love all your spaces and paint makes such a difference!
I love these paint tips! I have been using Purdy brushes for over a decade and they by far are my favorite! It does take some practice but a good angled brush can make a world of a difference and no need for painters tape! I hope you have a wonderful weekend and I always enjoy reading your blog posts, so helpful and thoughtful!
Great tips! I have so much painting to do in our new to us house and new Purdy paint tools would be great. I use Purdy and that is the product I can’t do without when tackling a painting project! My husband knows not to use my brushes!
Thanks for the great tips, Sarah. I sure will get a wet cloth to clean the messes when painting. I am doing my first paint job in my new house in two weeks’ time. I hope it turns out well. Now I need to grab a Purdy.
I hope they’re helpful, Cynthia :) Good luck with your painting projects!
My husband and I paint kitchen cabinets and there has been a few times that the painters tape has pulled their paint right off the wall. I am thankful for the tips. I will have to try cutting in with the brush you recommend.
Painters tape is so frustrating! Sorry that happened. It’s always annoying when you’re trying to get perfect lines and the tape messes things up.
As I’m reading this I’m looking up at the very un-neat paint job we had done this summer! But now I can go back and touch it up.
Lol! Exactly :) I have some of those areas, too… from the previous homeowners painter. Ha!
Thanks for this timely post. I’m in need of a replacement (I haven’t been good about maintenance and mine is a mess!). Do you use a 2” wide brush as pictured for both trim and cutting in, or do you recommend different widths? Thanks
I use the 2″, but that’s just my personal preference! I wouldn’t go wider than that, but you could definitely go smaller.