10 Pro Painting Tips (+ A Giveaway)
 Emmett and I have been renovating for almost a decade and the one task I’ve done more than any other is paint. Over the years, I’ve picked up a lot of professional paint tricks and thought it might be helpful to share my favorites with you. Maybe your future paint projects can benefit from some of my tips! From cutting in a clean & crisp line to minimizing brush strokes and cleaning & keeping your tools in great condition- this post is one to save if you have paint projects on your to-do list. I also teamed up with Purdy to host an awesome giveaway that includes a brush set and a paint consultation with yours truly (me)! Click through for the details…
*This post is sponsored by Purdy. All content, ideas, and words are my own. Thank you for supporting the brands that allow us to create unique content while featuring products we actually use & enjoy!
Since we’ve been doing a LOT of painting in our guest room, you’ll notice a lot of references and examples happening in that space throughout this post. Obviously these tips apply to all rooms, furniture projects, surfaces, etc. Ready for my best tips?
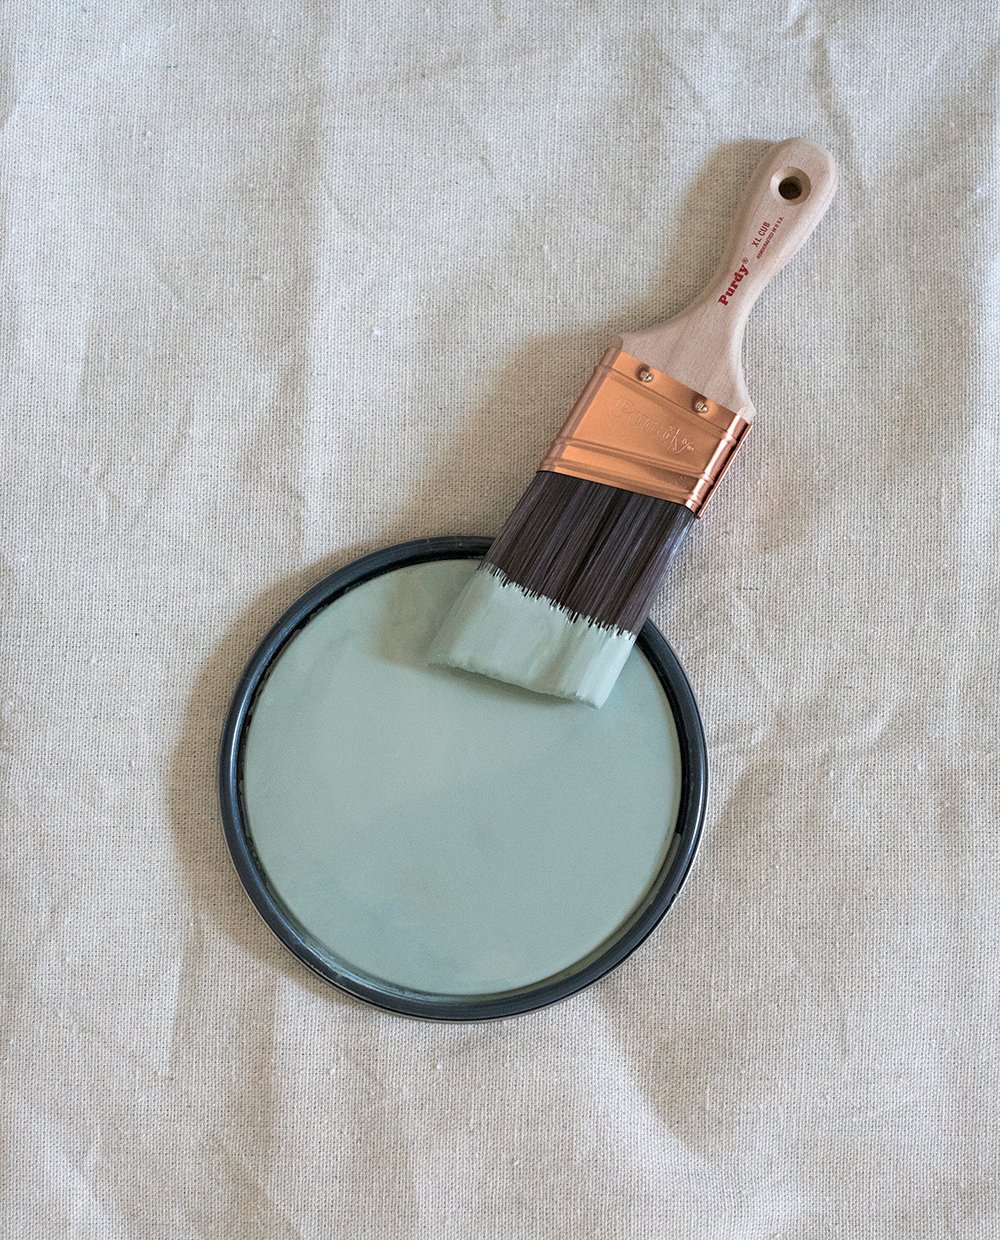
#1 // Choose The Right Tools
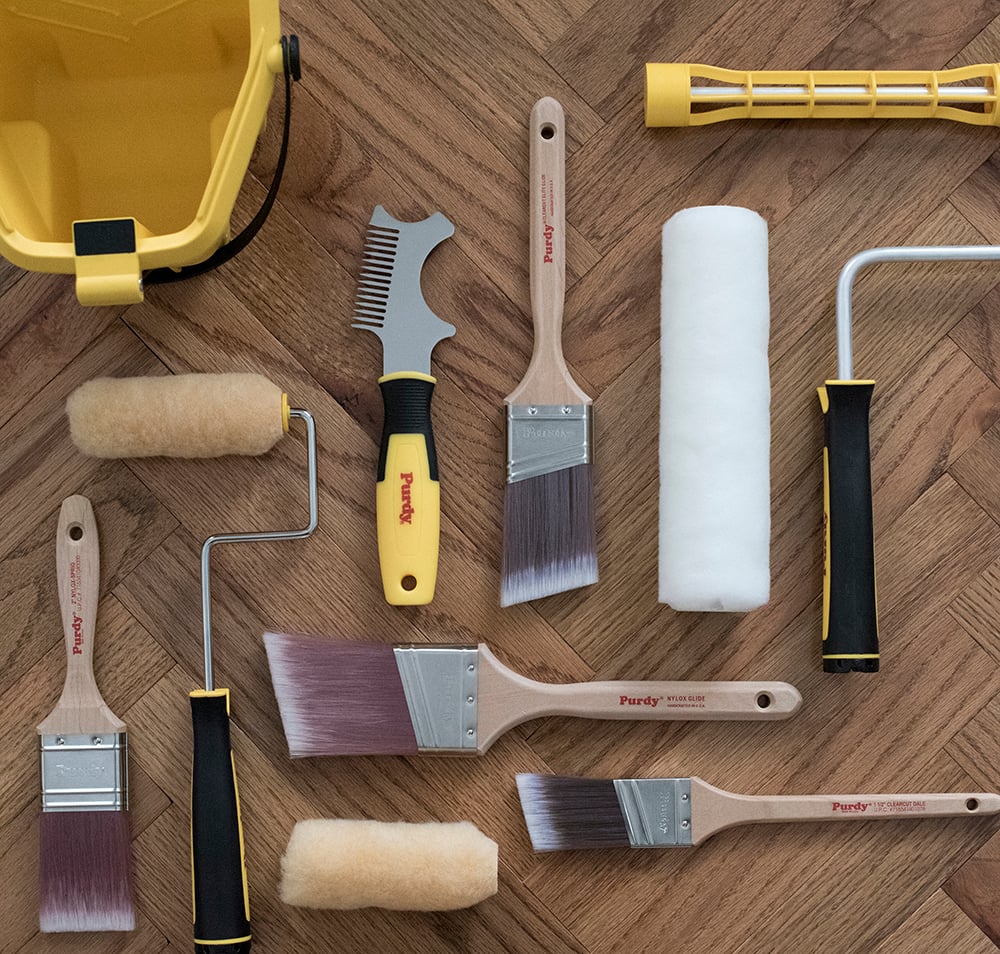 Depending on what you’re painting and what type of product you’re working with, will influence the tool you need for the job. Did you know smaller trim brushes have stiffer bristles and more control? They’re designed for short strokes that create crisp lines, while wall brushes are larger, hold more paint, and are made for long strokes that cover a larger surface area, saving you time. When choosing a brush, you’ll want to consider the size, shape, stiffness, handle style, and type of bristles or filaments. When selecting a roller cover, you have to determine what look you’re going for… completely smooth, stippling, a little texture, etc. You should consider the nap, roller width, and knit to determine what texture works for your project. I would rather spend money on high-quality tools that last and give me the best outcome. I also don’t like throwing brushes or tools away, as I think they get better with time (if you take care of them). In the long run, it also saves you money on supplies.
#2 // Take the Time to Prep
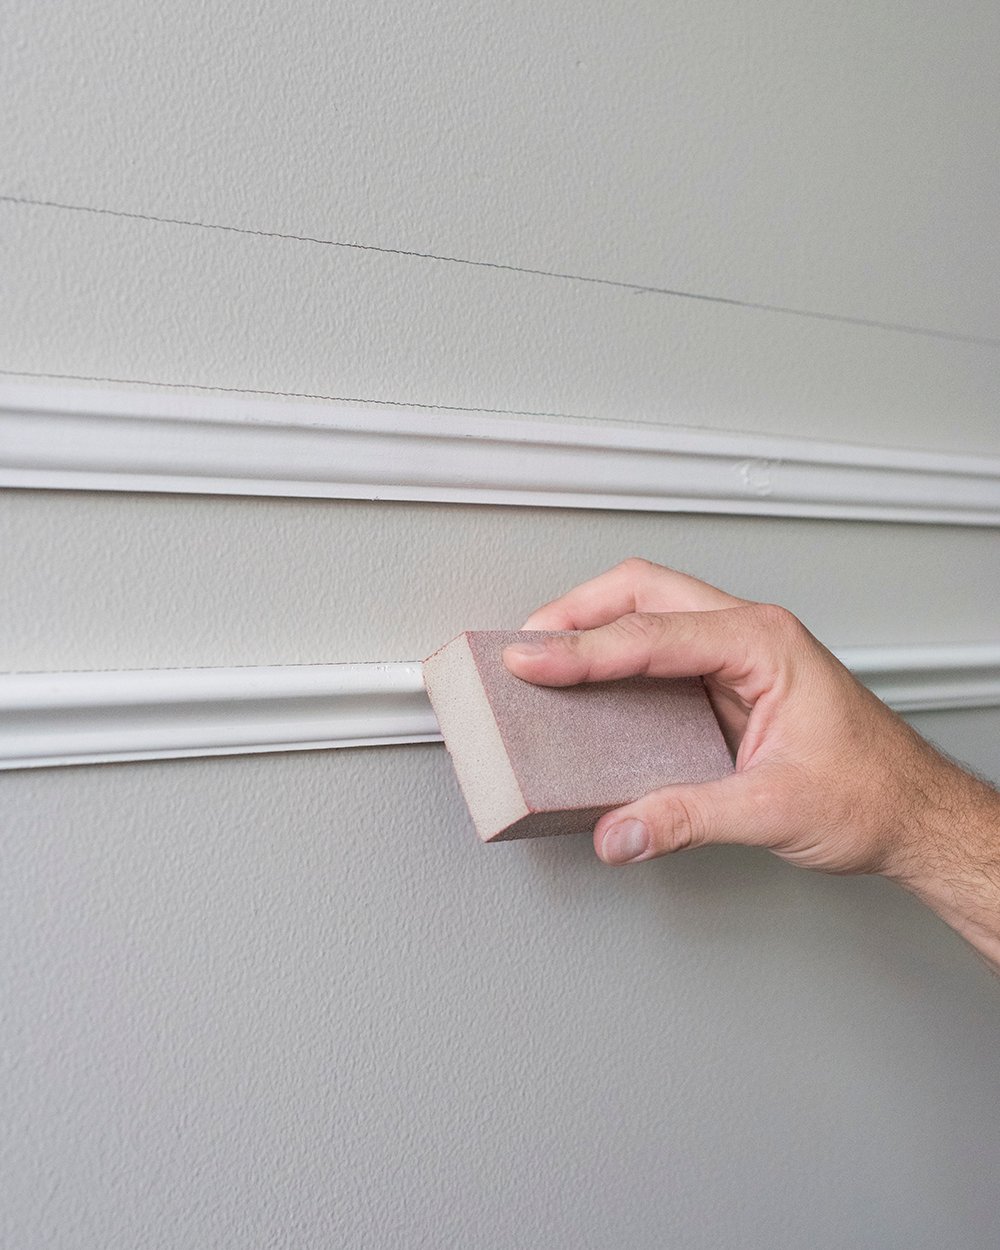 Believe me when I say, a good paint job begins with prep. While scraping, sanding, caulking, and cleaning isn’t nearly as fun as painting a beautiful color on your wall, it is a necessary part of the process. If you’re looking to invest in tools for this portion of the project, Purdy offers an entire line of prep tools… we pretty much own all of them (scrapers, joint knives, multi tools, putty knives, etc).
#3 // Always Swatch Your Paint
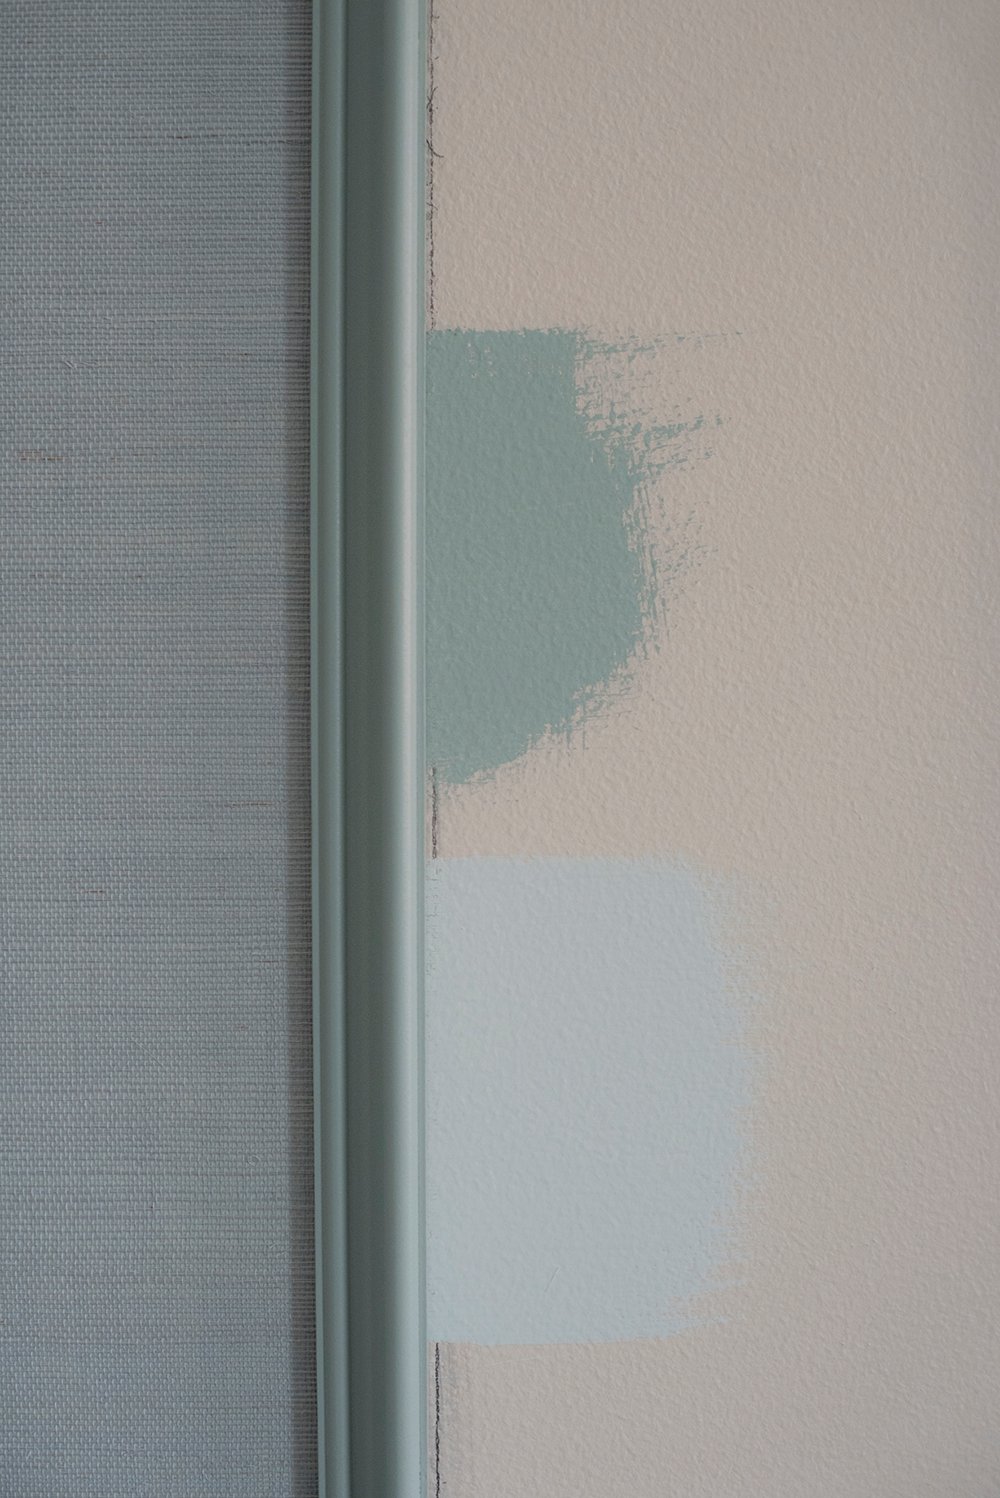 This piece of advice is so important because a paint color you see online or on social media in MY home, will look totally different in YOUR home. Paint reflects and absorbs the colors and environment that surrounds it. The direction your room faces, the lighting, and even your existing decor will influence how a paint color looks in your home. I always recommend testing swatches before committing. Live with those swatches on your wall for a few days and notice how they change at different times of the day. This will prevent paint color selection mishaps or regret. Even as a trained designer, I would never buy paint without swatching it first.
#4 // Cut In With Crisp, Clean Lines (No Painter’s Tape Necessary)
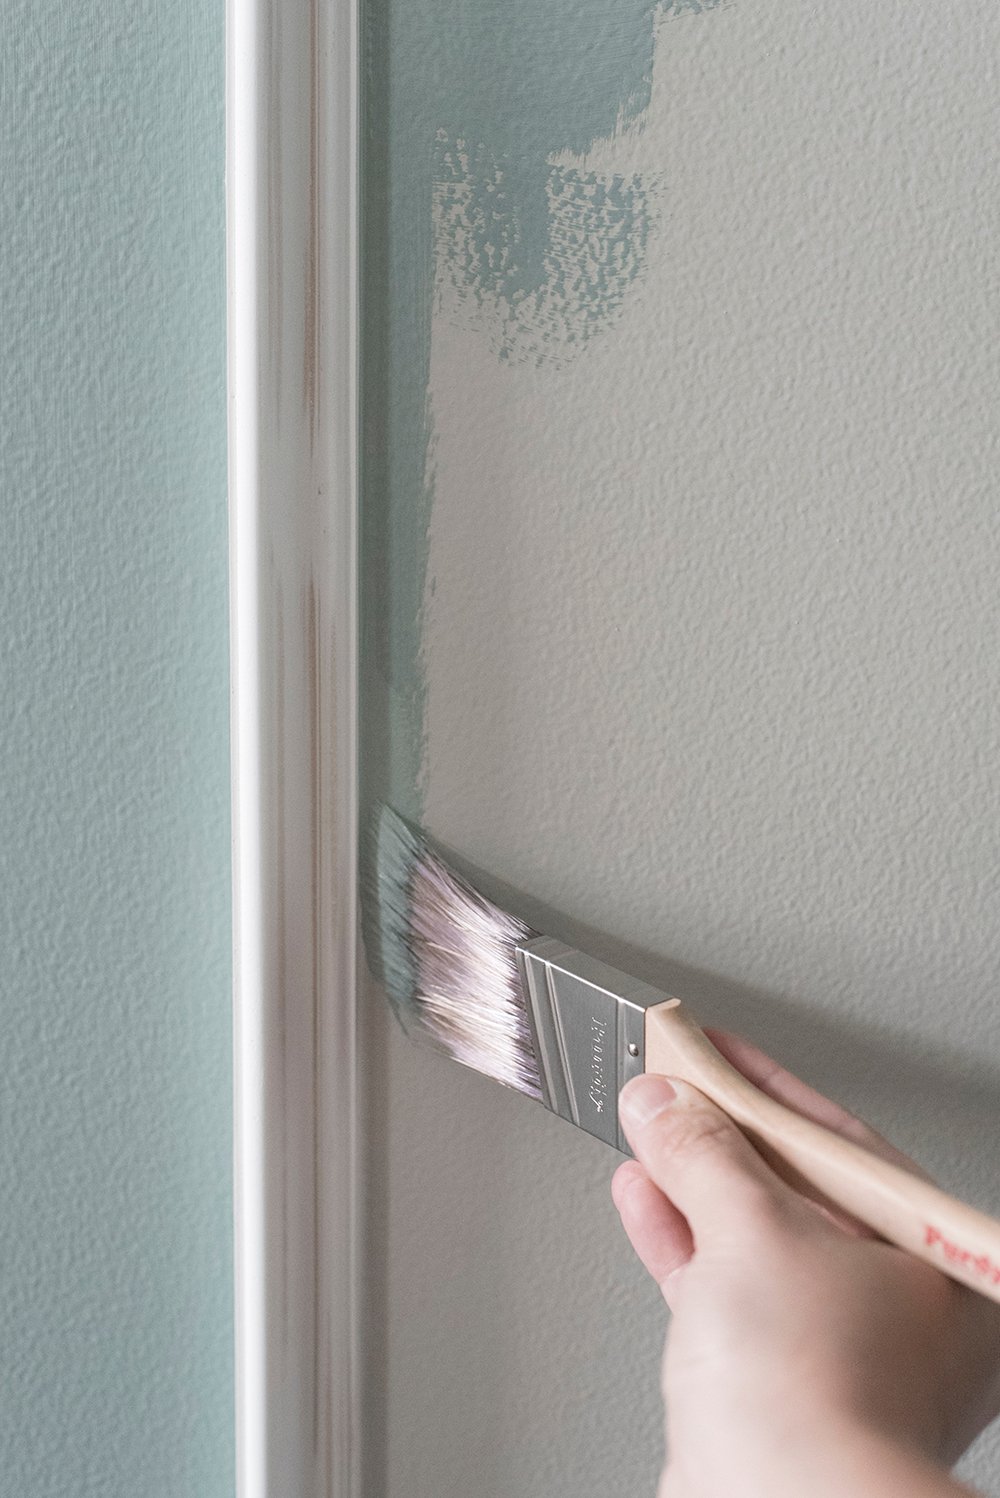 I’ve talked about this topic multiple times here on the blog, but I HATE painter’s tape (with a passion). I feel like it always makes a mess, is never perfect, and it takes way too much time to install. I’d much rather rely on cutting in with a brush by hand. It’s so much easier and I feel the outcome is visually better. To achieve a clean, crisp line you’ll need a good brush designed for trim. I recommend the Purdy Clearcut brush… it has stiff bristles that are perfect for cutting in, corners, ceilings, trim work, and tricky areas. When precise painting is needed, this brush is the one you should grab. I’ve been using the same Clearcut brush for almost three years now, and believe me when I say- it sees a lot of action.
#5 // Avoid Brush Marks
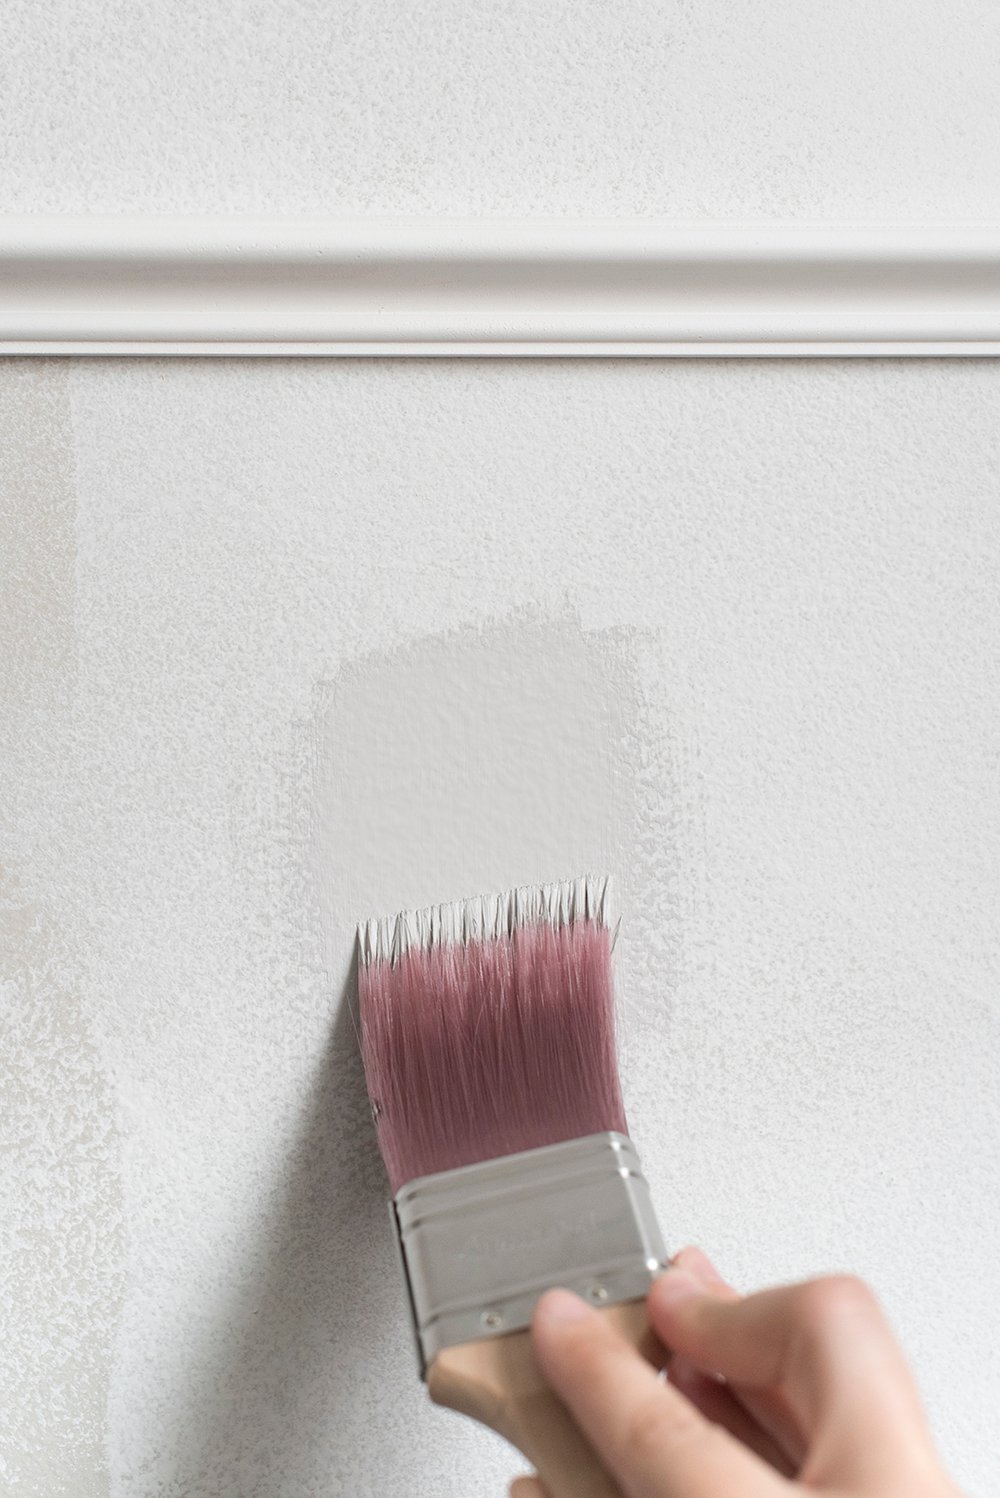 This is a question I receive often… how to paint without noticeable brush strokes. I have a couple recommendations: self leveling paint and the right brush for the paint you’re using. If you’re painting anything that needs a super smooth finish, grab a Nylox brush. These brushes are perfect for smooth interior projects (doors, trim, and cabinetry). Paired with a self leveling paint, they provide an ultra smooth finish without any brush marks. As the paint dries, you’ll notice them disappearing. These brushes have very soft nylon filaments that provide a level, even finish.
#6 // Get Comfortable and Don’t Rush
 Have you ever experienced those projects you just want to hurry up and finish? Painting is not the home improvement step to rush. The best paint jobs are thoughtful and calculated. This may sound silly, but I wear comfortable paint clothing, buy ergonomic tools (Emmett uses a Power Lock extension pole for rolling because it’s better for his back), and we always plan to settle in for duration of the project. I like to find a good podcast or listen to music and work at my own pace. It’s easy to rush, want to add that second coat too quickly (even when the first is still drying), or skip prep work to begin with, but believe me- a rushed paint job is noticeable. We’re big on craftsmanship around here and I always want our projects to look professional. Taking our time to create a quality paint job is something we always try to do. In fact, painting has become a really therapeutic task for me because it allows me to slow down and enjoy some mindless “me time.”
#7 // Finish One Wall Before Moving Onto the Next
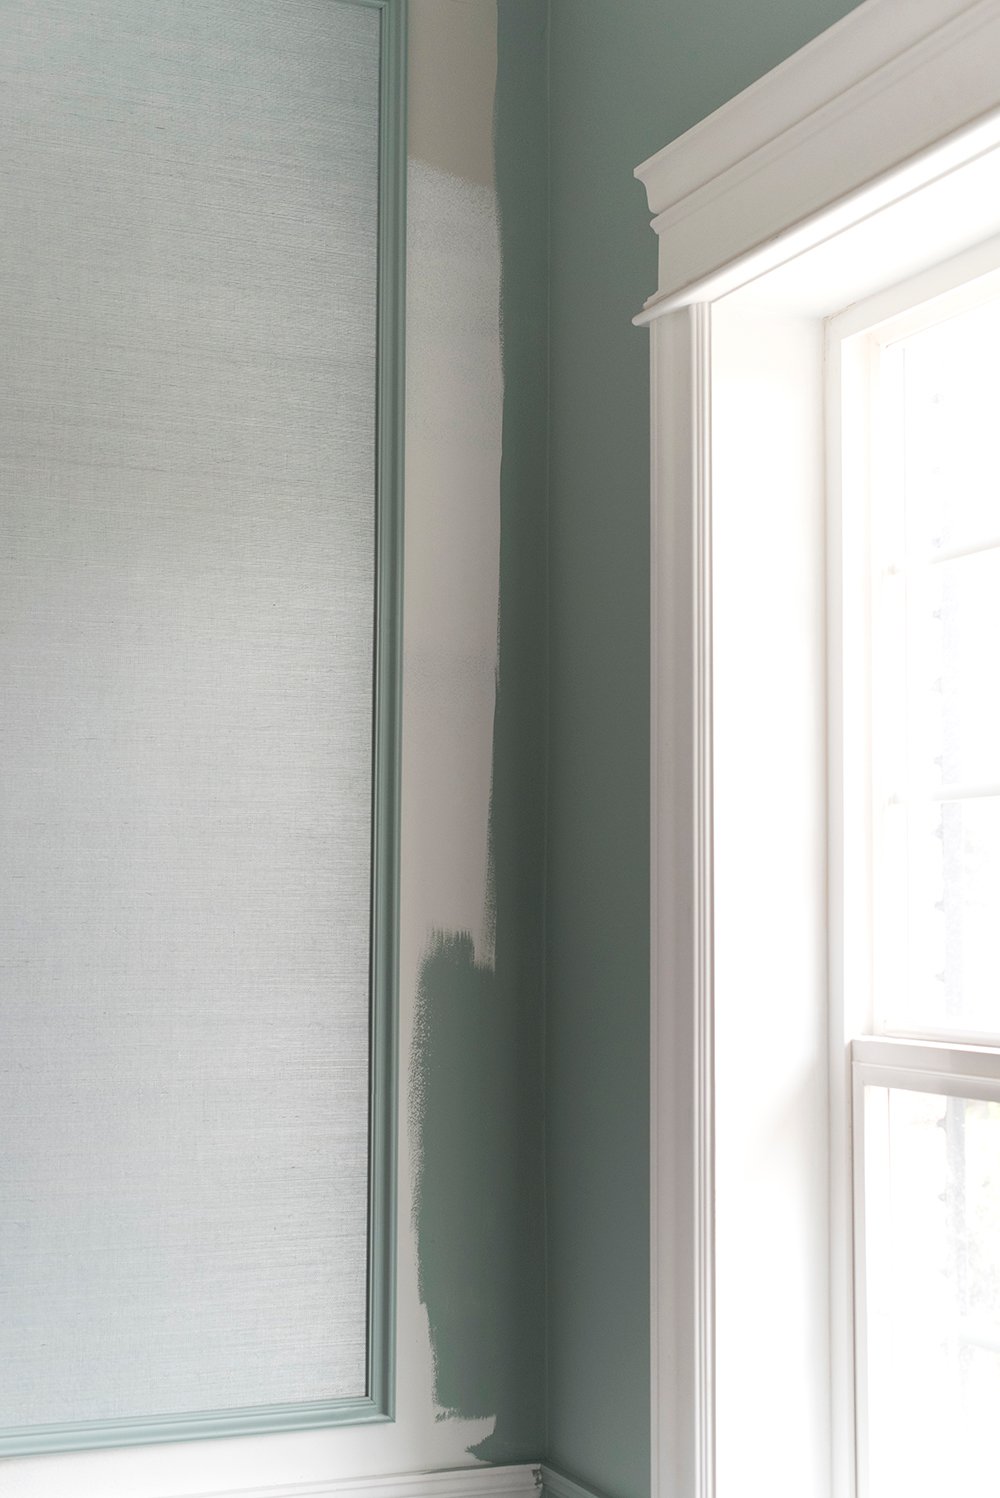 Maybe this tip is obvious, but I always recommend finishing one wall completely before moving onto the next. This way, you’ll have a seamless transition and all of your walls will match perfectly. It’s also important to continue stirring your paint throughout the duration of a paint project, so the color is consistent. I’m actually not great at this… I get “in the zone” and Emmett is constantly reminding me to stir the paint. Ha! Don’t do as I do, do as I say.
#8 // Invest in a Good Drop Cloth
 I don’t like the idea of plastic drop cloths to begin with, because they always end up in the trash. I’d encourage you to buy a heavy cotton or canvas drop cloth that can be reused time and time again. I’ve been using the same drop cloth for almost seven years now… it’s very heavy, washable, and is used for all of our projects. At this point, I don’t even push it tight against the wall (we honestly don’t drip anymore), but it’s awesome to lay out a workspace. It sees a ton of use!
#9 // Keep Your Tools Clean
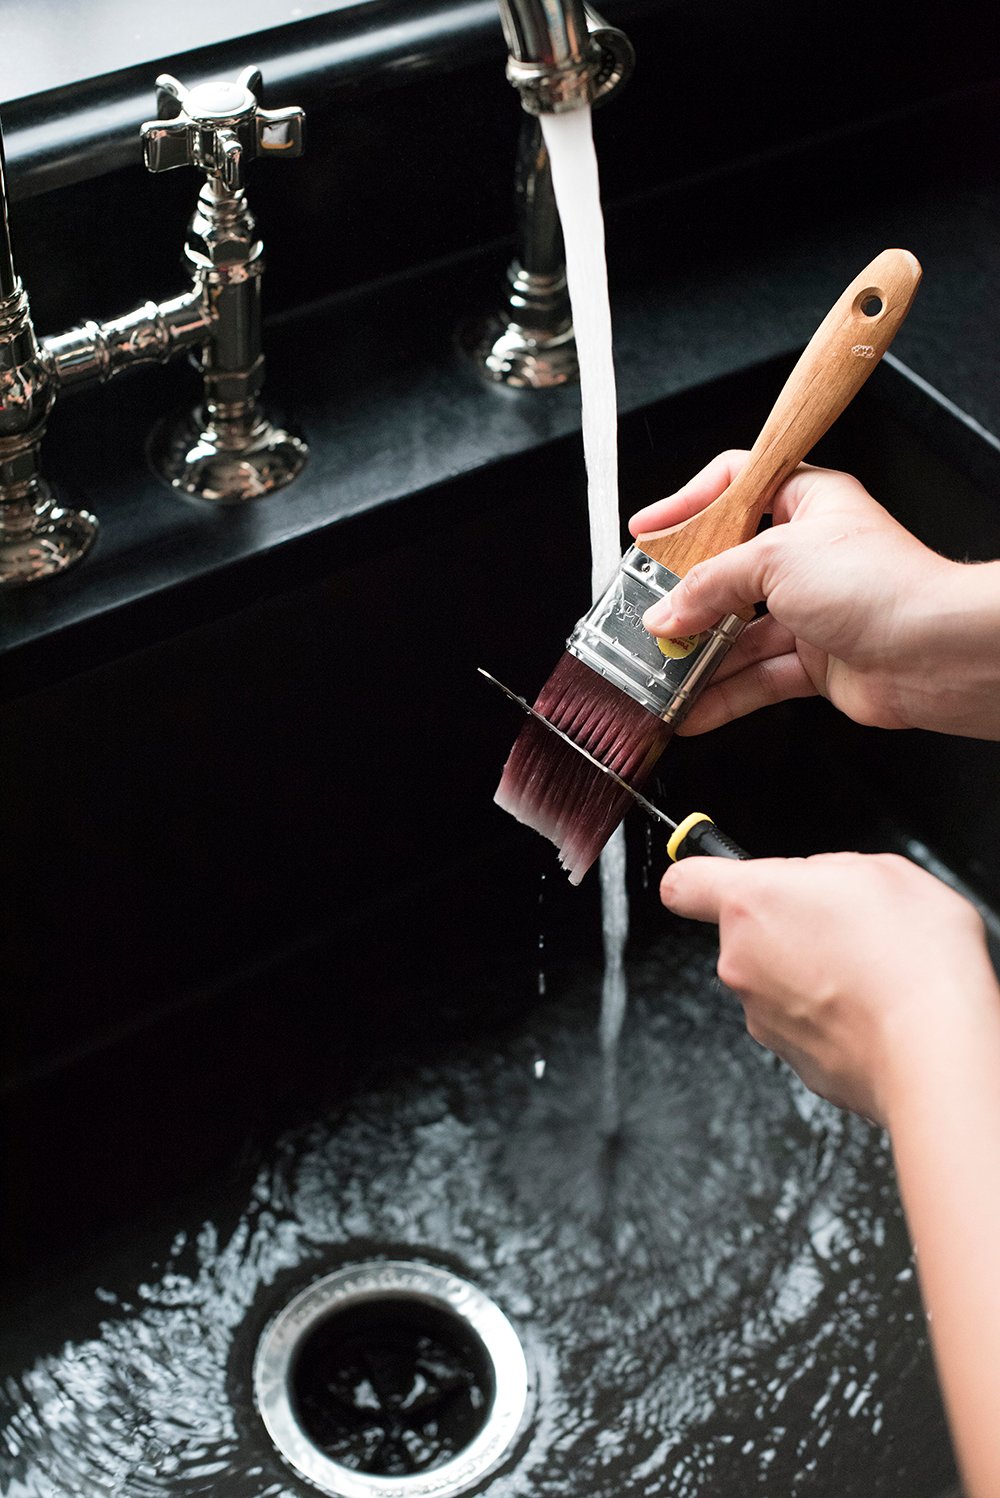
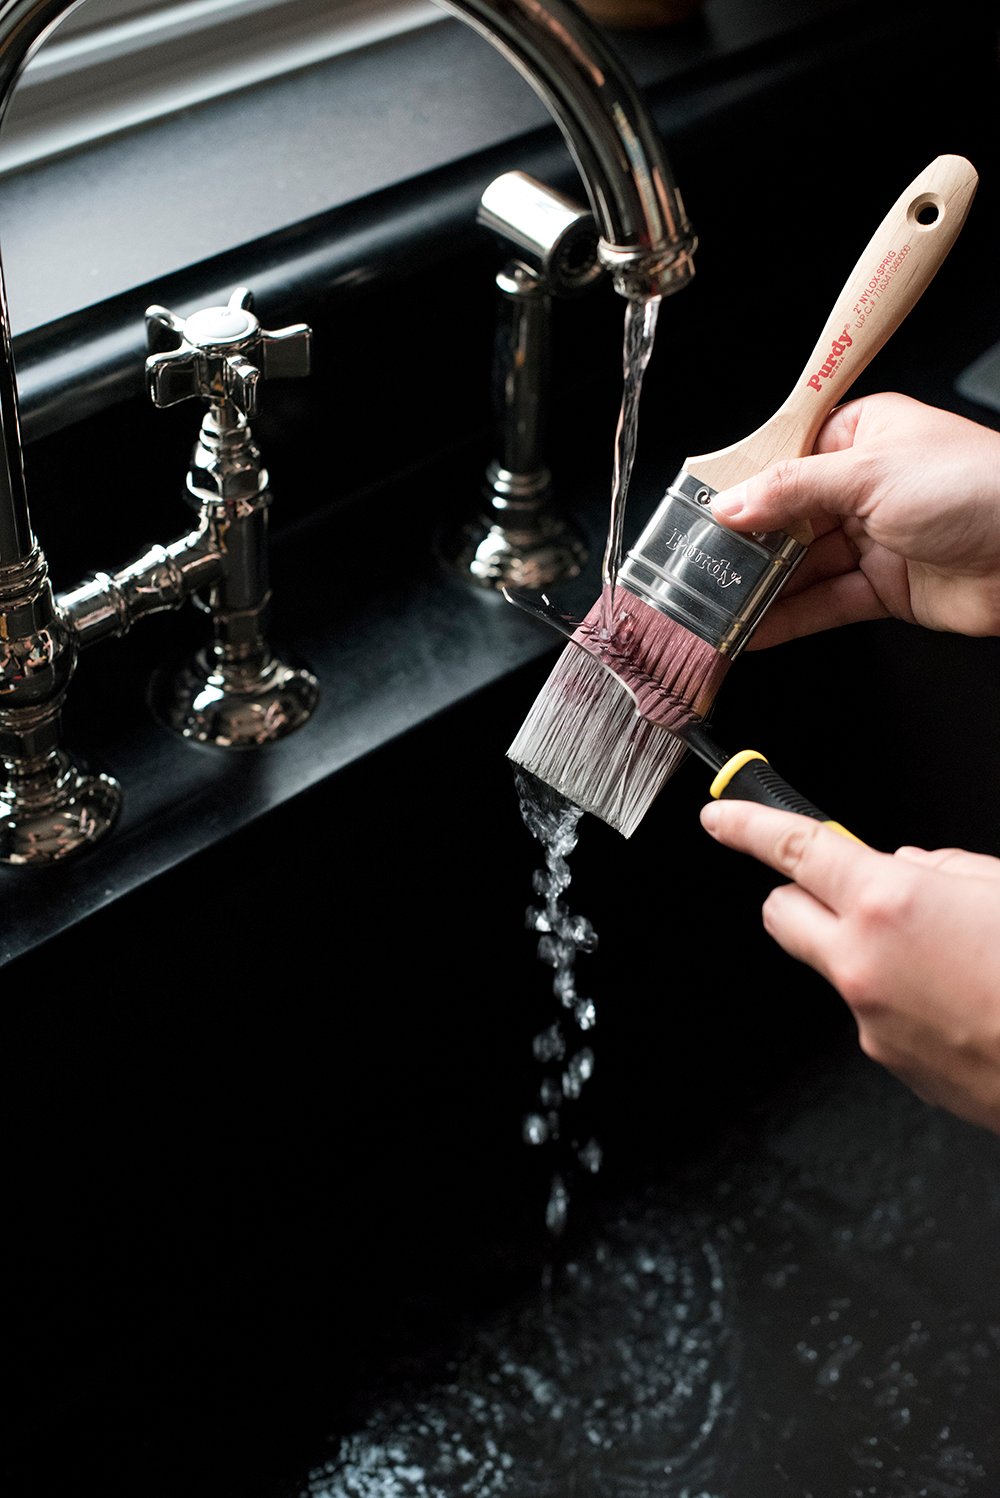 I get a lot of questions on brushes- and most people assume I buy new brushes for each project, but that isn’t the case. I take really good care of my paint tools and use them over and over again. Keeping them clean is a big part of that! I actually think they get better with time. A key to keeping brushes (and even rollers) clean is to use a cleaning tool. You can extend the life of your paint tools by cleaning them immediately after use. Use water (sometimes I’ll even add a drop of dish soap) for latex paints, and mineral spirits for oil based paints. Use the brush comb to straighten the bristles and remove any remaining clumps of paint before letting your brush air dry completely.
#10 // Take Care of Your Tools (Proper Storage)
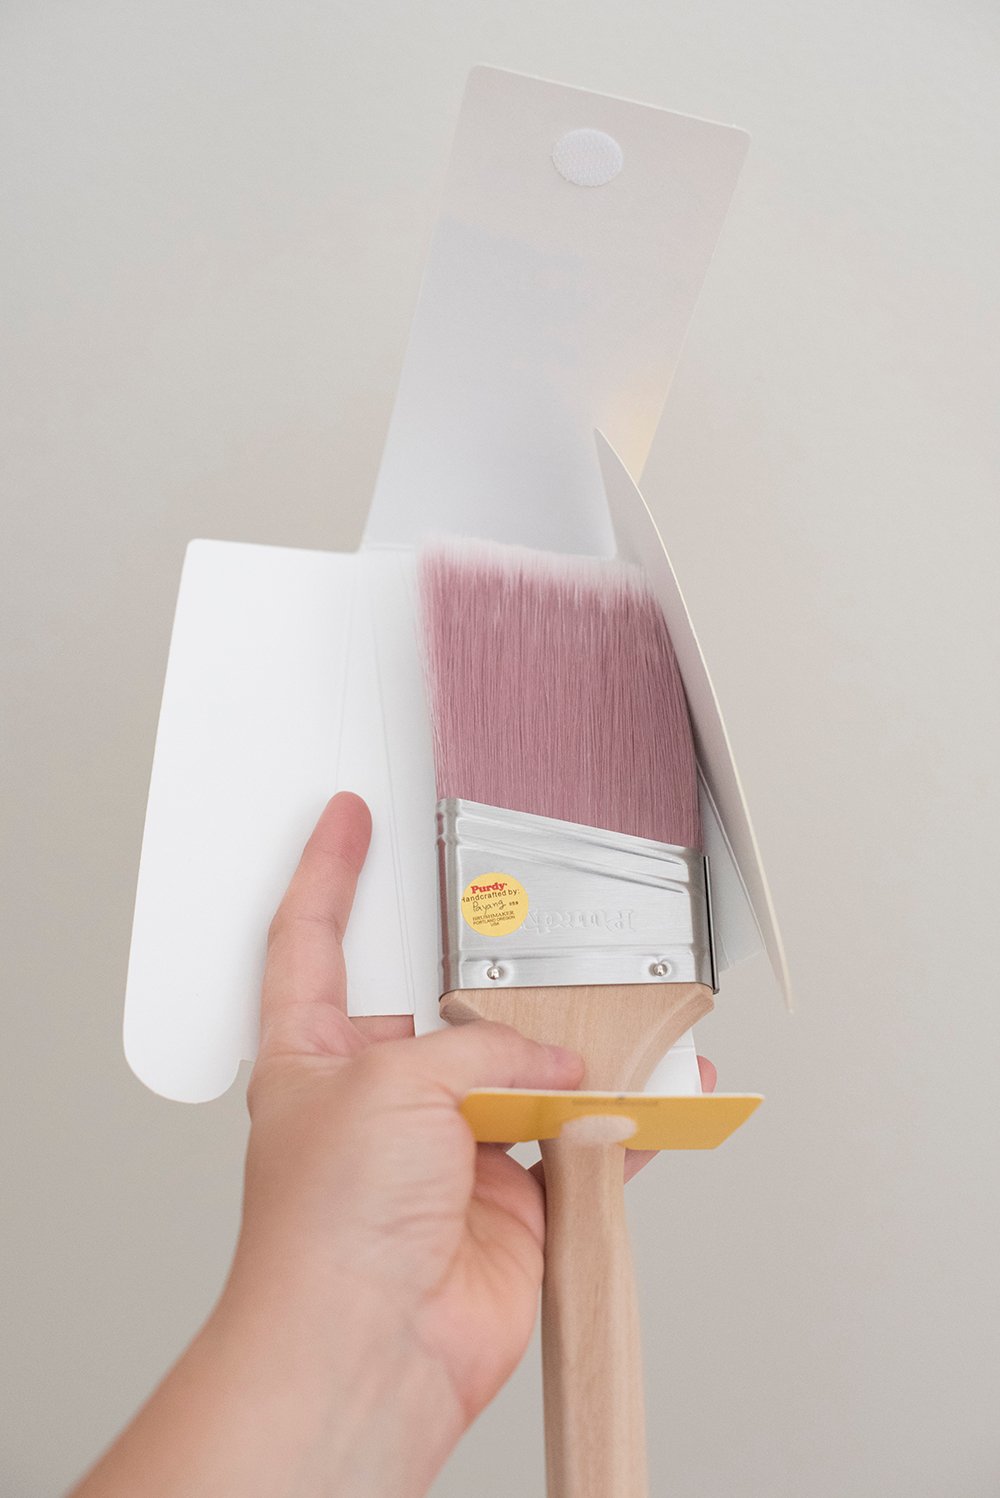 Since we just chatted about cleaning, once your brush has air dried- you should store it properly. Don’t throw away the original brush packaging. It’s actually called a “keeper” and they help by forming the bristles to their original shape. The keepers are actually coated in wax to prevent water penetration, and are designed to help your brush get adequate air flow, eliminating build-up or mold.
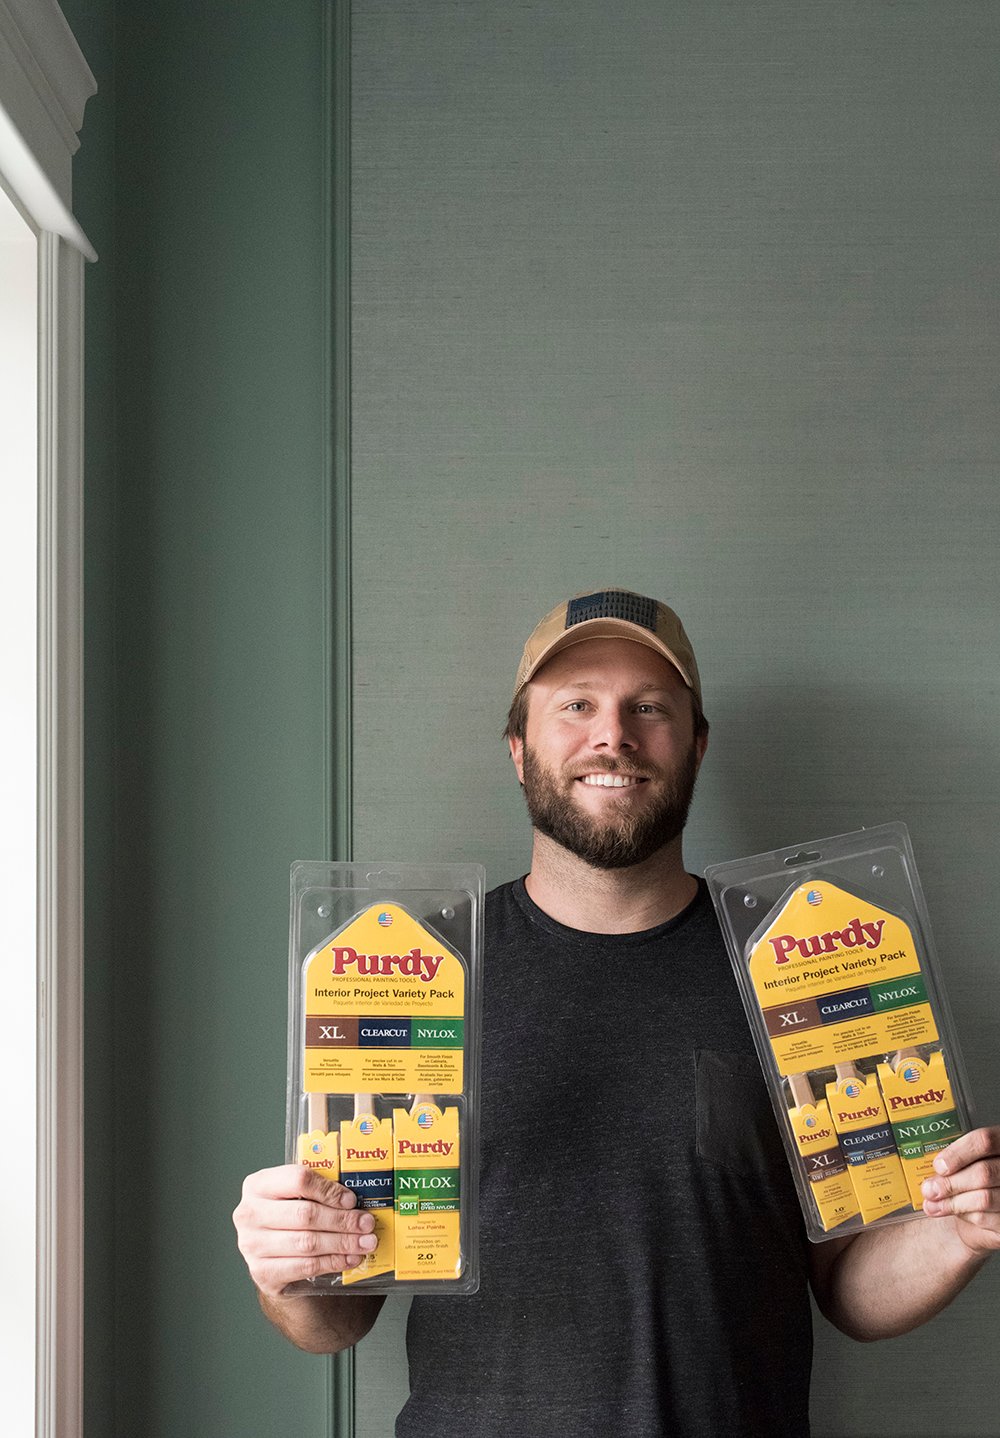
GIVEAWAY INFO
*This giveaway is now closed… congratulations to Danna & Krista! Thank you to everyone who entered. I’ll be hosting more giveaways soon.
Ready for the giveaway?! I made Emmett pose for me. Ha! Get excited because I’m giving away two variety brush packs (that include the brushes I discussed in this post) AND a paint consultation. Enter to win the giveaway for you and a friend below…
Here’s how to enter:
- Follow @purdypainttools on Instagram.
- Follow @roomfortuesday on Instagram (if you’re not already).
- Comment below on this blog post and let me know which friend deserves the brush pack and paint consult!
You have to do all three to enter. The winner will receive a brush pack and a virtual paint consultation (from me) for the room of their choosing… and their friend will win the same! Ready to tag your bestie?
*Winner will be chosen at random, and contacted via email. No purchase necessary to win. Must be a U.S. or Canadian resident, and be age 18 or over to enter.
 I hope this post will be helpful if you have upcoming paint projects! Did you learn anything new? Have any paint tips of your own to add? I’d love to hear! Good luck in the giveaway. I’ll randomly choose a winner in one week.

Paint prep. Is there anything worse? But woe to those who skip it. I’ve had to really train myself over the years to make it a focus. I also kind of find painting meditative; my friends think I’m a little nutty. I don’t have any paint projects on the horizon, but I am definitely bookmarking that Nylox brush for future reference. I should also probably invest in a cleaning tool; it’s the only item featured that I don’t own. Picture me using my hand to scrape excess paint from the roller. (You wish I was kidding.) Great tips and tools! I love that you are doing a paint consult with this giveaway! Who wouldn’t love your expert help?! Also, those guest room images are very enticing! Cheers to another lovely October week!
Right? Paint prep is the WORST. Sanding is my least favorite chore ever. You hit the nail on the head- meditative is the word I was looking for. Painting really does relax me. I’m glad I’m not alone. I really like the cleaning tool- I used to use my fingernails and that didn’t work out very well. Haha! The struggle. I’m picturing you scraping a roller, lol! Cheers to another lovely October week and good weather, Peggi :) xo
I love painting. Thanks for the tip on the clear cut brush. I will get one for my next project. My friend Natanya is prepping to sell. That typically means a new coat of paint.
Yes! Me too, Erin… and that brush is one of my favorites. Hope your week is off to a great start :)
Oh man I would love to win this set!! I’m actually in the middle of a paint project now (basement) and have to repaint a lot of my main level that I had professionally painted when we moved in a year ago. I made the biggest mistake ever and have been using a magic eraser on my walls (I know, I know) and now there is a very visible (to me at least) difference in the sheen and it’s making me crazy! Live and learn I guess- but ugh. These paint tips are great and I’ll definitely be using them (who knew there’s a brush cleaning tool- all this time!!).
Uh oh! I’ve heard similar magic eraser stories. I think the key to avoiding that is probably a light sanding or primer. I have a few areas that didn’t take the paint as expected and they drive me nuts, so I feel your pain… and yes- that brush cleaning tool is a gamer changer! Have an awesome week, Amanda! xo
I have been a silent (but appreciative!) reader of your blog and am always amazed by the beauty of your designs and the level of expertise with which you and Emmett execute your projects. I am also a long time user of Purdy products. The combination in this giveaway is just way too good to ignore so I’m entering myself and C. E. Reid. I love your work – thank you Sarah!
Aw, thank you Frances! I truly appreciate that. Fingers crossed :) Have a wonderful week!
My husband and I are fixing up a mountain home…. we’ve been painting SO much lately! This would be so helpful to finish strong :) One of my besties (who is actually getting married next weekend!) could also use the set. She’s moving into her fiance’s house and it’s been a bachelor pad for a while now…. he has “power red” accent walls that will definitely need to go!
Ooohhh, a mountain home?! That sounds exciting! I’m cracking up at “power red” in the bachelor pad. What is it with dudes and that color? haha!
I would love to win this! I have so many paint projects that I think about. Just need to get started. My friend Vicki would love a set as well.
Yes!! Getting started is always the hardest part, Sara :)
Your tips are spot on Sarah! I firmly believe in reusing paint brushes. I’ve tried a ton of cleaning tools over the years and the Purdy one I bought a few weeks ago is far superior to any I’ve tried. I also bought a putty knife: that thing is like slicing butter compared to the junk ones laying in Jeff’s toolbox! I now have my own toolbox that I keep my preferred tools in when I’ve found his don’t do the trick. If I buy something new I keep it separate from his so he doesn’t ruin it, especially paint tools!! He is the absolute worst painter and far worse at cleanup! He can’t stand that I keep the original paint brush packaging, but thanks to you I now have a logical reason to offer for my craziness. Haha! I’m going to have to pickup one of those Nylox brushes. I have a ton of paint projects around this house and that would come in immensely handy! Also you’ll probably cringe, but I hate drop cloths the way you hate painters tape. We own a few of the good quality ones (because…well…Jeff) but I don’t use them. I use an old pillowcase slit up the long edges. It’s just big enough to hold my tray, the paint can, and maybe another tool. Lol. Everyone thinks I’m nuts but it tricks my brain into being a cleaner painter. The more space for mess I allow myself, the messier I am. Thank you for sharing the tips and mostly the tools! I’ve loved Purdy for years and now have a reason to grab some more of their items! Quick question on cleanup: is it perfectly ok to wash your brushes out in the sink? I use my utility sink in the laundry room, but always wonder if that’s acceptable. Jeff tells me I have to wash them in a bucket and dump the bucket in the yard…no one has time for that! Lol, please tell me you know😂🤣My sister Jennifer Ingram moved into a new build a little over a year ago and I would imagine a set like this would be wonderful for her! Plus I would thoroughly enjoy picking your brain over paint! Happy Monday Sarah!
I love that you each have your own toolbox filled with your preferred things! That is amazing. Emmett is also not great at brush painting and is pretty messy in comparison. Ha! So fun that you use a pillowcase instead of a drop cloth! I keep mind folded in a little area for my bucket of paint too. I’m all about being a neat painter- it’s much faster! Over the years, I’ve learned to trust myself and I hardly ever mess up or drip. To answer your cleanup question- I think it’s probably personal preference. I’ve washed brushes in every sink in our home (including the kitchen), haha! I’m with you, nobody has time for a bucket. Lol! Have a great week, Lauren! xo
Well well isn’t this fun! I am preparing for two very different (both indoor) painting projects at the moment, so the timing here is wonderful!
We are going to be re-painting our basement this fall or winter- it is one long, somewhat narrow, room with a small window at the end. Its set up so that it has several ‘zones’ for purpose, and defining the spaces currently has me stumped. I believe I need to go with the same color throughout the whole room, and use accessories and other colors and textures to differentiate, but I’m having a hard time getting my husband on board with that thought.
Paint consultation could solve all my problems! :D I’d nominate my friend Julie Miller since she’s re-doing her loft office space at home.
I love Purdy paint projects- thank you for mentioning the case keepers ARE for storage- that’s awesome and I’ll never recycle one again!
That sounds amazing, Kaitlin! Yes- I just learned that a couple years ago myself… I had also been recycling the case keepers. It has made a difference in storing my brushes and keeping their shape :) So happy that little tidbit was helpful! xo
My friend Jordan and I are big fans of your work and it doesn’t surprise me at all that you take the time and dedication needed in each project—even if it’s just painting a wall! I’m learning to be more patient with my painting projects and hoping I’ll get a good chunk of time to finally paint my bathroom vanity after 4 years!!
Thank you so much, Amy (and Jordan)! Painting is honestly really fun and relaxing for me… and it makes a big difference when you do a good job :) Crossing my fingers your schedule allows for your bathroom vanity soon! Have a great week!
I’m just finishing up decluttering my daughters’ rooms so we can paint both of them…the hardest part is getting my 12 year old to decide on a paint color, the 8 year old is much more decisive :-)
My friend just moved into a house from an apartment during the pandemic…it’s actually the house her hubby grew up in! I think she’d love the brushes and consultation.
Perfect timing for your post & giveaway Sarah! I am trying to make some paint color decisions in our house.
Painting prep & clean up are my least favorite. Put on a good podcast or tv series and I can paint all day!
Great tips. I never knew to save the cases for storing your brushes…so helpful. Also the brush comb. I need to try that next time.
What a dream it would be to have you as a consultant on paint colors!!!! My friend Krista would benefit with a paint color consultation.
Have a great Monday Sarah!
Congratulations Danna!! You’re the giveaway winner. You were randomly selected :) Apologies in my delay for notifying you. Look for an email from me soon. xo
Ooh I’d love your help choosing paint in our guest room. We’re thinking about converting it to more of an office, and I’ve never loved the color we picked when we moved in. Can my husband count? He’s my bestie. Because we also need to update our boys’ bathroom. He recently painted our main bathroom (first time painter!) and is now eager to take on another room. (Otherwise, my next door neighbor and great friend is beginning a remodel soon and could use some advice.) ;). Thanks.
My mom deserves a consultation. She is updating a few rooms that haven’t been touched in a number of years.
I would love to win this! And also wish I had read this sooner. I’m currently in the process of repainting most of my house and could use all the tips and tricks! Keeping my brushes clean has been one of the harder things in my opinion, so I need to invest in a tool I guess. Plus, I’m not totally sure about my color choice, even though I swatched like 10 colors 😅
So helpful. Planning to paint my office but stuck on the color. Alex could use a consult too!!
Love these tips Sarah! My grandps had his paint brush for about 30 years because he took such great care of it. My sister needs this consult! She recently painted 2 of her bathrooms. She doesn’t love the color in 1 and the other had a mishap where the 2 can of paint did not match the first.
Oh I love all your paint tips Sarah! I’ve been using Purdy brushes for every project for years and they are my absolute favorite! You are so right with proper clean up they can last such a long time too. Although I didn’t know to store it in the package after use? Next one I purchase, I’ll make sure to keep it! I’ll be updating my bedroom next and excited to get started, of course not sure what color yet…and my sister would be so deserving too :) Usually I am able to help her with projects and paint choices but unfortunately we aren’t seeing each other as before due to COVID so I know it would be such a surprise to have your help and the tools necessary to tackle her next project!
Another quality blog post! Thank you for sharing!!
My bestie is my sister and she would love this too!
I just bought a house, I am going to be painting everything. One bestie is renovating a house, we have been sharing design and painting tips. These are helpful.
Great tips! My husband can use some new paint gear. Bonus points for that guy, he painted our black roof white this summer. Yikes!
We’d be so excited to win this, on our project list is to add picture molding and repaint our foyer, dining room, study, and living room. All of these rooms are connected and we’ve been living with 4 swatches in each room that look radically different on each wall and at different times of day. I need your input via this consultation so badly! I love your blog and your IG. Thank you so much for always teaching!!
My sister in law Leah just bought a new home and would also love a set + consultation 🤍
Paint is such a wonderful way to transform a room. I’d pick my mom as well since it feels like she’s always in the middle of a paint project.
Hi. Question on prep- if you were re-painting a door, would you just prime and prep over? Or strip? Or sand? All sound so messy and this is the one thing keeping me from tackling such projects which seem so doable. Thanks
I broke rule #3 this weekend! I alwaaaays tell Alex that paint is the last thing we should choose and that we always need to swatch it in the house, but I got cocky and rushed it, and now I have a purple kitchen 🤦🏻♀️
Thankfully that’s going to be renovated eventually, and it’s still better than the horrible beige that was in there before! My best friend Michelle is a new homeowner and she’s planning her very first renovation! She’s redoing her early 00’s brown kitchen and would LOVE a consult and some tools!
First, I’m sooooo excited to see the guest room! Also, I do just about everything you do when painting. Ha! Prep is definitely the biggest part of the job IMO, and makes all the difference. I’ve been using Purdy products for years and really the only way to go IMO. I too hate painters tape for all the reasons you mentioned. If you can keep your hand and arm steady you really don’t need it. And I love painting because it really makes me slow down and concentrate on one thing, and without realizing it my breath slows and I relax-kind of like being in the dentist’s chair. :) I will add that I don’t do a full cut-in like I see a lot of people do. I do it as I go-it keeps a wet edge and I don’t get that “border” look that you see sometimes. A Sherwin Williams manager gave me that tip years ago, and I’ve found it really works. Also, I recommend listening to Paramore and Amy Winehouse while painting. My go-tos!
My new daughter-in-law deserves some new brushes so that she can finish making their home her own.
I hate to tape off too and almost never do. Love Purdy brushes….the only kind I buy.
How did you know I was painting my living room today and swatching my sunroom like crazy (though the sunroom leaves me perplexed–would love your help!)? I would love for my friend to have a consult — she and her husband just moved out of NYC and found out they’re pregnant. They could use some help getting their nursery just right!
I love Purdy brushes! I told my friend they are like painting with angel wings compared to the cheapo brushes I had been using. I’m redoing our guest bath for my winter quarantine project and could use alll the help! My sister is moving soon and could use the Purdy set for sure!
Such an awesome giveaway. I need to repaint our living room and am struggling with finding a color so I really hope I win. The room faces north and does not have great natural light. My sister could also really use your services she just moved and her new place doesn’t have the best lighting so it makes finding a color tough.
I would love to win this! We just bought our first house and slowly renovating each room. We are painting constantly 😝
We’re getting ready to repaint 90% of our house! When we moved in, I was uneducated about painting and did a terrible, very much rushed job trying to paint over the dated wall colors! My hubby and I would love to win this not only to finish our projects, but my parents are also about to tackle a big indoor painting task that we could share the tools with🧡love following along your renovations and noteworthy blog posts! Y’all give the best project inspiration by far with such professional results!
I would love to win this set! We’ve been repainting our home and want to paint our fireplace next! Definitely need to do my research and get some help before tackling that!
The timing couldn’t be more perfect! My daughter and her adorable husband are planning on painting their mudroom and neither have any painting experience, not to mention tools. We are planning on helping them and teaching the tricks of the trade. This set would be perfect!
My mom needs help with her kitchen. She moved the upstairs old kitchen cabinets and pieced them together to create a Lower level kitchen and they need A LOT of work, prep and painting!! Would love this for her!! Love you mom and love your blog!!
My husband & I (newlyweds) are about to buy our first home – more than likely, we’ll have to pick one that needs some work, so these tips & tools will be so helpful!
So many amazing tips – as always – Sarah!
We’ve been in our house 2 years and I’m FINALLY ready to make it a home that reflects me… which means a few less white walls! So I need all the help I can get in the painting department!
I would probably gift the other set of brushes to my dad! He’s a big DIYer and is always letting me and my husband borrow his tools, so it’s probably time for me to return the favor!
Perfect timing for this post! My girlfriend and I are planning on helping each other paint each other’s dining rooms and we have ZERO experience! This is going to be so helpful.
I’ve gotten pretty decent at painting over the years, but the part I still struggle with is proper care of the brush. No matter how well I think I clean them, they rarely ever dry back to the way they were. Sounds like a cleaning tool, and putting the brush back in the keeper, may solve my issues. I hope to win because I want to paint our soon-to-be-second-child’s nursery! And my sister Emily just moved into a new house and wants to do some painting, so she would be interested in this, too!
Hi Sarah!
I am smack dab in the middle of a kitchen renovation. We bought a 100 year old craftsman cottage at the start of the pandemic and it needs some love. The previous owner was a DIY warrior, but didn’t seem to care about quality. We are trying to remedy that. I thought I was skilled at painting, but you offered a lot of new tips in this post! Thank you so much for sharing. We have about three more weeks until we can start thinking about paint colors and I would love to win so I can put this product and your knowledge to good use! My good friend, Holly, just moved into the next neighborhood over and I know she could use this as well! She’s got a lovely 100 year old Tudor fixer upper that she’s working on! I’ll be sharing this post with her because she’s almost ready to start painting her new dining room!
I came across this post at the perfect timing! We are going to paint our trim and walls on the first floor of our house! We are by no means experts but could use the expert tools of Purdy!!!!!
My sister Danielle swears by the “no painter’s tape approach”, I, on the other hand, do not trust myself to even try it.
We moved into a home for the first time three years ago and are still trying to get all the spaces painted. Thanks for this post. I have an upcoming project and am definitely going to use these tips!
@dafraser85
We are gearing up for a whole home renovation and currently working on a “she shed” for an office space for me. These tips will be very helpful when we get to the painting stage! Hopefully sooner than later or at least before the snow flies. My uncle Ken is helping me with the painting and would definitely be able to use the brushes!
I am thinking about re-painting one bath and the laundry room. Sadly the people before us used oil base and we painted over it with latex. Needless to say it pulls off easily, and I am wondering if I should strip off the old latex. I love the Purdy backpack I saw on their instagram account! Looks like everything one could want to do the job! Sometimes I use my fine art oil painting brushes for a critical area like a door frame that I want ultra smooth. I would give a set to my friend Allie who is in the middle of a remodel.
Great tips! My bestie Yalina is planning on repainting her en suite bathroom, and some new brushes would be great for her! These tips are so handy since we’ve been swapping paint design ideas. She just moved into her new home
My roomie from uni just did a FaceTime tour of all the new decor she got herself to change up her space since she’s been feeling a bit blah about spending so much time alone in her apartment. She rents so I’m sure she hasn’t even considered paint but I think it would make just as big a difference! Thanks for hosting this, I’m pinning for my next paint project!
I have two daughters and a daughter in law and we all DIY paint projects. Home renovations are always going on somewhere. I can’t pick just one of them, so I’ll let you pick if I win 😂
My bestie and husband, Aaron would love these! He just started painting our entire 80’s house. We need all the help we can get, as the entire house needs painting from top to bottom. It’s our first house and we are pouring our heart and soul into it! We would love your design expertise as well! You have great taste!
My friend Kelsey and I are both painting rooms in our houses right now, so we’ve been discussing color a lot! It would be so great to win this giveaway!
Love all of these tips!! I would gift the second set and consult to my dad! He ALWAYS lets me borrow his paint tools at a moments notice whenever my next idea hits! He’s literally my go to guy for DIY and they’re about to redo their 25 year old home and could definitely use some tips! Would be so much fun to share this with him 🤗
Hi Sarah! Your room looks so good! You have such a good eye and design style. I would be so happy to win your giveaway. We moved from Ca to Wa right before the pandemic started and the house has agreeable grey on literally every wall and ceiling in the house. I like the color in general but my brain is craving color variation, even one crisp white room for goodness sakes. 🥴 I’d love for my sister to win the other set as well. She also just moved in to a new build and has a bunch of house projects to tackle. Thank you for the opportunity!
I just finished my work from home office & gym with contrast trim & walls. But I didn’t swatch first & boy am I paying for it now! I kept telling myself the trim color would get darker as it dried but it never did. 🤦♀️ My husband can’t even tell the difference in color. Ugh! Swatch swatch SWATCH! I promise I’ve learned my lesson & I’m ready to tackle my hallway & doors next!
And most importantly three cheers for reusable tools & less waste! I love it!
My best girlfriend Lety could SO use some top notch tools, she’s a painting machine & has tackled almost all the rooms in her new house. She’s got a heart of gold & a house of green walls. 💚 & with some good tools maybe she’ll learn to love cutting in. ☺️
Don’t put me in for the giveaway (I am not eligible, and that is fine!), but I just wanted to say thank you for this fabulous, information-packed post. If there is ever anyone I want to take tips from on making a paint job look nice, it’s you — you guys do such an incredible job.
This post is a keeper, for sure!
Great tips. Thank you! My brother and I are both repainting houses and would love a color consult!
Painting just makes me happy, the first stroke is magic and I love to see how a room transform in front of me. Painting our family room from gray to white will be my next project and I can’t wait to start. These paintbrushes will help get the job done quickly. My daughter Aimee shares the love of painting with me.
Wow these are amazing tips! I have made more mistakes with paint to count so many we are now going back to redo two rooms grr! But I will definitely utilize your amazing tips!! Thank you so much! I’ve been a long time follower of your blog and you spark so much inspiration in us all! I’d love to enter myself and Ashley Davis in your contest please ! =]
This would be for my brother, or at least for his house. We installed a metal roof on his home last fall and he needs to paint all of his trim to either match or complement the new roof. The home is a red brick, and we put a charcoal grey roof on. His trim is a dark green color. It doesn’t look awful, but a change in color would help.
I learned so much from your post! Who knew one should tuck the brush back into the packaging when done to reshape it; I am fiendishly protective of my brushes! (Read that as “his” and “hers” lol!) I also keep my drop cloths for years and really enjoy revisiting the dots of paint colors past…my friend Samantha W. Is finding her way around a paint bucket these days and would surely enjoy a set of good brushes!
My husband totally needs this! We’re one year married and one year in our first teenie-tiny starter home! He painted our living room with some low quality brushes and could use a nice upgrade. He loves researching how to DIY this house and doesn’t make a decision unless he has thoroughly checked all options. We’re hoping to move on to the kitchen next! My husband is Greek… so we’re thinking Mykonos meets Mid-Century Modern :)
Hi Sarah! I came across your account on Pinterest recently and have loved all the content you publish on your blog and instagram! They are not only beautiful home inspiration, but more important they are extremely informative and useful. My husband and I is buying our first home and are looking to make some changes to make the house feel more than a home for us. This blog post along with many of others suchs as the one on laundry room have been tremendously helpful in our renovation planning and learning process. Thank you for sharing all your knolwedge with the rest of us!
Love all the helpful hints and would so love a consultation! My friend that I would share with is Nicole Vortherms.
Love this, there is so much you mentioned that had never occurred to me. I’m a “get it done fast” kind of painter, so this will take some good restraint. I’m always planning my next room redesign and my friend Teryn is renovating her home and could use some good tools!
Great tips. My Mom just moved in to their new house and are painting all the walls, so this will be helpful to her
Thank you for the reminder to put the brushes back into the “keeper”. My dad always did that. Cooler weather is a good time to paint some interiors for my mom in her new place.
I would rather do burpees than prep work. It is the literal worst!
I painted our office/den a deep black when we first moved in and I’m ready to go back light.. any tips for a drastic transition of color? Also, how do you determine when to use a brush vs. roller? Going to enter this giveaway asap! Need some new brushes desperately. Thanks for always putting so much thought into your posts!
Whoops! Thought the giveaway was on your Instagram. I would love to share this giveaway with my brother , AC, who just bought a fixer upper and is doing some really cool things to it! :)
My friend Megan just bought a house that just doesn’t feel like them yet. Meanwhile, I need to finish painting The peeling paint on our exterior.
This is perfect timing as we are doing our first paint job on our ranchouse! Thank you for sharing your wealth of knowledge and resources. 🙌🏼 My friend, Kambrie, totally deserves this over at @redobigblue on Instagram!
We are starting a few different paint projects. Exterior and interior. They always make me frustrated because it doesn’t always go as smooth as I’d like it to. Thank you for the tips! I would love your advice but also know my friend Jessica O’sick would too!
Thanks for all of your well seasoned tips! My canvas drop cloth is over 35 yrs old & still in use (also been known to protect outdoor plants from winter chill). I have never seen the cleaning tool you use but have always used a 5 in 1 tool. My “secret weapon” is a flea comb used to clean out any left behind paint in the brush bristles. I totally share your disdain for painters tape – & I’ve never seen a paid pro painter actually use it! A lean brush just does a better job than starting with a plastic wrapped refrigerated brush.
Purchased a house to be near my grown sons. Worst paint job EVER. Realtor talked me into it after looking for year. It’s so overwhelming and I’m only three months in. Can’t live here until the sanding is over. There are too many types of paint on one wall., and so puzzled as to what will cover all these mistakes! All my painters don’t want to do it, it’s that bad, and the one that finally agreed is so over the top. I will begin painting soon. Would love some good tools and tips for my best friend and me to use.
#toobrokeforprofessionals #toooldforthis. #paintingismylifenow #husbandsaysitshopeless
Good tips! I also enjoy the “me time” of painting. About to do some today. I always listen to music. My friend Jennifer S would definitely love to win this with me.
Perfect timing as I’ve been prepping to paint my daughter’s room!
These tips are so helpful! My husband and I just purchased our first home this summer and oh boy, have we been painting! We still have several rooms to tackle and have enjoyed pulling inspiration and advice from your posts. The prep is not my favorite but there is something nice about putting on some tunes and tackling a paint project together. My brother is also currently building his dream home, and could definitely use this as well! Thanks Sarah!
This post and giveaway are so good! I’ve been throwing away brushes this whole time because I didn’t know how to handle them. I’ve been holding off on painting because I find it daunting to figure out how to make the house flow otherwise, but at least when I do it, it’ll be that much easier with your tips. My friend, Janelle, has also been working on getting her house painted because all of her walls had a weird variation of bright green, bright blue, and purple in one space together.
Does the Purdy Clear-Cut brush also come in the Nylox style bristles or are they two separate brushes?
Great blog content! Thanks so much Ü
This blog is GOLD! Thank you so much! You will laugh, the biggest fight my husband and I have ever had in 7 years of being together was over paint techniques while painting a room together. He was on a paint crew in the past and I learned from my mom, who would absolutely use a new paint set to use as she uses old supplies and not great technique. Heather needs Purdy in her life! Because I need her help (and my husband’s) to get our house renovation finally finished!