Guest Room Reveal
 Our guest room is finished! I repeat, the guest room is finally finished. Get ready for a long post with LOTS of images. It was difficult to narrow them down because it’s been such a long time coming. We’ve been working on this room for what seems like years. It obviously hasn’t been THAT long, but it has been awhile. Refinished floors, new windows, repaired drywall, a new closet, a rehabbed chest of drawers, and a few accessories later- it’s ready to share. Take a gander and let me know what you think!
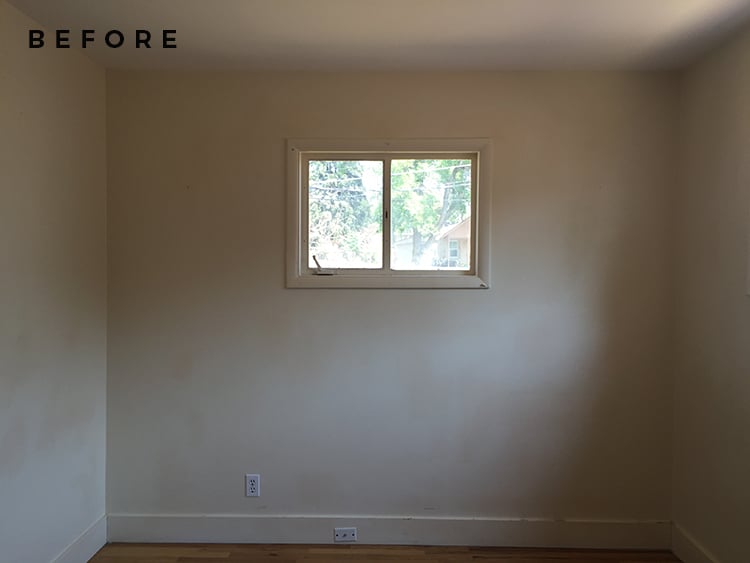
To give you a little preview of what we were working with, here are a few before images. Everybody loves a good before and after, right?! It’s crazy to think this is where we started.
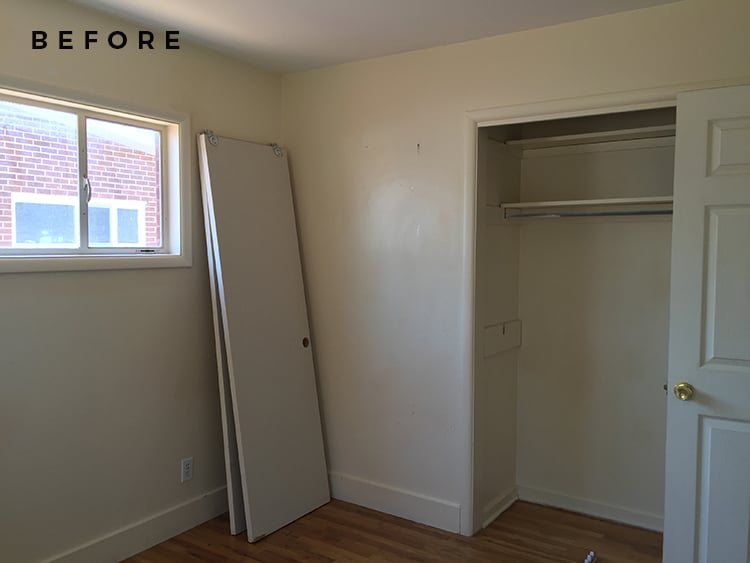 This place was a total dump. It was rented for 20+ years prior to purchase and neglected. You can totally tell this room (and the entire home) had seen better days.
 I’m happy to report, we’ve restored this space to it’s former glory… and then some. Such a difference! I’m really excited with how this room turned out. We’ve been entertaining house guests since we moved in (even in the icky condition), and now I feel like I finally have a space I can be proud of when hosting friends and family.
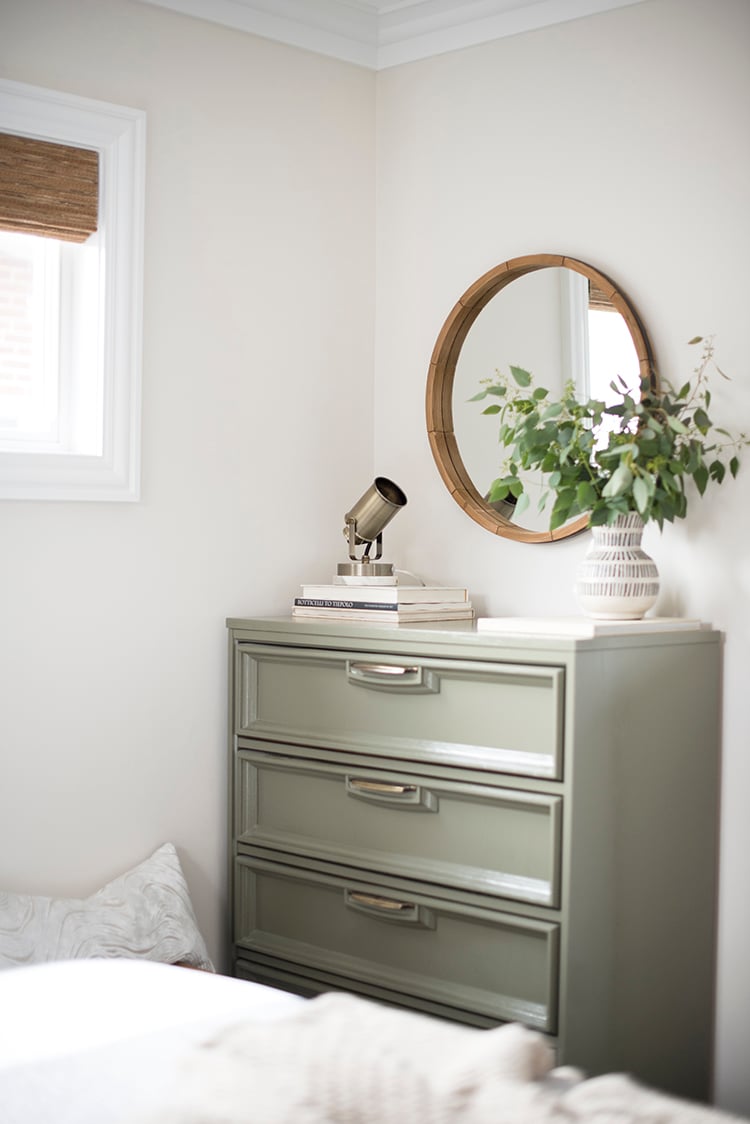
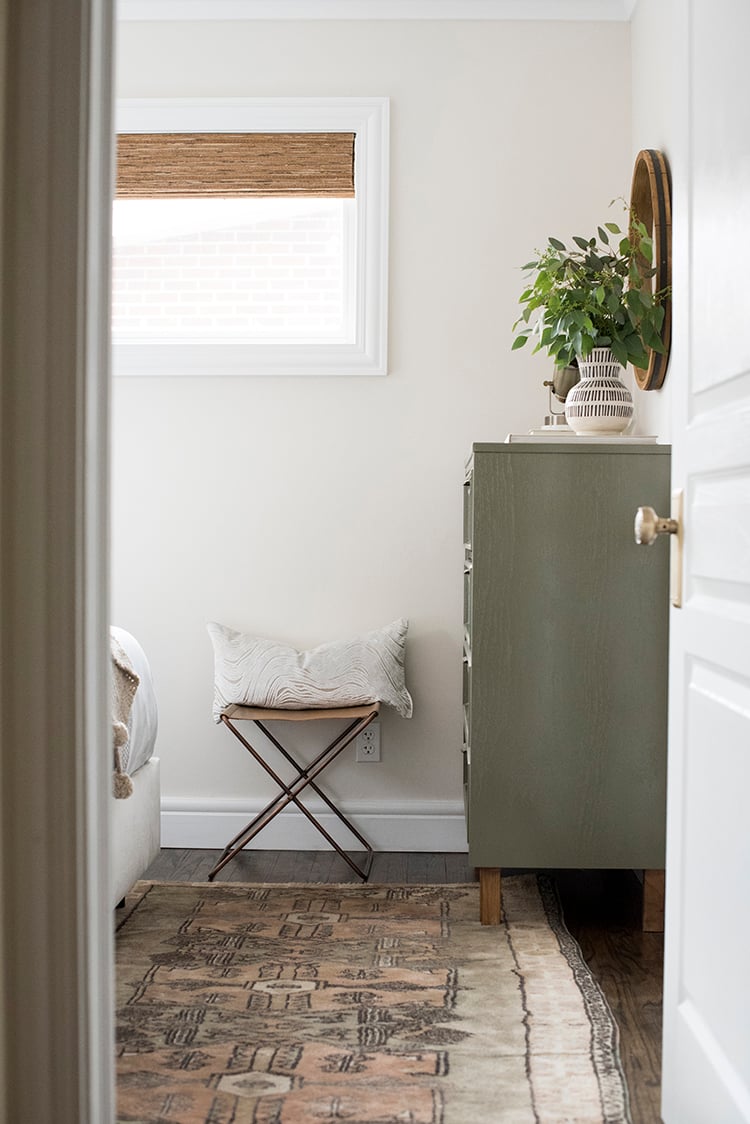
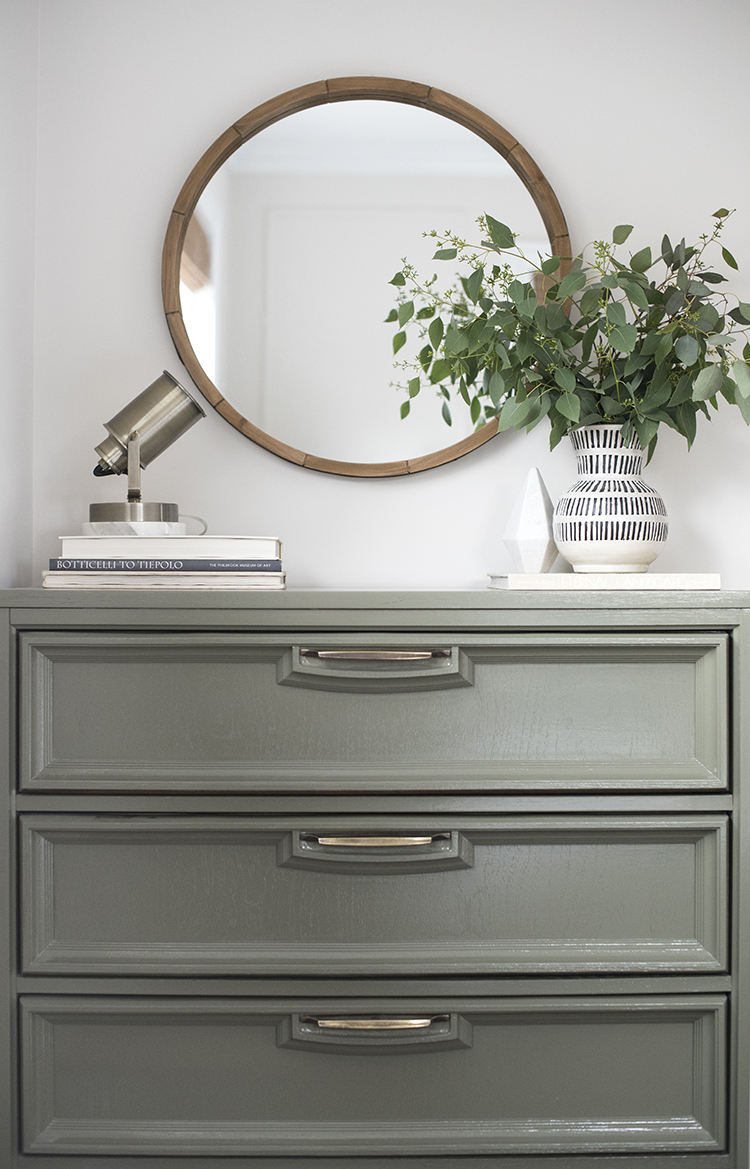
 If you’re wondering about the tallboy dresser, read that post here. It was a lucky vintage find I restored. It goes perfect with the creamy, warm wall color. Speaking of paint, we used Sherwin-Williams Emerald Interior and absolutely loved it. Most walls only required one coat. I know someone will ask, so I included it at the bottom of the post as well, but the paint color is Aesthetic White SW 7035. It’s the perfect neutral! Not too cool and not overly warm or beige.
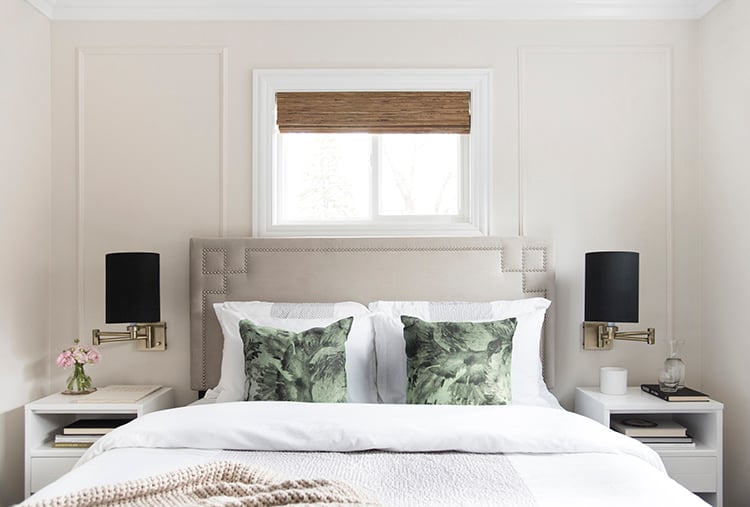
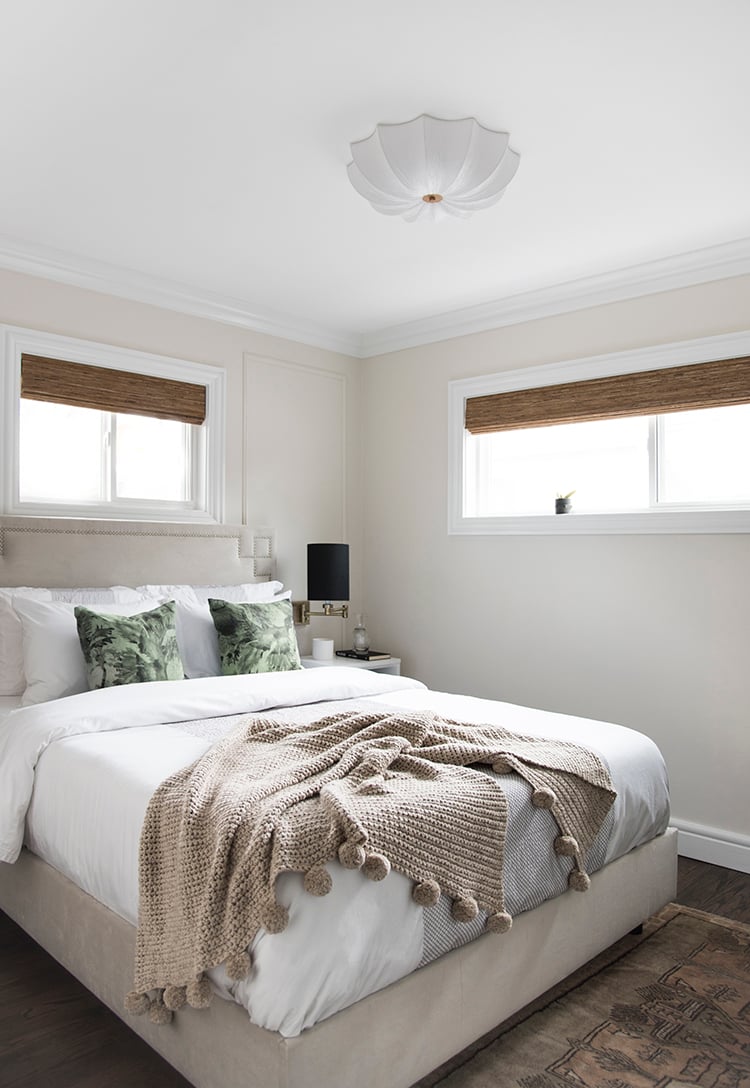
 This room is actually on the smaller side, but we opted for a queen size bed anyway. Since we do host a lot of visitors, it was important to create a guest room that felt comfortable, cozy, and clean.
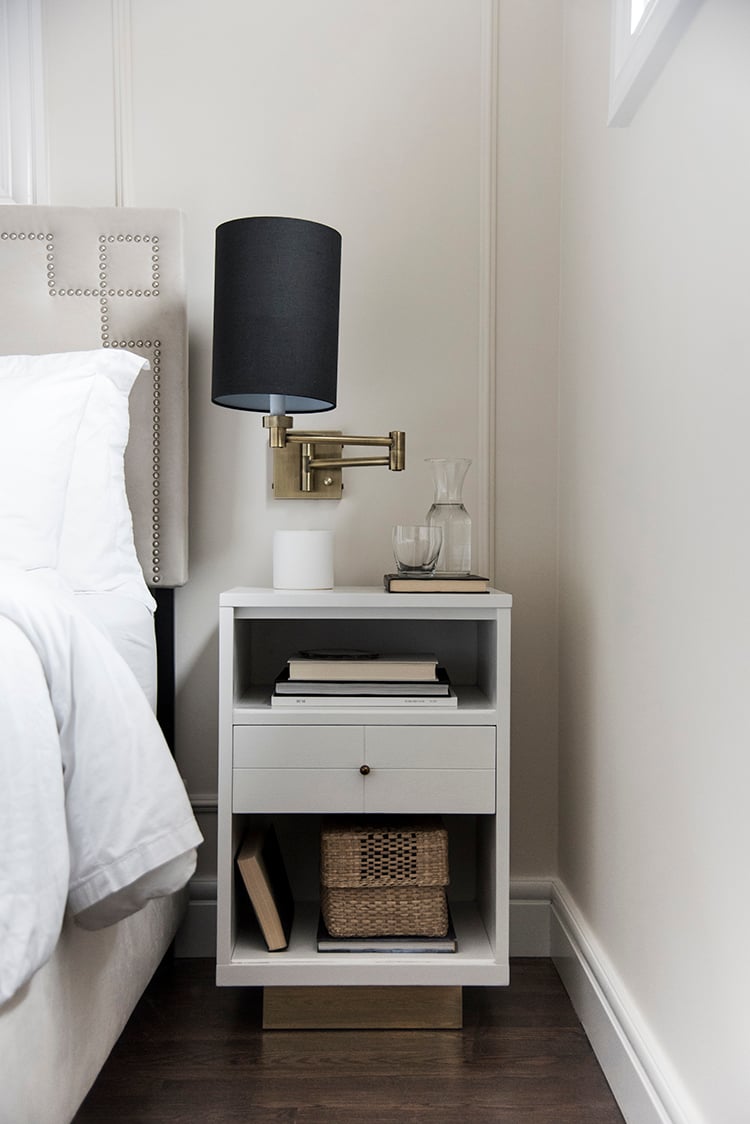
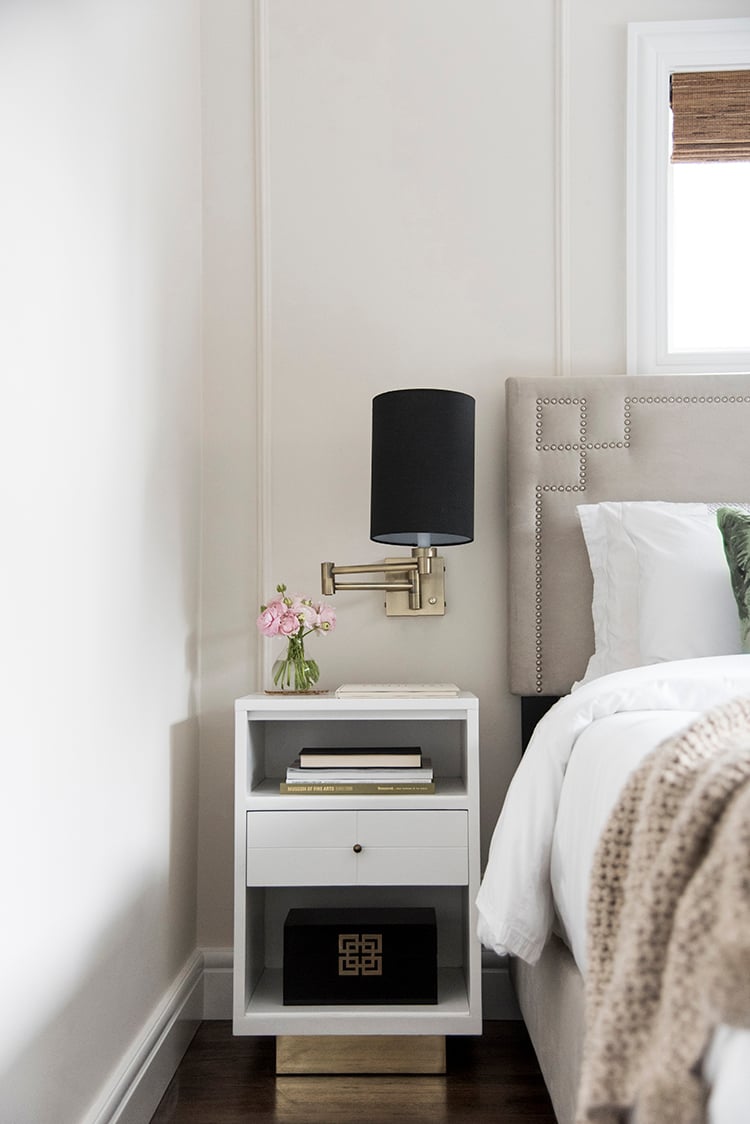 You might notice some familiar things in this space that came along from our previous home- in particular, the nightstands! I still love the vintage bedside tables as much as I did the day I bought them. They used to live in our master bedroom, but because of their slender size, they fit better in the guest room this time around.

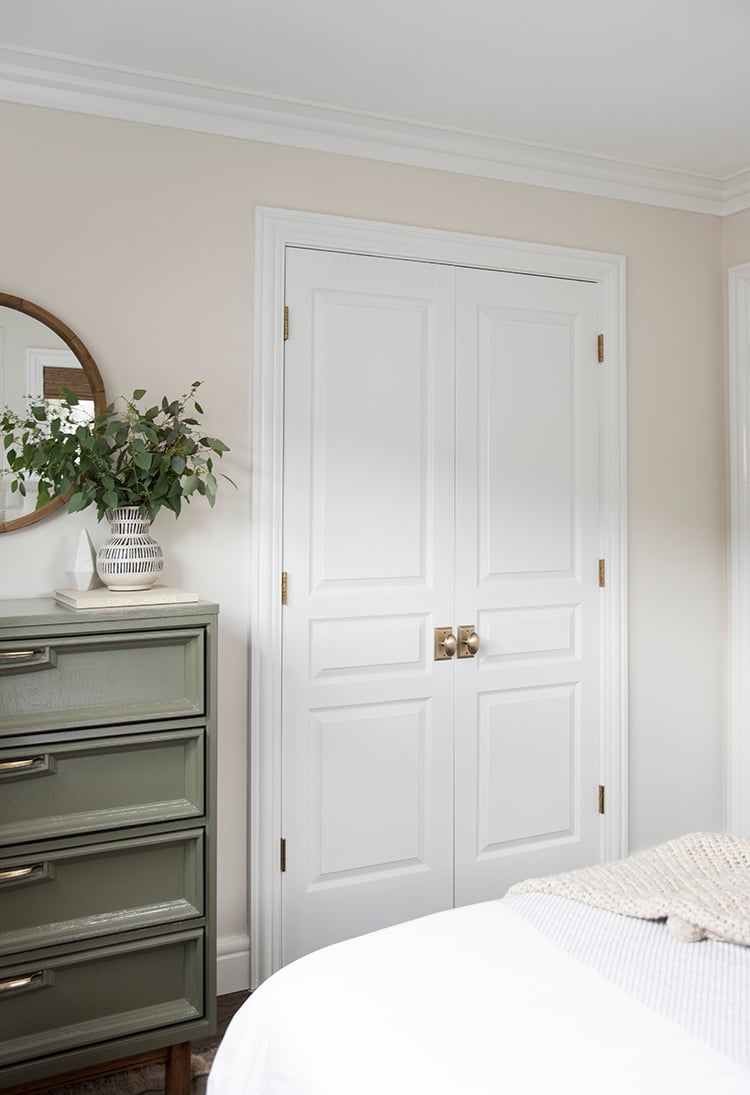
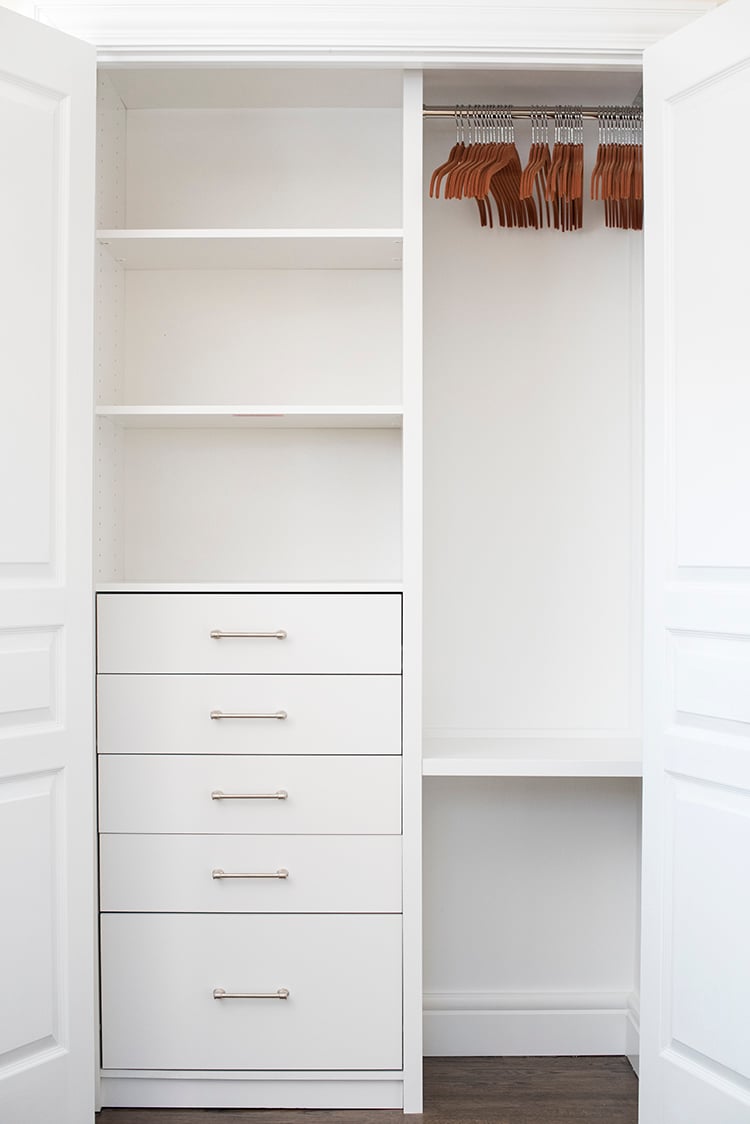
 If you haven’t been following along, the first completed space in our reno I shared was actually the guest room closet… just behind those french doors. Feel free to read more on that project here.
 The entire room is basically designed with guests in mind. It’s neutral- nothing too crazy and more specific to Utah than any other space in our home. Most of our visitors are from out-of-state.
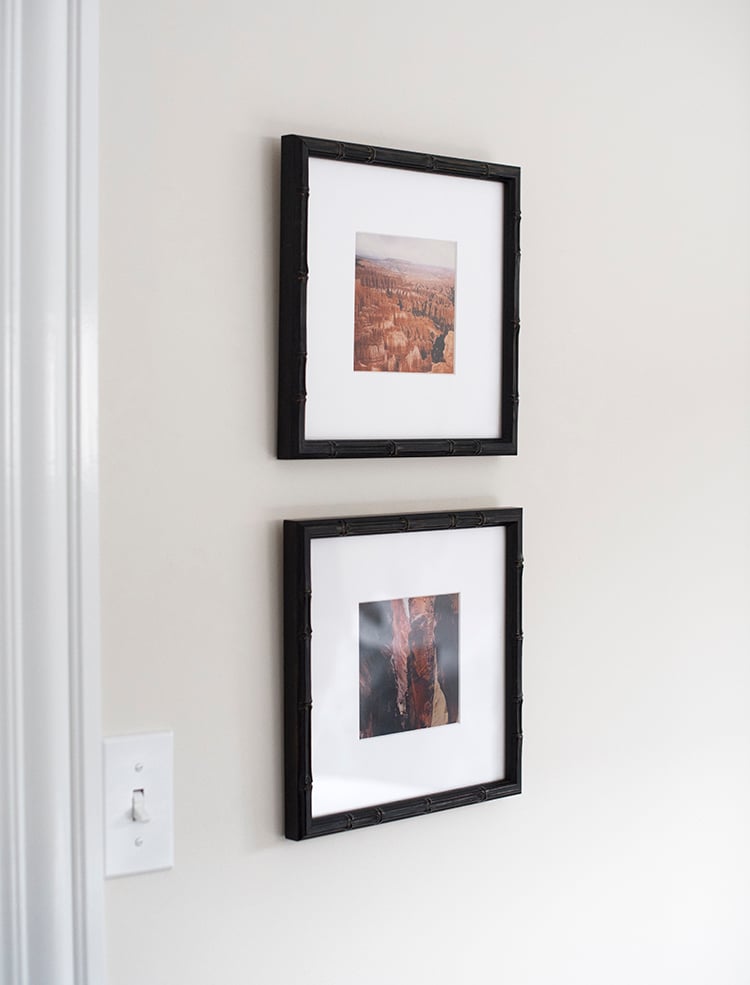
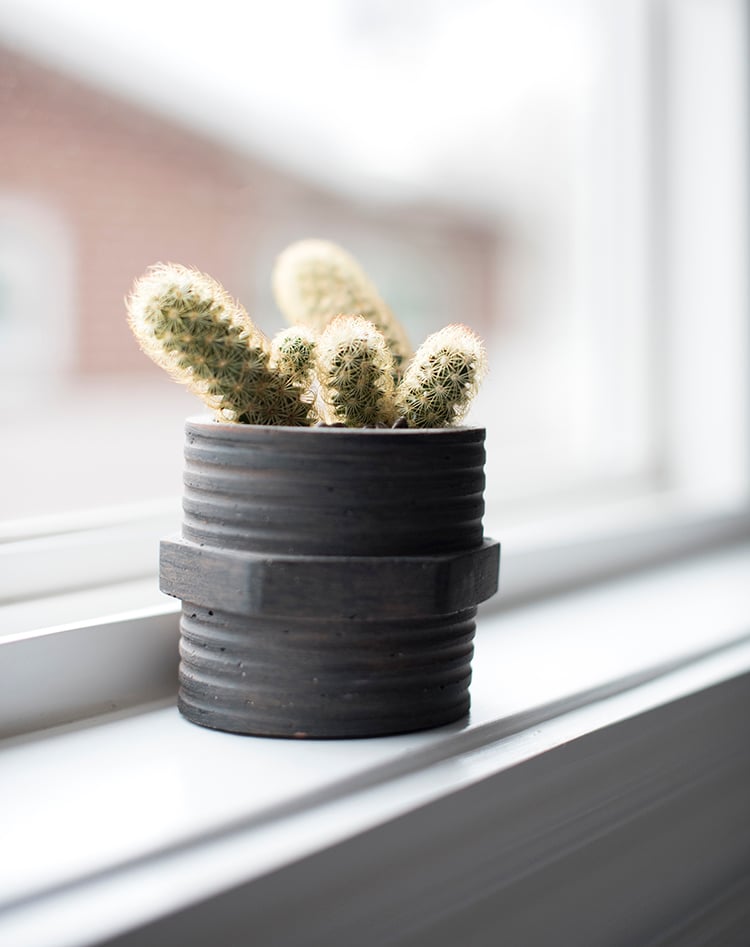
 I wanted to find ways to insert bits of Utah and why we love it into the space, but in an inconspicuous way. I found an amazing book at a rare book store downtown for the nightstand, framed a couple prints from Utah state parks, and added a mini cactus to the window sill from a local greenhouse.

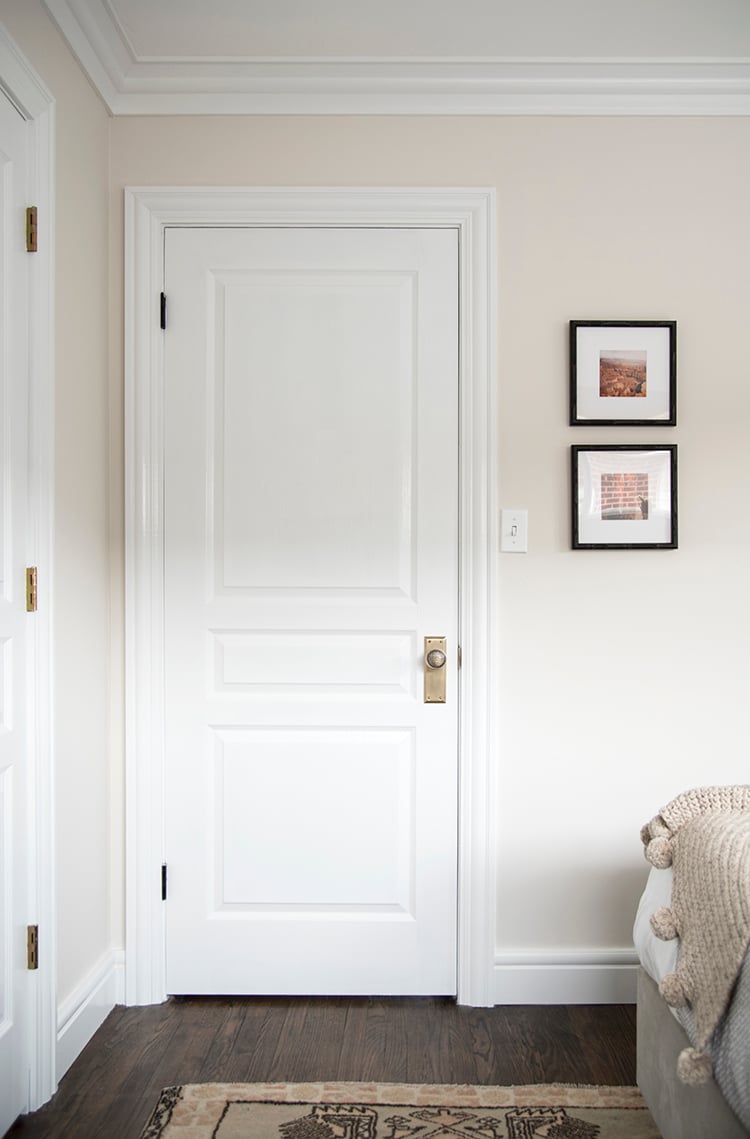
 Contrary to our last renovation, I decided to pay way more addition to detail… the type of details that make a space. I carefully selected trim this time around- from panel moulding, base moulding, to crown, and casing. I’m glad I took the extra step because it made this otherwise boring shoebox of a room interesting. We used trim from this fashion-forward collection. I also have to brag on Emmett for one minute- he installed everything and it looks absolutely perfect. The man is a perfectionist and I love that about him. It may take him awhile to complete a project, but his precision is worth the wait.
 My philosophy is this- trim shouldn’t be an afterthought! I’ve learned it’s not the “finishing touch”, but it literally builds a space. The same goes for hardware, light fixtures, and window treatments. You could buy the finest furniture and without those “little” things, a space would still look meh.
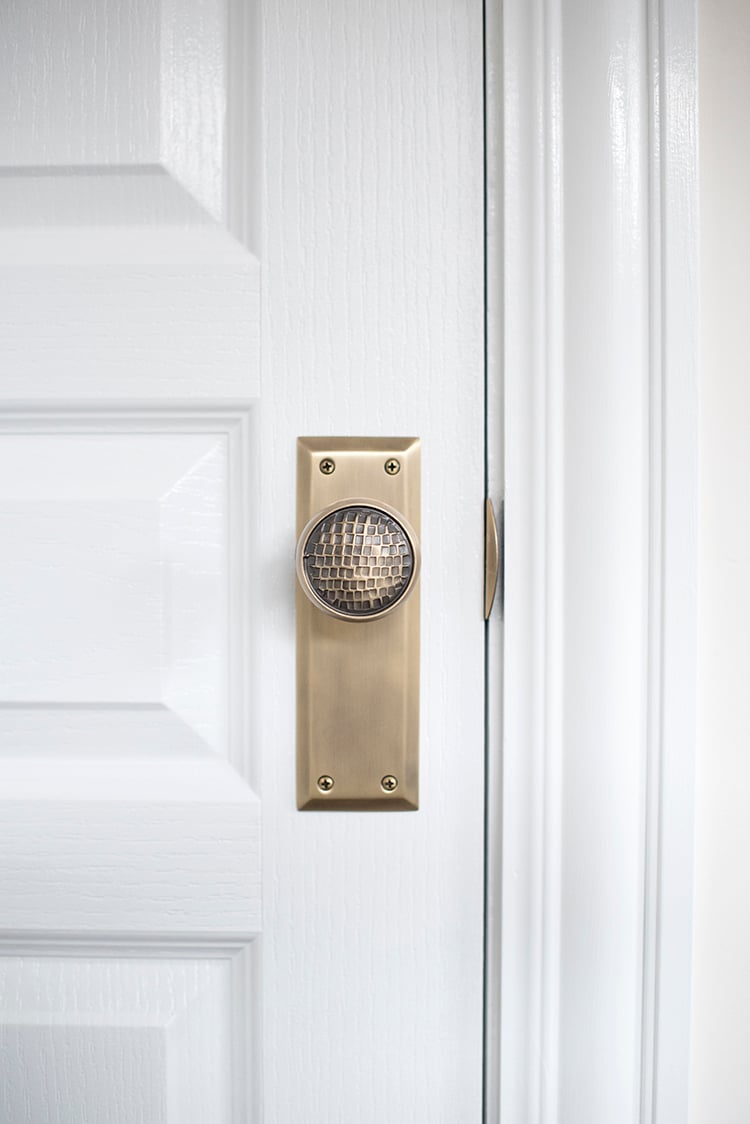 If you missed the post on “How to Select Hardware“- go read it! I really enjoyed putting that one together and I’ve already had people email saying it was useful. I am SO into our new door hardware. Everyone comments on the knobs and it’s easy to see why… that unique hammered texture is everything.
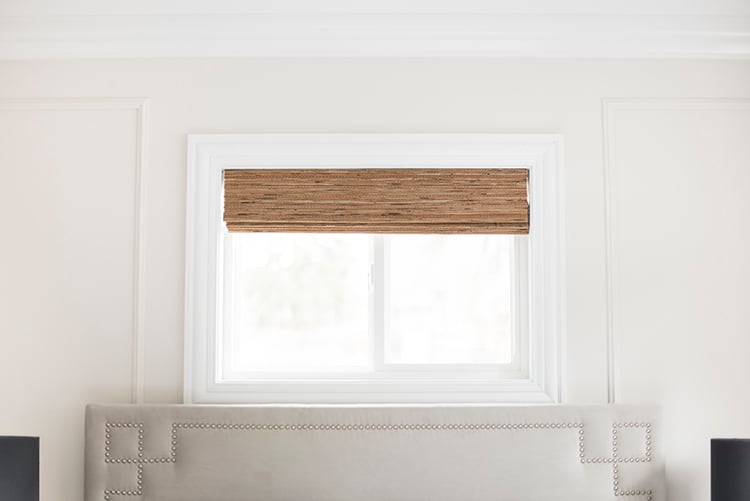
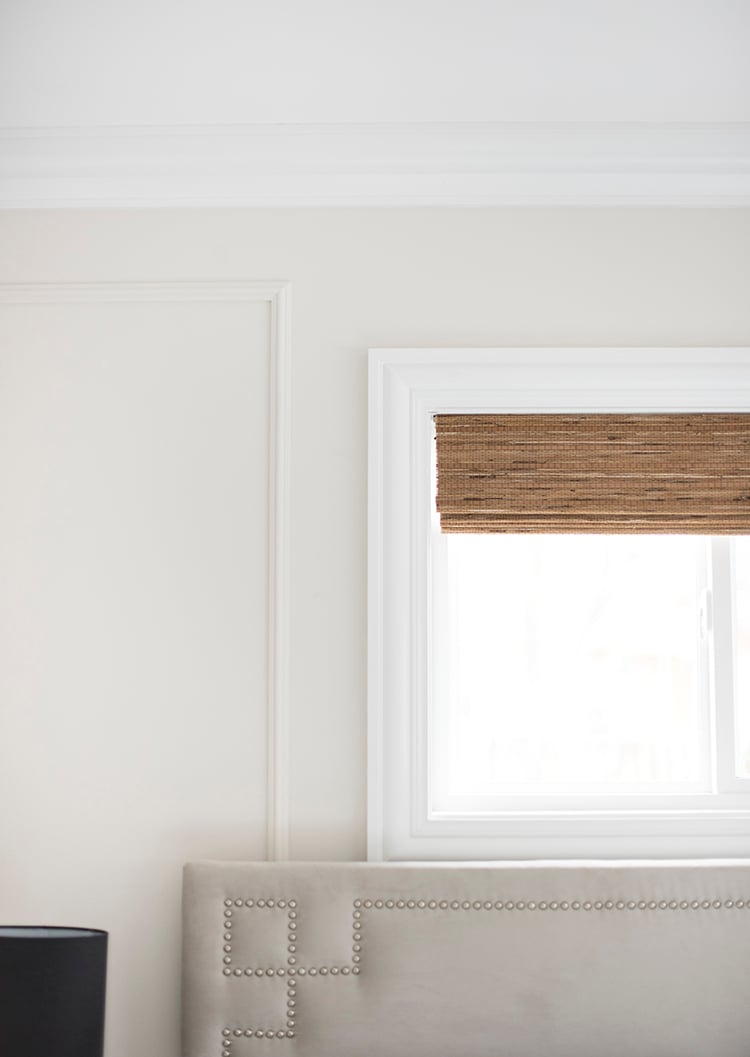 Shifting gears and sharing one last thought on the window treatments… our rambler / mid century home has weird windows throughout. They’re brand new, but we kept the original sizes because of the budget. Typical of most homes during this time period or style, the windows start five feet up the wall. They’re long and skinny, and high. I sort of hate them, but they’re slowly growing on me. Long story short, woven roman shades made the most sense for this space. They make the windows appear larger and streamlined. I also wanted a little warmth and texture- the woven bamboo adds just that.
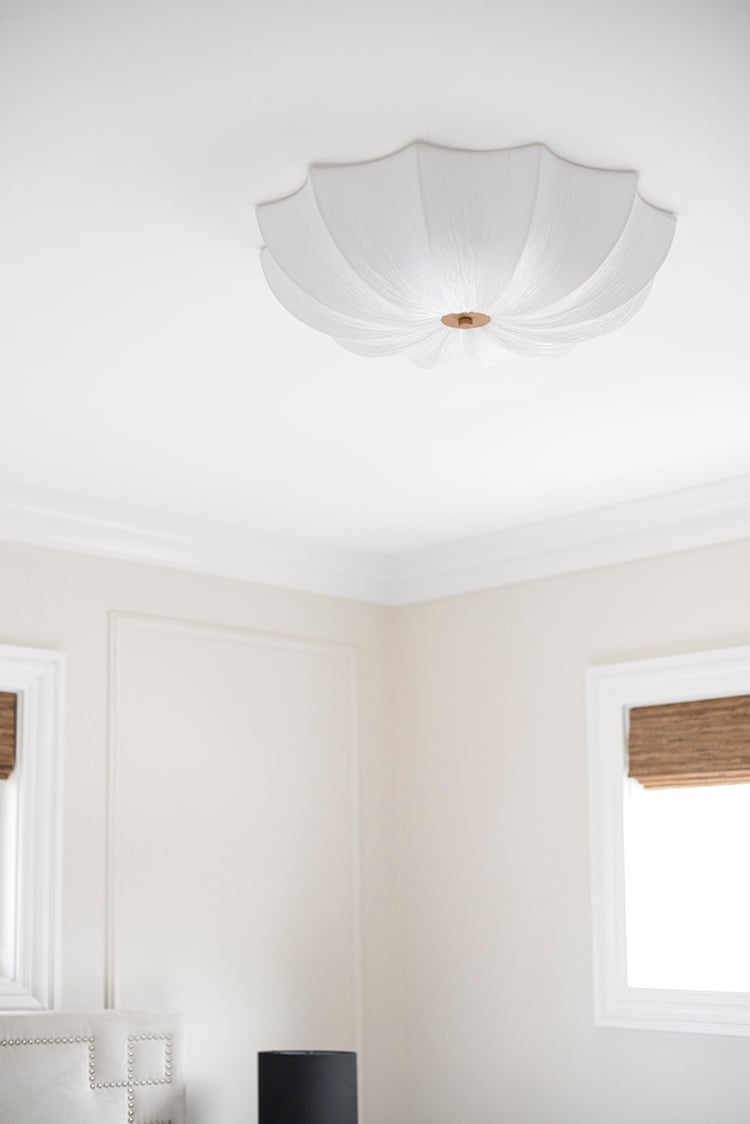 The above light fixture has been a point of controversy from the very beginning, and I love absolutely love it! I asked a couple family members what they thought (knowing it wouldn’t skew my opinion- sorry guys!), and every single one of them said no way. Ha! It’s a great size, interesting shape, and that baby looks magical when it glows at night. No regrets whatsoever! I do have to say, after it was installed everyone had the “aha” moment and apologized for trying to steer me in a different direction.
The sconces were another awesome addition. They’re on dimmers and give the perfect soft light at night. The swing arms are also moveable, so they function well as reading lights. It’s also nice to be able to swing them out of the way if needed.
 Last but not least, I wanted chat about the accessories in this room (helllllllo throw pillows!).
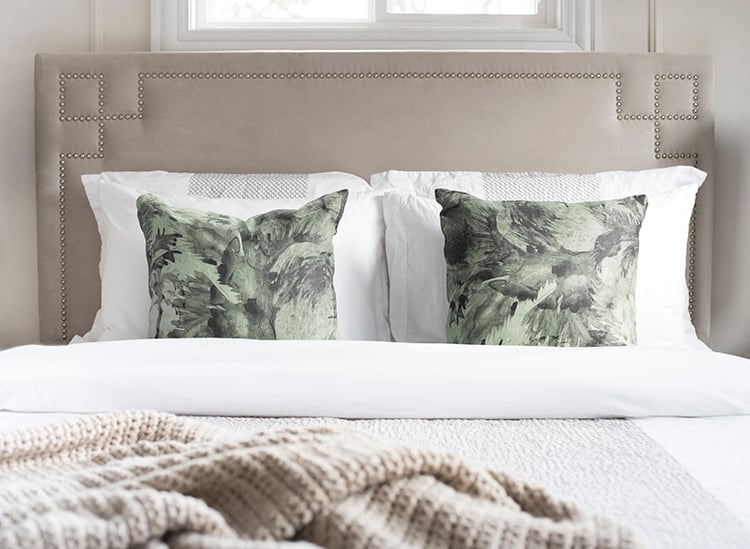
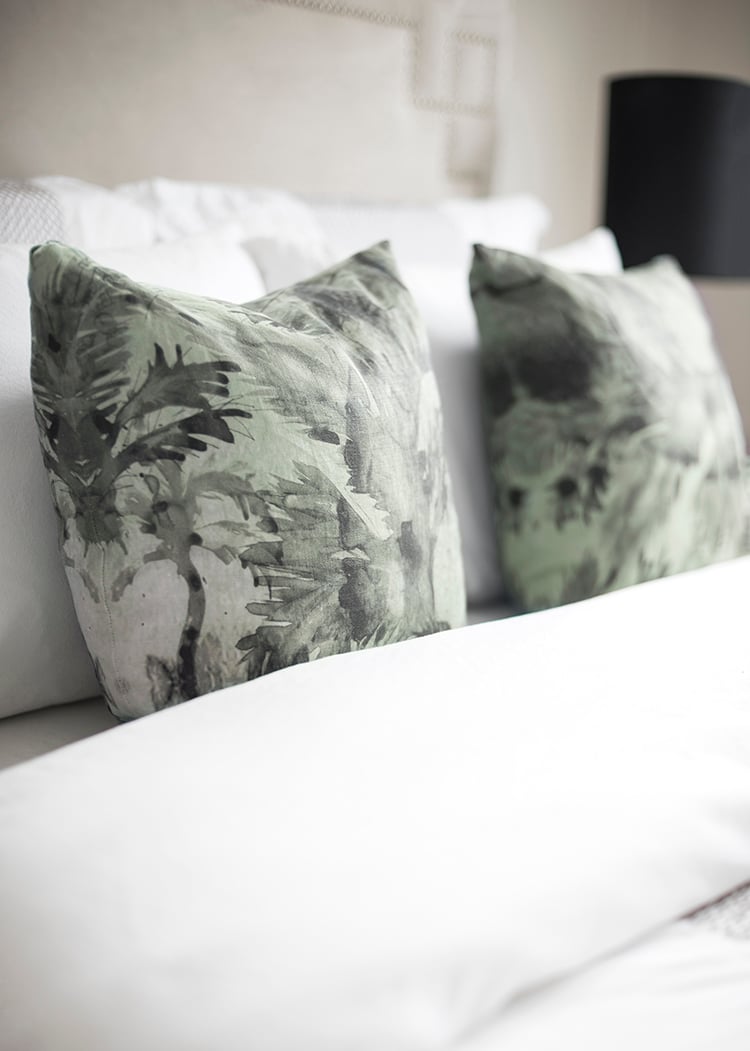 You guys know I love the color green, and I was immediately drawn to this abstract palm print cushion. I found them at one of my new favorite local shops, in addition to the gorgeous one below (insert five heart eye emojis here).
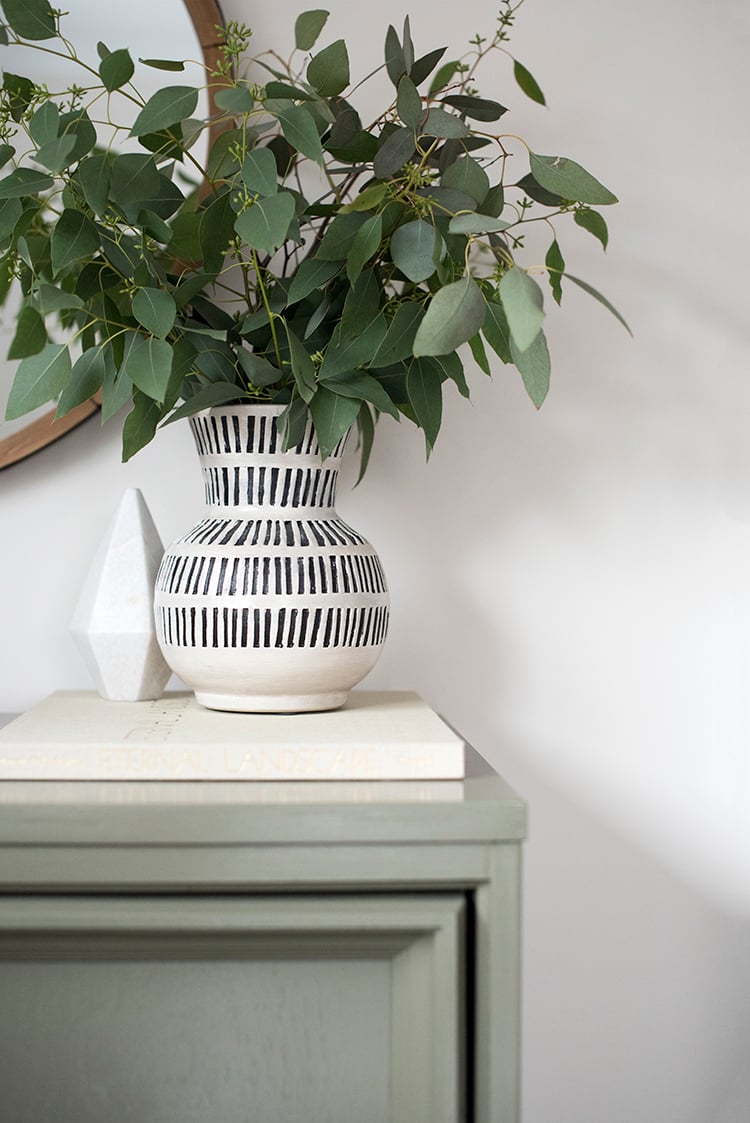
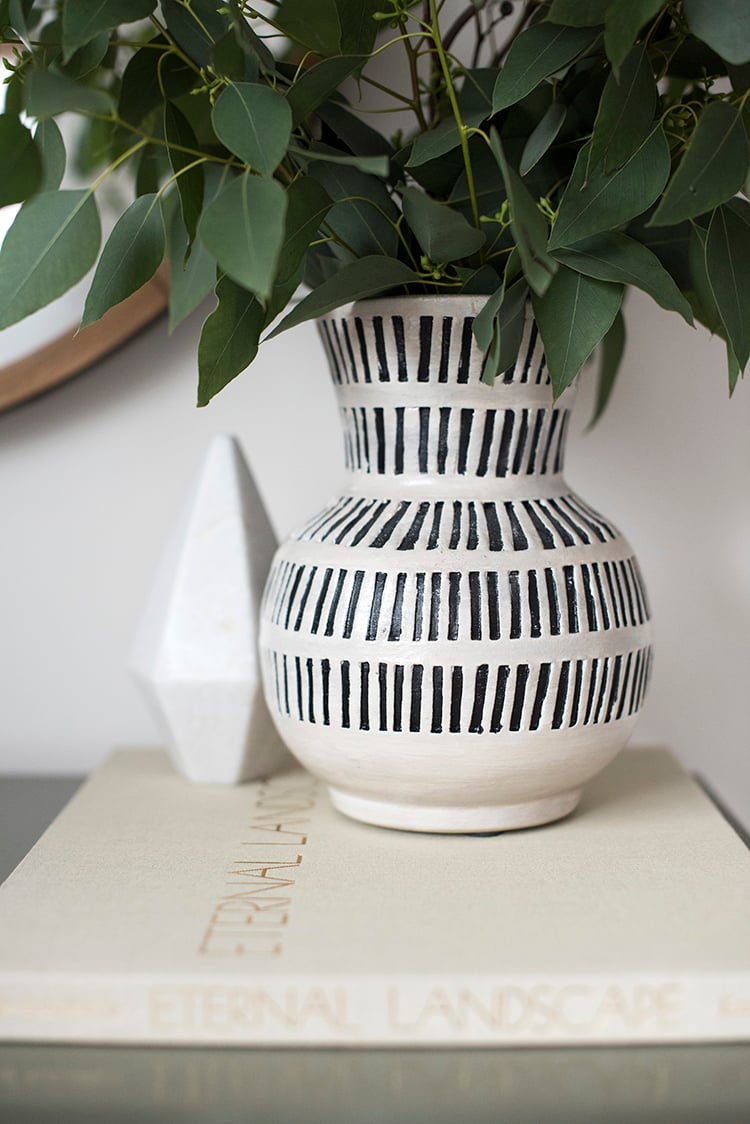
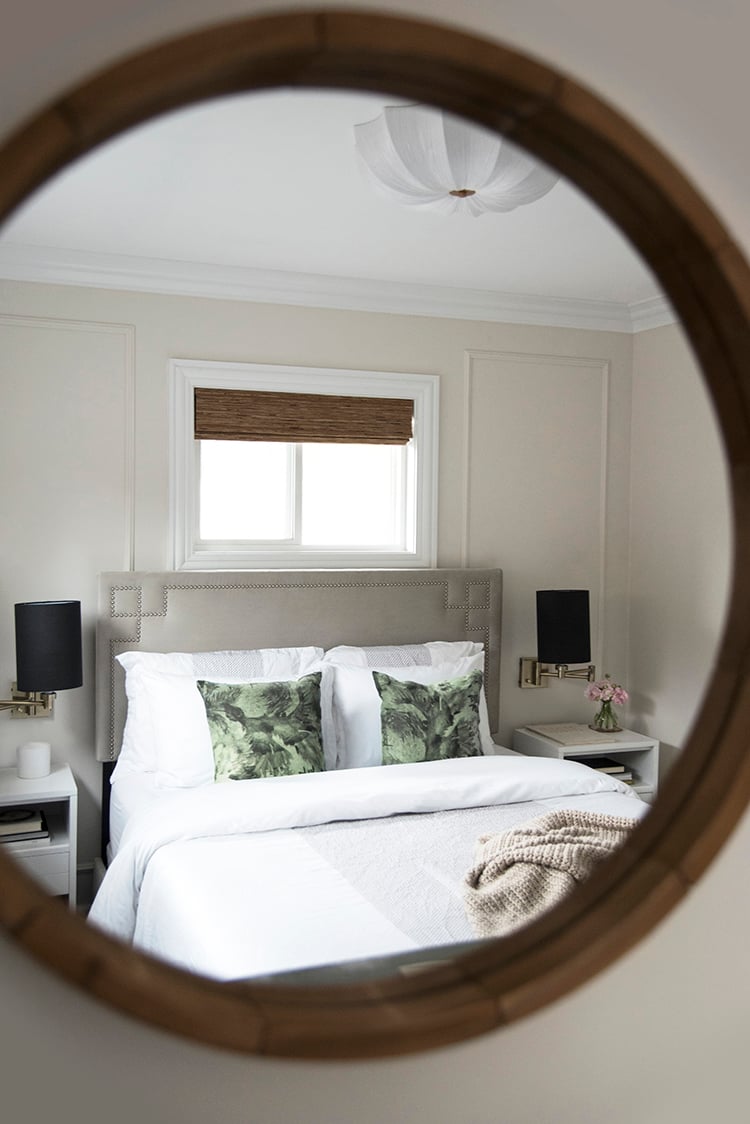
 I also scored this cool, inexpensive vase at Target for under 20 bucks, along with the mirror. Links are all in the collage at the end if you want to shop!
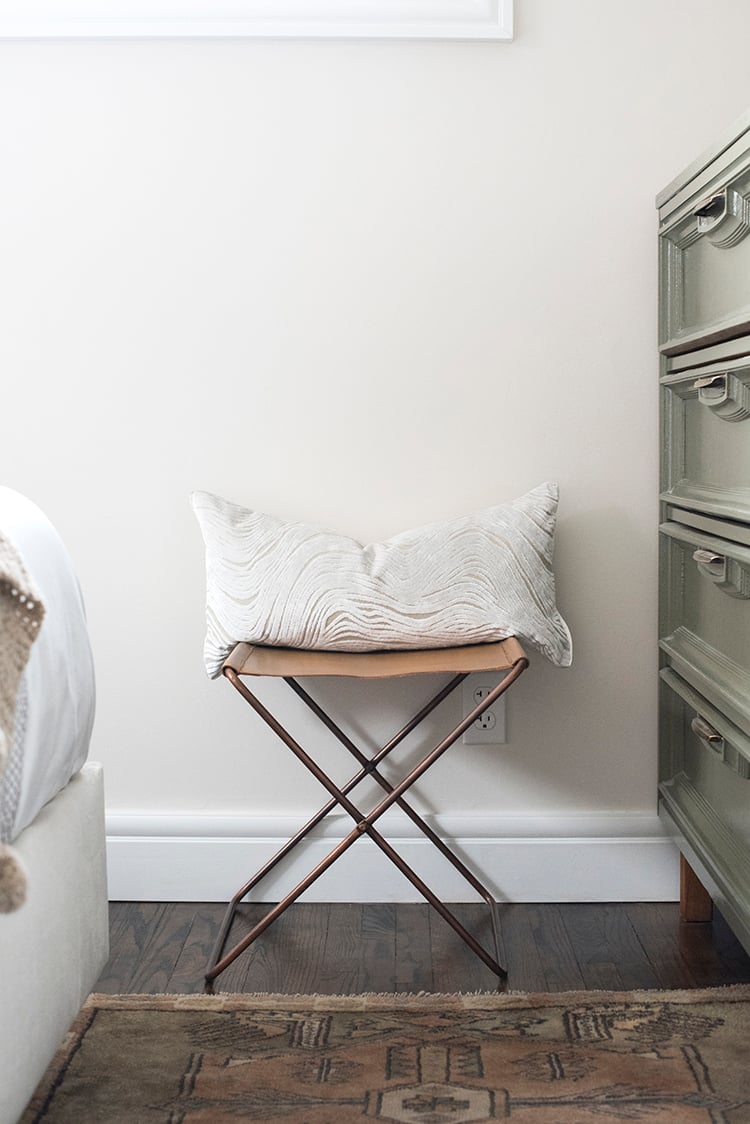
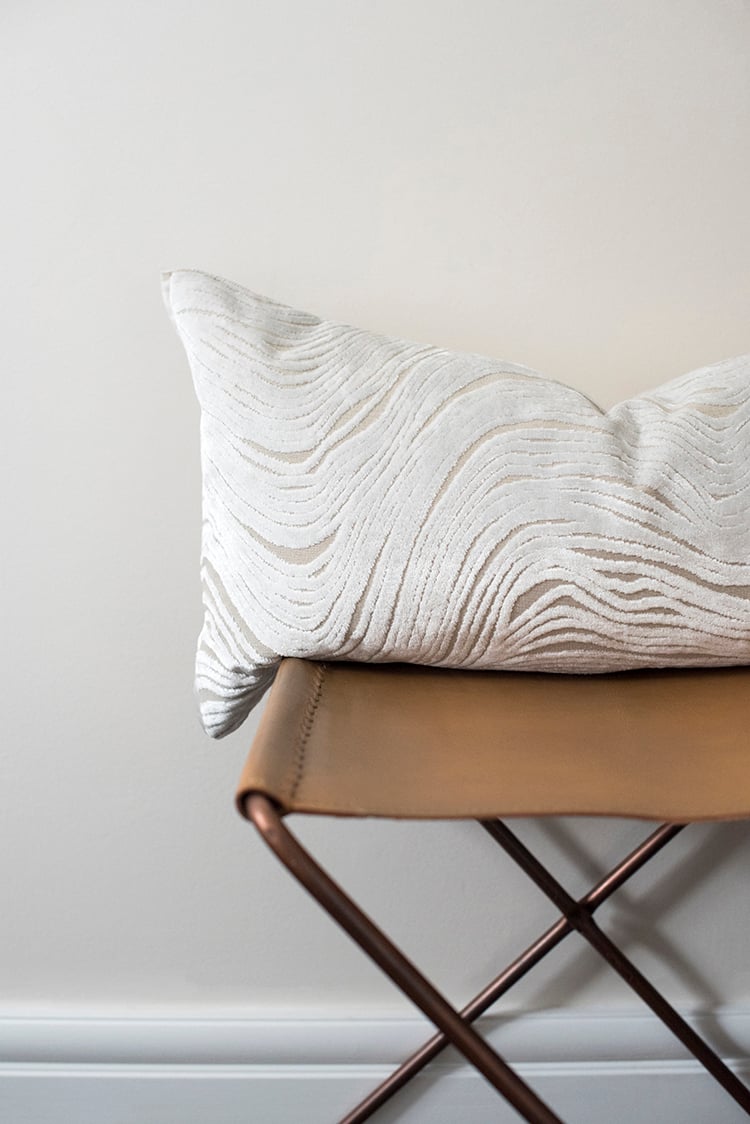
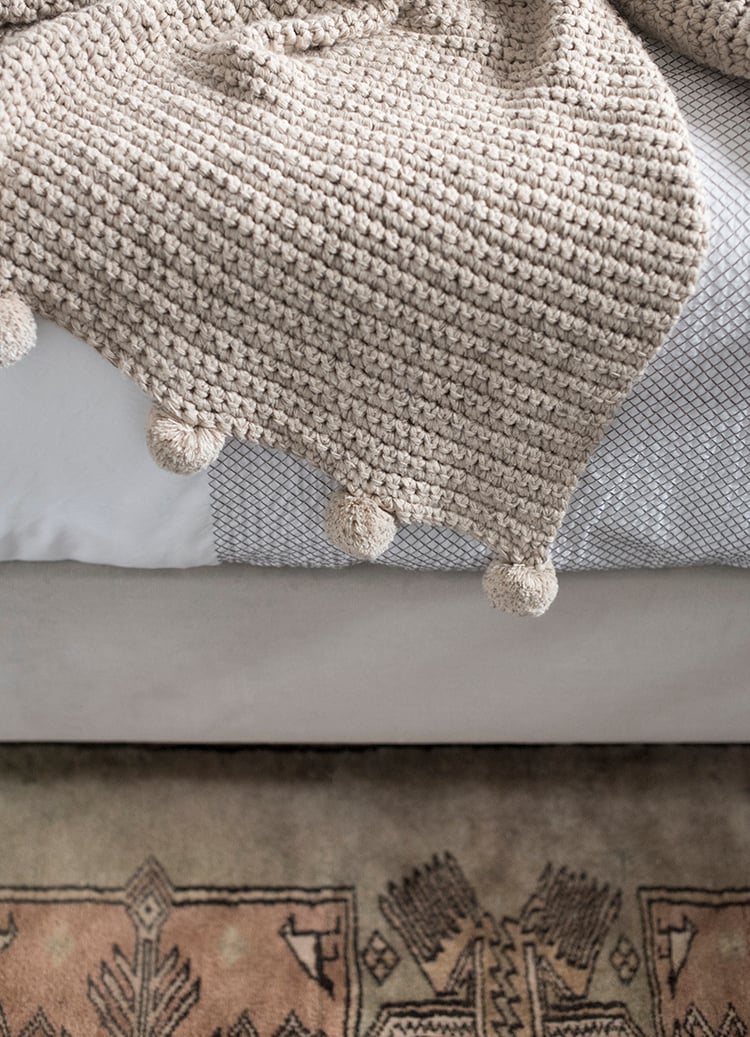
 I’m feeling pretty happy about the variety of textures occurring in this bedroom. It all started with the vintage rug and I just kept layering and layering as I found things I liked. The result was a cozy bedroom full of complimenting textiles.
 I wanted to make shopping easy for you guys and answer as many questions as possible in the post itself- find all the sources below, in addition to the permanent renovating materials!
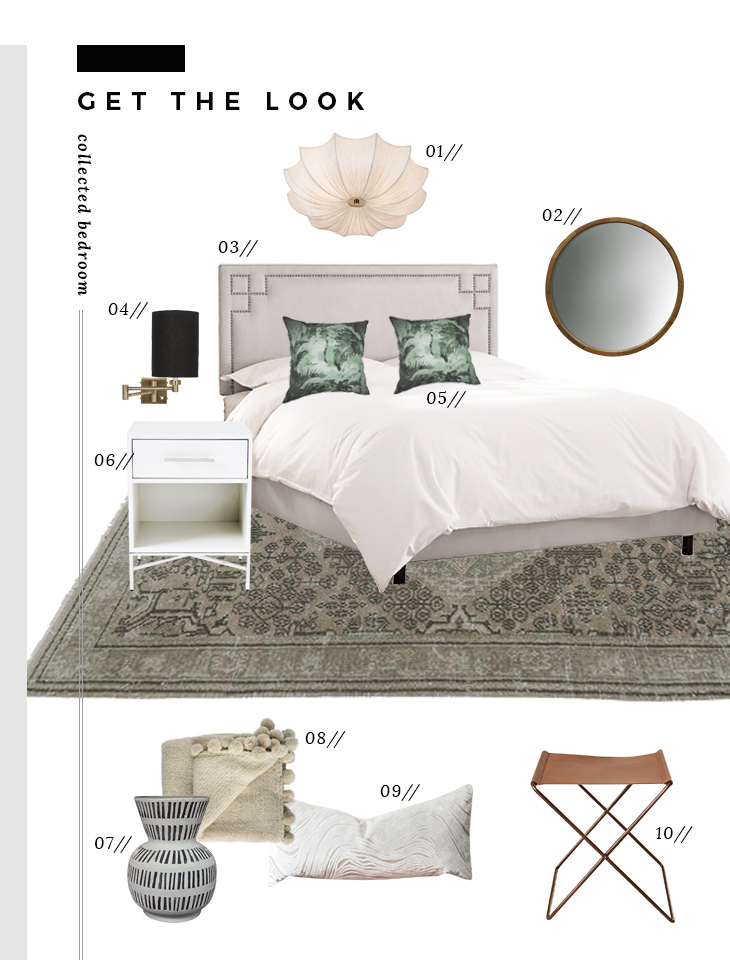 01: flush mount ceiling fixture // 02: wall mirror // 03: upholstered bed // 04: wall sconce // 05: throw pillows // 06: nightstand // 07: vase // 08: pom throw // 09: lumbar pillow // 10: leather ottoman // (not numbered) vintage rug
Permanent Fixtures: trim + mouldings // window treatments // door hardware // closet system
Paint Color: Sherwin-Williams
Alright… that pretty much wraps it up! Thanks for reading allllll the way through that long post. Thoughts? I’d love to hear your feedback!
*This post is brought to you in collaboration with brands I know and love: Lamps Plus, Metrie, Sherwin Williams, and Nostalgic Warehouse. All content, ideas, and words are my own. Thank you for supporting the sponsors that allow us to create unique content while featuring products we actually use and trust!