New Windows Make a Huge (But Expensive) Difference
 During the very first walk through of our home with the realtor, we immediately noted the entire place needed new windows. It was an “every window must go” situation. The existing ones were original to the home and were in really rough shape. Nobody wants to drop thousands of dollars on windows, but it had to be done. Here’s a little summary of our experience, the process of replacing windows, and the huge difference it made for our home.
If you read my post about budgeting, you already know we were WAY wrong on our guesstimate for window costs. We assumed we’d spend about $7,500 on new windows. Our house is really small and that seemed like a decent number. The actual cost ended up being about double our estimate- around $14,000. It was definitely a hard pill to swallow.
 We received quotes from a few different reputable companies for standard (middle of the road) windows, and to our surprise the estimates ranged from $9,000 to $17,000. That’s a lot of cashola for windows!! Like any normal person, I’d rather spend that money on window treatments rather than the actual windows themselves… but like I said, it had to be done (hence the broken before images).
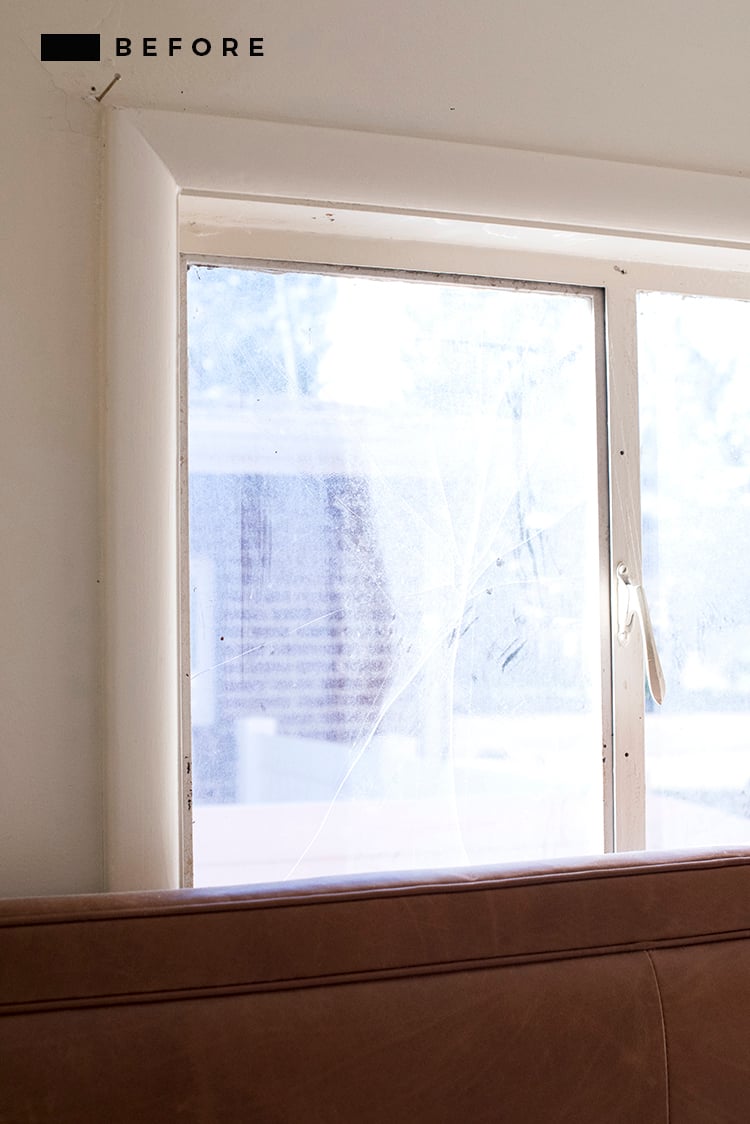
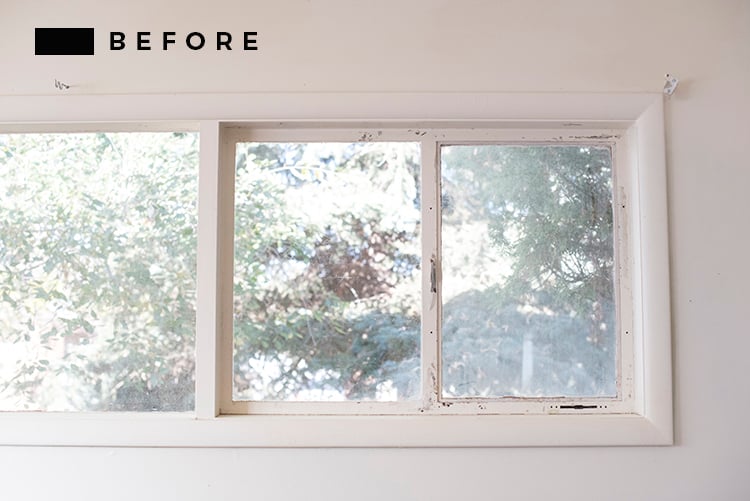
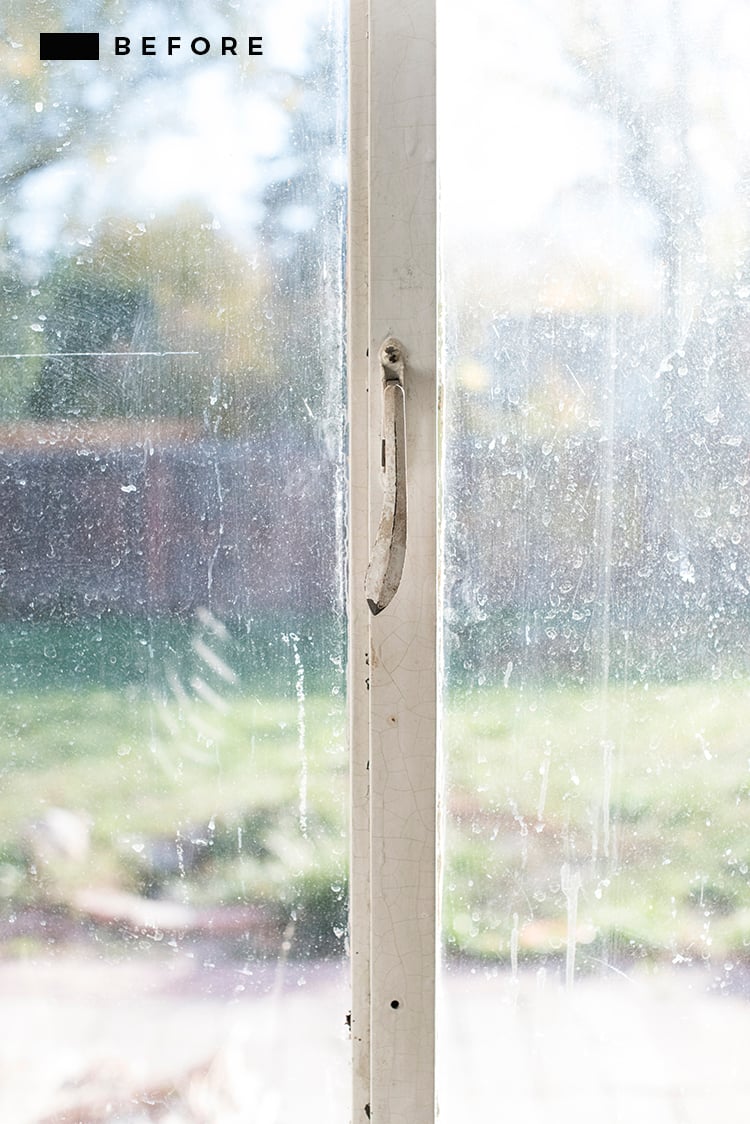 This is what 20 years of renting, lead-based, original windows look like. It wasn’t pretty, folks. It was also becoming a hazard because they didn’t lock anymore. Not only was our home insecure, but Finn busted through the living room window in an effort to “greet” the mailman. If the windows can’t keep my dog inside, we have a big problem.
 Going into the window upgrade process, there were a few challenges in which I needed to provide design solutions:
- There is a large window in the shower and it is in the worst spot when it comes to privacy (as in, the neighbors could definitely see me showering from the chest up).
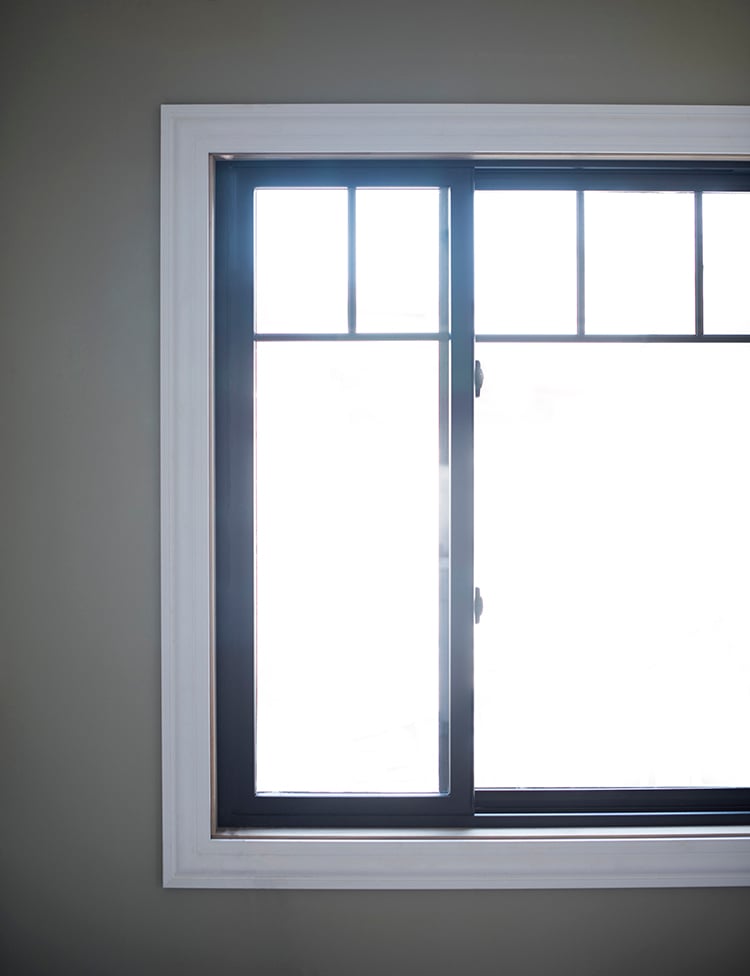
- I wanted a few black framed windows for specific areas (living room, bathroom, and the dining room). It turns out these are really expensive and difficult to source.
- Our allotted budget could not even cover half of the actual cost.
- Since we were investing in all new windows throughout the home, it was important to us that the replacements increase the efficiency.
 I can gladly say, all of the problems were solved, and we’re super happy with the outcome. Here’s how we compromised:
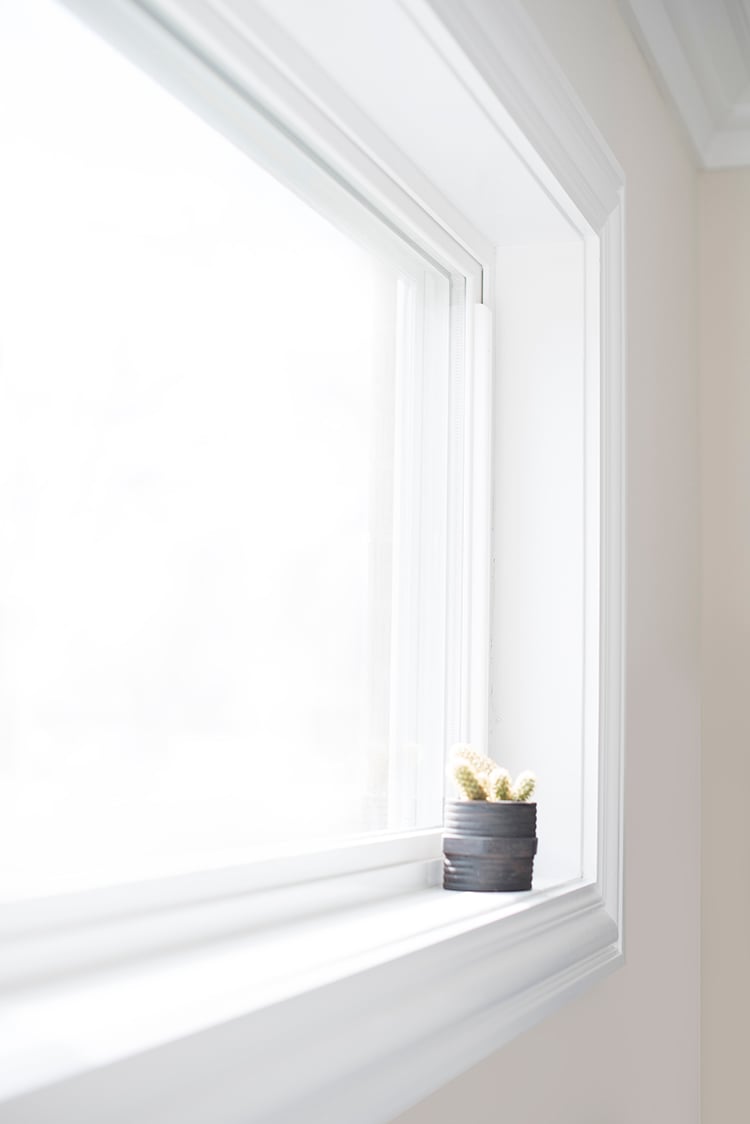
- For privacy in the bathroom, I opted for privacy glass. There are some really bad privacy glass options out there, so beware. I selected a classic rippled wave glass. The best rule of thumb for privacy glass is to keep it simple and textural. I try to avoid designs and intricate patterns, because they tend to look cheap and easily become outdated. I knew I wanted to keep the window because I take all the natural light I can get, and it was ultimately less expensive than moving it or adding a skylight.
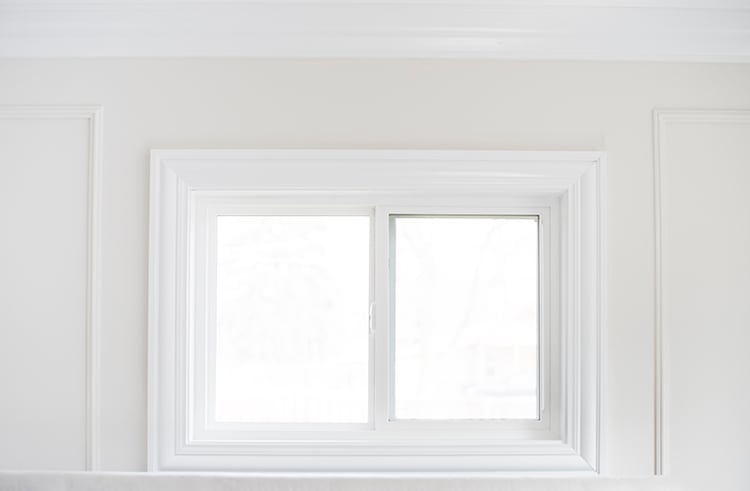
- Black framed windows are hard to come by- especially on a budget. We actually used two separate window companies for this exact reason. The windows in the bedrooms were far less expensive than the windows throughout the rest of our home. They’re just standard sliding, efficient windows. Nothing special, but sourced from a local company. The rest of the windows are from Andersen. We were able to get the black frames at a decent price. This also helped our budget situation… cheaper windows in the bedrooms allowed for beautiful windows elsewhere.
- All of the windows we purchased are high efficiency and will tremendously help our utility bills. Although, we did just discover there is not a single ounce of insulation in our home (a big problem when you live in a snowy area). We’ll be addressing that sooner rather than later!
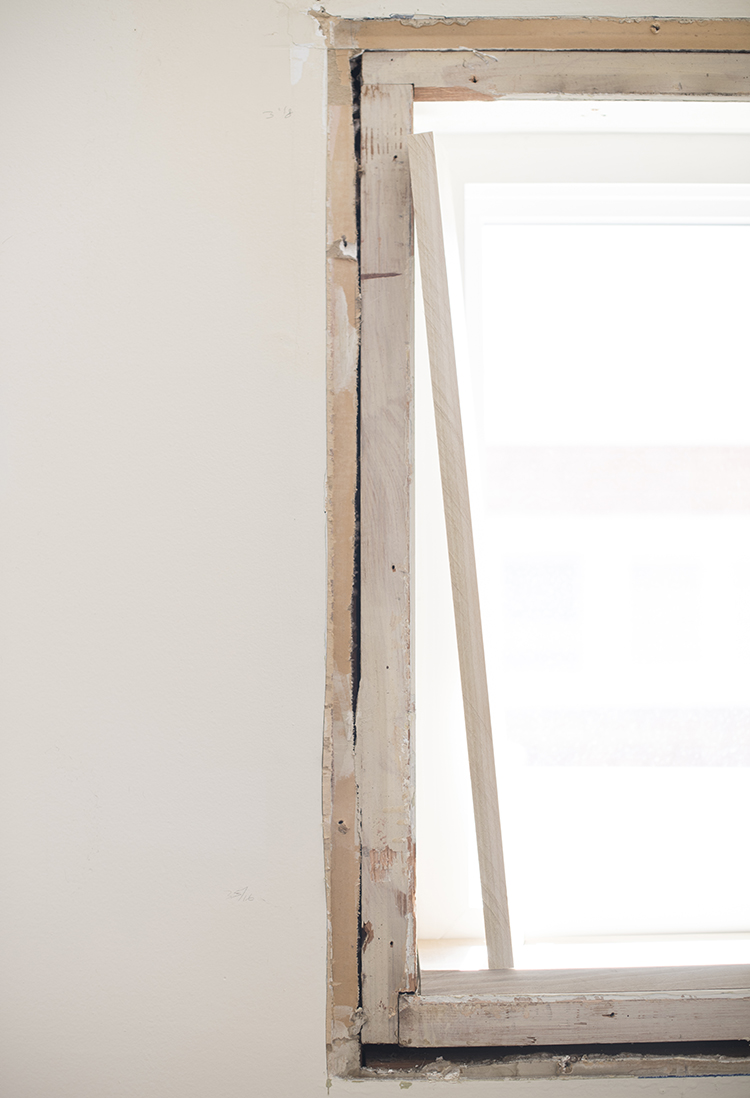
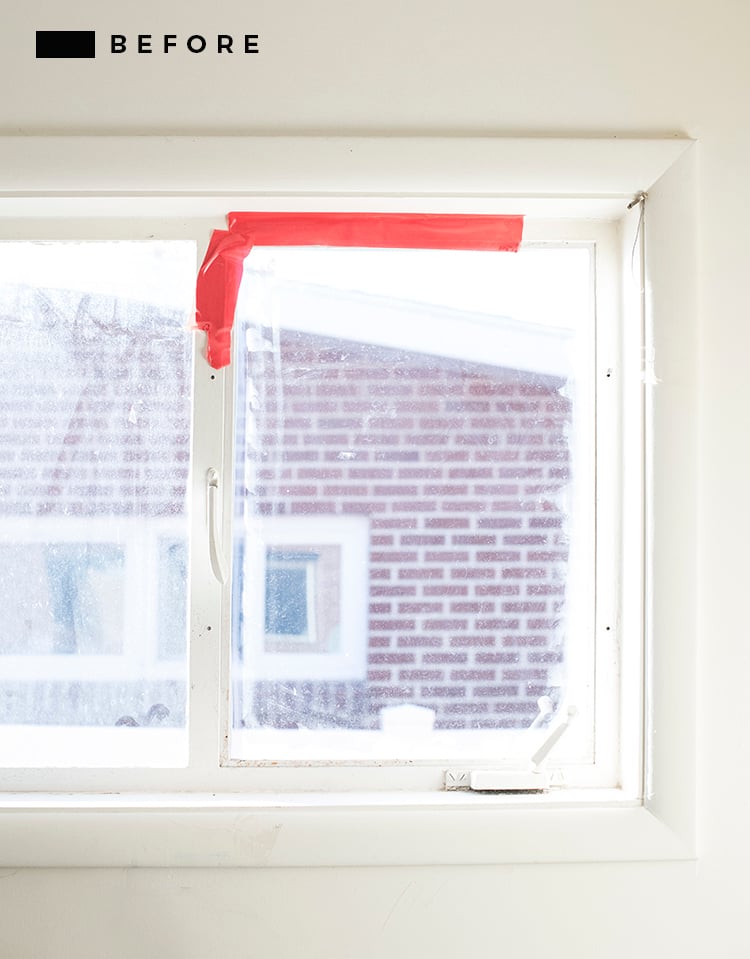
 The process was actually pretty easy- despite the icky looking progress image above. After deciding which reputable companies to use, the design and selection process was in my hands. There are LOTS of different styles of varying prices. Unfortunately, the more intricate (adding mullions, etc), the more expensive… so I wasn’t able to go crazy and get every single thing I envisioned. After I made my selections, both hired companies came to measure. The lead time for the less expensive company was around 3-4 weeks, and the lead time for Andersen was around 3-4 months.
We suffered through ugly windows, and zero window treatments (with lack of privacy) until they were installed. Both installation days were full days. I would not recommend doing this in the winter like we did, because they remove the existing window completely and while they are prepping for the new one (which could be over an hour), you have cold air rushing into your home. It was freezing, but the results were well worth it!
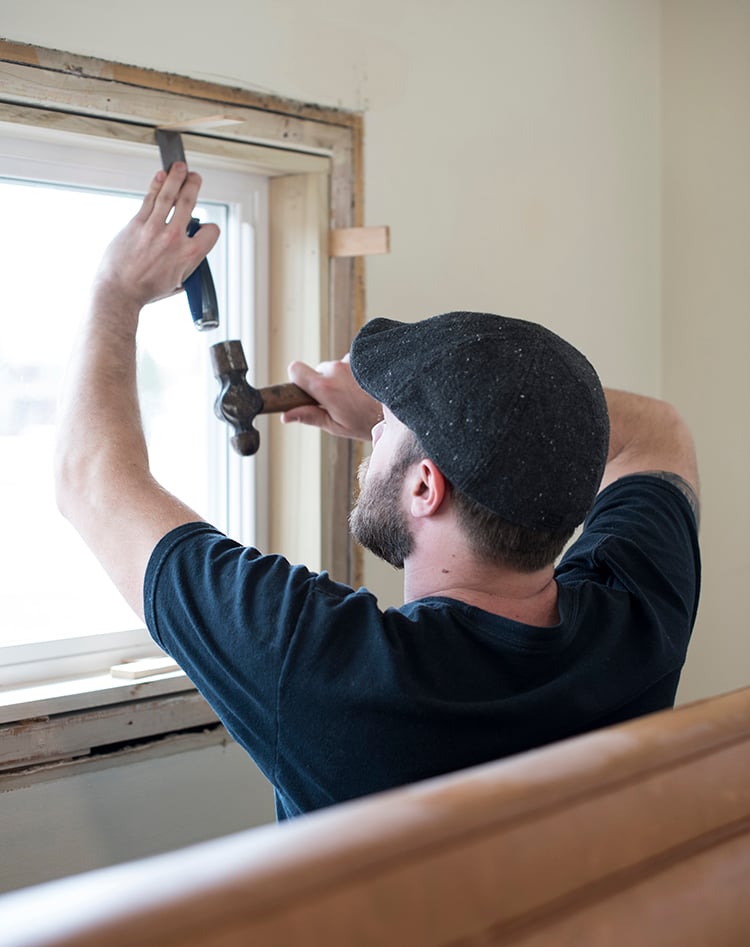
 After installation, Emmett began building new window boxes and adding the casing trim around each window. Once that part of the process was complete, I FINALLY was able to paint and nail down window treatments. It felt like a long overdue victory and I’ll post on that separately.
 This window is in the guest room. I’m hoping to share it with you guys later this month! The only thing left to install in this space is the window treatments, and I’m crossing my fingers they arrive soon.
 I’m really happy with how things are turning out! I’m dying over our beautiful trim and the new windows are SO much easier to use- not to mention, way safer and secure. We have a long way to go, but things are looking up!
 This post is not sponsored, I just thought it might provide some helpful info for those of you looking to replace your windows anytime soon! I didn’t realize how lengthy the process would be or how much we’d spend, but it made a tremendous difference. Even with the high price tag, long wait, and inconvenient installation, everything exceeded my expectations.
Have you guys ever had to replace windows? If not, consider yourself lucky!
We’re going through the same saga right now, replacing 100 year old windows with no locks! I was surprised how hard it is to find black windows — are yours from Anderson vinyl or wood? We were told to steer clear of vinyl for a dark exterior color. Curious what you were advised.
It is incredibly difficult! I definitely struggled. Our windows are not vinyl or wood. Because of that exact reason, we have a mix of composite and fiberglass. I would’ve loved to have wood (that’s what we had in our previous home), but the budget just wouldn’t allow. Our windows are actually white on the brick exterior, but black on the interior. I did research and a dark vinyl exterior isn’t good because of the heat and the malleable material. Good luck! xo
We are looking for black windows right now and are having a hard time finding them! Could you give me more specifics on the Andersen windows you selected? Are they wood and you painted them? Or did you get a factory finish? Thanks!
It’s a struggle! They are not wood- although I wish they were. It’s a factory black finish. Some of our windows are composite and some of them are fiberglass. Hope this helps! xo
Hi, Sarah. We also had to replace all of the original windows in our 1979 home. We now have wonderful triple-pane windows throughout and it makes a huge improvement in both comfort and utility cost reduction. Black finish would have been fantastic, but the budget didn’t allow for it. Nonetheless, we are so happy with them. And I’m happy for you guys that you have new ones of your own. Cheers, Ardith
Thank you, Ardith! It’s such a difference- I know you can relate on all fronts. New windows aren’t something you really want to spend money on… until you have them. Worth (most) every penny. haha! xo
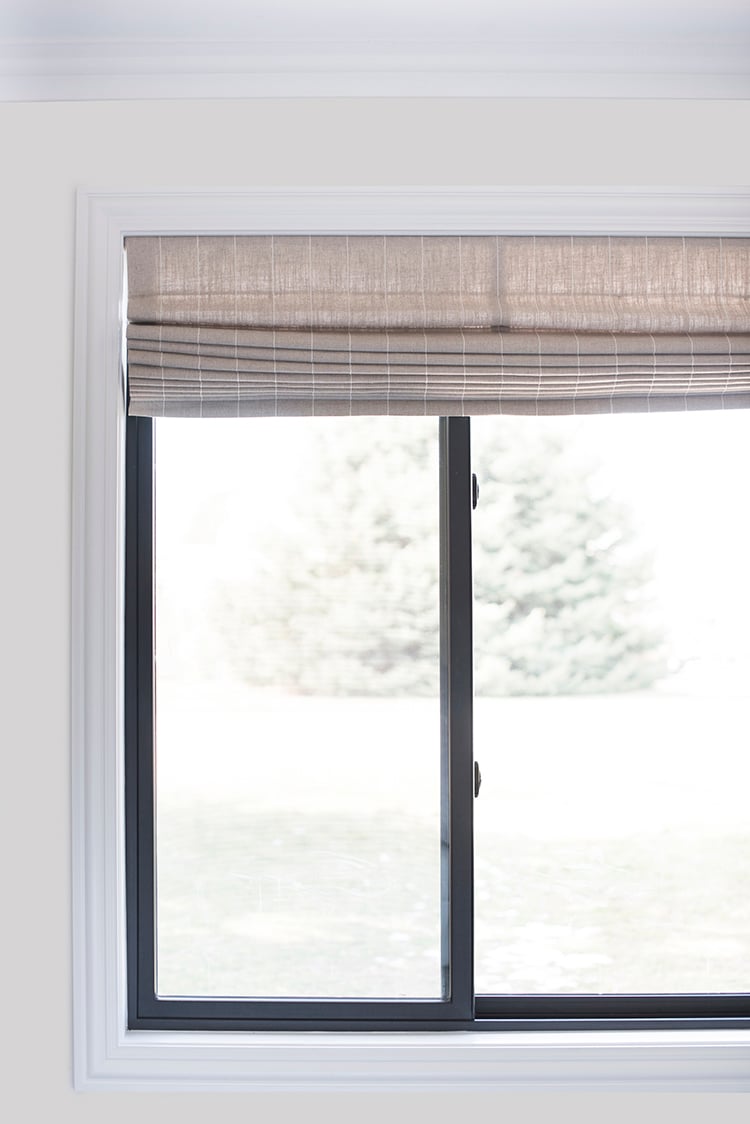
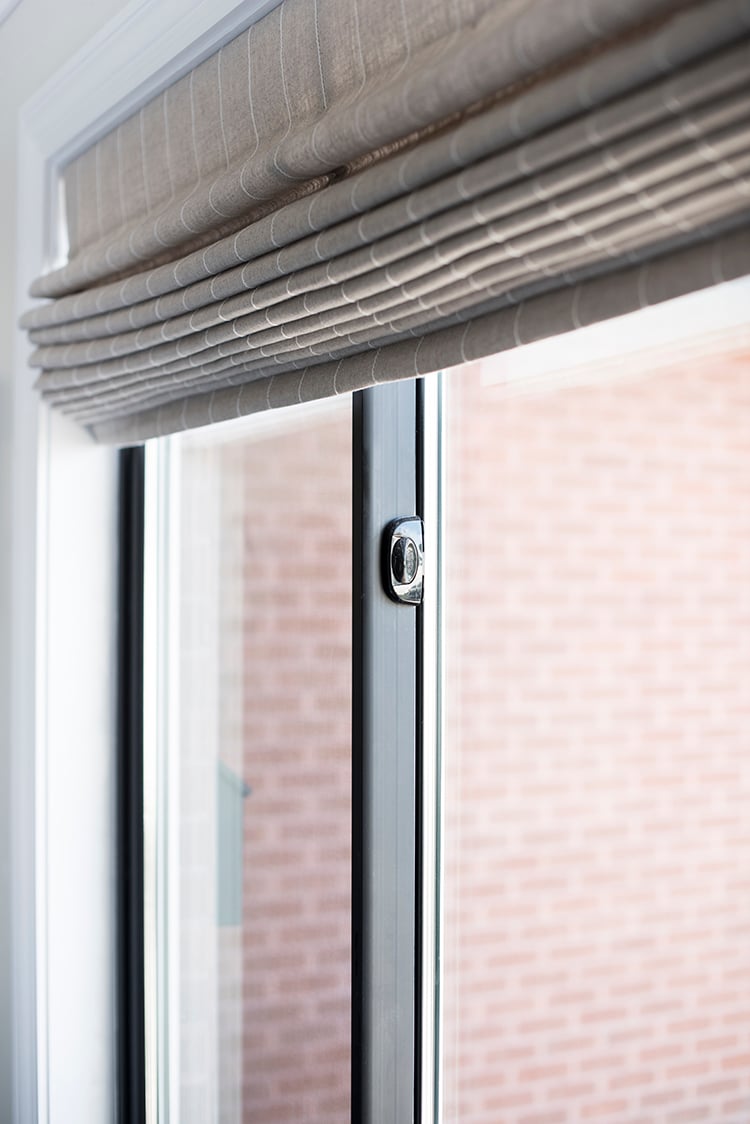
I love your roman shades. Will you do a post on these? I made my biggest mistake on draperies when we moved in. It covers all our beautiful trim. I would love to hear how you found roman shades, if they are blackout, how to measure, etc? Thank you in advance!!
Thanks, Elizabeth! I am absolutely doing a post on the window treatments. Look for that soon. I’m waiting on my guest room window treatments to arrive, and then I’ll shoot a quick post. xo
I actually was just shopping for windows for our remodel recently! Like you, we have to replace every single window in the house. But we decided to go all Anderson composite because I really wanted all black windows in the house and they’re the most cost friendly option. But our budget came in almost half of yours. Must be the difference between Oregon and Utah? But yeah it’s definitely a big chunk of budget when it’s something so necessary!
Yes! That’s exactly why we ended up using them. Funny the cost different. Our windows are all odd size and they’re huge- most are over 7 feet long… I’m thinking that’s the reasoning behind our steep invoice. Yours will look equally as amazing! They do a great job. xo
Where did you get these roman shades???
These came from Blindsgalore, but there will be a separate post fully devoted to window treatments and how to choose them… coming soon! xo
What color are these blinds? I love them
Sarah – I have really loved reading all of your blog posts about windows, trim/millwork, and window treatments! Until we needed to replace our windows in our fixer upper I did not realize how many options there were and how small details were so important! I always turn to your blog for ideas!
Thanks so much, Jessie! So happy to hear you’re finding some ideas around here :) that makes it all worth it. xox