Vintage Rug Picks from Tuesday Made
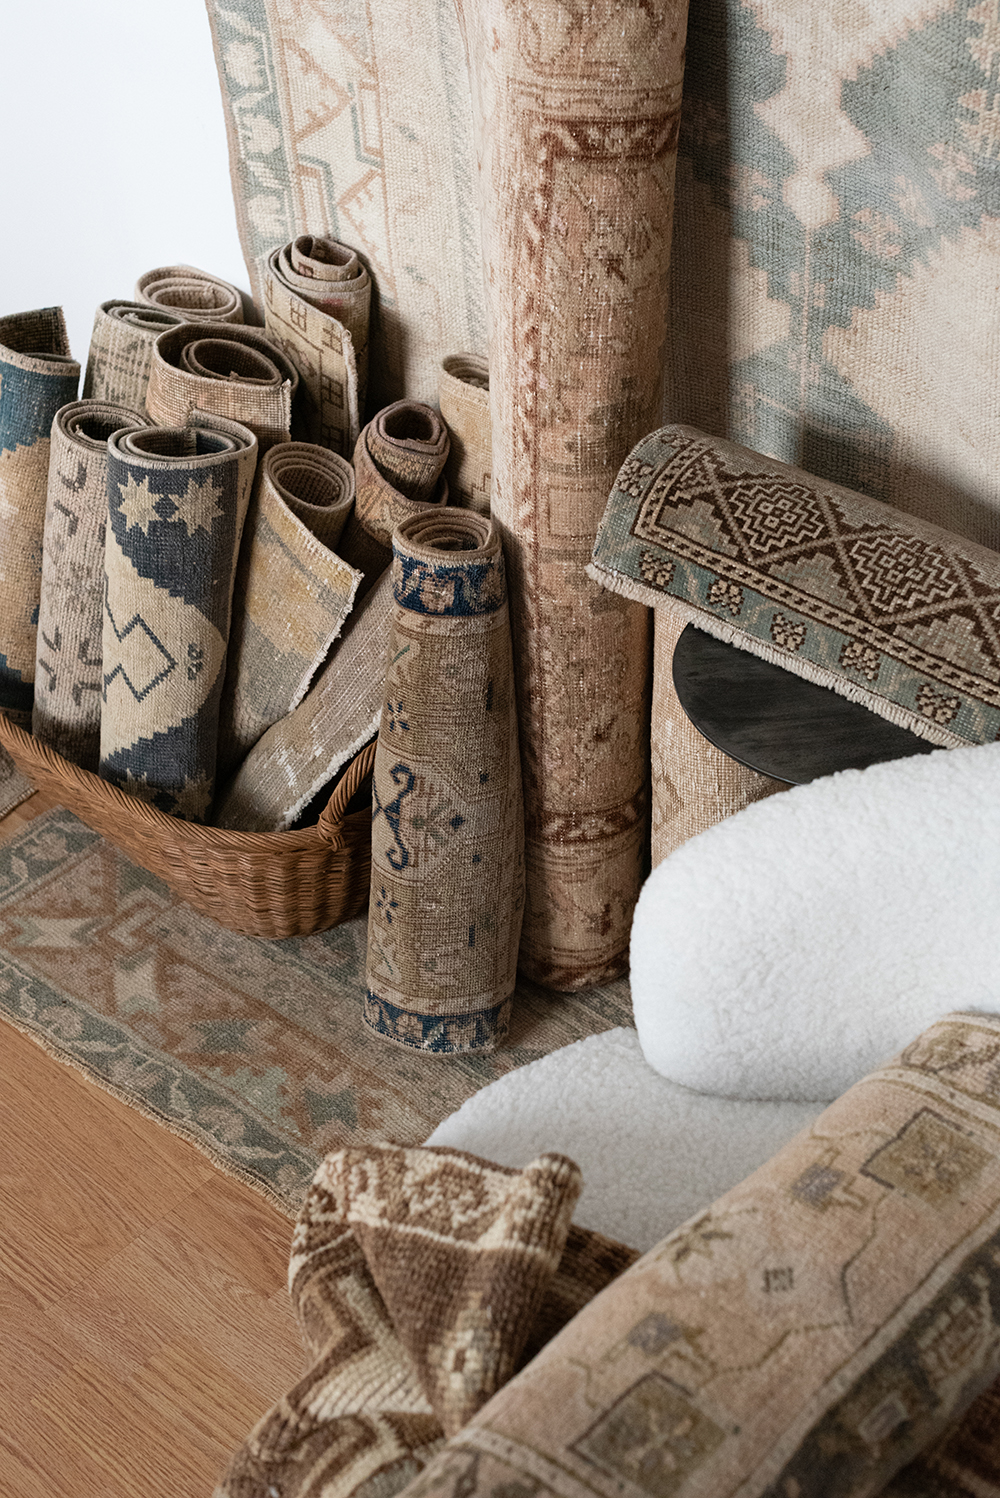
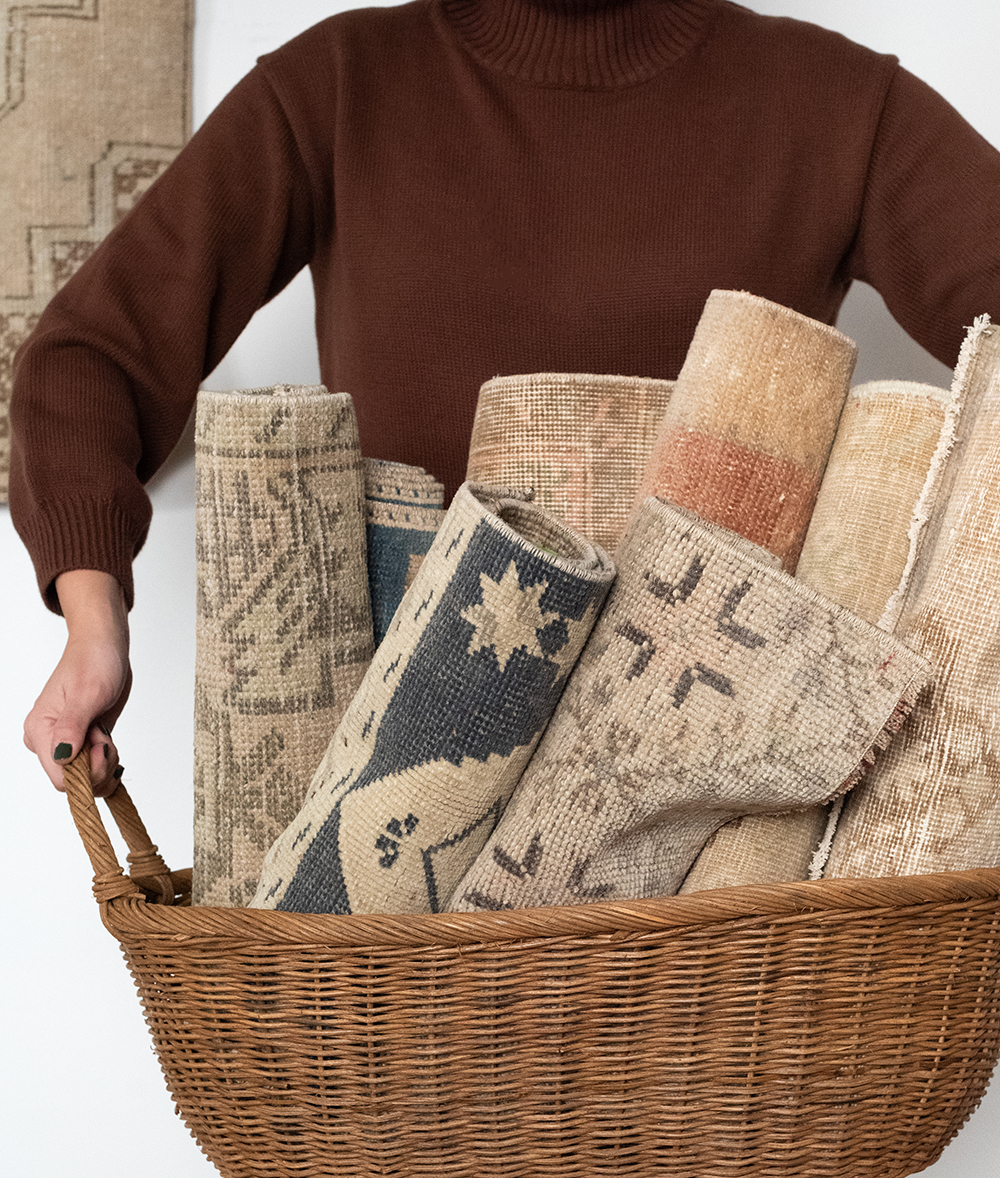
Happy Friday, friends! I’m going to keep today’s post short & sweet, but I’m excited to share a peek behind the scenes at my shop, Tuesday Made. The past few months, I’ve been carefully collecting a big pile of vintage rugs. Yesterday, I made the collection live and it’s one I’m really proud to share with you. From larger area rugs to runners and lots of small rugs, it’s a well rounded haul. Vintage rugs add so much warmth and character to a home- they’re honestly my favorite part of having a shop, and while a lot of work- it’s always been the most enjoyable part of my job. Click through for some of my vintage rug cleaning & care tips, and to see my top picks from yesterday’s rug haul! If you’re ever in the market for a new (vintage) rug, please keep us in mind…
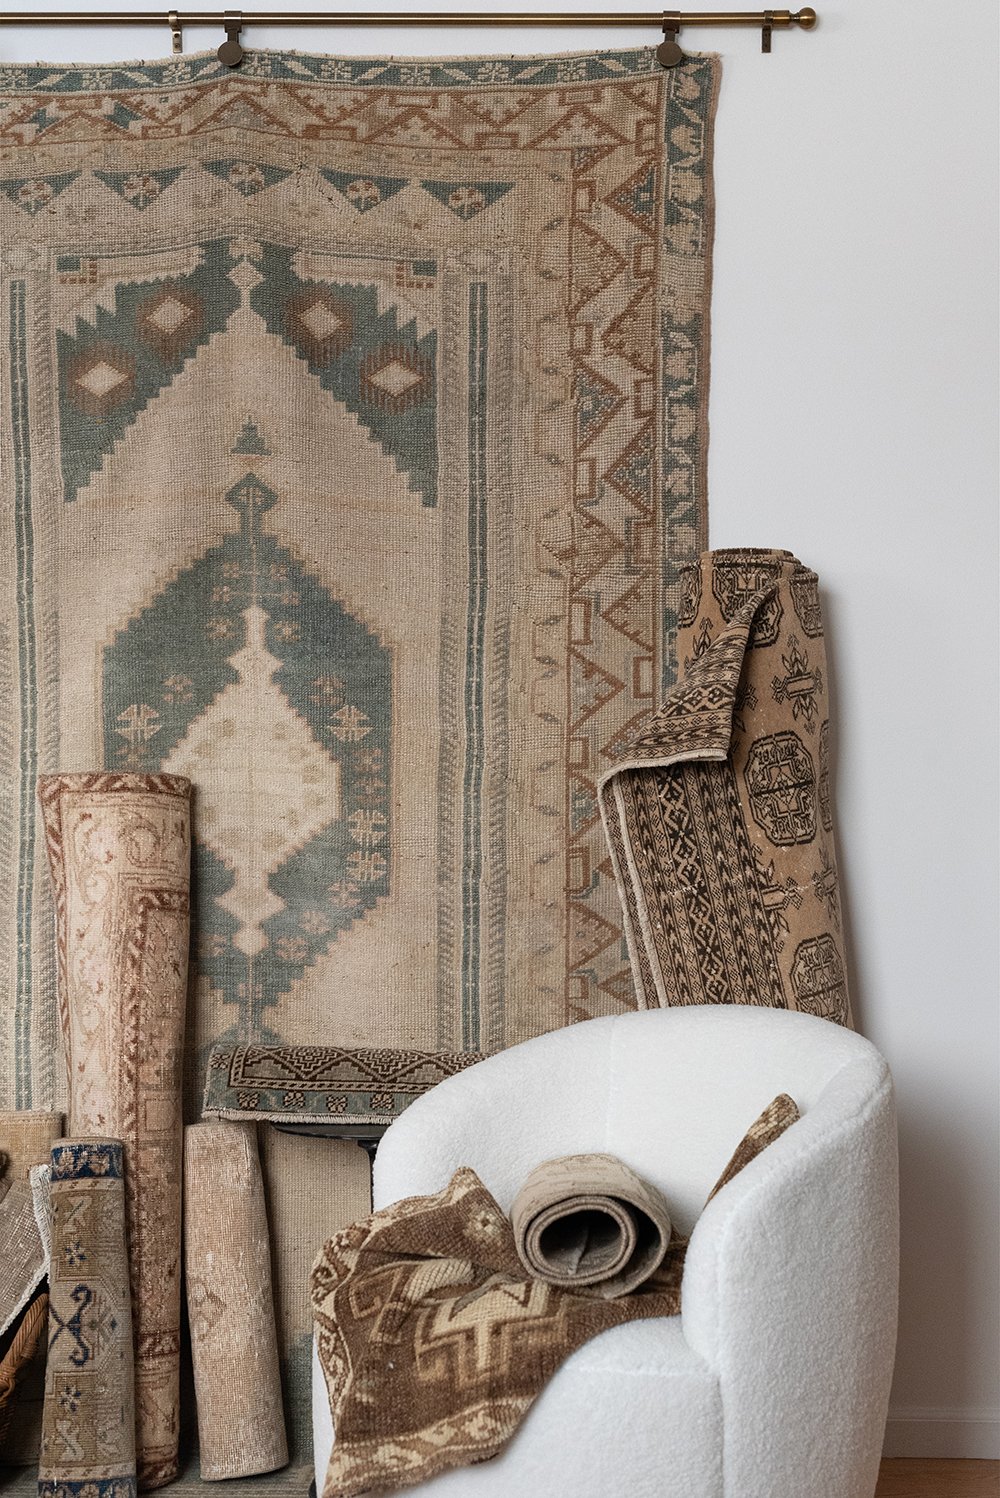
Last week I shared keywords to use when searching for large vintage rugs, and many of you said it was helpful. Like I mentioned, I’d like to think vintage rugs are kind of my thing! I’ve learned so much much about them over the years. From selecting the right rug to installing wool rugs in the bathroom (I promise you it’s a wise choice!), I’ve still got some tricks of the trade to share with you. Scroll on for my top picks from our latest haul in the shop, and for my best cleaning & care tips! Vintage rugs really are the most durable… a worthy investment for your home, that will withstand the test of time.
Unpacking Your New (Vintage) Rug
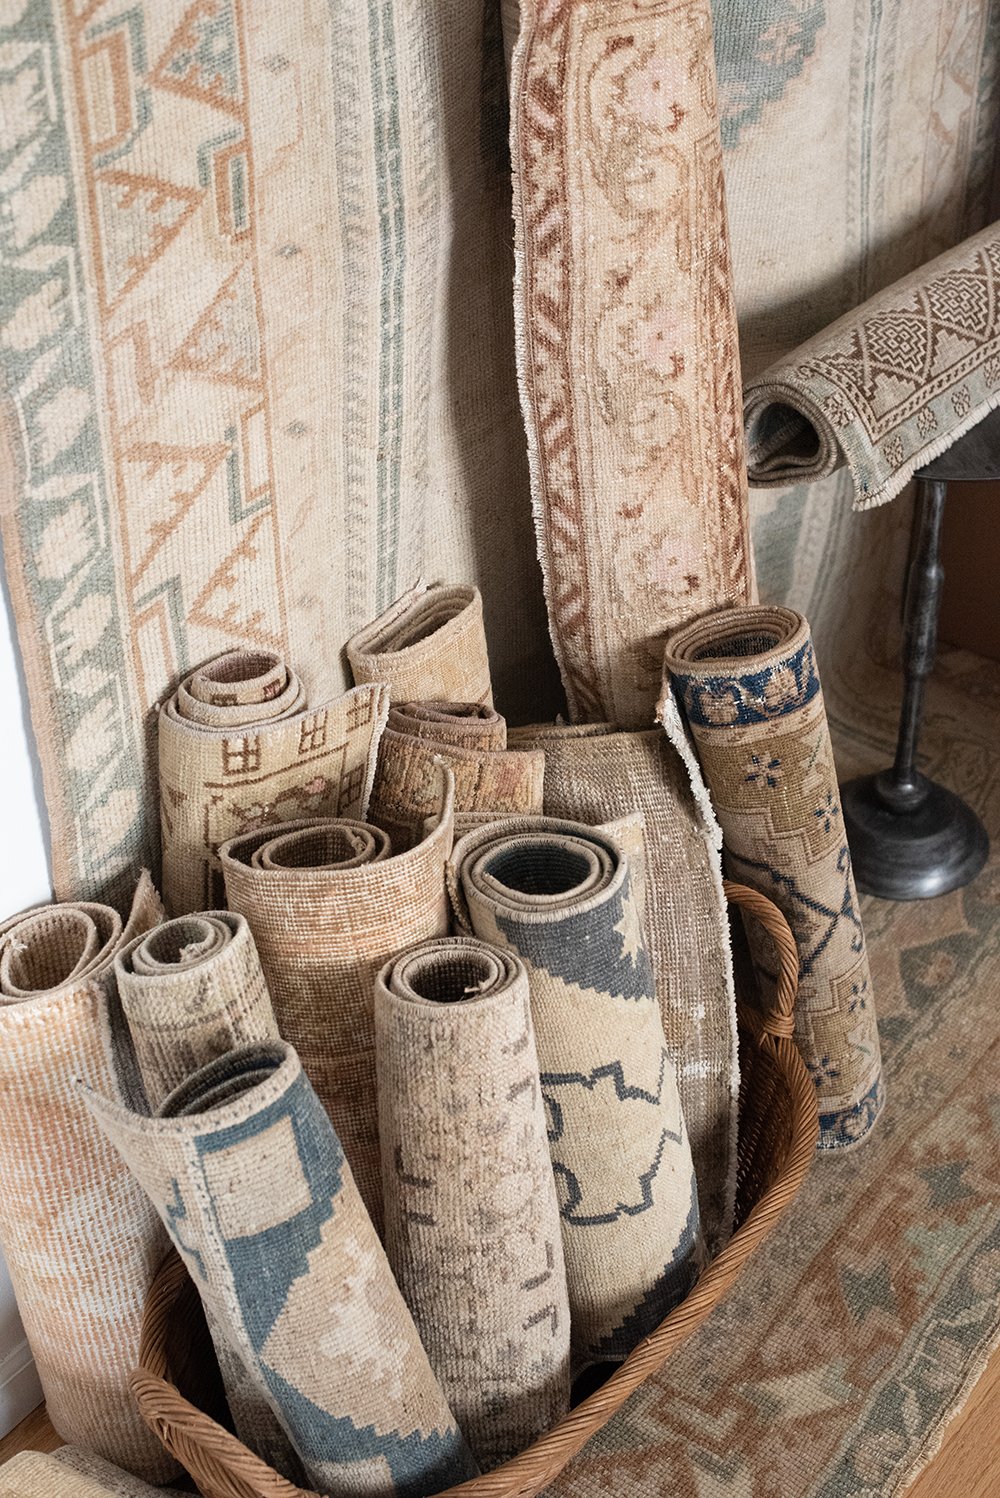
This is how we pack rugs at Tuesday Made… but it may look different for other sources. We always try to roll rugs (to minimize creasing), but sometimes folding is necessary to keep shipping affordable. Creases & folds are totally normal after opening, but it’s best practice to unroll your rug immediately- allowing it to relax & flatten 24-48 hours before installing it beneath furniture.
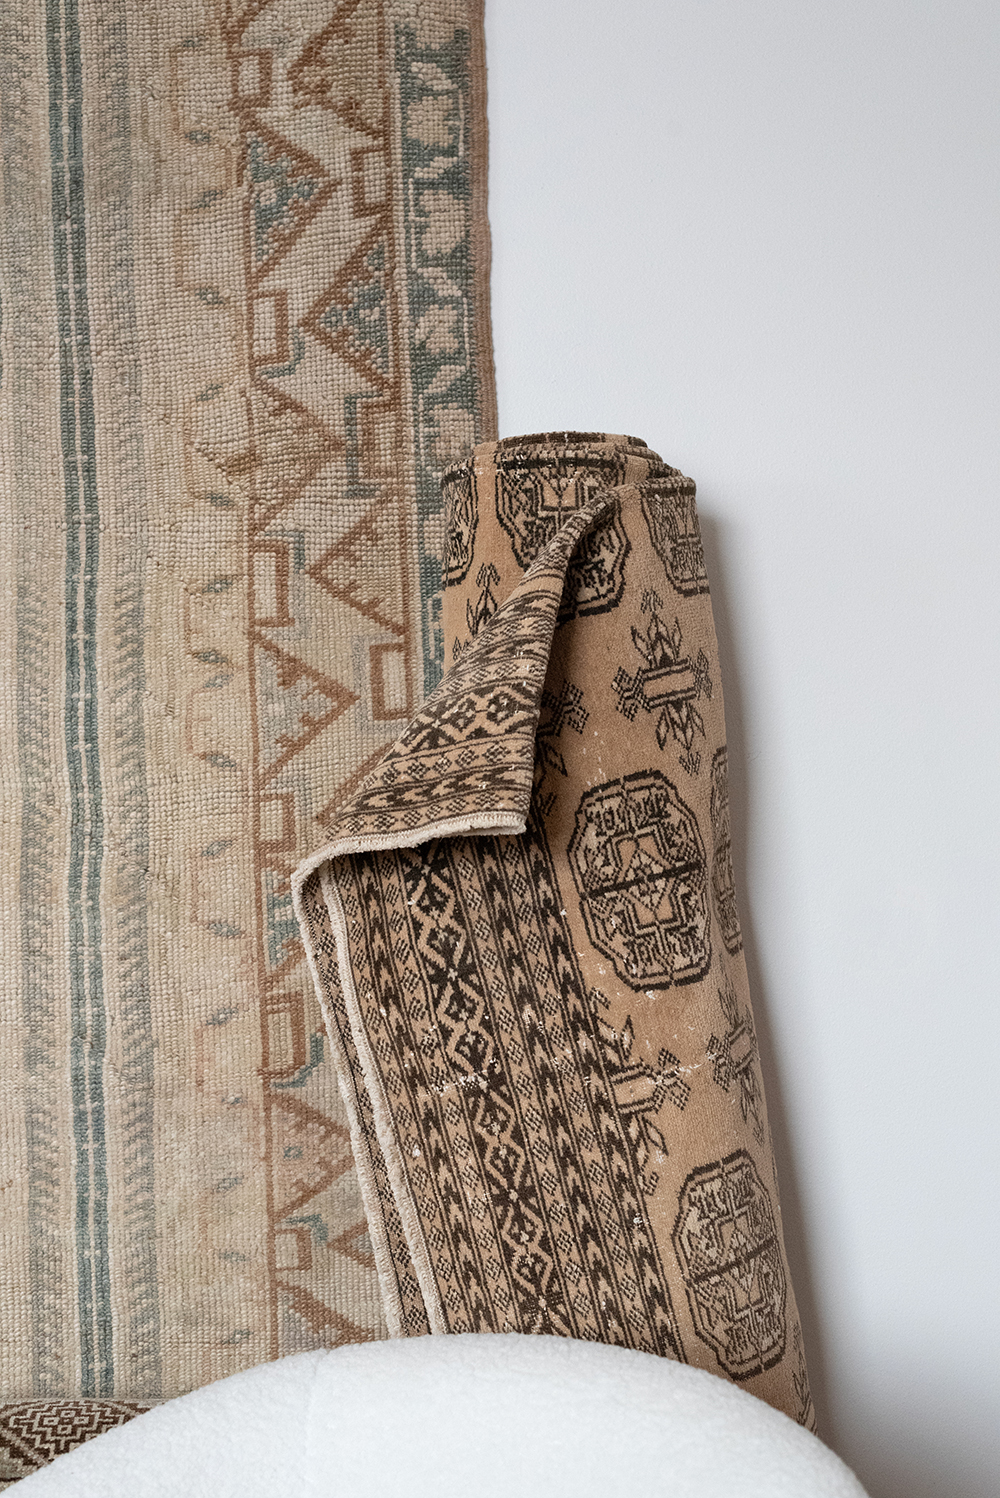
Creases and folds always work themselves out. Occasionally, you may have to train the corners by rolling them in the opposing direction. Your vintage rug will actually continue to look better with time, if cared for properly! You know how I love a good aged patina.
Vintage Rug Cleaning & Care Tips
Vacuum your rug regularly on low power. High-powered vacuums can pull threads from the rug, so be careful with the settings. Spot clean as needed (this my preferred cleaner!), and clean spills immediately. Blot the stain and use lukewarm water to remove any residual cleaner, followed with a dry towel to absorb any remaining moisture. Avoid using harsh chemicals, as they could damage or fade your rug. Always perform a spot test (unless you use the cleaner I linked, which I’ve tested on everything). You can also lay your rug flat in direct sunlight to remove odors, and make sure to dry it thoroughly after cleaning.
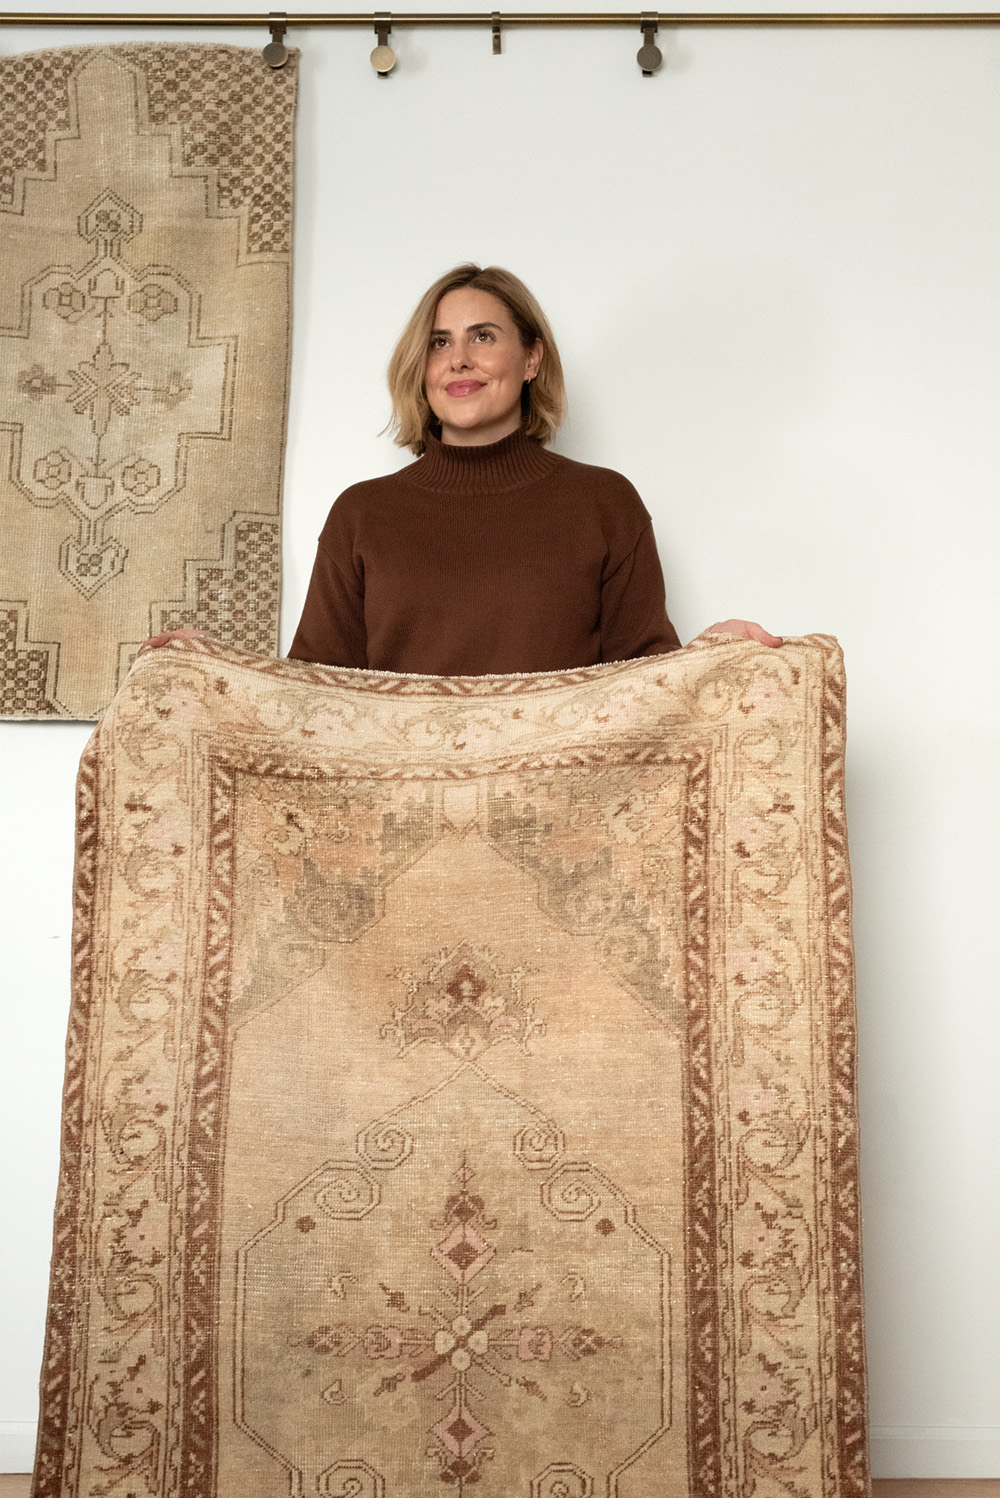
My Top Picks From My Shop
Click directly on each vintage rug below to be redirected.

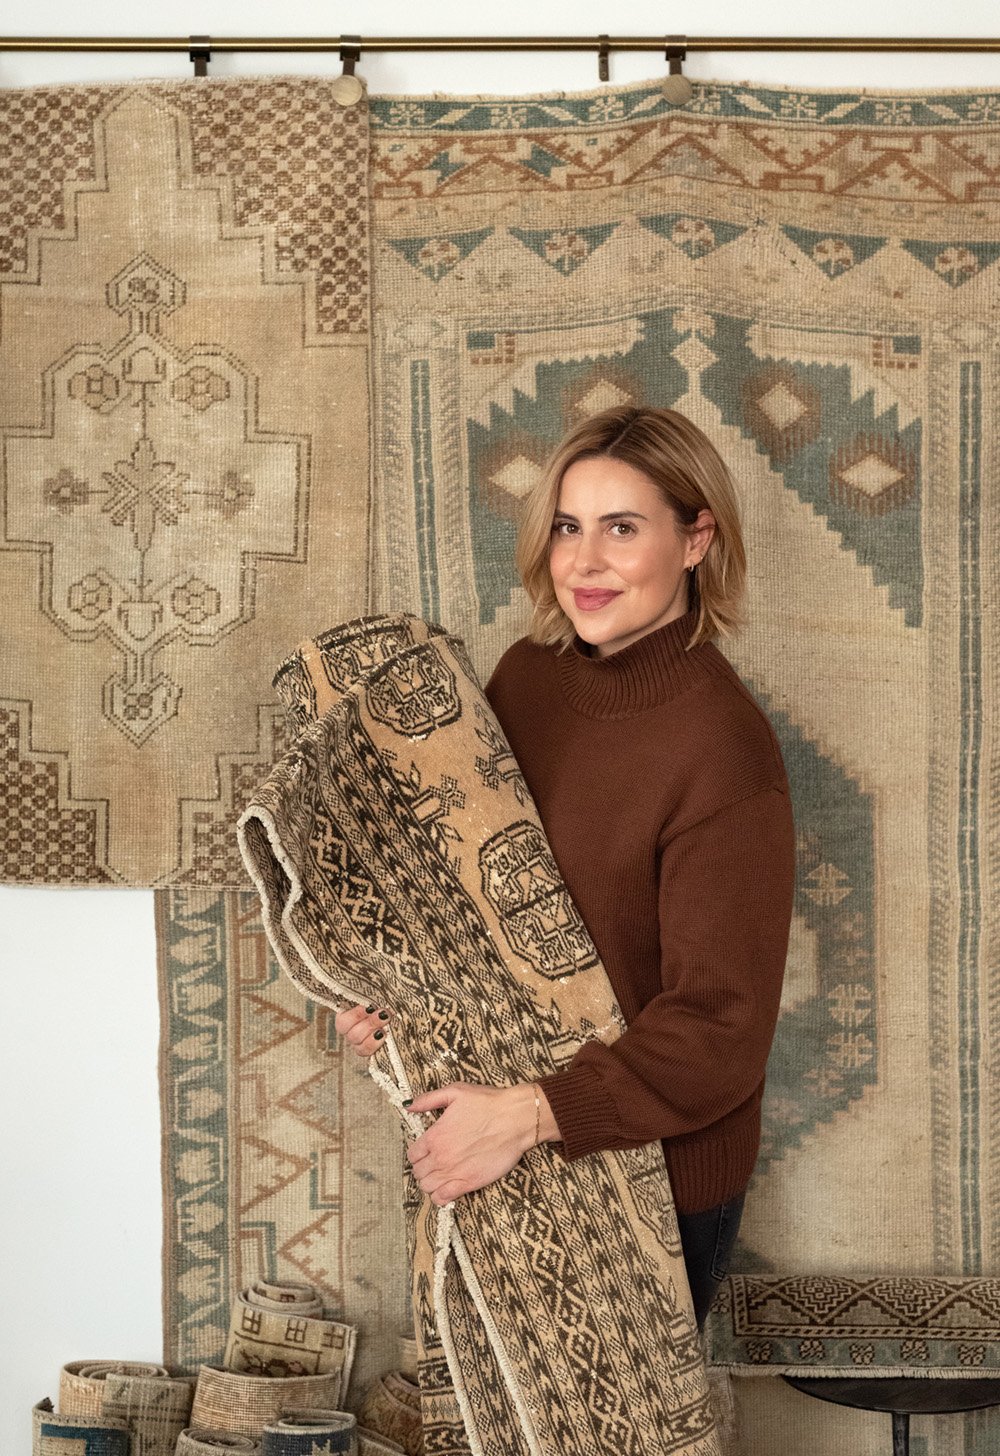
Naturally, the rug I’m holding is my favorite from the collection. I had a really hard time parting with this one and was super tempted to keep it for our basement renovation! The colors are just perfect.
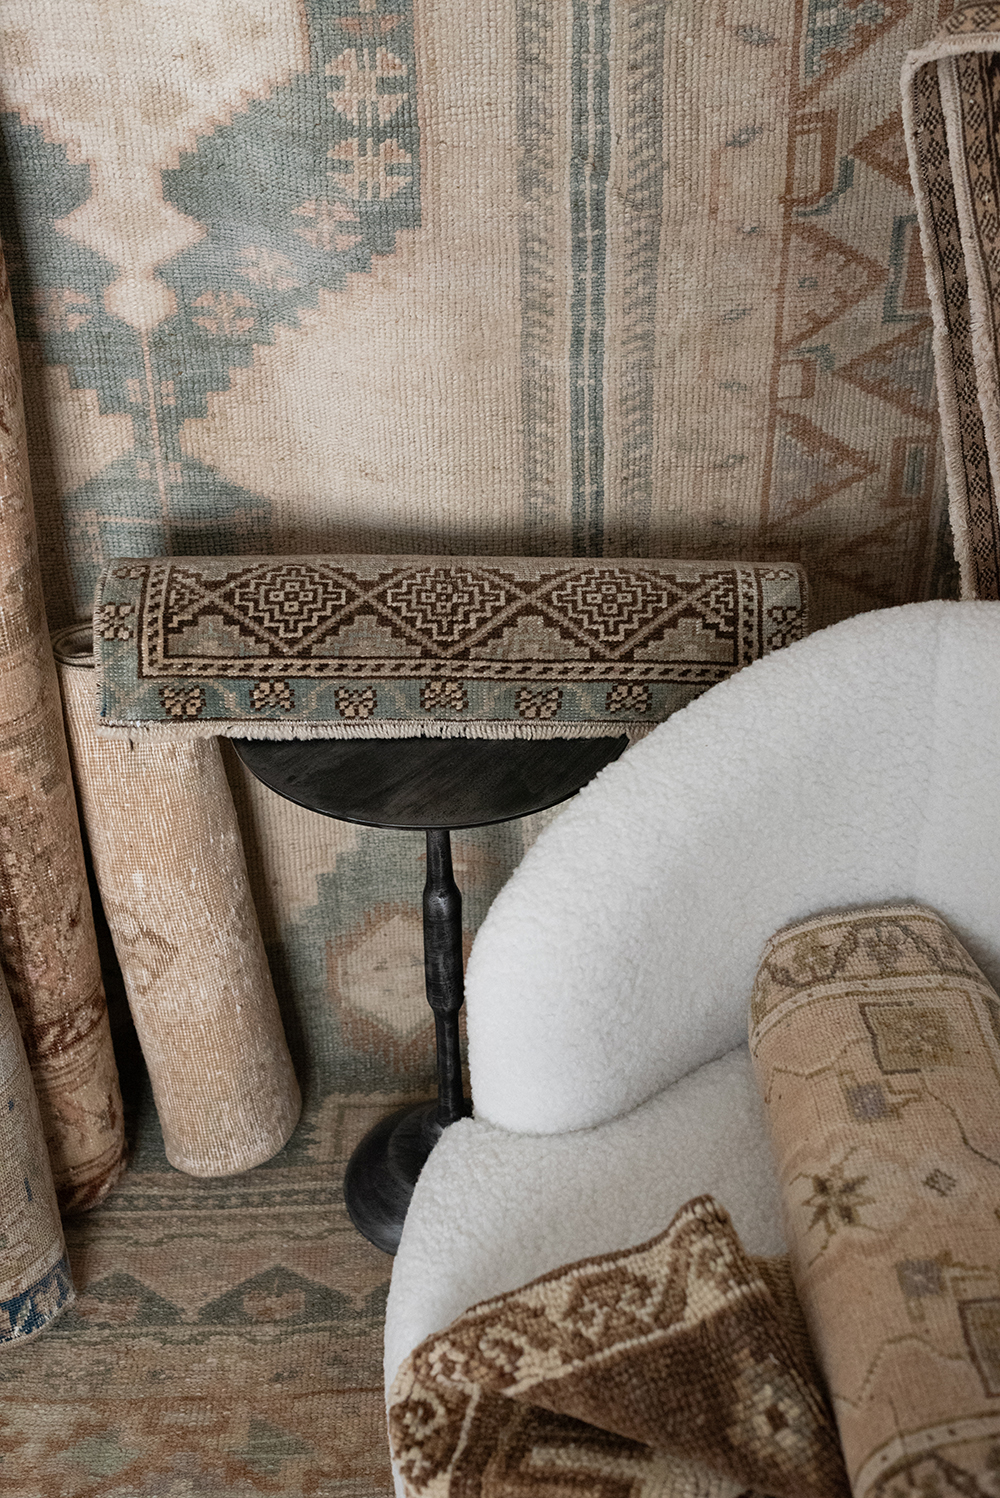
Styling Ideas for Small Rugs
Small rugs are really my specialty. I love that they can be styled pretty much anywhere, are fun (and easy) to move around for a quick refresh, and they’re an affordable way to add pattern, texture, and character.
If you’ve ever wondered how or where to style smaller vintage rugs, here’s a little list to brainstorm…
- In a powder room
- In front of the kitchen sink
- In an entryway
- In a small hall
- On the stair landing
- In front of the entry garage door
- In front of a soaking tub
- In front of the bathroom vanity
- In front of laundry units
FAQ
You can find it here (it’s customizable). It’s a fun way to display vintage rugs, but it would also be ideal for textile art- like a tapestry or wall hanging!
Most vintage rugs are made from wool… which means they can definitely give off damp sheep smell, ha. Most of the time, they just need cleaned or aired out. All of our Tuesday Made rugs are professionally cleaned before they’re packaged up and shipped out. I’ve definitely purchased a few from Etsy that have arrived with a very strong odor, and cleaning them or allowing them to air out in direct sun does the trick. You can also sprinkle some baking soda or carpet powder on them, allow it to sit in the sun, then vacuum it up. Easy fix!
Most definitely! This is why you shouldn’t skip the rug pad. If you care about your flooring beneath the rug, or the rug itself… use a rug pad.
If you sign up for our email list, you’ll automatically receive a 15% off code! And you’ll get first dibs on vintage goods…
Related Rug Posts
If you’re looking for more rug & carpet related home ideas and information, I’ll link some helpful posts for you below:
- Roundup : Neutral Area Rugs
- How to Remove Furniture Indentations from Carpet
- Design Discussion : Wool Rugs in the Bathroom
- Keywords to Use When Searching for Large Vintage Rugs
- Replacing Our Upstairs Carpet
- Designer Trick : Selecting the Right Rug
- Why You Shouldn’t Skip the Rug Pad
Vintage rugs have been a design passion of mine for a very long time. It’s funny, we never had any in the home I grew up in. The first vintage rug I purchased was from a flea market…. I saw it and immediately loved it. I think I paid $20 for it and put it in my college dorm. I wish I would have kept that little rug! It kind of started this entire obsession. Since then, I’ve been collecting them and haven’t looked back. Just out of curiosity- how many vintage rugs do you have in your home? More than one? More than five? I’ll admit, I’m in the 5-10 category… which feels like a design flex. Ha! Though, they’re constantly being rotated and swapped. Cheers to a beautiful weekend ahead! We’ve got house projects on our agenda. I hope you have a good one!
Good morning! Choosing, unpacking, fluffing, stacking, styling and photographing vintage rugs. Yeah, that sounds terrible. Your lovely smile belies lots of suffering. HA. Such a gorgeous selection! As I’ve mentioned, my vintage rug count stands at 8. Technically, I could probably find space for 3-4 more, but that might seem excessive. Snort. Truly though, my vintage wool (and goat hair!) rugs are the most beautiful items in my home. I chuckle sometimes when folks worry about their delicacy. Two seventy-pound doodles, a cat, and a couple of shoe-wearing, coffee-spilling humans have done zero damage to my rugs. I wish I could say the same for my oak floors! I care for them exactly as you suggest-lots of vacuuming, spot cleaning, and the occasional trip outside for a shake and some sunshine. My collection includes several flatweaves, and they too perform like champs. I’m basically a vintage rug evangelist at this point. I can’t imagine my spaces without their warmth and history! I love that you stock so many small examples; they’re a great way to start an obsession. Like yourself, my first rug was a diminutive one- a plum and navy treasure from eBay. It has welcomed muddy, wet boots in our entry for a decade. Yup. Gimme all the vintage rugs, Sarah. 🤣 Cheers to an amazing wintery weekend. Happy Pizza Friday, friends! 💜
Hi Peggi! Right? What a terrible day at the office, ha. I feel so lucky to have a job I love- and vintage rug days are the best days! 8 is an impressive number of rugs. I love that Emmett has been hanging around with me long enough to have requested “lots of vintage rugs in our basement”, which means I’ve officially rubbed off on him. Goat hair rugs!! I’m envious- those sound amazing. I always have the same thought when people think vintage rugs are too precious… they’re as durable as it gets. Hope your weekend ahead is fun and relaxing! Are you having pizza tonight?! It’s carryout for us, and we recently found an amazing Indian spot that delivers. Happy Friday!
Ok you and Peggi are the vintage rug pros, I’m convinced vintage rugs = durability. Haha! I’m learning 😂 Goat wool rugs. Wow! Amazing 😍
I’m catching up on the blog today! We arrived in Florida yesterday afternoon, we’ve been traveling since Monday and my back is super happy I’m not getting back into a car today 😊 And so is little Lorrie 🐶 She’s an angel in the car but she does not like that much time in the car.
The basement kitchen looks beautiful I love the profile of the door you chose Sarah and the two tone color selection is just stunning 😍 Great job on the painting, you are a pro! Can’t wait to see the reveal, it going to be gorgeous. I was also relieved to hear you are hiring out the entryway painting, the thought of you or Emmett painting stripes at that height made me nauseous. Professional painters I’m sure will do a splendid job and you will pick the perfect paint color combo I’m sure. Exciting!
Adding clip on shades to a chandelier or sconce is a superb idea. I’ve added shades to chandeliers back in my rental days just to update and add my own flair to outdated boring dining fixtures and it always dressed things up and felt more finished. A very affordable way to add some pizzazz 💖 I honestly can’t pick a favorite shade in your roundup because they are all excellent options and all so very pretty. Can’t go wrong with any of them.
I’m ordering that cleaner you suggested today! I have purchased so many spot cleaners over the years and haven’t found one that truly works. Can’t wait to give yours a try. BTW, you cut your hair, looks great! Love it! Sometimes a change is in order 👍
You are an expert when it comes to vintage rugs and I trust your advice and rug selection wholeheartedly. I’m incredibly indecisive on the rug front and I just don’t have any experience with vintage rugs. Finding the right size seems tricky but maybe layering a smaller rug onto a larger natural fiber such as jute or sisal might solve that? Still in pursuit of a rug for our entryway. Honestly I’m not sure what I’m looking for but I think I’ll know when I see it. At least I’m hoping so 🥰 Anyway happy Friday and have a fantastic weekend 🥂
Hi Colleen! I’m so happy to hear you, Andrew, and Lorrie arrived safely to Florida. Please soak up some of that warm sunshine for me (as I’m buried in snow, ha)! The entryway is all set to be painted next week and I’m super excited to be having it professionally done. No scaffolding for us, whew. Let me know what you think of that cleaner- I always have spare bottles on hand and use it for everything. It’s incredible (and clean- no nasty chemicals). Thanks for the hair compliment- I appreciate it! I figured it was time. With my health things going on (and my hair falling out), it just made more sense. I like it though! It already feels more healthy. I love layering vintage rugs on top of jute or sisal. I’ll have a post about doing that soon… as we’re about to add natural rugs to the Tuesday Made shop! Happy Friday- hope you have the best sunny weekend ahead! xo
The one you’re holding might be my favorite too. The color and pattern! “Jasmine” in your shop is really pretty too! I don’t own any wool rugs at this point. We’re in saving mode to redo all of our floors, then paint, then maybe rooms will finally start coming together. Like you, we have very tall ceilings in our great room and foyer and I’m going to have to hire that painting job out. I’m wondering if I can talk the painters into cleaning the top portion of our fireplace? Haha! By the way, your haircut is so cute!
I love that one! I’m still tempted to pull it from the shop and keep it, ha (not a very good business lady over here)! lol! I need to record some videos and share the rugs rolled out or on the rack- photos just don’t do them justice. Saving is the hardest part of renovating, but is always worth it (and smart). Keep up the good work! I had no idea painting our entry would be so expensive… it reminded me of why we do everything ourselves. I bet you could talk the painters into cleaning while they’re up there, ha. Thanks for your kind words about my hair! Appreciate it! Have an amazing weekend.
Good morning!! When I first laid eyes on this drop I was immediately in love with so many of them. You pick some of the most stupendous examples I’ve seen, and I find the patterns and colors captivating. My favorite is Elliott, followed by Emre- although August is also stupendous. I gravitate towards either a neutral background with hints of red, or a blue background with neutrals and rust. Elliott is giving all the feels on this blustery morning. How I wish we were at the décor phase of the front room!! In other news, I jumped for joy at the sight of your new range. I can’t with how gorgeous it is, and I’m on pins and needles waiting to see this beauty against your kitchen cabinetry. So beyond excited for you to toss the cafe in the garbage where it belongs!! Cheers to a wintery pizza Friday, new (old) rugs, and a range that will keep the home fires burning (quite literally😂)!!
Hi Lauren! I’m most excited about this rug drop… I think it’s our best one yet! Thanks for your sweet words. Of course I love all of your favorites. It’s fun to hear what everyone gravitates toward. The new range is BEAUTIFUL. I’m super excited about it and can’t wait to cook, but we’re unexpectedly having to move our gas line (womp womp). That means we’ve gotta rip up the flooring beneath the range, so it’s going to take a little time. It’s carryout this weekend and hopefully by Tuesday or Wednesday we’ll be all set! All worth it though. I just shared some peeks on IG stories with our cabinets. It’s a perfect match! Happy pizza Friday!! xox