Slipcover Christmas Stocking DIY
I shared some snippets on Instagram stories yesterday which led to an inbox full of DMs and I figured this post from a couple years ago was worth sharing again. Back in 2017, I posted a DIY stocking tutorial and I’ve been doing this for years now. I call it a “stocking slipcover” and it’s the easiest way to mix up your holiday mantel look each season in an expensive, customized way. It’s exactly what it sounds like- a slipcover for your Christmas stockings. Click through to see how mine turned out this year and for the complete, updated tutorial! It’s great for new or beginners learning how to sew… you can do it by hand or machine- I promise it’s easier than sewing a simple pillow cover.
 First of all, the most frequently asked question I received yesterday was this…
Do you have to attach the slipcover to the stocking?
I’ll get to that in the tutorial, but the answer is no! I don’t attach it, but this might depend on the type of stocking you have that you’re trying to cover. My “insert” is burlap, very textural, and has a shearling cuff. I sew my slipcover to fit pretty snug, but the rolled cuff and burlap texture keeps it in place very well. In all the years I’ve been doing this, I’ve never had the fabric shift, fall off, or fit weird.
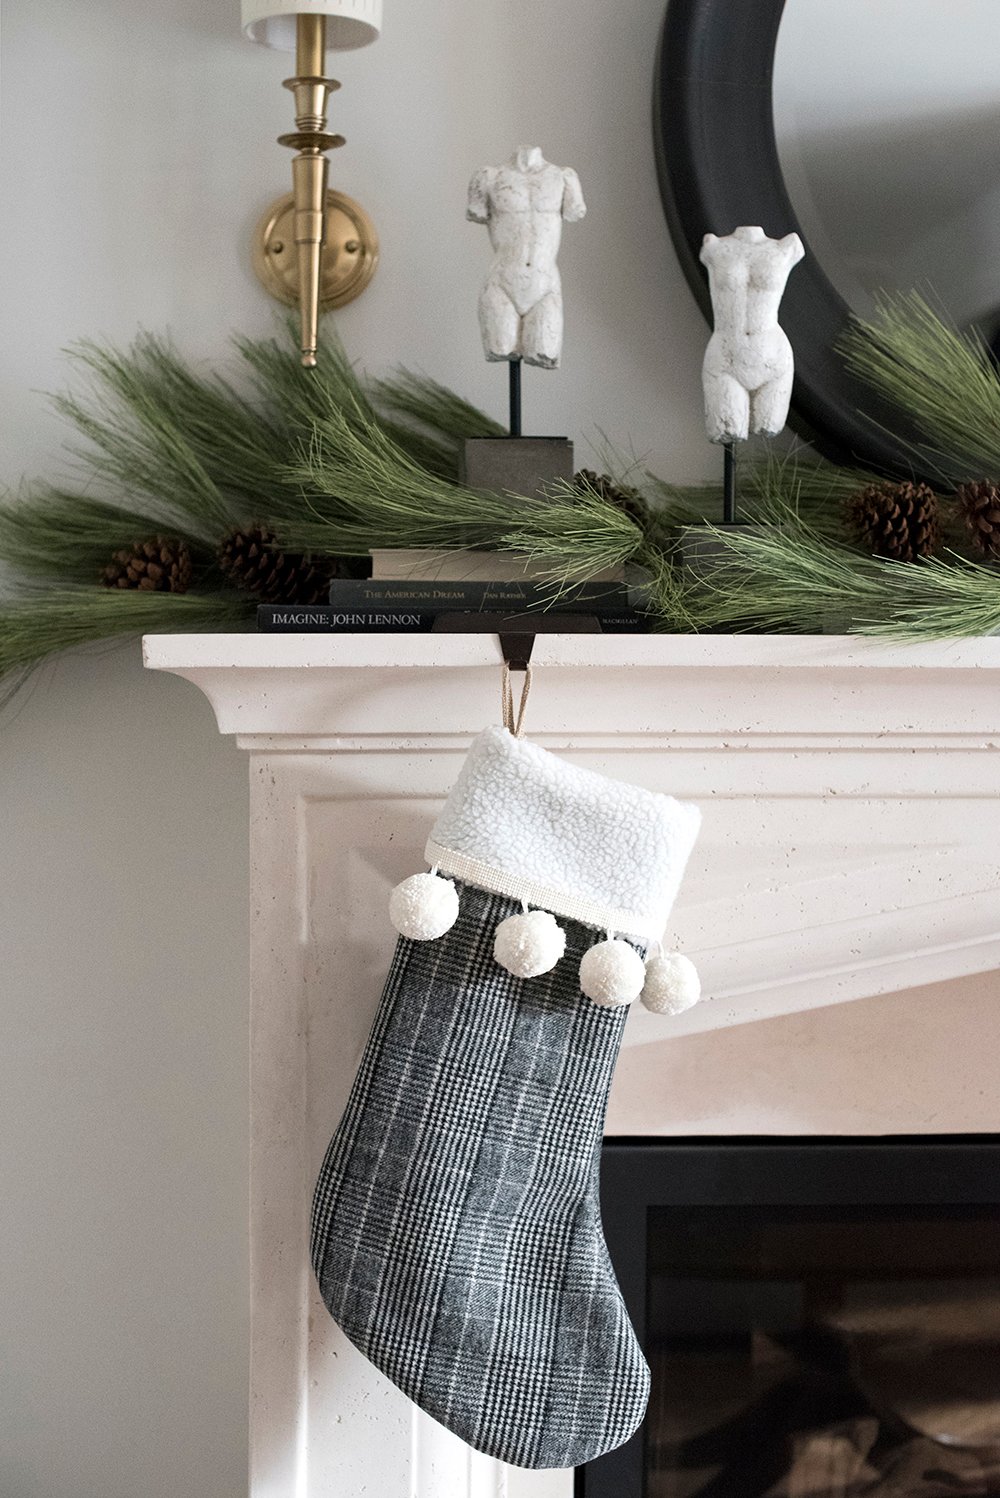
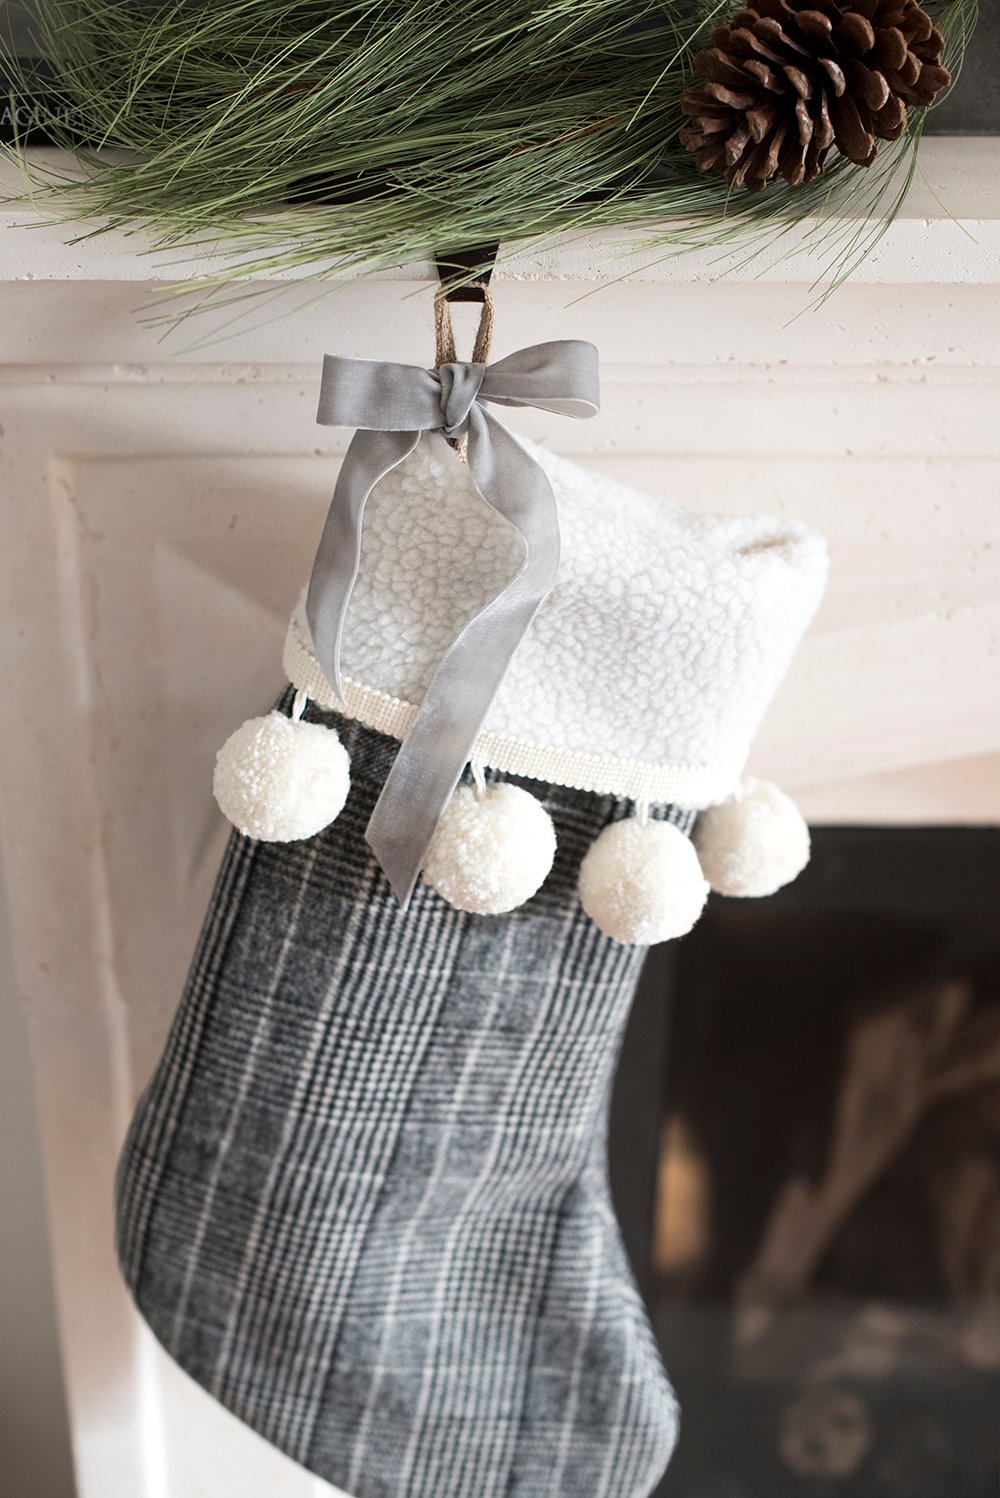
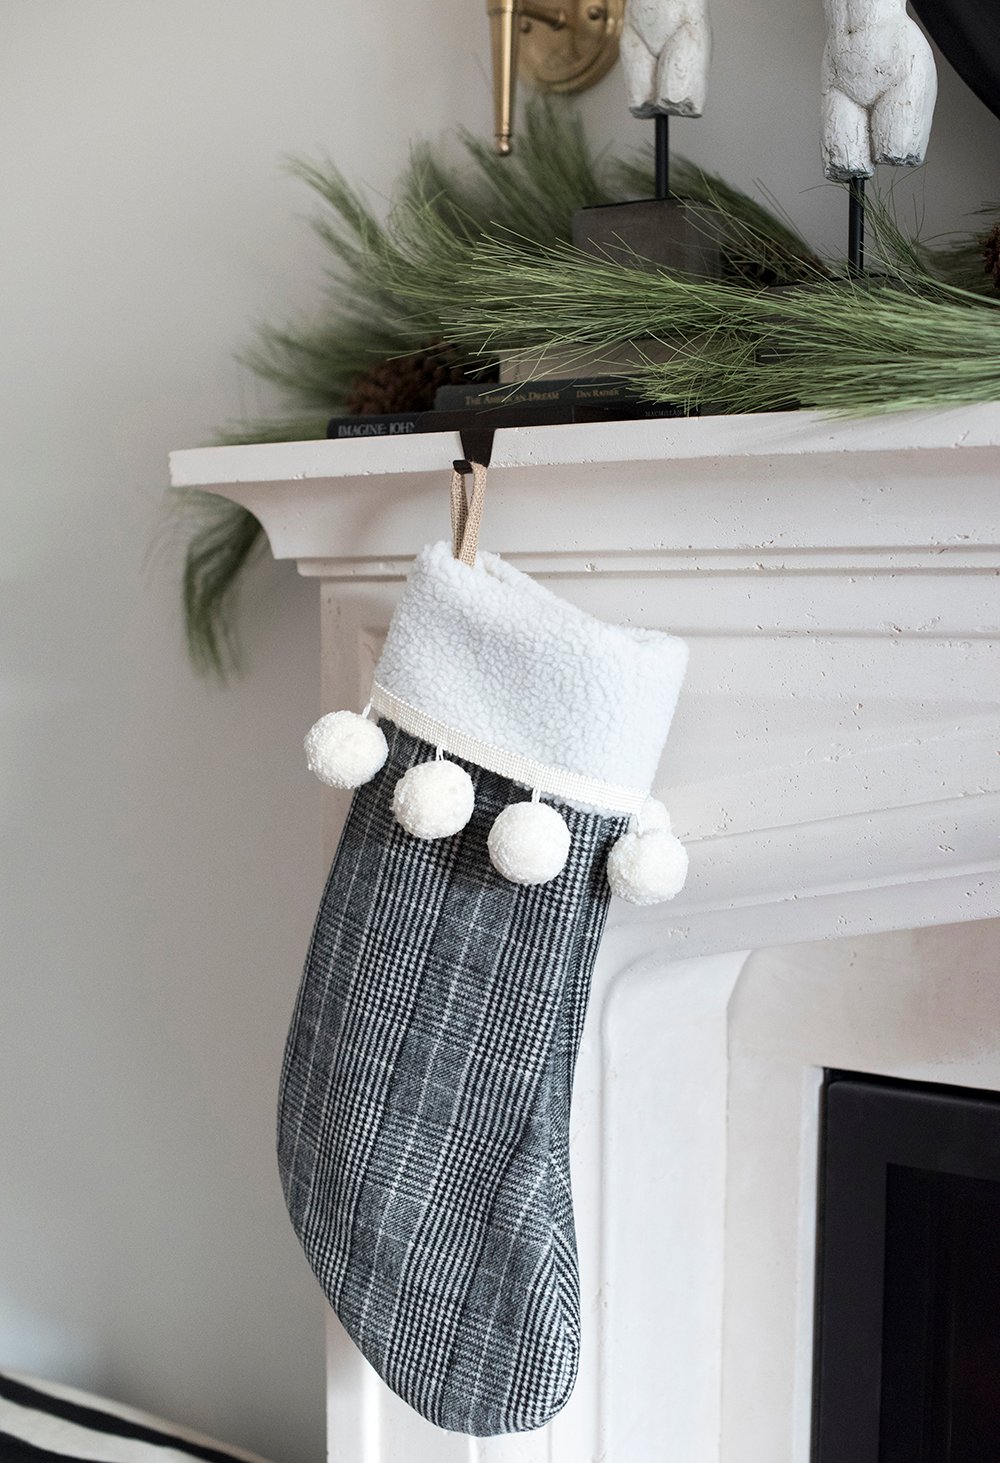
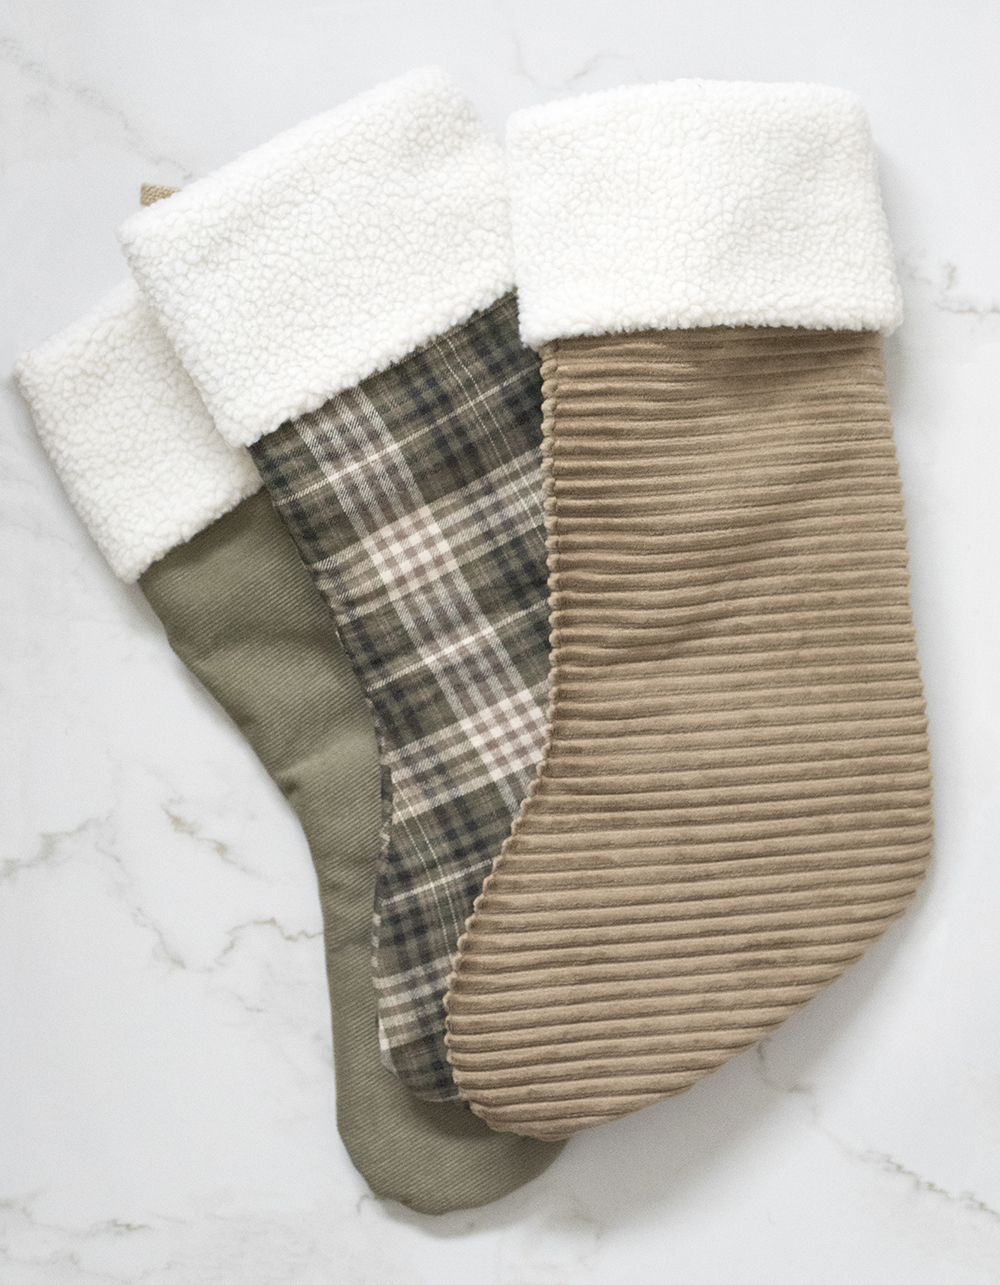
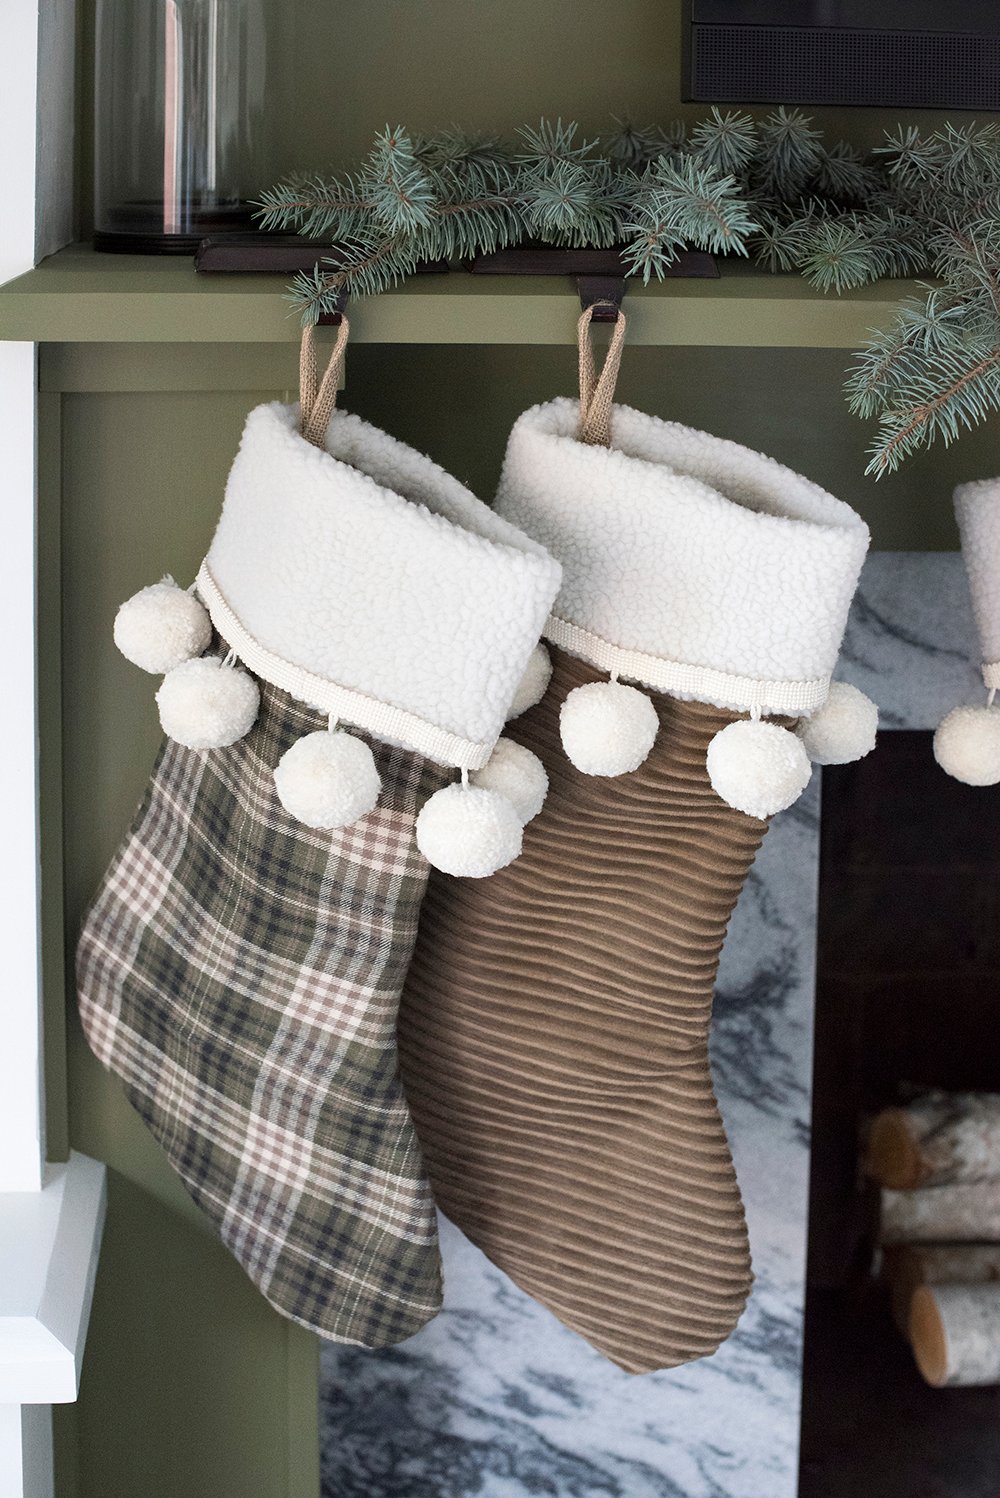
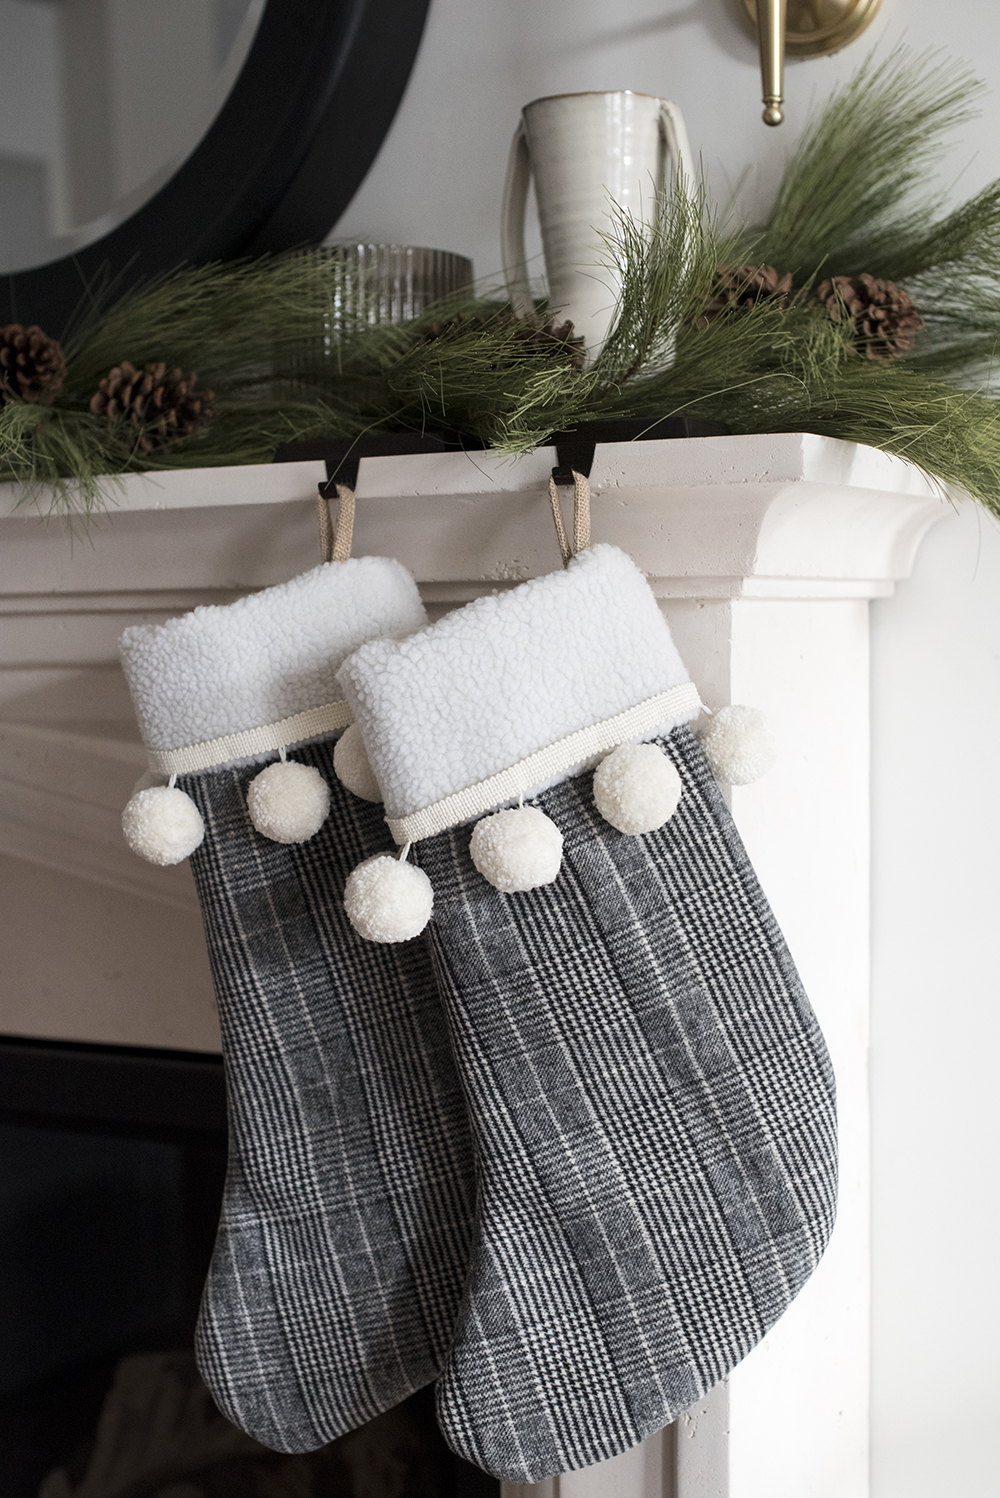 I’m just going to copy the original tutorial below, but this year I wanted to sew menswear / Ralph Lauren inspired stocking slipcovers. They feel really classic against our new limestone mantel. I added velvet ribbon (pictured in the second image) after I was basically done photographing these. Whoops!
 This is everything you’ll need for the project…
SUPPLIES
- fabric (similar)
- pre-made stocking with cuff
- sewing machine (or a needle and thread to stitch by hand)
- scissors
- sharpie marker
- fringe / pom pom detail (optional)
- straight pins
- stocking holders (I prefer these plain ones)
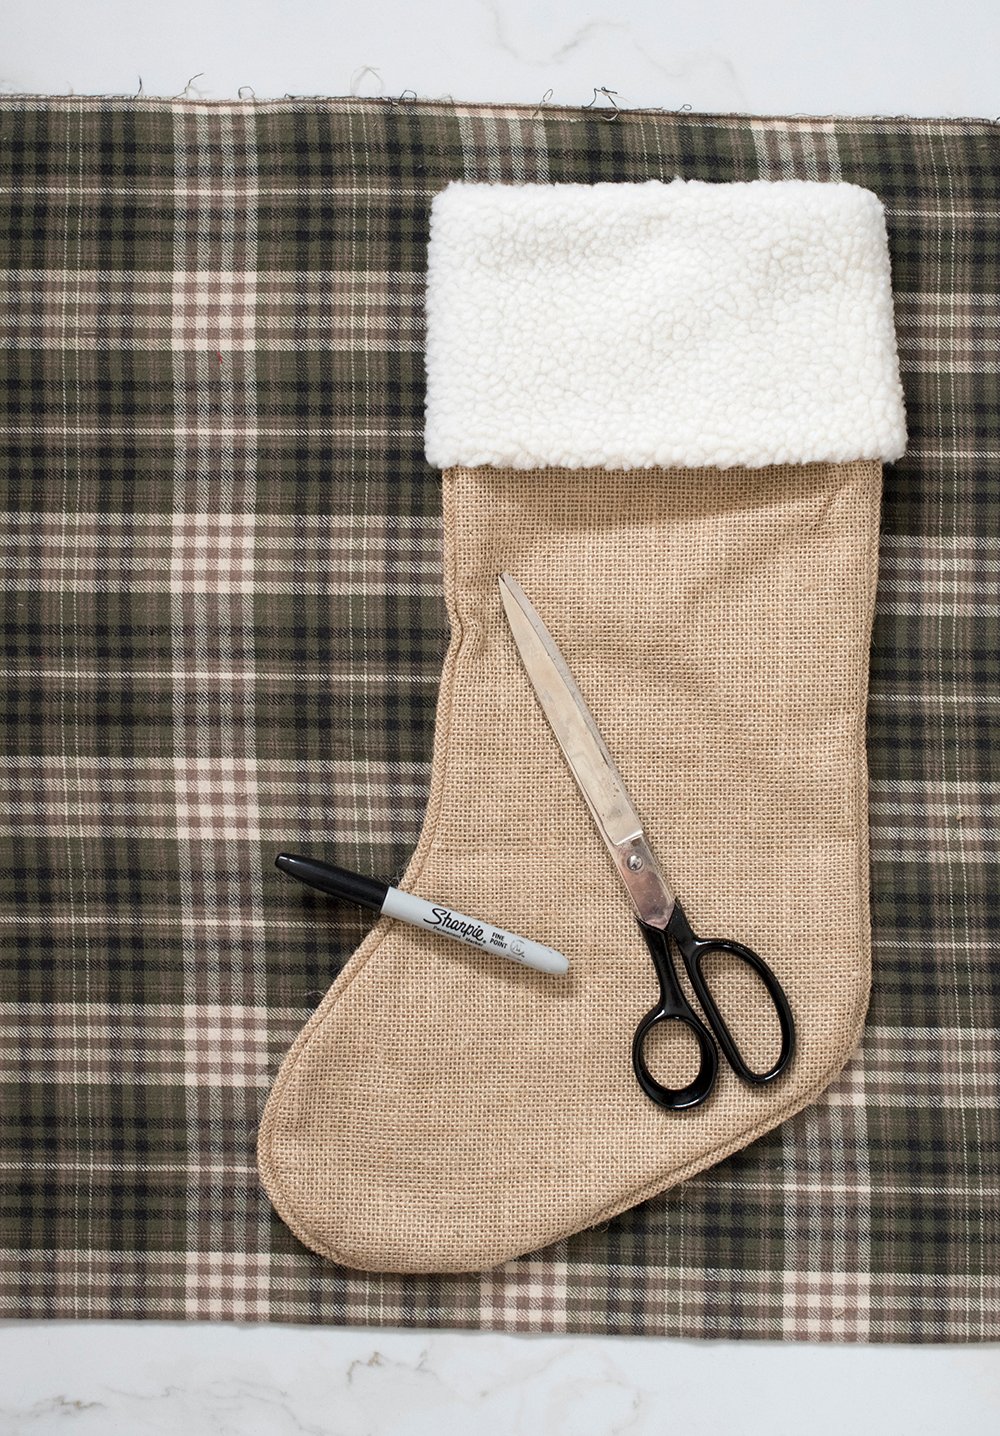 Step 1 // Mark your pattern. Lay the pre-made stocking on top of your fabric, which should be folded in half AND with the inside facing out (the bad part of the fabric facing toward you). Using a sharpie or fabric marker, trace around the stocking, leaving a quarter inch gap.
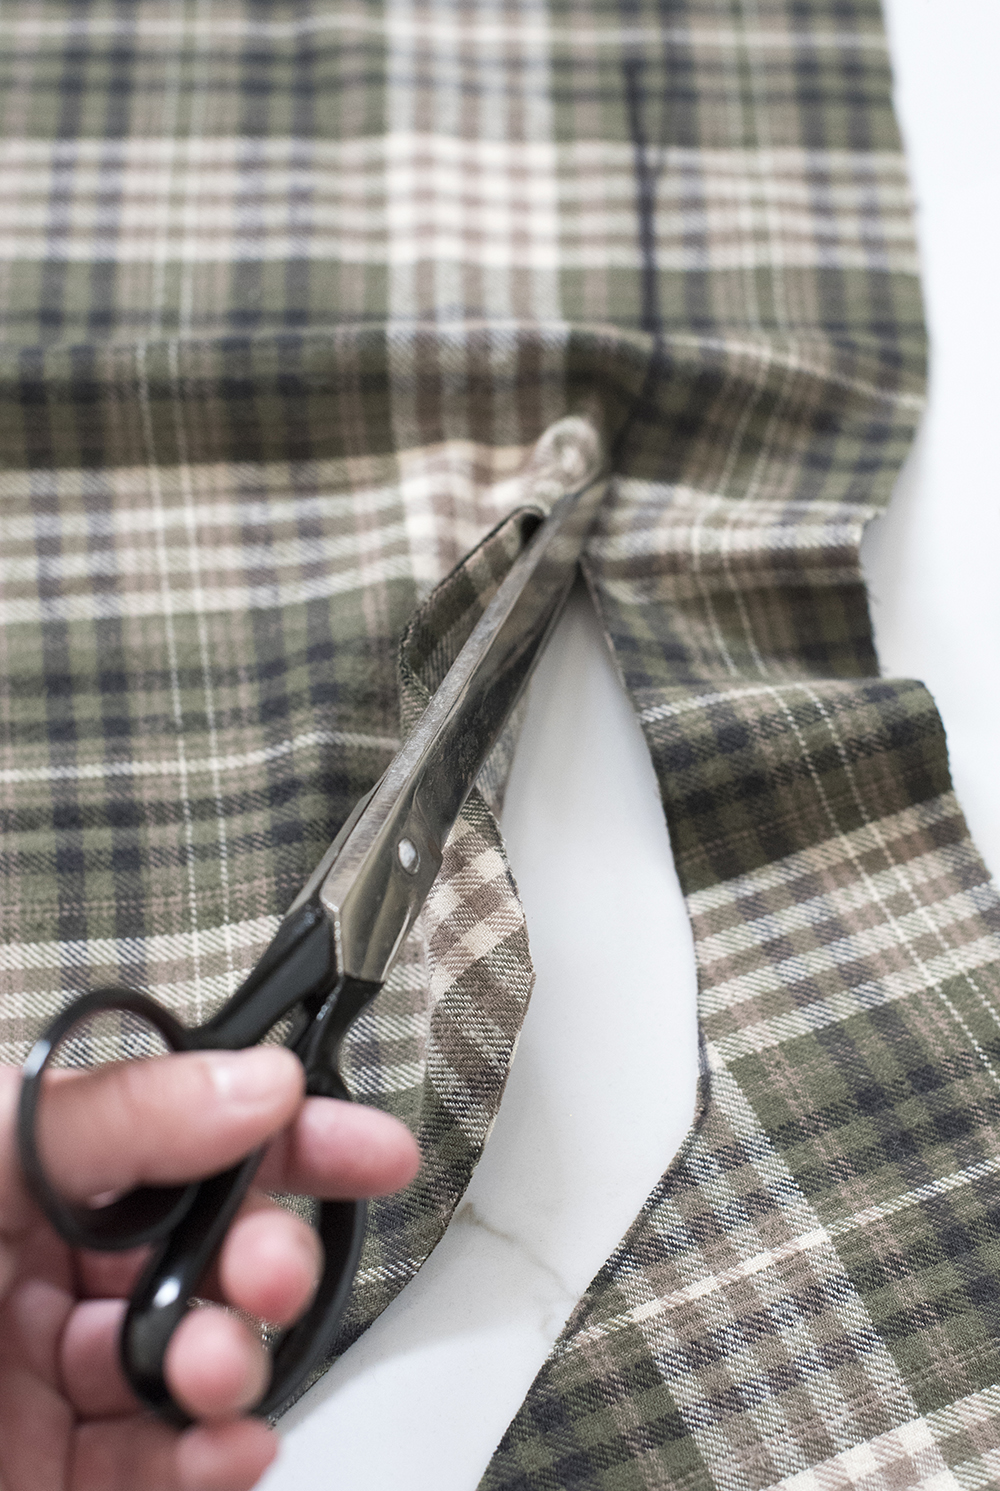 Step 2 // Cut out the pattern. Carefully cut along your marked line, until you have two identical pieces shaped like a stocking.
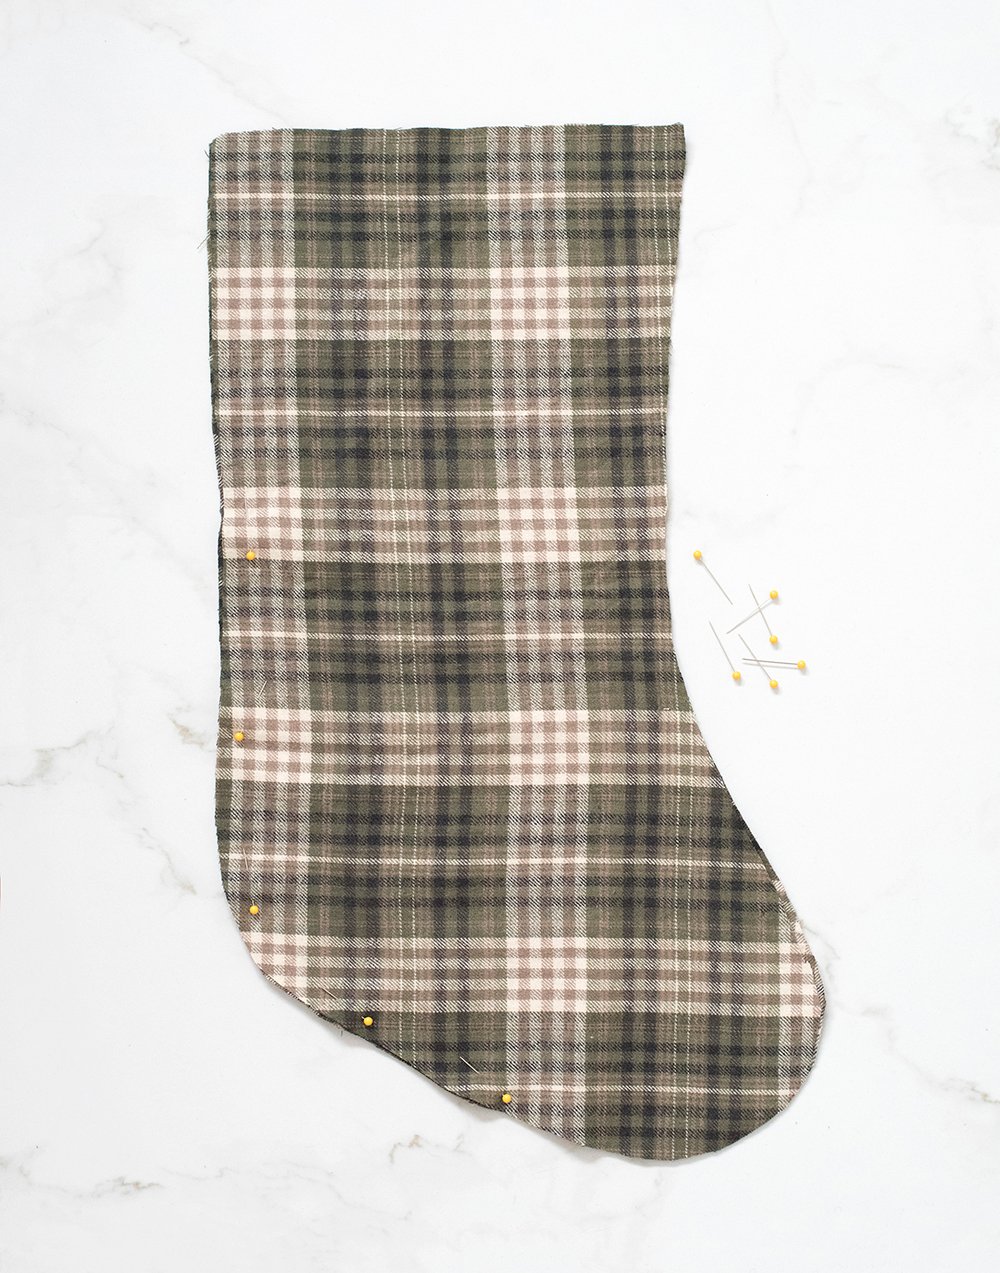 Step 3 // Pin the stocking. Using straight pins, pin the two identical sides together. Again, the inside should be facing out. The nice part of the fabric will be on the interior side of the stocking at this point.
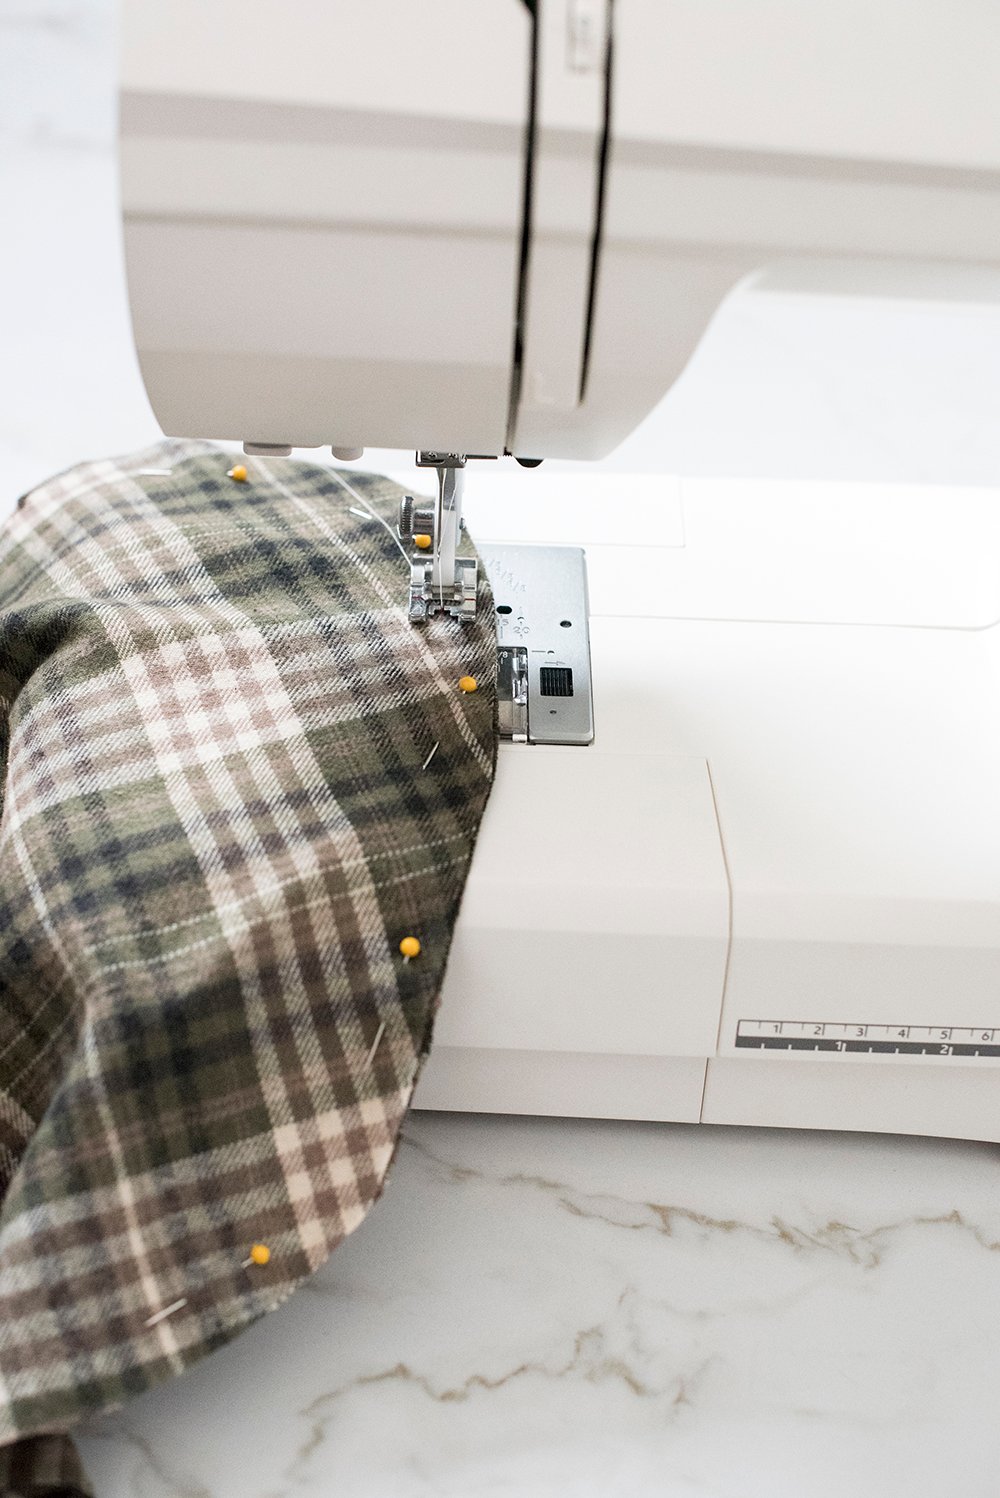 Step 4 // Sew it. Using a sewing machine (or a needle and thread if you don’t have a machine), stitch around the perimeter of the stocking, excluding the top (that will be the opening).
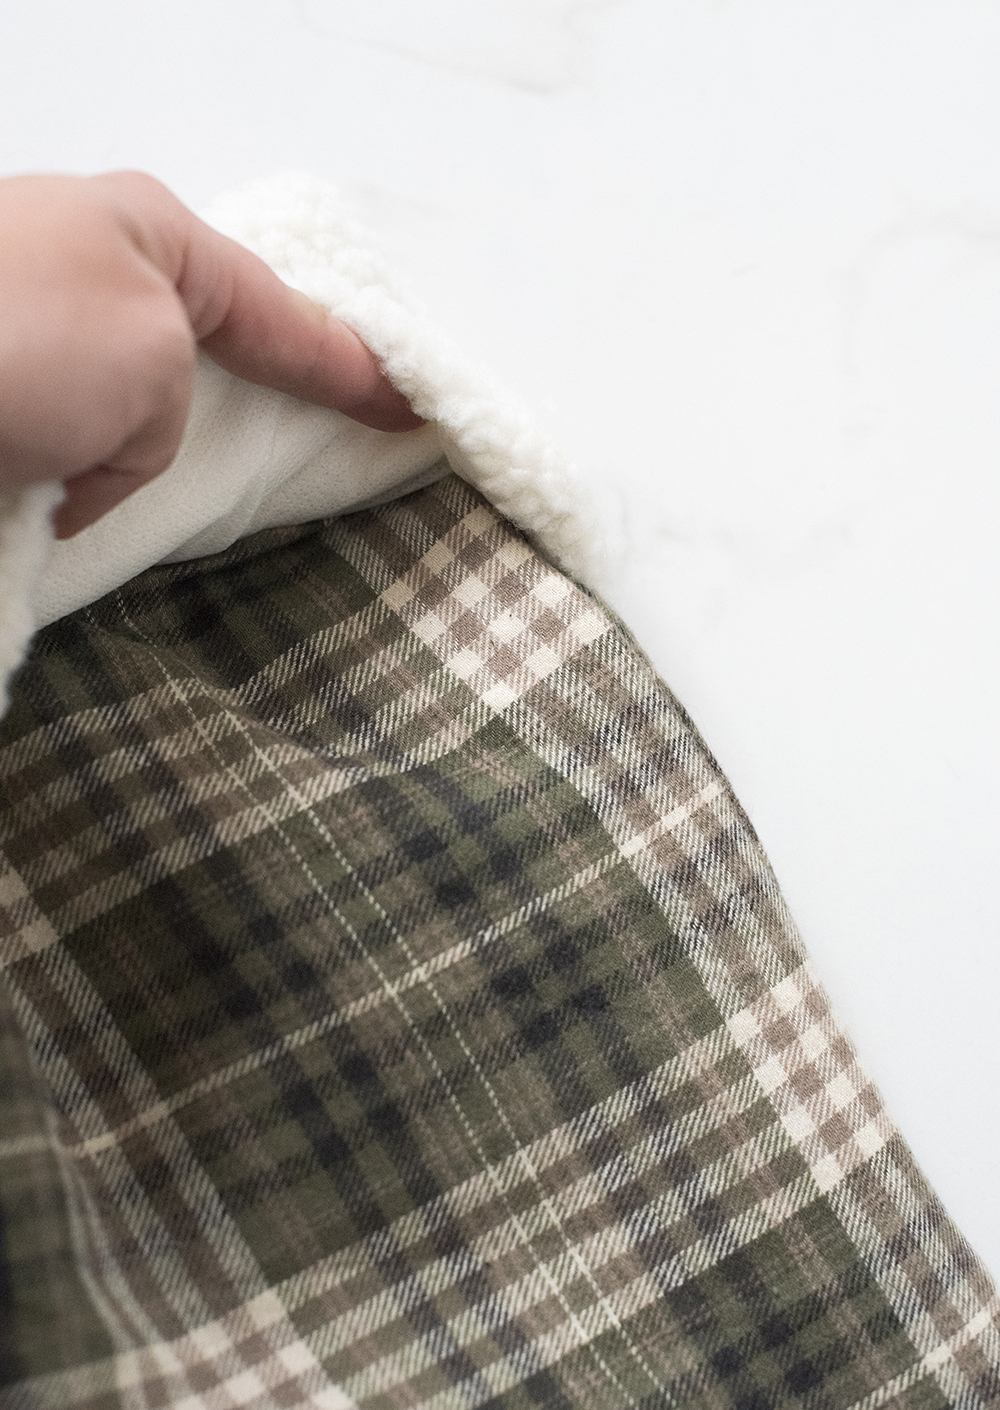 Step 5 // Put it together. Turn your fabric right side out, so that your seam is completely hidden. The fabric should definitely resemble a stocking at this point. Much like you would a pillow case and a pillow, slide your fabric slipcover over top of the pre-made stocking. It should fit nice and snug, while lying flat. Push the fabric up under the collar or cuff, then turn it back down. You shouldn’t need to secure it, as it should fit snug and nestle under the cuff nicely.
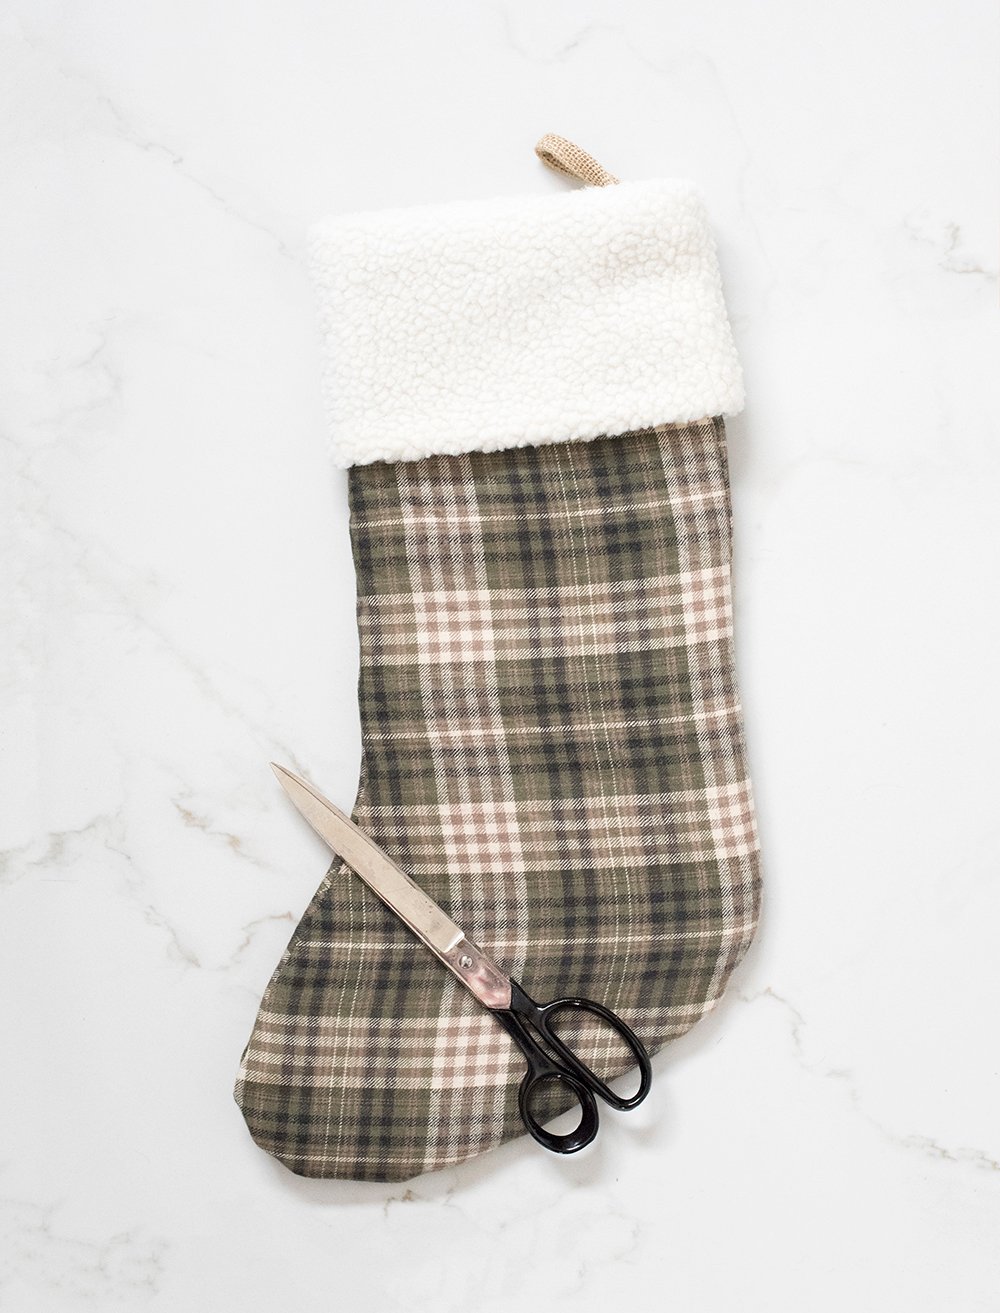 Cool concept, right? Trim any loose threads, and voila! Slipcovers for your stockings.
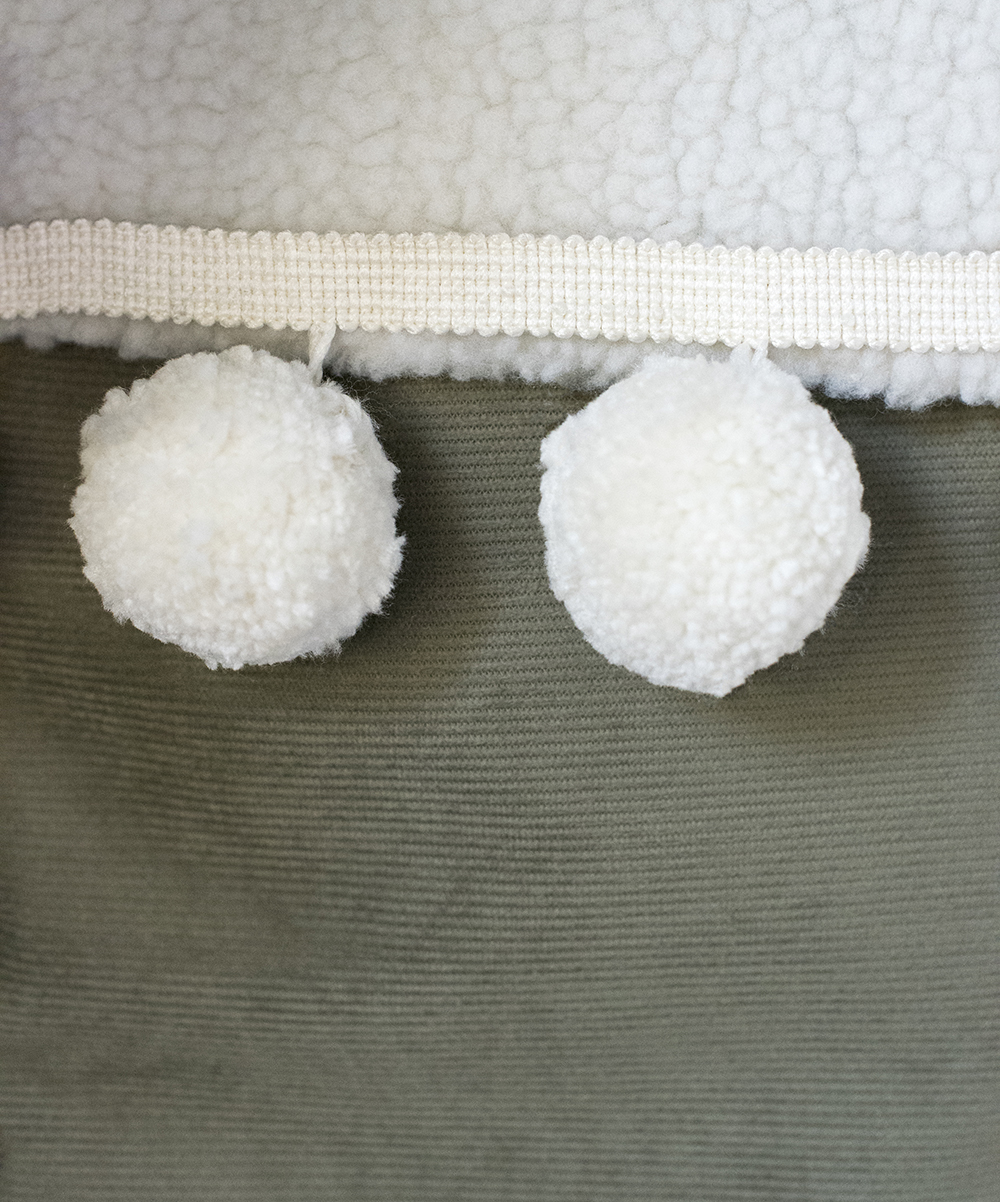
 Step 6 // Add any details you’d like. If you’d like to dress your stocking up a bit, feel free to add any fringe, tassel, or pom details. I found some pom poms at the local fabric store and designed to tack them on with some easy hand stitching. It took all of ten minutes. Easy peasy!
 There you have it! The easiest DIY stocking ever. The three of these cost me under $30 to make! So, roughly they were about $10 each. I like switching things up each year and having a bunch of slipcovers to choose from. This would also be a fun activity for kids! This is what mine looked like a couple years ago…
 What do you think? Do you like how they turned out? Which fabric do you prefer? My previous slipcovers (pictured above) or my new ones (pictured in the intro)? Be sure to tag me if you try this DIY, please! I love seeing what you guys come up with and how you interpret projects. It’s really fun to create something special for the holiday and these beat those pricey designer Christmas stockings any day! You can customize it exactly as you wish. Let me know if you have questions in the comment section below. I’m also dropping other items seen throughout this post in a shopping slider below, if you’re interested…

OK. This is pretty genius! I love the idea of changing the palette every year without making a completely new stocking. I really like your sophisticated menswear look this year, and those closeups showcase the beautiful mantle texture! I’m still contemplating holiday decorating…but stockings make me feel nostalgic. As kids, opening our stockings was how we started Christmas morning. I still enjoy shopping for those little special gifts the best! Here’s to a lovely week!
Thanks Peggi! We also opened stockings first growing up and it feels nostalgic for me too. The little gifts are always my favorite to shop for :) Hope you had an awesome weekend and fun time at the park with Joe! xo
Such a great idea and saves so much money! I decided to change our red stockings for brand new neutral ones and well it was a big chunk of change. Wish I saw this instead.
Your new mantle and garland are looking beautiful for the holidays. Cant’ wait to see the whole room!
Thanks Danna! They’re so expensive! The room is coming along slooooowly, but we’re getting there :) xo