Christmas Stocking DIY
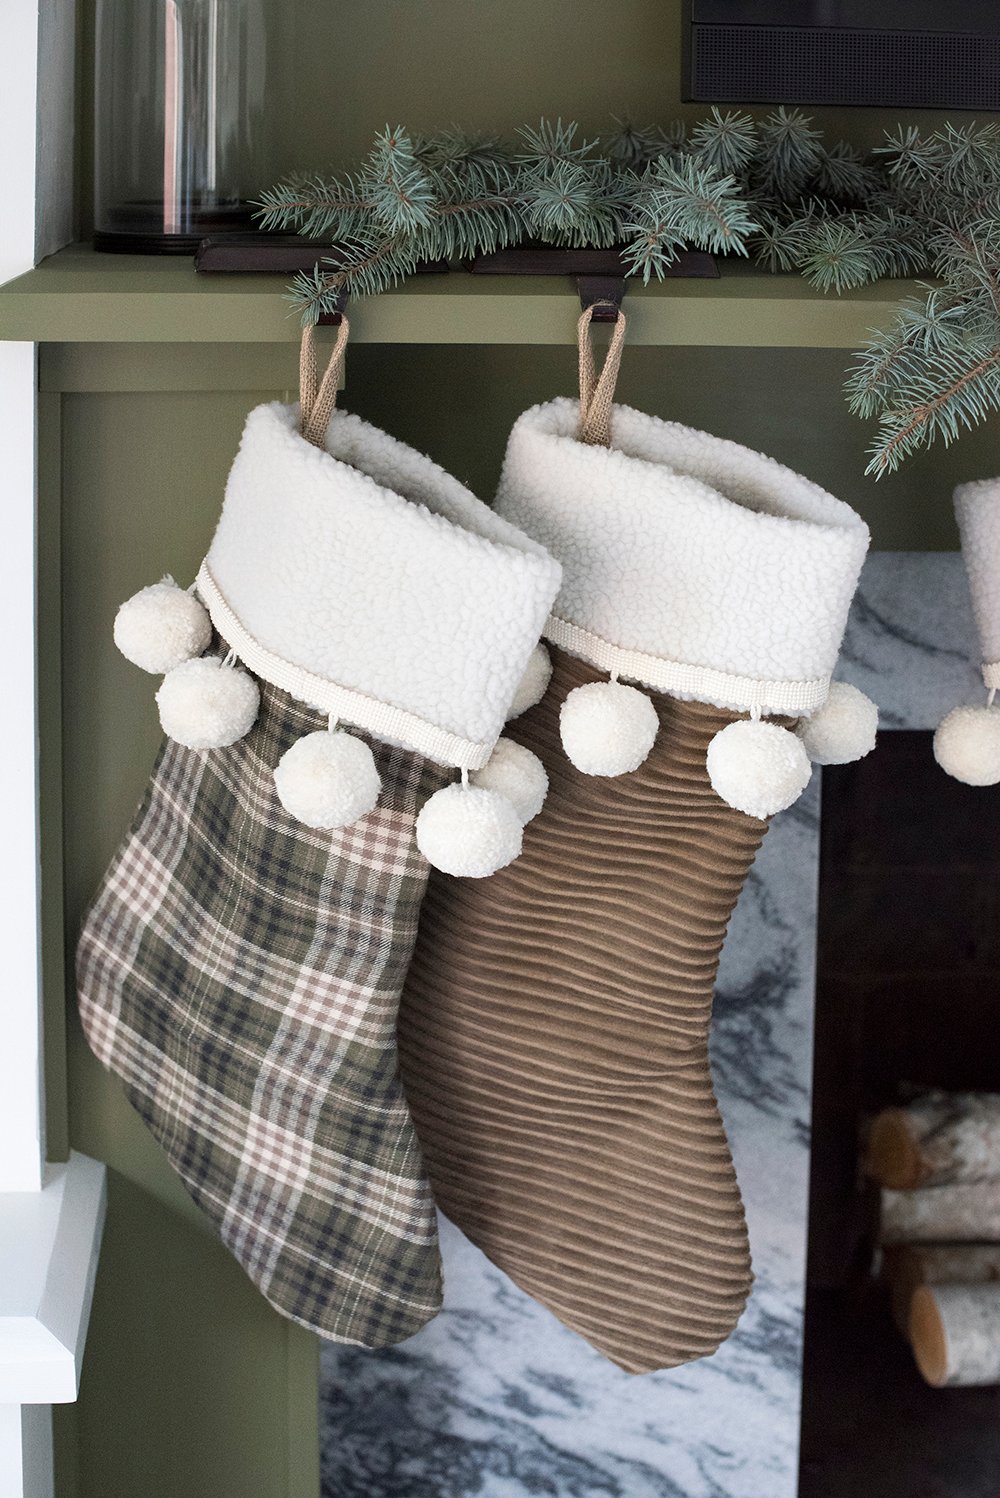 I’m feeling super festive lately, and although earlier than expected, I’m welcoming the holiday season with open arms! This Christmas, we’re not putting up a tree… sad, I know. There’s a good (really good) reason though. We’ll be in the middle of a kitchen renovation and since our house is so small, it’s just not in the cards for us this year. I’m okay with choosing the kitchen over the Christmas tree, just this once. However, I’m going all out and styling the fireplace and built-ins to the nines in an effort to make up for the lack of tree. As I’ve been unpacking boxes of decor, I decided I couldn’t live with our sad, basic stockings any longer. Click through for the easiest stocking DIY ever… seriously- I made 3 of these in 30 minutes.
 I’m all about adding special touches to my holiday decor. There’s nothing better than making something you’ll use year after year. I love unpacking decorations I’ve made in the past. There’s a sense of nostalgia, accomplishment, and happy memories that goes along with each of them. I remember my aunt and grandma making stockings during the holiday season and wondered why I hadn’t done the same. I’m happy to report, these turned out amazing and are seriously so easy. Here’s everything you need for the project…
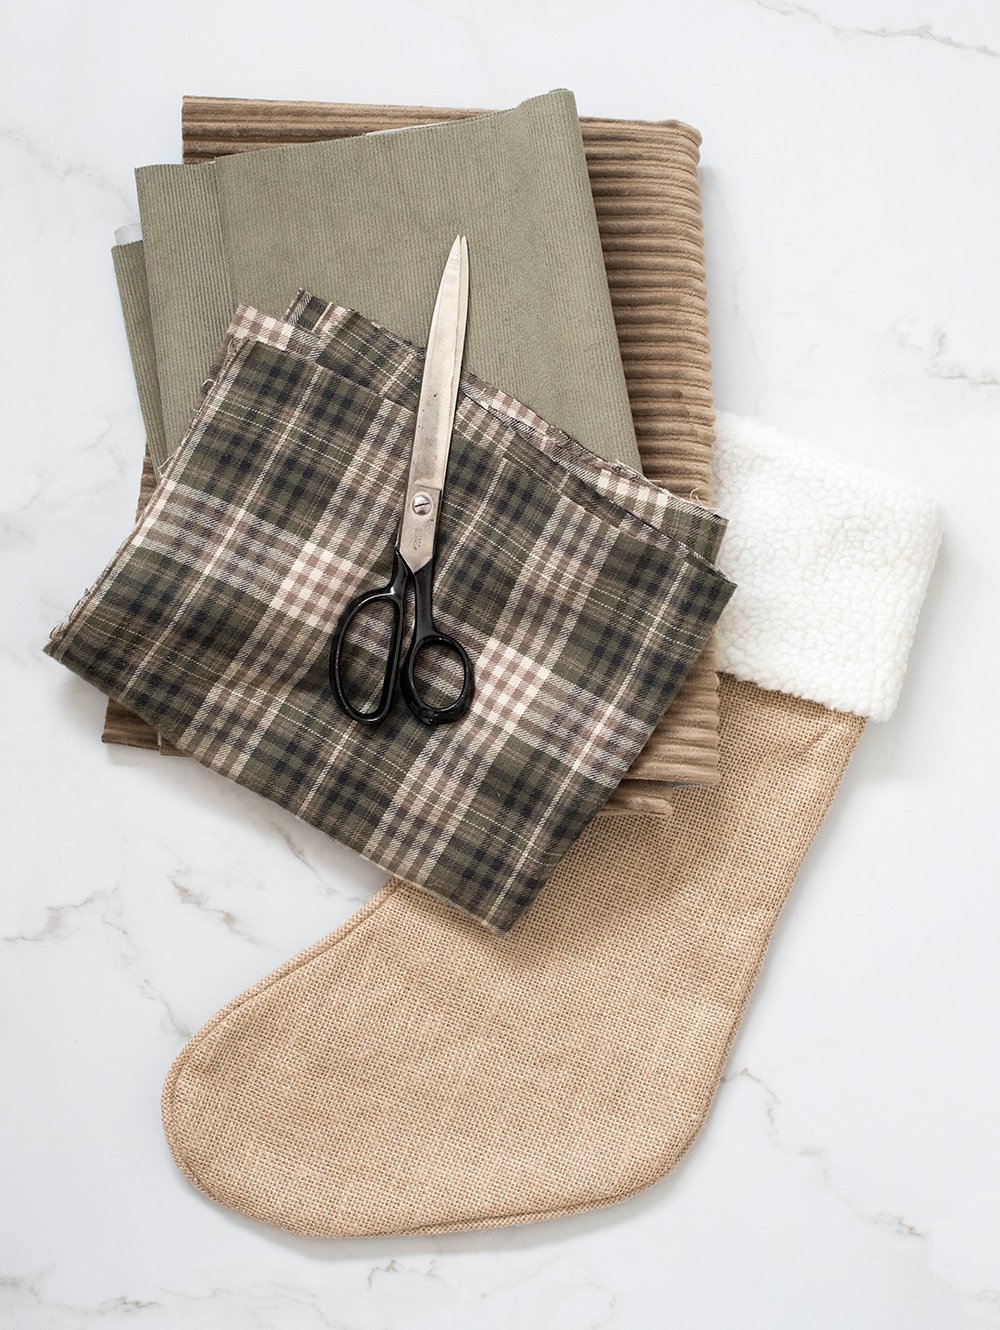
S U P P L I E S
- fabric
- pre-made stocking
- sewing machine (or a needle and thread to stitch by hand)
- scissors
- sharpie marker
- fringe / pom pom detail (optional)
- straight pins
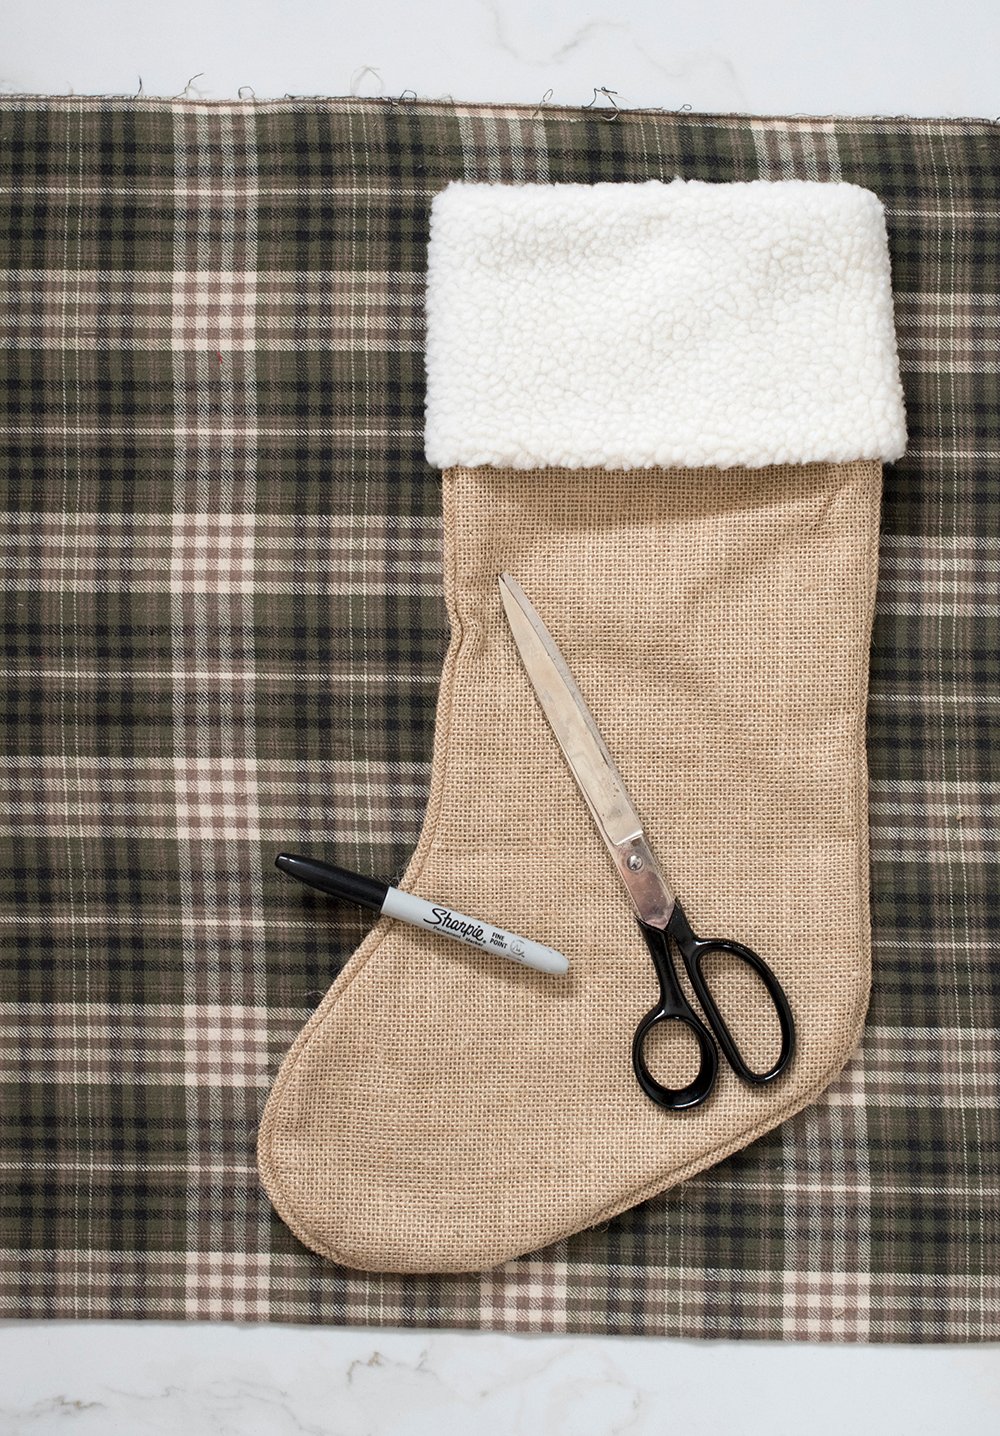 Step 1 // Mark your pattern. Lay the pre-made stocking on top of your fabric, which should be folded in half AND with the inside facing out (the bad part of the fabric facing toward you, as well as touching your work surface). Using a sharpie or fabric marker, trace around the stocking, leaving a quarter inch gap.
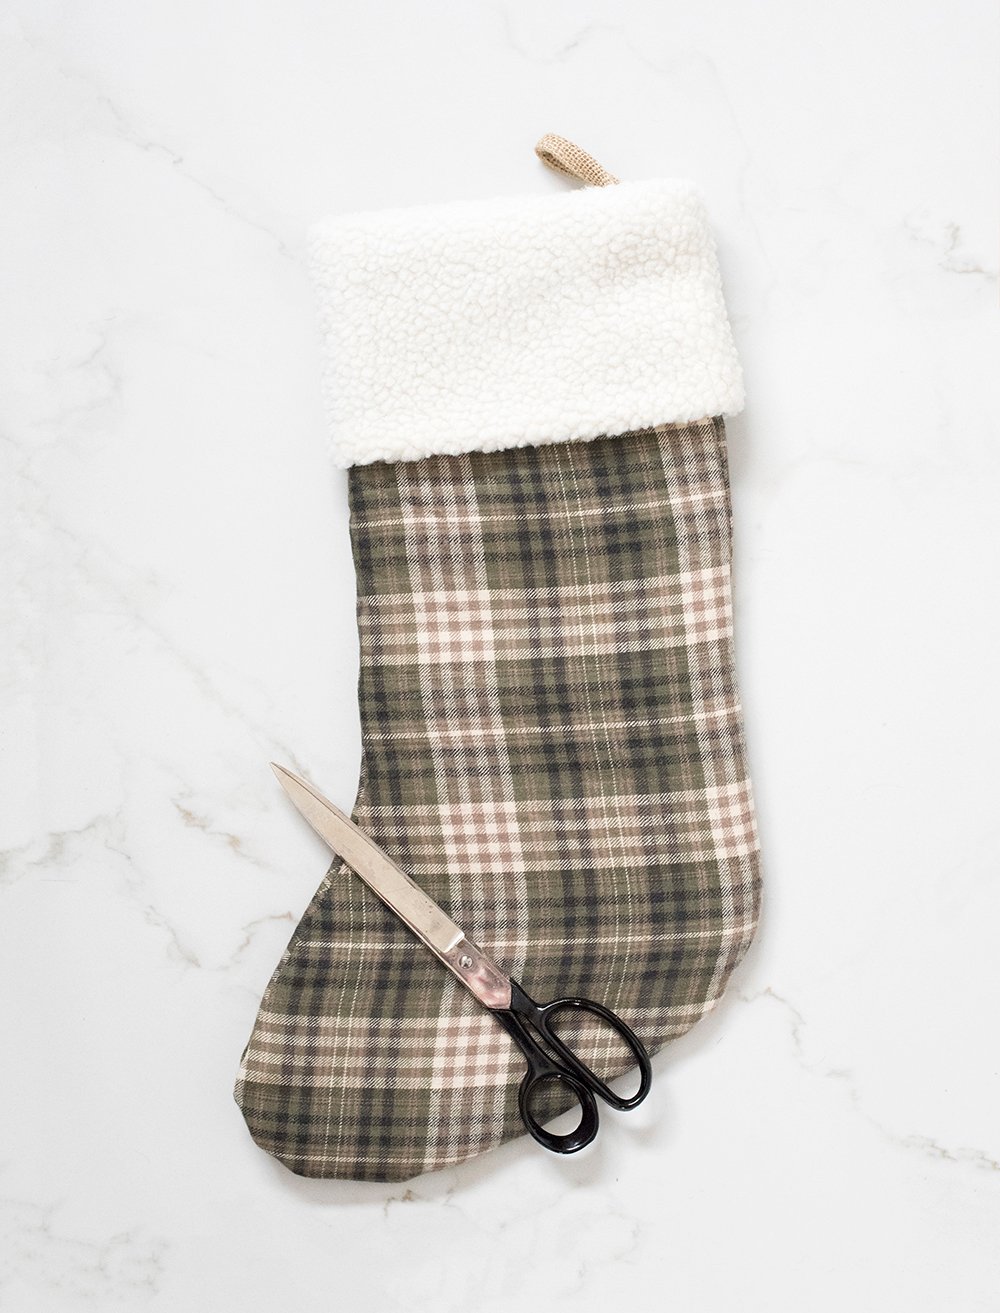
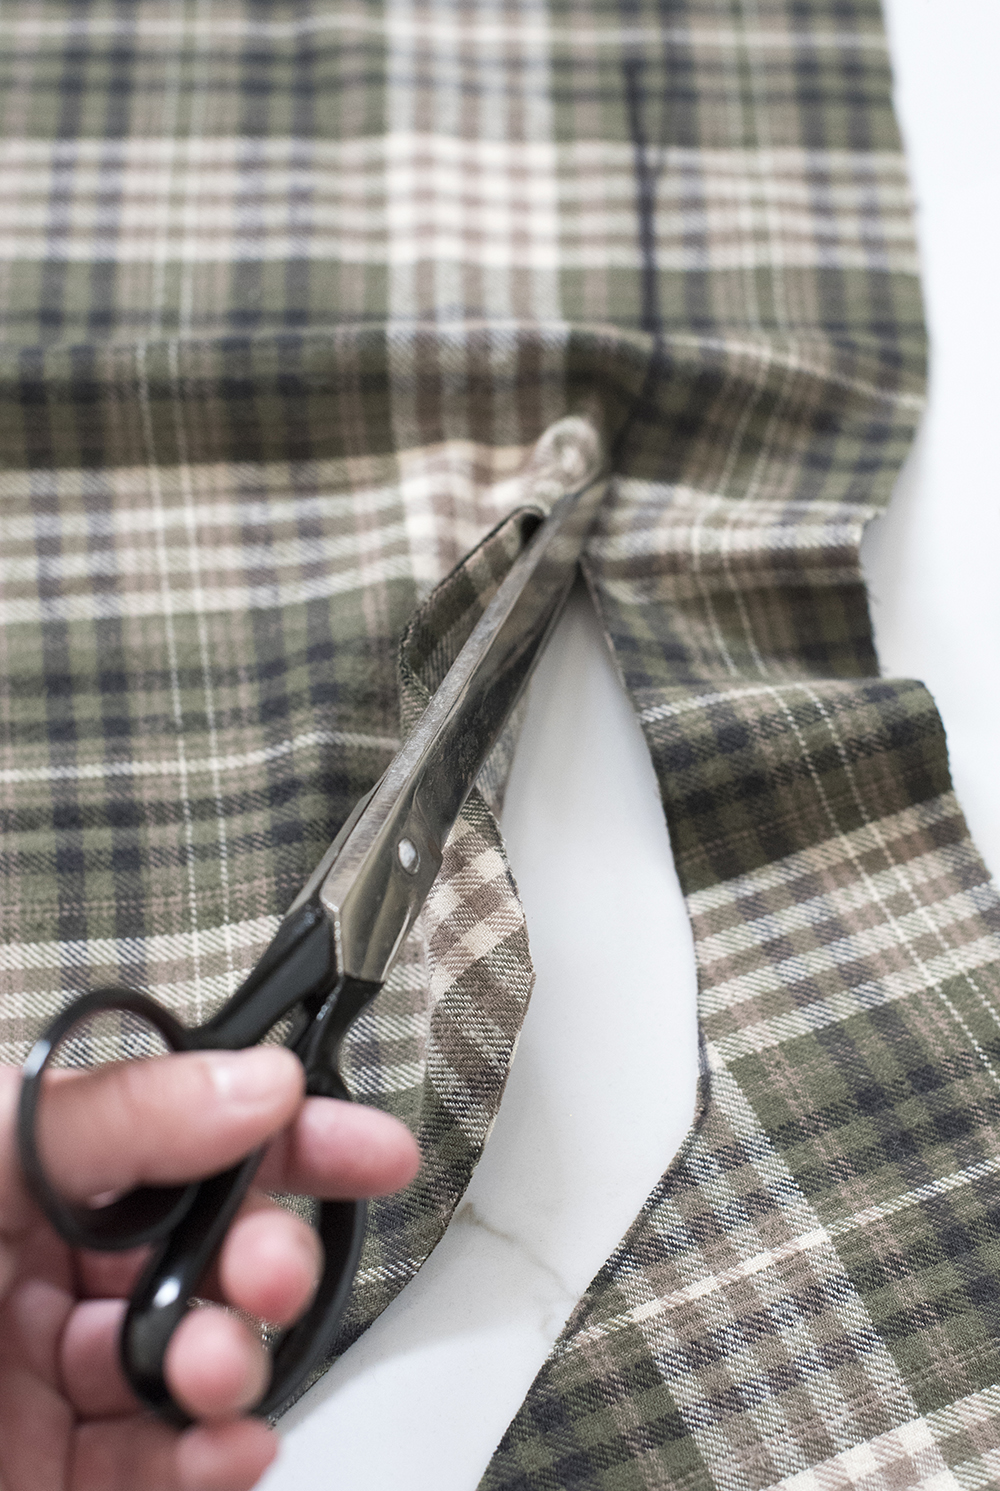 Step 2 // Cut out the pattern. Carefully cut along your marked line, until you have two identical pieces shaped like a stocking.
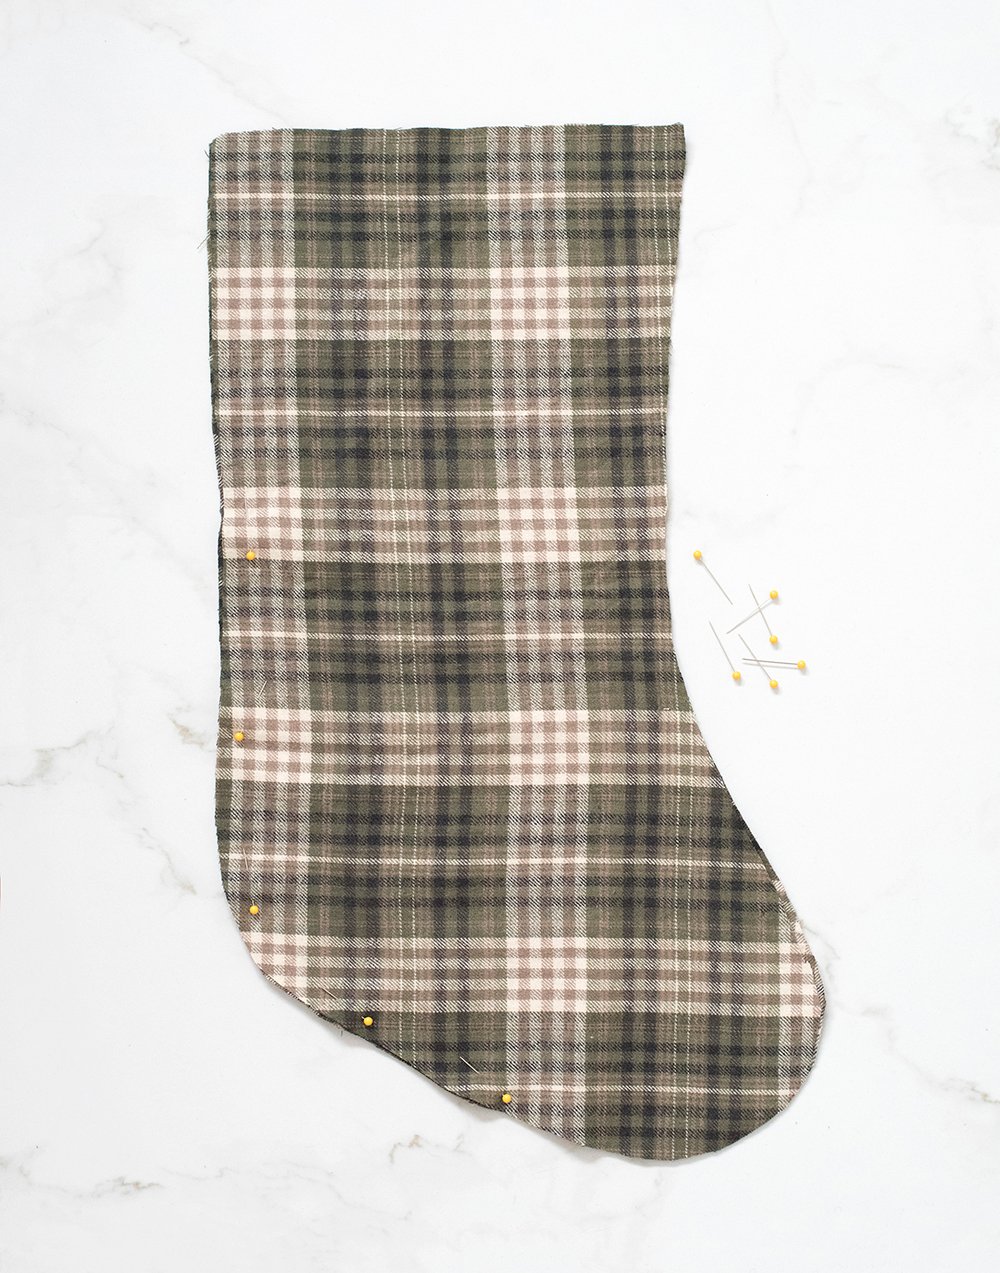 Step 3 // Pin the stocking. Using straight pins, pin the two identical sides together. Again, the inside should be facing out. The nice part of the fabric will be on the interior side of the stocking at this point.
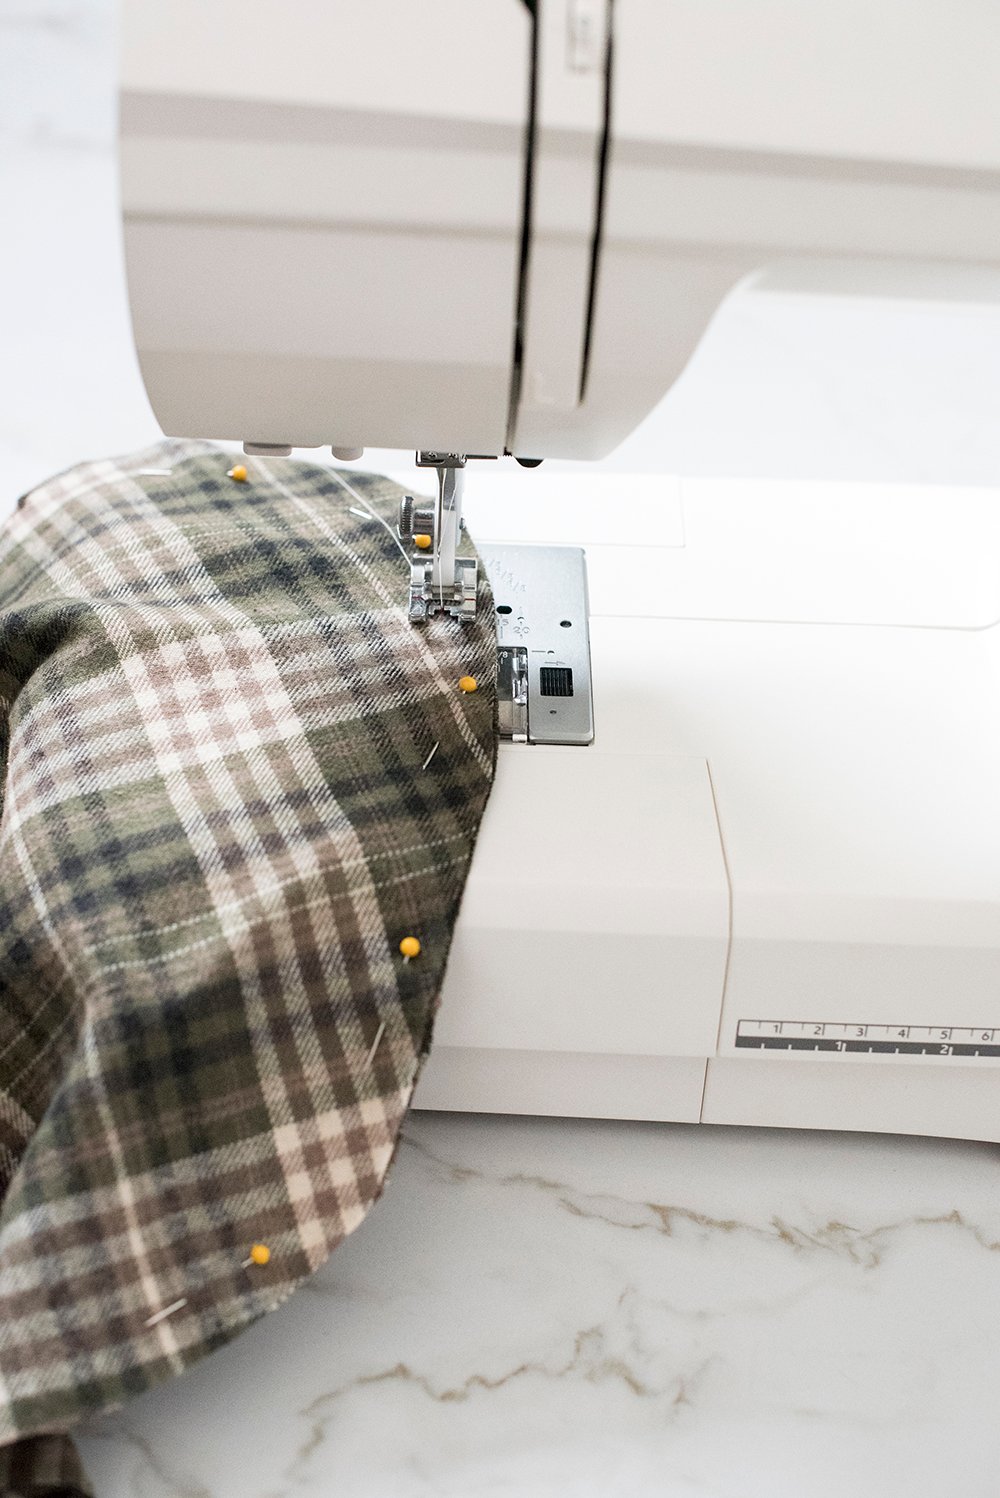 Step 4 // Sew it. Using a sewing machine (or a needle and thread if you don’t have a machine), stitch around the perimeter of the stocking, excluding the top (that will be the opening).
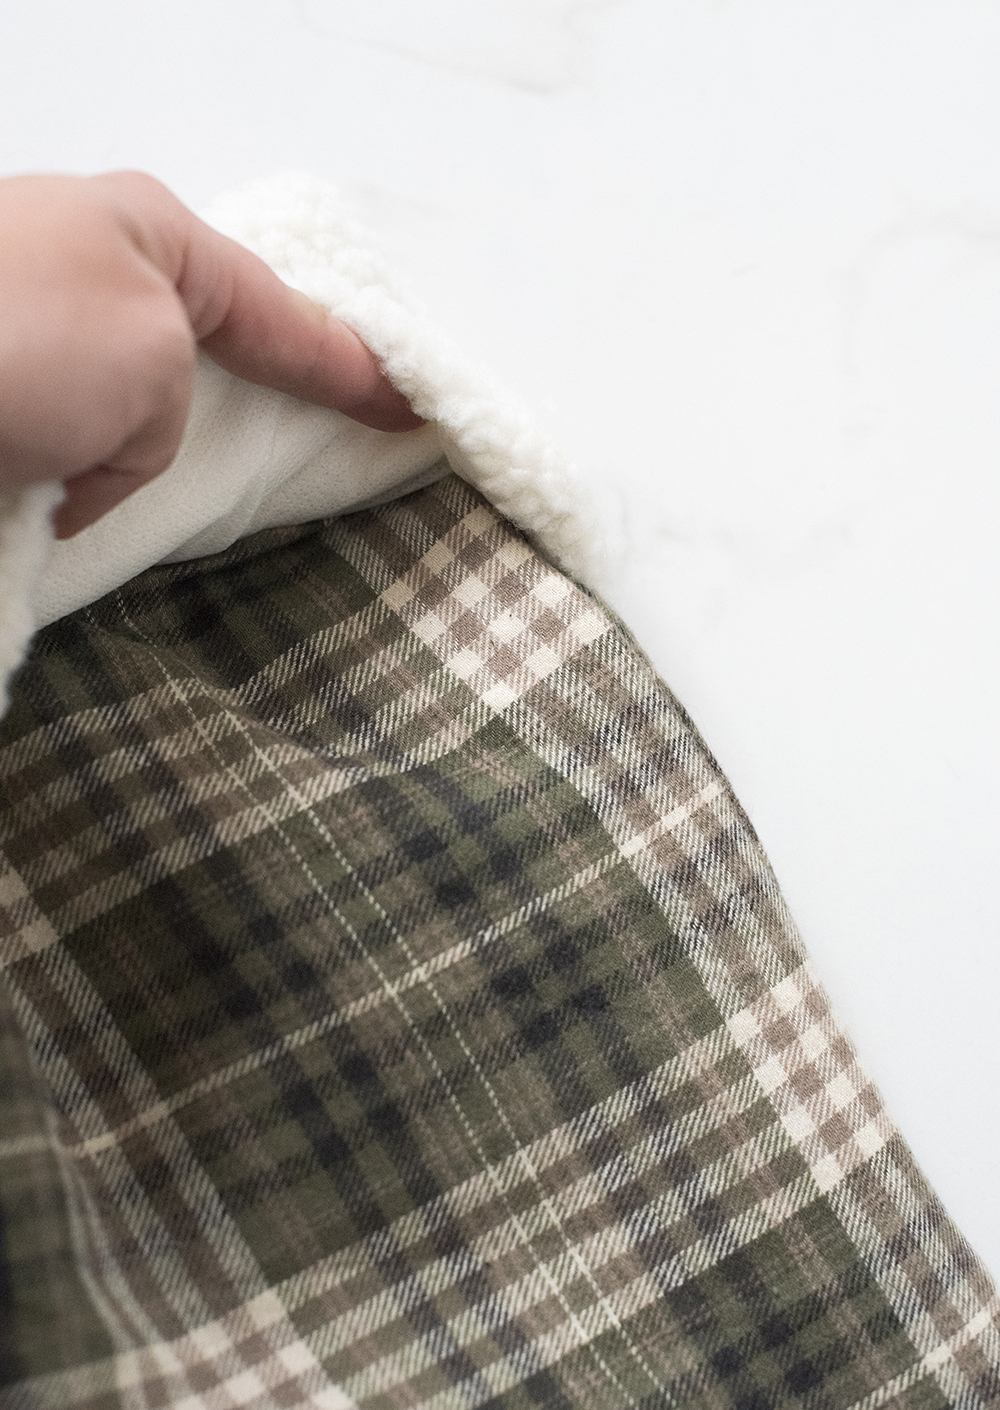 Step 5 // Put it together. Turn your fabric right side out, so that your seam is completely hidden. The fabric should definitely resemble a stocking at this point. Much like you would a pillow case and a pillow, slide the fabric stocking over top the pre-made stocking. It should fit nice and snug, while lying flat. Push the fabric up under the wool collar and secure if you wish.
 I didn’t even secure mine! It fit so great that it stays in place on it’s own and retains the shape nicely. This also gives me the option to trade the fabric next season if I feel inclined to do so. Think of it as a slipcover for your Christmas stocking. Cool concept, right? Trim any loose threads, and voila!
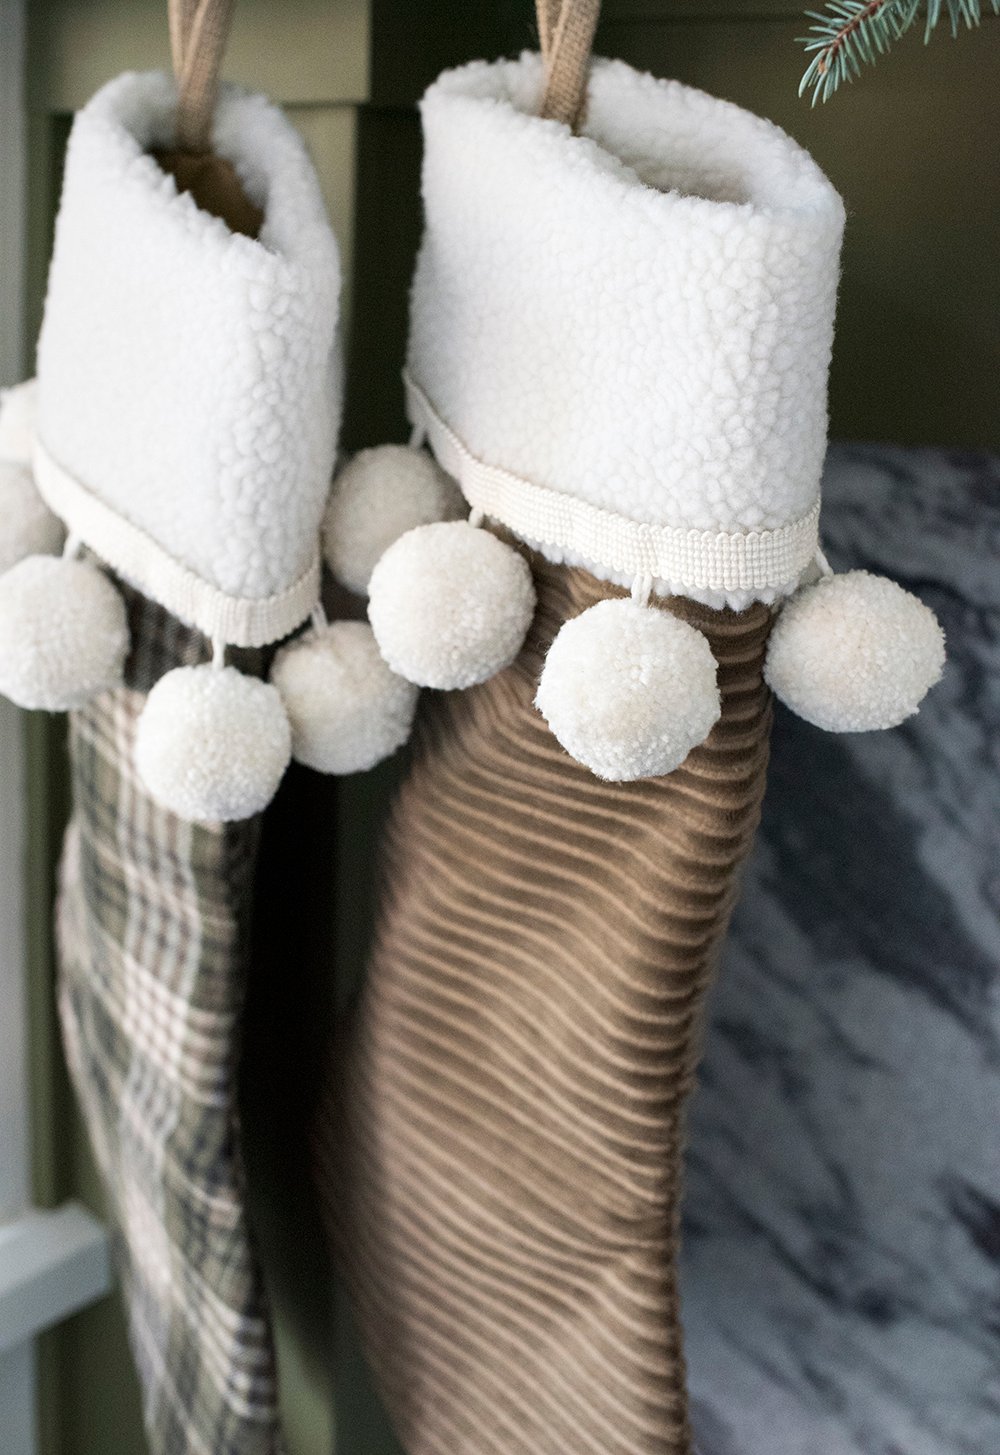
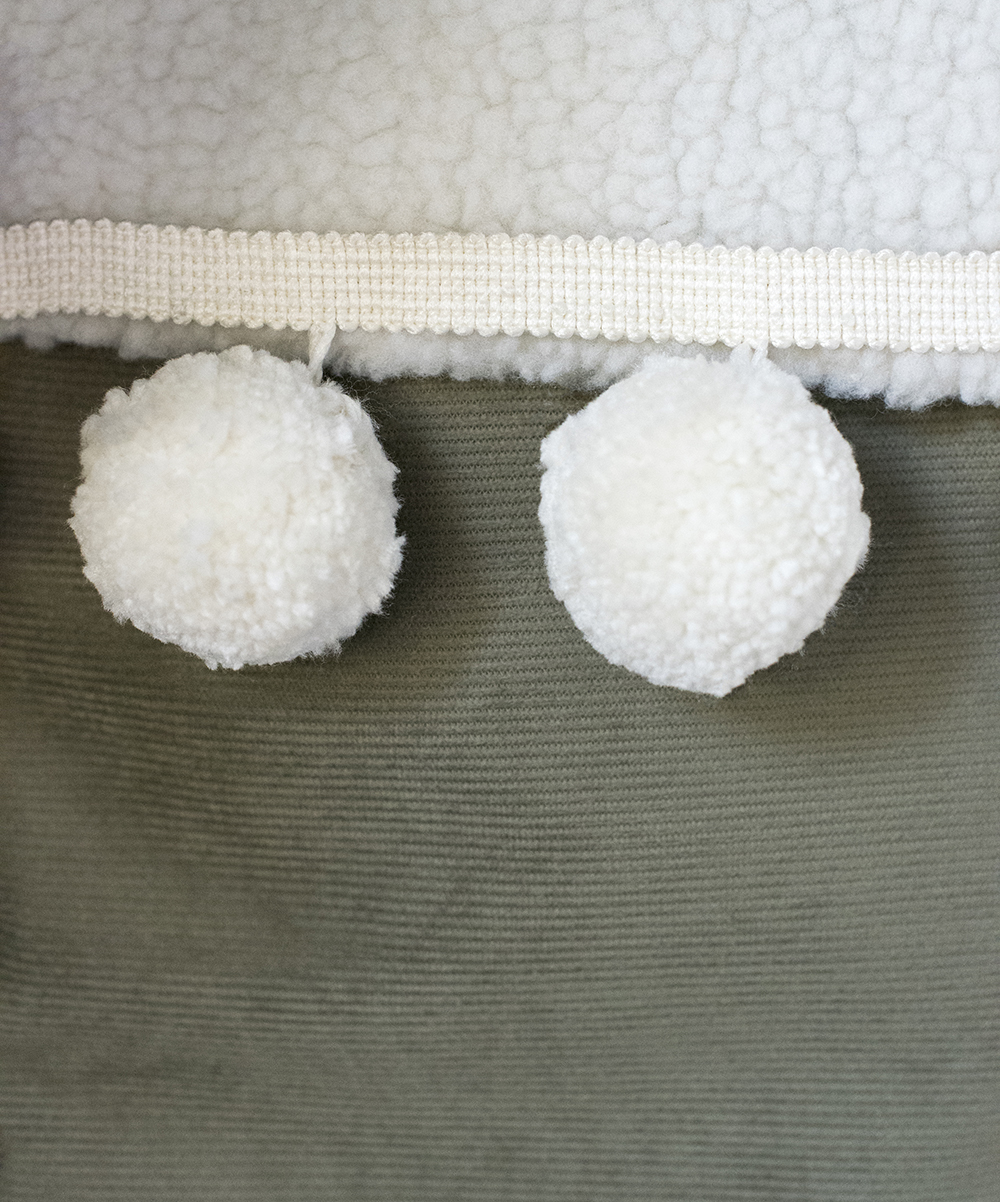
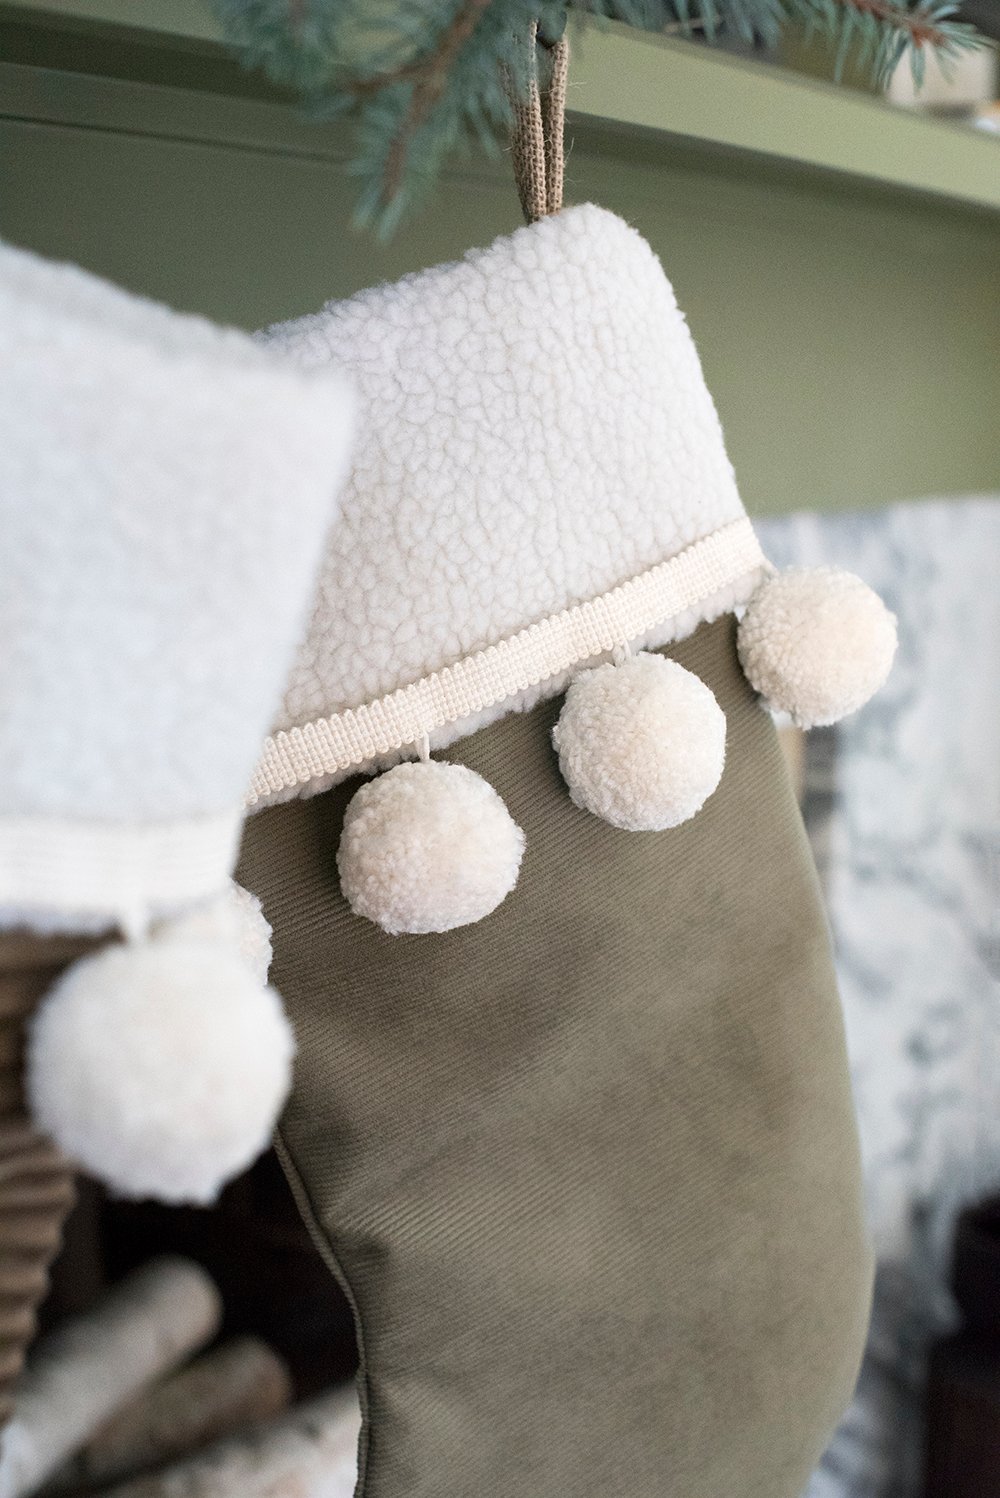
 Step 6 // Add any details you’d like. If you’d like to dress your stocking up a bit, feel free to add any fringe, tassel, or pom details. I found some pom poms at the local fabric store and designed to tack them on with some easy hand stitching. It took all of ten minutes. Easy peasy!
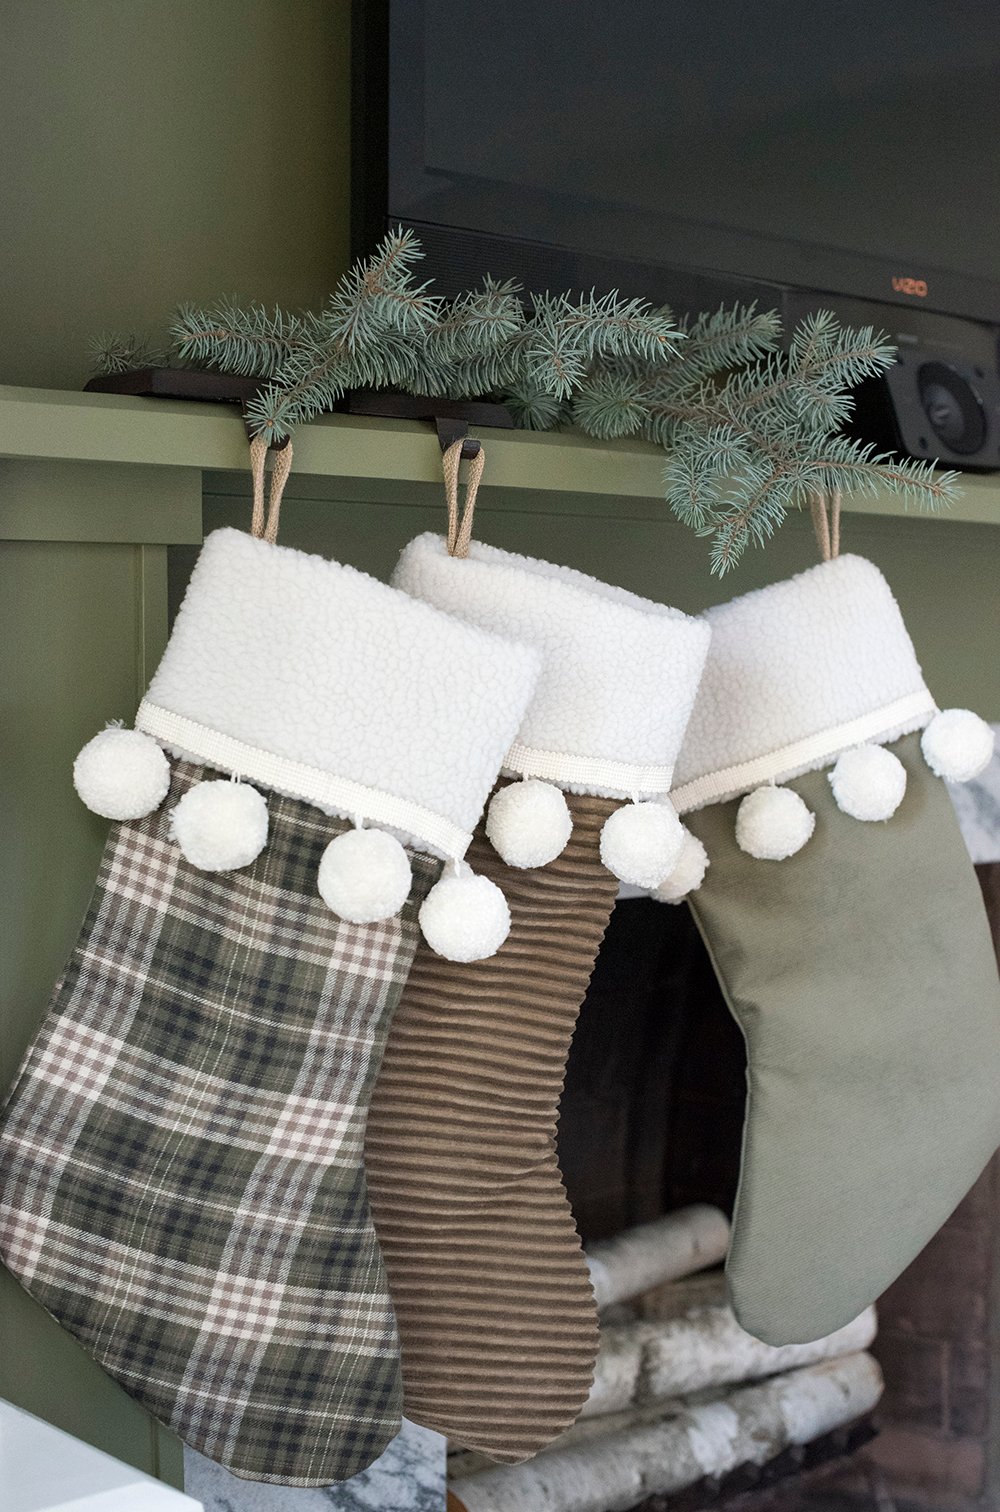
 There you have it! The easiest DIY stocking ever. Or maybe I should call it a DIY stocking slipcover? Either way, they’re super cute and I’m really happy with how these turned out.
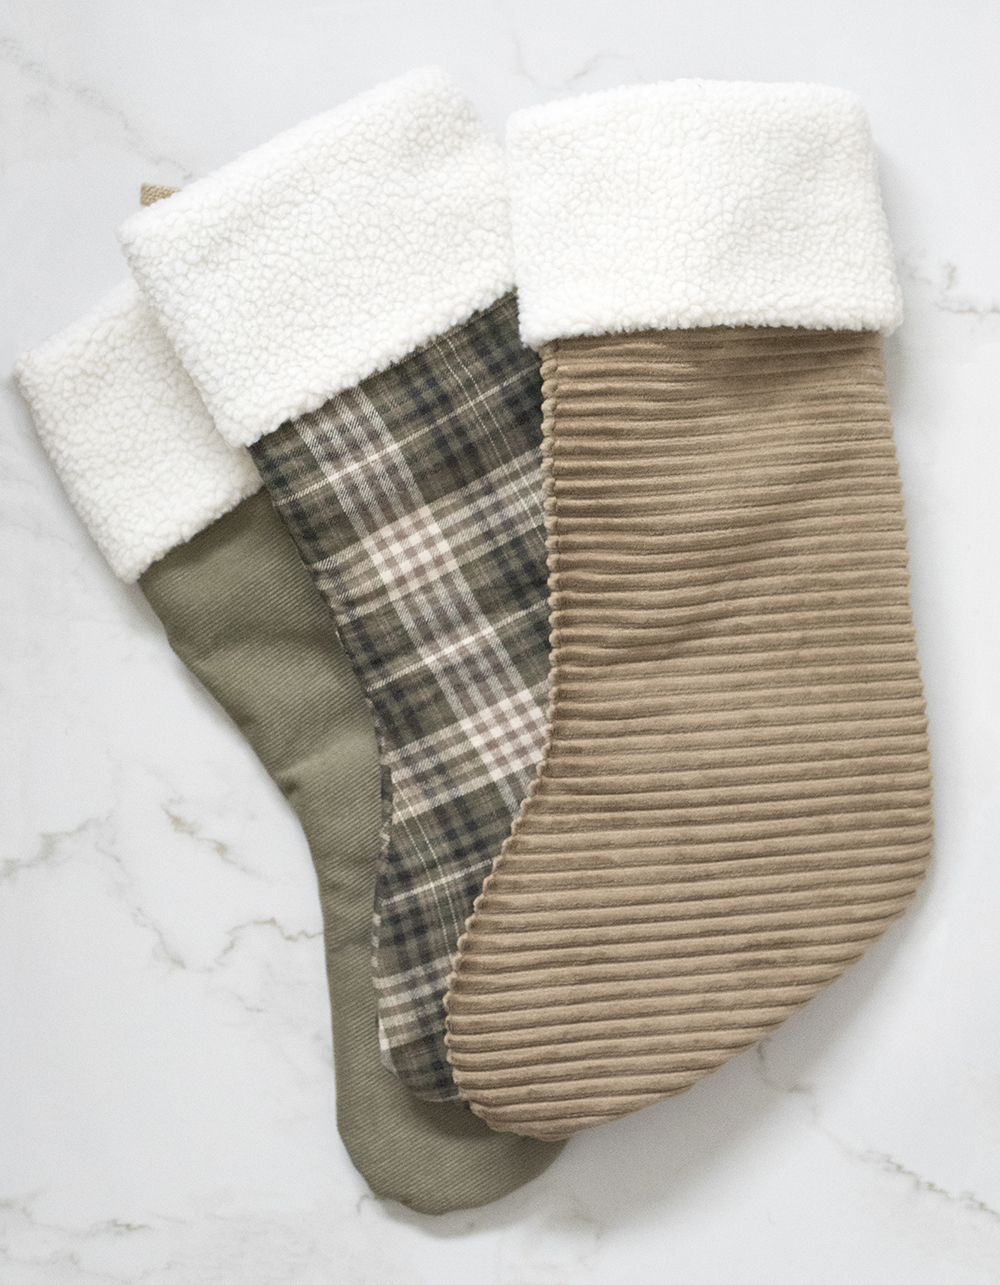
 The three of these cost me under $30 to make! So, roughly they were about $10 each. That’s right… all of the materials, including the fabric and pre-made stockings cost under $30. I just grabbed my material at Joann’s (everything was on mega sale).
 What do you think? Do you like how they turned out? Are you going to give this a try? I hope so because it’s really fun to create something special for the holiday and these beat those pricey designer Christmas stockings any day!
This is so clever! What a great way to refresh the stockings without buying new ones. I can see doing this for the kids and changing the fabric as they grow. Thank you.
So glad you liked this one! Definitely a great option for updating as kids grow.
Great idea! I love using an old stocking as the “form.” I’ve tried sewing my own before and the shape always turns out a little funny.
Thanks, Meredith! That’s exactly why I bought the cheap stockings in the first place… I was worried about the form. I’m really happy with the versatility. It made things so easy!
Hi Sarah,
I love your blog and have never commented before……but I wanted to thank you for your stocking tutorial. I made 4 “slip covers” for my store bought stockings. It was super easy (I’m not a sewer) and they turned out so cute!
Thanks again and I look forward to your posts!!
Thanks so much, Joyce! So happy to hear the tutorial came in handy. Thanks so much for following! Happy Holidays!
Great idea! I love those large pom-poms. Where did you find them?
Thank you, Emmy! I found those at a local fabric shop.