Plans for Our Main Cabin Bath Renovation
Although I’ve been in mom mode on maternity leave, we’ve been charging full steam ahead with the cabin renovation. The main bath is the first room on our list and things are moving right along! Today, I wanted to bring you up to speed, share the before images, the design plan, hash out my ideas for the space, and show you how it currently looks. I think you’re going to be surprised which direction I’m headed, aesthetically speaking. Click through for the all the details on our main cabin bath renovation!

If you missed it, last fall we began cabin hunting in the Utah mountains. We toured many cabins and ultimately landed on the first one we stepped into- it immediately felt like home and the perfect option for us! If you missed it, be sure to check out the first look at our Utah cabin, which contains all the pre-renovation before images. Let’s dive right into the main bath plans…
The Before
First, let’s talk about what you’re NOT seeing. The cabin didn’t have heat or cooling, so we had to add an entire HVAC system to the house to make it functional year round. Then, we discovered most of the electrical wiring had been chewed by wildlife, so we ran copper wiring and reworked everything. Once those daunting tasks were crossed off the list, we started demo…. we took everything down to the studs and bare bones. Here’s how it looked before demo.
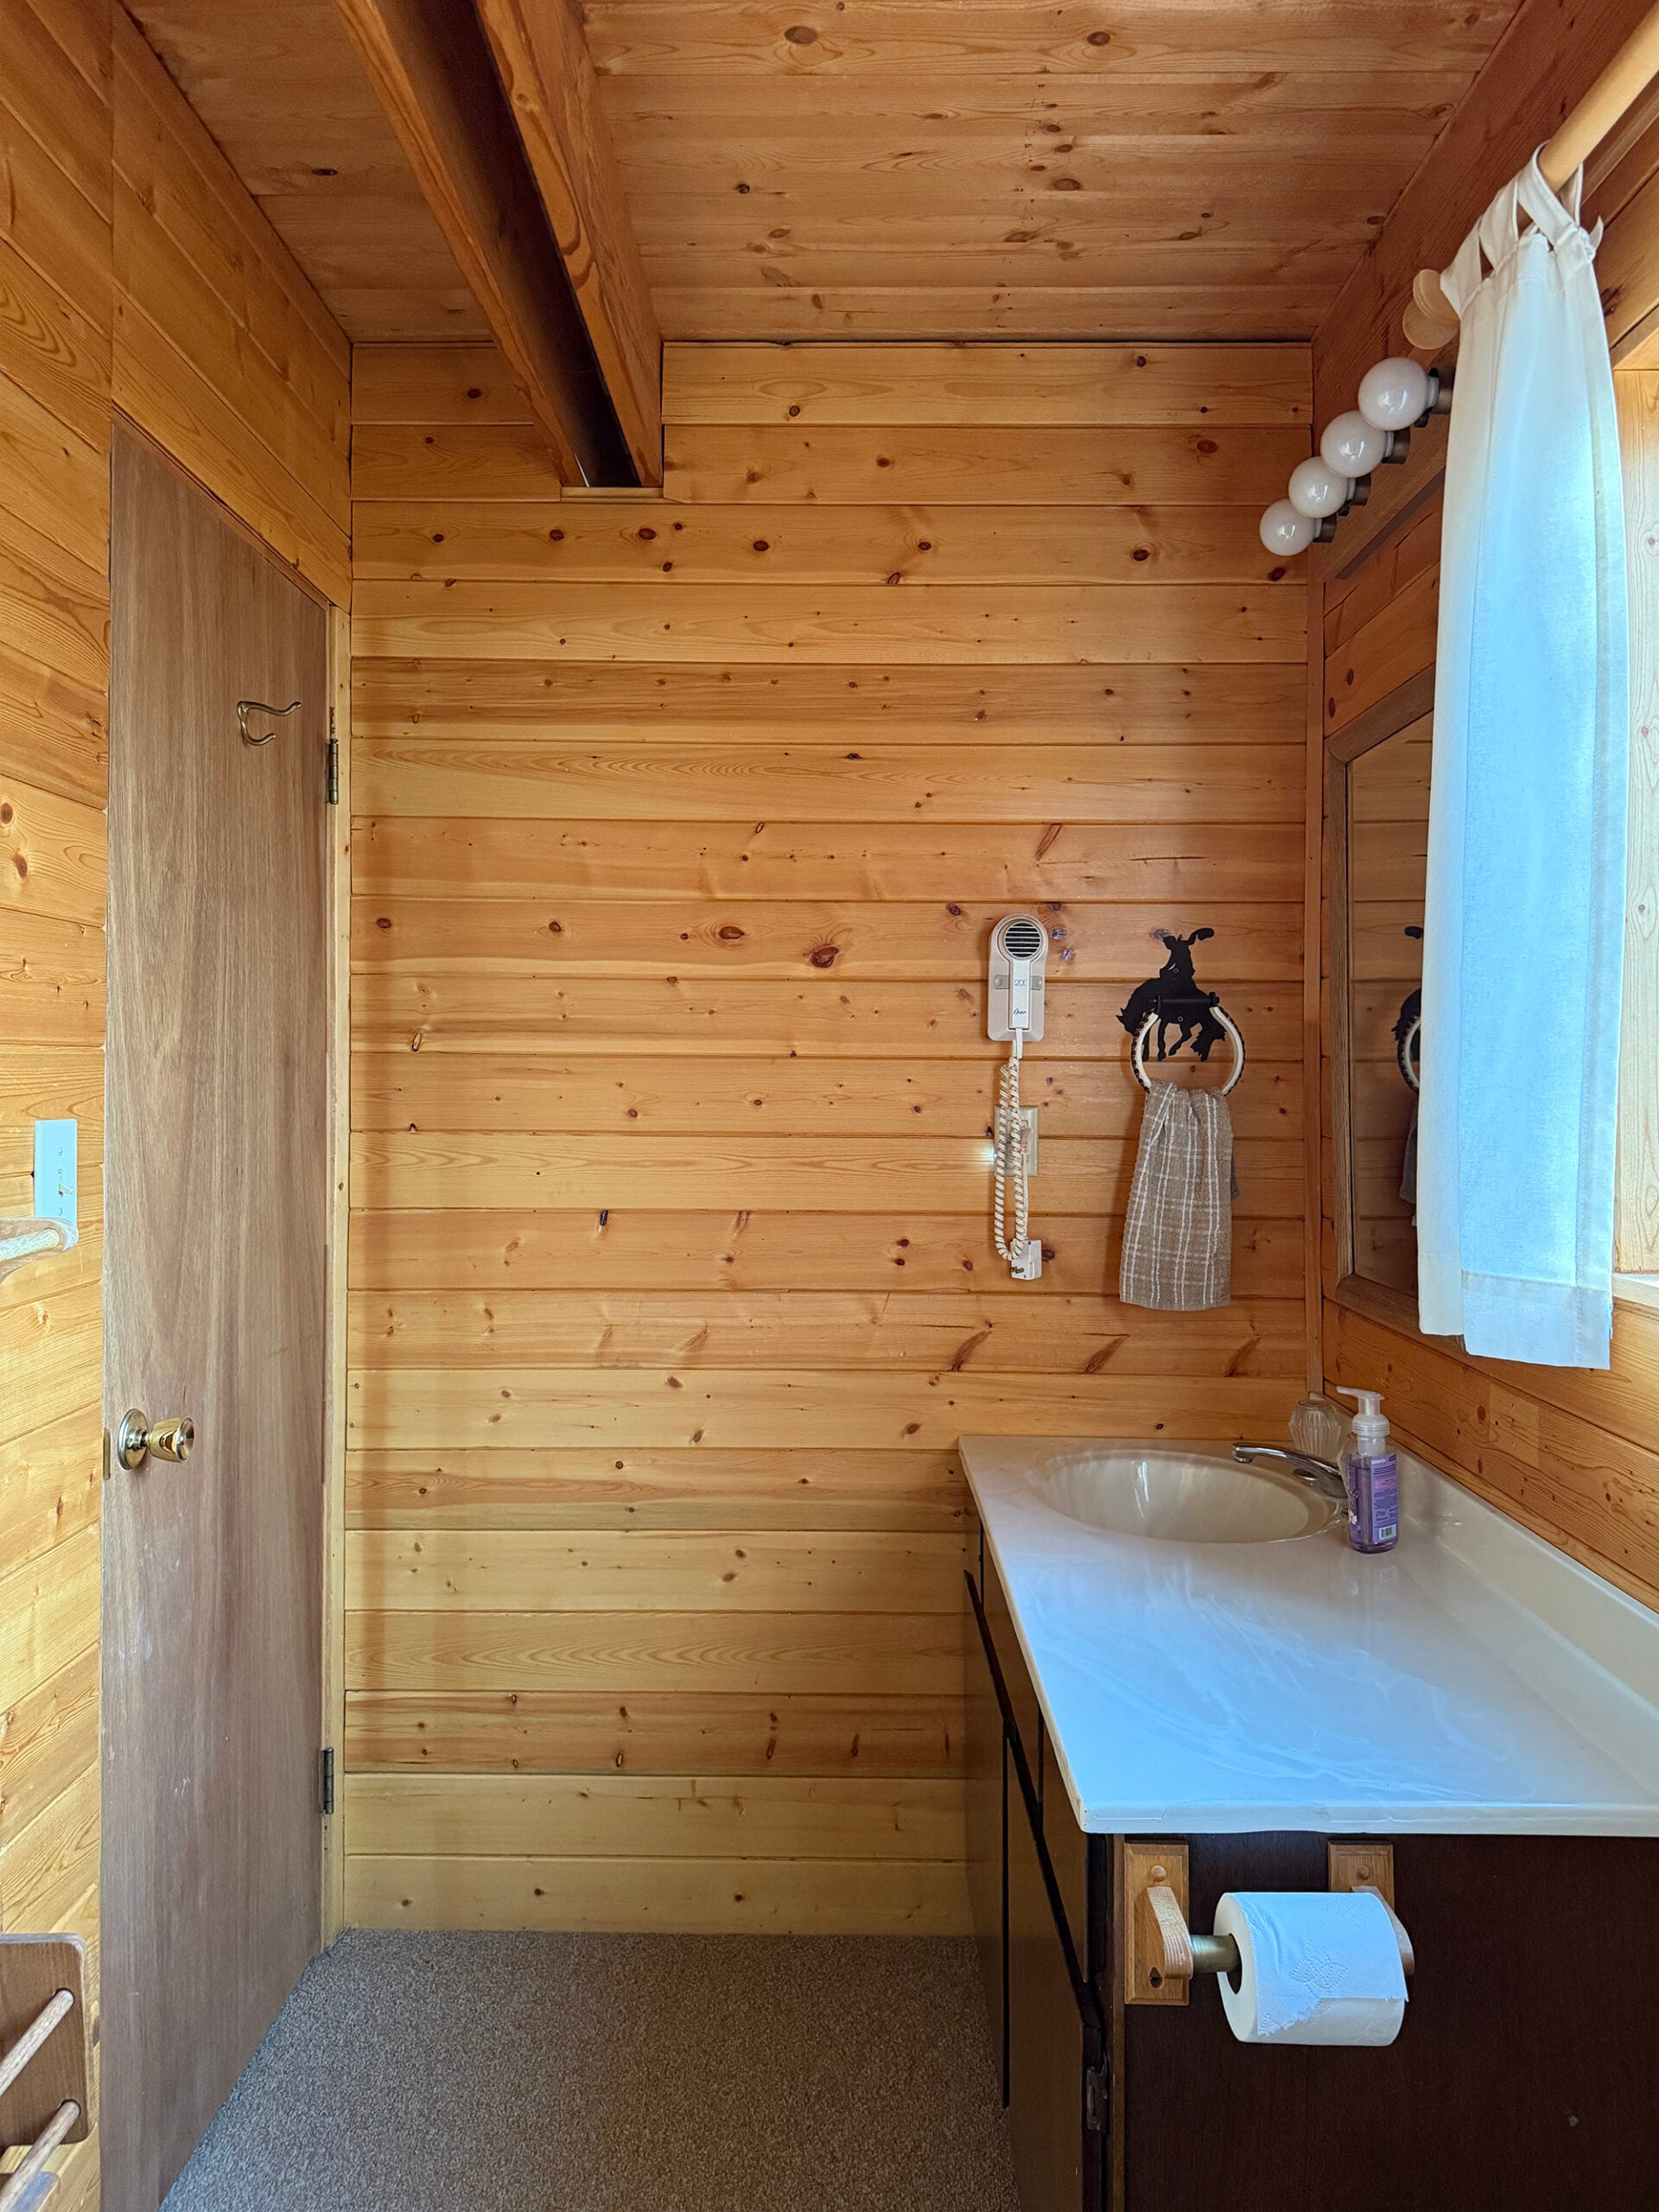
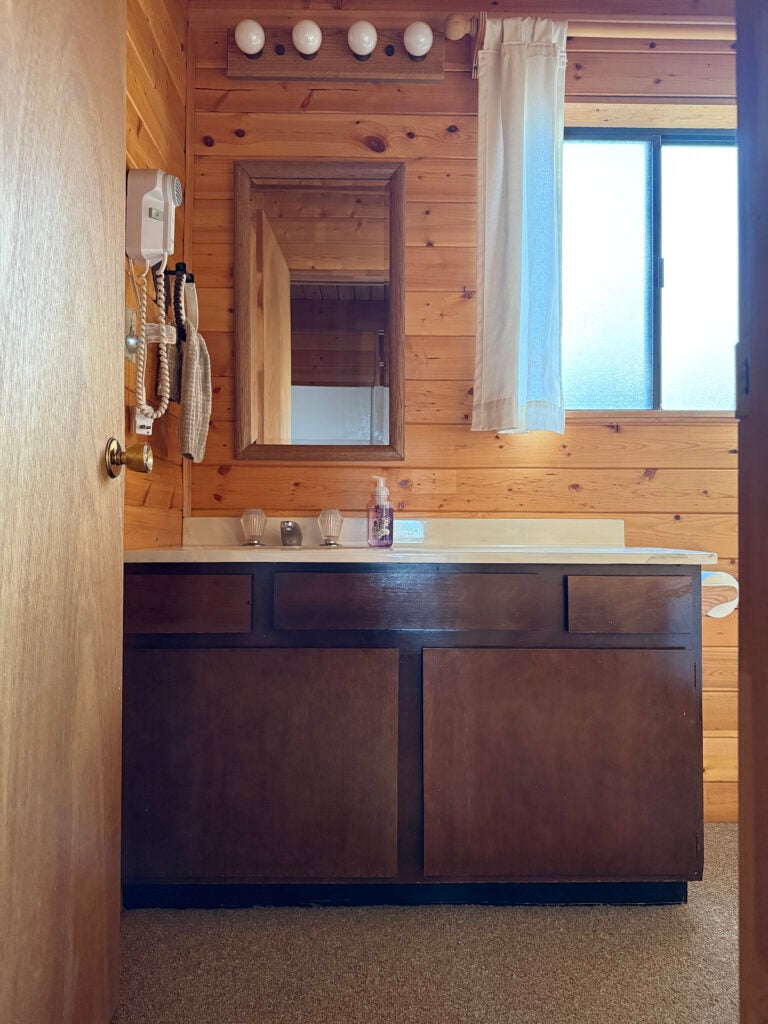
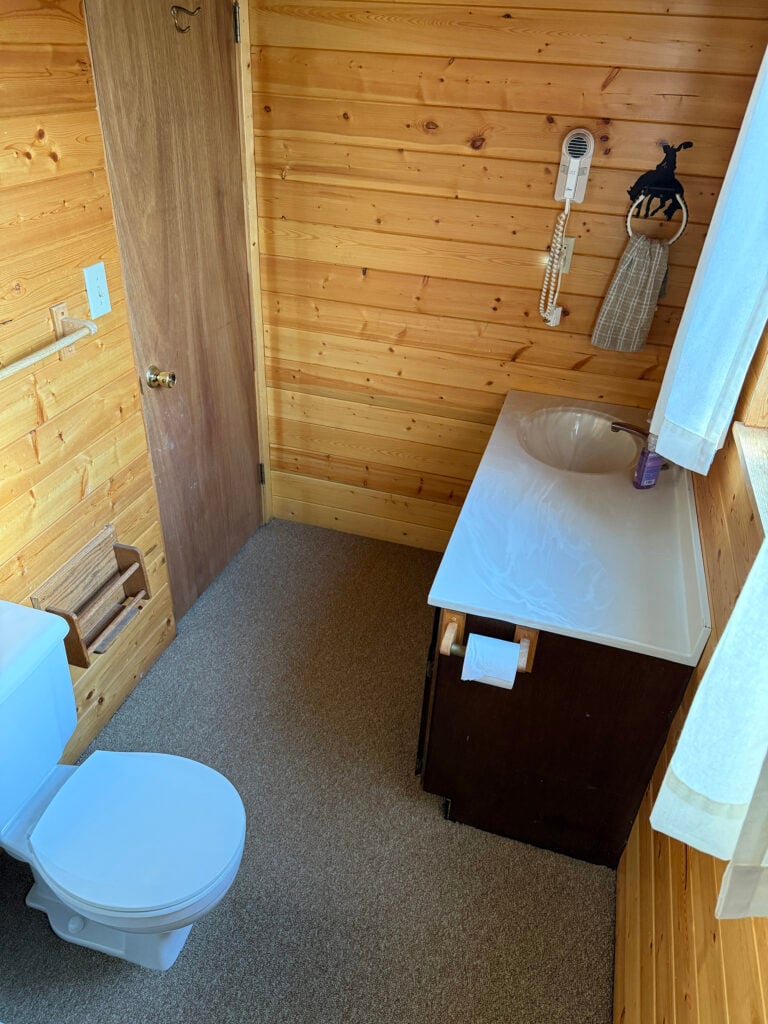
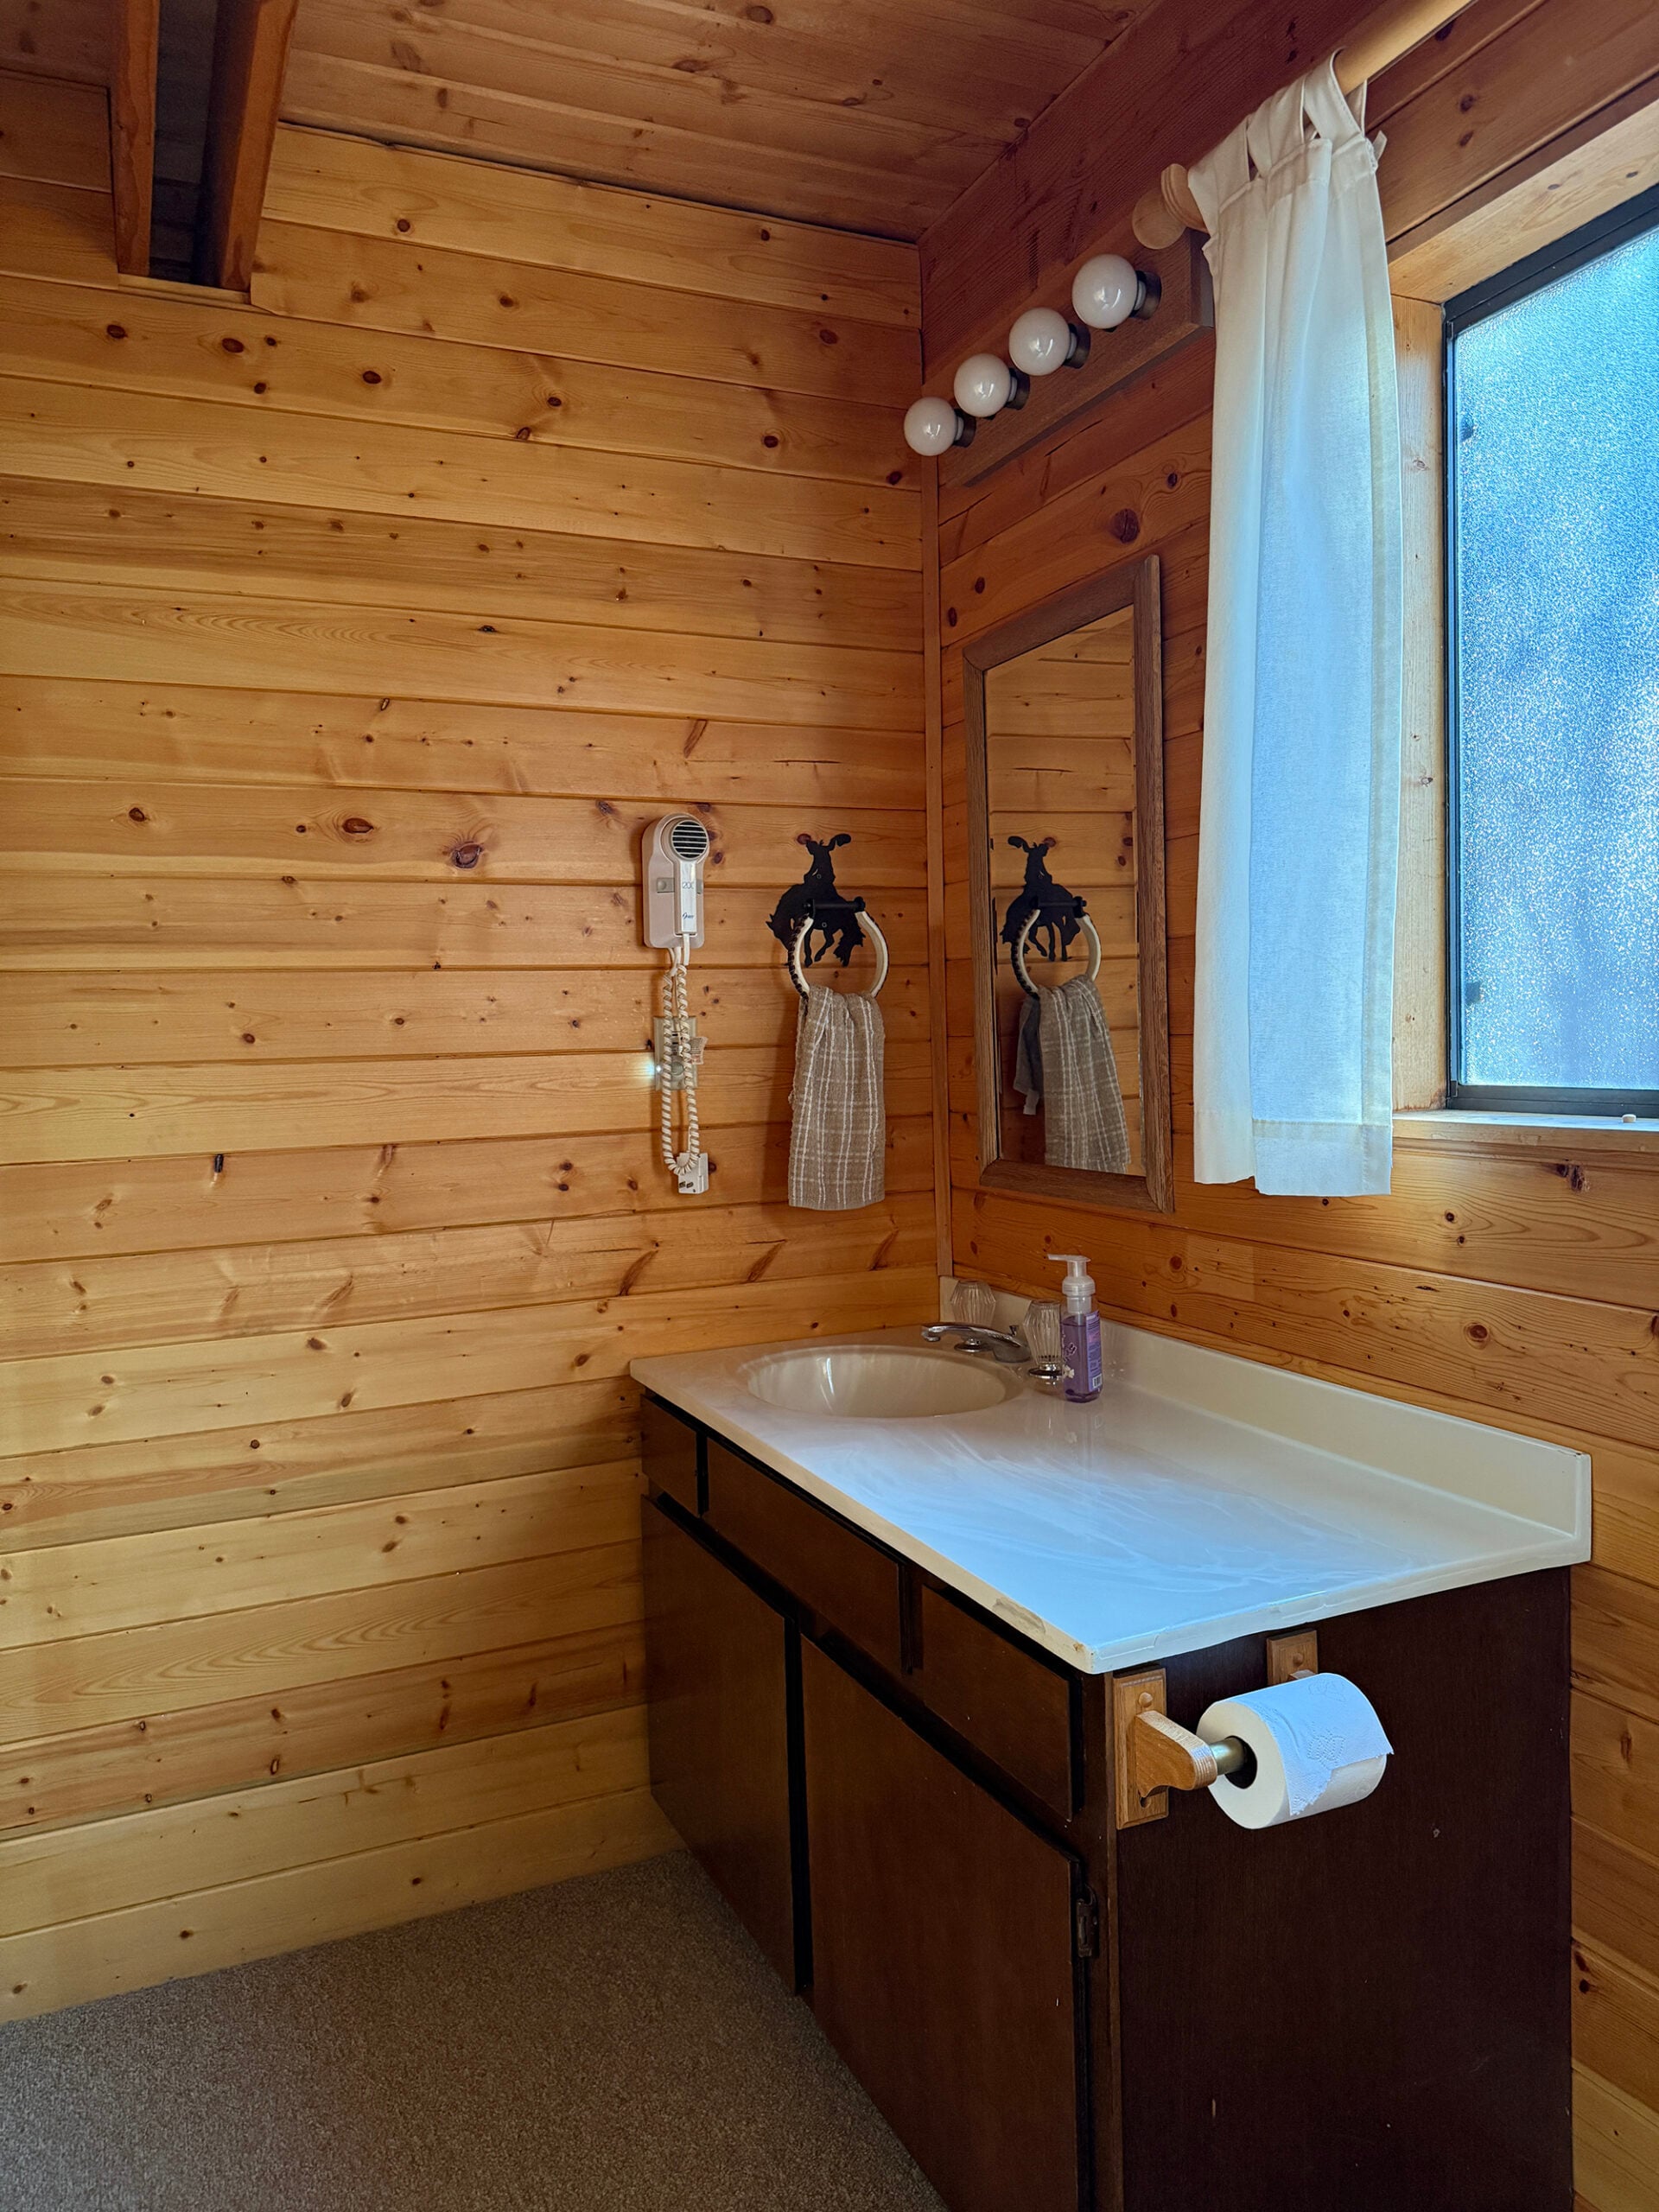
As you can see, carpet in bathrooms tend to follow us around. I’m not sure why so many of our spaces have had carpet in the bath, but it definitely gives me the ick! That obviously had to go. The low toilet, dated tub, basic vanity, lighting, and existing plumbing also were in needed of an update.
Updating the Layout & Functional Improvements
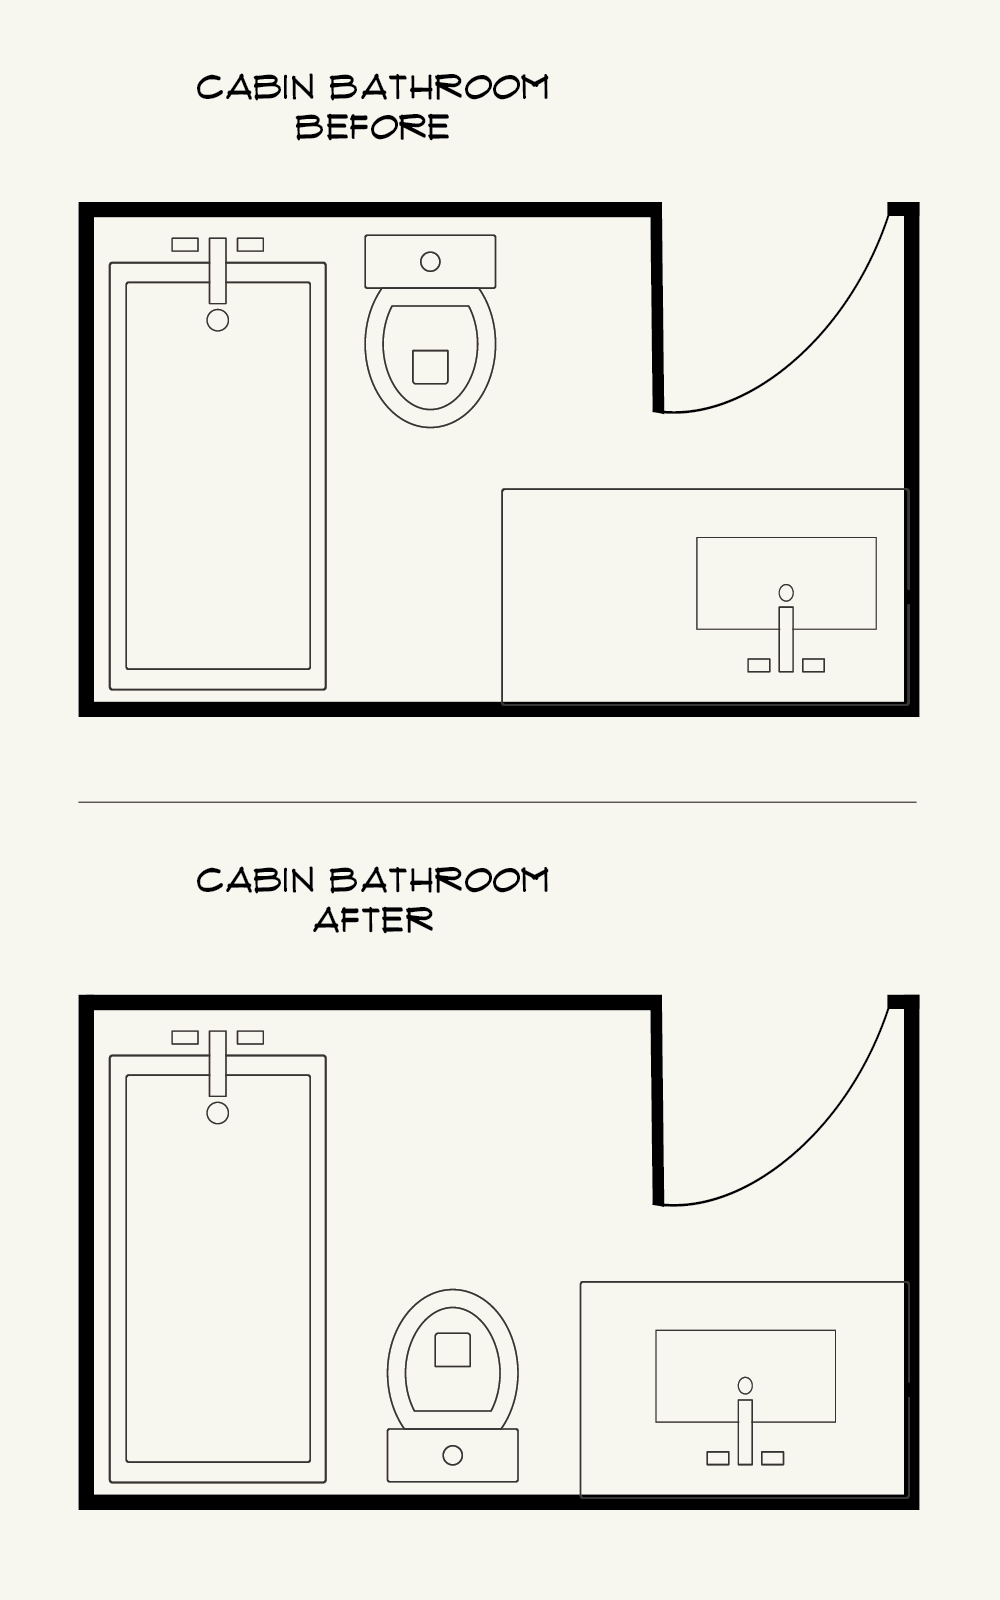
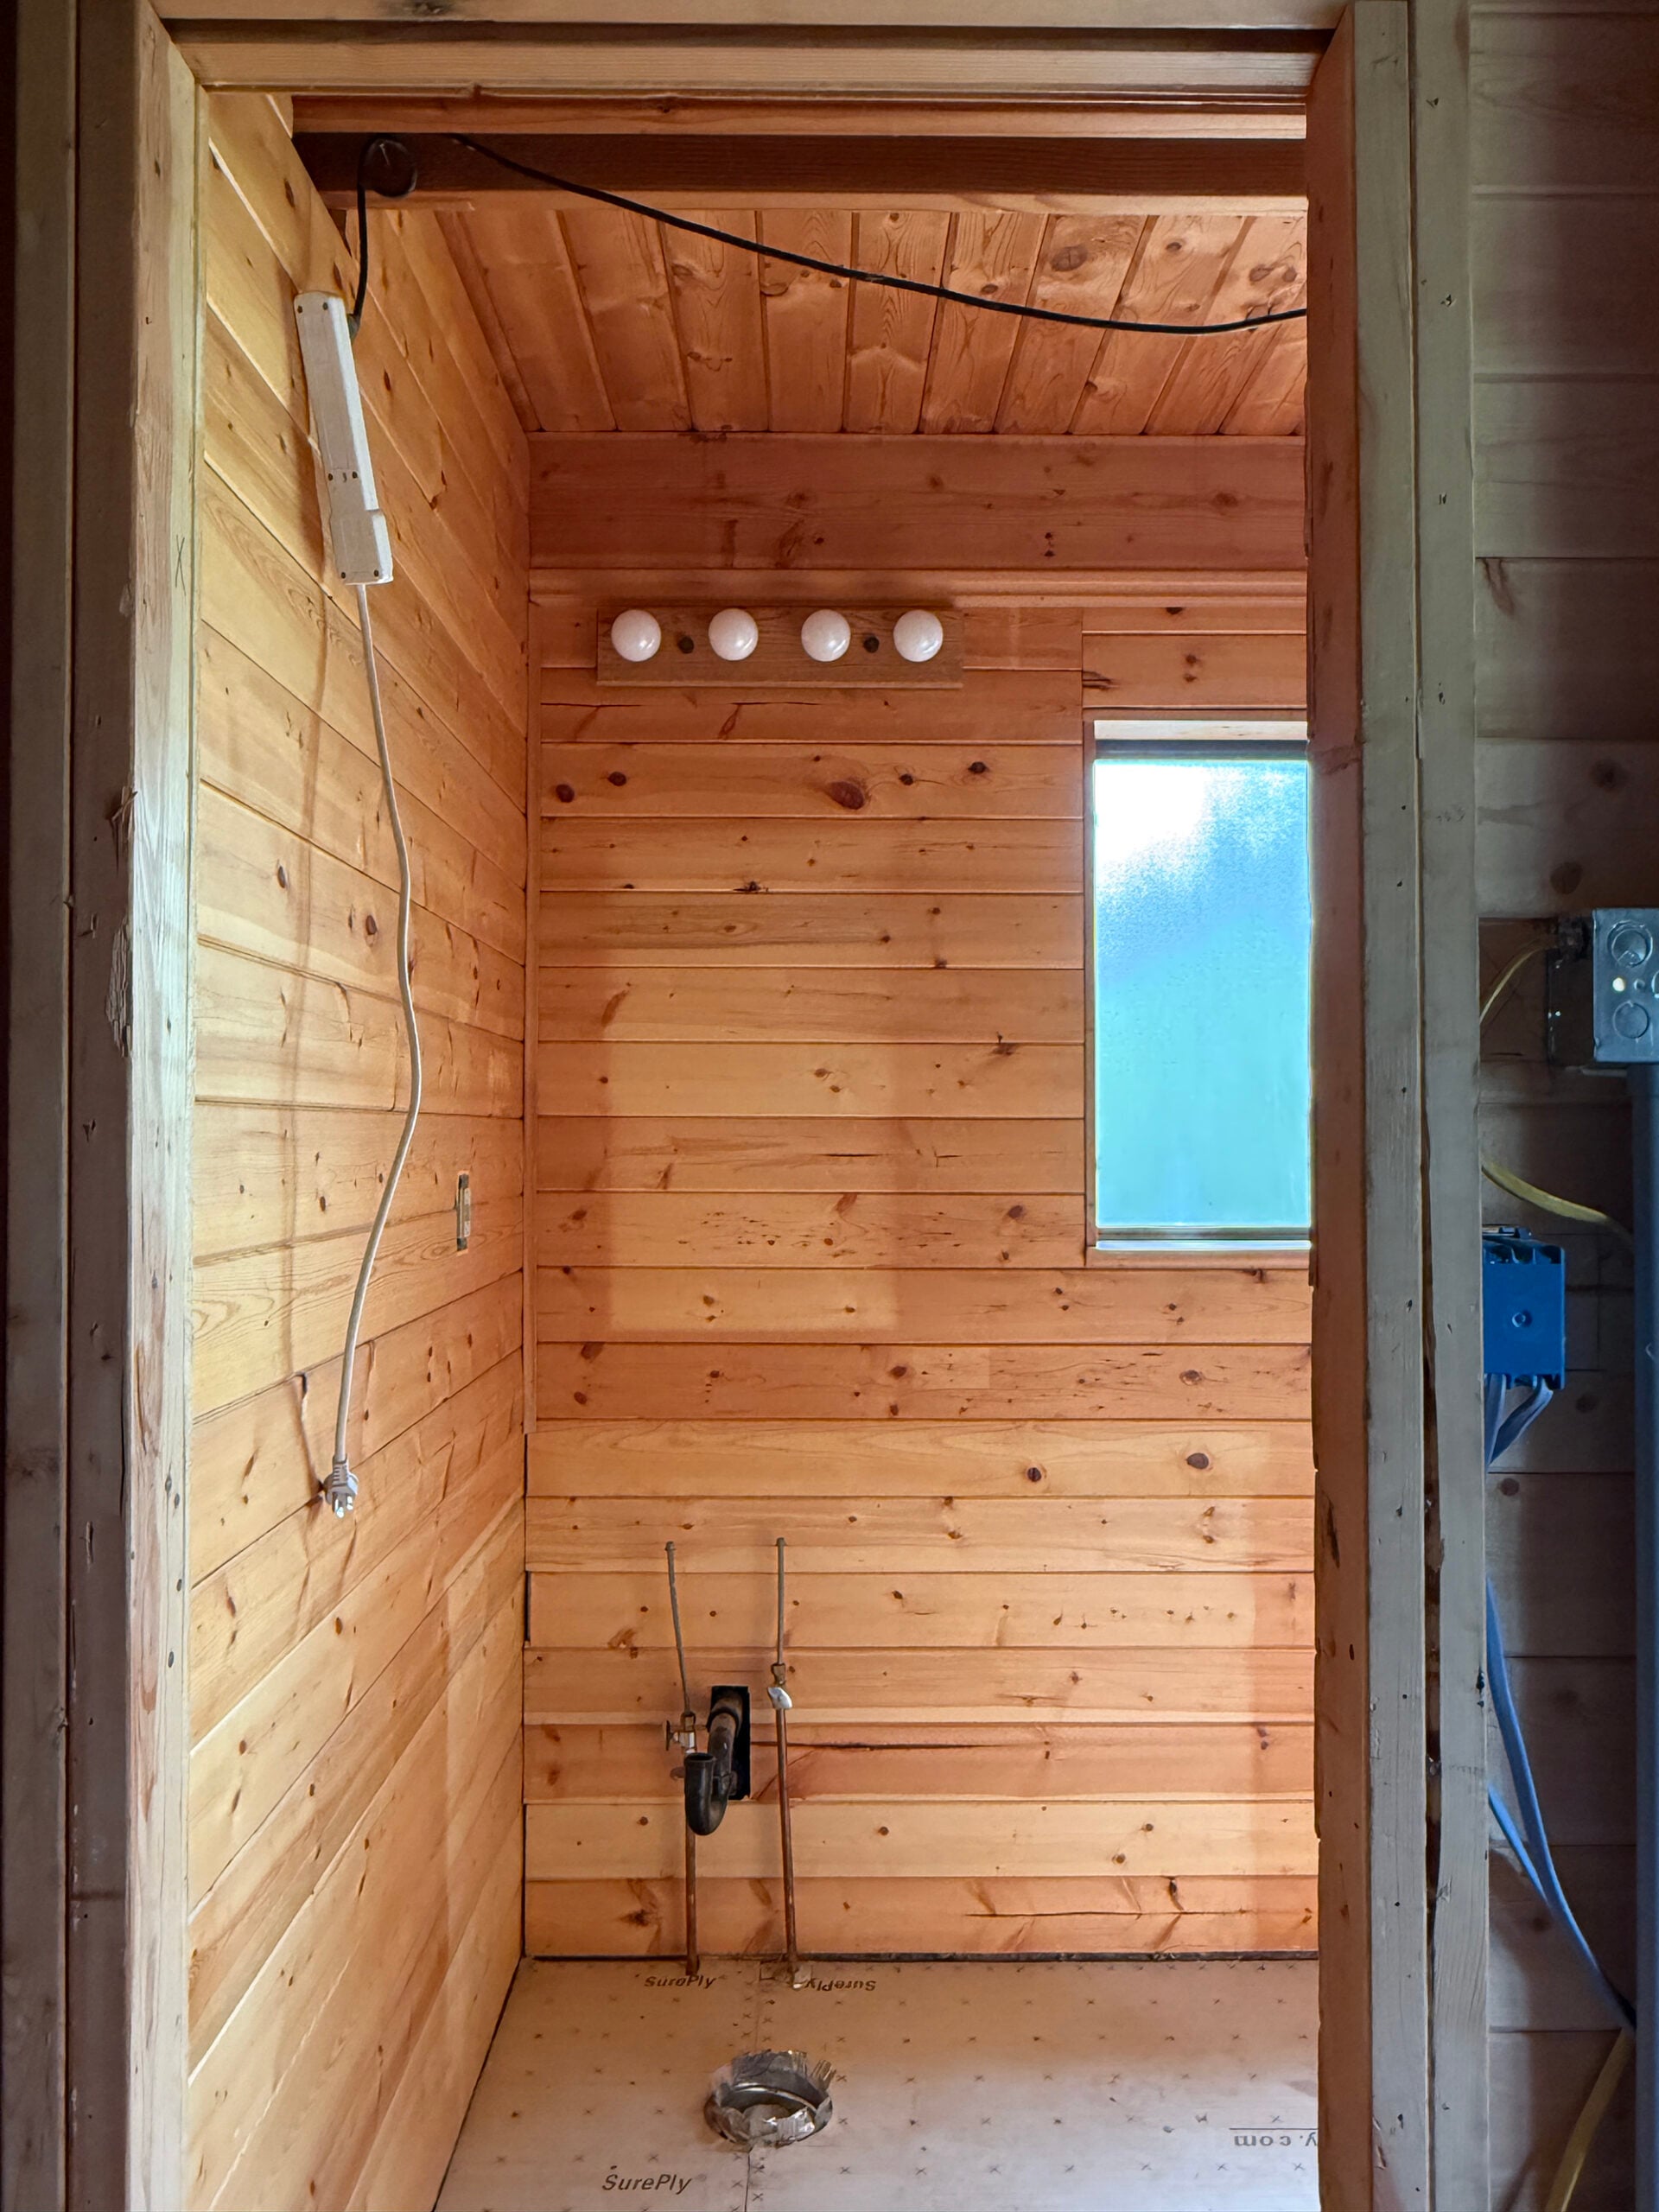
See how the toilet and vanity create a weird squeeze? That traffic path isn’t to code, so relocating the toilet was a must. We also had to consider functionality… this bathroom contained no exhaust or fan, which is a necessity in a wet-rated room. We needed to add a vent, additional lighting, and re-plumb, bringing this bathroom back up to code. It hasn’t been touched since it was built in the 80s, which has been a little problematic.
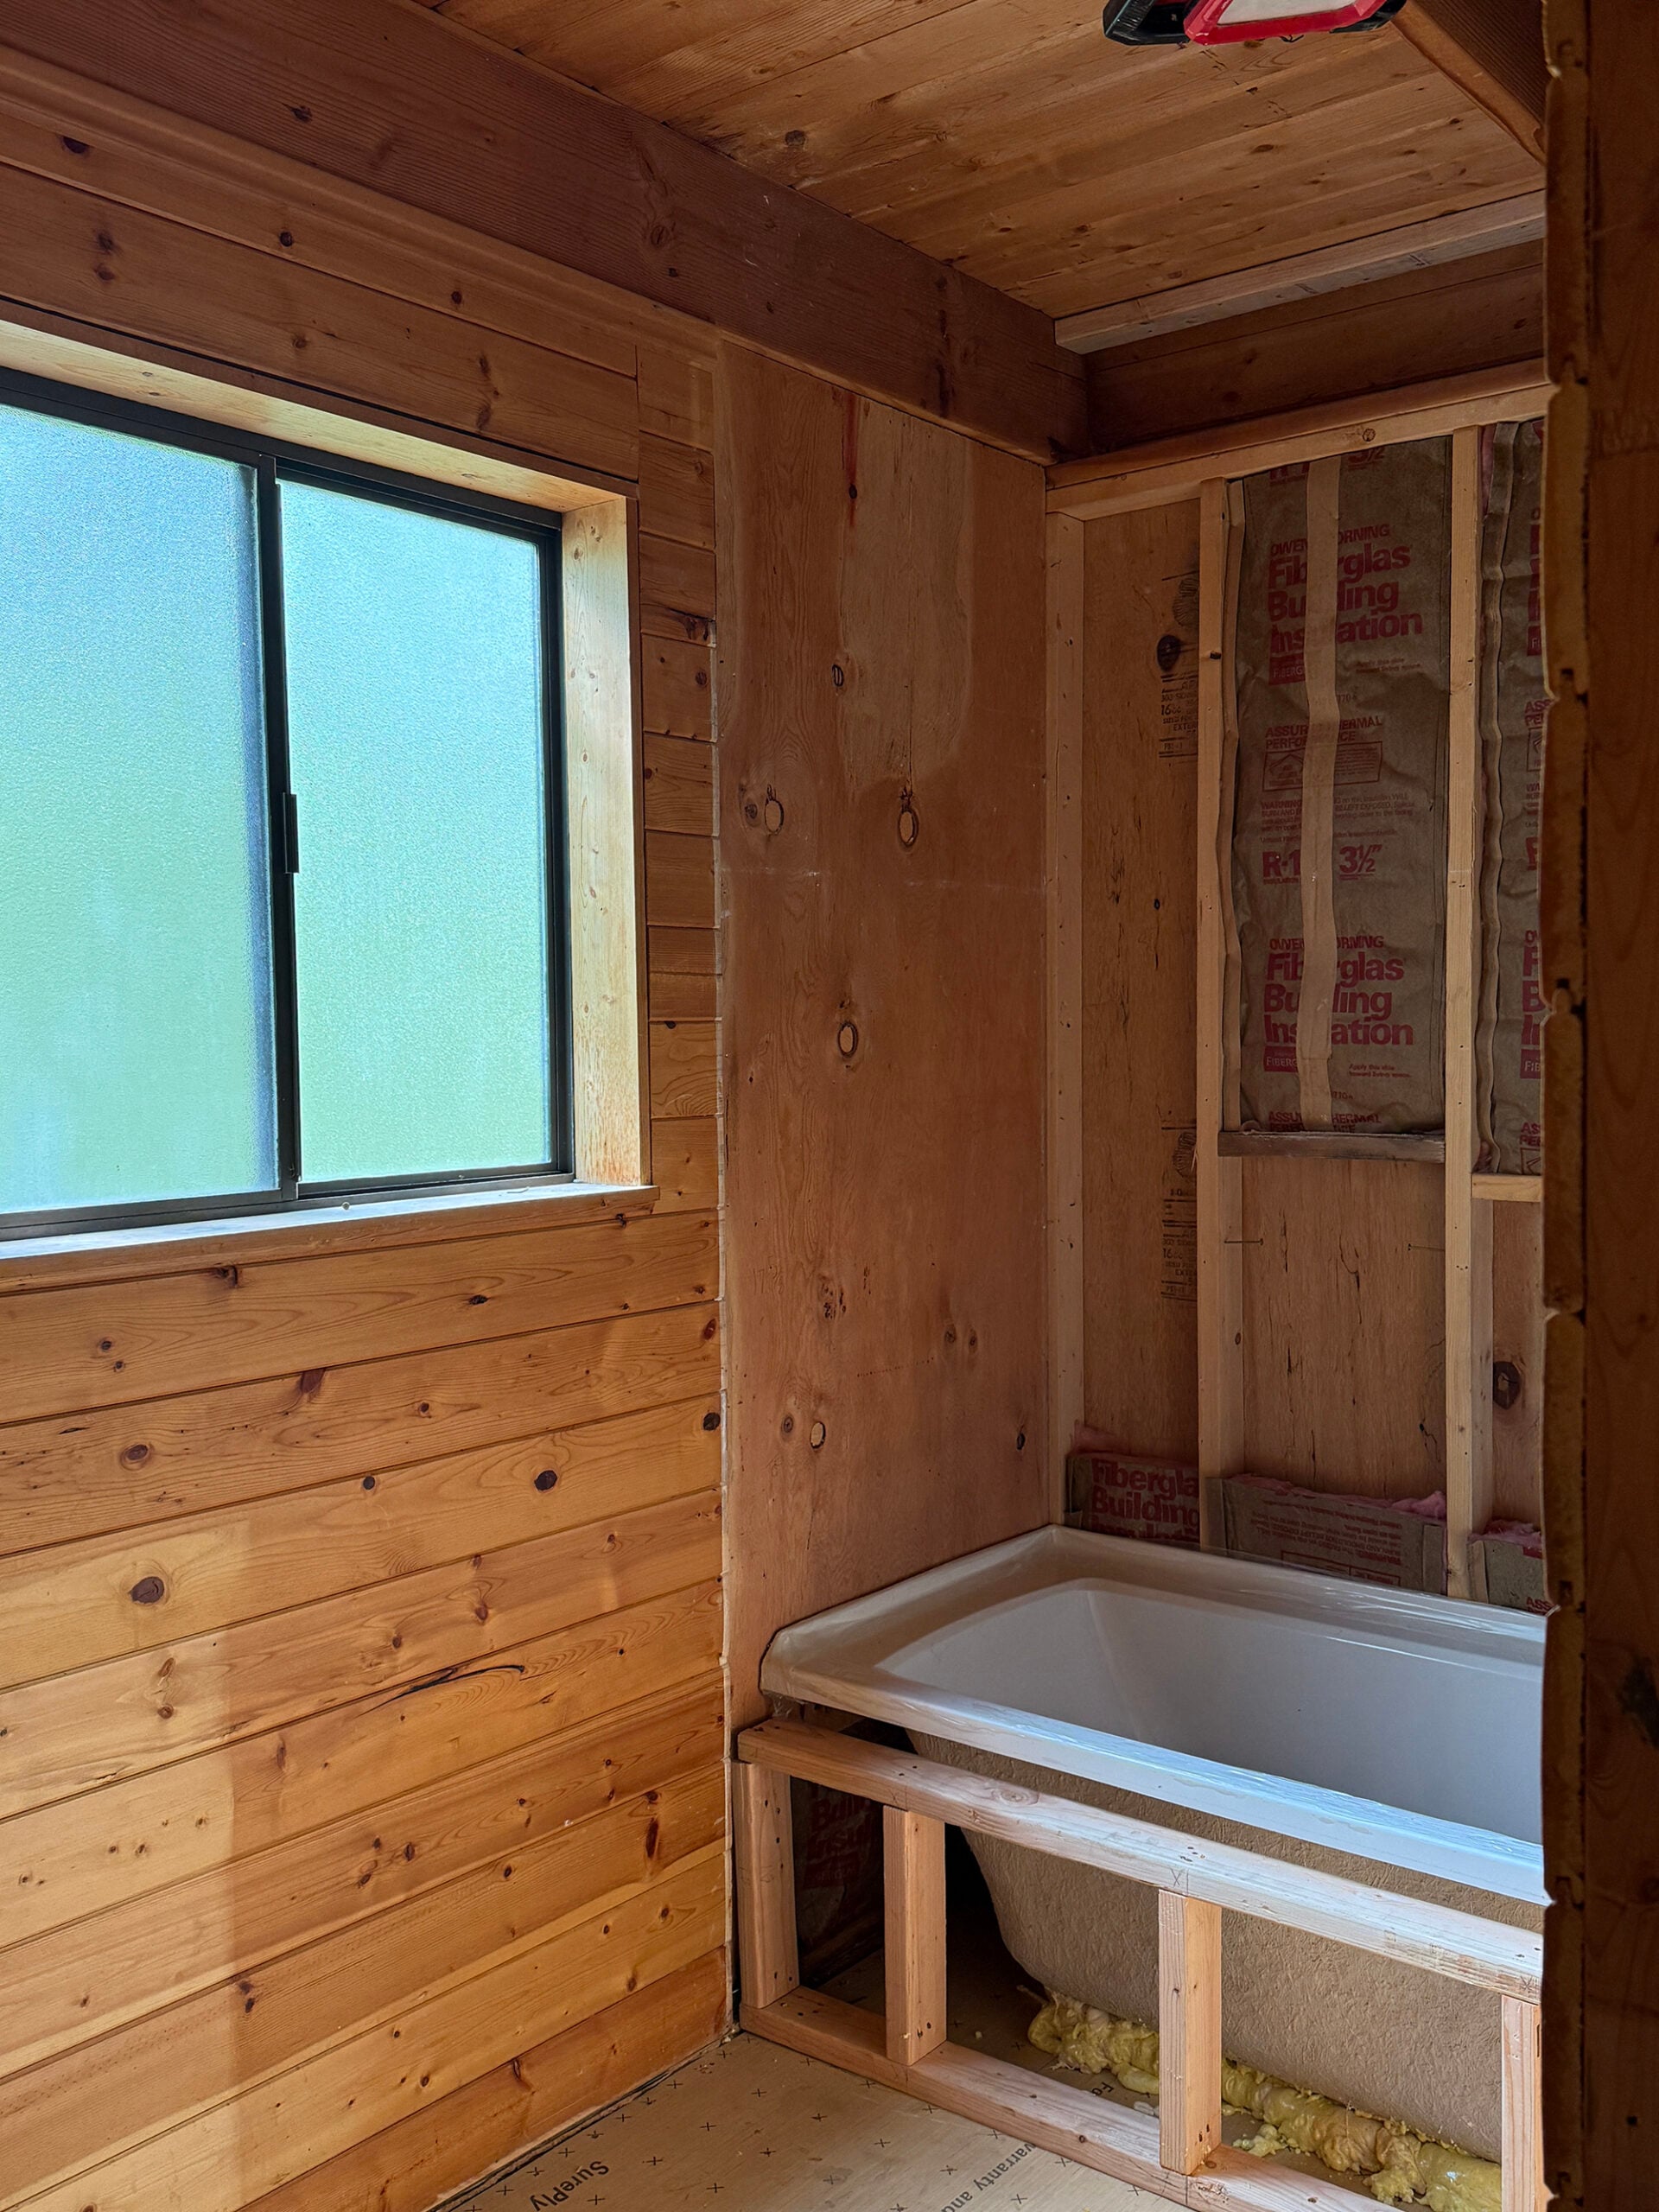
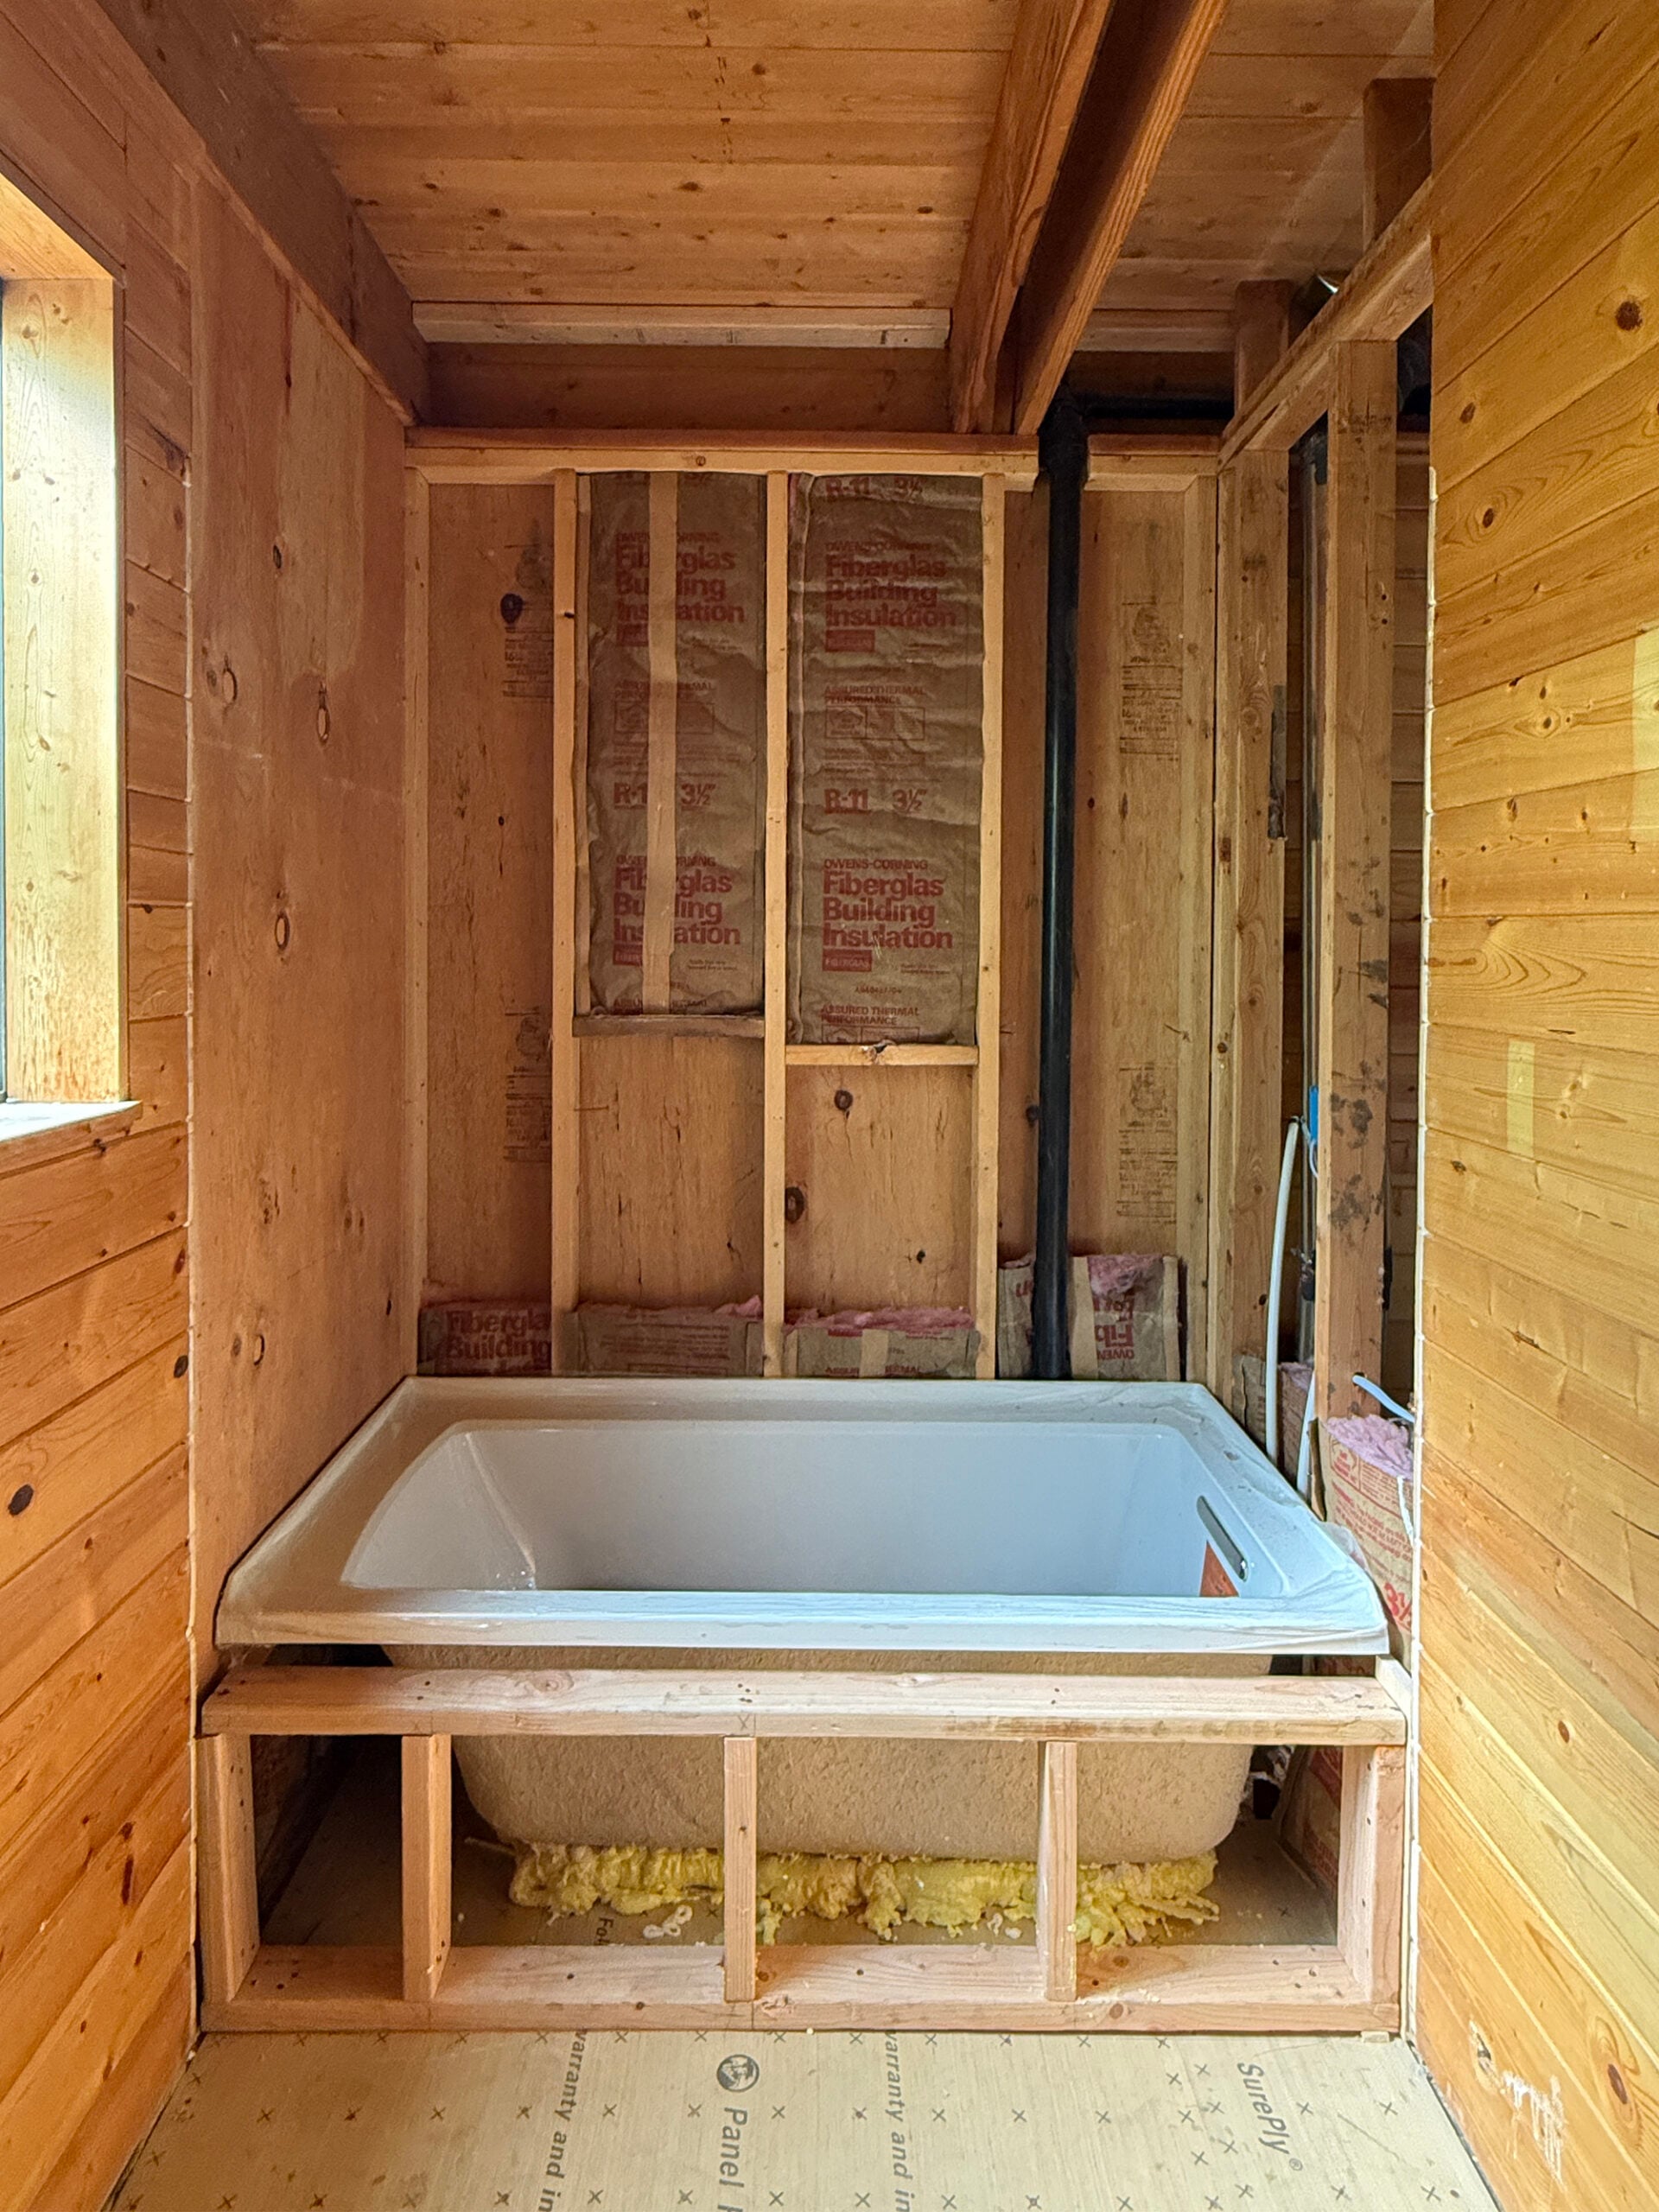
Since we had so much to rework, we were really left with a shell of a room. While that may seem like a bad thing, it also offered us the opportunity to adjust the floor plan and layout. We decided to move the toilet to the other wall, adjust the vanity size, and plan for a deeper tub. Here we are mid-demo…
This is going to be much more functional, make the space look larger, and allowed us to add extras… like heated flooring and a heated towel rack- two things that will make this bathroom feel super cozy when it’s buried under feet of snowfall. You can see the layout changes below…
The Design Direction
I’m leaning into the rustic traditional cabin aesthetic, but I also want to pull in some eclectic or modern design elements. Here’s a peek at the design plan.
Click directly on each item within the collage to shop…

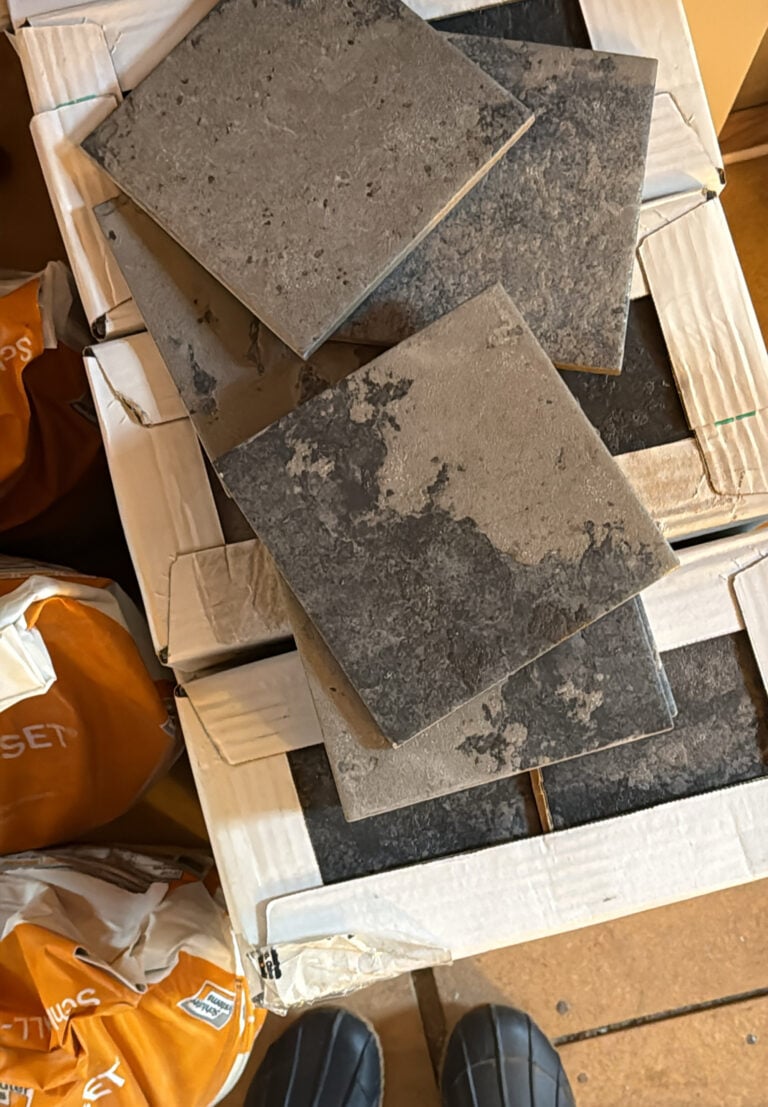
I found plumbing fixtures from Kohler (toilet and tub) and Rejuvenation (faucet and shower trim), and paired them with organic materials- like that pretty handmade tile and an earthy color palette. Here’s a peek at the tile…
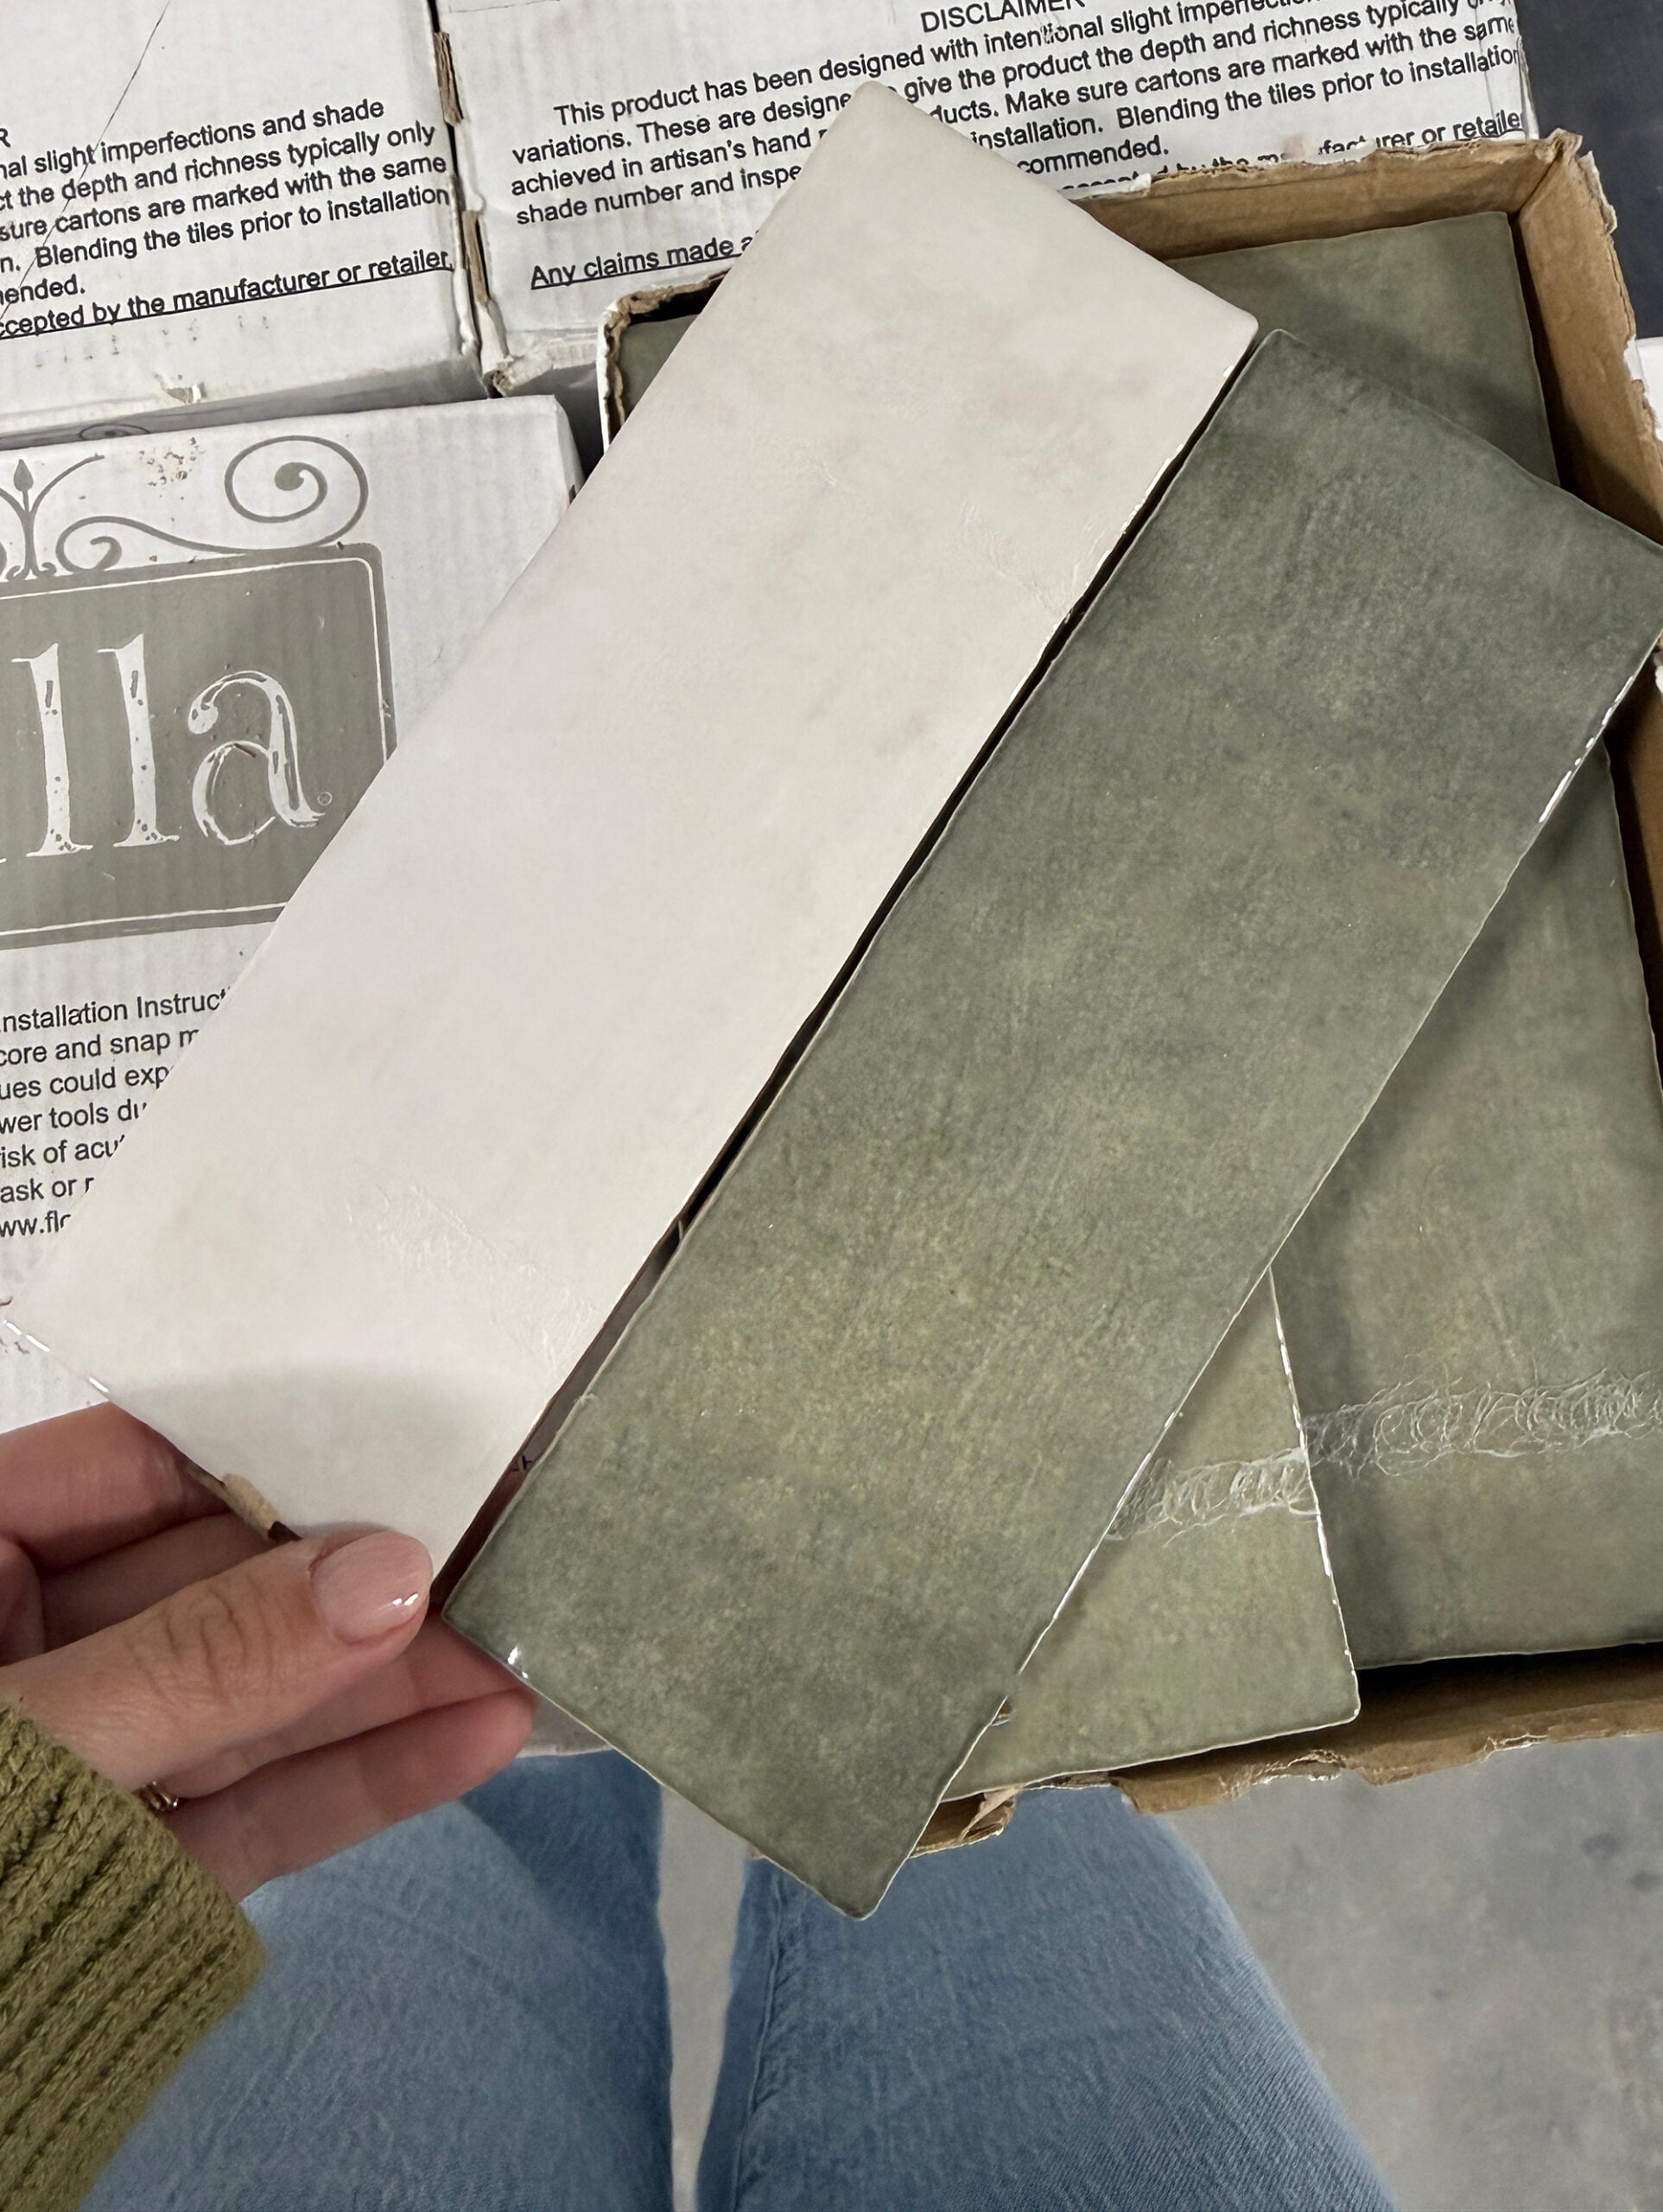
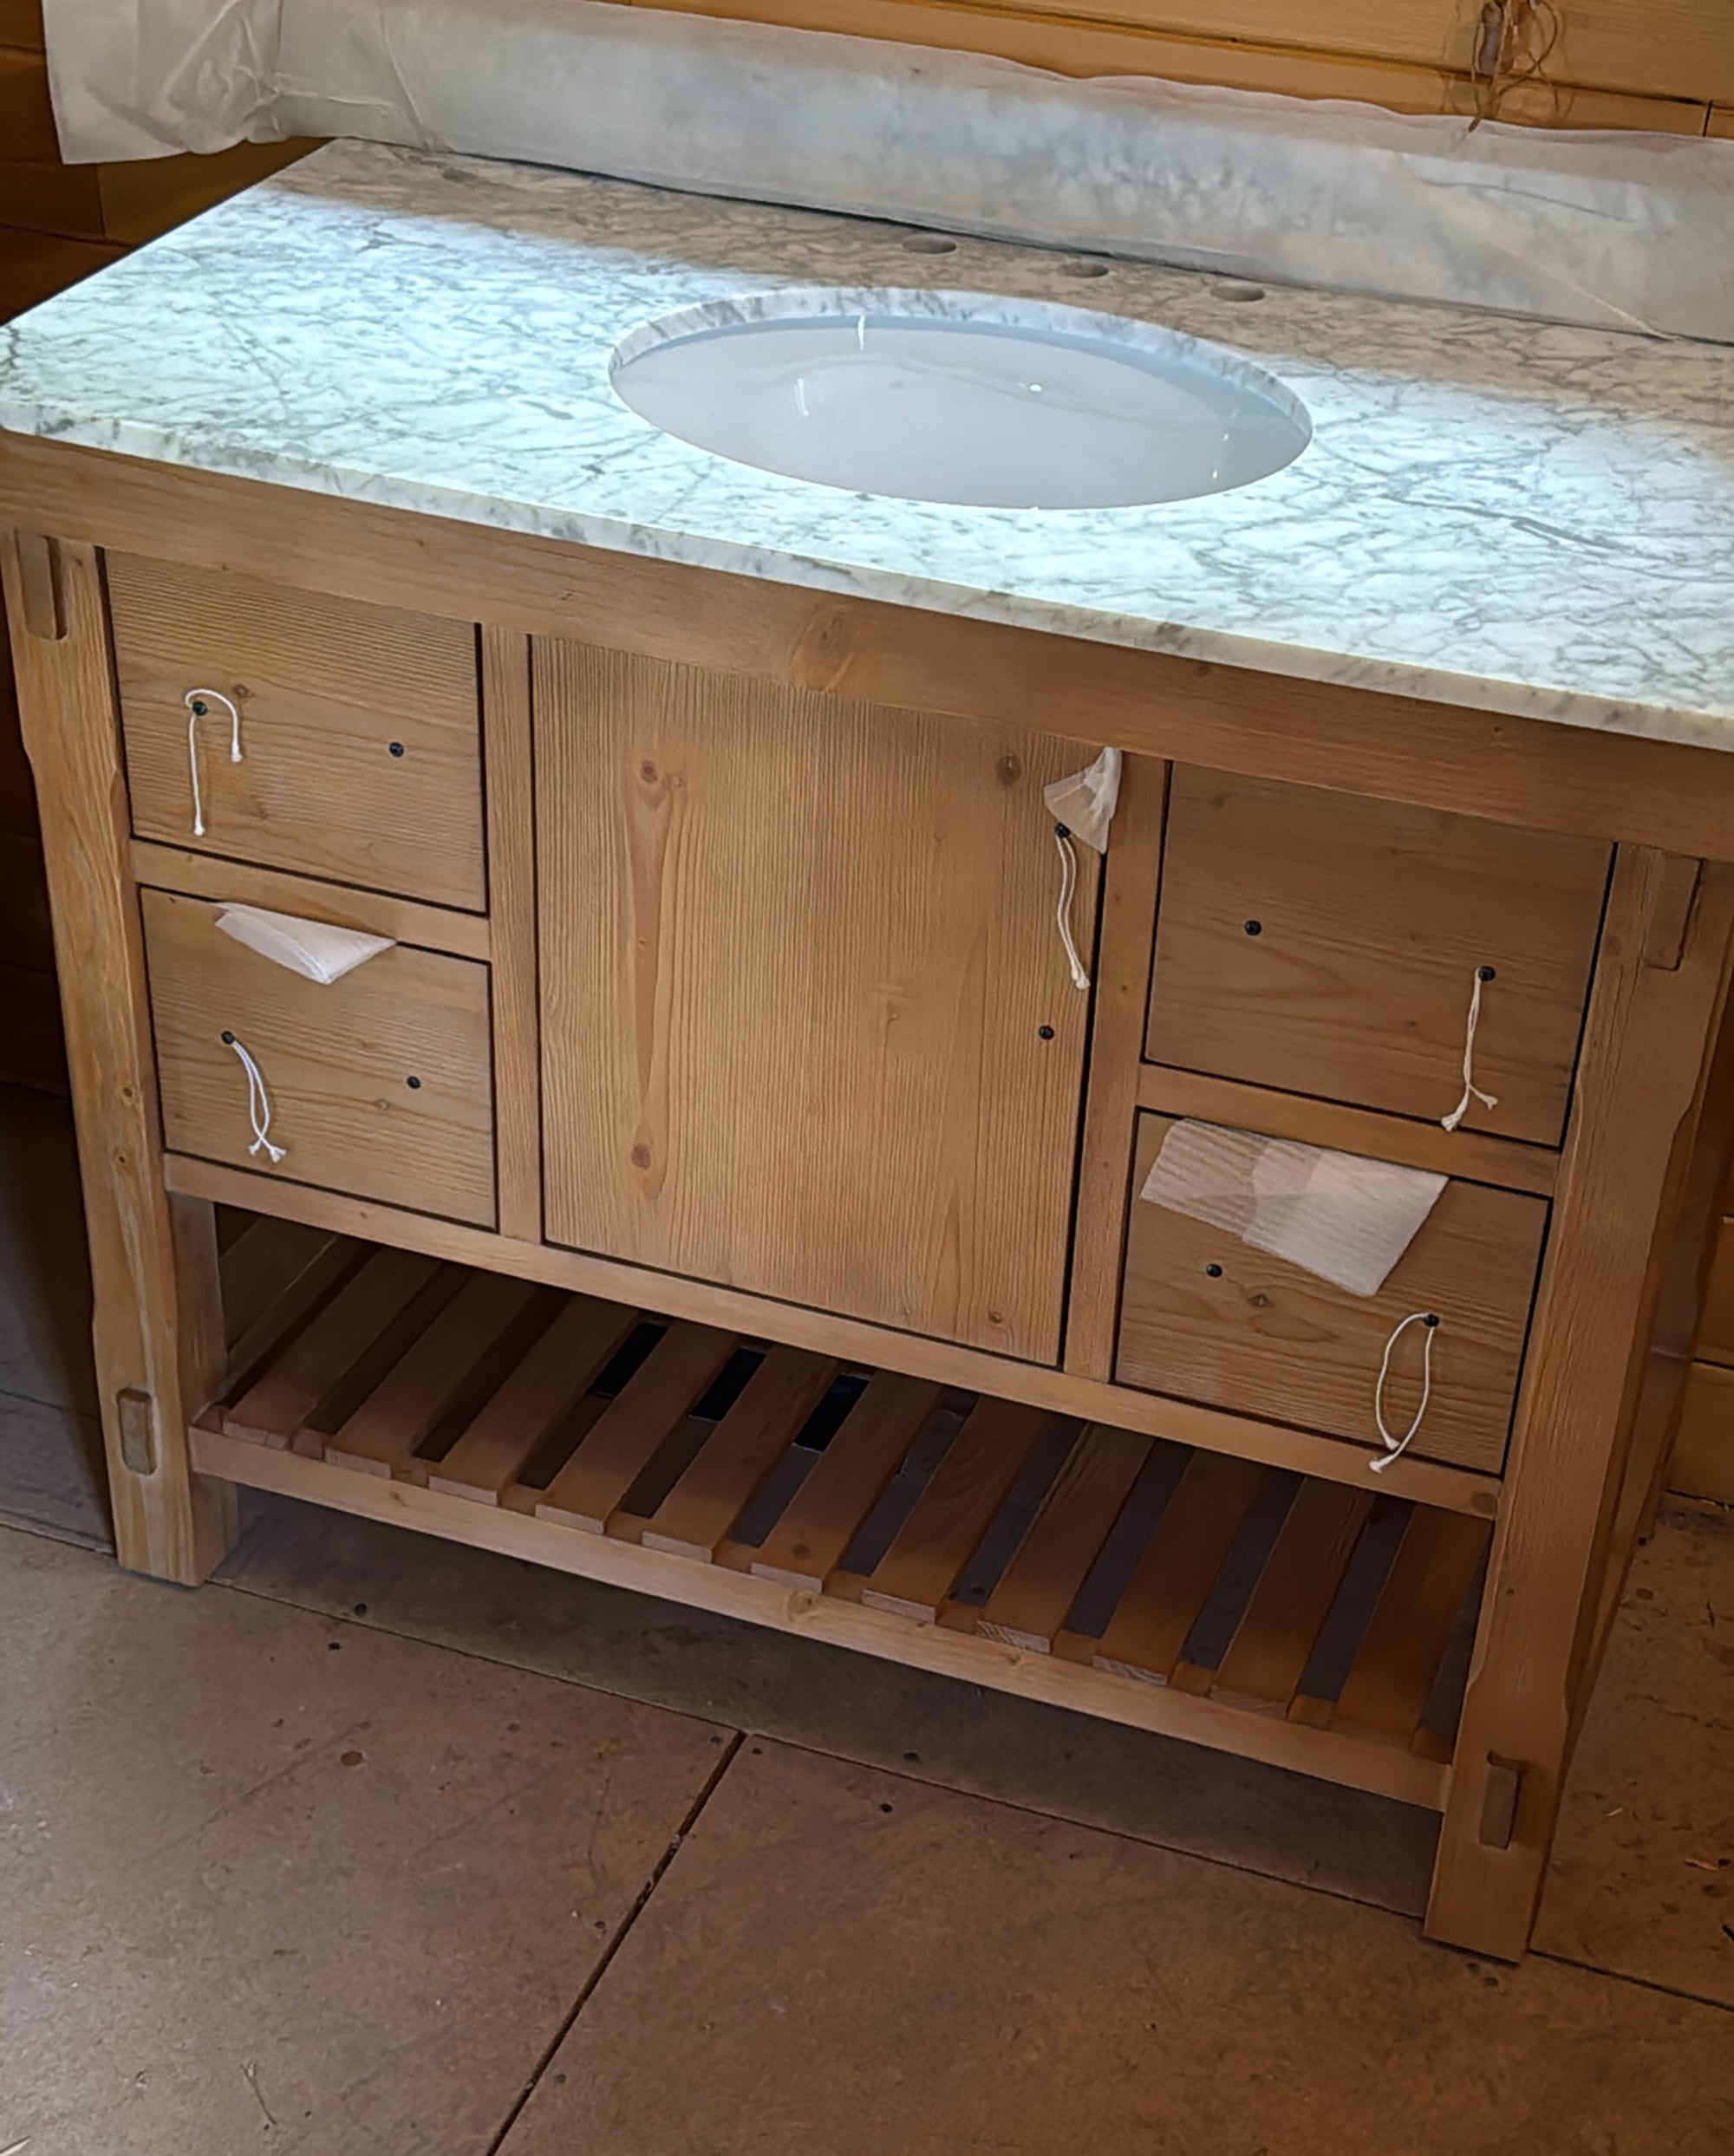
I’m leaning into green for this one, but we’ll see how it evolves as I thrift accessories. The vanity also came in this week, and as you might expect… you’ll see a healthy dose of carrara marble installed in the space.
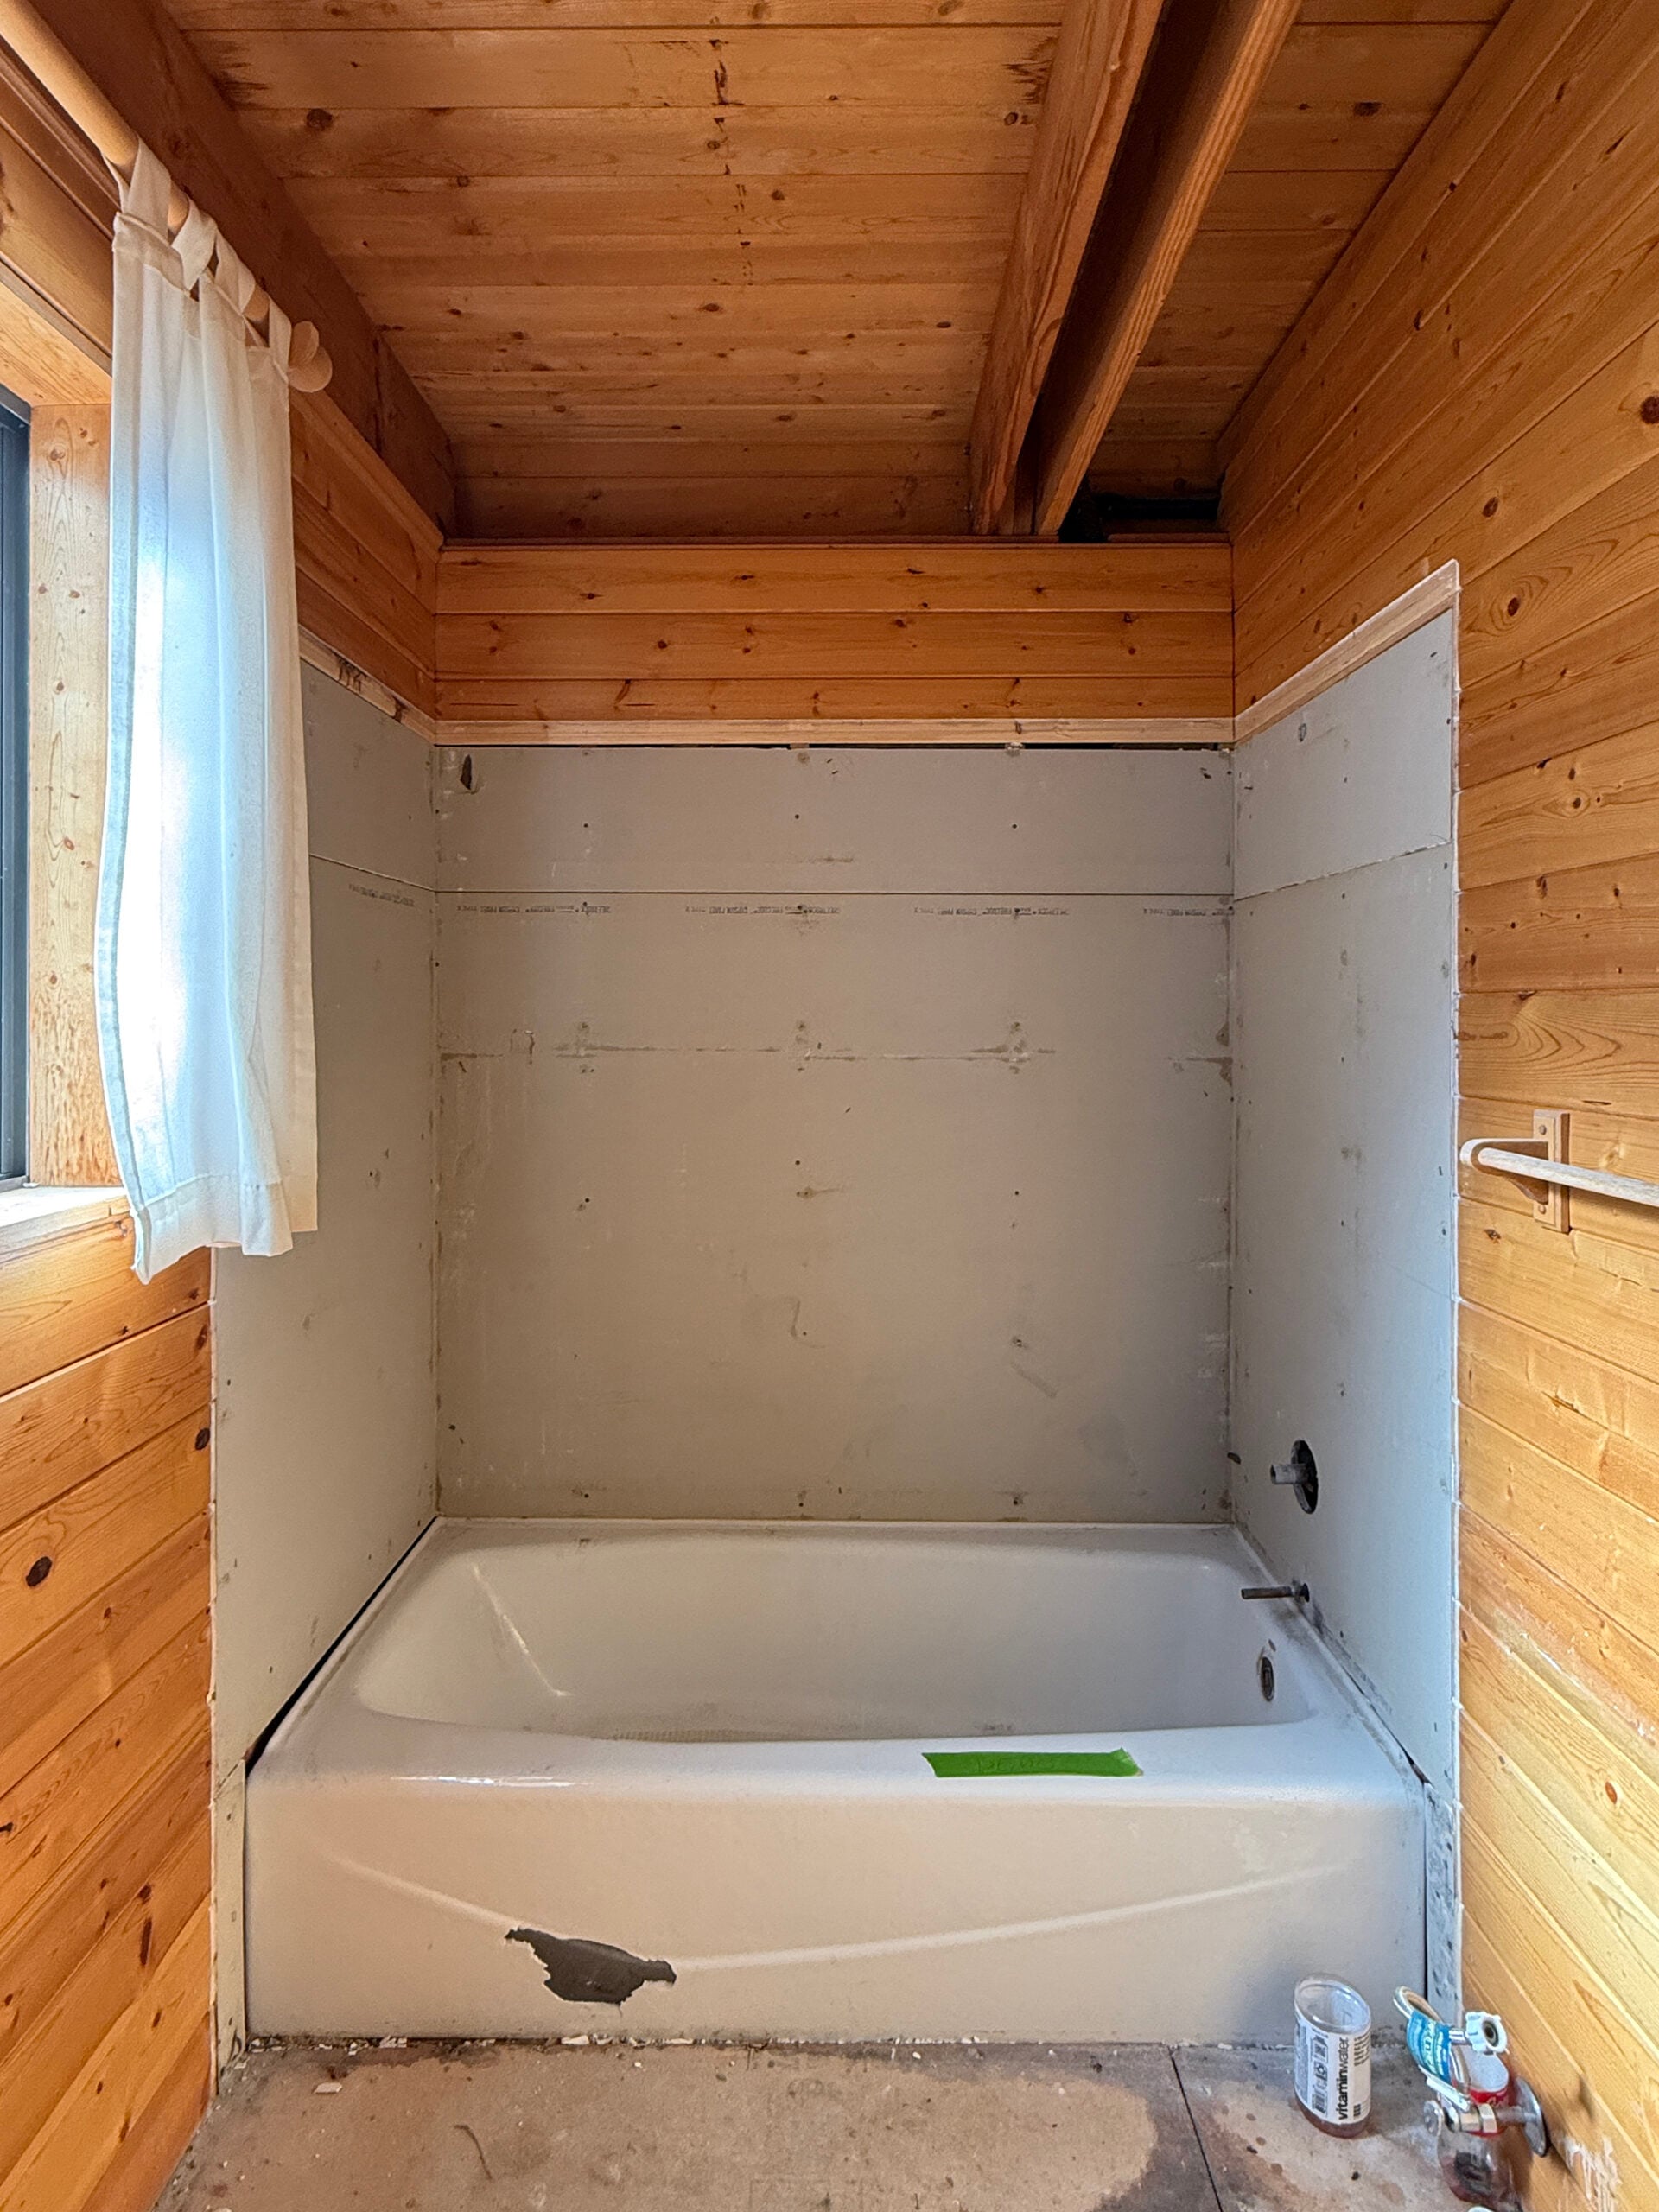
How It Currently Looks
I’ll spare showing you the bathroom totally torn apart, so here’s how it looks today. The new plumbing is in, electrical is ran, the subfloor is installed, the new tub is in place, and Emmett is prepping to begin installing the heated floor tile.
FYI… here’s how to install DIY heated floor tile– it’s actually a really easy upgrade. I certainly recommend it, if you live in a cold climate.
Questions?
Some of it, but not all… I have some ideas up my sleeve for that!
Not at all- I’m totally fine with the warmth and tone. I’m trying to embrace the original character and can definitely design around the pine and original stain color.
Yes! It’s in good shape. We’ll be keeping the original windows throughout the entire home.
Happy to! You can find it here… it comes with the carrara marble top, backsplash, and sink. It was an awesome find.

Related Bathroom Renovation Posts
Looking for more bathroom renovation advice, makeovers, and designer approved sources? I’m going to link some reader favorites for you below…
- 20 Bathroom Remodeling Tips… Before You Begin Your Renovation
- Why an Exhaust Fan & Light Combo Is the Best Choice for Bathroom Renovations
- How to Plan and Design a Shower Niche
- How to Properly Light a Bathroom for Function and Design
- Classic Bathroom Plumbing Fixtures from Wayfair
- How to Style a Bathroom That Feels Like a Boutique Hotel
- How to Make a Small Bathroom Look Larger
- Is Brass Out? How Polished Nickel is Replacing The Favorite Metal
- Stocking a Guest Bathroom: Essentials for Visitors
- Bathtub Refinishing Process & Reglazing A Tub White
I hope you enjoyed this glimpse into the cabin bathroom renovation. I’ve been so excited and inspired by this place and project. It feels like an entirely new design challenge outside of my typical colonial aesthetic in our Salt Lake City home. Despite the lack of sleep that accompanies a new baby, I’m feeling invigorated and creative thanks to the cabin. It has been the best spending time up here as a family… even with Greer in tow! I’d love to hear your thoughts in the comment section below.
I was wondering what Emmett was working on up there; quite the project! Those pesky unseen renovations offer peace of mind and modernized functionality though. I love the direction you chose for the aesthetics; the green tile is going to look so incredible in this space. Very excited for you all; I know this cabin will hold some of Greer’s most fond childhood memories, and can’t wait to see it unfold.
Love the design plan. It’s going to look great. Not sure how you or Emmett are getting any work done, but kudos to you both! And Congrats again.
Fun update, thanks for posting. Is the door swing on your plans inaccurate? Seems to be the “wrong” swing for me, but maybe you have better vision, or maybe you have mom fog brain. I’m just here to see that you are sleeping through the night, getting all the baby snuggles you can get, and enjoying all the sweet time with that precious baby girl. Congrats to you guys, I hope you are enjoying it all!
I enjoyed reading about the thoughtful planning behind this renovation. Focusing on layout improvements first makes a big difference, and I love the balance between preserving the cabin’s original charm and adding modern comforts. It’s inspiring to see design decisions driven by both function and character.