How to Hide Light Fixture Cords
 The living room sconce was a great budget find, but Emmett and I had always planned to modify it and hardwire the fixture when the time came to open the doorway between the kitchen and living room. Let’s just say, we got a little lazy and found an alternative that cost much less and takes all of 5 minutes. Click through and watch Emmett’s video on the best cord hiding solution we’ve found. It’s doesn’t get easier than this!
I’ll start off with a couple quick disclaimers… 1.) our kitchen is obviously under construction, so please ignore that mess in the background; 2.) I’m extremely new to video and made a rookie mistake on the auto focus on this one- I promise next time I’ll practice prior to shooting. Ha! But back to hiding cords…
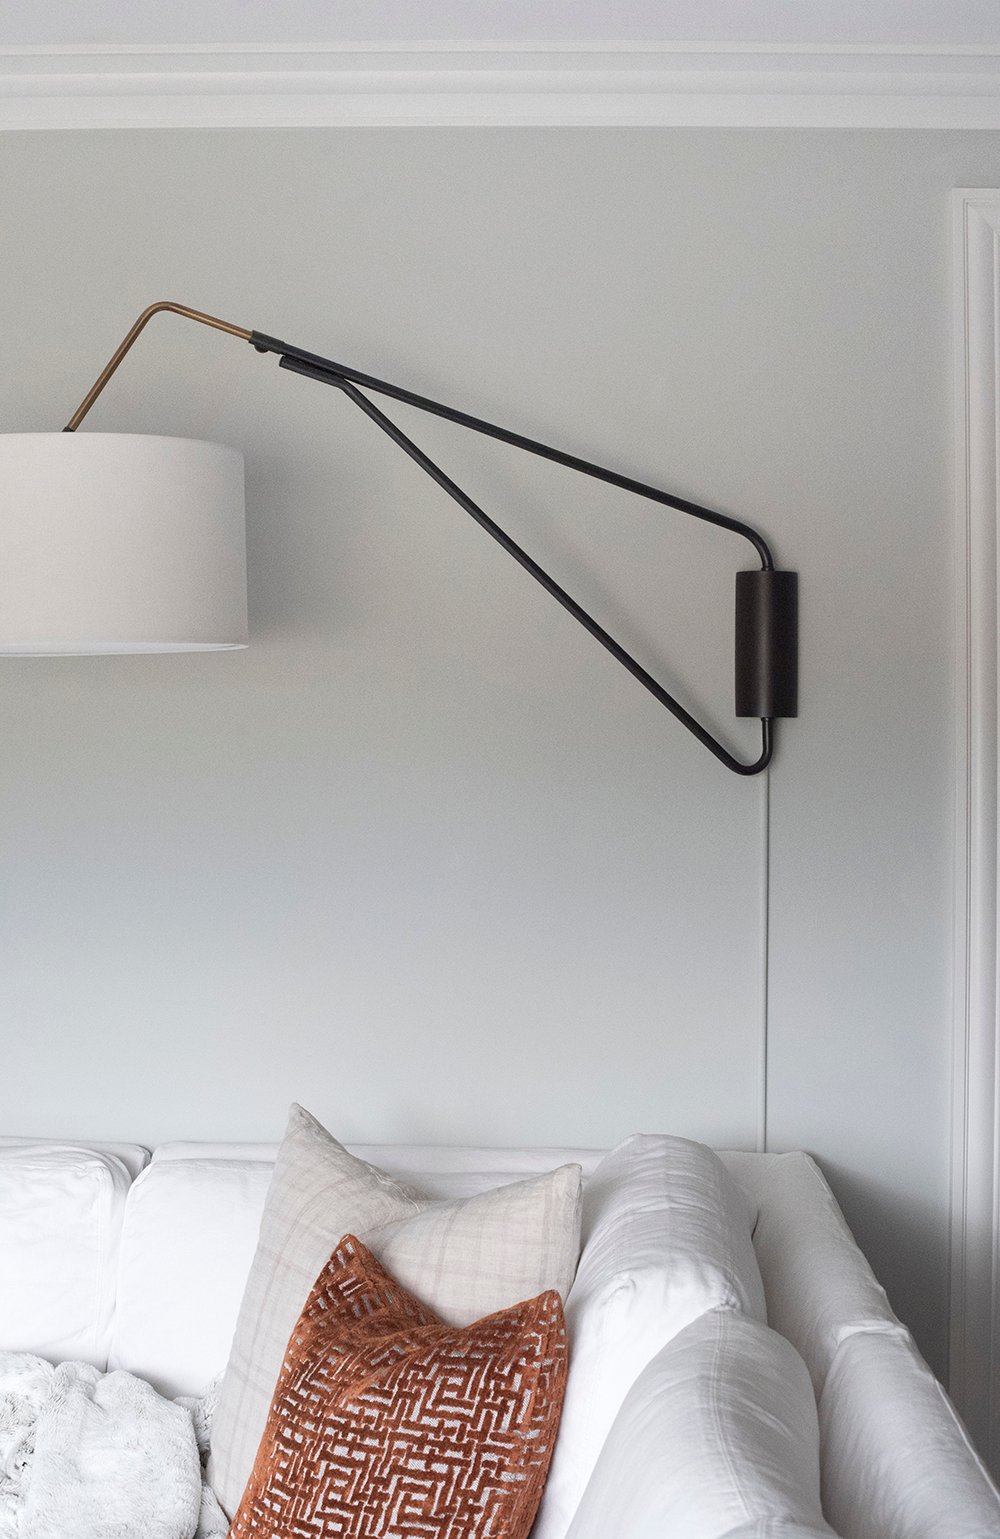
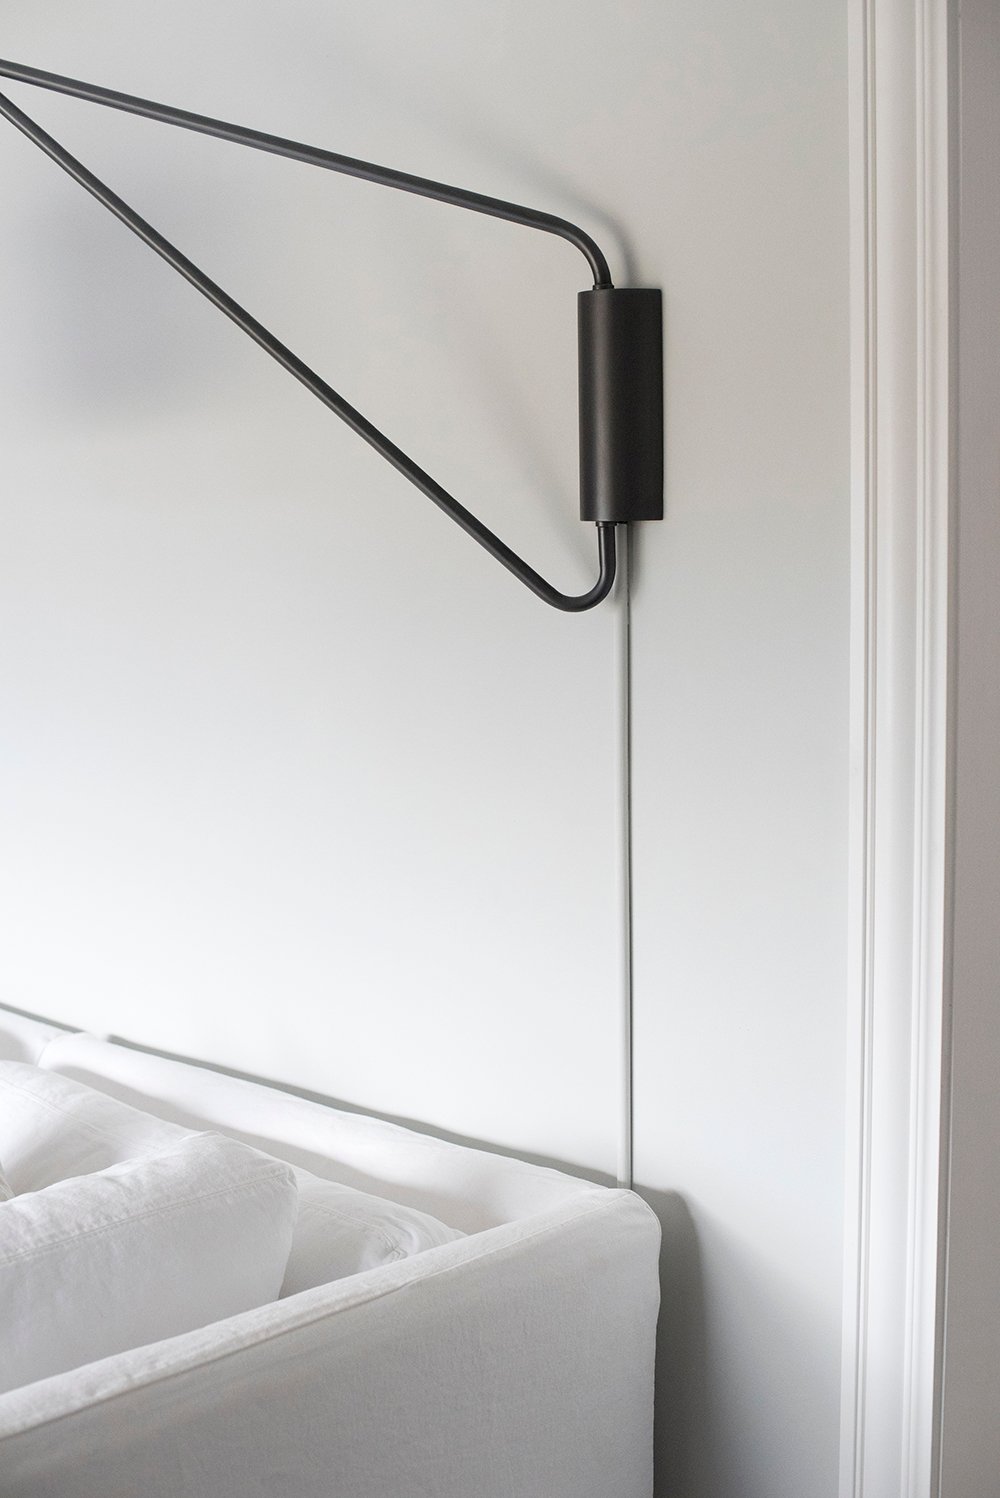
 Lots of plug-in light fixtures (mostly sconces) come with a metal casing that hide the ugly cord. Our bedroom sconces are a fantastic example of that, check them out in this post! Our living room sconce, on the other hand, was inexpensive and therefore comes with an exposed dangling cord- which I obviously don’t love looking at on the day-to-day. I can’t complain because of the price, but something needed to be done if we opted to forego the hardwiring process.
The light is already operating on a wall switch, so it’s not like we ever use the switch attached to the cord anyway. Therefore, casing the cord was the perfect functional option. Check out Emmett’s video below for a fast five minute tutorial (again, sorry for the focus!):
It really doesn’t get easier! In case you’d like product links to accompany the video, I’m sourcing everything below:
- single cord conduit
- sharpie
- cutting utensil
- tape measure
- paint (our wall color is Sherwin-Williams Silverpointe)
- paintbrush
- our wall sconce (it’s actually on sale right now!)
I’m all about painting the cord conduit the same color as the wall so it blends even better. We also have panel moulding throughout our living room, so seeing trim work on the wall is already natural in this space. You don’t even think twice about the cord.
 Finn definitely photobombed my images as soon he realized something special was happening in the living room (aka, me shooting the final product). I swear that dog always has to be the center of attention.
I basically wanted to show Emmett’s point about the majority of the cord being hidden behind the sofa. I’m glad he ended up covering the entire thing though- I’m way too OCD to know that part of it is still dangling back there (even if it’s hidden).
 Questions? Chat with us in the comments below! We’d love to hear your feedback and can offer suggestions or solutions to your own cord design dilemmas. If you’re in need of sconces and light fixtures to try this on, check out this GIANT roundup.
Nice result for a satisfyingly small effort and cost! I suppose that one could always paint the cover before installation to avoid any ‘new paint on old paint’ patches. Theses sconces would also be ideal to operate with something like a a Hive or equivalent socket or bulb for those unable to wire into a light switch.
Thanks, Sally! Yes- you could definitely paint prior to installing!
so first, i need you to send emmett over to hide our cords and second… you should come, too!! but really, love this post!
Thanks lady!! We need to plan a Seattle adventure for sure! xox
Cord covers are such a satisfying DIY project. We recently hung out tv on the wall and have a flat “raceway” cover hiding all of the cords.
It really is instant gratification! I love that you already did this for your TV / media cords. I’m sure it looks so much better. xo
I’m so glad you did this post! I actually bought this same sconce – and I was curious what your solution was since the switch is on the cord. It seems like they tried to make the cord ‘pretty’ but…just no. Hide those cords!
Great tutorial…thanks so much.
Looking forward to more DIY posts. You have such a wonderful style…and gorgeous dogs!
So happy it you liked it, Brenda! Thanks so much.. we love our fur babies. Ha! xo
Thanks for the tip. Love your wall color and I LOVE your blog and style!!
Thank you so much, Leslie! I really appreciate you following along :) xox
You inspired me to hide my sconce cords this weekend! Also, any experience with removing it? Does it damage the wall?
Yay! So happy to hear that, Meg! I don’t have experience removing the cord cover yet- but I can imagine it might peel some of the paint off. The adhesive is pretty sticky. Hope this helps! xox
I love the lights! Where are they from?
Thanks Stacy! Here is the link for the light: https://rstyle.me/+UTO_dDJkWVEu_tvHaHutWQ