Honing Our Guest Bathroom Nero Marble Countertops
 Happy Friday! I’ve got an informative marble post to share- filled with a few words of caution, advice for “fixing” etched marble, and my experience having the polished nero marble countertops in our guest bathroom honed. As a self-proclaimed natural stone enthusiast with quite a bit of design education on this topic, I’m sad to say- our guest bathroom countertops had a bit of an accident a few weeks ago. Since I’ve been dealing with some health issues, Emmett surprised me with a house cleaning. He hired our go-to cleaners for a whole-house deep clean. Long story short, they used a cleaning product on our guest bathroom countertops that was not marble-friendly. After they left, I went upstairs to admire our clean house and immediately noticed the countertops had been badly etched from a harsh or abrasive cleaner. Mistakes happen, marble etches, and getting upset never helps. I called our stone fabricator to ask what I should do to repair or fix them, and ultimately I landed on having them honed. I’m sharing all the details in this post- click through for some crazy before & after images.
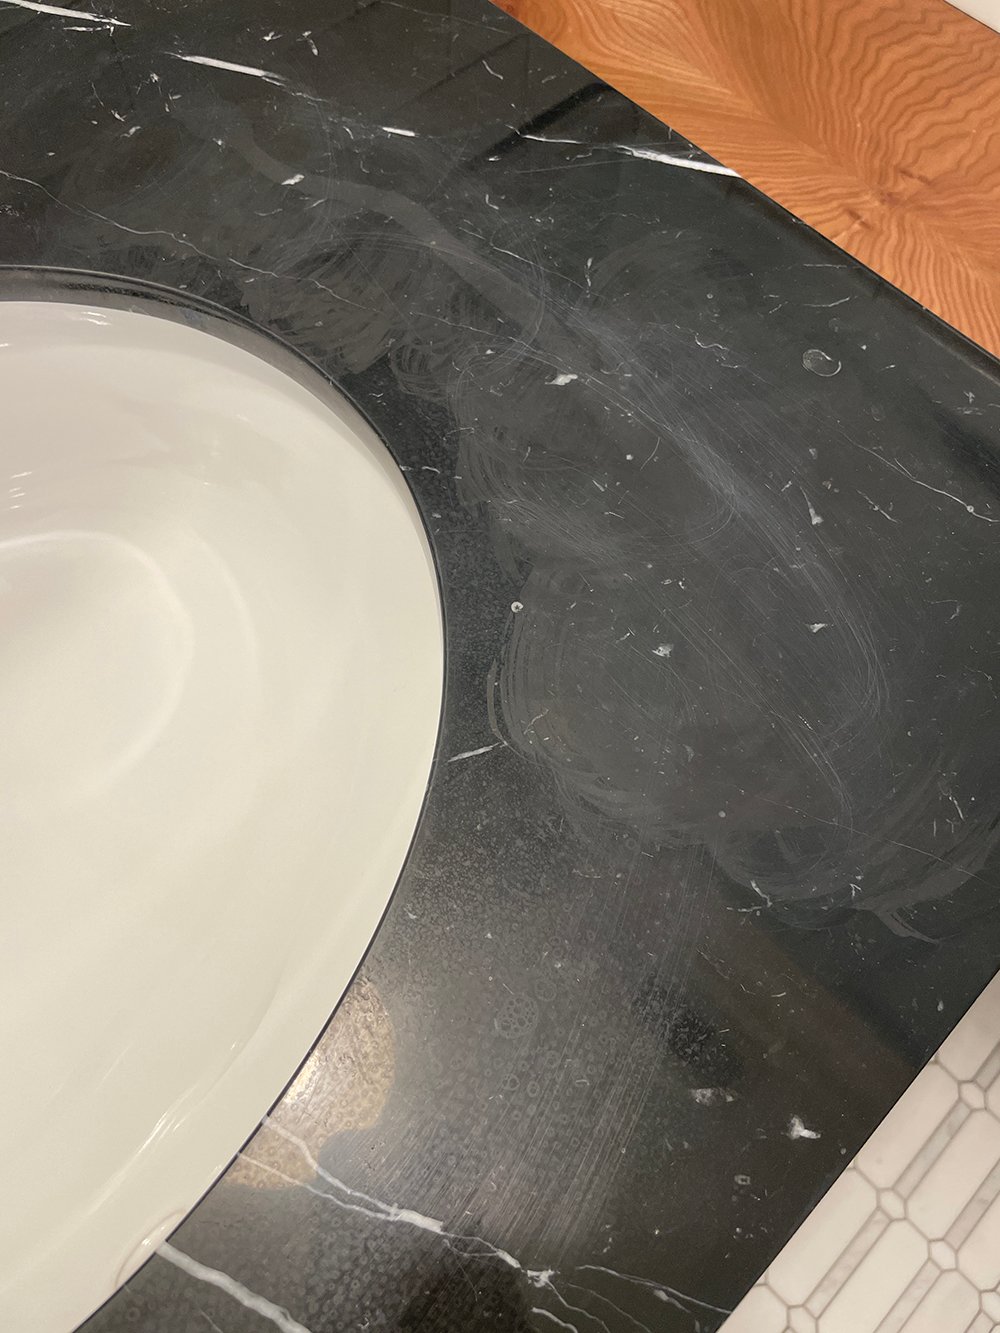
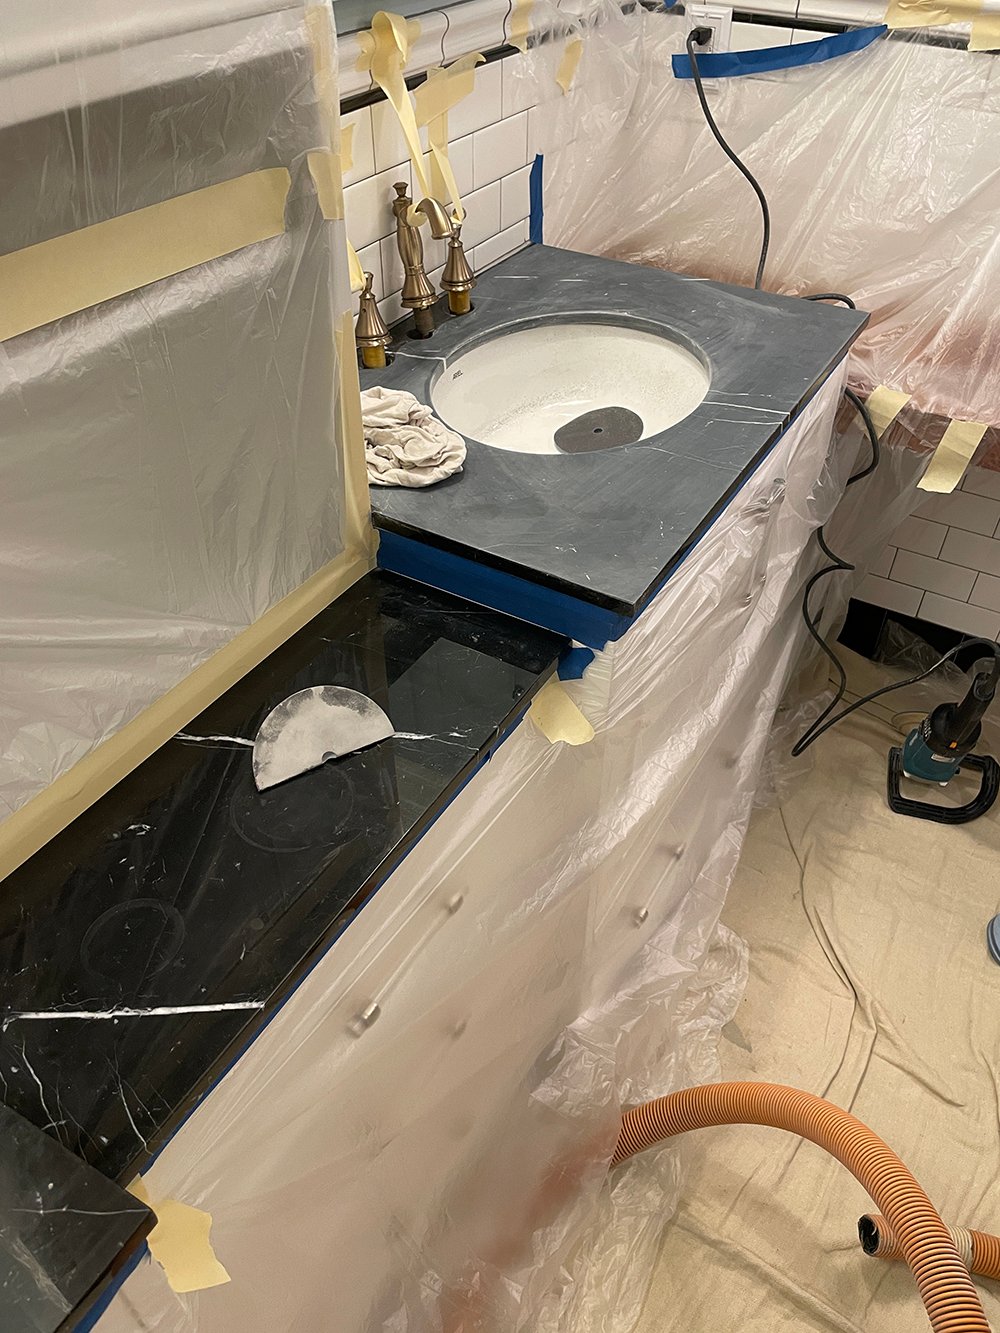
First of all… the house cleaners were very apologetic and offered to pay for the damage- we’ll definitely use them again in the future. They felt really bad, but as I previously stated- these things can happen, and that’s part of having natural stone. It’s subject to etching and is easier to damage than fabricated products (like quartz). I just wanted to share our experience and how I changed the look of our countertops to cover said cleaning mishap. I still love the countertops and wouldn’t change my decision to install nero marble. Should I ever want the countertops to look glossy again, I can easily change them… nothing a little sanding and polishing can’t fix! This is what they looked like post cleaning & etching:
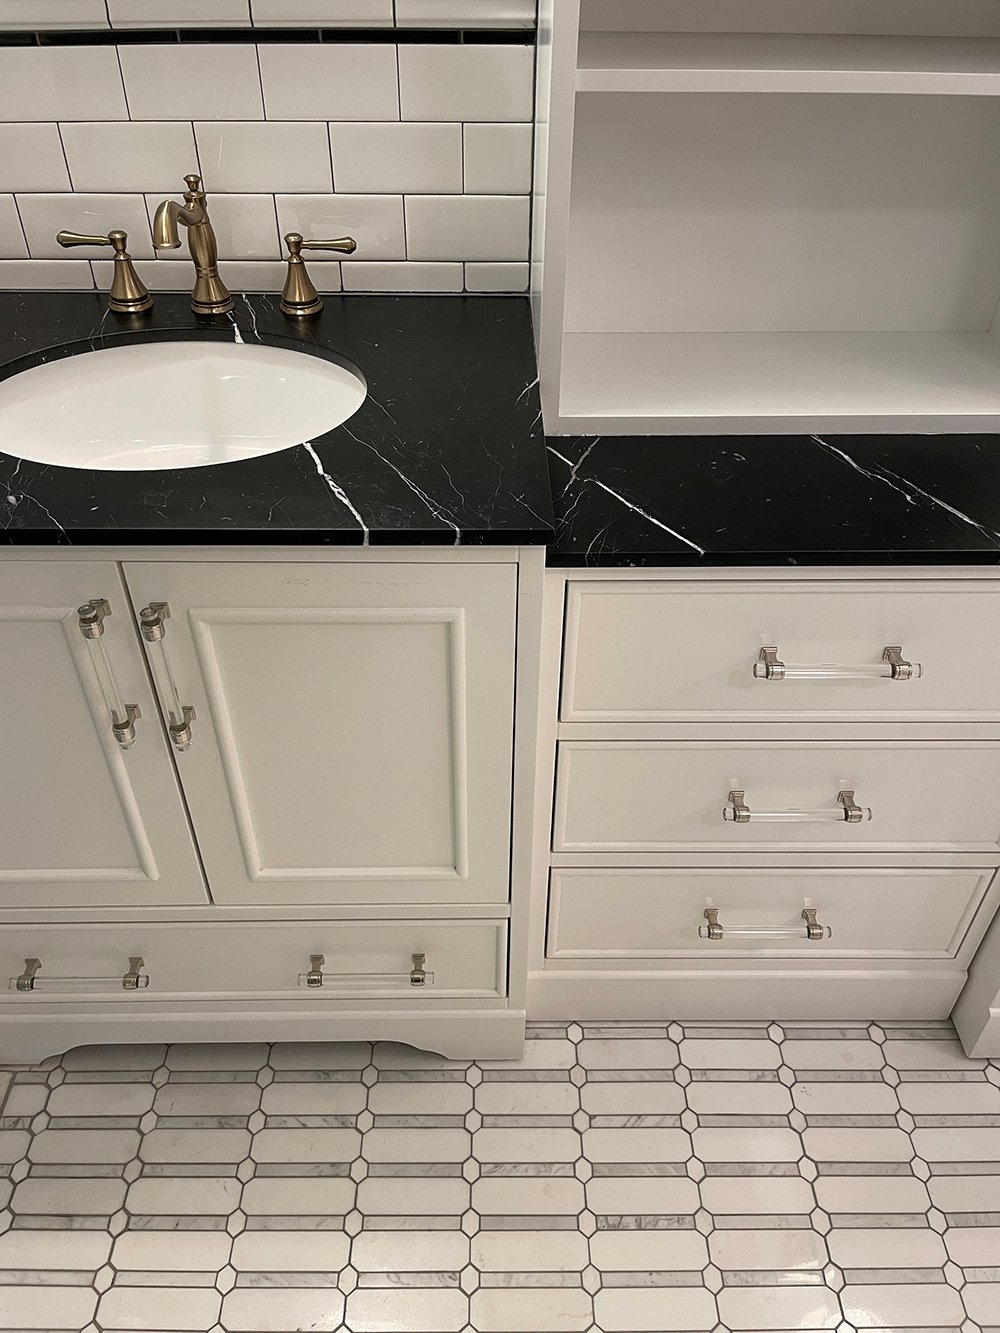
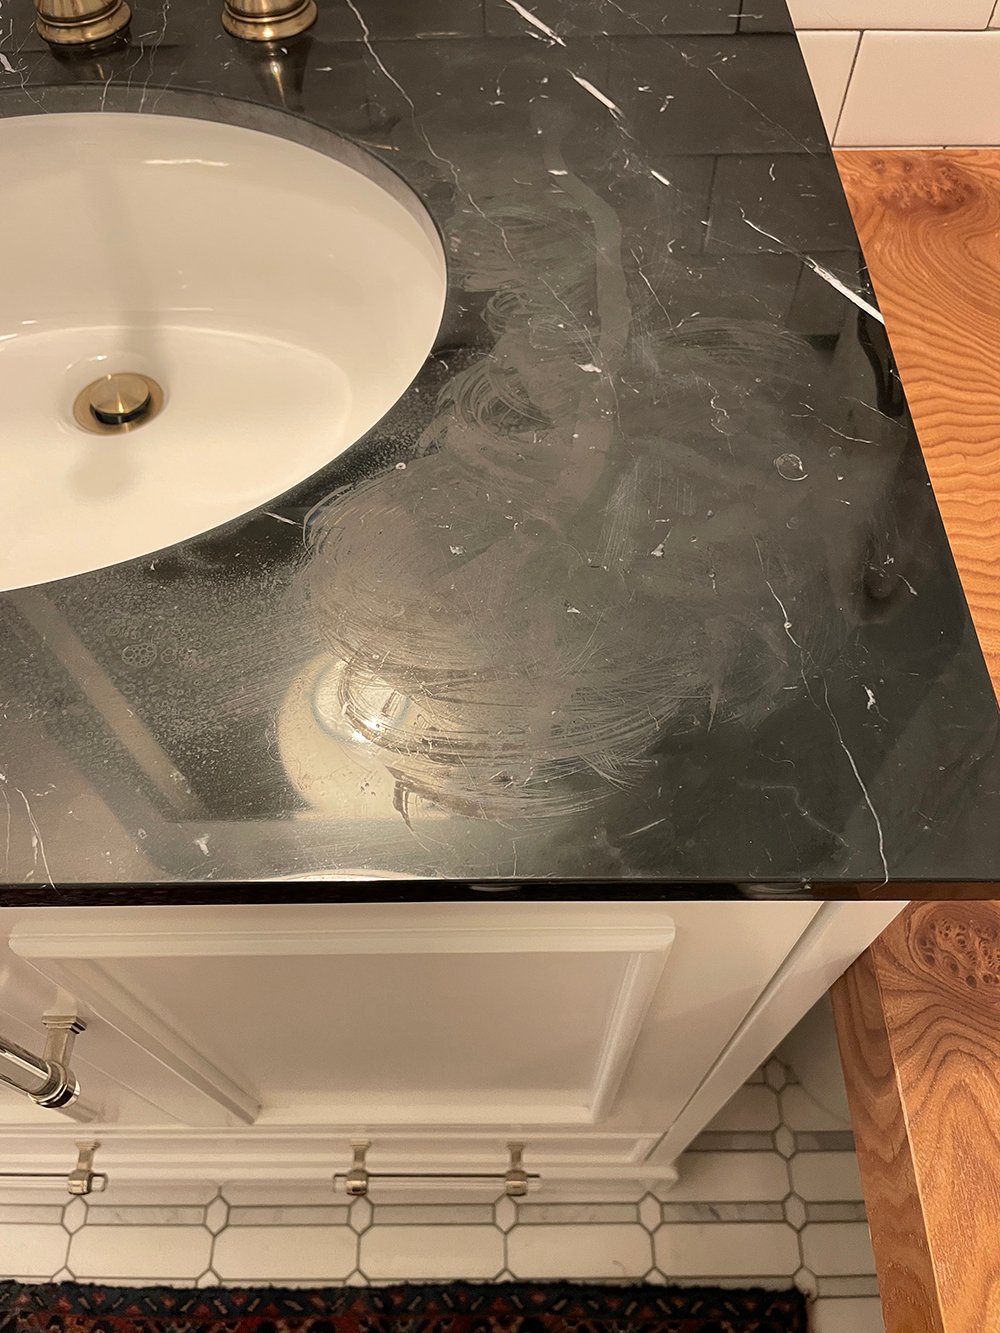 This just reassures that you have to have a certain mindset or semi-chill attitude if you’re going to embrace & install natural stone. Natural stone patinas over time, is guaranteed to change, and becomes imperfect over the years…. although some instances are worse than others, when it comes to accidental etching. In this instance, the etching was pretty severe and something I didn’t want to embrace because it looked like a cleaning mistake… rather than natural aging or a ring here or there. All three of the bathroom countertops were badly etched, as cleaner was used on all of them (left sink, right sink, and the center portion).
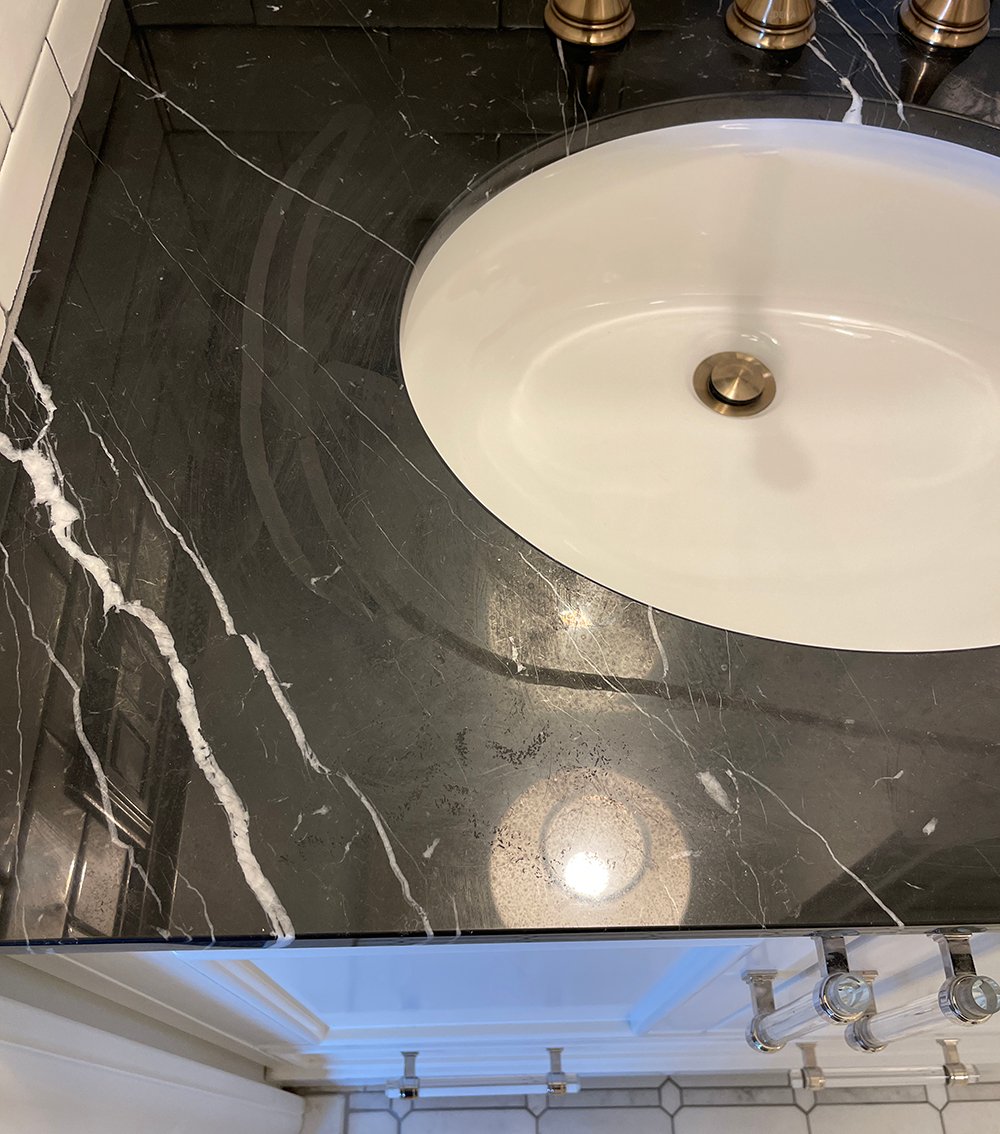 It was a pretty ugly situation, but I knew it could be fixed! The streaks, hazy scrub marks, and etching could all be buffed out. It just meant parting with my beloved high-shine, glossy counters. In hindsight- I knew they were a risky move to begin with, but we made it three years post renovation before a mishap (even though it was a big one, ha). I’ll call that a win. Part of me was kind of interested to switch things up with a more matte look.
 We probably could have handled honing the countertops on our own, but given the cleaners were willing to cover the cost- I was glad to save time and hire a professional. José, the fabricator I worked with is the best of the best! Before he arrived, Emmett partially removed our faucets and I emptied everything out of the bathroom, knowing things would get dusty.
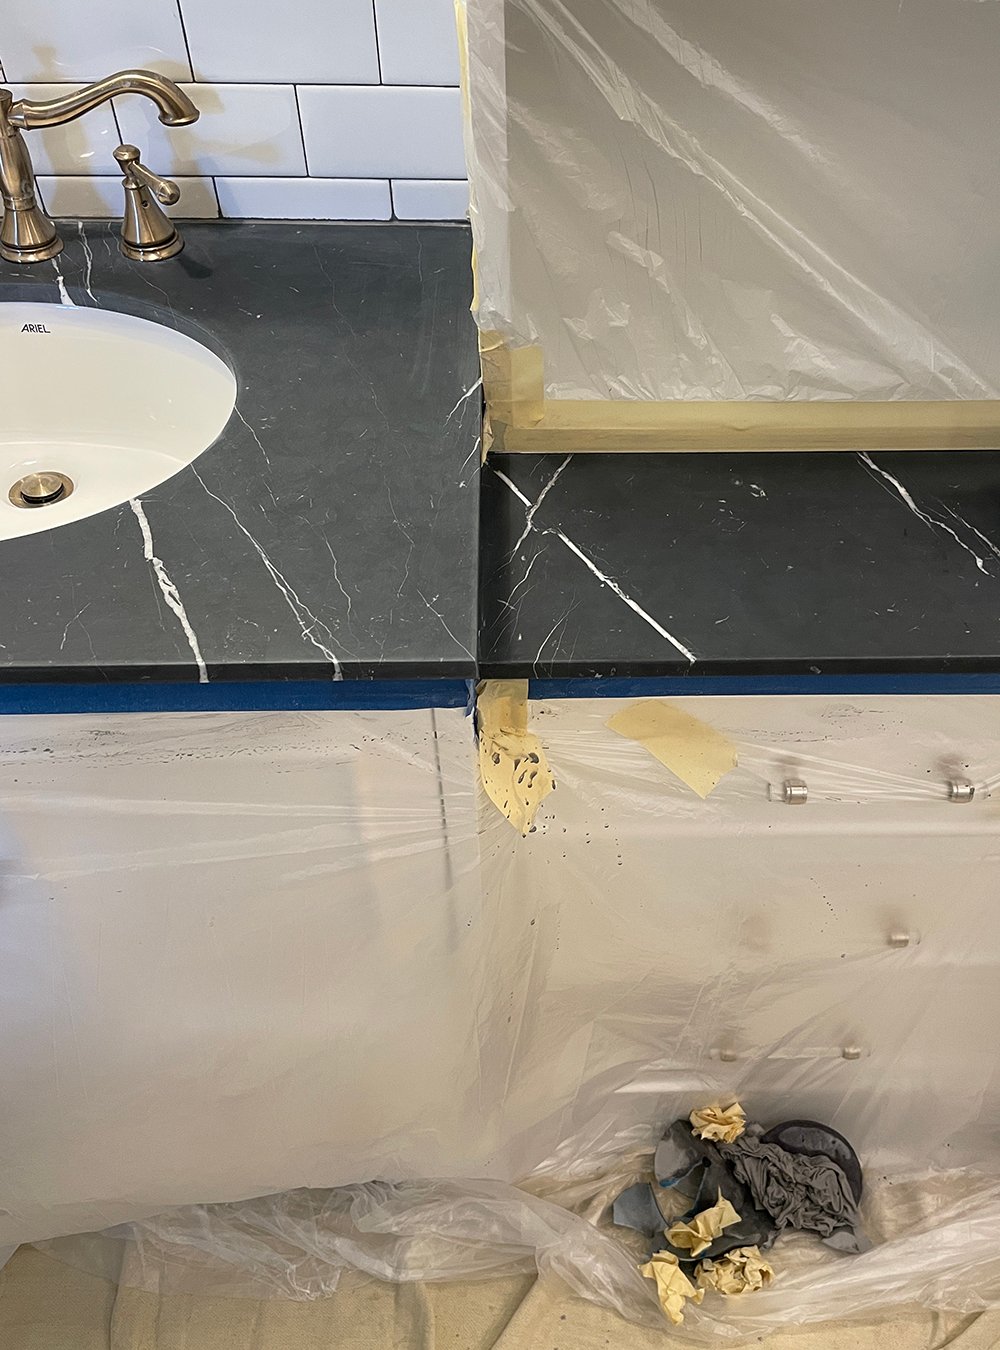
 José taped everything off and used a combination of both power sanders and hand sanding to knock down the polished marble and buff out the etching. He also used some honing powder. See the difference above? The below image shows the other two sections after sanding. Looking good as new!
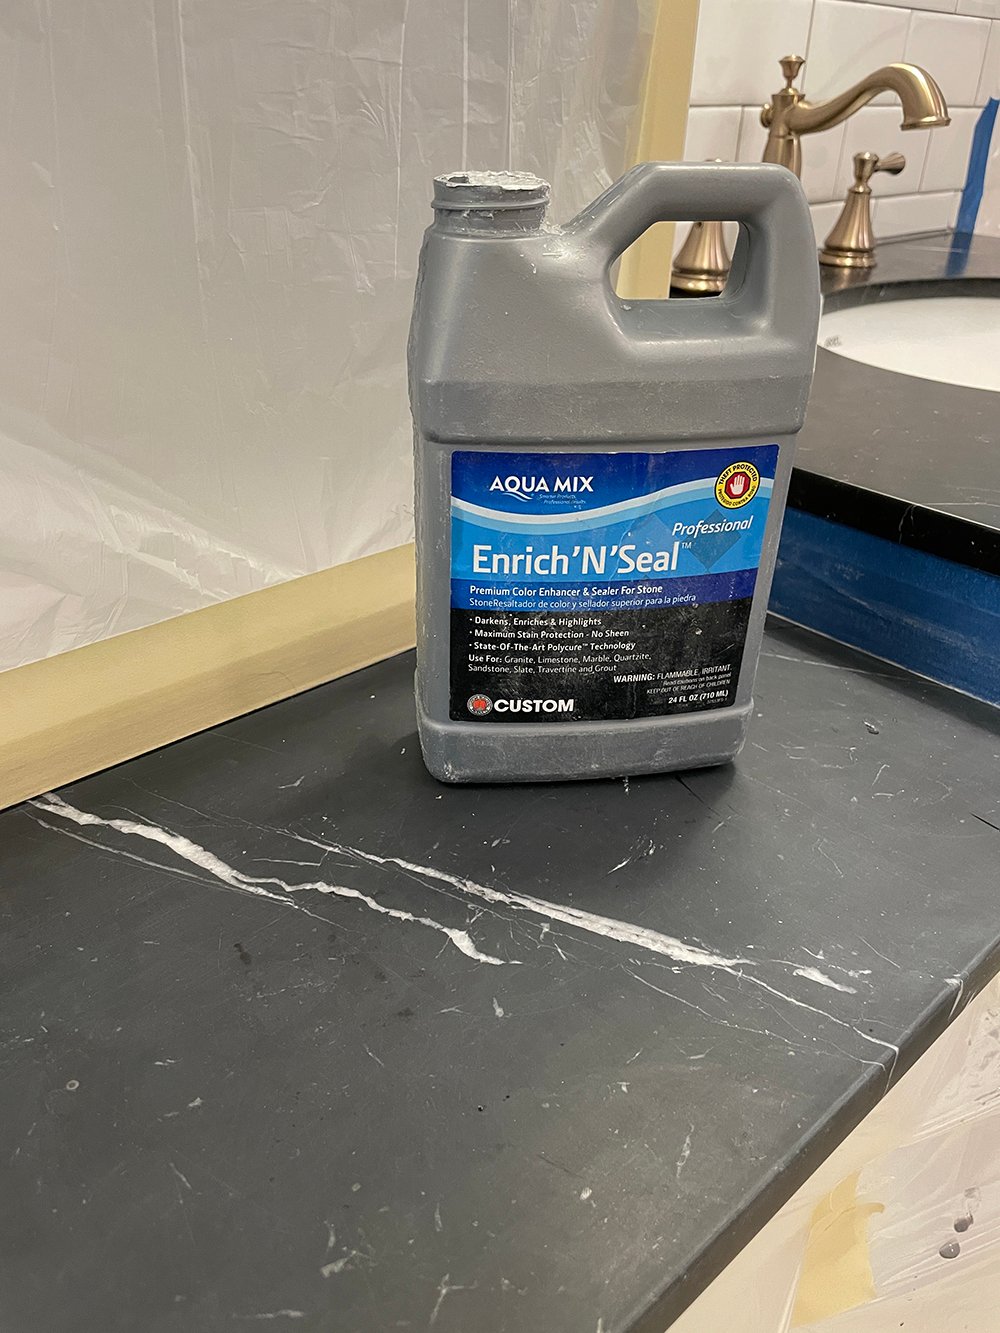
 Once he was finished, he asked if I wanted to leave the stone natural and just use simple sealer to finish the honed marble- or use an enhancer. You can probably guess (based on my soapstone posts), I love an enhanced stone. I opted for enhancer to darken the marble and really bring out the rich black nero tone. This is his preferred enhancer & sealer…
 Below, you can see the difference between the natural look (middle section) and the enhanced look (right side). I took all the process images with my phone, which didn’t do an amazing job with the lighting (there is zero natural light in this room), but hopefully you get the idea!
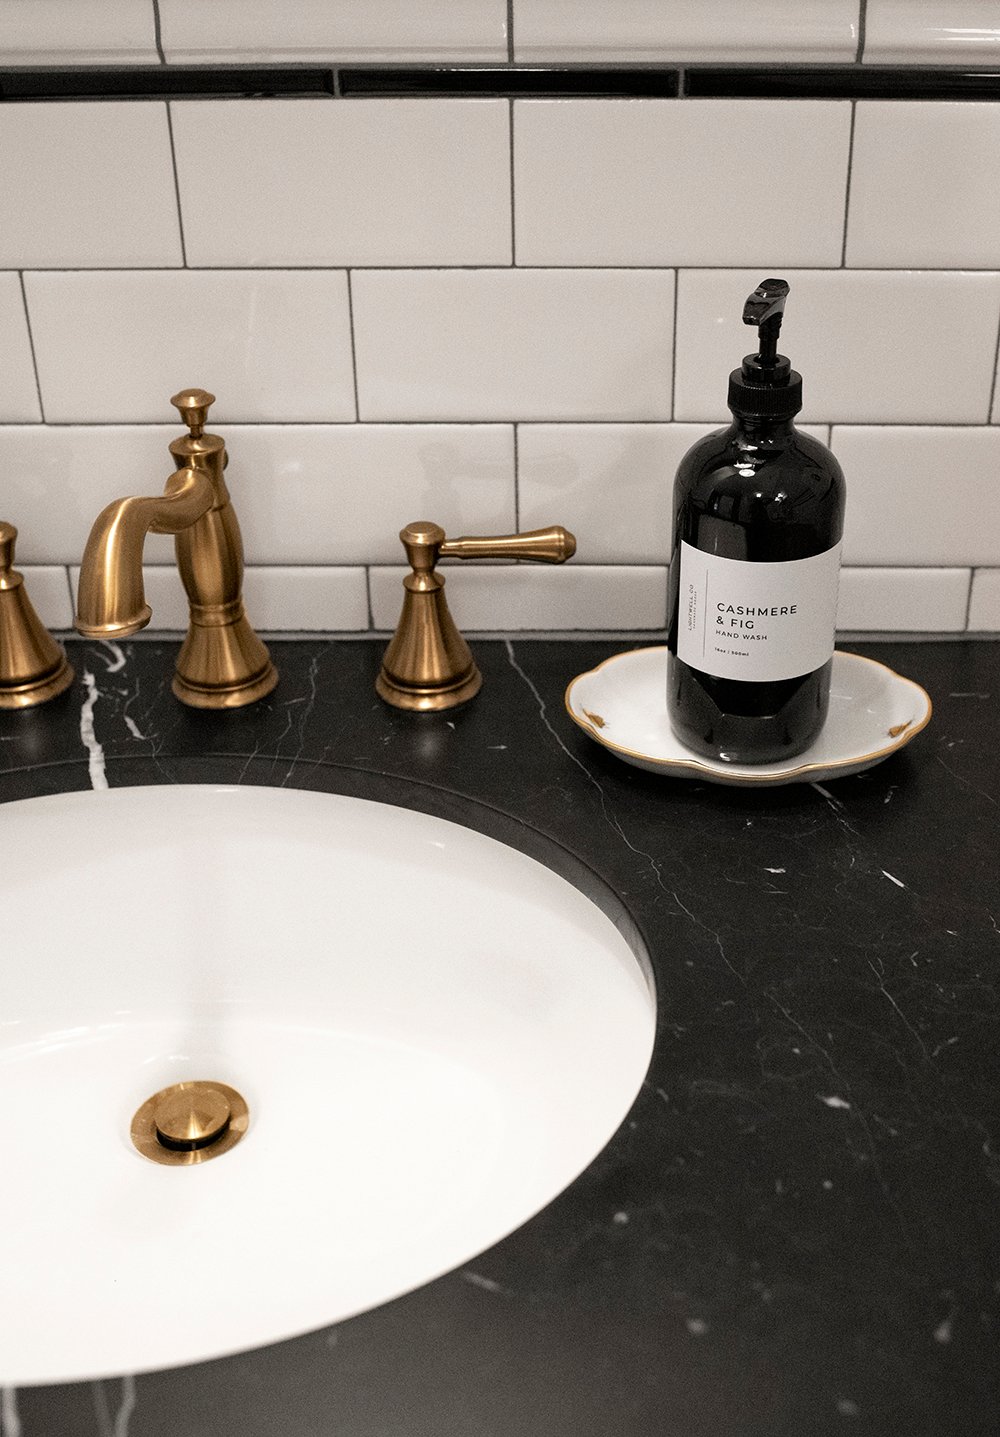
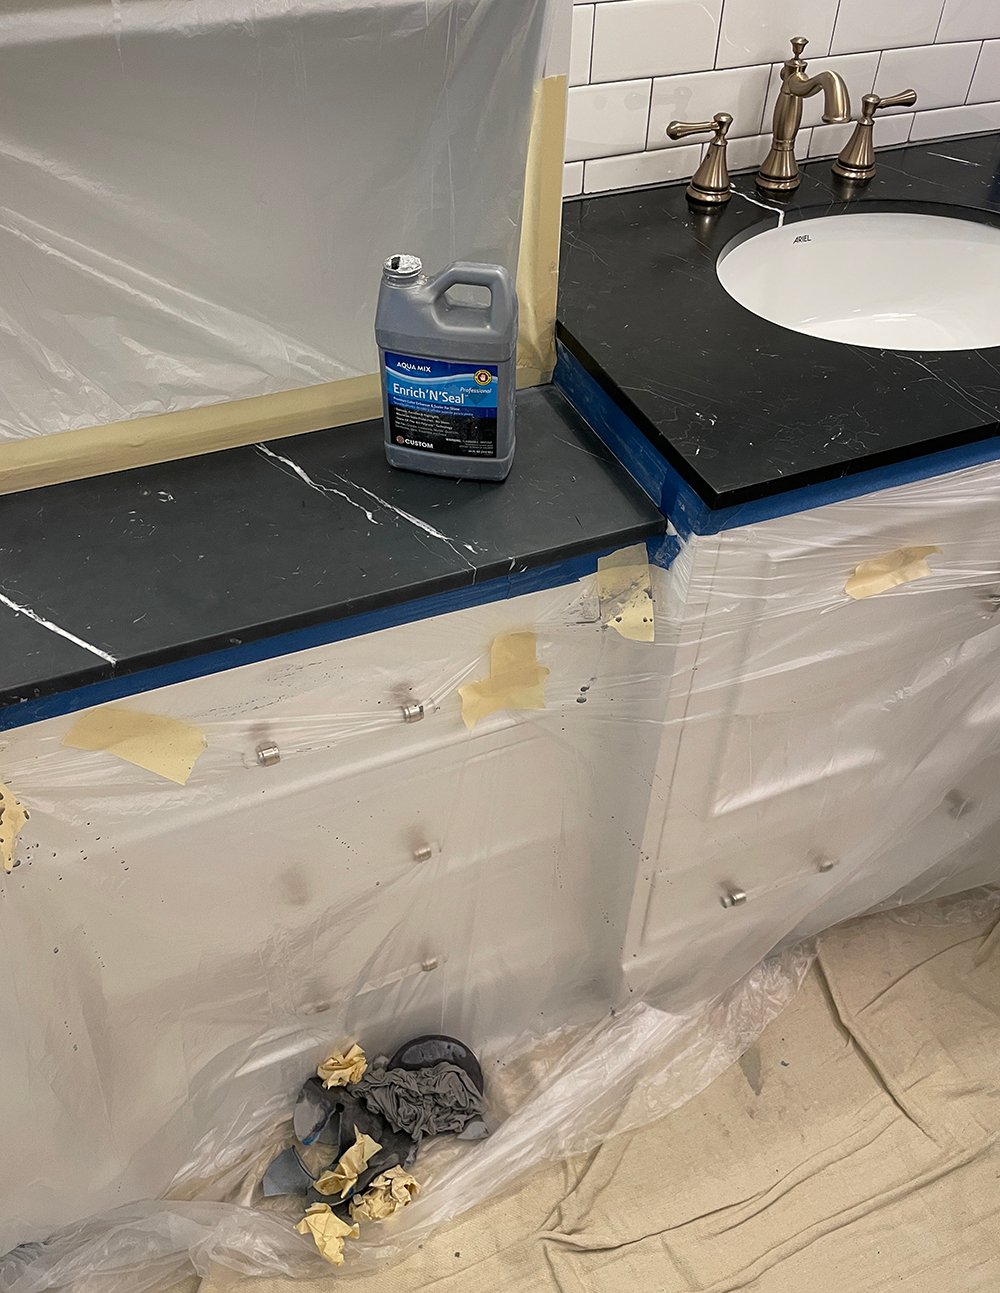 Here is a quick photo of the finished result, post sealing and enhancing- before I moved everything back into the space… what a difference! Emmett actually prefers the honed look, as opposed to polished.
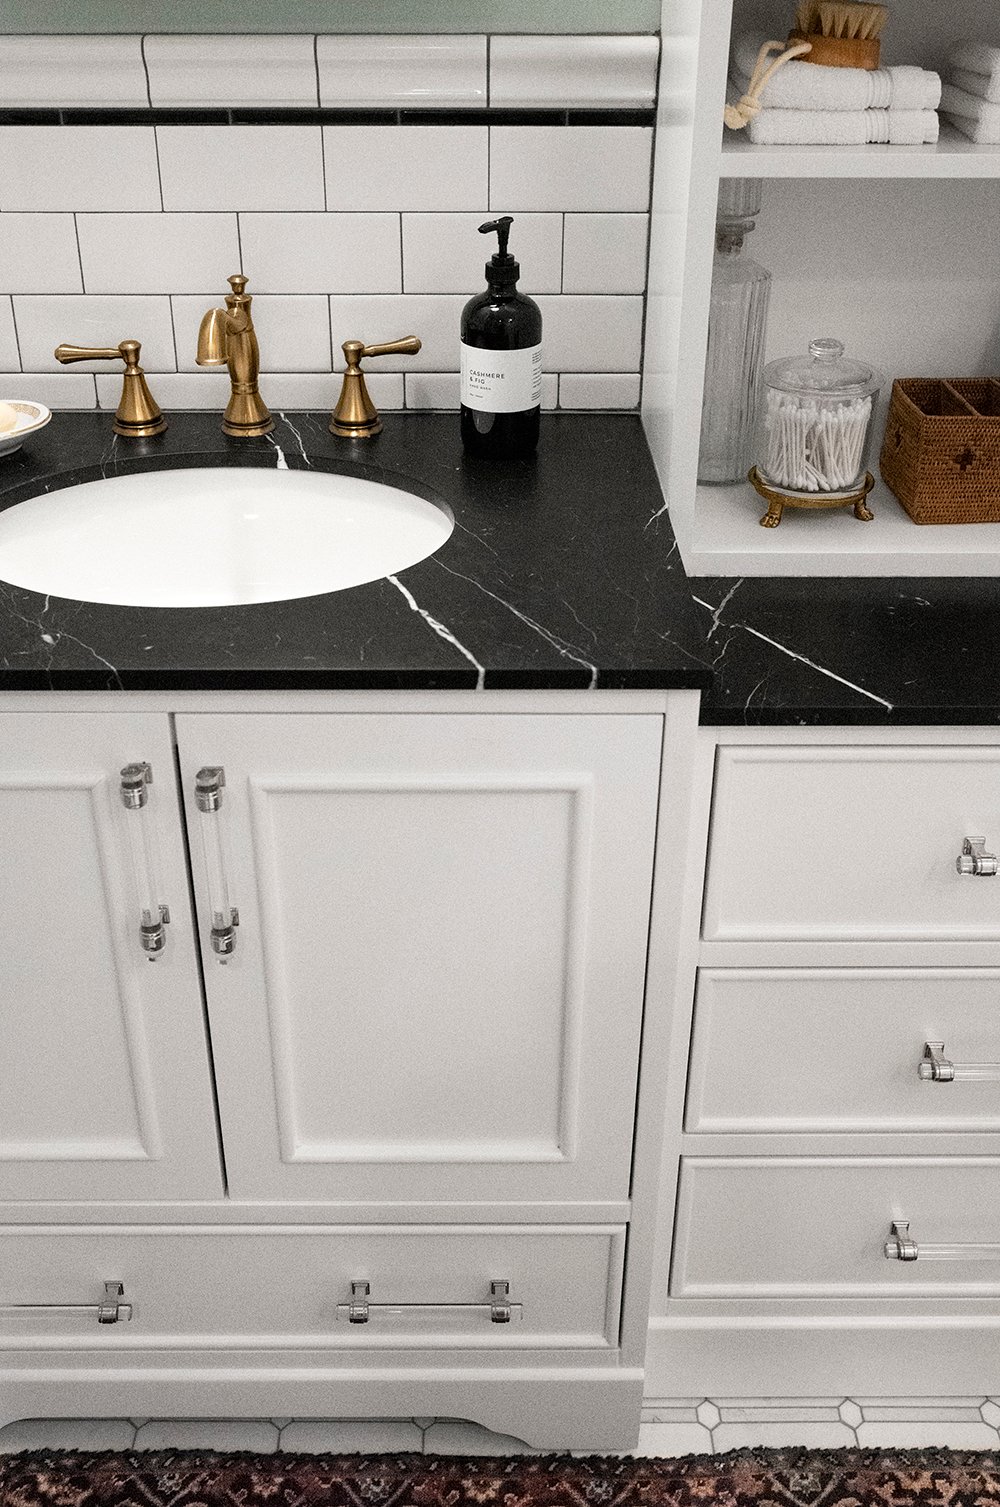
 This is what they look like today- check out the below image. One week post honing and they’re doing great! We had our house & dog sitter using this space while we visited our family over the holiday weekend, and everything is still in tip top shape while seeing a lot of use.
 I did want to share some tips with you for maintaining and protecting your natural stone…
- Use an appropriate cleaner. I use this one– which is natural and derived from plants… safe for all natural stone, including marble.
- If you’re having your house cleaned- always specify what cleaner is appropriate to use (and double check to confirm).
- Seal your marble as scheduled (per the instructions on the sealer). Make a reminder in your calendar!
- Avoid ingredients that etch natural stone (oils, acids, cleaners, eroding products, vinegar, etc).
- Wipe up excess water or spills- don’t allow it to sit for long periods of time. Clean up spills right away.
- Use trays, trivets, coasters, and small dishes to elevate soaps & supplies… they’ll catch spills and protect your stone.
- Use sticky felt pads on the bottom of abrasive decor to prevent scratching.
- Embrace the beauty of natural stone… including patina and natural imperfections that come with age. Remember, natural stone depicts a home that is lived in and well-loved!
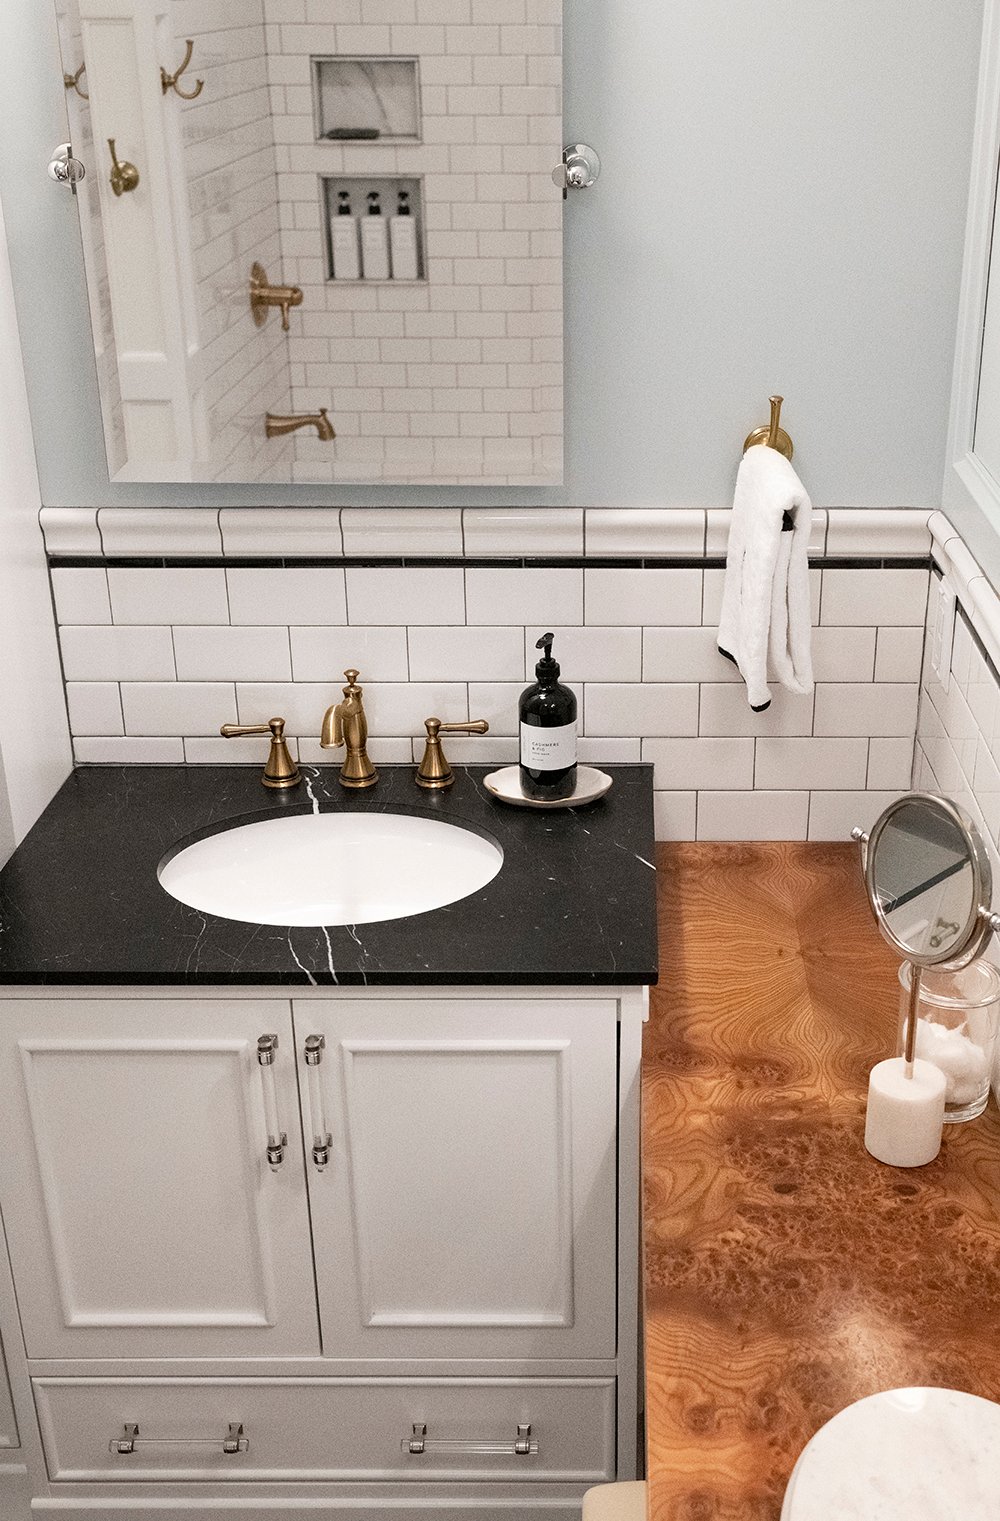
 If you missed our guest bathroom renovation, you can find the majority of those posts here! We tackled this space at the beginning of 2019… it was the first room we renovated in our house. It’s still a space I really love. I wouldn’t change a thing! My only regret is that I wish we could have renovated our primary bath instead, so I could use it on a daily basis (ha!). Although I am happy that our guests get to enjoy this bath. It’s a really gorgeous room in person, despite the lack of natural light! It’s looking good as new thanks to José’s help with the countertops. Phew! Meltdown avoided. Here’s to a great weekend ahead. I’m still playing catch up after being out of town. I can’t wait to comb through the comment section and catch up with everyone! Thanks for being patient with me this week.
Good morning! Um. Let me just say that you are a model of patience and civility. I would have required more than a few deep breaths after seeing that damage. What a relief that the counters could be resurrected and the cleaning company took responsibility. Everything looks spectacular, but what a cautionary tale! This definitely confirms that we are not a marble household. I know that no surface is impervious. My quartz countertops are extremely forgiving, but even they show minor signs of wear after 10 years. I do have a couple of questions about the final look. If you hadn’t chosen the enhancer, would the counters have kept that grayish color after sealing? Also, are polished and honed the only options? Haven’t I heard something about “leathered” granite? So much to know! We are experiencing our own home dilemma at the moment. Our (apparently 35 year old) AC has officially died, and we can’t even get someone in to bid until Tuesday. This girl’s pretty excited for 107 next week. 🥵 Send all the cool thoughts my way. Ha. Happy Pizza Friday, friends! 💜🍕
Peggi, so sorry about your AC! Fingers crossed you can get it fixed/replaced sooner. Will hope for rain or cooler days for you.
Oh no Peggi, Ugh nothing worse than an AC breakdown at the hottest time in summer. Get the fans going! Yikes…Sending the AC cooling vibes your way and fingers crossed for sales rep coming today!
Oh no!! Blow up pool and Negronis will take the edge off! If I were closer I’d let you post up in my pool for the week. I’m sorry Peggi- I’ll cross my fingers for a cool summer storm to blow through for you- and pray that the rep can come out sooner.
Peggi!! Noooo, I am sorry about your A/C. That is absolutely miserable. If you feel like a road trip, just drive over here and stay at our house. Ha! As for the marble- phew. What an ordeal! They look great now though. I think the cleaning culprit was vinegar (based on the smell). Quartz is the way to go to avoid imperfections. I’d take minor wear after a decade with quartz- not too shabby! If I would have had him just use the sealer alone, they would have kept the lighter dark gray tone. The enhancer is what brings out the black… just like my soapstone. However, any oils or water will darken the non enhanced stone temporarily. So if I were to splash while washing my hands, you would see little dark water spots until it evaporates. They’re hardly noticeable with the enhancer. Other finish options: honed, polished, tumbled, leathered, etc. Honed & polished are the most common when it comes to countertops. Good luck with the A/C! Trek over if you need to- seriously. I hope you’re able to stay cool this weekend. It’s going to be HOT. Hang in there, friend! xox
Gosh, that’s a huge accident and one I am so glad you were able to repair! I concur with Peggi, you are way more calm and civil than I. They look beautiful! I appreciate you showing us the details and what can occur with natural stone. I love marble and soapstone and will admit they make me nervous to put into our home. I know what can & can’t be used but my family isn’t as cautious. We need to bullet proof, dirt hiding, indestructible materials for my husband and son. I love them but its who they are. Ha!
Here’s to hoping your weekend is less eventful and wonderful!
By the way, have you had any problems with your Daily Harvest smoothies, etc? I purchased several smoothies, ice cream, flatbreads then saw on instagram that another user & her husband were experiencing stomach issues after eating. I tried the ice cream and the next day I had a little issue. Could be in my head. I haven’t tried anything else lately. Just curious.
Hi Danna!! Oh I know- the moment I saw it, I knew I had to call the fabricator or it would drive me crazy. Ha! The cleaners really did feel so terrible- I felt for them. They handled the situation really well… mistakes happen. This was just a costly one. Quartz is the way to go in your new home, based on what you’ve said! It will give you the stone look with the durability. It’s a great alternative to natural stone. I just finished my second Daily Harvest box before leaving to visit our family last week and didn’t have any issues, but I do want to try Mosaic for my next order instead (another reader recommended them). I would contact their customer service and see if anyone has reported anything- that is so weird and totally unacceptable! I bet they would issue a refund. Emmett tried some and struggled, but he rarely eats healthy or clean- so I just figured it was his body adjusting to fresh food. Haha! Maybe that was it?!
Oh goodness Sarah I’m so relieved your counter tops were saved and also pleased the cleaning company covered the cost. It would have been horrifying otherwise. Yikes! However, I love the honed marble, quite impressed and surprised they could be repaired in place. Wow! Can other natural materials like granite be honed too? Was it expensive to refinish? Very interesting?
I realized a long time ago these types of finishes are not meant for my personality, I’m way too intense to have high maintenance finishes. I learned this the hard way but I totally get the appeal, your countertops are beyond beautiful. So wonderful they could be saved and they look even better I think. Have a wonderful weekend and yummy pizza Friday!
Hi Colleen! It was definitely an unexpected “surprise”. Haha! It didn’t take much effort on our end- other than calling the fabricator and cleaning up the mess. The cleaners felt terrible. The honed look is actually really nice- I’m very happy with how they turned out. You would never know how bad they looked previously. Yes- any natural stone can be honed, and there are multiple finish options! I’m still waiting for our final invoice, but the estimate was between $400-$600 for our three pieces of marble… and refinishing in place. It would have been impossible to remove the slabs because the undermount sinks are glued to the marble underneath. We would have ruined the sinks trying to remove them and risk the marble cracking. These days, quartz looks very convincing and is maintenance free- which is why it’s so popular! I definitely suggest that for anyone who doesn’t want to chance issues like this with natural stone. I’m thankful they were fixed so quickly! I hope you have a lovely weekend ahead- it’s HOT here. I’m missing the weather in the midwest. We spent most of last week with my sister in her swimming pool and coming back home to Utah was a harsh reality. Ha! I hope you’re able to get some pool time in this weekend :) xox
Ok…I need to take some notes on patience and grace- you have far more than I think I would have in this situation. I think that’s probably one of the reasons I would find it difficult to hire anyone to clean my home. It’s amazing that they were apologetic and offered to cover the cost of repair. As a side note, I’ll now be checking the products I’m using on our marble vanity top, and checking the vanity. Reminder is set to seal the marble, and the product you recommend is saved. Ha! Somehow the maintenance factor has slipped my mind since installation, because I’ve thoroughly enjoyed the way they look. In the world of marble, honed and polished are the options one has for “finish” correct? In this situation, was there an option to get back the polished look? How much more intensive would that process have been? Kudos to you for embracing the opportunity to switch up the look of the bathroom. They turned out beautiful, and I think for Nero marble, this is the look I would prefer. That velvety finish just grabs me. Can enhancer be used on any type of marble? Or is enhancer primarily for the darker natural stones? I’m glad that a frustrating situation turned out so well and you’re happy with the end result. Cheers to pizza Friday; what are your weekend plans? We’re prepping for a San Francisco trip with the littles- I’m excited to feel that coastal air hitting my face! Have a great one friend. Xo
Hi Lauren! Definitely use a natural or gentle cleaner on your vanity… I’m sure nothing from Grove would mess it up (with the exception of vinegar based products). Exactly- honed or polished are the finish options for marble… or you could get tumbled (but that’s more for floor tile). I could have went with the polished option again, but that would have cost more (it’s more work). Emmett prefers honed, so I figured we’d just head in that direction :) It actually turned out really beautiful and has a nice feel to it! Enhancer can be used on any natural stone. Cheers to pizza Friday, indeed. I cheated and just picked up our dough from Trader Joe’s! We’re hanging out this weekend… working on projects and playing catch up. We we’re gone most of last week… from Thursday-Wednesday visiting my sister in Ohio, which was super fun! Anyway, I feel like behind and need to catch up on things like work, cleaning, groceries, laundry, etc etc etc. San Francisco sounds amazing!! Hope you and the fam have an incredible time and enjoy all the good food! I’m envious and will live vicariously through your videos- please post some! Ha! Have a lovely weekend. xox
This same thing happened to us about 6 years or so ago and I called a stone professional and he told me it couldn’t be polished! He didn’t even mention honing it. So our Nero Marquina has looked awful (master bath) for years now. I’m going to look in to having it honed- thank you for doing this article. BTW what was the guy who did yours? What type of company did you call?
Uh oh! Yes- it can definitely be honed… I think you’ll feel so much better about it. I just called my regular stone fabricator. I’d find some local and go that route. Many of the stone retailers and showrooms have a preferred list of fabricators on staff. That would be a great place to start :)
Hi! First, let me say how much I love this bathroom! So much that I am trying to recreate much of it in my own home! I was wondering what grout you used for the subway tiles on the walls?? Thanks in advance for the info and also for the beautiful design inspiration you provide!
Thank you so much, Christine! I wish I could remember the grout color off the top of my head, but it’s been over 7 years- I’m sorry. It might be in this post: The Best Mapei Grout Colors