How to Make Your Own Photographic Art
When I look around our home, some of the pieces that feel most personal is the art I’ve collected over the years. These are not just snapshots or reproductions stuck into cheap frames. They are moments that capture light, memory, and the way a space felt when we were there. Creating your own photographic art is one of the most meaningful ways to personalize a home. Art is an intimate part of how I design homes and build layers that feel lived in and interesting. Today, I wanted to share how I created these oversized photographic works because they turned out so beautiful! They were also surprisingly easy to create… it just takes a keen eye for design, knowing the right local shops, and some easy installation tools. I’m sharing my complete process… from choosing images, preparing them for print, and framing them so they feel intentional. I’m breaking down the cost as well. Click through for all the details!

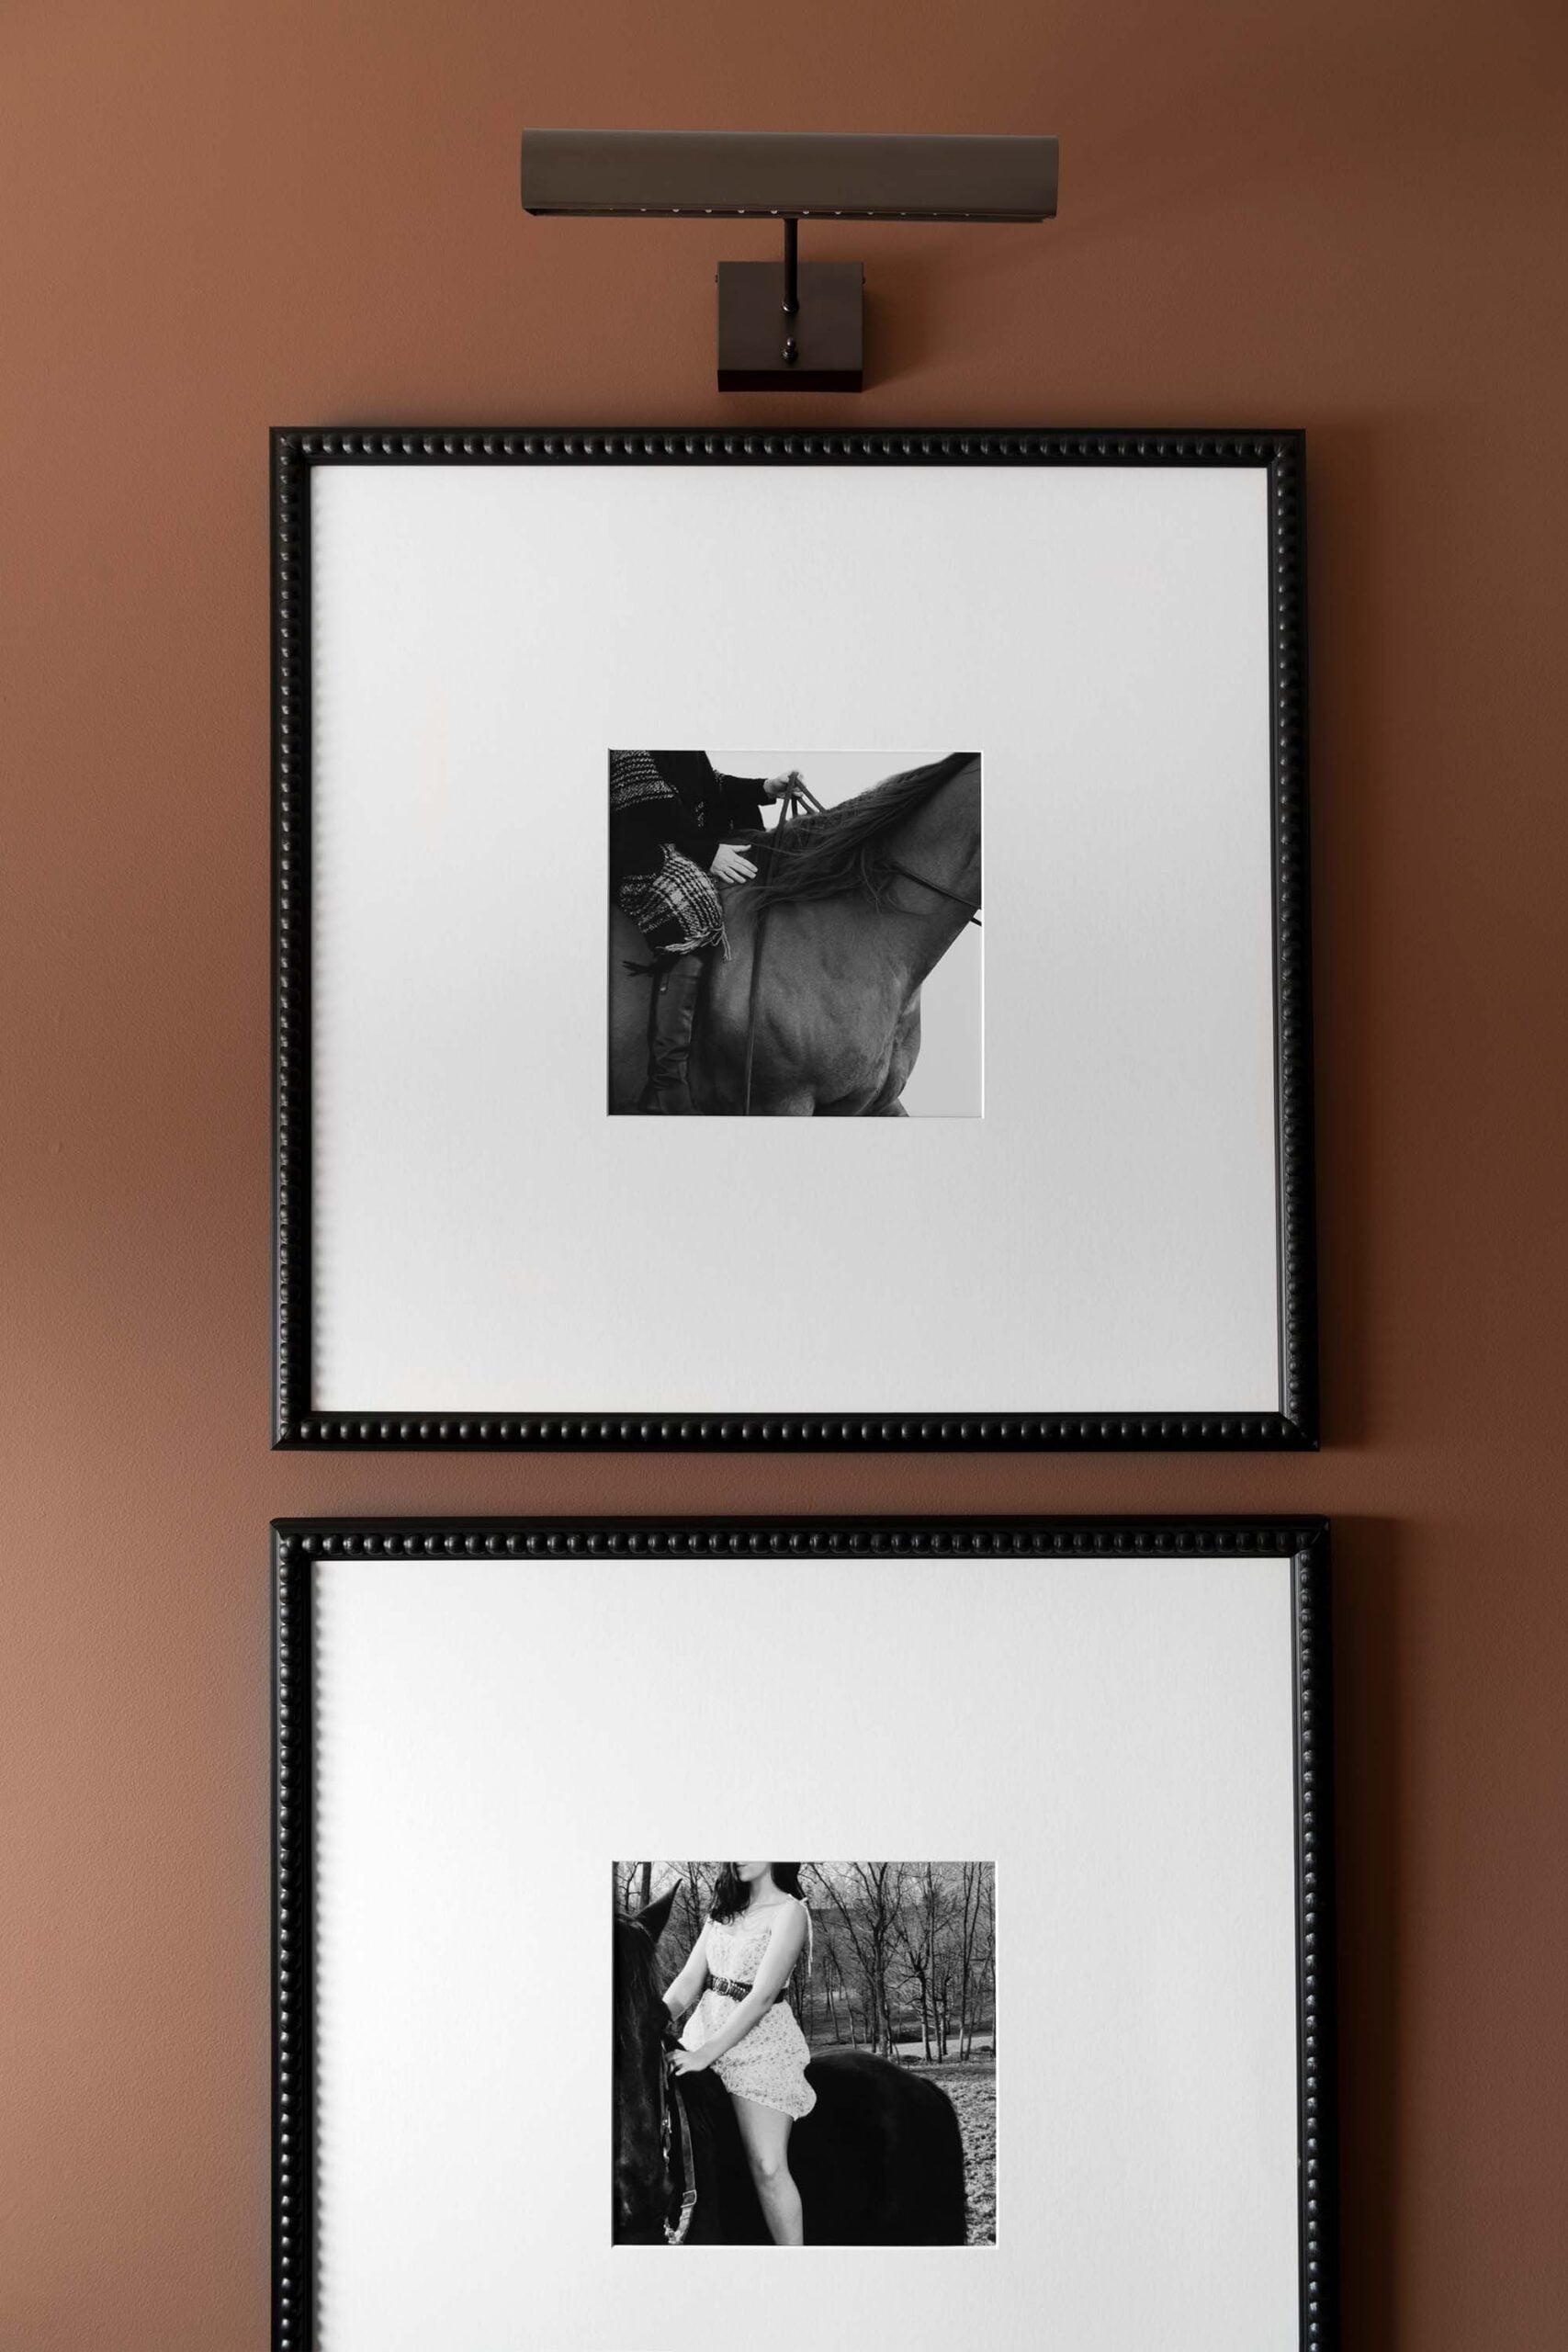
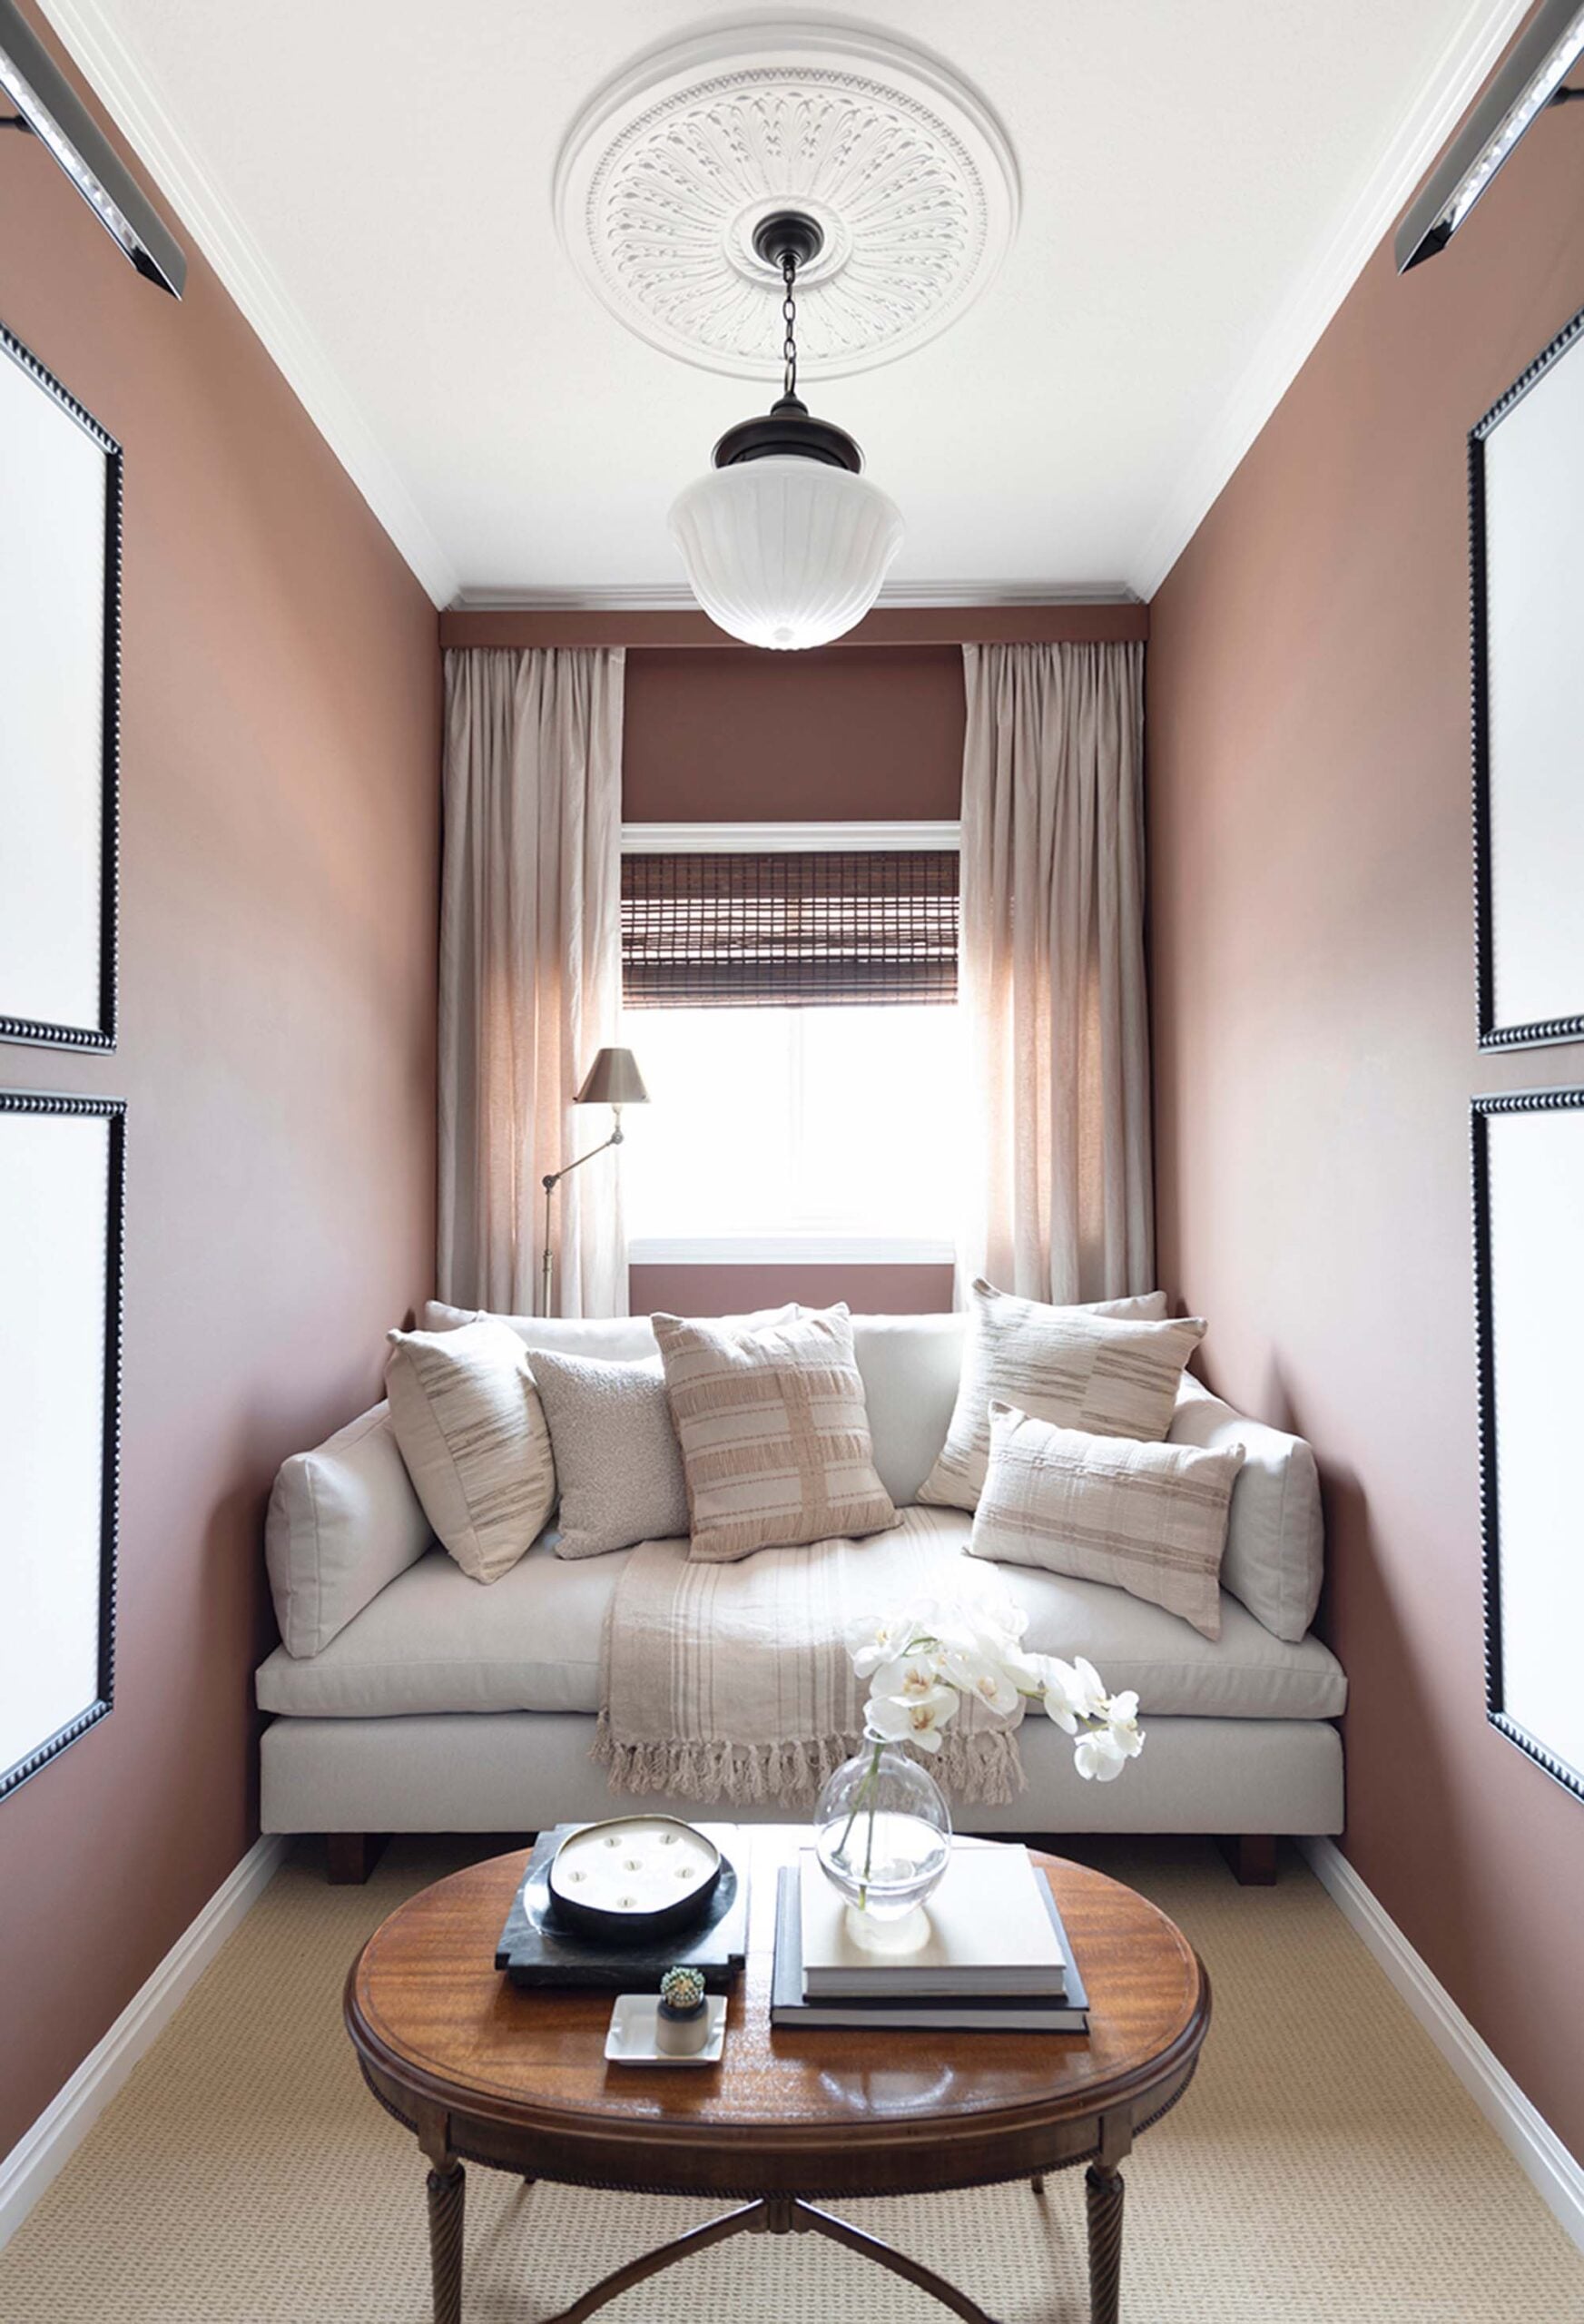
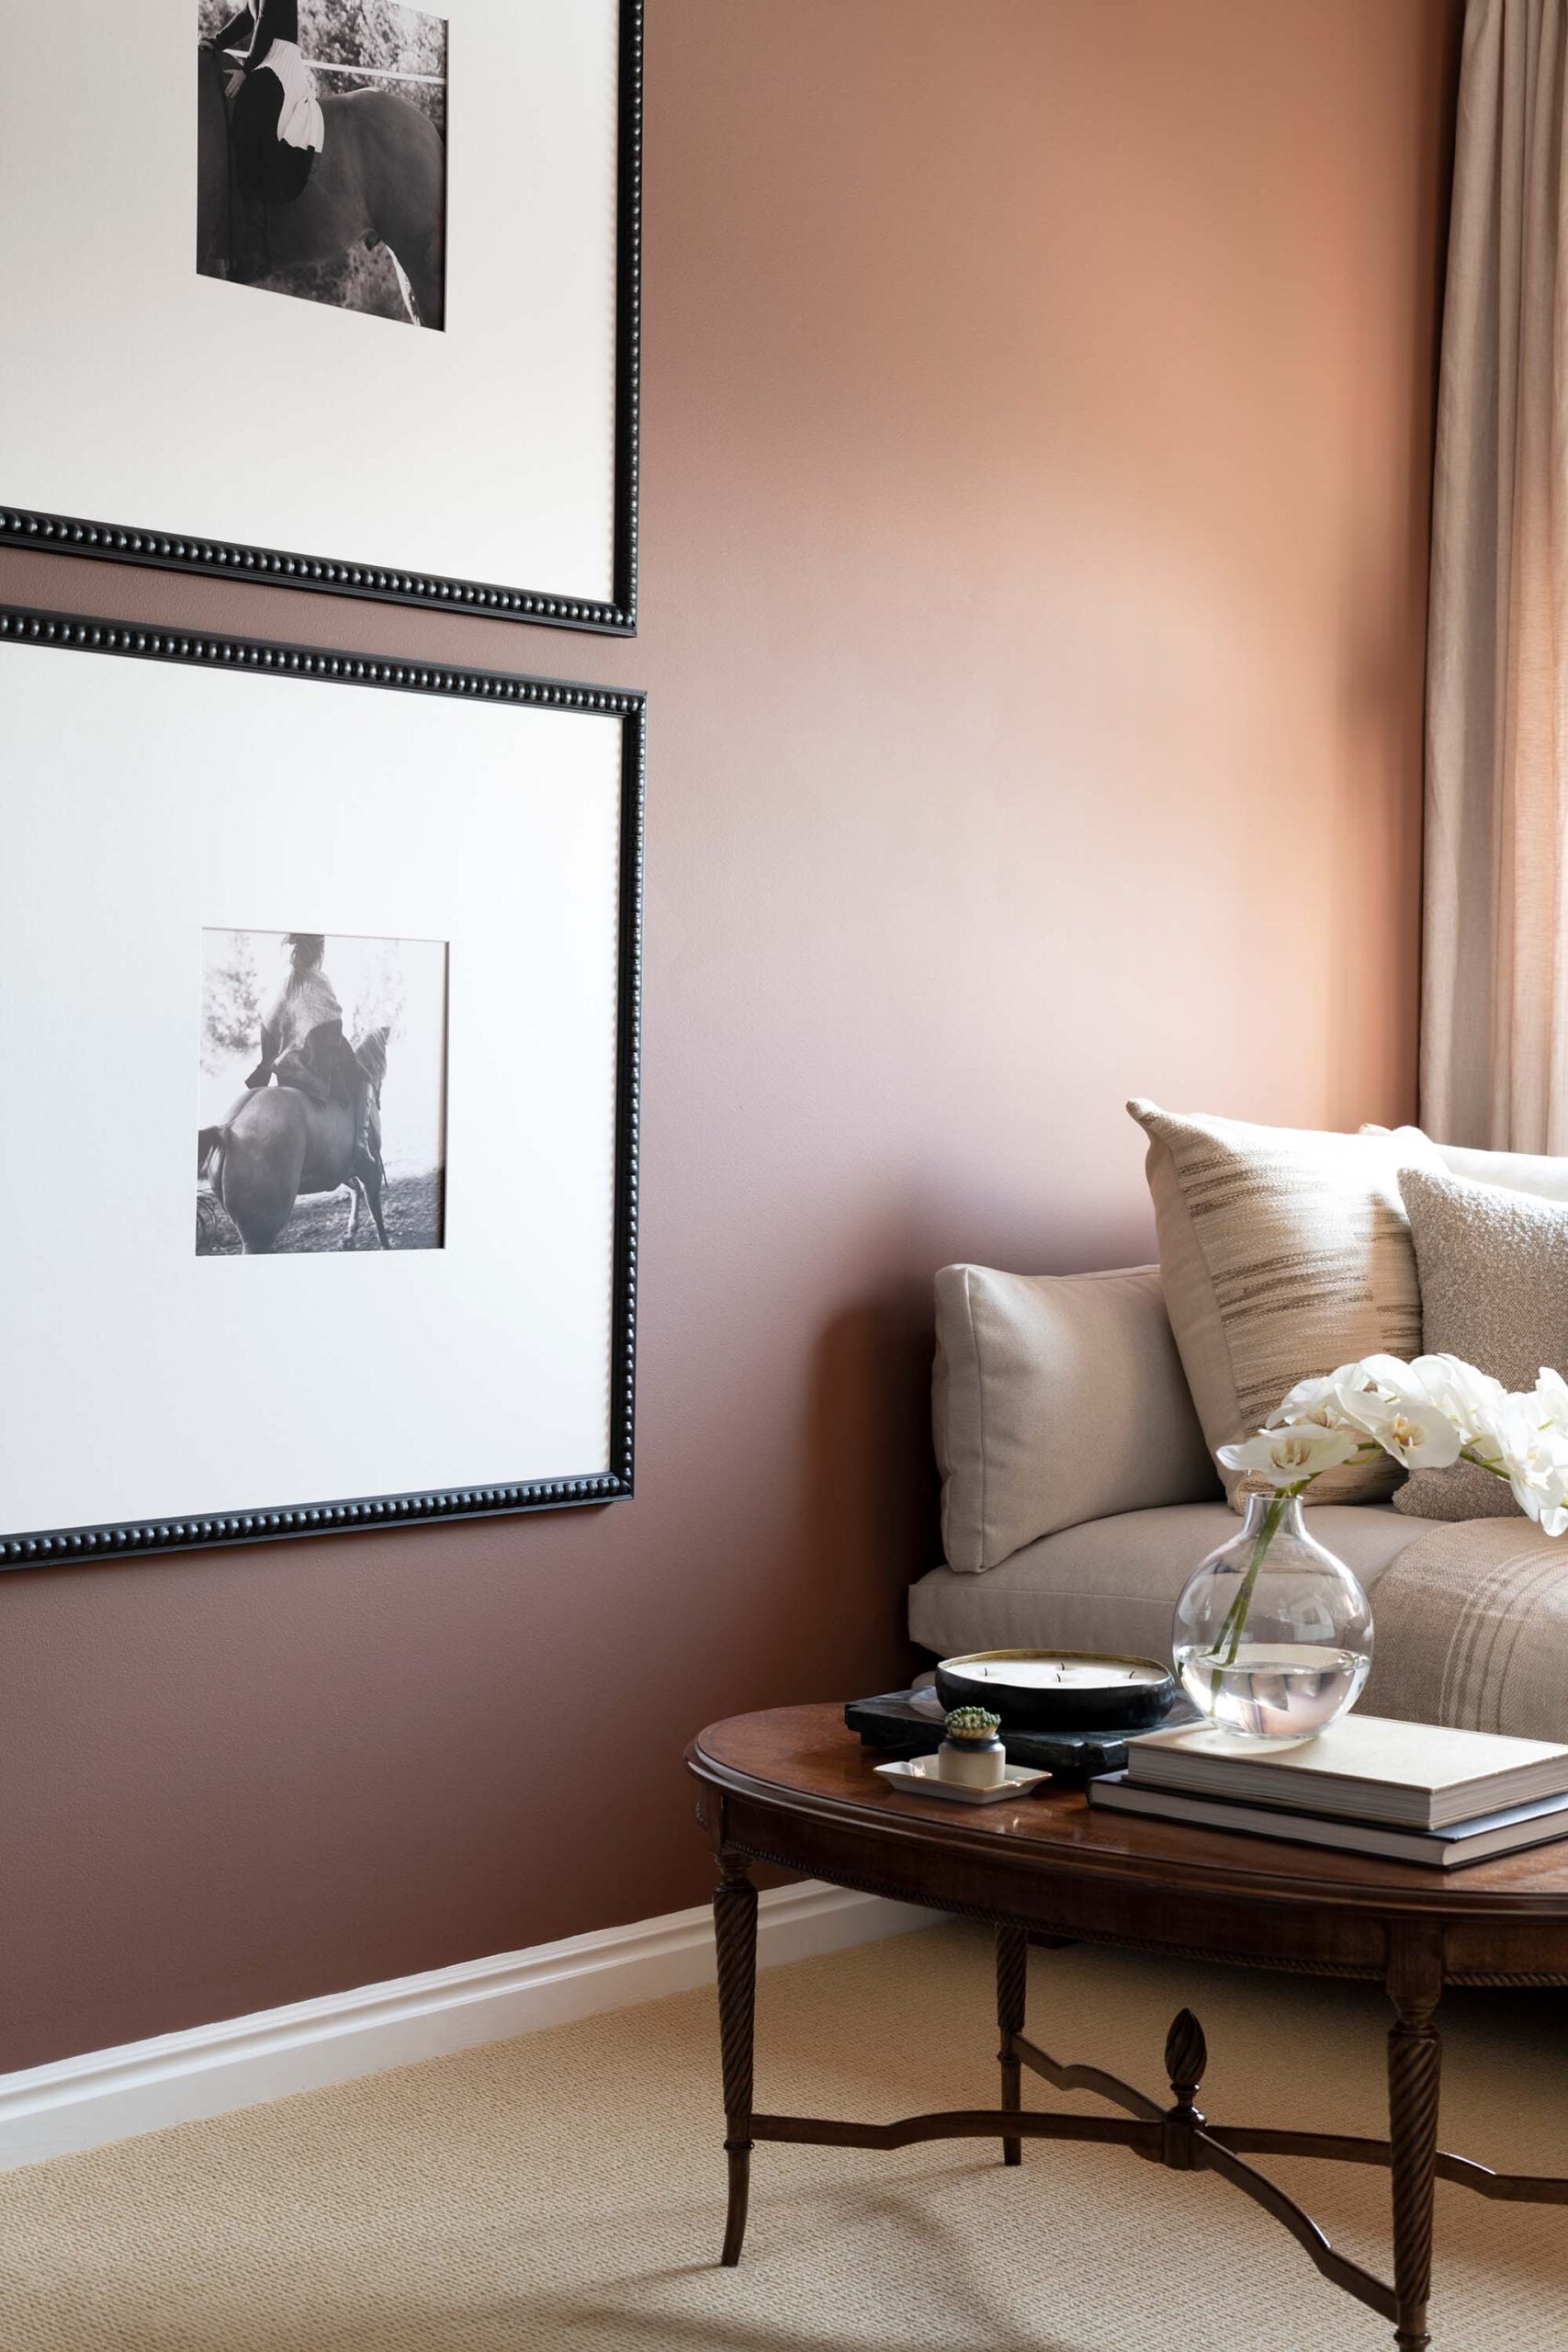
The space you see throughout this post is our maroon guest bedroom. We gave this bedroom a much needed makeover, updating the lighting, and we changed the flooring when replacing our upstairs carpet. You can also see my tips for hidings cords for wall sconces and picture lights, like we did in this space. Onto the art…
Why Photographic Art Is a Personal Favorite
Photographic art adds depth and contrast to a vignette… I especially love black and white images. I find that when photography is chosen and styled deliberately, it totally elevates the entire space, making a statement or capturing a memory. It can reflect the places that have shaped you, remind you of moments you cherish, or simply add interest to an otherwise boring vignette. Photographs speak to human experience and make a room feel as though they were collected over time rather than decorated all at once. I also think they can look incredibly chic! My horse images were inspired by none other than Ralph Lauren.
How I Choose the Right Photographs
Obviously you’ll need photos to begin. I select images based on how they make me feel and how they will relate to the space they are going into. When I scroll through my camera roll or photo libraries, I am looking for images where the composition naturally holds my attention, where the light feels harmonious, with tones that complement the palette of the room. Sometimes I choose landscapes from trips that we loved, sometimes architecture that inspires me, and often moments that feel personal without being overly specific.
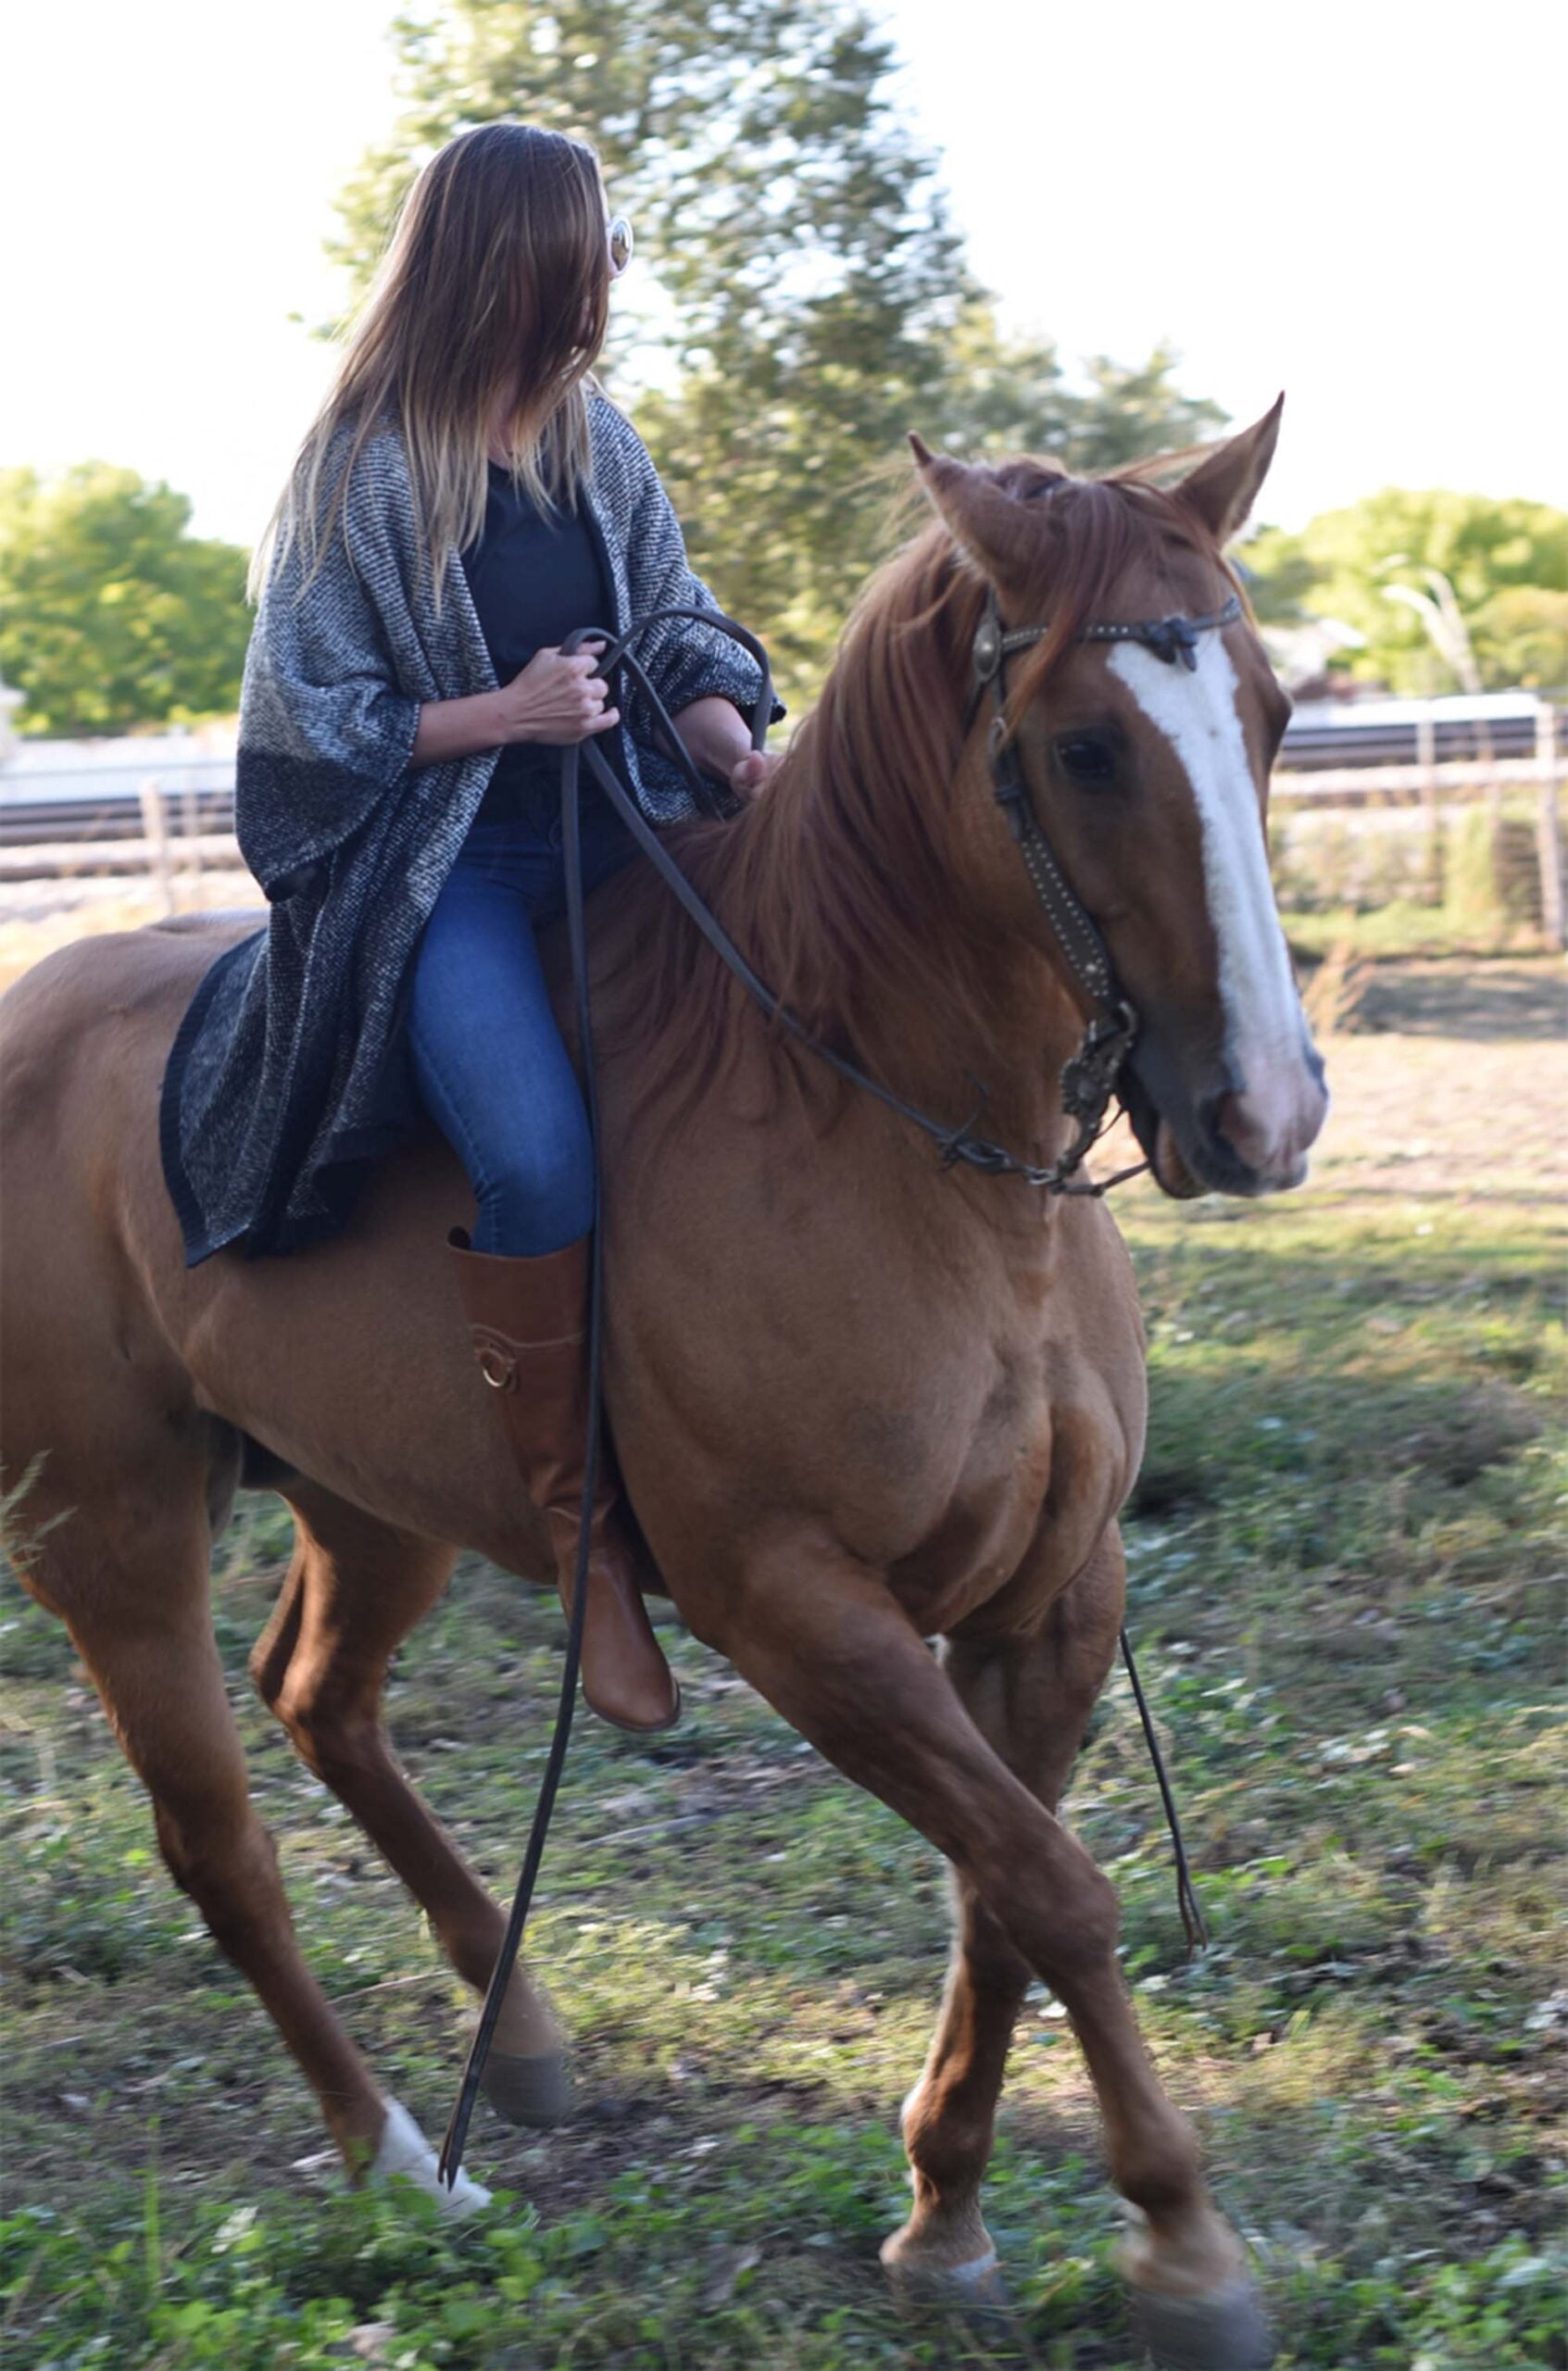
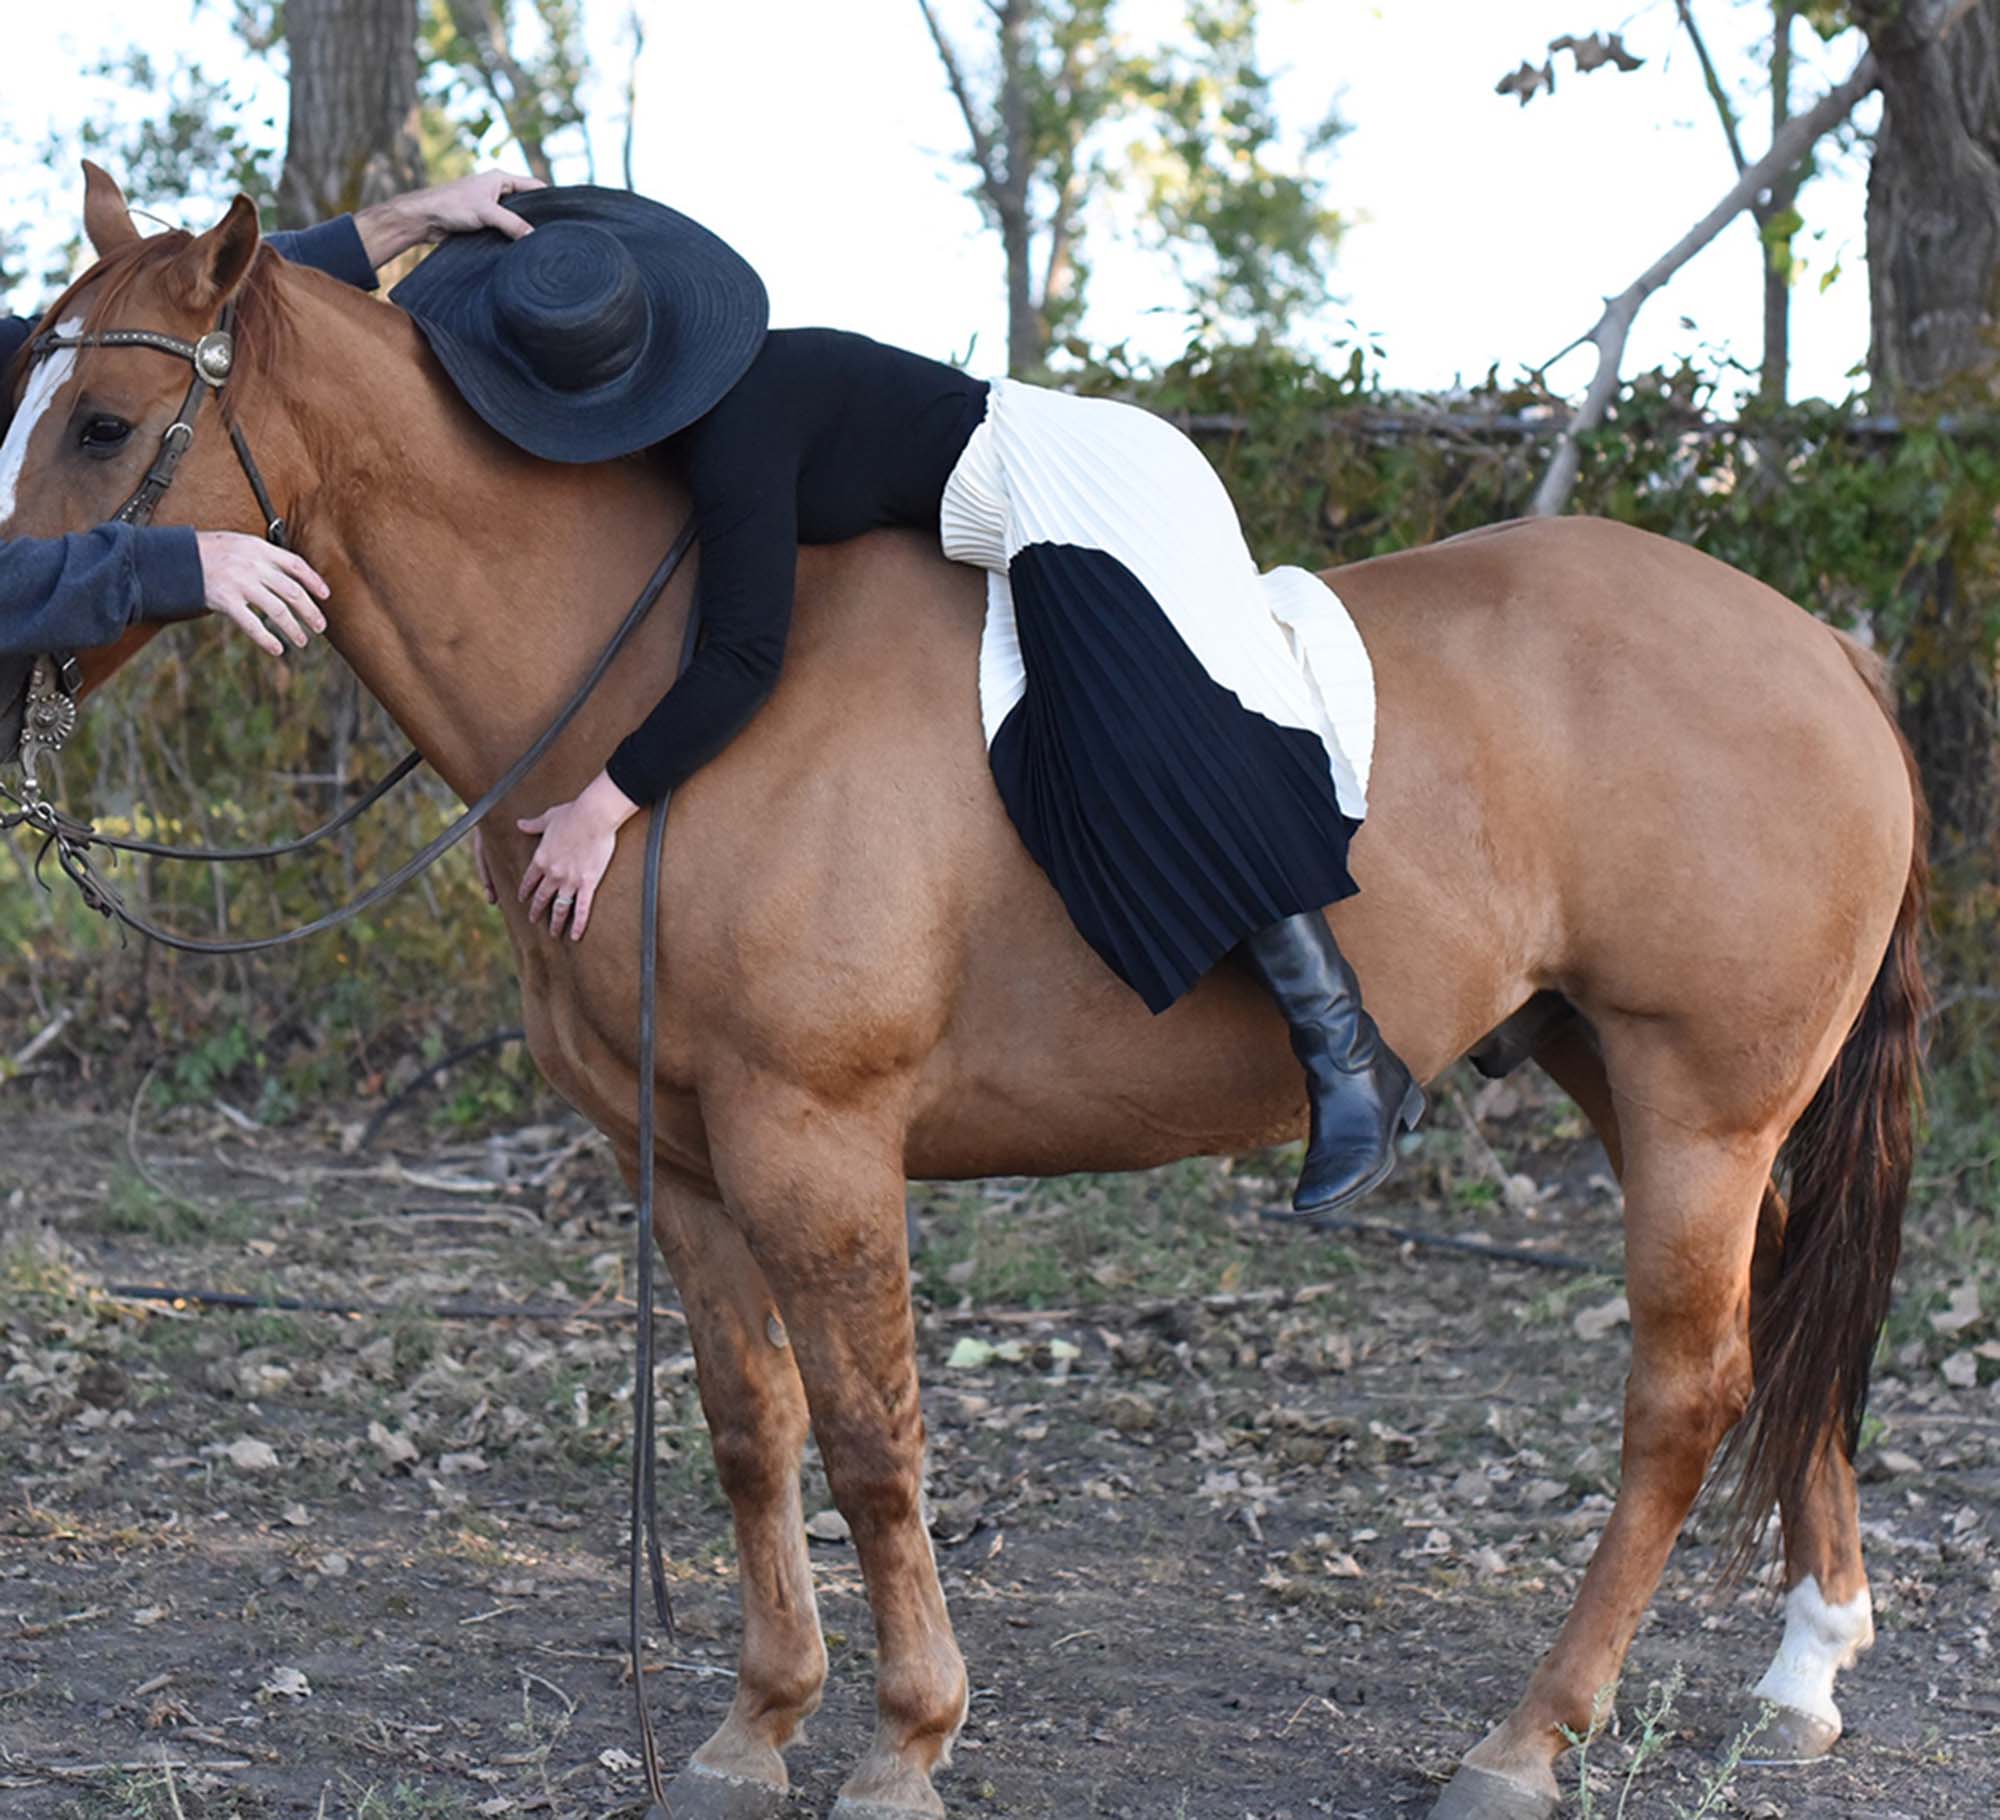
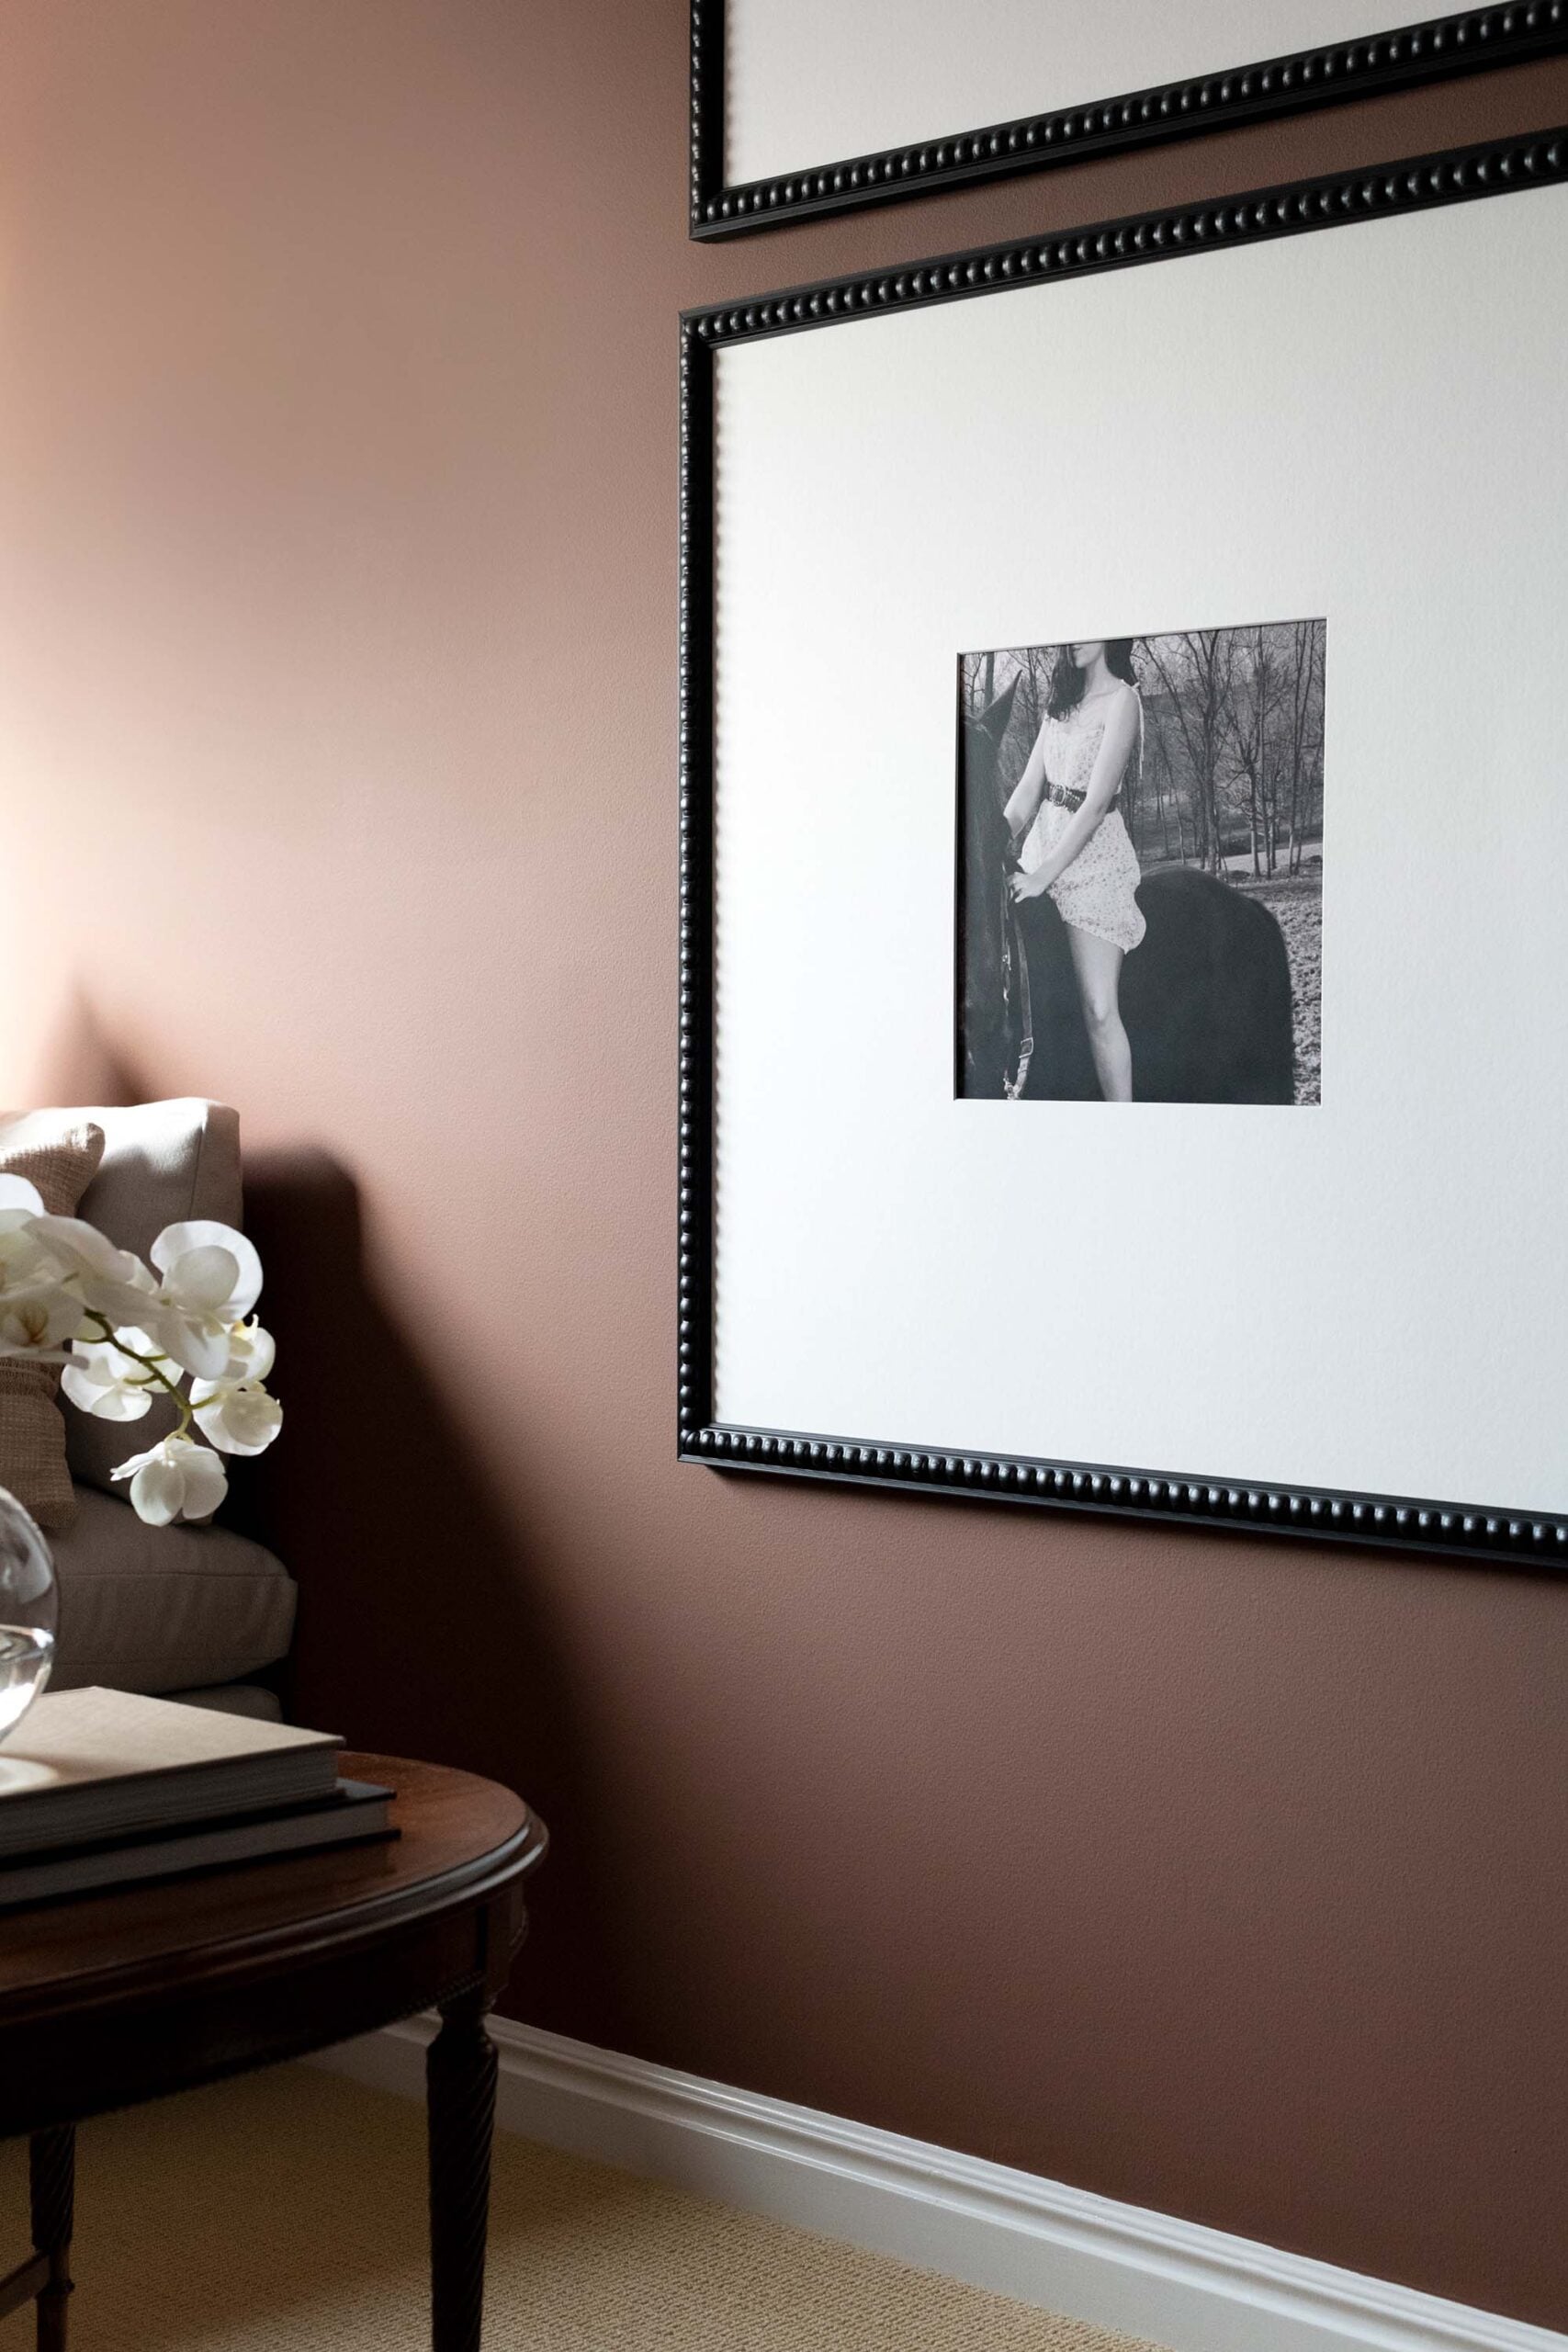
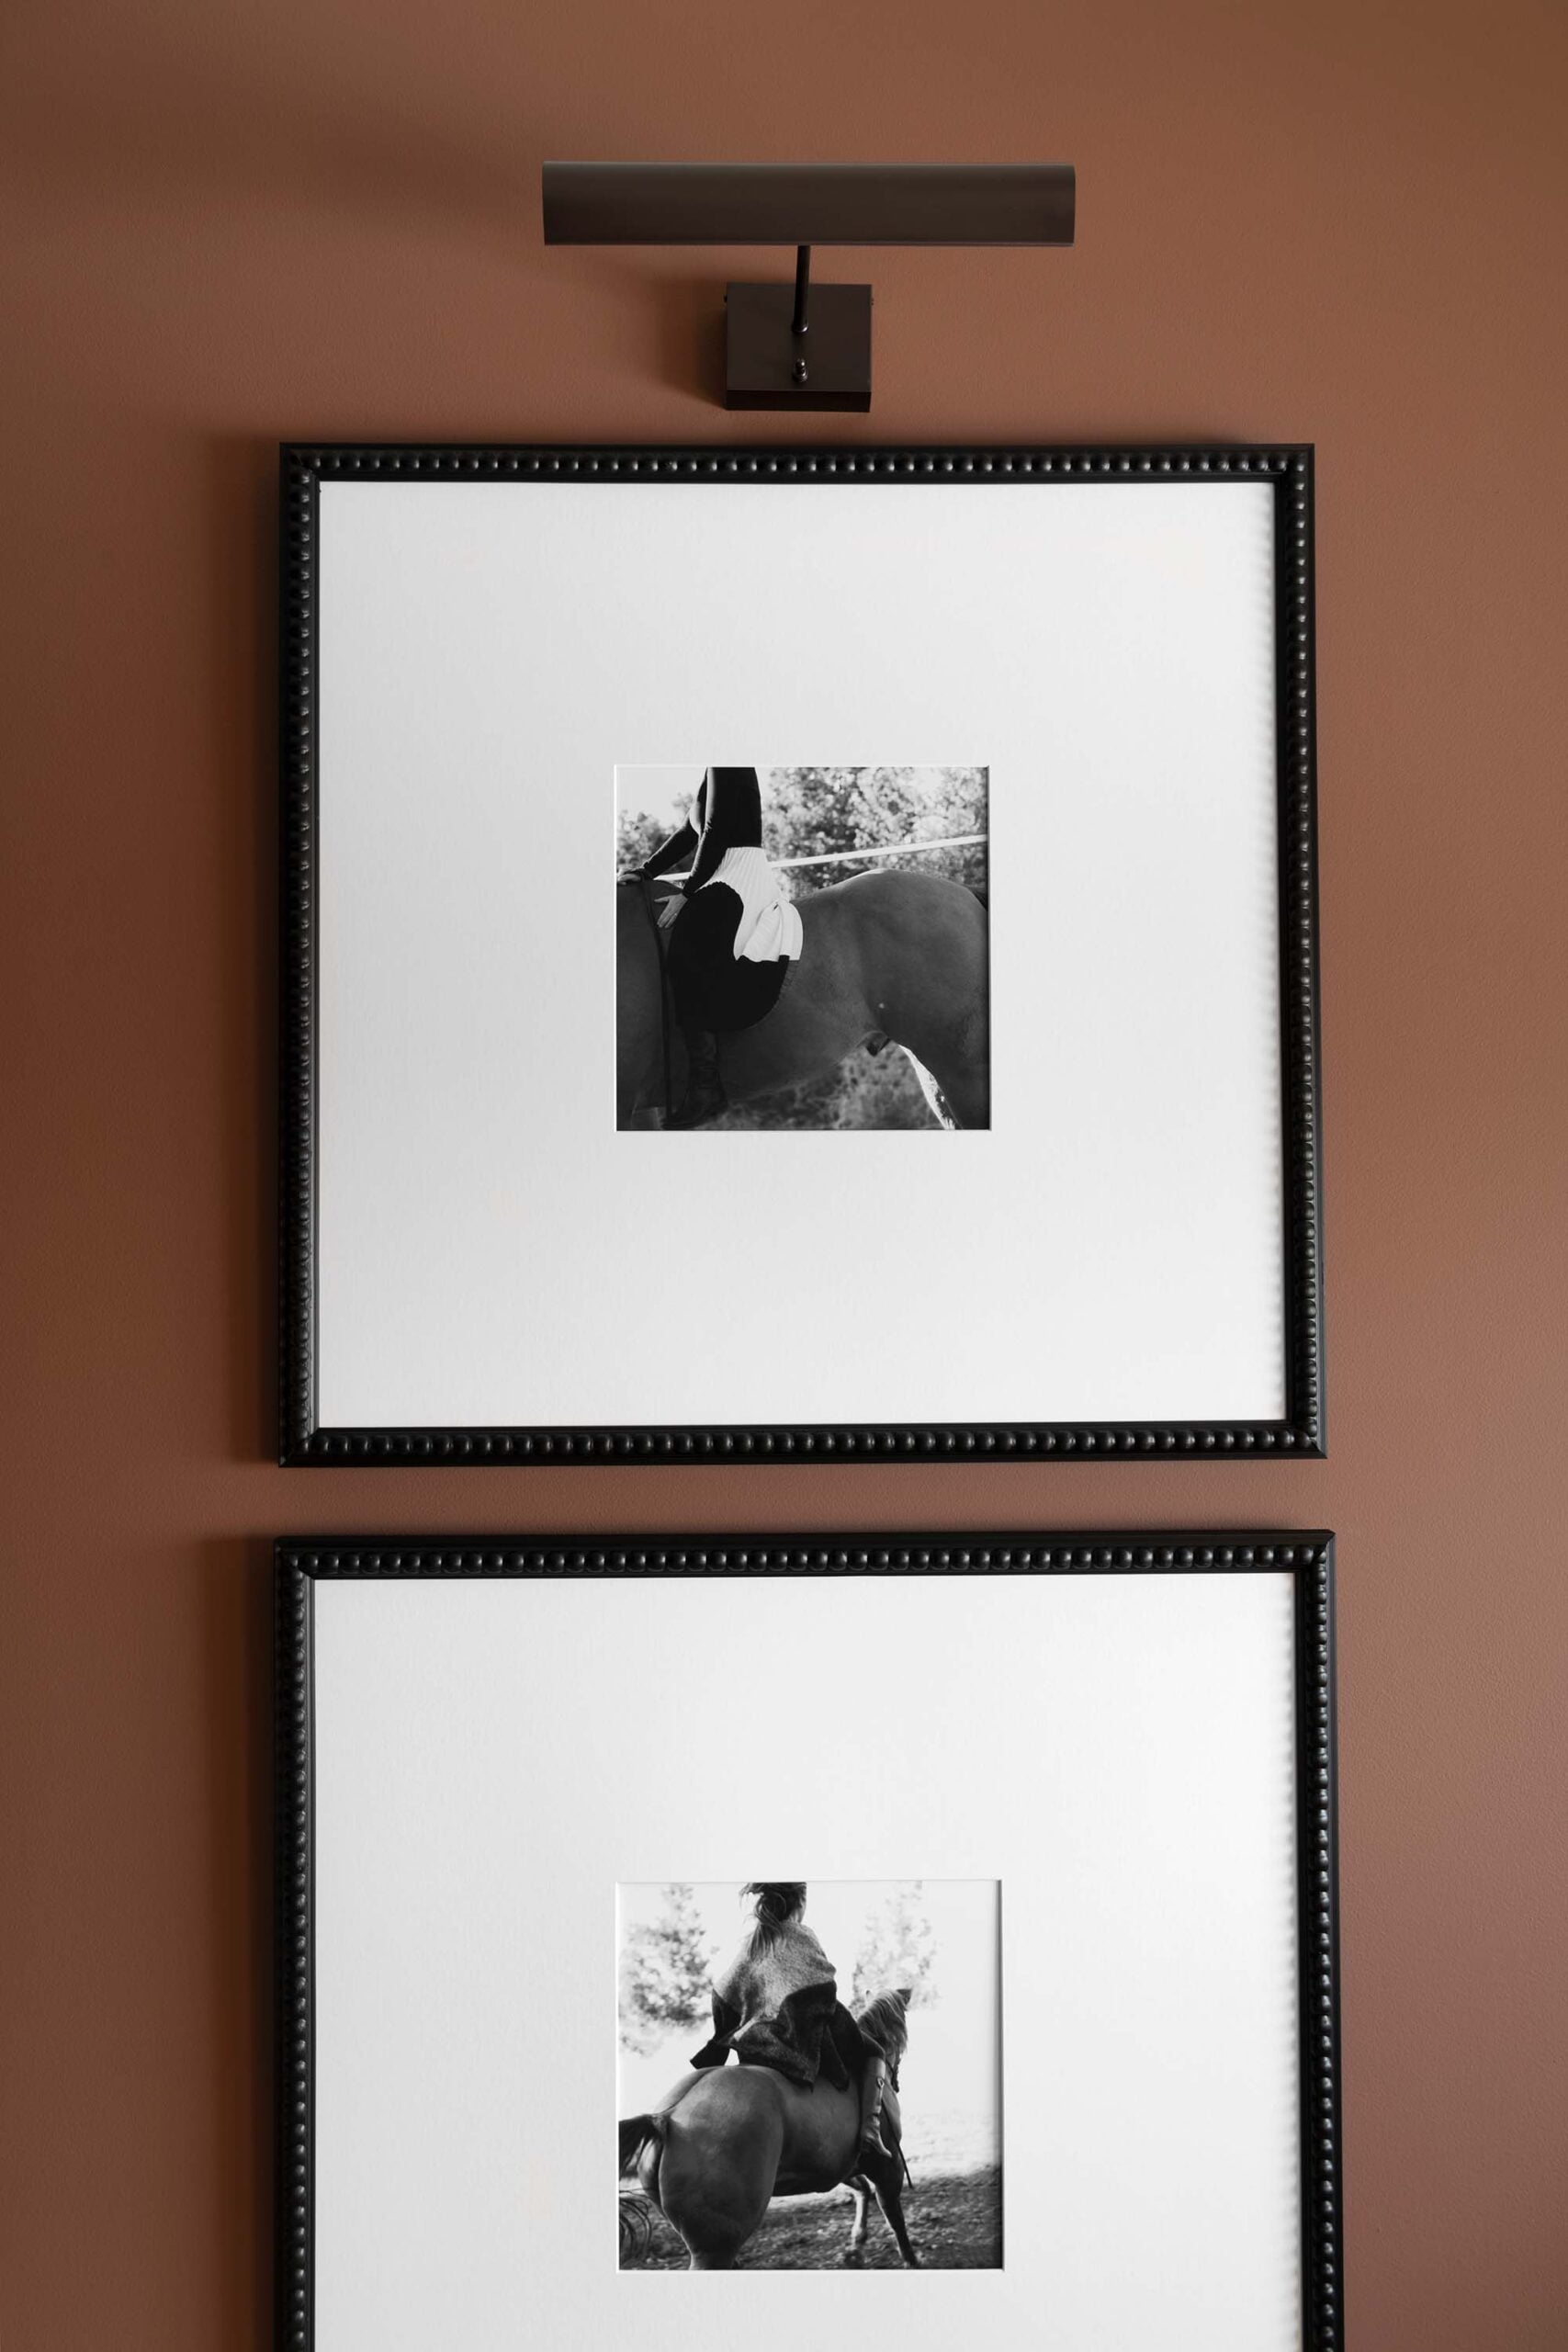
I was combing through old photos, when I came across one Emmett took of me riding his horse, Derby, over a decade ago. It was summertime, I was wearing a sundress, and we hopped on the horses (bareback) to ride them into the pond for a quick dip. Fun fact… our horses enjoy swimming with us. Anyway, Emmett snapped a photo while we were riding out, and it’s one I love but had not seen for years. It got me thinking- casual photos of friends on horses on could be really beautiful when cropped in the right way. I convinced my friend, Chelsea (pictured above), to have a riding day with me for the sake of art.
For this project, I began the process by digging up some inspiration. I pulled pretty black and white images. I had a Ralph Lauren equestrian aesthetic in mind. I called up my girlfriends and asked if they wanted to have a fun day modeling on horses with me. I styled my friends and had them hop on the horses while I snapped away with the camera. I wish I would have kept more behind the scenes photos because it was a hoot! They were great sports and did such a phenomenal job- we had a blast and made some good memories.
Obviously if you’d like to frame photos you’ve taken, it doesn’t have to be a big ordeal or photoshoot. You could use family photos, snippets from your travels, a hobby you’re passionate about, or blown up photos taken from decades past… whatever feels right from your camera roll on your phone. Don’t worry if they’re grainy, not excellent quality, or have imperfections… that adds to their character.
Editing Your Photos with Intention
Once I decide which images I want to work with, I focus on subtle edits that enhance the photograph without changing its character. I adjust exposure, contrast, and warmth so the image feels balanced. At this stage I also decide whether the photograph will be more impactful in color or in black and white. Black and white often adds elegance and timeless appeal, especially when the tones are strong and well defined. The goal in editing is not to make something trendy, but to make something that will stand the test of time and relate to the room’s overall mood.
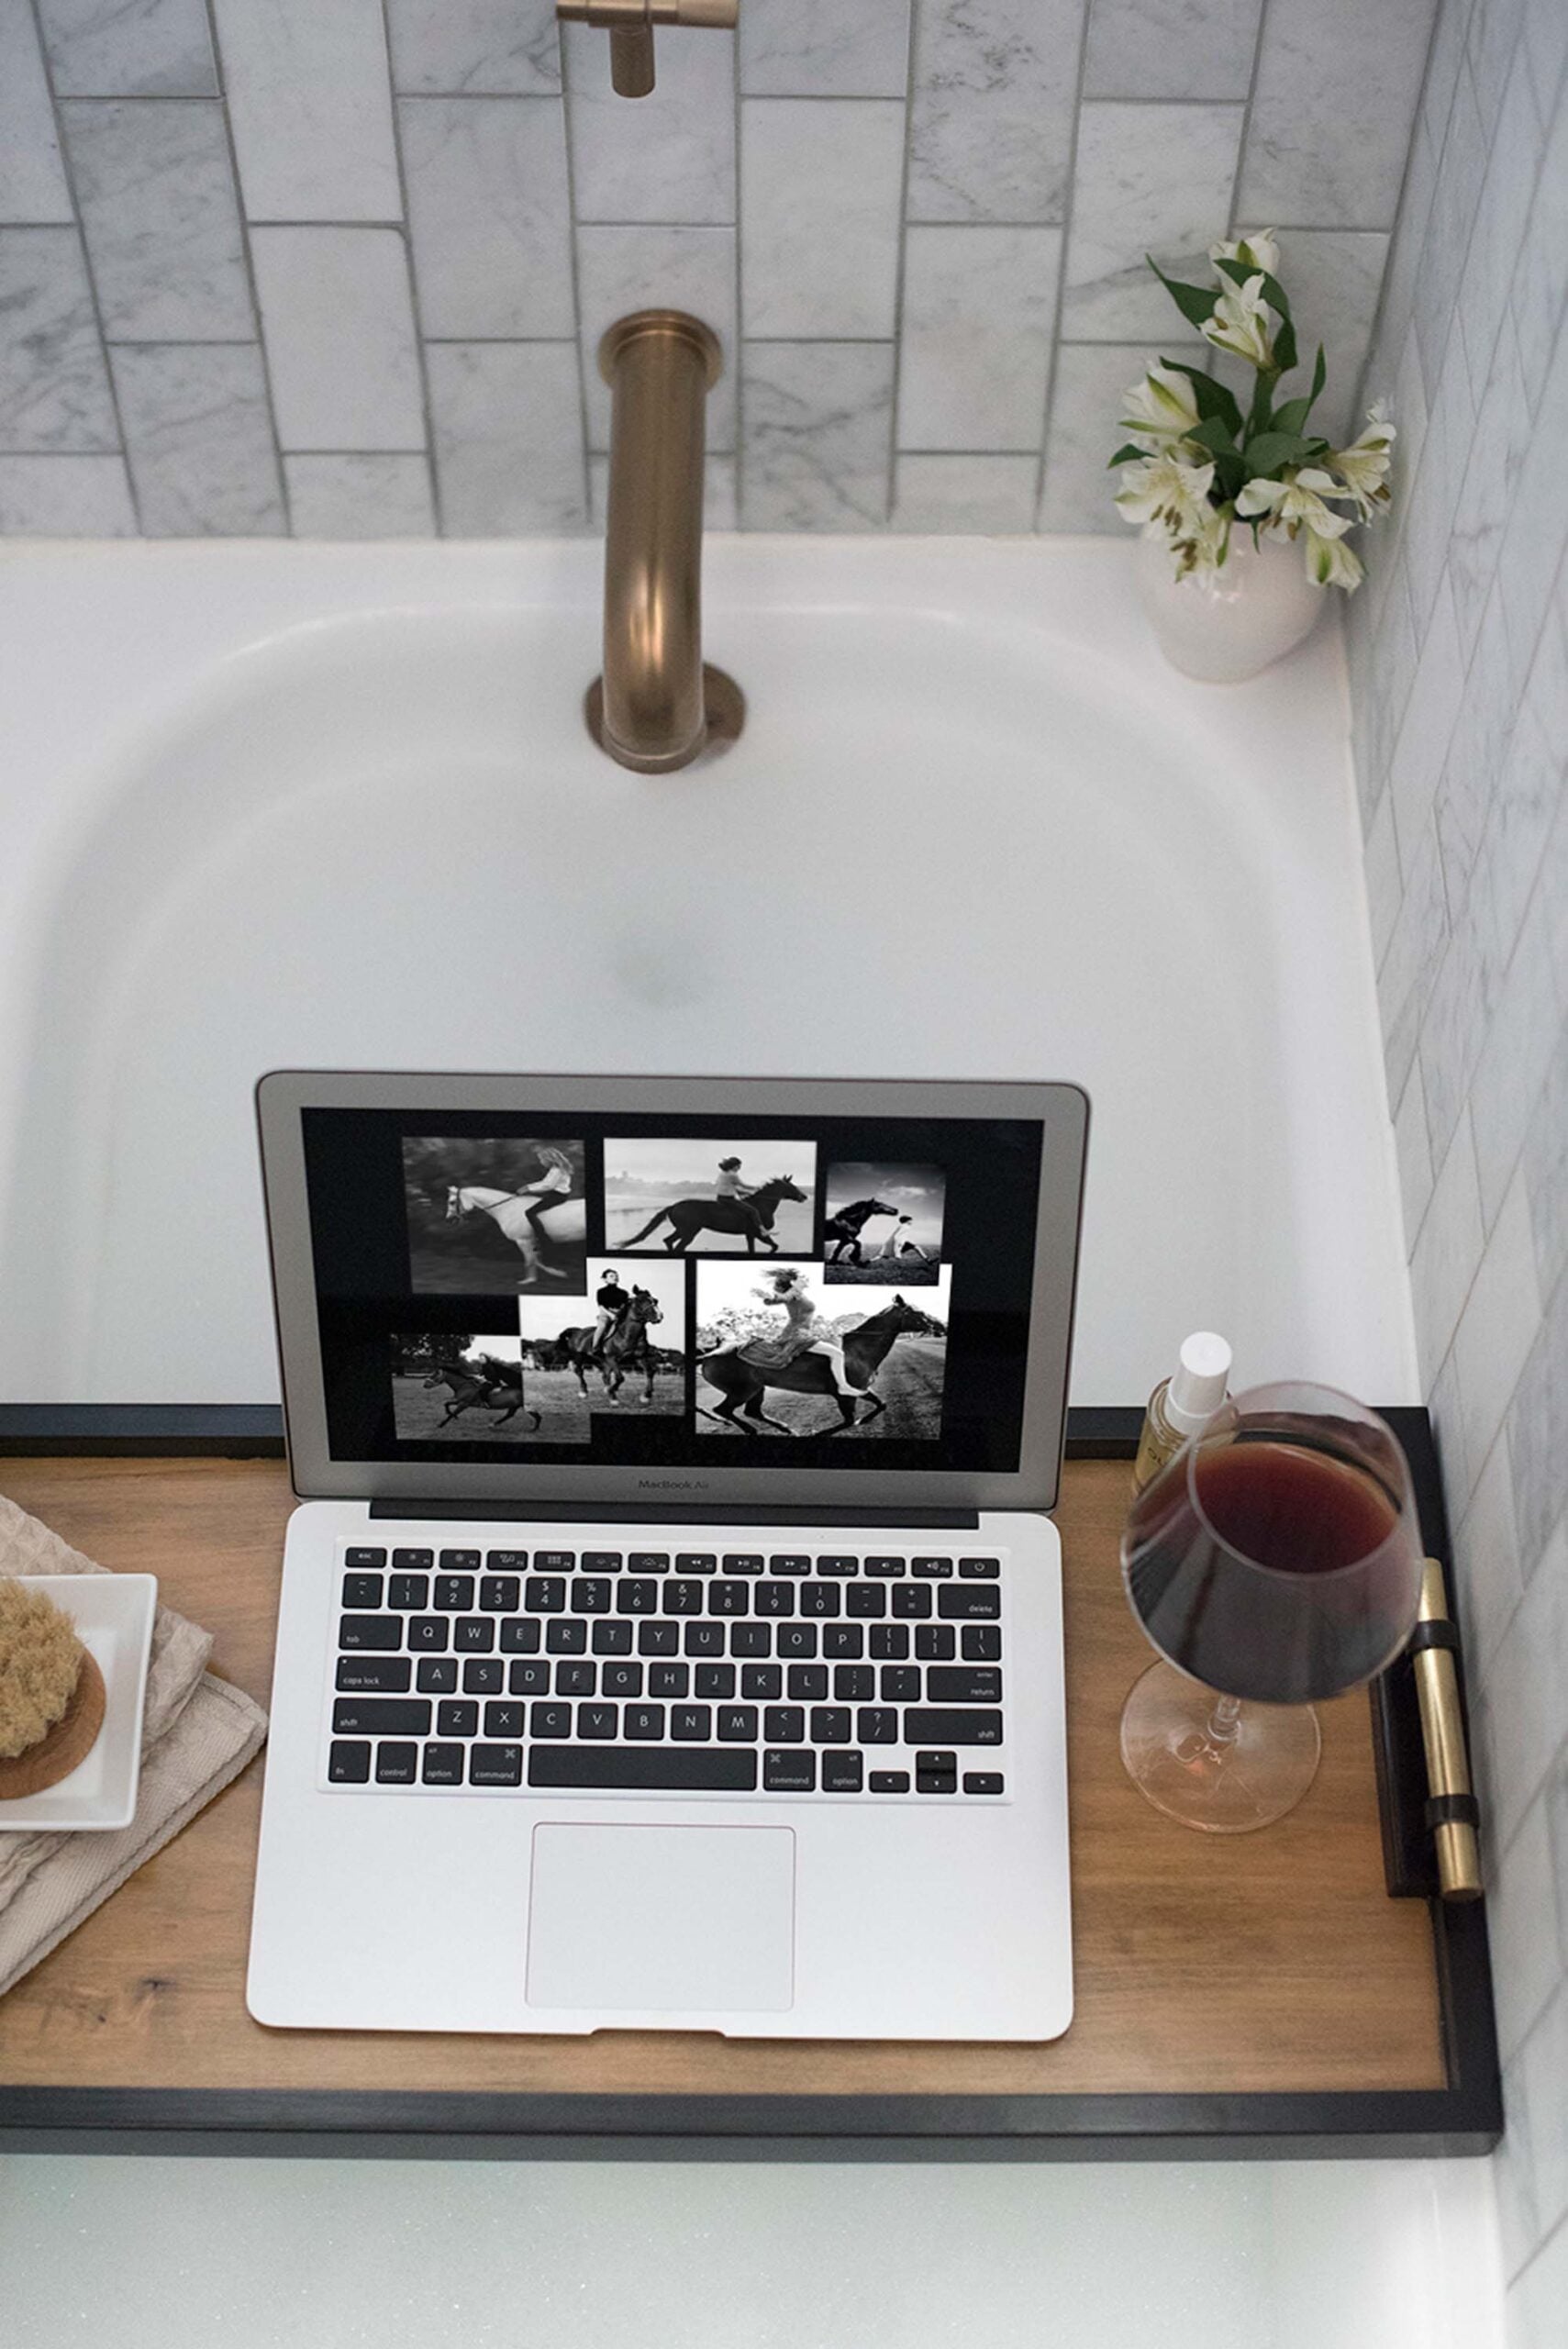
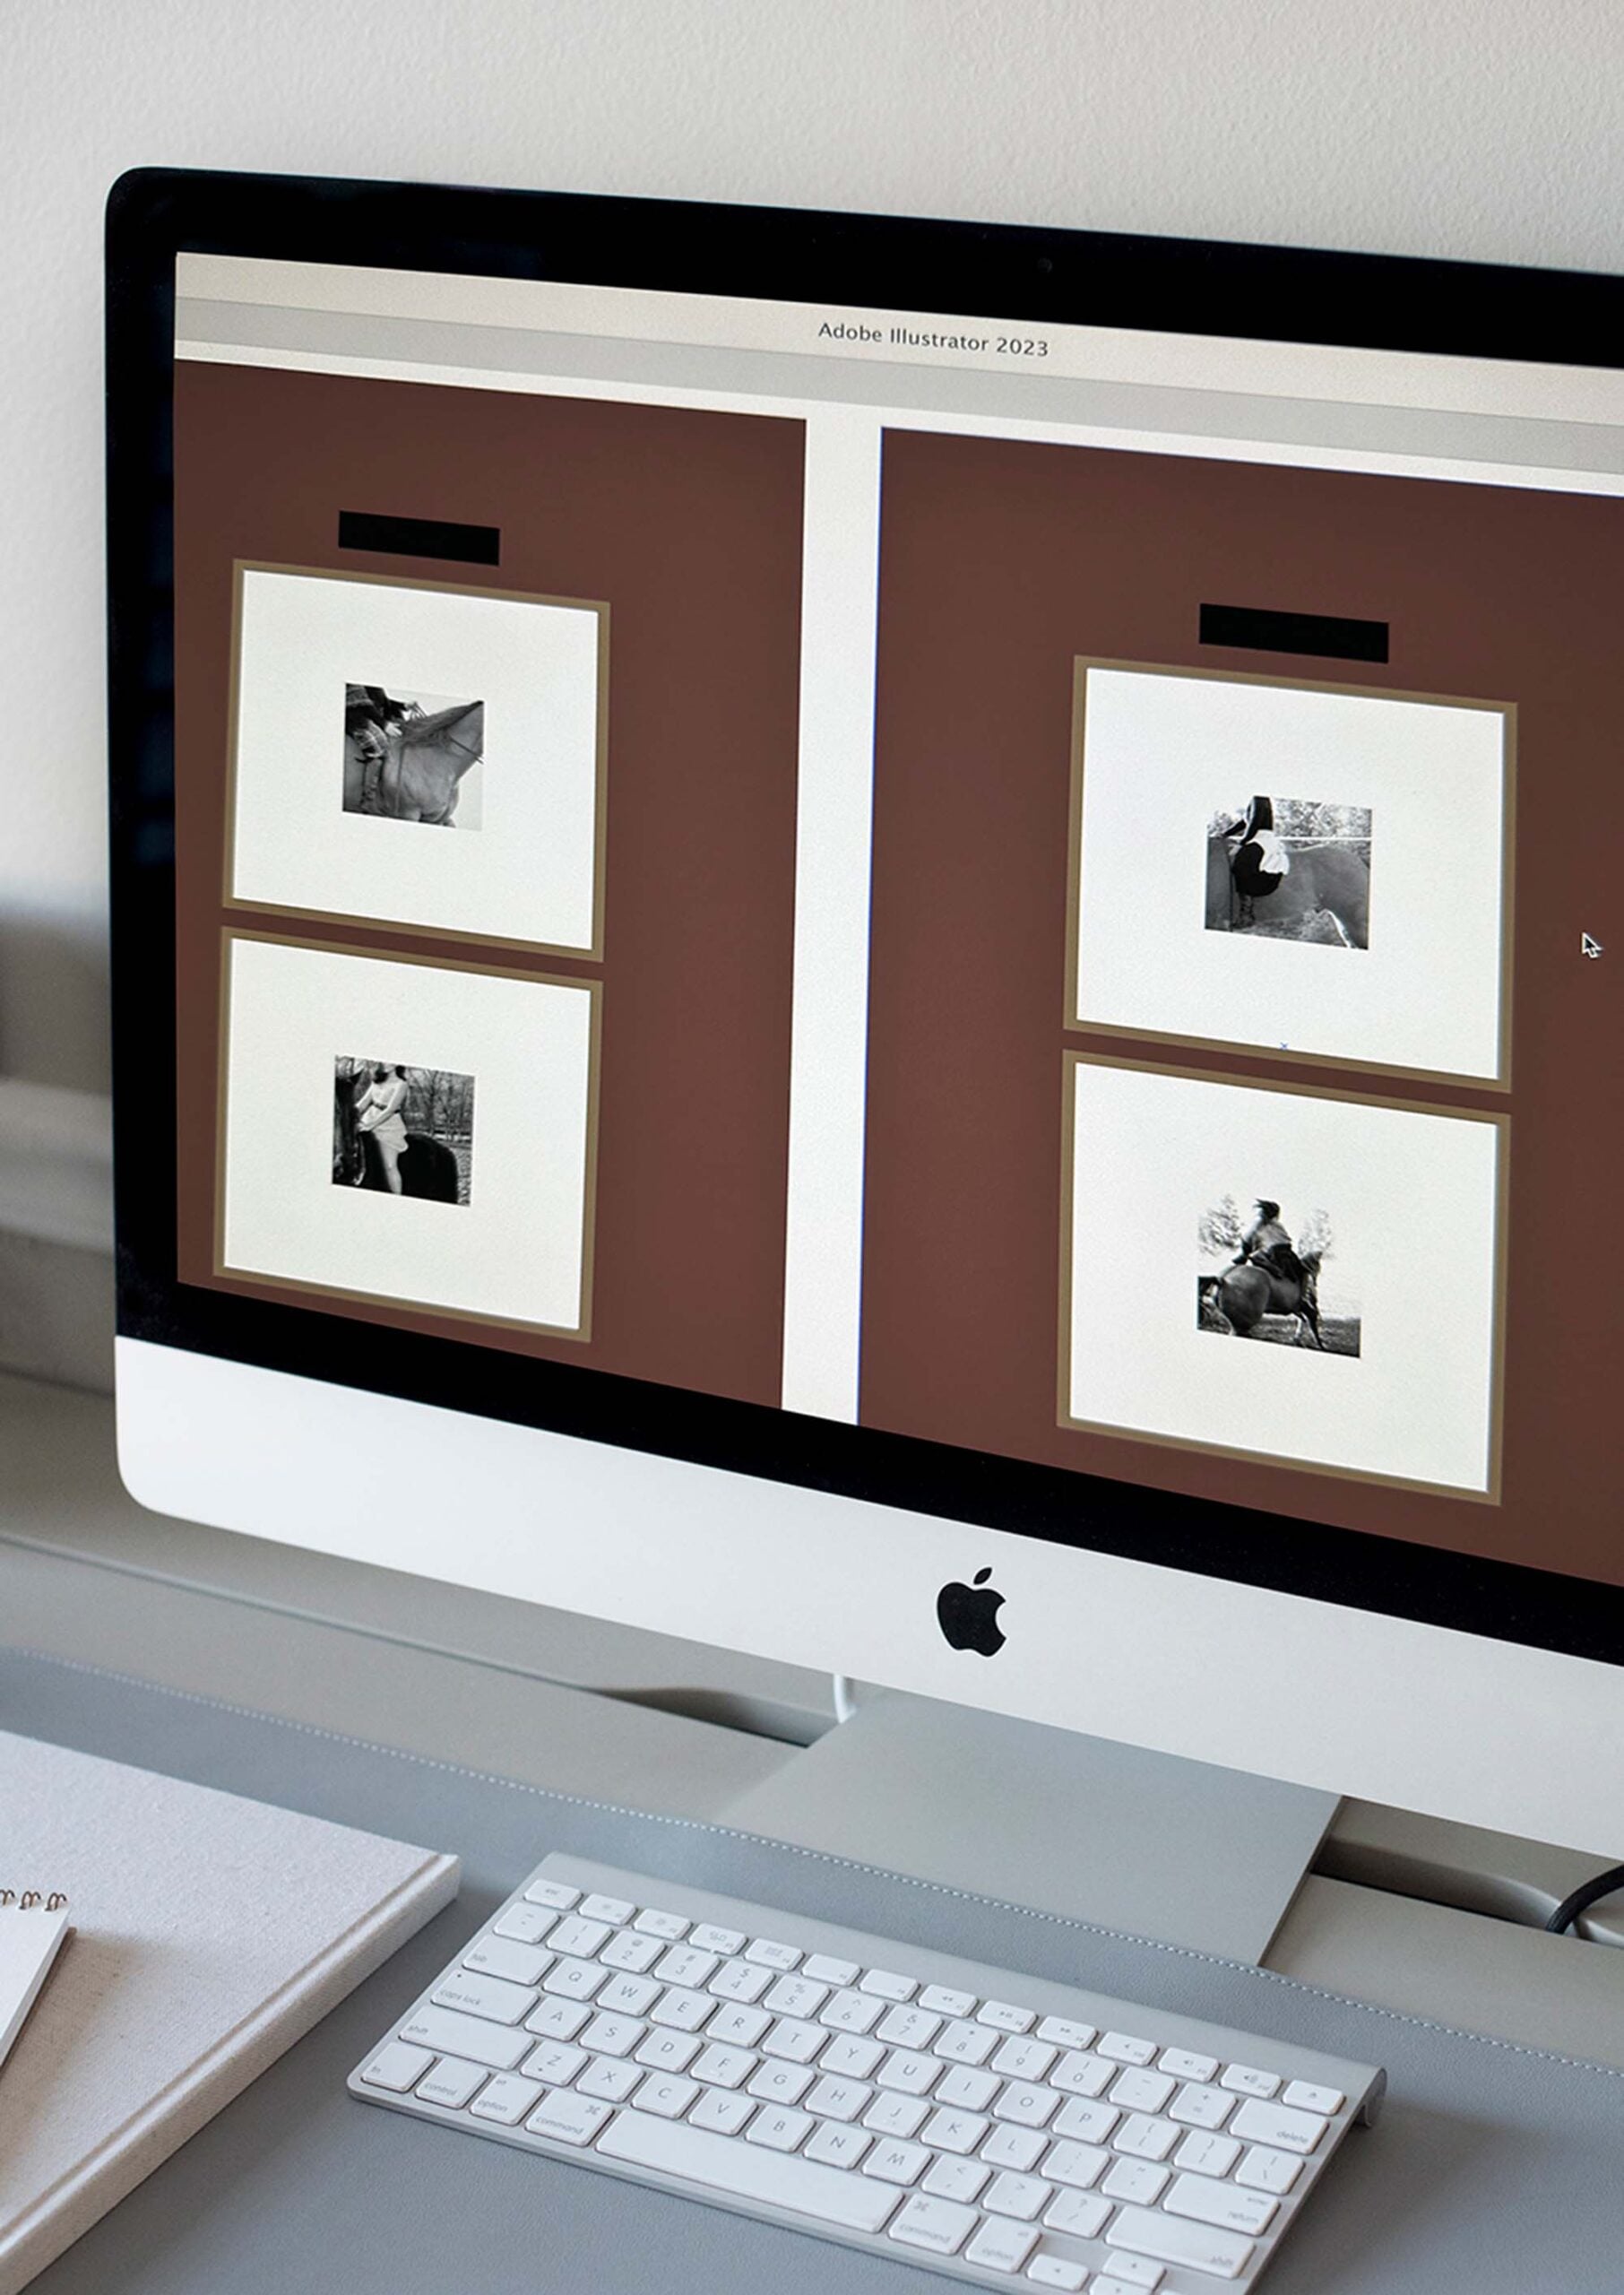
I sorted and edited the images, selecting my favorites and removing the saturation for that high contrast, black and white look I was after. I knew I wanted to install the photographs as art, but wasn’t sure where. Fast forward to a few years later, when working on the guest room it occurred to me this would be the ideal spot for my equestrian photos! I knew I needed large scale artwork to fill the negative space in the window nook, so I scaled everything out on my computer in Adobe Illustrator, mocking up the walls, mat, image, frame size, and even the gallery lights.
Printing and Framing Like a Designer
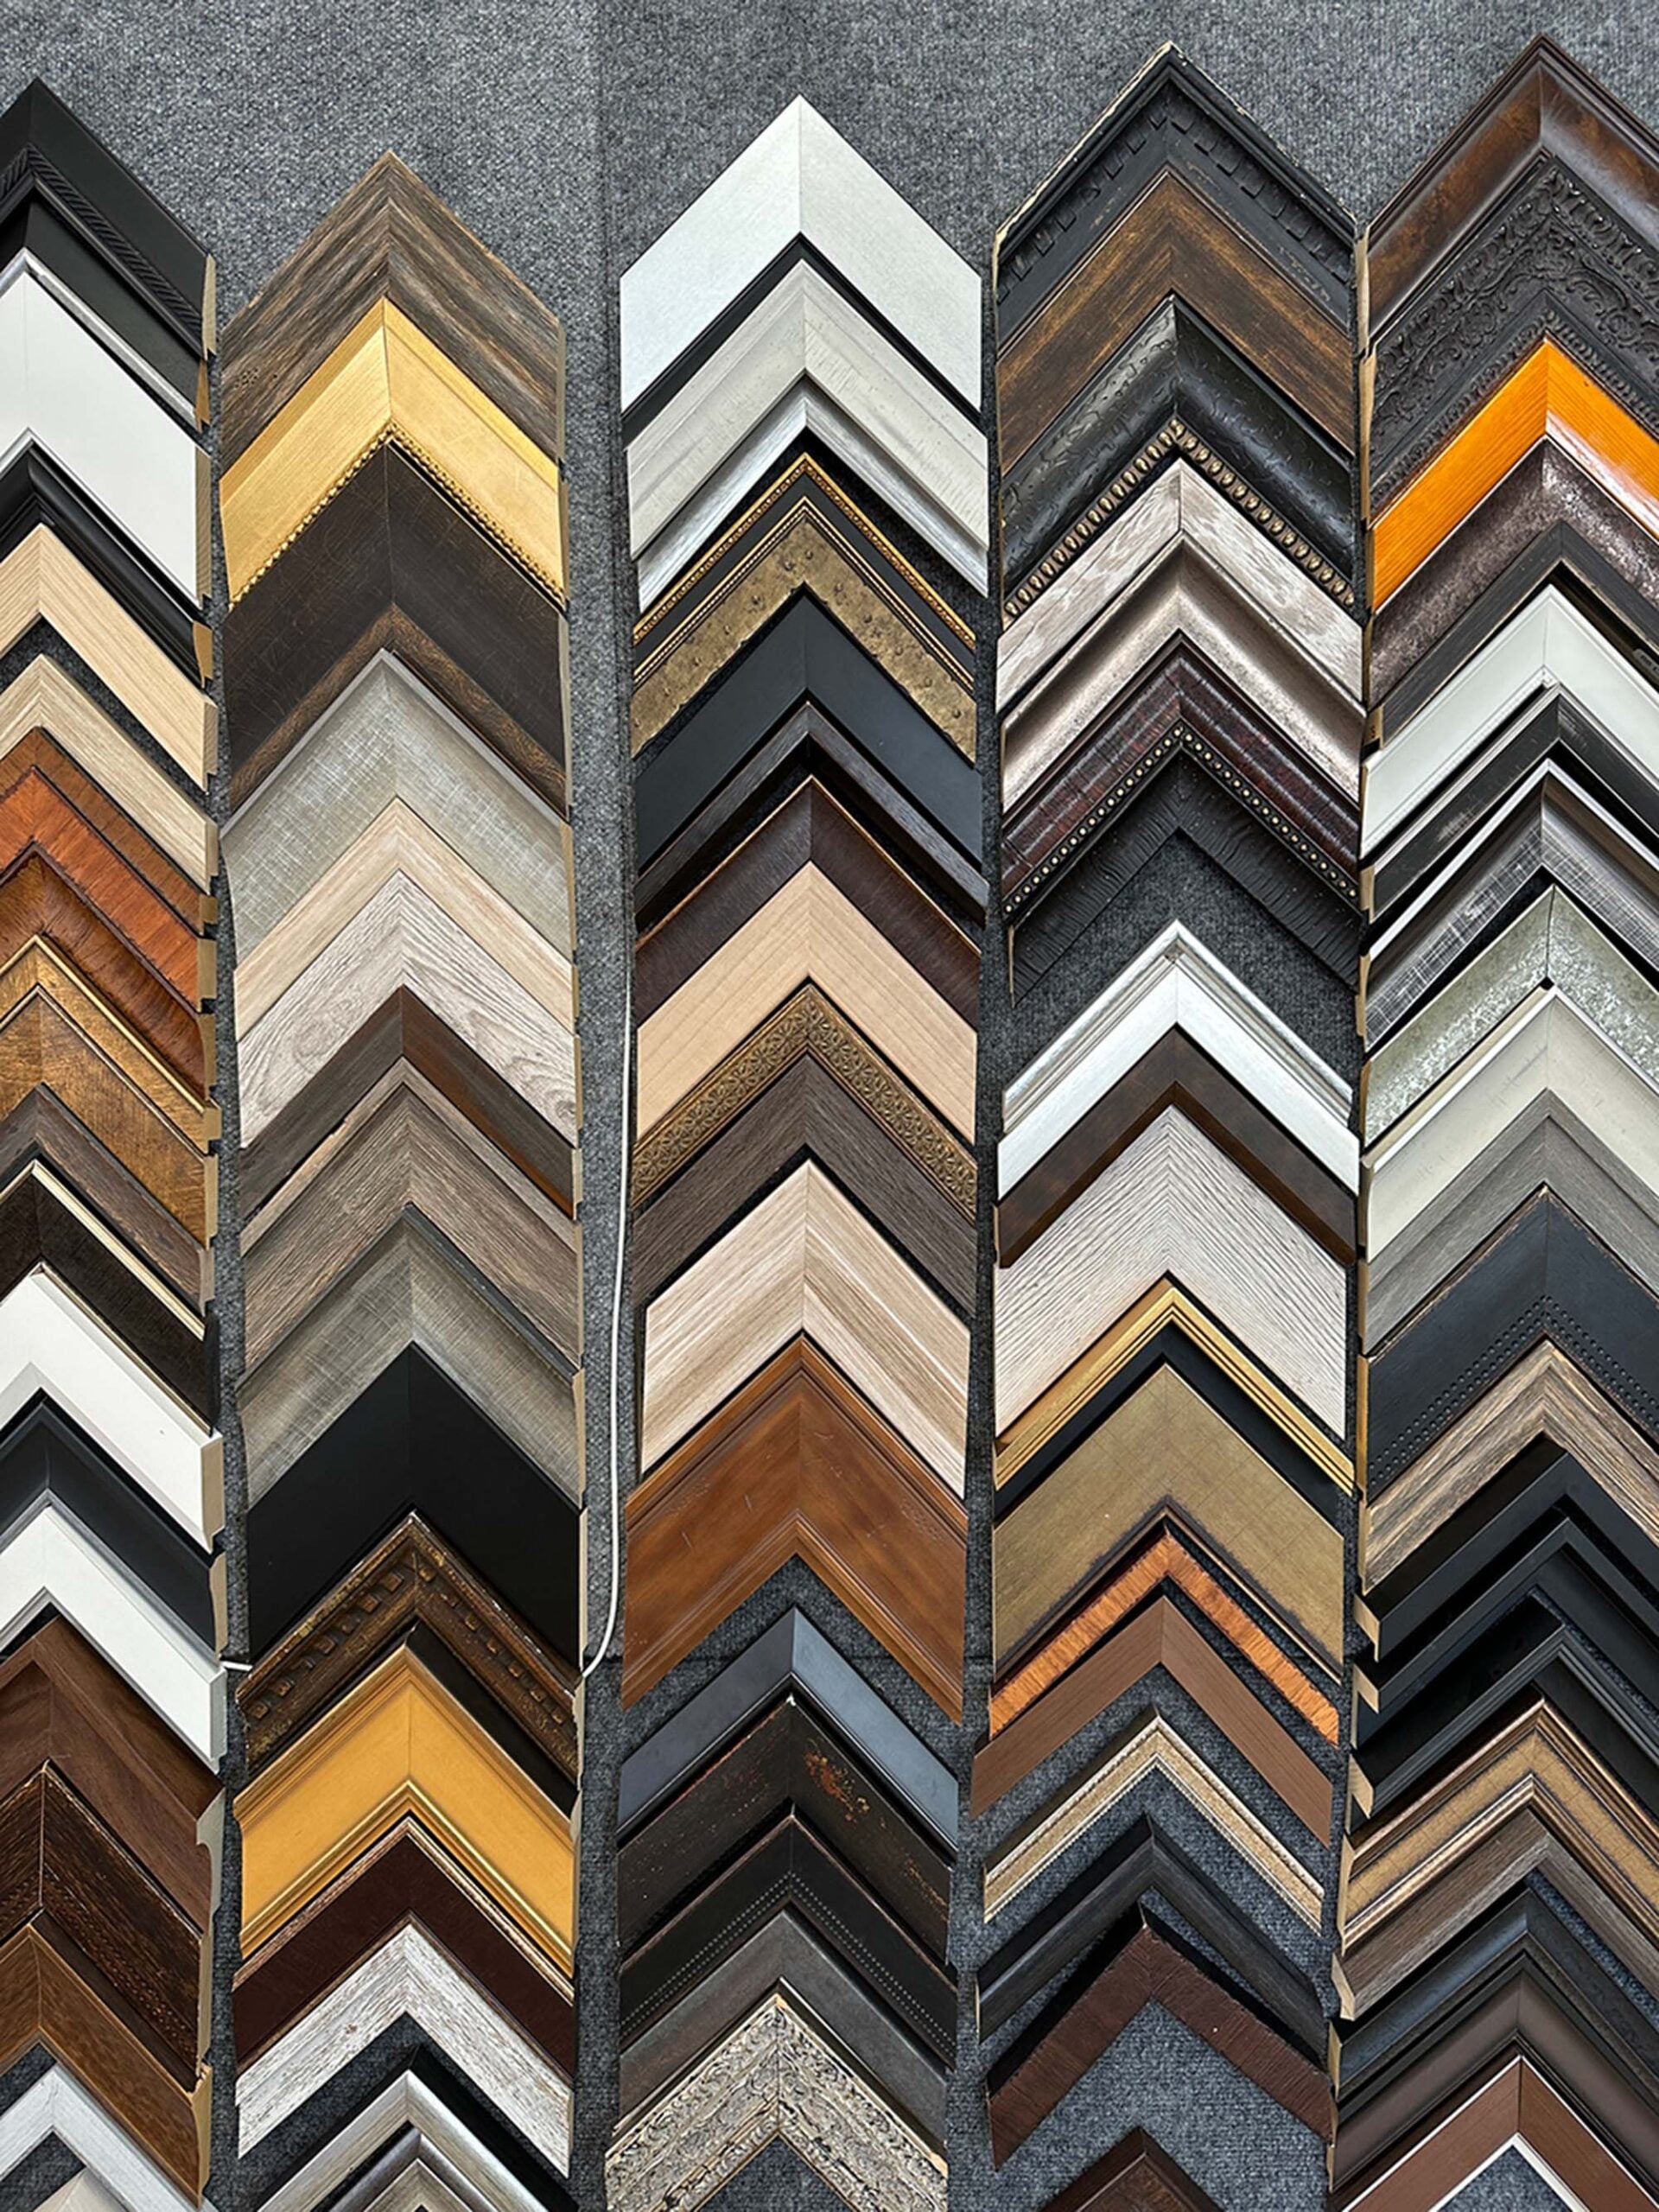
Once I had it designed, I sent the photos to my local photography printer (Nichols Photo Studio, if you’re local) to have them professionally printed. For four photos, the professional photographic prints cost around $100. After picking up my photos, I immediately dropped them off at the framer and made frame selections. Want to see my two top picks? I was trying to decided between a simple black textural frame and a greek key option…
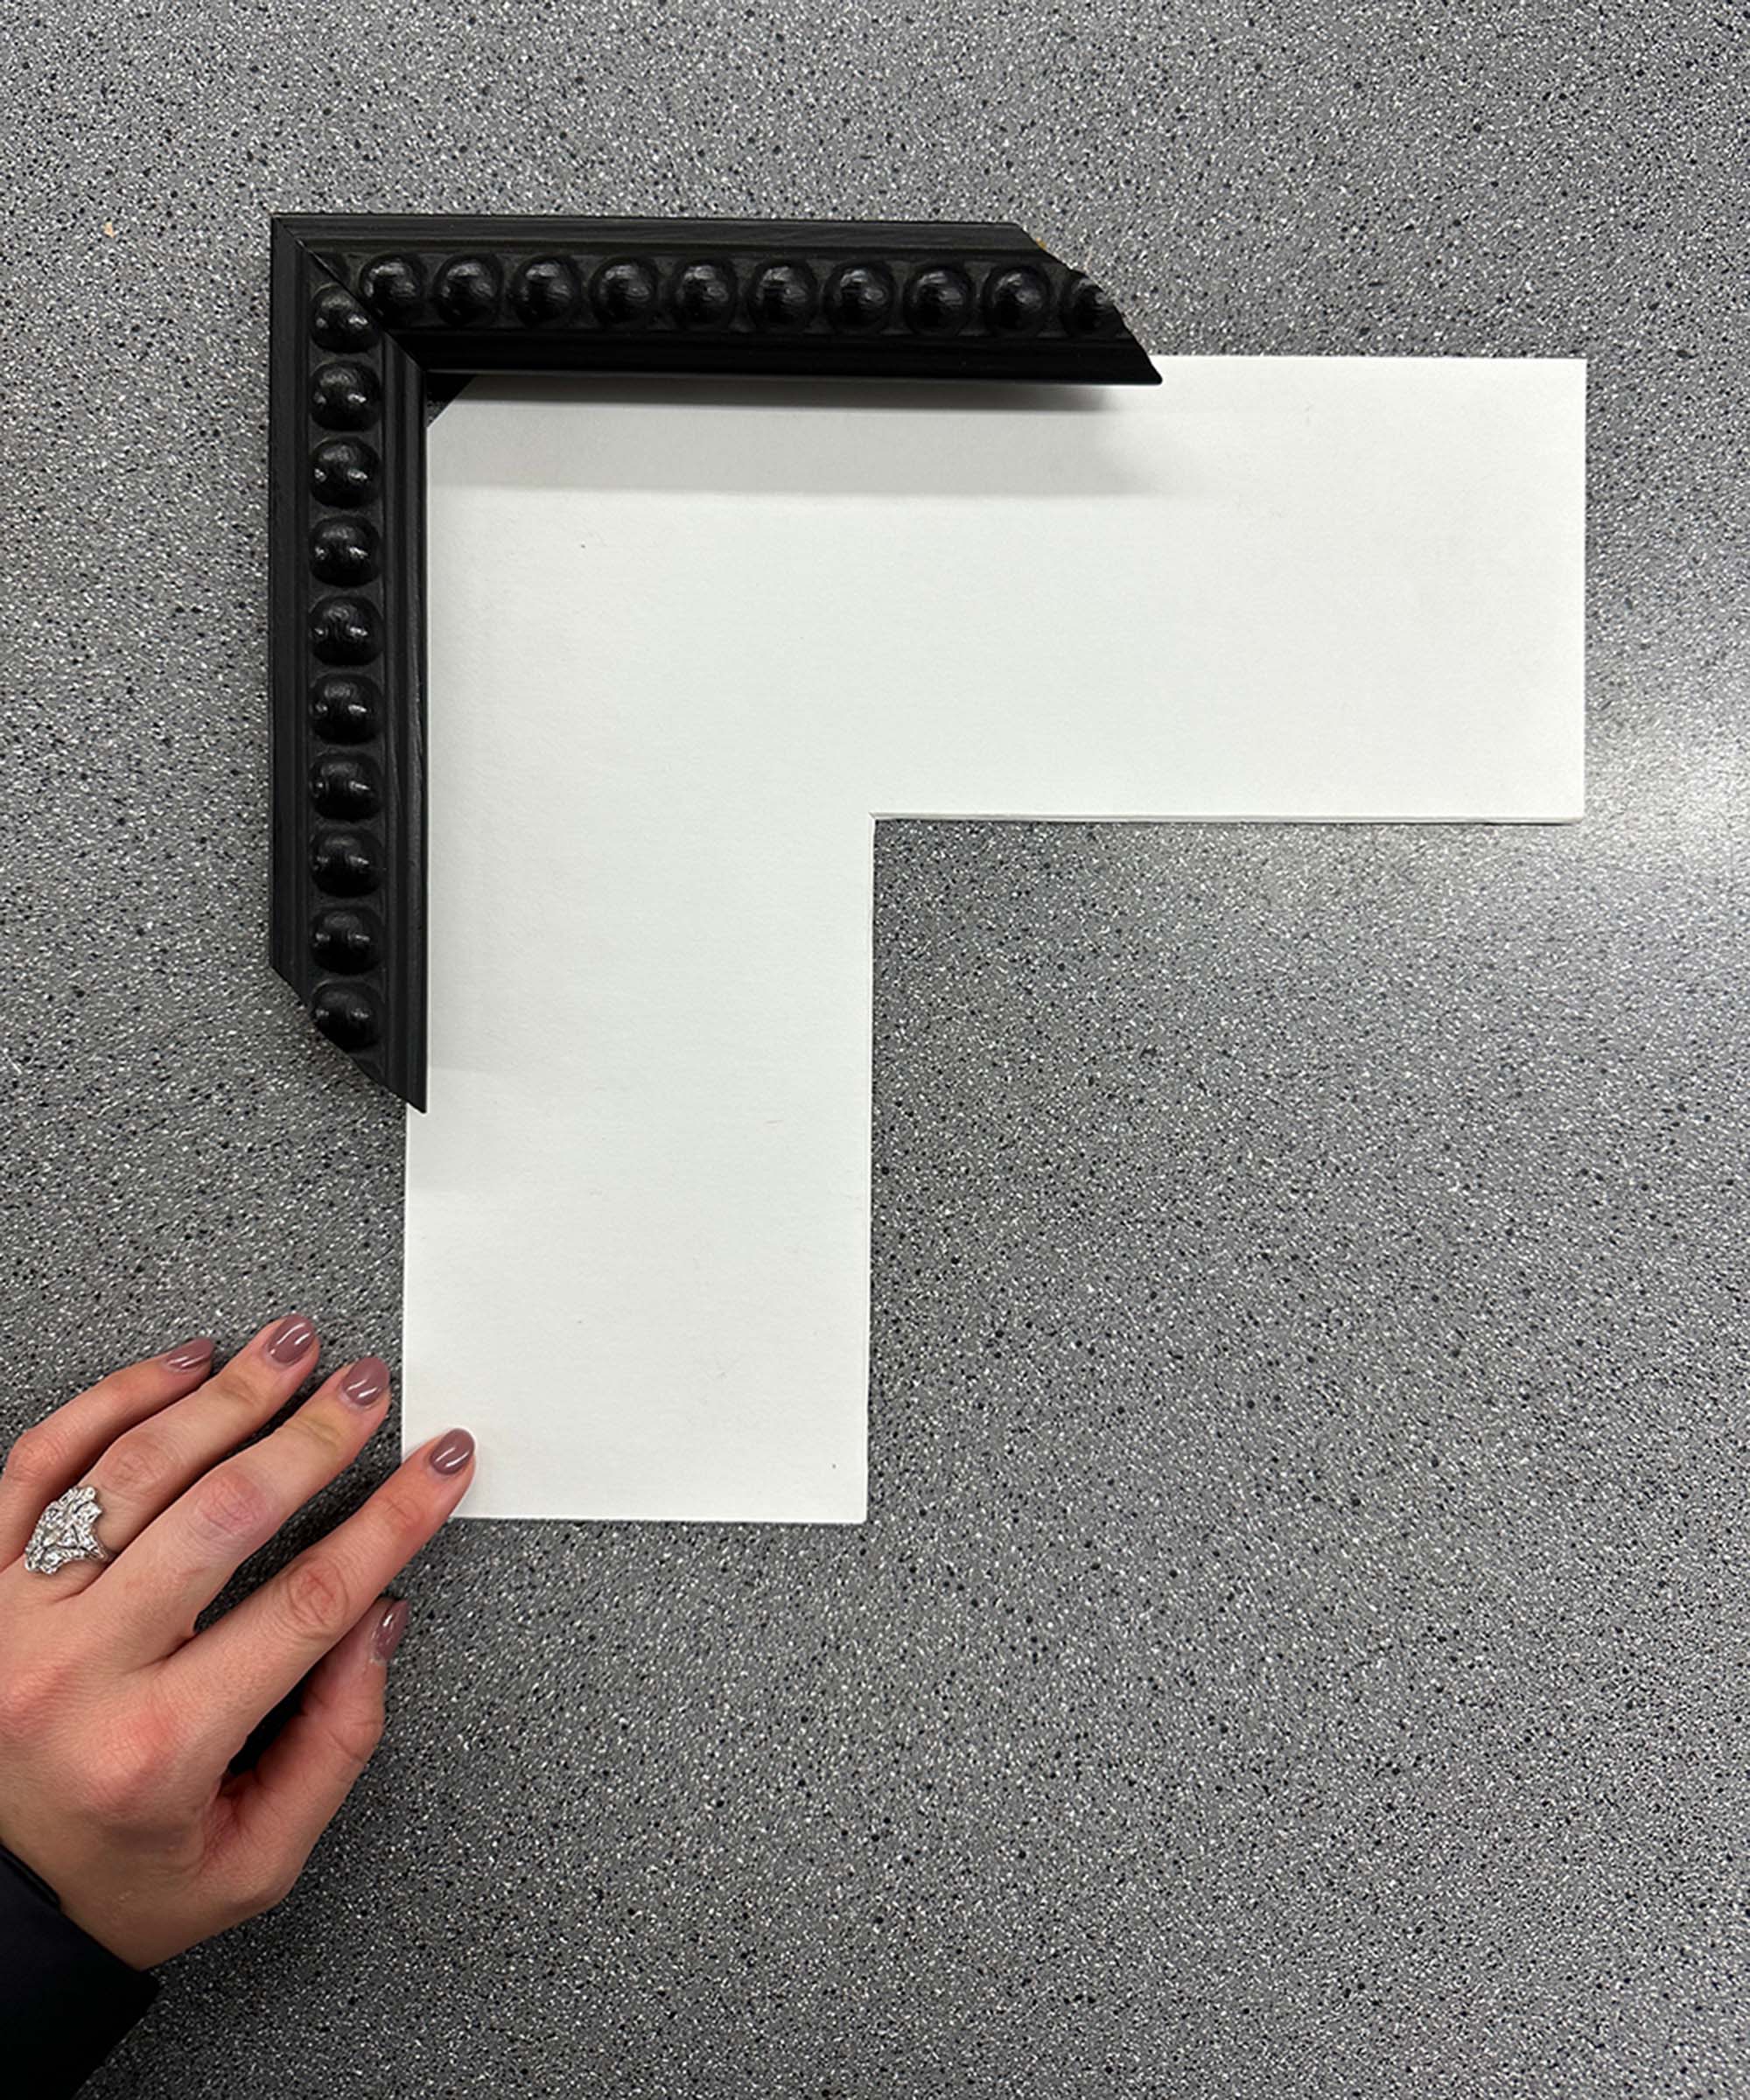
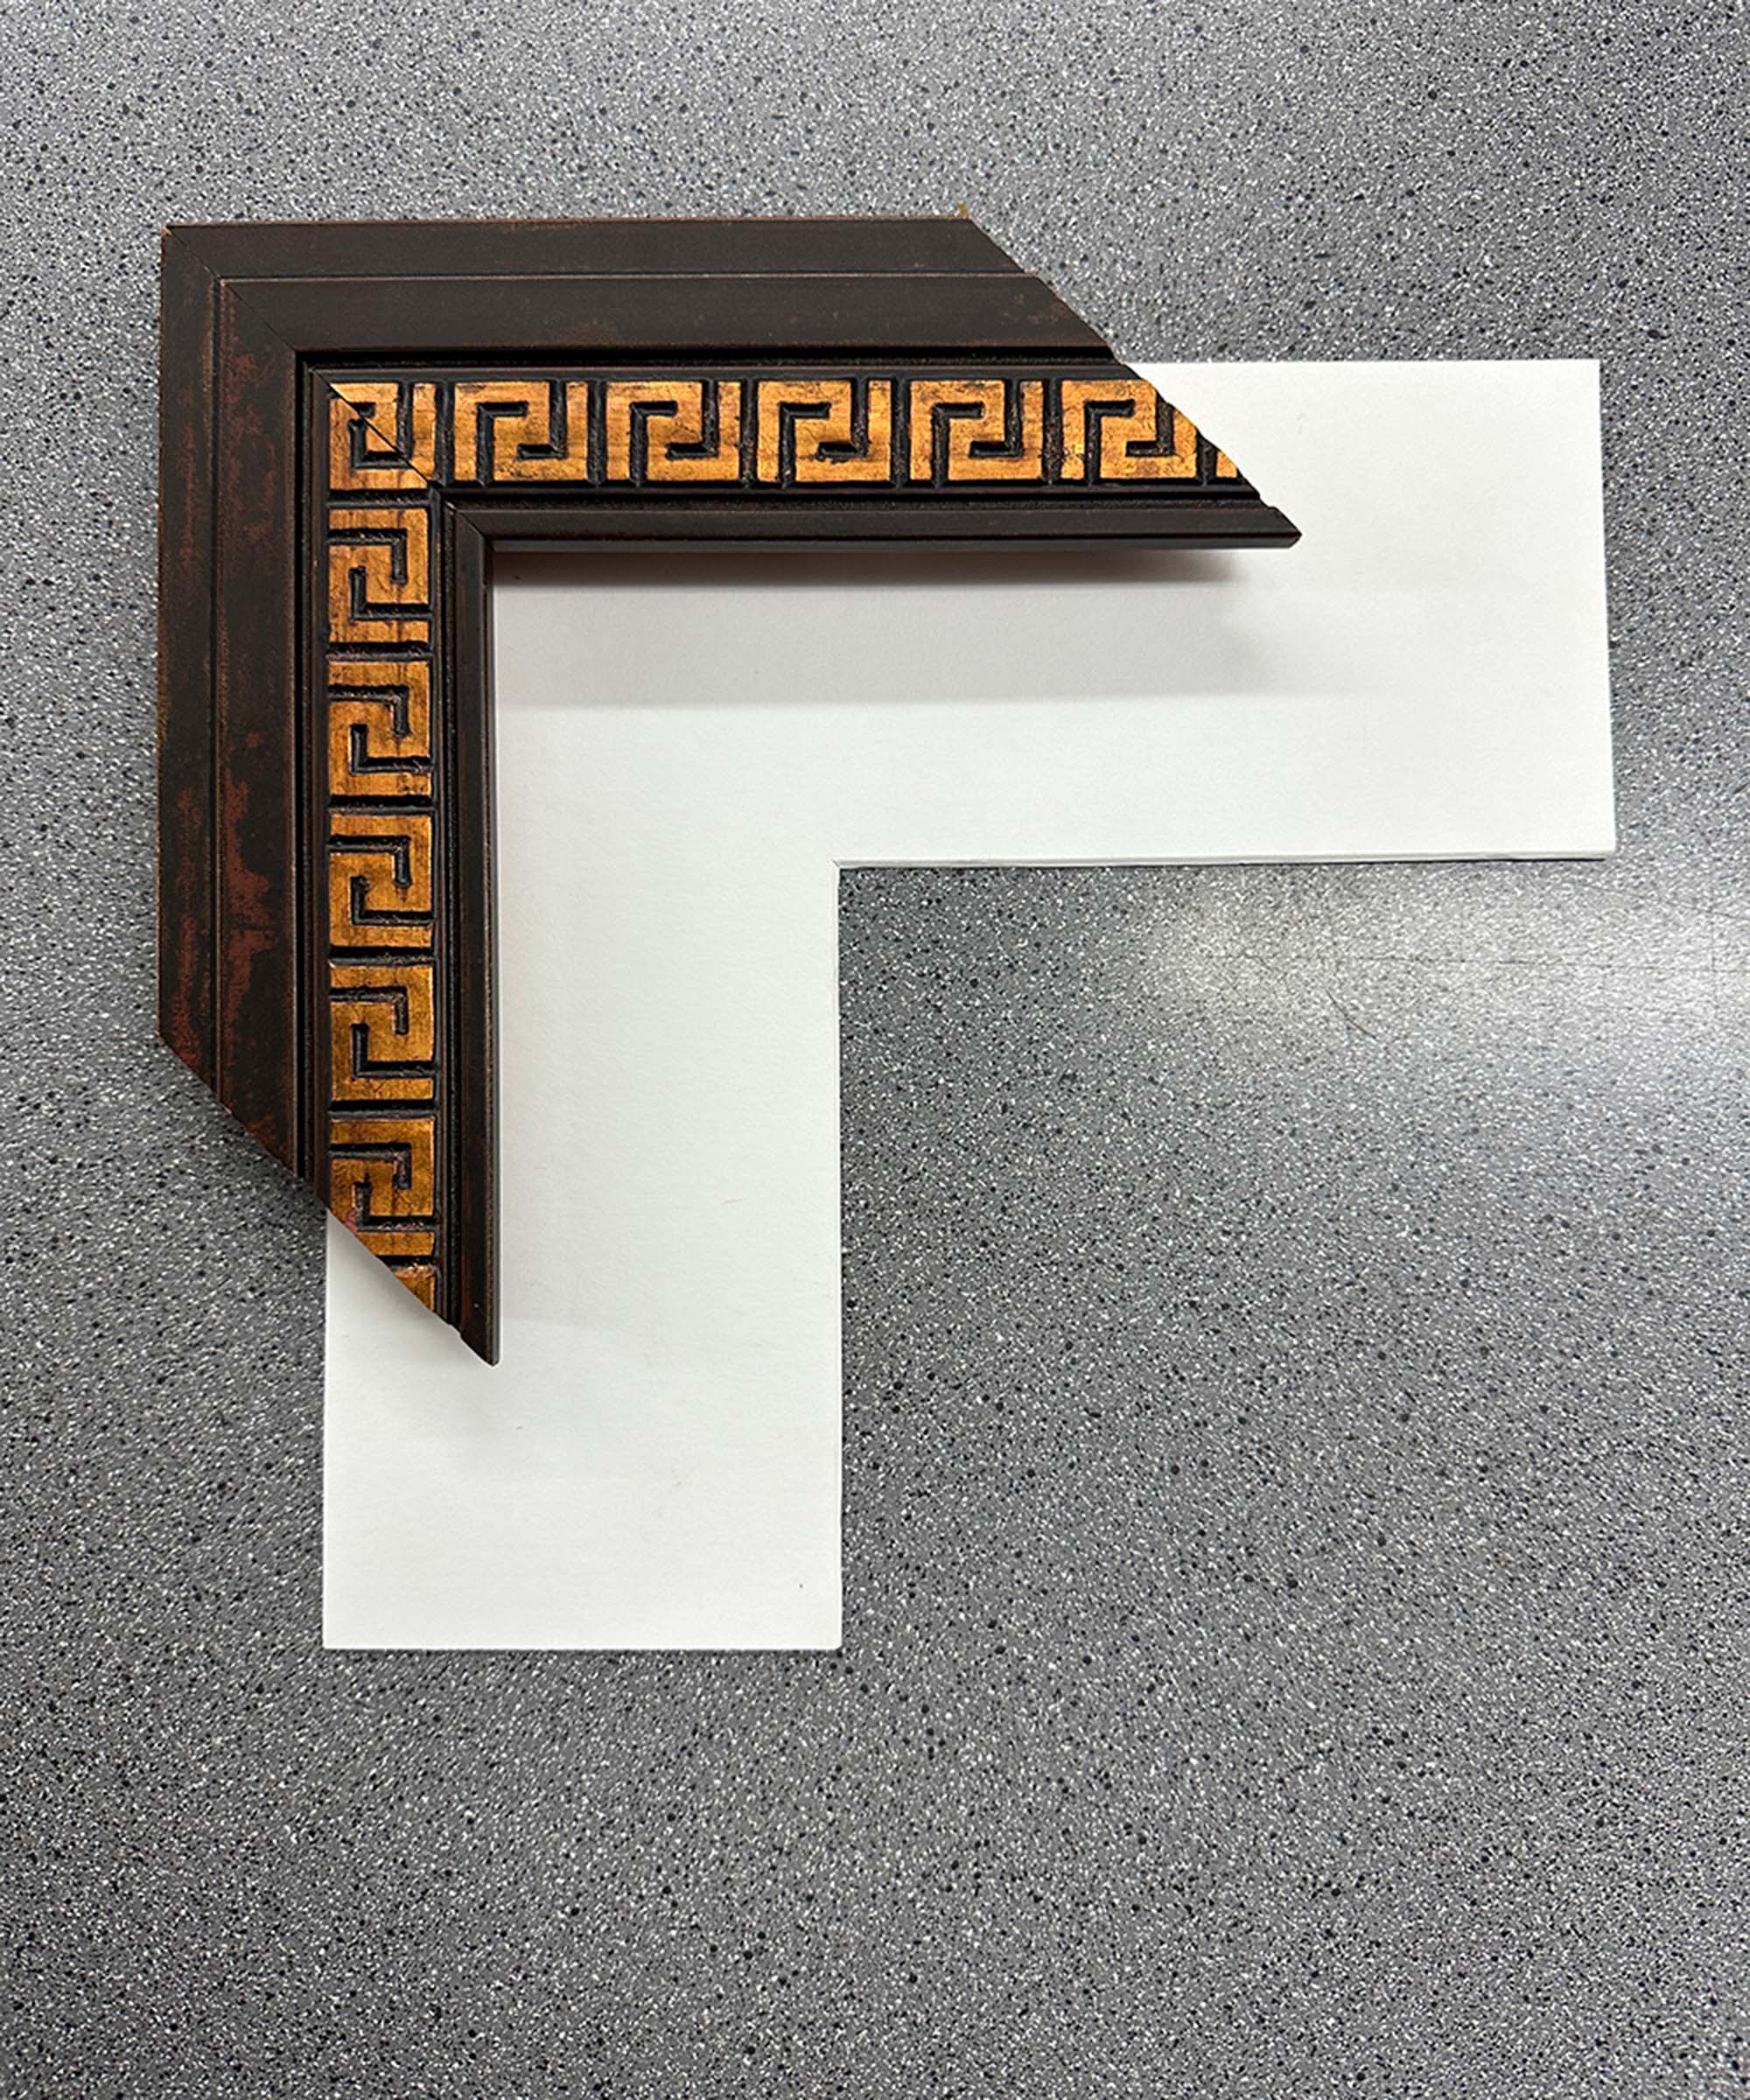
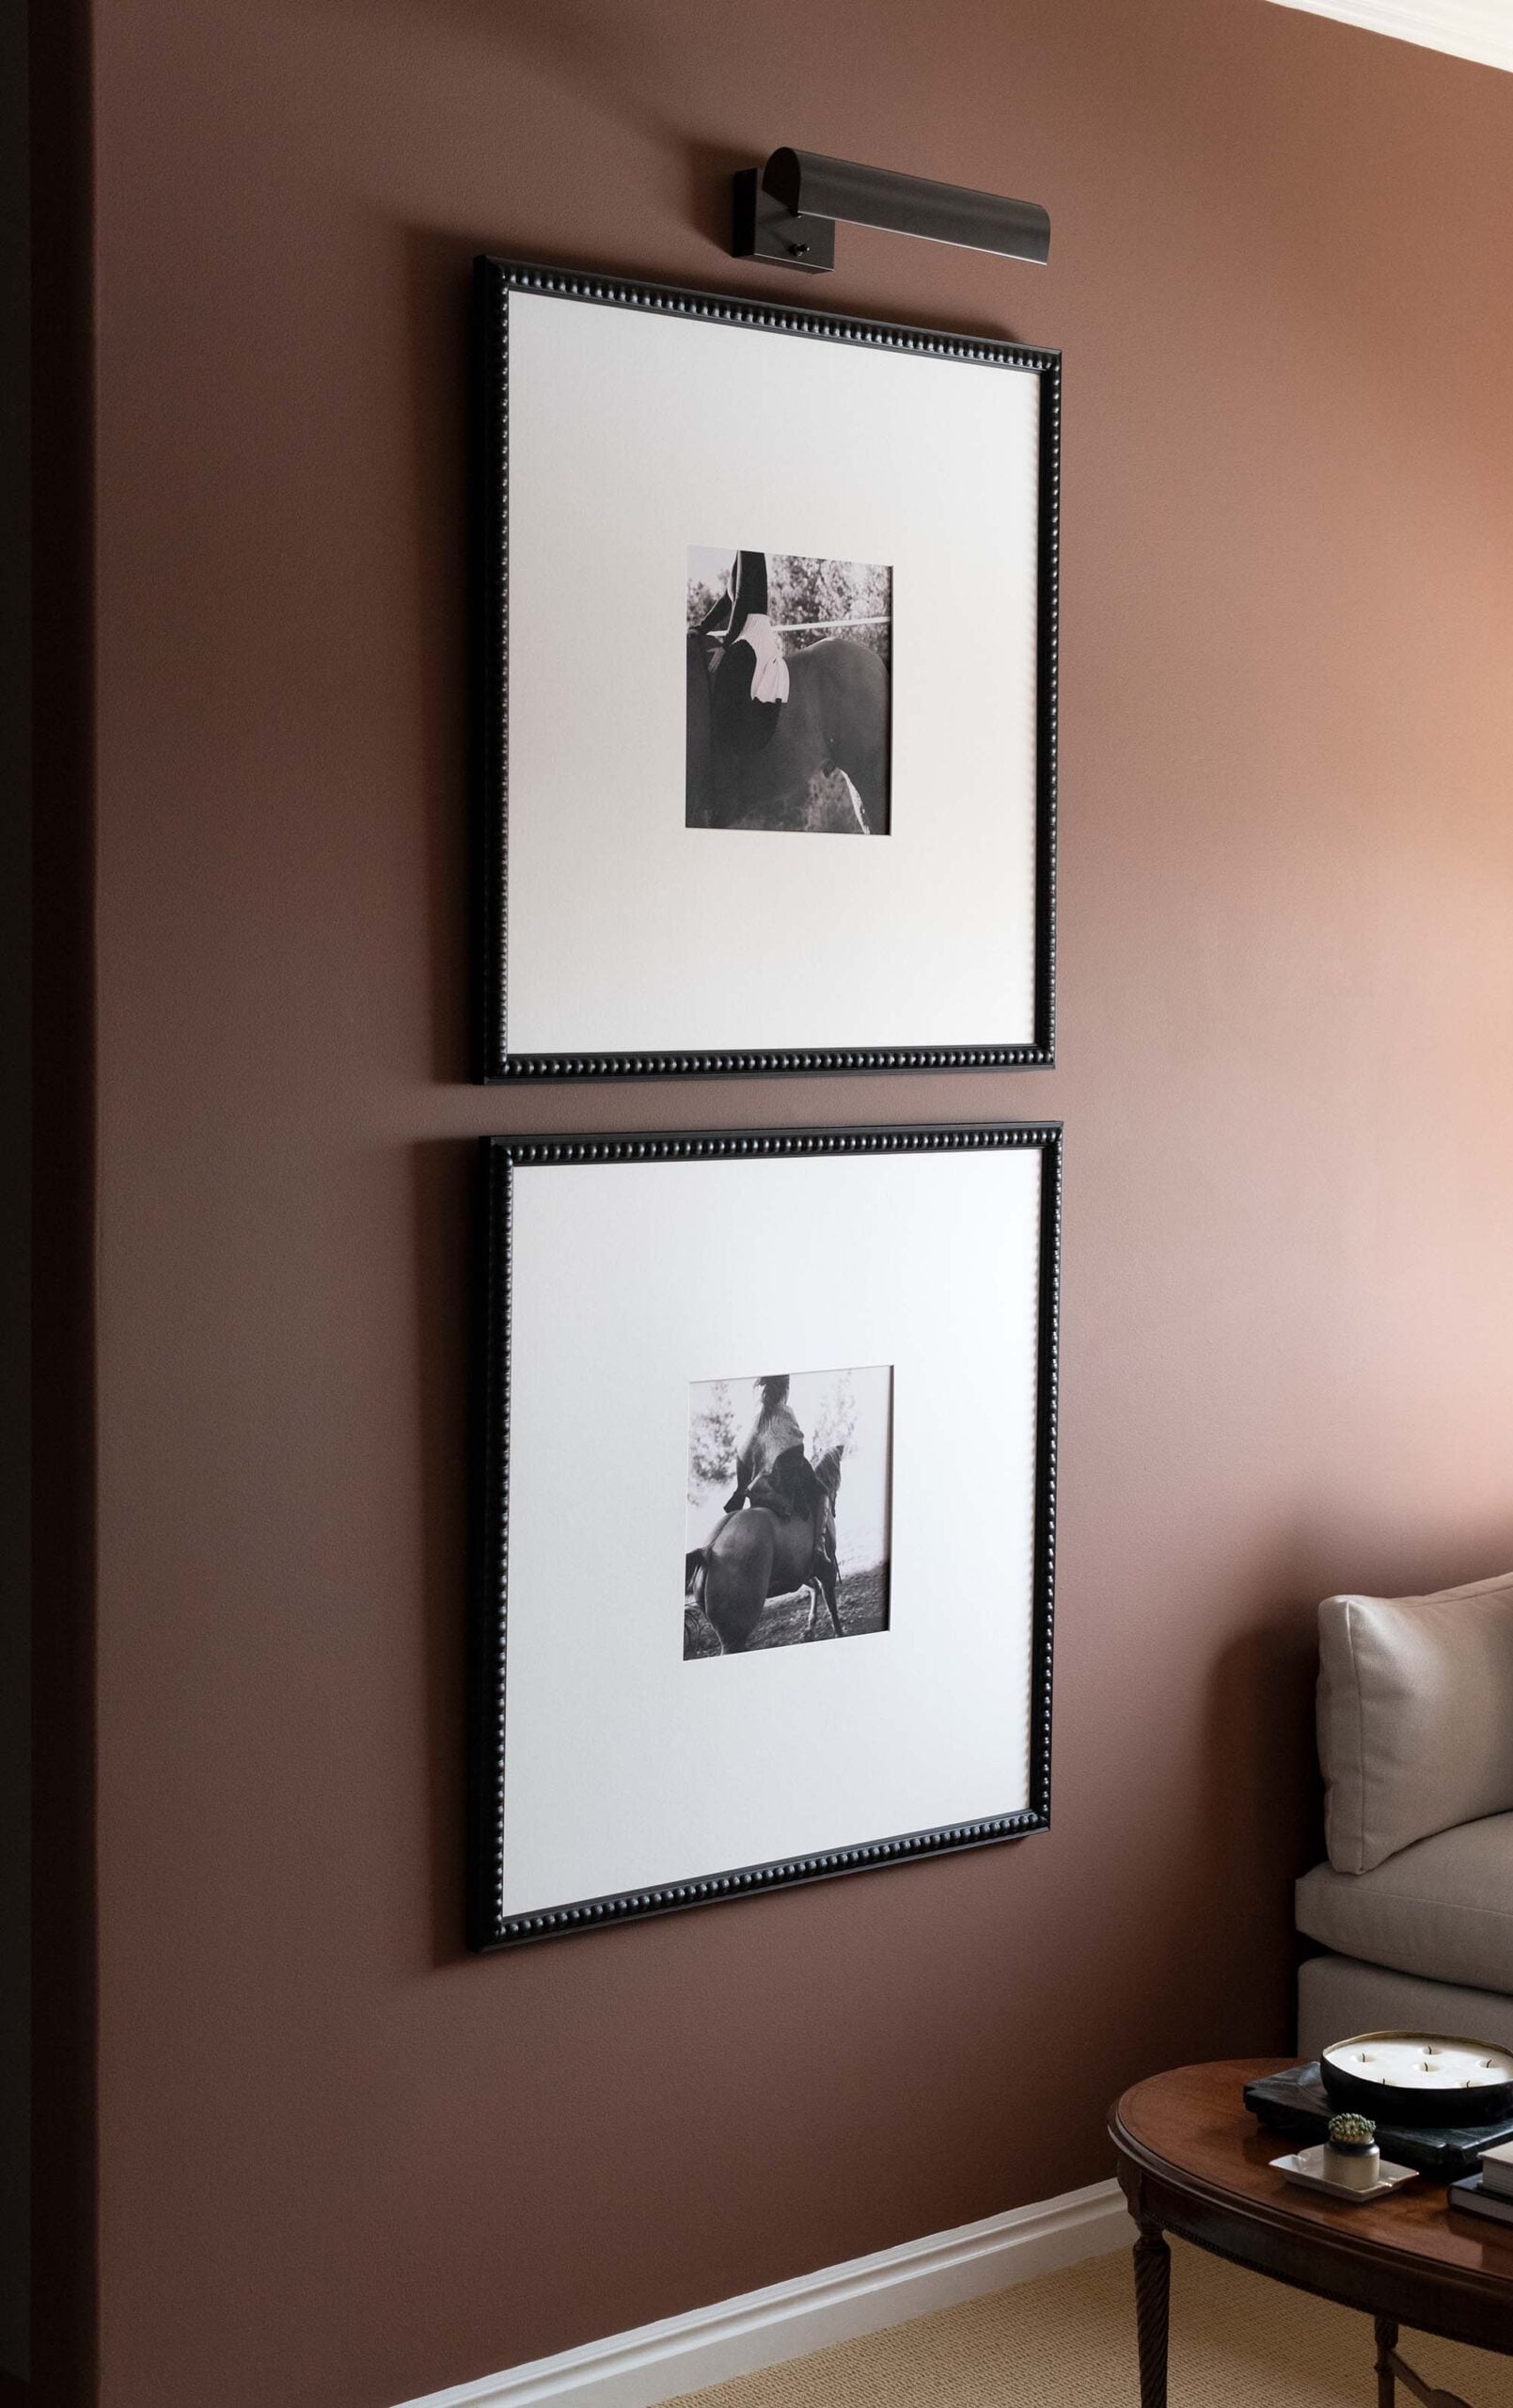
Check out my custom framing tips, here! Ultimately, I landed on the black frame that better fit my budget because the scale of these works ended up being a bit costly (for a DIY). They’re large 32″ squares, so each one cost around $150… and I had four. I (impatiently) waited for my art to be framed and finished, so I could wrap up the guest room. I think the frame and mat can really elevate the look of artwork or photographs. These frames offer such a nice contrast, simplicity, and the right amount of texture for this room. I think the scale helps the window dormer feel more integrated with the rest of the bedroom. Oversized artwork definitely felt like the right move for this space.
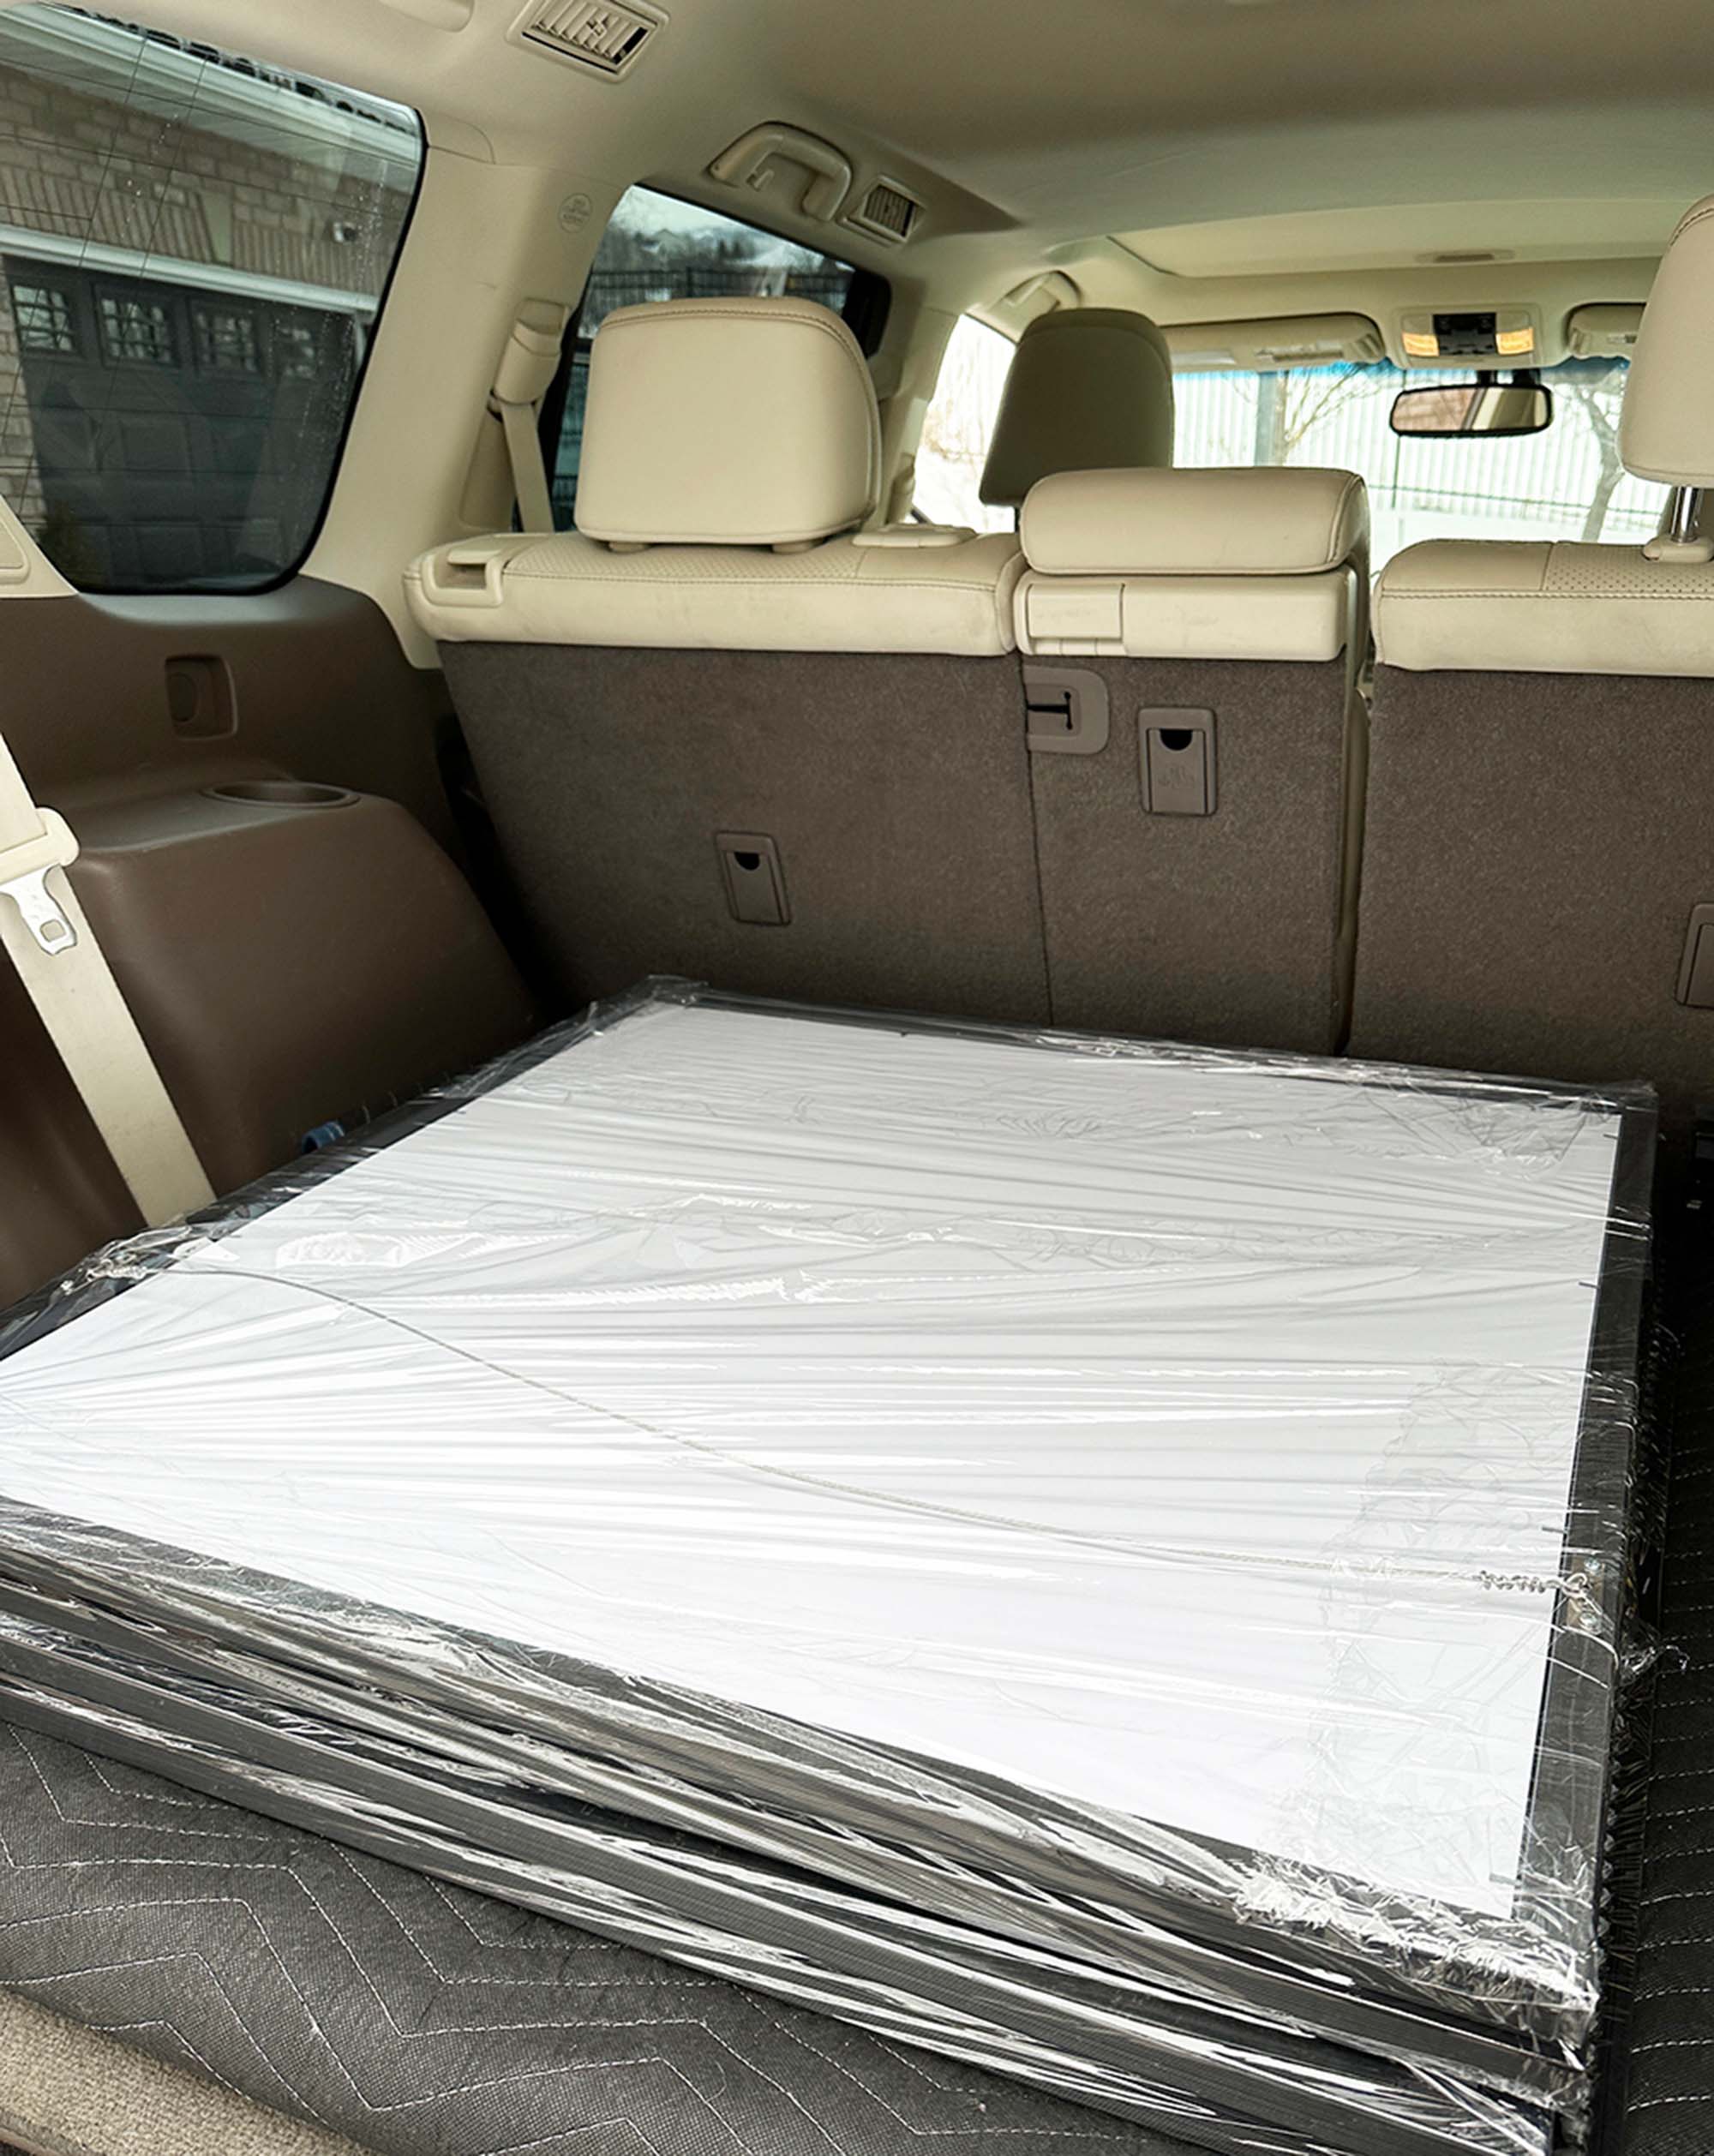
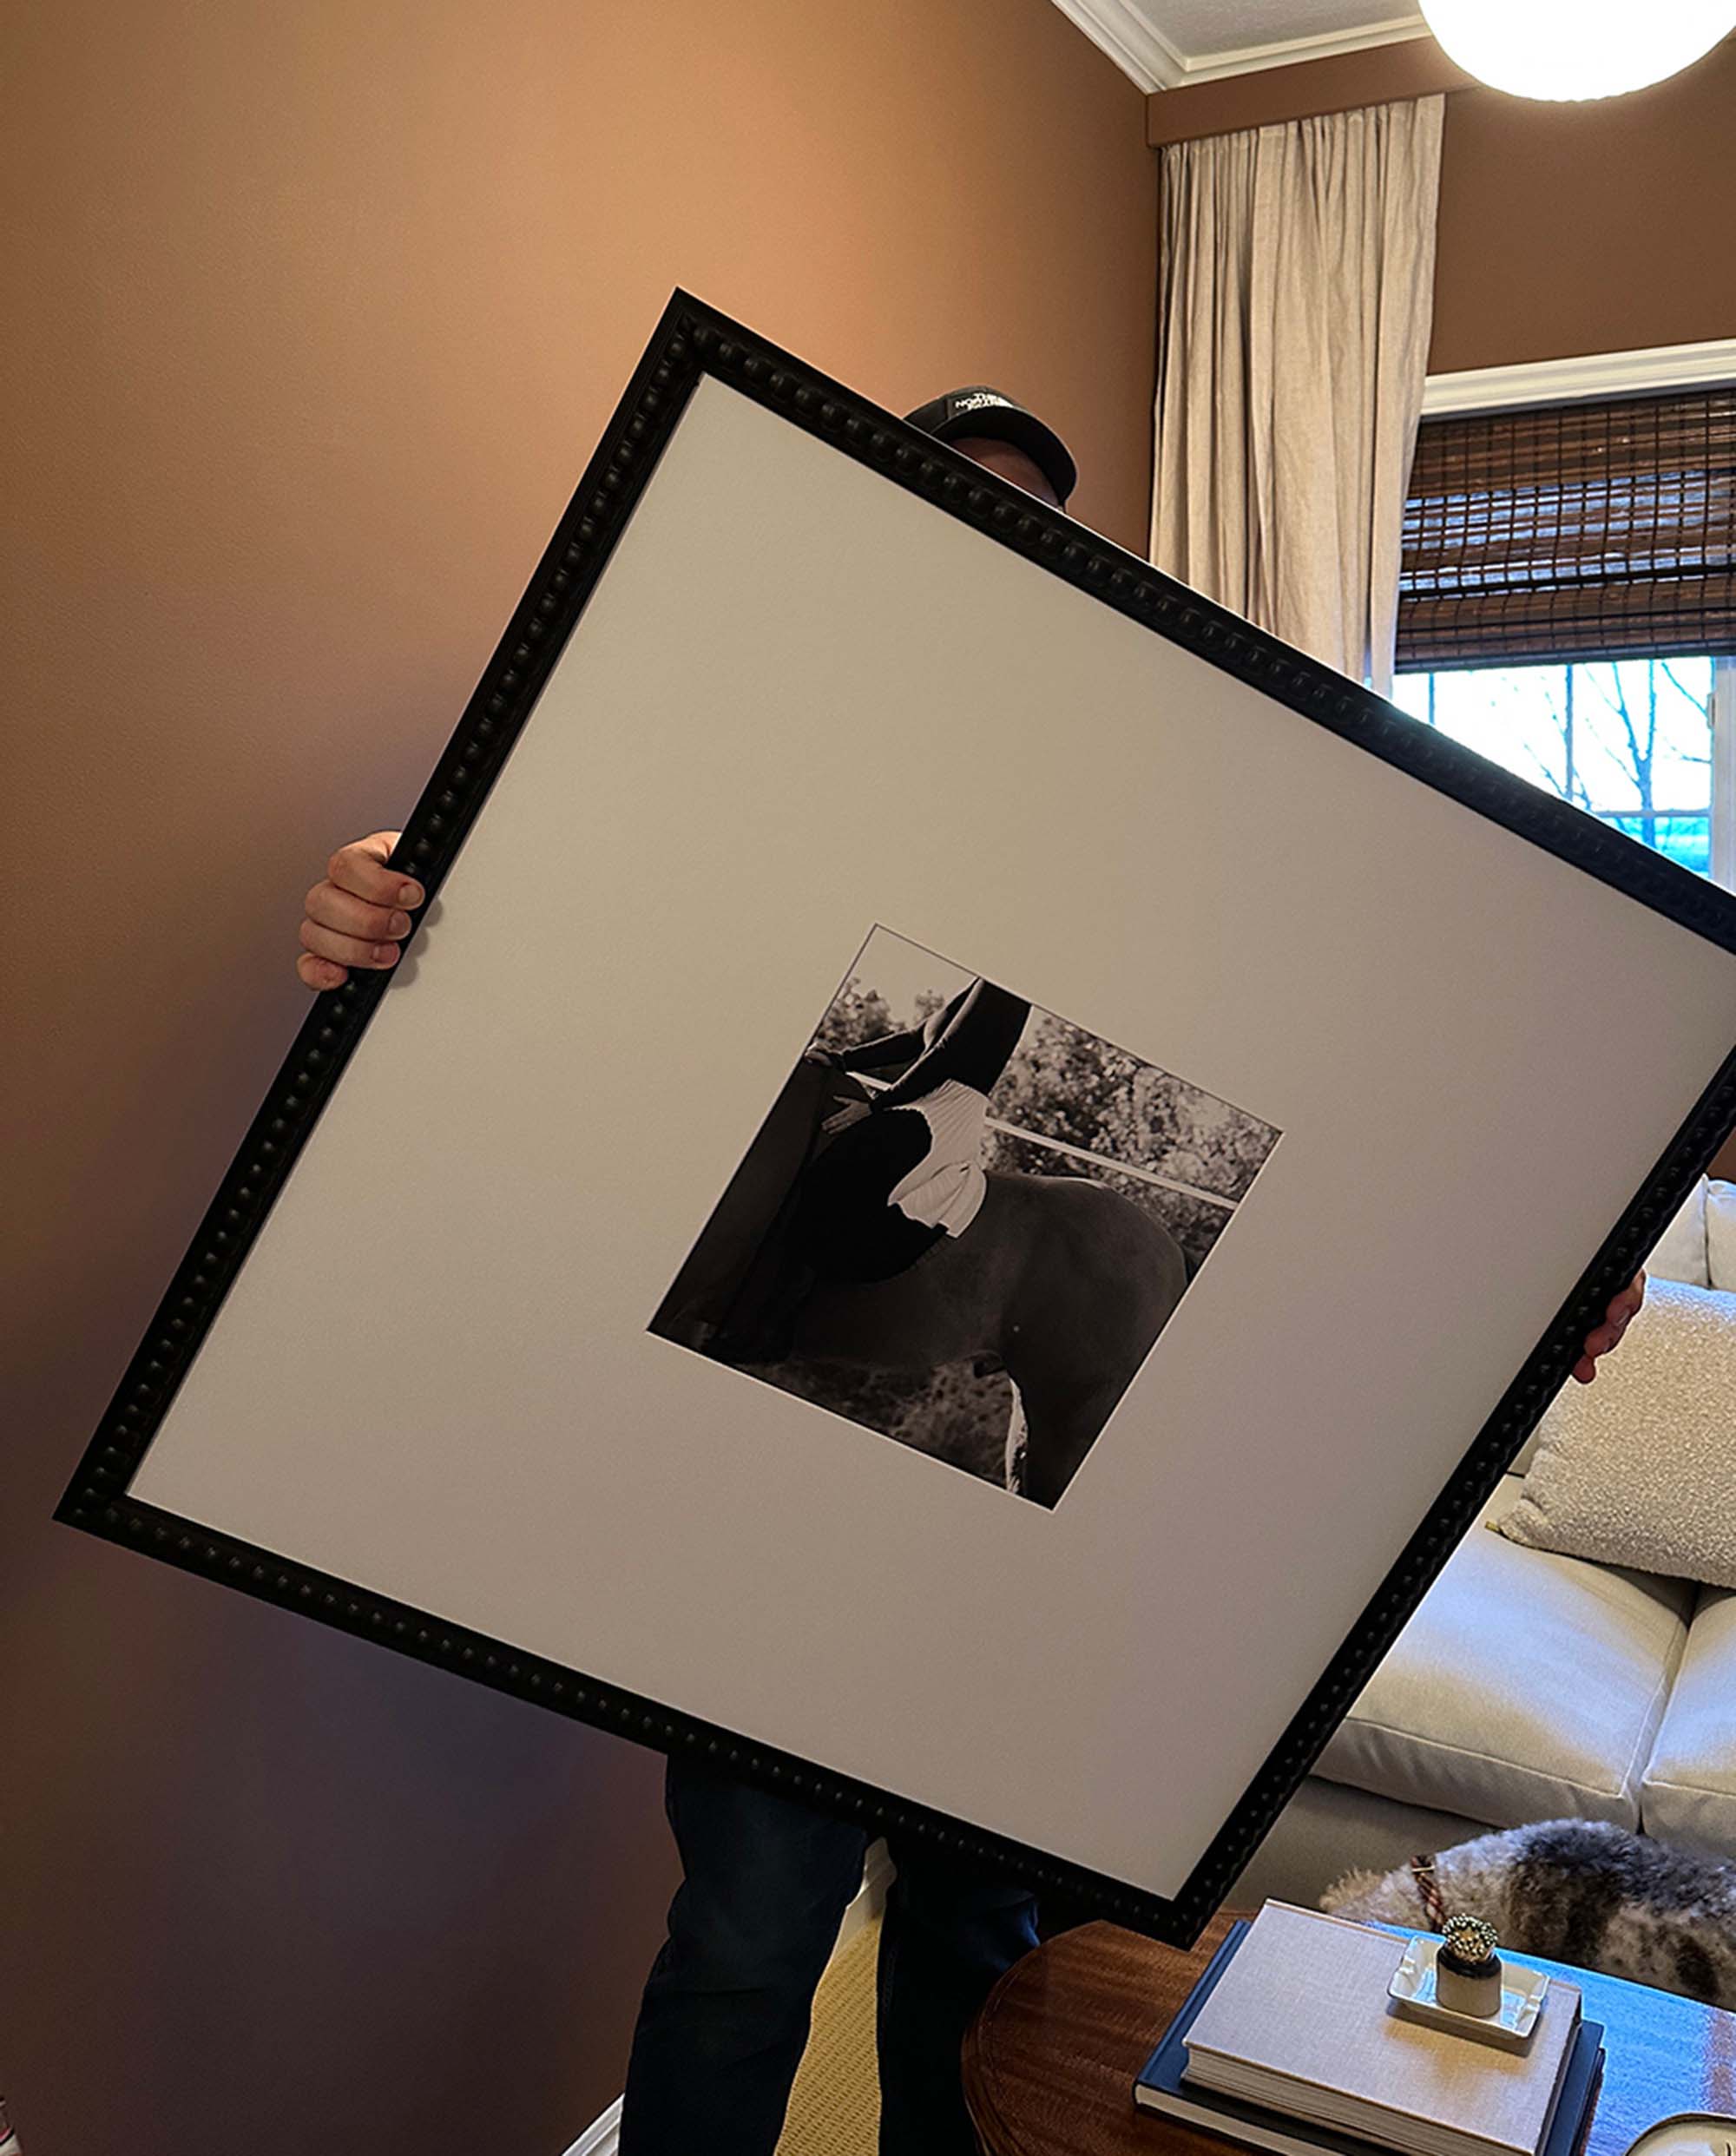
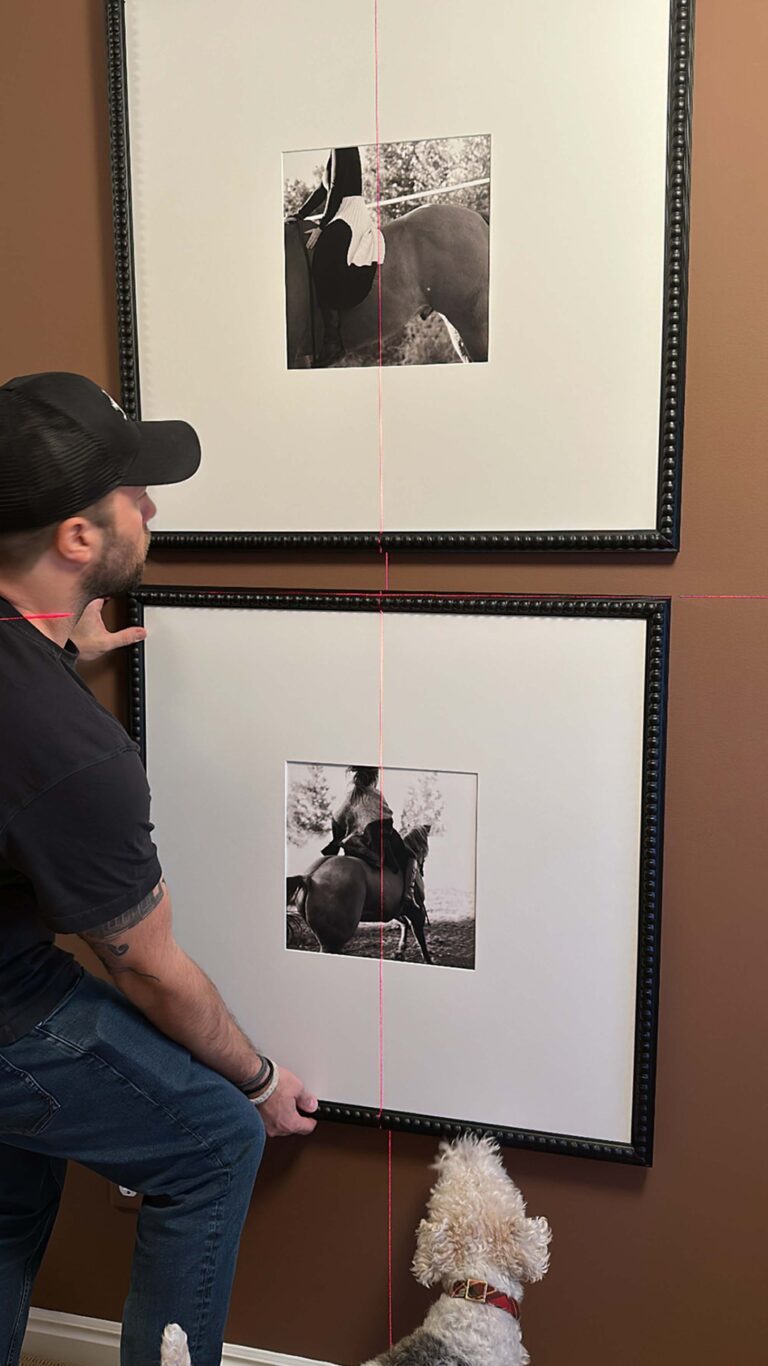
They barely fit in the back of my car when I picked them up, but I was so happy with how they turned out! I carefully lugged them inside and dug out our tools for installation. To give you a better sense of scale, I asked Emmett to hold one. They’re BIG. I love the look of the oversized mat, with the print swimming in negative space.
How I Style Photographic Art in a Room
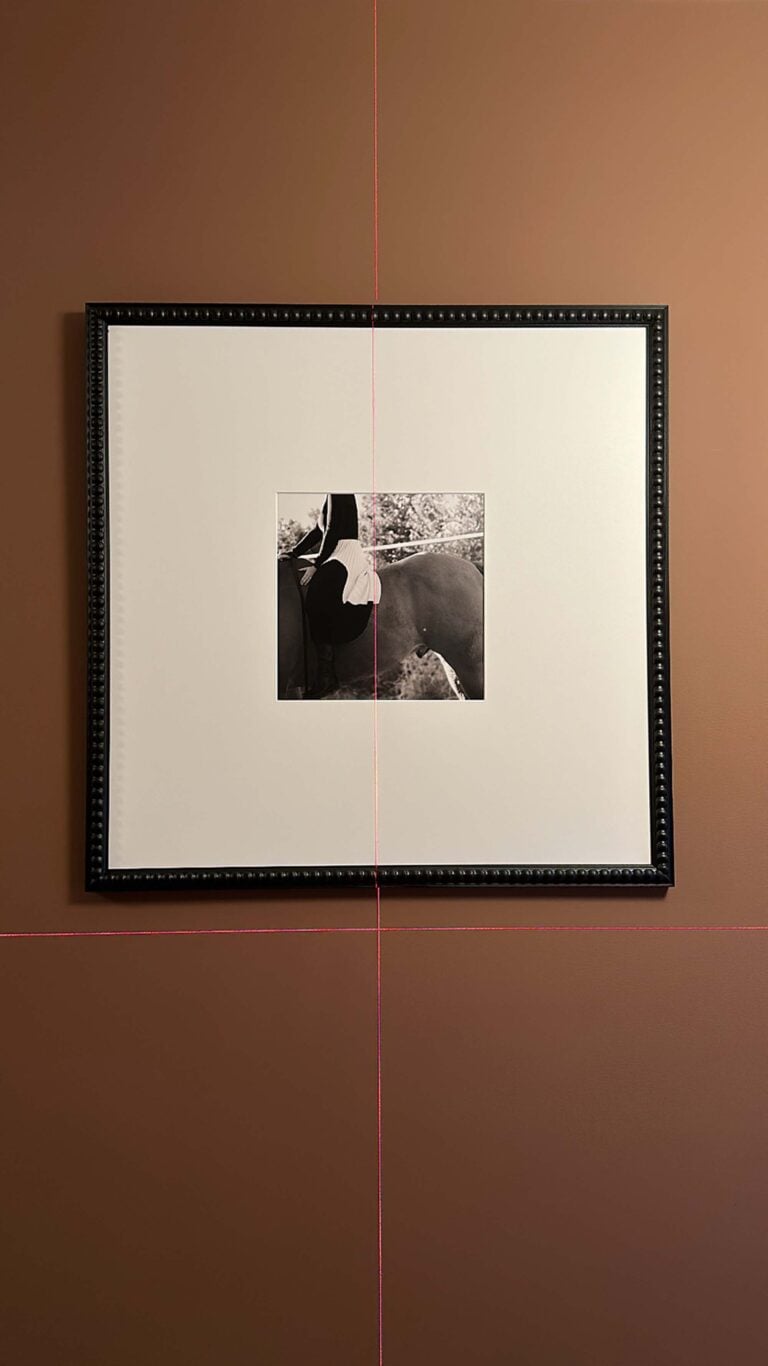
Our framer gave us a finishing nail kit for installation, so that’s what we used. We made quick work of it with the laser level. My previous planning also helped, as I had already designed their hanging height and mapped out the position. I had it all planned and it took about 15 minutes to attach all four to the wall.
When installing art, I think about scale, sight lines, and how the artwork relates to other layers in the room. For example, I rarely hang art too high. I aim for eye level, which naturally connects pieces to the way people experience the space. Over a console or sofa, I like letting photographic art hover just above the furniture edge without feeling distant. When grouping multiple pieces, I pay attention to spacing so the gallery feels connected rather than scattered.
This is the image that sparked it all… me on Derby, riding to the pond on a hot summer day (pictured below). I’ll admit, I had to get creative with cropping the image because during my art school days- I wore entirely too much eyeliner and experimented with dark hair dye. I do think the pulled in version feels more editorial and interesting though, despite my questionable beauty choices. I selected my three favorite images I shot of my friends to create a complete set of four for the guest room- all cropped in a similar way.
I took quite a few photo classes during my time in art school and one of my favorite exercises was called “Top 10 of the Week”. We were expected to carry our cameras around for the duration of the class and each week we were expected to take 50 photos, then narrow down and share our top 10 with the class- as well as why we selected that particular batch. Each week we focused on a different skill: exposure, composition, white balance, etc. There’s something to be said about challenging yourself to get creative with your camera (or phone!). When it’s constantly on us, we have the ability to capture really beautiful moments on a whim. I’d encourage you to give it a try- you never know what you’ll come up with or which images will end up being your favorite. I’m glad Emmett was carrying my Nikon that day in the field on the way to the pond.
Questions?
Definitely! These days, our phones capture amazing detail and are great quality. I always make sure the resolution will support the size I plan to print.
Both have their place. Black and white often feels timeless and elegant, while color can be powerful when it relates to the room’s tones and mood.
I encourage you to think bigger than you’d expect. Undersized art can look puny. Scale and negative space (with a mat) matters more than most people realize in making art feel intentional.
Related Posts
I think these images and compositions feel special to me for many reasons. Obviously you know I’m very into horses, having grown up on a farm. 4-H was a big part of both mine and Emmett’s life, and riding is something I’ll always want to do more of. Who knows, maybe someday we’ll have our own farm and horses to care for again. I do think there’s something really amazing seeing my close friends on the walls of our home. These women mean so much to me. They’re strong, passionate, driven, caring, are incredible mothers, the list goes on. I like when art makes you feel or has a connection of some sort- and all four of these works do that for me.
Looking for more fun art posts? I’m going to link some reader favorites for you below… let me know if you give any a try!
- How to Make DIY Pressed Flower Wall Art
- Custom Framing Art Tips, Cost, and Frame Selection Ideas
- How to Turn Inexpensive Framed Art Into Custom Artwork
- Where to Find Vintage Ski Prints & Winter Artwork
- How to Hang Artwork in Front of Curtains
- Design Discussion : Nude Art
- How to Choose the Best Picture Light for Your Artwork
Making your own photographic art is such a fun and personal project. It allows your home to reflect your story in a way that feels layered, intentional, and meaningful. When you choose images thoughtfully, edit and print them with care, and place them with design principles in mind, photographic art becomes a defining layer in your home. Start with one image you love and build from there. Your walls are a place for both beauty and memory, and thoughtfully made photographic art brings both to life. Do you display photographs in your home? What are some of your favorites? I’d love to hear your thoughts on my equestrian photos, and as always- I’m happy to answer any questions about the process in the comment section below…

Good morning! What a wonderfully fun and nostalgic project! And such a game group of friends. (I’m slightly intimidated by horses myself.) I love the close-cropped, black & white images, and I adore the frame. (My favorites are rarely the cheaper option…) Oof, those darn framing costs can really add up, especially when you think you’re doing a simple DIY. The scale and high contrast are perfect for the nook though and so personal. I can imagine the loving energy they bring to the space. Your “Top 10 of the Week” assignment was stellar. Such a great exercise for encouraging practice and honing your eye, and so easy to replicate now that we’re all glued to our phones. Fun fact, my honey has a Fine Arts degree that included many photography classes (back when that involved hours in a dark room!). His first Valentine’s gift to me was a framed group of his favorite shots. 😍 My photos rarely match my vision, but that doesn’t stop me from taking them. Ha. I am hopeful we’ll get to see some glorious images of Canada in the near future; your photos never disappoint. Enjoy the rest of your trip and safe travels home, Gibsons!💜🎿
Thank you, Peggi! My friends are the best… always game for an adventure or trying new things. They were such good sports and we had a fun day! I think framing is half the equation when it comes to cool art. I always enjoyed my photography class Top 10 assignment. It’s definitely an easy thing to do with phones these days- and those cameras are arguably just as good as large SLR cameras. I didn’t know your honey has a Fine Arts degree- so cool to learn that!! I’m gushing over your Valentine’s Day gift- so so thoughtful. I just think it’s fun to be creative, whether the shot turns out as expected or not, the process is always a good time. Hope you’re staying warm today! xo
Happy Monday! I have never really thought about taking an existing photo and closing in on it like you did with these. I love close photos of horses, dogs, flowers. You have good friends who were willing to get on a horse & a great eye for taking pictures. The frames and size are so pretty in that space. Sarah, the photo of you riding bareback is special. Such a horse lover at heart.
Hope your trip is going well and getting lots of skiing in. Have a great week!
Hi Danna! Thank you so much! My friends are the best- always willing to help out or try something new. I will always love that photo of me riding that Emmett took.. it was such a fun day. We had the most wonderful trip. I’m already looking forward to our next Canadian adventure someday. It’s stunning!! xo
I meant to say you have a great eye for taking pictures…very talented.
The story behind these prints is so special. I adore the entire project. Your photography skills never cease to amaze me, and you’re right, this large scale works so well in the dormer space. I feel like the placement was key for really pulling in you in, and you and Emmett did a tremendous job. The frames you selected definitely reflect the sweet sentimentality behind these photographs as well, and I think it’s darling to have such bespoke prints in an area you enjoy spending time when the room isn’t in use. I don’t know much about photography but photographs like this have always captivated my attention. Perhaps I should challenge myself to snap more photos. This little project turned out so beautiful Sarah! Enjoy the rest of your Canadian fun and safe travels home friend!
Thanks, Lauren!! You are so sweet. I’m really excited with how the window nook came together and I think the art plays a big part of that. I vote yes to snapping more candid photos- you never which ones will turn out to be your favorite :) Our phones are really the best tool we have- and they’re always attached to us. Canada was so lovely and wonderful, thanks Lauren!! Hope you’re having a good day. Are you having crazy weather in CA this week?
Crazy doesn’t begin to describe it! It’s been snowing all day- schools throughout our district are shut down. We had a 20 car pile-up on the freeway just east of my house, due to icy road conditions…and those slightly northeast of me are in my prayers- they’re in the path of flooding from the burn scar, and we’re all under severe flood watch until Saturday. It’s snowing in cities it hasn’t snowed in since I was a little girl- but I’m not complaining. I love every second of it! I’m nursing a little one with double ear infections and taking all the extra snuggles.
Oh yikes- I’m so sorry to hear about the CA struggles in the northeast… this weather has been insane. We’re getting SO much snow, so I can only imagine what it’s looking like in your area. I hope there wasn’t much flooding over the weekend. Also thinking of your little and hope the ear infection has cleared!
Your DIY art Sarah is gorgeous! I can’t believe Jupiter passed on those photos, they are stunning. I’m so glad you incorporated them in your home and they fit perfectly in the guest bedroom nook. Sounds like you had the most wonderful day with your friends and turned that day into the prettiest gallery wall moment ❤️ This type of art is the best and I love how they were framed. When the art is personal like this I think the frame should be simple and unfussy. I love everything about your selection, scale, matte and the black and white photos are my favorite 😍
I have quite a few stunning photos of my daughter and her horse captured over the years and they are always my favorite. I have been accused of having a shrine in our last house as I had so many 😬 so I tried to pair it down in our current home. Horses make the most beautiful art don’t they? And paired with your favorite people is quite frankly priceless. Thanks for sharing these beautiful memories and the framing process you chose. The art is spectacular 🤩 I hope you are having a fantastic time in Banff! Xoxo
Thank you so much, Colleen! I’m really happy with how they turned out and am glad I was able to find a fitting space for them. We definitely had a fun time that day! I’m a big believer that good framing is just as important as the artwork itself. Sometimes simple is best! I love that you have so many beautiful images of your daughter and her horse. Shrine looking or not- framing special moments like that is what makes our home a home. No judgements here! Horses are my favorite so maybe I’m biased- but I also think they make the best art. Banff, and Canada in general, was the most amazing. I couldn’t get over the views and how incredibly nice everyone was. I’d love to go back in the spring or summer.
Hi Sarah! Looking to recreate this in my home using 27×27 frames and I wanted to know what size photo you would recommend for that size frame? Wondering what size your picture was for you 32×32 frame?