How to Install a Ceiling Medallion Like a Pro
It’s no secret I’m a big fan of ceiling medallions, as you’ve probably noticed them throughout our home. They’re very simple to install and really elevate the look of any light fixture. It’s a simple piece of millwork that feels like the finishing touch on the ceiling… especially if you have a fixture you’d like to emphasize. Click through for our complete tutorial on how to install a ceiling medallion, my thoughts on medallions with textured ceilings, why medallions vastly vary in price, how to determine what size medallion you’ll need, and examples of how I’ve used ceiling medallions in the past.
Installing a ceiling medallion is an easy and quick DIY project. If you want to follow it up with trim, I shared how to install panel moulding: a step-by-step guide. I’ve talked about millwork multiple times here on the blog; it’s a big component of interior and architectural design I’m pretty passionate about. Let’s dive in!
Supplies & Tools
- Caulk
- Finishing nailer (with compressor)
- Filler
- Sanding block
- Paint
- Light fixture (linking similar pendants from my shop, Tuesday Made)
- Ceiling medallion (linking ours for this project)
- Longer screws (you’ll want these to match the thread of whatever screws came with your light fixture… just longer!)
How to Install a Ceiling Medallion
I’ll begin by saying, pre-paint your medallion. It makes the process so much easier. You’ll still need to do some touch-up painting at the end of the installation, but it saves time and keeps things clean. I used “Ceiling Bright White” by Sherwin-Williams for my medallion this time around.
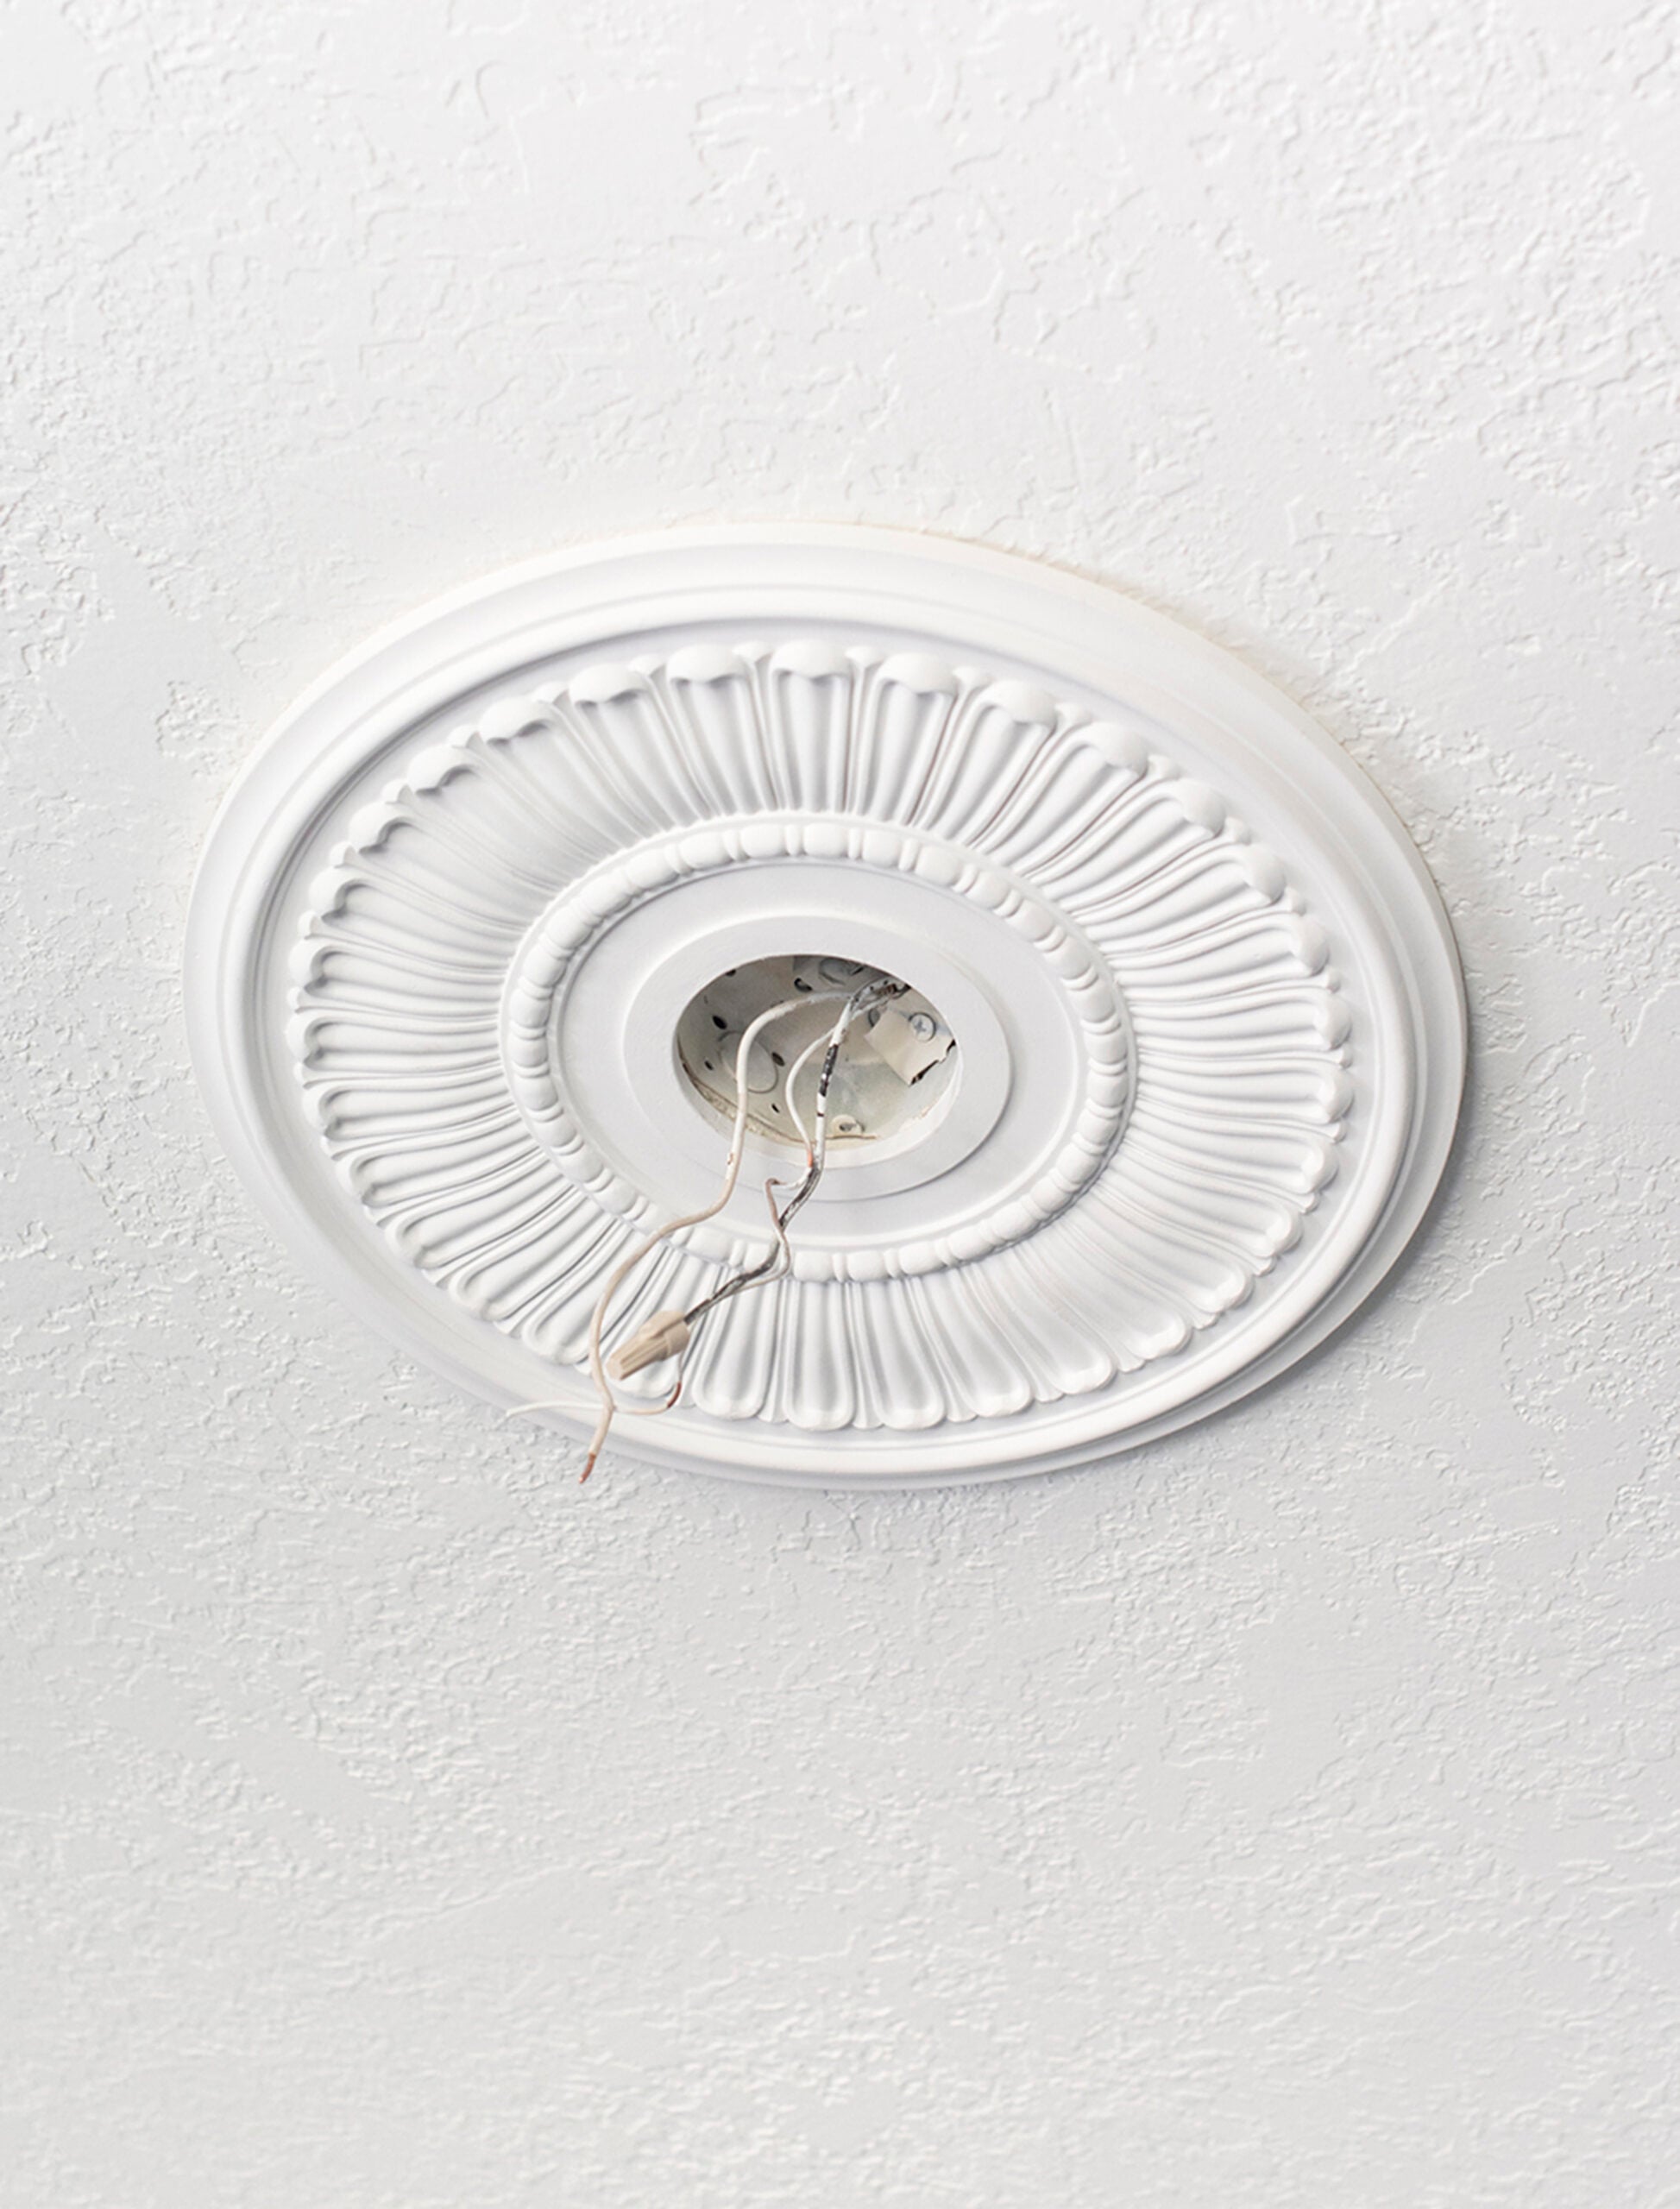
Step 1 : Remove The Existing Fixture
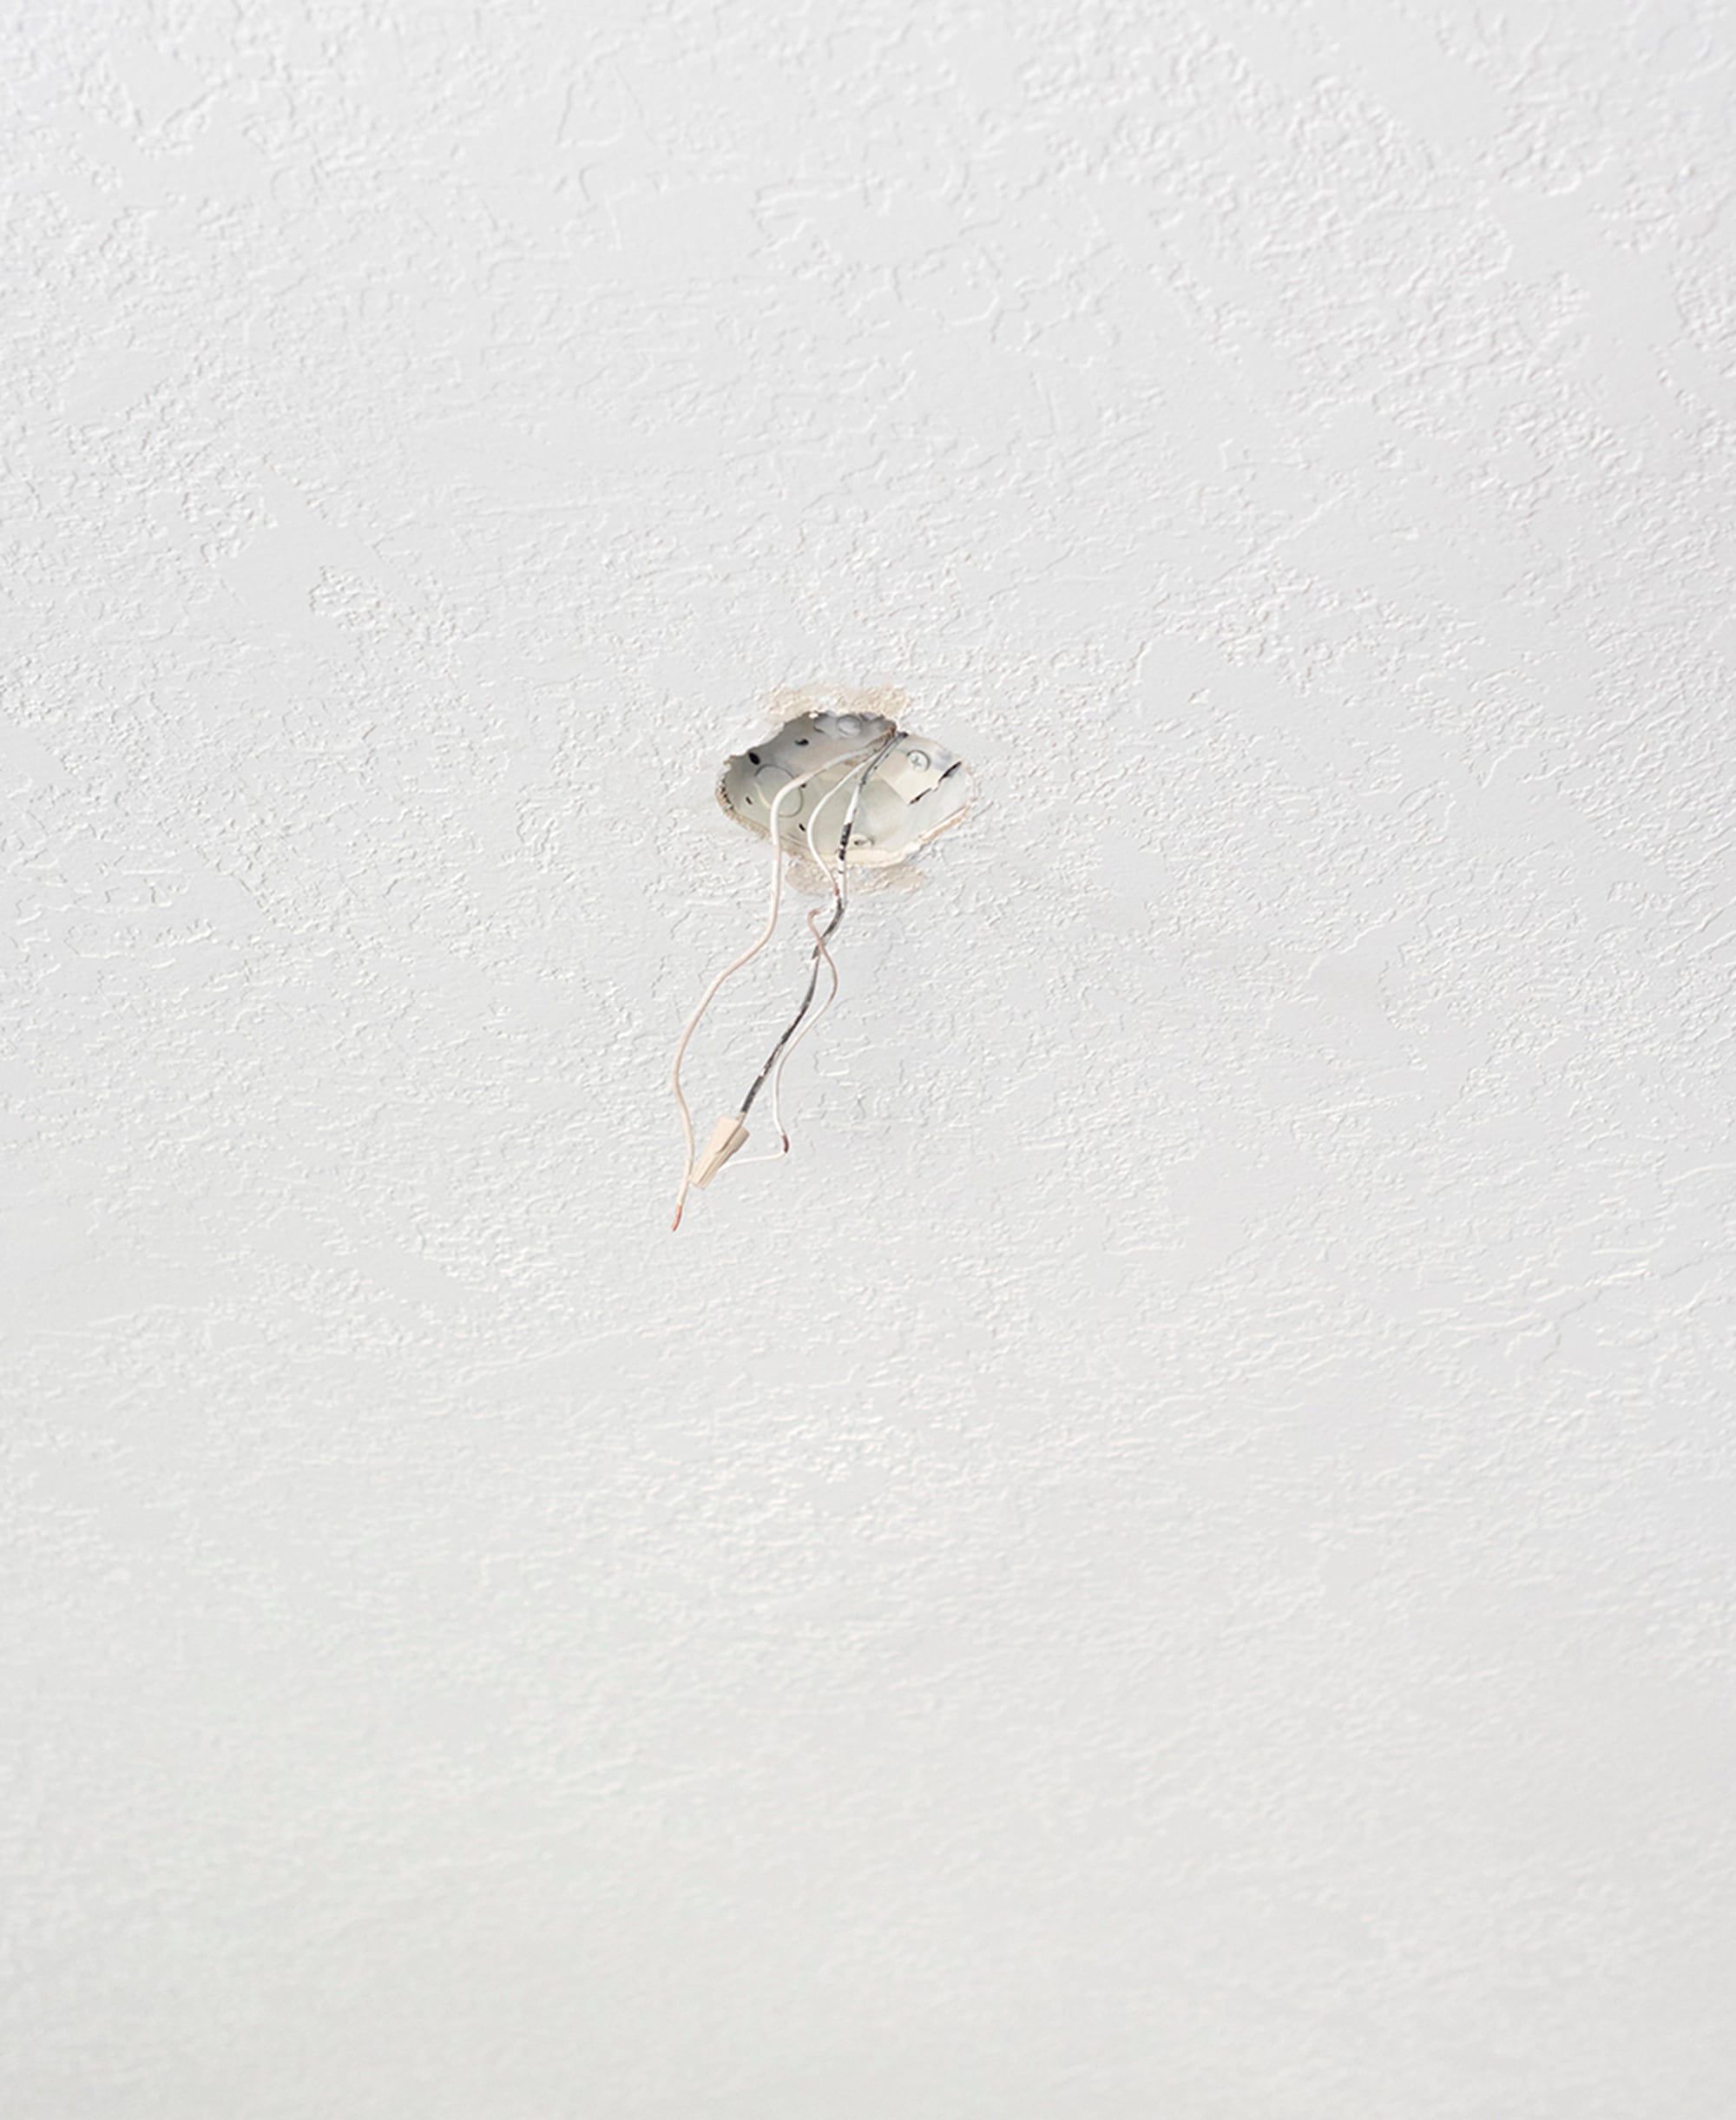
Whether you’re keeping your existing fixture or installing a new one, you must completely remove it before installing your ceiling medallion. You want a clean surface to work with. Remember to turn the power off.
Step 2 : Caulk The Backside of The Medallion
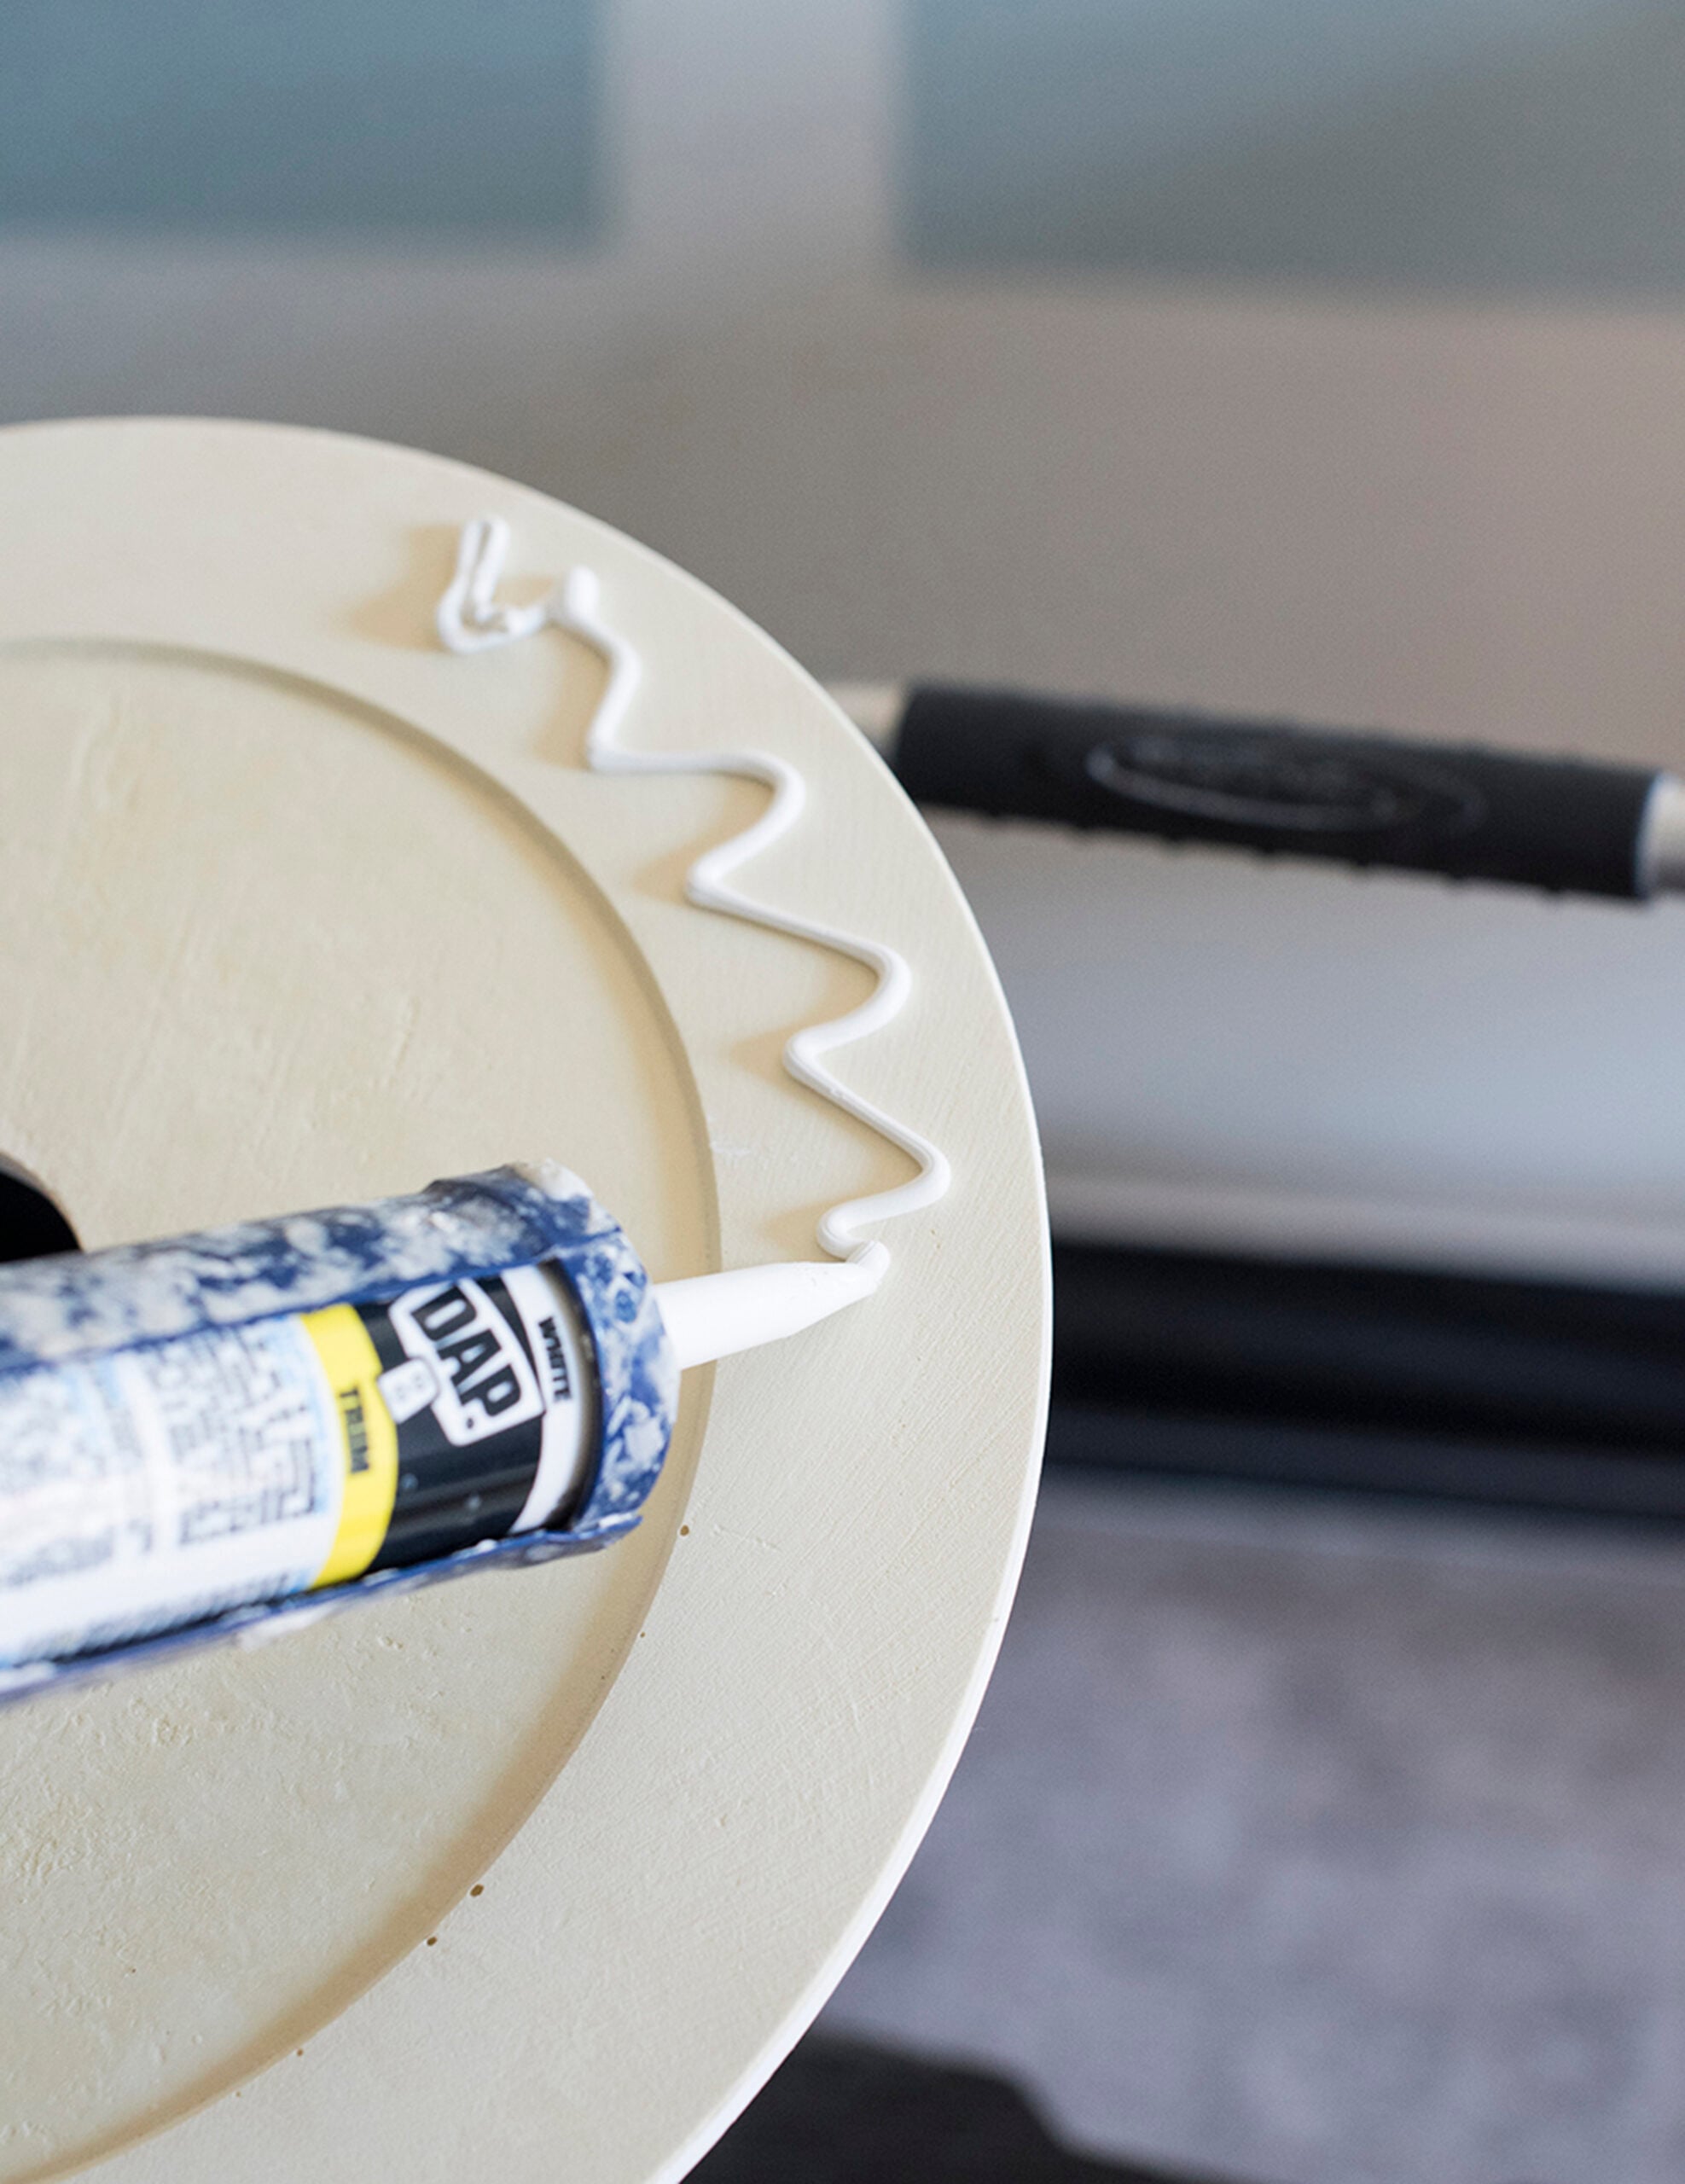
This is a trick we’ve learned over the years. Caulk works much better than construction adhesive. It gives you flexibility. You have time to shift the medallion and center it perfectly while securing it to the ceiling.
Run a bead of caulk all the way around the perimeter of the medallion and position it on the ceiling. The caulk will hold it in place while you work, until you’re ready to permanently secure the ceiling medallion.
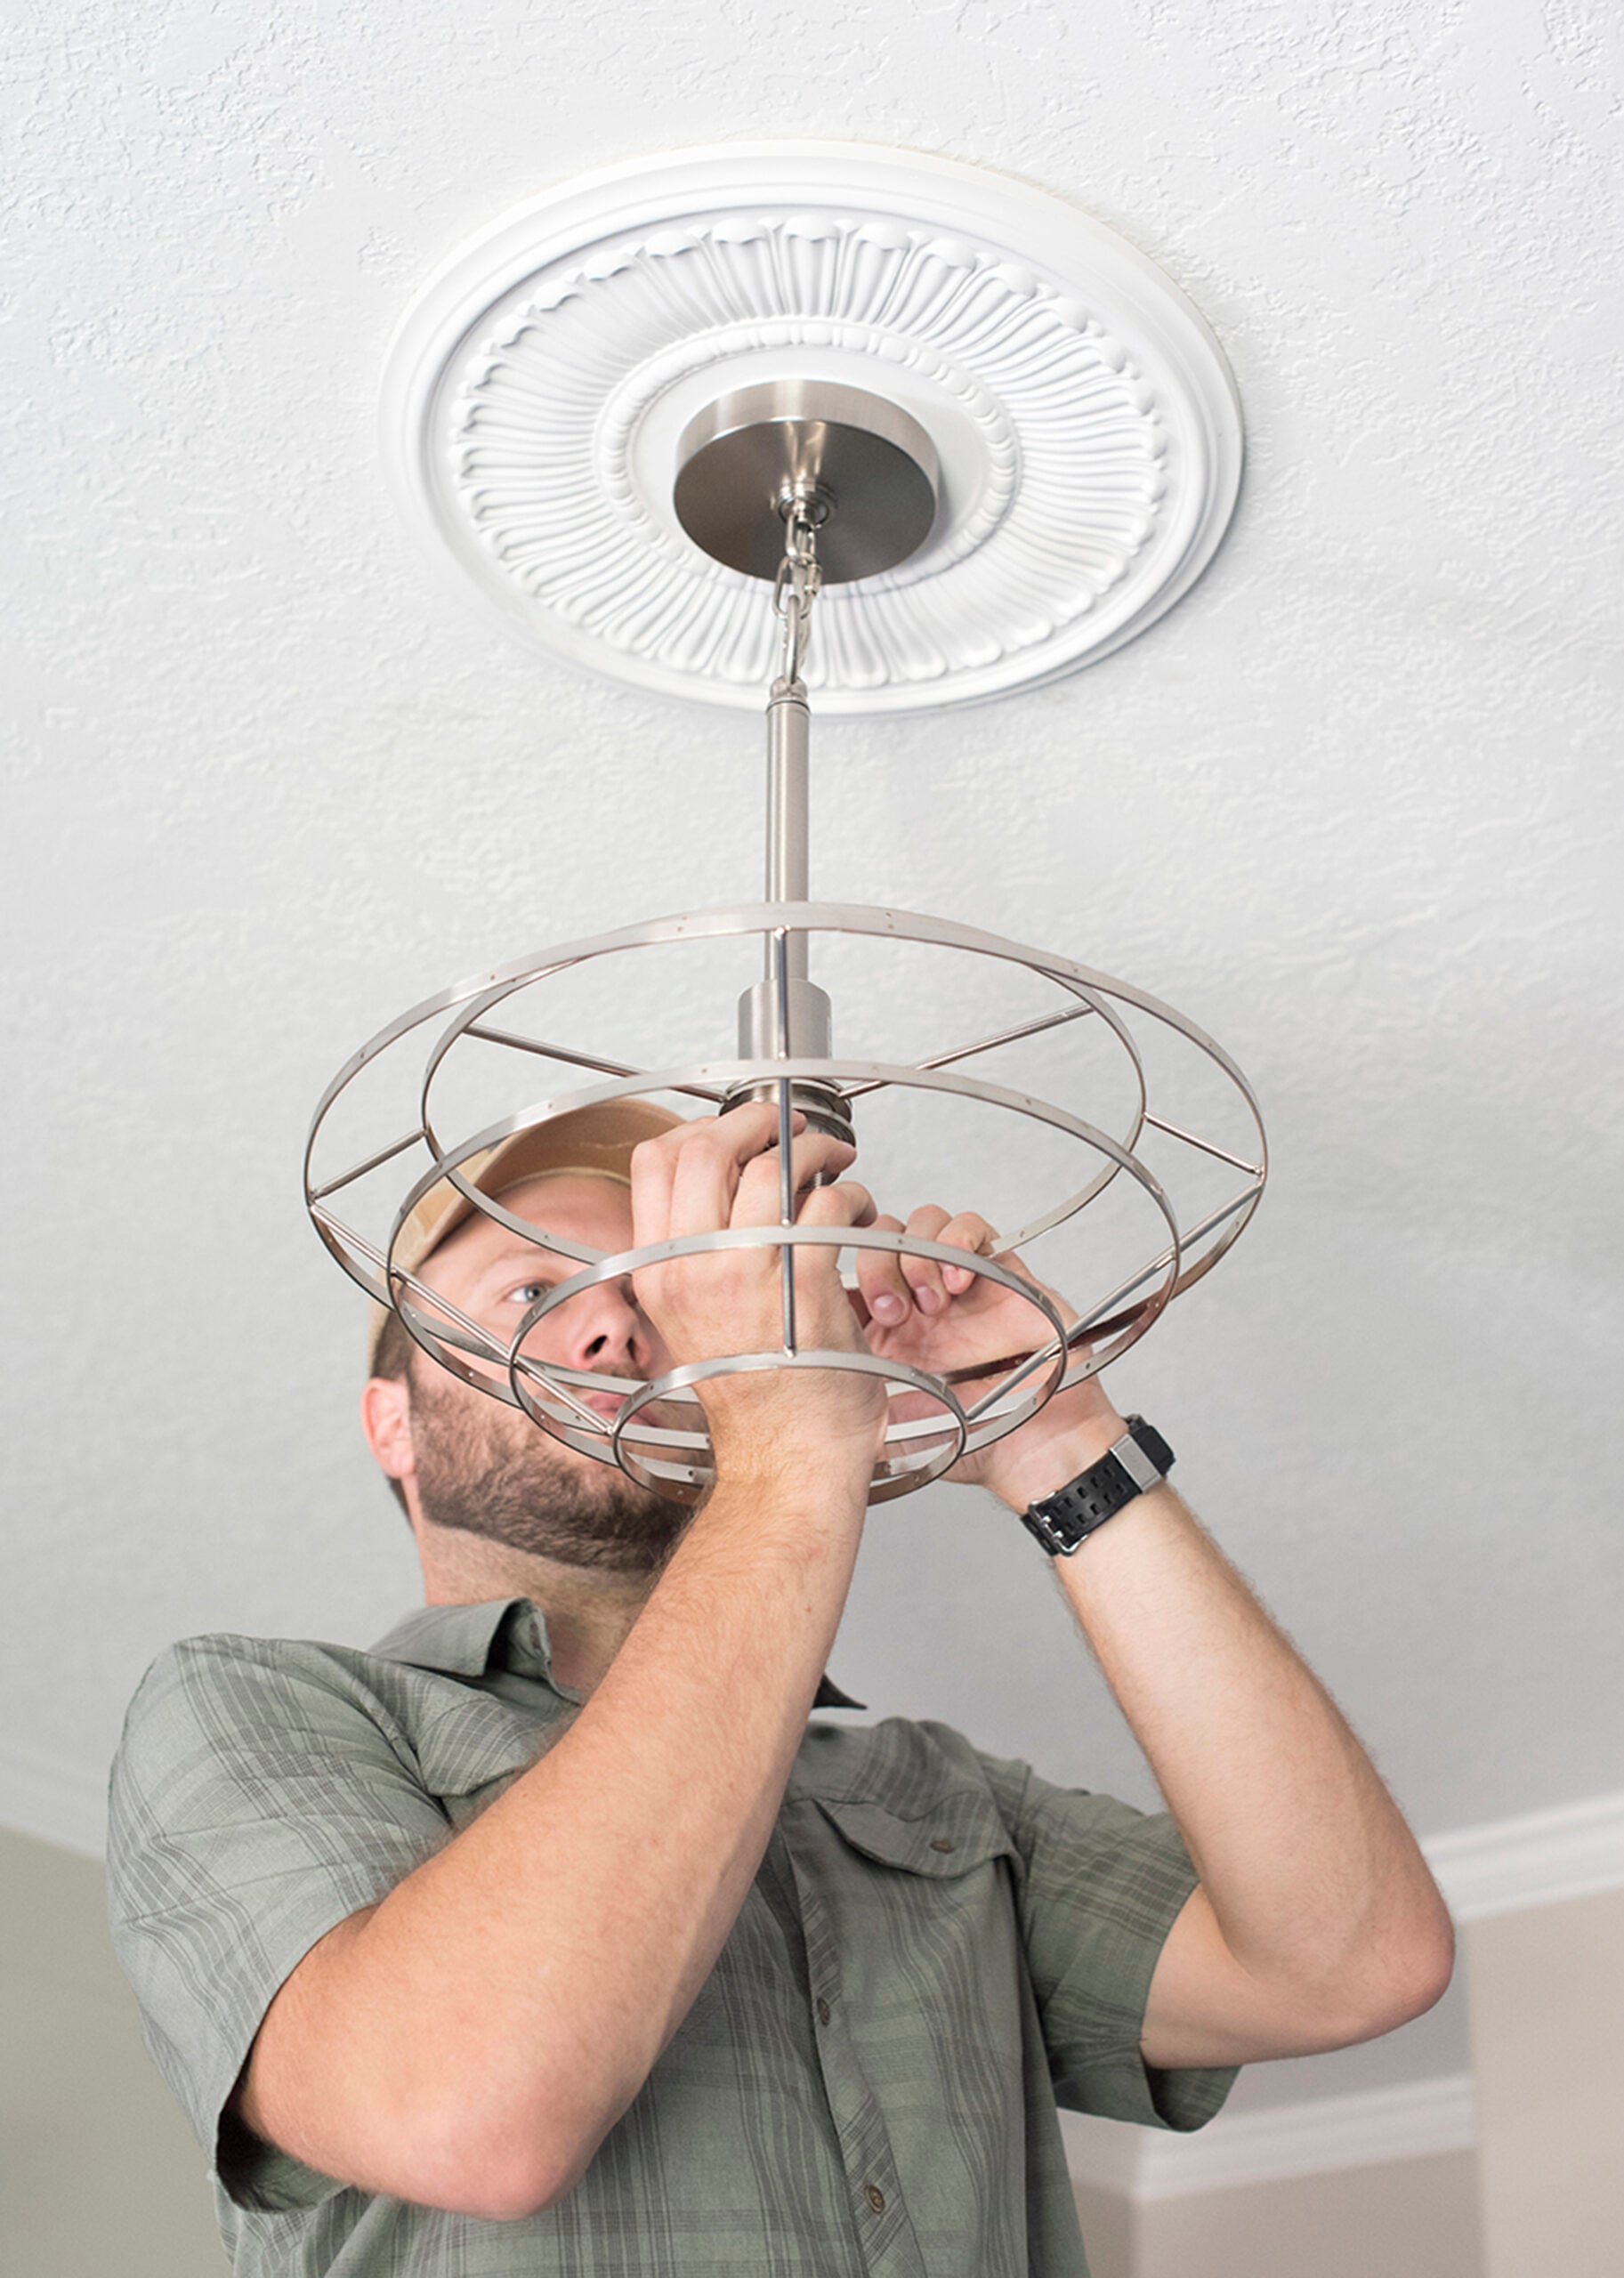
Step 3 : Wire The Light Fixture

Next, it’s time to wire your preferred light fixture. Follow the instructions that came with it. It’s pretty self-explanatory. Once everything is connected, tuck the wiring neatly into the housing, out of the way, as shown below…
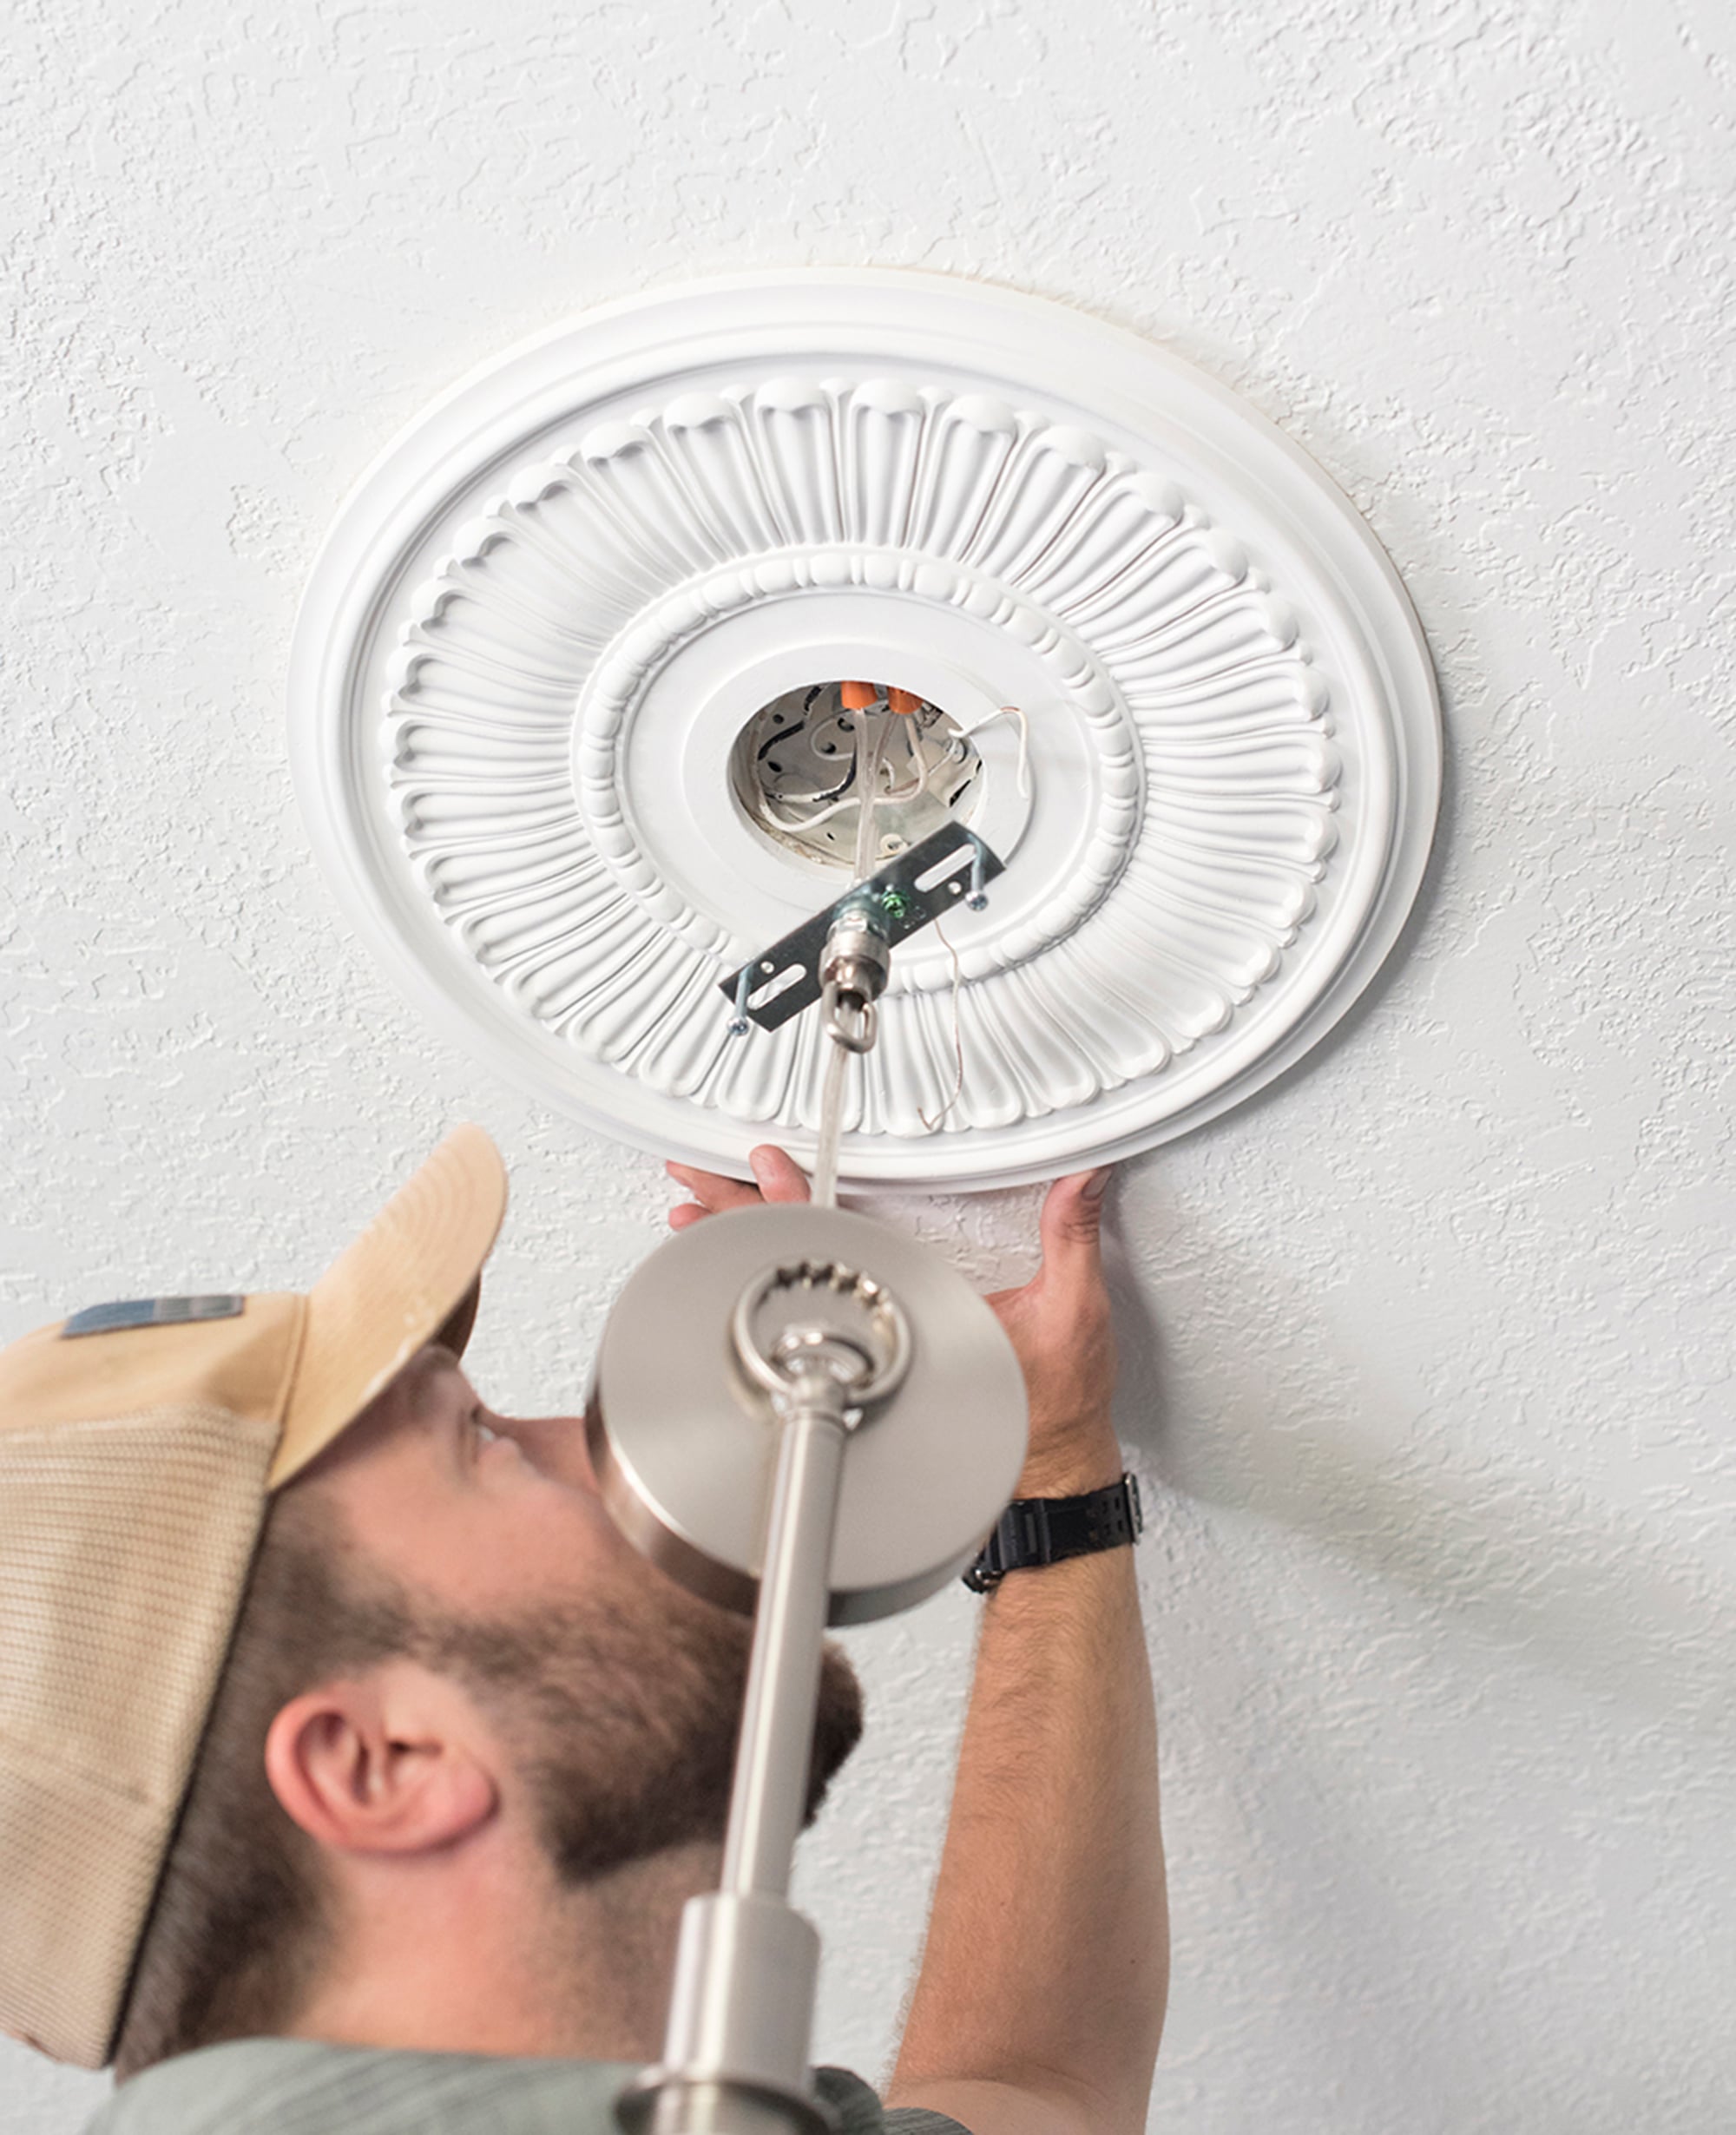
This is where you’ll want longer screws. The hardware that comes with your fixture is most likely too short to go through the medallion. Secure the fixture loosely, but do not fully tighten the hardware at this point…

Step 4 : Center The Medallion

Since you loosely secured the fixture to the ceiling, you should be able to shift your medallion (thanks to the caulk) until it centers with the light fixture canopy.
Once you have adjusted and centered it, go ahead and fully tighten and install the fixture.
Step 5 : Add Finishing Nails

This step is more important for larger ceiling medallions (15″-20″ or larger), but we do it every time… just to be safe. Add a few finishing nails around the medallions perimeter at an angle. It prevents sagging and keeps everything secure. The light fixture is actually holding the medallion to the ceiling, not the caulk– so adding these nails will ensure it stays in place without drooping over time.
Step 6 : Fill, Sand, and Touch Up
Next, fill the nail holes, sand the excess filler smooth, and touch up the paint on the medallion. This makes the installation look seamless.
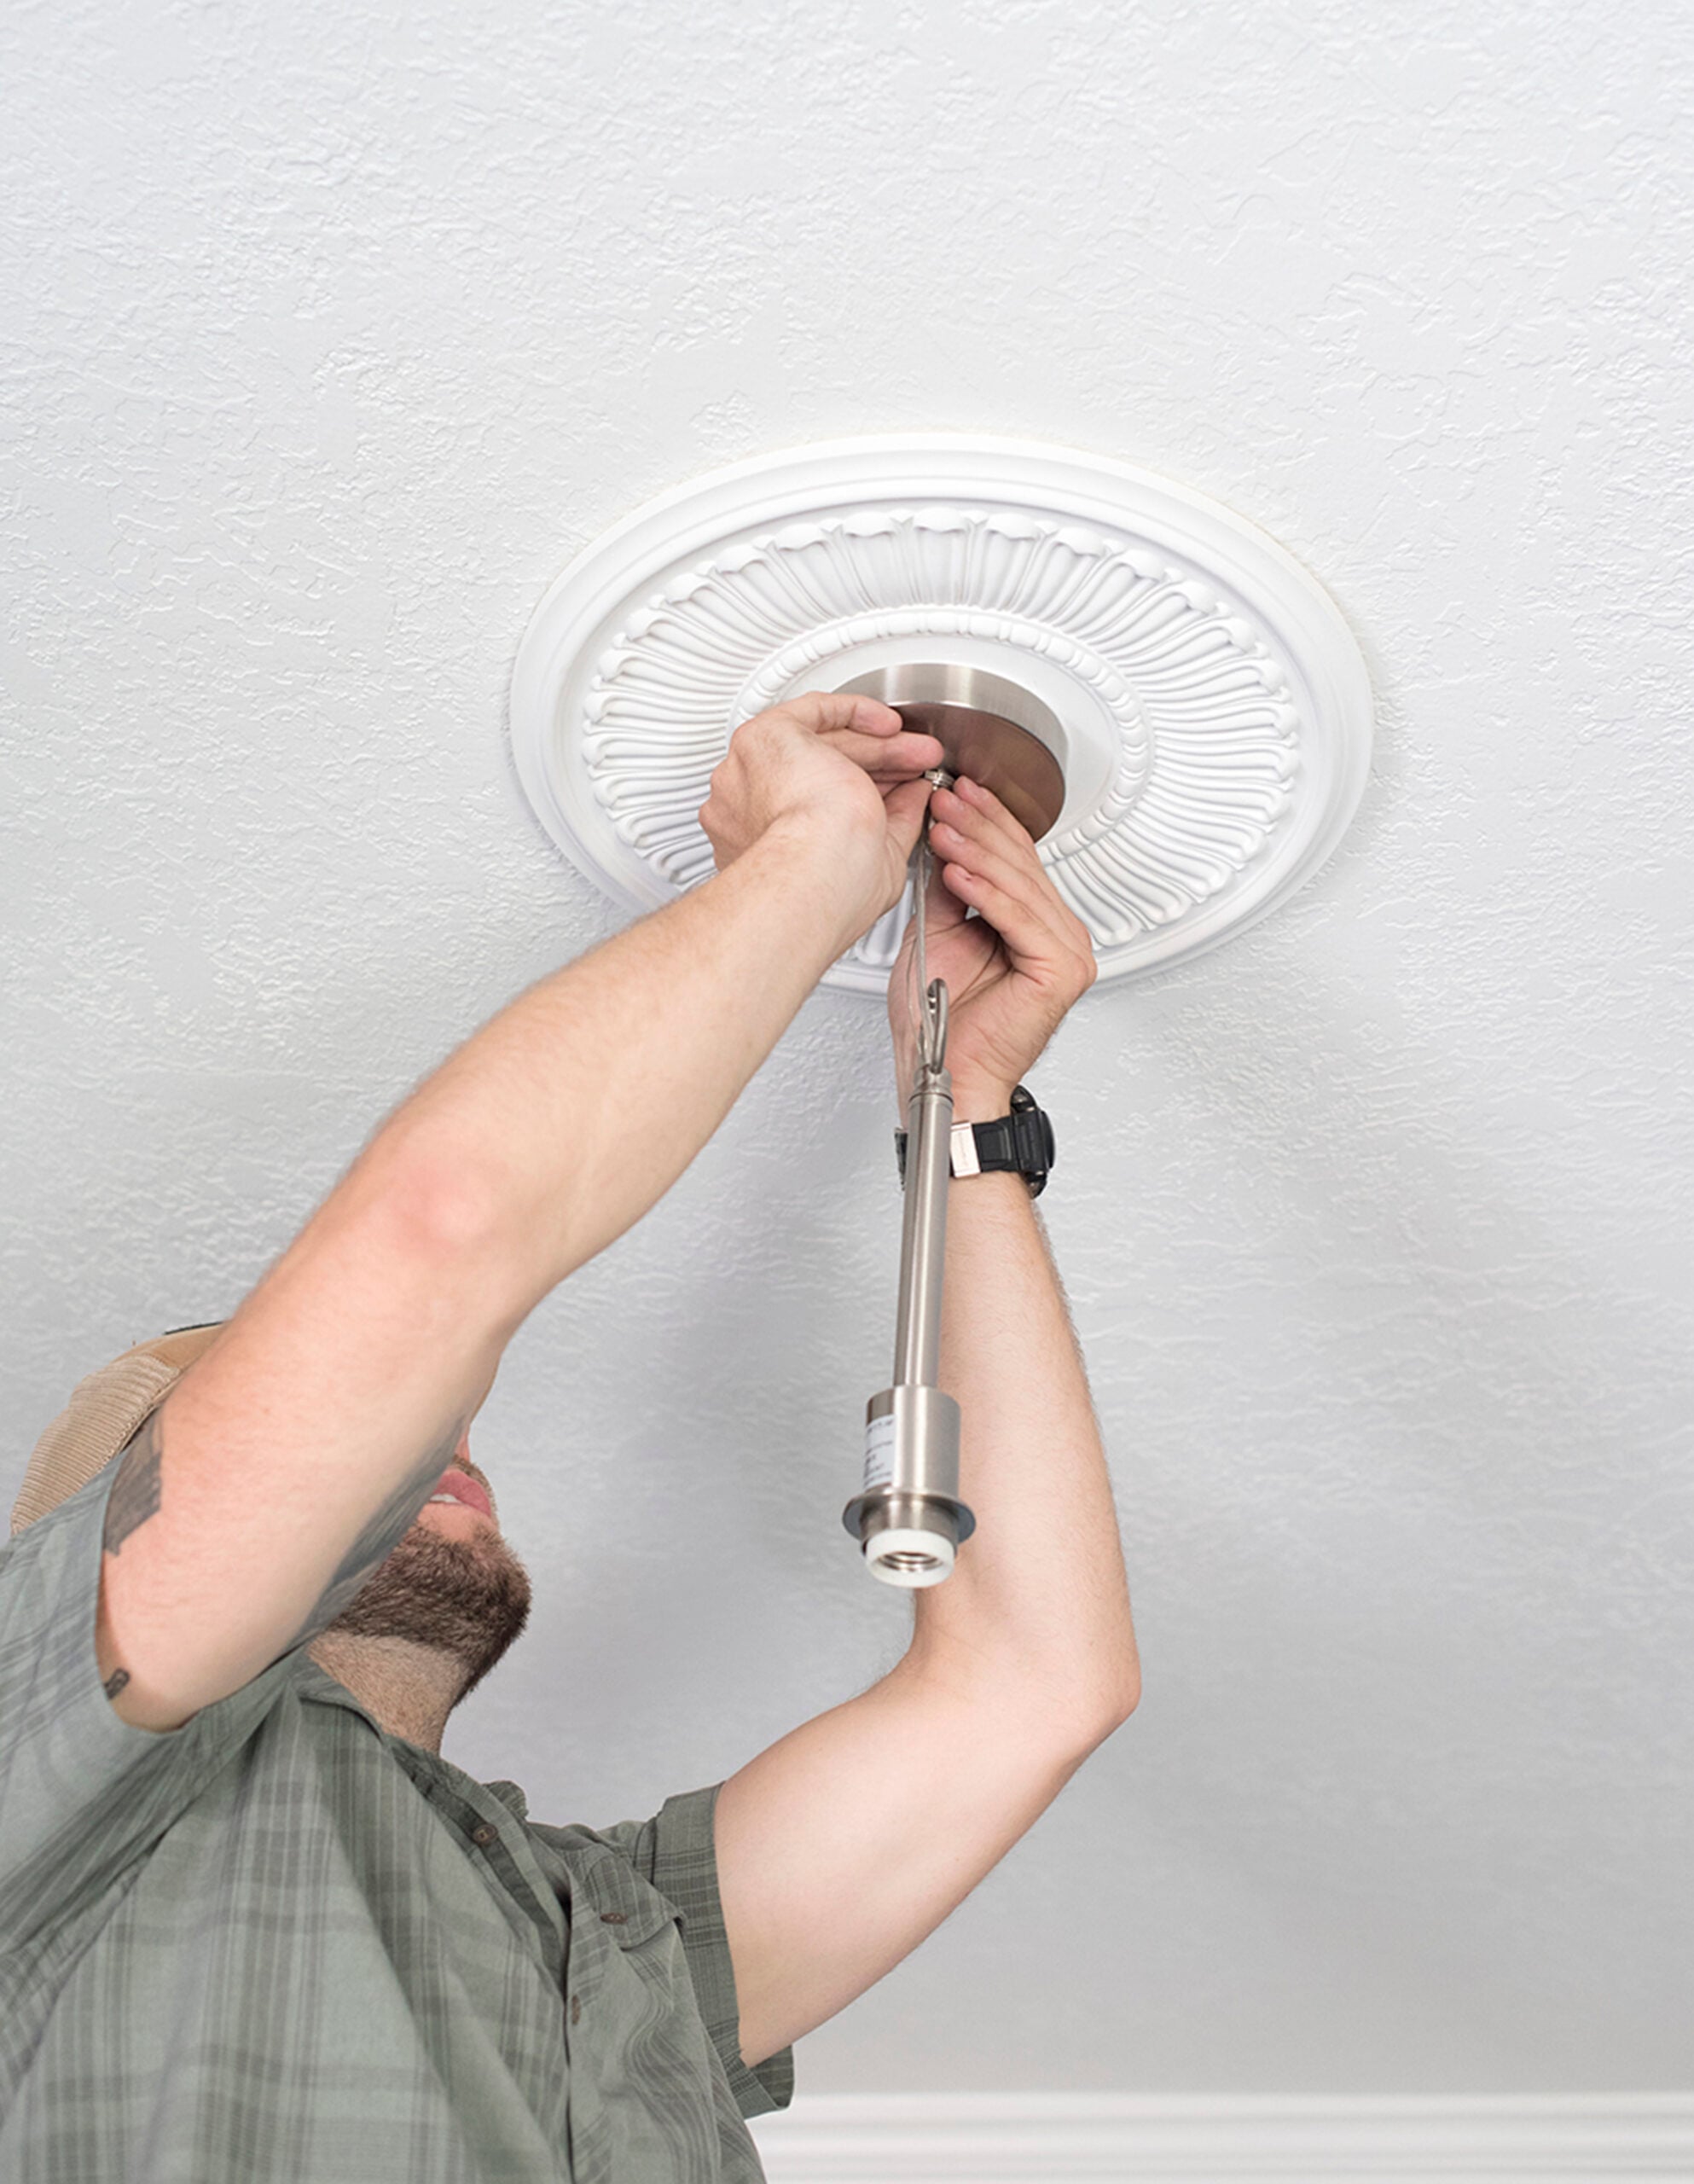
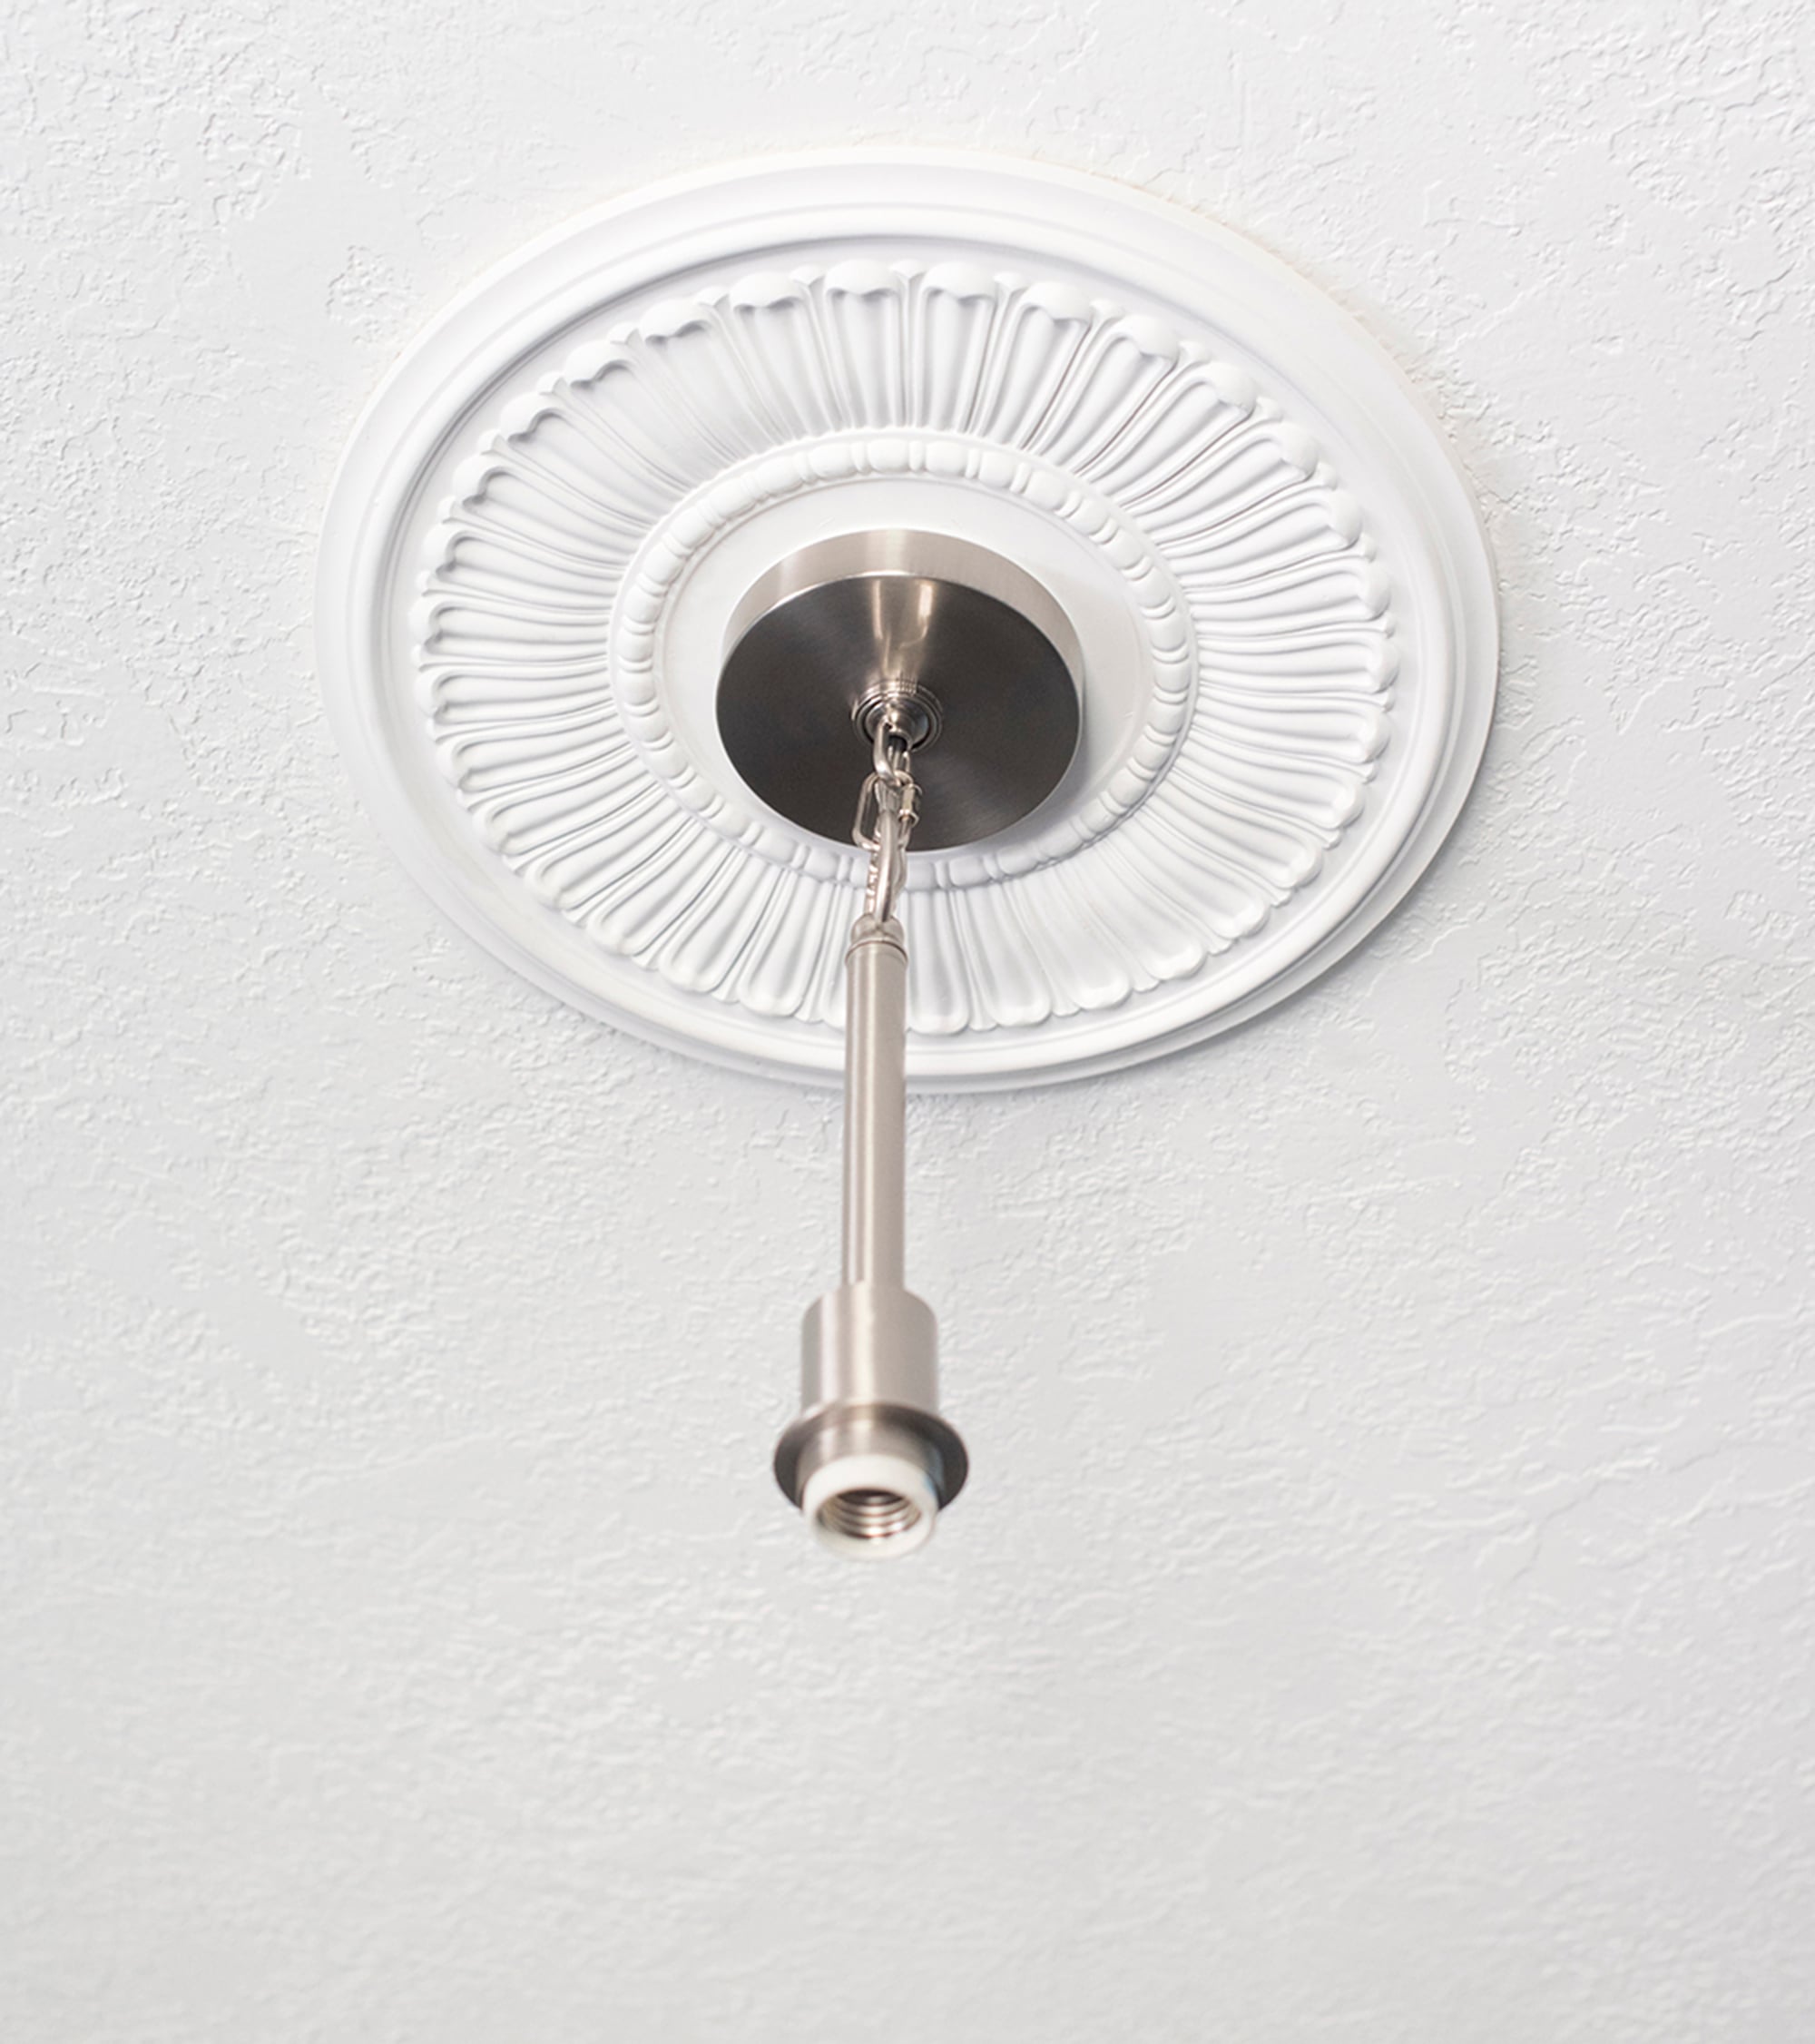
Step 7 : Finish Installing The Light Fixture
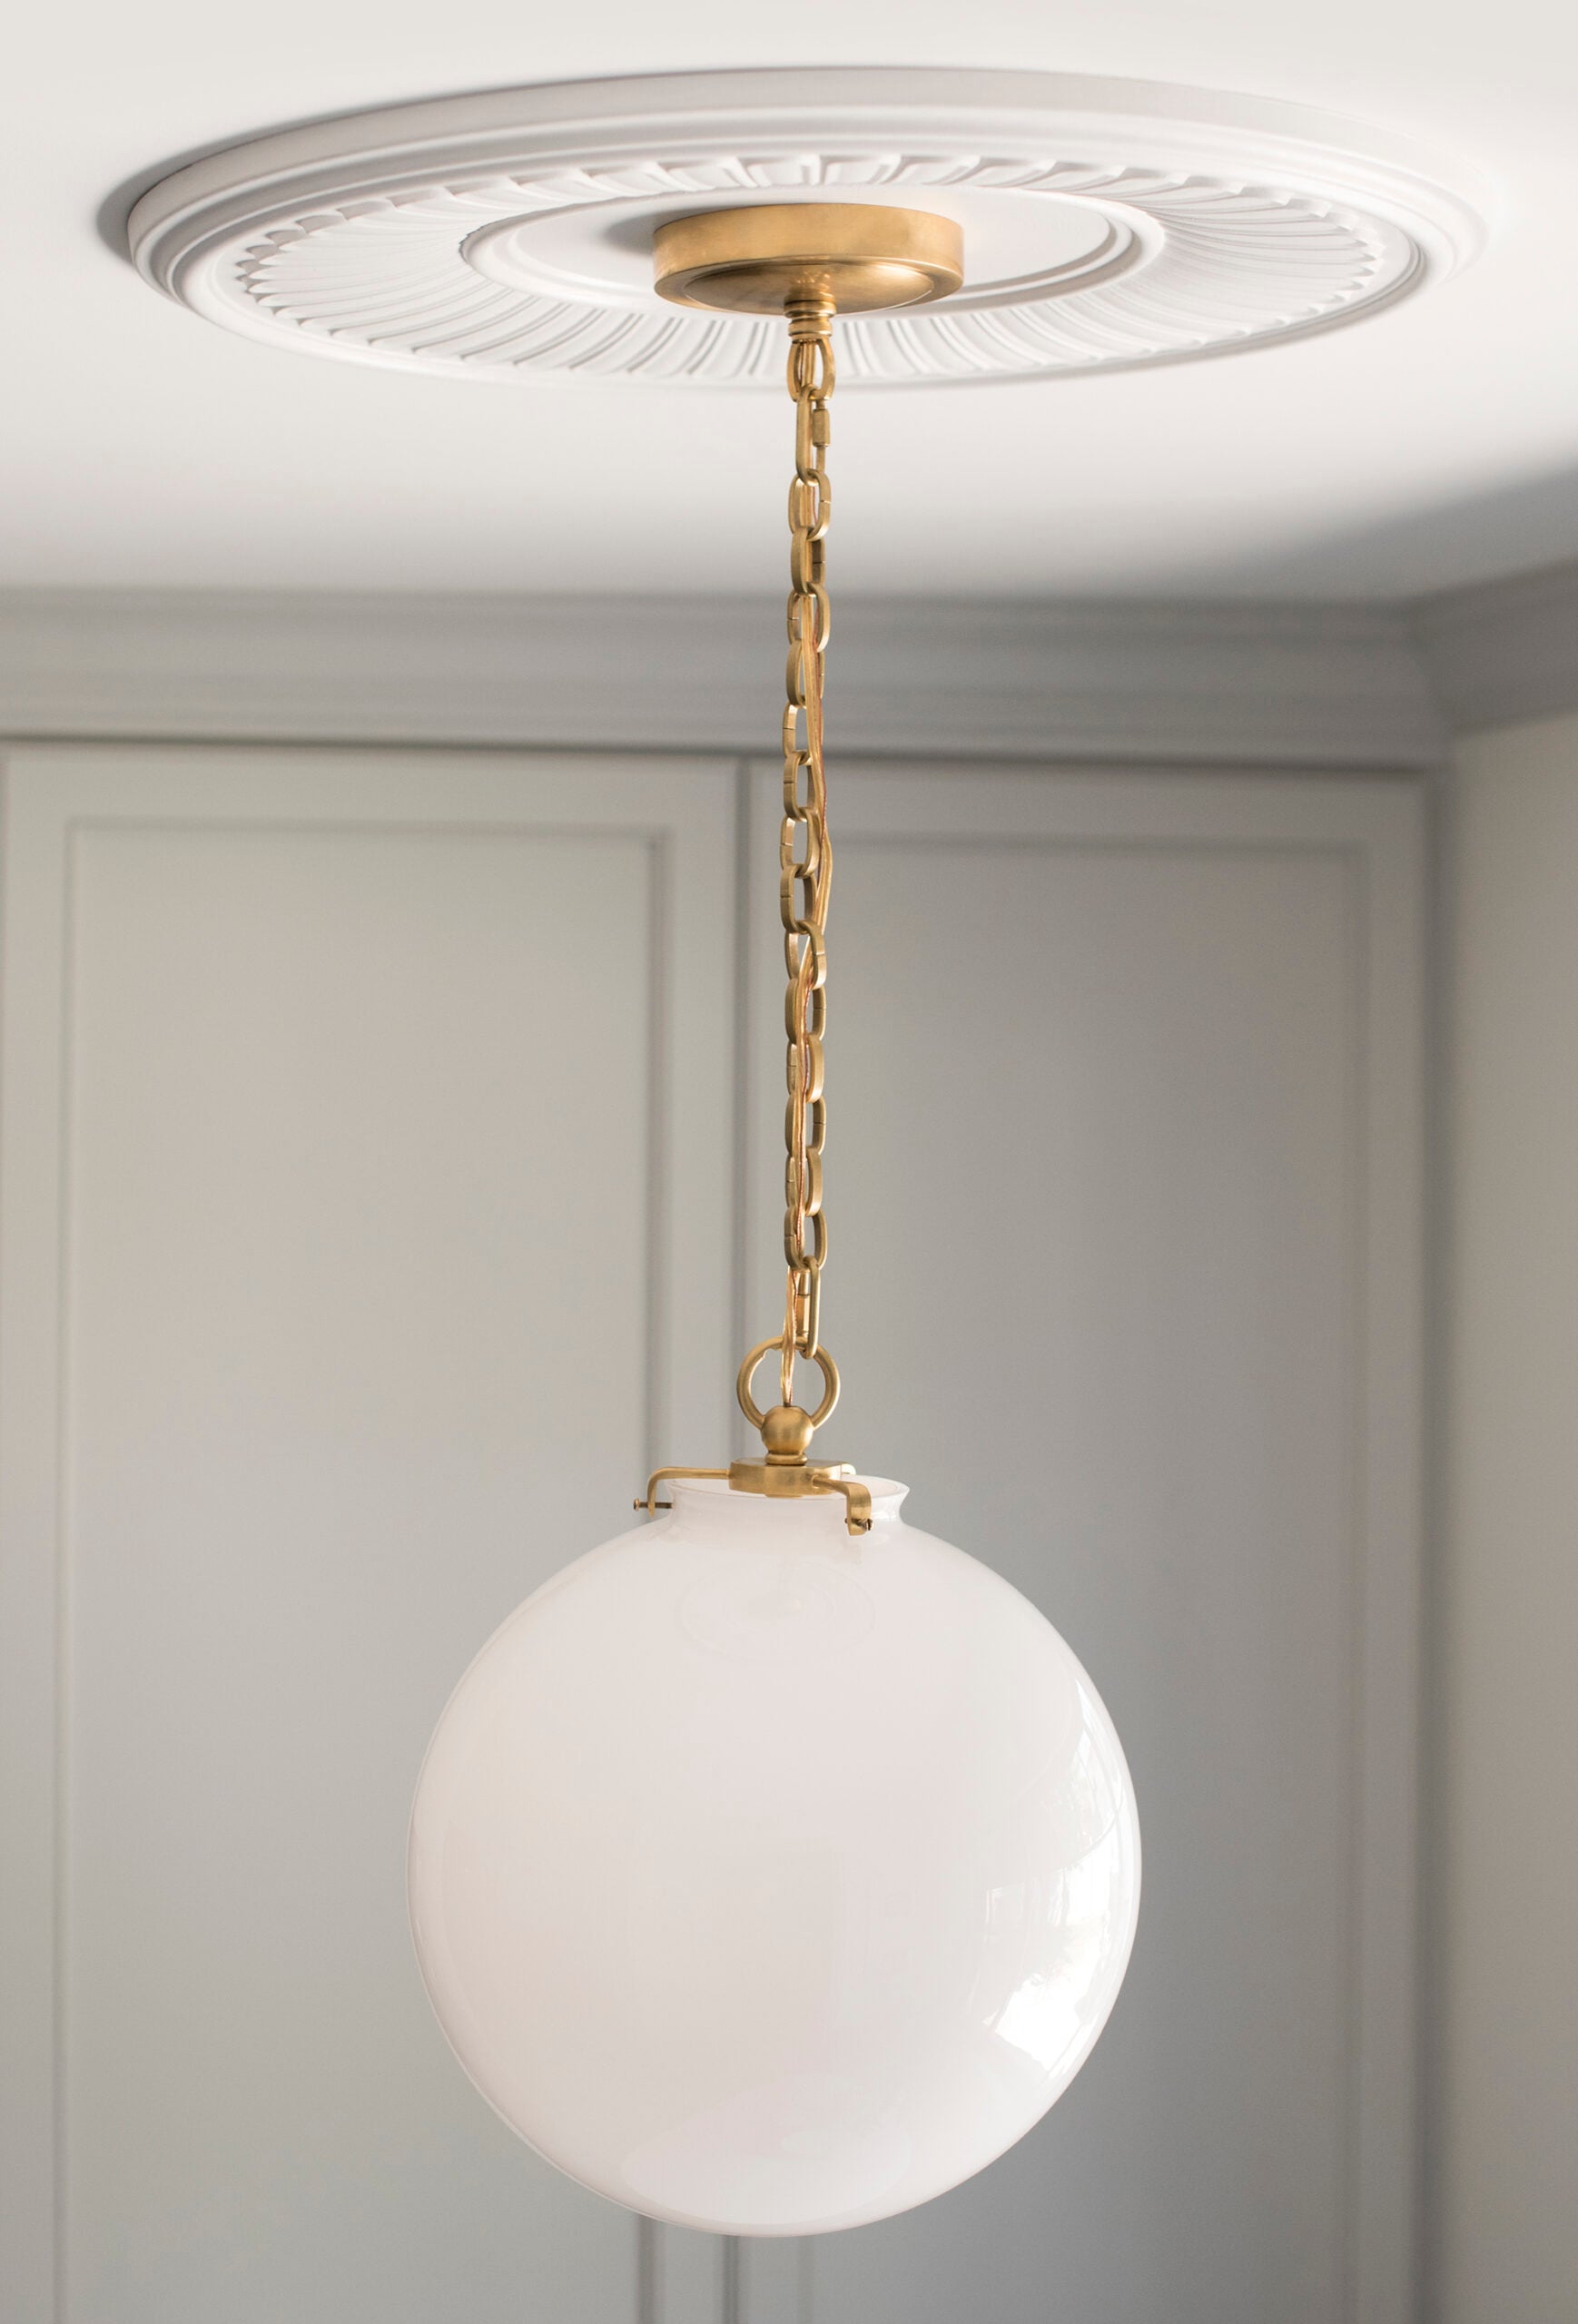
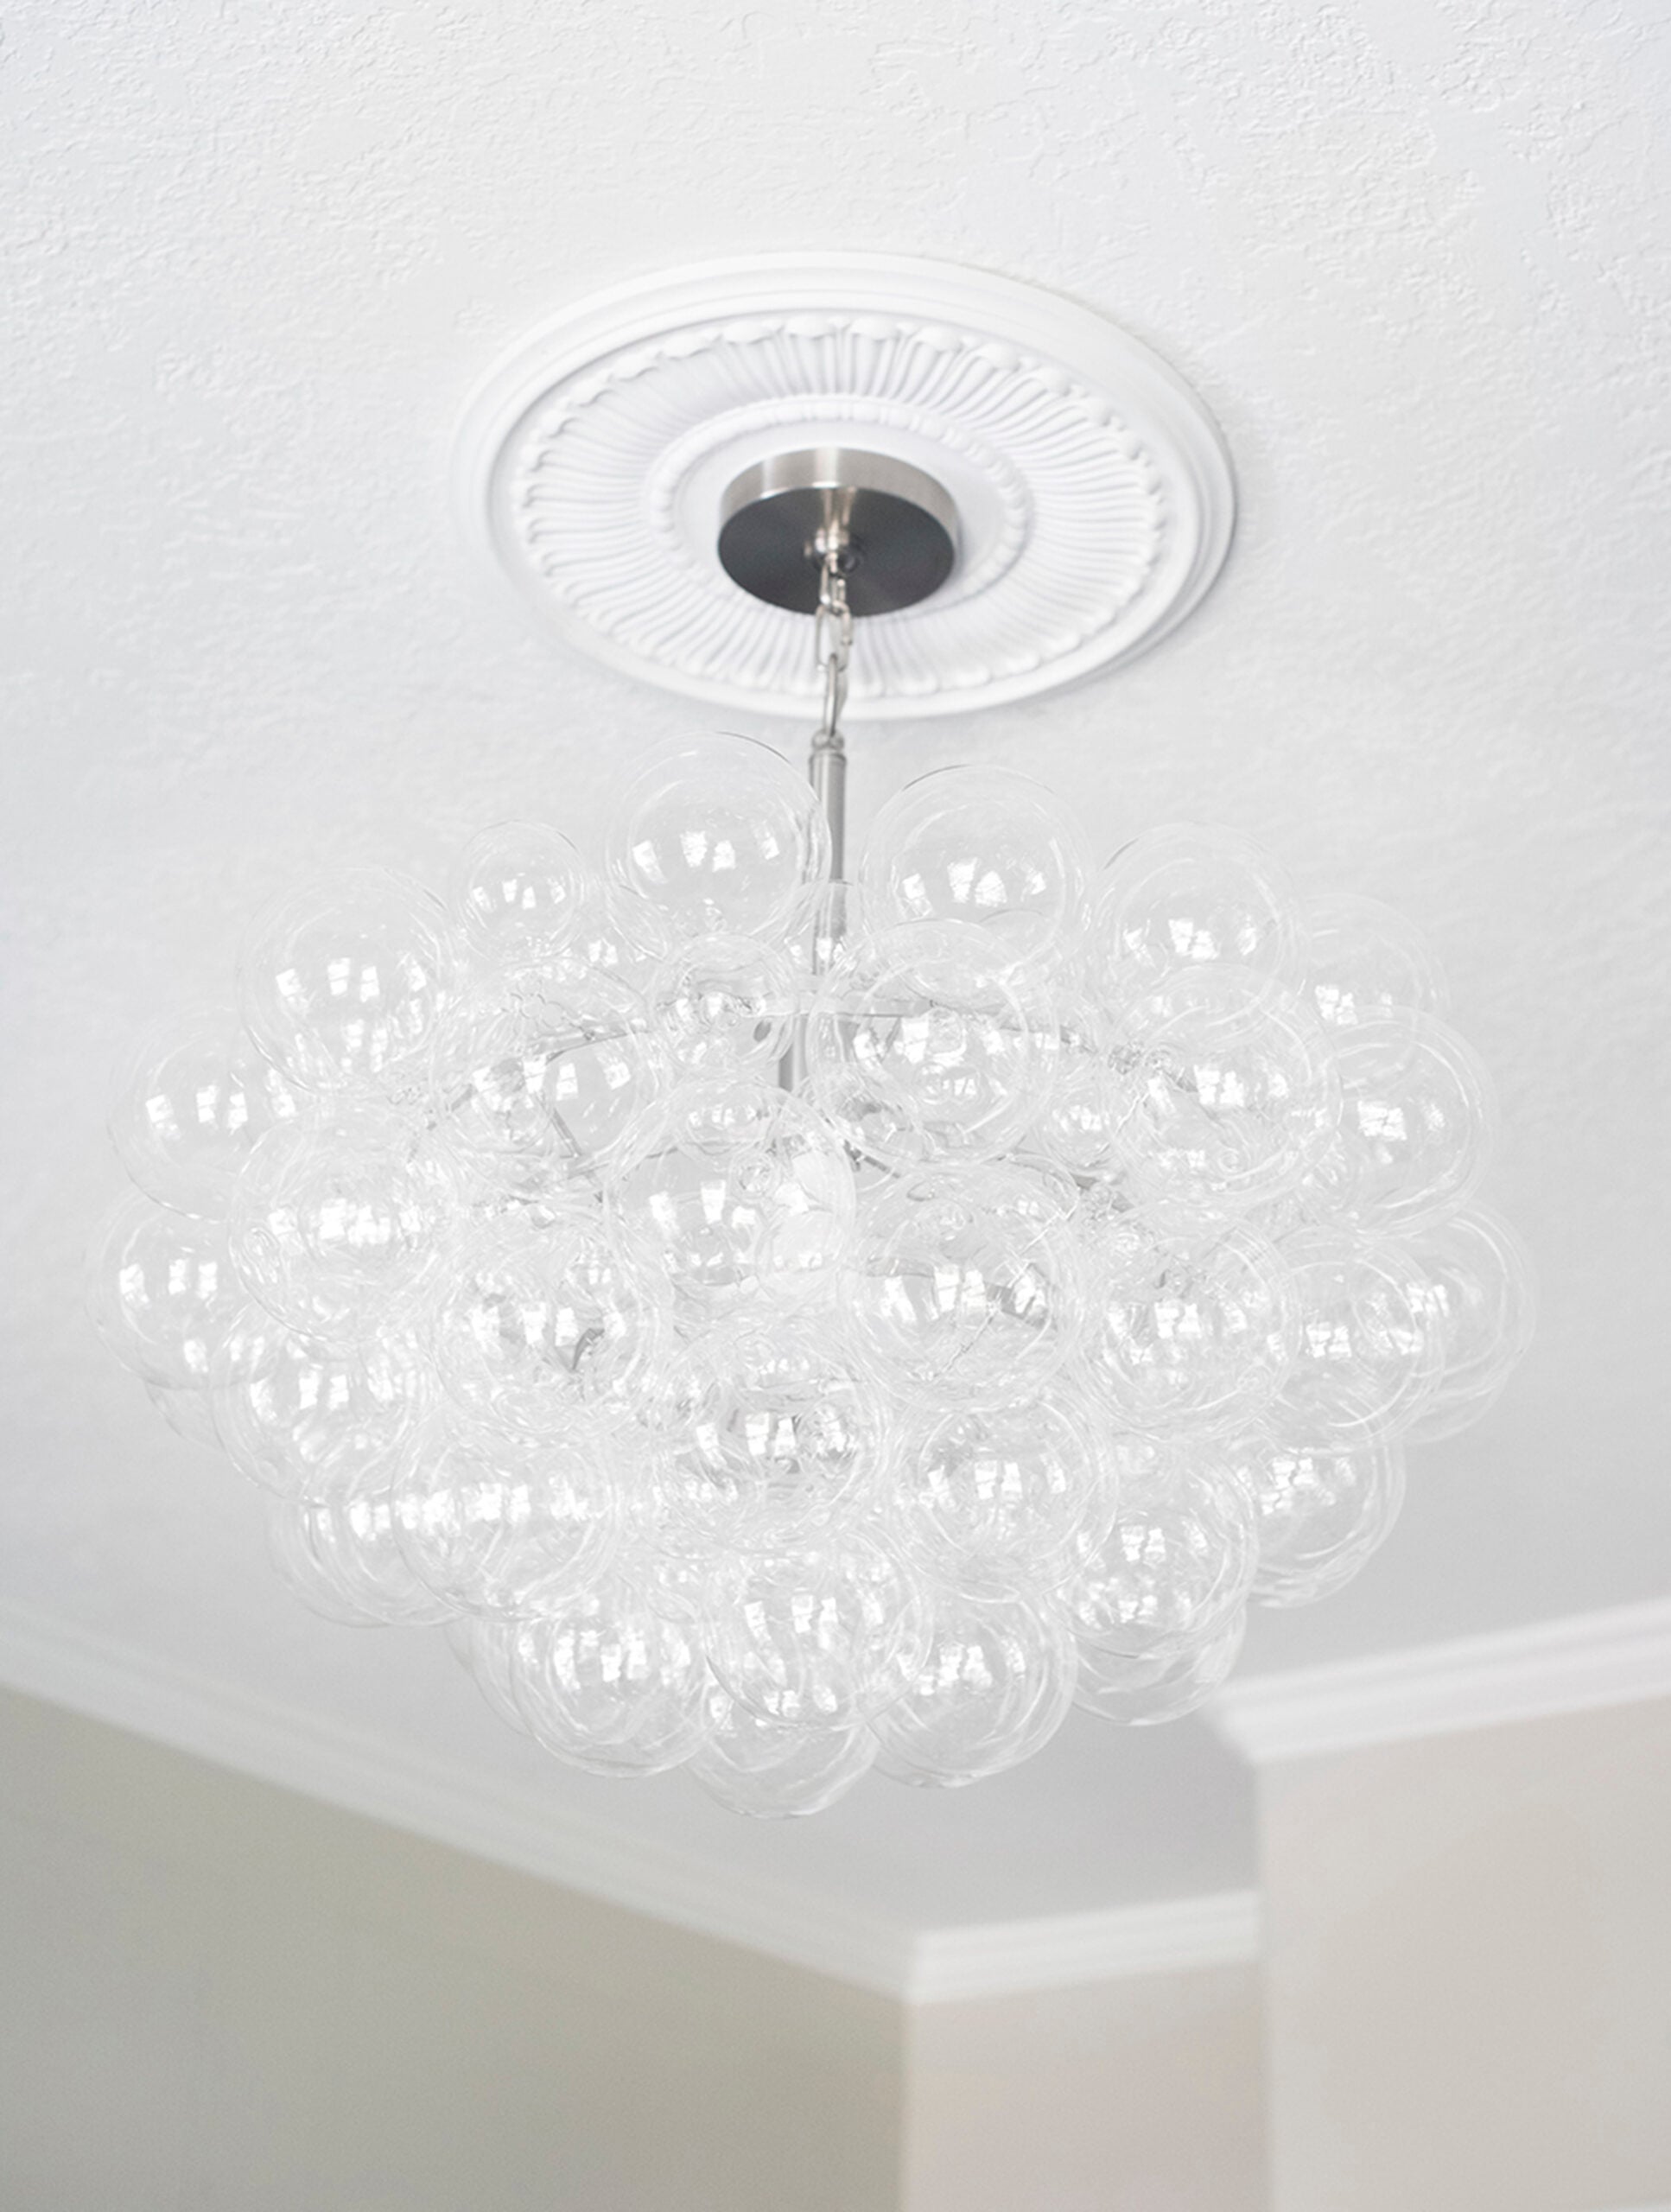
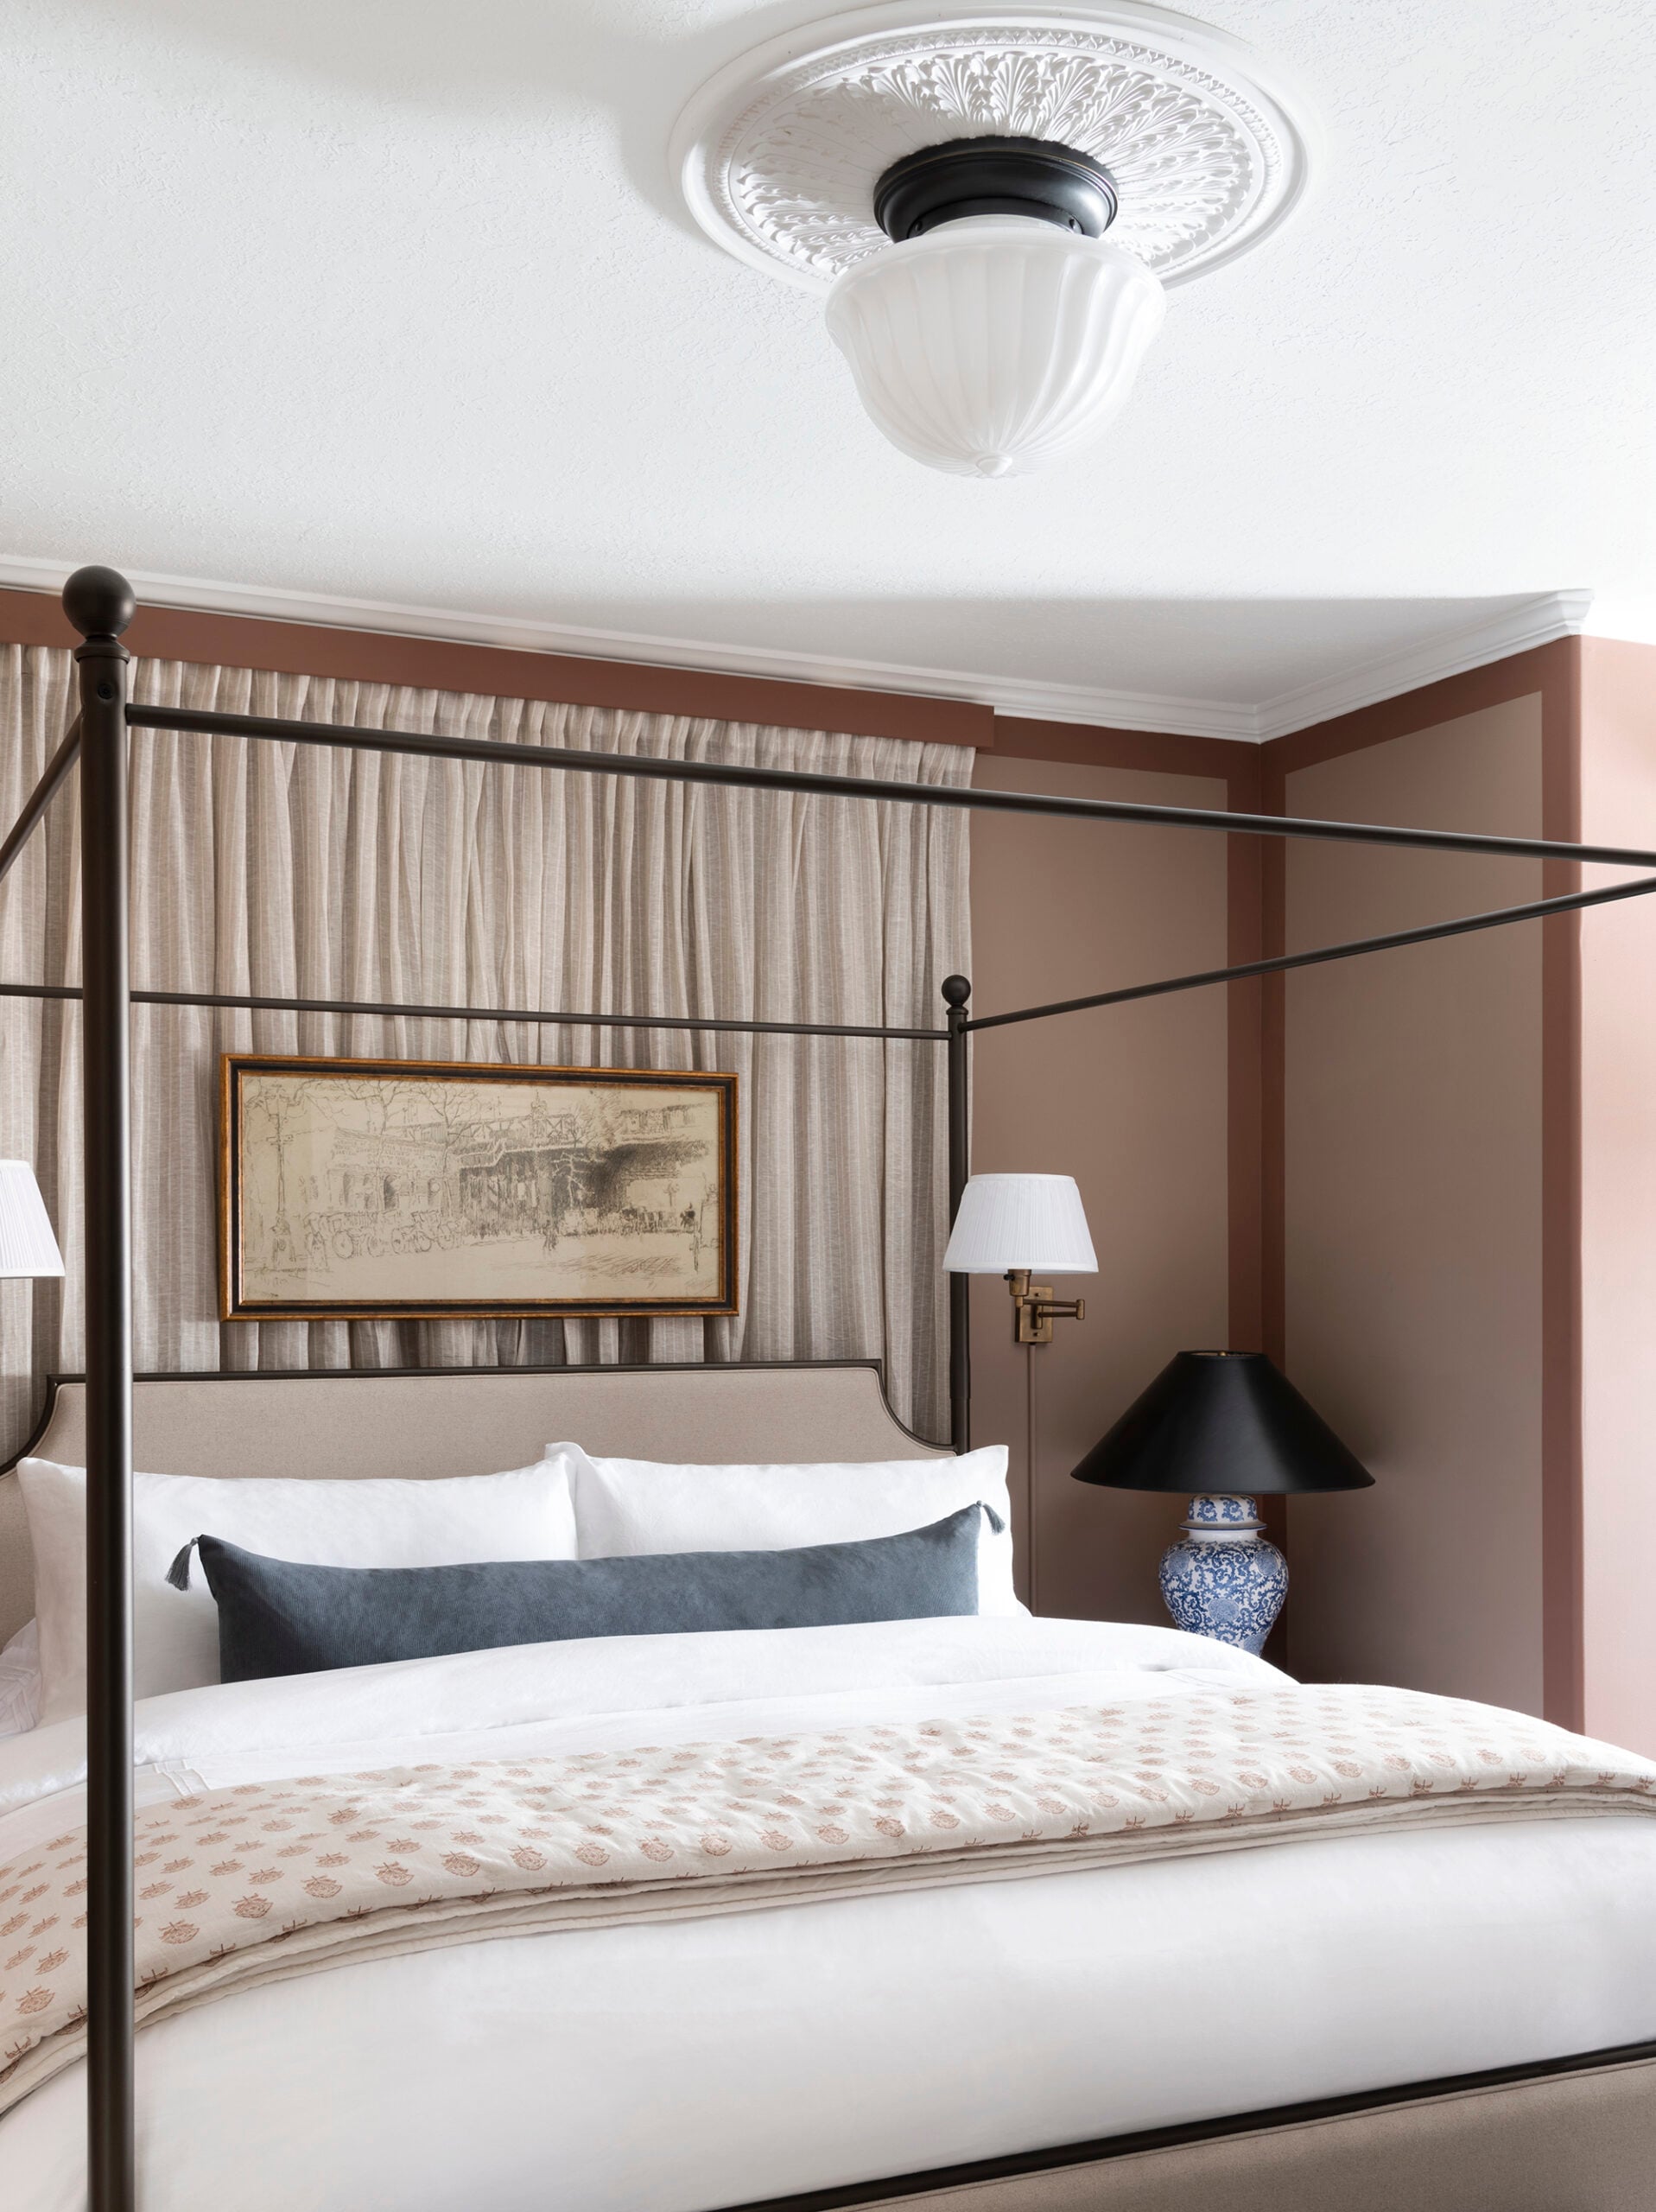
The final step is to finish assembling the light fixture. In our case, we needed to install the pendant portion of the fixture, a lightbulb, and the glass “bubbles”. This is always my favorite part. Seeing it all come together makes the effort feel worthwhile.
Now that you know how to install a ceiling medallion, I’ll share some examples from our home renovations and answer questions you sent over!
Questions?
My ceiling texture preference is always smooth. However, I think ceiling medallions can work with a multitude of ceiling textures… so don’t let that deter you. Our current ceilings are textured throughout our home. As we renovate, we’ve been replacing the ceilings or skim coating them. Here is how to smooth a textured ceiling (skim coat tutorial).
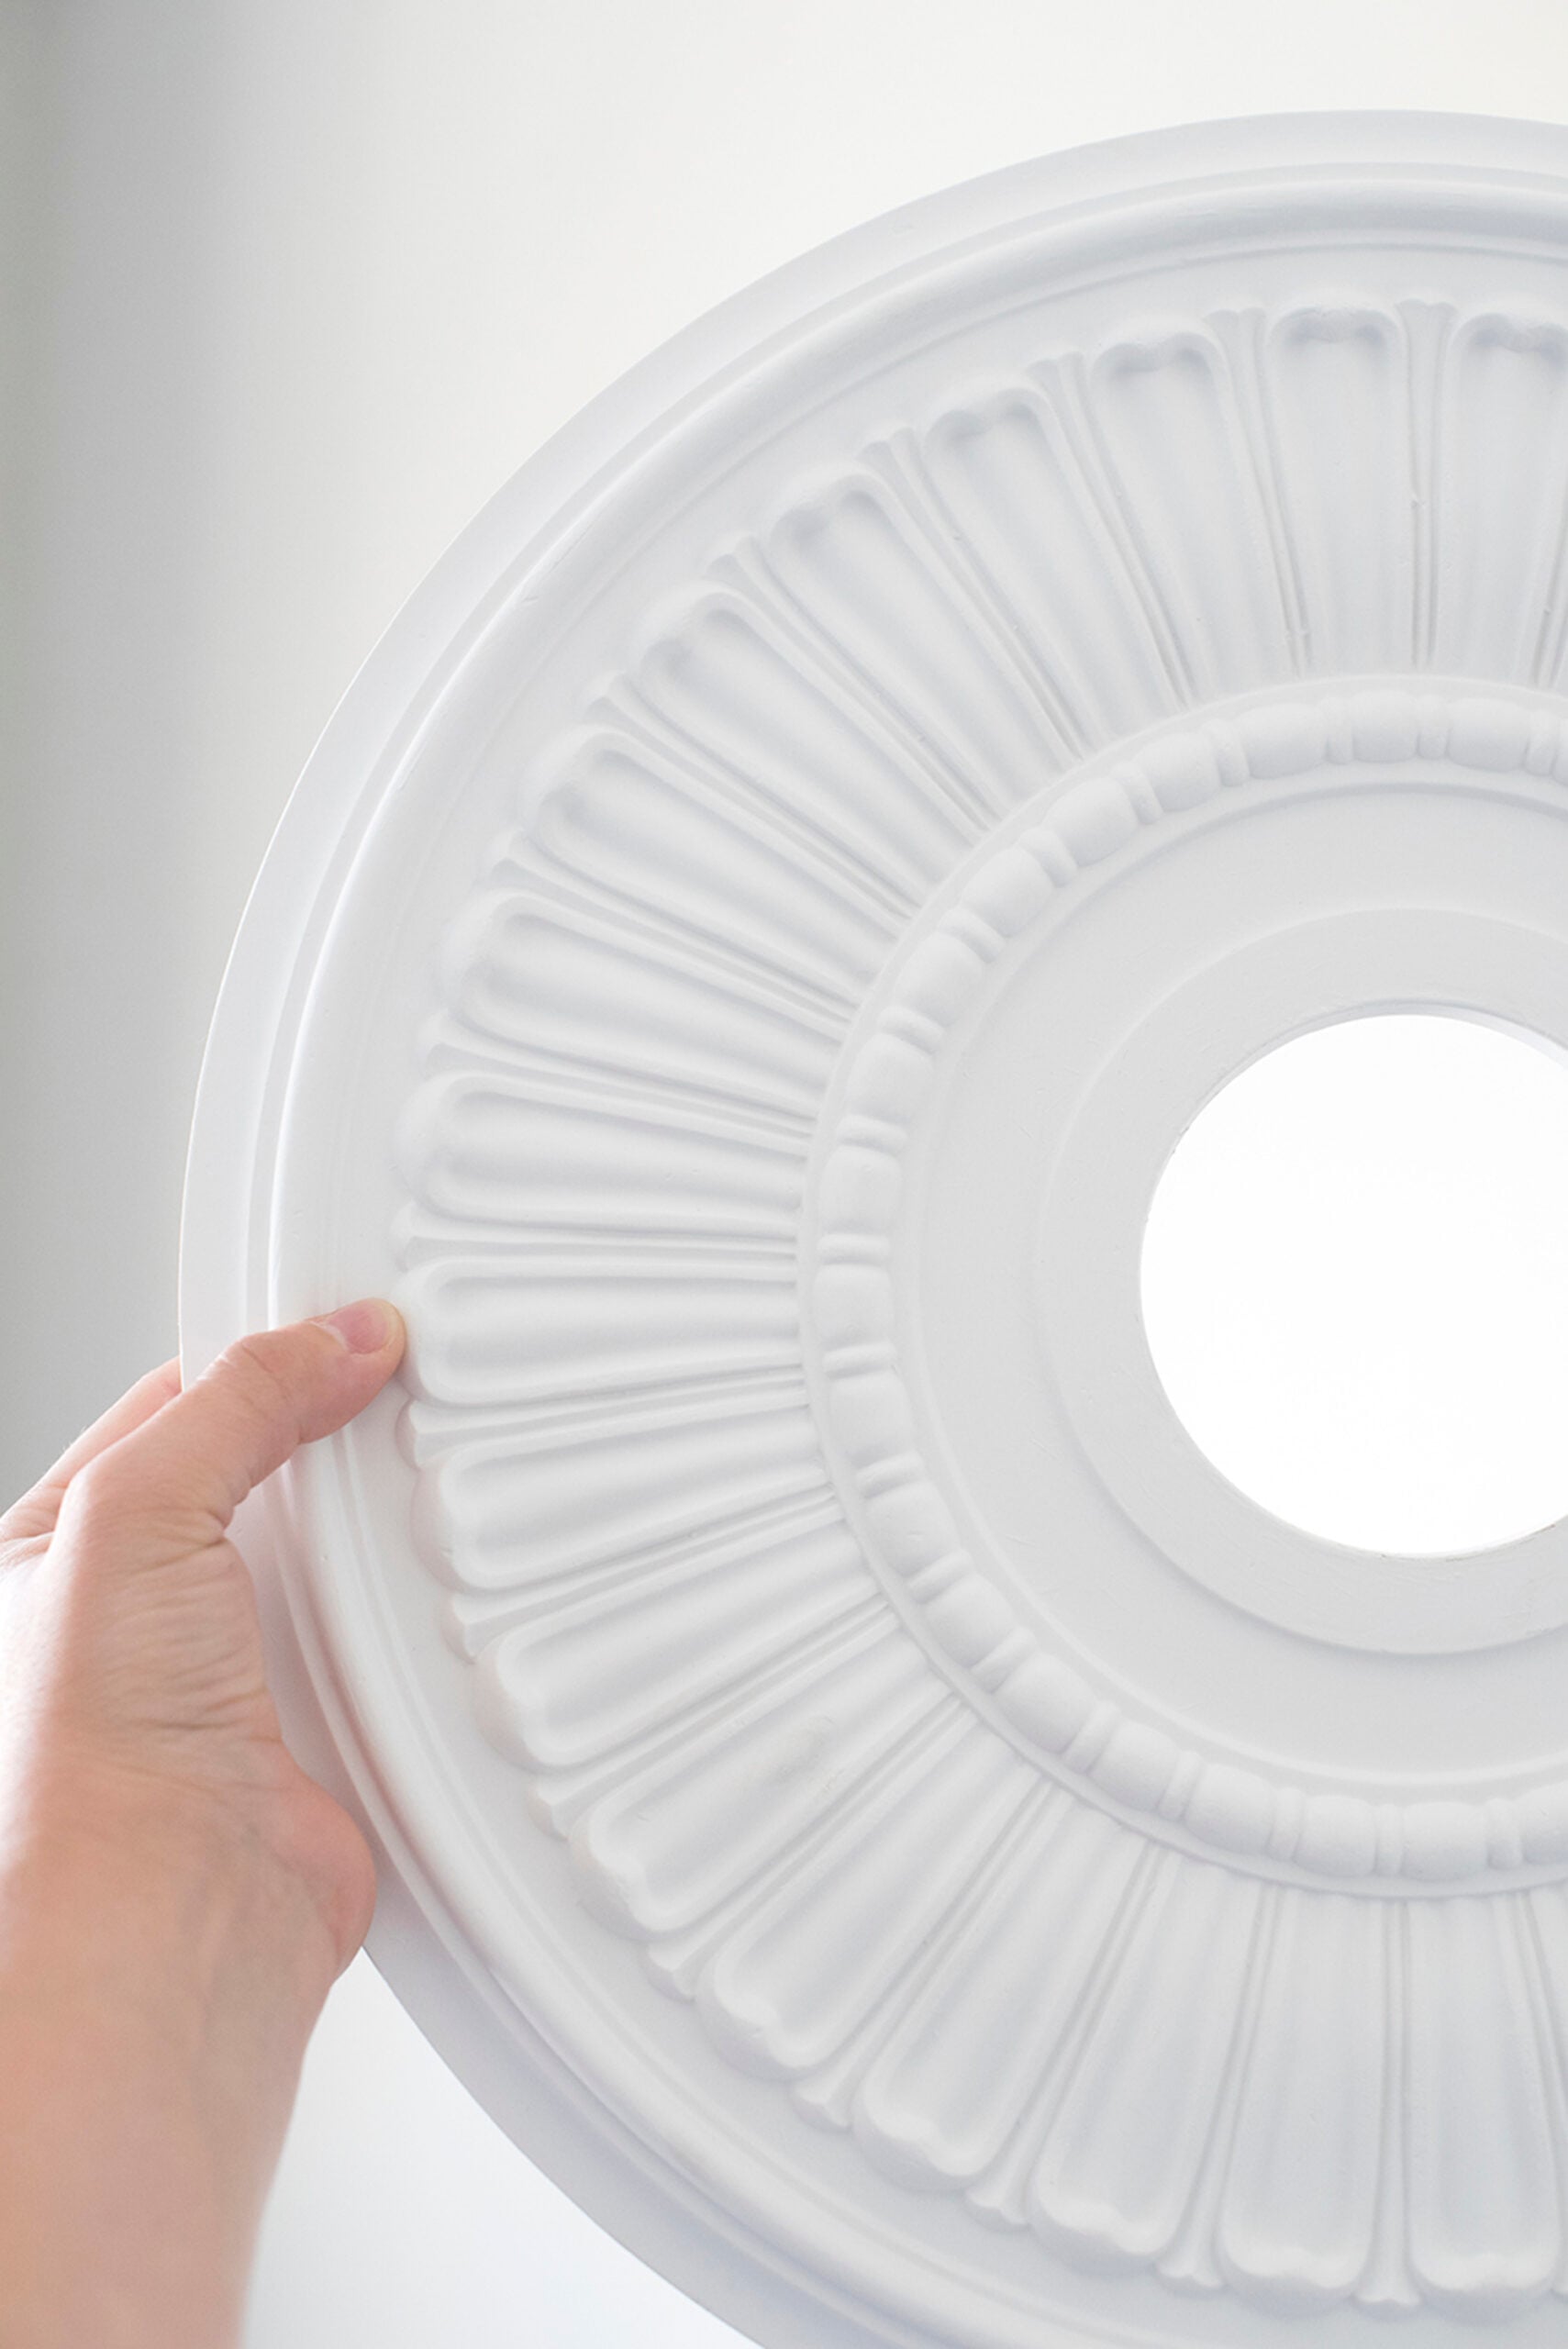
Ceiling medallions can range from $10 – $1,000. It’s kind of crazy! The price difference boils down to intricate details (like gold leaf or gilded features), the material, and the size. We typically like to stay in the low to middle price range. Our preference is a single piece medallion because they are easier to install (rather than two pieces split down the center that have to fit together), and we prefer plaster, wood, or primed polyurethane (which looks and feels like hard foam). The medallion in this tutorial was a lower end option, which cost $17 for a 16″ round medallion made of polyurethane.
You have to consider the size of the room rather than the light fixture itself. Measure the length and width of your room in feet. Multiple the length and the width, then divide by 7. This will give you the proportionate medallion size in inches. For instance… a 10‐by‐14 foot room calculation would be: 10 feet x 14 feet = 140 square feet divided by 7 = 20 inches diameter. You can use that dimension as a starting point and determine what looks best with your light fixture, plus or minus a few inches.
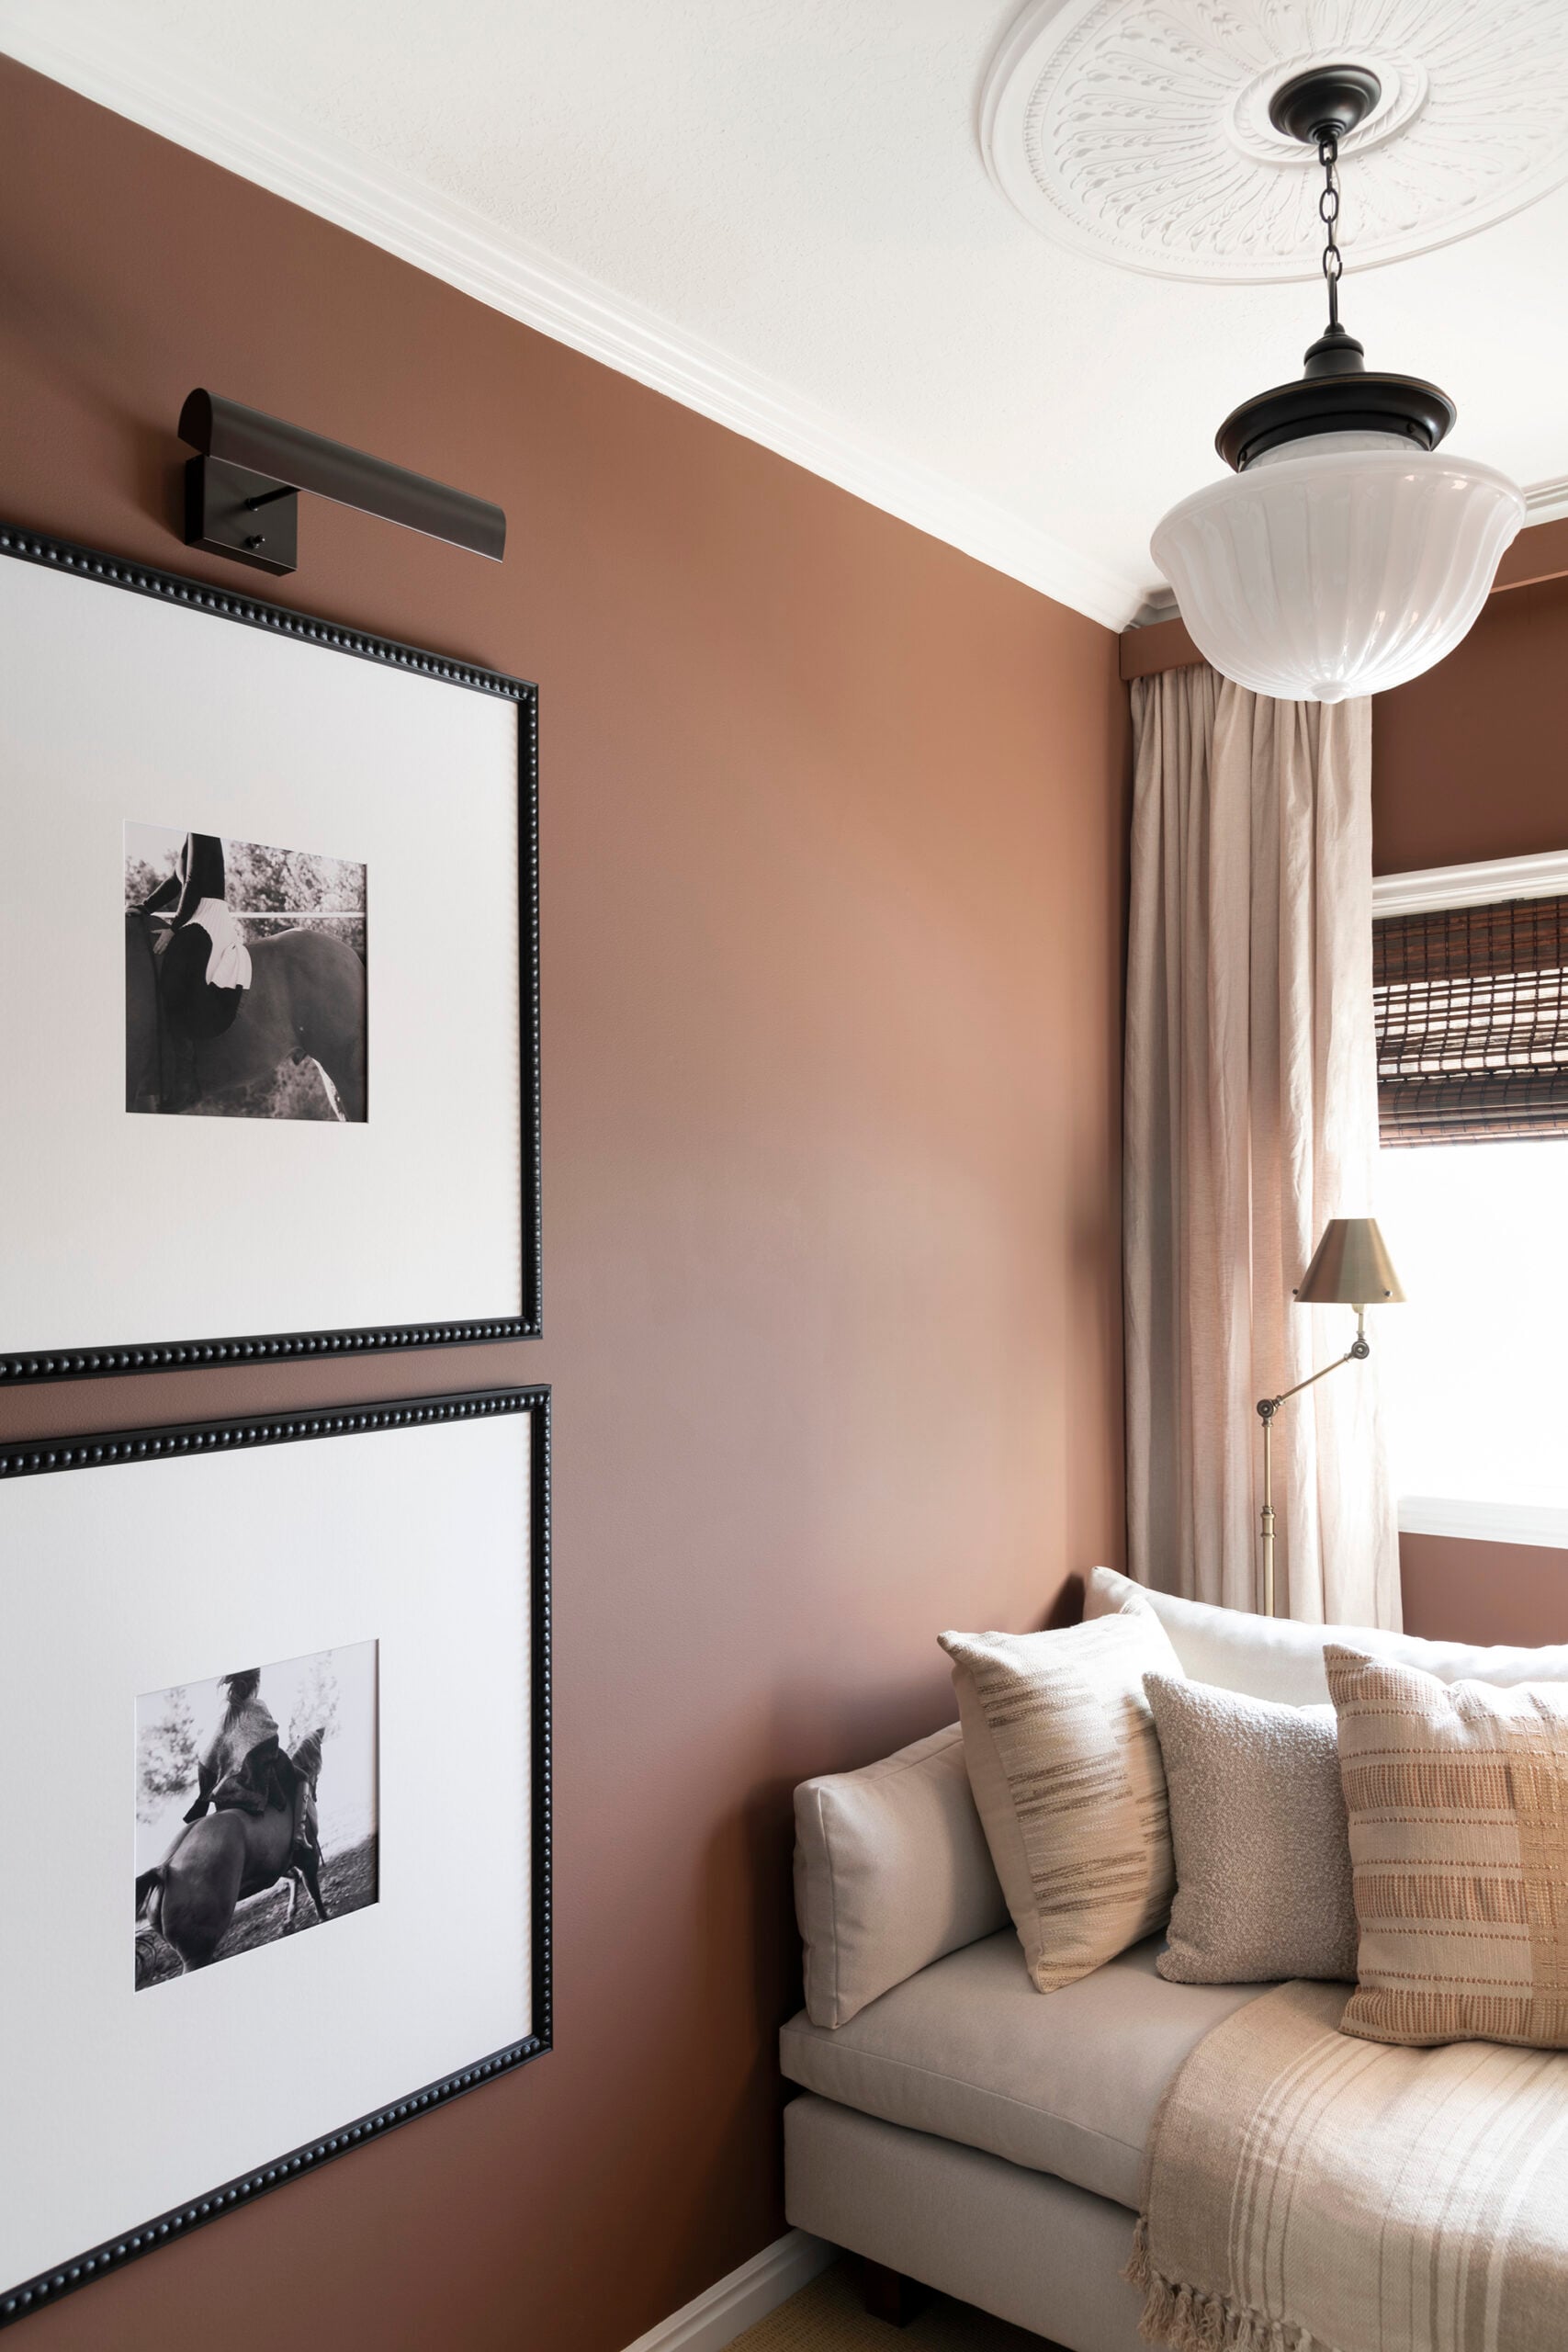
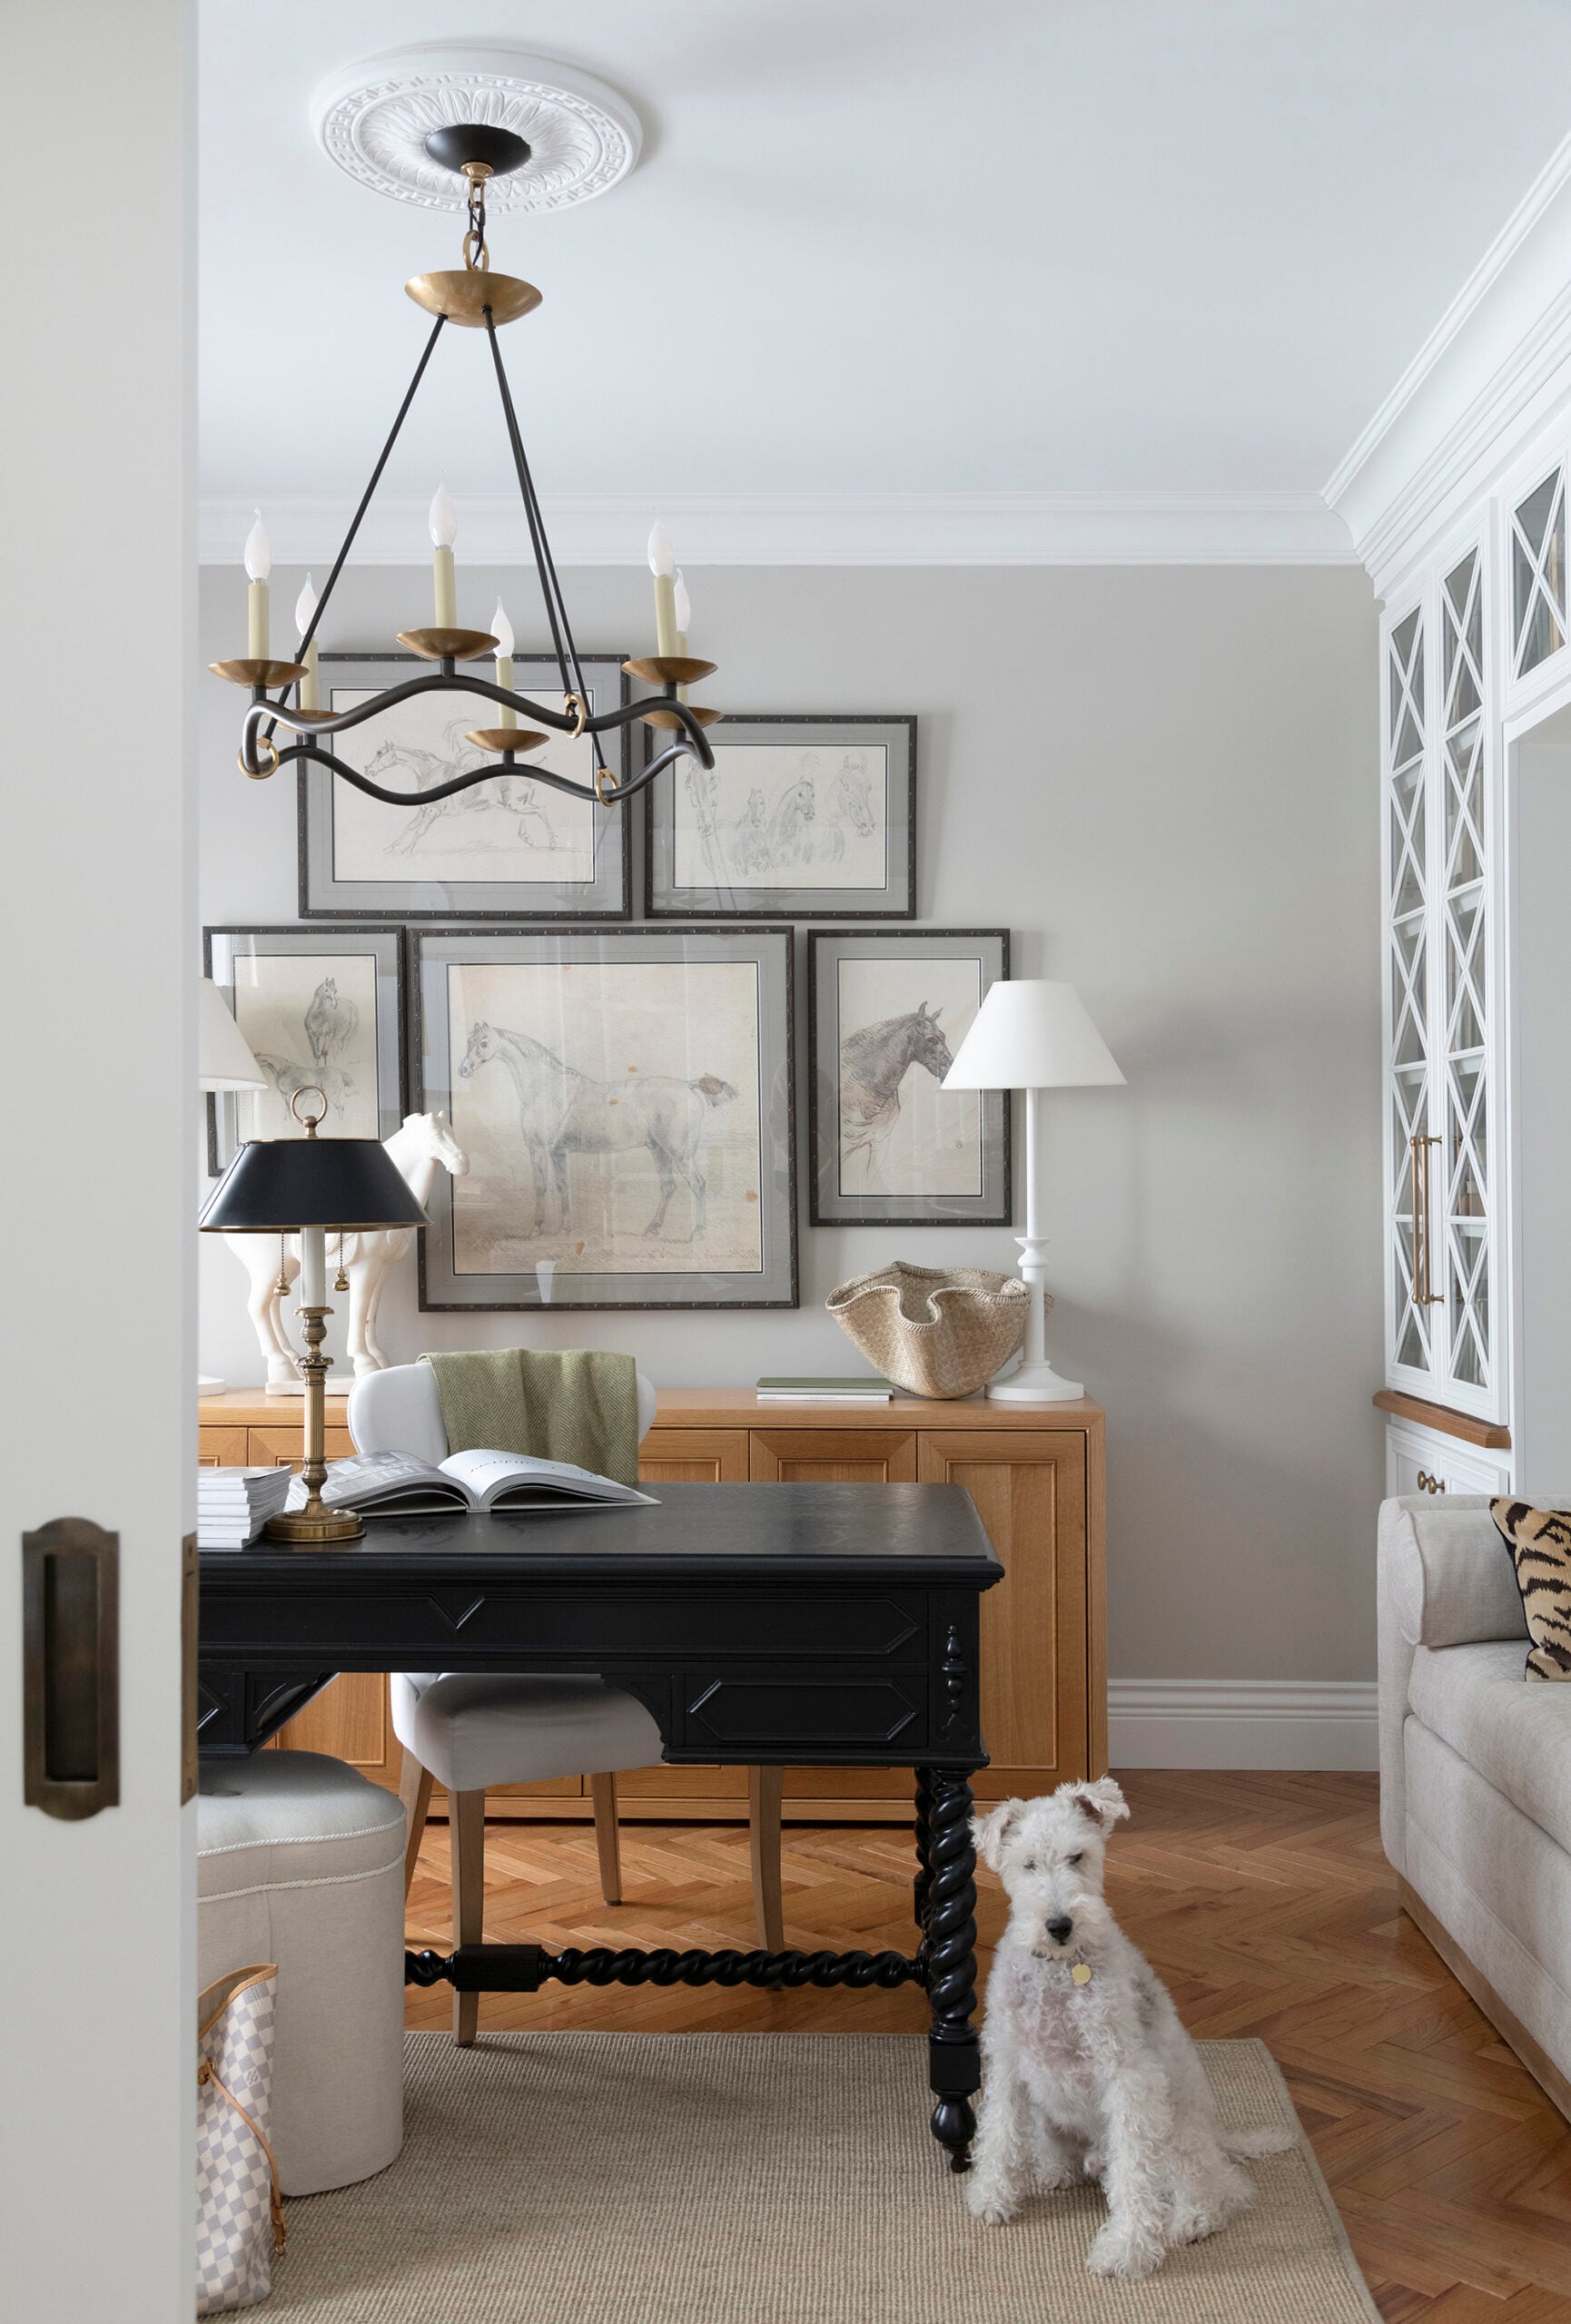
No, I do like it to match the ceiling, though… unless I’m intentionally designing a space with contrast trim or millwork. In our previous bathroom, I painted the ceiling medallion black. It was really more for texture and added millwork interest.
Isn’t the bubbles chandelier from Annie Selke so beautiful? Since it is no longer available, here are a few similar options from Pottery Barn, Wayfair, and Visual Comfort.
Related Posts
Looking for more lighting or millwork related posts? I’ve shared a LOT over the years. I’m going to link some of my favorites for you below…
- 20 Classic & Affordable Light Fixtures from Amazon
- Choosing Timeless Exterior Lighting (A Designer Guide)
- Easy Smart Home Kitchen Cabinet Lighting Ideas
- Designer Lighting Picks for Less from Wayfair
- The Best Designer Approved Ceiling Fans & How to Choose One
- How to Deep Clean a Fabric Lampshade
- Hiding Cords for Wall Sconces & Picture Lights
- How to Choose a Clip On Sconce or Chandelier Shade
- Designer Light Fixtures That Will Never Go Out of Style
- Your Millwork Questions Answered (a Q&A)
- How to Smooth a Textured Ceiling (Skim Coat Tutorial)
- How to Choose the Right Wall Trim and Baseboard Style for Your Home
Ceiling medallions are one of those details that feel small but have a big impact. They’re approachable, affordable, and surprisingly forgiving if you take your time. Once you install one, you start noticing all the places it could work. That’s usually how it begins. I hope this post was really helpful! If you have any questions, please leave them for me in the comment section below. Have you ever installed a ceiling medallion? Are you a fan of the look? I’ll link a bunch below if you’d like to give it a try. Everyone have a great week!

Such good tips! Using caulk instead of adhesive seems genius. I really like the look of a ceiling medallion, but our home presents two problems-we have some highly textured ceilings and most of our fixtures are flushmounts. Maybe in our next home! I am SO excited that you decided to stick with the bubble chandelier! I adore it! This guest room is going to be epic!!
I’m off to the mountains for huckleberry picking! Then I need to watch 14 videos, so I can install my new entry lockset. (Please send “security” vibes!🔐) Go, Monday!
PS The French doors on the shed look awesome!
The caulk really is a game changer! We used to use adhesive, but it set so quickly, it was a stressful situation to get it perfectly centered. I love the bubble chandelier! It’s so fun (even though it took FOREVER to assemble and hang all of the glass bubbles). I’m really excited about this guest space. Things are moving right along. Enjoy your huckleberry picking- that sounds incredible and I’m a little jealous! Good luck with your lockset- sending you all the security vibes :) Have a great week!
I have always loved your ceiling medallions and lighting in each room. Taking the room size in effect makes perfect sense on determining the medallion size. Will be storing that useful tidbit away.
As I was reading your post I was imagining one above our dining room table. Our table measures 80″ long. I have been eyeing a fixture that is rectangle or long rather than circular. Would you put a round medallion with this type of light?
Hope your weekend was productive and relaxing. I made good progress on my son’s furniture. This Texas heat makes it hard to do anything outside.
Have a wonderful Monday!
Thank you Danna! Yes- I think most people assume the medallion is determined based on the size of the light fixture, but it’s actually the scale of the room. So happy that was helpful. I think a medallion above your dining table would be beautiful. They’re especially great for dressing up more formal areas (like a dining space). Your long dining table sounds like a dream! You can definitely mix and match shapes… they also make medallions that are oblong, oval, rectangular, geometric, etc. Something like this could be nice for your dining room! It was a hot one here this weekend, too. We were able to get some work done and we spent one day relaxing, which was much needed :) So glad to hear you’re making progress on your son’s furniture. That’s amazing! Happy Monday!
Thank you Sarah for the medallion inspiration!
Do you think medallions look better with certain interior design themes?
I think they look great with any style, but you do have to make sure you find a medallion that fits the aesthetic and architecture (modern for modern homes, traditional for a colonial home, etc)!
Hi, as always a great post – I’m a very big fan of your work and style.
We have medallions in our French rental, but without holes in the middle and no light/wiring on the ceiling (with the exception of the kitchen and bathroom) and we can’t damage/ drill into any medallions, moulding (very wide and beautiful) and millwork. Everyday I’m a bit frustrated that I can’t hang any lamp on the ceiling, so I envy you very much 😉
One electric socket in each room is connected to the switch and I thought if it’s possible to instal special long cord to it, put that on hooks under ceiling and just instal some lamps. Any tips? I don’t want it look sloppy etc.
Thank you so much, Kinga! I wonder if you could install a fixture, cut out the wiring, and use a puck light (battery operated on a remote) instead? Just to give you the look of a fixture? That’s tricky! Or embrace floor lamps, table lamps, and sconces… then let the millwork shine!
Sarah,
Always love your posts! So helpful, interesting, and informative:) Wondering if you’d recommend a medallion/what you’d suggest for 2 scenarios:
1) cathedral ceiling where the table light fixture canopy is hung angled flat to ceiling (we have open concept living/dining/kitchen)
2) tray ceilings- (angled 8ft to 10ft) do you still use the same calculation method for the medallion size?
Thanks!
Thank you, Jes! I’m so happy to hear that. I’m actually not a fan of installing medallions on angled ceilings… I’ve found it’s best to keep it modern and minimal. For tray ceilings, you’ll want to measure the interior portion to get your medallion size! Hope this helps :)
I don’t know what was more informative: the post or the comments section!! All these amazing questions that I had myself. Personally I adore the look of ceiling medallions, but you are the first designer I’ve seen use them in a home that isn’t a Victorian. Out here, that would be where we would see it the most. I love that you showcase how they can beautify any space, and can’t wait to see what I can come up with for our house. I won’t be able to use them in the main rooms because of the angled cathedral ceilings, but that leaves a few to have fun with! THanks for such an interesting DIY post! Now I need my phone to start working again so I can check out those shed doors!!
Yay!! Love to hear that :) I think it’s mostly about finding the style that works best for your home and architecture. The installation is the easy part! Our plan is to paint the shed this weekend- woohoo!!
We have a place to put a chandelier, but the wires aren’t centered over our coffee table. It has been suggested to float a ceiling above the fixture, but I’m wondering if we could use a medallion instead and run the wires to the middle, if it was big enough….
The ceiling is concrete and on a middle floor, so we can’t do the obvious thing and move the box!
Could you advise?
Hi Daniela! I wouldn’t recommend a floating ceiling, because if you cover the existing junction box- that’s a building code violation. I also worry that if you ran wiring under the medallion in that way, it would only act as a temporary fix. If you ever plan to sell, that might get flagged during an inspection, but you could also do that for now, and then replace the fixture if you ever move? My advice (though you’re not going to like it), is to move the box. It can be done! Yes, it will require a dremel or something to cut the concrete, but it’s your best bet at solving the problem correctly. I hope that helps and sorry it isn’t the news you were probably looking for.
What about using a medallion with a ceiling fan? Ceiling fans are a necessity in the south but I love the look of the medallions.
You can definitely use a ceiling medallion with a ceiling fan… really any type of light fixture.
This might be a dumb question, but is the center hole diameter of the ceiling medallion supposed to be the same size as the light fixture being installed? Most of the medallions I’ve seen have a 3-4 inch center hole diameter but our light fixture base is almost 6 inches!
Not a dumb question at all, Alice! Typically the hole will be smaller, so the fixture canopy covers the raw edge. You can also cut medallions to fit, if needed. I hope that helps!
We are updating pendant kitchen lights and I love the medallion options you’ve shown here. Our current lights have ugly 7” medallions in yellowed plastic. They are only held up by the light fixtures; no adhesive or caulk. I’m nervous about using caulk on larger medallions, because I don’t know how it will come off if we change it out again in the future. My husband and I are not so handy as you and Emmett. How do you go about removing the caulked medallion in future renovations? Thanks.
How do you determine how big (diameter) a medallion to use?