Double Chocolate Brownie Jar
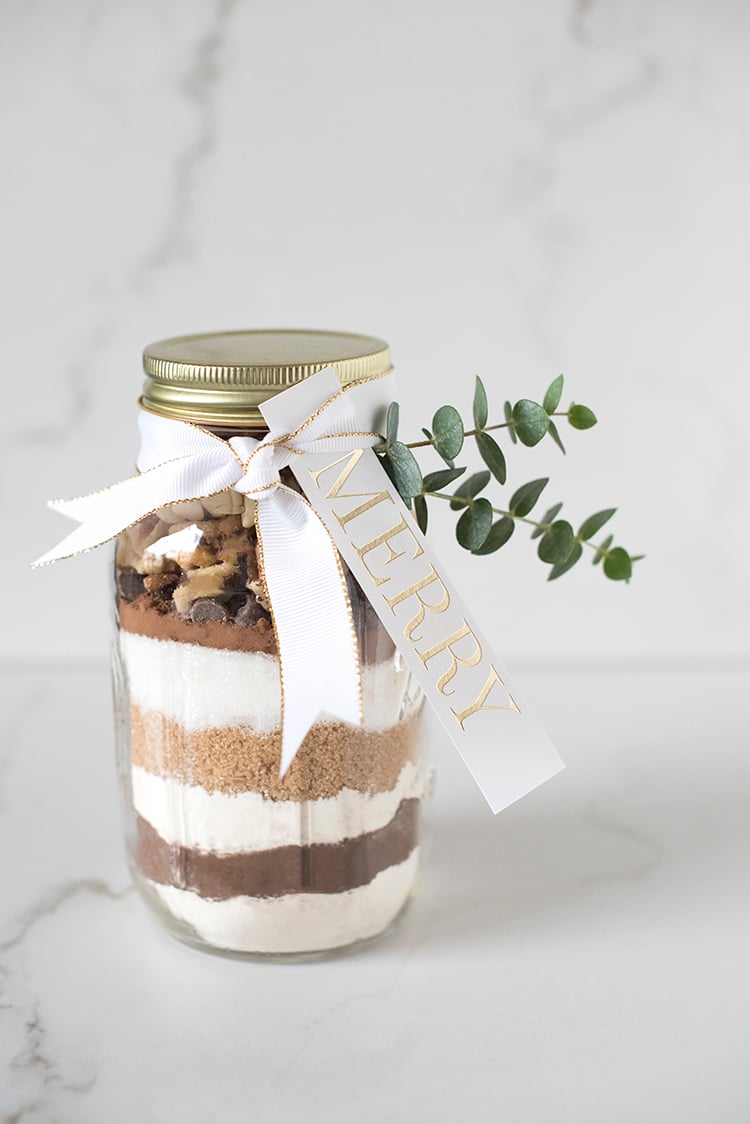 For the foodies on your list, there’s nothing better than something indulgent to satisfy their sweet tooth! It doesn’t get easier than a DIY mason jar gift. Yes these are all over the internet, but… this double chocolate brownie recipe is to. die. for. They are seriously so good! Save yourself the stress… you probably already have all the ingredients on hand, and make multiples to keep for unexpected gift giving. Click through to get the recipe and assembly instructions…
What you’ll need for this recipe:
– 1 quart mason jar
– 1 cup + 2 tablespoons all-purpose flour
– 1/2 teaspoon salt
– 2/3 cup packed brown sugar
– 2/3 cup granulated sugar
– 1/3 cup dark quality cocoa
– 1/2 cup semisweet chocolate chips
– 1/2 cup white chocolate chips
– 1/2 cup chopped nuts (I used walnuts)
 Step 1 // Prep your first layer. In a small bowl, combine the flour and salt. Scoop half of the mixture into a mason jar.
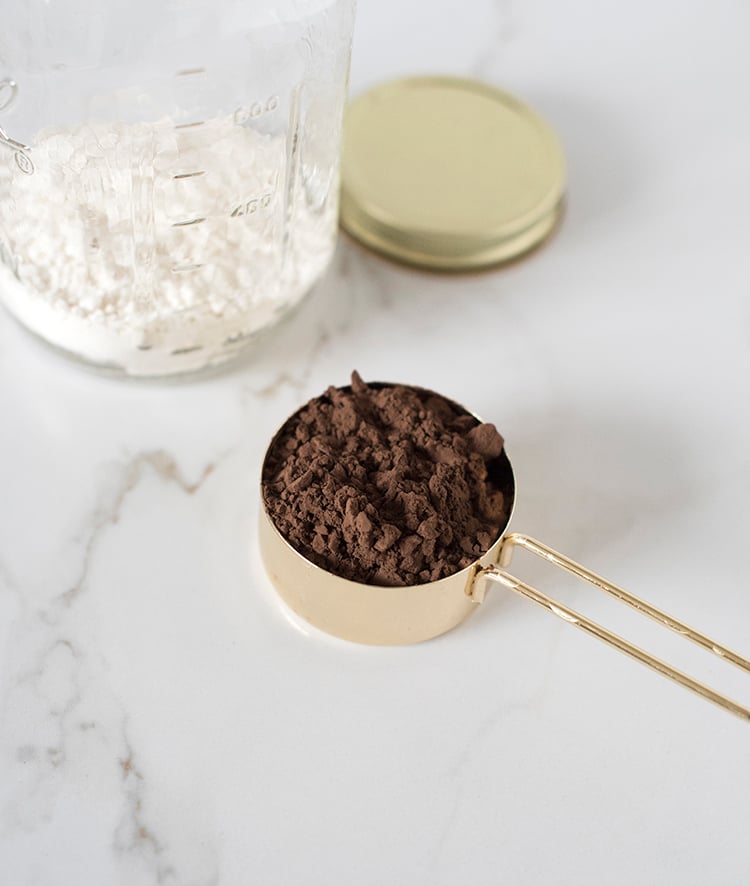 Step 2 // Add the cocoa. Layer half of the cocoa on top of the flour, followed by the remaining flour.
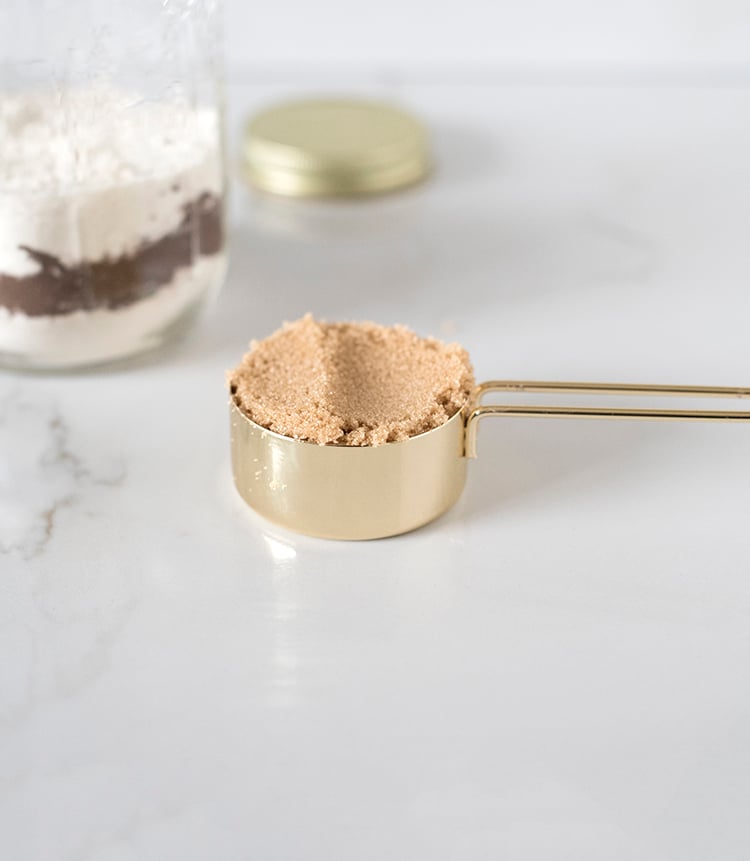 Step 3 // Add the brown sugar. Break up the packed brown sugar and use it as the next layer.
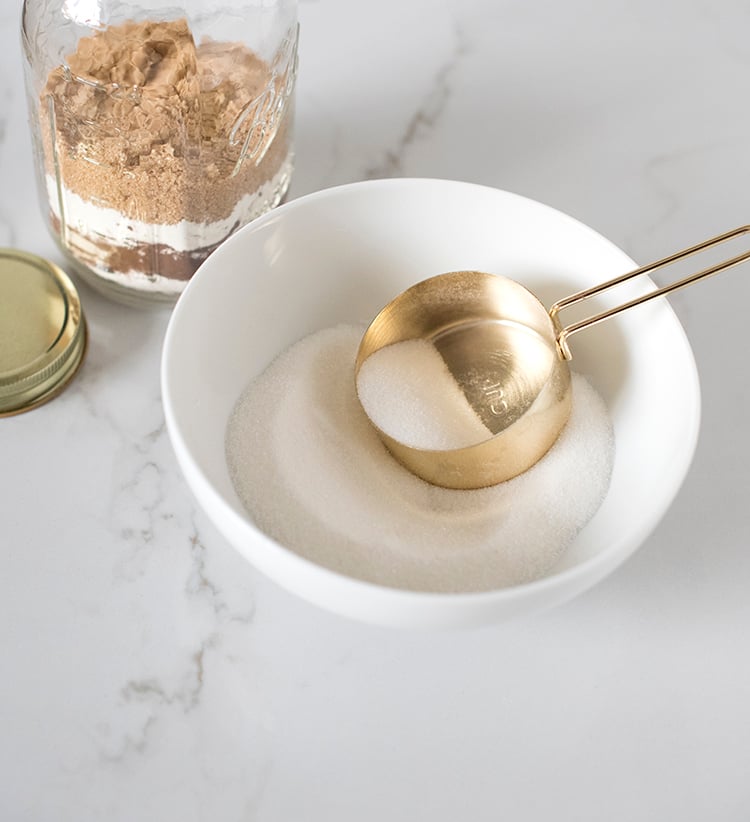 Step 4 // Add the granulated sugar. Next comes the sugar… layer it on top of the brown sugar.
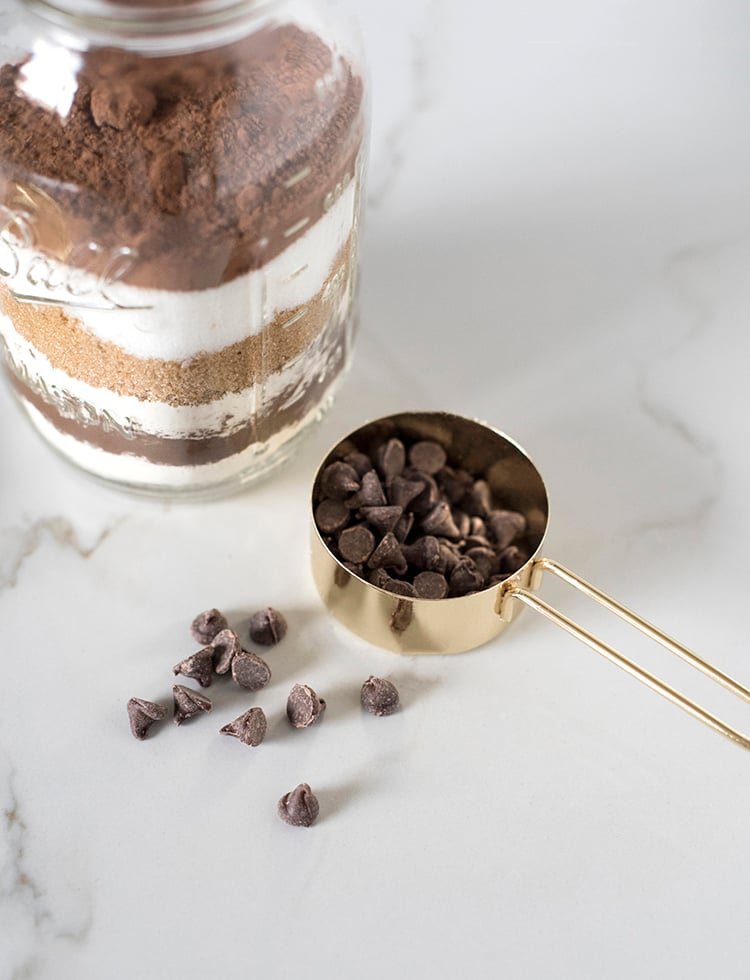 Step 5 // Add the remaining cocoa and chocolate chips. Use the reserved cocoa, and top it with dark chocolate chips.
 Step 6 // Add the nuts. Nuts are optional, but I love the texture they add to brownies… I added the walnuts next.
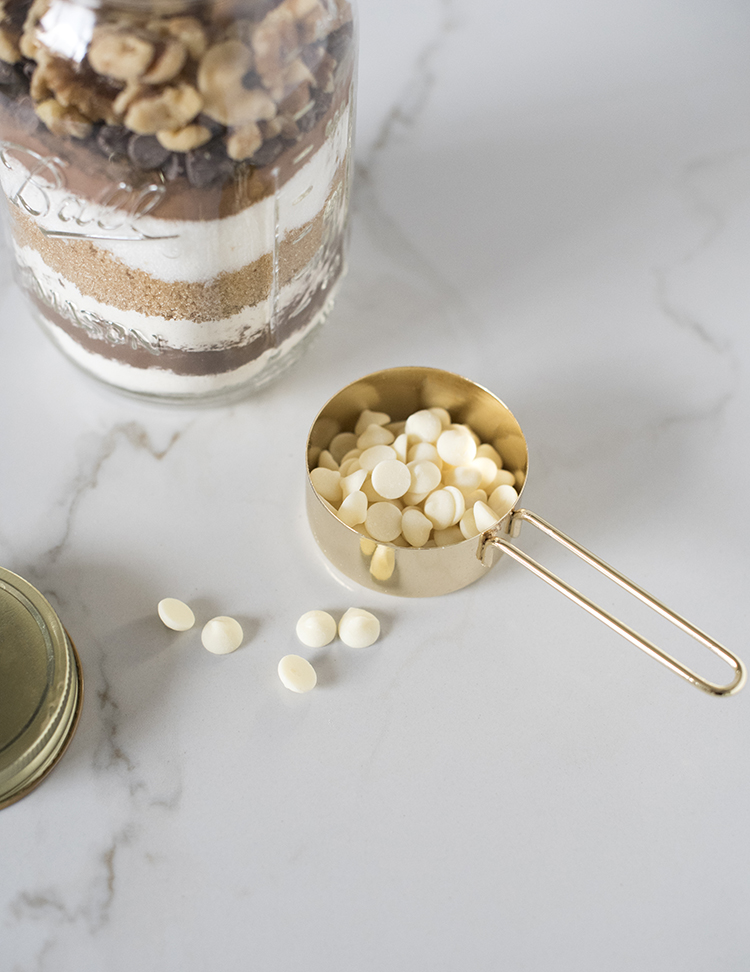 Step 7 // Add the white chocolate. Last but not least for the ingredients, top off the jar with white chocolate chips.
Step 8 // Attach a tag with the directions. Obviously the recipient of this gift will need to know how to make the recipe. I added a little handwritten note on the back of a “merry” tag that read…
ADDITIONAL INGREDIENTS:
– 3 eggs
– 2/3 cup canola oil
– 1 teaspoon vanilla extract
DIRECTIONS:
Preheat oven to 350°. In a large bowl, whisk eggs, oil, and vanilla. Add the contents of the jar and stir until well blended. Spread into a greased 9 inch square baking dish. Bake 25-30 minutes or until a toothpick inserted near the center comes out clean (do not over bake).
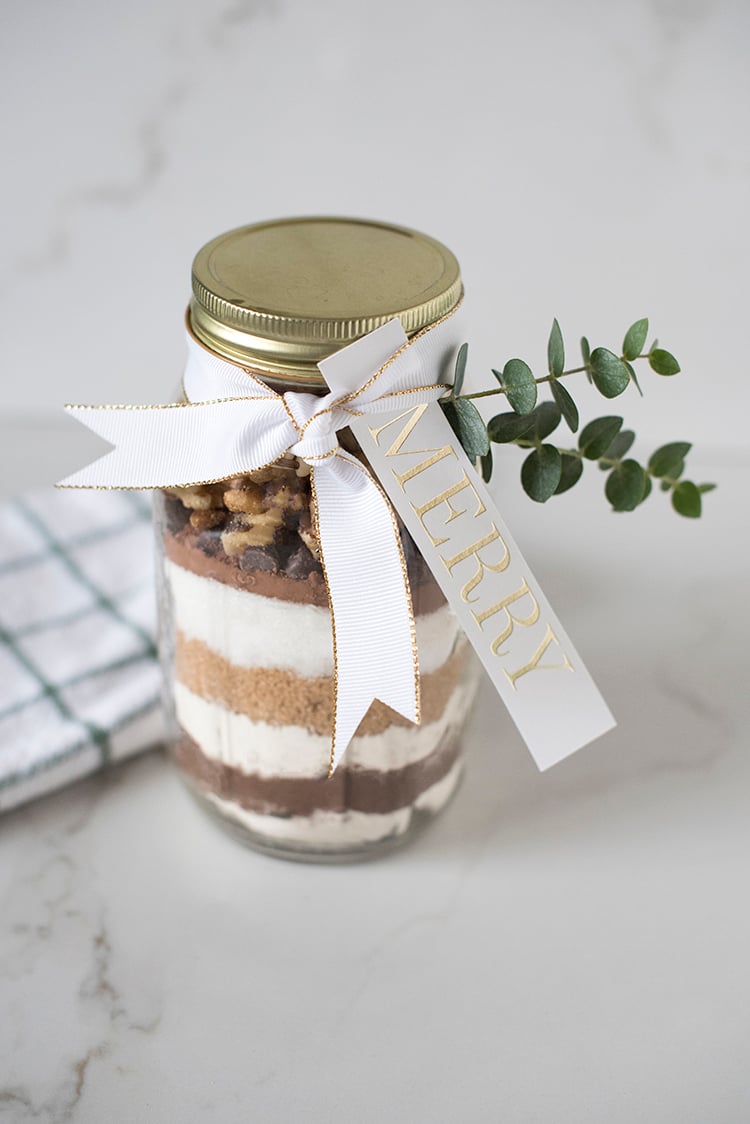 I also like to dress my jars up a bit… in addition to a tag, I added a gold piped ribbon, and a couple sprigs of eucalyptus. I’m also partial to the mason jars with the brass lids. The country look is not my thing, so I tried to take the mason jar in a direction that felt less country and more seasonal. Have you guys ever tried mason jar layering? I jumped on the salad and ramen in-a-jar train a little while ago, but this was my first dessert. Enjoy!!
All I can say is that I’d be very glad indeed to receive one of these as a gift – simple, but very effective! 🎁
That is the ultimate compliment Sally :) So happy you liked these ideas!
Your jars are adorable! Thanks for sharing. I love the brass lids. Where did you find the brass mason jars?
Thank you, Aimee! You can find the lids here: https://bit.ly/3pbs2t3
Your tags are beautiful! Did you make these?
Thank you so much, Tiffany! I did make these :)
These are beautiful! How did you make the Merry tag?
Thanks Madi! I recycled those from past holiday cards we had sent out :) I had extras, so I just cut out the “Merry” section, hole punched, and added ribbon.
How many jars can you fill from this recipe
This is for one large jar, Paige!
Hi Sarah do you by any chance have a recipe for anything like this, but No egg
Thx from New Zealand
Hi Ann! I don’t, I’m sorry!