A Beginner’s Guide to Wallpapering
 A few weekends ago I had my first experience with wallpapering (those of you who follow me on Instagram stories may have seen some behind-the-scenes action). Sarah and Emmett had already warned us about their first experience putting up wallpaper in their hallway from their Ohio home. Good or bad, I am somewhat OCD and can be a perfectionist when it comes to house projects. Dan is wonderful when it comes to helping out with projects, but (bless his heart) does not have the eye for detail that I have. So, we enlisted the help of his father who has lots of experience wallpapering in his home. Quite honestly, I went into the weekend thinking I was going to steer clear of the nursery while those two worked on the project (mainly so I wouldn’t be a pest and freak out if something went terribly wrong). However, as it turned out, I worked alongside my father-in-law to complete most of the room and pleasantly surprised myself at how much I enjoyed it. For those of you who are as intimidated by wallpaper as I was, I am going to do my best to break it down step-by-step to make your lives much easier (if and when you decide to tackle a DIY wallpaper install). I apologize in advance for the quality of some of these images: since I was knee-deep in wallpapering, I was only able to grab a few quick in-process shots on my iPhone.
 Measuring the Space
To begin, you will need to measure the area you plan to wallpaper to determine how much to order. For us it was easy since we were only doing one accent wall and the wall did not contain any windows or doors to work around. You will need to measure the width and height of each wall you plan on wallpapering, then multiply the two to find your area for each wall. If you are wallpapering more than one wall you will then add the area of each wall together to get your total square footage. Another way to put it is to measure the width of each wall, add them together and multiply by your ceiling height. After you have calculated your square footage, divide that number by the square footage of a single roll to determine how many rolls of paper you will need. Our wall was about 80 square feet and the roll covered about 60 square feet so we ordered two – you always want to round up to account for pattern repeat (which I will talk more about below)!
Choosing Your Wallpaper
With all the amazing options out there, selecting a wallpaper can sometimes be the hardest part (especially if you’re a very indecisive person like I am…ha). However, there are a few things to look out for that could make your life much easier. We made sure to look for a wallpaper that was prepasted so we wouldn’t have to worry about an extra (messy) step during application. We also paid attention to price, knowing that we most likely would need more than one roll and cost and quickly add up with buying multiples (especially if you are doing an entire room)! Ours came in under $100 a roll which fit well within our budget.
Dealing with Pattern Repeat
This can be a confusing step when working with pattered wallpaper. We used this article from Houzz to help us! Yes, there is a lot of math involved, but I am glad we took the time to do it because it confirmed the amount of rolls we needed to order to account for the pattern repeat on our paper, which was 20.5″.
Prepping the Wall
Before we wallpapered, we applied primer to the wall to help the wallpaper stick. We added the primer the night before to give it plenty of time to dry. We used a roller for the wall and a brush for edging – just like we would if we were painting the wall with paint. You will need to decide if you want to wallpaper from left corner to right corner or center the wallpaper on the wall. We knew we needed four sections across, plus two small filler pieces for the ends. We wanted everything to be even so we centered the wallpaper and began in the middle. On the day of, we carefully measured everything out (once, twice, three times…no joke) and used a level and straight edge to mark lines on the wall. When it came time to begin install we had everything “mapped” out on the wall already, which definitely helped along the way!
Prepping the Paper
If you are using patterned paper you will need to decide where you want your pattern to begin at the top. Our roll did not begin where we wanted it to, so we trimmed the top in order to start the pattern in a spot that was more visually appealing to the eye (again…always using a straight edge before cutting). We added 3-4″ to the top and bottom that would later be trimmed off. Remember, the less paper you have to deal with the better!
Once the paper is trimmed, lay it face down on a clean surface (we used a sheet on top of our hardwood floors, plus a clear tarp). Then we applied warm water to the backside of the paper, using a circular motion with our hands to make sure all paper and seams were covered. Be careful not to use too much water – you want just enough to get the surface wet, not soggy. Once you have applied water to the top third of the paper fold the paper back in on itself and align seams. This process is called “booking”. When you are done applying the rest of the water, fold the bottom two-thirds in to meet the top, leaving a few inches between the top and bottom. Wait about one minute to allow the adhesive to start working. Now you will have dry paper to grip onto and carry over to the wall and it won’t stick tot he wall until you are ready to apply.
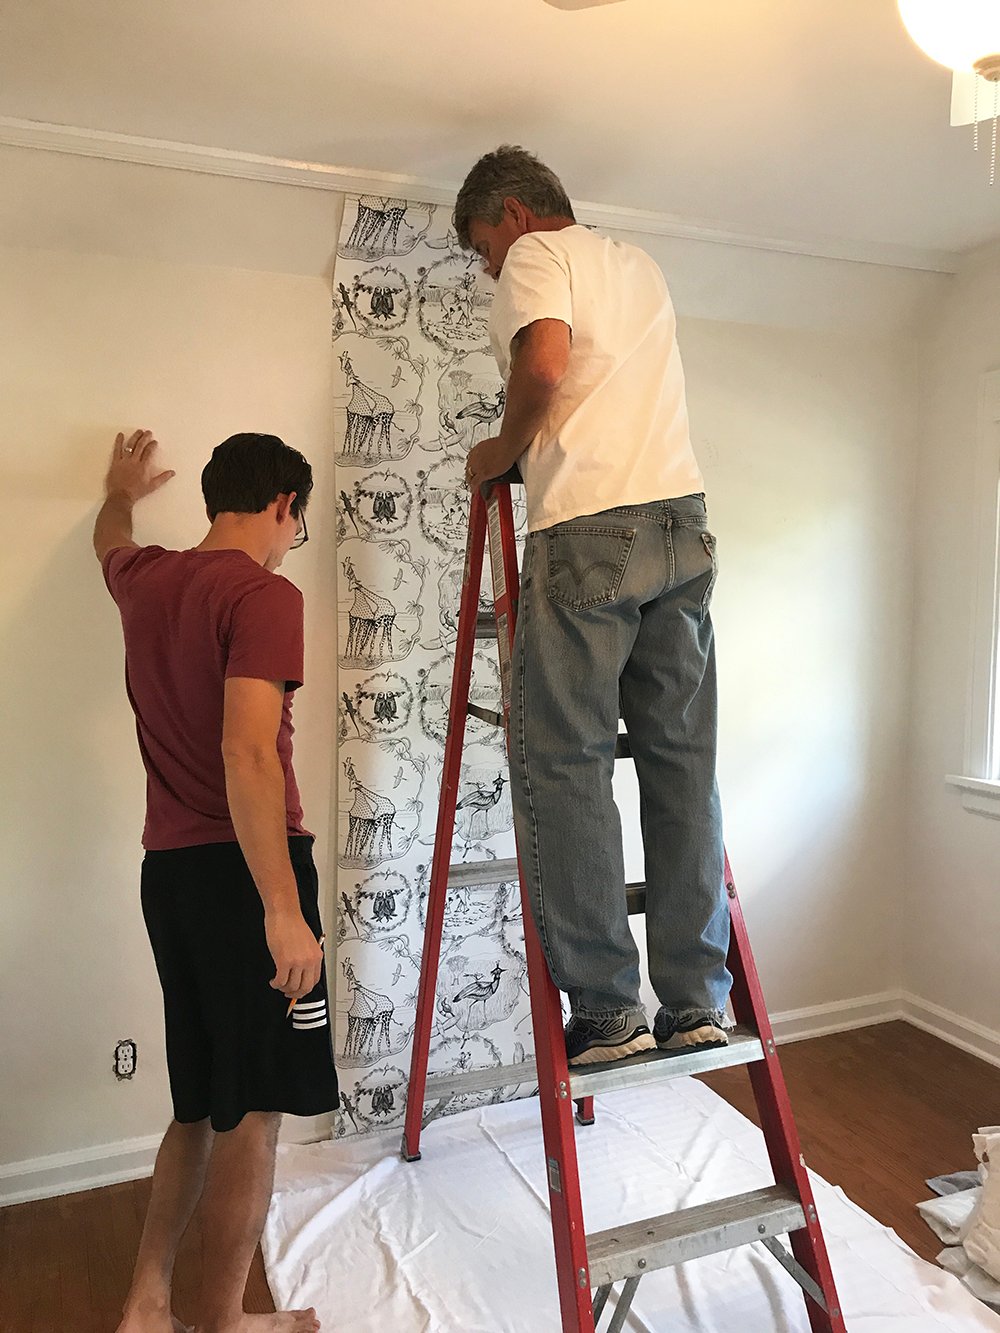
 Hanging Your First Piece
The first piece is probably the hardest, yet most important piece you will hang. First, undo the top portion of the paper you booked so you only have a few feet of wet paper to deal with. Make sure the top of the paper aligns where you want it to and you follow the lines you marked on the wall to ensure it stays straight all the way down. Smooth the paper using a brush and work out any bubbles that appear along the way. If creases happen, carefully work them out. The paper will have a little give since its wet and will be able to slide around for a little while before it starts to set. As you work your way down, use a seam roller to adhere seams. Some glue may spill out over the edges and that’s ok, just carefully wipe it with your finger. Once you have finished the top, unfold the bottom portion and work your way down the wall a little at a time, following the same steps as before.
 Trimming the Top and Bottom
Once your first piece of wallpaper is installed you’re ready to trim the top and bottom. Use a fresh razor blade and straight edge (such as a metal ruler) or simply use the headboard and baseboard to create a nice, clean cut.
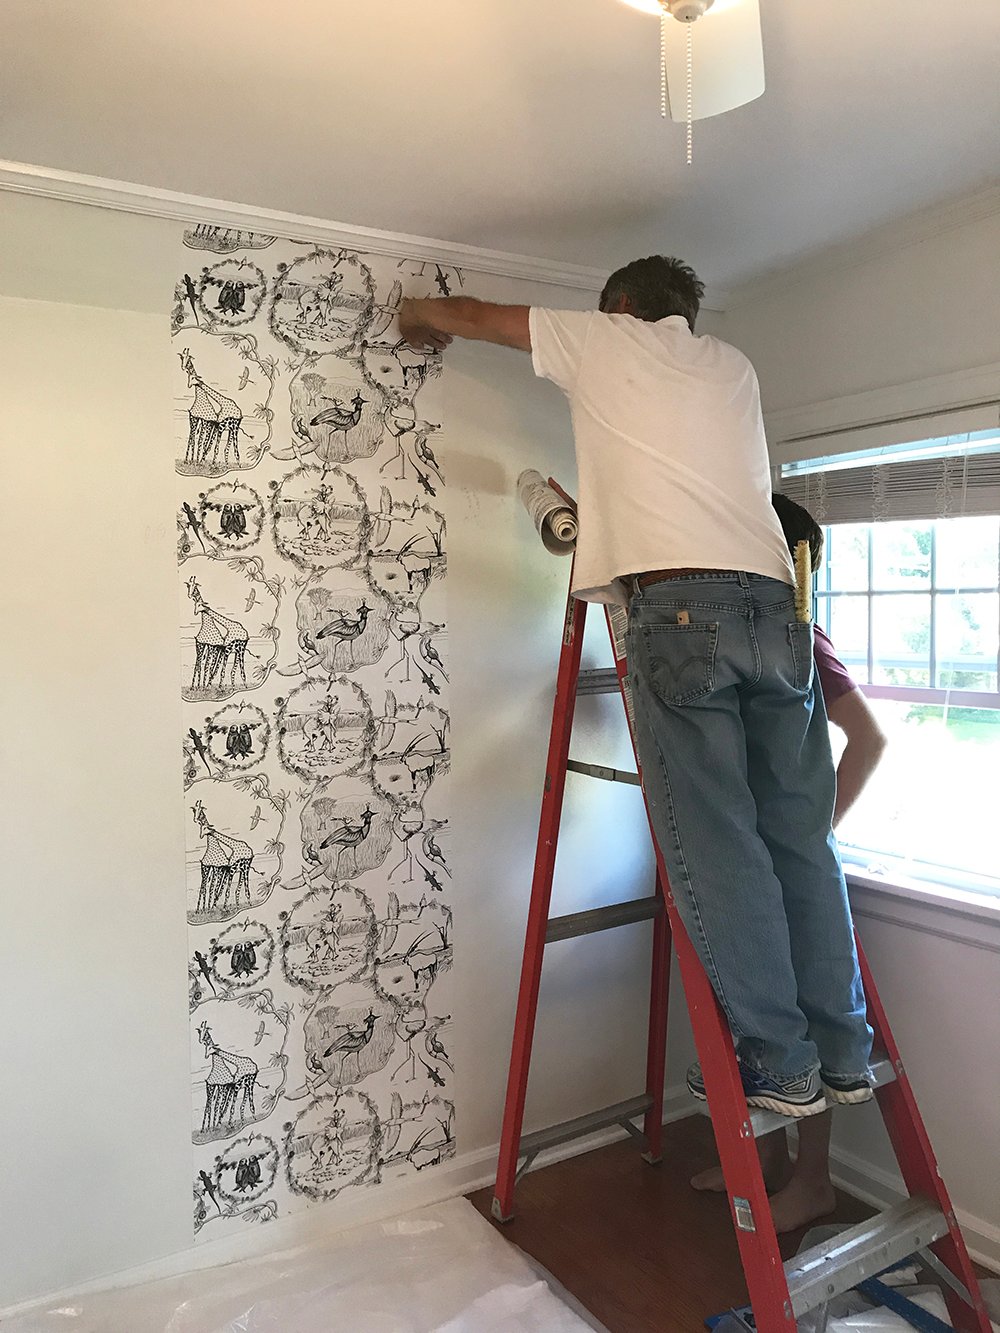
Aligning the Seams
Once you have installed your first piece and have cut your additional pieces of wallpaper the hardest part will be matching up the pattern and aligning the seams so they aren’t visible. This is where being a detail-oriented perfectionist comes in handy! Carefully install additional pieces, making sure the pattern lines up perfectly and does not overlap. Use a seam roller to secure in place.
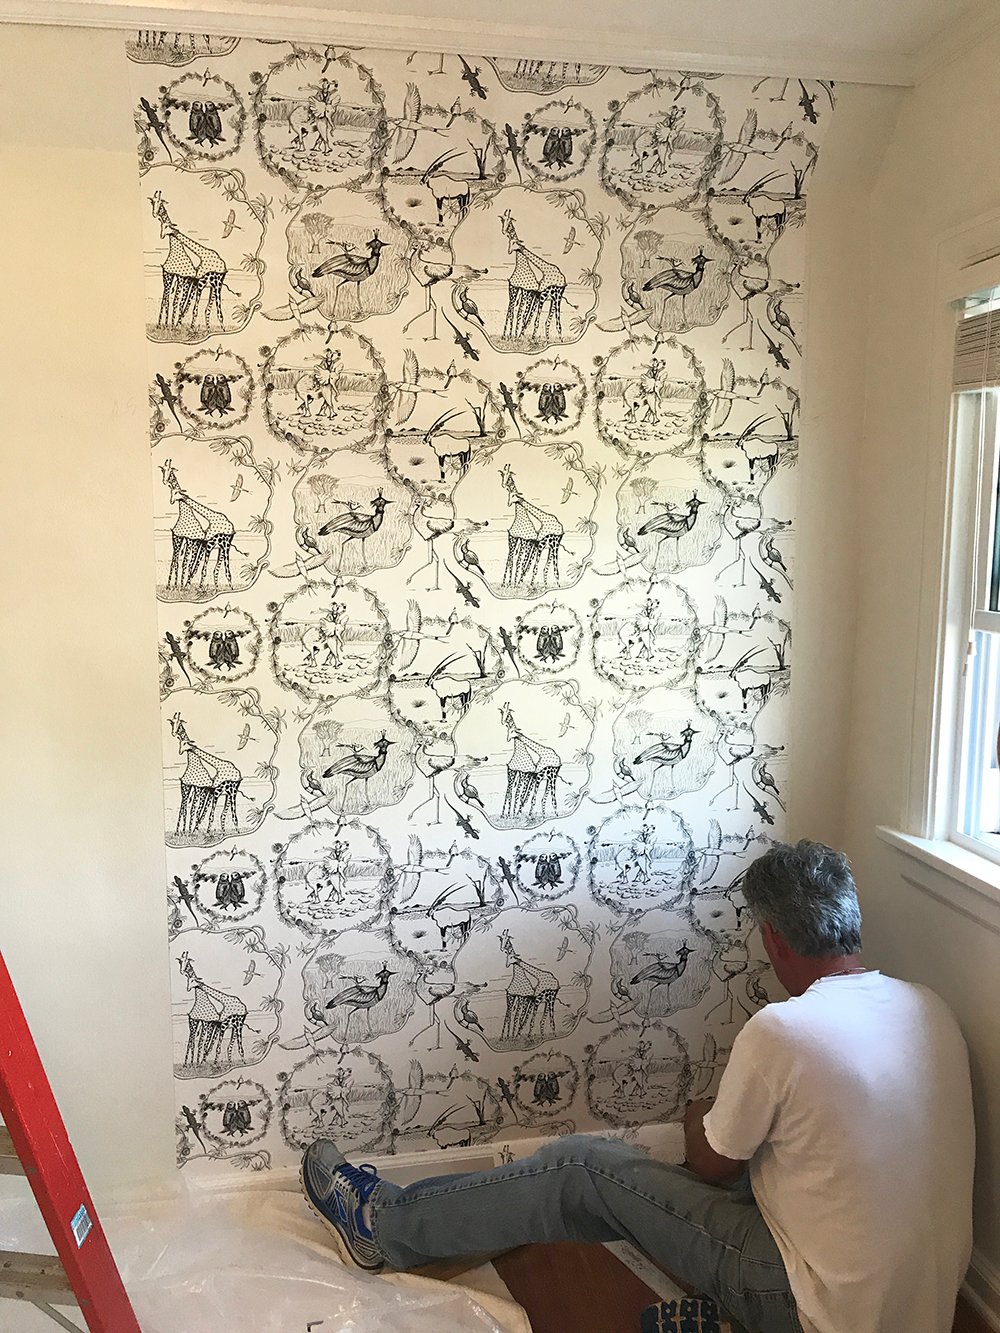
Finishing Touches
After we installed our four bigger pieces of wallpaper, we had to add two smaller pieces to each side. Since we live in an old home and our walls are not perfectly square, we used a razor and straight edge to trim along each side in the corners. Once all the paper was installed, we carefully wiped down the wall using a rag soaked in warm water to remove any glue that had seeped out during application.
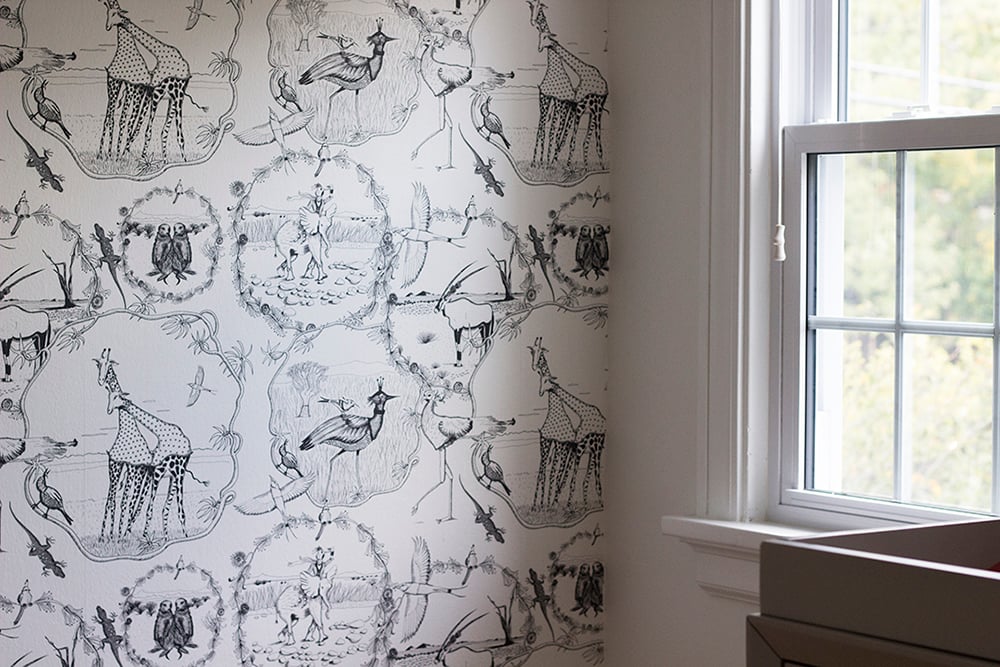
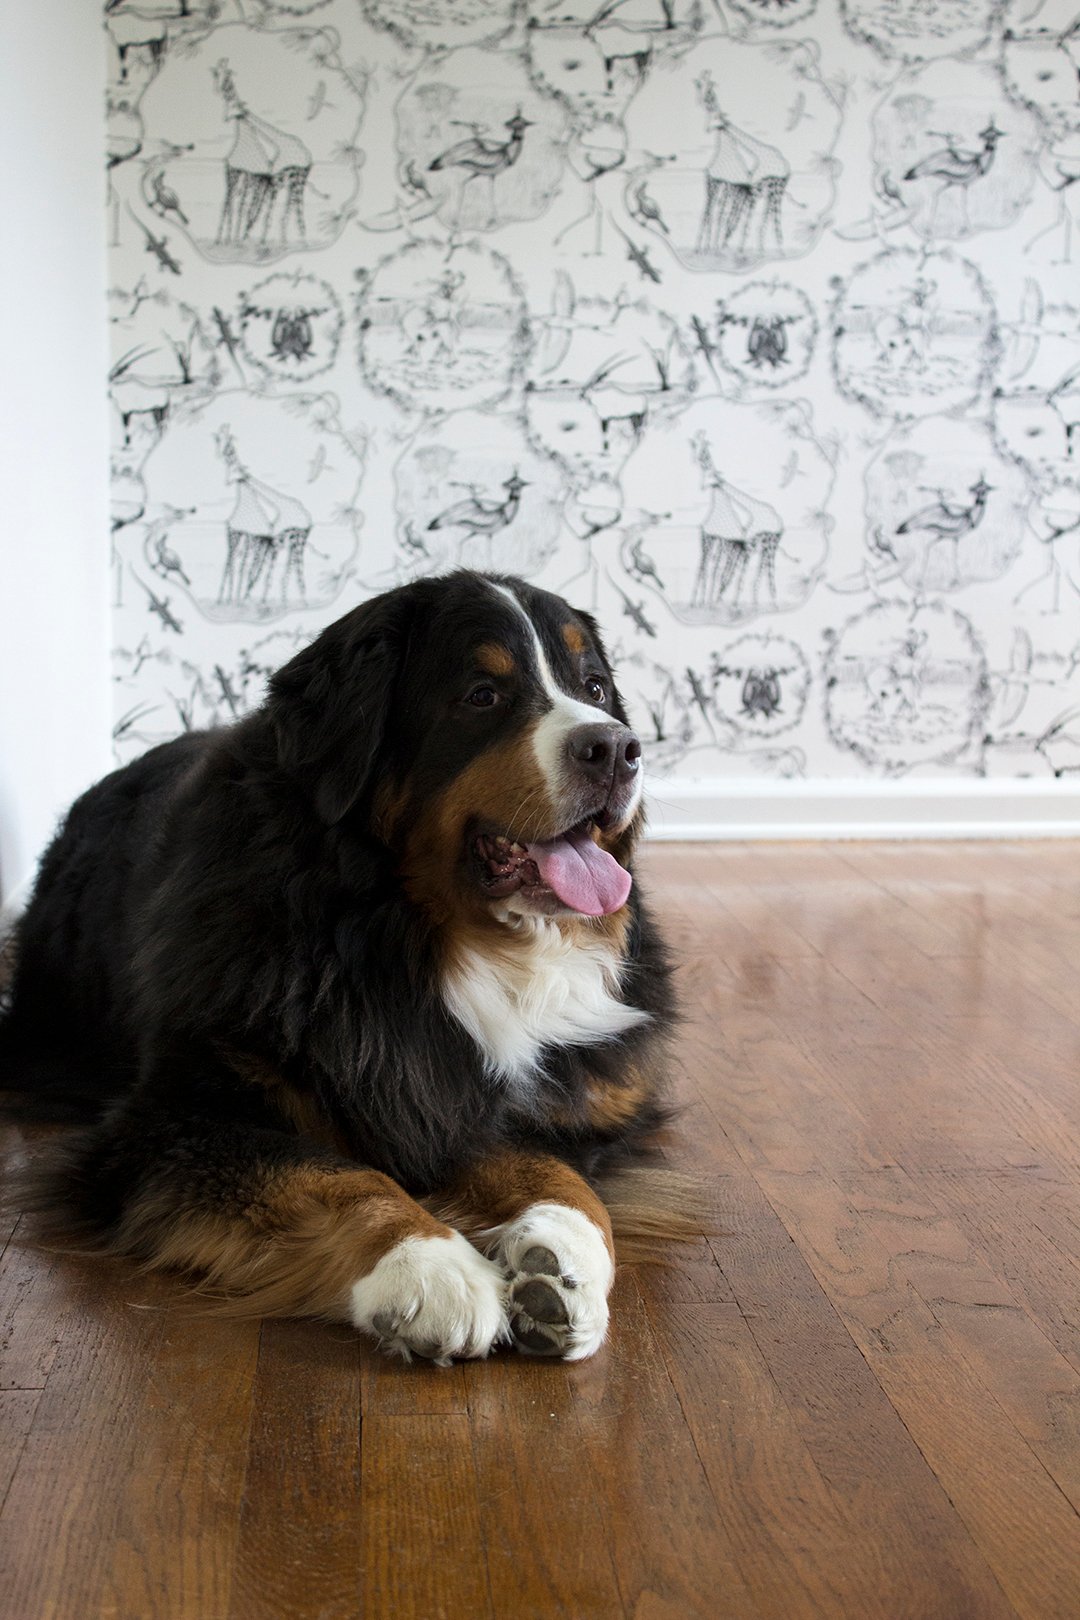 I’d have to say – my first experience wallpapering was actually kind of fun! I have been begging Dan to let me wallpaper something in our home since we first moved in, and now I already have the itch to wallpaper another room in our home (maybe our powder room?!?). Also, this was one of the big projects we had left in the nursery and I felt a weight lifted off my shoulders when it was done. We are one step closer to finishing the space and moving in furniture. There is nothing I love more than envisioning a space and finally starting to see it come together. Stay tuned as we get closer to the full reveal! I can’t wait to share it with you all! Also…I’m pretty sure Piper already loves this room, but has no idea a baby brother is coming with it. Ha!
Ok, so I SERIOUSLY LOVE that wallpaper! <3
I also love the tips, thanks for posting lady!