Plans for My Main Bath (and Before Images)
 Our main bathroom project is underway, as everything has pretty much arrived. I’m tired of having a vanity, toilet, plumbing fixtures, and tile piling up in my office. As of lately, it seems my workspace has become the holding room for all things bathroom. As we begin to plan demo and installation, I wanted to share a sneak peek of my design plan and a tiny glimpse of what it’s going to look like, and what it looks like now… along with before images. Click through for details!
Here’s a little peek of my office piling up with stuff. Meanwhile, I’m shoved in the corner on my iMac typing this post.
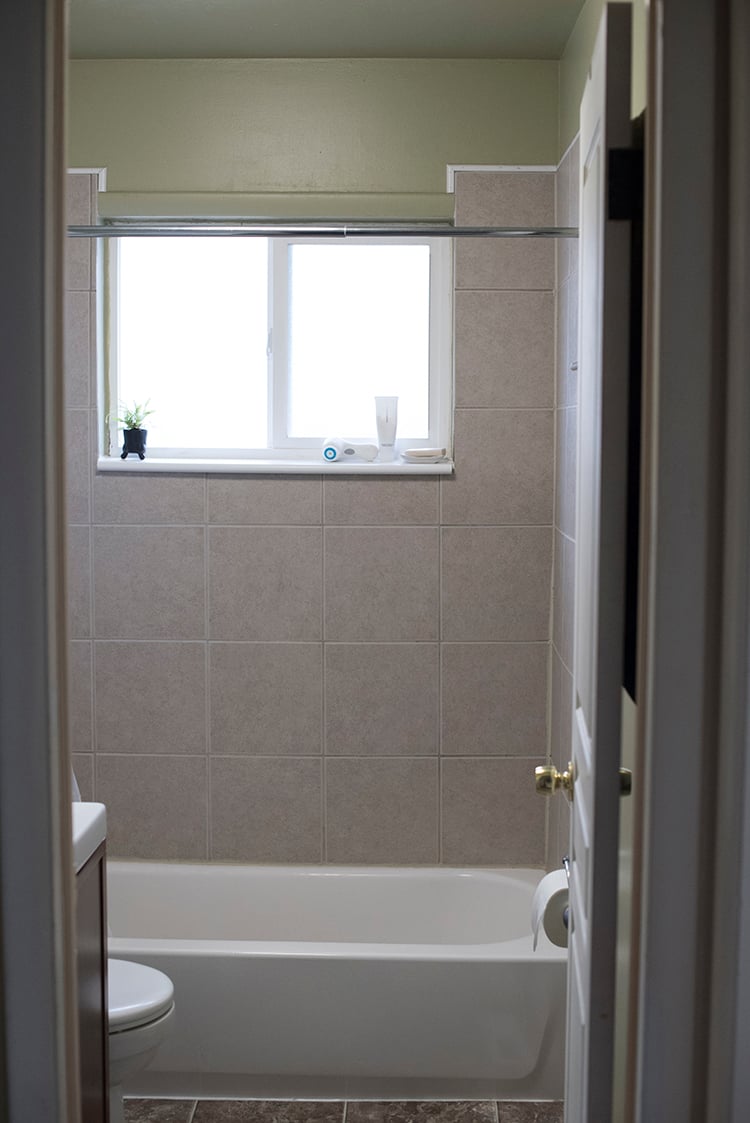
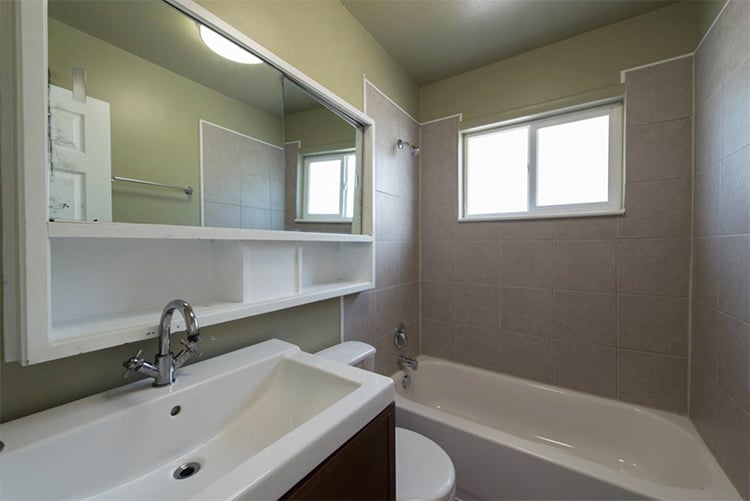
 When designing a space, I typically work through the issues or problems first. Once I brainstorm and address how to solve those problems, the design plan starts to come together. It just so happens that our tiny main (meaning the one and only) bathroom has a lot that needs addressed. We have to maximize the space and make it as functional as possible since it’s currently our only bathroom. Before you dive in, I’m sharing real photos of our current living situation and it’s not pretty, but that’s part of the actual renovating process. As clean as it is, and as much as I’ve bleached it… it still looks drab and dirty.
 A few things I hate about our bathroom as it currently is, and my solutions for them. P=problem / S= solution below…
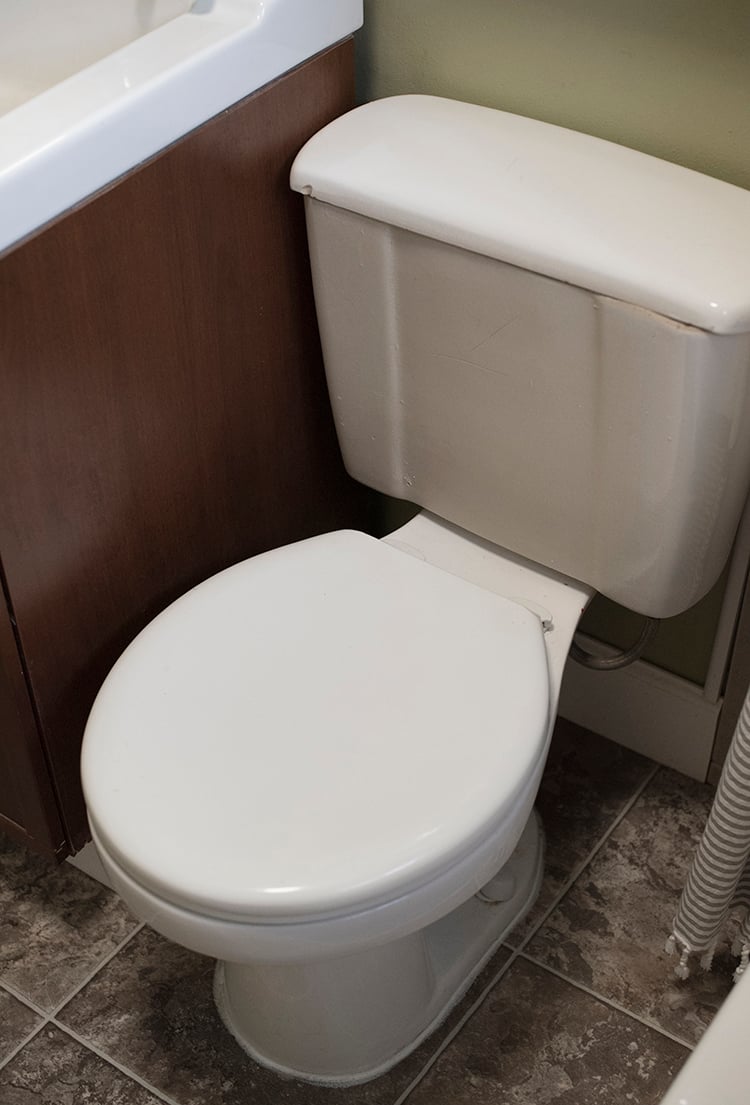
- P: The toilet doesn’t fit the space, therefore the tank was installed backwards. The flusher is actually on the back of the tank and pressed tight against the wall. It’s sort of difficult to flush, and when seldom guests are over, nobody can figure out how to flush the toilet! The other issue is it’s so tight against the vanity, I’m not joking (maybe TMI)- your butt or outer hip touches the vanity when you sit on the toilet. That just grosses me out.
- S: I carefully measured and adjusted the floor plan to find a toilet that fits and can be installed correctly. This does mean moving the plumbing slightly. It will be a bit more work, but definitely worth it!
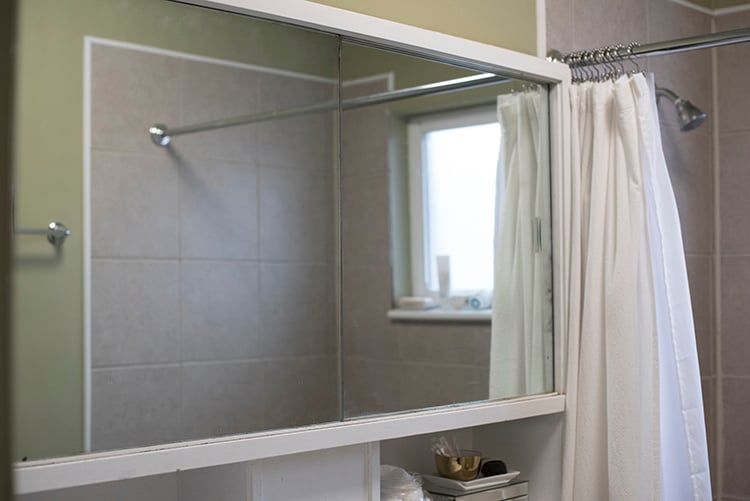

- P: This medicine cabinet and mirror combo is gigantic, but it’s ugly and not very functional. The mirror slides to access the storage, but the issue is that it doesn’t slide easily. 90% of the time, it’s totally stuck.
- S: We’re planning to remove it completely and close it in with drywall. However, this means we’ll lose a lot of storage space. My solution is to add storage within the vanity, and potentially another, more modern, smaller medicine cabinet. We also have a large linen closet next to the bathroom in the hall, so- that’s always an option for overflow items.
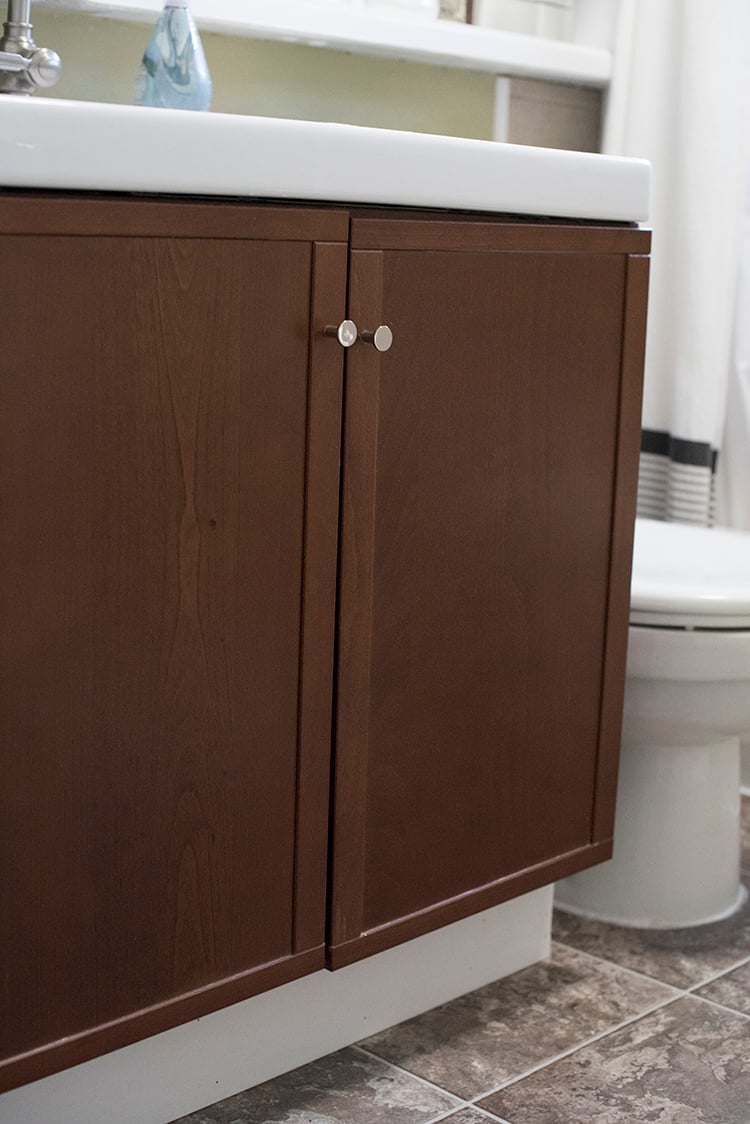
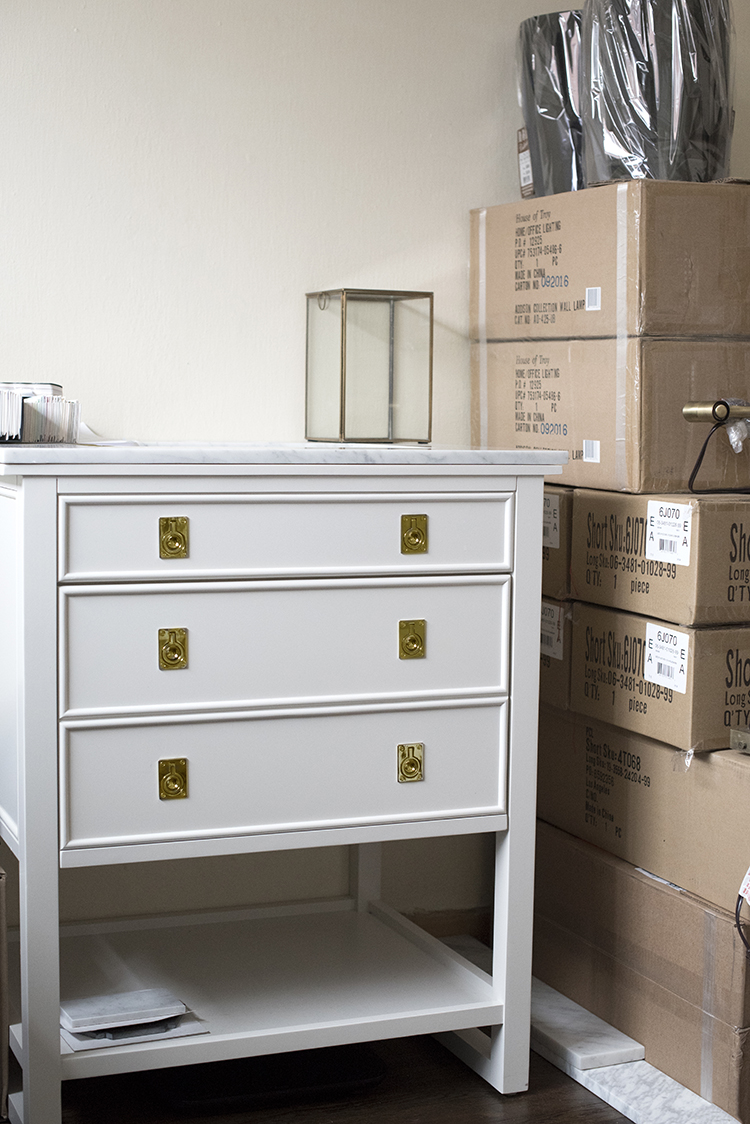
- P: The vanity is too large for the space and the doors were installed incorrectly. It provides a lot of closed storage, but it’s an awkward size and an eyesore in the space.
- S: The obvious solution was to replace it. A new sink/vanity combo was the first thing I purchased for the bathroom reno. It has both open and closed storage, but is smaller and will actually make the bathroom feel larger. I also wanted the sink to have a little counter space. With the currently vanity, there is nowhere to sit things while you’re getting ready (soap, makeup, linens, etc). The new vanity has a marble countertop with about 6-7″ of space around the under mount sink.
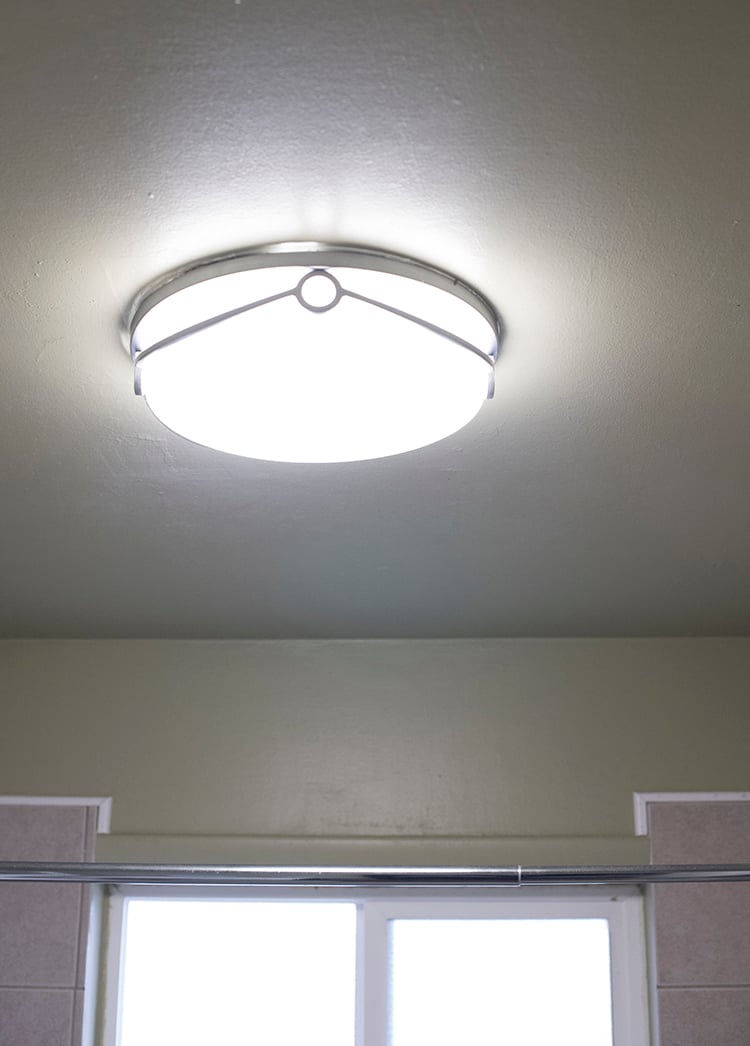
- P: The lighting in this space is terrible. It currently only has a flush mount ceiling fixture. Luckily, there is a window that provides some natural light, but overall it’s not very practical.
- S: We’ll be adding a sconce above a mirror, in addition to a new flush mount, that will help adequately light the space.
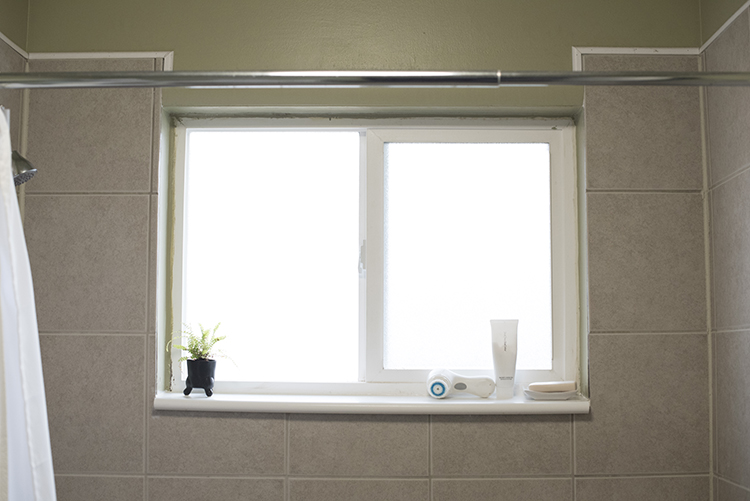
- P: Speaking of natural light. This window is being replaced next week. All of the windows in our home will be updated, and although the bathroom window is the newest in the home, I opted for a new one.
- S: We’ll be getting a black framed window with privacy glass. More on the windows later… I’ll be sharing an entire post devoted to them!
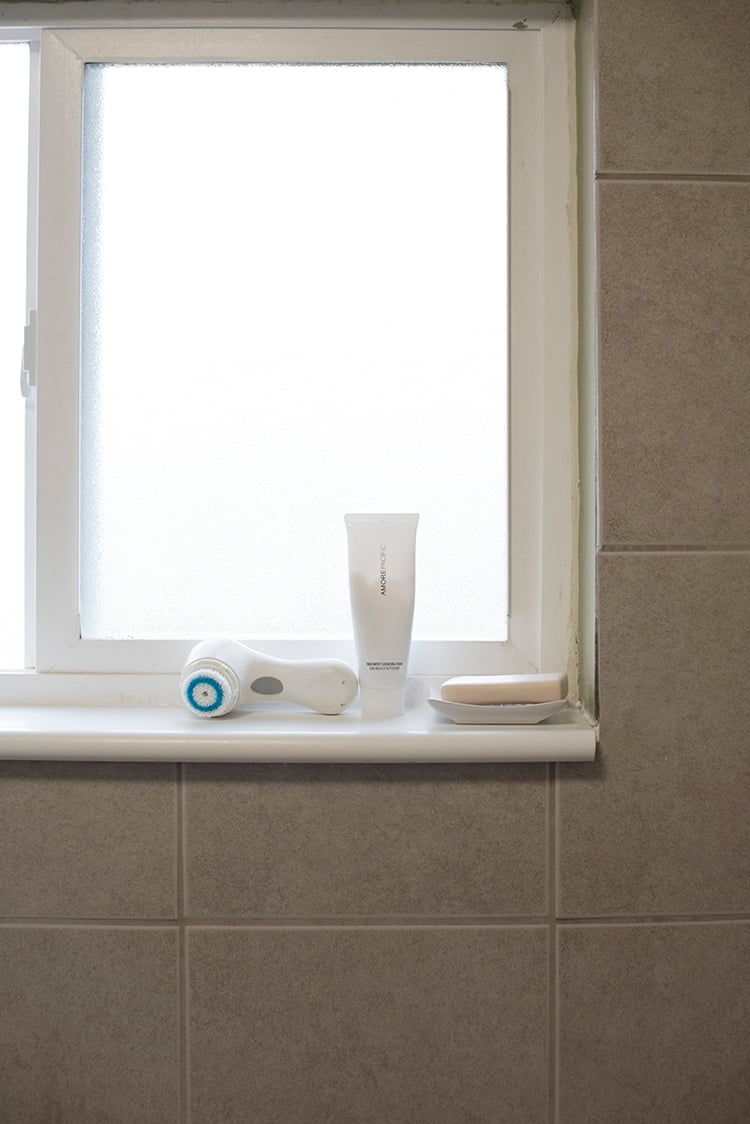
- P: Speaking of the window… it’s become a ledge to sit bath products (which I hate). There is absolutely zero storage for products in the shower.
- S: We’ll definitely be adding a couple shower niches that will provide storage for shampoo, soaps, and shower accessories.
- P: In general, this is a tiny space. Downsizing vanities means less storage.
- S: Our plan is to build recessed pockets for things like toilet paper and the toilet brush…. these things will be hidden and won’t have to live in the vanity. Stay tuned for those special projects soon!
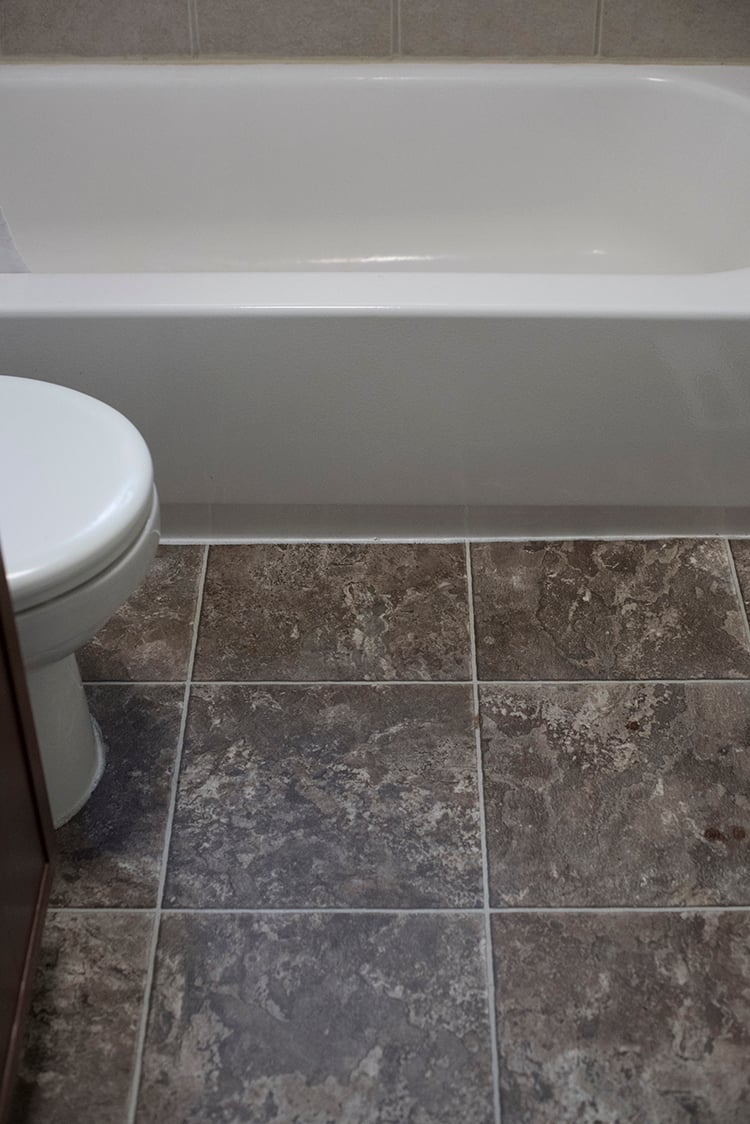
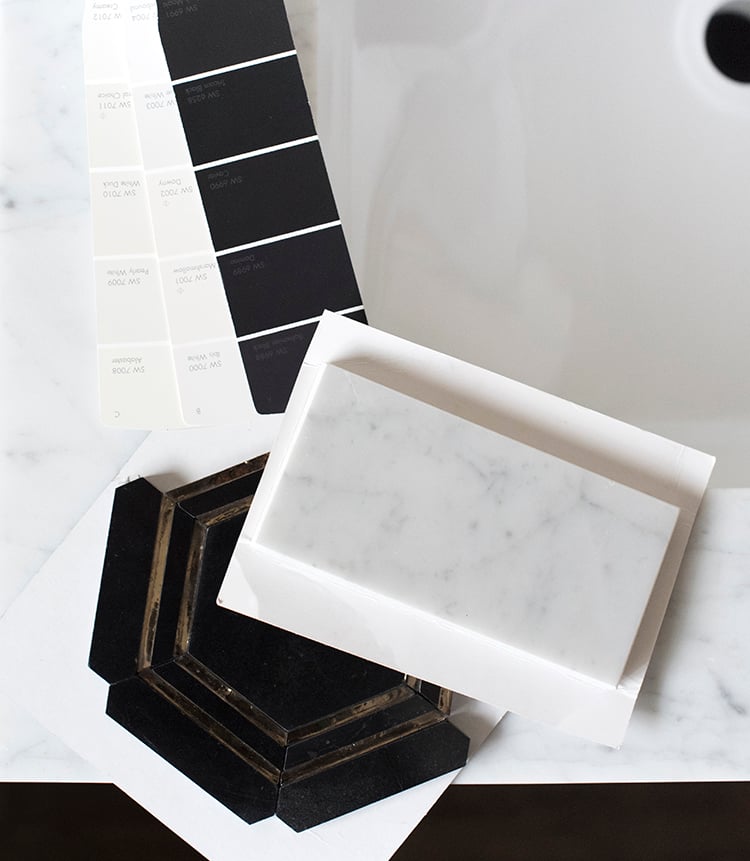
- P: Last but not least we had to address the tile (or lack of) situation. The current floor is linoleum and in addition to being extremely ugly, it’s warping.
- S: New tile was a must. We’ll be installing the black marble hex tile on the floor and the carrara marble subway tile in the shower.
My overall concept behind this space was a no brainer: functionality. Being the only bath, I had to keep this space bright, clean, classic, and consider storage. We had to brainstorm creative ways to maximize space and make this room look and feel larger than it actually is. Things I’m really excited about? That floor tile, mostly. Followed by new plumbing fixtures (a functional toilet) and paint! The space is so drab right now, I’ll be happy to see it post demo and begin filling it with these pretty items. I’ll divulge details and sources once the project is finished and live on the blog.
 We are planning to keep the existing bath tub. It’s the only thing that will stay. It’s original and really heavy cast iron. It was recently refinished with enamel and is in great shape. We would probably replace it, but being an odd size, it would be quite expensive and custom. We both decided we’re cool with keeping it. Sometime in the near future, it’s hard to believe our bathroom will go from looking like the before images above to more like this collage. Pretty crazy! I can hardly wait.