Our Guest Bathroom Design Plan & Before Images
 I am beyond excited to introduce the very first room renovation in our new home! Sometimes a house tells you where to begin when it comes to renovating. Due to some plumbing issues, we opted to overhaul our guest bathroom first since it was a priority in regards to plumbing. Luckily, Lowe’s wanted in on the action, so they’re sponsoring part of this renovation and once you see the design plan- you’ll understand the look I’m going for. It’s super classic, elegant, attainable, bold, and I hope you love it as much as I do. I can’t wait to get started and watch the space unfold. Click through for before images, the design plan, my source list (everything has been ordered and is starting to arrive- yay!), and an intro video diary. That’s right- Emmett and I are both on camera discussing the things we’re most excited and nervous about in regards to this bath remodel. I also wanted to include some tips for planning a bathroom renovation, so if you have an upcoming project- definitely check out my suggestions and pin them for when the time comes!
*This post is sponsored by Lowe’s. All content, ideas, and words are my own. Thank you for supporting the brands that allow us to create unique content while featuring products we actually use & enjoy!
Let’s dive right in, shall we? Brace yourself for the before images! Actually… the space isn’t too terrible. We’re honestly used to much worse. Our home was built in the 90’s and the tile in this space was updated by the previous homeowners, but given the plumbing issues- now is the time to make this space beautiful, more functional, and exactly as we’d like it.
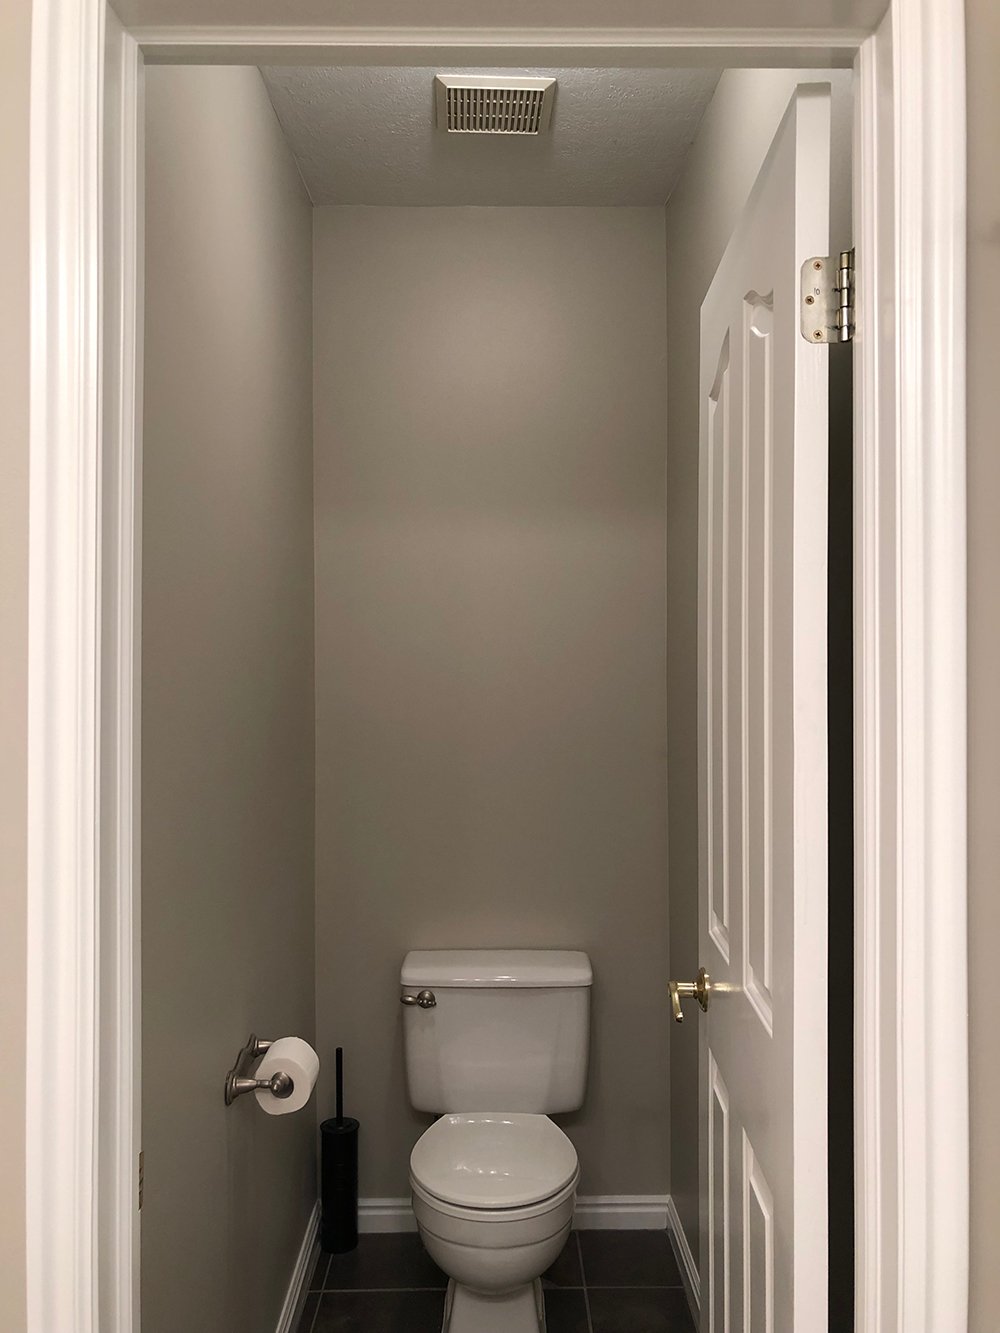
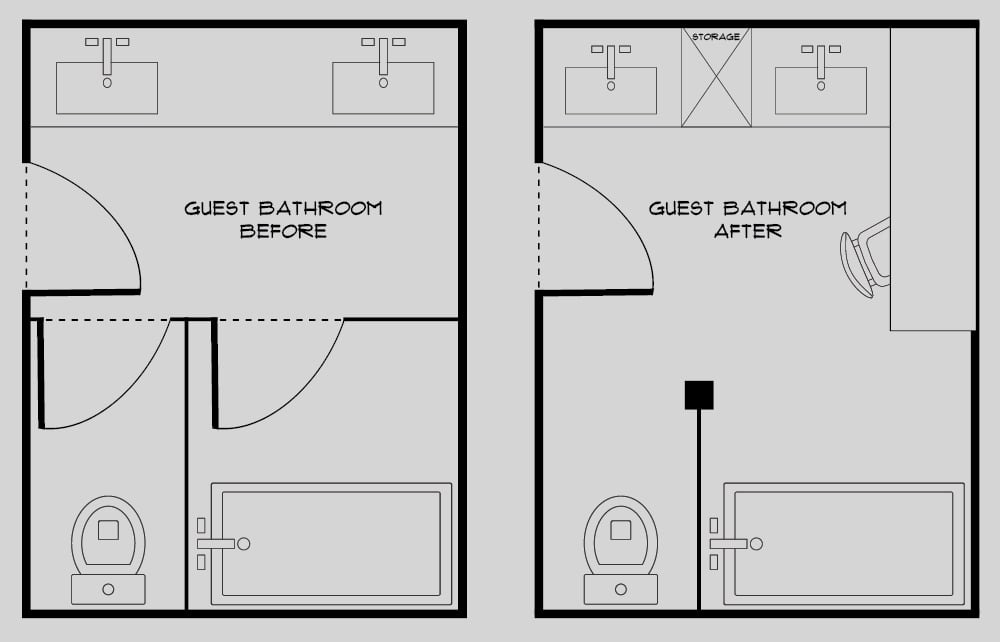
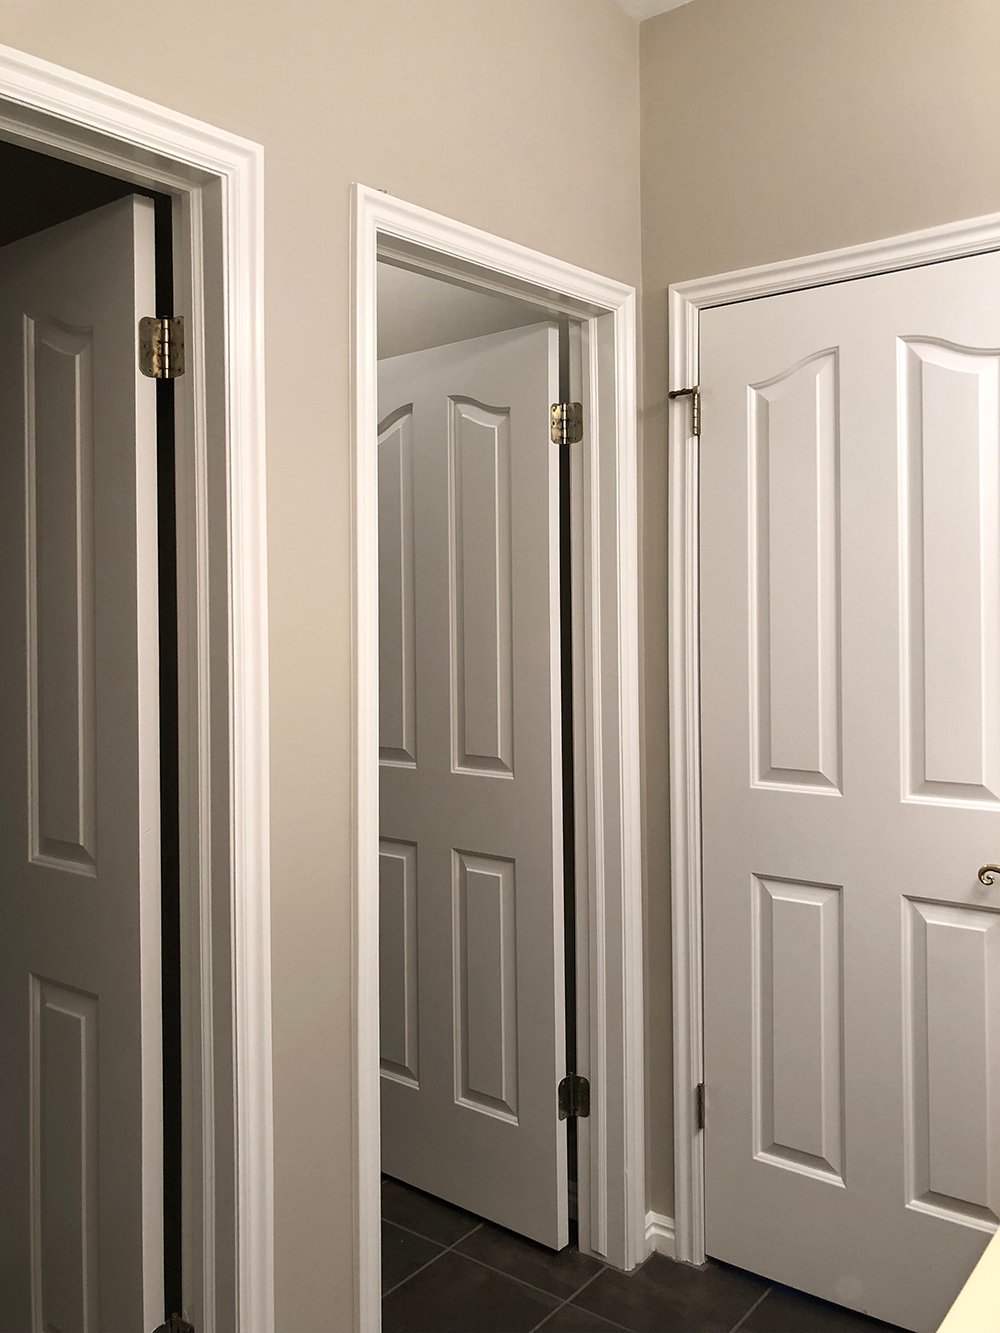 The issue with this bathroom is the use of space. It’s basically doors galore and there are 3 separate rooms in what would be a very spacious, spa-like bathroom. Instead, there is a toilet room, a sink room, and a shower room- all of which have their own door. We have multiple bathrooms in the house, so privacy or sharing a bath isn’t an issue. This just feels like overkill for this particular space and layout.
 The entire room kind of induces claustrophobia and makes you feel like you could get stuck in a bathroom traffic jam thanks to all those doors. There are just too many spaces in a space, which wastes precious space. Did you follow that? Haha!
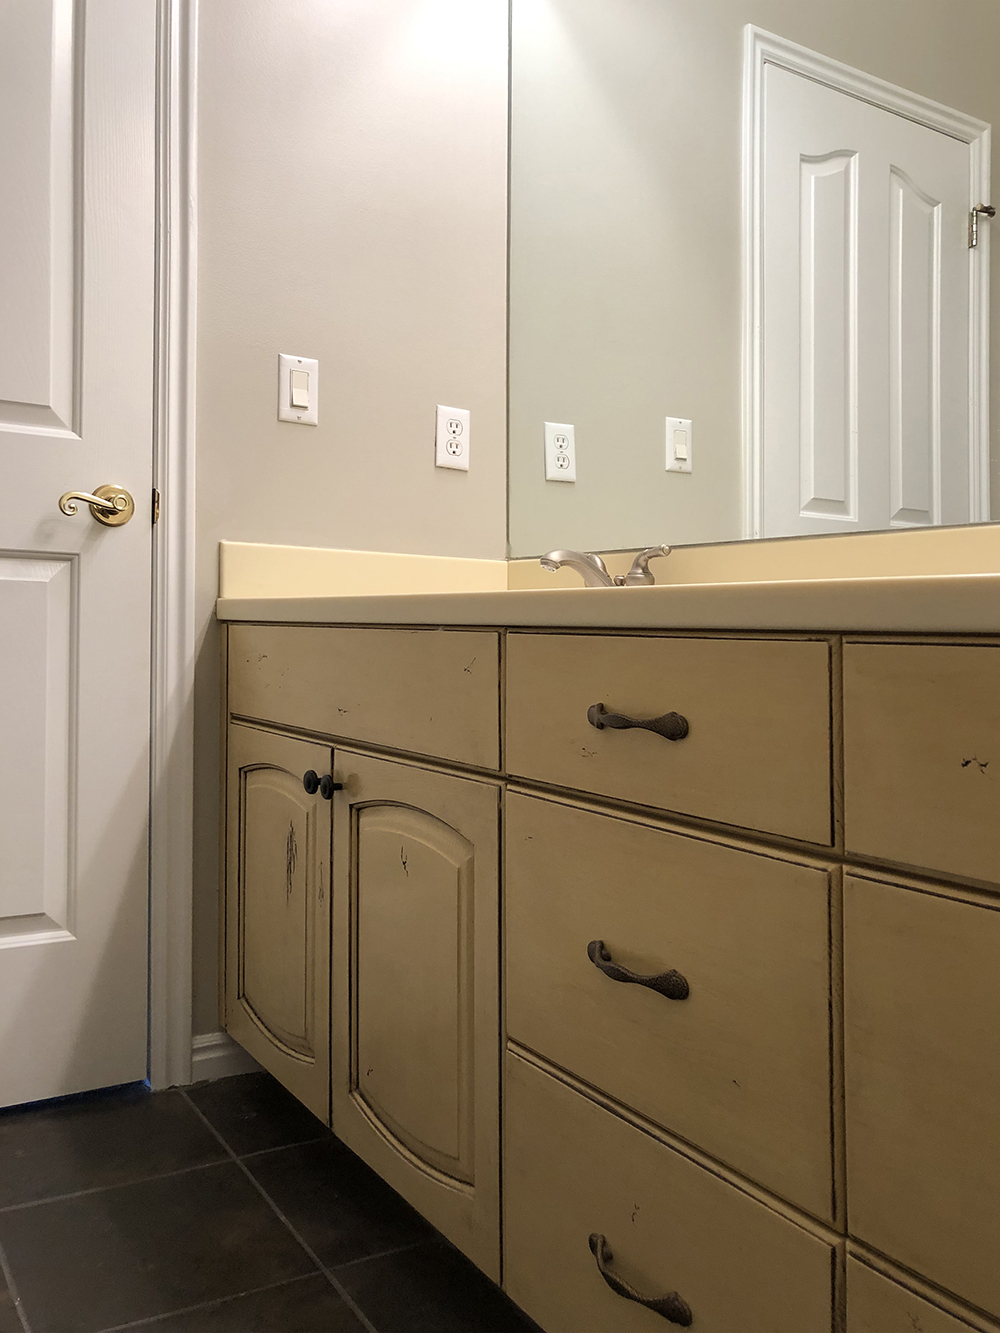
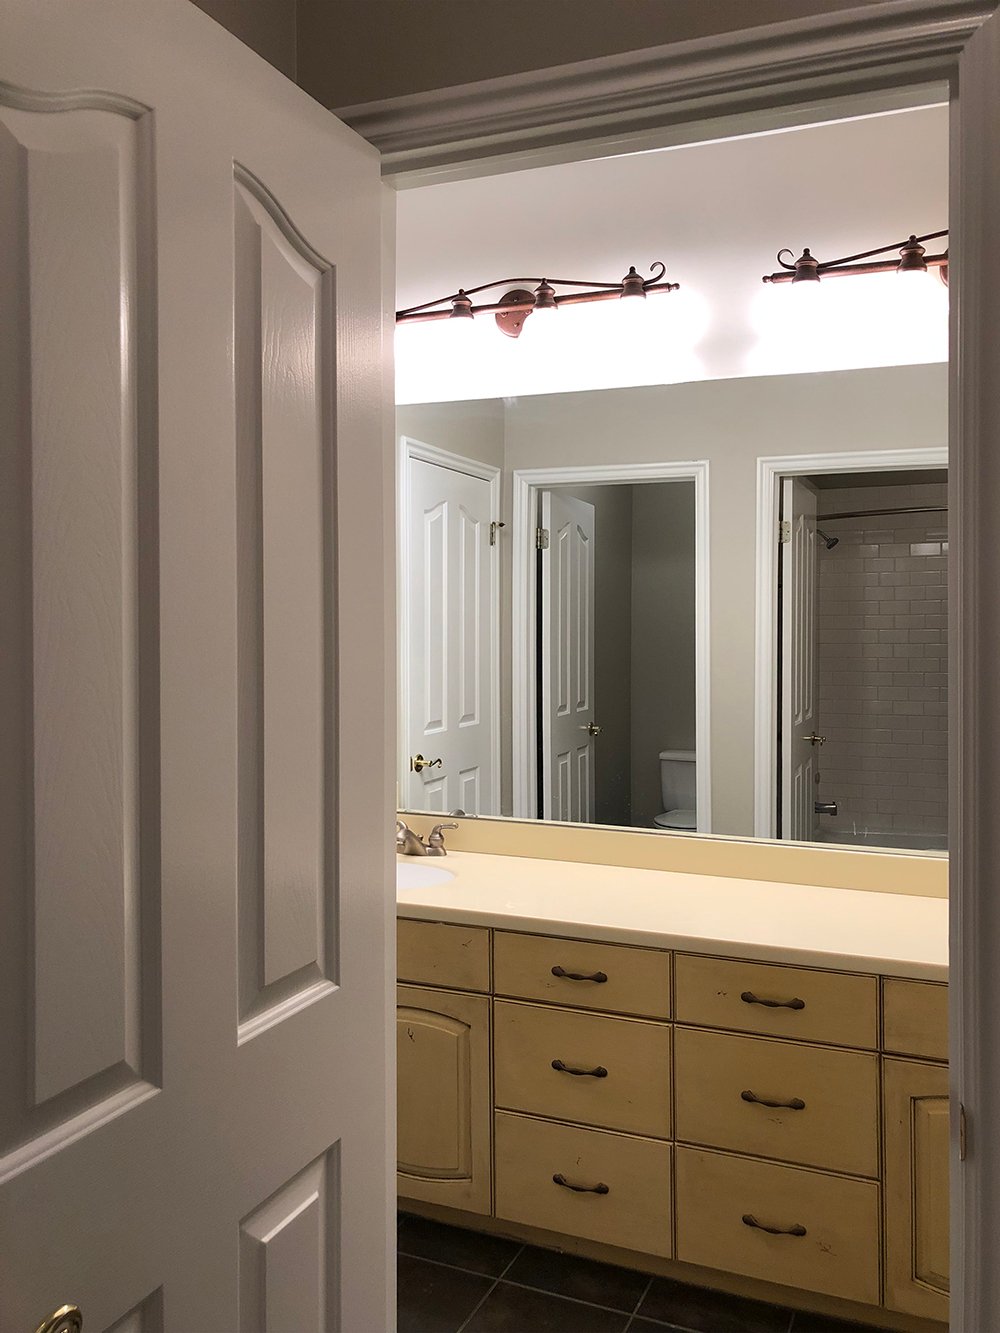 On another note, I nicknamed the current vanity and countertop combo “bananity” because it’s literally the color of a banana. It’s also sort of shaped like a banana, which feels really weird and impractical. There’s just too much negative space in between the sinks that is wasted.
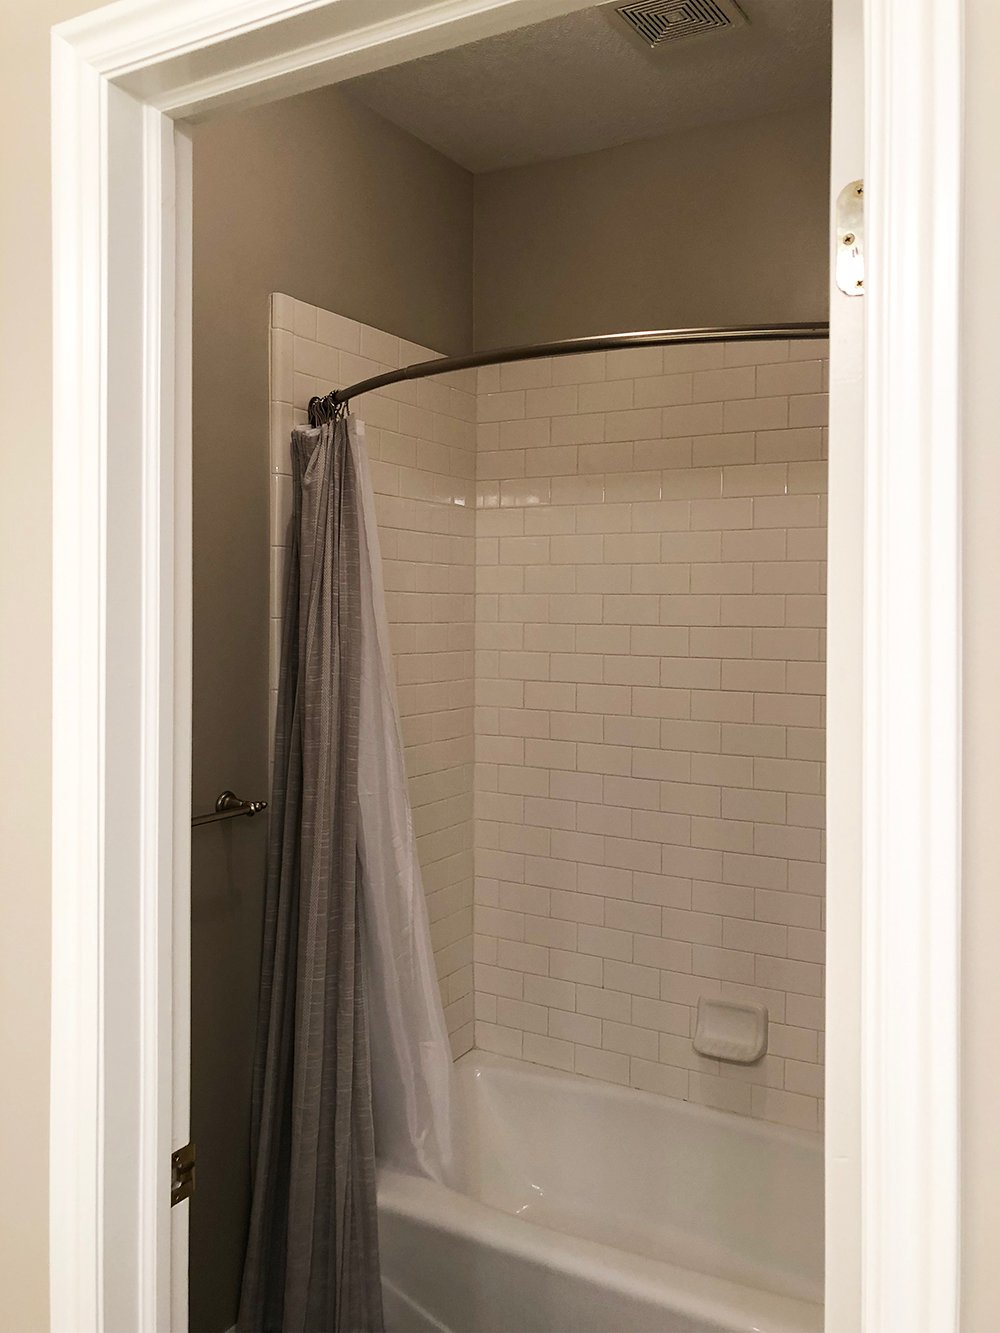
 The shower isn’t really that bad, since it was updated within the past 10 years. I don’t have an issue with white subway tile- in fact, you’ll notice we’re using white subway tile once again in the space (spoiler alert). What bothers me is the installation and the fact that it looks VERY basic and boring. It doesn’t run all the way to the ceiling and the plumbing fixtures are dated. It certainly has a 90’s vibe.
 Emmett and I had fun filming our very first renovation video diary. Our plan is to share our thoughts before and after every project… basically we’ll kick things off and wrap them up via video! Check it out below and hear all about our goals, as well as the things we’re most excited to tackle… the dogs also make an appearance:
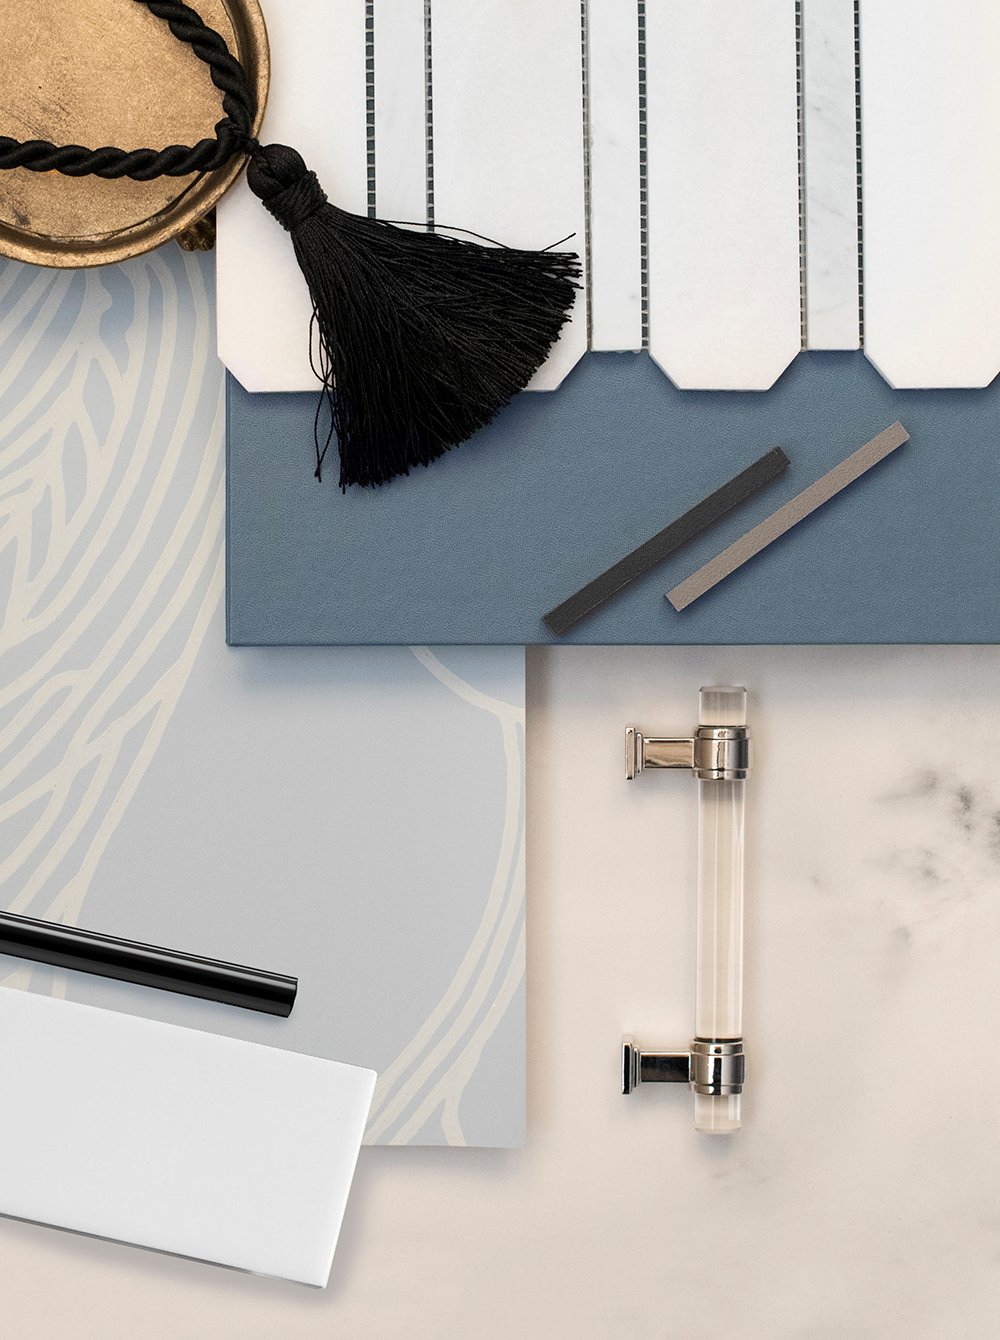
Obviously we’re eager to get started and transform this bathroom. If you’re wondering what it’s going to look like, I’ve made you wait long enough! I’ve inserted the design plan below. You can shop all of the sources from Lowe’s using the numbered links listed at the bottom of the collage.
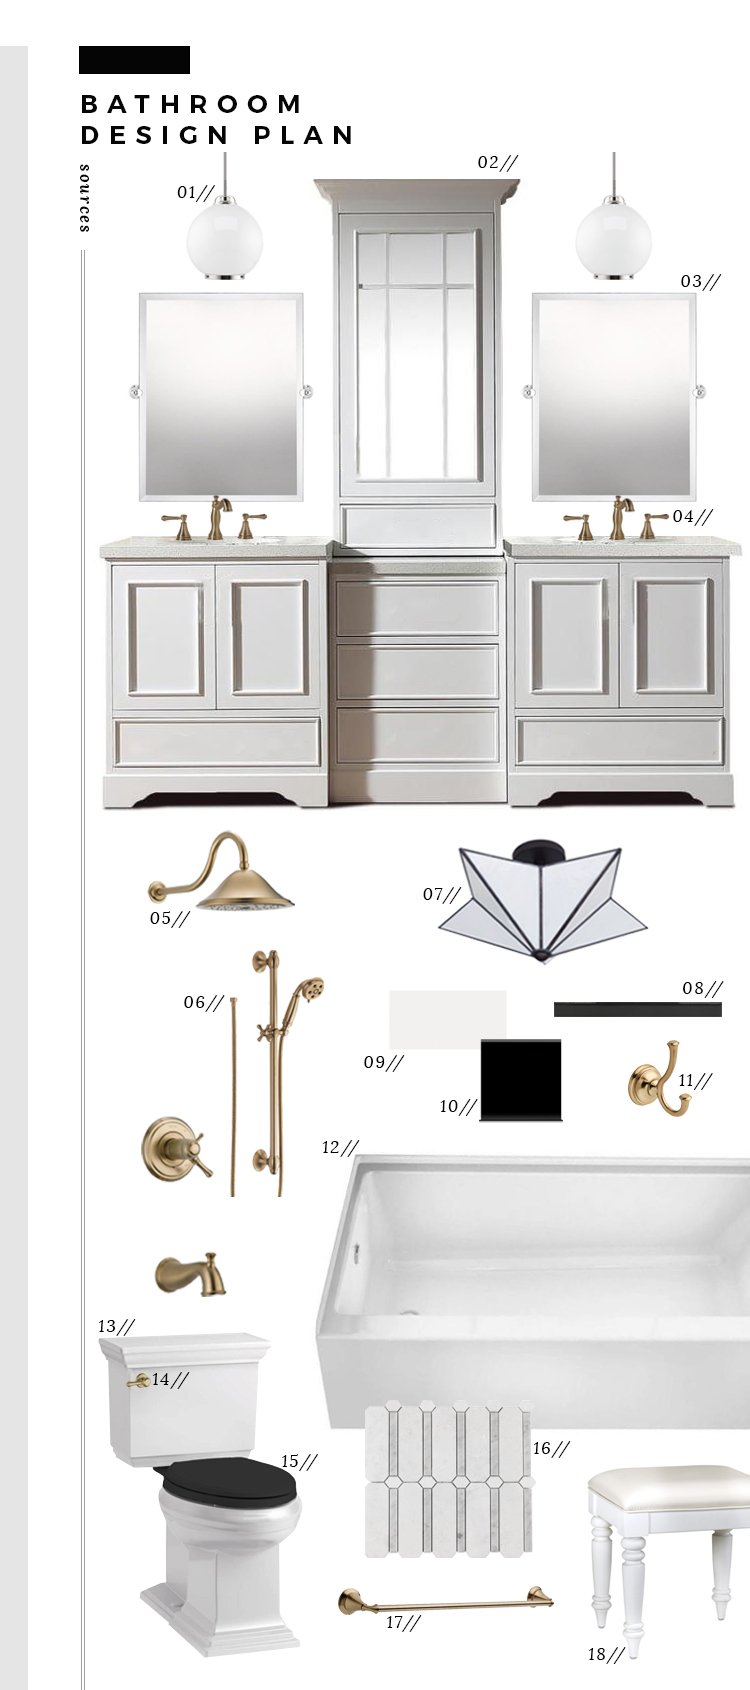 01: progress lighting pendant lights // 02: ariel stafford white double sink vanity with white quartz top // 03: quoizel wall mirror // 04: delta cassidy widespread faucet // 05: delta cassidy shower trim // 06: delta handheld shower // 07: allen+roth flush mount light fixture // 08: black pencil liner tile // 09: ice white gloss subway tile // 10: black ceramic cove base tile // 11: delta cassidy towel hook // 12: alcove bathtub // 13: kohler memoirs elongated toilet // 14: brass toilet lever // 15: kohler toilet seat // 16: carrara marble mosaic floor tile // 17: linden towel bar // 18: home styles vanity stool
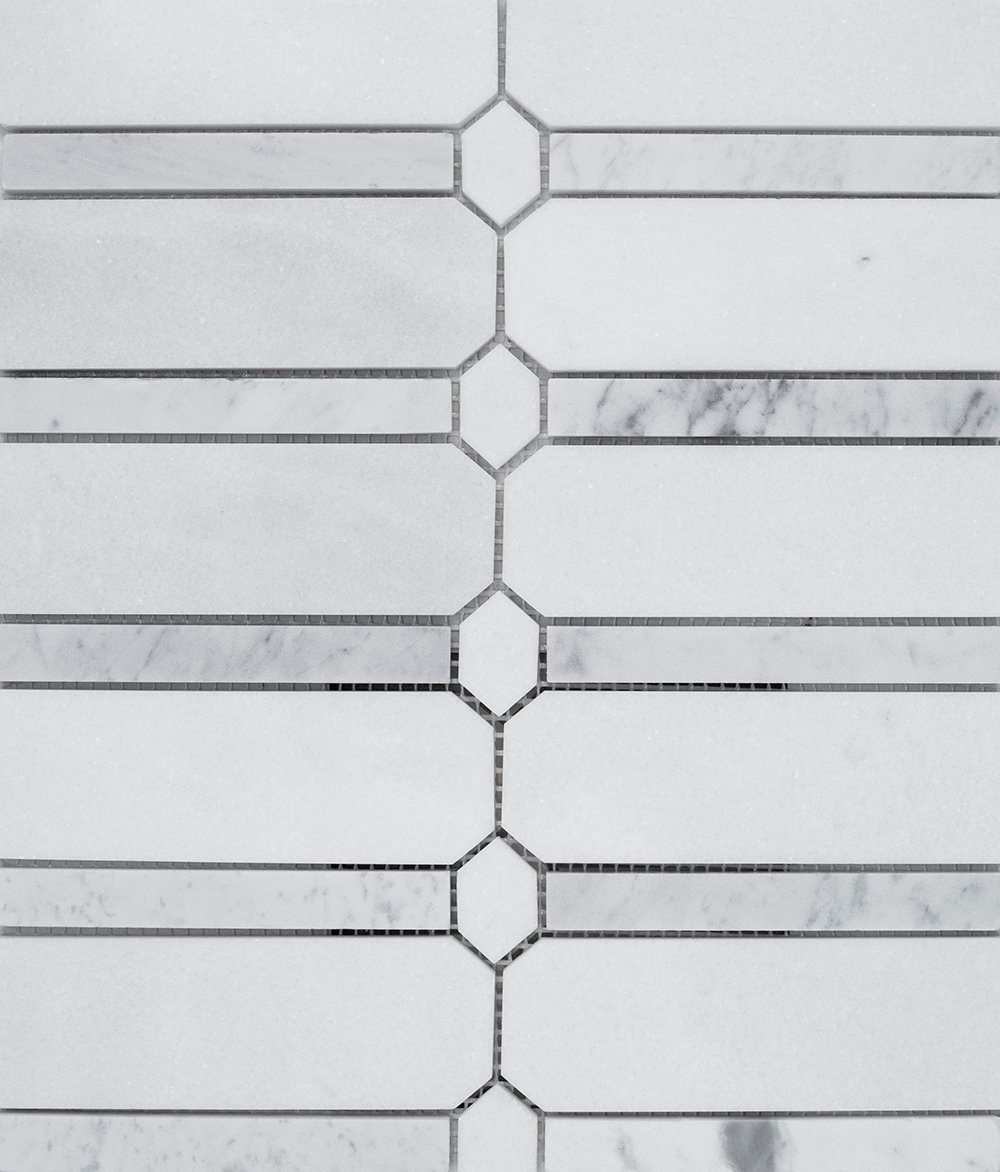
Here is a sneak peek of the floor tile. It actually came in right before Christmas and was the best holiday surprise! I wanted to stick with something timeless and easy to install- yet unique. I’m tired of hex tile and this updated mosaic felt really nice and classic… especially being carrara marble. As for the wall tile, I’ve got a secret subway tile trick up my sleeve! I’ll share more on that later.
We’re also planning to do some customization work to that gorgeous vanity. It arrived on a palette last week and I was SUPER impressed with the quality. The doors are soft-close, the paint job is flawless, and Emmett (who works at a cabinetry company) also stopped to comment on how well-made it was. That’s a big compliment coming from Mr. Picky.
 As for the floor plan, here’s a visual of how that will look once it’s updated. We didn’t want to move plumbing this time around since there are already plumbing issues happening and we’ll need to invest money toward new piping. My goal was to open up the room (especially since there is no window) and use the space wisely in a more functional way that feels a bit brighter.
BATHROOM RENOVATION PLANNING TIPS
Last but not least- my promised bathroom renovation planning tips. Here are 10 tidbits or words of wisdom I like to follow prior to beginning a bathroom reno:
- Consider function above all else– a bathroom HAS to work… and work well for your entire family.
- Make smart tile selections– choose a floor tile that is slip resistant or has lots of grout lines for better traction. Also choose wall tile that is easy to clean.
- Select efficient plumbing fixtures– when choosing toilets, faucets, shower trim, etc… I like to check stats and make sure they conserve water and are efficient.
- Plan for storage– no matter the size of your bathroom, storage for linens & toiletries is always nice. Make sure your vanity or additional bathroom furniture has room for open or closed storage.
- Don’t forget about privacy– when planning your bathroom renovation, consider which way the door swings, purchase a privacy lock when choosing door hardware, and install privacy glass if you’re swapping a window.
- Create a lighting plan– much like a kitchen, bathrooms require adequate light. Mix recessed lights, exhaust fans, pendants, flush mounts, or sconces to achieve the best lighting for your space.
- Remember the finishing details– things people tend to forget are the details that really make a bathroom! Don’t forget towel hooks, towel bars, vanity hardware, matching drains, and overflows.
- Check inventory– as items begin to arrive, check to make sure nothing arrived broken and everything fits as expected. I have a mountain of boxes and products that are all neatly labeled. It makes the process so much easier!
- Make necessary arrangements while bath is out of order– while the space is out of commission, plan which bathroom you’ll be using instead.
- Map out a timeline– given bathrooms are spaces we use every single day, creating a construction timeline is helpful in determining how long you’ll need to plan alternative arrangements. It also helps to keep things moving and stay on track if you’re following a strict schedule.
I’d love to hear your thoughts on our newly designed bathroom and intro video in the comments below! Demo is officially underway and I’m eager to test my tile skills once again. I have a lot of fun post ideas to share throughout the duration of this renovation- some of them include: how to make subway tile look interesting (and anything but basic), tips for selecting cohesive plumbing fixtures, how to modify a readymade vanity to make it appear custom, how to reupholster a vanity stool,… and more. If there is anything specific you’d like us to cover, just let me know!