DIY Built-Ins and Office Organization
 *This post is sponsored by Lowes. All content, ideas, and words are my own. Thank you for supporting the brands that allow us to create unique content while featuring products we actually use & enjoy!
The office is finally finished, but before I share the big reveal- I wanted to break down a quick DIY for our built-ins. So many of you asked where to buy them, and were surprised to learn we built them from scratch! It’s not as difficult as you might expect, I promise. Click through for the tutorial and for a sneak peek at how I’m organizing my office and the newly constructed shelving. If you’re only interested in the styled images and want to bypass the DIY, just keep scrolling to the bottom…
 I’m not sure why or how my office became the last room renovation on the punch list, but it did. By the end of this post, you’ll be wondering why it wasn’t the first project we tackled. It really didn’t take us long to make the space ten times better and so much more organized.
 Although I have a gorgeous reveal post planned to share the entire room, this one is all things built-ins. Let’s dive into the DIY and then I’ll share how I’ve been keeping my drawers, cabinets, and shelves organized. Here is the master source & supply list:
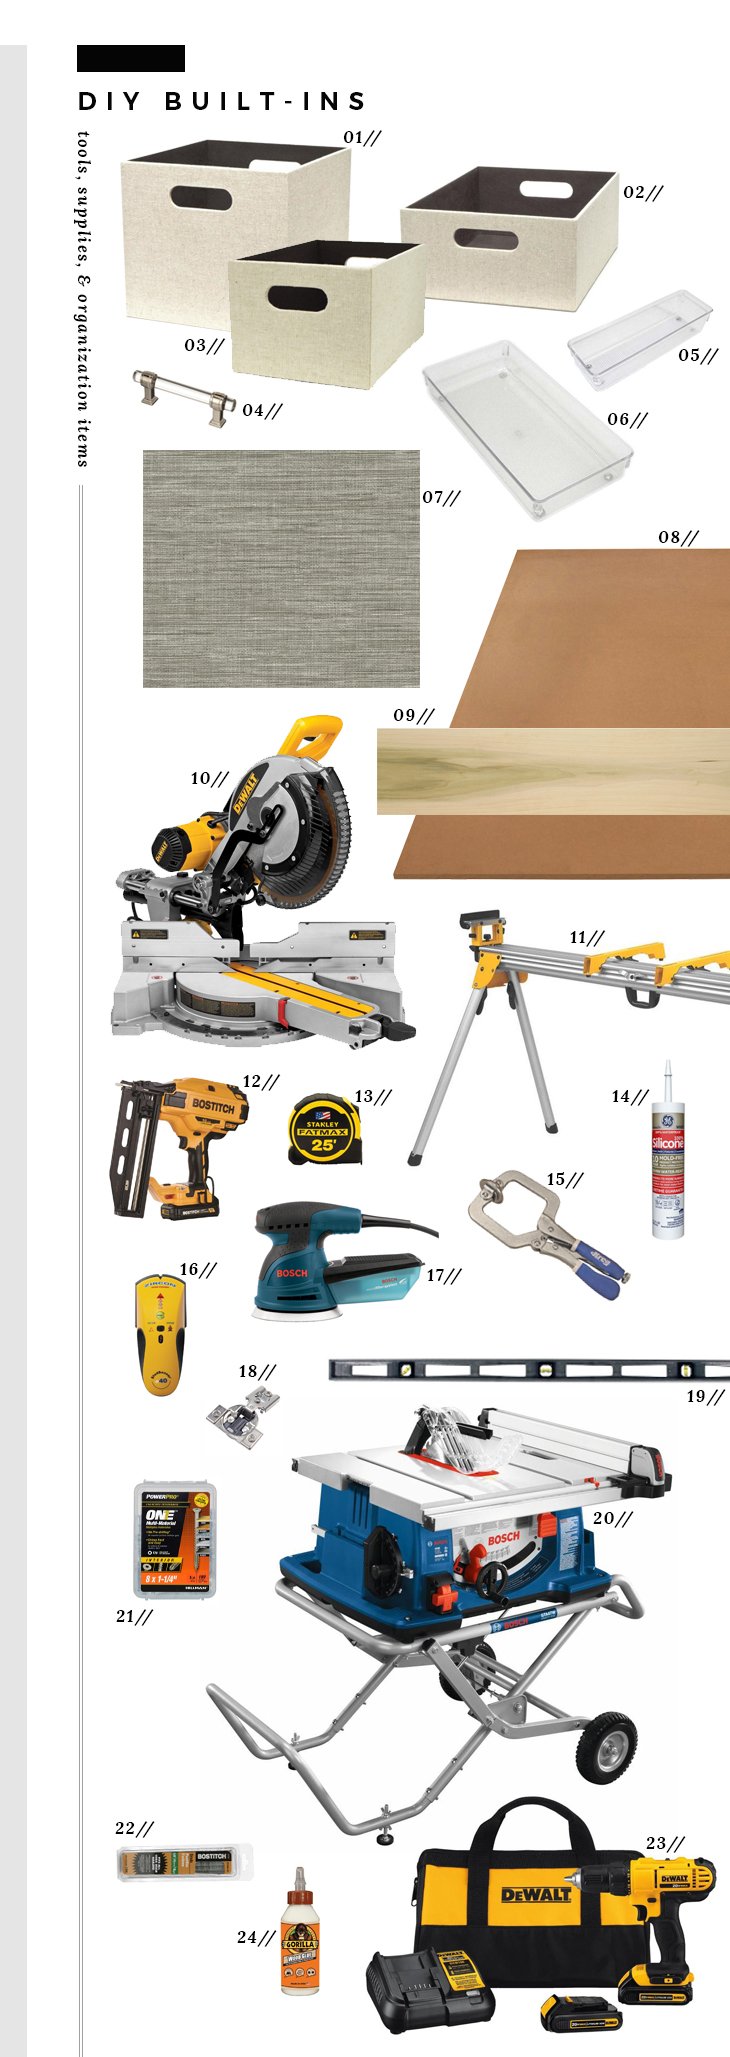
01: large bin // 02: wide bin // 03: medium bin // 04: cabinet pull // 05: pen organizer // 06: drawer organizer // 07: grasscloth // 08: MDF material // 09: poplar // 10: dewalt miter saw // 11: miter saw sand // 12: nail gun // 13: tape measure // 14: caulk // 15: clamps // 16: stud finder // 17: orbital sander // 18: hinge hardware // 19: level // 20: bosch table saw // 21: screws // 22: finishing nails // 23: dewalt drill // 24: wood glue
 Step 1 // Measure and plan. I always like to sketch out the wall, add dimensions, and formulate a plan prior to heading to Lowes for supplies. Much like our living room, I wanted these built-ins to have open and closed storage. Once everything is planned out, then it’s time to grab the goods.
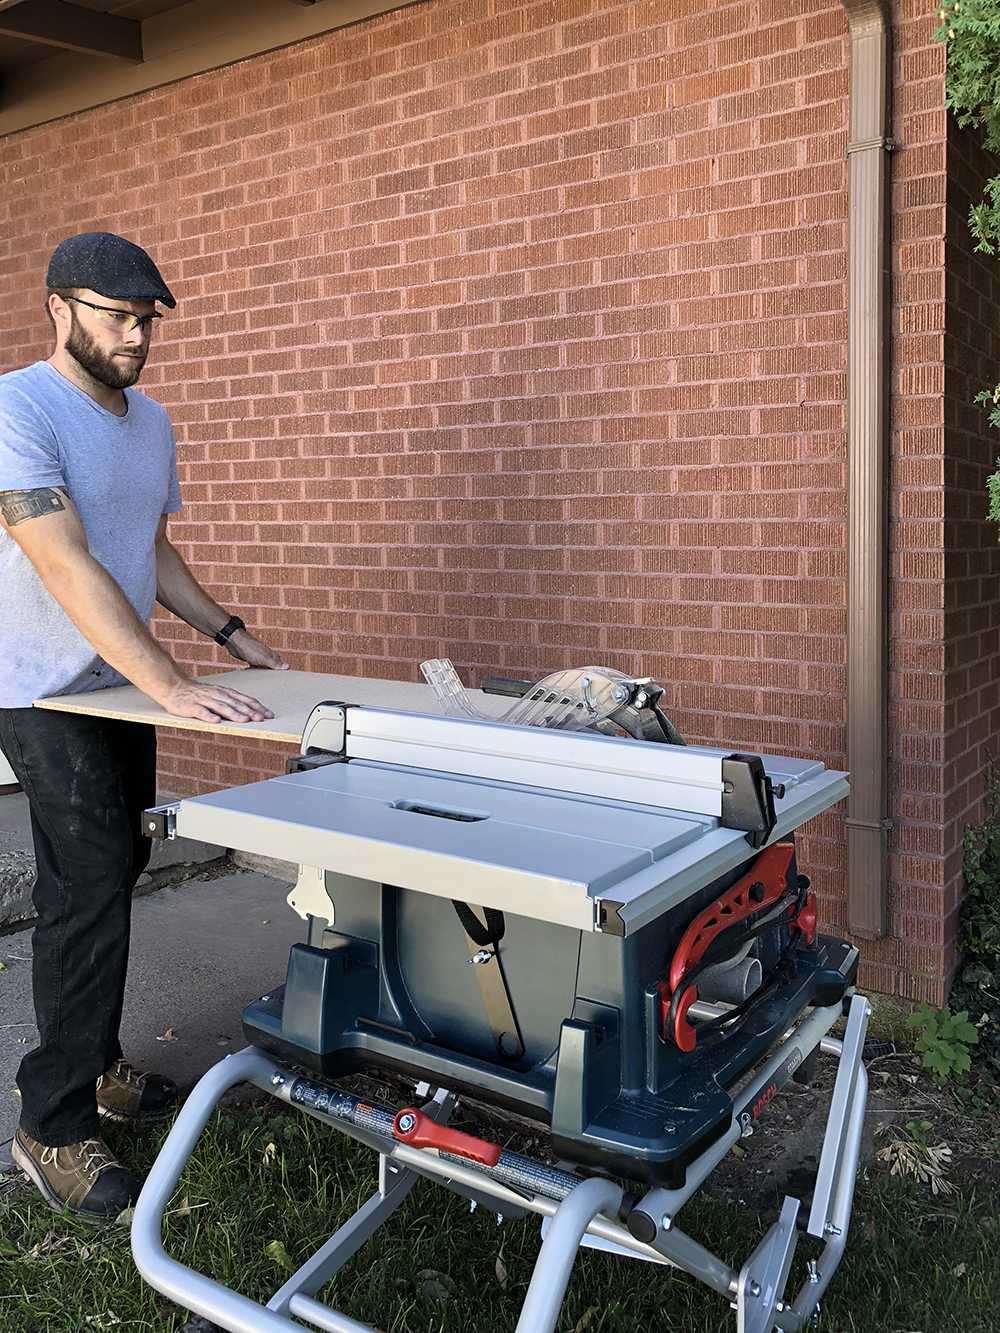 Step 2 // Cut the material. Use your plan and cut each MDF built-in piece to size (side shelves, edge panels, etc). I let Emmett get this new Bosch table saw and this is seriously his baby- he’s obsessed. I’m totally fine with that though because he’s already formulating and planning all of the projects he’s going to use it for. Ha!
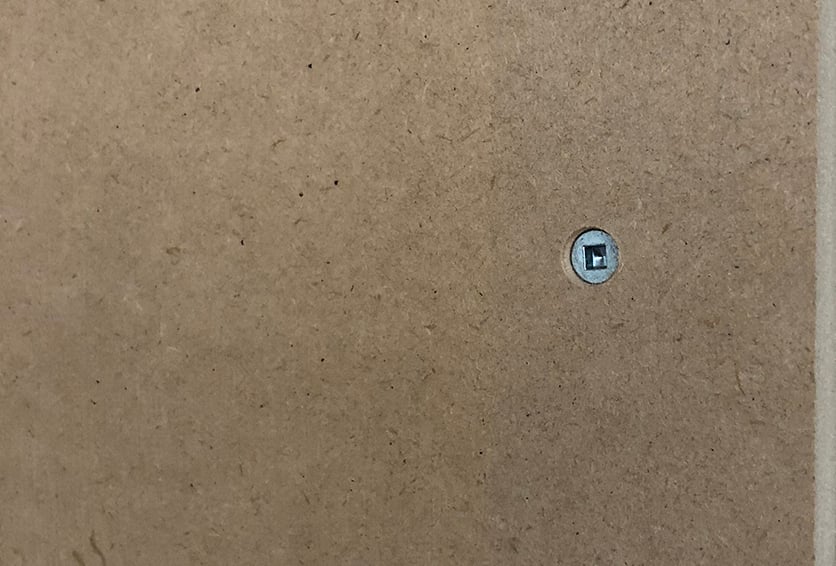
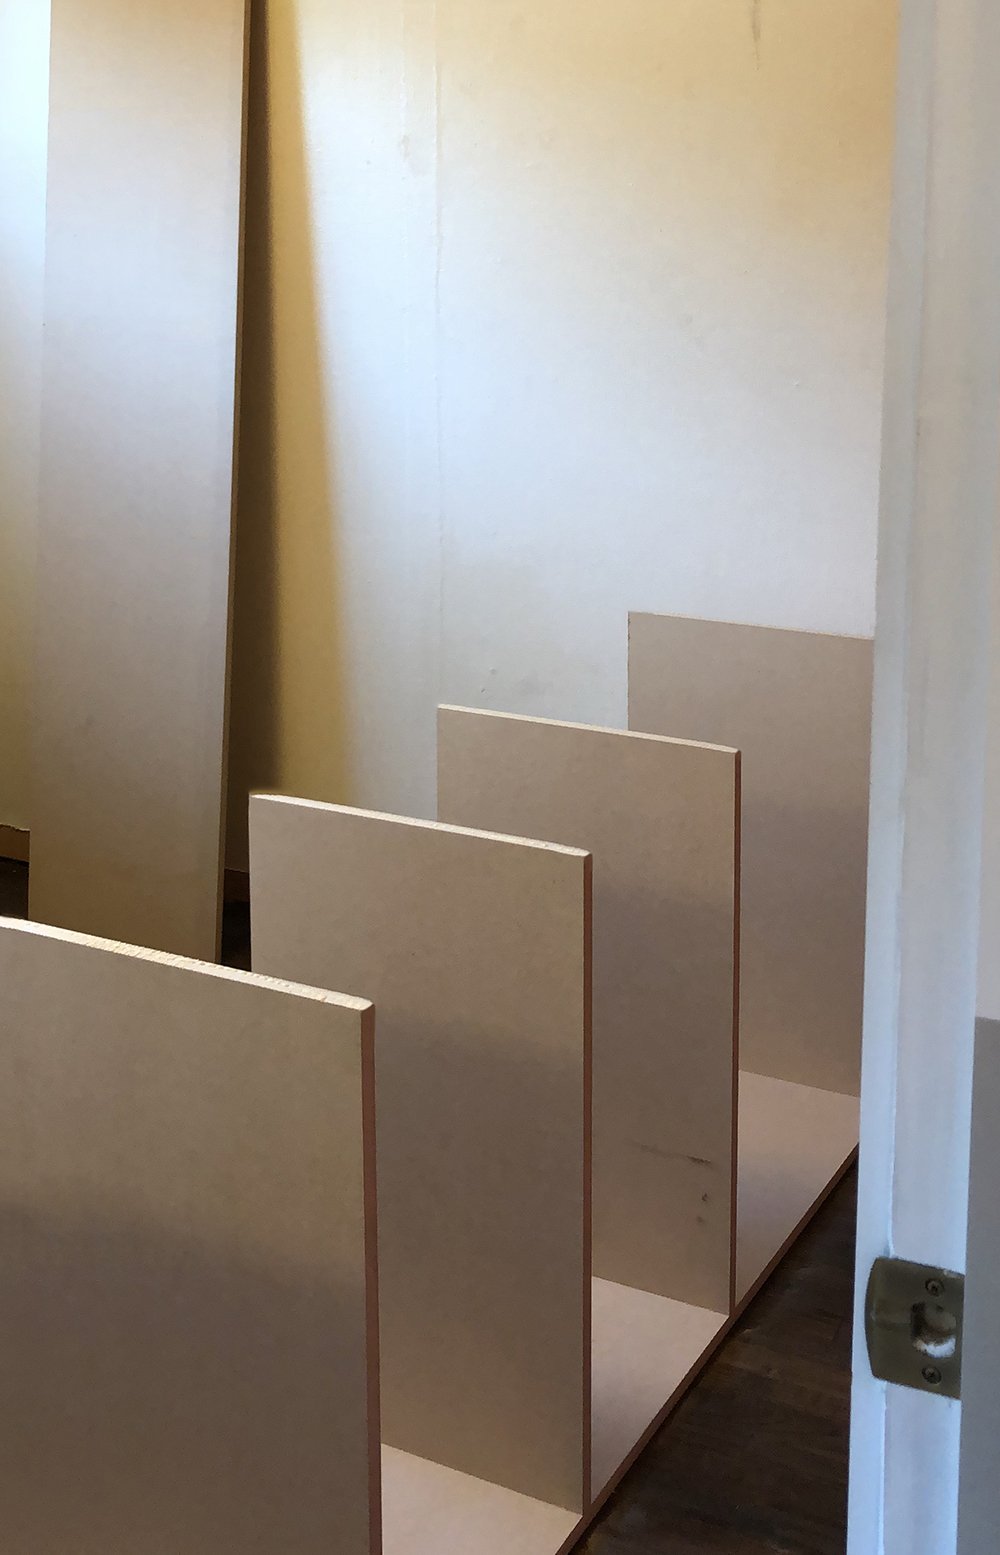 Step 3 // Assemble the cabinet carcass. The main built-in structure is called the cabinet carcass, in terms of carpentry. Using a counter sink bit, screw each shelf into place from the outside panel. It should look like this…
 Step 4 // Dry fit the cabinets to the wall. Next you’ll want to ensure they fit the wall as planned. Emmett actually screwed them in because it made the unit easier to paint. We used a stud finder to make sure it was securely mounted.
 Keep in mind, my built-in design connects in the middle- but this process works for any shape or size! It should look something like this…
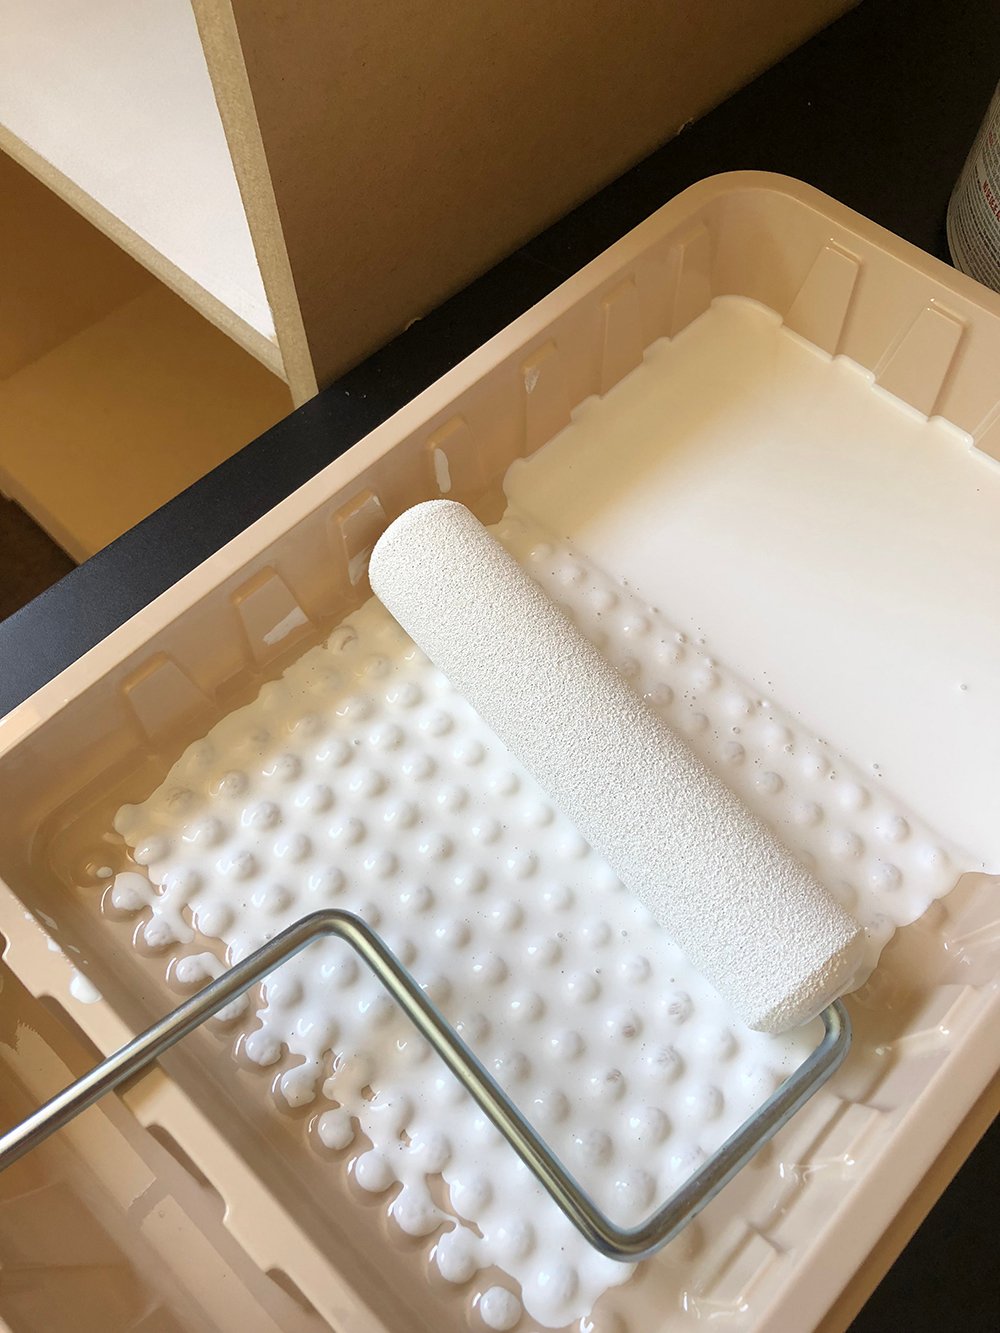
 Step 5 // Prime the cabinet carcass. MDF soaks in a lot of primer. Once the built-ins were affixed to the wall, I quickly applied the first coat of primer using a high density foam roller, specifically made for cabinets and doors.
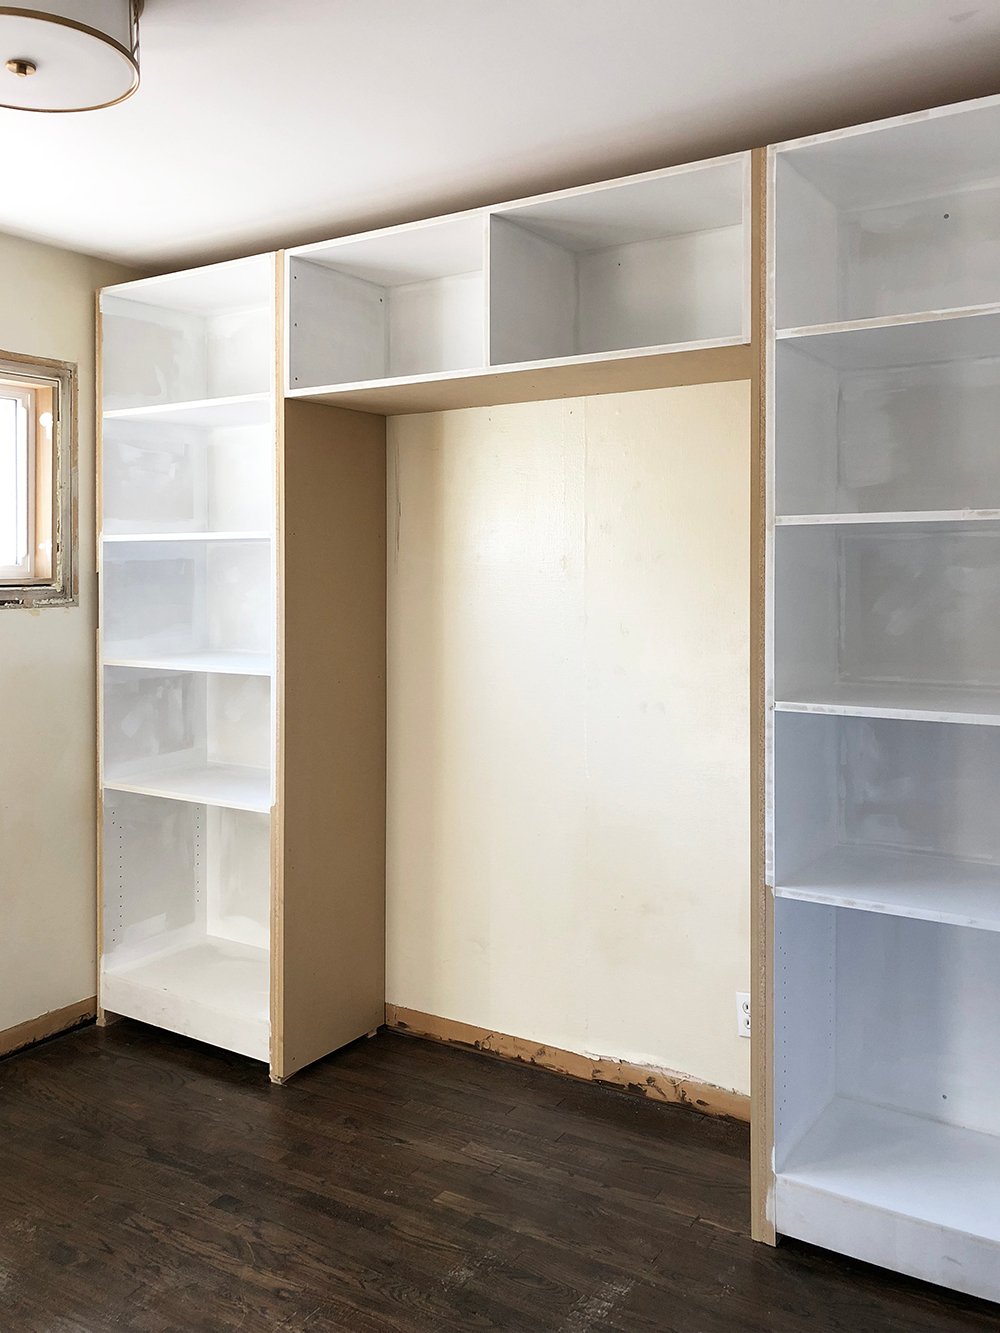
 Step 6 // Add the filler pieces. Built-ins don’t look “built-in” at the beginning of the process. You’ll notice gaps and negative space between each section. This is the step where you’ll essentially “close in the gaps” with scrap filler pieces. Keep in mind, the scrap pieces don’t have to cover the entire side… it just needs to bump out the gap and fill the negative space between the cabinet carcass and end panel.
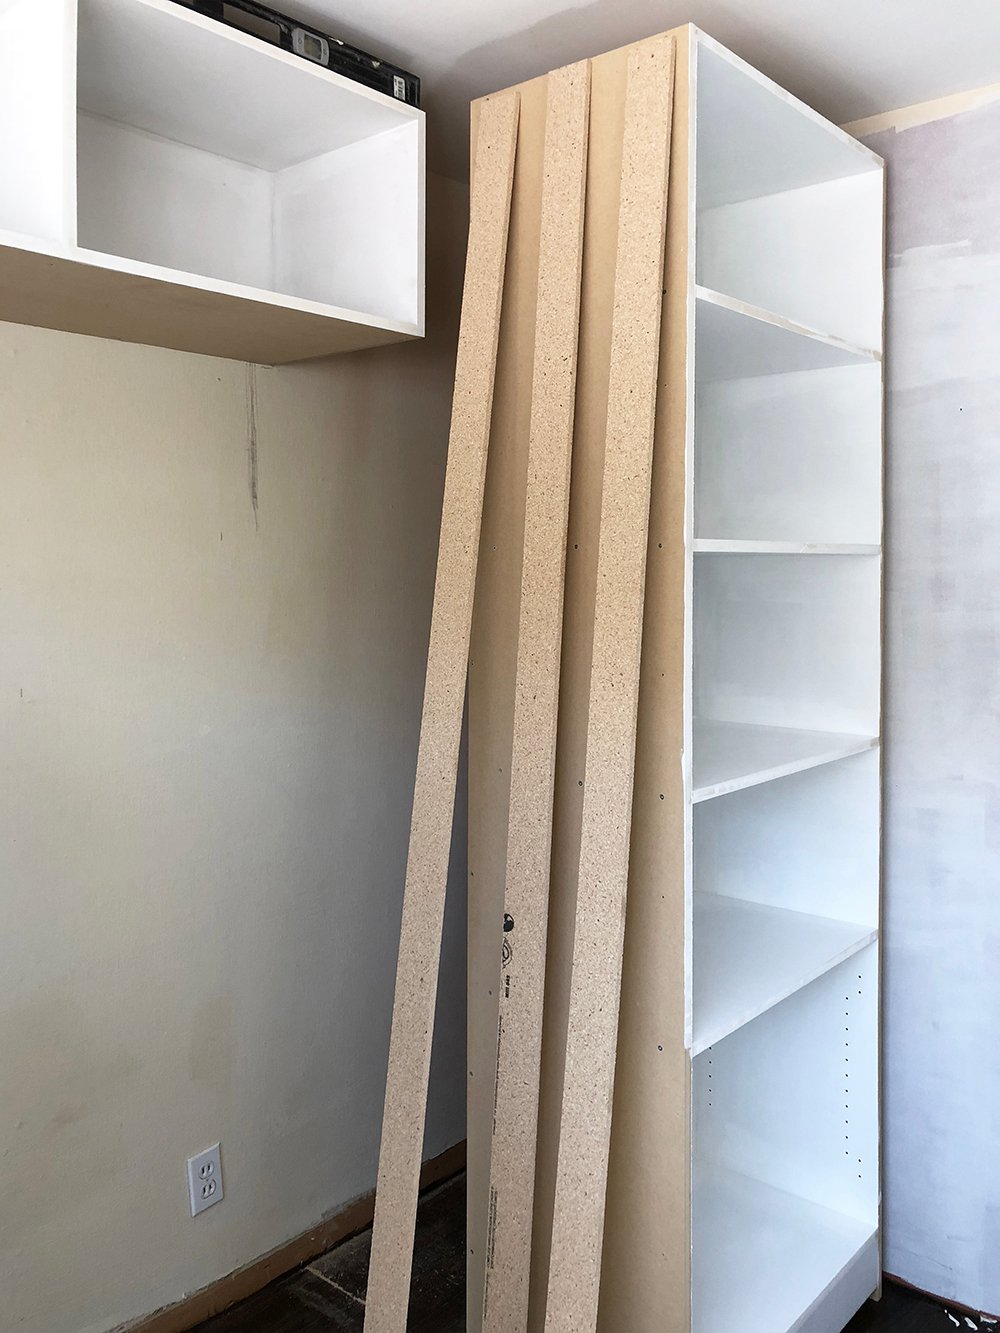 Step 7 // Apply the finished end panel. Next, you’ll add the end panel. Notice how it will mount to the filler pieces and close the gap?
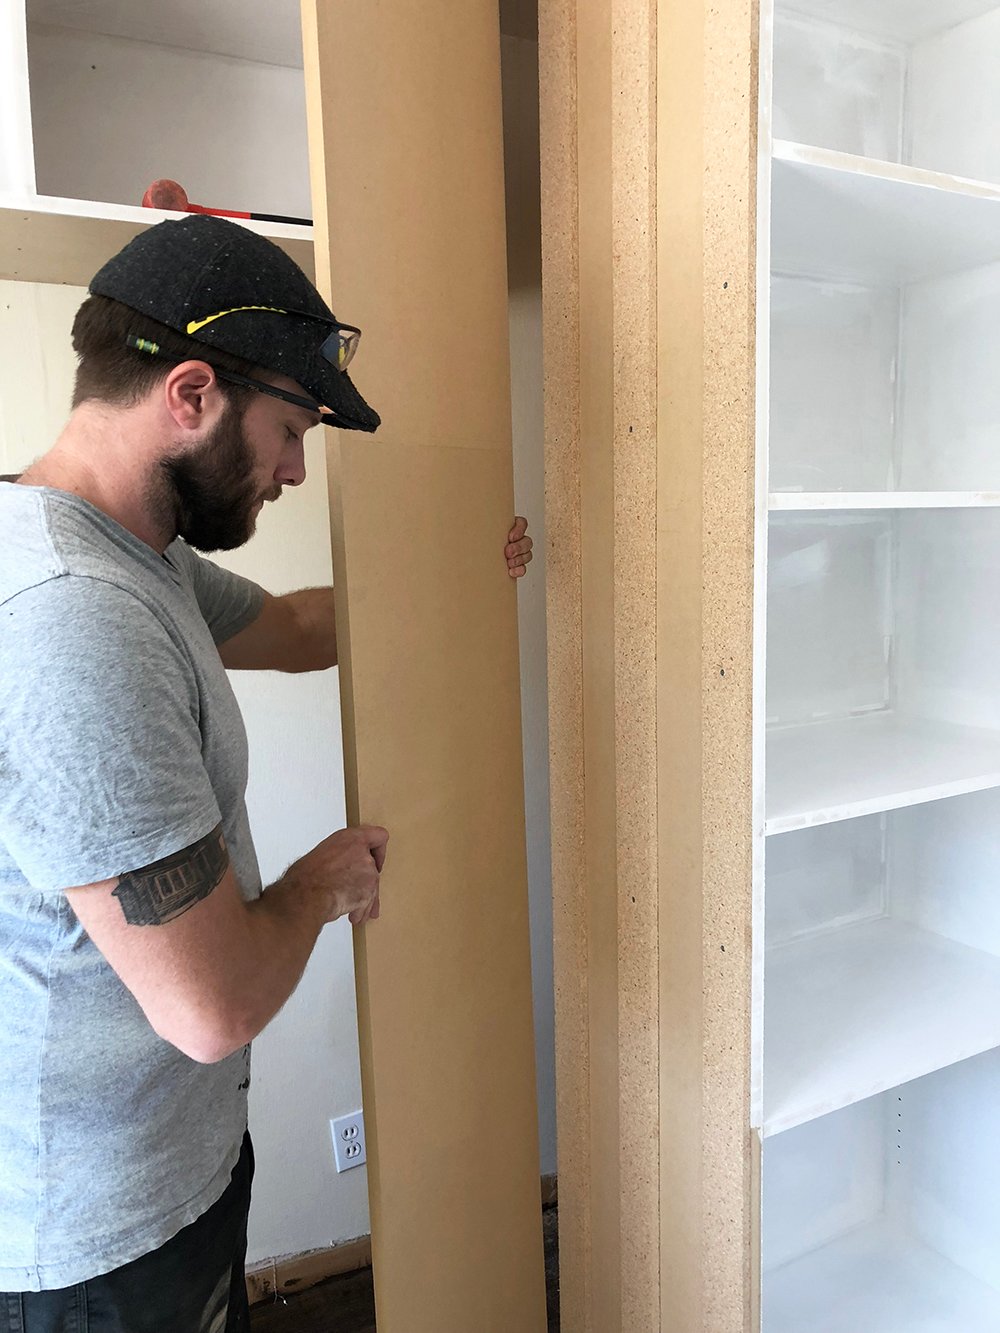 Install the panel using wood glue, clamp it into place, then secure it with screws…
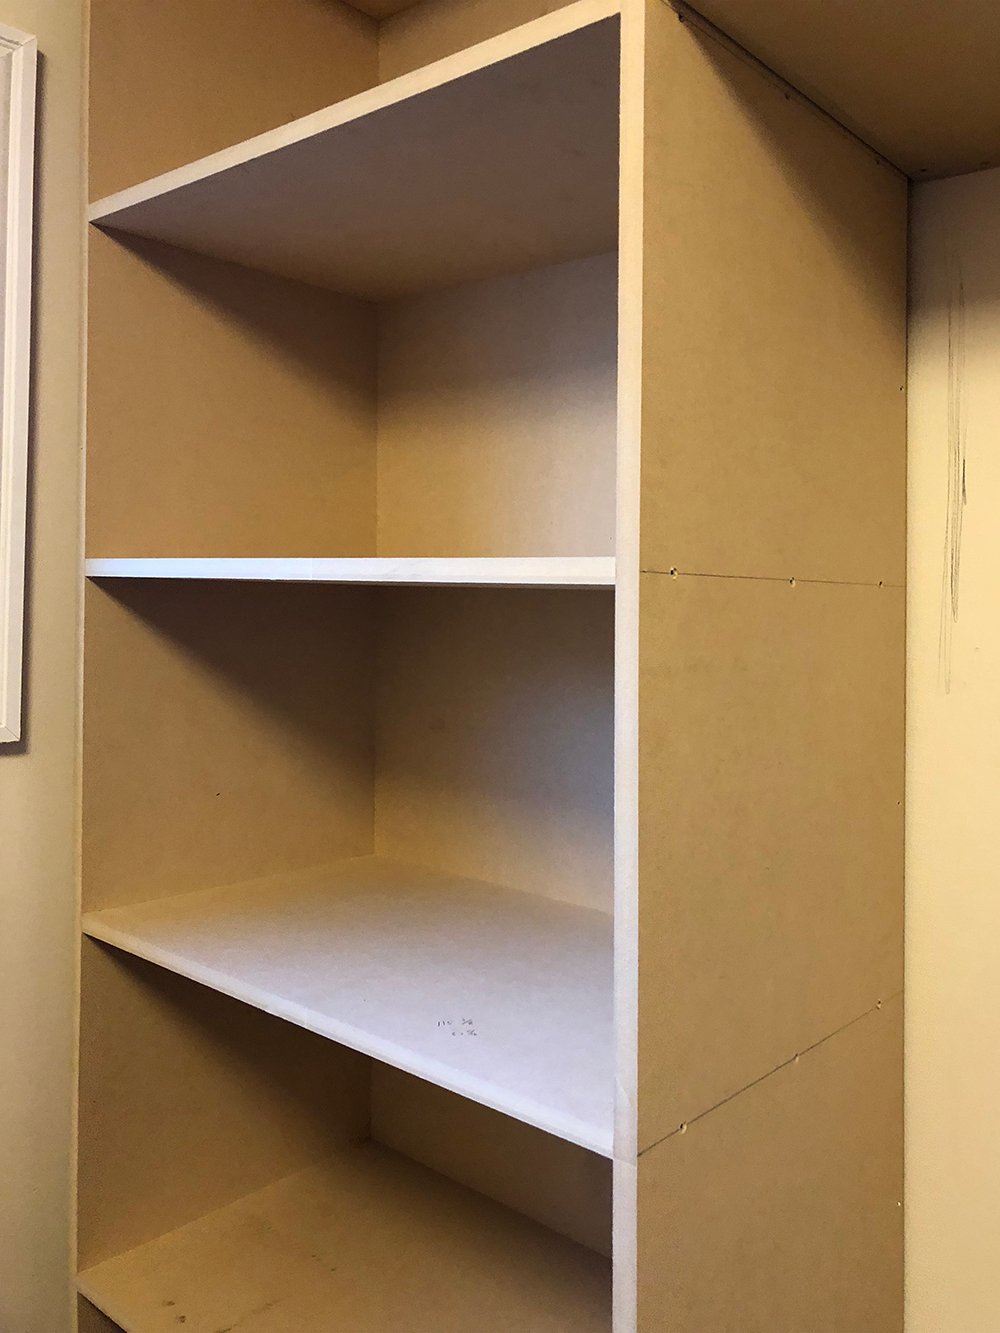
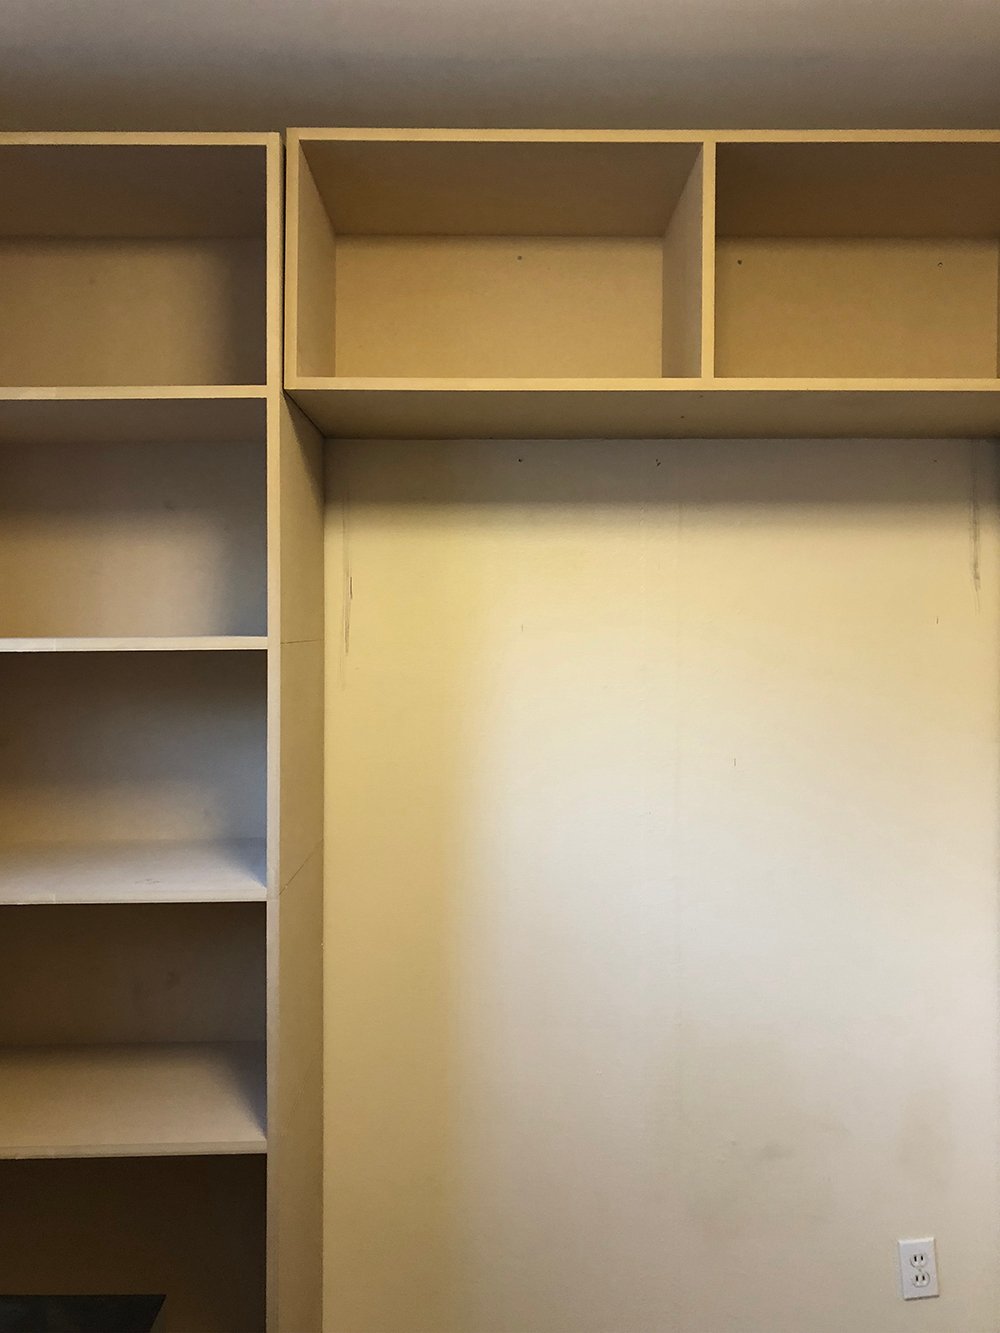
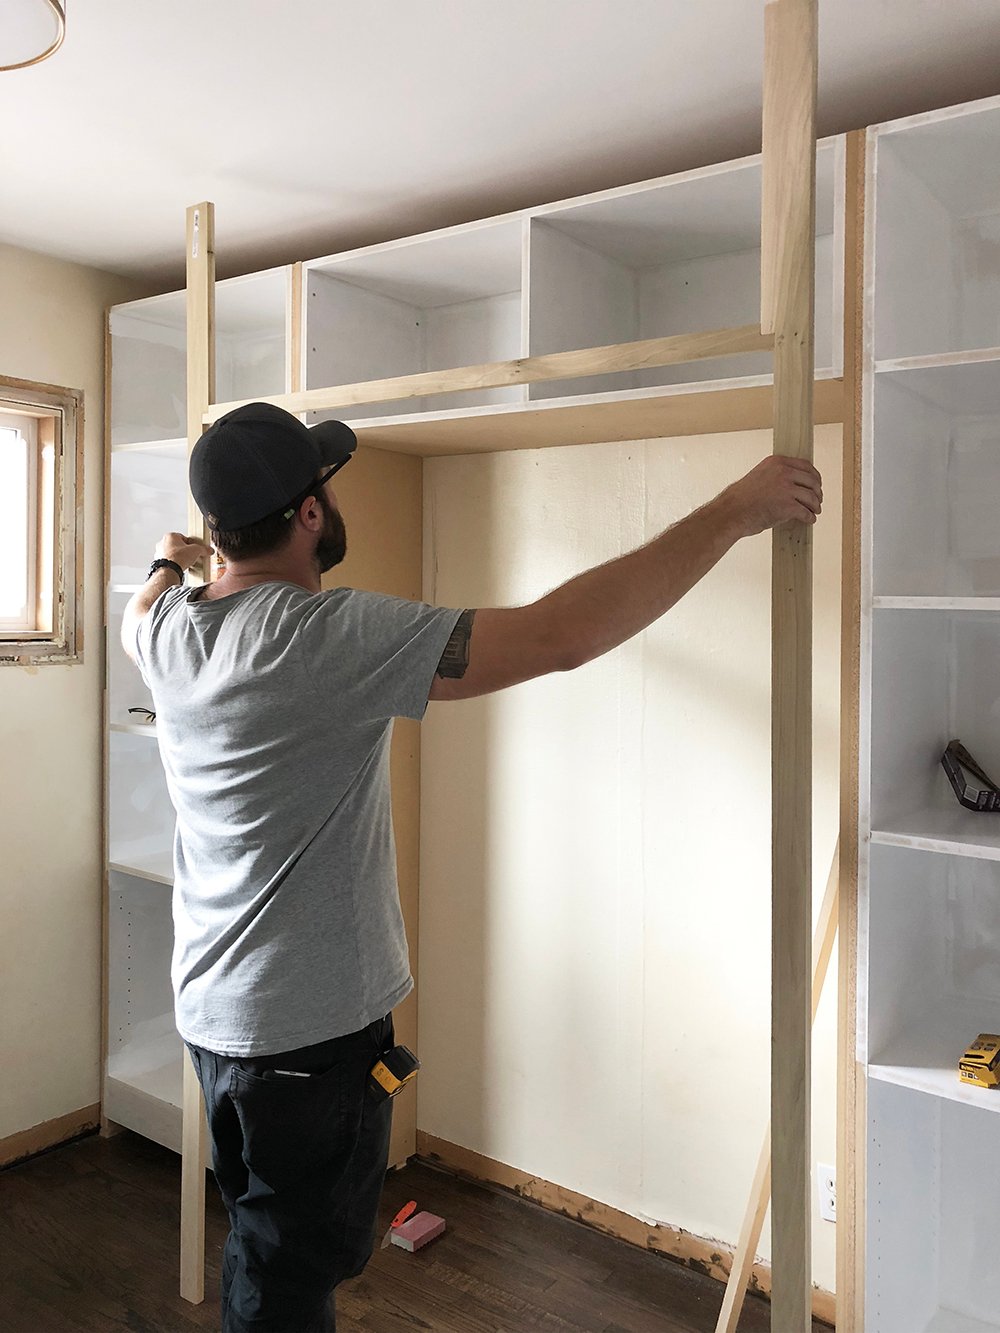
 Step 8 // Align and level the cabinet carcasses. Next, you’ll want to permanently affix the shelving to the wall and to each other (if you also have a center section).
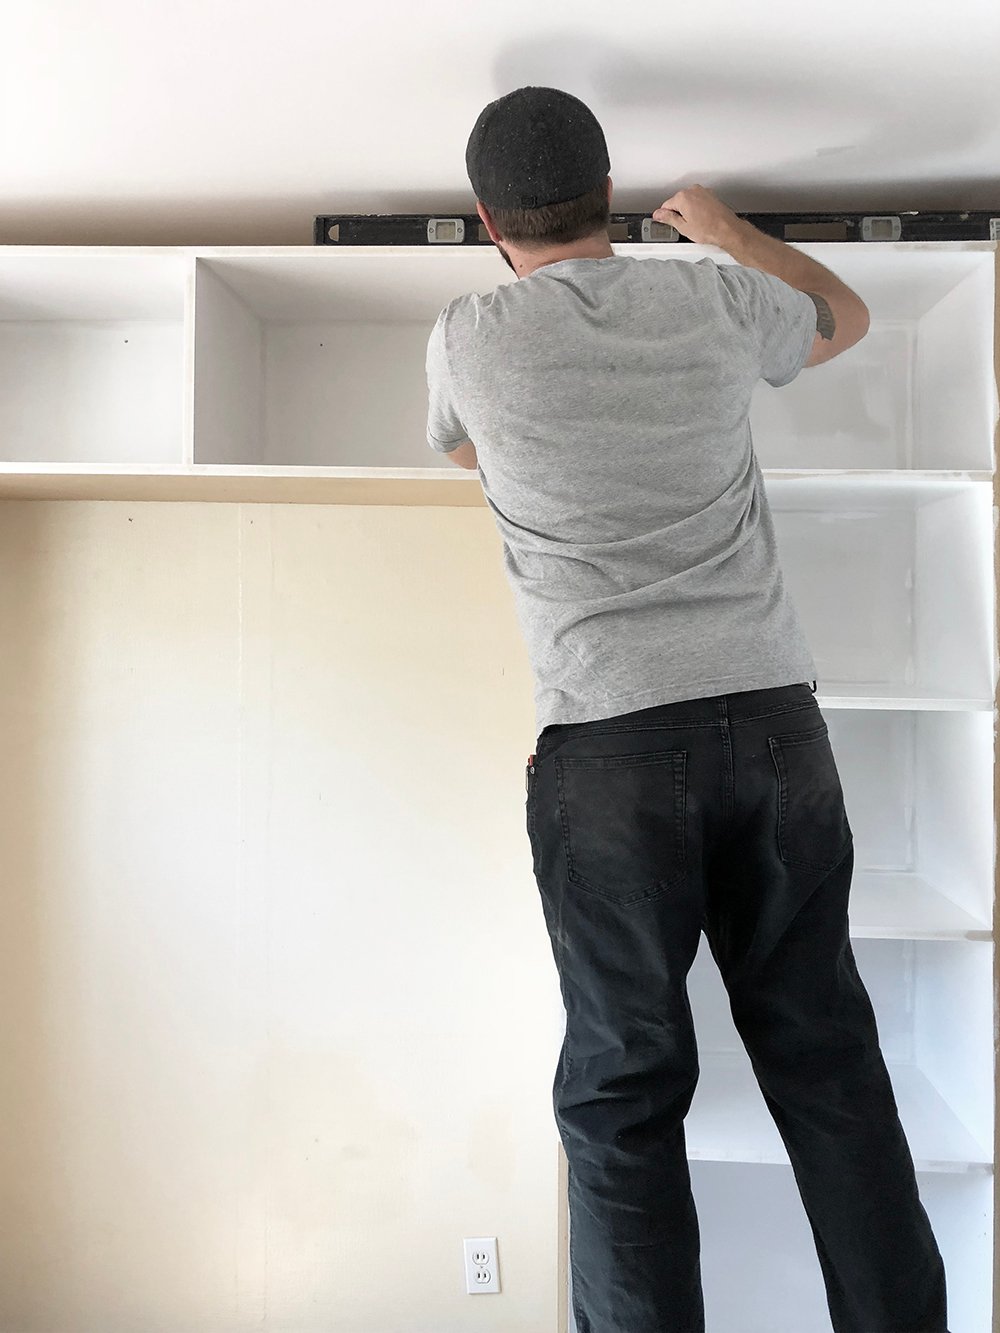
 The built-ins should look like this once they’re installed…
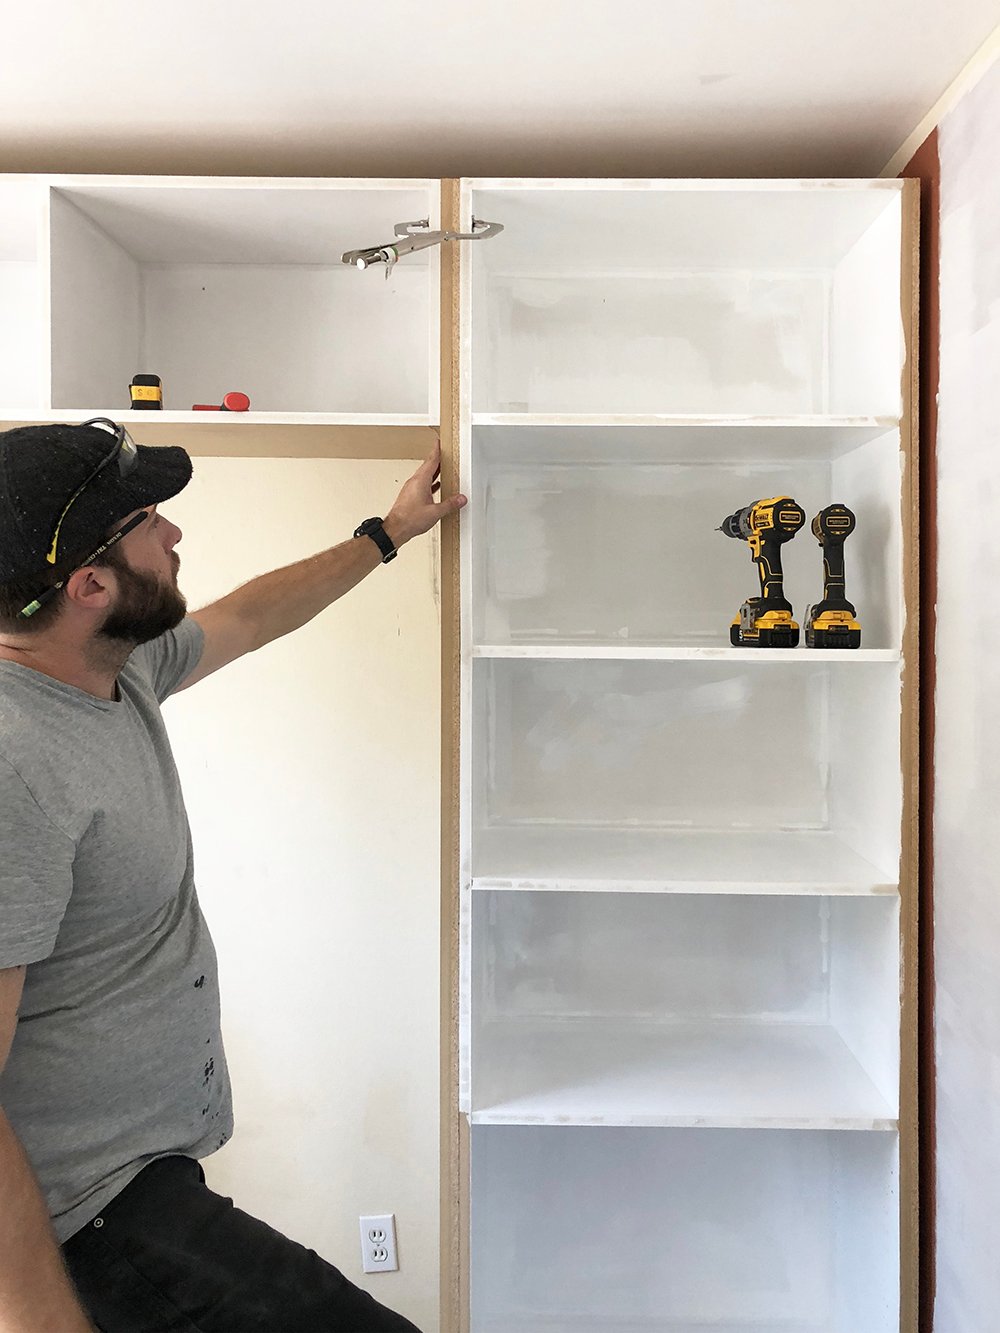
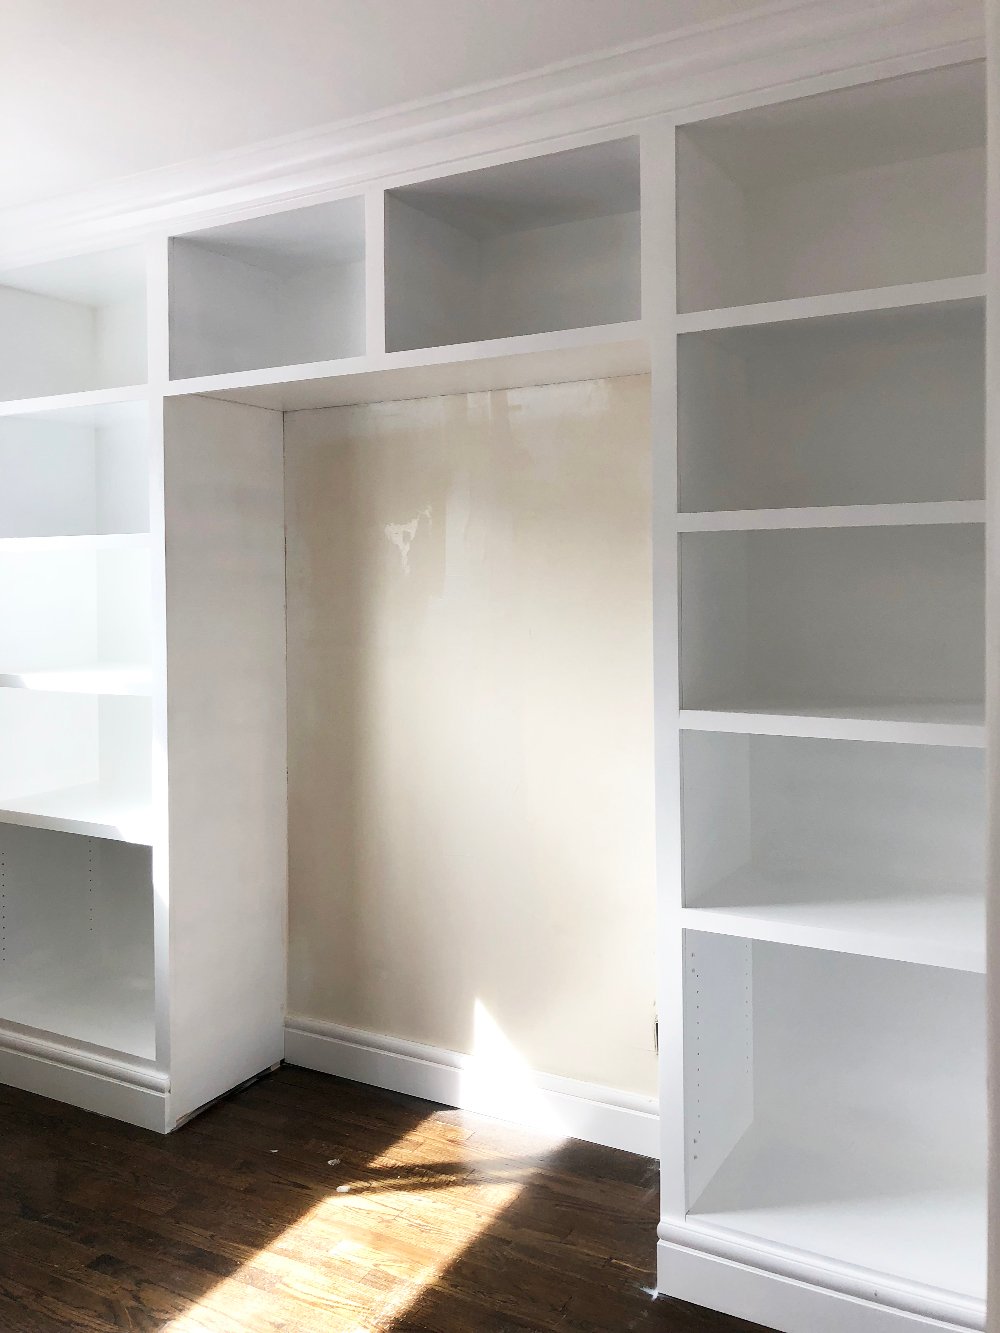
 Step 9 // Measure, preassemble, and install face frame. The above built-ins don’t really look that pretty or finished- and that’s because they’re not!
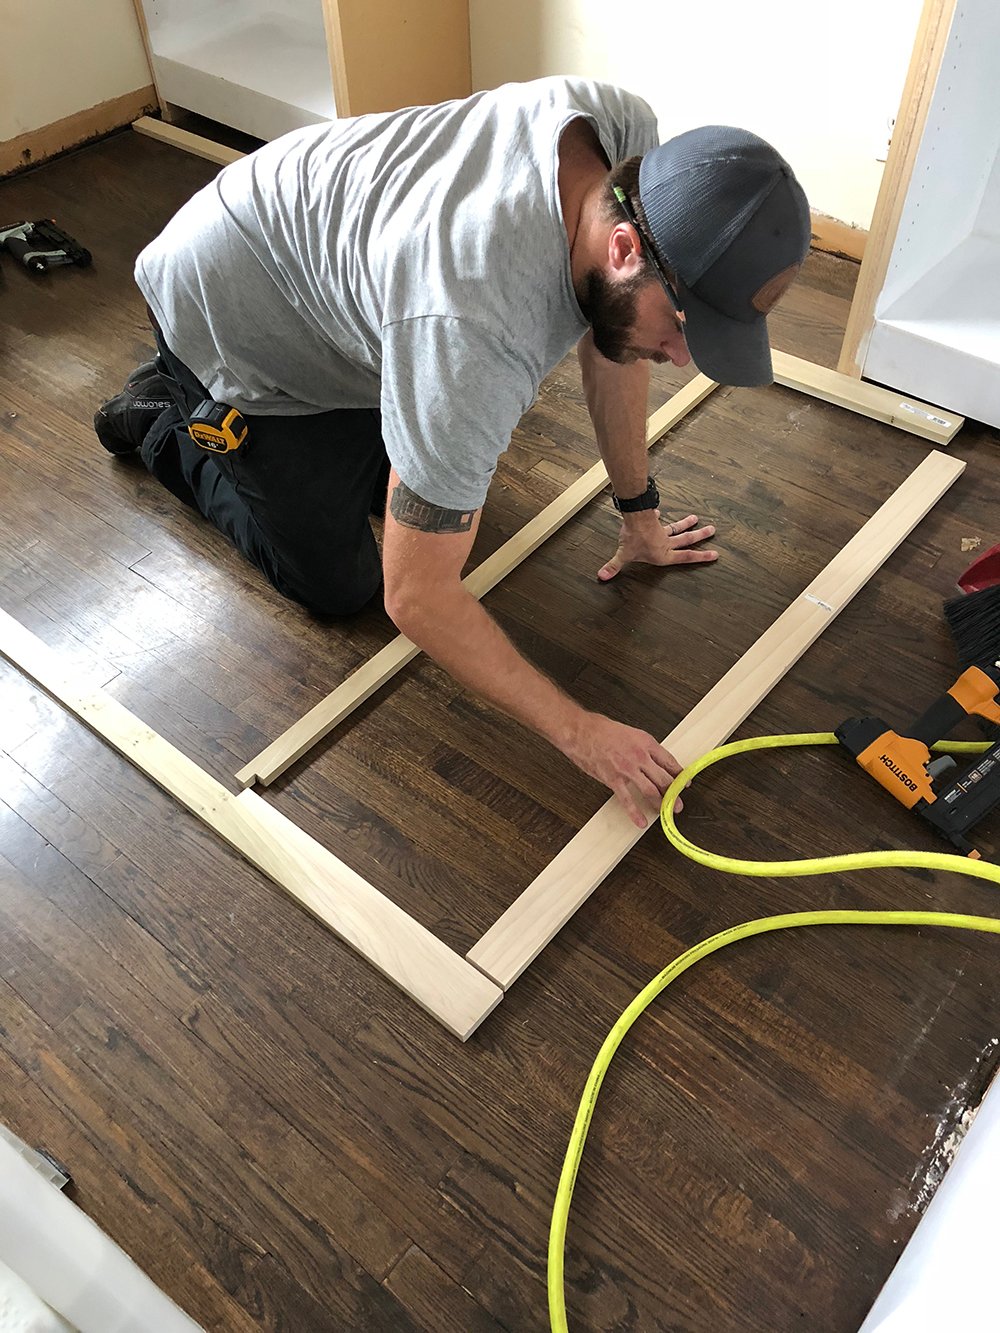 Using a hardwood, like poplar, you’ll want to encase them by installing a face frame. It takes a lot of measuring, but the result is well worth the tailored look. See how it works?
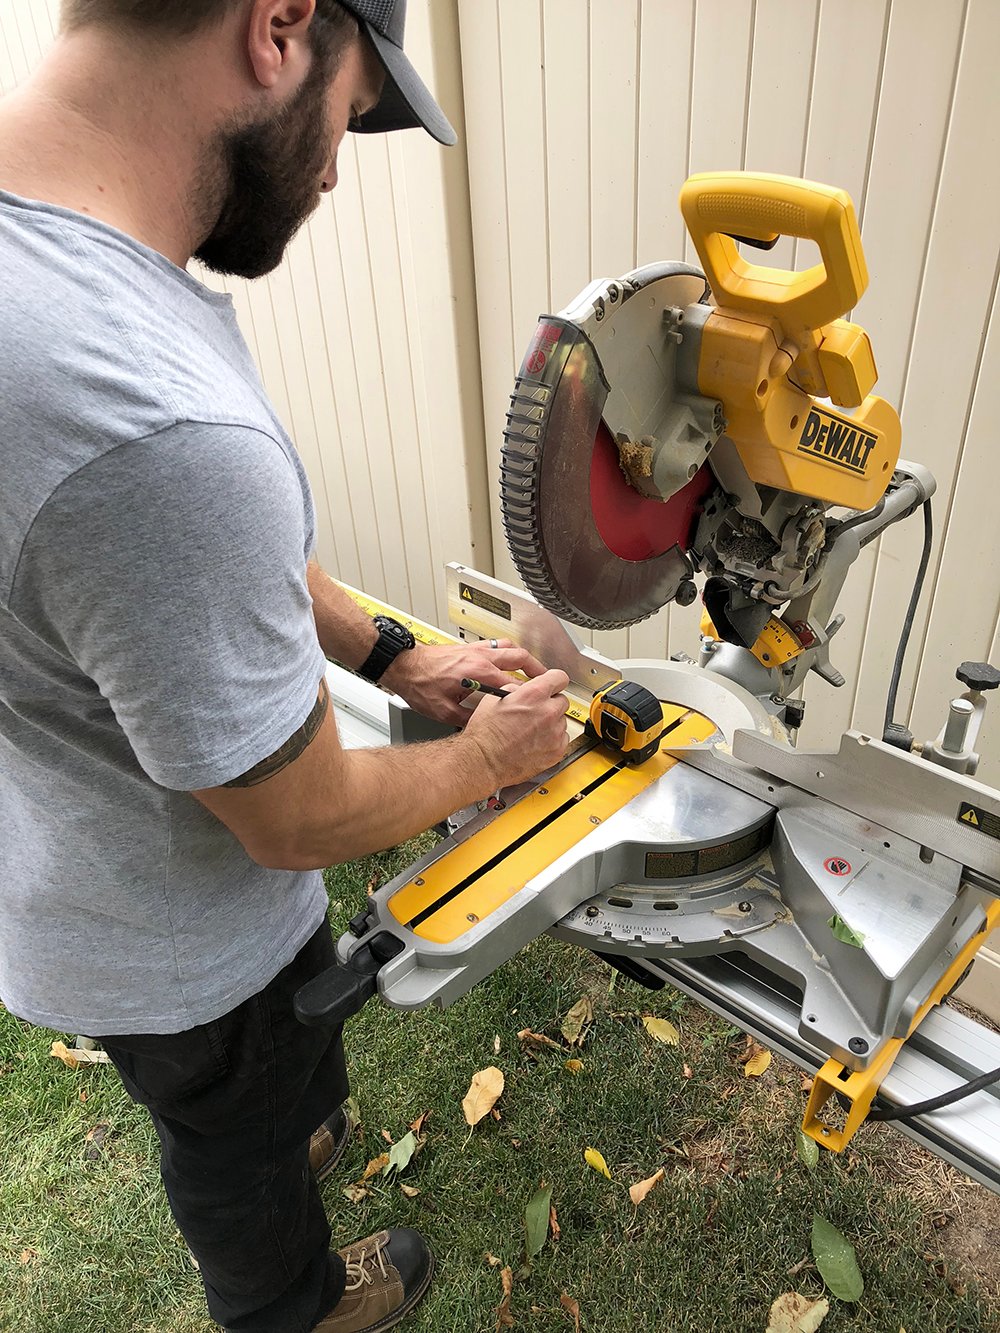
 Step 10 // Install the crown moulding. Using a miter saw, make your cuts for the crown moulding and install it to the top of the built-in.
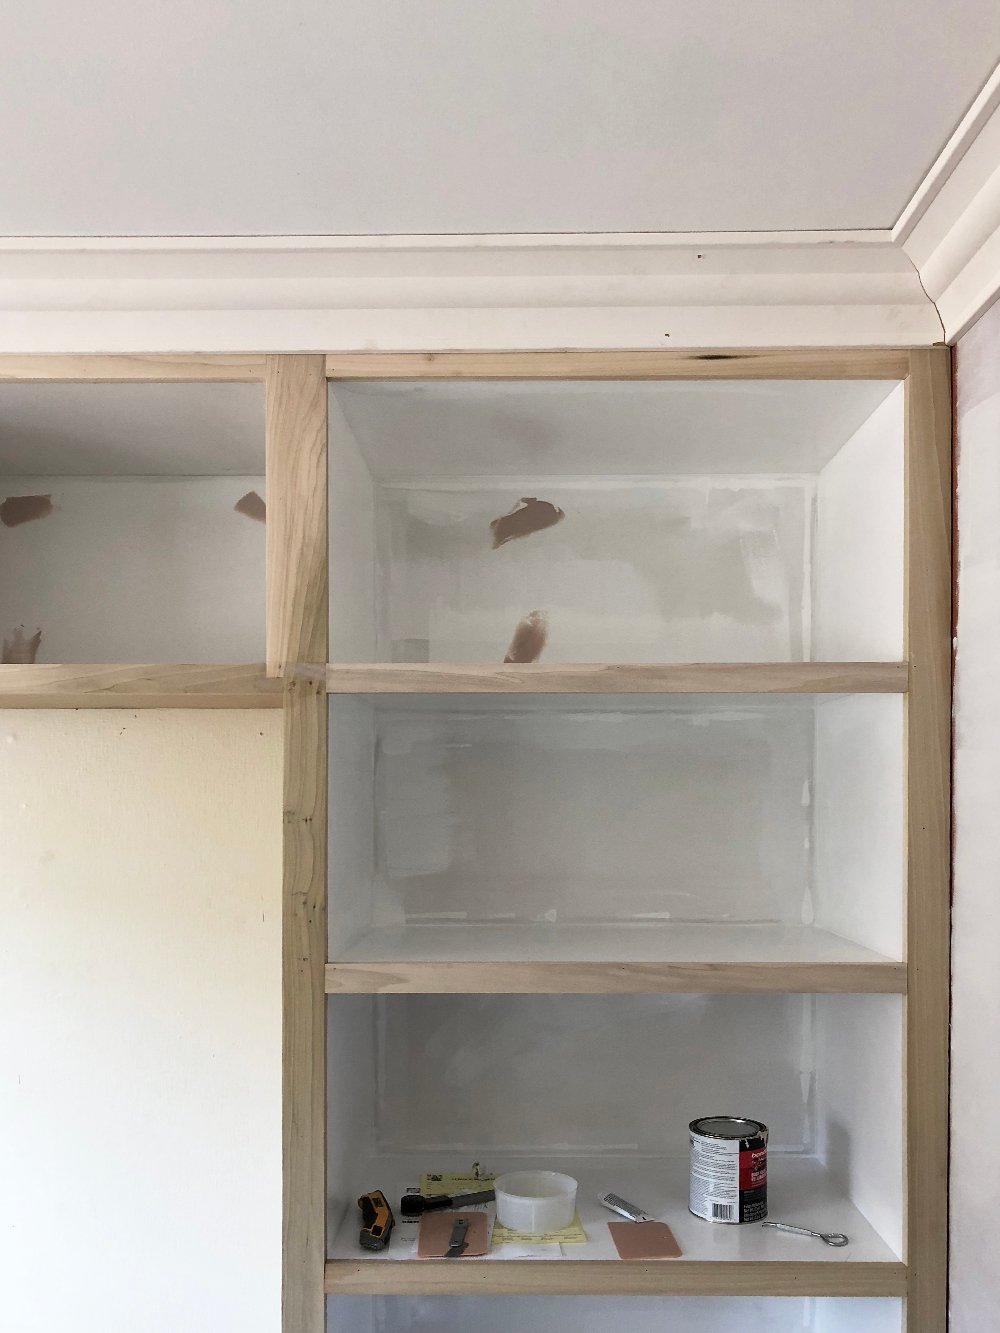
 Adding millwork really makes built-ins look custom and finished. See the difference the crown made?
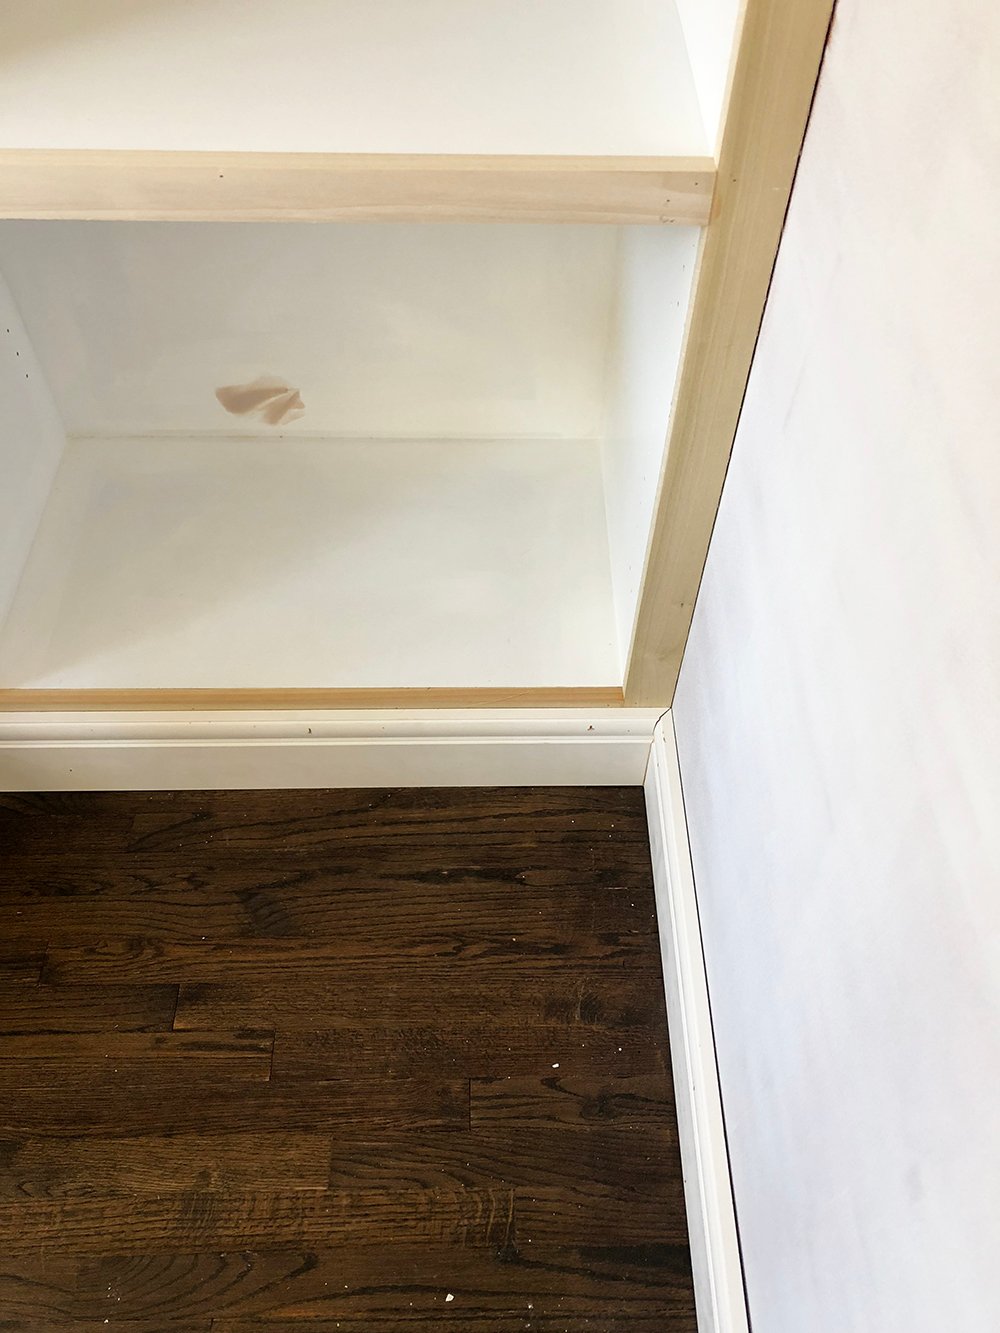
 Step 11 // Install the baseboards. Repeat the same millwork process with the miter saw for the baseboard, wrapping it thoroughly around the built-in base.
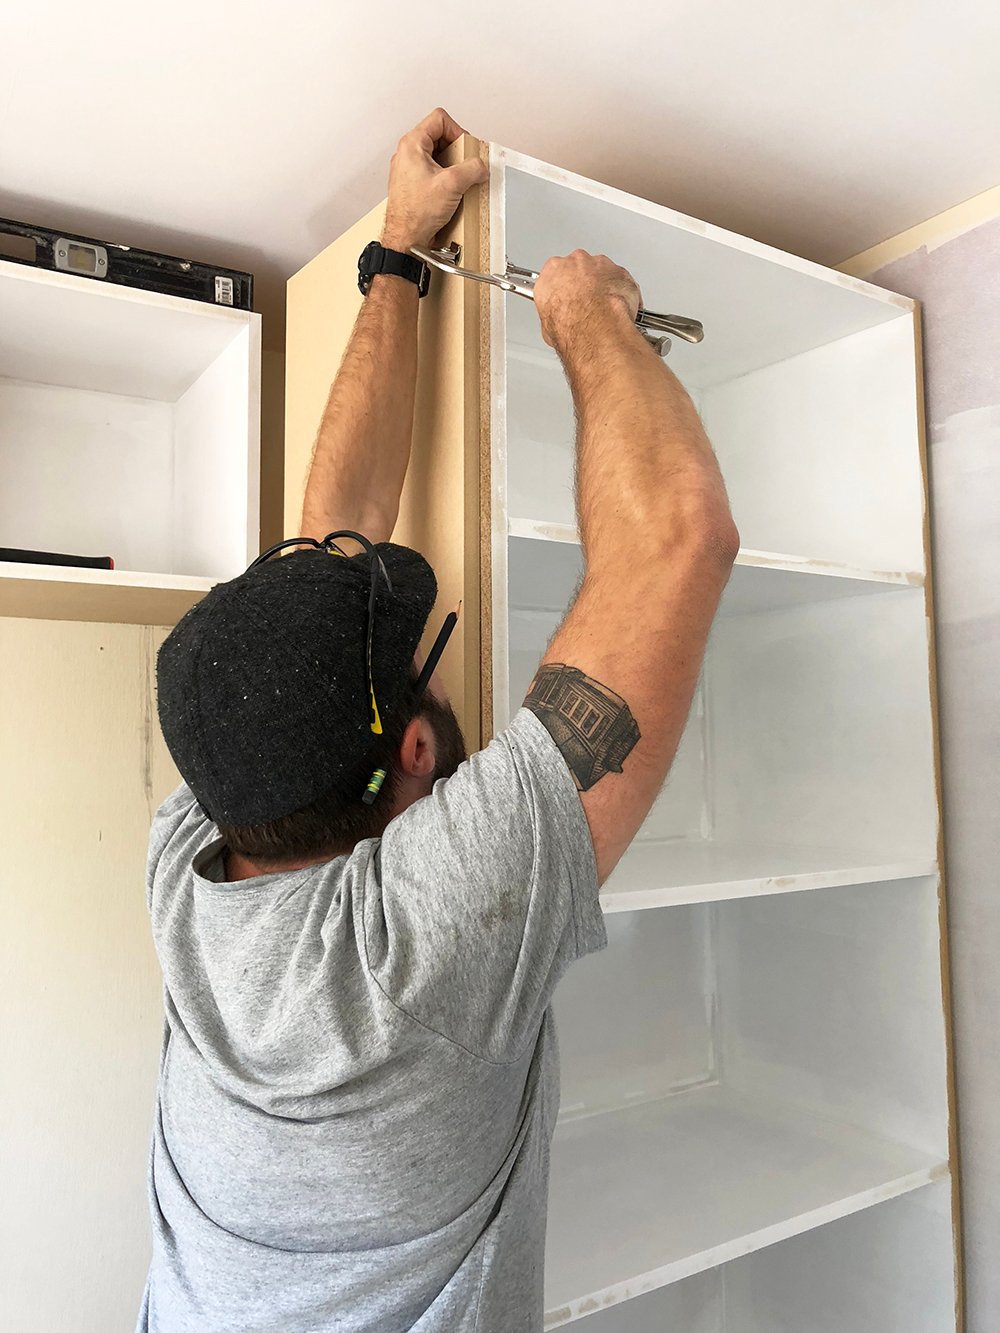
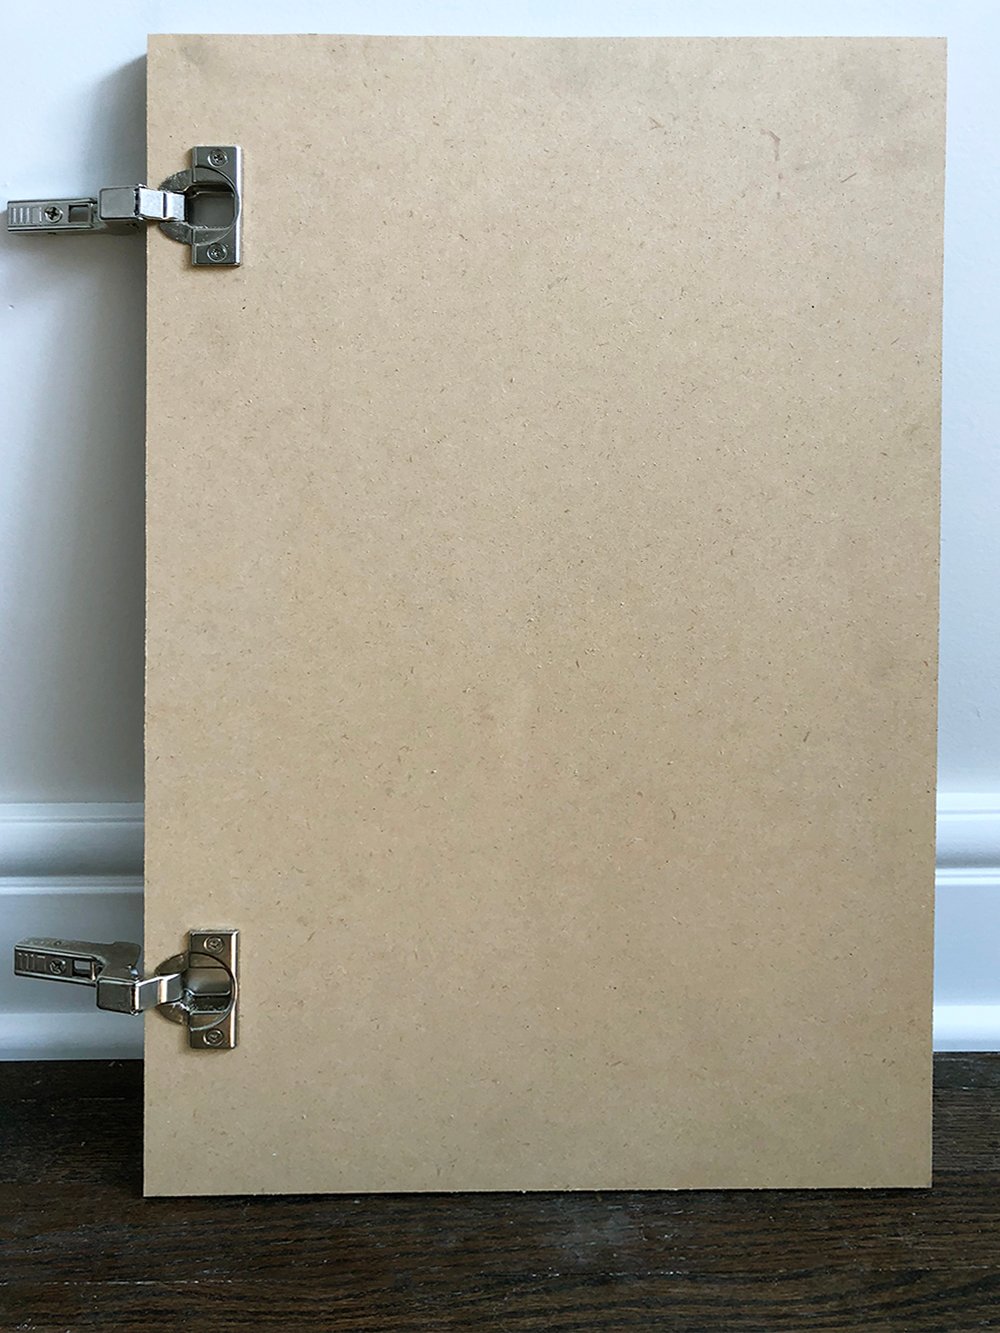
 Step 12 // Install the doors. If you designed your built-in to have closed storage, now would be the time to install the doors (wait until after painting for the exterior door hardware installation). We used simple hinges to affix the doors to the closed storage portion of the built-in.
 Step 13 // Finish the built-in. Now for the fun part… fill the holes, sand, and caulk the unit. Once the prep work has been completed it’s time to prime once again and paint the finished piece. We made quick work of this by using a Bosch orbital hand sander.
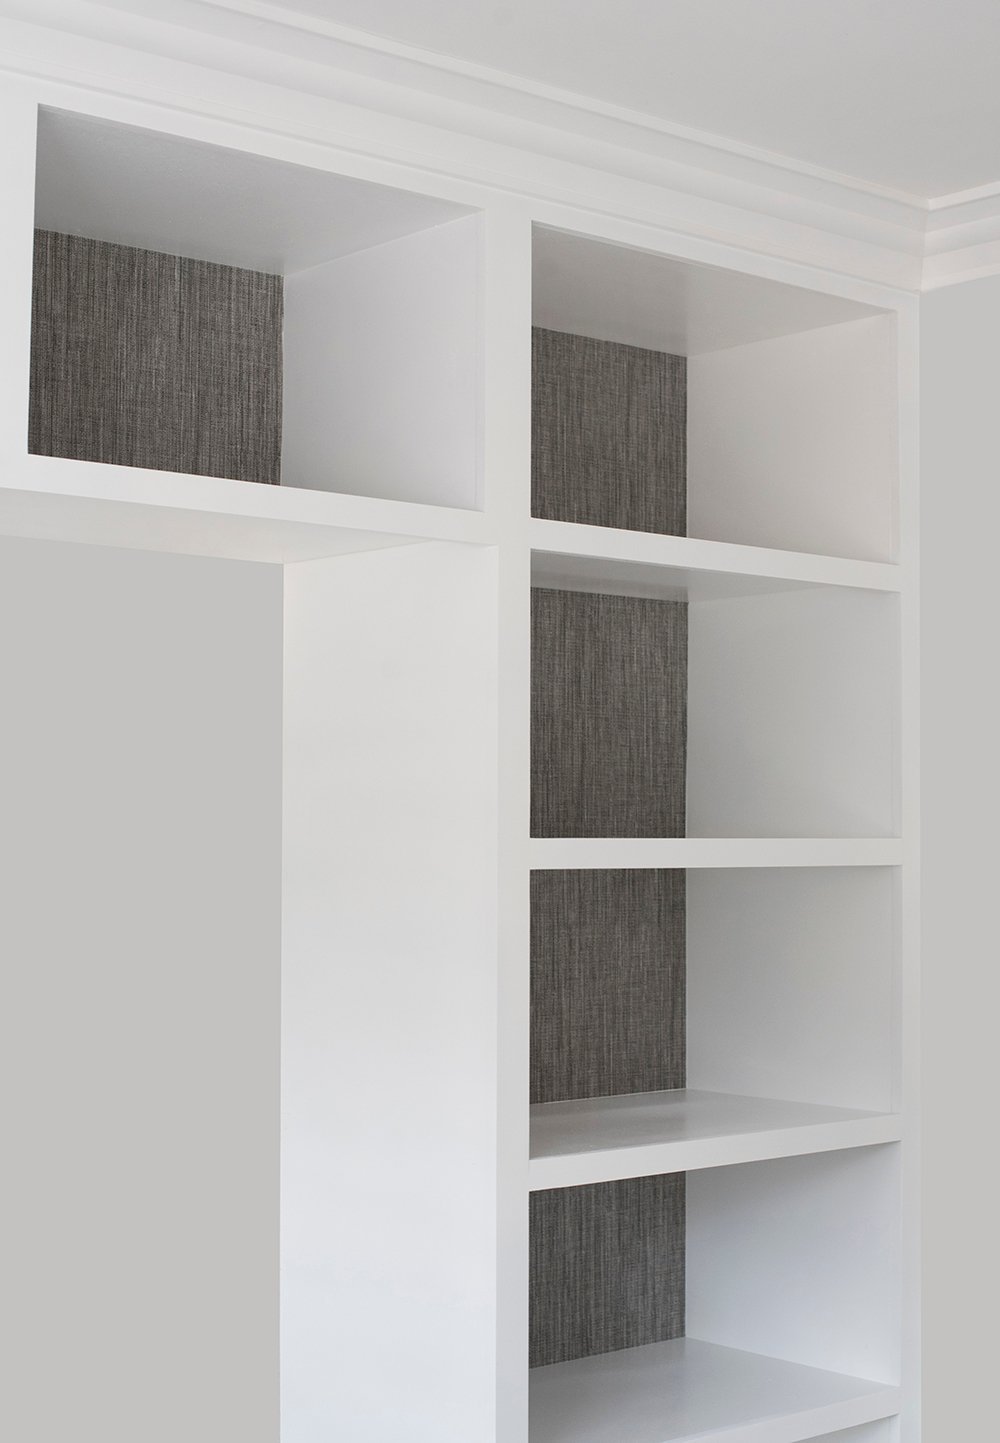
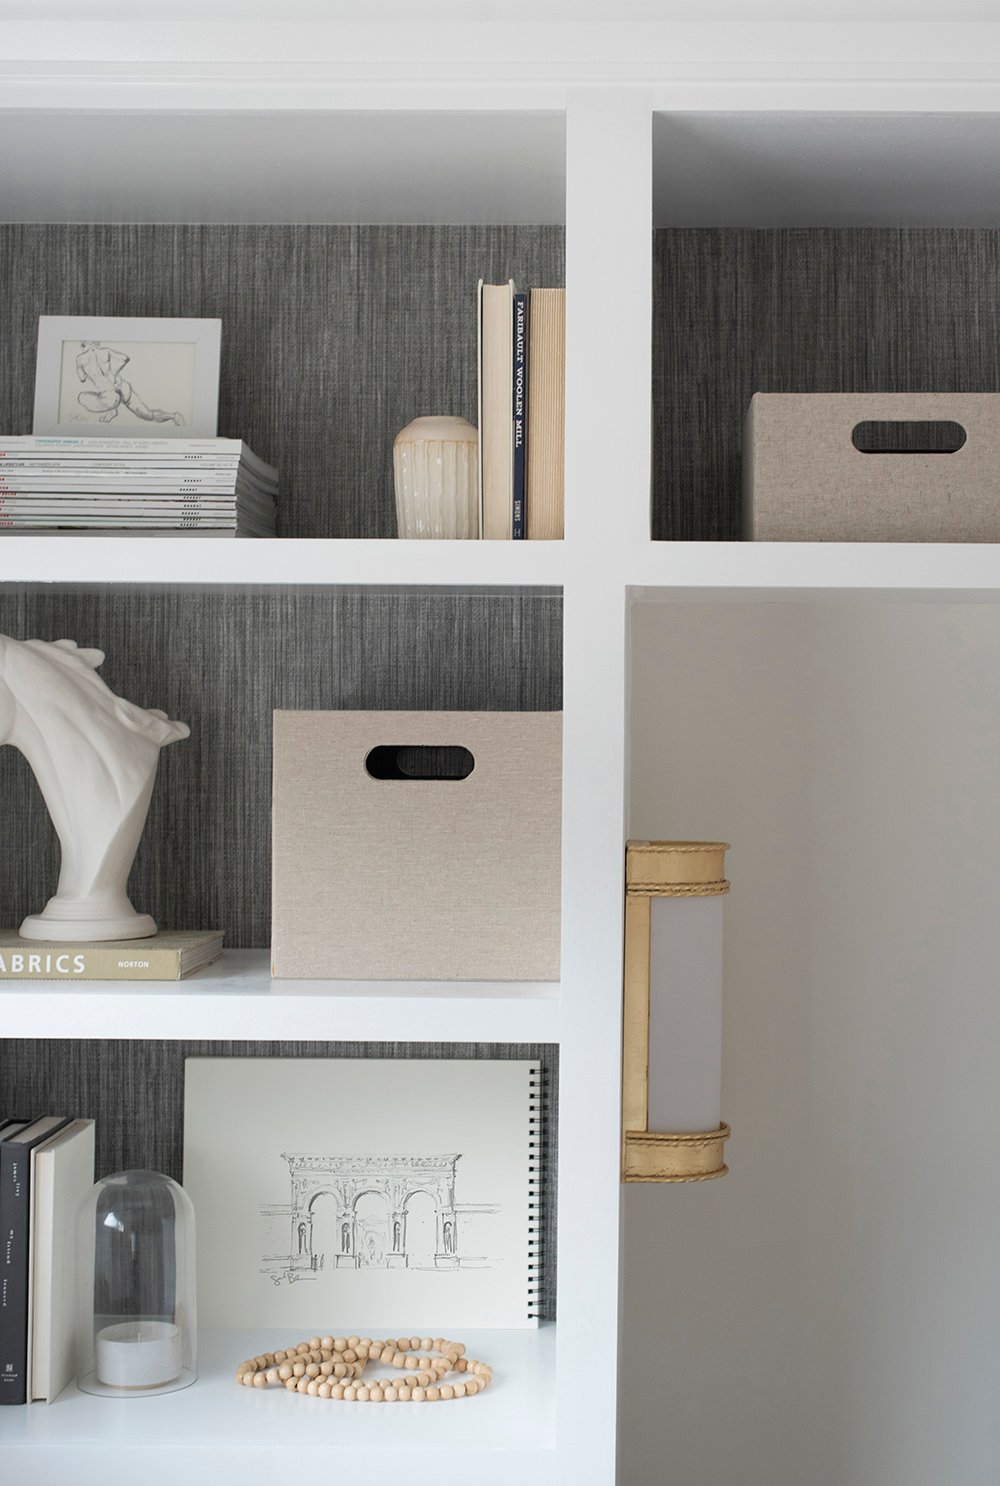
 I also decided to add grasscloth to the back of the shelving. I did a separate tutorial for that. If you’re interested- find it here!
 Ready for the finished result? Would you have guessed this built-in wasn’t original? It really feels cohesive to the room and basic-shaped architecture. It’s an easy way to add instant charm to a boring space.
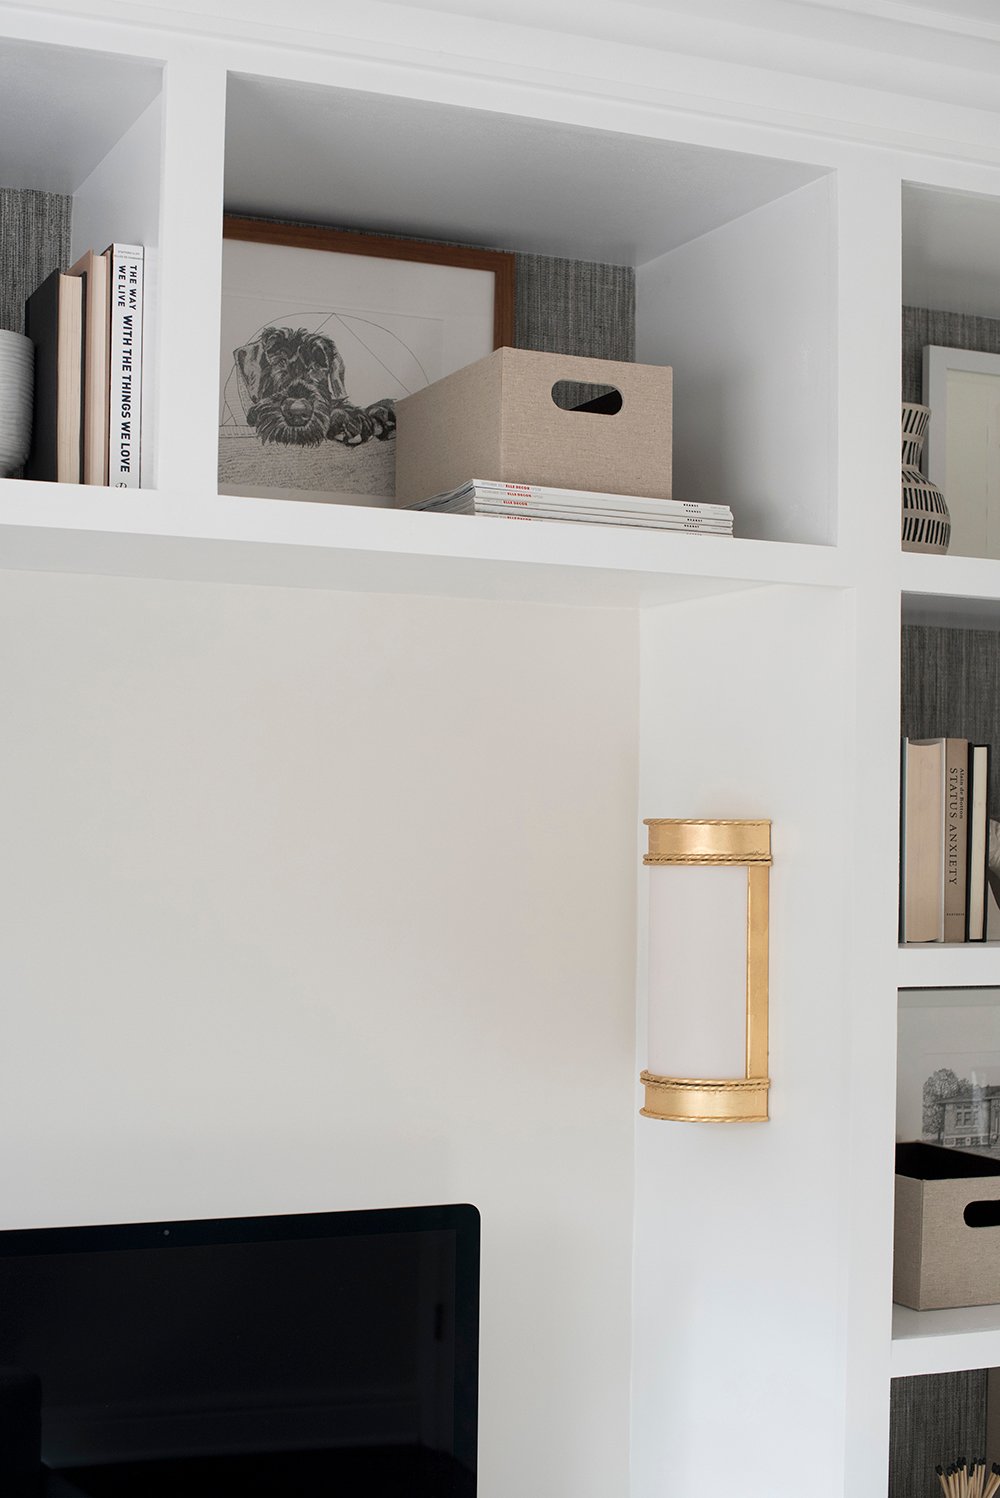
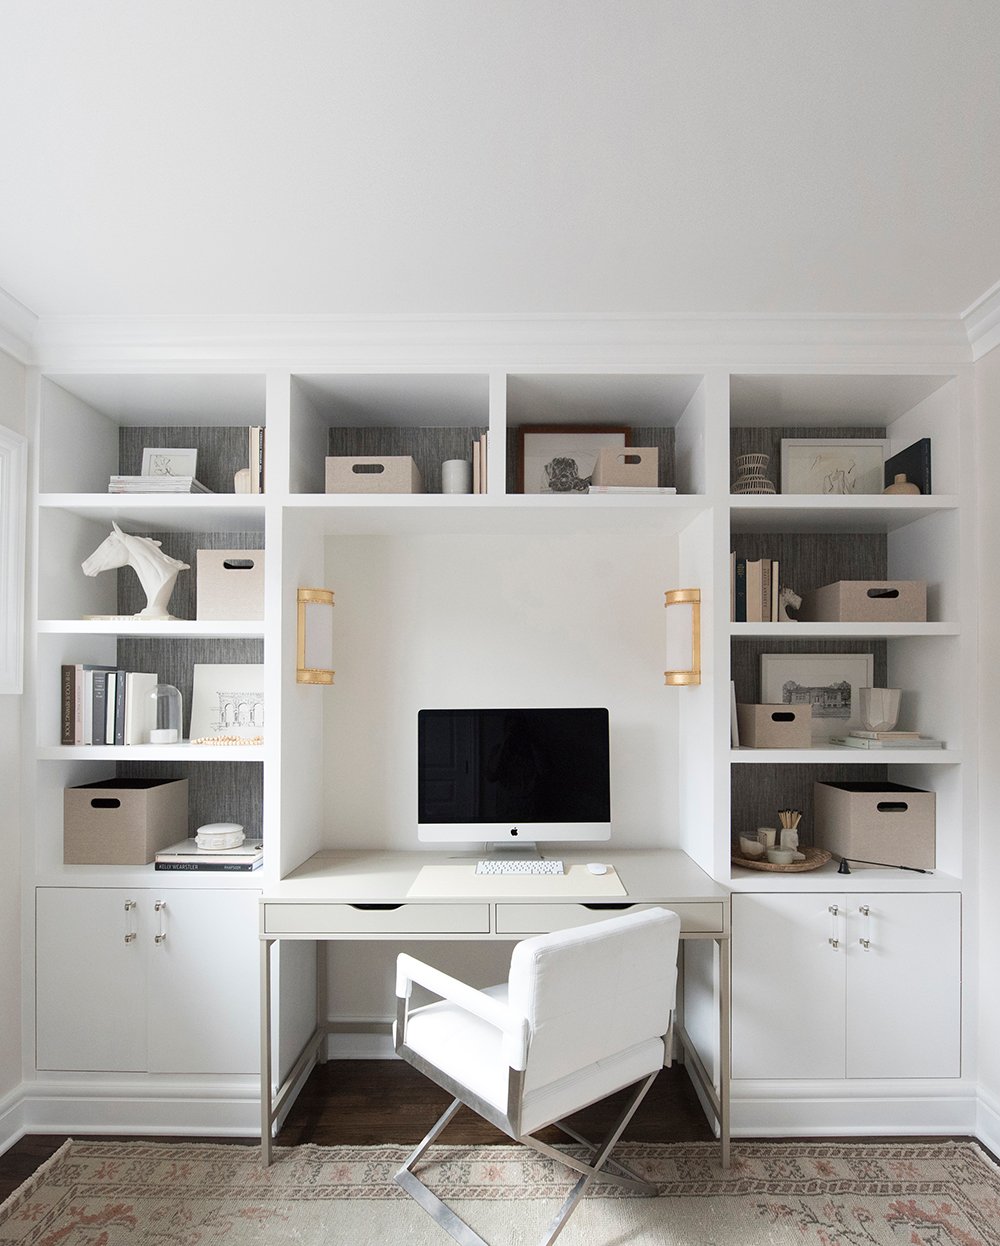 I’ll be sharing the entire room reveal soon- and believe it or not, things have already been moved around, but I did want to touch on keeping built-ins organized. This space is obviously functioning as my office (although a full-size bed can fit into the recessed niche), and I wanted everything to have a place.
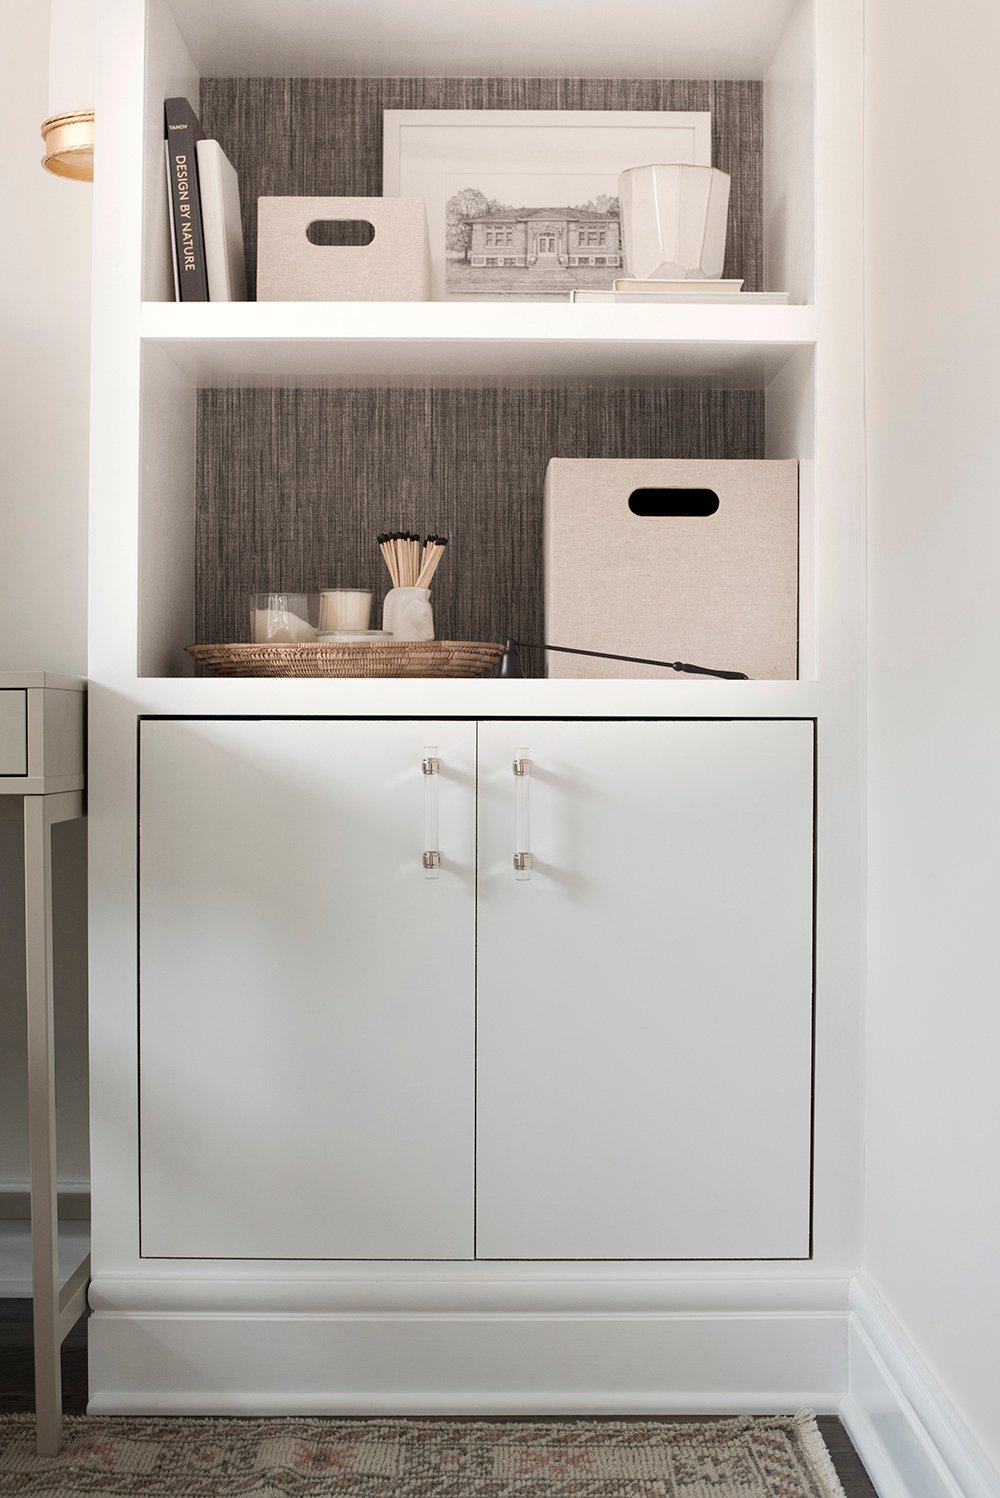
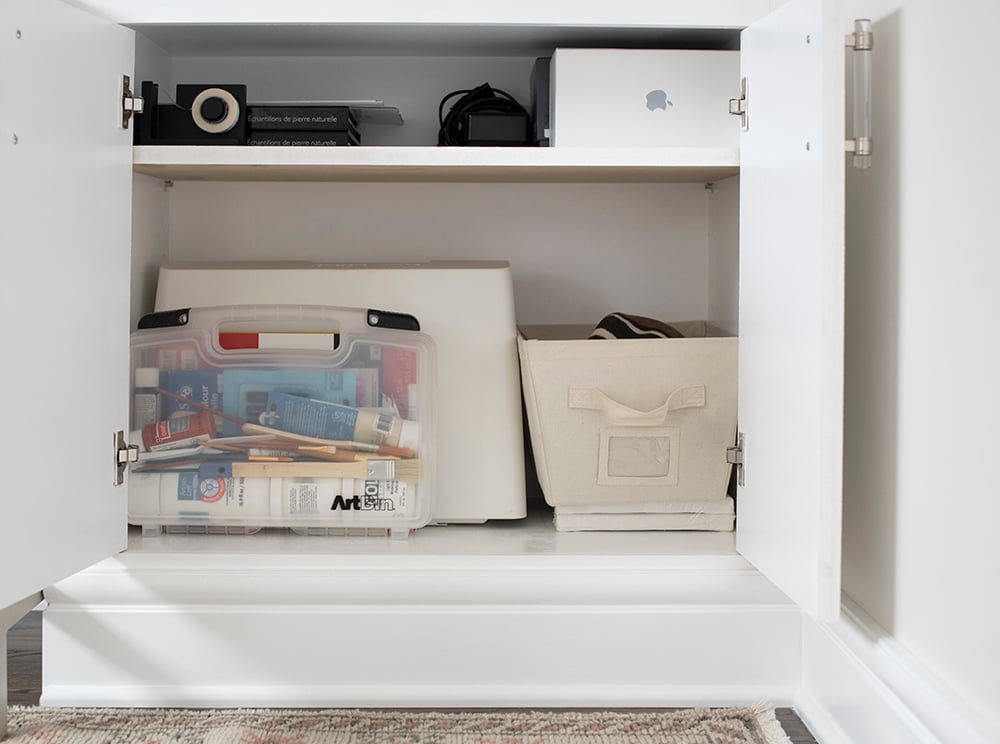
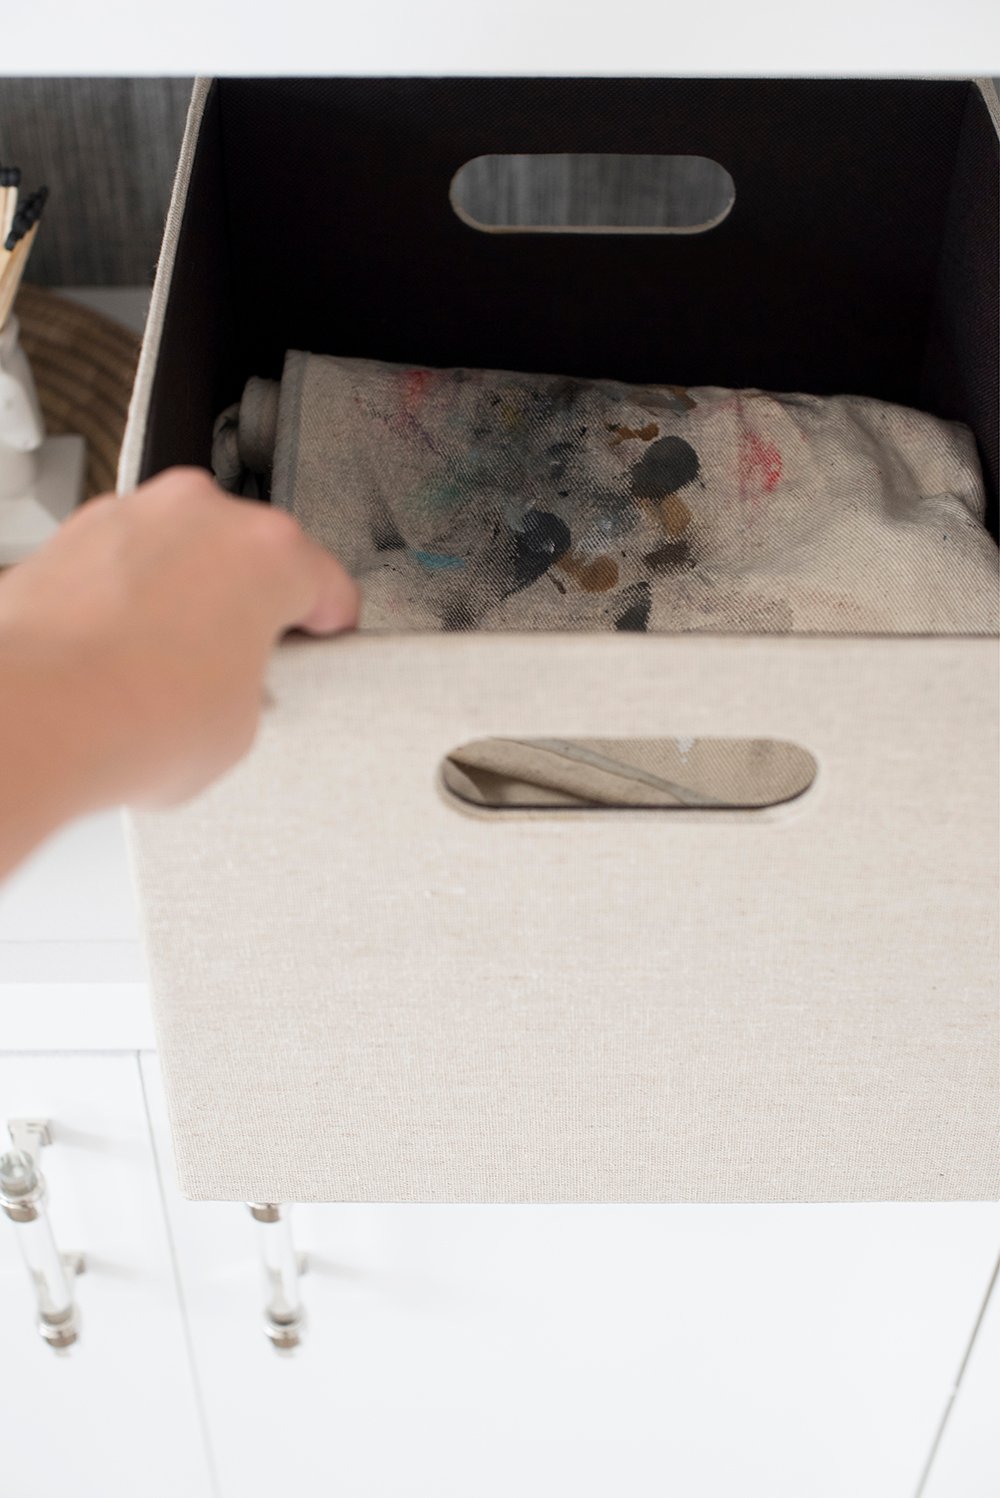
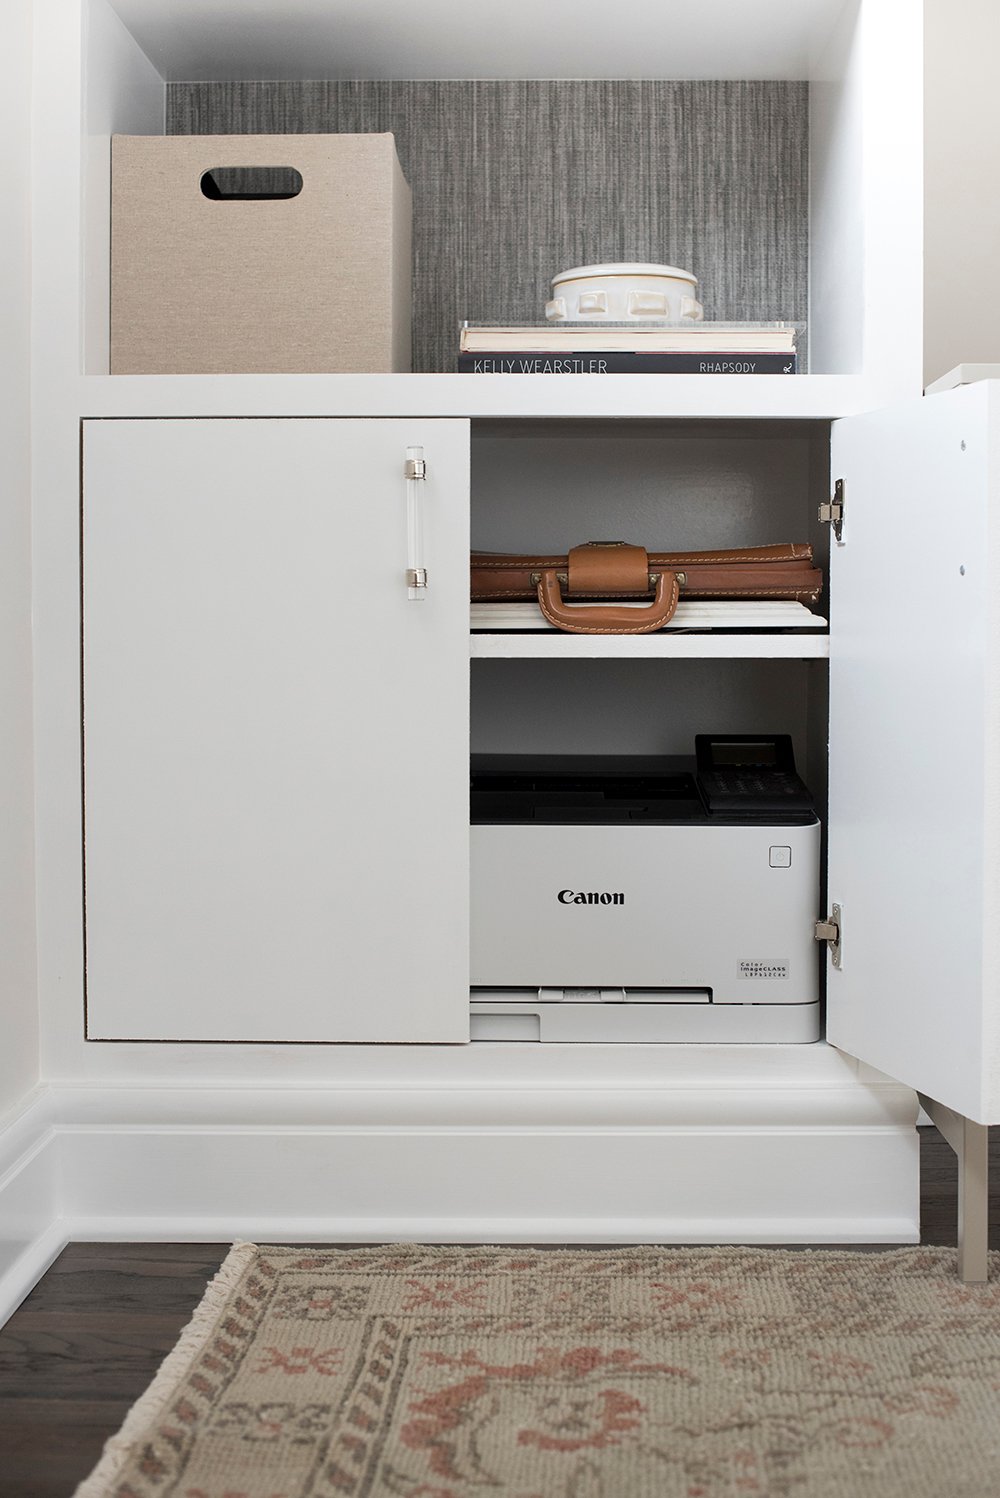 The obvious, larger items live inside the lower closed storage: my wireless printer, sewing machine, art supplies, portfolios, larger cutting mats, etc.
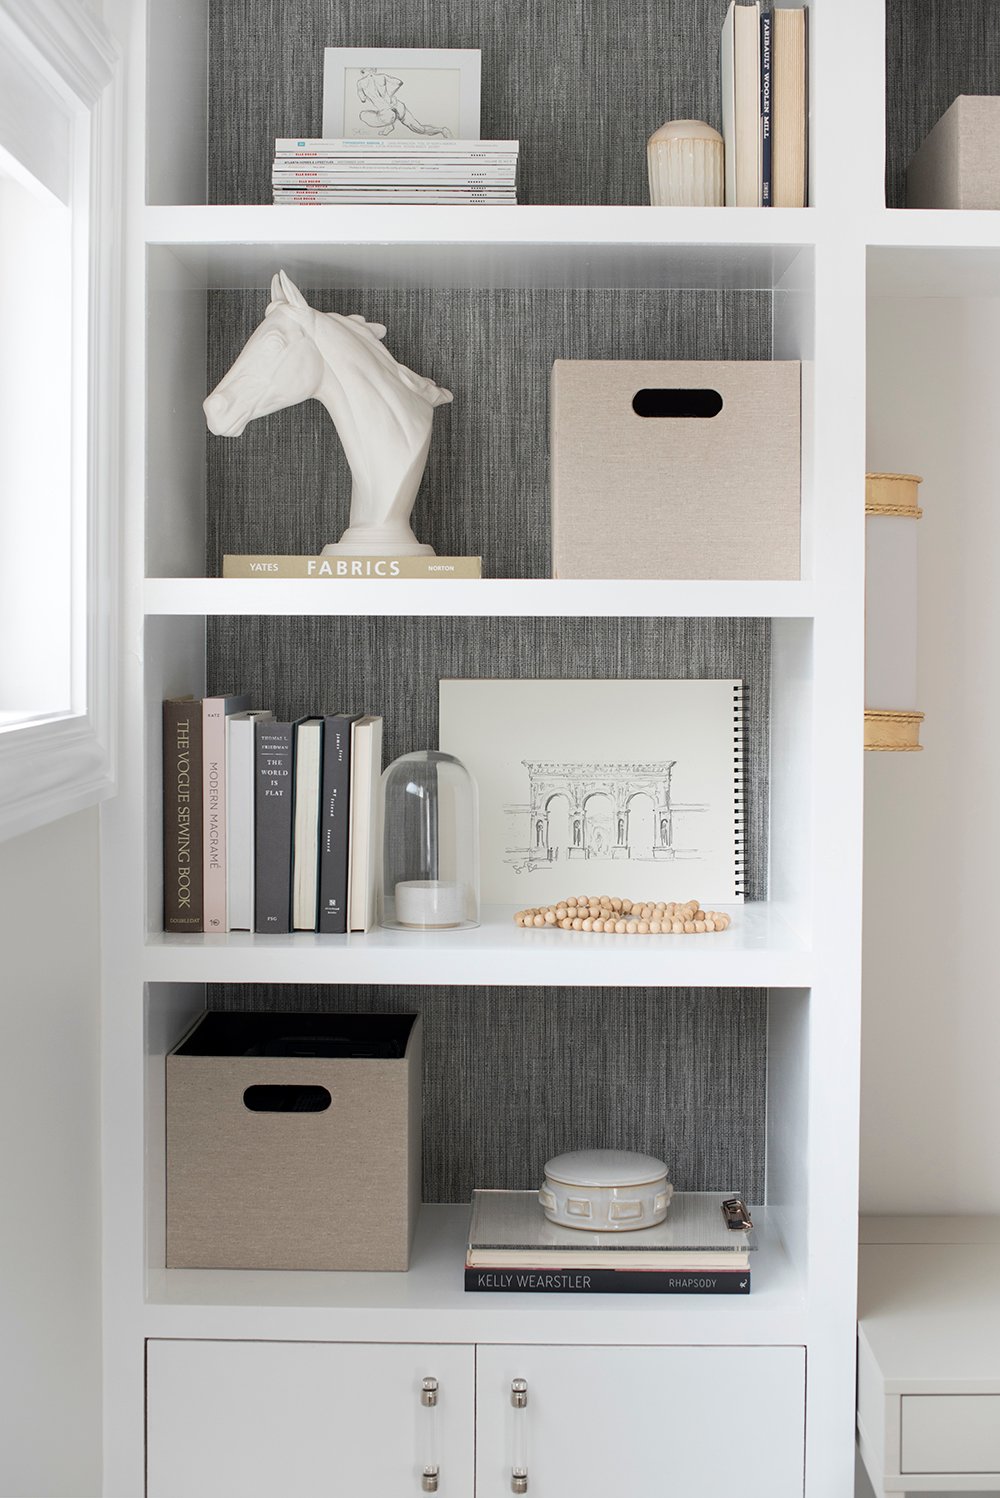
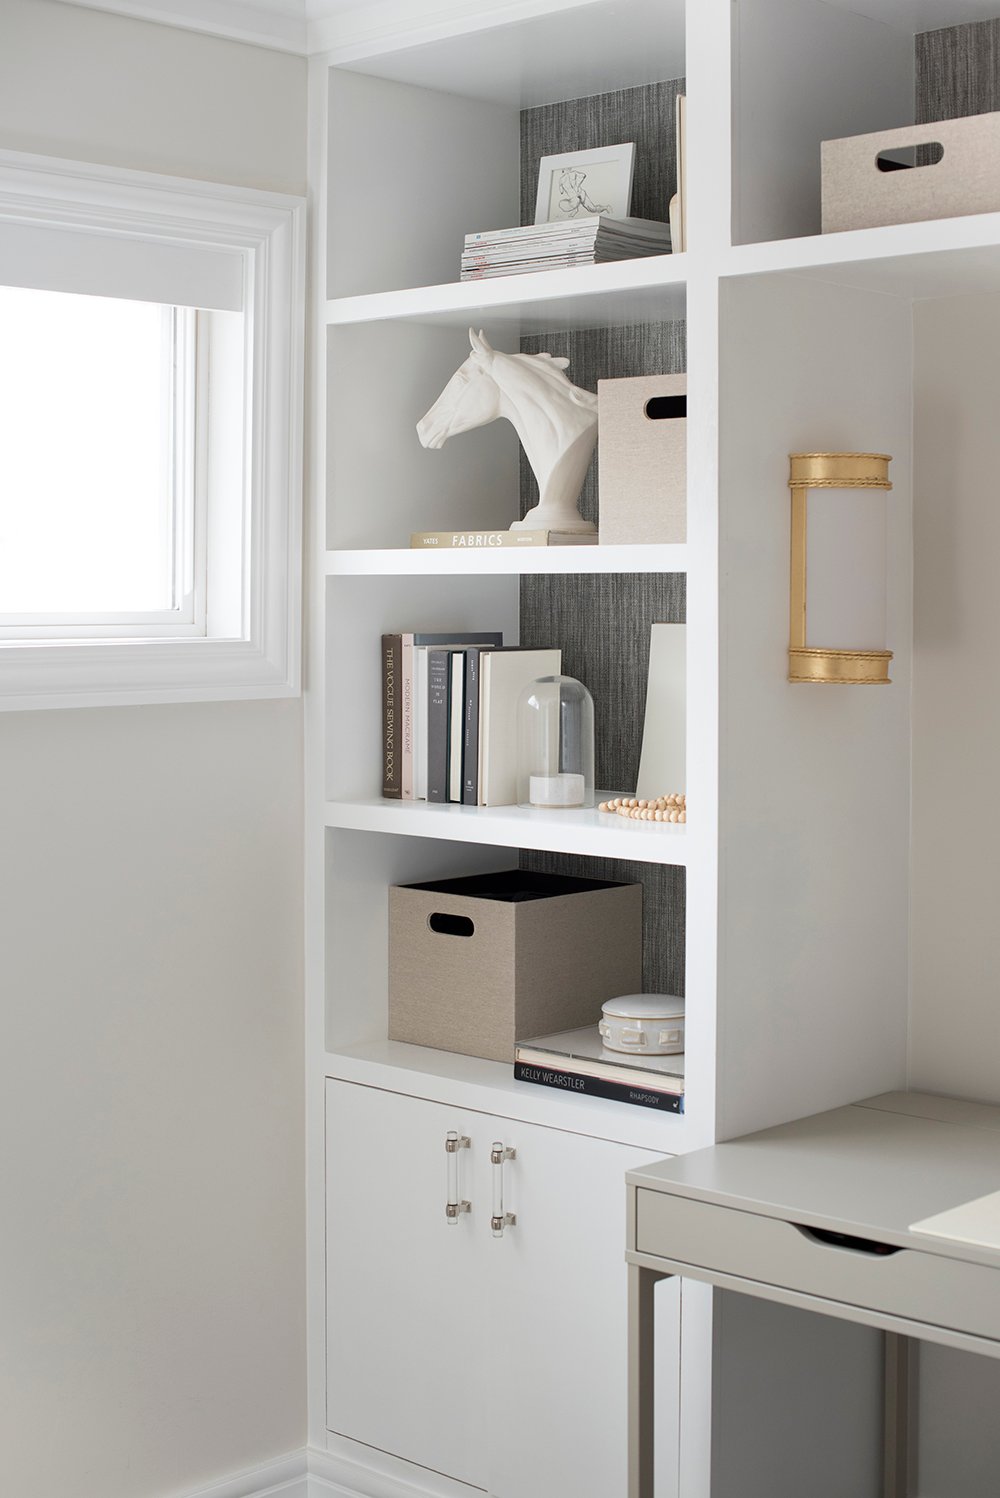
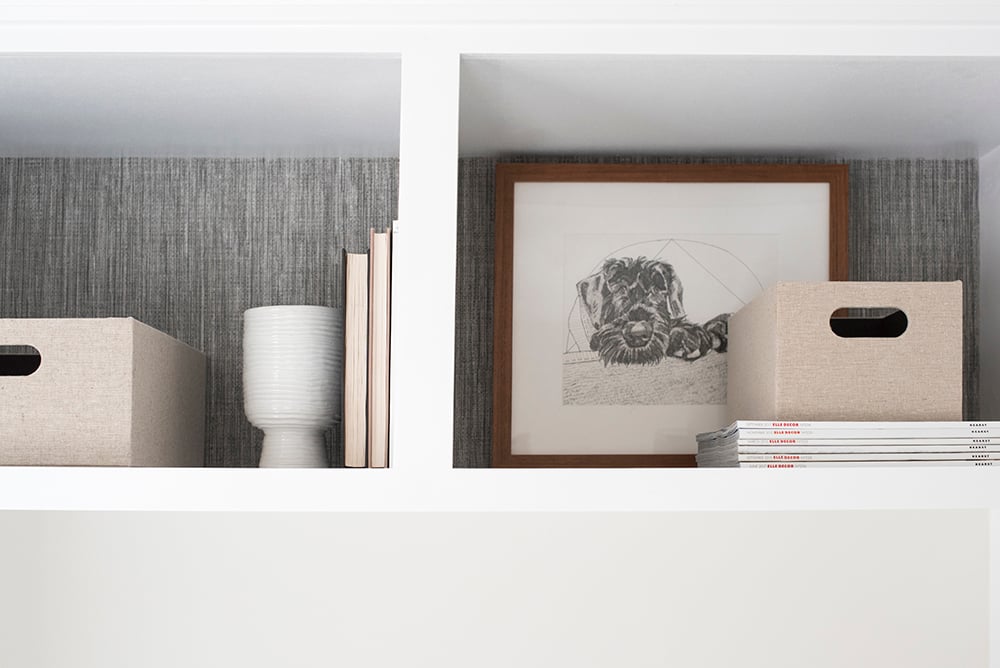
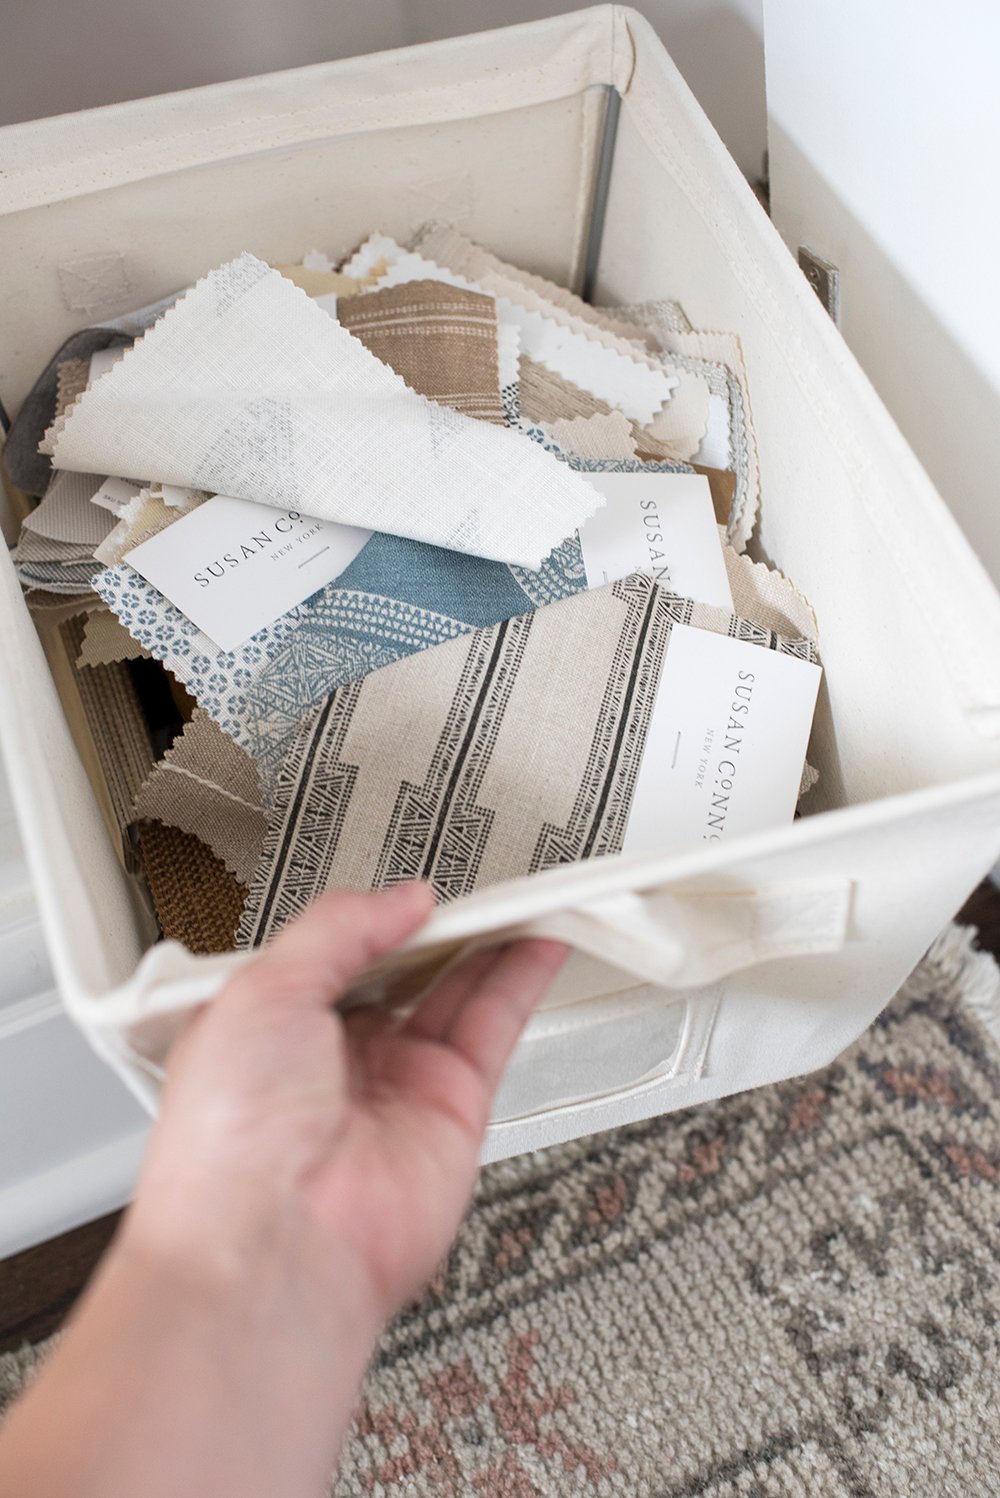 The styled linen bins on the open shelving also have a storage purpose. Every single one of them is full. Any guesses on what I keep inside?
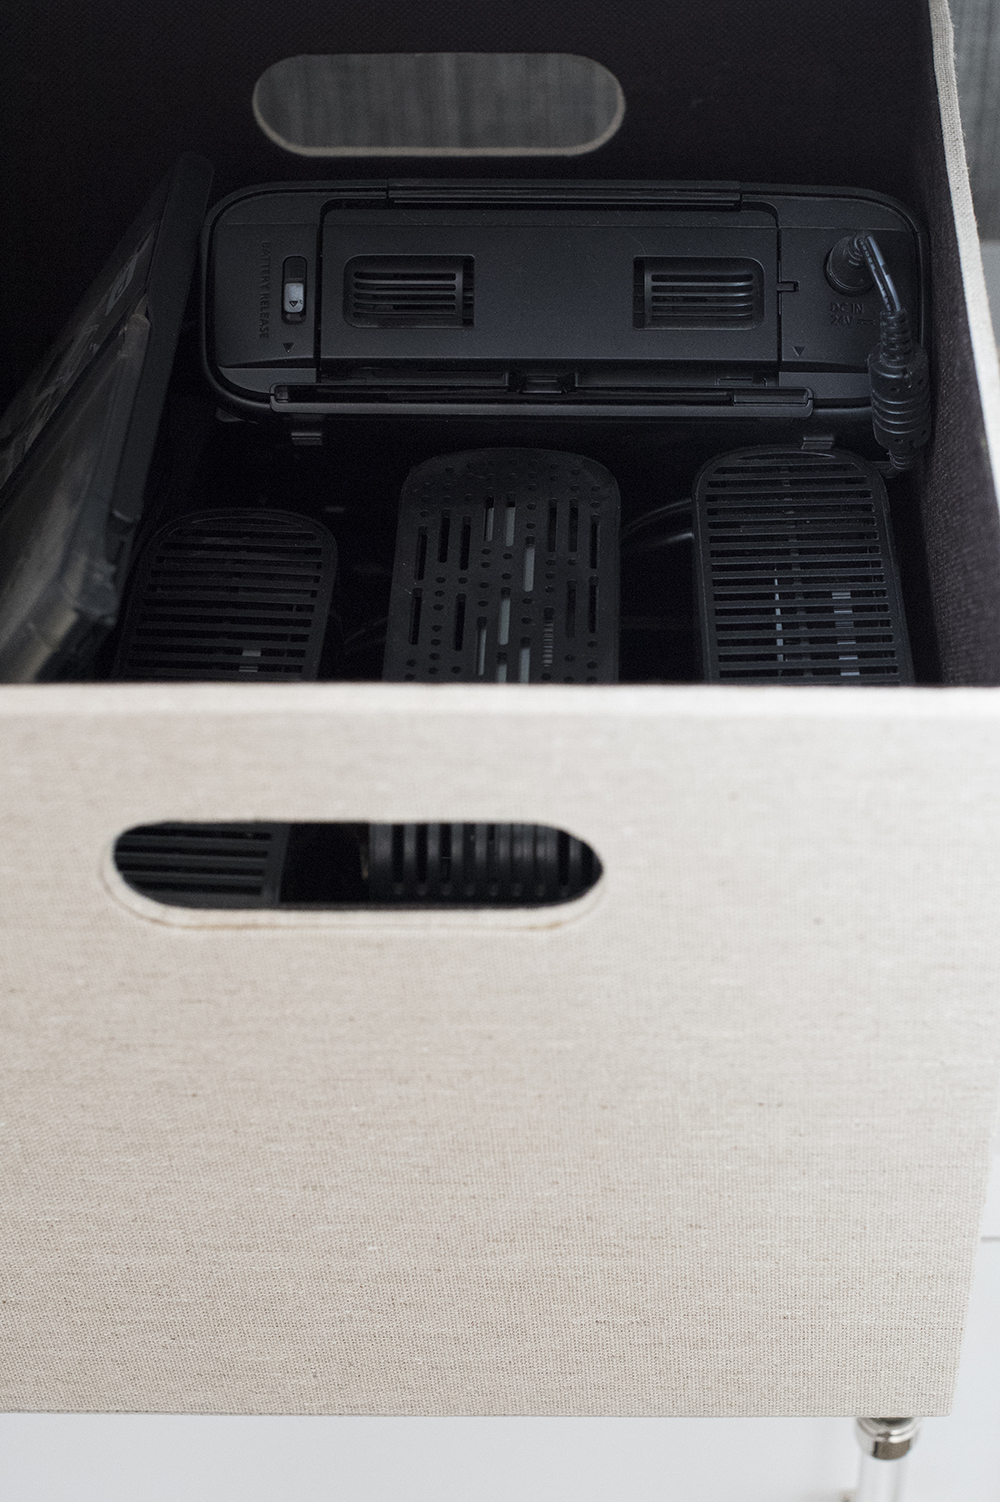 Basically anything and everything… one is filled with hard drives and portable printers, one is filled with additional art supplies, one is expense receipts (Emmett, my husband the accountant, wants to murder me because of that), one is mailing items- stamps, envelopes, address labels, etc. You get the point. They’re handy, but they also look nice styled on the built-in.
 I’m also a fan of using organization containers inside desk drawers! I’m the type of person who wants every single item to have a designated place.
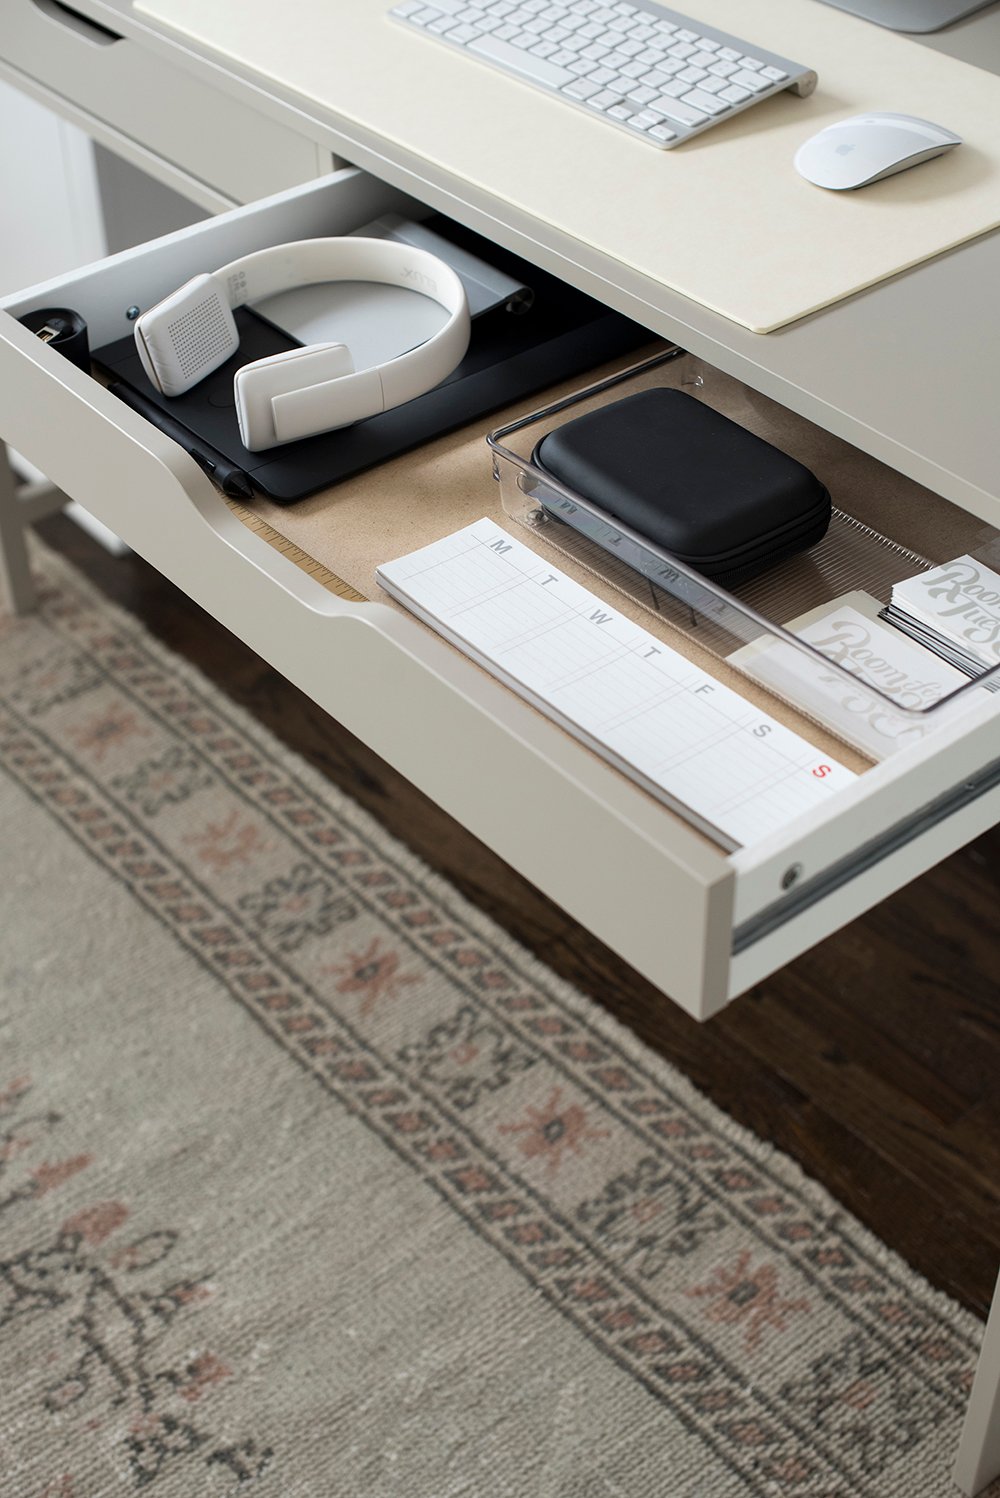
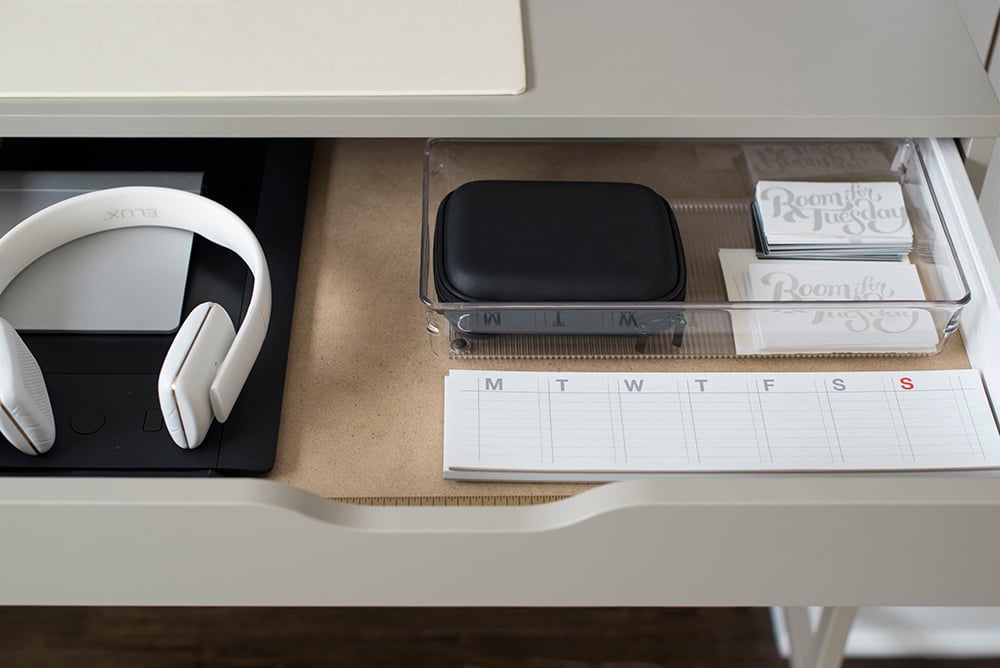 I like that the plastic organizers are clear, so I can still see behind them, all while corralling my items- like business cards, shipping stickers, pens, and pencils.
 There you have it- I know that was a lonnnng post, so thanks to those of you who scrolled all the way to the end. I wanted to squeeze in the organization AND the built-in DIY since they were both popular requests. As always, I’d love to hear your thoughts or questions in the comment section below! Stay tuned for the big office reveal. There is so much more to this room I haven’t shared yet- including a fun pet DIY.